27 Tiny House Living Hacks That Make Small Spaces Feel Bigger
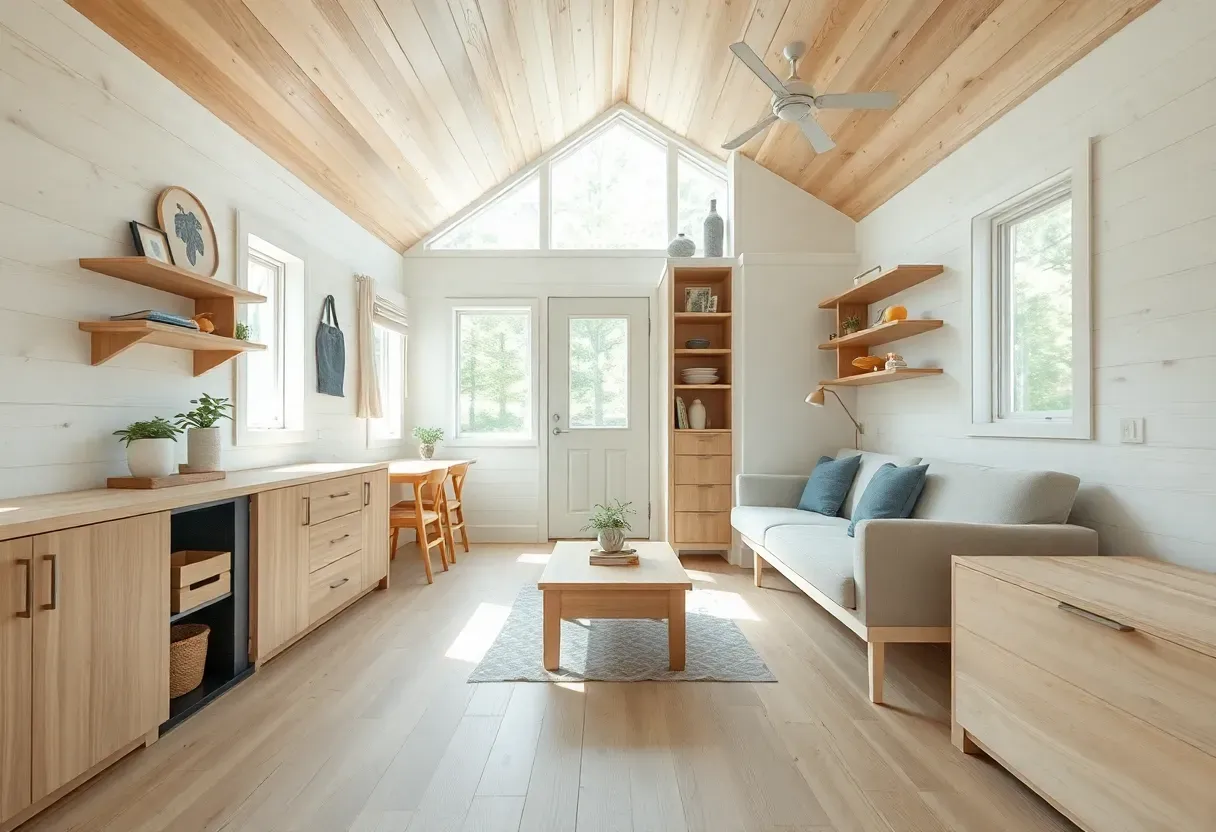
Tiny house living hacks work best when every square inch serves multiple purposes through smart design that makes small spaces feel generous rather than cramped.
This collection of 27 proven tiny house living hacks focuses on layout, built-in storage, and multi-purpose furniture that transforms tight footprints into intentional homes. Whether you are a renter or a tiny home owner, these space-saving ideas adapt to your situation.
Use these small space living tips to maximize your tiny house or small apartment without sacrificing comfort, style, or your security deposit.
Quick FAQ
How does tiny house living work with design choices instead of just decluttering?
Good design does the heavy lifting by using vertical space, built-in storage, and multi-purpose furniture. When the home itself is organized, tiny house living feels spacious rather than restricted.
What are the most effective tiny house living hacks for small bedrooms?
Loft beds with storage underneath, wall-mounted nightstands, and built-in wardrobes that use full ceiling height. These moves free floor space while keeping essentials accessible.
Can tiny house living work for families or couples?
Yes, with thoughtful zoning and convertible spaces. Use room dividers, fold-down surfaces, and defined storage zones so each person has territory without crowding.
How do you keep tiny house living from feeling cramped?
Use light colors, continuous flooring, and minimal visual breaks. Let one material lead the design and keep the palette unified so the eye reads the space as larger.
What tiny house living hacks work for rentals without permanent changes?
Focus on multi-purpose furniture, vertical storage, and light-reflecting surfaces. Tall bookcases, over-door organizers, and mirrors can transform small spaces without construction.
As an Amazon Associate I earn from qualifying purchases.
Table of Contents
- 1. Build Storage into Every Vertical Inch
- 2. Use Lofts for Sleeping and Free the Floor
- 3. Choose Multi-Purpose Furniture That Adapts
- 4. Create Zones Without Walls
- 5. Hide Storage Under Stairs and Seating
- 6. Mount Desks and Tables to Fold Away
- 7. Use Light Colors and One Continuous Floor
- 8. Install Sliding Doors Instead of Swinging
- 9. Maximize Natural Light with Minimal Treatments
- 10. Build Window Seats with Hidden Storage
- 11. Use Over-Door and Wall-Mounted Organizers
- 12. Choose Furniture Exposed Legs for Visual Lightness
- 13. Extend Living Space with Outdoor Decks
- 14. Build Murphy Beds for Daytime Living Space
- 15. Use Mirrors to Double Perceived Space
- 16. Create a Kitchen Galley with Pull-Out Pantry
- 17. Build Bathroom Storage into Nooks and Recesses
- 18. Use Pocket Doors and Curtains for Separation
- 19. Choose Compact Appliances That Still Function
- 20. Create Defined Storage Zones by Activity
- 21. Use the Space Above Cabinets for Seasonal Items
- 22. Build a Wet Bath with Curved Walls
- 23. Install Built-Ins from Floor to Ceiling
- 24. Use Lightweight Furniture That Moves Easily
- 25. Create a Closet Nook Behind the Bed
- 26. Build a Deck That Expands Living Space
- 27. Design One Reset Ritual for Daily Calm
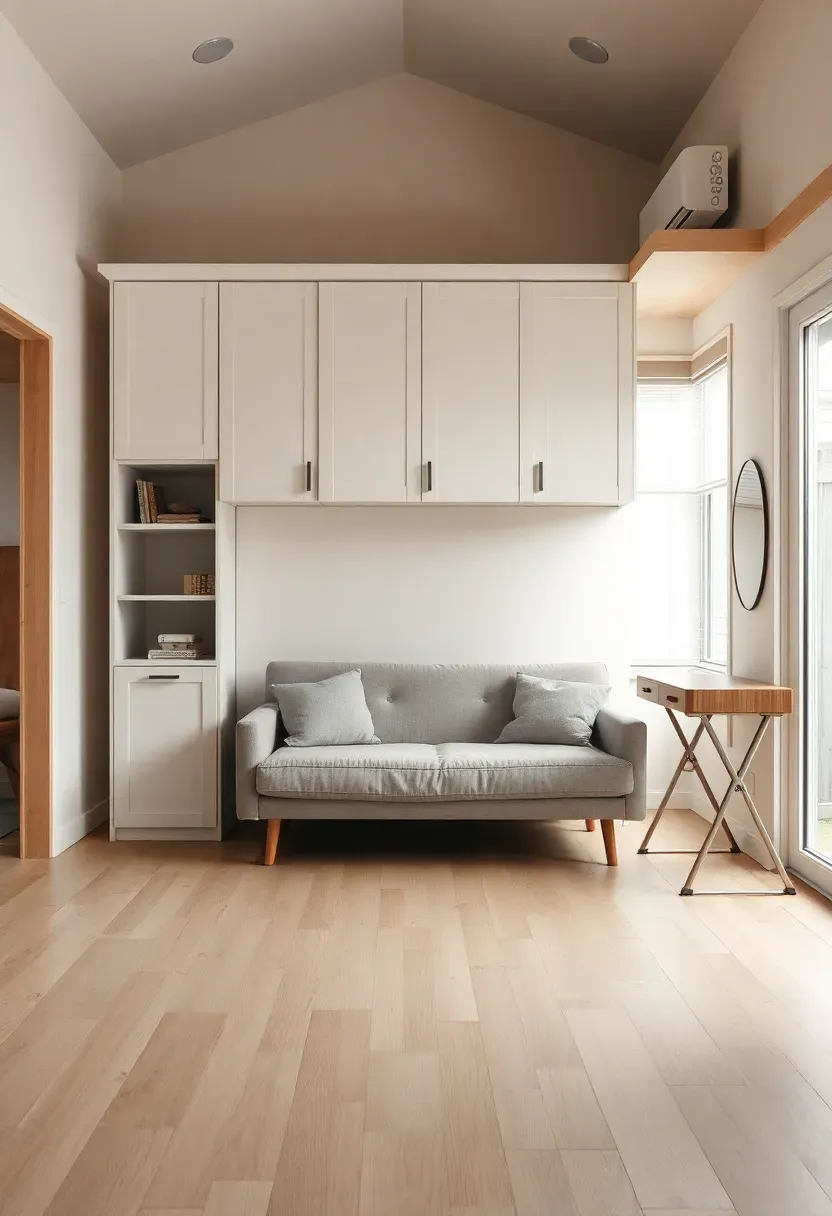
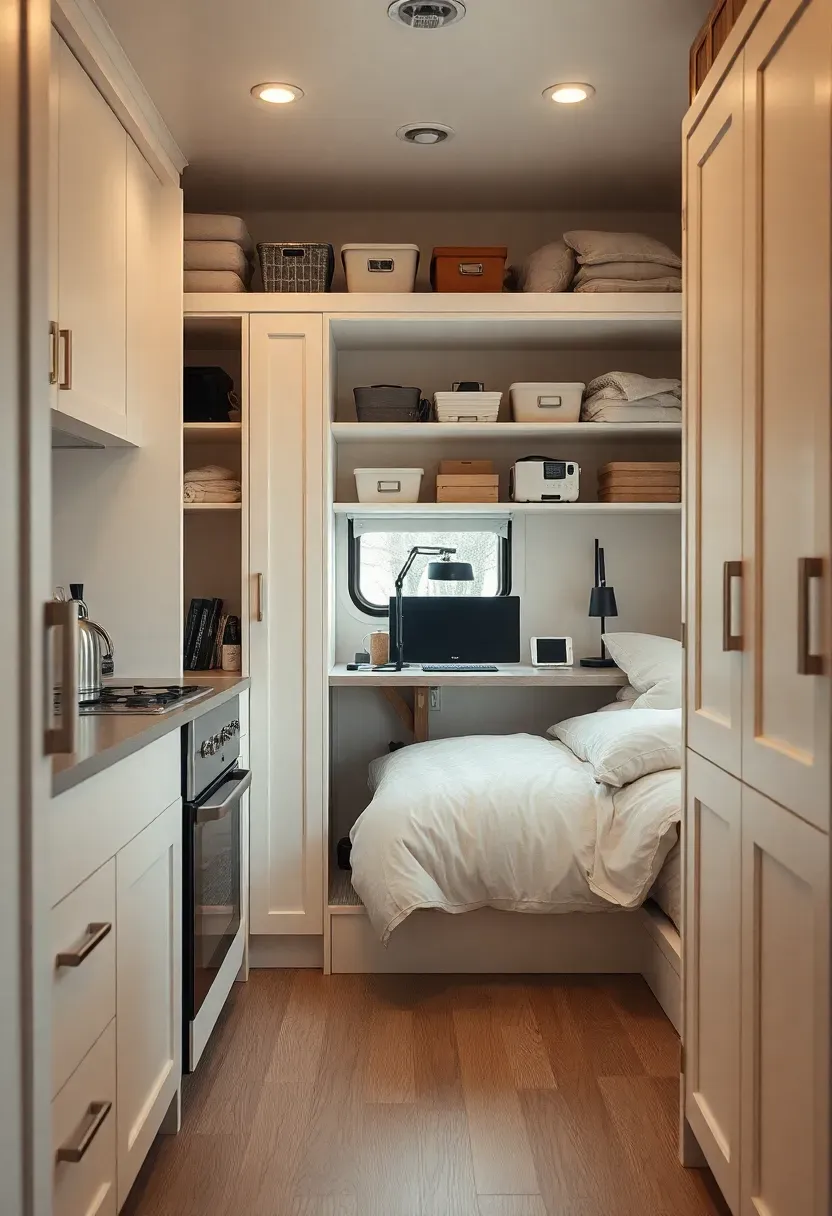
1. Build Storage into Every Vertical Inch
Tiny house living succeeds when storage claims every vertical surface. Build floor-to-ceiling cabinets with consistent 18-inch depth and use the top third for seasonal items. Keep doors flush with push-latch hardware so storage reads as architecture rather than furniture. This approach makes small spaces feel organized without consuming floor area.
Tips
- Do: use the top 24 inches for items accessed only seasonally.
- Don't: leave wasted space above cabinets—build to the ceiling.
What this gives you: maximum storage without sacrificing floor space.
We picked a few things that go well with this idea: QEEIG Floating Bathroom Shelves Set of 3 (★4.7), QEEIG Wall-Mounted Bathroom Shelf Set (2-Pack) (★4.5) and Black Wooden Over-Toilet Wall Shelves (Set of 3) (★4.5). As an Amazon Associate we earn from qualifying purchases.
2. Use Lofts for Sleeping and Free the Floor
The most effective tiny house living hack is moving the bed to a loft. Keep 36-42 inches of clearance above the mattress for comfort and add a railing or partial wall for safety. The space below becomes a living area, office, or storage zone. Use a built-in ladder with storage rungs or a staircase with drawers underneath.
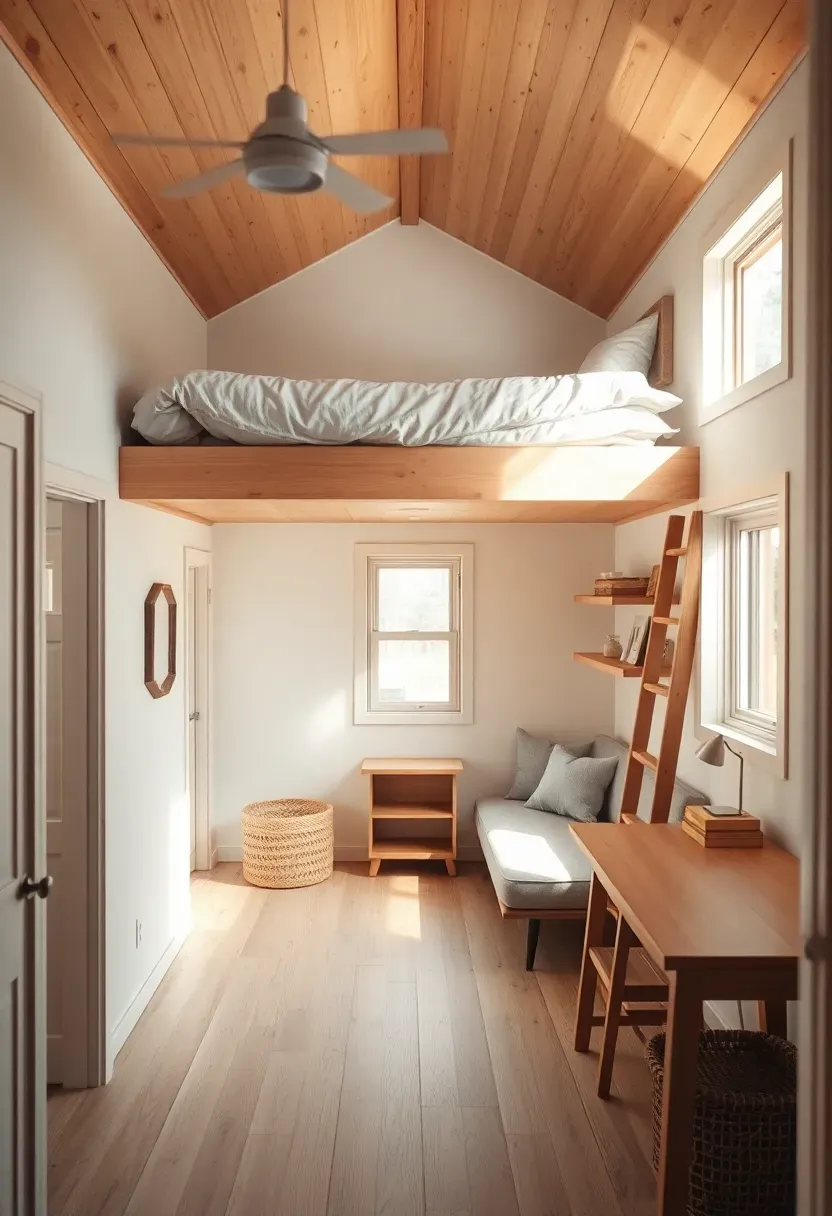
Placement note: position the loft above a bathroom or kitchen to preserve headroom in living areas.
If ceiling height limits a loft, consider a murphy bed instead. The trade-off is that loft access requires some climbing, but the floor space gain is substantial. Add a skylight above the loft for light and ventilation.
Tips
- Install a reading light at the head of the bed for evening use.
- Use low-profile bedding to maximize headroom.
What this gives you: a full floor reclaimed for daytime living.
We picked a few things that go well with this idea: KIMBORA Narrow Over-Door Mesh Organizer (2-Pack) (★4.6), Lifewit Over-Door Clear Window Storage Organizer (★4.6) and JARLINK 5-Shelf Over-Door Hanging Organizer (★4.8). As an Amazon Associate we earn from qualifying purchases.
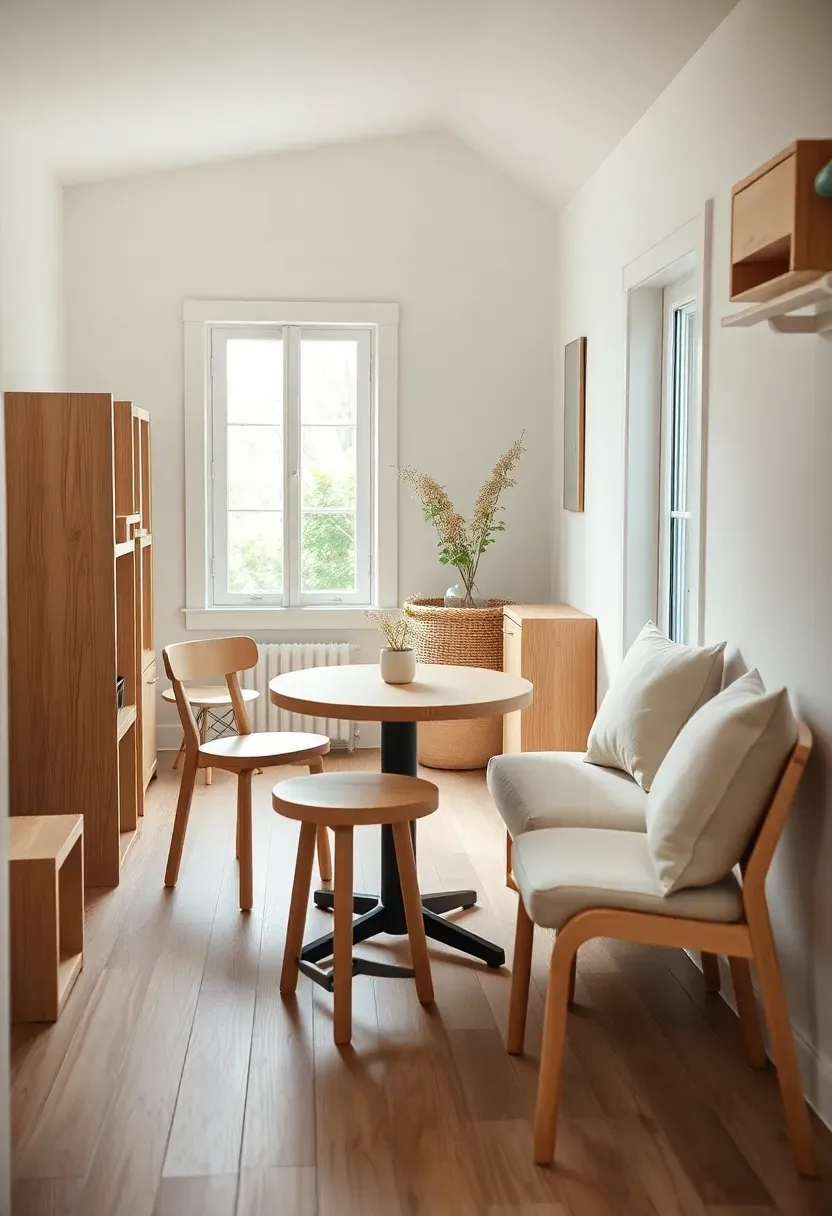
3. Choose Multi-Purpose Furniture That Adapts
Tiny house living requires furniture that shifts functions throughout the day. Choose a sofa that converts to a guest bed, a dining table that folds against the wall, or ottomans with hidden storage. Each piece should earn its footprint by serving at least two purposes. This keeps the space flexible without adding more objects.
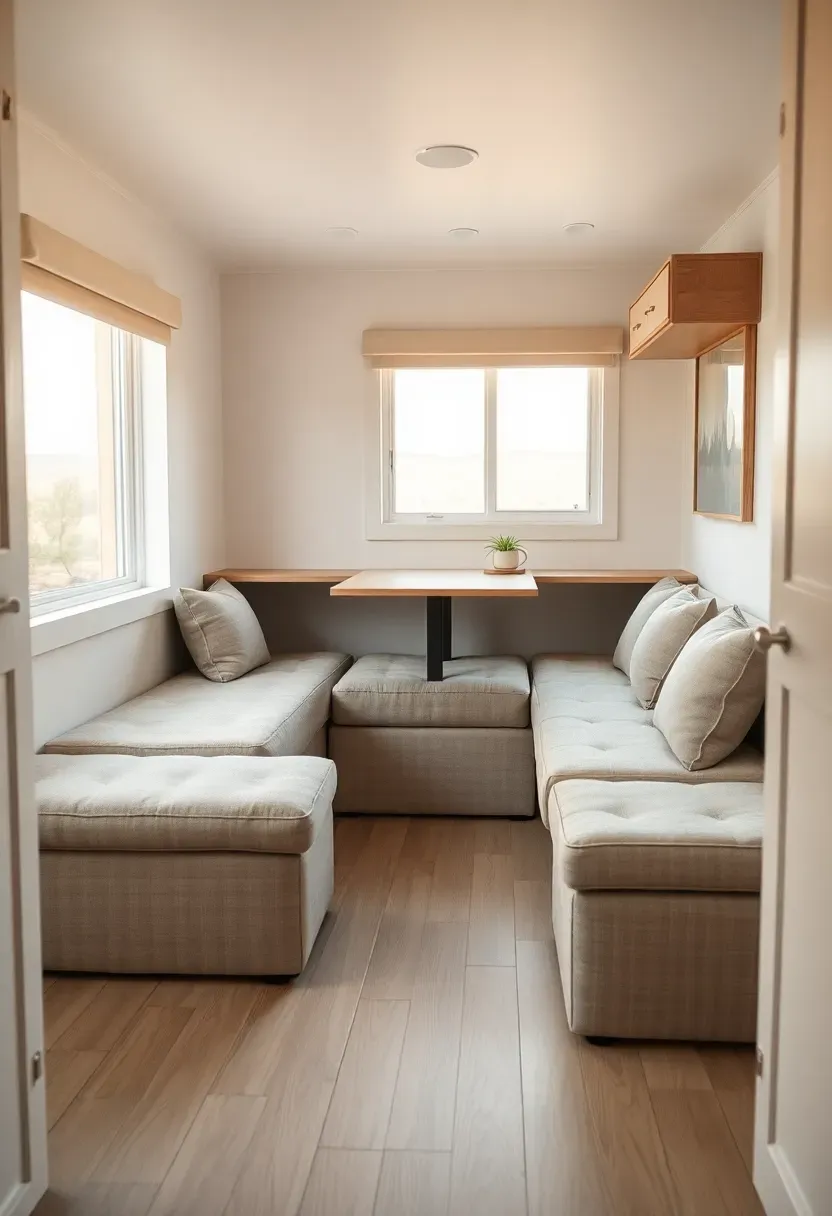
Why it works: multi-purpose furniture doubles functionality without doubling the footprint.
Look for hydraulic mechanisms that make conversion easy. If you want more design direction, see our modern tiny house ideas for sleek multi-purpose pieces. The consequence of single-purpose furniture in tiny houses is that half the space sits unused most of the time. A lift-top coffee table that becomes a desk, or a bench that stores blankets, transforms how the room functions.
Tips
- Pro: convertible pieces let one room serve as living, dining, and guest space.
- Con: mechanisms can add cost and complexity.
- Fix: choose simple designs with fewer moving parts.
Budget/Time: $500-1500 for quality convertible pieces that last.
What this gives you: a space that adapts to daily needs without feeling cramped.
We picked a few things that go well with this idea: HOOBRO Folding Drop-Leaf Wall Mounted Desk (★4.4), Upgrade 31.5-Inch Wall Mounted Folding Table (★4.4) and TEAMIX Black Wall Mounted Folding Float Desk (★4.2). As an Amazon Associate we earn from qualifying purchases.
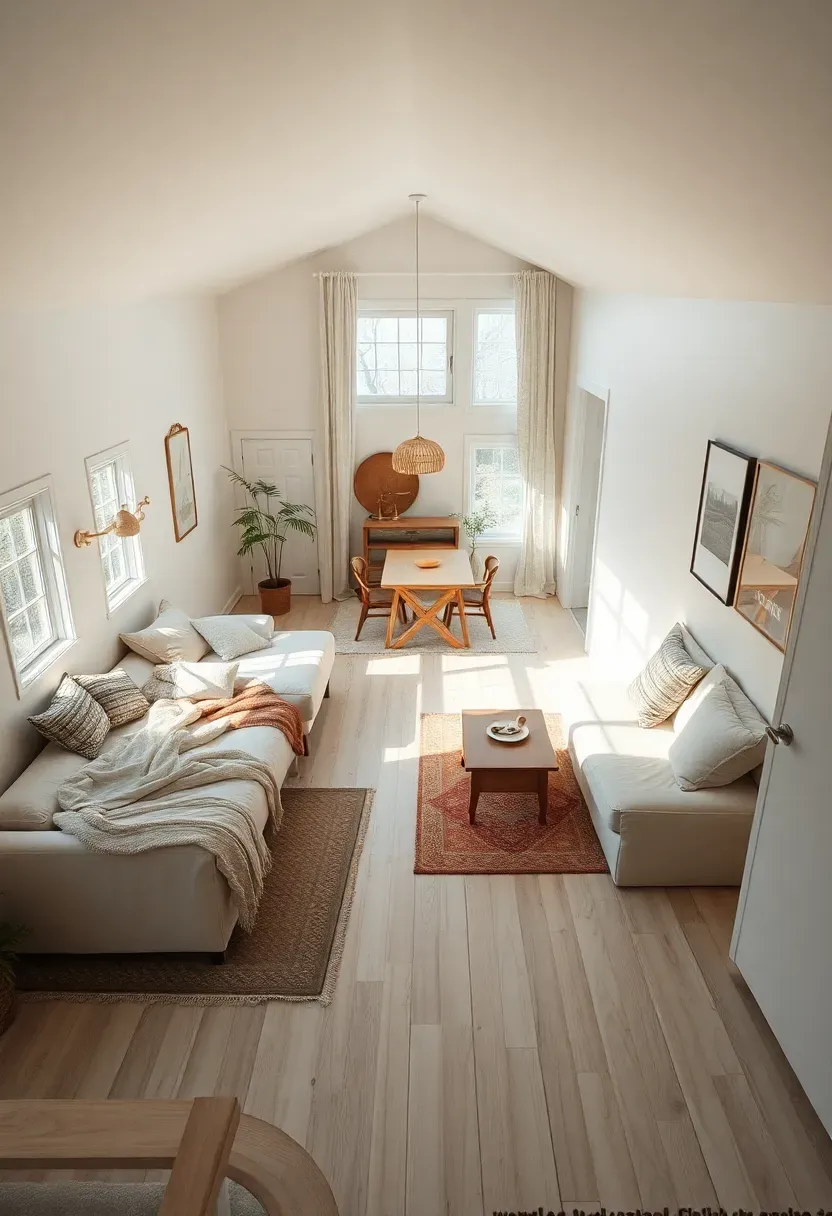
4. Create Zones Without Walls
Tiny house living feels larger when you define zones without building walls. Use rugs, furniture placement, and ceiling changes to separate sleeping, living, and eating areas. A sofa backing defines a living zone, while a rug anchors dining space. This preserves flow while creating visual separation.
Recommended
Items for this idea
Keep circulation paths at least 30 inches wide. The contrast move is to avoid placing furniture in the center of the room—push pieces to walls to preserve open space. If privacy is needed, use curtains or open shelving as dividers instead of solid walls.
Tips
- Do: use different rugs to define separate zones.
- Don't: block natural paths with furniture arrangements.
What this gives you: defined spaces without sacrificing openness.
5. Hide Storage Under Stairs and Seating
The most valuable tiny house living hack is using otherwise dead space for storage. Build drawers under staircase treads, add storage inside benches, and use hollow ottomans. These hidden compartments store bulky items like blankets, shoes, or seasonal gear without using visible shelf space.
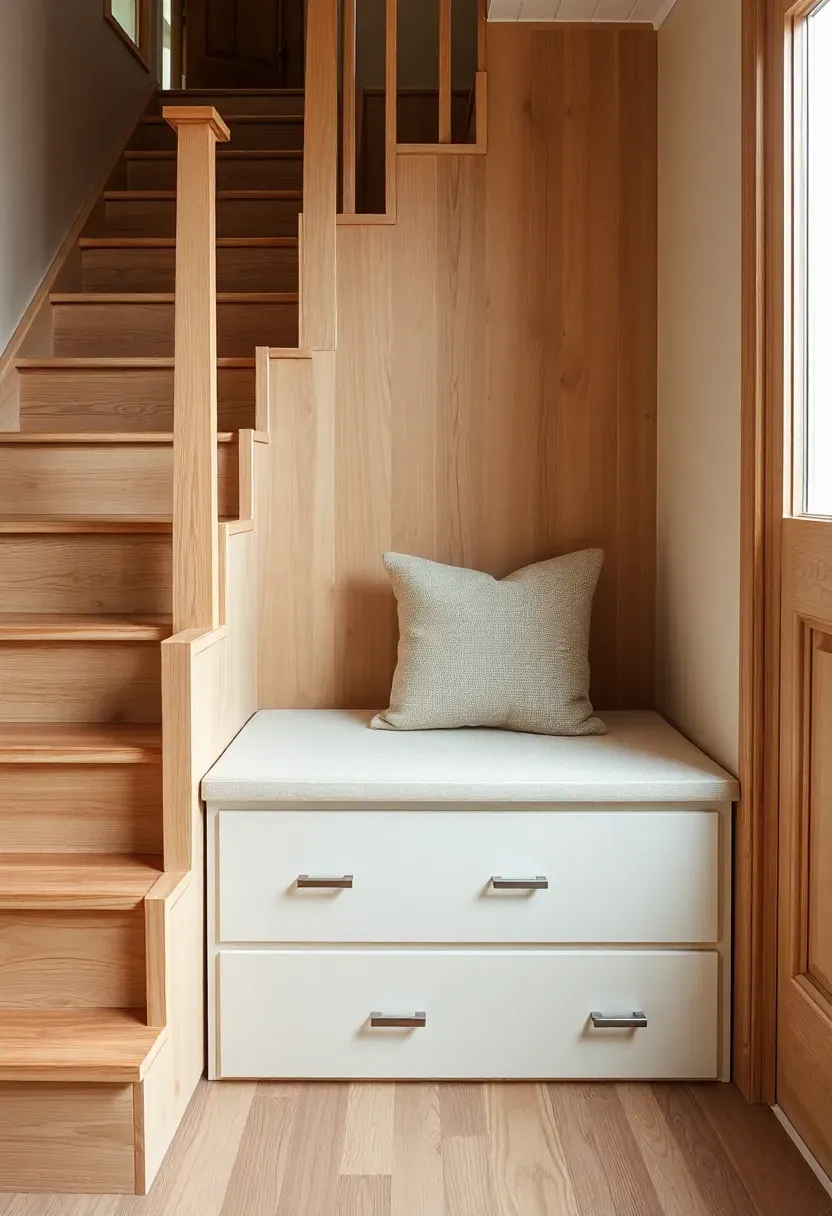
Why it works: under-stair and seating storage uses structural space that would otherwise be empty.
Design drawers with 6-8 inch depth for shoes or 12 inches for bedding. The trade-off is that hardware must be durable—choose recessed pulls or push-latches to avoid catching on clothing. A storage bench with a hinge lid is simpler than drawers and can hold bulkier items.
Tips
- Use soft-close hinges to prevent slamming in tight spaces.
- Label contents on the inside of drawer fronts for quick identification.
What this gives you: hidden storage that does not impact visual space.
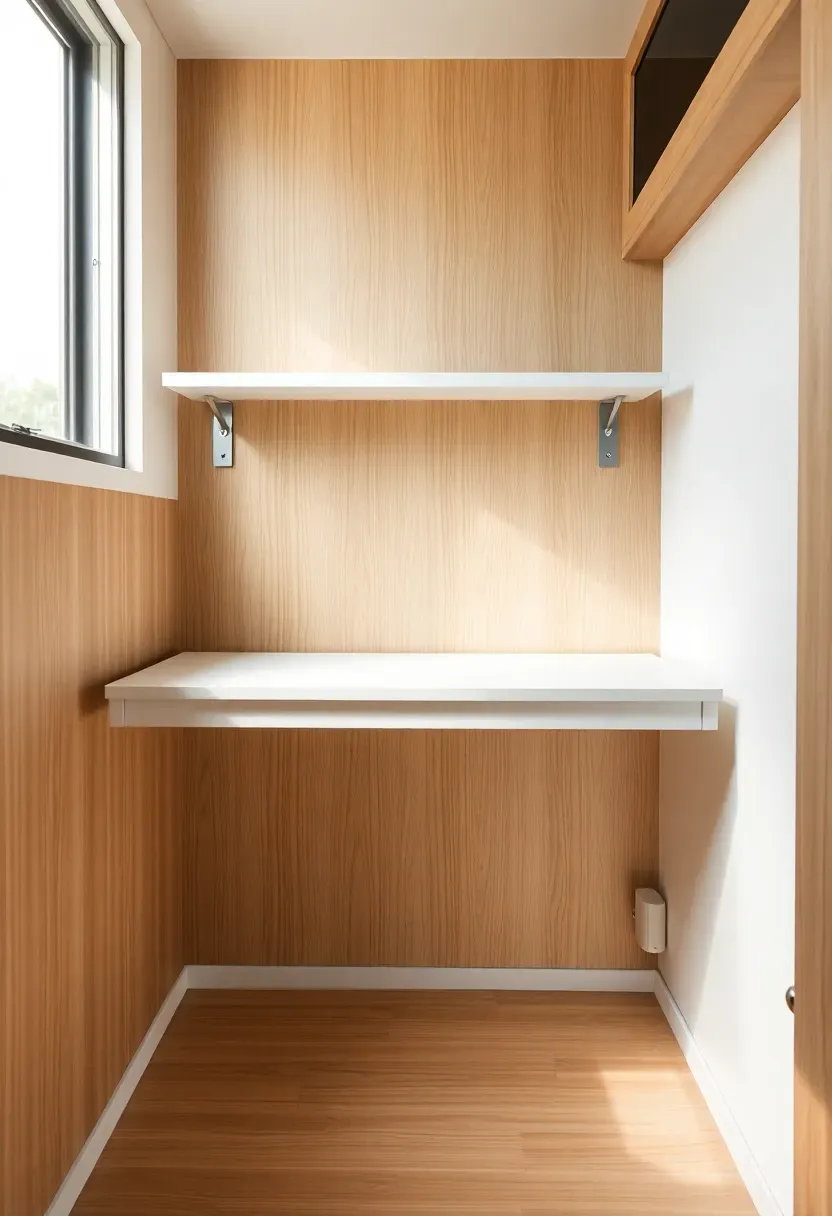
6. Mount Desks and Tables to Fold Away
Tiny house living gains usable space when surfaces fold down when not in use. Mount a desk to the wall with folding brackets, install a murphy table that drops from the wall, or use a leaf that extends only when needed. This keeps circulation clear and makes the room feel larger.
Recommended
Items for this idea
Common mistake: leaving fold-down surfaces permanently deployed, which defeats the space-saving purpose.
Use sturdy folding brackets that support at least 50 pounds. The contrast move is to avoid bulky legs—mount directly to wall studs. Add a magnetic catch to keep surfaces secured when folded. This makes tiny house living feel spacious during the day.
Tips
- Install a power strip on the wall behind the desk for easy access.
- Use lightweight materials to make folding easier.
Best for
What this gives you: floor space when you need it, workspace when you don't.
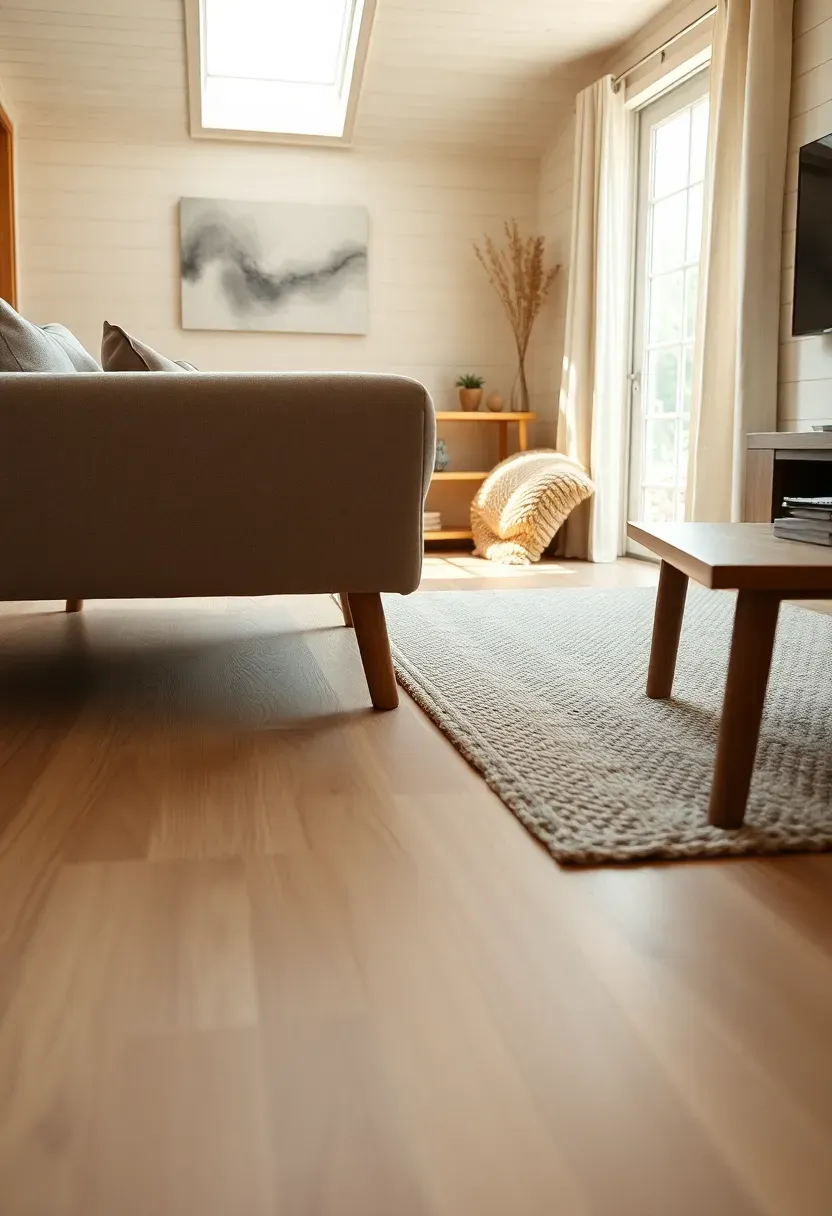
7. Use Light Colors and One Continuous Floor
Tiny house living feels expansive when the palette is light and unified. Choose warm white walls, a continuous floor material like white oak or light tile, and limit dark accents to small pieces. This reduces visual breaks and makes the eye read the space as larger. Light colors reflect more daylight, which further expands the perceived size.

Placement note: carry the same flooring material throughout without thresholds to maximize the sense of space.
For more techniques, read our guide on how to make a tiny house feel bigger. If you want contrast, use texture instead of color—a boucle throw or nubby rug adds depth without darkening the room. The consequence of dark colors in tiny houses is that walls advance visually, making the space feel smaller. Keep the LRV of wall paint above 75 for maximum light reflection.
Tips
- If the floor is continuous, then use area rugs to define zones.
- If you need contrast, then add it in small accessories rather than large surfaces.
What this gives you: a tiny house that feels twice its actual size.
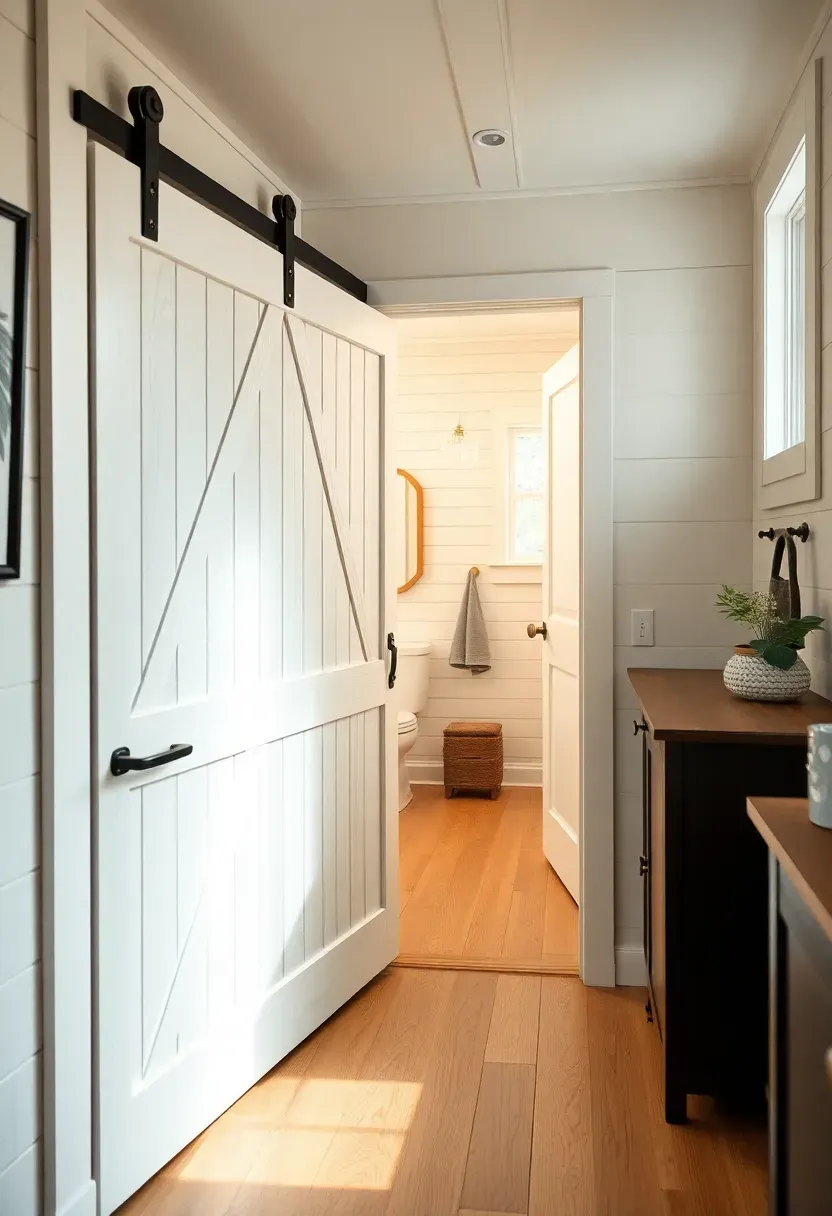
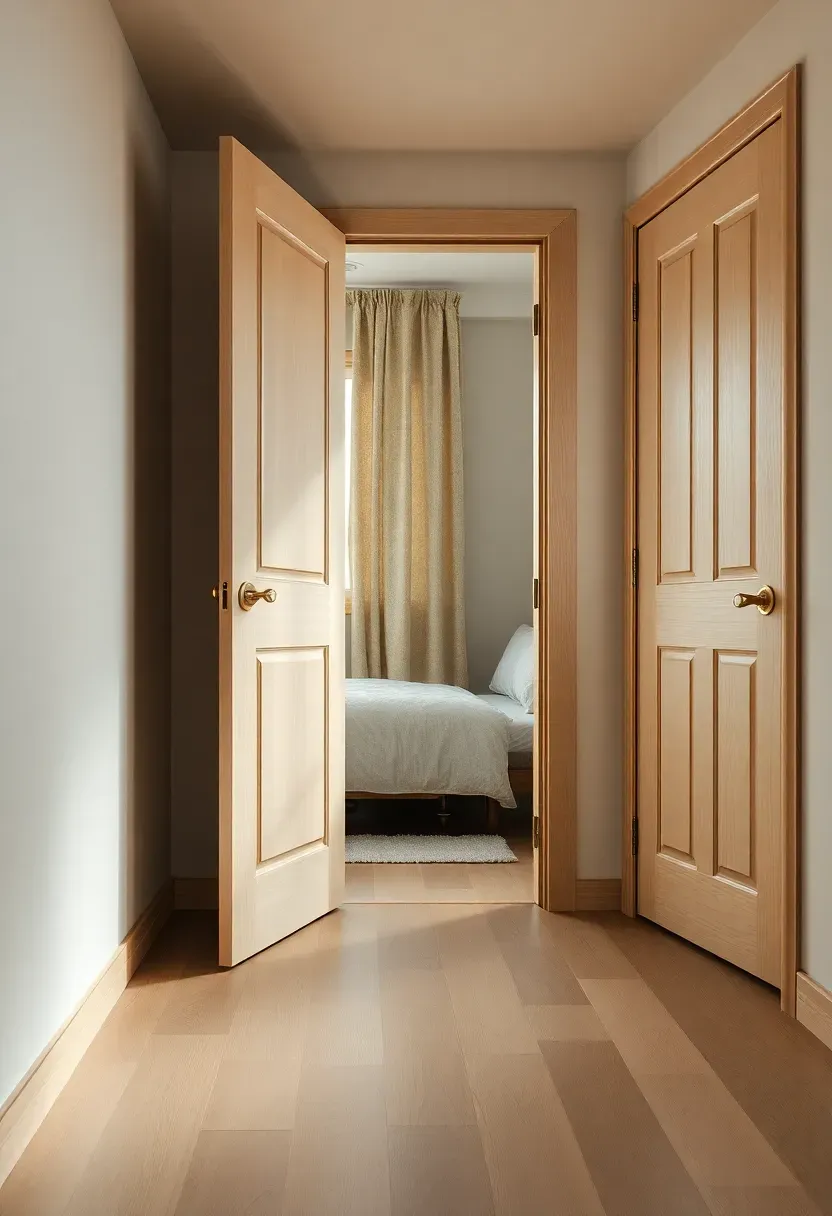
8. Install Sliding Doors Instead of Swinging
The simplest tiny house living hack is replacing swinging doors with sliding versions. Barn doors, pocket doors, or sliding panels preserve floor space because they do not require clearance arcs. A standard swinging door claims up to 10 square feet when open—a sliding door uses zero.
Recommended
Items for this idea
Why it works: sliding doors free up floor space that swinging doors would claim.
Install a flush-mounted track so the door slides parallel to the wall. The trade-off is that sliding doors do not seal as tightly as swinging doors, so use weatherstripping for bathrooms. If a pocket door is not possible, a surface-mounted barn door adds character while saving space.
Tips
- Use soft-close mechanisms to prevent slamming in tight quarters.
- Choose flush pulls so the door does not catch on clothing.
Rental note: use tension-mounted room dividers or curtains instead of replacing doors.
What this gives you: up to 10 square feet of reclaimed floor space per door.
9. Maximize Natural Light with Minimal Treatments
Tiny house living feels larger when natural light fills the space. Use large windows if possible, keep treatments sheer or remove them entirely, and position mirrors to reflect daylight deeper into the room. Light makes boundaries recede and creates a sense of connection to the outdoors.
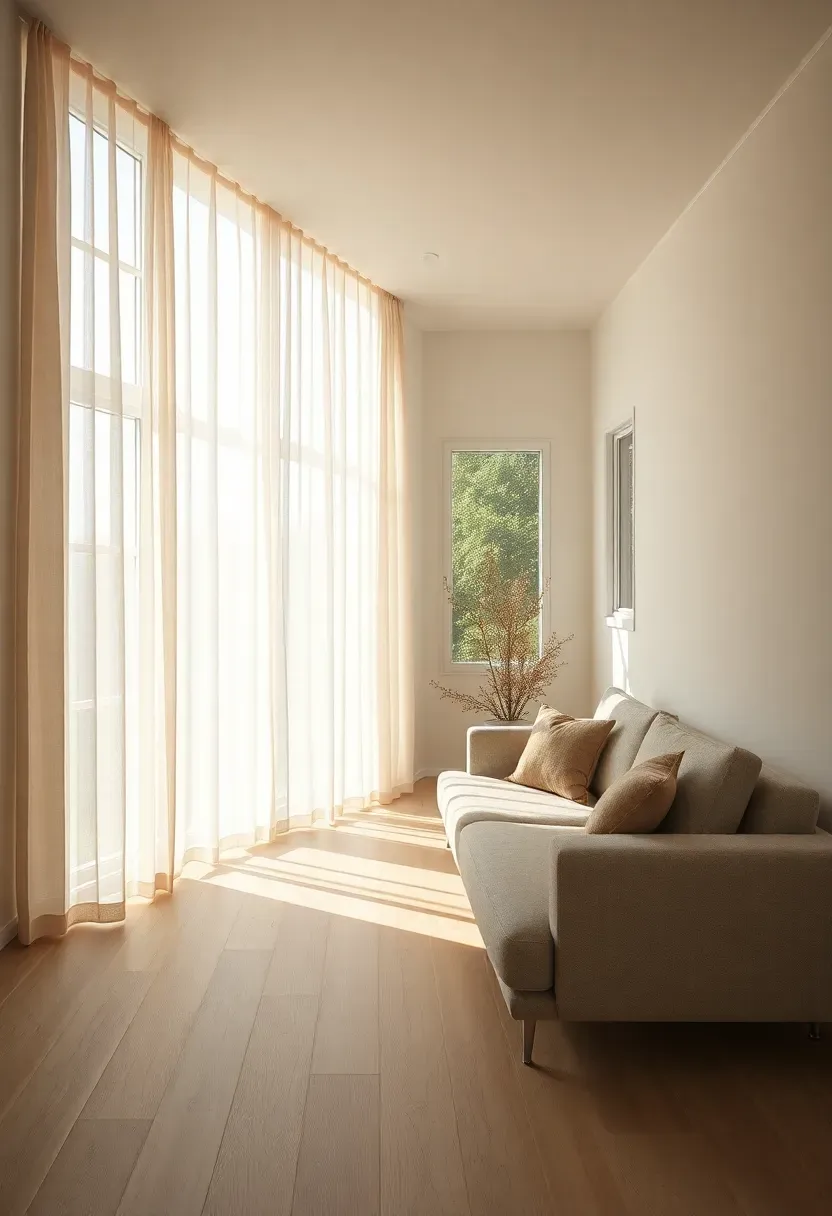
Common mistake: using heavy blackout curtains that block light and make tiny houses feel like caves.
If privacy is needed, use top-down shades that admit light while obscuring the lower portion of windows. The contrast move is to skip curtains entirely on windows that face private outdoor areas. Place a mirror opposite the largest window to double the daylight effect.
Tips
- Do: keep window treatments minimal to maximize light.
- Don't: place furniture where it blocks natural light paths.
What this gives you: a tiny house that feels open and connected to outdoors.
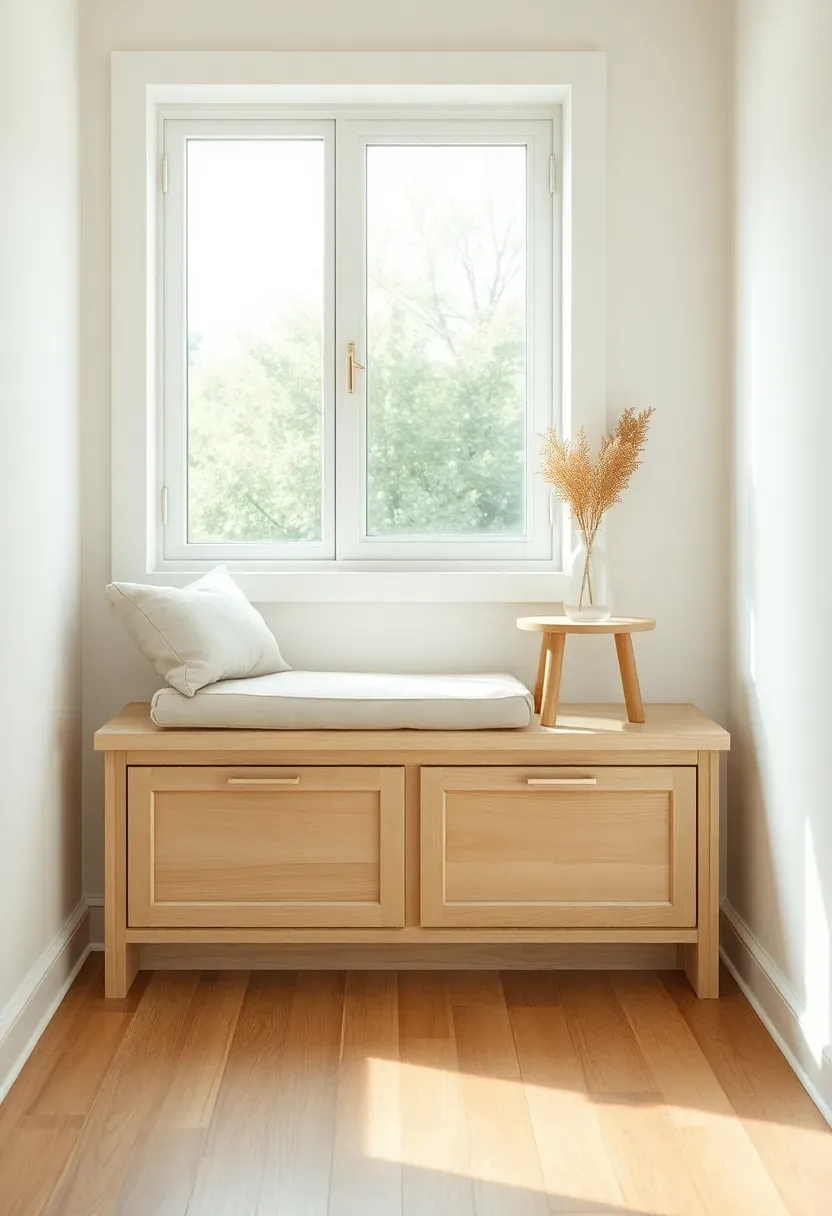
10. Build Window Seats with Hidden Storage
Window seats are a tiny house living hack that adds comfort, storage, and visual interest. Build a bench under a window with a hinged lid for blankets or seasonal items. Add a cushion in durable upholstery like canvas or performance fabric. This uses dead space while creating a cozy reading nook.
Recommended
Items for this idea
Keep the seat depth at 18-20 inches for comfort. The trade-off is that window seats consume floor space, so use them only where circulation is not impacted. If the window is low, build the seat at standard chair height rather than bench height.
Tips
- Use gas struts to make the lid easy to open.
- Add a removable cushion cover for washing.
What this gives you: storage plus seating in otherwise unused space.
11. Use Over-Door and Wall-Mounted Organizers
Tiny house living gains storage from surfaces that are often overlooked. Over-door racks store shoes or pantry items, wall-mounted pegboards hold tools or kitchen supplies, and magnetic knife racks free counter space. These organizers use vertical space without requiring floor area.

Placement note: mount organizers on the back of doors or unused wall sections near work zones.
Choose slim-profile organizers that do not protrude more than 4-6 inches. The consequence of deep racks is that they block circulation in already-tight spaces. A pegboard is particularly versatile because hooks can be rearranged as needs change.
Tips
- If using over-door storage, then check that the door can still fully open.
- If mounting pegboard, then use at least 4 anchors for stability.
Rental note: over-door hooks and tension-rod organizers require no installation.
What this gives you: storage that does not consume precious floor space.
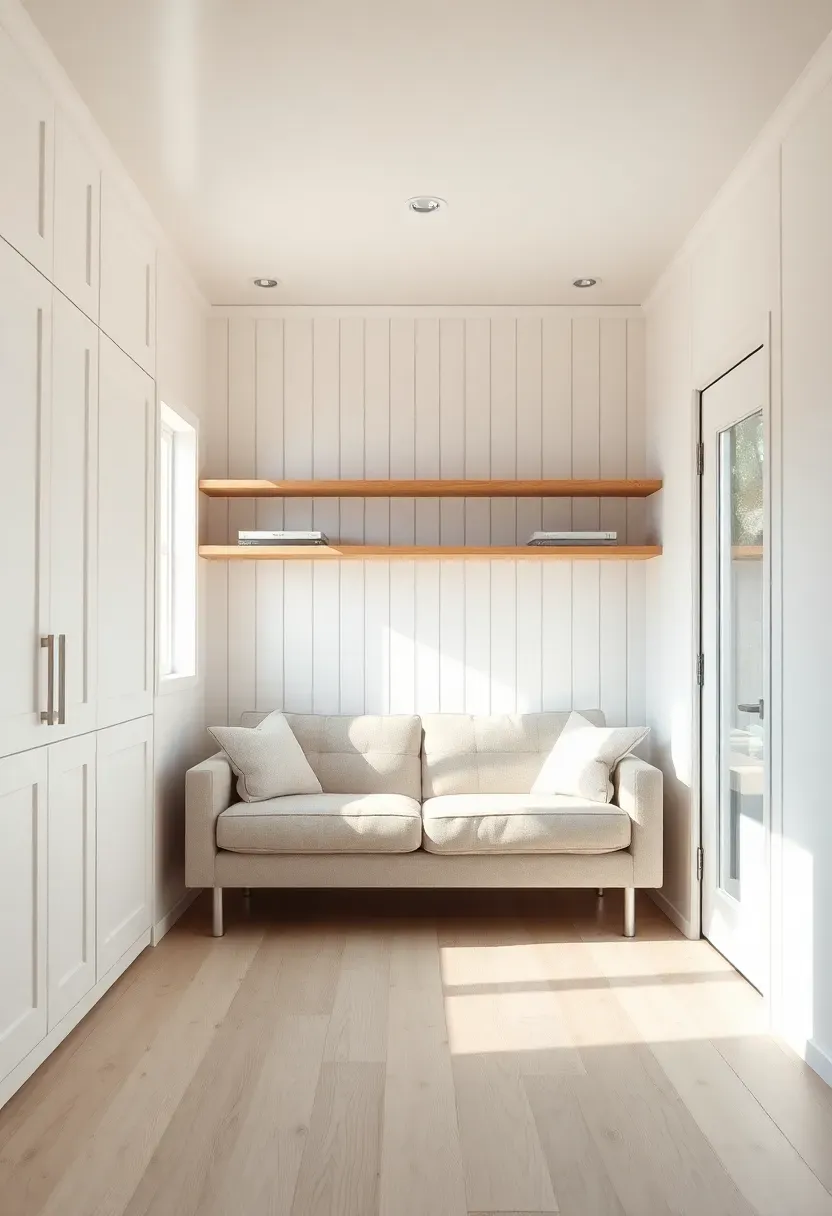
12. Choose Furniture Exposed Legs for Visual Lightness
Tiny house living feels airier when furniture shows the floor beneath. Choose sofas, tables, and cabinets with exposed legs rather than solid bases. This allows the eye to travel continuously across the floor, making the room feel larger. Mid-century or Scandinavian designs work well because they emphasize leggy silhouettes.
Recommended
Items for this idea
Why it works: visible floor creates a sense of continuous space and visual lightness.
Avoid skirted furniture or boxy bases that sit flush with the floor. The contrast move is to choose acrylic or glass tables that practically disappear. Keep legs tapered rather than chunky to maintain a delicate profile.
Tips
- Pro: leggy furniture makes cleaning underneath easier.
- Con: storage beneath is visible and must stay tidy.
- Fix: use bins or baskets to conceal under-furniture storage.
What this gives you: a room that feels visually lighter and larger.
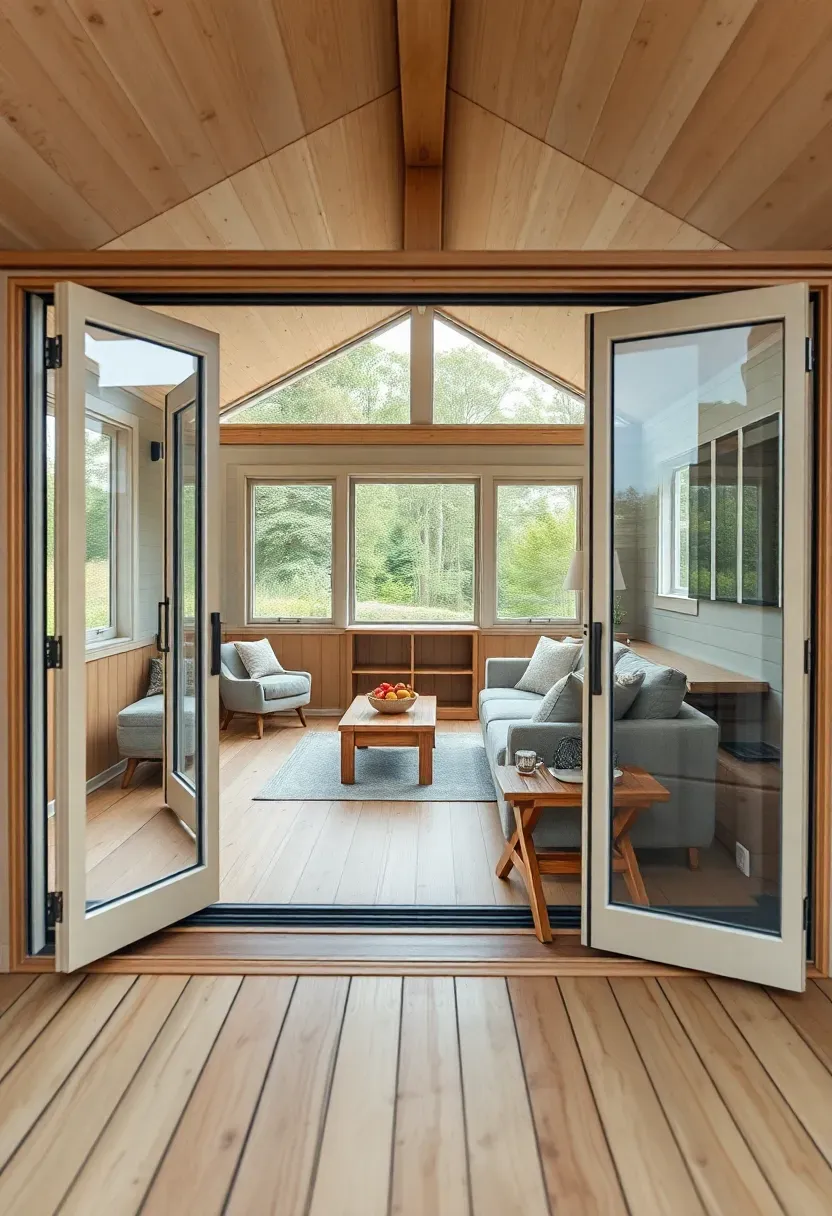
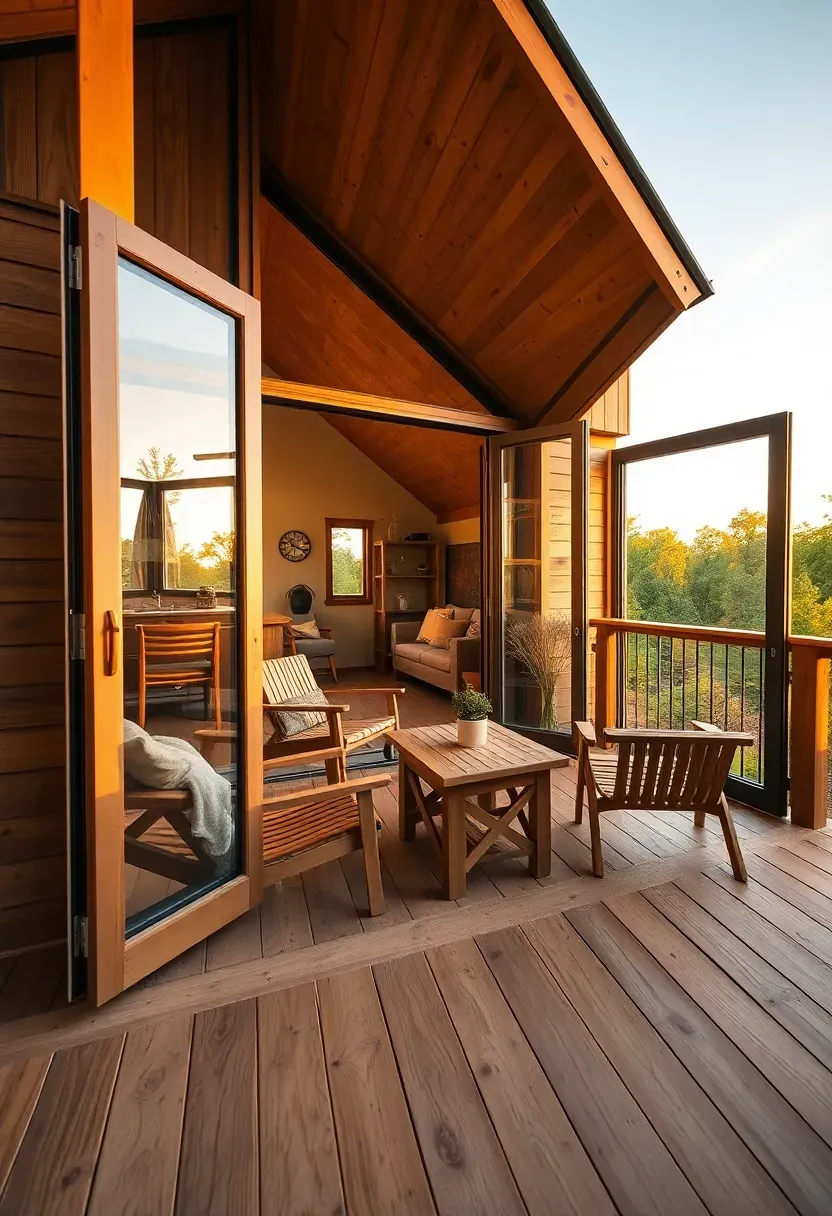
13. Extend Living Space with Outdoor Decks
Tiny house living effectively doubles when you create usable outdoor space. A deck even half the size of the interior becomes a living room in good weather. Use folding doors that open fully to connect indoors and out, and choose durable outdoor furniture that can handle weather while matching interior style.
Placement note: orient the deck to capture afternoon sun or morning shade depending on climate.
If a full deck is not possible, a Juliet balcony or even a large window shelf can provide a sense of outdoor connection. The trade-off is that outdoor spaces require maintenance, so choose durable materials like cedar or composite decking.
Tips
- Install an overhang or awning for rain protection.
- Use outdoor rugs to visually extend the interior floor.
Best for: tiny houses on foundations with accessible outdoor space.
What this gives you: living space that effectively doubles in good weather.
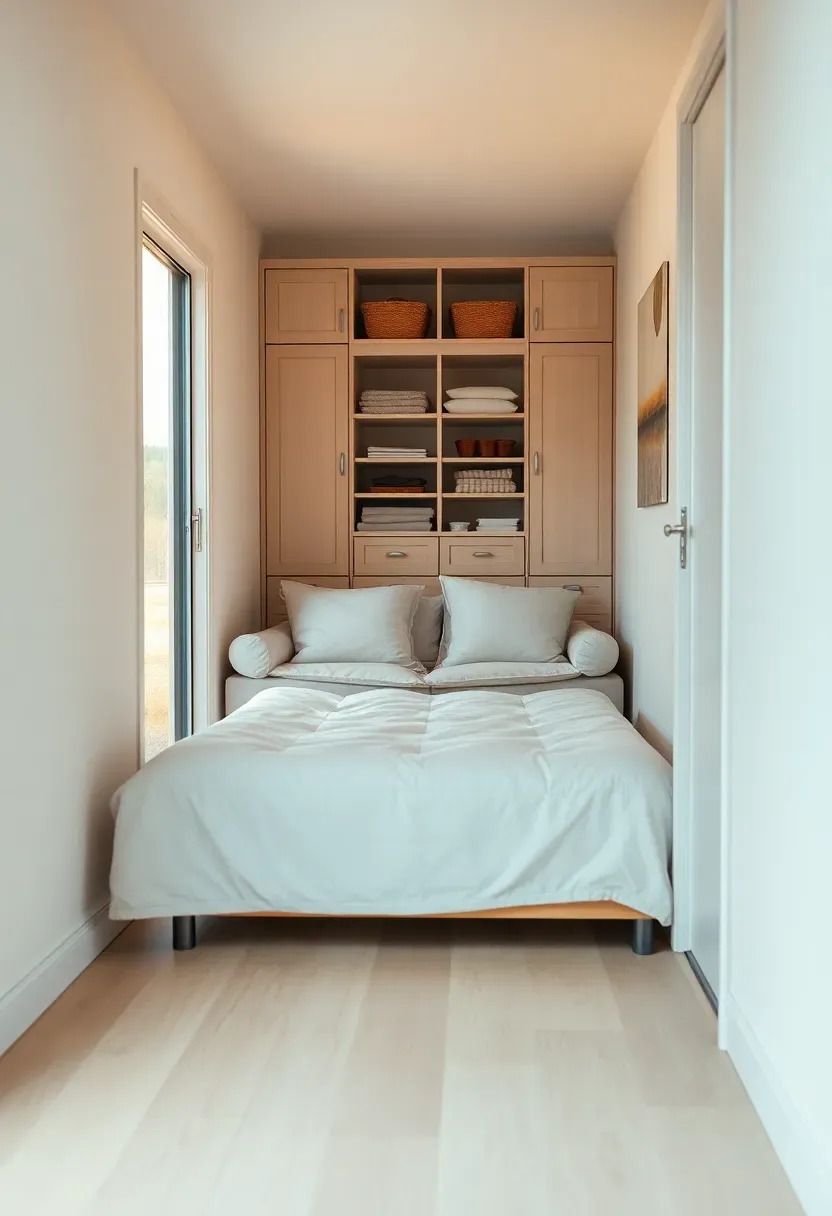
14. Build Murphy Beds for Daytime Living Space
When lofts are not an option, murphy beds are the tiny house living solution. Build a bed into the wall that folds vertically when not in use, freeing floor space for daytime activities. Add a sofa or desk in front that can be moved aside when the bed is lowered. This transforms one room from bedroom to living room.
Recommended
Items for this idea
Why it works: a murphy bed reclaims floor space that a permanent bed would claim.
Use piston mechanisms that make lifting easy—avoid DIY gravity designs that can slam. The consequence of cheap murphy hardware is failure under weight, so invest in commercial-grade pistons. Build a shallow shelf or desk into the bed cabinet for additional function.
Tips
- Secure the bed to wall studs, not just drywall.
- Use lightweight mattress materials to reduce lift weight.
Budget/Time: $2000-5000 for a professionally installed murphy bed system.
What this gives you: a bedroom that disappears during daytime hours.
15. Use Mirrors to Double Perceived Space
Tiny house living gains an immediate sense of size with strategic mirror placement. Position a large mirror opposite a window to reflect daylight and create the illusion of depth. Use mirrored closet doors or a full-wall mirror to double the perceived dimensions of the room.

Common mistake: placing mirrors where they reflect clutter or unattractive views.
Aim mirrors toward windows, artwork, or architectural features. The contrast move is to avoid multiple small mirrors—one large statement mirror has more impact. Lean a floor mirror if wall mounting is not possible, but secure it to prevent tipping.
Tips
- Do: place mirrors opposite windows to maximize light reflection.
- Don't: use mirrored ceilings, which feel dated and oppressive.
What this gives you: a room that feels up to twice its actual size.
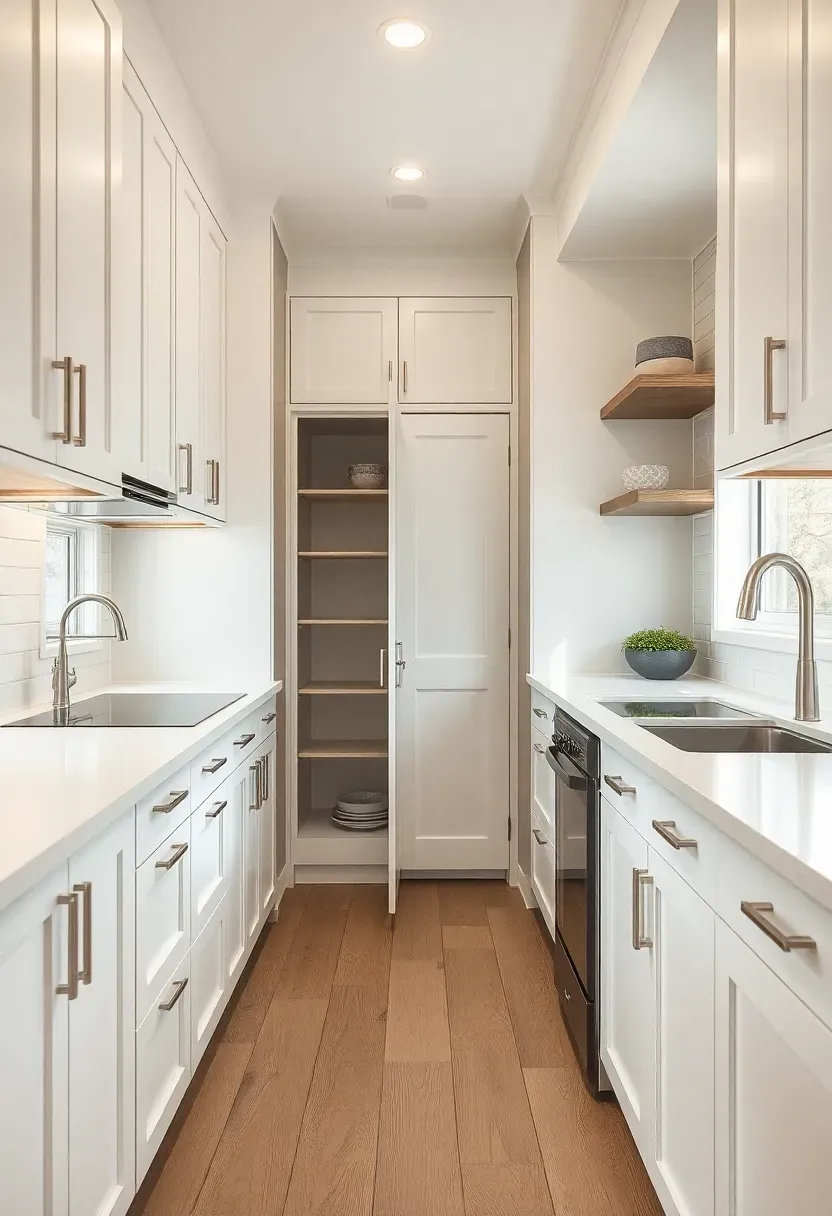
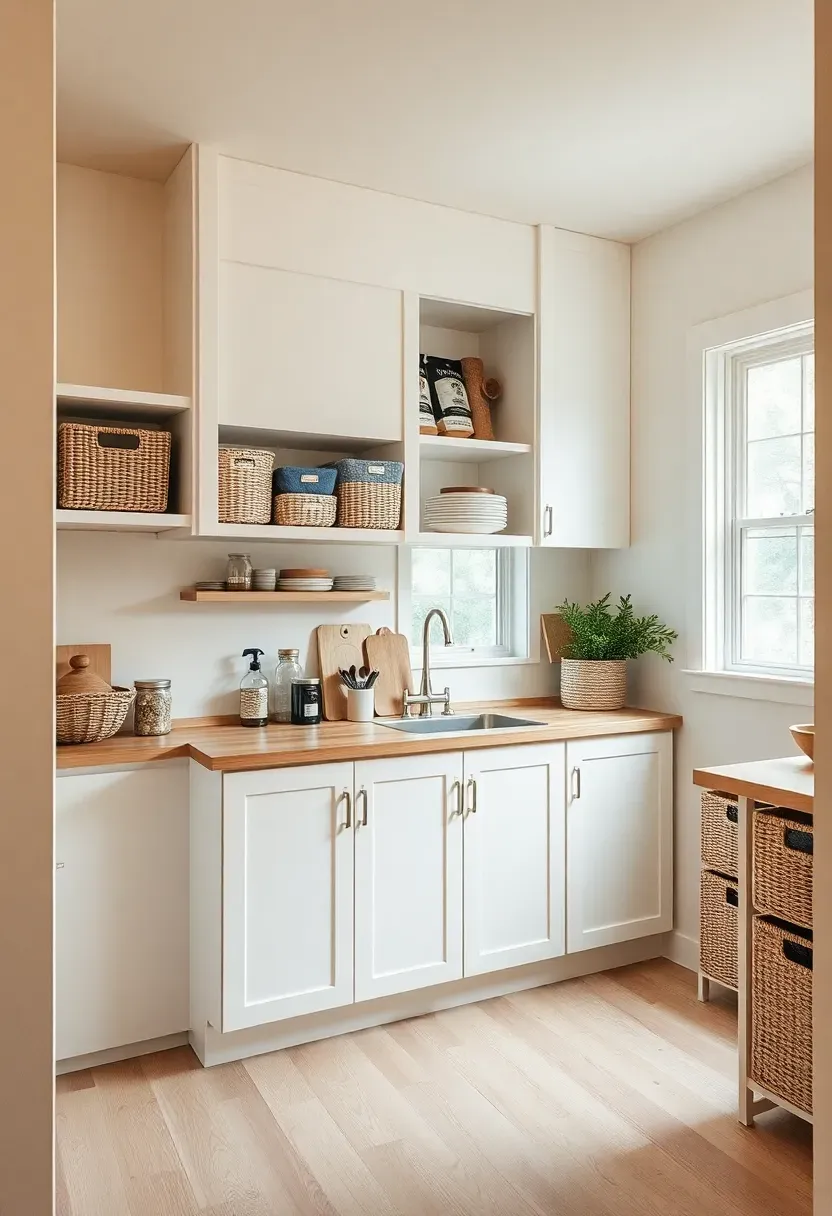
16. Create a Kitchen Galley with Pull-Out Pantry
Tiny house living kitchens work best as compact galleys with storage pushed to the walls. Build a pull-out pantry that slides out from a 6-inch gap between cabinets, storing spices and canned goods vertically. Use upper cabinets to the ceiling and keep the counter clear with appliance garages.
Recommended
Items for this idea
Placement note: place the pull-out pantry near the cooking zone for easy access while preparing meals.
Keep the aisle width at least 36 inches for comfortable movement. The trade-off is that galley kitchens can feel narrow, so use light colors and under-cabinet lighting to brighten the space. A pull-out pantry maximizes a gap that would otherwise be wasted.
Tips
- Use soft-close slides to prevent the pantry from slamming.
- Adjust shelves to fit your tallest items.
What this gives you: full kitchen function in minimal square footage.
17. Build Bathroom Storage into Nooks and Recesses
Tiny house living bathrooms gain storage by carving into wall depth. Build recessed medicine cabinets, use the space behind the shower wall for shelves, or install a vanity with drawers that pull out rather than doors that swing open. Every inch counts in compact bathrooms.
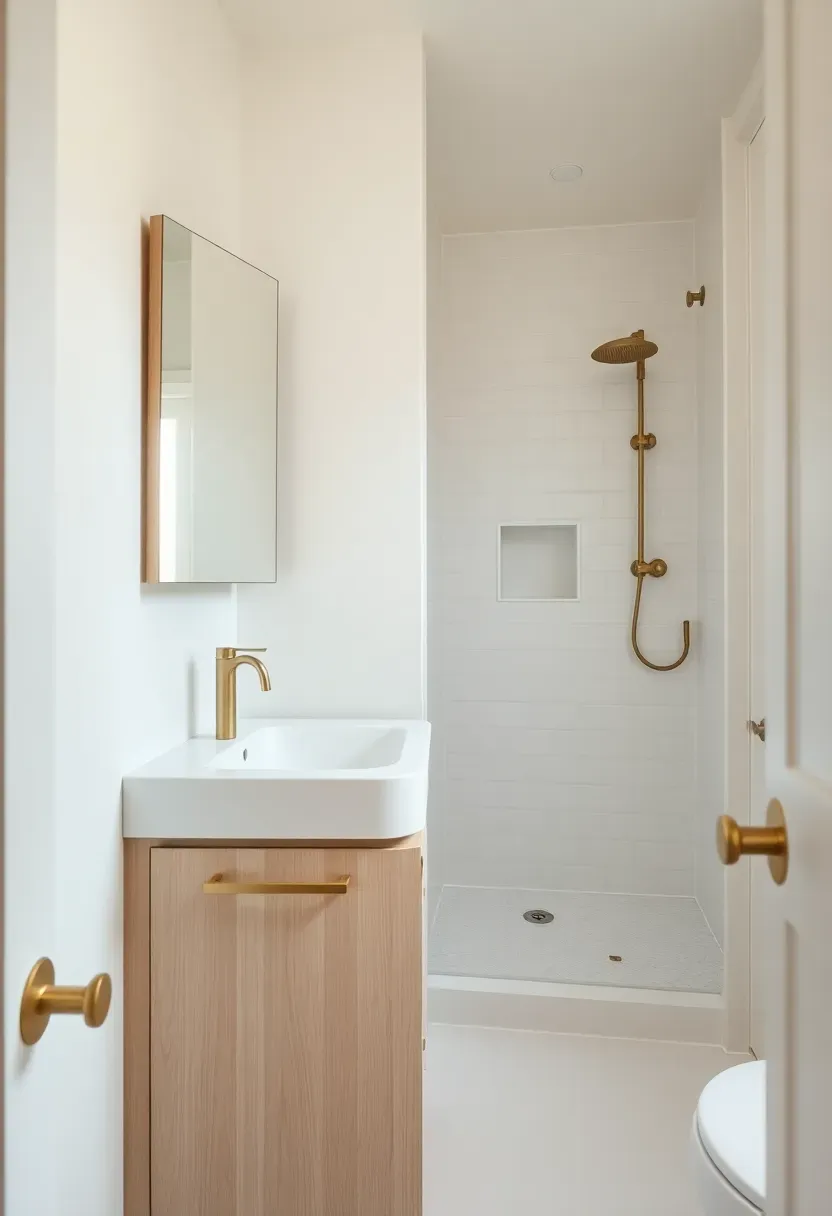
Why it works: recessed storage uses wall depth instead of claiming floor space.
If building recesses is not possible, use over-toilet storage and shallow wall-mounted cabinets. The consequence of inadequate bathroom storage is that toiletries migrate to other rooms, creating clutter. A well-organized tiny bathroom keeps everything contained.
Tips
- waterproof niches with tile or acrylic for shower use.
- Use magnetic catches for cabinet doors to save space.
Rental note: over-toilet organizers and tension rod shelves require no construction.
What this gives you: bathroom storage that does not encroach on limited floor area.
18. Use Pocket Doors and Curtains for Separation
Tiny house living requires flexible separation between zones. Pocket doors disappear into walls when open, while curtains can be drawn for privacy and pushed aside when not needed. Both preserve space that swinging doors would claim and allow you to adjust privacy as needed.
Recommended
Items for this idea
Common mistake: using heavy drapes that visually weigh down small spaces.
Choose lightweight curtains in the same tone as walls so they blend when open. The trade-off is that pocket doors require wall cavity space during construction. If pockets are not possible, surface-mounted sliding doors or curtains are effective alternatives.
Tips
- Do: use ceiling-mounted tracks for curtains to avoid floor hardware.
- Don't: choose dark curtains that contrast sharply with walls.
What this gives you: privacy when needed, openness when it's not.
19. Choose Compact Appliances That Still Function
Tiny house living kitchens require downsized appliances that maintain full functionality. Use a 24-inch range, an under-counter refrigerator, and a combination washer-dryer unit. These compact versions work as well as full-sized while consuming half the floor space.

Placement note: group appliances to minimize plumbing and electrical runs.
Test appliance capacity before committing—a compact refrigerator may not fit weekly groceries. The contrast move is to skip a dishwasher if hand-washing is manageable, freeing counter space. Choose apartment-sized appliances from reputable brands for reliability.
Tips
- Measure all doorways and stairs before appliance delivery.
- Consider drawer-style refrigerators for easier access in tight spaces.
Budget/Time: compact appliances often cost more than full-sized versions.
What this gives you: full kitchen function in minimal square footage.
20. Create Defined Storage Zones by Activity
Tiny house living stays organized when storage is zoned by activity rather than by item type. Keep kitchen items near the kitchen, work supplies near the desk, and linens close to where they are used. This prevents carrying items across the house and keeps clutter contained.
Recommended
Items for this idea
Common mistake: storing items far from where they are used, leading to constant transport.
Use clear bins or labels so zones remain intuitive. The consequence of poor zoning is that items pile up on surfaces instead of being put away. A well-zoned tiny house feels larger because each item has a logical home near its point of use.
Tips
- Group items by frequency of use within each zone.
- Keep daily items at waist level and seasonal items higher up.
What this gives you: a house that stays organized with minimal daily effort.
21. Use the Space Above Cabinets for Seasonal Items
The space above upper cabinets is often wasted in tiny houses. Build a shallow platform or use the gap for seasonal items like holiday decorations, winter gear, or special occasion serving pieces. This storage is low-access but perfect for items used only occasionally.
Placement note: use a folding step stool stored nearby to access above-cabinet storage.
Keep items in lightweight bins for easy retrieval. The trade-off is that above-cabinet storage can collect dust, so use lidded containers. If the gap is too small for bins, display a few attractive pieces that are rarely used.
Tips
- Use uniform containers for a cohesive look.
- Avoid heavy items that are difficult to lift down.
What this gives you: storage for rarely-used items without consuming accessible space.
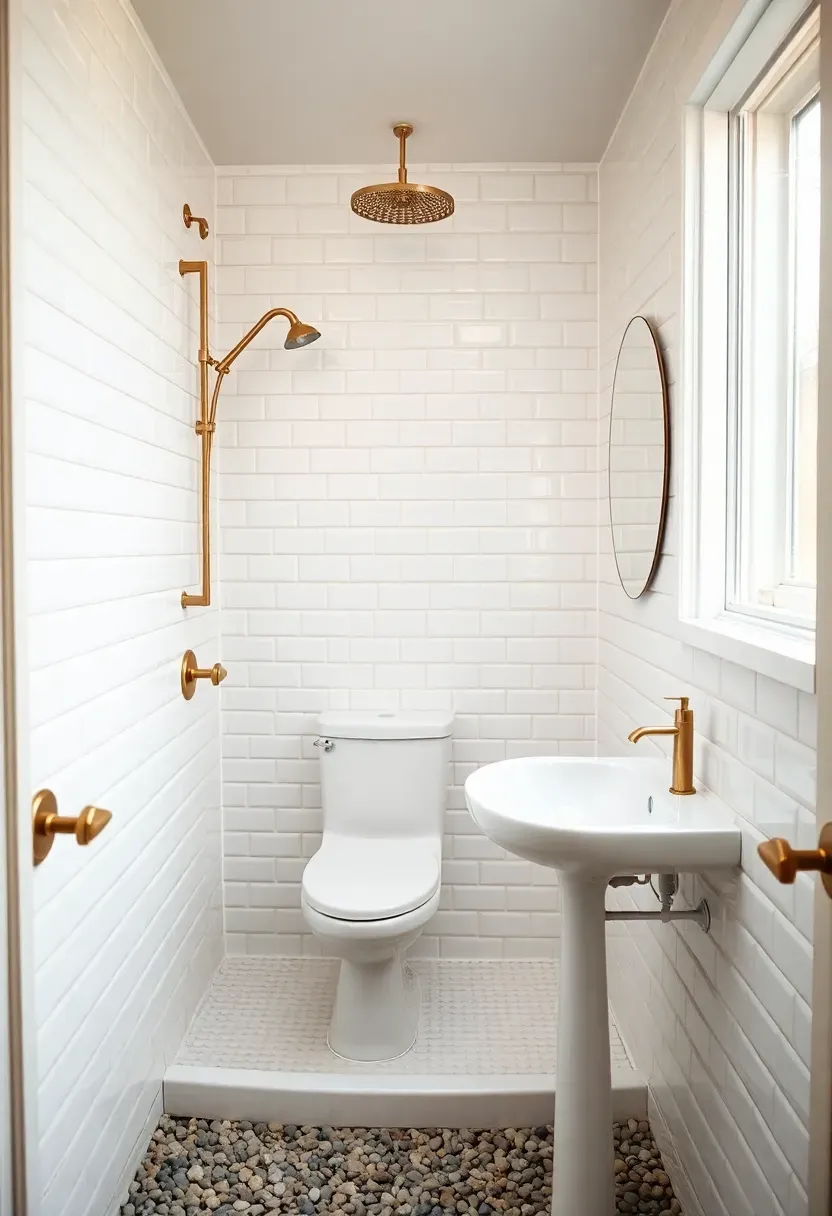
22. Build a Wet Bath with Curved Walls
Tiny house living bathrooms gain space with wet bath designs where the shower and bathroom share one waterproof envelope. Use curved walls or shower curtains instead of glass doors to preserve floor area. The toilet and sink fit within the same waterproofed space, maximizing every inch.
Recommended
Items for this idea
Why it works: a wet bath eliminates the need for separate shower enclosure, saving precious floor space.
Use a sloped floor toward a central drain for proper drainage. The trade-off is that the entire bathroom gets wet during showers, so waterproofing must be flawless. A curved shower curtain rod adds elbow room without claiming floor space.
Tips
- Install an exhaust fan to prevent moisture buildup.
- Use waterproof materials on all surfaces including ceiling.
Best for: tiny houses under 150 square feet where every inch matters.
What this gives you: a full bathroom in minimal square footage.
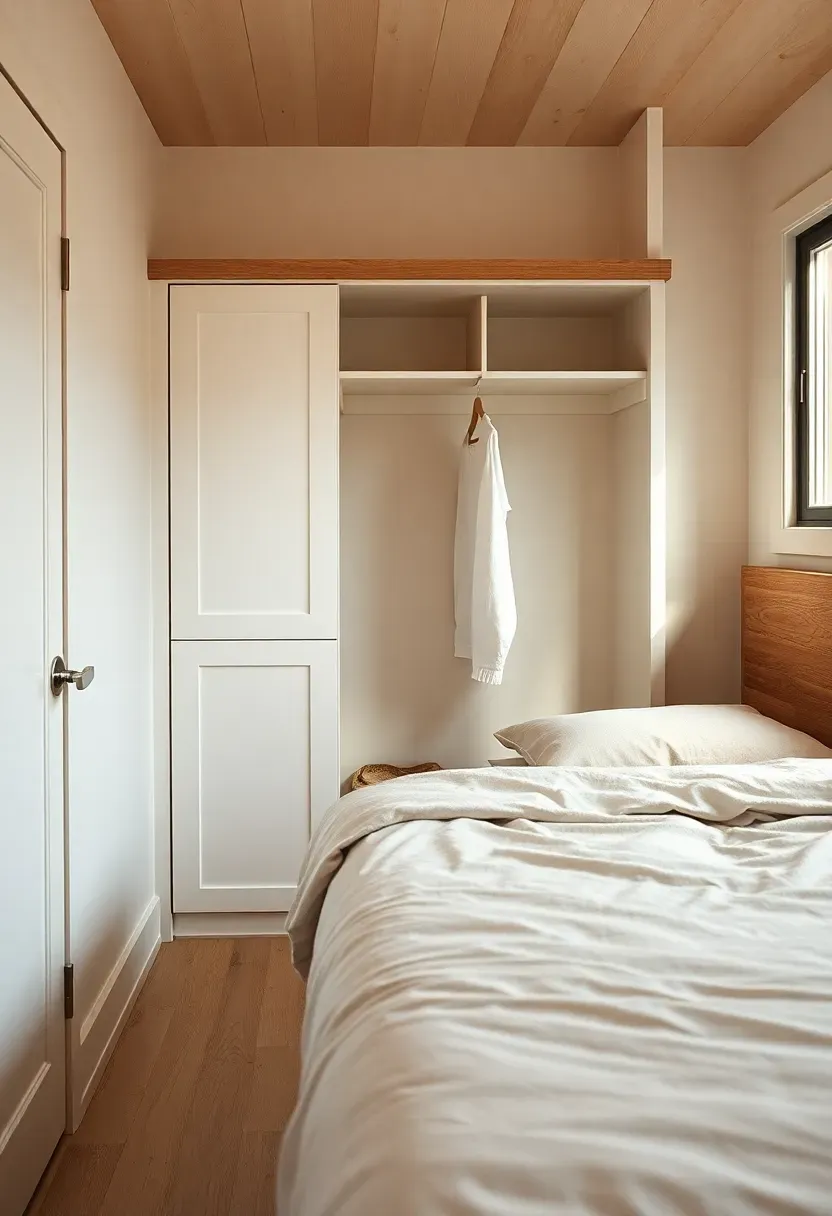
23. Install Built-Ins from Floor to Ceiling
Tiny house living reaches maximum efficiency with built-in furniture. Build a bed platform with drawers beneath, a desk that folds from the wall, or a banquette with storage inside. Built-ins use every inch of available space and can be customized to exact dimensions.
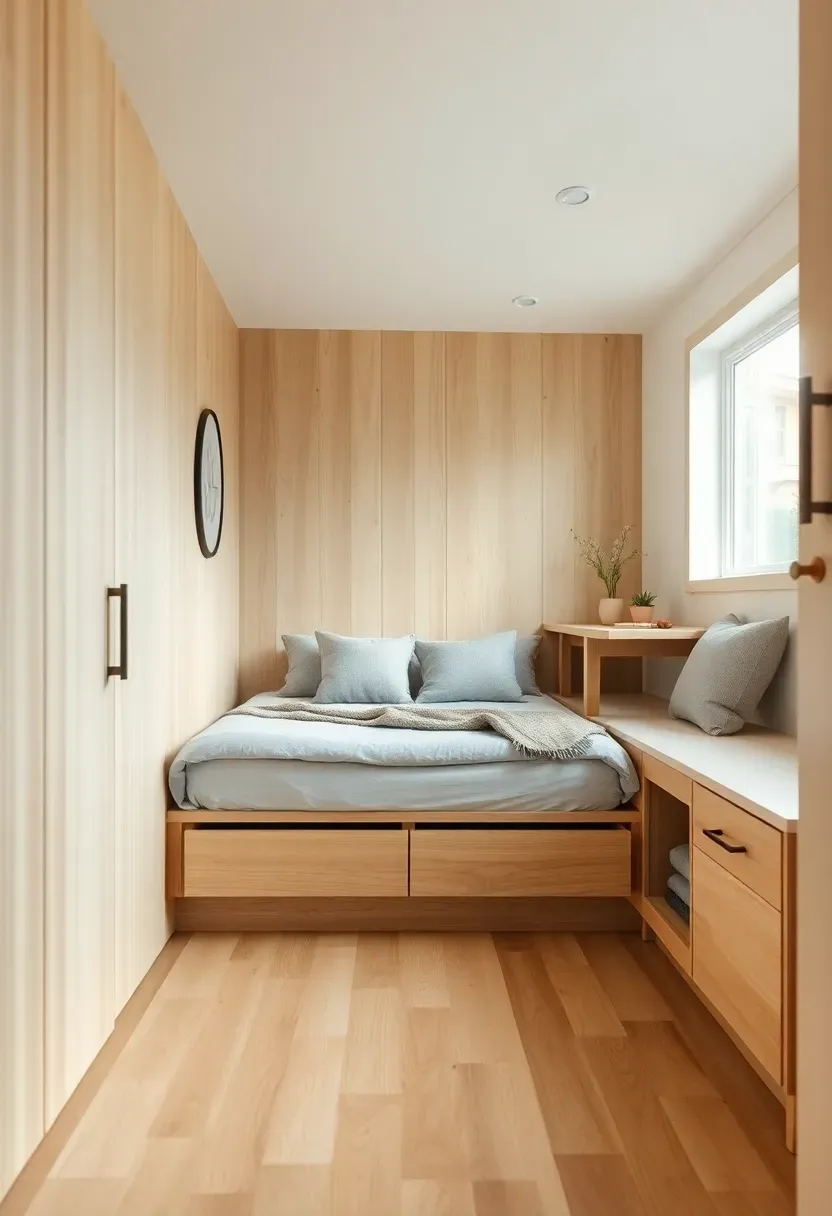
Why it works: built-ins eliminate wasted space around furniture and can incorporate storage.
Plan built-ins around your specific routines and storage needs. For warm material inspiration, explore our rustic tiny house ideas with reclaimed wood built-ins. The consequence of freestanding furniture in tiny houses is awkward gaps and unused corners. Built-ins fill these spaces completely and can include hidden compartments for valuables.
Tips
- Include access panels for plumbing and electrical behind built-ins.
- Use screw-fastening instead of nails for future disassembly.
Budget/Time: built-ins cost more upfront but maximize space efficiency.
What this gives you: custom storage that uses every available inch.
24. Use Lightweight Furniture That Moves Easily
Tiny house living requires flexibility, and lightweight furniture makes reconfiguring easy. Choose pieces that can be moved by one person—nesting tables, stackable stools, or chairs that tuck away. This allows the room to shift from workspace to dining to lounging as needed.
Recommended
Items for this idea
Common mistake: choosing heavy furniture that becomes permanent once placed.
Avoid solid wood tables or sofas with kiln-dried frames if weight is a concern. The contrast move is to choose acrylic, metal, or plywood furniture that weighs half as much. Lightweight pieces make cleaning underneath easier and allow complete room reconfiguration in minutes.
Tips
- Test weight before buying—lift one corner of the piece.
- Add felt pads to make sliding furniture easier on floors.
What this gives you: a space that adapts to different uses throughout the day.
25. Create a Closet Nook Behind the Bed
When a closet is not possible, use the space behind the bed for storage. Build a shallow cabinet or hanging rod behind the bed headboard, or use a wardrobe that doubles as a room divider. This placement is less obtrusive and uses space that would otherwise be wasted.
Placement note: allow 24-30 inches of clearance between bed and closet for access.
If depth is limited, use hanging storage that pulls out rather than fixed rods. The trade-off is that accessing this storage requires moving the bed or sliding it aside. A better solution for permanent beds is a platform with drawers underneath.
Tips
- Use sliding doors instead of swinging to save access space.
- Install LED strips inside for visibility.
What this gives you: closet storage without claiming additional floor space.
26. Build a Deck That Expands Living Space
Tiny house living effectively gains a room with an attached deck. Even a 6x8 foot deck creates outdoor dining, lounging, or work space. Use folding glass doors to blur the boundary between inside and out, and choose decking materials that complement interior flooring for visual continuity.
Recommended
Items for this idea
Why it works: a deck effectively extends living space for a fraction of the cost of interior construction.
If a full deck is not possible, a Juliet balcony or large picture window sill can provide a taste of outdoor connection. The trade-off is that decks require maintenance and are weather-dependent. In cold climates, consider a three-season porch instead.
Tips
- Install a roof overhang or awning for weather protection.
- Use the same flooring material indoors and out to visually expand space.
Budget/Time: $50-100 per square foot for a basic deck with railing.
What this gives you: additional living space that feels like an extension of the interior.
27. Design One Reset Ritual for Daily Calm
Tiny house living stays sustainable with a simple daily reset. Return items to storage, clear surfaces, and fold away convertible furniture before bed. A ten-minute routine keeps the space calm and prevents clutter from accumulating in tight quarters.
Why it works: a daily reset prevents clutter from overwhelming small spaces.
Build habits around transitions—reset the kitchen after meals, the living area after work, the bedroom before sleep. The consequence in tiny houses is that clutter is immediately noticeable because there is nowhere to hide. A consistent reset makes the space feel larger.
Tips
- Pro: a reset routine prevents decision fatigue about where things go.
- Con: rigid routines can feel constraining on busy days.
- Fix: keep one basket for temporary overflow during chaotic weeks.
Budget/Time: 10 minutes daily maintains order indefinitely.
What this gives you: a tiny house that stays calm without constant organizing.
These tiny house living hacks prove that small spaces become intentional when design choices maximize every square inch. By building storage vertically, using multi-purpose furniture, creating zones without walls, and embracing convertible spaces, tiny homes feel generous rather than cramped. Light colors, continuous materials, and strategic mirror placement further expand the perceived size. Whether you rent or own, these space-saving strategies work on any budget. When every element serves multiple purposes and a daily reset ritual maintains order, tiny house living becomes not just manageable but genuinely enjoyable.
About the author
OBCD
CGI visualization and interior design content. We create detailed 3D renders and curate practical design ideas for every room in your home.