Tiny House Living with Dogs: 10 Smart Design Ideas
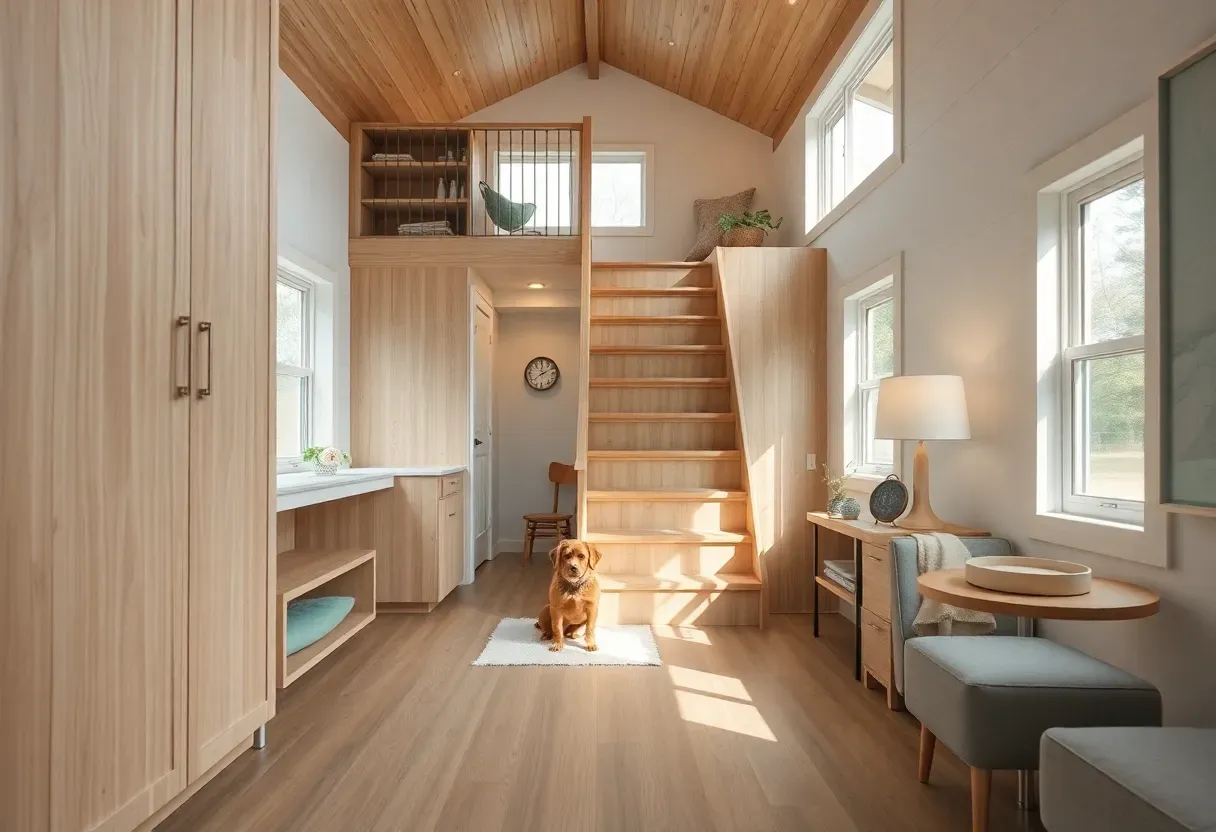
Tiny house living with dogs requires thoughtful interior design that balances your needs with your pet's comfort. The key is creating designated dog zones, choosing durable washable materials, and maximizing every square foot through smart multifunctional solutions that work for both you and your pup.
When designing a pet-friendly tiny home, focus on built-in pet features, easy-clean surfaces, and circulation patterns that accommodate four-legged residents. Whether you need a tiny house dog sleeping area under a loft or a space-saving feeding station, these ten ideas prove that small space dog design can be both beautiful and practical.
Quick FAQ
How much space does a dog need in a tiny house?
Most dogs adapt well to tiny houses when they have a dedicated sleeping spot and clear pathways. The key is vertical space and designated zones rather than square footage.
What flooring is best for dogs in tiny houses?
Luxury vinyl plank, polished concrete, or sealed bamboo offer durability and easy cleaning. Avoid wall-to-wall carpet which traps odors and shows wear.
Where should a dog sleep in a tiny house?
Built-in nooks under stairs, lofts with easy access, or designated floor zones work best. Elevate the bed slightly for draft-free comfort.
How do you manage dog hair in a small space?
Choose smooth surfaces, washable bedding, and a designated grooming area. A strong vacuum with HEPA filtration and regular brushing minimize hair accumulation.
What if I have multiple dogs in a tiny house?
Create separate sleeping zones, multiple feeding stations, and ensure clear circulation paths. Vertical separation like different loft levels can help maintain peace.
As an Amazon Associate I earn from qualifying purchases.
Table of Contents
- 1. Built-In Under-Stair Dog Nook with Integrated Storage
- 2. Elevated Loft Bed Platform with Built-in Dog Zone Below
- 3. Multi-Purpose Dog Crate That Doubles as Side Table
- 4. Built-in Wall-Mounted Feeding Station with Pull-Out Drawers
- 5. Washable Removable Wall Panels Behind Dog Zones
- 6. Integrated Dog Bath Zone in Shower or Laundry Area
- 7. Hidden Litter Box Cabinet for Tiny House Cats
- 8. Fold-Down Pet Gate Built into Door Frame
- 9. Vertical Leash and Harness Storage System
- 10. Climate-Controlled Ventilation Design for Pet Comfort
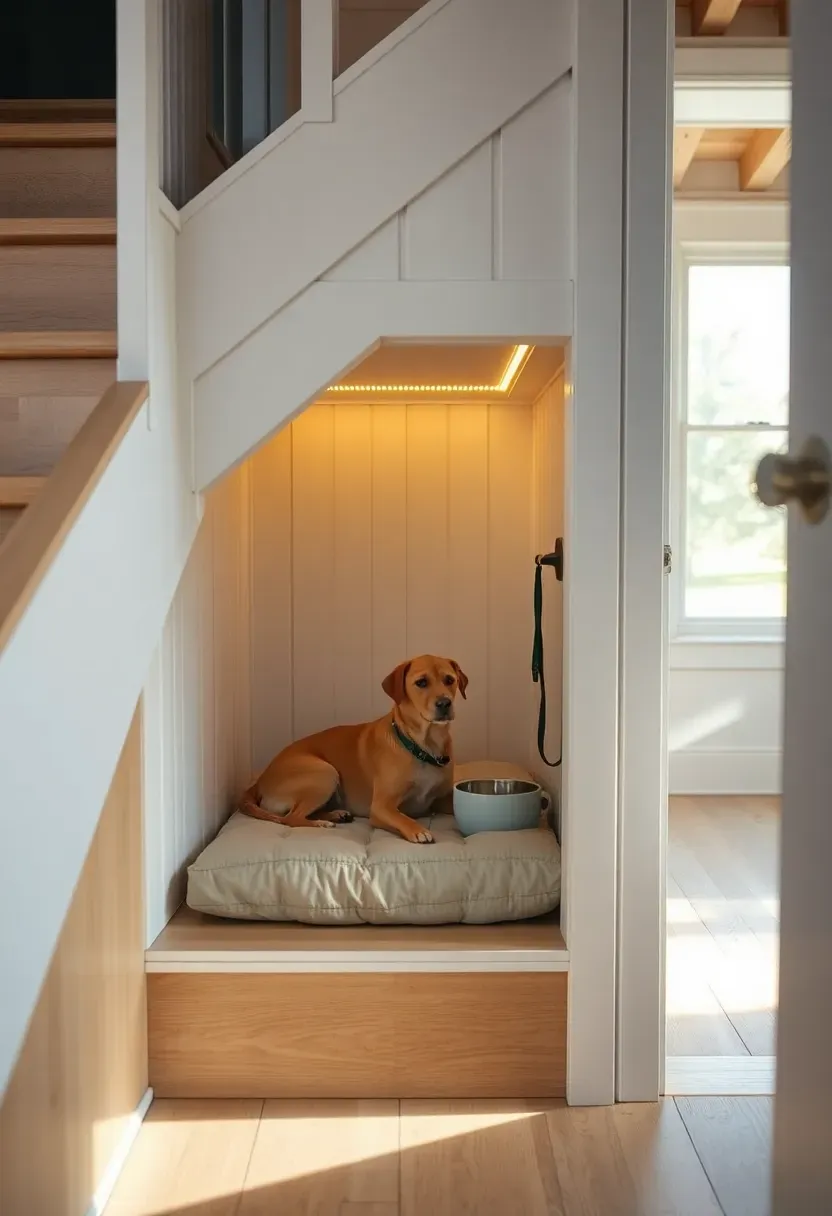
1. Built-In Under-Stair Dog Nook with Integrated Storage
Carve out a cozy sleeping space beneath stairs or loft access, creating a dedicated dog zone that feels like a den rather than an afterthought. The nook should be sized to your dog's proportions—roughly 1.5 times their curled length—with smooth interior surfaces and ambient LED strip lighting for evening visibility without harsh brightness. Frame the opening with architectural trim to make it intentional, and include a small built-in shelf nearby for leash storage or a small water bowl.
Tips
- Add a removable washable cushion with waterproof liner for easy cleaning
- Install a small motion-sensor LED light for nighttime visibility without disruption
- Include a small ventilation cutout near floor level for air circulation
Best for: Dogs under 50 pounds who prefer enclosed sleeping spaces
What this gives you: A designated dog zone that uses otherwise dead space while giving your pet a secure, comfortable retreat.
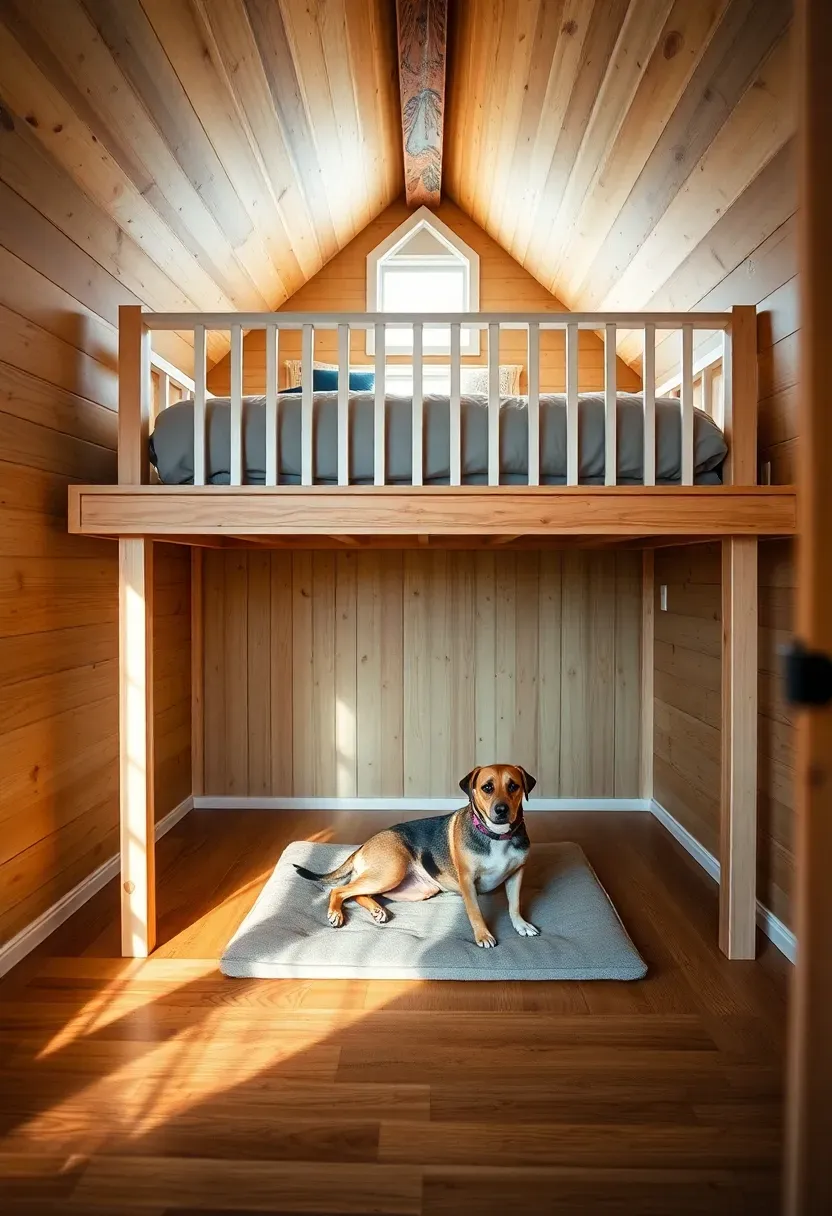
2. Elevated Loft Bed Platform with Built-in Dog Zone Below
Design your sleeping loft with a 24-30 inch clearance beneath, creating a perfect dog-sized sleeping zone that's naturally sheltered and draft-free. This approach maximizes vertical space while giving your dog a dedicated area that's close to you at night without occupying prime floor space during the day. The loft structure should include integrated guardrails with dog-safe spacing, and the area beneath can feature a built-in bed platform at floor level with removable washable bedding.
Recommended
Items for this idea
Tips
- If/Then: If your dog is older or has joint issues, add a small ramp or step system to the loft access
- Ensure loft ladder rung spacing accommodates your dog's climbing ability if they access the loft
- Add a small clip-on fan or ventilation port near the dog zone for airflow
Budget/Time: Moderate—requires structural planning during build phase
What this gives you: Maximum space efficiency with your dog sleeping literally beneath you, creating proximity without sacrificing floor space.
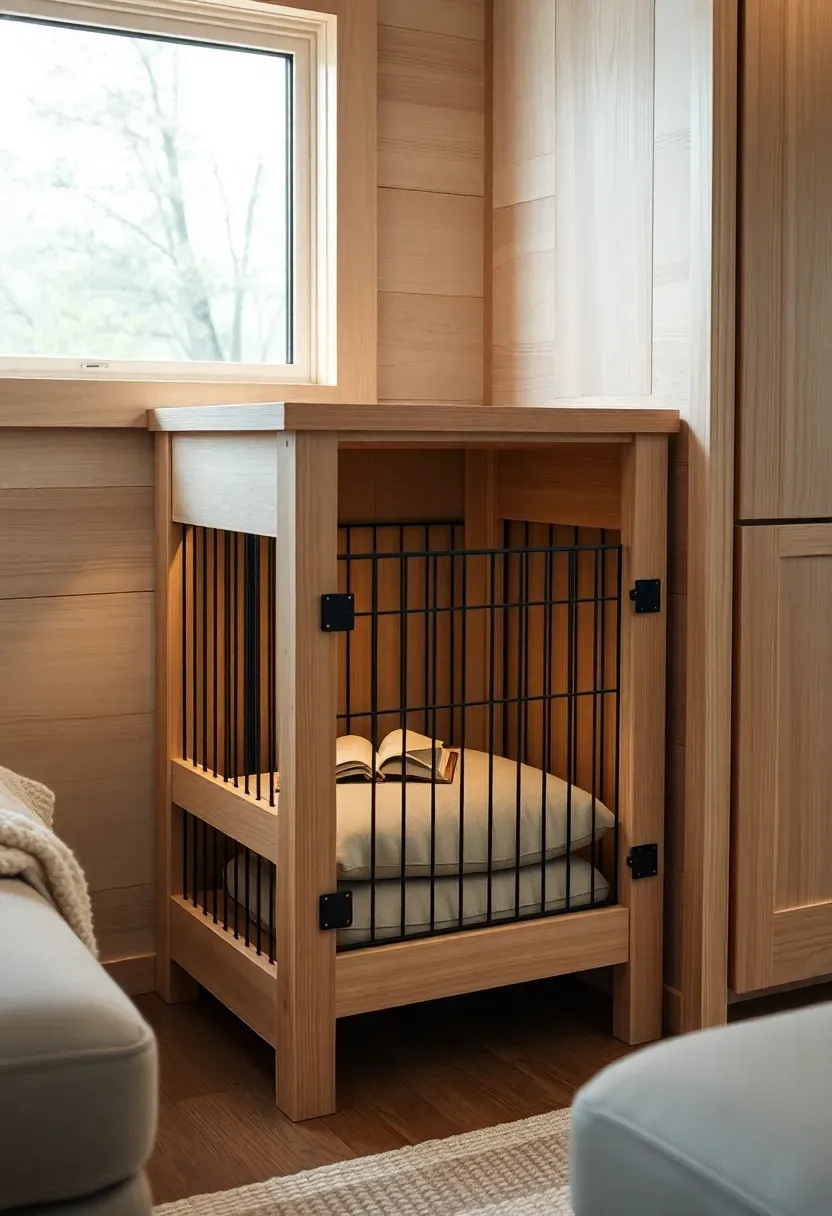
3. Multi-Purpose Dog Crate That Doubles as Side Table
Replace traditional freestanding crates with built-in furniture-grade enclosures that serve as nightstands, console tables, or bench seating. The crate should feature a removable gate panel that converts to open bedding when needed, with ventilation slots designed as architectural details rather than functional afterthoughts. Use the same materials as your built-ins—matching wood tones, consistent hardware, and integrated crown molding—so the crate reads as furniture rather than pet equipment.
Tips
- Pro/Con/Fix: Traditional crates are ugly—fix with built-in furniture-grade construction matching your aesthetic
- Use removable gate panels with magnetic closures for easy conversion to open bedding
- Design ventilation as decorative cutouts or slats rather than purely functional grilles
Best for: Dogs who are crate-trained or need a secure space when alone
What this gives you: A pet containment solution that doesn't announce itself as such, maintaining your design aesthetic while providing your dog with a familiar secure space.
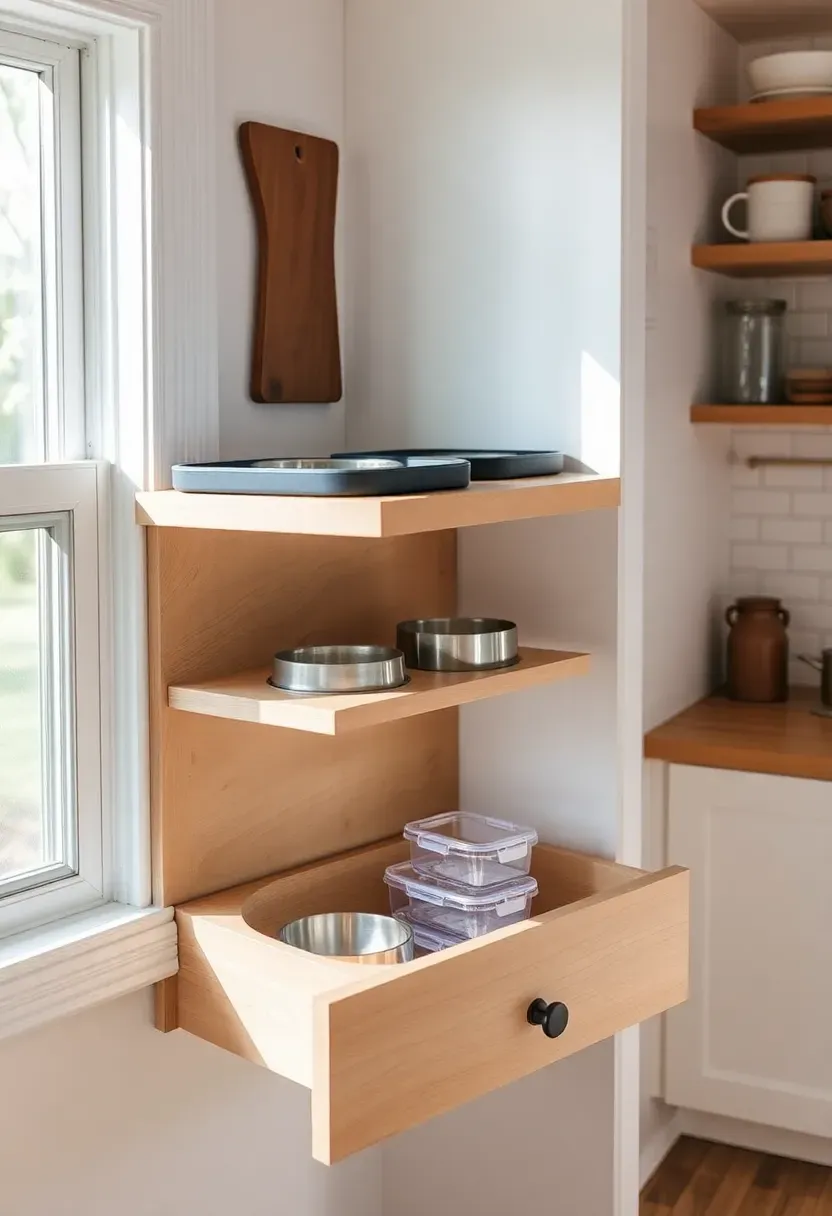
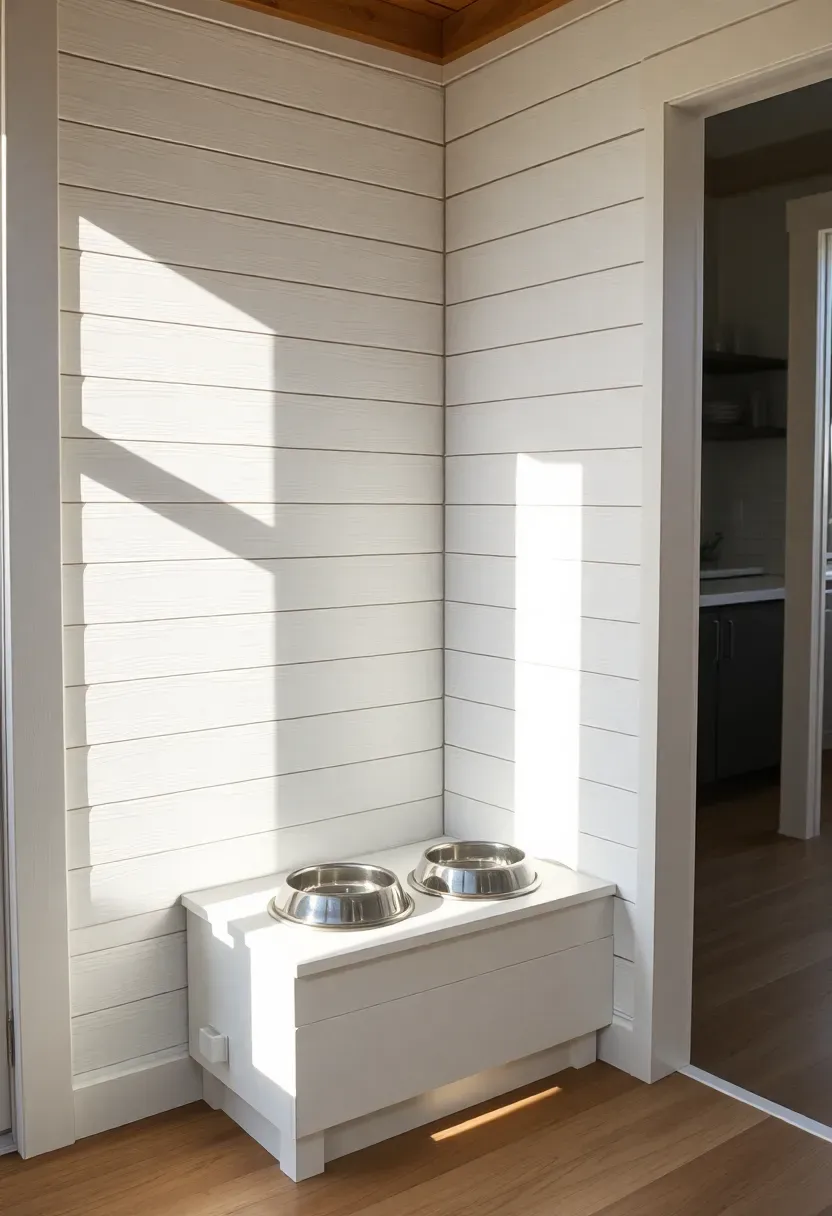
4. Built-in Wall-Mounted Feeding Station with Pull-Out Drawers
Elevate feeding to wall-mounted height (typically 6-12 inches from floor depending on dog size) with integrated storage for food, bowls, and medications in pull-out drawers beneath. This design keeps feeding zones tidy, prevents bowl tipping, and uses wall space rather than valuable floor area. The station should include a waterproof tray surface with raised edges to contain spills, with removable stainless steel or ceramic bowls that are dishwasher-safe. Store a 2-3 day food supply in airtight containers in the drawer below for easy access.
Recommended
Items for this idea
Tips
- Install a small spring-loaded faucet or filtered water dispenser near the station for easy water refills
- Use bowls with non-slip silicone bases to prevent sliding on the tray surface
- Include a small built-in treat compartment with magnetic closure in the drawer
Placement note: Position near water source but outside main circulation paths to prevent tripping.
What this gives you: A clean, organized feeding setup that eliminates bowl clutter while storing all pet supplies in one compact location.
5. Washable Removable Wall Panels Behind Dog Zones
Install full-height removable wall panels behind feeding stations, crate areas, and sleeping nooks using waterproof materials like shiplap, beadboard, or FRP panels that can be wiped down or removed for deep cleaning. These panels should mount with magnetic catches or removable screws, allowing you to take them down periodically for thorough cleaning behind dog zones. Choose materials in light, reflective colors that make small spaces feel larger while showing less dirt and wear than darker surfaces.
Tips
- Do/Don't: Do use light-colored waterproof materials—don't use wallpaper or porous drywall behind dog zones
- Install panels with slight gaps (1/8 inch) at edges for airflow and easy removal with a pry bar
- Consider adding a clear coat sealant for extra protection against accidents and moisture
Budget/Time: Low—shiplap or beadboard panels are inexpensive and DIY-friendly
What this gives you: Long-term wall protection that makes cleaning up after pets easy while maintaining a clean, bright aesthetic in your tiny home.
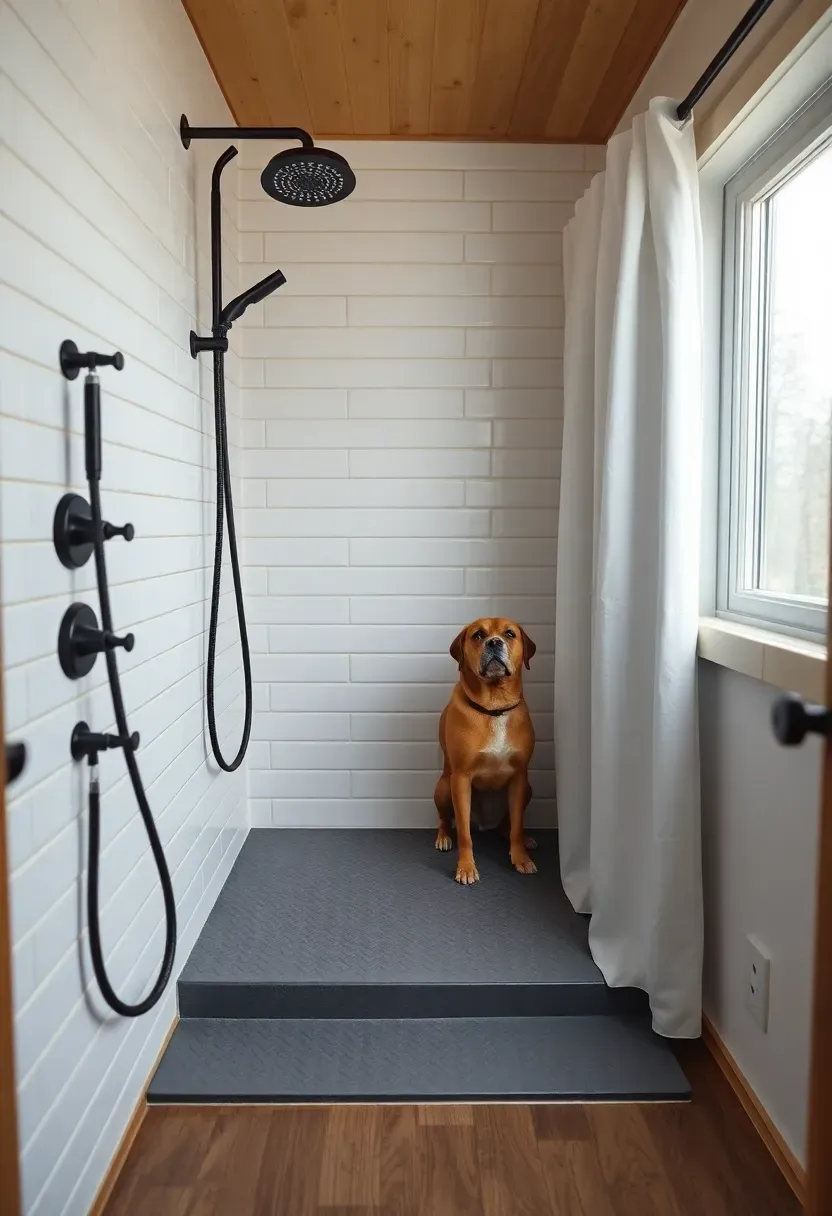
6. Integrated Dog Bath Zone in Shower or Laundry Area
Design your bathroom or laundry area with a dedicated dog washing station—a handheld showerhead mounted at waist height with a dedicated drain or raised washing platform positioned at 18-24 inches for easy bathing without bending. The zone should include waterproof wall materials up to 48 inches, non-slip flooring, and integrated storage for shampoo, towels, and grooming tools. A folding or removable waterproof screen can contain water spray, while a built-in tether point keeps dogs secure during bathing.
Recommended
Items for this idea
Tips
- If/Then: If space is extremely limited, use a removable shower stool and handheld showerhead rather than a dedicated platform
- Install a thermostatic mixing valve to prevent water temperature spikes during bathing
- Add a small built-in drain or sloped floor toward the main drain to contain water
Best for: Dogs over 30 pounds who are difficult to lift into standard tubs
What this gives you: A practical bathing solution that saves your back while keeping your tiny house bathroom fully functional for both human and pet needs.
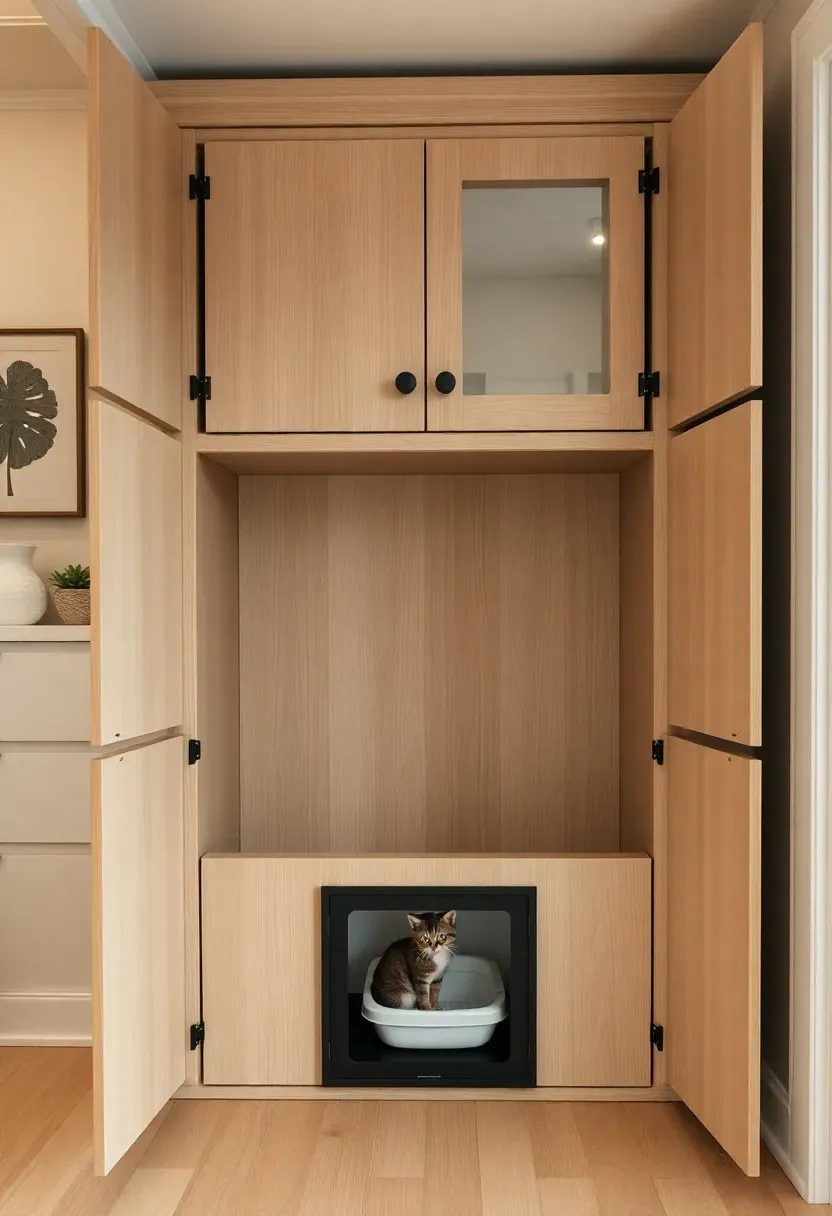
7. Hidden Litter Box Cabinet for Tiny House Cats
For cat-owning tiny house dwellers, build a floor-to-ceiling cabinet that conceals the litter box while providing entry through a cat-sized opening in the side or bottom. The cabinet should include ventilation slots near the top to exhaust odors, a removable interior tray for easy cleaning, and storage for litter and scooping supplies in the upper portion. Position the cabinet near exterior walls if possible to vent directly outside, or include a small exhaust fan for odor control.
Tips
- Install a small activated carbon filter in ventilation slots to minimize odor escape
- Use a covered litter box inside the cabinet for additional odor containment
- Position the cabinet on an exterior wall with a small vent to the outside if possible
Avoid if: Your cat is claustrophobic—test with a temporary covered box before building
What this gives you: A completely concealed litter area that maintains your tiny home's aesthetic while giving your cat a private, accessible bathroom space.
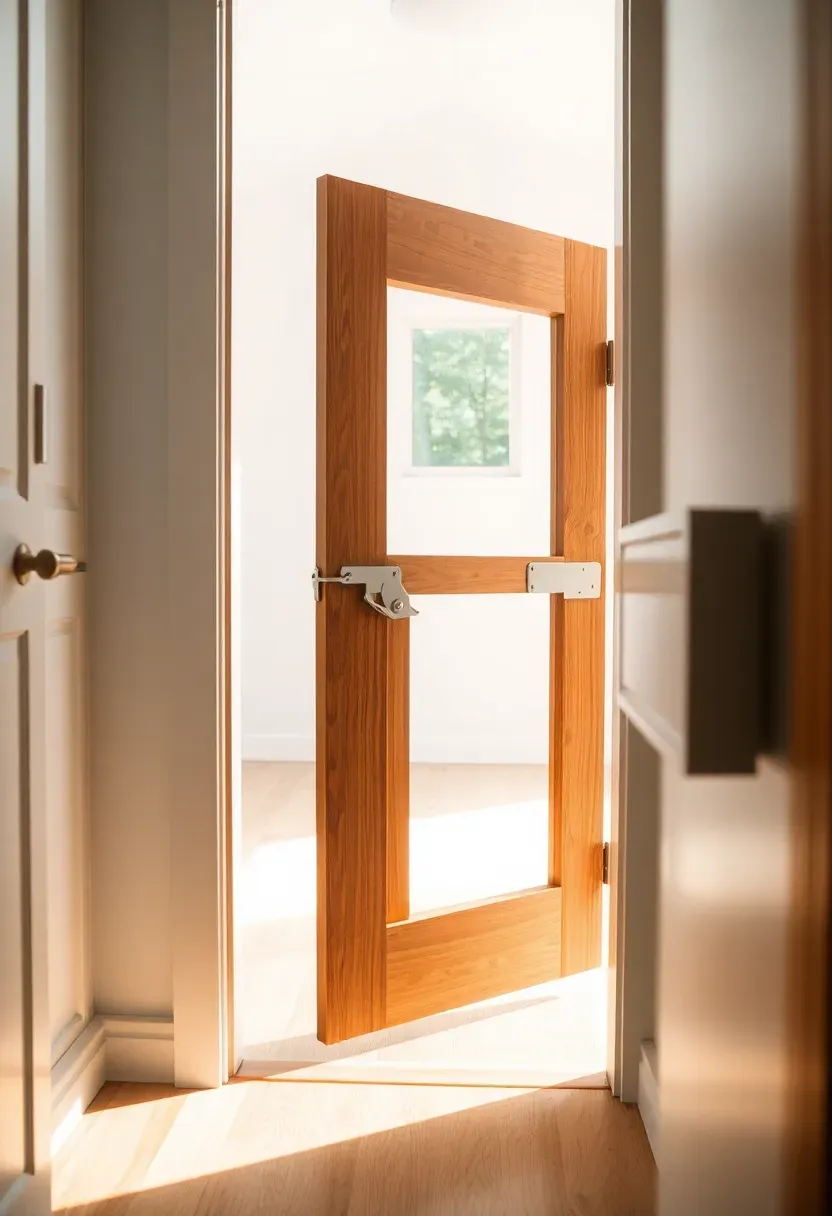
8. Fold-Down Pet Gate Built into Door Frame
Replace freestanding pet gates with built-in folding gates mounted directly into door frames, creating barriers that disappear when not in use. The gate should be full-height for your dog's breed, with hardware that allows it to fold flat against the wall when open and lock securely when closed. Use matching wood tones or paint to blend with your door trim, making the gate nearly invisible when folded—a far better solution than clunky metal gates that announce themselves as temporary pet equipment.
Recommended
Items for this idea
Tips
- Install gates on both sides of door frames if you need to contain pets in different zones
- Use magnetic catches for secure closure that's easy to operate with one hand
- Consider a small cat door cutout within the gate if you have both dogs and cats
Placement note: Install at key transition points like loft stairs, kitchen entry, or bathroom access.
What this gives you: Effective pet containment that maintains your design aesthetic and disappears completely when not needed.
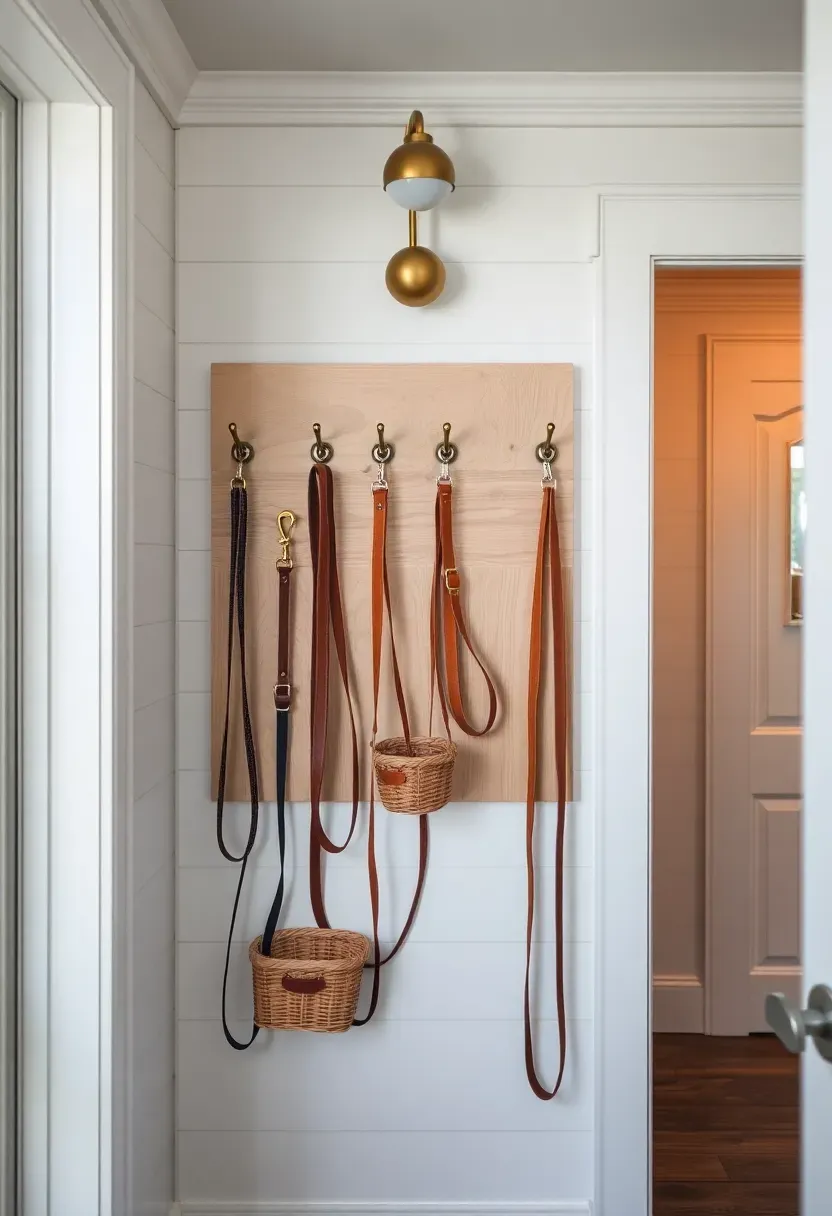
9. Vertical Leash and Harness Storage System
Mount hooks, racks, or a pegboard system near your primary entrance to keep leashes, harnesses, waste bags, and other walking gear organized and accessible. The system should be positioned at a comfortable height for grabbing gear on the way out, with designated spots for each item to prevent the tangled mess that often accumulates near doors. Use matching hardware finishes throughout—matte black for modern spaces, oil-rubbed bronze for traditional—to make the storage feel intentional rather than improvised.
Tips
- Install a small shelf above hooks for temporary storage of wet walking gear or muddy boots
- Use carabiner clips on hooks for quick leash attachment and removal
- Add a small mirror above the storage zone for last-minute appearance checks before walks
Budget/Time: Low—pegboard and hooks are inexpensive and can be installed in an hour
What this gives you: An organized entry zone that eliminates clutter while keeping all pet walking gear grab-and-go ready.
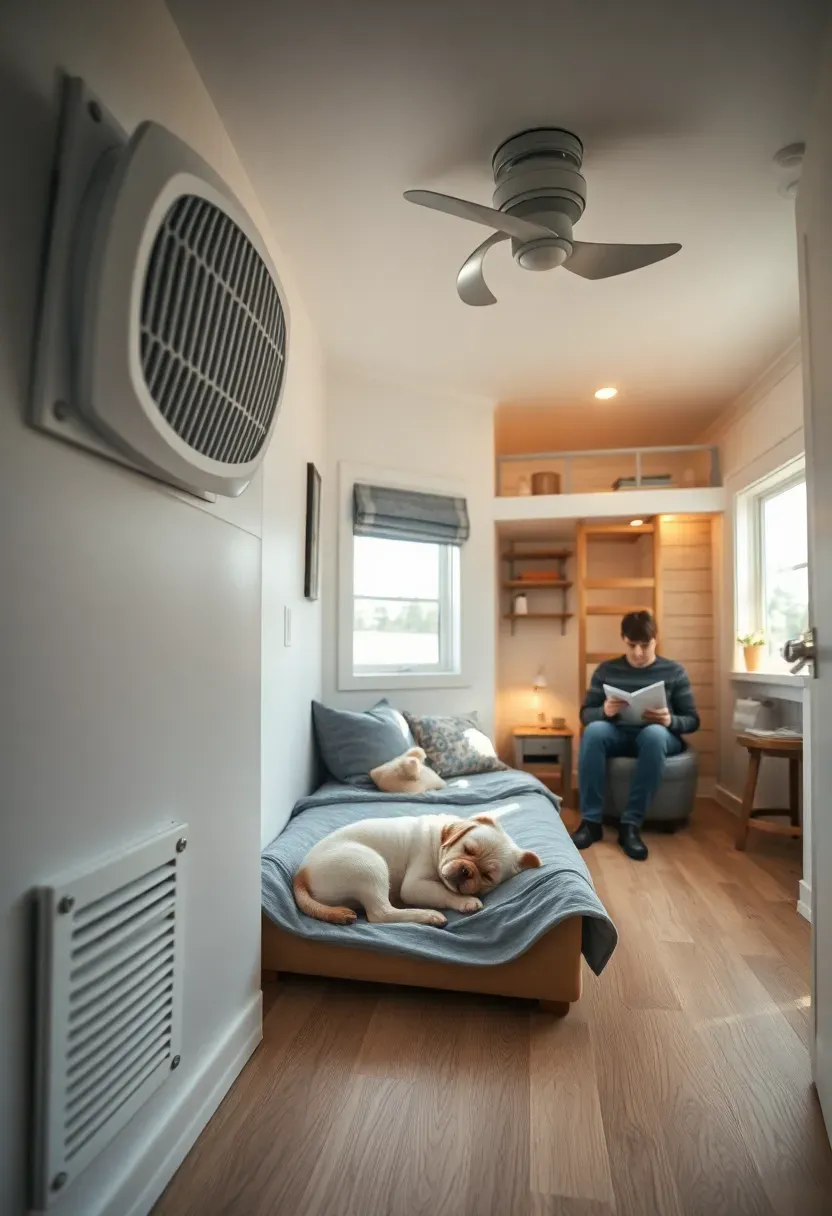
10. Climate-Controlled Ventilation Design for Pet Comfort
Design your tiny house ventilation system with pet comfort in mind—placing intake and exhaust vents at multiple heights to account for both standing humans and floor-dwelling pets. Dogs generate significant body heat, and poor ventilation can make tiny houses uncomfortably warm even when humans feel comfortable. Include low-level vents near dog sleeping zones and a continuous exhaust fan that runs at low speed to remove stale air and pet dander, with variable speed controls you can adjust based on temperature and occupancy.
Recommended
Items for this idea
Tips
- Install temperature sensors at both human and dog height levels to monitor comfort zones
- If/Then: If you leave pets alone during the day, program ventilation for continuous low-speed operation
- Consider a small air conditioner or heat pump with pet-mode settings for extreme weather
Best for: All tiny house climates, especially extreme heat or cold regions
What this gives you: A healthier indoor environment for both you and your pets, with better air quality and consistent comfort throughout your tiny home.
Tiny house living with dogs works beautifully when your design prioritizes both human and animal needs through thoughtful planning, durable washable materials, and smart space allocation. The key is creating designated pet zones that feel integrated rather than added-on, using every square foot for dual purposes whenever possible. With these ten pet-friendly tiny home ideas, your small space can provide a comfortable, functional home for both you and your four-legged companion without sacrificing style or livability.
About the author
OBCD
CGI visualization and interior design content. We create detailed 3D renders and curate practical design ideas for every room in your home.