Where Are Tiny Homes Legal? State-by-State Zoning Guide
If you are asking where are tiny homes legal across the U.S., this guide translates state zoning laws into practical design moves that keep your small build calm and compliant.
Use it as a minimalist planning lens: layout, light, and storage choices that meet common tiny home building codes and habitability standards, whether you choose a permanent foundation or wheels.
Always confirm local permits and regulations, then shape a general interior plan before you commit to a build or purchase.
Quick FAQ
How do I check where tiny homes are legal in my state?
Start with state building codes and local zoning. Many areas define tiny homes as ADUs, park models, or RVs, each with different rules. Check both state guidance and city or county ordinances before choosing a plan.
Why does tiny home legality differ so much across states?
States and cities set their own minimum size, foundation, and occupancy standards. Some prioritize ADU density, others restrict mobile units. A flexible interior plan helps you adapt without redesigning from scratch.
Which design choices make tiny homes legal approvals easier?
Code-aligned layouts, clear egress, and a consistent wet-wall plan make approvals smoother. Inspectors want a livable, conventional flow, even in small spaces. Design for clarity first, then layer personality.
Should I build on wheels or a permanent foundation?
It depends on local classification and your lifestyle. Wheels can be treated as RVs in some places, while foundations fit ADU rules elsewhere. Your interior plan should allow either path with minimal changes.
What should I avoid when planning a legal tiny home interior?
Avoid cramped circulation, blocked windows, and makeshift sleeping lofts. Those choices raise safety concerns and can derail approvals. Simple, well-lit layouts read as compliant and comfortable.
As an Amazon Associate I earn from qualifying purchases.
Table of Contents
- 1. Start With a Code-Friendly Layout That Meets Tiny Home Building Codes
- 2. Design an Entry-to-Core Flow That Satisfies Zoning Requirements
- 3. Prioritize Egress Windows for Tiny House Legal Requirements
- 4. Match the Foundation Type to Local Tiny Home Zoning Laws
- 5. Use a Wet-Wall Spine for Easier Tiny Home Permits
- 6. Build Storage Walls That Reduce Required Square Footage
- 7. Plan Daylight and Ventilation to Meet Habitability Codes
- 8. Choose Fire-Safe Finishes That Pass Tiny Home Inspections
- 9. Use Multifunctional Furniture Without Visual Noise
- 10. Create a Documentation-Ready Design Package for Permits
1. Start With a Code-Friendly Layout That Meets Tiny Home Building Codes
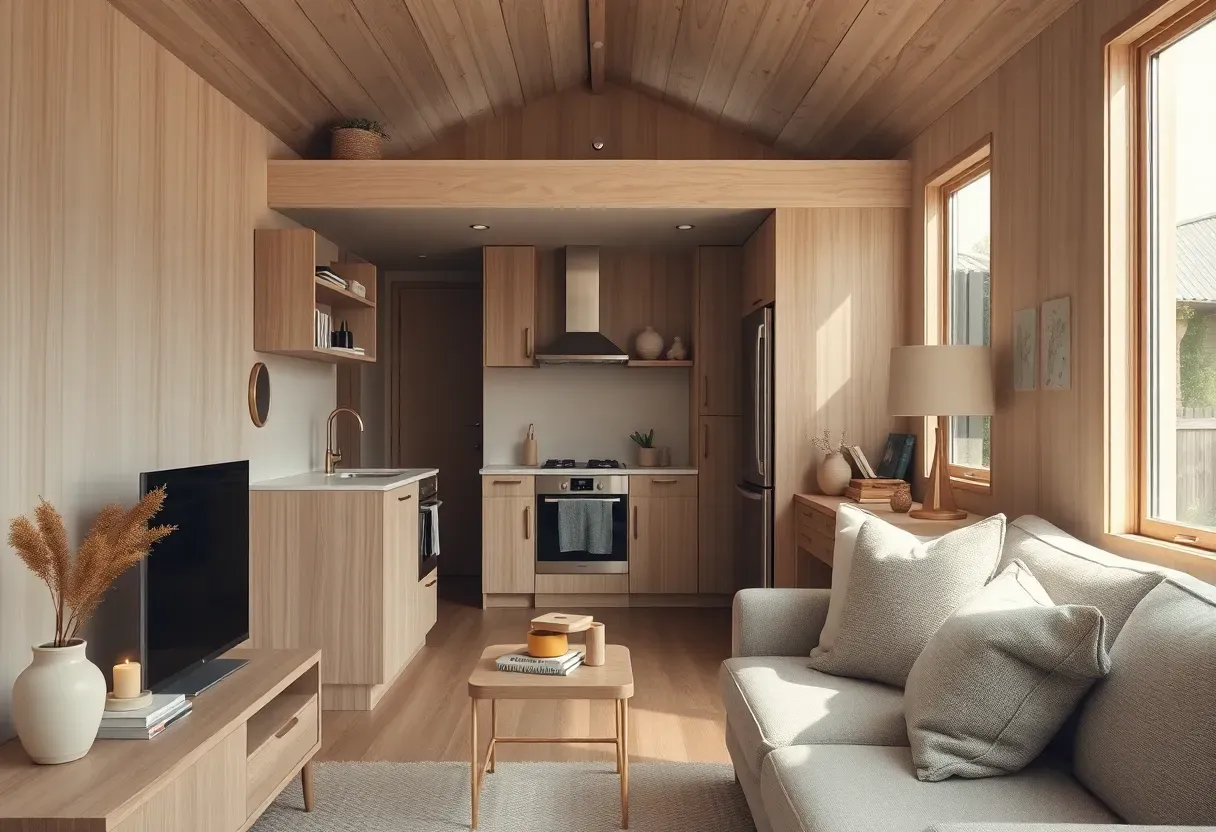
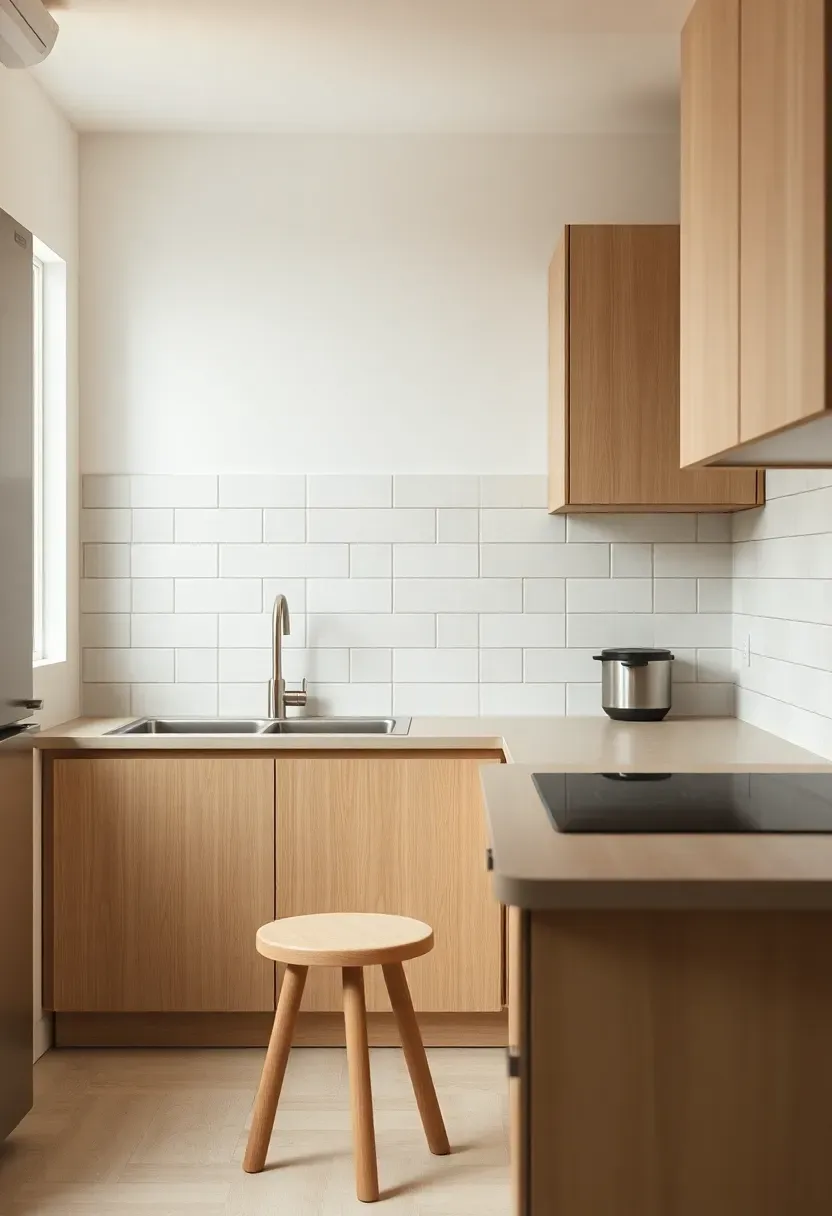
A legal tiny home plan begins with a layout archetype that most states recognize: an open core with clearly zoned living, cooking, and sleeping areas. A zoned layout keeps traffic flow obvious, which makes the interior read like a conventional studio rather than a novelty build. Aim for a 36-inch clear path from entry to kitchen, then keep the core around 140 to 180 square feet so scale feels realistic. Instead of scattering micro furniture, anchor one low sofa and a fold-down table so the room stays legible.
Keep ceiling lines clean and let one continuous material run through the floor and base cabinetry for calm continuity. A single 24-inch deep counter gives you prep space without stealing circulation, while a 30-inch table fits two people without feeling cramped. The contrast move is to skip bulky sectional seating; a streamlined sofa plus one stool reads lighter and keeps the core functional.
Choose a restrained palette and let negative space work as a design element. If you need more storage, add it vertically along one wall so the center stays open. This balance of open core and vertical support feels intentional and code-ready.
For a broader overview of everyday tiny living, see The Ultimate Guide to Tiny House Living.
Tips
- Do: map the layout with painter's tape before you commit to placement.
- Don't: place seating in the main circulation path.
Best for: first-time builders who want a layout that reads conventional.
What this gives you: a clear, code-friendly core that feels calm and livable.
We picked a few things that go well with this idea: HOOBRO Wall Mounted Fold-Down Desk (★4.4), Foldable Hidden Desk with Storage and Socket (★4.7) and Wall Mounted Folding Desk with Brackets (★4.3). As an Amazon Associate we earn from qualifying purchases.
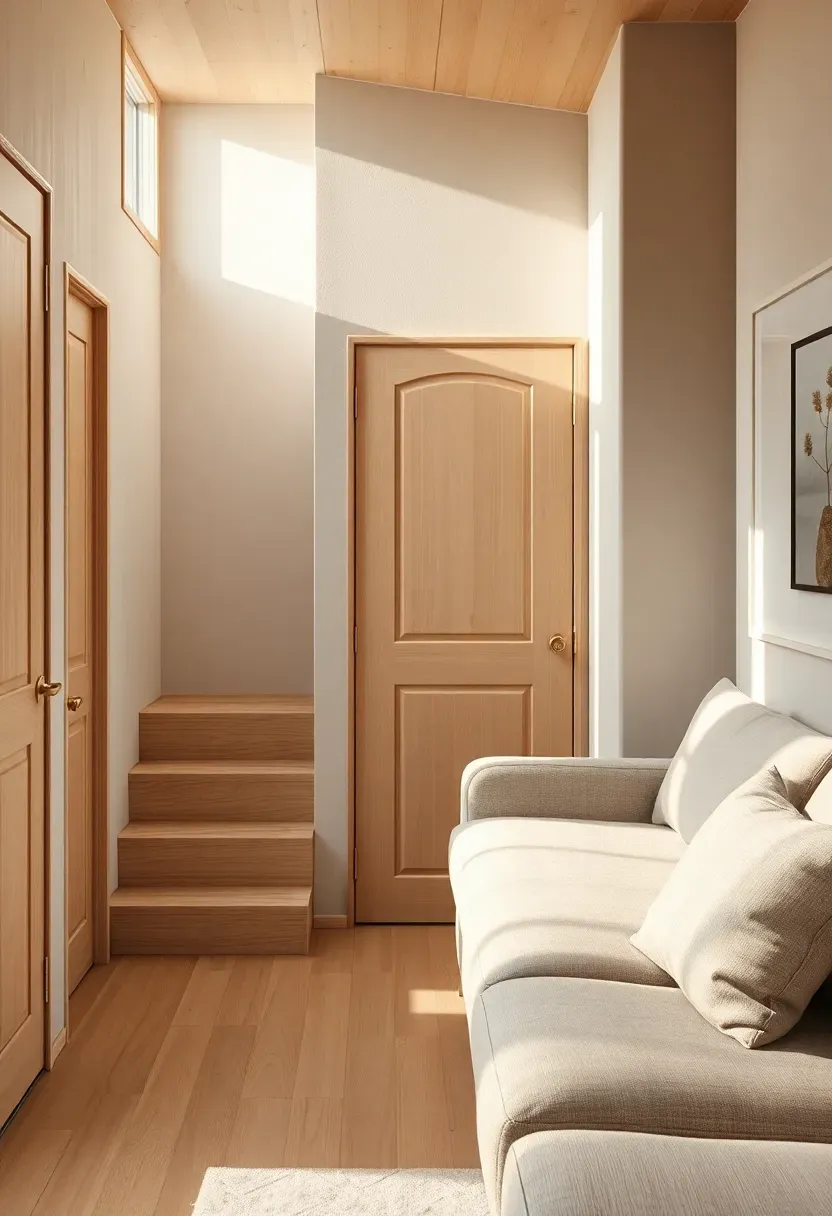
2. Design an Entry-to-Core Flow That Satisfies Zoning Requirements
When tiny home zoning laws dictate how your space is categorized, a clear entry sequence helps your interior read as a real home. Create a defined entry-to-core flow by placing a bench and closed storage near the door, then opening to the living zone. An open plan works best when the entry feels like a small mudroom rather than a hallway. Keep the entry zone about 4 feet deep so you can store shoes and outerwear without blocking circulation. This simple threshold makes inspectors see the home as functional, not improvised.
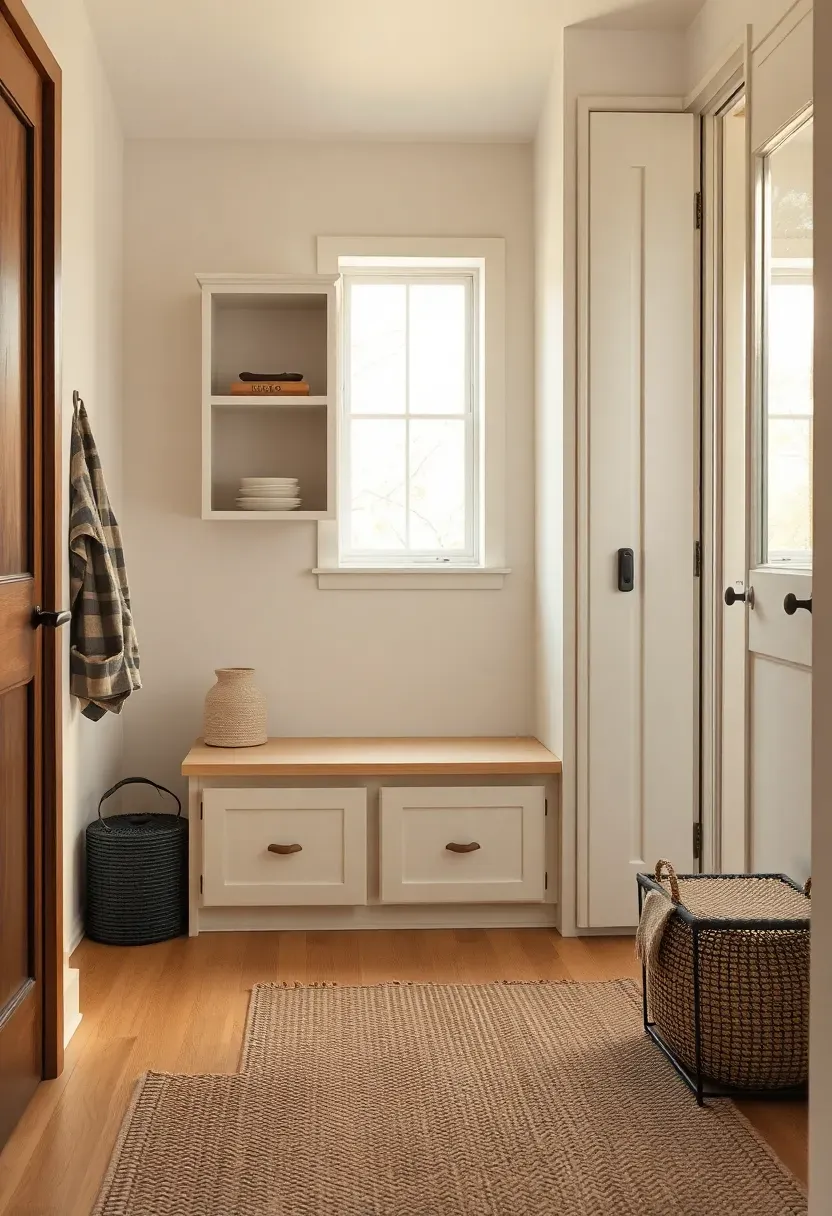
Placement note: keep the entry bench on the same wall as the door to preserve a straight line into the core.
Use a low-profile rug to define the entry without tripping hazards. The contrast is to avoid tall coat racks in the middle of the space; closed storage keeps visual clutter down and improves sightlines. If the door swings inward, choose a bench no deeper than 14 inches so clearance stays clean. A simple entry zone supports daily reset habits and makes the entire space feel more intentional.
For a room-first minimalist plan, see How to Start a Minimalist Lifestyle: A Beginner's Guide.
Tips
- If your entry is tight, then swap a bench for a wall-mounted flip seat.
- If you need more storage, then add drawers under the bench instead of baskets.
What this gives you: a welcoming threshold that keeps the open plan tidy.
We picked a few things that go well with this idea: VIAGDO Bamboo Freestanding Storage Cabinet (★4.6), HITNET 4-Tier Bamboo Floor Cabinet (★4.6) and HH DESIGNS Narrow Bamboo Dresser (4 Drawers) (★4.3). As an Amazon Associate we earn from qualifying purchases.
3. Prioritize Egress Windows for Tiny House Legal Requirements
Many tiny house legal requirements come down to safety, so design the sleeping area around egress rules from the start. Place a large egress window beside the bed or loft opening, and keep ceiling lines simple to avoid awkward headroom. A common standard is a 24-inch by 20-inch clear opening, but check your local code before finalizing sizes. The key is to make the sleeping zone feel like a proper room, not a tucked-away shelf. That means clean geometry and a clear ladder or stair path.
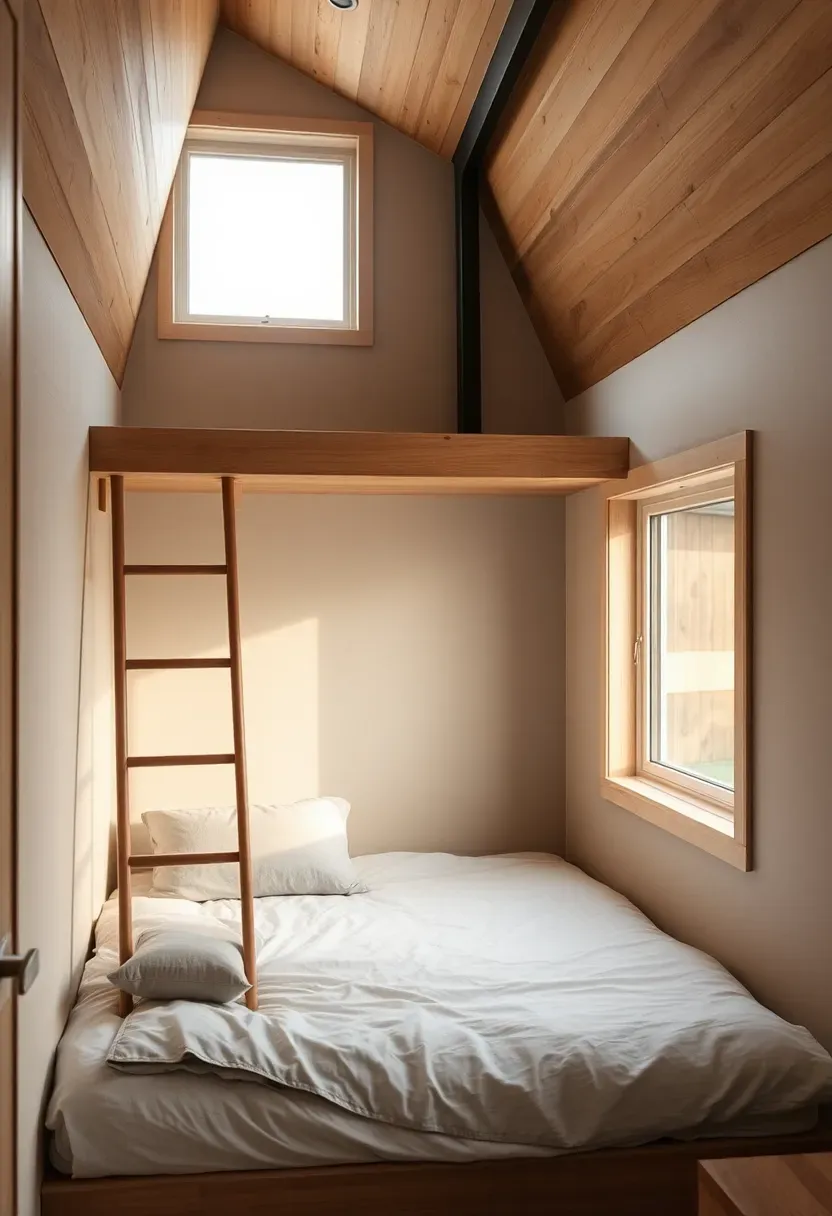
Why it works: generous openings and clear headroom communicate safety, which speeds approvals and improves comfort.
Use a low bed platform to keep the ceiling line unobstructed, and avoid heavy beams that crowd the space. The contrast move is to skip decorative pendant lights in the loft; a wall sconce keeps clearance and looks cleaner. If you want a cozier feel, add texture with a wool throw and linen bedding instead of bulky pillows. A simple, breathable sleeping zone signals that the home is designed for year-round living.
Tips
- Pro: placing the window at the bedside improves cross-ventilation.
- Con: too much glazing can make the loft feel cold at night.
- Fix: add insulated blackout curtains with ceiling-mounted tracks.
Avoid if: your local code limits loft height or requires a full stair.
What this gives you: a safe sleeping zone that feels like a real room.
We picked a few things that go well with this idea: MIULEE Natural Linen Curtains (2 Panels, 84") (★4.6), LAMIT Semi Sheer Linen Curtains (2 Panels) (★4.6) and Natural Linen Back Tab Curtains (2 Panels) (★4.6). As an Amazon Associate we earn from qualifying purchases.
4. Match the Foundation Type to Local Tiny Home Zoning Laws
Where tiny homes are legal often hinges on definitions, so align your interior design with the foundation type your area recognizes. If the state treats tiny homes as ADUs, a permanent foundation and fixed stair can make the space read like a standard dwelling. If the jurisdiction treats tiny homes as RVs, a compact stair ladder and lightweight finishes may make more sense. The contrast is to avoid hybrid choices that confuse classification, like a heavy built-in stair inside a trailer chassis. A clear design direction makes permitting easier.
Recommended
Items for this idea
Common mistake: designing for wheels and a foundation at the same time, which leads to compromised proportions.
Pick one path and build the interior around it. A foundation-based layout can use a 7-inch riser stair and a 36-inch landing, while a wheel-based plan often needs a steeper, narrower stair or a ladder. That trade-off impacts furniture placement, so plan early and choose compact pieces that support the decision. A consistent approach keeps the room balanced and makes inspections smoother.
For small-space planning cues, see Minimalist Living in a Tiny House: Simple Life, Small Spaces.
Tips
- Use a full-height closet if you are on a foundation.
- Choose a slim ladder rail if you are on wheels.
- Keep floor transitions flat to avoid tripping on narrow paths.
What this gives you: a clear design story that matches the legal category.
5. Use a Wet-Wall Spine for Easier Tiny Home Permits
When tiny home permits and approvals involve utilities, a wet-wall spine simplifies inspections and keeps the interior orderly. Align the kitchen sink, bathroom, and mechanical closet on one wall so plumbing runs stay compact and visible. A 10 to 12 foot wet-wall length usually fits a galley kitchen and a compact bath without awkward turns. The contrast is to avoid scattered fixtures that create costly pipe runs and eat up storage space. One continuous utility wall keeps the layout clean and permits easier to document.
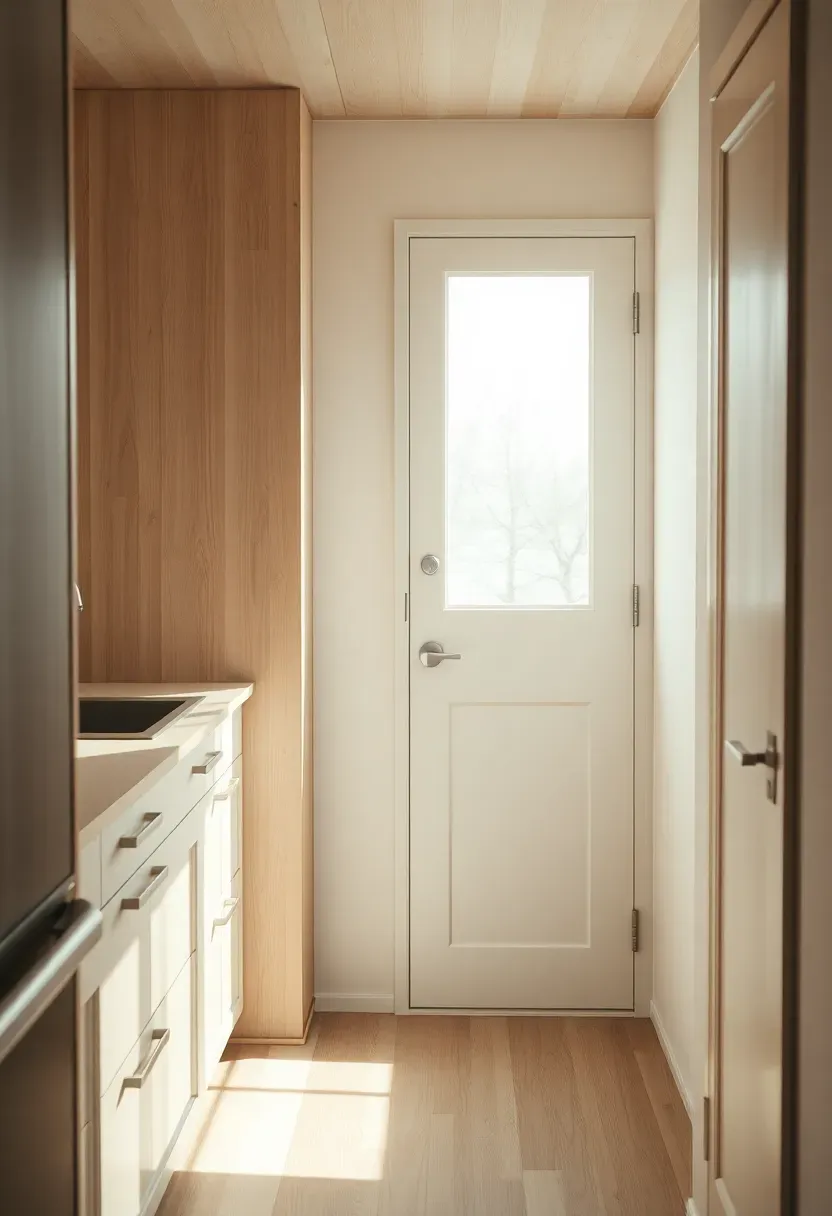
Keep finishes consistent along the wet wall to make the space feel longer and more cohesive. A single backsplash material, like matte ceramic tile, can run from the sink to the bath door and visually unite the zone. If you want contrast, use a different wood tone on the opposite wall rather than changing tile types. This approach reduces visual noise and makes the plumbing wall feel intentional rather than utilitarian.
For daily use, include a 24-inch dishwasher drawer or a slim pullout pantry to keep the corridor clear. It is a small detail that supports a larger design goal: an uncluttered spine that reads as permanent infrastructure.
Tips
- Do: place shutoff valves in an accessible base cabinet.
- Don't: hide the water heater behind loose furniture.
Budget/Time: $1,500 to $3,500 covers basic plumbing consolidation.
What this gives you: a tidy utility core that feels built-in and inspectable.
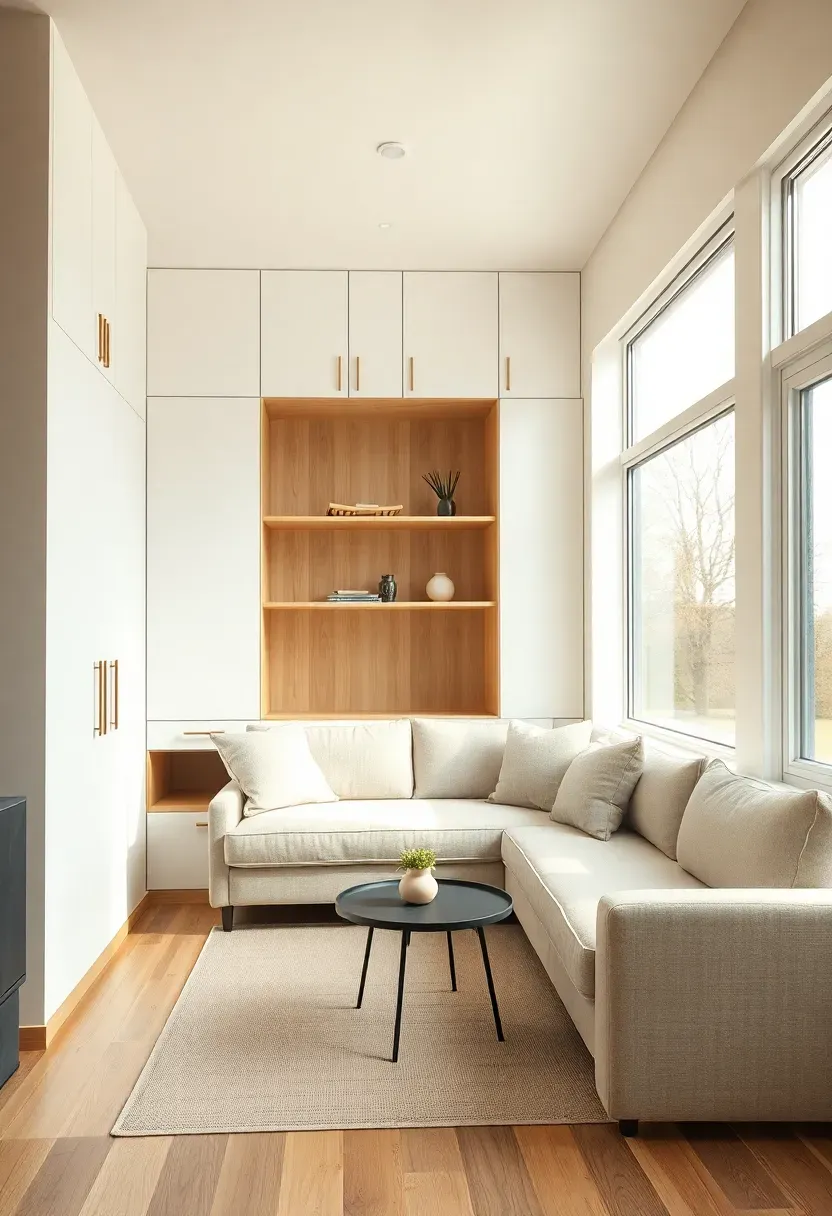
6. Build Storage Walls That Reduce Required Square Footage
Some tiny home legal paths depend on minimum square footage, so make the room feel larger through built-in storage walls. A full-height wall of cabinets keeps belongings behind a single plane, which reduces visual clutter and makes the space read as bigger. Use 16 to 18 inch deep cabinets on one side and keep the opposite side open for seating. The contrast is to avoid open shelves everywhere, which makes the room feel busy and smaller. A clean storage wall turns tiny living into a calmer daily rhythm.
Recommended
Items for this idea
Placement note: place the tallest storage on the long wall to stretch the room visually.
Keep cabinet fronts flat and match them to wall paint for a continuous surface. The trade-off is that you lose display space, so plan a single open niche near eye level for everyday items. Add a soft-close hardware package to reduce noise and reinforce quality over quantity. A concealed storage wall helps your interior meet minimum size expectations without actually increasing square footage.
For space-expanding layout ideas, see How to Make a Tiny House Feel Bigger: 20 Pro Tips.
Tips
- If you need airflow, then add a toe-kick vent at the base.
- If storage feels heavy, then break the wall with a 12-inch open shelf.
What this gives you: a room that feels larger and more compliant.
7. Plan Daylight and Ventilation to Meet Habitability Codes
To keep tiny homes legal across many states, demonstrate habitability with strong daylight and ventilation. Large windows, skylights, or a pair of operable vents show that the home supports healthy living. Aim for at least one generous window in the living zone and another in the sleeping zone to create cross-breezes. The contrast is to skip heavy blackout curtains during the day; choose light-filtering linen that preserves brightness. Natural light makes small rooms feel bigger and more compliant.
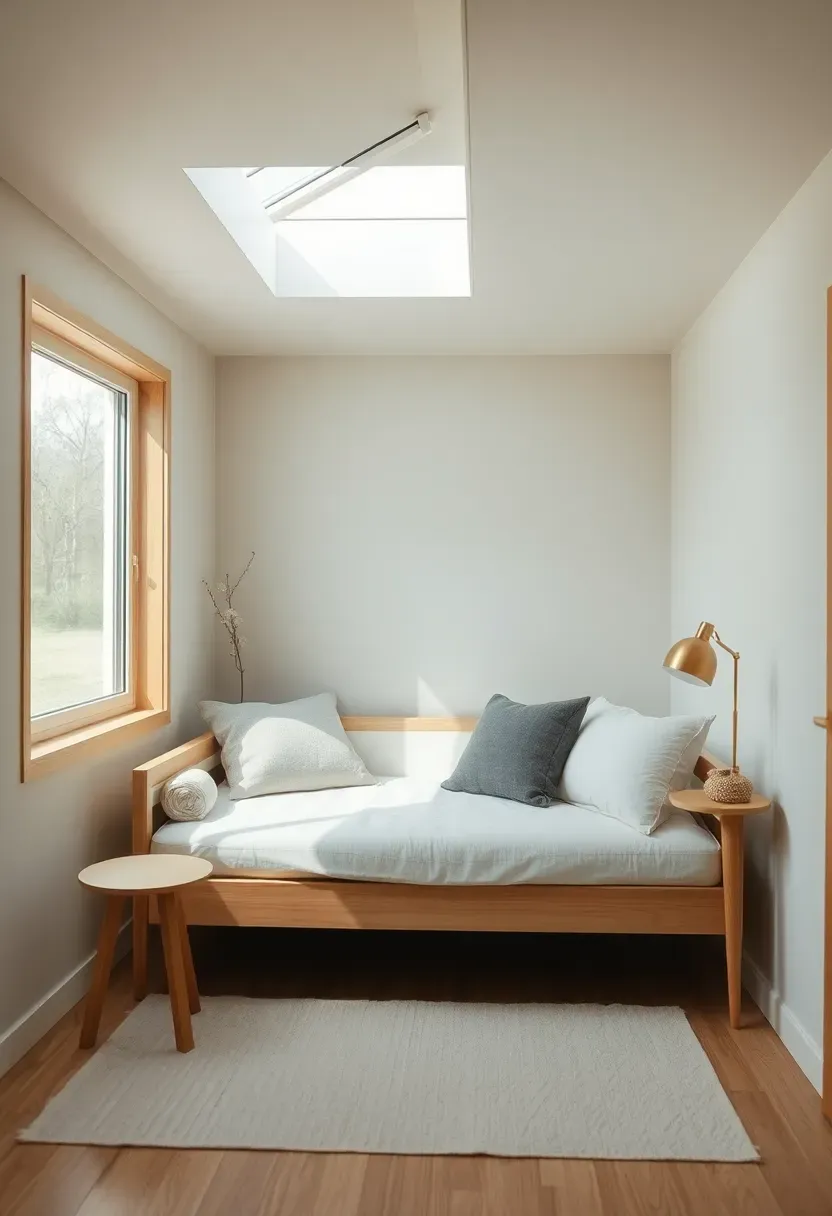
Why it works: bright, breathable rooms signal safety and livability, which aligns with most habitability checklists.
Keep window frames slim so more glass is visible, and use a pale wall color to bounce light deeper into the space. If glare is a concern, use sheer shades rather than dark blinds. A simple daybed and side table keep the scene airy while still functional. This is a light-first design strategy that satisfies both comfort and compliance.
If you are considering a mobile build, see What Is a Tiny House on Wheels for foundation and ventilation trade-offs.
Tips
- Pro: north-facing windows give even light with minimal heat gain.
- Con: winter light can feel cool in tone.
- Fix: add warm 2700K lamps for evening balance.
Best for: climates where ventilation and daylight are key approval points.
What this gives you: a healthier interior that feels larger and more legal.
8. Choose Fire-Safe Finishes That Pass Tiny Home Inspections
States that treat tiny home legal compliance like small dwellings often look at safety and durability. Choose fire-safe finishes such as ceramic tile, steel, and treated wood for kitchens and heat-adjacent zones. A compact cooking area still needs proper clearances, so keep 18 inches between the cooktop and any combustible surface. The contrast is to avoid peel-and-stick panels near heat sources, even if they look minimal. Durable finishes signal a permanent, code-ready build.
Recommended
Items for this idea
Common mistake: overusing decorative finishes that look good but fail durability checks.
Keep the palette warm and tactile with one durable tile and a quiet wood tone. If you want contrast, use a matte black fixture rather than multiple finishes. A slim stool and a clean counter edge keep the space functional without adding clutter. This approach keeps maintenance low and makes the interior feel dependable for long-term living.
For minimalist finish ideas, see 25 Minimalist Living Room Ideas for Small Spaces That Create a Welcoming Living Room.
Tips
- Use tile behind any heat source for quick cleanup.
- Choose rounded counter edges to reduce knocks in tight spaces.
- Seal wood annually to prevent moisture damage.
What this gives you: a resilient interior that passes safety checks.
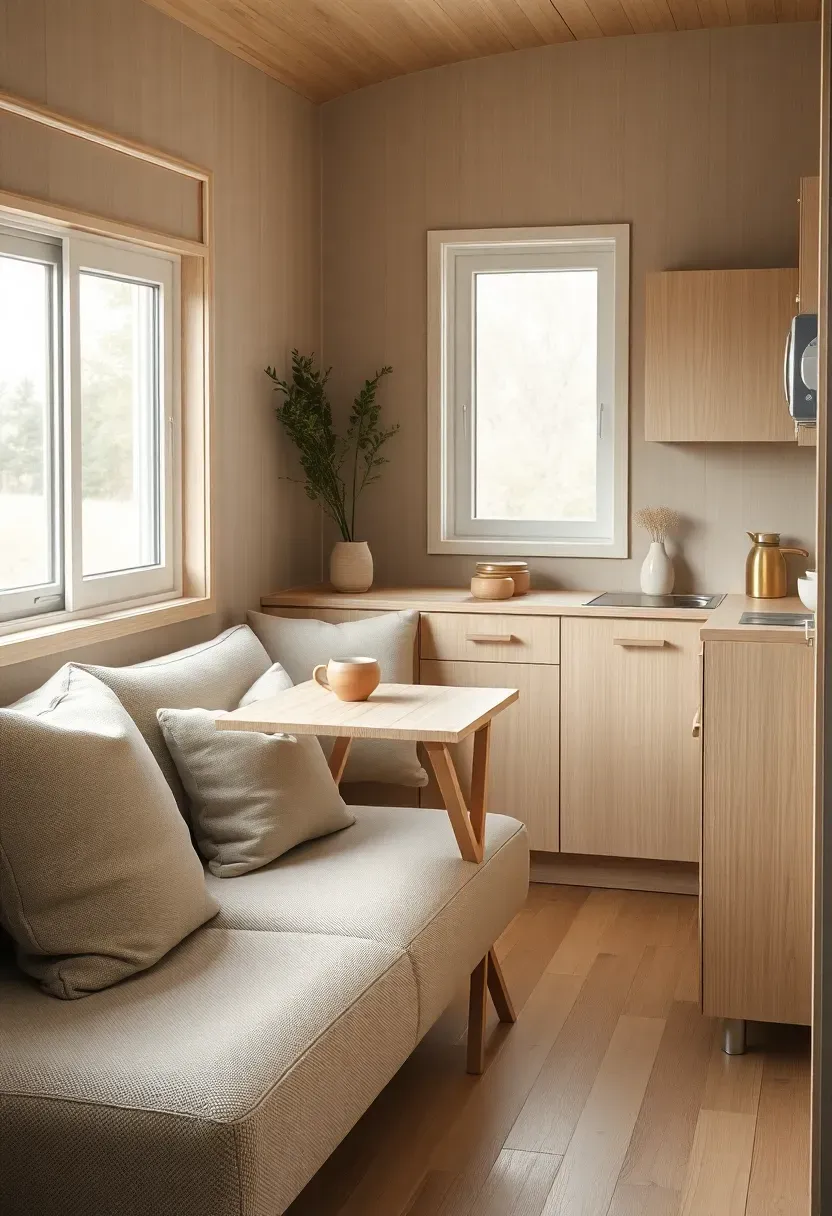
9. Use Multifunctional Furniture Without Visual Noise
A legal tiny home interior should feel livable every day, not just clever on paper. Use multifunctional furniture that keeps the room flexible, like a wall bed with a desk or a bench that stores linens. The goal is to keep the floor plan open while meeting daily needs. The contrast is to avoid stacking folding chairs and loose ottomans, which create visual clutter. Choose two or three smart pieces that handle multiple tasks cleanly.
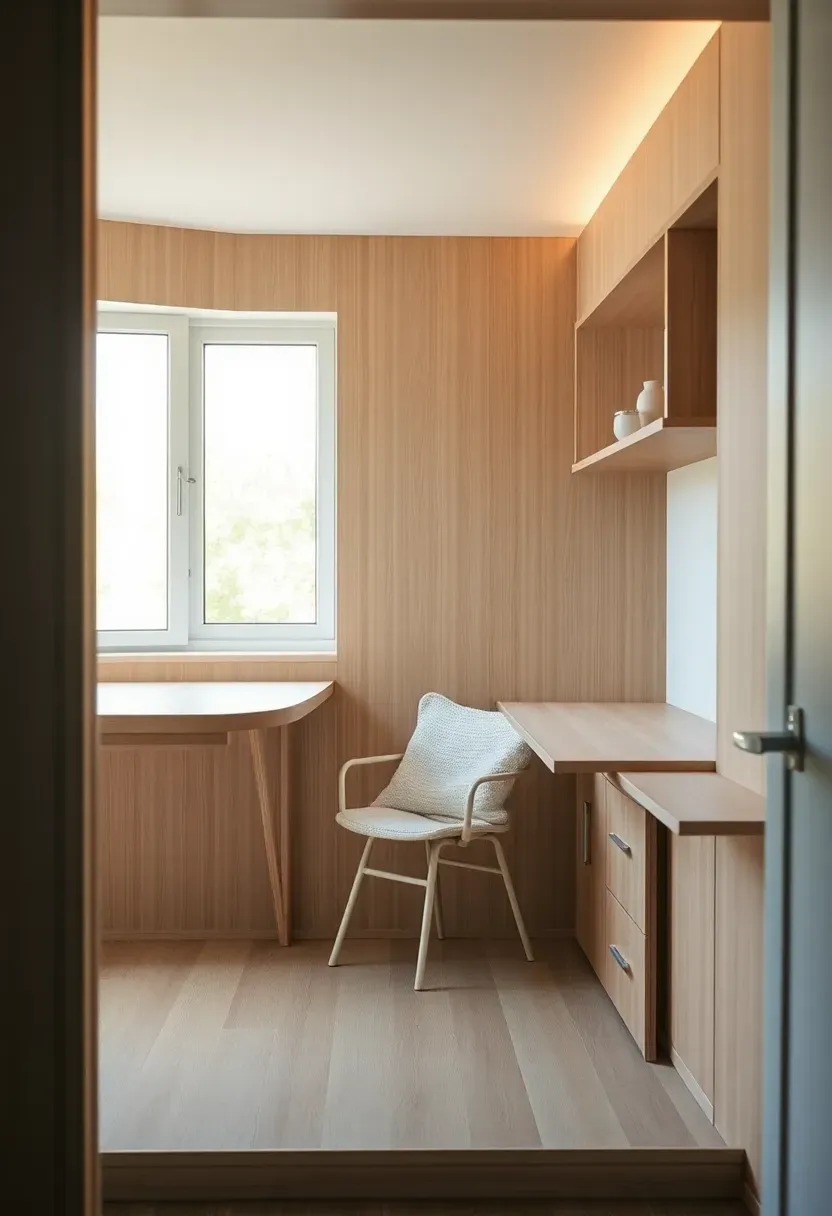
Keep proportions slim: a 20-inch deep desk and a 24-inch wide chair preserve circulation. The trade-off is that you must edit what stays visible, so store cords and tools behind closed doors. Use one floating shelf instead of a full bookcase to keep the wall light. This approach supports multifunctional furniture while protecting the minimalist look.
Choose one material family for the main pieces so the room stays cohesive. A light oak finish with linen upholstery feels soft and consistent, which reduces visual noise even when furniture changes positions.
Tips
- Do: test the bed mechanism before installing wall panels.
- Don't: block access to outlets with fixed furniture.
Rental note: use freestanding pieces if your lease prohibits wall anchoring.
What this gives you: a flexible space that still feels calm and complete.
10. Create a Documentation-Ready Design Package for Permits
Tiny home legal approval often depends on clear documentation, so build a design package that explains the interior choices. Include a simple floor plan, a material palette, and a furniture schedule that shows clearances. Call out 30-inch doorways and 36-inch paths on the plan. The contrast is to avoid vague sketches that inspectors cannot interpret.

Recommended
Items for this idea
Placement note: show the plan from the entry perspective so the flow is easy to understand.
Pair the plan with three to five material samples so reviewers see the safety and durability choices at a glance. If you need to simplify, show one primary wood, one tile, and one metal finish. A simple, professional presentation often makes the legal process faster.
For a simplified lifestyle framework, see 23 Simple Living Ideas for a Minimalist Lifestyle Now for a More Thoughtful Home.
Tips
- If you work with a builder, then ask for the CAD export in PDF format.
- If you DIY, then include a legend for doors, windows, and appliances.
What this gives you: a clear, review-ready plan that supports approval.
Knowing where tiny homes are legal starts with understanding your state's zoning laws, then shaping a design that looks conventional and feels calm. Use these steps to build a coherent interior plan with light, storage, and safety in mind. The result is a tiny home that reads as a real dwelling, not a workaround. With a clear design narrative and the right permits, you can adapt to local building codes and still create a minimalist space you love.
About the author
OBCD
CGI visualization and interior design content. We create detailed 3D renders and curate practical design ideas for every room in your home.