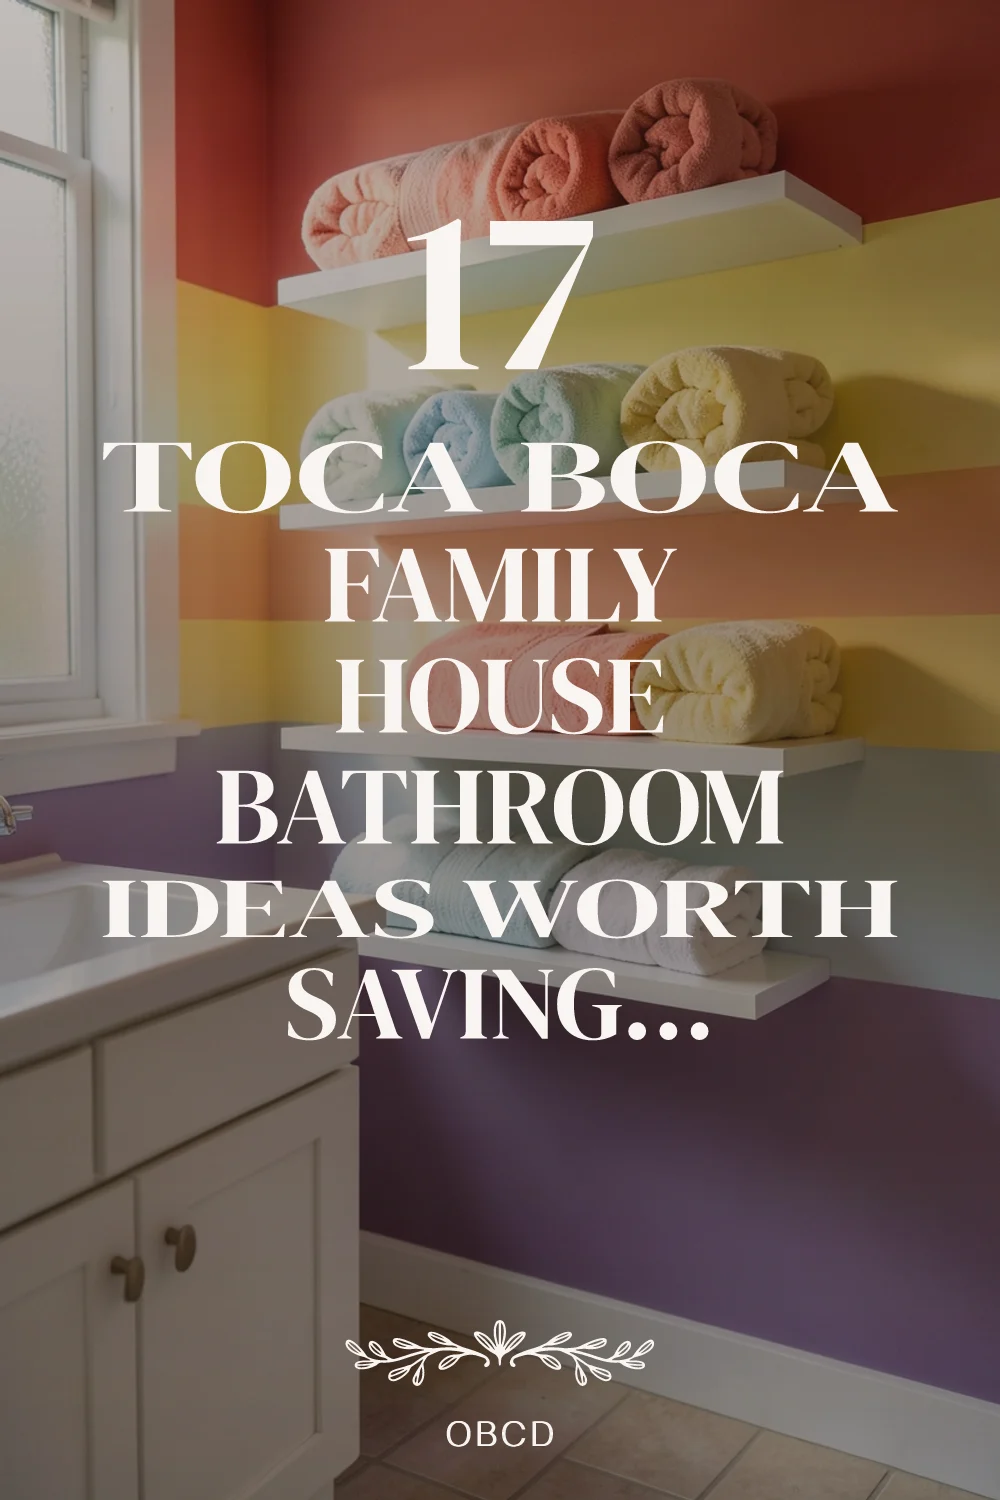
17 Toca Boca Family House Bathroom Ideas to Save Now
Toca Boca Family House bathroom ideas capture the playful spirit of the beloved kids' app, bringing vibrant colors and imaginative layouts to real-life spaces. These design concepts translate the game's cheerful aesthetic into functional family bathrooms that delight children and adults alike — and many work just as well in small rental apartments as in larger homes.
What makes these Toca Boca Family House bathroom ideas worth saving is their emphasis on creativity and fun without sacrificing functionality. From bold color palettes to clever storage solutions inspired by the game's interactive elements, each concept offers a unique approach to playful bathroom design. Whether you're working with a tiny powder room in a rental or a larger family bath, there's inspiration here for every space and budget.
These 17 ideas range from simple renter-friendly decor updates to bolder overhauls, all while maintaining the cheerful Toca Boca aesthetic. You'll discover ways to incorporate interactive elements, choose durable materials perfect for families, and create spaces that make daily routines feel magical. Each idea can be adapted to your specific needs, lease constraints, and style preferences.
Quick FAQ
Can adults enjoy Toca Boca-inspired bathrooms too?
Absolutely! The key is balancing playful elements with sophisticated materials and finishes. Use the vibrant color palettes and creative layouts as inspiration, but choose durable, high-quality fixtures that appeal to all ages.
Are these ideas expensive to implement?
Not necessarily. Many concepts focus on color, layout, and clever organization rather than expensive materials. You can start with simple updates like colorful accessories, peel-and-stick wallpaper, or painted cabinets before committing to larger changes.
How do I choose the right colors for a Toca Boca-style bathroom?
Look to the game's palette: bright primaries, cheerful pastels, and unexpected color combinations. Pair bold accent walls with neutral backgrounds to create balance. Test samples in your bathroom's lighting before committing.
Will these designs work in small bathrooms?
Yes! Many Toca Boca-inspired ideas actually work beautifully in compact spaces. Focus on vertical storage, mirrors to expand the visual space, and clever fixtures that maximize functionality. The playful aesthetic can make small spaces feel larger and more inviting.
As an Amazon Associate I earn from qualifying purchases.
Table of Contents
- 1. Rainbow Accent Wall with Floating Shelves
- 2. Interactive Animal Mirror Station
- 3. Cloud-Shaped Vanity Cabinet
- 4. Pebble Floor with Mosaic Pathway
- 5. Staircase Towel Storage Tower
- 6. Colorful Hexagon Tile Backsplash
- 7. Secret Compartment Medicine Cabinet
- 8. Bubble-Inspired Light Fixture
- 9. Magnetic Wall for Toys and Art
- 10. Slide-Down Shower Curtain
- 11. Tree Branch Towel Rack
- 12. Chalkboard Feature Wall
- 13. Sunken Bathtub with Steps
- 14. Under-Sea Themed Ceiling Mural
- 15. Fold-Down Changing Table
- 16. Glowing Path Night Lights
- 17. Mini Playhouse Storage Nook
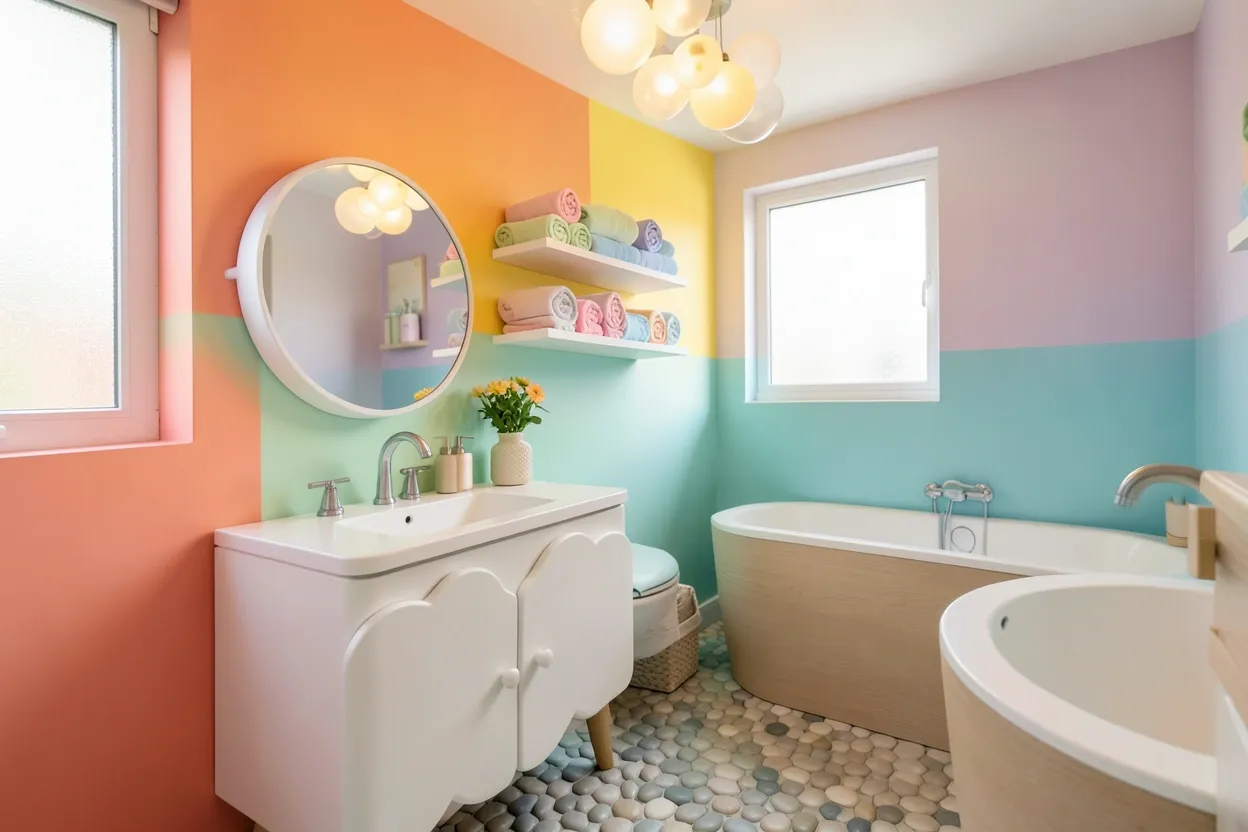
1. Rainbow Accent Wall with Floating Shelves — Colorful Toca Boca Style
This Toca Boca Family House bathroom idea transforms a blank wall into a cheerful focal point using graduated rainbow stripes. The design works best on the vanity or bathtub wall, where it can create visual interest without overwhelming the space. Natural light enhances the colors, making them feel vibrant and energetic rather than cartoonish.
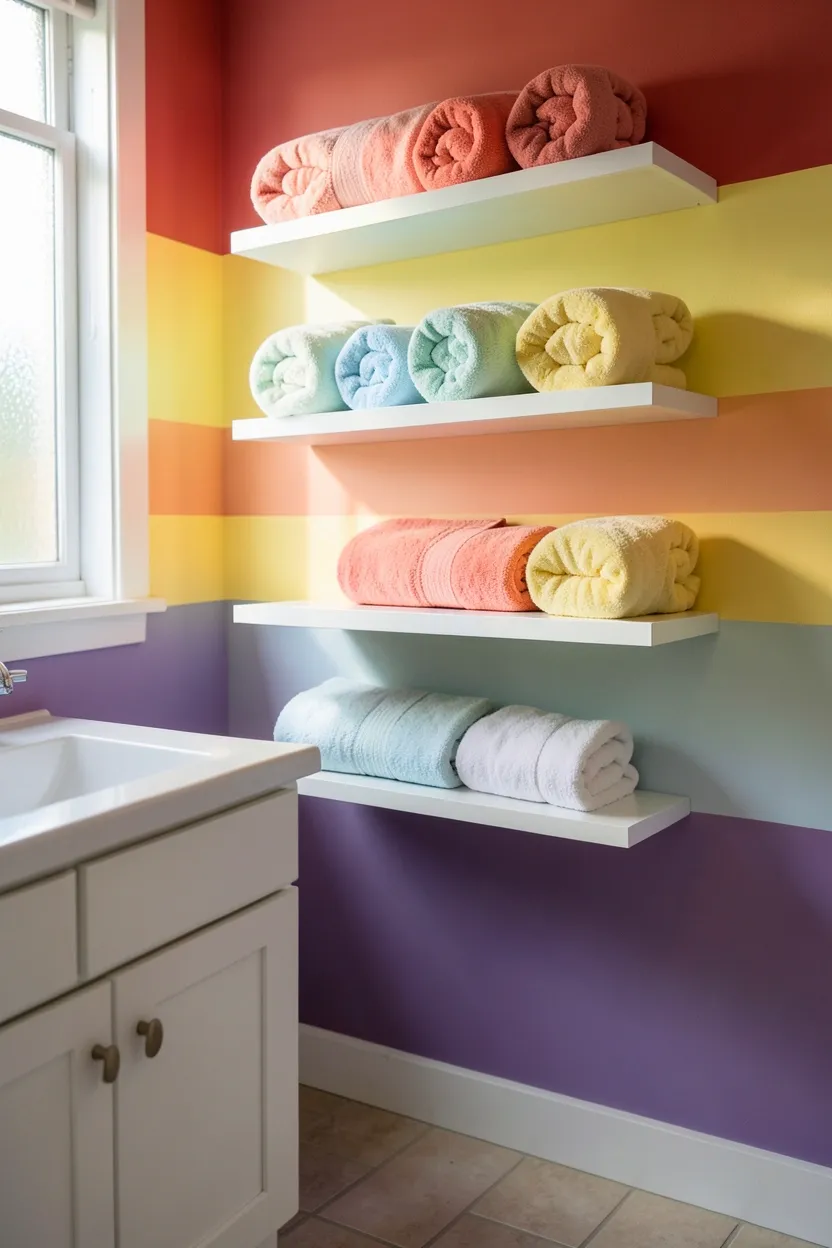
Paint each stripe approximately 8-12 inches wide, using high-quality bathroom paint that resists humidity and moisture. Start with red at the top and work through the spectrum to purple at the bottom, or reverse the order for a different visual effect. Complete the look with white floating shelves that create clean horizontal lines against the colorful backdrop.
The key to success is keeping the rest of the bathroom relatively neutral—white fixtures and simple tile patterns let the rainbow wall shine without competing for attention. However, avoid matching every accessory to the rainbow palette, which can feel overwhelming and juvenile. Instead, choose one or two accent colors from the spectrum for smaller decorative elements.
Do: Use painter's tape and a level for crisp, clean lines between color transitions. Allow each stripe to dry completely before applying tape for the next section.
Don't: Apply rainbow stripes on all four walls—this creates a chaotic, busy feeling that makes the space feel smaller.
Pro tip: Add warm LED strip lighting behind the shelves to create a glowing effect that emphasizes the colors and provides functional task lighting.
What this gives you: An instant mood booster that makes morning routines feel cheerful and energized while providing functional storage space.
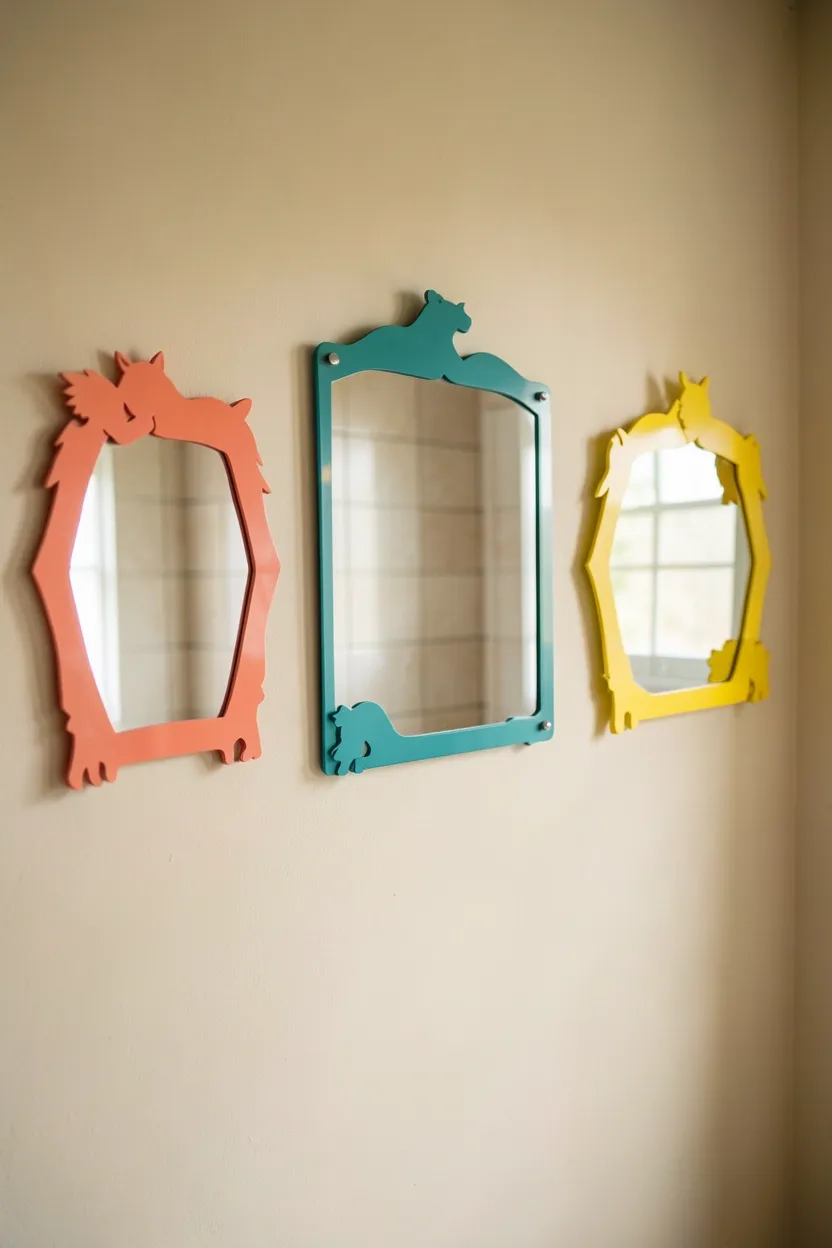
2. Interactive Animal Mirror Station
Create a playful grooming area inspired by Toca Boca's character designs by installing multiple mirrors framed with colorful animal shapes. This concept transforms ordinary mirror installations into an interactive experience that children love while maintaining functionality for adults. The key is arranging the mirrors at varying heights to accommodate different family members.
Recommended
Items for this idea
Placement note: Position this station on a wall with good natural light from a window or skylight, ideally 36-48 inches above the floor. Ensure electrical outlets are nearby for any additional lighting or accessories you might want to add later.
Use acrylic or wooden cutouts in bright colors—think flamingos, lions, or dolphins—that frame round or oval mirrors in varying sizes (20-30 inches diameter). Mount the mirrors with slight angles to create depth and dimension, allowing users to see themselves from different perspectives. The animal frames should be spaced evenly with 6-12 inches between each mirror.
If you're worried about durability, choose shatter-resistant acrylic mirrors rather than glass. Then you can place this station at lower heights for children without safety concerns.
Why it works: Multiple mirrors create visual interest and make the space feel larger, while the playful animal frames add personality without requiring permanent commitment.
Avoid overcrowding the wall with too many mirrors—three to five strategically placed mirrors create the best balance between functionality and visual impact.
What this gives you: A designated space where getting ready becomes an enjoyable activity for kids, with practical grooming benefits for the whole family.
3. Cloud-Shaped Vanity Cabinet for a Playful Family Bathroom
A cloud-shaped vanity cabinet brings the whimsical Toca Boca aesthetic into a functional bathroom element while maintaining clean lines for adult appeal. This design works particularly well in children's bathrooms or as an unexpected surprise in a guest bathroom. The soft curves create a welcoming, gentle atmosphere that contrasts beautifully with typical angular bathroom fixtures.

Why it works: Cloud shapes evoke childhood imagination and playfulness while remaining neutral enough to complement various design styles. The natural white or soft gray palette fits seamlessly into existing bathroom color schemes.
Custom-build or modify a standard vanity cabinet to feature three to five rounded projections along the top edge, creating the fluffy cloud silhouette. Use moisture-resistant MDF or high-quality plywood with a durable white paint finish. Complete the look with rounded cabinet pulls in chrome, brass, or colorful acrylic to enhance the playful theme. Pair with a simple rectangular mirror or another cloud-shaped mirror for continuity.
For more bathroom storage inspiration, check out 23 Renter-Friendly Apartment Bathroom Ideas — many include creative cabinet alternatives that work without permanent changes.
Common mistake: Making the cloud shape too elaborate or cartoonish, which can feel overwhelming in a small bathroom space. Keep the silhouette simple and clean.
Best for: Families with young children who want bathroom fixtures that feel magical without sacrificing durability or easy cleaning.
Material choice: Opt for semi-gloss or satin paint rather than matte finishes, which are easier to clean and more resistant to water damage.
Rental-friendly alternative: Apply a cloud-shaped decal or wall sticker above a standard vanity for a temporary transformation that can be removed without damage.
What this gives you: A bathroom vanity that sparks joy and imagination while providing ample storage and functional workspace for daily routines.
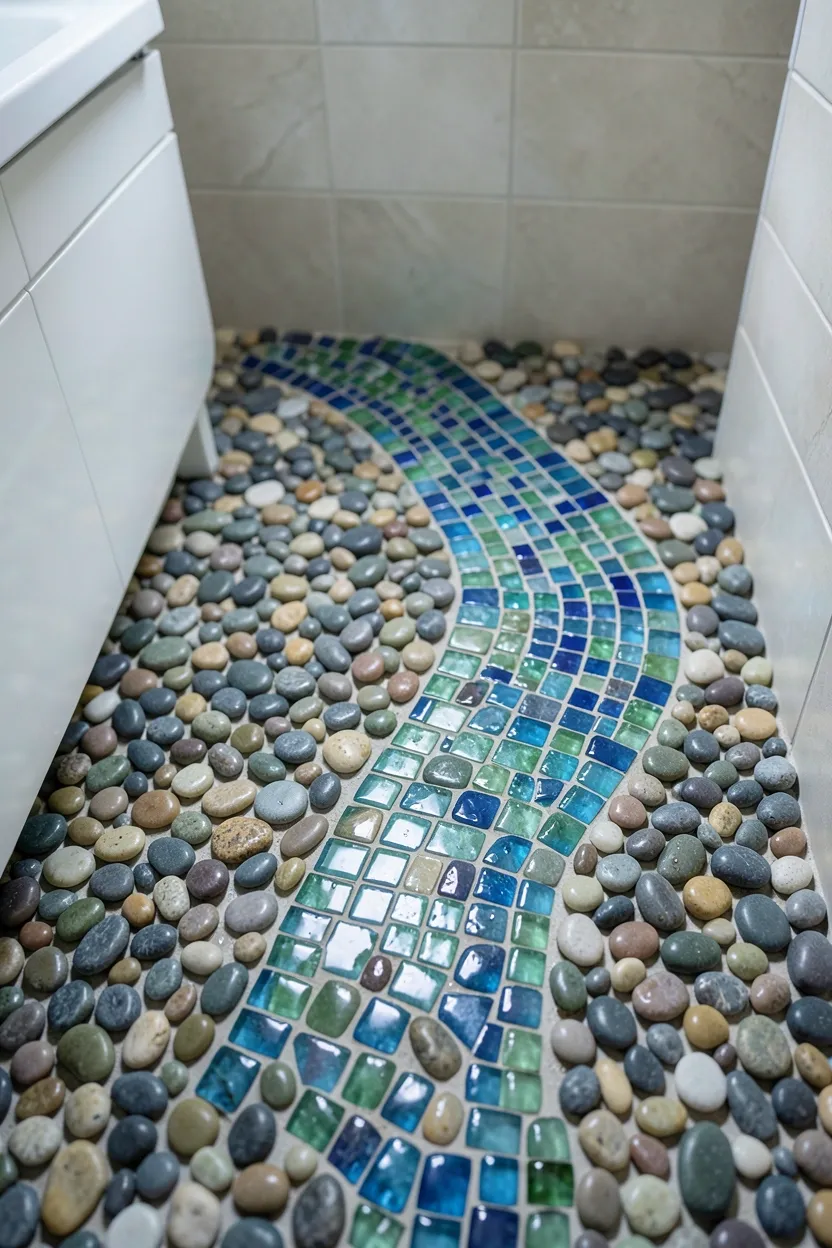
4. Pebble Floor with Mosaic Pathway
Inspired by Toca Boca's natural outdoor spaces, this bathroom floor concept combines smooth river pebbles with a decorative mosaic pathway. The texture-rich design creates a spa-like atmosphere while adding visual interest through varying colors and sizes of natural stone. This works exceptionally well in larger bathrooms or as an accent area within the shower or bathtub surround.
Recommended
Items for this idea
Common mistake: Using pebbles that are too rough or uneven, which becomes uncomfortable and potentially hazardous in a wet bathroom environment. Always select polished, smooth river stones designed for flooring applications.
Install pebble tiles over a properly waterproofed and sloped subfloor, ensuring proper drainage for wet areas. Create a winding mosaic pathway through the pebbles using colorful glass tiles in blue, green, or earth tones—this mimics a garden path through a riverbed. The pathway can lead to the bathtub, shower, or vanity, creating a natural flow through the space. Consider bordering the pebble area with larger, smooth tiles for easier transitions to other flooring materials.
Pro tip: Use a contrasting grout color between pebbles to emphasize the natural texture and make the floor easier to clean. Light gray or tan grout works well with most pebble colors.
Maintenance note: Apply a high-quality stone sealer after installation to protect against water damage and staining. Reseal annually to maintain the floor's appearance and durability.
Budget alternative: Create a pebble mosaic only in the shower floor or as a border strip around the room rather than covering the entire bathroom floor.
What this gives you: A uniquely textured floor that brings natural beauty indoors, creates a spa atmosphere, and provides a gentle, massage-like sensation under bare feet.
5. Staircase Towel Storage Tower
Maximize vertical space while adding playful Toca Boca charm with a staircase-inspired towel storage tower. This clever design turns towel storage into an architectural feature, perfect for bathrooms with limited floor space. The stepped design mimics the game's interactive elements, encouraging family members to "climb" the steps to reach their designated towels.
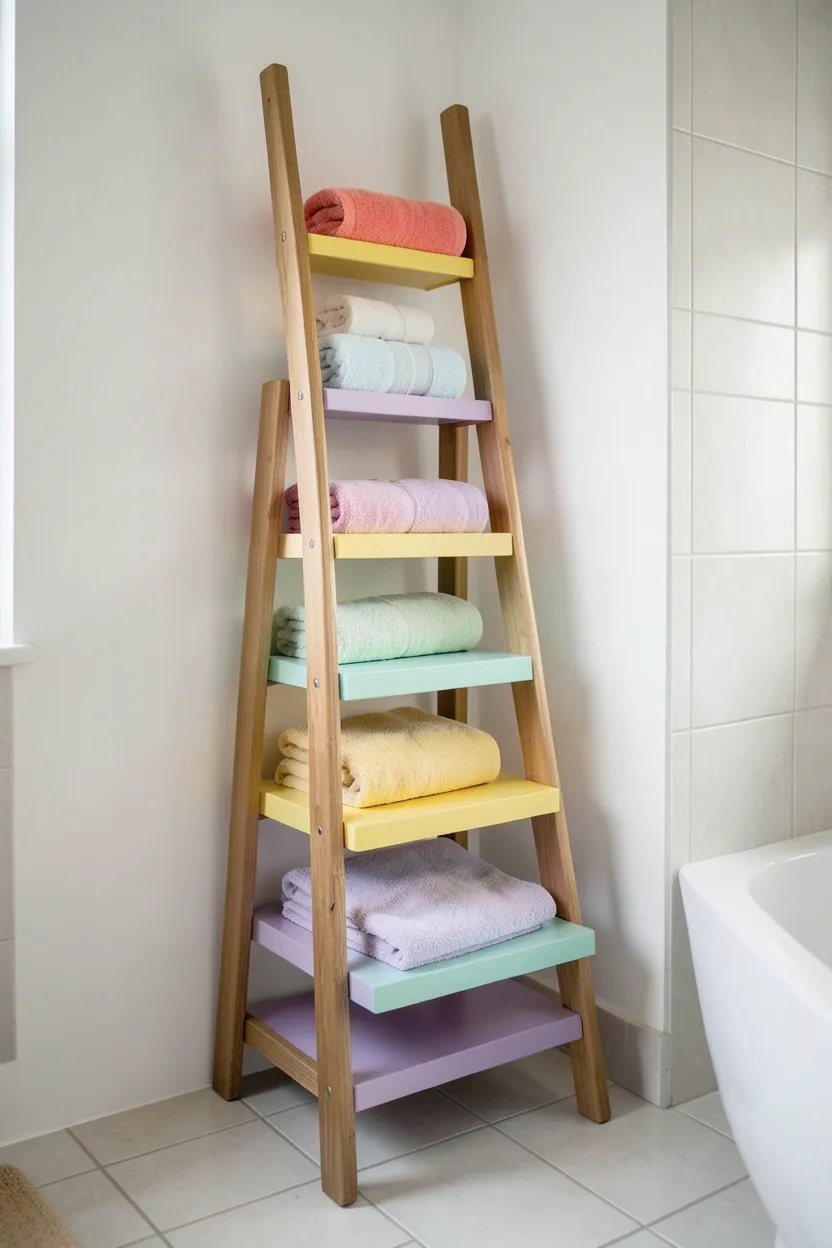
Build or purchase a narrow ladder-style tower with 4-6 ascending steps, each approximately 8-10 inches deep and 18-24 inches wide. Paint each step a different color from a coordinated palette or keep the structure neutral with colorful towel accents. The tower should stand 5-7 feet tall, with wider steps at the bottom for larger towels and narrower steps at the top for hand towels and washcloths.
Position the tower against a blank wall or in an unused corner, ideally near the bathtub or shower for easy access. The vertical orientation draws the eye upward, making ceilings feel higher while providing ample storage without consuming floor space. Consider adding small baskets or bins on each step to organize smaller items like bath toys, soaps, or toiletries.
Do: Secure the tower firmly to the wall using anti-tip hardware, especially important in households with children. This prevents accidents and provides additional stability.
Don't: Overload upper steps with heavy items, which can make the tower top-heavy. Reserve higher steps for lighter items like rolled hand towels.
Alternative approach: Use a repurposed wooden step ladder or modify a bookcase to create a similar staircase effect with less custom construction required.
Budget/time saving: Start with a ready-made ladder shelf and add colorful paint or washi tape accents rather than building from scratch. This creates a similar effect in a fraction of the time.
What this gives you: Space-saving vertical storage that doubles as decorative art while keeping towels organized and easily accessible for the entire family.
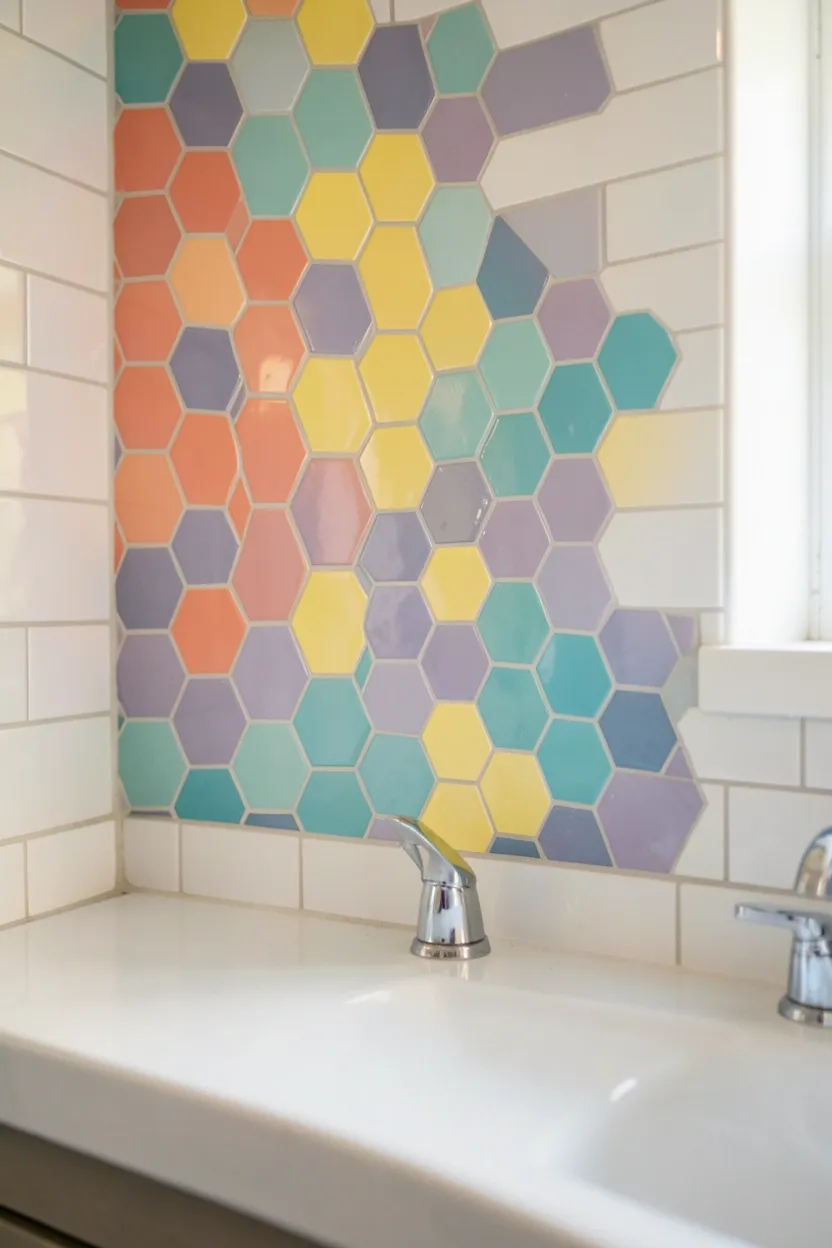
6. Colorful Hexagon Tile Backsplash
This Toca Boca-inspired backsplash features hexagonal tiles in a vibrant, playful color arrangement that transforms a standard vanity area into an artistic focal point. The geometric pattern adds visual interest while the bright color palette brings the game's cheerful energy into real bathroom design. The hexagonal shape creates natural honeycomb patterns that are both modern and whimsical.
Recommended
Items for this idea
Arrange hexagon tiles (2-4 inches diameter) in a random or gradient color pattern, selecting 4-6 complementary colors from the Toca Boca palette—think coral, mint green, sunny yellow, lavender, turquoise, and soft pink. Apply the tiles from the vanity countertop up to 18-24 inches, or extend all the way to the ceiling for a more dramatic effect. Use white or light gray grout to let the colors pop without creating visual clutter.
Placement note: Focus this colorful backsplash on the wall behind the vanity and mirror, where it creates maximum visual impact during daily grooming routines. The pattern should frame the mirror like artwork while providing a cheerful backdrop.
Keep the surrounding elements relatively neutral—white subway tile or simple solid-color tiles elsewhere in the bathroom balance the busy hexagon pattern. Consider echoing the hexagon shape in other elements like light fixtures, drawer pulls, or soap dishes to create subtle continuity without overdoing the theme.
If you're concerned about color commitment, then create a smaller hexagon feature panel above the sink rather than covering the entire vanity wall. This provides the same playful effect with less visual dominance.
Pro tip: Mix matte and glossy finishes within the same color palette to create subtle depth and dimension that catches light differently throughout the day.
Why it works: The honeycomb pattern is naturally pleasing to the eye and feels organic rather than geometric, making colorful variations feel sophisticated rather than overwhelming.
What this gives you: A durable, water-resistant backsplash that serves as functional wall protection and stunning decorative art, elevating the bathroom's personality instantly.
7. Secret Compartment Medicine Cabinet
Inspired by Toca Boca's hidden surprises and interactive elements, this medicine cabinet conceals clever storage compartments behind an unsuspecting exterior. The concept transforms a standard bathroom necessity into an exciting discovery experience for children while maintaining adult functionality. Hidden compartments keep medications, toiletries, and valuables secure yet accessible.
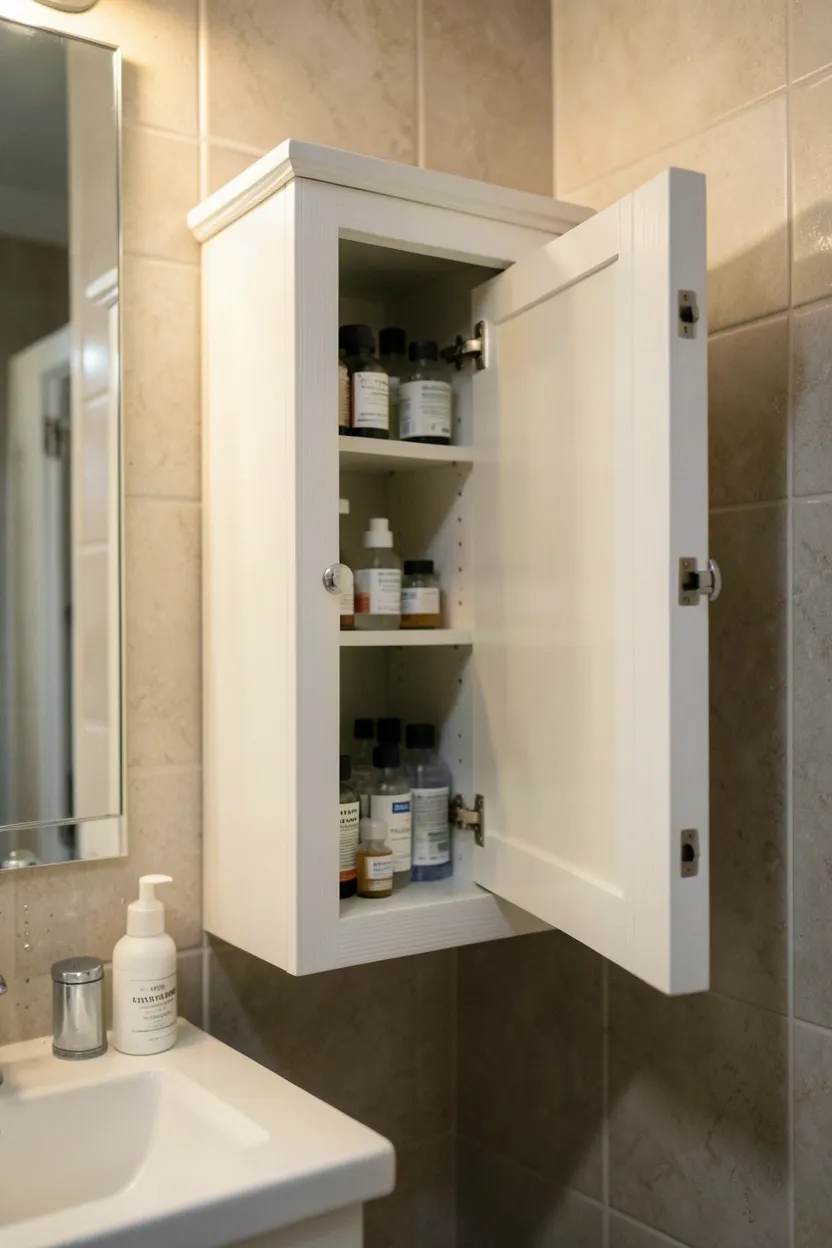
Install a recessed medicine cabinet with one or more hidden compartments accessed through push-latch mechanisms, magnetic locks, or false panels. The cabinet exterior can be mirrored or finished in wood to blend seamlessly with the bathroom design. Inside, create compartments of varying sizes—some small for medications, larger for bottles, and shallow for flat items.
Common mistake: Making the hidden compartments too difficult to access, which defeats their practical purpose for everyday items. Ensure the opening mechanisms are intuitive and easy for authorized family members to operate.
Consider dividing the cabinet into "family" and "children" sections with different access methods. Family compartments might use simple push-latch doors, while child-safe compartments require magnet keys or combination locks. This approach teaches children about organization while keeping dangerous items safely stored away.
For more creative storage solutions throughout your home, check out Living Room Shelving Ideas Worth Saving for Later to see how hidden compartments work in other spaces.
Best for: Families with young children who need safe medication storage but want to avoid boring, utilitarian cabinets that feel clinical or institutional.
Material consideration: Choose moisture-resistant materials like painted wood, high-pressure laminate, or rust-resistant aluminum interiors to withstand bathroom humidity.
Lighting upgrade: Install motion-activated LED lighting inside the cabinet that turns on when the door opens, making it easier to find items and adding a magical discovery element.
Avoid if you're renting or plan to sell soon—this custom installation requires significant wall modification that may not recoup costs.
What this gives you: Smart, secure storage that keeps dangerous items safely away from children while adding an element of surprise and discovery to daily routines.
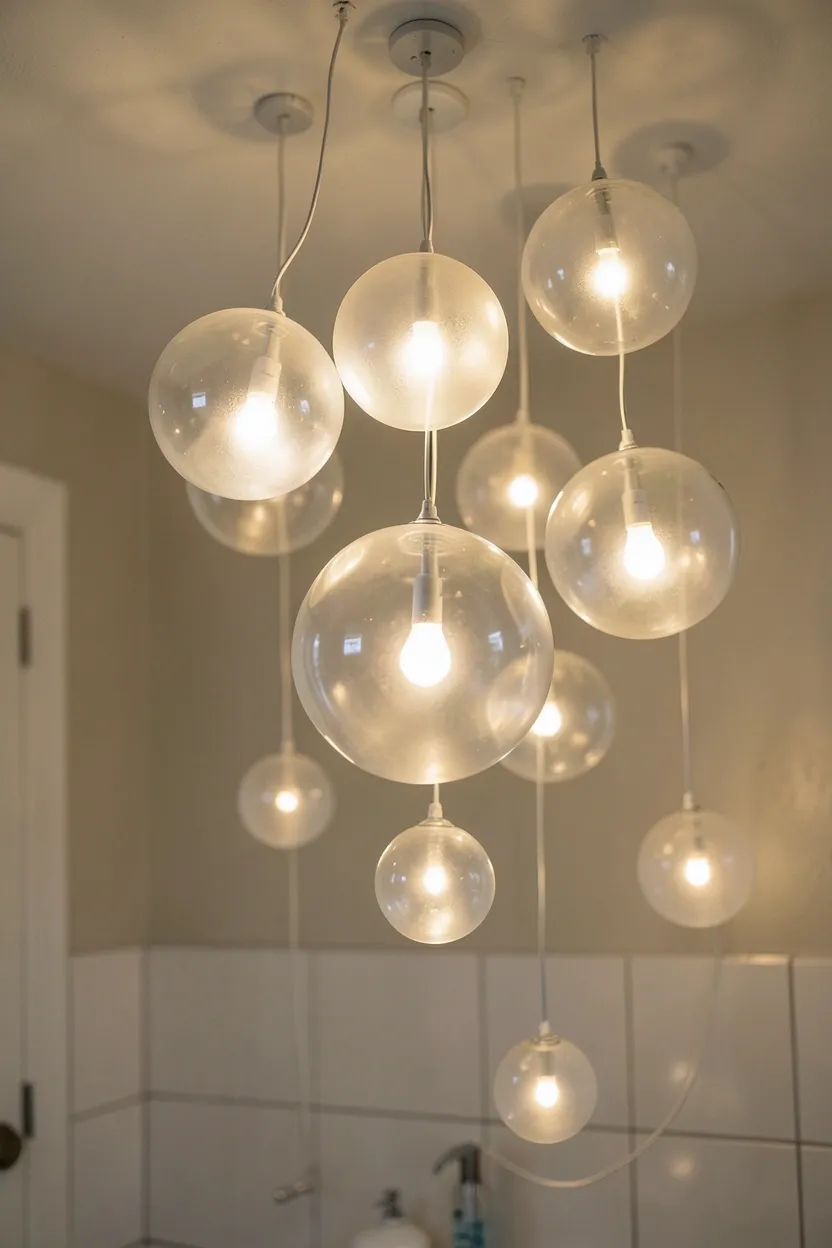
8. Bubble-Inspired Light Fixture
Create a dreamy, underwater-inspired atmosphere with a light fixture that captures the playful essence of floating bubbles in Toca Boca. This lighting concept uses multiple glass or acrylic spheres arranged in an asymmetrical cluster, casting playful shadows and creating an enchanting focal point. The design works beautifully above the vanity, bathtub, or as a central ceiling fixture.
Recommended
Items for this idea
Select 5-9 glass or acrylic spheres in varying sizes (6-16 inches diameter) with clear or frosted finishes. Mount them at different heights using thin cables or rods, creating an organic, floating cluster that mimics bubbles rising through water. Use warm white LED bulbs (2700-3000K) to create a soft, inviting glow rather than harsh clinical lighting.
Position the bubble cluster 30-36 inches above the vanity mirror for optimal task lighting, or higher if used as general ambient lighting. The asymmetrical arrangement adds visual interest while the spherical shapes reflect light throughout the space, creating beautiful refractions and shadows on walls and surfaces.
Pro/Con/Fix: Pro: Creates magical, diffused lighting that's gentle on the eyes. Con: May require professional installation and electrical work. Fix: Choose a plug-in option with a decorative canopy that hides the cord, or hire an electrician for permanent installation.
Why it works: The spherical forms are universally appealing and create beautiful light patterns without feeling childish or overly thematic—this works equally well in adult spaces.
Best rooms: Ideal for master bathrooms, children's bathrooms, or guest bathrooms where you want to create a memorable, photogenic moment.
Best for bathrooms with higher ceilings (9+ feet) where the bubble cluster has room to float without feeling cramped or potentially hazardous to tall family members.
What this gives you: Unique ambient lighting that transforms bathroom ambiance from functional to magical, creating a spa-like retreat perfect for relaxation.
9. Magnetic Wall for Toys and Art
Transform a blank bathroom wall into an interactive gallery space using magnetic paint and decorative magnets, inspired by Toca Boca's creative, hands-on approach to design. This concept provides a designated area where children can display artwork, hang bath toys, and arrange magnetic decorations, turning the bathroom into a creative zone rather than just a functional space.
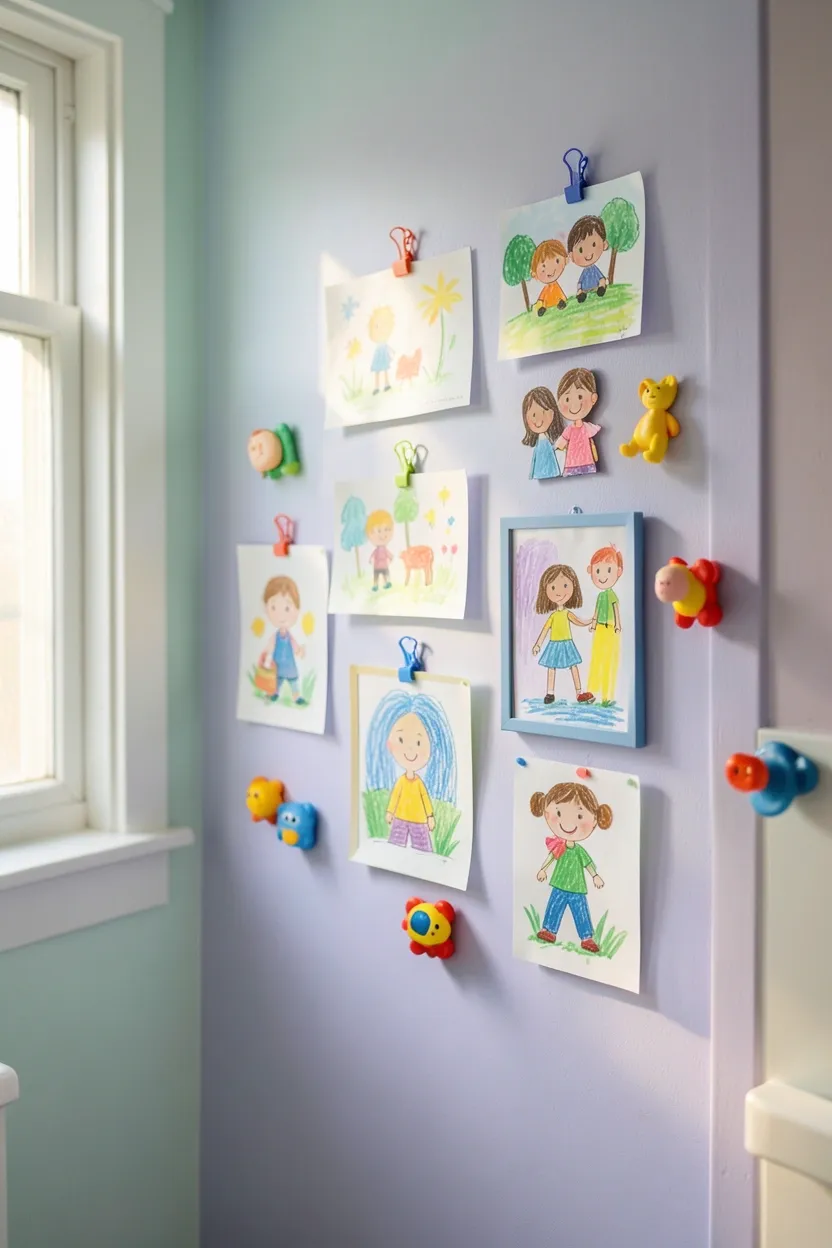
Apply magnetic primer (3-4 coats) to a smooth, prepared wall section, then finish with your choice of bathroom paint color to match the room's palette. Create a defined magnetic zone using trim or painted borders, ideally 4-6 feet wide and 4-5 feet tall. Position the magnetic wall at an accessible height for children (24-48 inches from the floor) while keeping some upper space for adult-arranged decorations.
Stock the magnetic wall with colorful magnetic clips, frames, and hooks for displaying artwork. Add waterproof magnetic toys or decorative elements that can be rearranged during bath time. Consider creating themed zones—one area for rotating artwork, another for bath toy storage, and a third for inspirational words or quotes.
If you love interactive wall elements, explore 18 Living Room Shelving Ideas for more creative display solutions throughout your home.
Do: Test the magnetic strength before committing to the project—some magnetic primers are stronger than others, and you want to ensure magnets hold securely in the humid bathroom environment.
Don't: Place the magnetic wall directly behind the bathtub or shower area, where it's frequently exposed to water spray. Position it in the vanity area or on a wall with some protection from direct water.
Pro tip: Create a rotating system where children choose which pieces to display each week, teaching decision-making and organization while keeping the space fresh.
What this gives you: An ever-changing interactive wall that engages children's creativity while providing functional storage for bath toys and personalized decor.
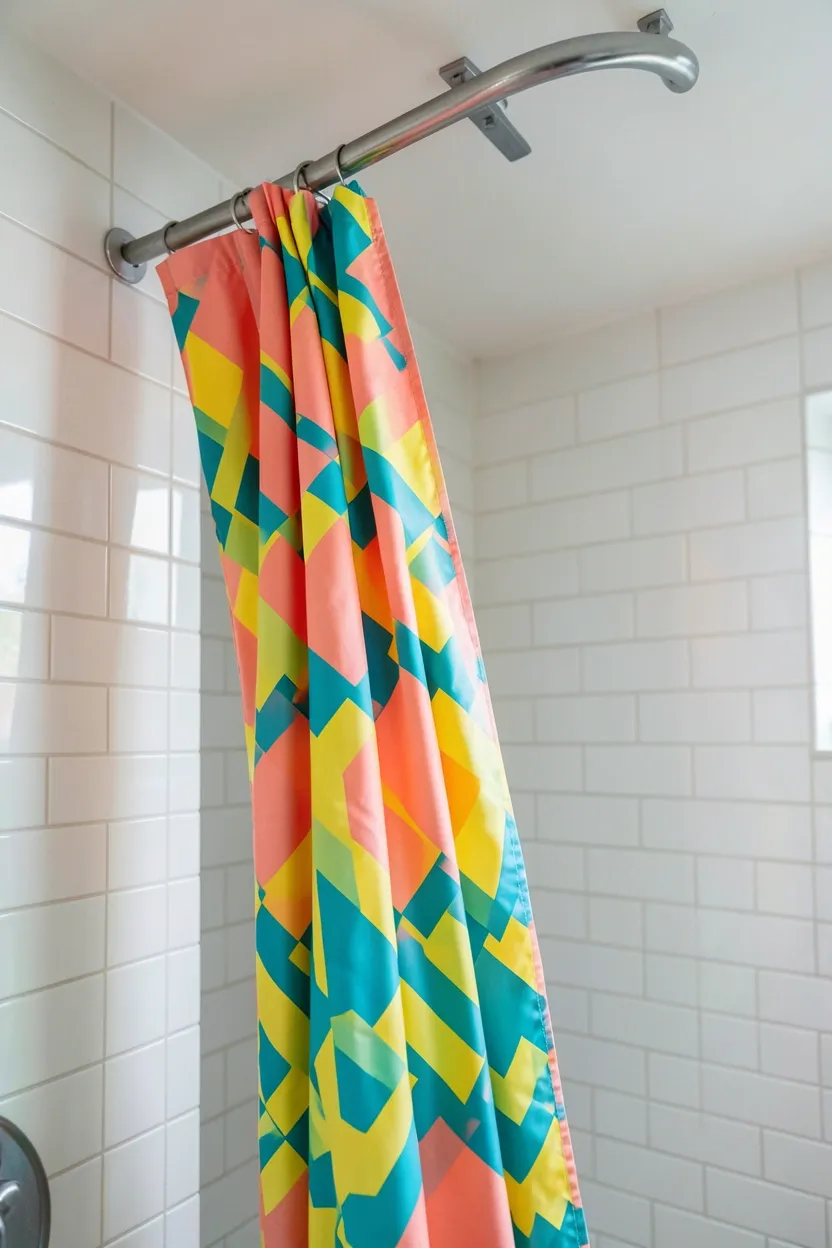
10. Slide-Down Shower Curtain
This playful twist on the standard shower curtain incorporates a "slide" mechanism inspired by Toca Boca's interactive playground elements. Instead of a simple curtain rod, install a curved track system that allows the curtain to slide dramatically across the opening, transforming the mundane act of showering into an exciting moment. The concept adds movement and anticipation to bathroom routines.
Recommended
Items for this idea
Install a curved ceiling-mounted track that runs from the shower opening diagonally downward toward the opposite wall, mimicking a playground slide's path. Use a lightweight, waterproof curtain with bold Toca Boca-inspired colors or patterns—geometric shapes, animals, or abstract designs work well. The track should be positioned so the curtain can slide fully open against one wall, clearing the shower entrance completely.
Placement note: This works best in shower stalls or tubs with open entries rather than enclosed units. Ensure the track is mounted securely into ceiling joists or appropriate supports to handle the curtain's weight when wet.
The sliding motion creates anticipation and makes entering the shower feel like a special activity rather than just a daily chore. Children especially love the playful mechanism, which can make bath time resistance less likely. Choose bright, cheerful colors or patterns that contrast with the bathroom's wall color to maximize the visual impact.
Why it works: The sliding motion adds kinetic energy to the bathroom, making the space feel dynamic and interactive rather than static and purely functional.
If you're concerned about durability, then choose a heavy-duty commercial-grade track system designed for stage curtains or industrial applications—these withstand repeated use and humid environments better than residential systems.
Avoid positioning the track where water from the shower can directly spray it, which can cause premature wear and damage to the mechanism.
Rental-friendly alternative: Use a tension-mounted curved rod instead of ceiling-mounted tracks, creating a similar arched appearance without permanent installation.
What this gives you: A fun, interactive shower entrance that transforms daily routines and adds playful energy to the bathroom experience.
11. Tree Branch Towel Rack
Bring the natural, organic elements of Toca Boca's outdoor scenes into the bathroom with a functional towel rack made from natural tree branches. This design creates a whimsical, forest-like atmosphere while providing practical storage for bath towels. The irregular, organic shapes of branches contrast beautifully with typical bathroom fixtures, adding character and warmth.
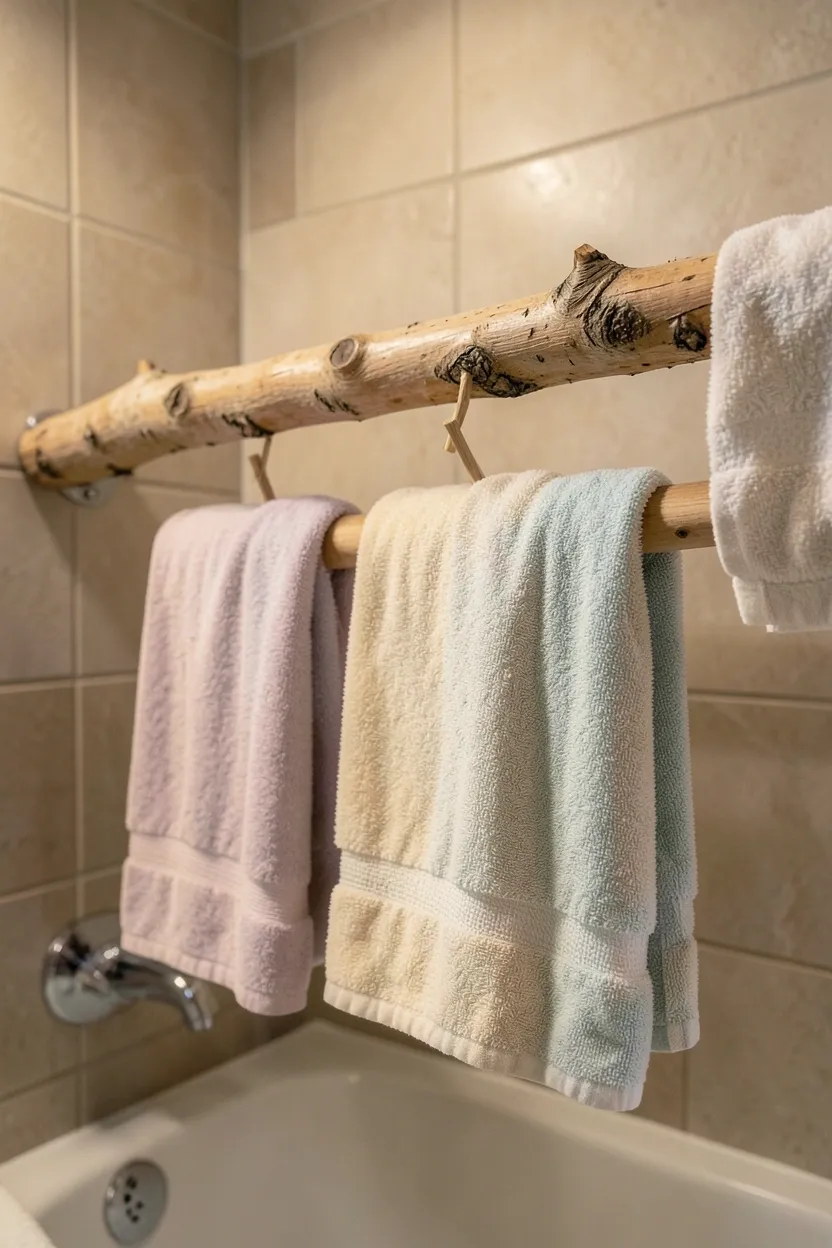
Select 2-3 sturdy hardwood branches (oak, maple, or birch work well) measuring 4-6 feet long and 2-4 inches in diameter. Clean, sand, and apply multiple coats of waterproof polyurethane or marine-grade sealant to protect against moisture. Mount the branches horizontally to the wall using concealed brackets, spacing them 18-24 inches apart vertically to accommodate different towel sizes.
Common mistake: Using branches that are too thin or made from softwoods like pine, which can warp, crack, or break under the weight of wet towels. Always choose hardwoods and test weight capacity before installation.
Position the branch towel rack near the bathtub or shower for easy access after bathing. The natural bark texture and irregular shapes create visual interest while the horizontal orientation provides multiple hanging points for towels, robes, and washcloths. Consider adding smaller branch pegs or hooks for hanging smaller items like loofahs or washcloths.
Do: Leave some of the natural bark texture visible rather than sanding everything completely smooth—this enhances the organic, forest-inspired aesthetic that makes the design special.
Don't: Install branches that have insect damage, rot, or cracks—these structural issues worsen quickly in humid bathroom environments and could cause the rack to fail.
Alternative option: Use metal pipe or copper tubing bent into organic, branch-like shapes if you prefer a more industrial or modern aesthetic with similar functionality.
Budget/time saving instead of collecting natural branches, purchase pre-finished wooden dowels or decorative molding that mimic branch textures while being more consistent and readily available.
What this gives you: A functional towel storage solution that brings nature indoors, adds organic warmth to the bathroom, and serves as unique decorative art.
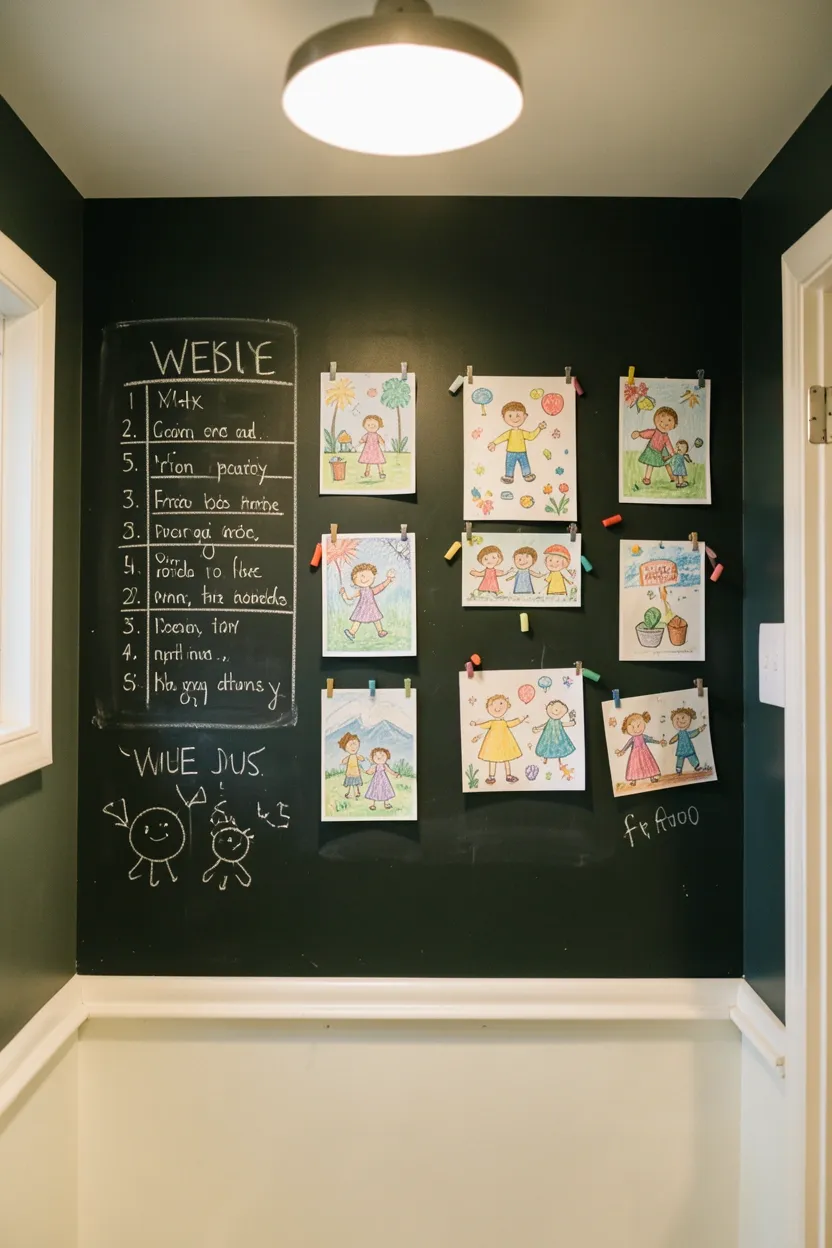
12. Chalkboard Feature Wall — Renter-Friendly Interactive Idea
Inspired by Toca Boca's creative drawing elements, a chalkboard feature wall transforms the bathroom into an ever-changing canvas for art, notes, and playful doodles. This design encourages creativity and personalization while providing a practical surface for reminders, schedules, or inspirational quotes. The dark matte finish creates dramatic contrast in typically bright bathroom spaces.
Recommended
Items for this idea
Apply specialty chalkboard paint to a prepared wall section (or use removable chalkboard wallpaper for temporary installations). Create a defined chalkboard area using trim or painted borders—ideally 4-6 feet wide and 3-4 feet tall. Position the chalkboard at child-accessible height (24-48 inches from the floor) while maintaining some upper space for adults.
Why it works: The chalkboard wall serves multiple purposes—creative outlet, message center, and decorative element—all in one. It's constantly changeable, keeping the bathroom feeling fresh and personal without requiring permanent changes.
Stock the area with colorful chalks and erasers, encouraging family members to contribute their artwork or notes. Create designated zones—a weekly schedule corner, a rotating artwork gallery, and a space for inspirational quotes. The matte black or dark green chalkboard surface provides dramatic contrast against typically light bathroom walls and tiles.
If you're concerned about chalk dust, then use liquid chalk markers or washable paint pens instead—they create less mess and offer bolder, more vibrant colors.
Pro tip: Install recessed lighting or picture lights above the chalkboard to illuminate artwork and make the wall feel like a gallery rather than just a functional surface.
Avoid placing the chalkboard directly above the bathtub or vanity where water splashes can damage the artwork or the chalkboard surface itself.
What this gives you: An interactive, ever-changing wall that sparks creativity, serves as a family communication hub, and adds dramatic visual contrast to the bathroom.
13. Sunken Bathtub with Steps
Emulate Toca Boca's architectural playfulness with a sunken bathtub accessed by decorative steps, creating a luxurious and dramatic focal point in larger bathrooms. This design transforms bathing from a mundane activity into an immersive experience, with the sunken tub feeling like a private retreat. The stepped entrance adds a sense of ceremony and anticipation to bath time.
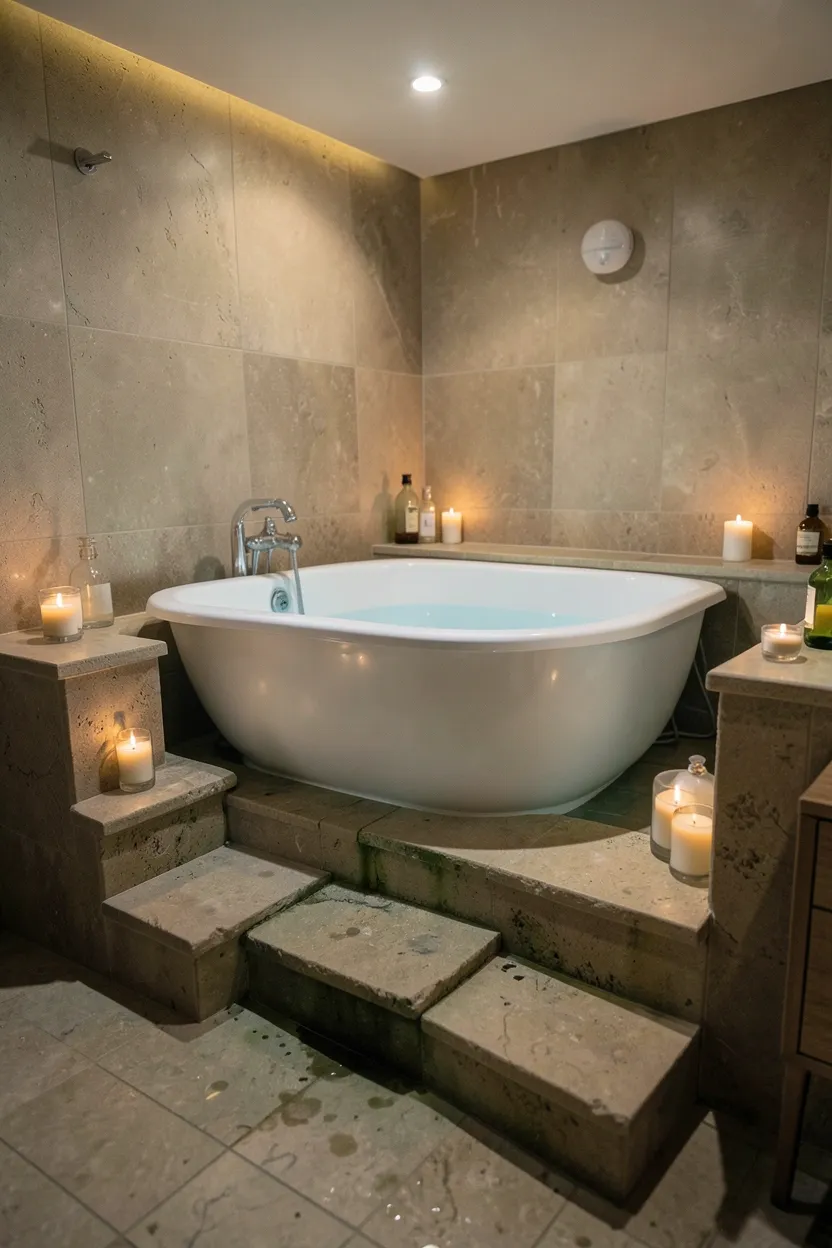
Create a sunken platform 8-12 inches deep by recessing the bathtub area into the floor or building up the surrounding floor level. Install a freestanding soaking tub or built-in tub that sits flush with the platform floor. Add 2-3 decorative steps leading down to the tub, using materials that complement the bathroom's design—stone, tile, or wood with waterproof finishes.
Common mistake: Creating steps that are too steep or narrow, which makes the tub difficult and potentially dangerous to access. Steps should be at least 4 inches deep and have gentle, comfortable rises (6-7 inches maximum).
Consider adding built-in seating or wide ledges around the sunken tub's perimeter for candles, bath products, or a book. Incorporate underwater lighting or dimmable overhead fixtures to create ambiance for evening baths. The sunken design provides a cocoon-like feeling that enhances relaxation while making the bathtub a dramatic visual centerpiece.
For more dramatic bathroom upgrades, explore 21 Wood Apartment Bathroom Ideas — natural materials that bring warmth and texture to family bathrooms.
Best for: Large master bathrooms with significant floor space and structural capacity to accommodate the sunken installation—this isn't suitable for small bathrooms or spaces with access limitations.
Safety consideration: Install handrails or grab bars near the steps, especially important for older family members or anyone with mobility concerns. Ensure good lighting around the tub entrance.
Material choice: Choose slip-resistant materials for steps and the tub surround—natural stone with honed finishes, textured tiles, or treated wood with non-slip coatings.
Avoid if you're planning to sell soon—this major renovation may not appeal to all buyers and may not recoup its investment cost in most markets.
What this gives you: A dramatic, spa-like bathing experience that transforms the bathroom into a luxurious retreat and creates lasting memories.
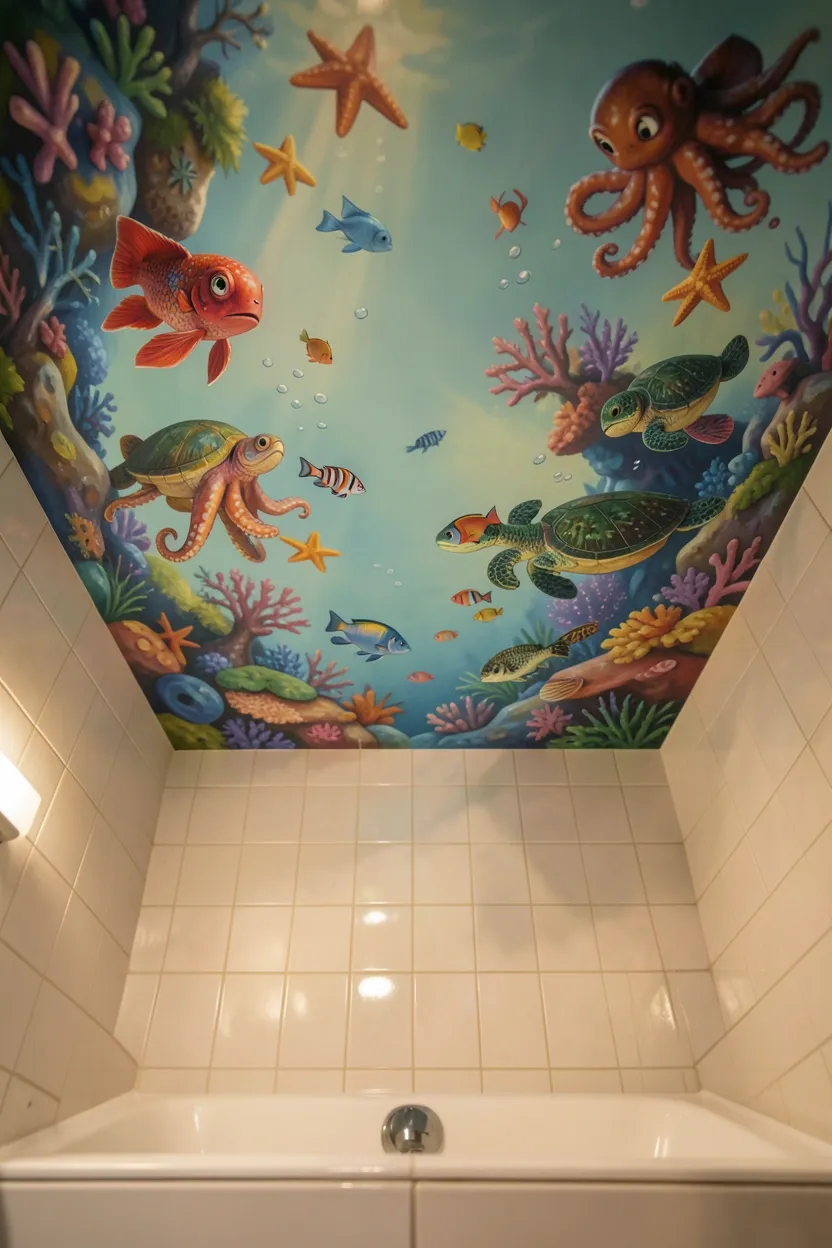
14. Under-Sea Themed Ceiling Mural
Transform the bathroom ceiling into an underwater wonderland inspired by Toca Boca's playful aquatic scenes, creating an immersive experience during bath time. This ceiling mural adds color, movement, and imagination to the typically overlooked "fifth wall" of the room. The design works particularly well above bathtubs and showers, where family members can gaze upward and enjoy the scene.
Recommended
Items for this idea
Commission or create a mural featuring whimsical sea creatures—colorful fish, friendly octopuses, starfish, sea turtles, and coral reefs. Use soft blues and greens as the base background, with vibrant accent colors for the sea life. Consider hiring a professional artist for detailed work, or use stencils and decals for a simpler DIY approach. The mural should scale appropriately to the room size.
Position the mural to create a complete scene when viewed from the bathtub or shower area—the best viewing angle is typically lying down or looking up at a 45-degree angle. Include depth by layering elements, with smaller fish and bubbles in the "distance" and larger creatures closer to the "surface."
Pro tip: Apply a clear topcoat or sealant over the finished mural to protect it from bathroom humidity and make cleaning easier without damaging the artwork.
Budget alternative: Instead of a hand-painted mural, use removable wallpaper or large-scale decals featuring underwater scenes—this creates a similar effect with less commitment and easier removal.
Why it works: Ceiling murals add surprise and delight because they're unexpected—people rarely look up in bathrooms, so discovering artwork overhead creates a magical moment.
Rental-friendly option Use large-scale wall decals or removable wallpaper designed for ceilings—these create dramatic effects without permanent changes or damage to the rental property.
What this gives you: An immersive visual experience that transforms ordinary bath time into an underwater adventure, sparking imagination for children and adults alike.
15. Fold-Down Changing Table
Inspired by Toca Boca's interactive furniture elements, a wall-mounted fold-down changing table provides essential baby care functionality without permanently occupying valuable floor space. This design is perfect for family bathrooms where space is at a premium but safety and convenience remain priorities. When not in use, the table folds flush against the wall, appearing as a decorative element or artwork.
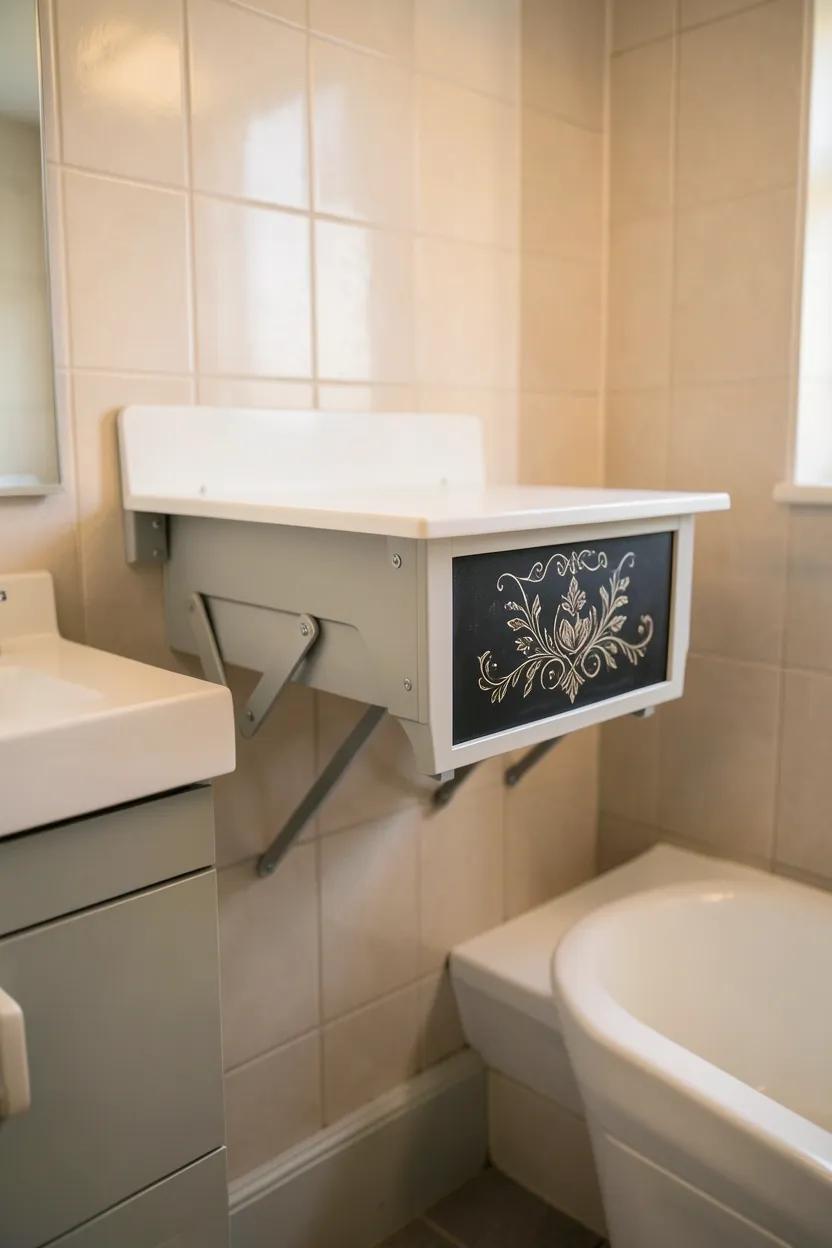
Install a wall-mounted changing station with sturdy folding brackets that can support at least 50 pounds securely. The changing surface should measure 30-36 inches wide and 18-24 inches deep when open. Add safety rails on three sides (or use one wall as the fourth side) and include built-in storage compartments or pockets for diapers, wipes, and essentials.
Placement note: Position the changing table at a comfortable height for the primary caregiver (typically 32-36 inches from the floor) with adequate clearance for opening and closing. Ensure there's good lighting directly above or near the changing station.
When closed, design the visible surface as decorative artwork, a chalkboard, or a mirror to maintain visual appeal when not in use. Choose materials that are waterproof and easy to clean—high-pressure laminate, sealed wood, or moisture-resistant MDF. Consider adding soft-close hinges to prevent the table from slamming shut.
If you're concerned about installation complexity, then purchase a commercially available wall-mounted changing unit rather than building from scratch—these come pre-assembled with tested safety features.
Why it works: This design maximizes utility while minimizing footprint, making small bathrooms feel larger and more flexible as children grow and needs change.
Avoid positioning the changing table near the bathtub or shower where water spray could reach the changing supplies or baby during use.
Budget/time saving instead of a custom installation, use a sturdy wall-mounted shelf with folding brackets and add a waterproof changing pad on top—this creates similar functionality with significantly less cost and effort.
What this gives you: Safe, convenient baby care functionality that doesn't compromise bathroom space, with the flexibility to repurpose the area as children grow.
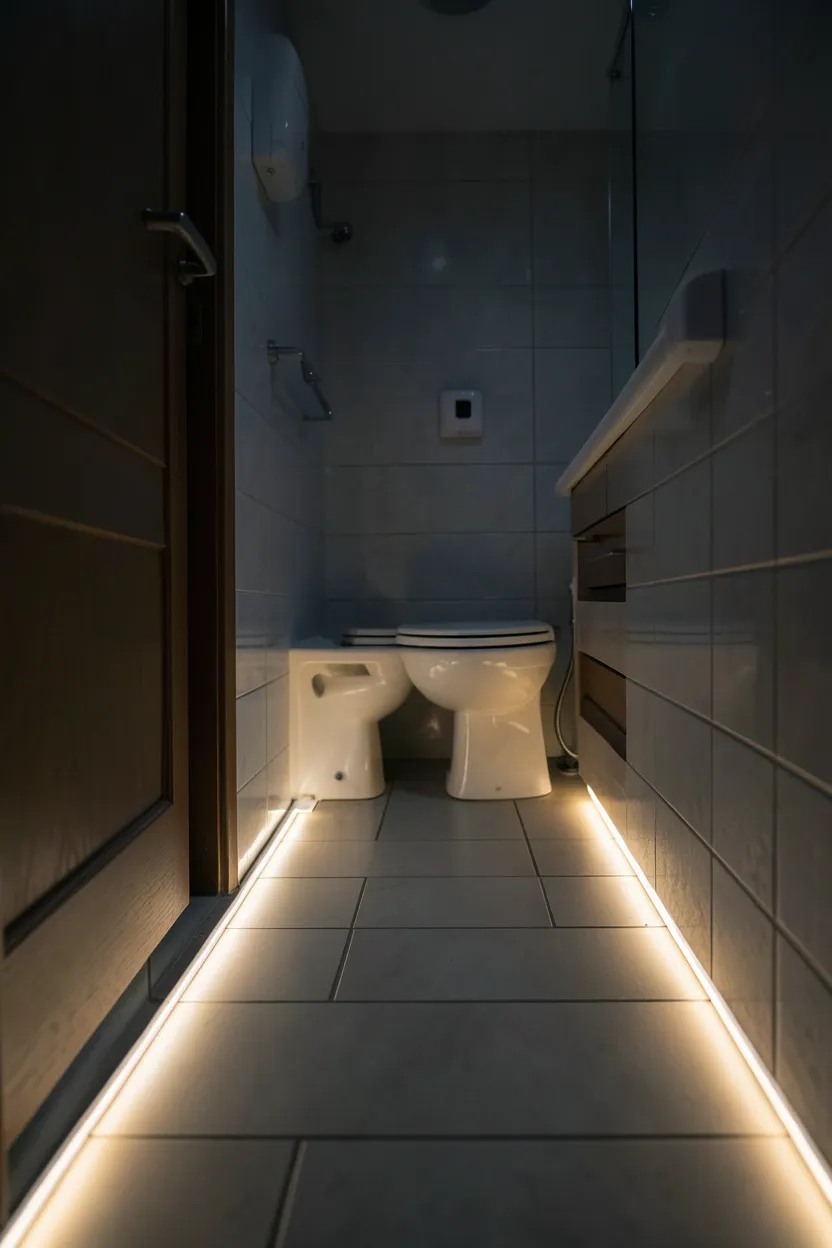
16. Glowing Path Night Lights for Safe Family Bathroom Nights
Inspired by Toca Boca's magical lighting elements, install a pathway of LED strip lights along the bathroom floor that provides soft illumination during nighttime bathroom trips. This concept creates a whimsical, enchanted atmosphere while serving a practical safety purpose—guiding family members safely through the dark bathroom without harsh overhead lighting disrupting sleep.
Recommended
Items for this idea
Install waterproof LED strip lights along the floor or low on walls, creating a path from the bedroom door or hallway to the toilet, vanity, and bathtub areas. Use motion sensors so the lights activate automatically when someone enters, and include timers or dimmers to control brightness. Choose warm white or soft amber LEDs (2700K or warmer) to create a gentle, sleep-friendly glow rather than harsh blue-white light.
Position the pathway lights approximately 6-12 inches above the floor or create a shallow channel in the floor if possible (like a runway light system). The lights should guide family members along safe walking paths, highlighting any obstacles or changes in floor level. Consider creating different colored zones—soft white near the toilet, warmer amber near the tub, etc.
Do: Use waterproof, IP65-rated or higher LED strips and connectors to ensure longevity in the humid bathroom environment. Regular LED strips can fail quickly when exposed to moisture.
Don't: Use bright blue or cool white lights, which can disrupt circadian rhythms and make it harder to fall back asleep after nighttime bathroom visits. Warm tones are always better for overnight lighting.
Pro/Con/Fix: Pro: Adds magical ambiance and improves nighttime safety. Con: Requires electrical work and professional installation. Fix: Use battery-powered motion-sensor LED puck lights for a simpler, rental-friendly alternative that provides similar benefits without wiring.
Rental-friendly alternative Use battery-powered motion sensor LED puck lights or plug-in night lights positioned along the desired pathway—these create a similar effect without permanent electrical modifications.
What this gives you: Safe, gentle nighttime illumination that creates an enchanted atmosphere while helping family members navigate bathroom trips without harsh light exposure.
17. Mini Playhouse Storage Nook
Create a whimsical storage solution inspired by Toca Boca's playhouse elements by building a small, house-shaped storage nook in an unused bathroom corner or alcove. This design transforms storage from a chore into a delightful experience, especially for children who can store bath toys and essentials in their own mini house. The house shape adds architectural interest and serves as decorative art.
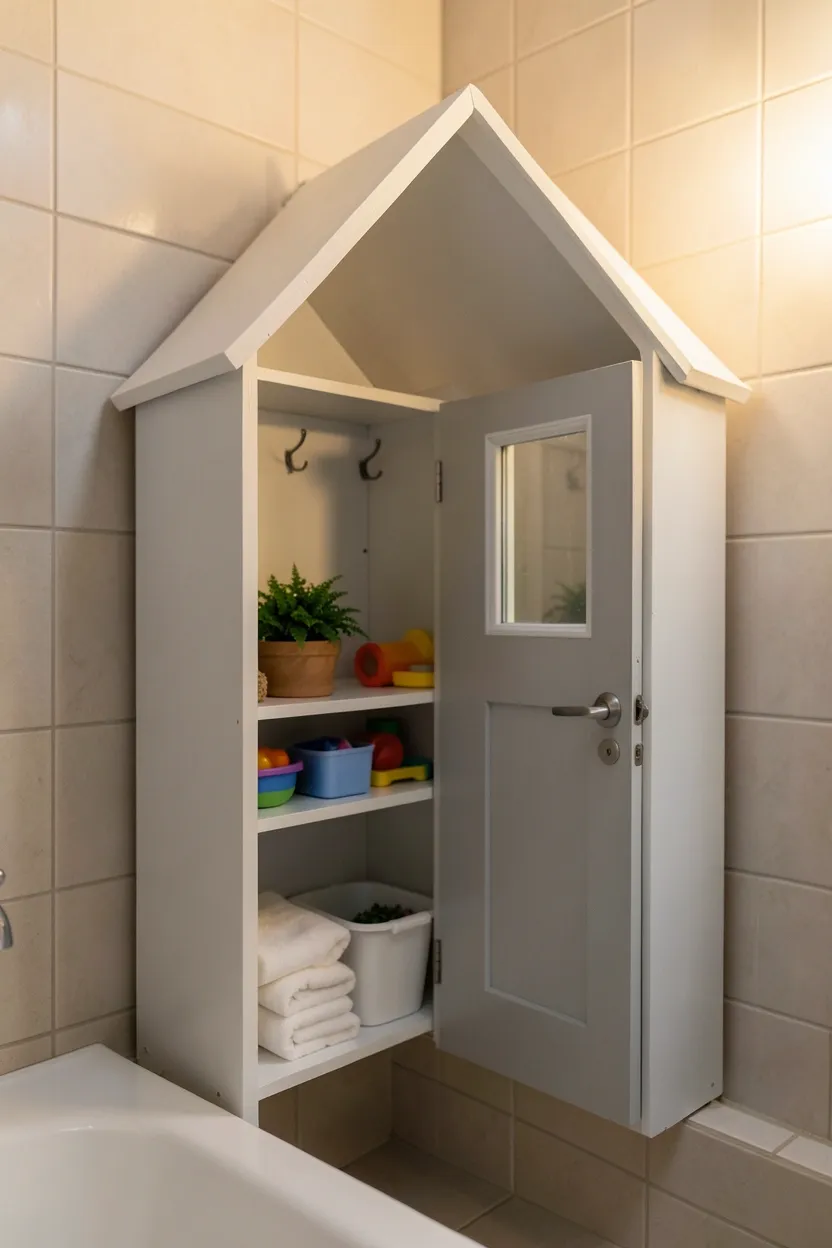
Build a simple house-shaped structure measuring 36-48 inches wide and 48-60 inches tall, featuring a pitched roof, a working door, and possibly windows. Use moisture-resistant materials like painted MDF, plywood with waterproof finish, or repurposed furniture modified for bathroom use. Include shelves, hooks, and bins inside for organized storage of bath toys, towels, and toiletries.
Common mistake: Making the playhouse too large or elaborate, which can overwhelm small bathrooms and feel claustrophobic. Keep the design scaled to the space—smaller, charming houses work better than oversized structures.
Position the playhouse nook in a corner or along a wall where it doesn't block essential pathways or fixtures. The house shape can serve as a room divider, separating vanity areas from bathing zones. Consider adding a small "garden" element with artificial plants or a small waterproof shelf for decorative items to enhance the playhouse theme.
If you're concerned about structural integrity in humid conditions, then use waterproof marine-grade plywood or high-quality moisture-resistant MDF with multiple coats of waterproof paint or polyurethane.
Why it works: The playhouse concept makes storage fun and engaging for children, encouraging them to keep their bath area organized while adding unique character to the bathroom.
Avoid placing the playhouse nook in areas directly exposed to shower spray or standing water, which can quickly damage wood-based materials.
Rental-friendly alternative Use a freestanding decorative cabinet or shelf unit with a house-shaped front or add removable vinyl decals that create a house-like appearance on existing storage furniture.
What this gives you: An engaging storage solution that turns organization into play, adds unique architectural character to the bathroom, and creates a special space children love.
These 17 Toca Boca Family House bathroom ideas prove that playful design and practical functionality can coexist beautifully. Whether you choose to implement a single concept or combine several elements, the key is maintaining balance—infusing spaces with creativity and joy while ensuring the bathroom remains functional and livable for the entire family. Start with smaller projects like magnetic walls or colorful accents to test the waters before committing to larger installations like sunken tubs or custom-built storage solutions. Remember that the best designs are those that reflect your family's personality and make daily routines feel special, turning ordinary moments into extraordinary memories.
About the author
OBCD
CGI visualization and interior design content. We create detailed 3D renders and curate practical design ideas for every room in your home.