21 Shabby Chic Kitchen Ideas for a Warm Cottage Feel
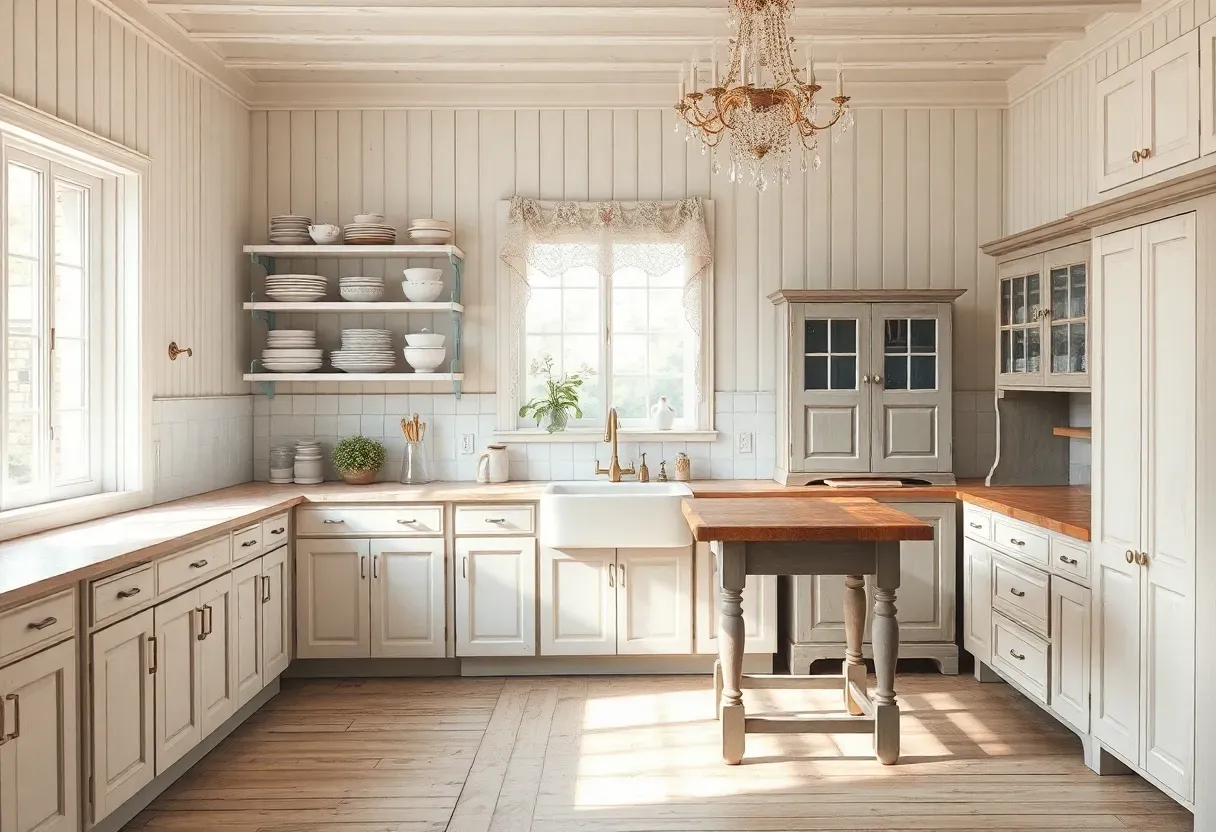
Picture this: morning light filtering through lace curtains, the soft clink of vintage china, and countertops that tell stories of generations past. These shabby chic kitchen ideas capture that perfect balance between lived-in comfort and refined elegance—where distressed wood meets delicate florals, and every scratch feels intentional rather than accidental. Best of all, most of these approaches work beautifully in rental apartments and small spaces without requiring a single permanent change.
The beauty of shabby chic lies in its forgiving nature. Unlike ultra-modern kitchens that demand perfection, this style celebrates imperfections as character marks. A chipped enamel sink becomes a focal point, not a flaw. Mismatched chair rails add personality rather than chaos. It's a design philosophy that welcomes real life—spilled flour, afternoon tea parties, and the inevitable wear that comes from a kitchen truly lived in.
What sets shabby chic apart from pure vintage or farmhouse styles is its deliberate softness. Think muted pastels over bold primaries, aged patinas over glossy finishes, and open shelving that invites display rather than concealment. The result feels like stepping into a French countryside cottage, even if you're in a suburban townhouse.
Below, I've gathered 21 shabby chic kitchen ideas that range from subtle vintage touches to full cottage transformations. Each approach works with different budgets, space constraints, and commitment levels—so whether you're ready for a complete overhaul or just want to test the waters with a few strategic updates, you'll find your starting point here.
Quick FAQ
Does shabby chic mean everything needs to look old and worn?
Not at all. Authentic shabby chic balances aged elements with fresh touches—think new linen curtains paired with a vintage hutch, or a refinished antique table alongside modern appliances. The goal is curated imperfection, not neglect.
Can I combine shabby chic with modern appliances without breaking the aesthetic?
Absolutely. Choose appliances in muted tones (cream, soft gray, matte black) or panel them with beadboard to blend seamlessly. The contrast between vintage surfaces and functional modernity actually enhances the "lived-in cottage" feel.
What's the difference between shabby chic and farmhouse style?
Farmhouse leans rustic and utilitarian with raw wood and industrial metals, while shabby chic emphasizes softness—distressed painted finishes, floral accents, and romantic details like chandeliers and lace. Shabby chic is farmhouse's more delicate, feminine cousin.
Table of Contents
- Distressed White Cabinets with Glass Panel Inserts
- Vintage Apron-Front Sink with Exposed Plumbing
- Open Shelving with Mismatched Vintage Dishware Display
- Butcher Block Countertops with Worn Patina
- Vintage Crystal Chandelier Over the Island
- Subway Tile Backsplash with Aged Grout Lines
- Freestanding Antique Hutch for Storage and Display
- Lace or Linen Café Curtains on Windows
- Mismatched Vintage Bar Stools at the Island
- Painted Wood Floors in Soft Gray or White
- Vintage Bread Boxes and Canisters on Counters
- Plate Racks Mounted on Walls for Display
- Vintage Scale or Stand Mixer as Counter Décor
- Beadboard Paneling on Cabinet Fronts or Walls
- Reclaimed Wood Open Shelving with Iron Brackets
- Floral Vintage Wallpaper on One Accent Wall
- Farmhouse Table as Kitchen Island Alternative
- Exposed Brick or Whitewashed Brick Feature Wall
- Vintage Aprons and Linens Displayed on Hooks
- Copper Pots and Pans Hanging from Pot Rack
- Soft Pastel Color Accents Throughout the Space
1. Distressed White Cabinets with Glass Panel Inserts
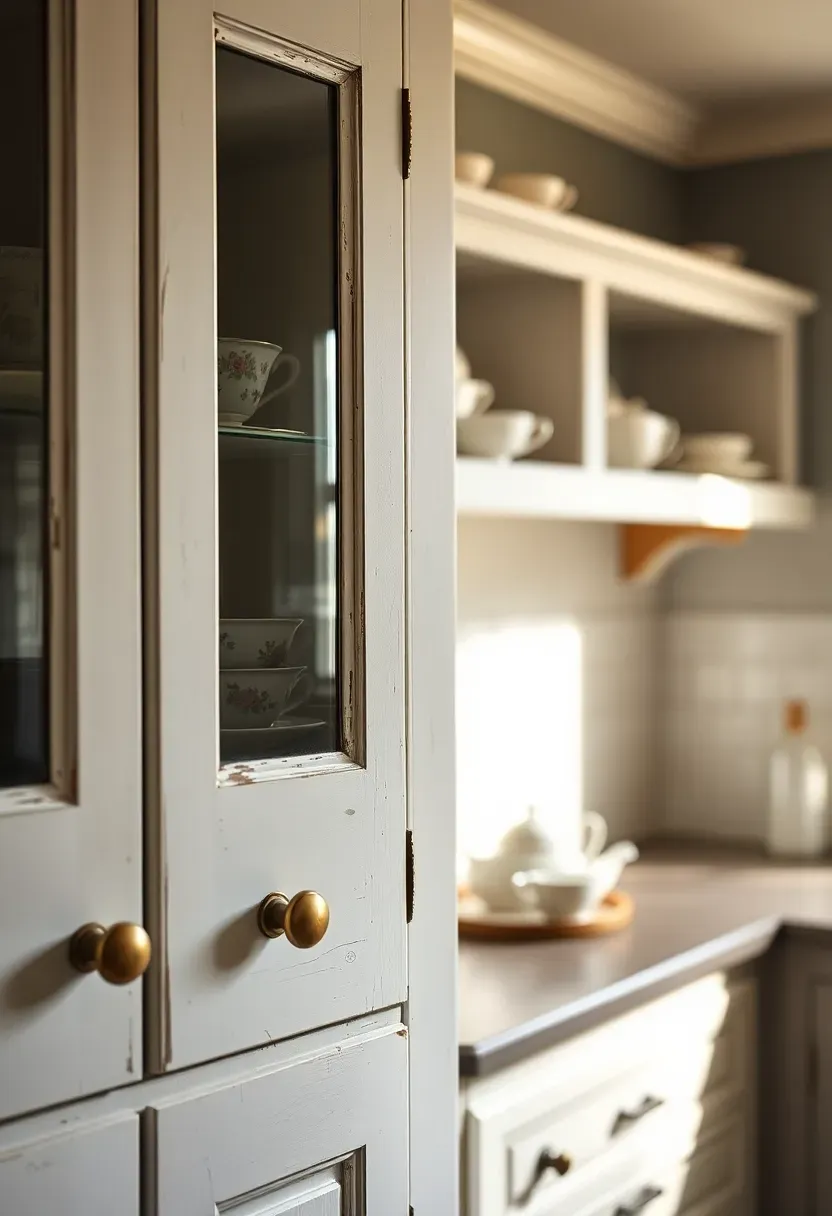
The foundation of any shabby chic kitchen starts with cabinetry that feels like it's weathered decades of loving use. Distressed white cabinets strike that perfect balance—formal enough for entertaining, casual enough for flour-dusted weekday baking. Glass panel inserts elevate the look beyond simple painted wood, offering glimpses of vintage dishware while maintaining the airy openness that defines cottage style.
The distressing technique matters more than you might think. True shabby chic avoids uniform sanding—focus wear on cabinet edges, corners, and handles where natural aging would occur. Use 120-grit sandpaper after your top coat dries, revealing hints of raw wood or an underlying layer of sage or gray. The glass panes work best as wavy antique glass or seeded glass rather than perfectly clear panels, adding that crucial layer of imperfection.
Unlike stark modern white kitchens, shabby chic cabinets benefit from slightly off-white tones—ivory, cream, or white with a hint of gray undertone. Pair them with brass or porcelain knobs (avoid sleek chrome) and consider removing a few upper cabinet doors entirely to create open shelving zones.
Do: Sand after painting (not before) to control exactly where distressing appears.
Don't: Use heavy-duty paint stripper if you want a subtle worn look—it removes too much too quickly.
Best for: Kitchens with good cabinet bones but outdated finishes; renters can achieve a similar look with peel-and-stick beadboard wallpaper on cabinet doors.
What this gives you: A kitchen that feels collected over time rather than purchased in a single showroom visit—the cornerstone of authentic shabby chic design.
We picked a few things that go well with this idea: yarlung Set Kitchen Canisters Airtight Lids, (★4.5), Rustic Vintage (★4.7) and Laura Ashley 3pc Canister Set China (★4.8). As an Amazon Associate we earn from qualifying purchases.
2. Vintage Apron-Front Sink with Exposed Plumbing
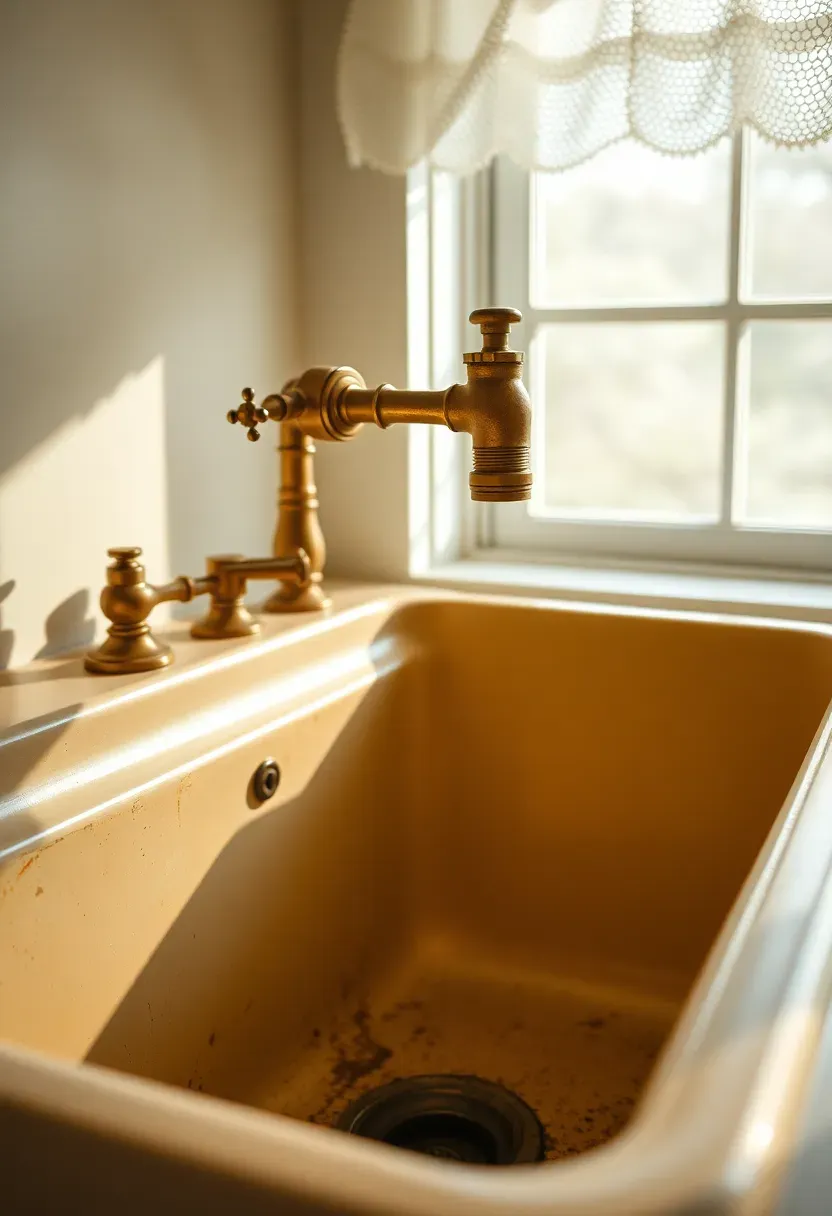
Nothing anchors a shabby chic kitchen quite like a deep apron-front sink that makes modern drop-ins look anemic by comparison. These farmhouse-style basins—typically 8-10 inches deep versus the standard 6—offer serious functionality wrapped in nostalgic charm. When you pair the sink with intentionally exposed chrome or brass plumbing, you create a focal point that feels honest and unpretentious, like the kitchen equivalent of rolled-up sleeves.
The magic happens in the material choices. Fireclay sinks develop a soft patina over time, while cast iron with a porcelain coating offers that classic look with modern durability. Avoid ultra-bright white; opt instead for warm cream or even pale blue for a true cottage feel. The exposed plumbing shouldn't look like an afterthought—vintage-style bridge faucets with cross handles and a gooseneck spout complete the aesthetic without sacrificing spray functionality.
Placement note: Position the sink under a window if possible, ideally with a vintage lace valance or café curtains that soften the view without blocking natural light.
Common mistake: choosing a sink that's too shallow for actual use. Shabby chic should never sacrifice function for form—a proper apron sink handles oversized pots and eliminates backsplash by containing splashes within its deep basin.
If you have dark countertops: Then choose a cream or off-white sink to create that essential contrast.
If your plumbing is outdated: Then swap just the faucet and leave original shut-off valves visible—instant vintage authenticity.
If you're on a budget: Then retrofit a drop-in sink with a wooden apron panel attached to the cabinet front.
What this gives you: A hardworking centerpiece that elevates dishwashing from chore to ritual, with enough character to anchor your entire kitchen's aesthetic.
We picked a few things that go well with this idea: Vintage Ceramic Cabinet (2-Pack) (★4.6), Vintage Brass Cabinet (5-Pack) (★4.8) and Vintage Ceramic Cabinet (12-Pack) (★4.6). As an Amazon Associate we earn from qualifying purchases.
3. Open Shelving with Mismatched Vintage Dishware Display
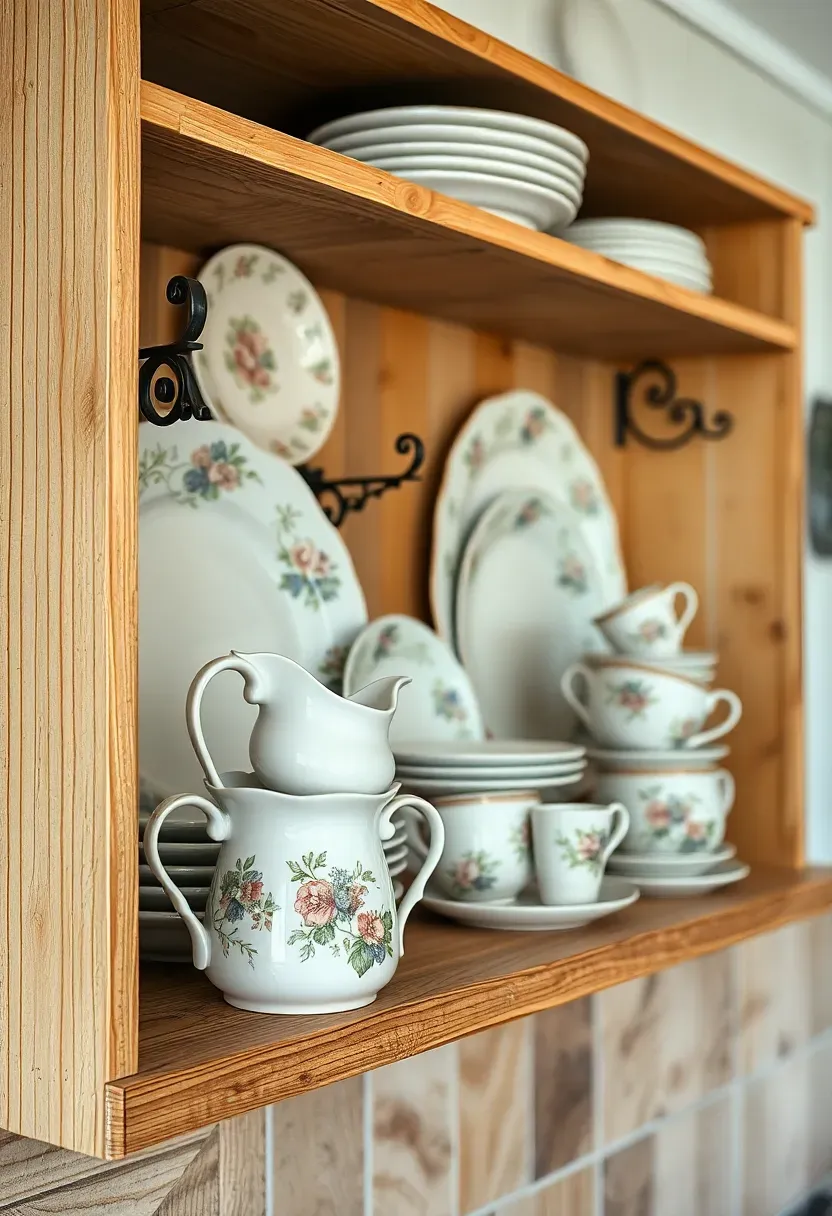
Open shelving transforms your everyday dishes into rotating gallery art, and in shabby chic kitchens, the "mismatched" part is entirely the point. Rather than concealing your collection behind closed doors, this approach celebrates the charm of accumulated pieces—the floral teacup inherited from your grandmother, the transferware platter from a flea market, the ironstone pitcher you couldn't resist. Each item tells a story, and the shelving gives them a stage.
Why it works: Open shelves force you to curate what you keep, naturally editing down to pieces you actually love and use. The visual breaks created by varying plate sizes, pitcher heights, and bowl depths add organic rhythm that uniform cabinet doors can't match.
Bracket style matters enormously here. Skip modern minimalist brackets in favor of ornate cast iron or distressed wooden corbels with decorative curves. Install 10-12 inch deep shelves in reclaimed or lightly stained wood—pine, oak, or even painted boards that show wear at the edges. Arrange dishware in loose clusters rather than rigid lines: stack 3-4 plates of different patterns, lean a cutting board behind them, tuck a small vase in front.
Rotate seasonally: swap heavy ironstone for delicate florals in spring, add copper mugs in fall.
Use plate stands to display your prettiest pieces vertically rather than stacking them invisibly.
Accept that open shelving requires light dusting weekly—consider it part of the ritual, not a burden.
Avoid if: You have small children who can reach lower shelves, or if you cook with heavy grease that creates sticky film (install a strong range hood first).
What this gives you: A kitchen that feels personal and collected rather than catalog-perfect, with the practical bonus of keeping your most-used pieces within easy reach.
We picked a few things that go well with this idea: Sweet Home Collection Old World Style (★4.5), Vintage Farmhouse (★4.7) and ALIGOGO Lace Kitchen Curtains inches Length (★4.8). As an Amazon Associate we earn from qualifying purchases.
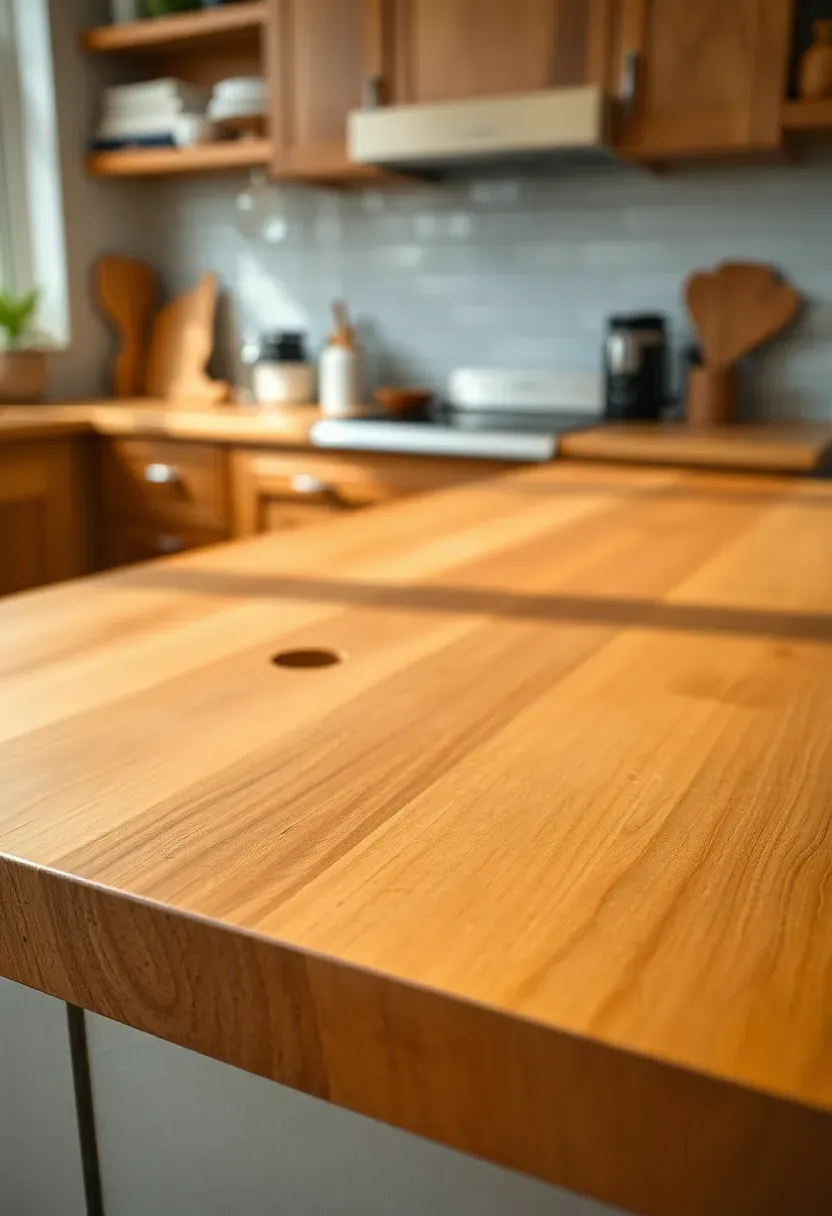
4. Butcher Block Countertops with Worn Patina
Butcher block countertops bring warmth that cold stone and sterile laminate simply can't match—the kind of warmth you feel under your palms when you're kneading bread dough or rolling pie crust. In shabby chic kitchens, the goal isn't pristine wood grain but rather a lived-in surface that shows knife marks, water rings, and the natural darkening that comes from years of use. These "imperfections" are actually proof of life, visual evidence that your kitchen is a workspace, not a showroom.
The wood species changes the entire mood. Maple offers a lighter, more uniform appearance that works well in small kitchens, while walnut brings deeper tones that anchor larger spaces. Oak sits in the middle with pronounced grain that adds texture even before any wear develops. For authentic shabby chic, avoid ultra-smooth finishes—opt for a matte oil treatment that penetrates the wood rather than sitting on top like polyurethane.
Common mistake: treating butcher block like it's precious museum-quality furniture. The beauty comes from using it freely—chopping directly on the surface, setting down hot pans briefly, letting water spots happen. Monthly oiling (mineral oil or beeswax blend) takes 10 minutes and keeps the wood from drying out while deepening that coveted patina.
Pro: Butcher block is endlessly repairable—sand out deep stains or burns and re-oil.
Con: Needs more maintenance than granite (monthly oiling versus annual sealing).
Fix: Install just an island or peninsula in butcher block if full counters feel too high-maintenance.
What this gives you: A tactile, forgiving work surface that gets better with age rather than worse, perfectly embodying the shabby chic philosophy of celebrating wear as character.
Recommended
Items for this idea
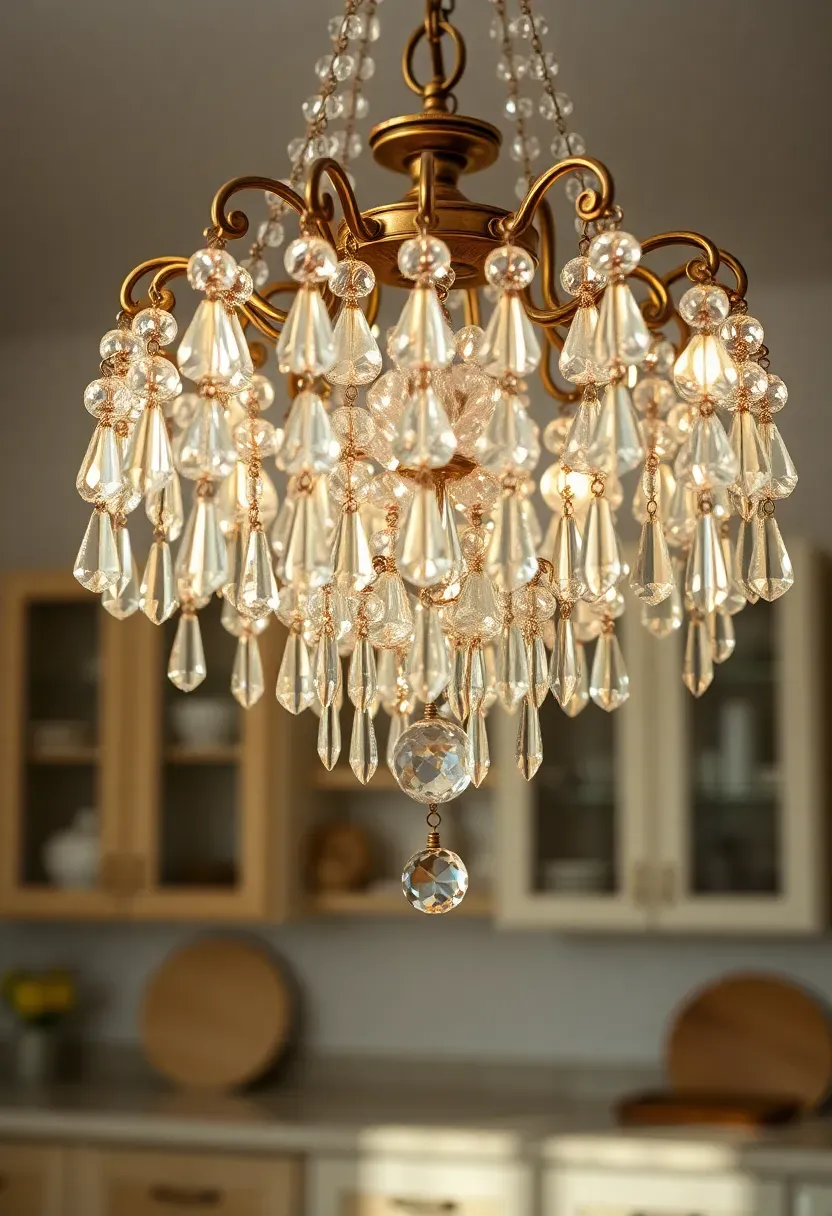
5. Vintage Crystal Chandelier Over the Island
Here's where shabby chic departs most dramatically from utilitarian farmhouse style: the unapologetic elegance of a crystal chandelier hanging over a kitchen workspace. This isn't about practicality (though dimmer switches make it surprisingly functional)—it's about bringing unexpected refinement to a space usually dominated by task lighting and recessed cans. The contrast between sparkling crystals and flour-dusted counters creates exactly the high-low tension that defines successful shabby chic design.
Scale is everything. A chandelier that's too small reads as timid; too large overwhelms the space and creates head-bumping hazards. Measure your island length and aim for a fixture that's one-half to two-thirds that dimension. Hang it 30-36 inches above the countertop—low enough to create intimacy but high enough for sightlines across the kitchen. The fixture itself should show age: look for brass that's tarnished rather than polished, or painted iron with chipped white or cream finish.
Placement note: Center the chandelier over the island's longest dimension, not necessarily over the room's center—this keeps the visual weight balanced where you actually work.
Don't worry if not every crystal matches or if the wiring looks slightly tired—these quirks add authenticity. Pair the chandelier with Edison bulbs or low-wattage incandescent for warm, flattering light that makes evening meal prep feel less like a chore and more like a choice.
If you don't have an island: Then hang the chandelier over your dining table or breakfast nook within the kitchen footprint.
If your ceilings are low (under 8 feet): Then choose a flush-mount crystal fixture to get the glamour without the headache.
If cleaning seems daunting: Then mist with a vinegar-water solution monthly and accept some dust as part of the vintage charm.
What this gives you: A conversation-starting focal point that elevates your kitchen from purely functional to genuinely special—the kind of detail guests remember long after they've forgotten what you served.
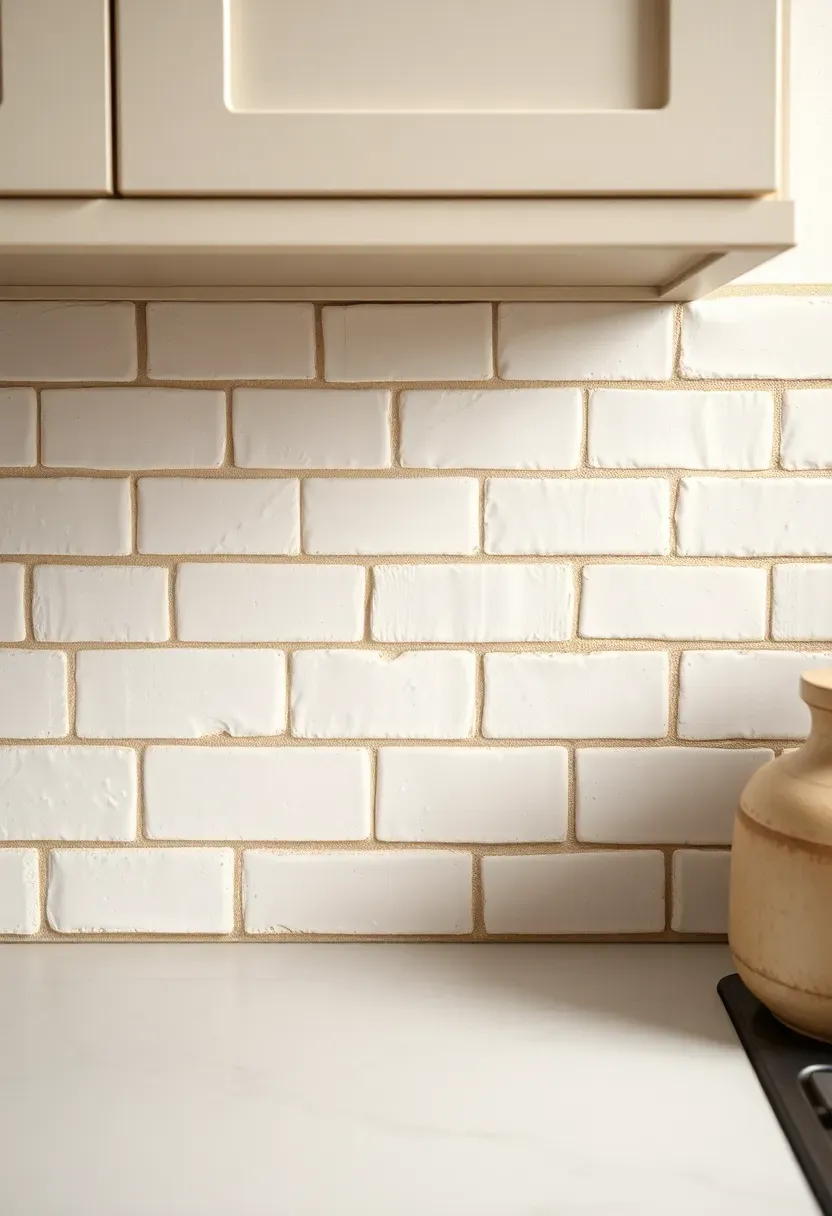
6. Subway Tile Backsplash with Aged Grout Lines
Classic white subway tile might seem too simple for shabby chic, but it's actually the perfect neutral backdrop—provided you resist the urge to keep it pristine. The magic lies in choosing handmade or irregular tiles with subtle surface variations, then pairing them with grout that looks like it's been there for decades rather than days. This isn't about creating actual dirt; it's about embracing the warm, lived-in quality that stark white grout can never achieve.
Skip bright white grout entirely. Instead, choose soft gray, taupe, or even a warm beige that reads as naturally aged. The tiles themselves should have slight thickness variations (handmade Mexican or Portuguese tiles work beautifully), or consider beveled subway tiles that catch light differently throughout the day. Install them in classic running bond pattern, but avoid perfectly aligned rows—slight irregularities in spacing add to that collected-over-time feel.
Why it works: subway tile provides clean, wipeable protection behind your stove and sink without competing visually with more ornate elements like open shelving or a statement sink. The neutral field lets colorful dishware and vintage accessories take center stage.
For extra authenticity, extend the tile only partway up the wall (18-24 inches above counters) rather than all the way to the cabinets. Finish the top edge with a slim wooden trim piece painted to match your cabinets—a detail common in early 20th-century kitchens that modern installations often skip.
Mix tile batches deliberately to get natural color variation across your backsplash.
Use unsanded grout for the thinner grout lines typical of subway tile (less than 1/8 inch).
Seal grout with a matte (not glossy) sealer to maintain the aged appearance while still protecting against stains.
What this gives you: A timeless, low-maintenance backsplash that grounds flashier elements and creates visual breathing room in a busy kitchen.
Recommended
Items for this idea
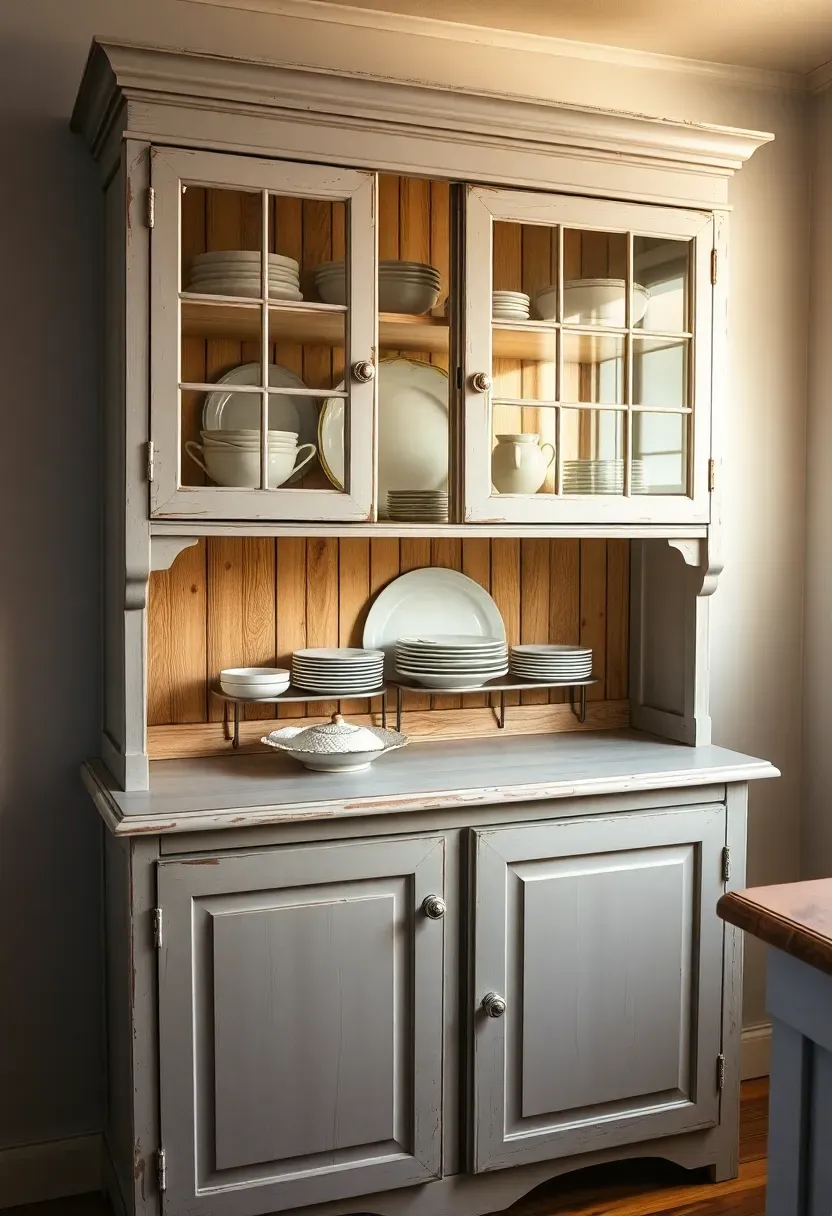
7. Freestanding Antique Hutch for Storage and Display
Built-in cabinetry dominates modern kitchens, but shabby chic embraces the flexibility and character of freestanding furniture pieces. An antique hutch—whether you score it from an estate sale, inherit it from family, or find it at a salvage yard—brings instant history that no custom millwork can replicate. The beauty is in its completeness: closed storage below for everyday items, open shelving or glass-front cabinets above for your prettiest pieces, and often a work surface at a comfortable height between the two sections.
Common mistake: choosing a hutch that's too large for your space. Measure carefully, accounting for door clearance and walking paths. A piece that's 36-48 inches wide works in most kitchens without overwhelming the room, while 60+ inches needs a dedicated wall. The ideal hutch has some architectural detail—carved corbels, beadboard backing, or decorative crown molding—but avoid anything too ornate that crosses into formal dining room territory.
The finish should show age but not damage: look for paint that's naturally worn at edges and handles, stable joints, and drawers that still slide smoothly. If you find a structurally sound piece in an unfortunate finish, a chalk paint refresh in cream, soft gray, or even pale aqua can transform it while still honoring its vintage bones. Keep hardware original if possible, or swap for period-appropriate pulls.
Do: Use the hutch top for small appliances you want accessible but not constantly displayed (mixer, toaster).
Don't: Cram every shelf full—negative space is crucial to the collected, curated look.
Rental note: Freestanding furniture is the ultimate renter-friendly upgrade—it moves with you and requires zero landlord approval.
What this gives you: Flexible storage that adds layers of texture and history, plus the freedom to rearrange your kitchen layout whenever the mood strikes.
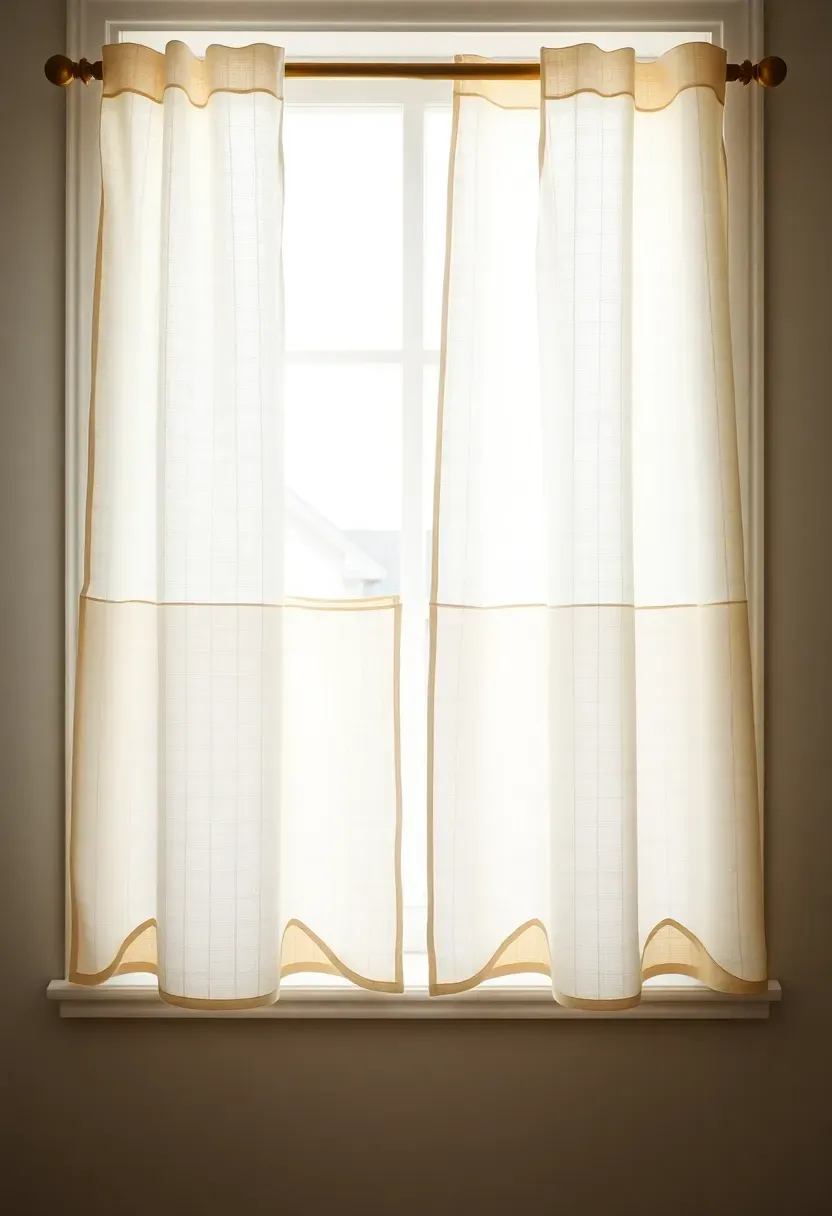
8. Lace or Linen Café Curtains on Windows
Café curtains—those short panels that cover only the lower half or third of a window—solve a uniquely kitchen problem: maintaining privacy from neighbors or passersby while preserving natural light from above. In shabby chic spaces, they add an essential layer of softness that hard surfaces like tile and wood can't provide. The gentle movement when you open a window, the way morning light filters through vintage lace patterns—these tactile, visual details separate a truly inviting kitchen from one that just looks nice in photos.
Material choice sets the entire mood. Crisp white linen offers a cleaner, slightly more modern take that still honors cottage roots, while antique lace (or convincing reproductions) leans fully into romantic nostalgia. Look for panels with scalloped edges, eyelet patterns, or delicate floral embroidery. Avoid anything too heavy or structured—these curtains should puddle slightly on the windowsill rather than hanging stiffly like formal drapery.
Placement note: Hang café curtains at the midpoint of your window or two-thirds up, using a slim tension rod or a vintage-style swing arm rod mounted inside the window frame.
Why it works: the contrast between soft fabric and hard kitchen surfaces creates visual balance. Bare windows can feel cold and exposed, while full-length curtains in a kitchen feel impractical and collect cooking grease. Café curtains hit the sweet spot.
If you have a window over the sink: Then choose linen over lace to avoid water spots and splashes.
If your kitchen gets strong afternoon sun: Then use a double layer (sheer white underneath, patterned linen on top).
If you rent: Then use spring-tension rods that leave zero damage when you move.
What this gives you: Privacy without sacrifice of light, plus a subtle nod to European cottage style that makes even a suburban kitchen feel transported.
Recommended
Items for this idea
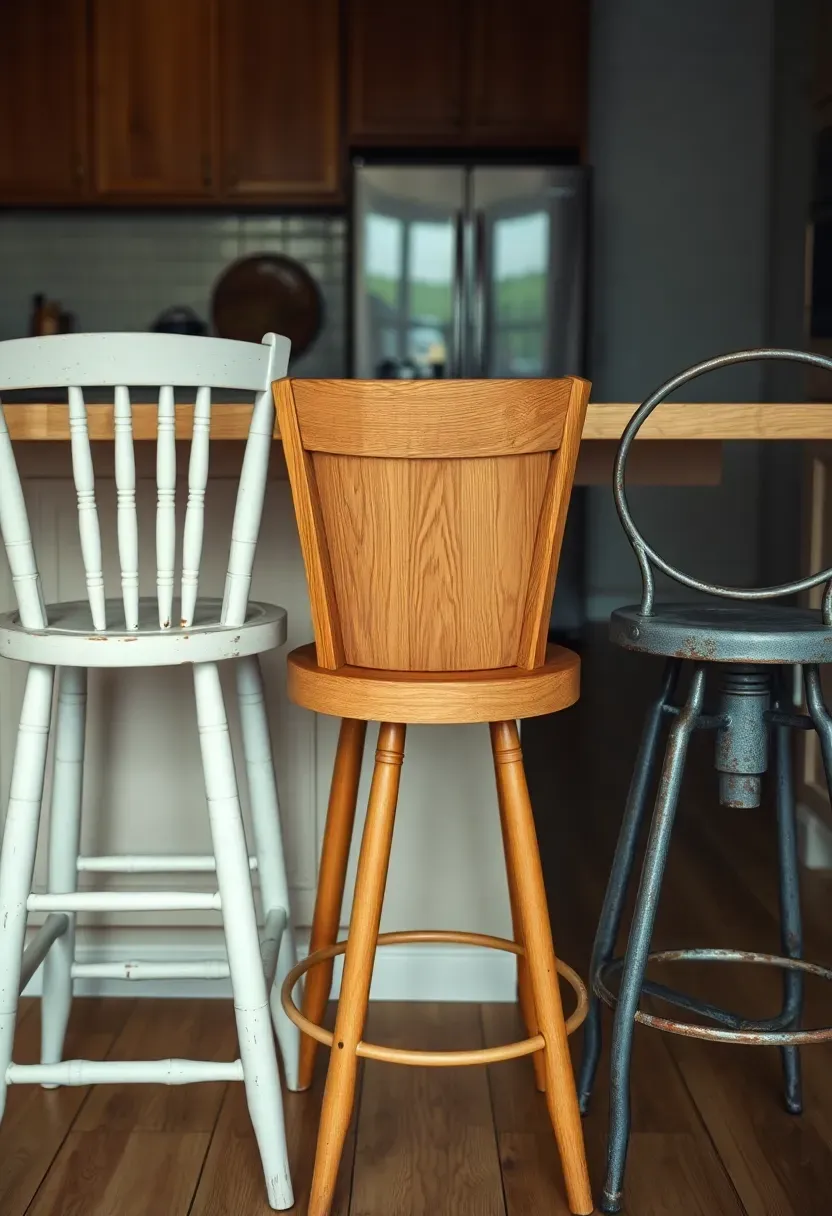
9. Mismatched Vintage Bar Stools at the Island
Forget matching sets from the furniture store—shabby chic thrives on the collected-over-time look of intentionally mismatched seating. Vintage bar stools, each with their own history and personality, turn a kitchen island from utilitarian workspace into a gathering spot that invites lingering. The key is finding pieces that vary in style but share a common thread: similar height, complementary color palette, or a unified finish like distressed paint or natural wood.
The hunt is half the fun. Scout flea markets, estate sales, and online marketplaces for industrial metal stools with wooden seats, painted farmhouse-style stools with spindle backs, or simple backless rounds that tuck completely under the island overhang. Seat height should be 10-12 inches below your island countertop (typically 24-26 inch seats for a 36 inch counter, or 28-30 inch seats for a 42 inch bar-height counter).
Why it works: uniform seating can feel sterile and hotel-like, while thoughtful mismatching adds visual interest and conversation starters. Each stool becomes a minor focal point, and the varied silhouettes create a more dynamic line than identical profiles repeated.
Avoid randomly mixing wildly different styles—that crosses into chaotic rather than curated. Instead, establish rules: maybe three stools are painted white but have different back styles, or all four are natural wood but in different species and shapes. Unity with variety is the goal.
Test comfort before committing—vintage stools often have narrower seats than modern ones.
Add cushions tied with linen ribbons for extra comfort and a hit of pattern or color.
Refinish only what's necessary; leave patina and wear marks intact where the stool is structurally sound.
Budget hack: Buy cheap stools in good shapes but ugly finishes, then unify them with a coat of the same chalk paint while letting individual details (turned legs, different backs) remain distinct.
What this gives you: Seating that feels personal and intentional, reflecting your taste and treasure-hunting prowess rather than a catalog page number.
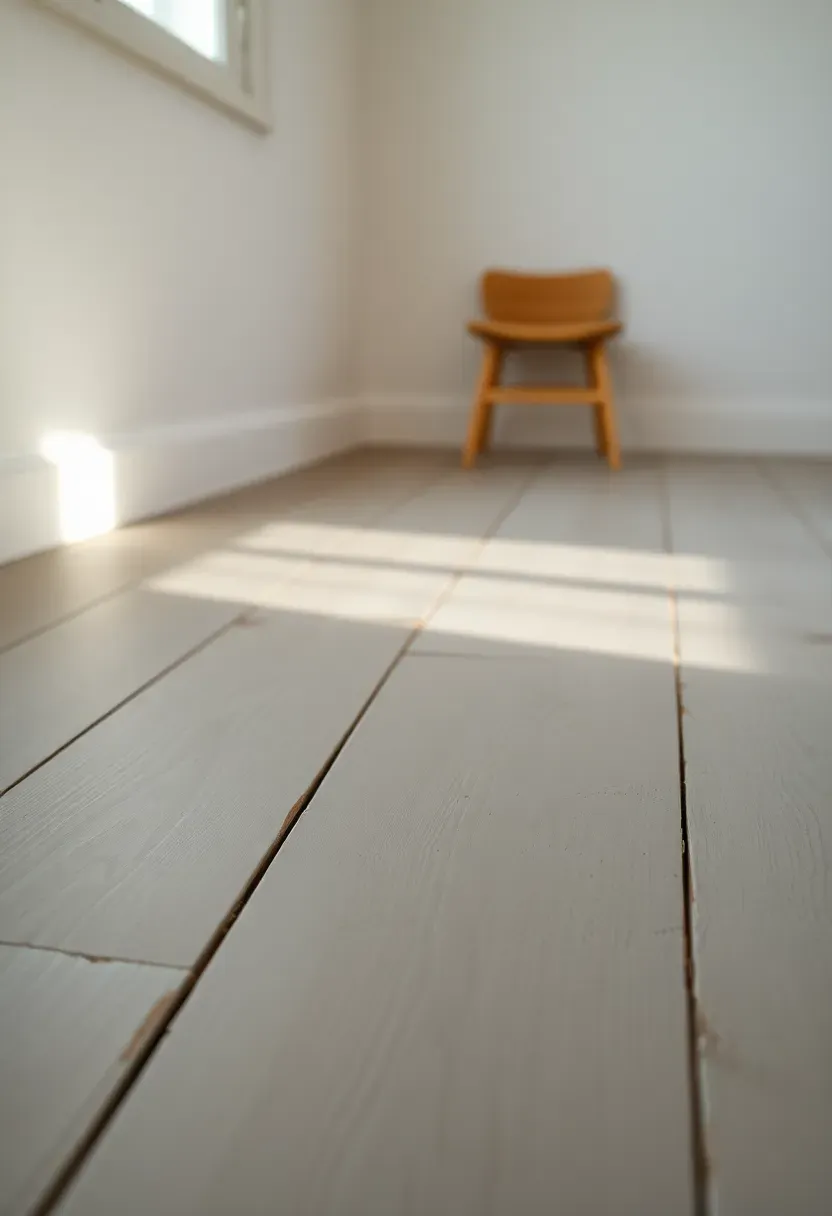
10. Painted Wood Floors in Soft Gray or White
Painted wood floors bring an unexpected elegance to kitchens, especially when done in the soft, chalky tones that define shabby chic. Rather than the darkness of traditional stained hardwood or the clinical brightness of white tile, painted floors in gentle gray, warm cream, or weathered white create a luminous base that makes the entire room feel larger and lighter. The slight wear that develops over time—paint thinning at high-traffic areas, revealing hints of wood underneath—adds to the charm rather than detracting from it.
This approach works particularly well for older homes with original but damaged hardwood that would cost a fortune to refinish properly. A coat or two of porch and floor paint (which stands up to foot traffic better than wall paint) can transform scratched, stained, or mismatched boards into a cohesive, cottage-worthy foundation. Choose a matte or eggshell finish rather than high-gloss; the slight sheen is practical for cleaning while maintaining that soft, aged quality.
Common mistake: expecting painted floors to stay pristine. The beauty of this look depends on embracing wear—scuff marks from chair legs, slight fading near windows, the gradual patina of daily life. If you're someone who stresses over every mark, stick with stained wood or tile.
For added interest, consider a painted pattern: classic checkerboard in two shades of gray, wide stripes running the room's length, or even a stenciled border along the edges. These details reference historic floor treatments and elevate the space beyond simple painted planks.
Pro: Budget-friendly transformation of damaged floors without sanding or refinishing.
Con: Requires repainting every 3-5 years in high-traffic kitchens.
Fix: Use water-based polyurethane over the paint for extra durability, reapplying annually in heavy-wear zones.
What this gives you: A bright, airy foundation that makes cabinets and furnishings pop, with a distinctly European cottage feel that's both elegant and approachable.
Recommended
Items for this idea
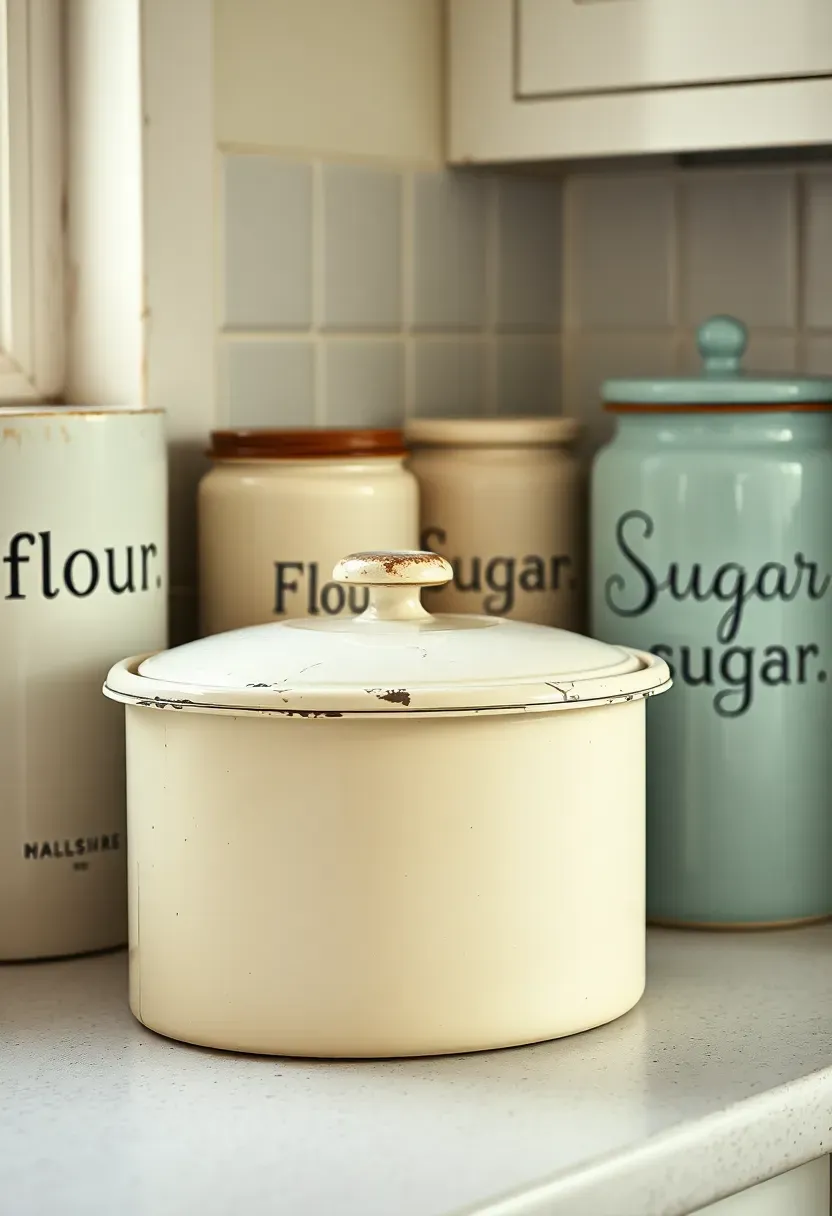
11. Vintage Bread Boxes and Canisters on Counters
The minimalist mantra of "clear all counters" doesn't apply in shabby chic kitchens, where carefully chosen functional objects double as décor. Vintage bread boxes and canister sets—especially those in enamelware, ceramic, or painted metal—bring both practical storage and visual warmth to counter surfaces. Rather than hiding everything in cabinets or stashing items in modern acrylic bins, this approach celebrates the beauty of everyday objects that have served kitchens for generations.
Look for enamelware pieces in cream, pale blue, or mint green with those characteristic chips and dings that prove decades of use. Metal bread boxes with roll-top lids or hinged doors add sculptural interest, especially when they've developed a gentle rust patina or worn painted finish. Ceramic canisters (often labeled "Flour," "Sugar," "Tea," "Coffee") work best as a mismatched set rather than a perfect lineup—different heights, complementary but not identical patterns, unified by similar color tones or shared vintage era.
Placement note: Group these pieces in a loose cluster near your primary baking area—beside the mixer, near the oven, or at the end of your main work counter where they're accessible but not in the way of daily meal prep.
The key is using them for their intended purpose, not just as props. Fill canisters with the items they name, use the bread box for actual bread or baked goods, and let the gentle wear of opening and closing lids add to their authenticity. Empty vintage containers feel staged; actively used ones feel like they belong.
If your counters are busy: Then limit yourself to 3-5 pieces in a single zone rather than scattering them everywhere.
If you need pest-proof storage: Then use vintage containers for dry goods but transfer flour/sugar from original bags into sealed plastic inside the canisters.
If you're budget-conscious: Then mix one or two authentic vintage finds with affordable reproduction pieces—no one will spot the difference.
What this gives you: Functional storage that adds layers of texture and color, making your kitchen feel curated and personal rather than sterile or generic.
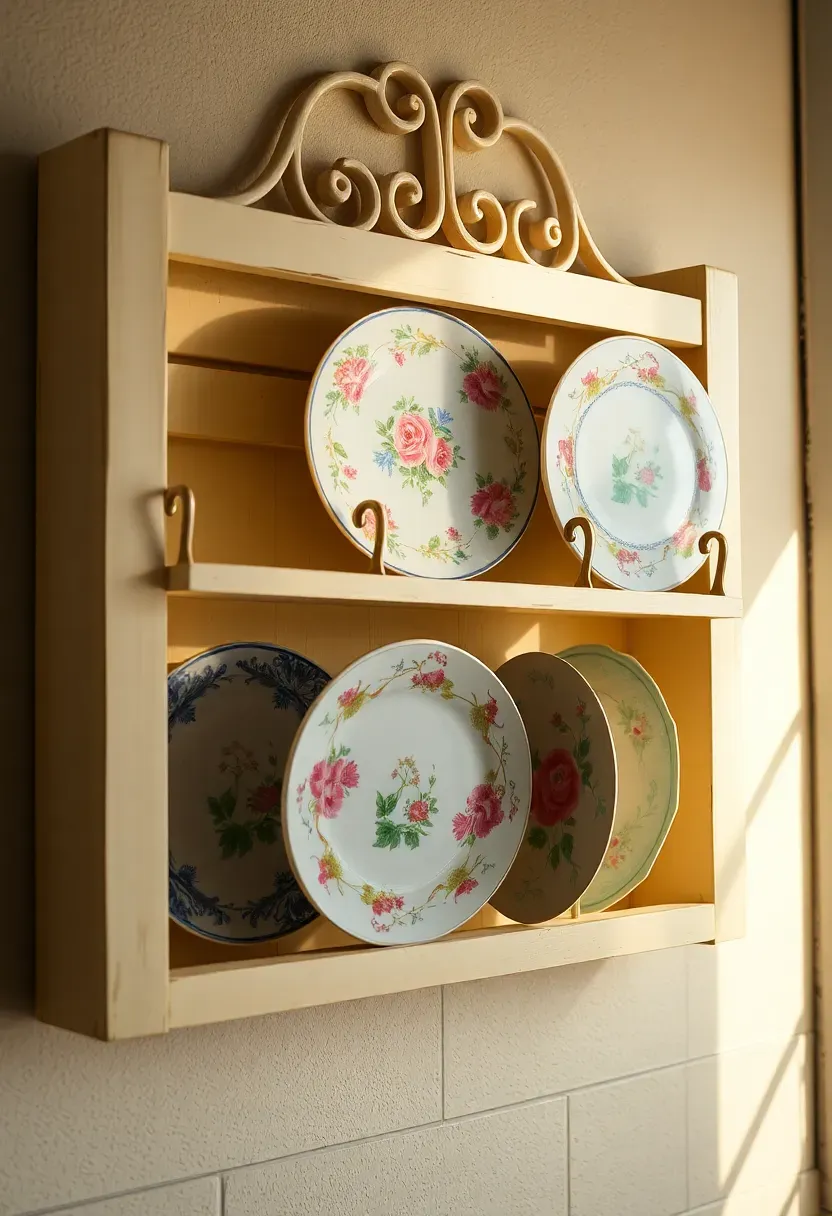
12. Plate Racks Mounted on Walls for Display
Wall-mounted plate racks transform your prettiest dishes from cabinet prisoners into rotating art installations. These dedicated displays—whether simple wooden shelves with a groove for plate edges or more elaborate racks with individual slots—solve the common decorating dilemma of bare wall space in kitchens while keeping frequently used items within arm's reach. In shabby chic kitchens, they're essential for showing off the mismatched vintage plates and serving pieces that define the style.
The rack itself should feel substantial without overwhelming the wall. Look for pieces in natural wood (pine, oak) with a worn or painted finish, or vintage wire racks with decorative scrollwork. Depth matters: shallow racks (2-3 inches) work for display-only plates, while deeper versions (4-5 inches) accommodate dinner plates you actually use. Install at eye level or slightly above, ideally flanking a window or filling the wall space above a sideboard or hutch.
Why it works: plates displayed vertically create visual rhythm and movement that flat artwork can't match. The circular shapes soften the hard edges of cabinets and appliances, while the varied patterns add color and interest without additional furniture.
Curate what goes on display. Mix plate sizes (dinner plates, salad plates, even a shallow bowl or two) and patterns, but look for a unifying element—maybe they all feature florals, or share a blue-and-white color scheme, or represent different decades of transfer-ware. Rotate pieces seasonally or whenever you find a new treasure that deserves its moment in the spotlight.
Secure plates with small adhesive plate hangers on the back or tiny museum putty dots to prevent shifting.
Position racks away from the stove—grease splatter is harder to clean from vertical surfaces and displayed plates.
Leave some slots empty rather than filling every space; breathing room prevents the look from becoming cluttered.
What this gives you: Functional storage that doubles as ever-changing wall art, celebrating your collection while keeping it accessible for actual use.
Recommended
Items for this idea
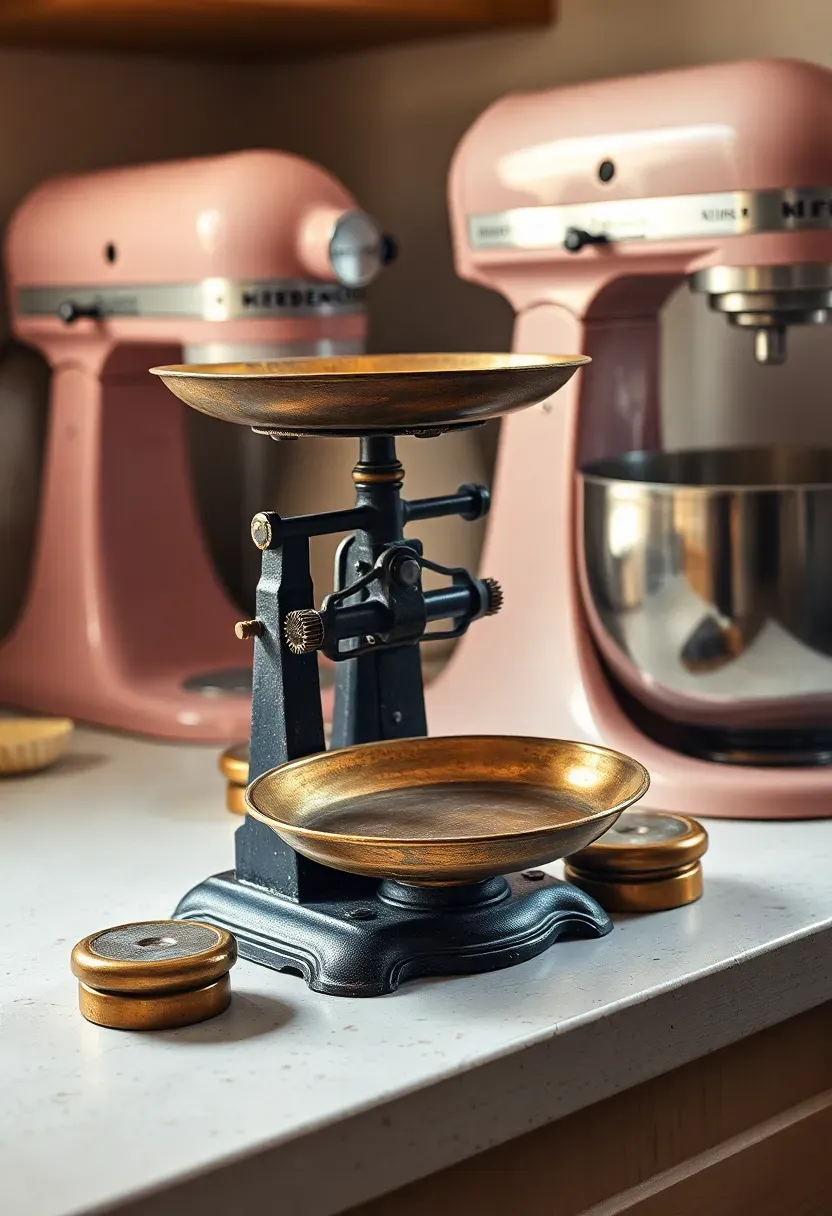
13. Vintage Scale or Stand Mixer as Counter Décor
Some kitchen tools are too beautiful to hide in cabinets. A vintage balance scale with brass pans and worn weights, or a mid-century stand mixer in robin's egg blue or soft pink—these aren't just appliances but sculptural objects that anchor counter vignettes and telegraph your appreciation for tools that were built to last. Unlike purely decorative objects, these pieces earn their counter space through actual utility, blending form and function in the best shabby chic tradition.
Vintage scales come in numerous styles: the classic two-pan balance with cast iron frame, the spring-loaded dial type with enamel face, or the charming hanging scales with hooks and chains. Look for pieces with patina—flaking paint, rust that's been stabilized, or brass that's tarnished to a warm gold. Many still work perfectly for weighing produce or baking ingredients; even non-functional ones add so much visual interest that it doesn't matter.
Common mistake: choosing oversized pieces that dominate the counter. Even in a large kitchen, a 12-15 inch scale or standard-size stand mixer provides plenty of impact without crowding your workspace. Position these statement pieces at counter ends or in corners where they're visible but not blocking prime prep real estate.
Stand mixers deserve special mention. While vintage models (1940s-60s) are increasingly expensive and sometimes need electrical updates, reproduction models in retro colors offer the same visual appeal with modern safety and performance. Display yours with the bowl attached and perhaps a wooden spoon resting against it—the "ready to bake" staging feels inviting rather than static.
Do: Group your scale or mixer with complementary items—a stack of vintage cookbooks, a crock of wooden spoons, a bowl of fresh fruit.
Don't: Cram too many "statement" pieces on one counter—one hero object per visible zone is enough.
Avoid if: Your kitchen is tiny (under 80 square feet) and every inch of counter is needed for daily tasks—in that case, display one beautiful piece on open shelving instead.
What this gives you: Hardworking tools that pull double duty as sculptural décor, reinforcing the shabby chic philosophy that beauty and utility aren't mutually exclusive.

14. Beadboard Paneling on Cabinet Fronts or Walls
Beadboard—that classic tongue-and-groove paneling with narrow vertical grooves—adds instant cottage character to kitchens, whether applied to cabinet doors, kitchen islands, or the walls themselves. The repetitive lines create subtle texture and visual interest that flat painted surfaces simply can't match, while the modest scale keeps it from overwhelming smaller spaces. In shabby chic kitchens, beadboard provides essential architectural detail that grounds more ornate elements like chandeliers or vintage furnishings.
Application options vary widely. For cabinets, consider replacing flat door panels with beadboard inserts, or wrapping an entire kitchen island in horizontal beadboard for a furniture-like appearance. On walls, beadboard wainscoting (installed 32-36 inches high with a chair rail cap) adds formality, while floor-to-ceiling application in a breakfast nook or pantry creates cozy cottage ambiance. Real wood beadboard develops character over time, but high-quality MDF versions cost half as much and paint beautifully.
Placement note: Install beadboard vertically on walls and cabinet fronts, but consider horizontal orientation on kitchen islands to differentiate the island visually from surrounding cabinetry.
Paint color dramatically changes the effect. Crisp white beadboard feels fresh and coastal, while cream or soft gray adds warmth. For maximum shabby chic impact, paint beadboard the same color as your cabinets but in a slightly different sheen (matte walls, satin cabinets) to create subtle differentiation without contrast.
If your cabinets are basic builder-grade slabs: Then add beadboard panels to create custom-looking doors for under $200 in materials.
If you're renting: Then use peel-and-stick beadboard wallpaper on one accent wall or the back of open shelving.
If you have low ceilings: Then run beadboard vertically all the way to the ceiling to draw the eye upward and create the illusion of height.
What this gives you: Architectural detail that elevates basic kitchens into spaces with history and character, providing textured backgrounds that make vintage accessories shine.
Recommended
Items for this idea
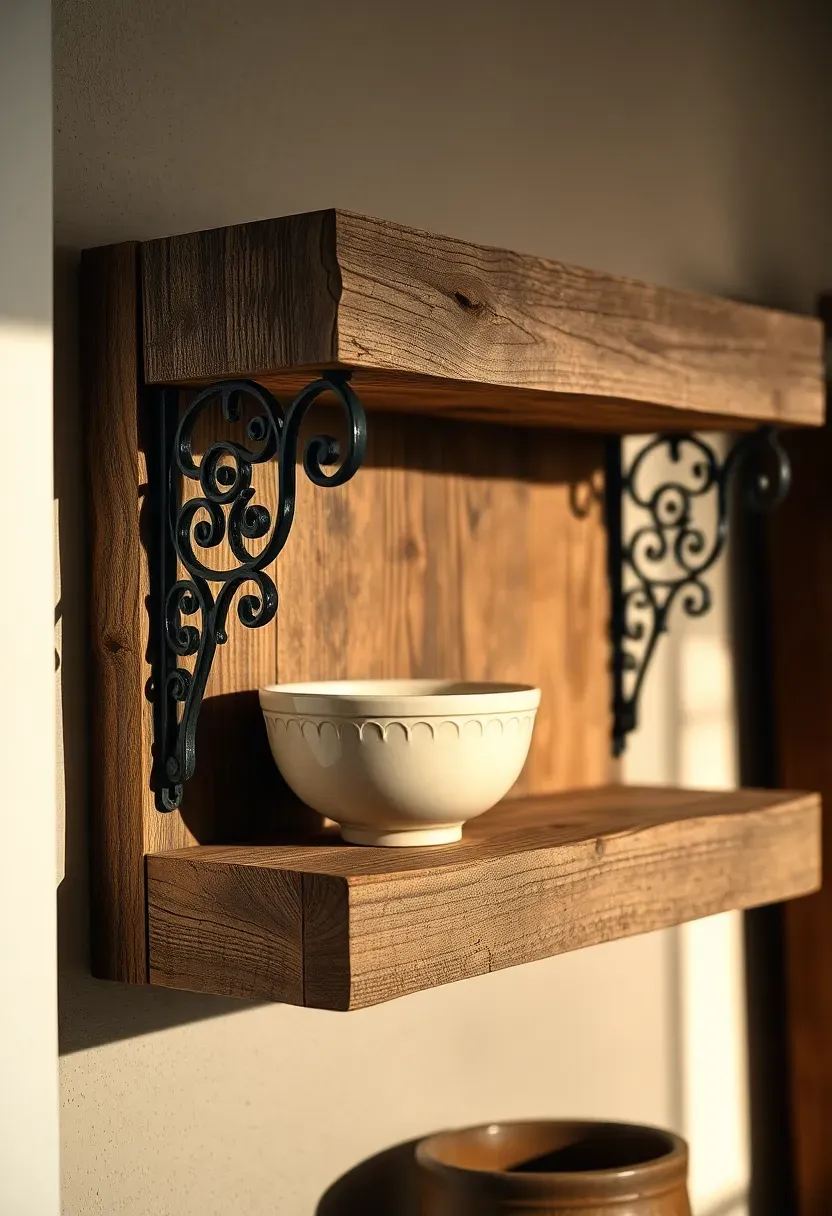
15. Reclaimed Wood Open Shelving with Iron Brackets
When you want open shelving that feels substantial and rooted in history rather than flimsy and temporary, reclaimed wood planks paired with ornate iron brackets deliver instant gravitas. These aren't the minimalist floating shelves of modern kitchens—they're thick, character-rich boards (often 2-3 inches deep) that show their age through nail holes, weathering, and natural color variation. Combined with decorative iron brackets, they create a look that's simultaneously rustic and refined, perfectly embodying shabby chic's balanced aesthetic.
Source your wood carefully. Genuine reclaimed barn wood, salvaged flooring, or old scaffold planks bring authentic patina, though they're pricier and require checking for stability and pest damage. More affordable options include new rough-cut lumber that's been deliberately aged through wire-brushing or staining techniques. The wood should feel thick and solid—1.5 to 2 inches minimum—not like standard lumber-yard boards.
Why it works: the contrast between raw, textured wood and delicate dishware creates visual tension that keeps the eye engaged. The horizontal lines of shelving break up vertical cabinet runs, while the depth of reclaimed wood allows for layered displays (plates leaning behind bowls, for instance) rather than single-file arrangements.
Bracket selection is crucial. Look for cast iron or wrought iron with decorative scrollwork, flourishes, or corbel-style shapes. Avoid modern industrial black pipe brackets unless you're deliberately mixing styles—they read too contemporary for true shabby chic. Mount brackets every 24-32 inches depending on shelf length and load; heavy dishes require closer spacing.
Seal reclaimed wood with matte polyurethane to stabilize splinters and protect against moisture without adding shine.
Install shelves away from the stove if possible—grease buildup is harder to clean from textured wood surfaces.
Use the thickest wood your brackets can support—heft equals authenticity in shabby chic design.
What this gives you: Shelving with genuine history (or the convincing appearance of it) that provides sturdy storage while adding a layer of rustic warmth that painted cabinets alone can't achieve.
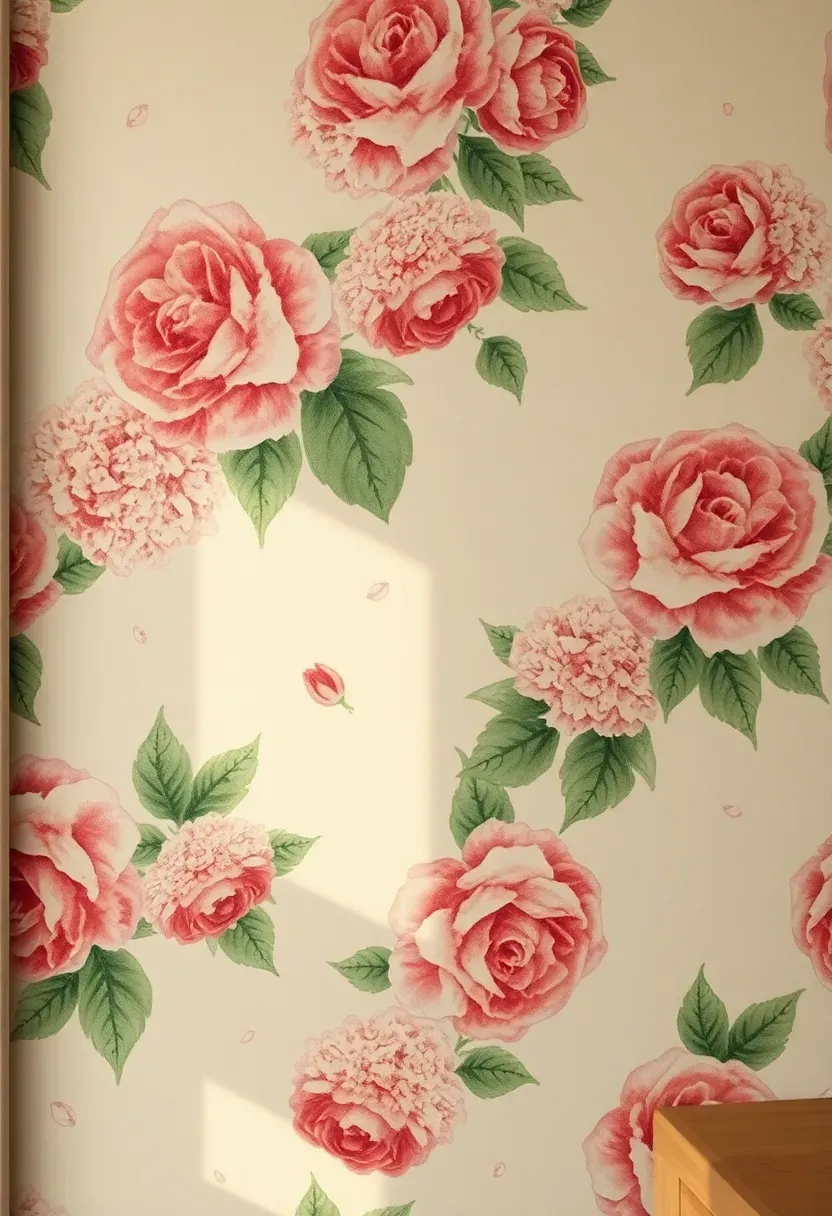
16. Floral Vintage Wallpaper on One Accent Wall
Floral wallpaper is where shabby chic gets its unapologetically romantic soul. Rather than wallpapering every surface (which can feel overwhelming), choose one accent wall—behind open shelving, in a breakfast nook, or flanking a doorway—and let a vintage or vintage-inspired pattern steal the show. Soft cabbage roses, delicate sprigs of lavender, or faded hydrangea clusters in muted palettes create instant atmosphere, transforming a plain kitchen into a space with depth and personality.
Pattern scale matters enormously. Large-scale florals make bold statements but work best on taller walls with fewer interruptions (windows, cabinets). Small-scale prints feel cozier and busier, ideal for nook areas or partial walls. The color palette should lean soft: think dusty rose, sage green, powder blue, or cream backgrounds with blooms in slightly deeper but still muted tones. Avoid bright, saturated colors—they clash with shabby chic's gentle aesthetic.
Common mistake: choosing wallpaper that's too precious or formal. You want patterns that feel like they've been there for decades—slightly faded, a bit worn at the edges. Modern farmhouse-style florals with crisp lines don't work; look instead for watercolor-style prints or patterns with soft, hand-drawn qualities. Vintage wallpaper books or reproduction patterns from companies specializing in historic designs are your best sources.
Consider practicality. Keep wallpaper away from direct stove-side exposure where grease splatter and heat can damage it. A wall adjacent to the cooking zone works beautifully, as does the wall behind a kitchen table or the back wall of a butler's pantry.
Pro: Creates instant focal point and injects pattern without committing every wall.
Con: Can feel dated if you choose overly bold or trendy florals.
Fix: Test with peel-and-stick samples first—they're removable and let you live with the pattern before committing to permanent wallpaper.
What this gives you: A dose of romantic cottage charm that grounds your shabby chic theme and provides a gorgeous backdrop for vintage accessories and open shelving displays.
Recommended
Items for this idea
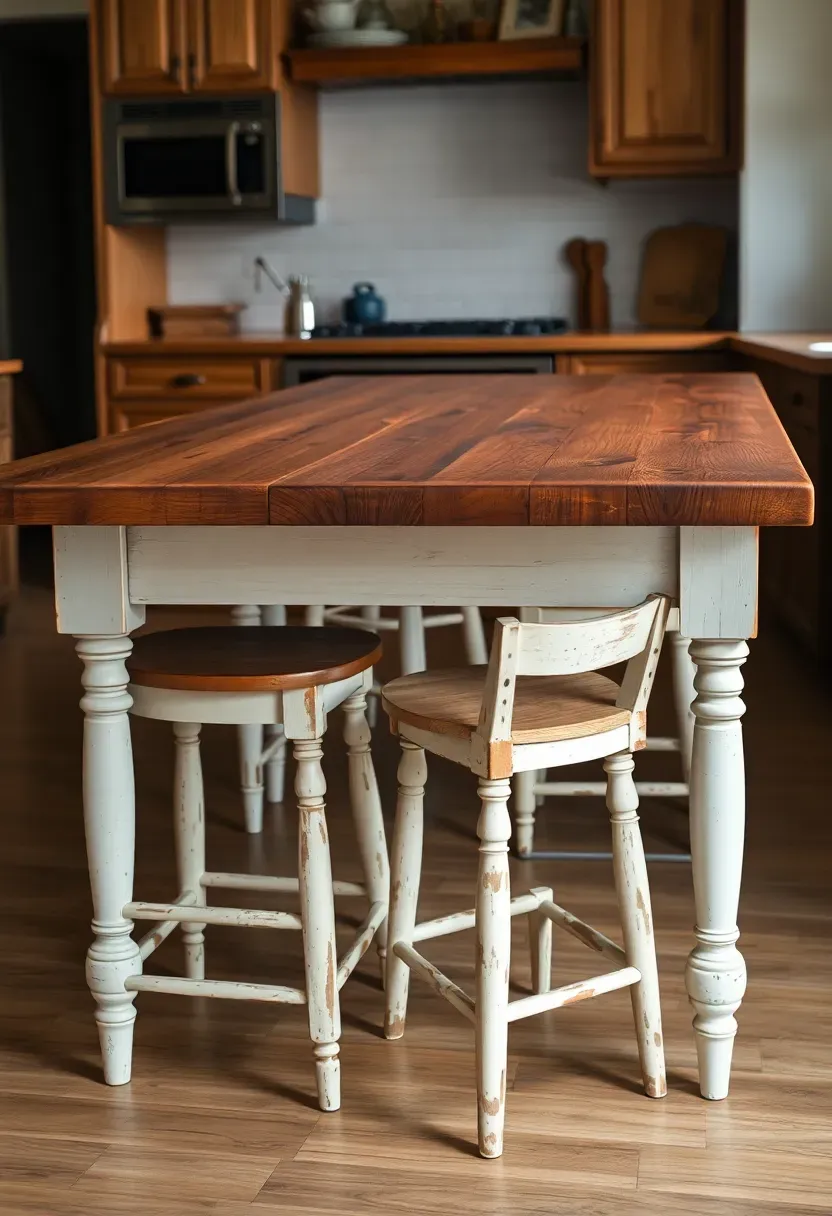
17. Farmhouse Table as Kitchen Island Alternative
Traditional kitchen islands are built-in, heavy, and permanent—everything shabby chic isn't. Swap that commitment for a freestanding farmhouse table positioned as a center-kitchen work surface, and you gain flexibility, character, and the option to rearrange whenever inspiration strikes. A sturdy vintage table with a solid wood top, turned legs, and a few decades of patina serves as prep space, casual dining spot, and sculptural anchor all at once.
The ideal table measures 30-36 inches high (standard counter height is 36 inches, so slightly lower works for comfort), roughly 3-4 feet wide, and 5-7 feet long depending on your kitchen's footprint. You need at least 36 inches of clearance on all working sides for traffic flow. Look for tables with thick tops that can handle knife work and hot pans—1.5 to 2 inches of solid wood, not veneer over particleboard.
Placement note: Position the table to create a natural work triangle between sink, stove, and refrigerator, ideally with seating on the side that faces away from the active cooking zone.
Why it works: a table feels immediately more inviting than a cabinet-style island. People naturally gravitate to sit and linger—for morning coffee, homework, or casual conversations while you cook. The open base (no cabinet doors or drawers blocking) creates visual lightness, making smaller kitchens feel more spacious.
Add a lower shelf between the legs for basket storage, or leave it open for bar stool parking. Some people add casters to one end for easier moving, though be sure they're locking casters to prevent unwanted rolling during active use.
If you need more storage: Then flank the table with freestanding shelving units or use decorative baskets underneath.
If the table is too low: Then add furniture risers under the legs (hidden) or replace feet with taller turned legs.
If you move frequently: Then this is your ideal "island"—it travels with you to your next home.
What this gives you: A flexible, personable work surface that encourages gathering and can be repositioned or replaced as your needs evolve—the ultimate shabby chic approach to kitchen design.
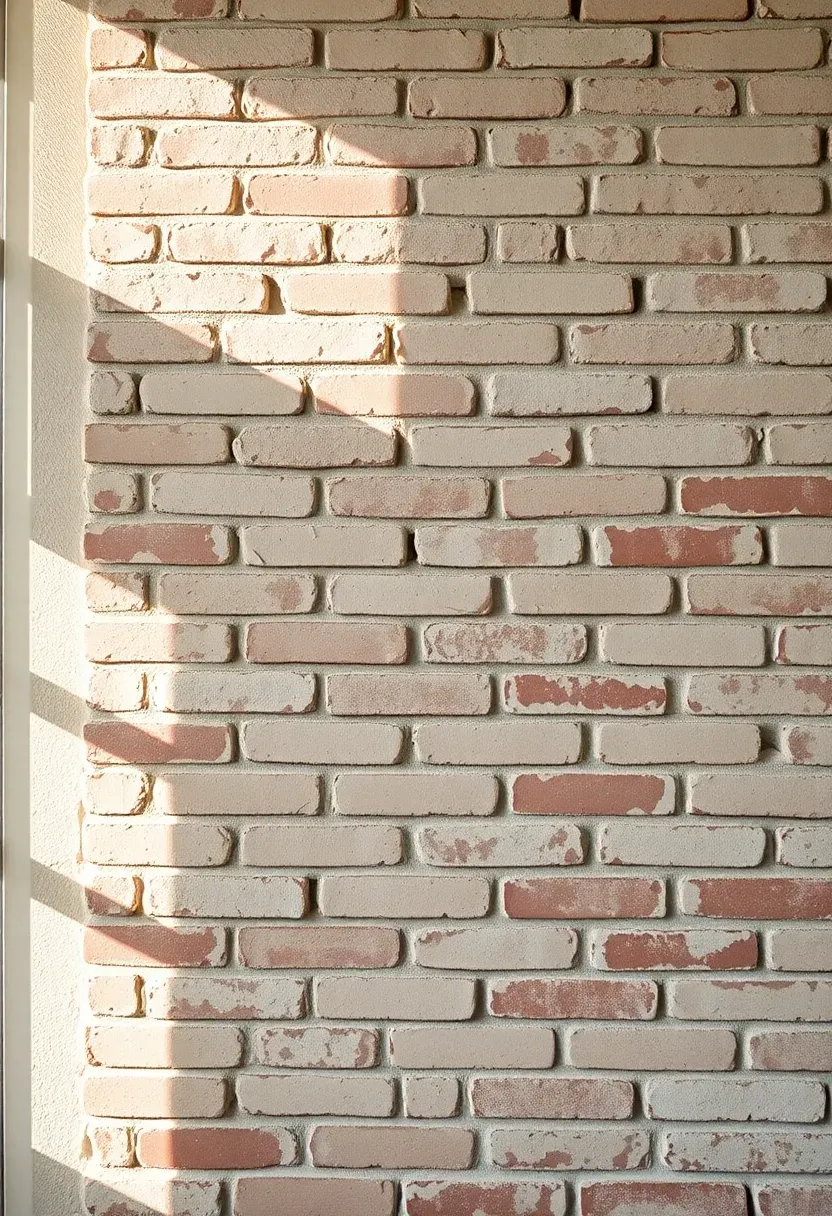
18. Exposed Brick or Whitewashed Brick Feature Wall
If you're fortunate enough to have original brick hiding behind drywall in an older home, exposing it creates instant architectural drama that no amount of decorating can replicate. Even if your home wasn't built with brick, adding a brick veneer or using faux brick panels on one accent wall brings texture, warmth, and historical gravitas to shabby chic kitchens. The key is in the finish: raw red brick leans industrial, but whitewashed or limewashed brick in soft cream tones hits that sweet spot of rustic elegance.
Whitewashing technique matters. True whitewash is a thin mixture of water and white paint (or lime and water in traditional applications) that's brushed or rolled onto brick then immediately wiped to let the brick color show through. This creates a soft, aged look where some bricks appear lighter and others retain more of their original tone—far more authentic than solid white paint that obscures the brick entirely. The irregular coverage is the point, not a mistake.
Common mistake: whitewashing too heavily in pursuit of a "clean" look. The beauty comes from variation—some mortar joints almost white, some bricks barely touched, creating depth and shadow play that catches natural light throughout the day. Test your technique on a small, hidden area first to dial in the right paint-to-water ratio.
Position matters. An exposed brick wall works beautifully behind open shelving (the texture provides visual interest between displayed objects) or as the backdrop for a dining nook within the kitchen. Avoid placing it directly behind the stove where grease will darken the porous surface and create cleaning headaches.
Seal whitewashed brick with a matte acrylic sealer to prevent chalking and make it wipeable.
If exposing original brick, budget for tuckpointing—old mortar often needs repair once exposed.
For renters, removable brick wallpaper has come a long way; high-quality versions add texture without permanent changes.
Best for: Kitchens with at least one full wall uninterrupted by windows or cabinets; the effect needs space to register visually.
What this gives you: Architectural authenticity and textural richness that grounds your shabby chic design in tangible history, whether genuine or artfully recreated.
Recommended
Items for this idea
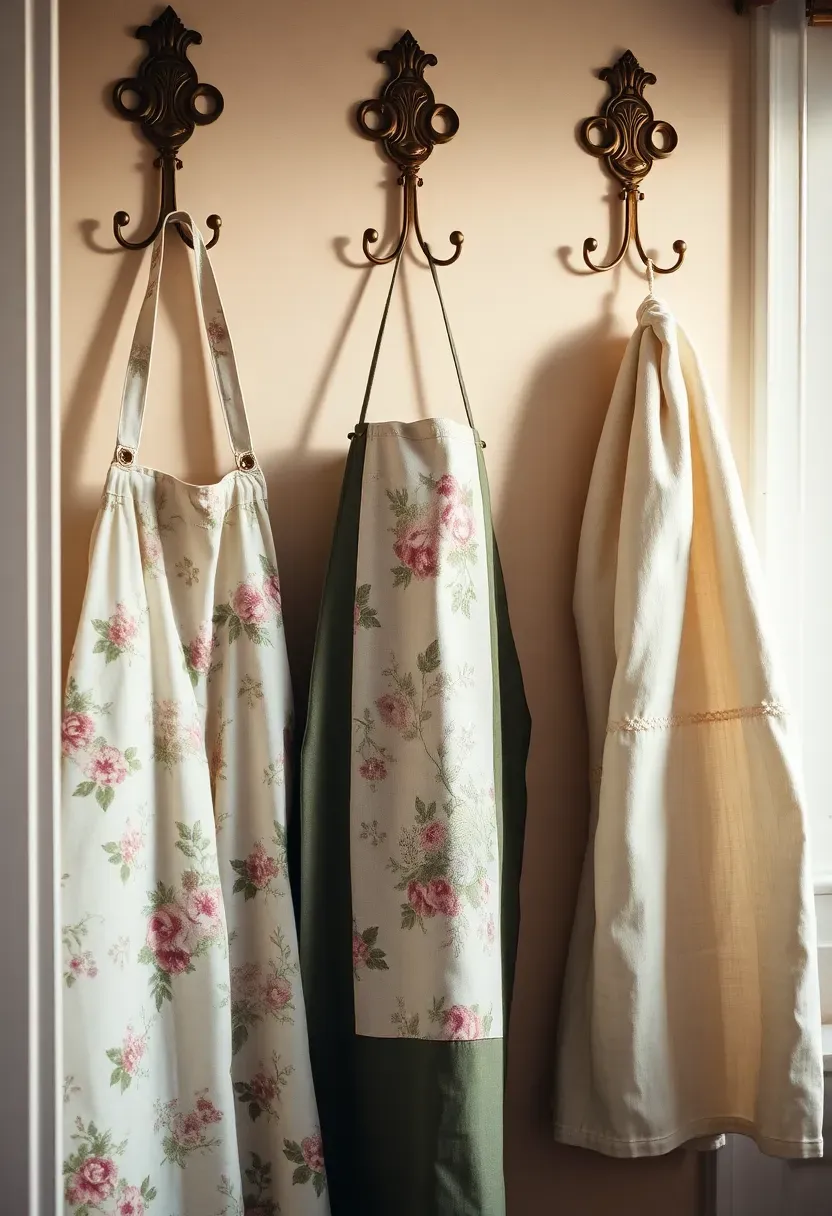
19. Vintage Aprons and Linens Displayed on Hooks
Functional textiles become charming wall art when displayed on vintage hooks or a mounted coat rack. Vintage aprons—especially those with floral prints, embroidered details, or rickrack trim—bring color, pattern, and a sense of daily ritual to kitchen walls. Add a few linen tea towels, a hanging hand towel, or even a small collection of pot holders, and you've created a display that's both practical (everything's within reach while cooking) and visually delightful.
The hooks themselves deserve attention. Avoid modern minimalist hardware; instead, look for ornate brass hooks, porcelain knobs with floral patterns, cast iron hooks with decorative backplates, or even a repurposed vintage coat rack mounted horizontally at waist height. Spacing matters—allow 6-8 inches between hooks so items don't crowd together and lose their individual charm.
Why it works: textiles add softness and movement (they sway when you walk past or when a door opens) that hard surfaces can't provide. The fabrics inject color and pattern without the permanence of paint or wallpaper, and you can rotate them seasonally or swap in new finds from flea markets and antique shops.
Placement note: Install hooks near your main prep area or beside the stove where aprons and towels are most needed, or create a dedicated display wall opposite the sink where they're visible but protected from splashes.
Curate your collection thoughtfully. Avoid randomly hanging every dishtowel you own; instead, choose pieces that share a color story (all pastels, all florals, all with embroidery) or represent a specific era (1950s kitchen prints, for example). Use what you display—aprons get creased and slightly stained from actual cooking, and that lived-in quality adds authenticity.
If you have limited wall space: Then install just 3-4 hooks in a vertical line beside a window or door.
If your linens are truly vintage: Then hand wash and air dry to preserve delicate fabrics.
If you want color rotation: Then keep a basket of seasonal aprons and swap them out monthly.
What this gives you: Hardworking décor that celebrates the rituals of cooking while adding layers of color, texture, and vintage charm to otherwise blank wall space.
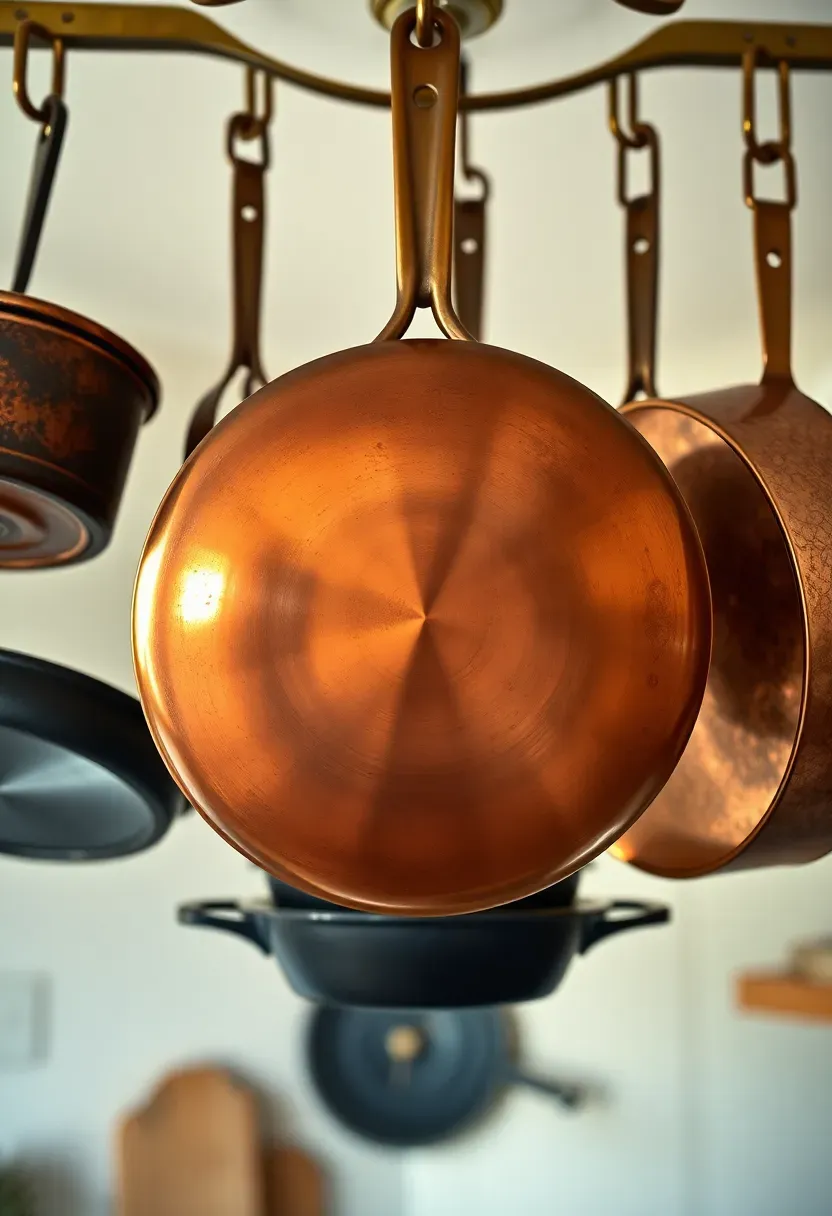
20. Copper Pots and Pans Hanging from Pot Rack
Few things signal serious cooking credentials quite like a collection of copper cookware hanging overhead. The warm metallic glow, the way light catches curved surfaces, the slight tarnish that develops on well-used pieces—copper brings both functional excellence and sculptural beauty to shabby chic kitchens. A ceiling-mounted or wall-mounted pot rack transforms necessary storage into a focal point, keeping your best cookware accessible while freeing up valuable cabinet space.
Authentic copper cookware is an investment, but even a mix of one or two genuine pieces supplemented with copper-bottomed stainless or vintage finds creates the desired effect. Look for pieces with visible wear—dings, darkened patina, slightly bent handles—that prove decades of use. Avoid ultra-shiny new copper that looks like it's never seen a flame; the shabby chic aesthetic celebrates tools that show their work history.
Common mistake: hanging every pot you own regardless of appearance. Curate your display to include only pieces worth showing—the beautiful copper sauté pan, the vintage colander, the cast iron skillet with perfect seasoning. Store your everyday nonstick pans in cabinets; the pot rack is for stars only.
Rack styles vary widely. Classic ceiling-mounted racks (either rectangular grids or circular hoops) work best in kitchens with at least 9-foot ceilings and a central island or table beneath. Wall-mounted racks with hooks fit smaller spaces and can be positioned at eye level or just below ceiling height depending on your reach and ceiling clearance.
Do: Mix copper with cast iron, stainless, and enamelware—variety adds interest.
Don't: Hang lightweight items like spatulas or measuring cups—they look cluttered; stick to substantial pots and pans.
Avoid if: Your kitchen has very low ceilings (under 8 feet) or you're exceptionally tall—head clearance matters more than aesthetics.
What this gives you: Professional-grade storage that doubles as kinetic sculpture, reflecting light and adding warm metallic tones that complement shabby chic's soft palette.
Recommended
Items for this idea
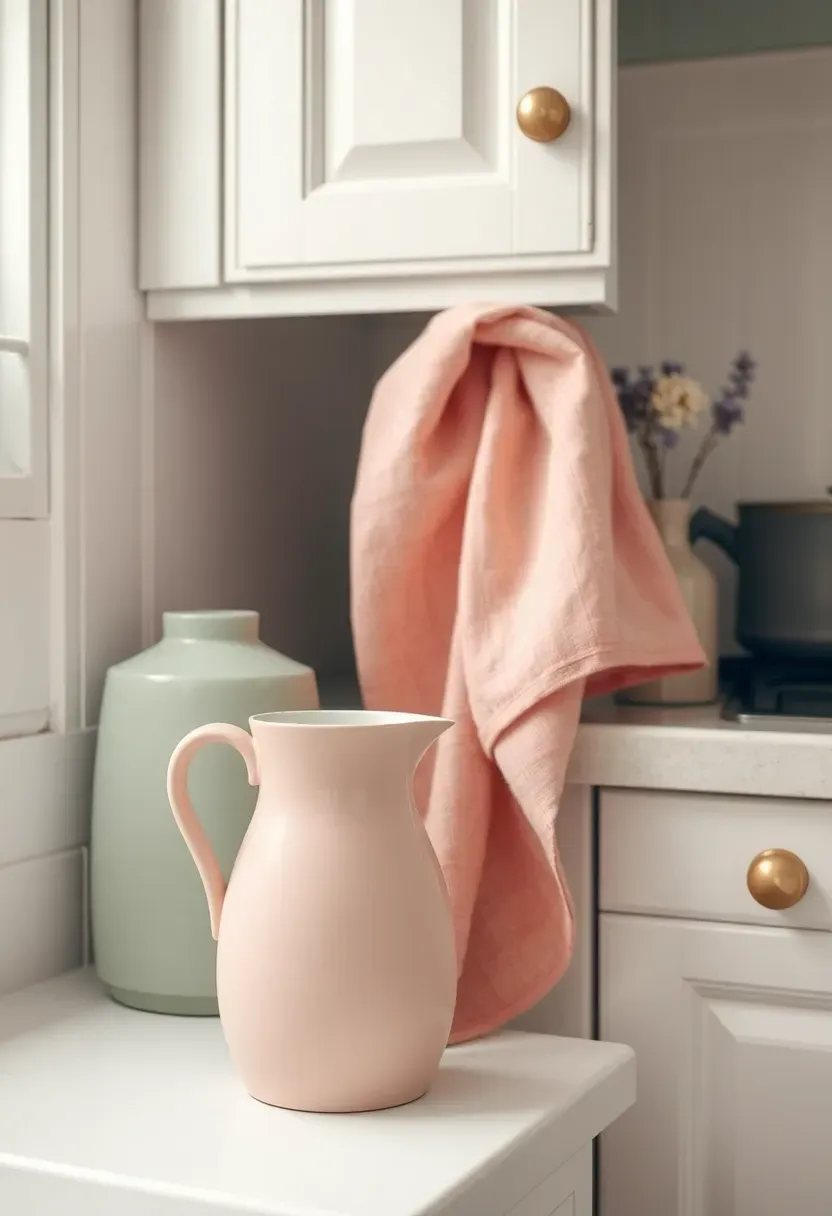
21. Soft Pastel Color Accents Throughout the Space
While white and cream form shabby chic's foundation, it's the whisper-soft pastels—dusty rose, powder blue, sage green, lavender, pale yellow—that give the style its signature warmth and romance. These colors shouldn't shout; they should murmur. A painted cabinet interior revealed when you open a door, a collection of ceramic pitchers in graduated shades of pink, chair cushions in faded floral fabric—these gentle color moments create visual interest without overwhelming the space's soft, airy quality.
The key is restraint and cohesion. Choose 2-3 pastel shades that harmonize (say, dusty rose, soft sage, and cream) and repeat them throughout the kitchen in varying intensities. Maybe your stand mixer is pale pink, your dish towels feature sage green embroidery, and your vintage canisters span the full range from cream to rose. This creates a color story that feels intentional rather than random.
Paint offers the boldest pastel opportunities. Consider painting just the island in a soft blue while keeping perimeter cabinets white, or painting the interior backs of open shelving in a pale yellow that makes displayed dishware pop. Even smaller moves—like painting a vintage chair in lavender or refreshing a thrift-store hutch in mint green—inject personality without commitment to permanent fixtures.
Placement note: Concentrate your pastel accents in areas where the eye naturally lands—the island, open shelving displays, seating, or a feature wall—rather than scattering tiny bits of color randomly.
Textiles offer the easiest, most changeable pastel infusions. Swap seasonal dish towels, add cushions to bar stools, hang curtains in a soft floral print. These elements can rotate with the seasons or your mood, keeping the kitchen feeling fresh without requiring paint or permanent changes.
Choose pastels with gray or brown undertones rather than pure candy colors—they feel more sophisticated and age better.
Test paint colors in natural light throughout the day; pastels can look very different in morning versus evening light.
Balance multiple pastels with plenty of white and natural wood to prevent the space from feeling too sweet or juvenile.
What this gives you: The finishing touch that transforms a merely white kitchen into a true shabby chic sanctuary—gentle, romantic, and unmistakably personal.
These shabby chic kitchen ideas prove that comfort and elegance aren't opposites. By embracing imperfection, celebrating history, and layering in personal touches, you create a kitchen that feels like it's evolved over decades rather than materialized overnight. Start with one or two elements that speak to you—maybe distressed cabinets or a vintage hutch—and build from there. The beauty of shabby chic is that it welcomes additions and changes, growing more authentic with each new find and every season of use.
Pinterest cover for 21 Shabby Chic Kitchen Ideas for a Warm Cottage Feel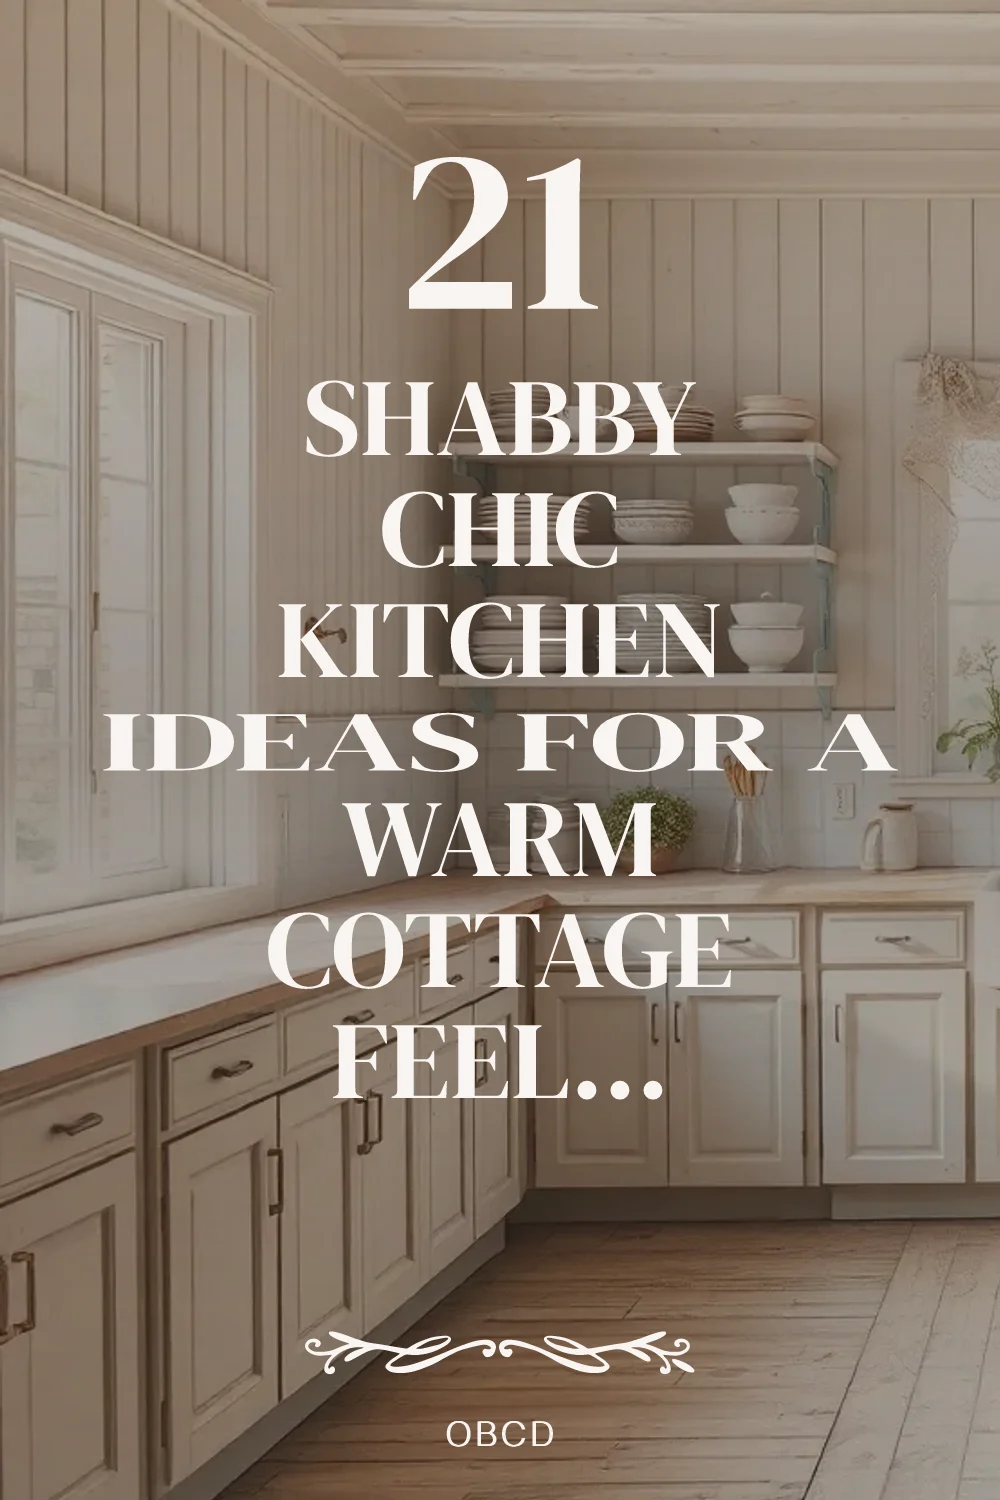
About the author
OBCD
CGI visualization and interior design content. We create detailed 3D renders and curate practical design ideas for every room in your home.