27 Spring Craft Projects to Brighten Your Home This Season
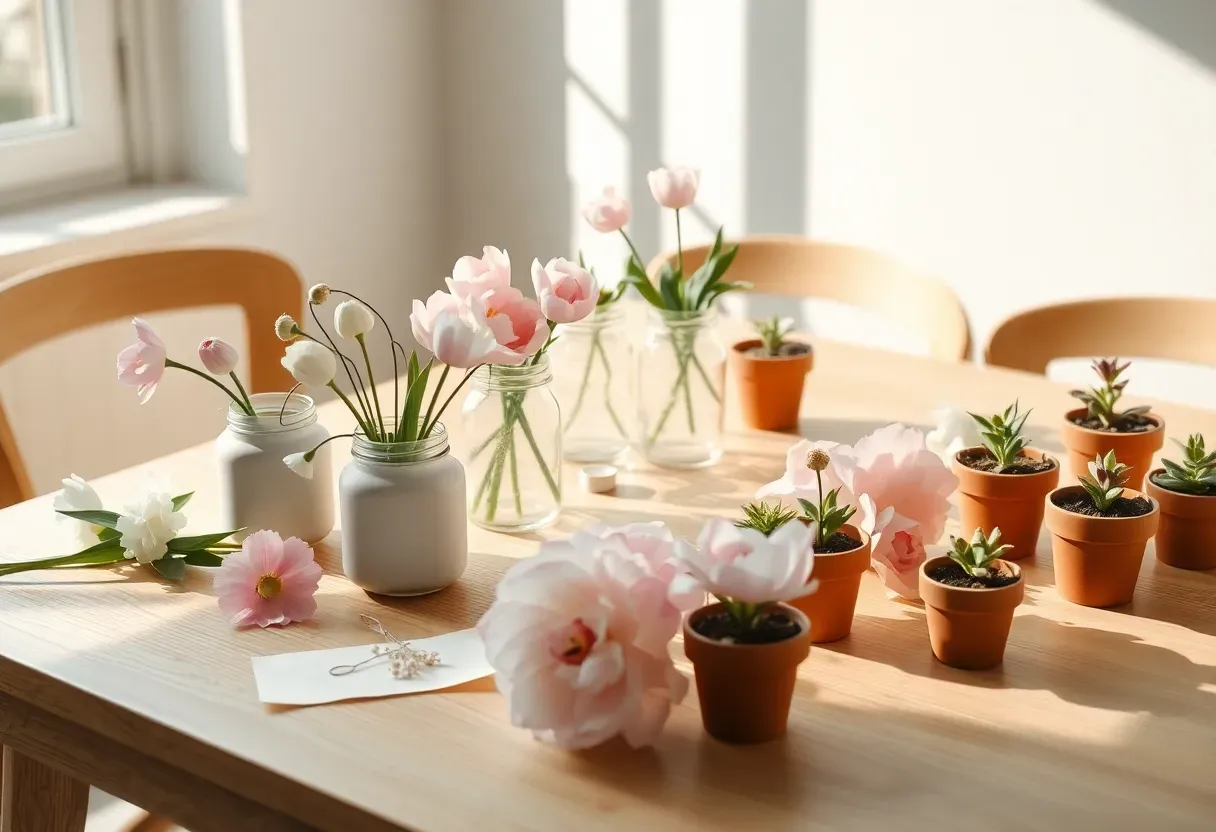
Picture this: a rainy Saturday, a basket of supplies you already own, and the urge to make something that actually looks good when you hang it on the wall. That is exactly what spring crafting is for. After months of gray skies and bare branches, there is something deeply satisfying about working with pastels, paper florals, and fresh scents again. Whether you have an afternoon or just thirty minutes, these spring craft projects meet you where you are — beginner-friendly options sit alongside more involved builds, so there is always something to try.
These spring home craft projects use everyday materials you probably already have on hand — mason jars, ribbon scraps, buttons, pine cones, and kraft paper — so most can be started today without a single trip to the craft store. In this collection I have gathered 27 ideas organized by material and approach, with practical notes on what works well and what to watch out for.
Table of Contents
- Paper Floral Wreath
- Seed Packet Gift Envelopes
- Painted Mason Jar Vases
- Pressed Flower Bookmarks
- Woven Branch Wall Hanging
- Egg-Dye Marbling with Silk
- Bird Feeder from Pine Cones
- Spring Terrarium in a Jar
- Watercolor Floral Cards
- Macrame Plant Hanger
- Bunny Burlap Door Sign
- Paper Butterfly Mobile
- Herb Garden Starter Pots
- Spring Ribbon Garland
- Decoupage Flower Pot
- Wool Felt Daffodils
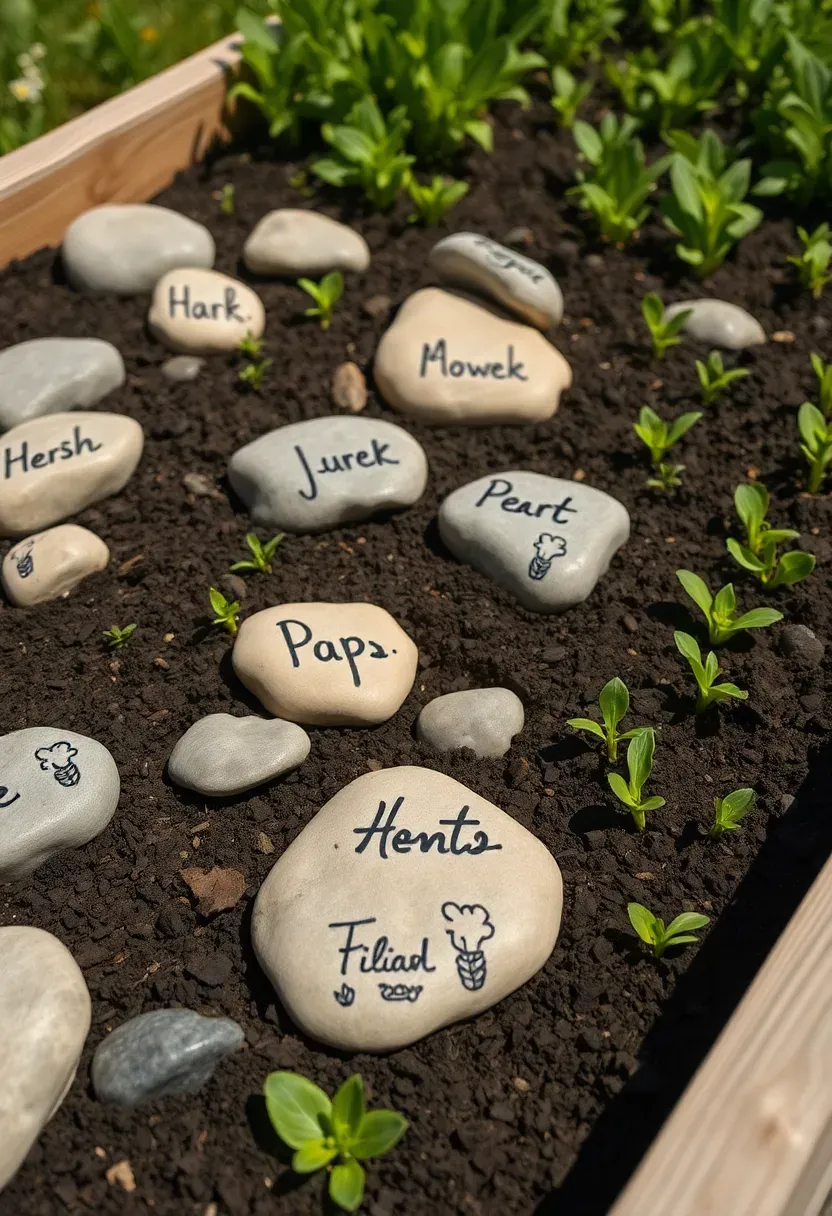
- Painted River Rock Garden Markers
- Willow Branch Basket
- Tie-Dye Spring Tote Bag
- DIY Seed Bomb Favors
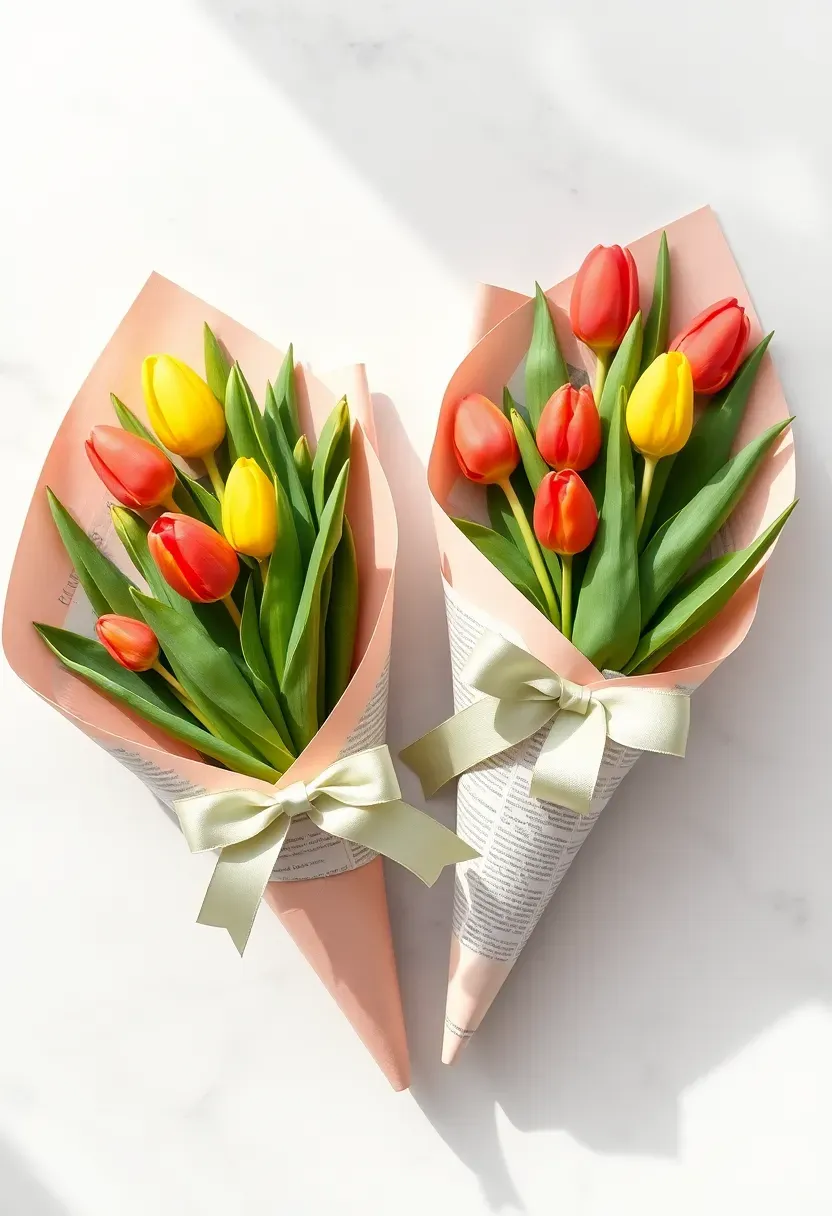
- Newspaper Cone Bouquet Wraps
- Spring Shadow Box Display
- Beeswax Candles with Floral Wax Sheets
- Ribbon-Wrapped Flower Crown
- Button Bouquet in a Vase
- Vintage Teacup Planters
- Spring Chalkboard Sign
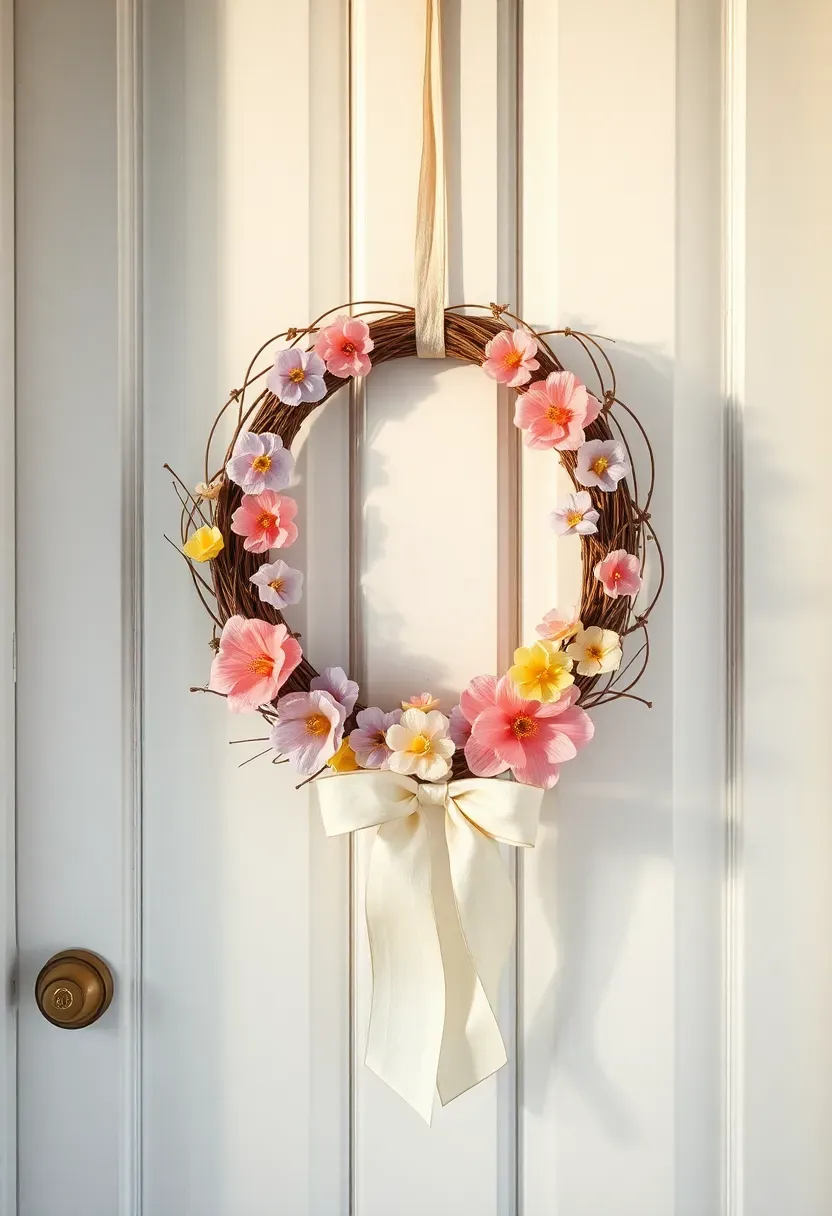
1. Paper Floral Wreath
Paper flower wreaths have outlasted countless other trends because they are forgiving, inexpensive, and completely customizable. You can build one from tissue paper, crepe paper, or cardstock — each gives a different texture and weight. A grapevine base works best for attaching blooms since it naturally grips stems without glue drips showing. Choose three coordinating colors and one wild card shade that ties the palette together.
Tips / Practical Recommendations
- Crumple and smooth tissue paper before shaping petals — it gives them a more organic, non-flat look
- Hot glue works faster than craft glue, but keep a damp cloth nearby for instant drip cleanup
- Seal finished blooms with matte spray fixative to make them more humidity-resistant near entryways
We picked a few things that go well with this idea: Hollowfly 48-Set Spring Wreath Paper Craft Kit (★4.3), Sereliy 4-Pc DIY Spring Coloring Wreath Craft (★4.5) and Funrous 48-Set Spring Wreath Bulk Craft Kit (★4.6). As an Amazon Associate we earn from qualifying purchases.
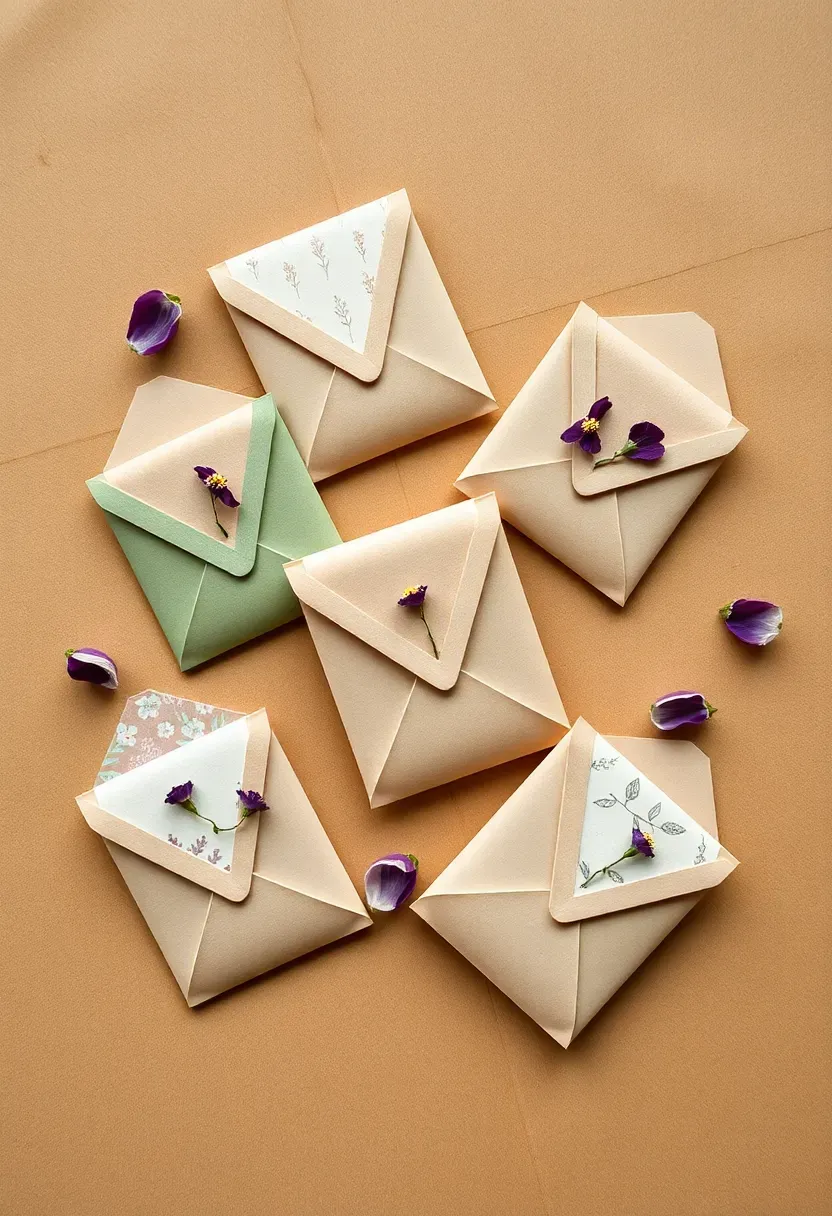
2. Seed Packet Gift Envelopes
The Core Issue
Gifting seeds is a lovely idea, but a plain plastic bag feels underwhelming. Standard store envelopes can look generic.
The Solution
Fold kraft paper or decorative origami sheets into small envelopes sized to hold seed packets neatly. Stamp or hand-letter the plant name on the front, tuck in seeds with a folded paper insert listing planting instructions, and seal with a washi tape strip in a coordinating pattern. The result is a gift that looks considered and costs almost nothing — ideal for spring gatherings, school events, or Easter baskets.
Pros and Cons
Pros: Virtually zero cost, infinitely giftable, completely personalized Cons: Folding takes patience; seeds need dry storage to stay viable
We picked a few things that go well with this idea: WSICSE 326-Pc Pressed Flower Bookmark Making Kit (★4.4), Fuyoooo 50-Pc Dried Flower Bookmark Kit Rainbow (★4.7) and Fuyoooo 50-Pc Dried Flower Bookmark Kit Purple (★4.7). As an Amazon Associate we earn from qualifying purchases.
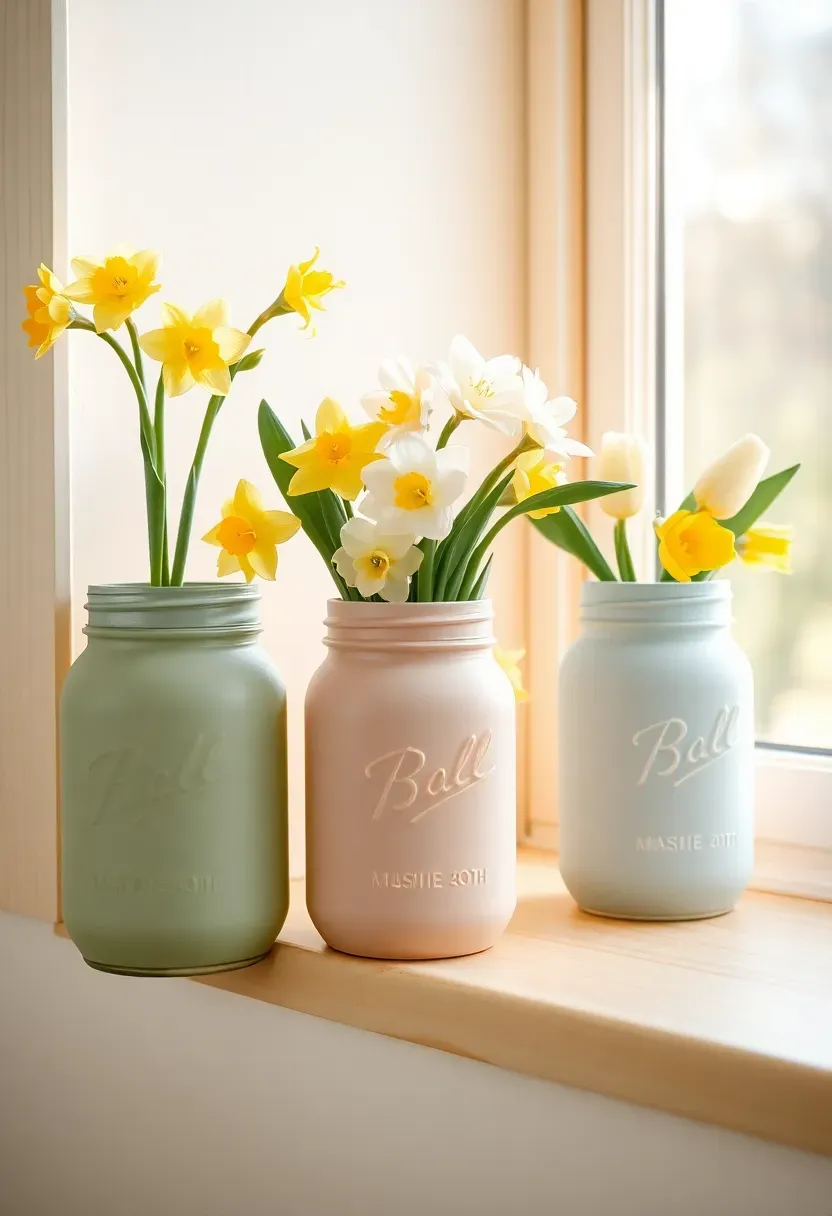
3. Painted Mason Jar Vases
Opening paragraph: Mason jars transform into spring vases in about 20 minutes with chalk paint and a simple color-wash technique anyone can pull off.
Step 1: Clean and Dry the Jar
Wipe the jar thoroughly with rubbing alcohol. Any grease or residue causes chalk paint to peel within days.
Step 2: Apply Color Wash
Dilute chalk paint 1:1 with water. Brush it on quickly in loose strokes, then wipe back with a damp cloth for a soft, sun-bleached effect.
Step 3: Seal and Style
Let dry completely (about one hour), then seal with matte water-based varnish. Fill with fresh tulips, ranunculus, or dried bunny tail grasses.
What to Watch Out For
- Do not submerge painted jars — the paint is on the exterior only; water goes inside as normal
- Wax-based sealers yellow over time on light colors; stick to water-based matte varnish
- Avoid dishwashing even after sealing
We picked a few things that go well with this idea: 87-Pc Macrame Beginner Kit 3mm Cotton Cord (★4.7), 3-in-1 Macrame Beginner Plant Hanger Kit (★4.6) and 227-Pc Macrame Kit Natural Cotton Cord Wooden Beads (★5.0). As an Amazon Associate we earn from qualifying purchases.
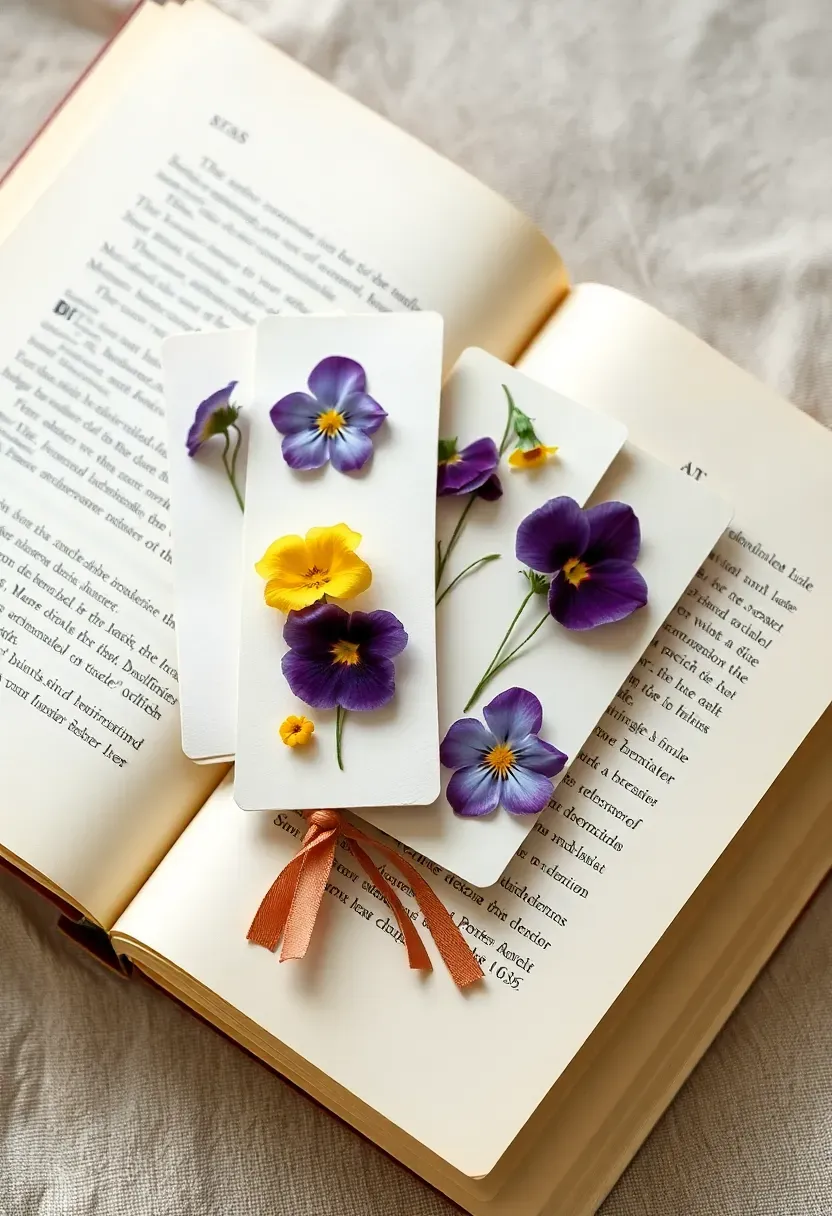
4. Pressed Flower Bookmarks
Pressed flowers capture spring at its most ephemeral. Violets, pansies, and small daisy varieties press particularly well because of their flat structure and low moisture content. Place fresh-picked blooms between two sheets of parchment, sandwich inside a heavy book, and wait one to two weeks. Once pressed, arrange on thick cardstock strips and laminate with a home laminator or adhesive laminating pouches. Punch a hole at the top, thread a satin ribbon, and the bookmark is done. The color holds surprisingly well for one to two years.
Tips / Practical Recommendations
- Pick flowers mid-morning when dew has dried but before afternoon heat wilts them
- Layer petals facing down onto the parchment rather than face-up — this preserves detail in the center
- Use a narrow strip of white gel pen to sign your name or a short phrase on the reverse side before laminating
Recommended
Items for this idea
5. Woven Branch Wall Hanging
Foraged Branch vs. Dowel Rod: Which to Choose
A wall hanging needs a horizontal anchor, and you have two main choices.
Foraging a Branch
A curved or Y-shaped branch adds natural character. Look for dry, fallen branches — green wood warps as it dries and can split your weaving apart. Sand rough edges lightly.
Using a Dowel Rod
Perfectly straight, consistent diameter, zero prep. Easier to attach evenly spaced warp threads. Looks more finished if you prefer a cleaner aesthetic.
What to Choose
Choose a branch if: you want an organic, outdoorsy look with built-in irregularity Choose a dowel if: precision and flat hanging matter more than texture
Recommendation
For a spring wall hanging, a branch almost always wins visually — the imperfections make it feel like it grew from the wall.
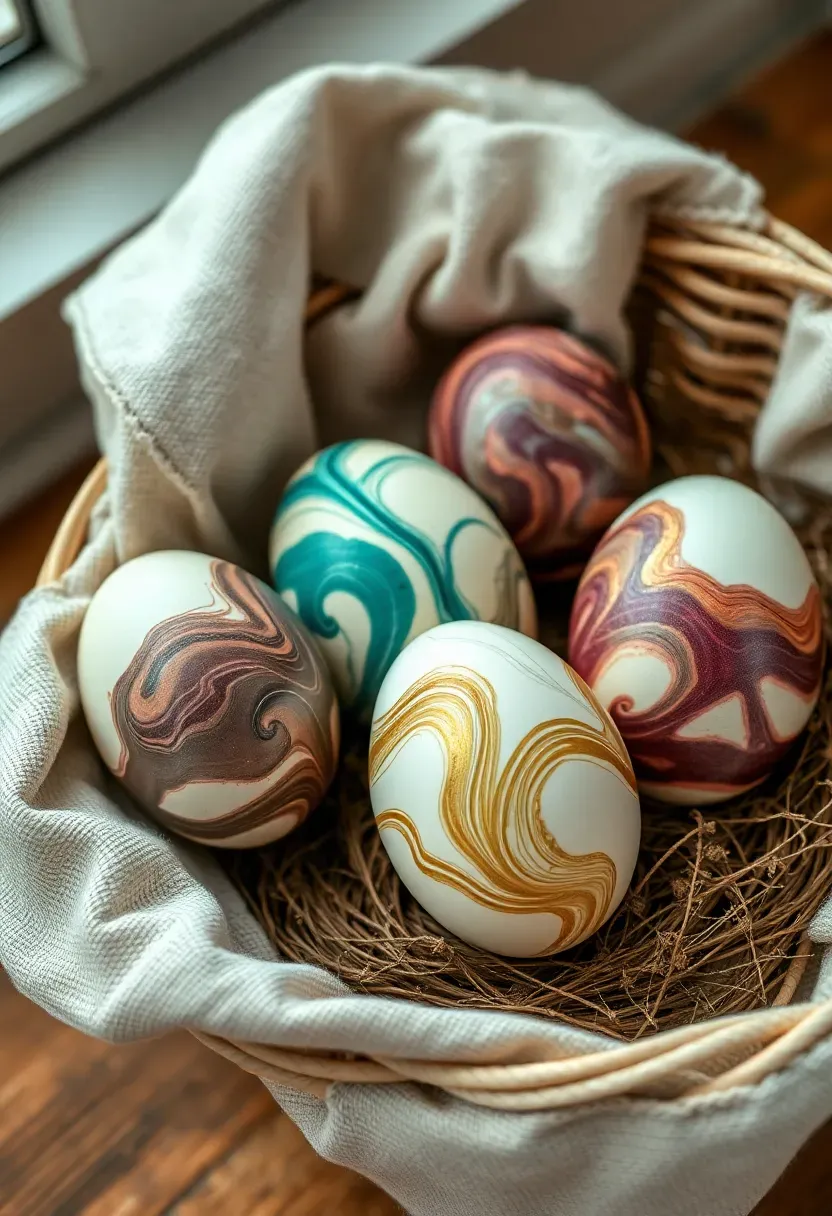
6. Egg-Dye Marbling with Silk
Silk-wrapped egg dyeing is one of those techniques that looks impossibly good given how simple it actually is. Cut squares from old silk ties or scarves — 100% silk only, since synthetic fabrics do not release dye properly. Wrap each raw egg tightly in silk, patterned side against the shell, then wrap again in a square of white cotton. Twist ends, secure with twist ties, and simmer in water with a splash of white vinegar for 20 minutes. Unwrap to find the fabric pattern transferred directly onto the shell in vivid, slightly watercolored tones.
Tips / Practical Recommendations
- Thrift stores sell silk ties inexpensively; one tie covers four to five eggs
- The more vivid the silk pattern, the more dramatic the transfer
- Hard-boil eggs fully before crafting if they will be displayed rather than eaten — hollow eggs can crack under simmering
Recommended
Items for this idea
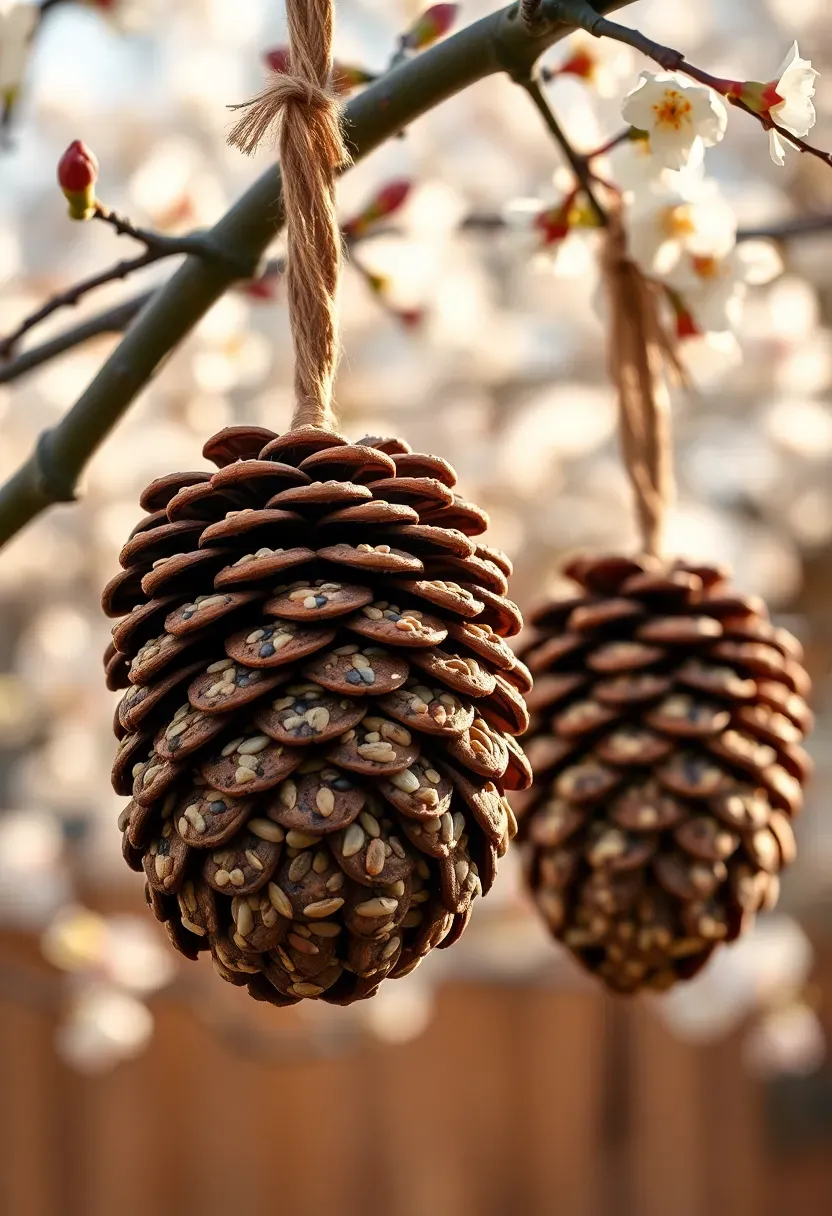
7. Bird Feeder from Pine Cones
Origins / History
Pine cone bird feeders are a staple of nature craft programs dating back at least to 1950s Scouting manuals. Simple, effective, and entirely biodegradable, they became a go-to because children can make them without sharp tools.
Modern Interpretation
Today's versions often use sunflower butter instead of peanut butter for school-safe versions, and some crafters roll them in specific seed mixes tailored to local bird species — nyjer seed for finches, safflower for cardinals. A twine hanger replaces old-fashioned wire, which can rust.
How to Apply at Home
- Tie a 30cm length of jute twine tightly around the top scales of a large pine cone
- Spread peanut or sunflower butter into the gaps with a butter knife
- Roll in a plate of mixed birdseed and hang from a branch outside a window where you can actually watch the visitors
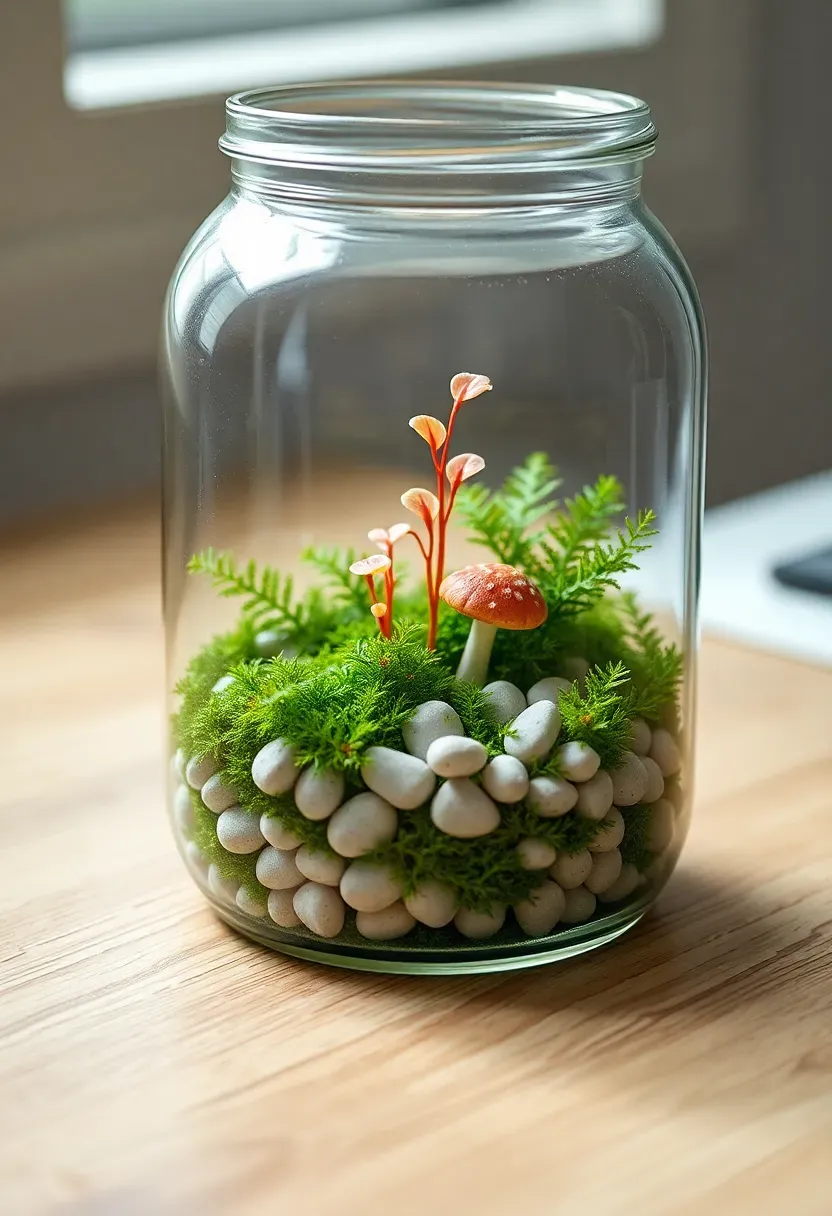
8. Spring Terrarium in a Jar
A glass jar terrarium concentrates spring's palette into a miniature world that requires almost no maintenance once established. Wide-mouth mason jars, fishbowls, or any clear glass container with an opening large enough for your hand will work. Layer drainage pebbles, activated charcoal (to prevent mold), potting mix, and plants. For spring terrariums, small ferns, creeping fig, nerve plant (fittonia), and baby tears all thrive in the humid microclimate a closed or semi-closed jar creates. Add a layer of sphagnum moss on top for a forest-floor effect and position a few tiny decorative pieces — a ceramic mushroom, a small quartz crystal.
Tips / Practical Recommendations
- Open the lid weekly for 30 minutes if condensation builds up excessively on the glass walls
- Terrariums near bright windows but out of direct sun grow most vigorously
- A turkey baster lets you water precisely without disturbing the surface
Recommended
Items for this idea
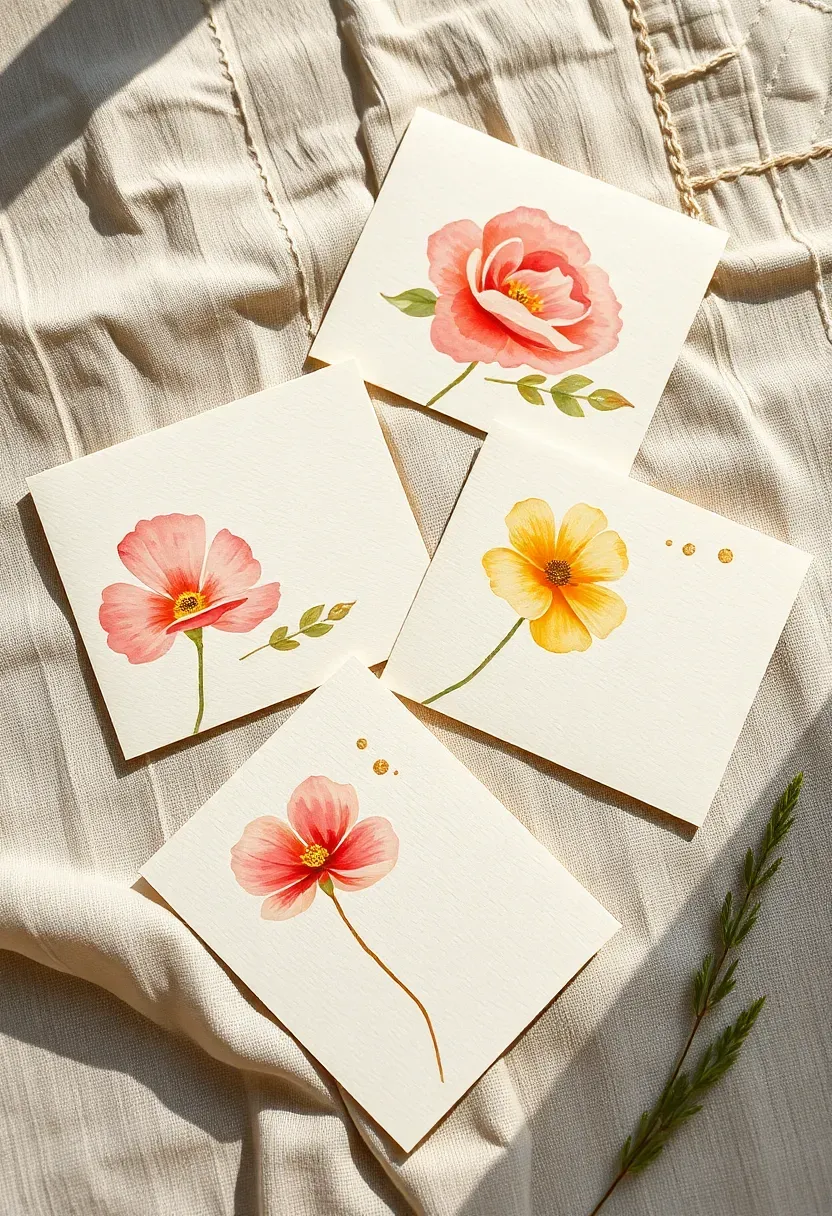
9. Watercolor Floral Cards
You do not need painting experience to make watercolor floral cards that look genuinely beautiful. The trick is working wet-on-wet: dampen the card area first with clean water, then drop in color and let it bloom outward naturally. Start with a large pale wash for the background, then add deeper petal shapes while still wet. The pigment will feather and diffuse rather than sit in hard-edged blobs. Once dry, outline the loosest blooms with a fine black pen or gold gel pen to define them. These cards photograph well for social sharing and feel far more personal than store-bought.
Tips / Practical Recommendations
- Cold-press watercolor paper handles water without buckling; standard copy paper warps badly
- Keep a paper towel nearby to lift excess pigment before it dries in unwanted areas
- Mixing only two or three colors per card prevents muddy results
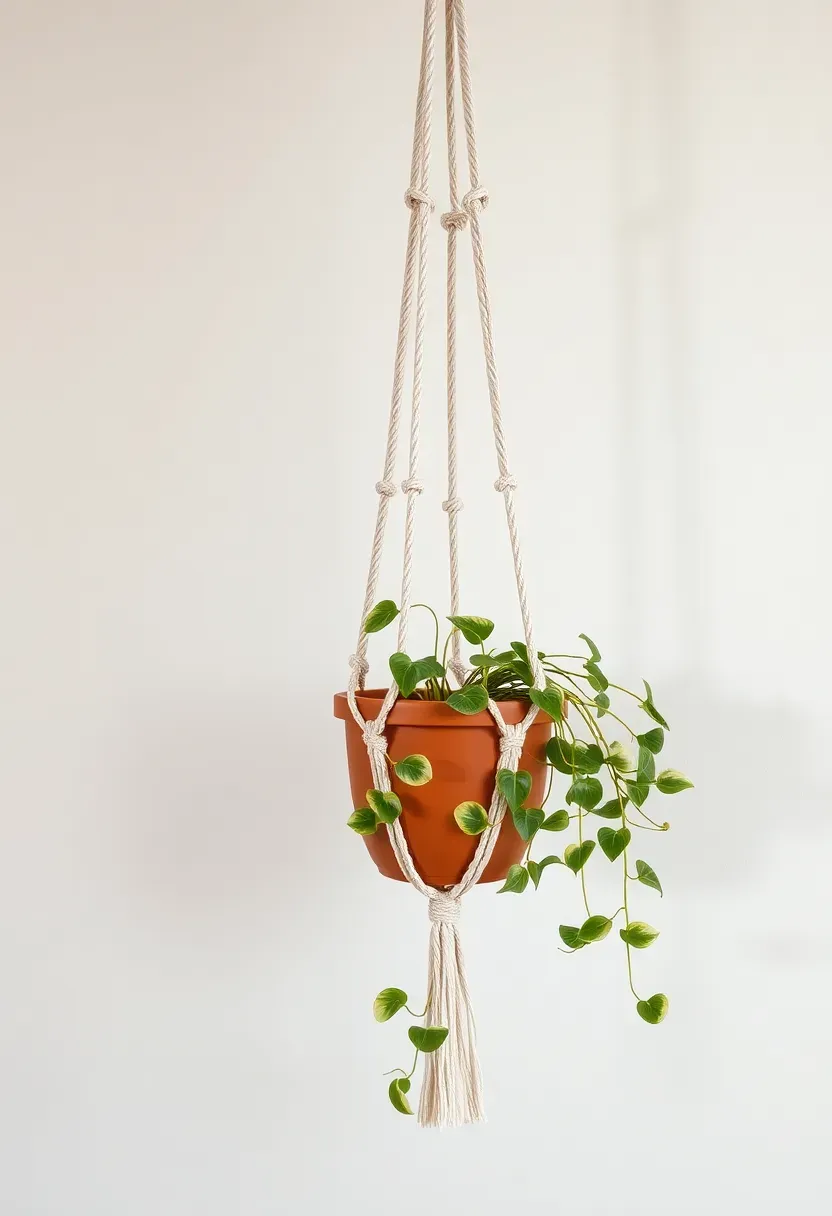
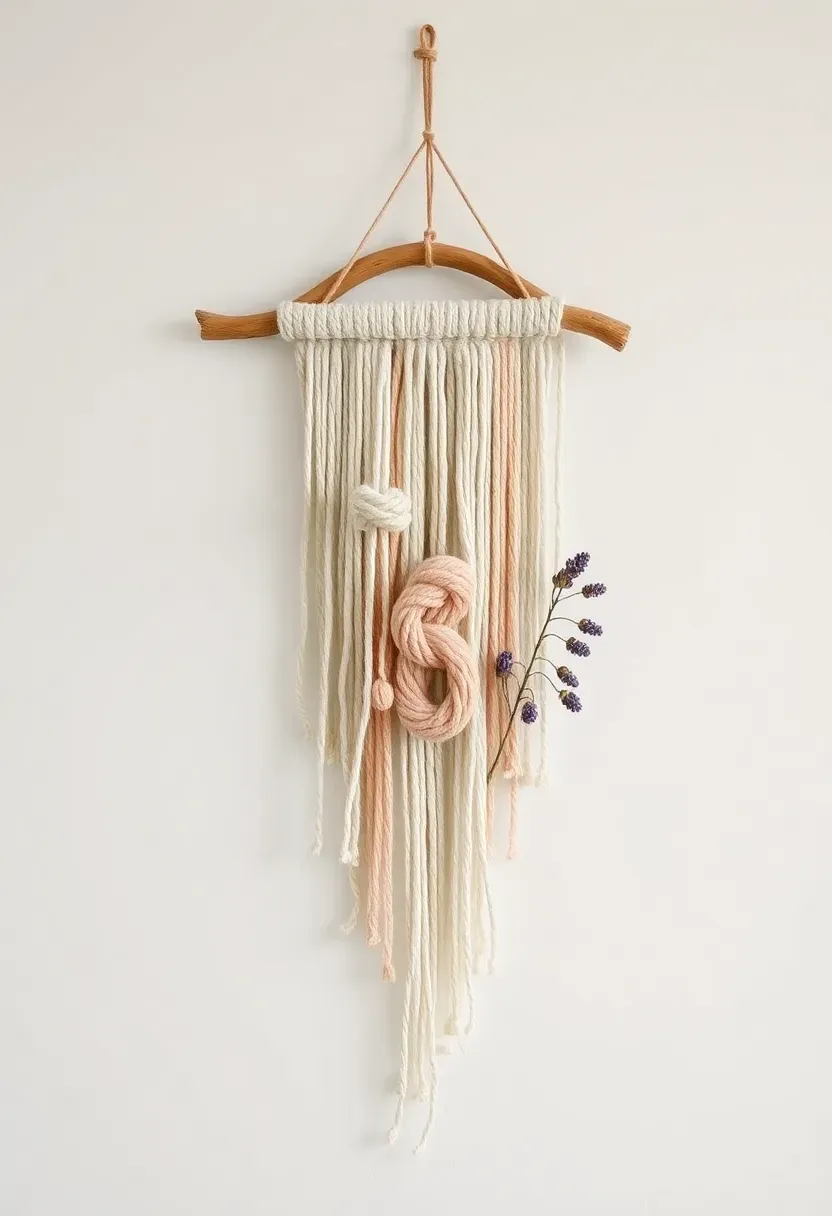
10. Macrame Plant Hanger
Why Beginners Often Struggle and How to Fix It
Macrame looks intimidating largely because of unfamiliar knot names. In reality, most plant hangers use only two: the square knot and the spiral (half-square knot). Learning those two and nothing else is enough for a functional hanger.
The Solution
Cut eight lengths of 5mm cotton rope, each about 4 meters long. Fold in half and attach to a wooden ring. Work square knots in groups of four cords for about 30cm, then gather all cords and create a gathering knot to form the basket. Spread the lower cords and tie a final gathering knot to close the base. Trim and fray the fringe.
Pros and Cons
Pros: Elegant finished result, cheap materials, relaxing to make Cons: Takes longer than expected on first attempt; knots can slip if tension is not consistent
Recommended
Items for this idea
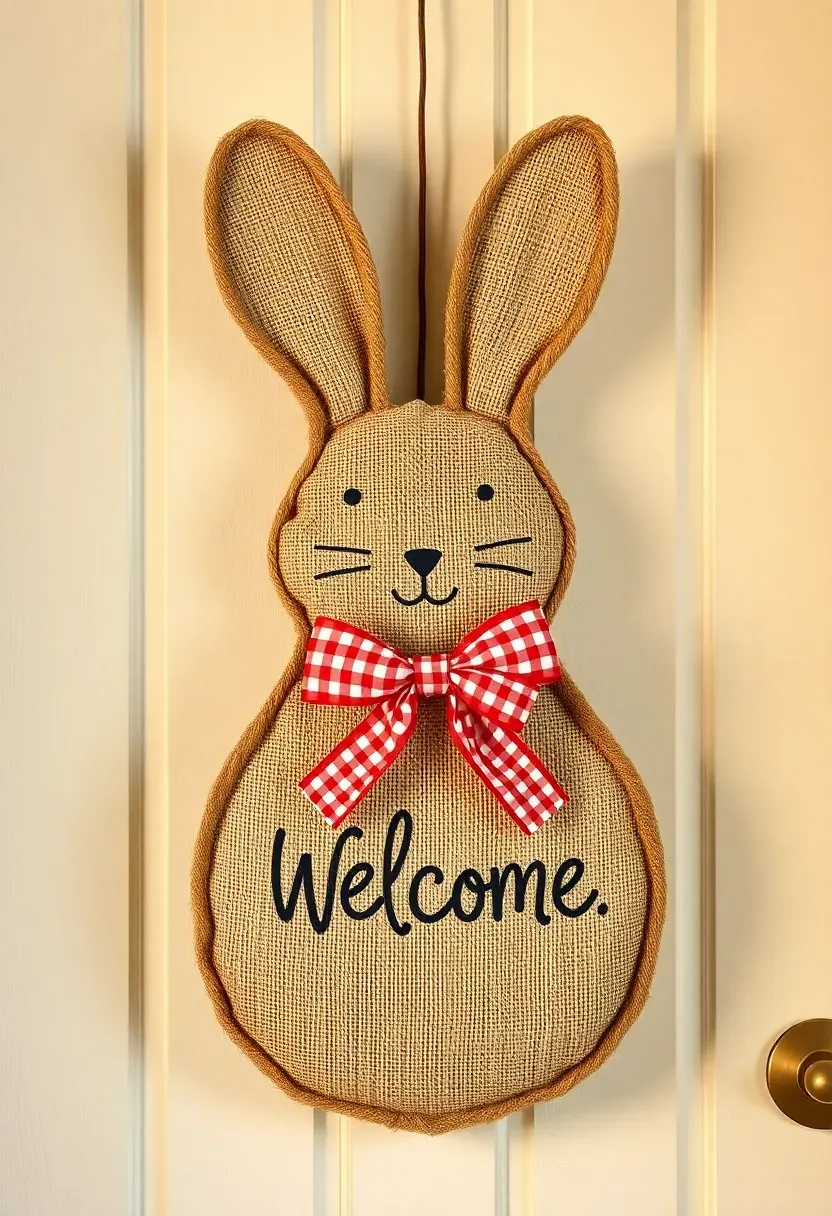
11. Bunny Burlap Door Sign
Burlap takes paint and markers surprisingly well for such a rough texture, which makes it ideal for seasonal signage that can go outside without immediately deteriorating. Cut bunny ears and an oval body from stiff burlap (backed with fusible interfacing if it frays too much), then paint or stamp a simple design. A chalk ink marker writes cleanly on the surface. Add a gingham ribbon bow at the neck, punch a hole at the top ears, thread jute through, and hang on a front door hook. This project takes under an hour and holds up through multiple seasons if stored flat.
Tips / Practical Recommendations
- Iron fusible interfacing onto the back of burlap pieces before cutting to stop fraying at edges
- Outdoor chalk markers are UV-resistant; standard chalk markers fade in direct sun within days
- Store flat between layers of tissue paper to prevent creasing the bow
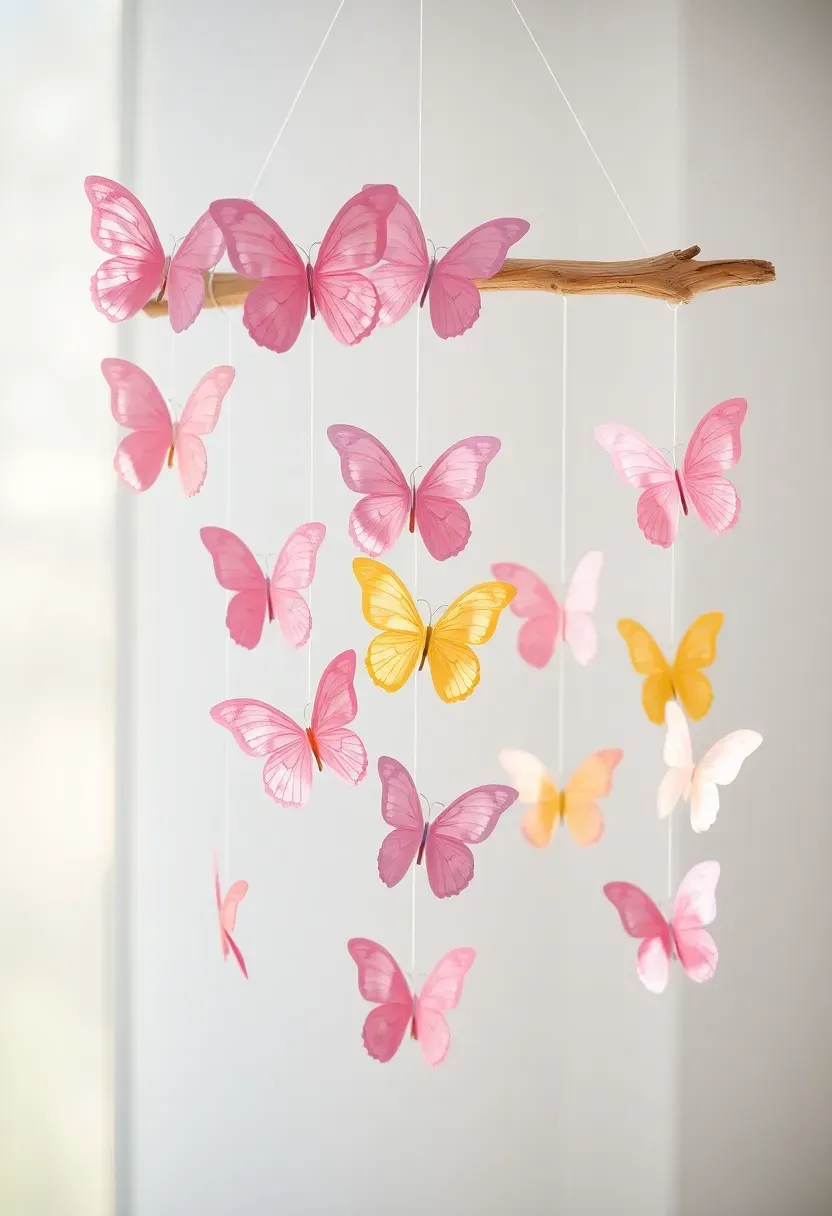
12. Paper Butterfly Mobile
Paper butterfly mobiles fill vertical space beautifully — a solution for rooms with high ceilings or empty wall corners that need something lightweight and whimsical. The simplest butterflies are accordion-folded strips of tissue paper pinched in the center and secured with wire. More detailed versions cut from cardstock can have punched or cut-away wing details. Hang them at varying heights from a driftwood branch or a wooden embroidery hoop using invisible thread. The slight movement from air currents makes them feel alive.
Tips / Practical Recommendations
- Balance the mobile before finalizing thread lengths — add small clay weights to lighter-side threads
- Assign a color gradient from one end of the branch to the other rather than random placement
- Apply a tiny dab of clear-dry glue where thread meets paper to prevent slipping
Recommended
Items for this idea
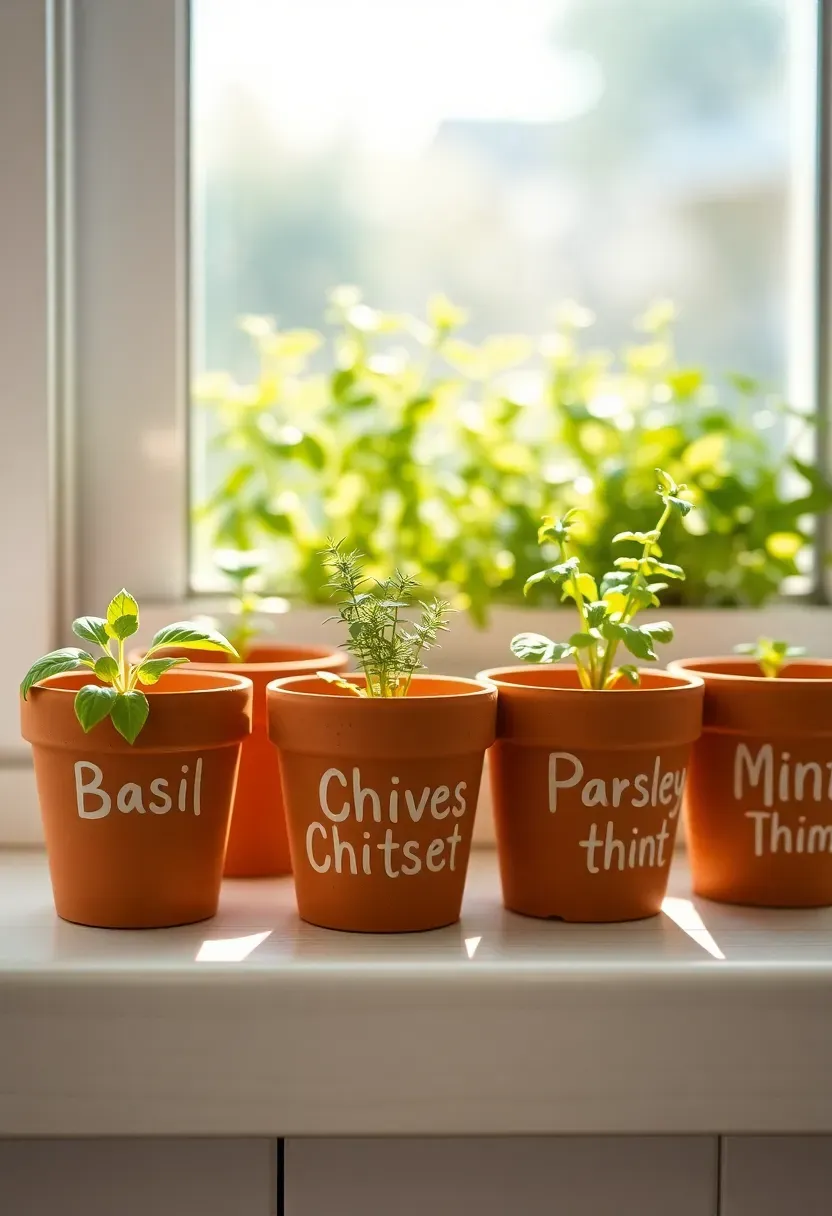
13. Herb Garden Starter Pots
Starting an herb garden in individual small pots rather than one large planter gives you more control and makes a charming spring display in the process. Use terracotta pots in the same size for visual consistency, then paint or stamp each one with the herb name using acrylic paint sealed with outdoor varnish. Fill with quality potting mix and sow basil, chives, parsley, or mint from seed — all germinate well on a bright windowsill in spring temperatures. Thin seedlings once they reach 5cm. Group pots on a small tray with drainage pebbles beneath to protect surfaces.
Tips / Practical Recommendations
- Soak terracotta pots in water for an hour before painting — dry terracotta absorbs paint unevenly
- Plant mint in its own pot; it aggressively crowds out everything else
- Label both pot and seed packet with sow date to track germination timing
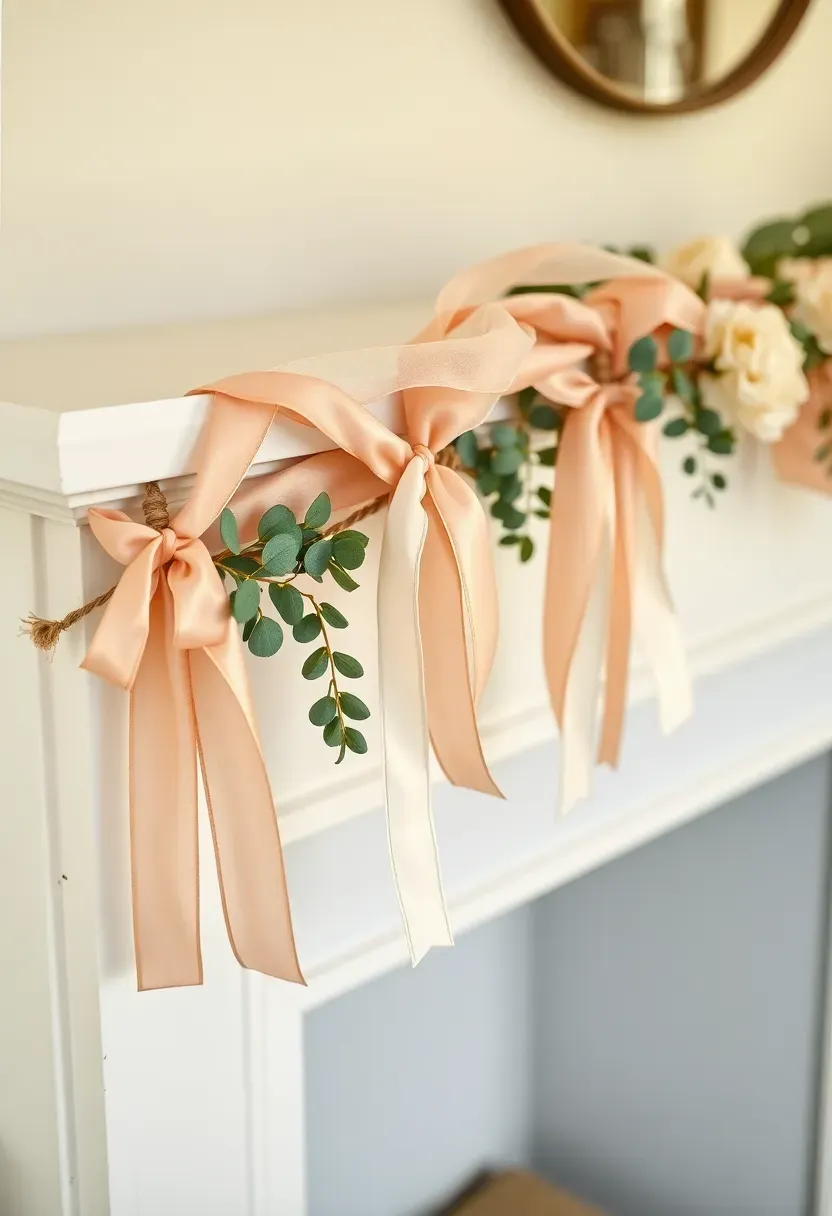
14. Spring Ribbon Garland
A ribbon garland requires no sewing and no tools beyond scissors. Select five to seven complementary ribbon types in spring tones — satin, grosgrain, velvet, and sheer organza give the best textural mix. Cut lengths ranging from 15 to 30cm, then knot them onto a length of jute twine at irregular intervals, mixing widths and textures as you go. The finished garland looks rich and layered despite being essentially just tied knots. Add small dried flowers or seed pods between ribbon clusters for natural texture breaks.
Tips / Practical Recommendations
- Pre-cut all ribbons before starting — sorting by length while knotting wastes time
- Seal cut ribbon ends with a lighter flame briefly to prevent fraying on synthetic ribbons; use clear nail polish on natural fiber ribbons
- Hang at a slight arc rather than taut for a more graceful silhouette
Recommended
Items for this idea
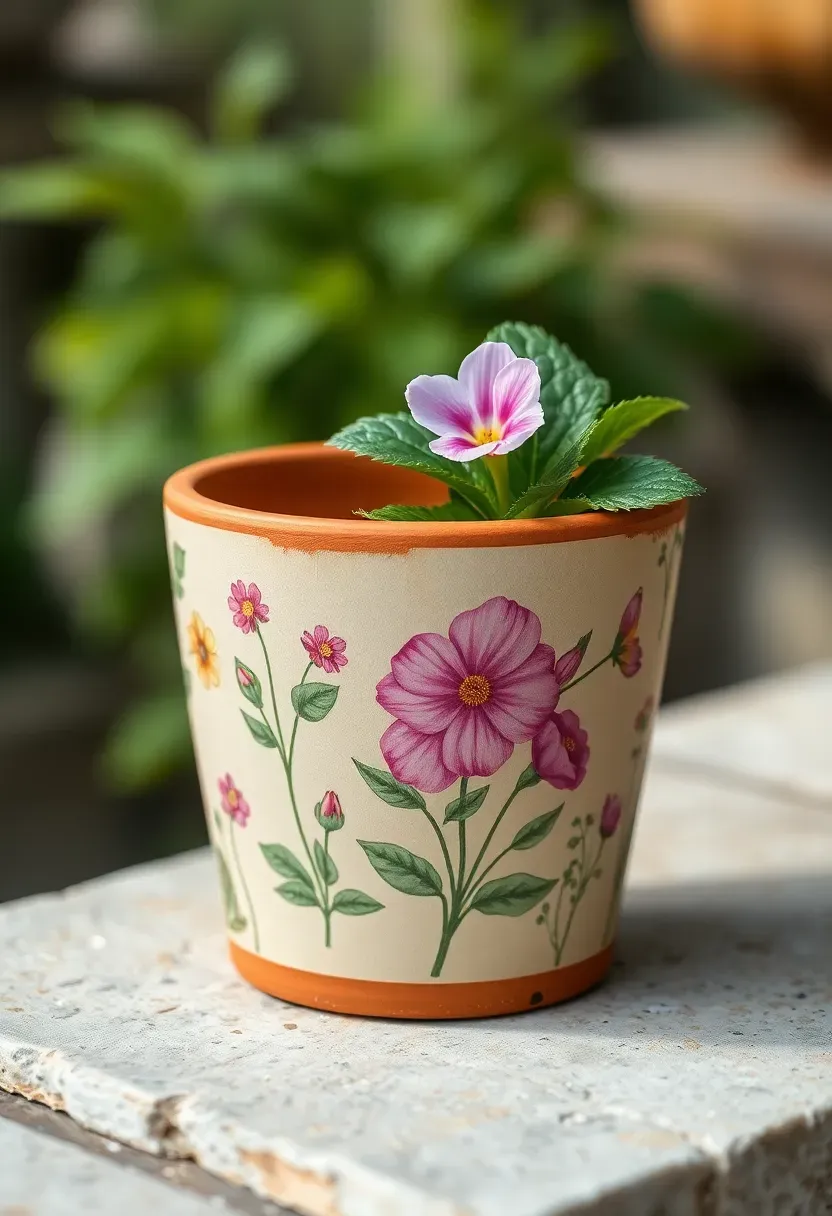
15. Decoupage Flower Pot
Decoupage transforms a plain terracotta pot into something that looks deliberately collected. The technique involves layering torn or cut paper with a glue medium that dries transparent. Vintage botanical illustrations from old books work beautifully, as do pages from floral wrapping paper or napkins printed with spring patterns. Tear rather than cut edges for seamless blending between pieces. Apply three coats of decoupage medium, letting each dry fully. The finished surface is water-resistant enough for indoor plants but benefits from an outdoor varnish overcoat for any pot kept on a porch.
Tips / Practical Recommendations
- Napkin decoupage requires peeling away the bottom plies first — you want only the printed top layer
- Brush decoupage medium on the pot surface before placing each paper piece, then brush over the top
- Work in small sections so glue does not dry before you lay the paper
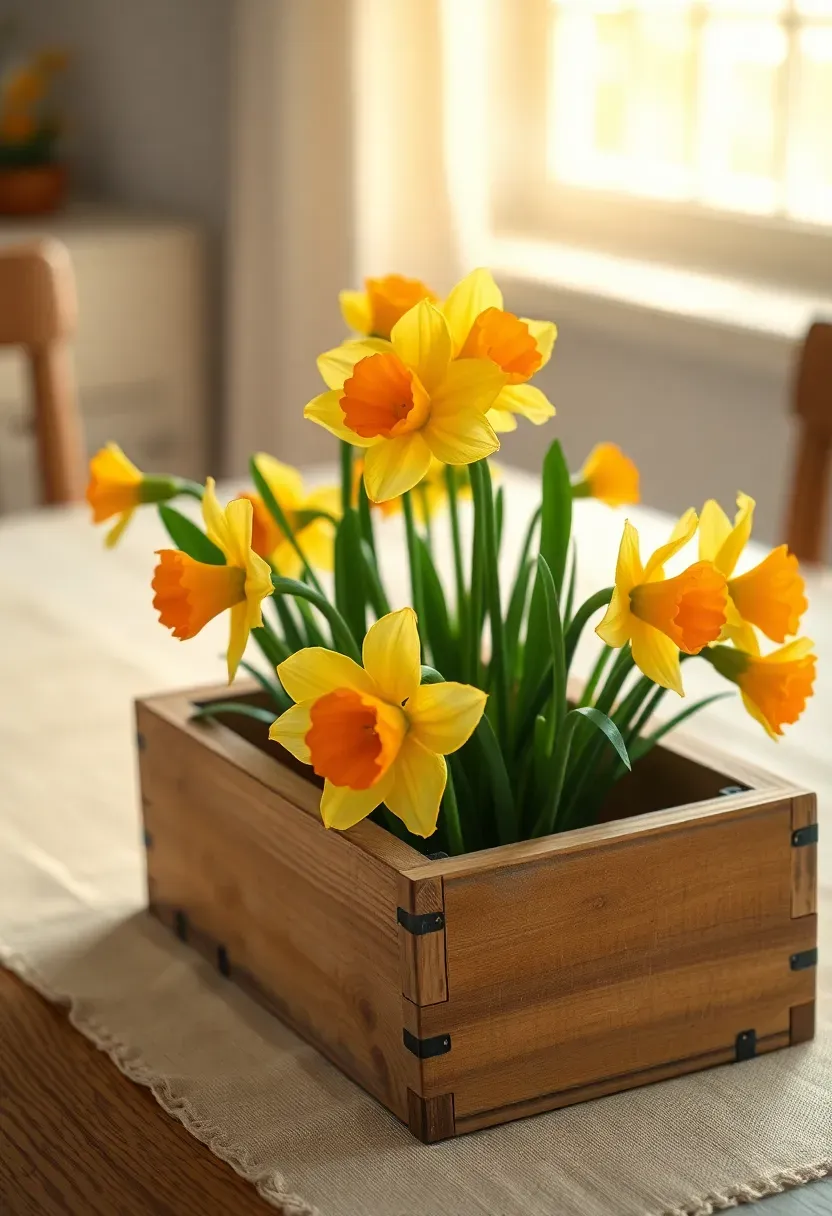
16. Wool Felt Daffodils
Felt daffodils made from wool felt outlast fresh flowers and maintain their color indefinitely. Cut six long petals from pale yellow felt and one trumpet shape from deeper yellow or orange. A simple running stitch gathers the trumpet into its characteristic cup. Petals attach around the base of the cup with a few small stitches. Wire stems (covered in green floral tape) allow you to arrange them in a vase or weave them into a wreath form. Wool felt has enough body to hold the petal shape without stiffening, unlike craft felt, which flops after a few weeks.
Tips / Practical Recommendations
- Use pinking shears on petal edges for a slightly ruffled, natural look
- Score petal centers lightly with scissors for a subtle midrib crease
- Store finished felt flowers in a lidded box rather than a bag — compression flattens the cups
Recommended
Items for this idea
17. Painted River Rock Garden Markers
River rocks make excellent garden markers because they are heavy enough not to blow away, free from riverbanks or garden centers, and require no drilling or stakes. Wash rocks thoroughly and let them dry for 24 hours. Apply a base coat of white or cream paint, let dry, then write plant names in paint pen or permanent marker. A simple botanical sprig illustration beside each name adds polish without needing real drawing skill — trace a reference image if needed. Seal with outdoor varnish; without it, marker ink fades after a few rains.
Tips / Practical Recommendations
- Flat river rocks are easier to write on than rounded ones — sort before painting
- Oil-based paint pens outperform water-based in outdoor conditions
- Clear spray lacquer provides faster, more even coverage than brushed-on varnish for small rocks

18. Willow Branch Basket
Origins / History
Basket weaving with willow has been practiced across Europe and Asia for thousands of years. Willow was chosen because its branches are naturally flexible when fresh and become rigid once dry, creating a self-locking woven structure.
Modern Interpretation
Today's willow baskets are more often decorative than functional. Craft-supply willow comes pre-dried in bundles and must be soaked overnight in water to regain pliability before weaving. Small oval baskets take an afternoon for a first-time weaver following a basic stake-and-strand pattern.
How to Apply at Home
- Soak willow rods for 8 to 12 hours in a bathtub before weaving — rigid rods split instead of bending
- Drive base stakes into a foam block to hold them vertical while you weave the sides
- Fill finished baskets with moss, spring bulbs, or a planted pot dropped inside for an instant centerpiece

Recommended
Items for this idea
19. Tie-Dye Spring Tote Bag
Spring is the natural moment to revive tie-dye with softer, more wearable palettes than the saturated 1970s versions most people imagine. Pastel fiber reactive dye on a cotton tote in three coordinating tones — soft sage, blush, and pale gold — produces something closer to a watercolor than a psychedelic pattern. The classic spiral works for any skill level: pinch the center of the flat tote, twist, rubber-band into sections, and apply dye colors to alternating wedges. Batch in a plastic bag for six hours, rinse until water runs clear, and wash alone in warm water.
Tips / Practical Recommendations
- Soda ash pre-soak is non-negotiable for fiber reactive dye — without it, the color rinses out within a few washes
- Apply dye in a well-ventilated space and wear gloves; fiber reactive dye stains skin for several days
- Dye leftover fabric scraps at the same time to use up the mixed dye before it expires

20. DIY Seed Bomb Favors
Seed bombs — compressed balls of clay, compost, and wildflower seeds — are one of the more genuinely useful crafts on this list. They make excellent party favors, Easter basket inserts, or teacher gifts that recipients can actually do something with. Mix air-dry clay with damp compost in a 1:4 ratio, work in wildflower seed mix, roll into marble-sized balls, and let dry for two days. Guests simply toss them onto a bare patch of ground, and rain does the rest. Wrap three or four in kraft paper tied with jute for gifting.
Tips / Practical Recommendations
- Native wildflower mixes outperform exotic mixes in most gardens — check local nursery recommendations
- Make seed bombs when clay is cool and slightly damp; overworked warm clay cracks when drying
- Include a small tag explaining what to do with them — most people will not know without instructions
Recommended
Items for this idea
21. Newspaper Cone Bouquet Wraps
The Core Issue
Fresh flower bouquets look beautiful, but wrapping them feels complicated without florist paper or a proper technique.
The Solution
A single sheet of newspaper folded diagonally into a cone gives any bunch of flowers professional wrapping in under two minutes. Line the inside with tissue paper in a complementary color so the ink does not show through against light petals. Fold the cone around the stems at an angle, secure with a single piece of washi tape at the back, and tie a ribbon at the stem join. The newspaper cone structure holds its shape long enough for gifting and adds vintage charm against bright tulips or ranunculus.
Pros and Cons
Pros: Free, immediately available, genuinely chic looking Cons: Not waterproof; flowers need fresh water soon after gifting
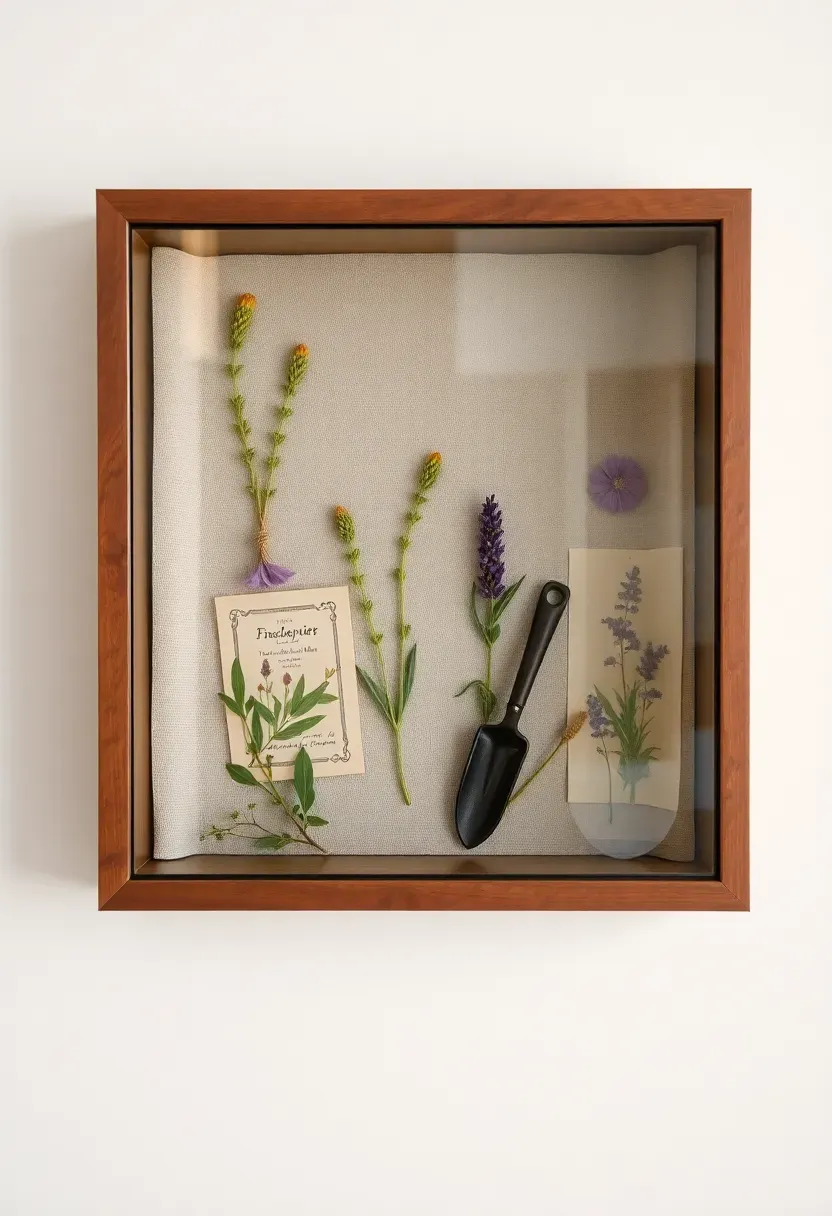
22. Spring Shadow Box Display
Shadow boxes offer a way to display small spring objects — pressed flowers, vintage seed packets, botanical prints, and miniature tools — as a composed wall piece rather than letting them pile up in a drawer. Choose a deep-frame shadow box (at least 3cm depth) and plan the arrangement before gluing anything. Layer elements at slightly different depths by building small paper risers beneath some items. A plain linen or watercolor-paper background suits botanical content better than colored mat board. This project rewards slowness — leaving the arrangement to evolve over a few days before committing with glue usually produces a better result.
Tips / Practical Recommendations
- Photograph the arrangement before gluing in case you want to rearrange later
- Acid-free adhesive protects botanical paper items from yellowing at contact points
- Glass on the frame protects pressed flowers from humidity; UV-protective glass prevents fading over years
Recommended
Items for this idea
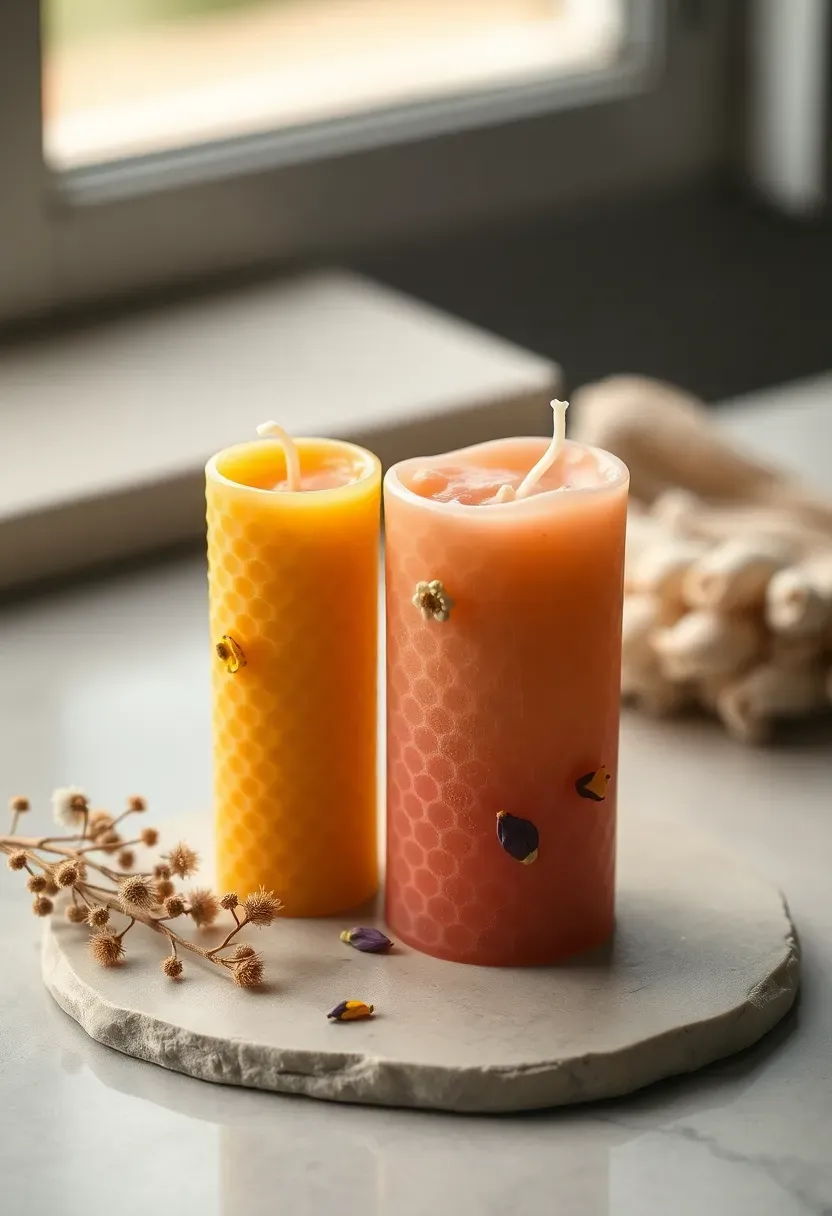
23. Beeswax Candles with Floral Wax Sheets
Rolled beeswax candles are the entry point for candle-making because they require no melting, no thermometers, and no special equipment. Sheets of honeycomb-textured beeswax — available in natural yellow and dozens of dyed colors — soften at room temperature and roll tightly around a wick. For spring, press small dried flower petals onto the outside of the roll before tightening the final layer so the wax encases them. The result is a candle with botanical inclusions that glow when lit.
Tips / Practical Recommendations
- Warm the wax sheet with a hair dryer on low for 20 seconds if it cracks at the fold — cold wax breaks rather than bends
- Use only candle-rated wick for the diameter you are rolling; undersized wick causes tunneling
- Dried flowers embedded near the outside burn away as the candle burns down — this is normal and safe for properly dried botanicals
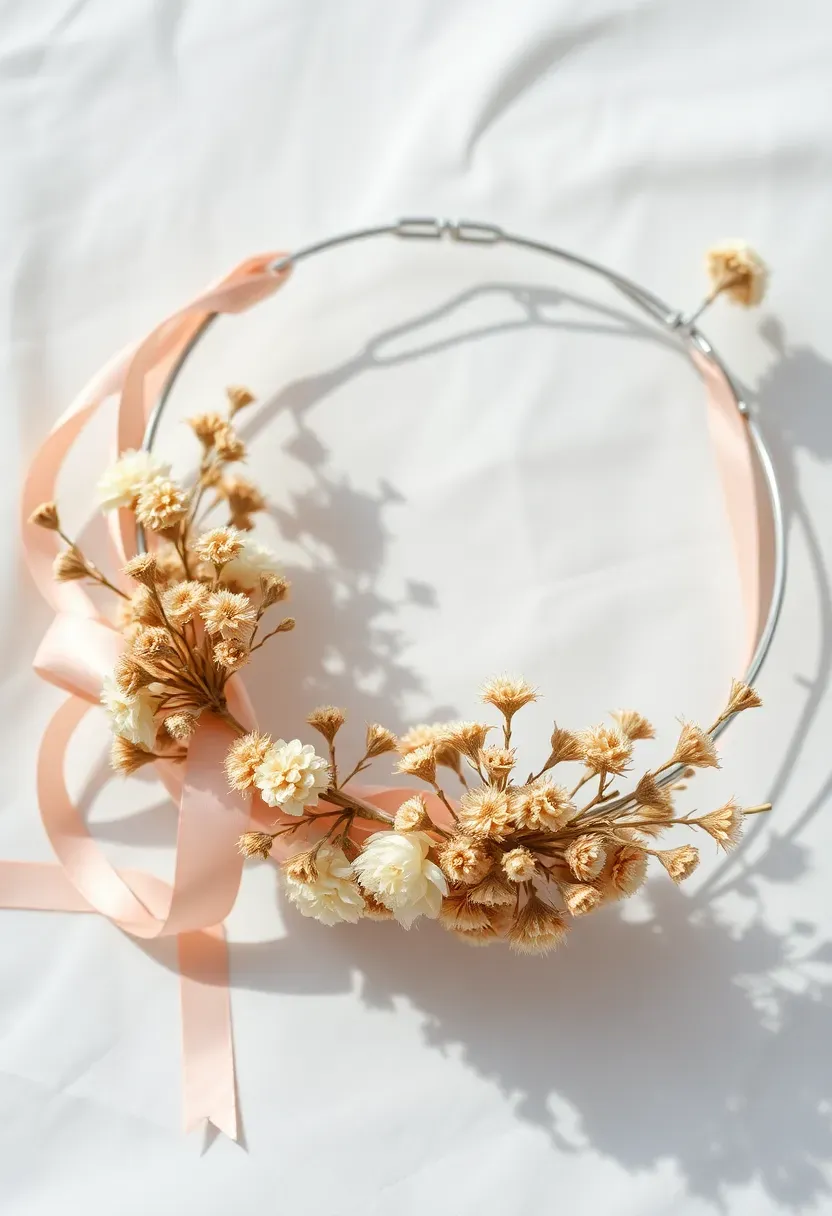
24. Ribbon-Wrapped Flower Crown
A flower crown built on a wire base wrapped with ribbon rather than floral tape lasts far longer than fresh flower versions and looks equally festive. Use a flexible aluminum armature wire bent to head size, then wrap entirely in narrow satin ribbon secured with small dabs of hot glue. Attach dried or fabric flowers using wrapped wire stems, distributing weight evenly around the crown. Trailing ribbon streamers attached at the back add movement and can be customized to any color scheme — ideal for Easter, spring birthdays, or outdoor photoshoots.
Tips / Practical Recommendations
- Measure head circumference before bending wire — crowns that slip constantly are frustrating to wear
- Balance the visual weight so heavier clusters sit at the sides rather than center-front, which causes the crown to tip forward
- Store in a round hat box to maintain the shape
Recommended
Items for this idea
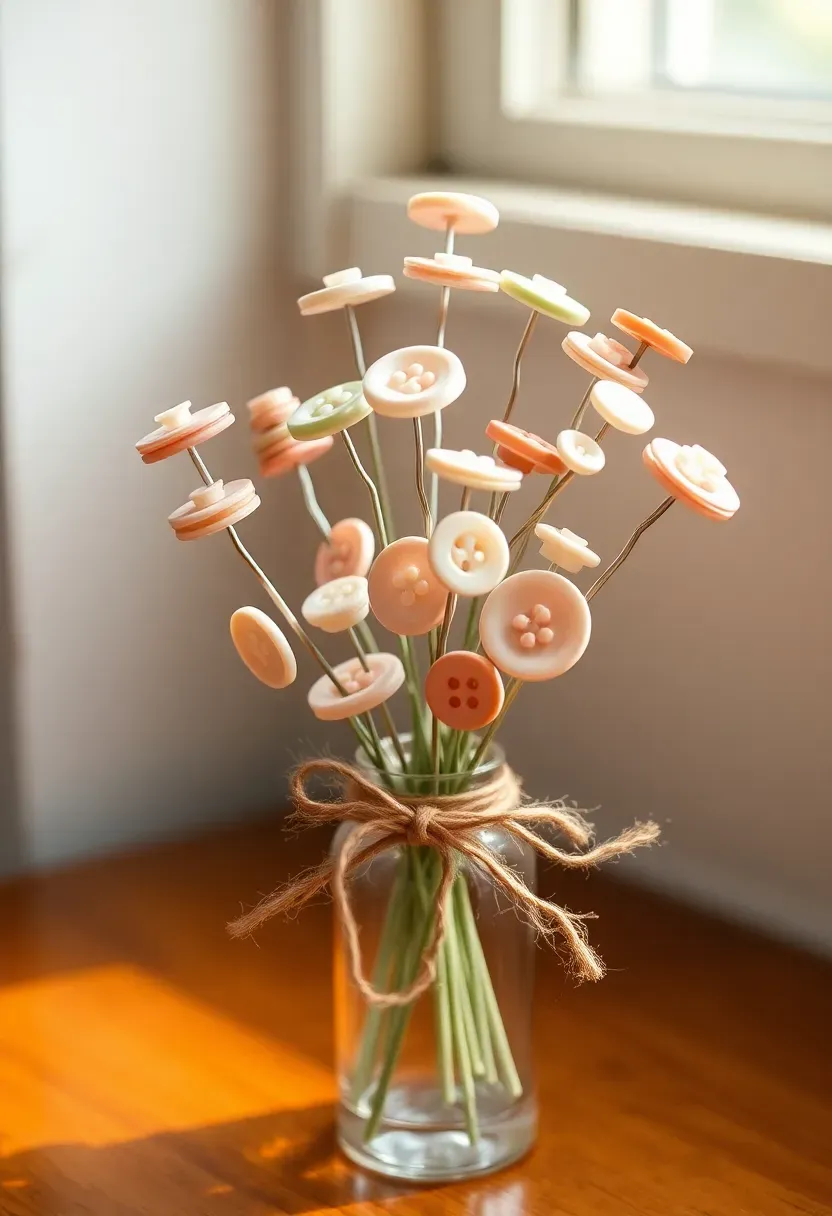
25. Button Bouquet in a Vase
Button bouquets are a charming permanent alternative to fresh flower arrangements — they never wilt, and a jar of mixed buttons collected from old garments becomes something genuinely beautiful. Thread two buttons of slightly different sizes onto the same piece of 24-gauge floral wire, one on each side, then twist the wire end into a stem. Repeat for 30 to 40 "blooms" and arrange in a small vase with floral foam or a ball of crumpled chicken wire for support. Pastel vintage buttons mixed with a few pearlescent or clear glass ones suit the spring palette particularly well.
Tips / Practical Recommendations
- Buttons with two holes look more like flowers than four-hole buttons — sort before building
- Cut wire stems at varying lengths before arranging for a naturalistic height variation
- Weight the vase base with pebbles if it feels top-heavy after filling
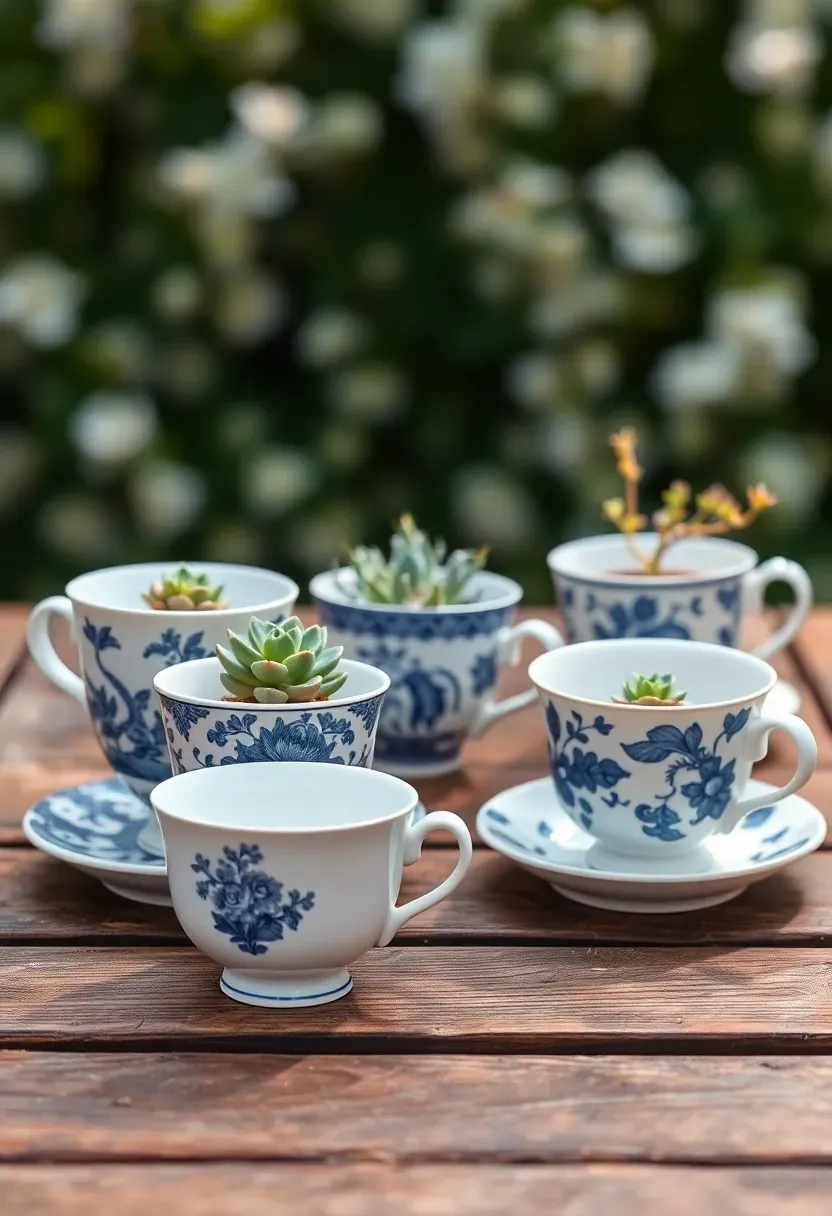
26. Vintage Teacup Planters
Thrift-store teacups make endearing small planters for spring succulents, miniature violas, or trailing string-of-pearls. Because teacups have no drainage hole, a generous layer of activated charcoal at the bottom prevents soil sourness from the inevitable water that collects. Use a mix of perlite and potting soil for succulents, or straight potting mix for flowering annuals that prefer more moisture. A collection of mismatched cups and saucers grouped on a garden table or windowsill looks intentionally eclectic — the visual key is finding a unifying element, whether that is a shared color (all blue-and-white china) or a consistent scale.
Tips / Practical Recommendations
- Drill a small drainage hole with a diamond-tip drill bit if you want to use the planters long-term — 60 seconds of careful drilling per cup
- Succulents in teacups rarely need water more than once every two weeks indoors
- Display cups on their saucers for a finished look and to catch any overflow
Recommended
Items for this idea
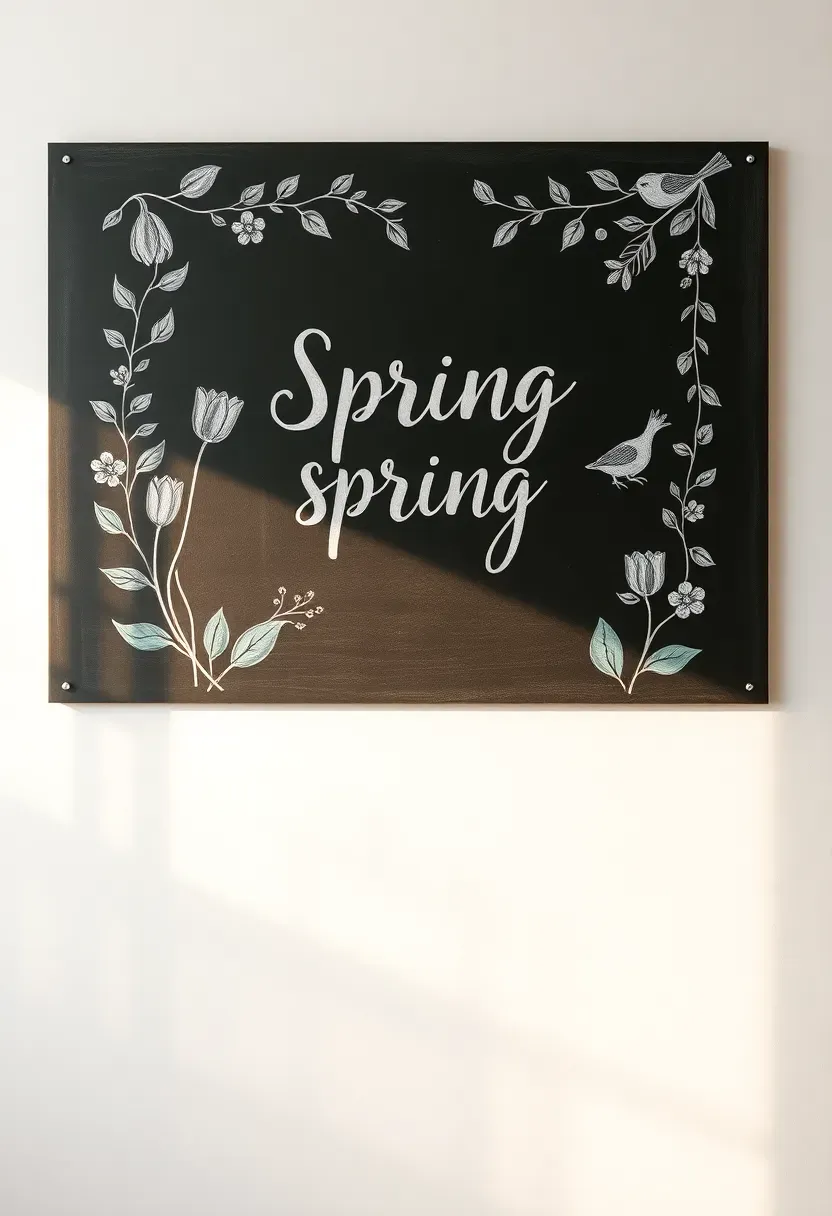
27. Spring Chalkboard Sign
A chalkboard sign is one of the more versatile spring crafts because it can be updated seasonally without starting over. A painted chalkboard panel — any piece of MDF or wood coated with two coats of chalkboard paint — becomes a permanent blank canvas. For spring, hand-letter a simple phrase in the center, then surround it with chalk botanical drawings: loose tulips, trailing ivy, small birds. Liquid chalk markers produce cleaner lines than dusty chalk and photograph better. Spray with a fixative if you want the design to last through the season; wipe clean at summer's end.
Tips / Practical Recommendations
- Season a new chalkboard before first use: rub a full piece of chalk sideways across the entire surface, then erase — this prevents ghost lines on the first proper design
- Liquid chalk markers dry within seconds and smear if touched before fully dry; keep hands clear while lettering
- Practice the lettering layout on paper first, then use a light chalk sketch as a guide before committing with markers
Quick FAQ
Can you do most of these spring craft projects with kids?
Many of these work well with children aged 6 and up — particularly the pine cone bird feeder, painted mason jars, river rock markers, and seed bombs. Projects involving hot glue, heat guns, or fiber reactive dye are adult-supervised or adult-only depending on the child's age.
Do you need to invest in expensive supplies before starting?
Not for a first attempt. Most spring home craft projects here use materials already in many homes — jars, paper, buttons, ribbon scraps, and kitchen basics. Add supplies gradually based on which projects you enjoy most rather than buying everything at once.
What is the difference between wool felt and craft felt?
Wool felt contains actual wool fibers and has enough body and texture to hold three-dimensional shapes well. Craft felt (usually polyester) is cheaper but floppier and pills over time. For any felt project meant to last — flowers, crowns, decorative items — wool felt is worth the price difference.
Which spring craft project gives the most impressive result for the least time?
Silk egg marbling consistently surprises people with how professional the results look for under 30 minutes of active effort. Pressed flower bookmarks laminated at home come in as a close second — the effort-to-result ratio is remarkably good.
Can these projects be made from fully recycled or repurposed materials?
Several absolutely can: newspaper cones, button bouquets, teacup planters, seed packet envelopes, and pine cone bird feeders use entirely repurposed or foraged materials. Even the watercolor cards can use the backs of printed paper if desired.
Start where your supplies already are. A mason jar, a bag of buttons, a few pine cones from the yard — any one of these is a complete spring project waiting to happen. The best seasonal craft is always the one you actually begin, not the most elaborate one you save to a board and revisit next year.
Pinterest cover for 27 Spring Craft Projects to Brighten Your Home This Season
About the author
OBCD
CGI visualization and interior design content. We create detailed 3D renders and curate practical design ideas for every room in your home.