How to Decorate a Room Like a Pro: 6 Simple Steps
Knowing how to decorate a room like a pro comes down to following a deliberate sequence rather than shopping on impulse — and the difference shows immediately in the final result.
Interior designers follow the same six steps whether they are working on a studio apartment or a sprawling living room: purpose, palette, furniture, lighting, textiles, and accessories, in that order.
As an Amazon Associate I earn from qualifying purchases.
Table of Contents
What You'll Need
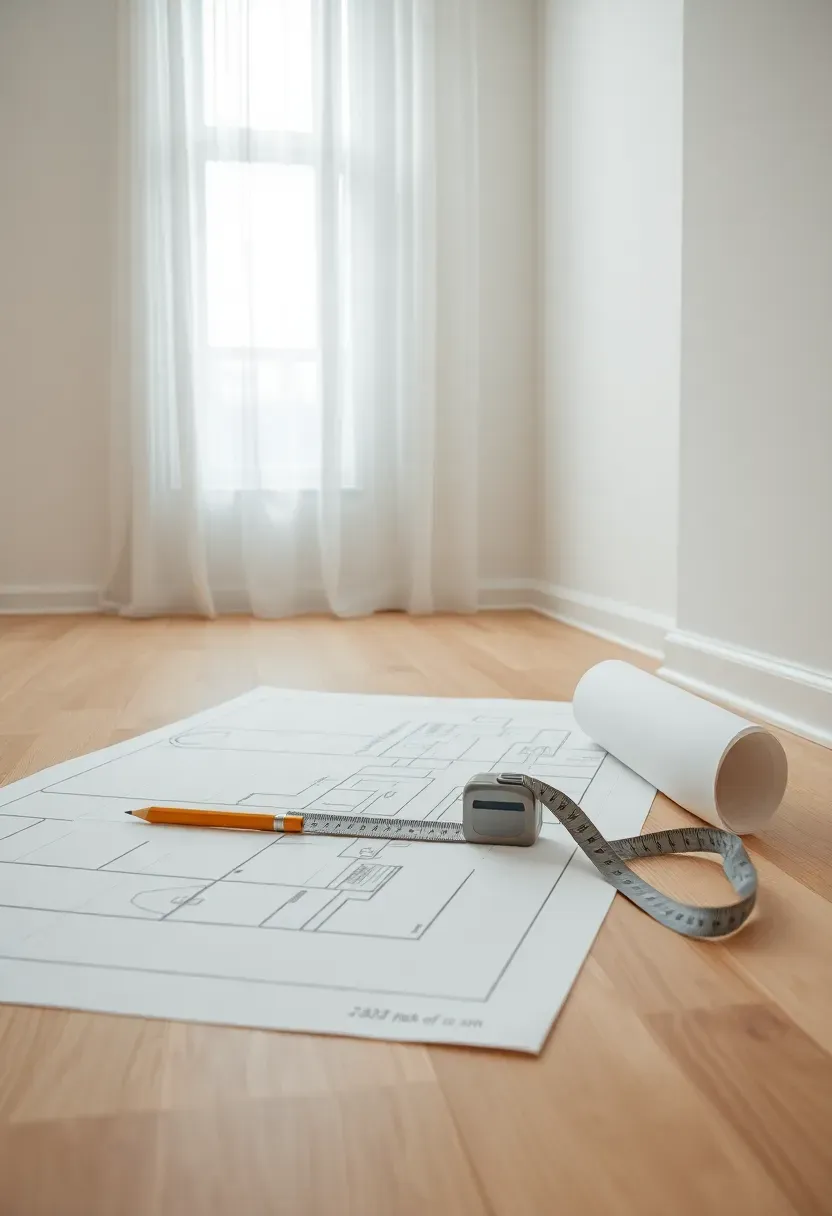
- Tape measure and graph paper (or a free floor-plan app)
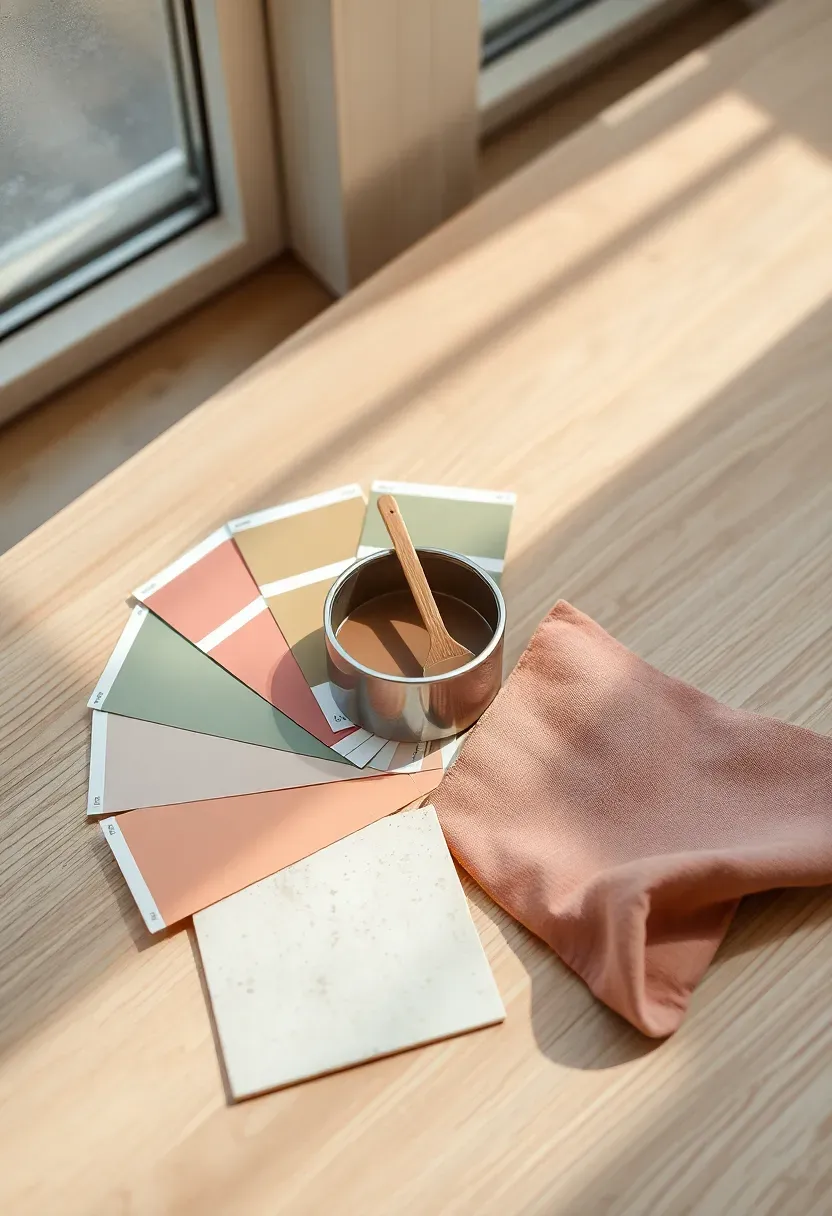
- Paint swatches and a color fan deck
- Furniture with correct proportions for the room's square footage
- At least three light sources: overhead, task, and accent
- A curated set of textiles, artwork, and plants
Step 1: Define the Room's Purpose and Layout
The single biggest mistake people make when decorating a room is starting at a furniture store rather than starting with a question: what will this room actually do? A room with a clear purpose — a focused home office, a relaxed reading nook, a dining room that hosts ten people — can be decorated with intention instead of guesswork. Before buying or moving a single thing, write down the primary activity and then the secondary ones. That list becomes your filter for every decision that follows.
Recommended
Items for this idea
Once you know the purpose, sketch a rough floor plan on graph paper or use a free app like Magicplan. Mark where natural light enters, note any fixed architectural features — a fireplace, a bay window, built-in shelving — and draw the traffic paths people will naturally take through the space. Rooms that skip this step end up with furniture pushed against every wall, which actually makes the space feel smaller and more chaotic, not more furnished.
Common mistake: treating a multi-function room as if it had one zone. Even a studio apartment benefits from a designated reading corner that feels distinct from the sleep area — a small rug and a floor lamp are all it takes to create that separation visually.
- Do: Assign a primary function and let that drive every major purchase decision.
- Don't: Push all furniture against the walls — floating pieces toward the center creates intimacy and makes the room look more intentional.
- Pro tip: Mark a 36-inch clearance around major furniture pieces on your floor plan to guarantee comfortable traffic flow before anything is moved.
What this gives you: A clear brief that prevents impulse purchases and ensures every item in the room earns its place.
Step 2: Choose a Color Palette
Color is the fastest way to create a cohesive, professionally decorated room — or to make it feel chaotic and unresolved. Designers typically work with the 60-30-10 rule: 60% of the room in a dominant neutral, 30% in a secondary tone, and 10% in an accent that pops. For most rooms, that means one primary wall color, a secondary color on soft furnishings, and an accent woven through cushions, artwork, or a single statement piece.
Recommended
Items for this idea
Always test paint on a 12-by-12-inch section of the actual wall and observe it at different times of day — morning light, midday sun, and evening lamplight can make the same swatch look like three different colors. Warm whites turn peachy under incandescent bulbs; cool grays can feel almost purple in north-facing rooms. The contrast to avoid: picking a palette from a mood board without testing it in the specific room where the light has its own personality.
Placement note: Run your accent color vertically through the room — a cushion at seat height, artwork at eye level, and a small vase on a high shelf — so the eye travels up and the ceiling feels taller.
Stick to two or three paint colors across the entire room, including any built-ins or trim. More than three and the space starts to feel like a patchwork quilt rather than a thoughtfully designed interior.
- Do: Pull your palette from a piece you already own and love — a rug, a painting, or a fabric — so the room feels personally curated.
- Don't: Choose your final paint color from a small chip under fluorescent store lighting; always test a large swatch at home first.
- Pro tip: Paint the ceiling in a slightly lighter version of the wall color to make the room feel taller without the harsh contrast of stark white.
What this gives you: A unified visual foundation that makes every other decorating decision easier and more coherent.
Step 3: Select and Place Furniture
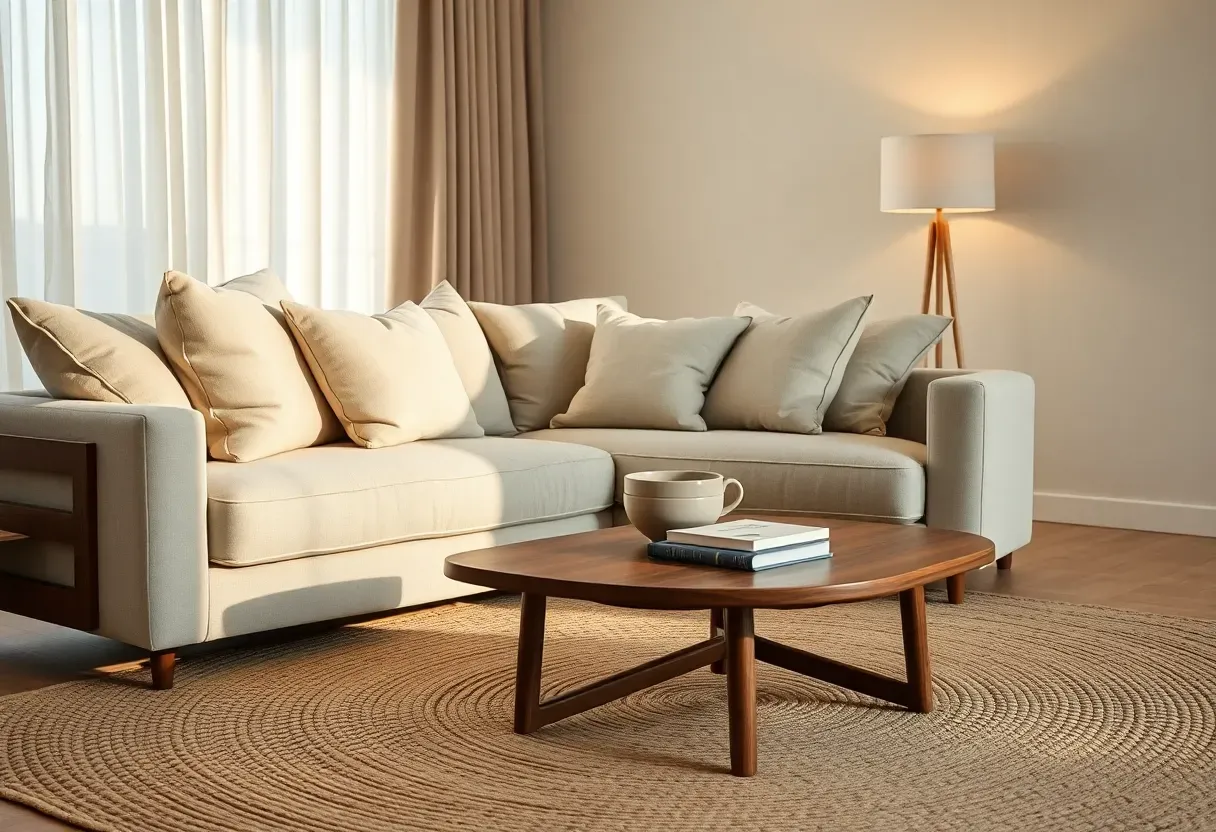
Scale is the concept that separates amateur decorating from professional-looking results. A sofa that is two inches too wide or a dining table that is a foot too long will make a room feel cramped no matter how beautiful the piece is. Before purchasing anything, tape out the footprint of each piece on the floor using painter's tape — it takes ten minutes and can save hundreds of dollars in return fees. The goal is furniture that leaves at least 18 inches between a coffee table and a sofa, and 36 inches on main circulation paths.
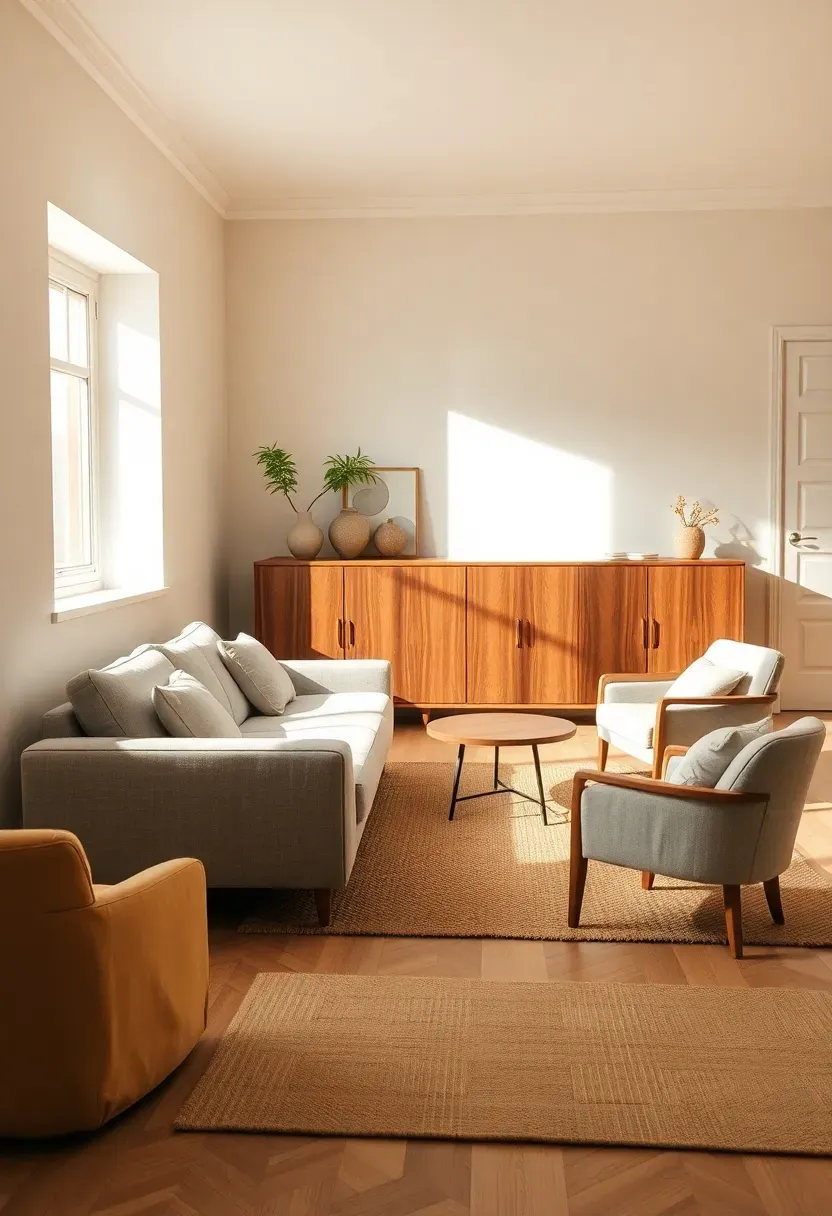
Why it works: furniture placed in conversation groupings — facing each other, close enough for easy talk — makes a room feel intentionally designed rather than randomly filled. A single large sofa facing a television across an empty expanse of floor is the hallmark of an undecorated room. Instead, anchor the seating group with a rug, bring chairs in at angles, and place a side table within arm's reach of every seat.
When you have a long, narrow room, use a large area rug to define a zone within it rather than trying to fill the length with furniture. The rug creates a visual boundary that makes the seated area feel complete and deliberate, while leaving the rest of the floor open and easy to move through.
If you are working with a tight footprint, see 25 DIY Room Decor Ideas for Teens for scale-appropriate furniture and multi-use piece strategies that apply to any small room.
- If the room feels too empty after placing the main furniture, then add one accent chair rather than pushing pieces apart — density in the right places reads as cozy, not crowded.
- If the room feels too crowded, then remove one piece entirely before rearranging — subtraction almost always improves a space faster than shifting.
- Pro tip: Orient seating toward natural light and the best architectural feature in the room, not just toward the television.
What this gives you: A room that feels proportionate, spacious, and functional from the moment you walk in.
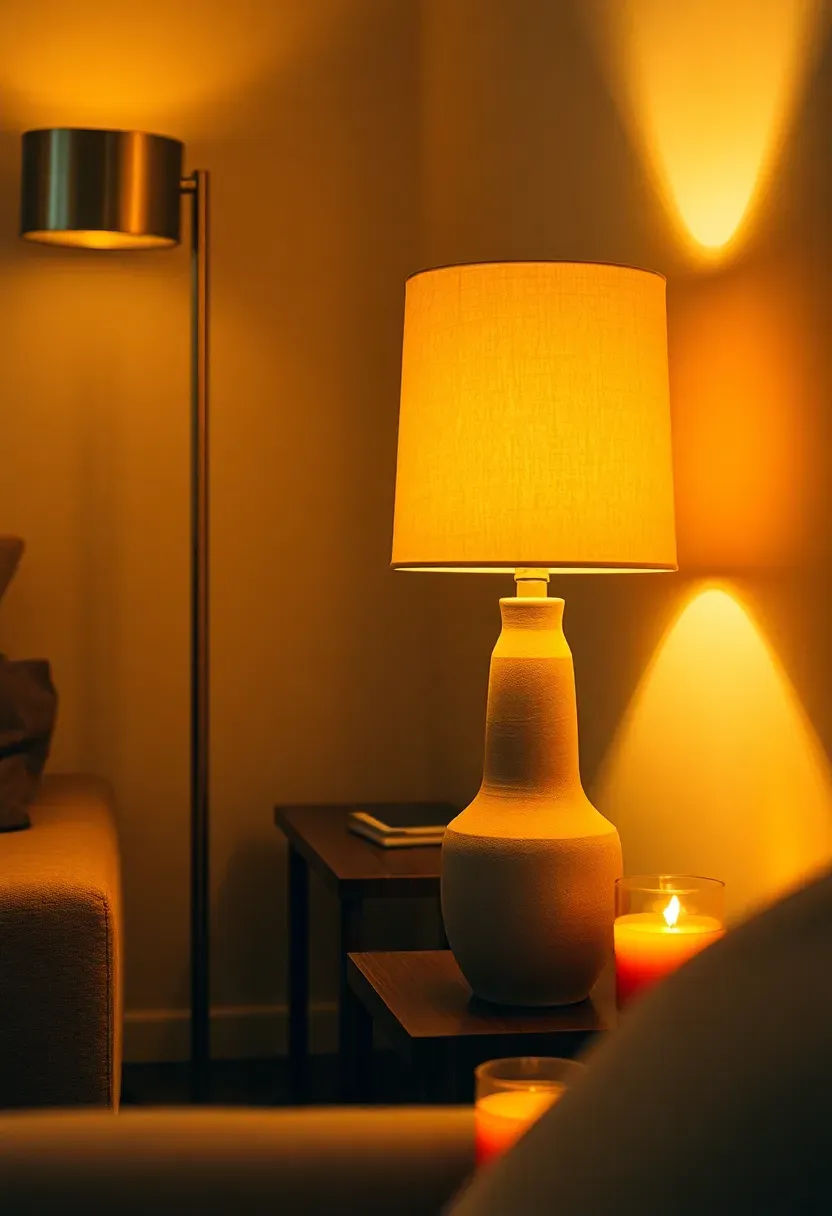
Step 4: Layer Your Lighting
Lighting is the most underestimated element in home decoration, yet it is the one that professional designers spend the most time planning. A room lit by a single overhead fixture — even a beautiful one — will always look flat and slightly institutional. The fix is layering: at least one overhead source for general illumination, one task light for reading or work, and one accent light to highlight a wall, shelf, or architectural feature. Three layers create depth, warmth, and the sense that a room has been thoughtfully considered.
Recommended
Items for this idea
Dimmer switches on overhead lights change the entire emotional register of a room for roughly $15 per switch. A living room at full brightness at noon and the same room at 40% brightness with two table lamps on at 9 pm feel like entirely different spaces — one is functional, the other is inviting. The contrast to avoid: replacing a harsh overhead bulb with a warm one and calling the lighting "done," while every corner of the room remains in shadow.
Vary the height of your light sources intentionally. A floor lamp at standing height, a table lamp at seated eye level, and a low candle or LED strip under a shelf create a vertical rhythm that draws the eye through the space and makes the room feel larger and more considered.
- Do: Install dimmers on at least the main overhead circuit — it is the highest-return lighting upgrade you can make.
- Don't: Mix color temperatures in the same room; warm (2700K) and cool (4000K) bulbs in adjacent lamps create a jarring, unresolved look.
- Pro tip: Place an upward-facing floor lamp behind a sofa or in a corner to bounce light off the ceiling and double the apparent room height.
What this gives you: A room that feels warm and dimensional in the evening and functional and bright during the day — without changing a single piece of furniture.
Step 5: Add Textiles and Soft Furnishings
Textiles are where a decorated room becomes a comfortable one. A rug grounds the furniture arrangement and signals where one zone ends and another begins. Curtains hung high — at ceiling height rather than just above the window frame — add vertical drama and make windows appear taller. Cushions and throws introduce color, pattern, and the kind of tactile warmth that makes a person want to sit down and stay. Without textiles, even a well-designed room feels cold, unfinished, and slightly photogenic-but-unliveable.
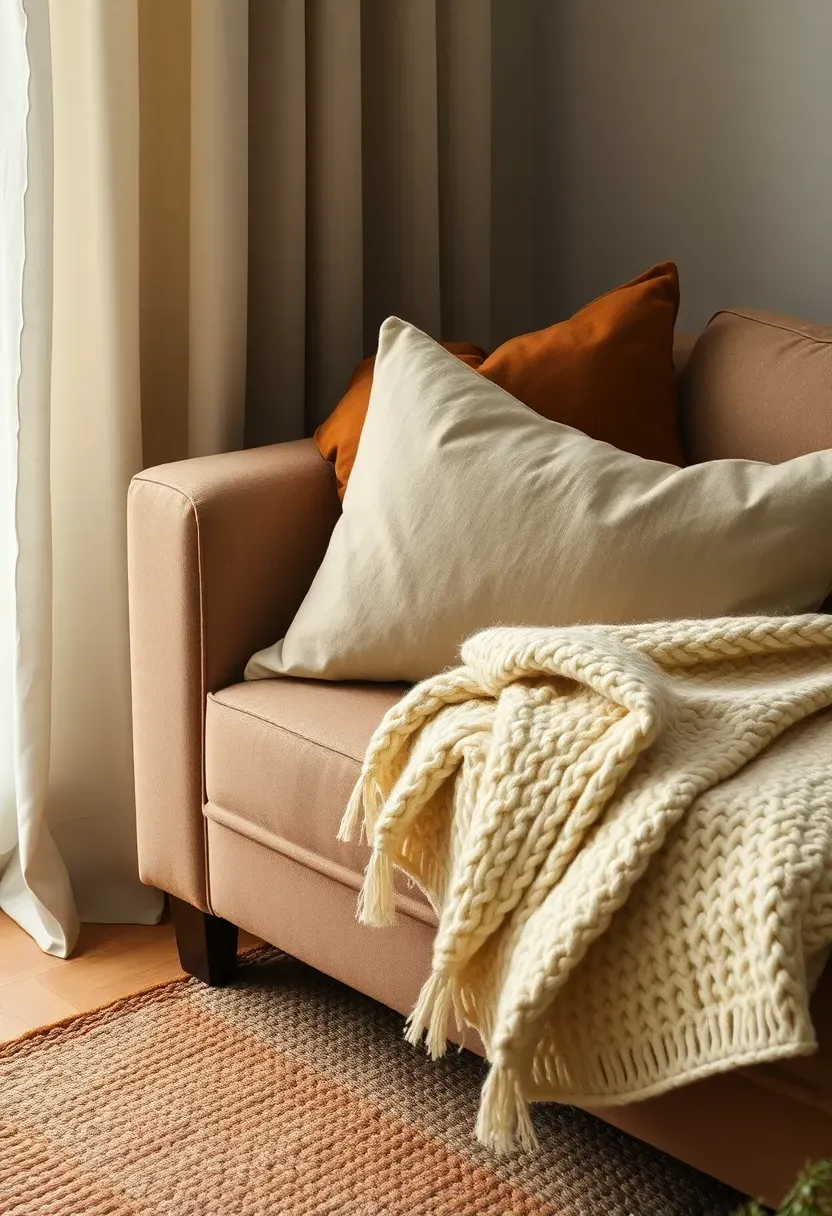
Mix at least three different textures in the same room: something smooth (linen, silk, polished cotton), something nubby or woven (boucle, jute, chunky knit), and something with a slight sheen (velvet, sateen, metallic thread). This variation catches light differently throughout the day and creates visual richness that a single-texture room, however high quality, simply cannot achieve. The contrast to note: a room filled with matching fabric sets — sofa cushions that perfectly match the curtains that perfectly match the rug — tends to read as overly coordinated and flat rather than designed.
To see how layered textiles work in a complete room concept, 23 Charming Farmhouse Dining Room ideas shows how natural linens, woven placemats, and simple cotton drapes combine into a cohesive, welcoming space.
- Do: Hang curtains as close to the ceiling as possible and let them pool slightly on the floor — the extra length is one of the easiest ways to make a room look more luxurious.
- Don't: Choose a rug that is too small; in a living room, all main furniture legs should sit on the rug, or at minimum the front legs of the sofa and chairs.
- Pro tip: Odd numbers of cushions (3 or 5) look more natural and less staged than symmetrical even-number arrangements.
What this gives you: A room that feels genuinely comfortable and lived-in rather than showroom-perfect and untouchable.
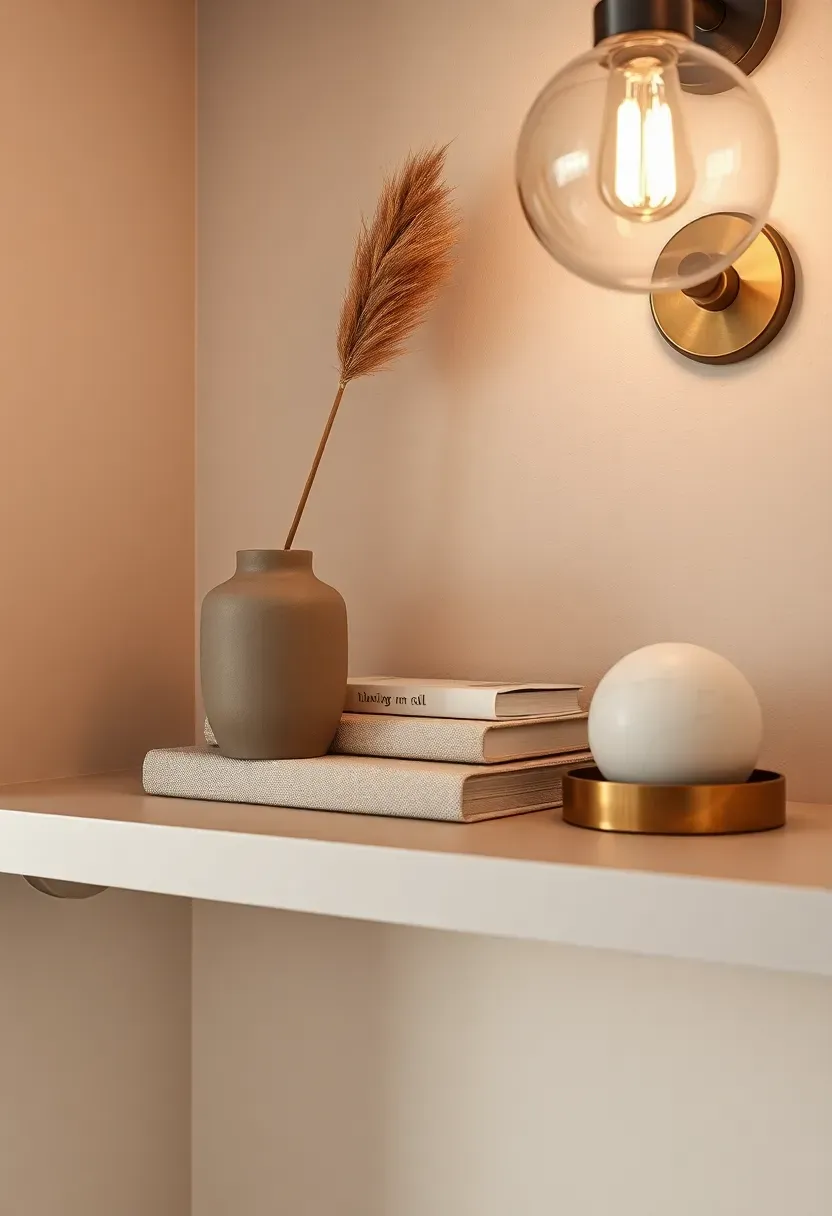
Step 6: Style and Edit Your Accessories
Accessories are the final layer of a professionally decorated room, and the one where most people go wrong — not by choosing the wrong objects, but by keeping too many of them. Designers follow a simple rule: display only the things you genuinely love, group them in odd numbers, and vary height within every grouping. A tall vase next to a mid-height candle next to a low stack of books reads as intentional. Three objects of identical height in a row reads as a shelf of trophies. Edit ruthlessly: if you remove an item and the arrangement looks better, it should stay off the shelf.
Recommended
Items for this idea
Artwork should be hung at eye level — the center of the piece at roughly 57–60 inches from the floor, which is the standard used in most galleries. The most common amateur mistake is hanging art too high, which disconnects it from the furniture below and makes the room feel visually unanchored. For a gallery wall, lay the arrangement out on the floor first and photograph it before committing a single nail to the wall.
Plants are one of the highest-value accessories in any room: they add organic shape, introduce a vertical element that does not require wall damage, and bring the one texture — living, shifting, imperfect — that no manufactured object can replicate. A single large-leafed plant in a well-chosen pot does more for a room's atmosphere than a shelf full of small decorative objects.
- Do: Edit down to the pieces you love most — a few well-chosen objects on a surface look more expensive and considered than a crowded collection.
- Don't: Hang artwork based on where the stud is; hang it at the correct eye-level height and use appropriate wall anchors to reach that position.
- Pro tip: Before adding anything new to a room, take a photograph from the doorway — the camera flattens the space and reveals clutter or imbalance that is easy to miss in person.
What this gives you: A room that looks curated and intentional — full of personality without feeling cluttered or overwhelming.
Frequently Asked Questions
What order should I decorate a room in?
Start with purpose and layout, then choose your color palette, then select and place furniture. Only after those three foundational steps should you add lighting layers, textiles, and finally accessories. Working out of order — buying accessories before you have furniture placed, for example — leads to mismatched scales and wasted purchases.
How do I make a room look professionally decorated on a budget?
Focus spending on the elements with the highest visual impact: paint (the best cost-per-square-foot transformation available), one large rug that anchors the seating area, and curtains hung at ceiling height. These three changes alone move a room from "undecorated" to "designed." Save money on accessories and art, which can be sourced secondhand or made yourself without any loss of quality or personality.
About the author
OBCD
CGI visualization and interior design content. We create detailed 3D renders and curate practical design ideas for every room in your home.