How to Decorate a Mantle in 2026: 6 Steps to a Stunning Focal Point
Your mantle is the architectural exclamation point in any room that has one — and yet most end up holding a random assortment of dusty frames and forgotten candles. The six steps below give you a structured approach to building a mantle display that feels intentional, balanced, and genuinely reflective of how you live. Whether your fireplace is a grand stone surround or a slim modern ledge, the principles stay the same: anchor, layer, breathe, repeat.
Table of Contents
- What You'll Need
- Step 1: Start with a Single Anchor Piece
- Step 2: Build Height with Layered Art
- Step 3: Introduce Sculptural Objects in Odd Numbers
- Step 4: Add Warm Lighting at Two Levels
- Step 5: Weave in Organic Texture
- Step 6: Edit Until the Mantle Breathes
What You'll Need
- One large anchor piece (mirror, framed artwork, or oversized print — at least 60 cm wide)
- 2-3 smaller framed prints or photographs for layering
- 3-5 sculptural objects in varied heights (ceramics, vases, candle holders)
- 2 candles or a pair of taper candle holders
- 1 organic element (dried branches, a small trailing plant, eucalyptus bundle)
- Painter's tape for testing placement
- A phone camera for checking symmetry from across the room
Step 1: Start with a Single Anchor Piece
Every compelling mantle begins with one object that claims the center and sets the scale for everything that follows.
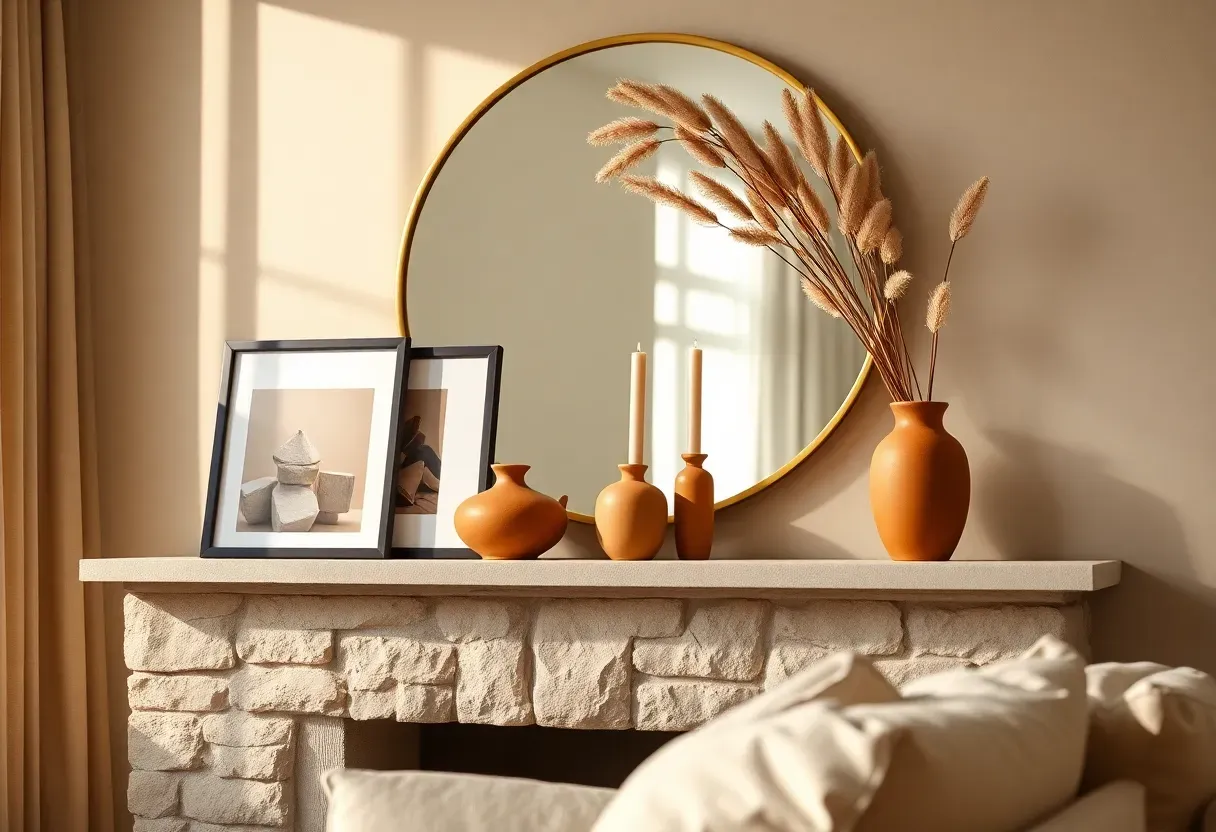
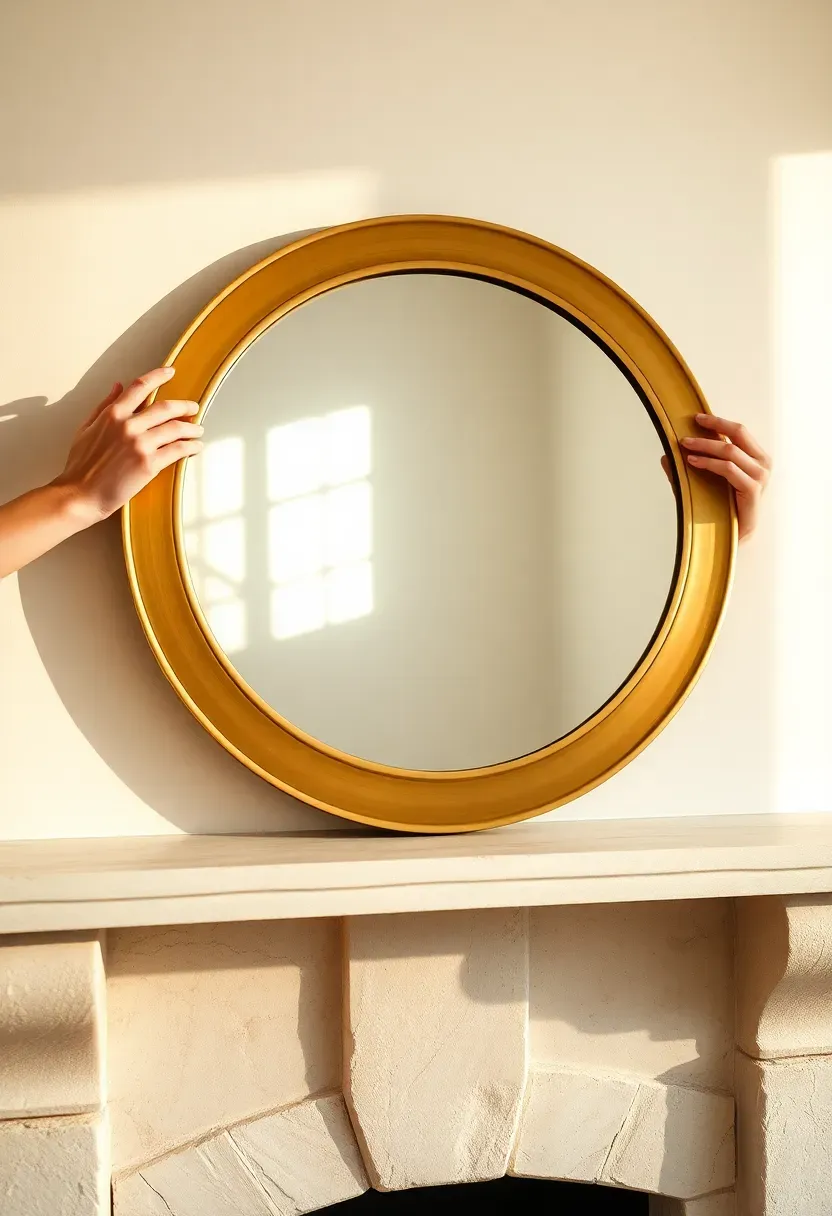
Choose a single piece that occupies the upper two-thirds of the wall space above the mantle: a round mirror, an oversized abstract print, or a large framed photograph. Lean it against the wall rather than hanging it — leaning creates a casual, layered quality that mounted art rarely achieves. Center it visually, not mathematically. If the fireplace surround is asymmetrical or the room layout pulls the eye to one side, shift the anchor piece slightly toward the heavier side of the room. Stand at the room entrance and confirm the anchor draws the eye before adding anything else. This single object needs to do the heavy visual lifting so that every subsequent layer supports rather than competes.
Do: choose an anchor piece that contrasts with the wall — a dark frame on a light wall, a warm brass mirror on cool plaster Don't: use a small 8x10 frame as the anchor — undersized focal pieces make the mantle look like a shelf in need of furniture Pro tip: round mirrors are having a major moment in 2026 interiors and they soften the typically rigid horizontal line of the mantle itself
Step 2: Build Height with Layered Art
Most people skip this — and it shows. A single framed piece on a mantle sits there; layered pieces create a story.
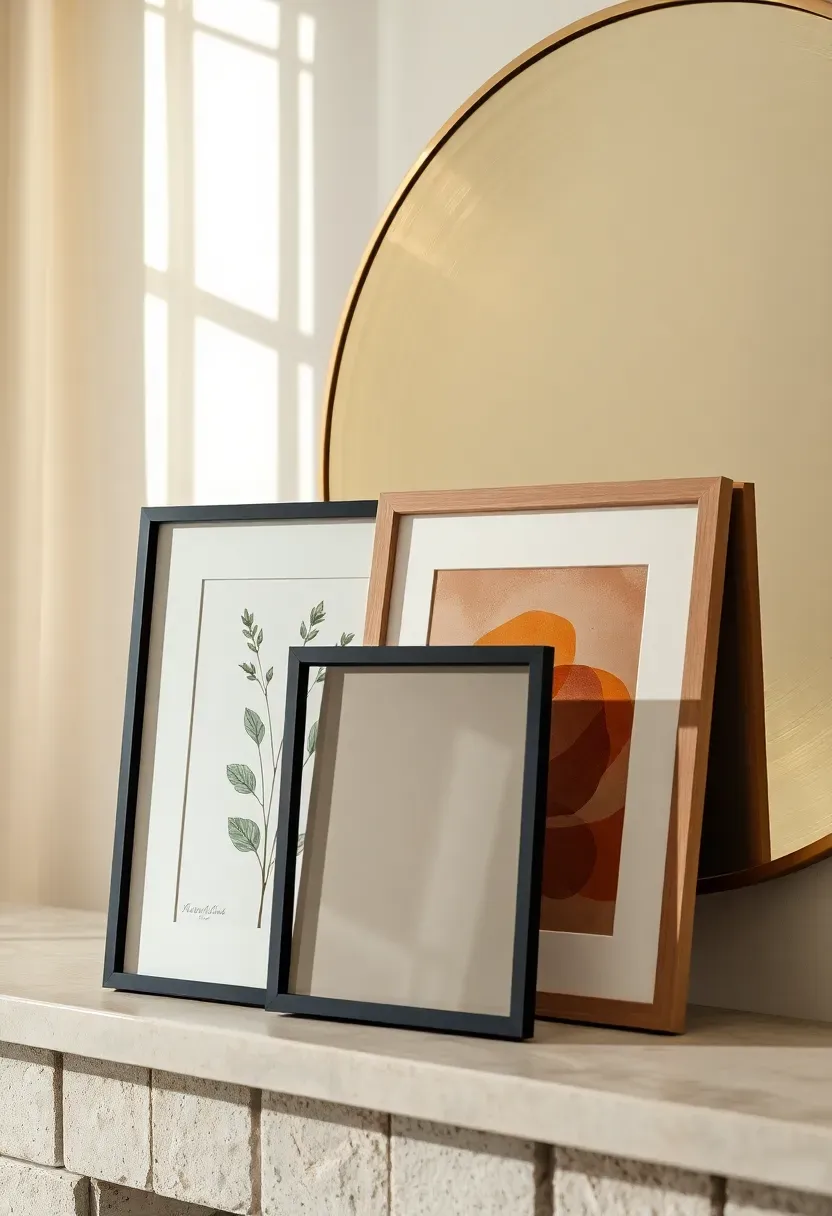
Lean two or three smaller framed prints in front of your anchor piece, overlapping their edges slightly. Vary the frame sizes — one medium, one small — and offset them to one side rather than centering the whole group. The overlap is essential: it creates visual depth that a row of separated frames cannot. Place the largest secondary print so it covers roughly 15-20% of the anchor piece behind it. This controlled overlap signals that the arrangement is designed, not accidentally accumulated. For the artwork itself, pick pieces that echo a color from your room palette — a botanical sketch with soft green tones, a charcoal abstract that mirrors your sofa fabric, a warm sepia photograph that picks up the wood in your floor.
Do: mix frame materials — a slim black metal frame beside a natural oak frame beside an unframed canvas adds textural variety Don't: lean identical frames in a perfectly even row — that's a store display, not a styled mantle Pro tip: postcards and small art prints from independent artists cost under ten dollars and layer beautifully against larger pieces — they add personality without the investment of full-size framed art
Recommended
Items for this idea
Step 3: Introduce Sculptural Objects in Odd Numbers
Get this right and the rest falls into place. Objects on a mantle need to feel like a composition, not a lineup.
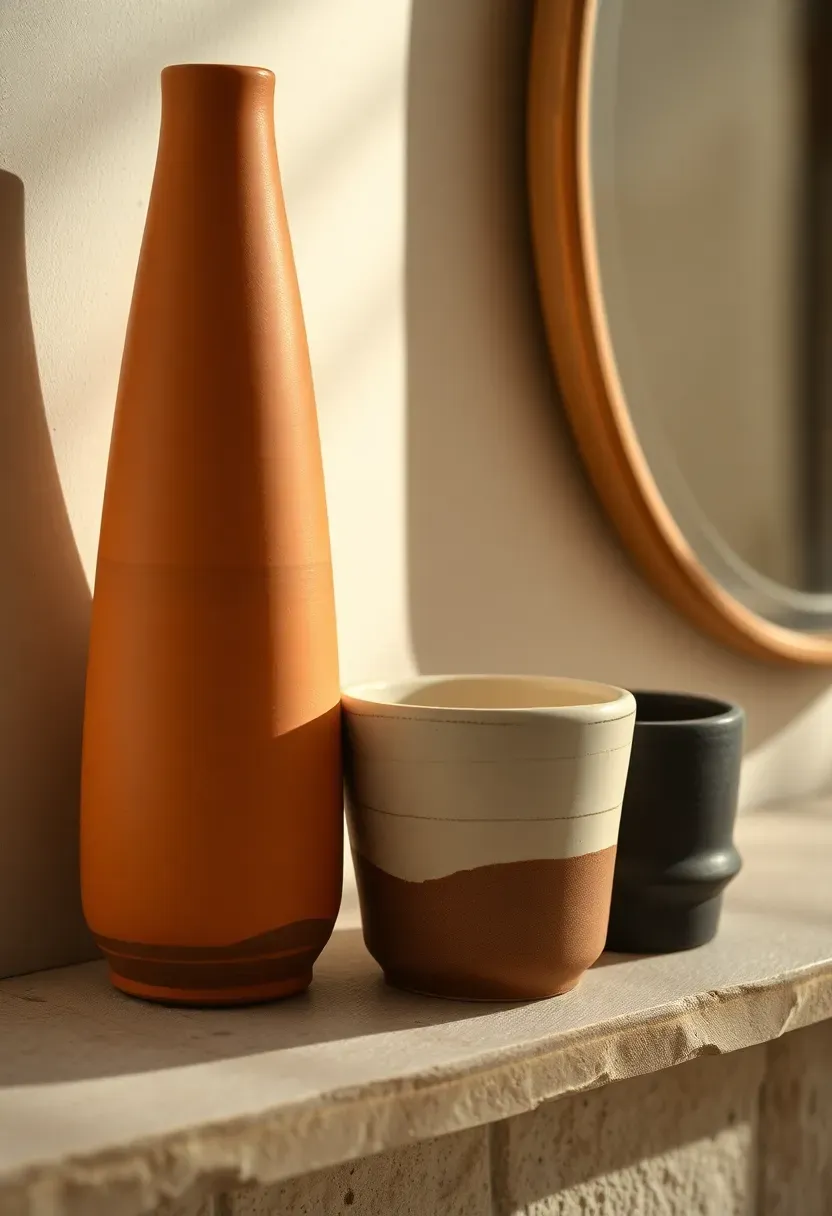
Group three or five objects — never two or four — on one side of the mantle. Odd numbers create a natural visual rhythm because the eye can't split them into equal halves; it keeps moving across the grouping instead. Vary the heights aggressively: the tallest piece should be at least twice the height of the shortest. A tall ceramic vase, a medium-height candle holder, and a low sculptural bowl create a descending visual line that mirrors the triangular composition photographers use. Keep the grouping tight — objects nearly touching read as a curated cluster; objects spaced evenly apart read as a collection of lonely items. Choose matte finishes over glossy for 2026: unglazed stoneware, raw terracotta, hand-thrown pottery with visible texture.
Do: place the tallest object at the outside edge of the mantle and step down toward the center — this frames the anchor piece visually Don't: match all objects in the same color and height — uniformity on a mantle kills visual interest faster than anything else Pro tip: thrift stores and estate sales are the best source for one-of-a-kind ceramics with real patina — new mass-produced vases rarely have the character of a ten-dollar vintage find
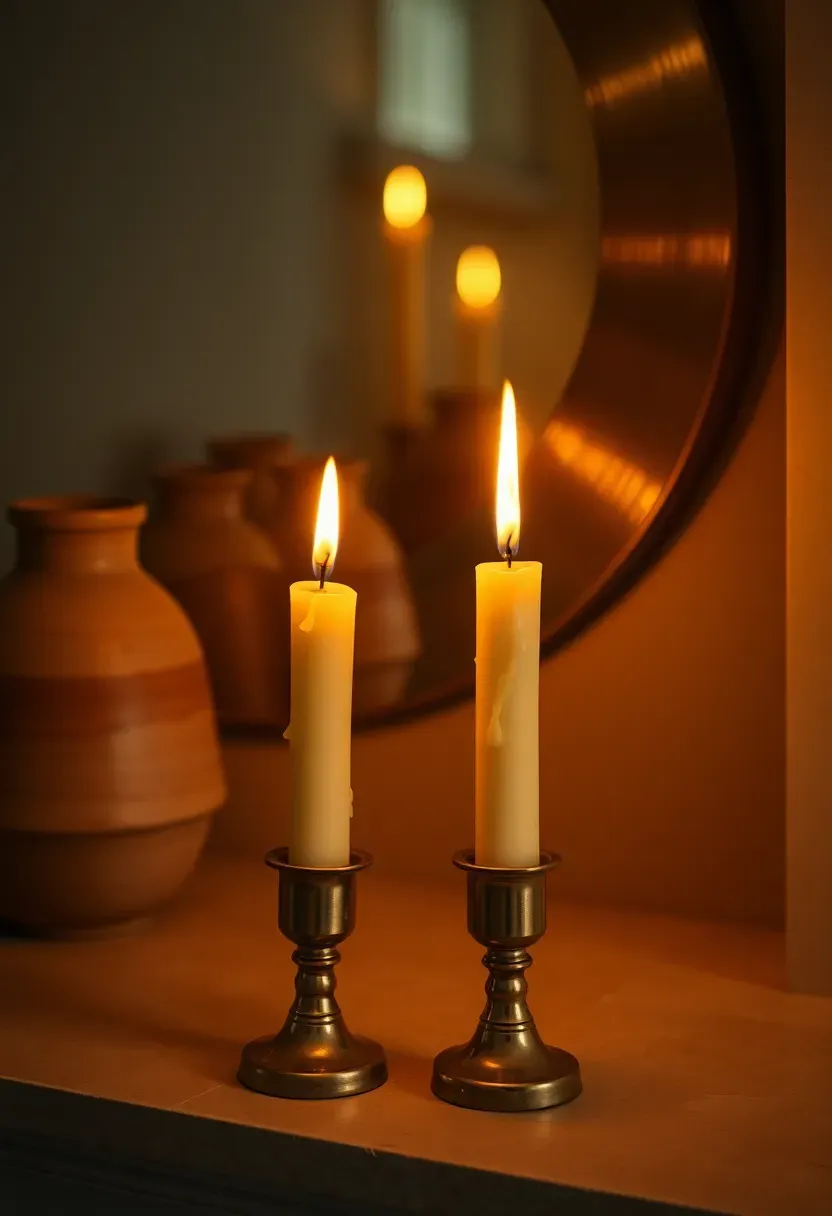
Step 4: Add Warm Lighting at Two Levels
Don't rush this step — it makes the biggest visual difference, especially after sundown when the mantle becomes the room's natural focal point.
Place candles or candle holders at two distinct heights on the mantle. A pair of tall tapers at the outer edges creates an architectural frame; a lower pillar candle or a cluster of tea lights near the center adds a warmer, denser glow at the base level. The two-level approach mimics how professional lighting designers layer ambient and accent light in a room — it gives depth rather than a single flat plane of illumination. In 2026, fluted brass or blackened iron candle holders read as both modern and collected; avoid anything chrome or overly polished. If you use the mantle daily and real flames feel impractical, flameless LED tapers with a warm 2200K tone are genuinely convincing now — the technology has caught up with the aesthetic.
Do: light the candles before photographing or assessing the arrangement — the display looks completely different with live flame than without Don't: group all candles on one side — distribute them across the mantle so the warm light wraps the entire display rather than pooling in one corner Pro tip: a small LED strip tucked behind the anchor piece along the top edge of the mantle creates a subtle halo backlight that makes the entire arrangement float — it's a designer trick that costs under fifteen dollars
Recommended
Items for this idea
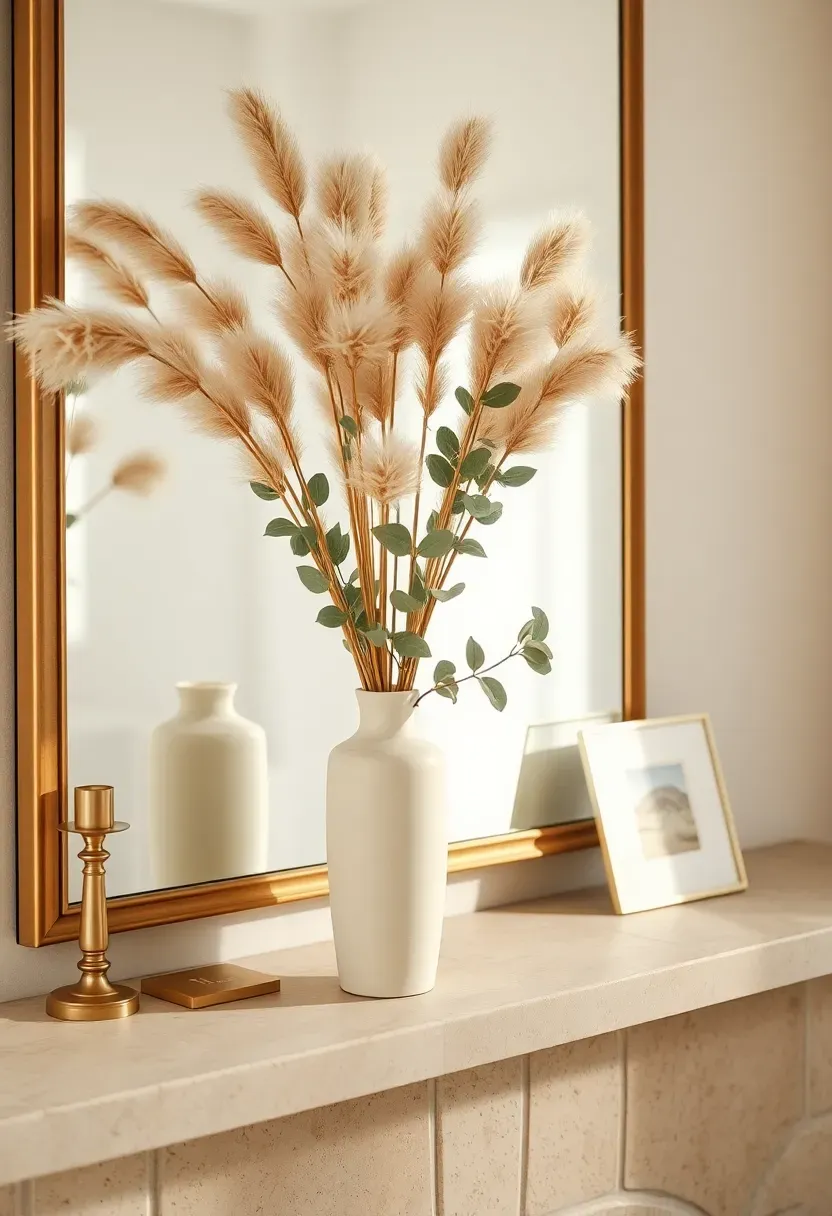
Step 5: Weave in Organic Texture
This is where the arrangement starts to feel alive rather than arranged. One natural element breaks the geometric rigidity of everything else on the mantle.
Tuck a single organic element into the composition — dried pampas plumes arching above the anchor piece, a bundle of eucalyptus stems in a slim vase, a piece of weathered driftwood laid horizontally, or a small trailing pothos in a ceramic pot at one end. The organic texture does two things: it introduces soft, irregular lines that contrast with the hard edges of frames and ceramics, and it adds a sense of seasonality that static objects cannot provide. Position the organic element so it extends above or beyond the mantle's horizontal line — a stem that arches upward or a trailing vine that cascades past the shelf edge breaks the visual boundary of the mantle and integrates the display with the room above and below.
Do: change the organic element seasonally — dried thistle and cotton stems in winter, fresh greenery in spring, wheat stalks in autumn Don't: add more than one type of organic material — a single variety reads as intentional; mixing pampas with eucalyptus with dried flowers reads as a craft project Pro tip: branches from your own yard, stripped of leaves and allowed to dry, cost nothing and carry the kind of irregular sculptural beauty that store-bought dried botanicals attempt to replicate

Step 6: Edit Until the Mantle Breathes
The arrangement is built. Now comes the step that separates a styled mantle from a crowded shelf.
Walk to the farthest wall in the room and look at the mantle as a single shape. You are checking three things: is the visual weight balanced side to side, does the height profile create a natural triangle or arc, and can you see the mantle surface itself between the objects? That third question matters most. If every inch of the mantle ledge is covered, the display reads as accumulated rather than designed. Remove one object — whichever feels least essential — and check again. The goal is a mantle where roughly 30% of the surface is visible bare ledge. That breathing room is what makes the remaining objects look chosen rather than crammed. Photograph from the room entrance, flip the image horizontally, and you will immediately see any imbalance your eye has learned to ignore.
Do: remove something even if you love it — restraint is the single defining quality of every mantle you have ever admired in a magazine Don't: add one last thing after you've declared the arrangement done — that final object is almost always the one that tips the display from curated to cluttered Pro tip: take a photo of the finished mantle and save it — when you inevitably move or bump objects over the coming weeks, you'll have an exact reference to reset to
FAQ
Should a mantle display be perfectly symmetrical? Symmetry works for formal rooms — a matched pair of candlesticks flanking a centered mirror is a classic approach that reads as elegant and traditional. For most modern homes, though, asymmetrical balance creates more visual interest. Place a taller grouping on one side and a lower, wider grouping on the other so the visual weight balances without mirroring. The result feels relaxed and intentional rather than rigid.
Can I decorate a mantle without a mirror above it? Absolutely. An oversized canvas, a large framed photograph, or even a bold piece of textile art hung above the mantle works as an anchor. If the wall space above is limited, a horizontal landscape print wider than the mantle shelf itself creates a dramatic effect. The mirror is popular because it reflects light and makes rooms feel larger, but it is a tool, not a requirement.
Is it worth styling a mantle in a rental where the fireplace is sealed? A sealed or non-functional fireplace is one of the best styling opportunities in a rental. The mantle still serves as the room's natural focal point. Consider filling the firebox opening with stacked birch logs, a cluster of pillar candles, or a large potted plant — that gives the sealed opening a purpose. Then style the mantle shelf exactly as described in the six steps above. No holes in the wall, no permanent changes, full visual impact.
What mistakes make a mantle look dated rather than modern in 2026? The fastest way to date a mantle is matching decor sets — identical bookend vases, a perfectly centered clock flanked by identical candlesticks. In 2026, the trend leans heavily toward collected over coordinated: mixed materials, varied heights, handmade textures over factory-perfect finishes. Also dated: anything overly themed. A mantle should reflect your everyday aesthetic, not a seasonal catalog spread. Subtle seasonal touches are fine — a full-themed transformation every holiday is not.
How do I style a very narrow mantle where objects keep falling off? Narrow mantles (under 12 cm deep) require flat-backed or wall-leaning objects only. Skip anything round or heavy. A leaning print, a slim taper candle holder with a weighted base, and a single flat-backed ceramic vessel give you all three layers — art, light, sculpture — within a shallow footprint. Museum putty under the base of any object prevents shifting and costs under five dollars for a pack that lasts years.
Clear the mantle tonight. Place just the anchor piece and stand at the doorway. If it already commands attention with nothing else around it, you have chosen well — and the remaining five layers will build themselves naturally from there.
Pinterest cover for How to Decorate a Mantle in 2026: 6 Steps to a Stunning Focal Point
About the author
OBCD
CGI visualization and interior design content. We create detailed 3D renders and curate practical design ideas for every room in your home.