How to Decorate a Fireplace Mantle: 7 Steps to a Cozy Display
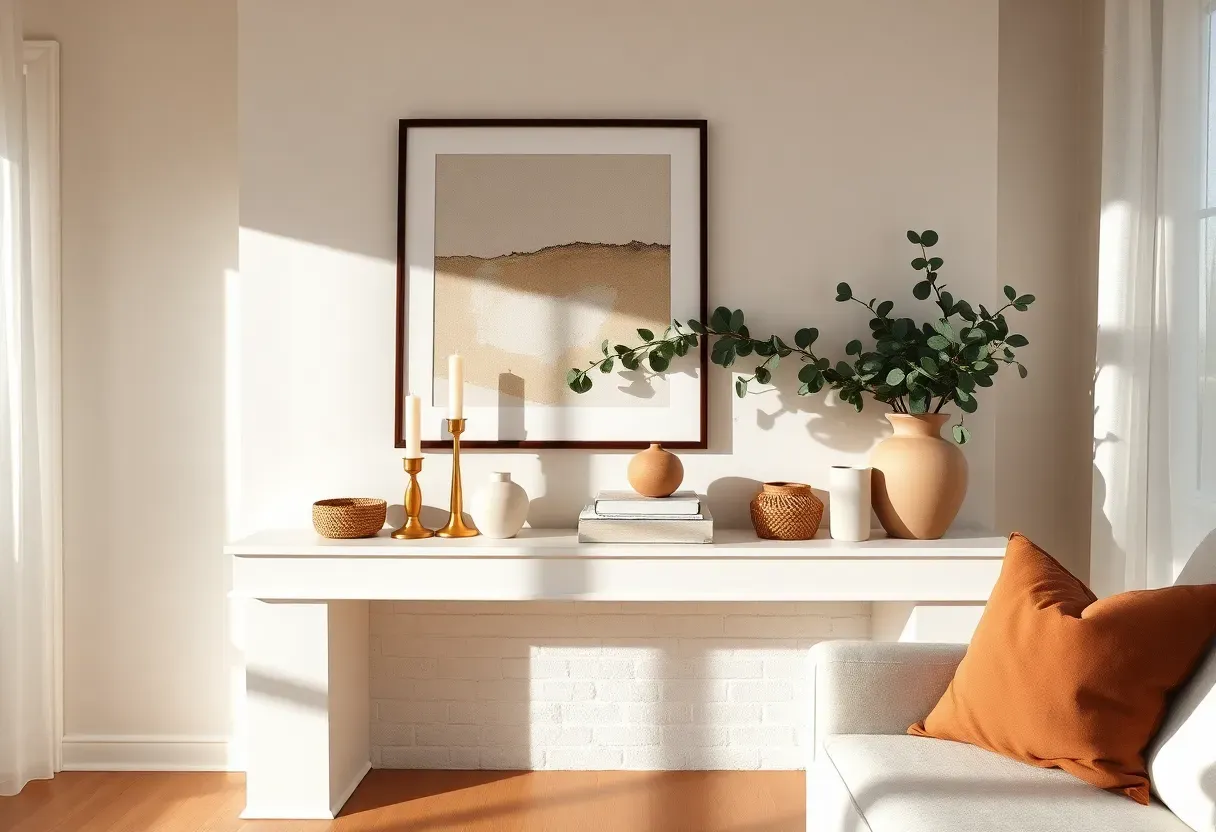
A bare fireplace mantle is a missed opportunity. It sits at eye level, anchors your entire living room, and yet most people leave it empty or pile it with random clutter. The difference between a mantle that looks thrown together and one that feels intentionally curated comes down to a handful of simple principles — height variation, balance, texture, and restraint. These seven steps walk you through building a display that makes guests pause and say, "That looks so good."
Table of Contents
- What You'll Need
- Step 1: Clear Everything and Start Fresh
- Step 2: Choose an Anchor Piece
- Step 3: Build Height with Layered Objects
- Step 4: Introduce Candles for Warmth
- Step 5: Add Natural Elements and Greenery
- Step 6: Fill Gaps with Textured Accessories
- Step 7: Step Back, Edit, and Refine
What You'll Need
- One large anchor piece (mirror, artwork, or oversized print)
- 2-3 candlesticks or taper candle holders at varying heights
- A trailing plant or faux greenery (eucalyptus, ivy, or olive branches)
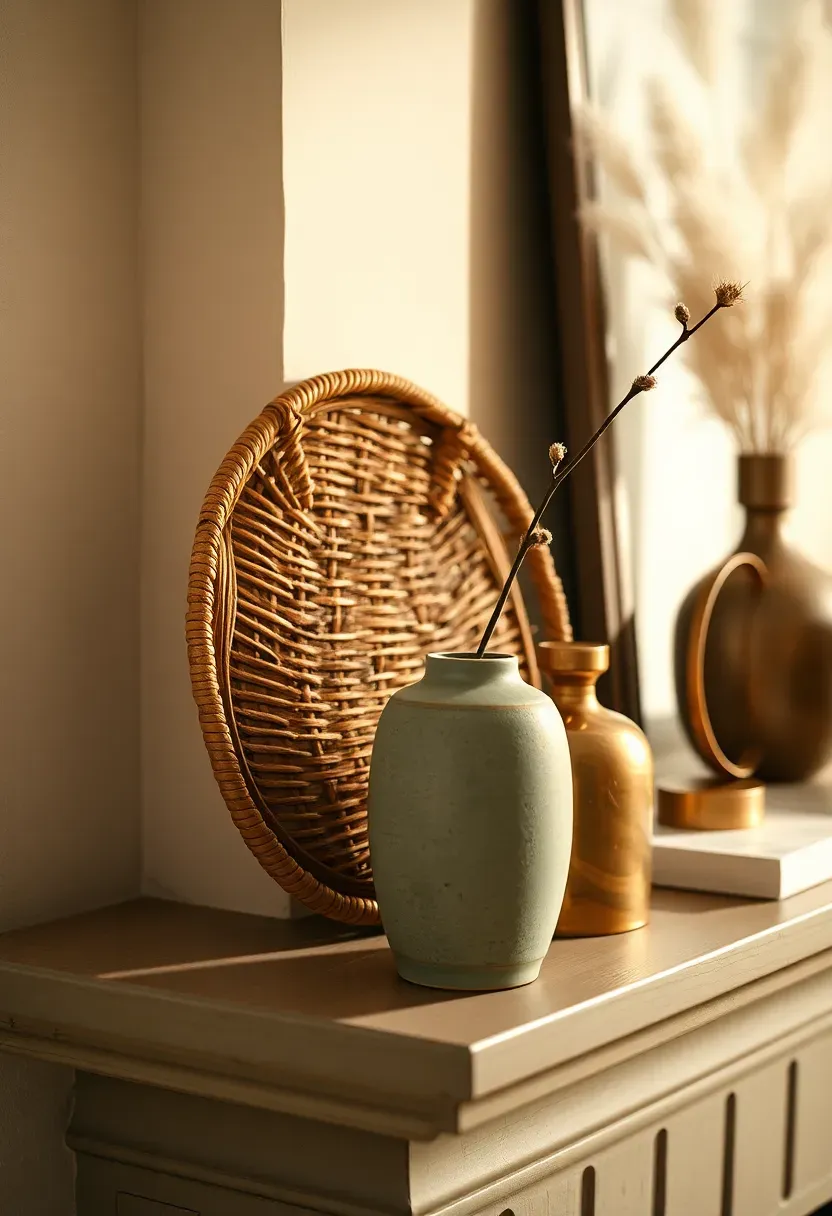
- 2-3 small decorative objects (ceramic vases, sculptures, brass figurines)
- A stack of coffee table books or vintage hardcovers
- Optional: a decorative tray or small basket for grouping
- Cleaning cloth and level tool
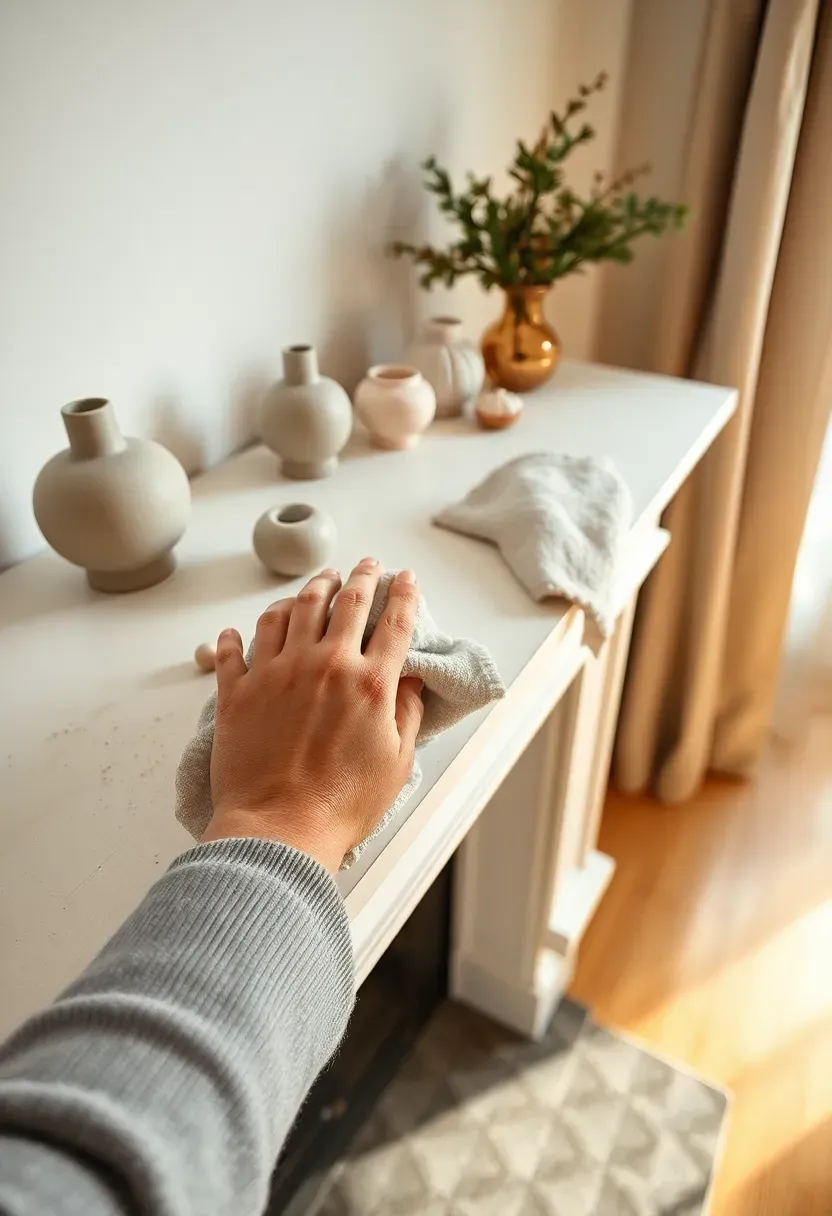
Step 1: Clear Everything and Start Fresh
Most people skip this — and it shows. A cluttered mantle with years of accumulated trinkets cannot be fixed by rearranging. It needs a reset.
Take every single object off the mantle, including anything leaning against the wall above it. Wipe the surface clean. Now step back to the middle of the room and look at the empty mantle with fresh eyes. Notice the width, depth, and the wall space above. This blank canvas is where your design decisions begin. Resist the urge to put anything back until you have read through all seven steps.
Do: measure the mantle depth before buying objects — narrow mantles need flat-backed decor Don't: skip the cleaning step, dust under objects creates rings that show when you restyle Pro tip: photograph the empty mantle from across the room so you can reference proportions while shopping

Step 2: Choose an Anchor Piece
This is the foundation everything else builds on. Without an anchor, a mantle feels like a shelf of unrelated objects.
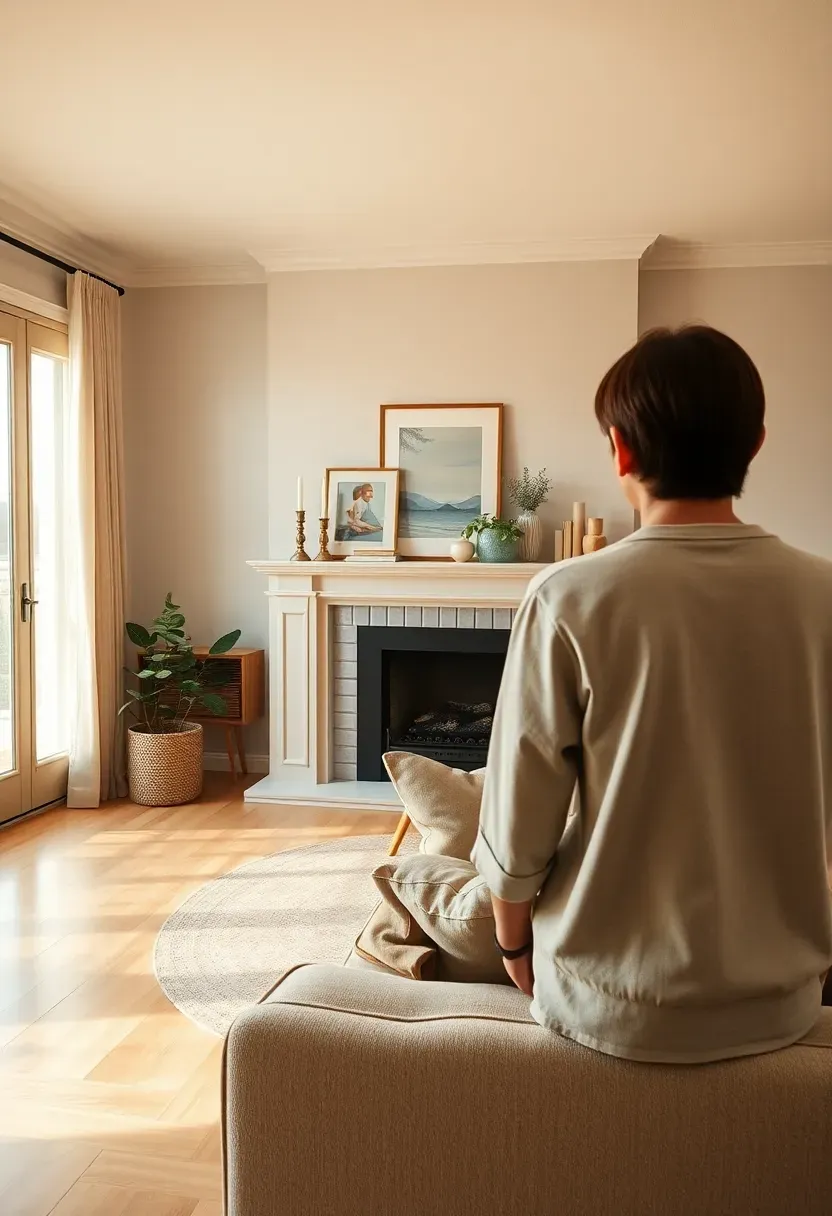
Your anchor sits at the back, centered or slightly off-center, and is the tallest element in the arrangement. A framed mirror is the classic choice — it bounces light and makes the room feel larger. A large piece of artwork sets a mood. An oversized botanical print in a thin black frame reads modern and relaxed. Whatever you pick, it should be proportional to the wall above the mantle: roughly two-thirds the mantle width is the sweet spot. Lean it rather than hanging it for a casual, layered look that is easy to swap seasonally.
Do: choose an anchor that reflects your room's existing color palette Don't: hang it dead center if you want a modern, asymmetric layout — try shifting it slightly left or right Pro tip: thrift stores and estate sales are gold mines for oversized frames and vintage mirrors at a fraction of retail price
Recommended
Items for this idea
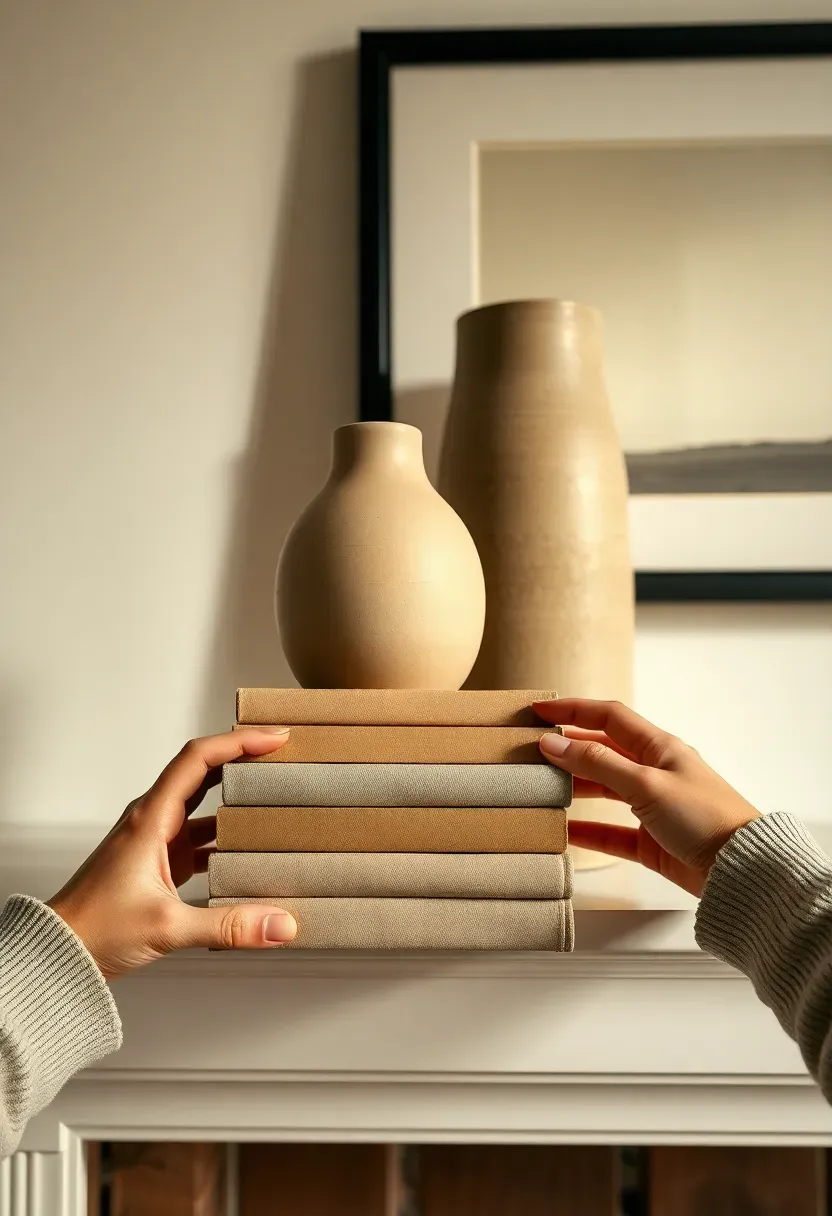
Step 3: Build Height with Layered Objects
Get this right and the rest falls into place. A flat line of same-height items across the mantle looks lifeless. You need peaks and valleys.
Place your tallest items at one end or behind the anchor, and your shortest items at the opposite end. A stack of two or three hardcover books creates an instant pedestal for a small vase or sculpture. A tall candlestick paired with a low ceramic bowl generates the contrast your eye craves. Think of the silhouette as a gentle wave — high on one side, dipping in the middle, rising slightly again before trailing off. This asymmetric triangle composition is the secret behind every mantle that looks professionally styled.
Do: aim for at least three distinct height levels across the arrangement Don't: line objects up like soldiers at uniform spacing — cluster them in groups of two and three Pro tip: odd numbers of objects in each cluster look more natural than even numbers
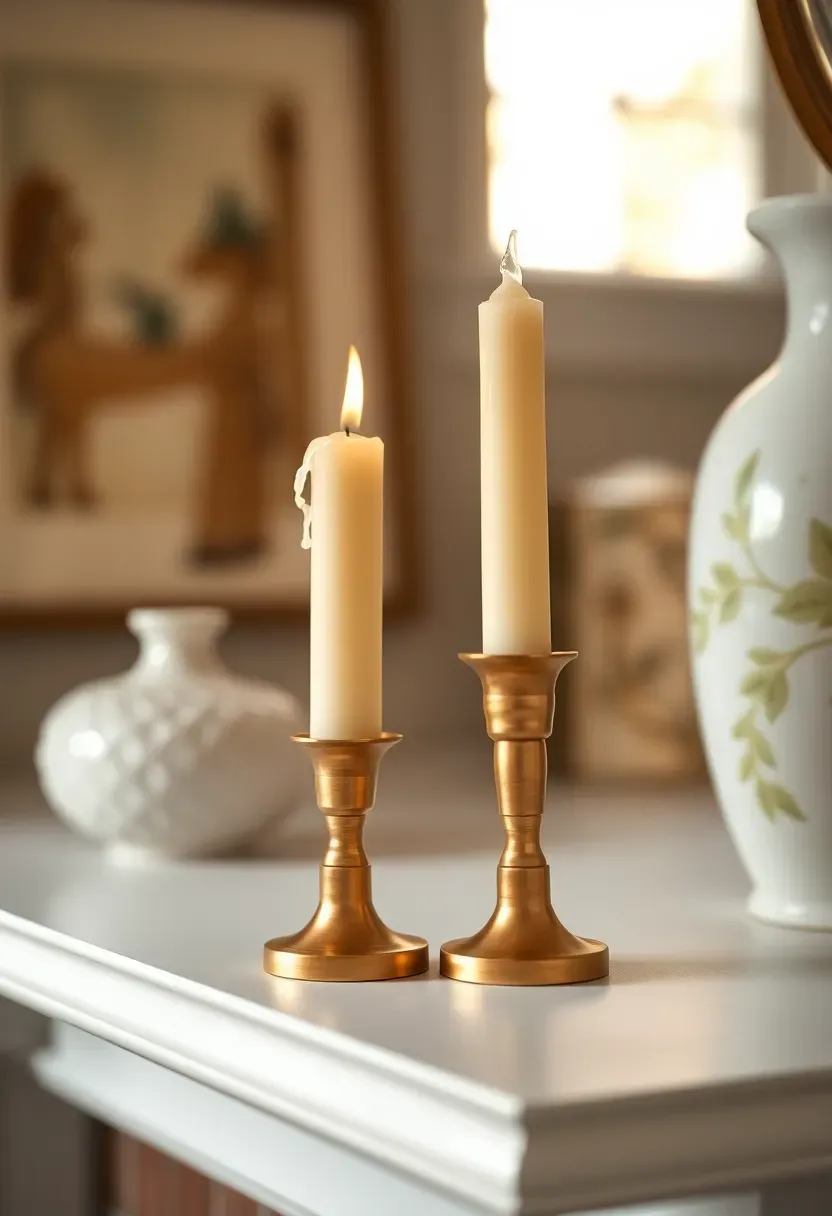
Step 4: Introduce Candles for Warmth
This is where the real transformation happens. Nothing says "cozy" faster than candlelight, and a mantle without candles misses the most powerful mood tool available.
Taper candles in brass or ceramic holders add vertical interest and warmth simultaneously. Group two or three holders of different heights together on one side of the mantle for an asymmetric cluster. Pillar candles on a small tray work well toward the center. If you have young children or pets, flameless LED candles with a warm amber flicker look surprisingly convincing — especially at night. The trick is choosing candles that are part of the composition, not afterthoughts placed in the gaps.
Do: match your candle color to the warmest tone in your room — cream, blush, terracotta, or honey Don't: use scented candles on a display mantle where they compete with other room fragrances Pro tip: beeswax taper candles develop a beautiful natural drip pattern that adds texture over time

Recommended
Items for this idea
Step 5: Add Natural Elements and Greenery
Don't rush this step — it makes the biggest visual difference. Greenery is what separates a "decorated" mantle from one that feels alive and inviting.
Tuck a few stems of eucalyptus or olive branches behind the anchor piece so they peek out and soften the hard edges. Drape a trailing pothos or string of pearls over one side of the mantle for organic movement. A small potted herb or succulent in a terracotta pot brings a grounded, earthy quality. Even dried botanicals — pampas grass, wheat stalks, dried lavender — work beautifully in cooler months. The goal is breaking up the hard lines of frames and ceramics with something that feels alive and imperfect.
Do: mix fresh and dried botanicals for year-round interest without constant upkeep Don't: use obviously fake plastic greenery — high-quality faux stems cost a little more but look ten times better Pro tip: eucalyptus from the grocery store dries naturally on the mantle and stays beautiful for months
Step 6: Fill Gaps with Textured Accessories
Now you are refining the composition. Look for spots where the arrangement feels thin or disconnected, and bridge them with textured objects.
A small woven basket adds warmth and hides practical items like matches or remote controls. A matte ceramic vase — empty or with a single dried branch — provides a sculptural pause. A brass or stone figurine brings weight and personality. The key is variety of materials: pair something smooth (ceramic) with something rough (woven rattan), something matte (stone) with something reflective (brass). This material contrast creates visual richness without adding more colors. Keep at least thirty percent of the mantle surface visible — breathing room makes each object matter more.
Do: touch-test your objects — if everything feels the same, add something with a different texture Don't: fill every inch of space, negative space is a design element, not a problem to solve Pro tip: a single unexpected object — an antique clock, a small geode, a ceramic bird — gives the mantle personality beyond "catalog page"
Recommended
Items for this idea
Step 7: Step Back, Edit, and Refine
The most important thing you can do after styling is walk away. Literally. Cross the room, sit on the couch, and look at the mantle from where you actually see it every day.
From a distance, check three things: does the arrangement have a clear high point and low point? Is there breathing room between groups? Does one side feel heavier than the other? If something bothers you, remove it entirely rather than repositioning it — subtraction almost always improves a mantle display. Take a photo on your phone, because the camera reveals imbalances your eye misses in person. Live with it for two days before making final adjustments. Small tweaks after the initial excitement fades always produce a better result.
Do: photograph the mantle from different angles and lighting conditions before calling it done Don't: add "just one more thing" after you have edited — the impulse to fill is the enemy of good styling Pro tip: revisit and rotate a few objects seasonally to keep the display feeling fresh without a complete overhaul
FAQ
Is it possible to style a fireplace mantle without spending any money? Absolutely. Shop your own home first — move a vase from the kitchen, stack books from your shelf, bring in a branch from the yard. Some of the best mantle displays use only repurposed items arranged with intention rather than purchased decor.
Should I match the mantle decor to the rest of the living room? Your mantle should feel connected to the room but not identical. Pull one or two colors from your sofa, rug, or curtains into the mantle display. This creates cohesion without making the space look overly coordinated or matchy.
Can I decorate a narrow mantle that is only a few inches deep? Yes, but choose flat-backed or slim objects. A leaning print instead of a bulky frame, taper candles instead of pillars, and small succulents instead of large pots all work beautifully. Wall-mounted shelves above the mantle extend your display surface upward.
What mistakes make a fireplace mantle look cluttered? The top three: too many small objects at the same height, no anchor piece to ground the composition, and zero negative space between items. If you squint and everything blurs into a single mass, remove at least a third of what is there.
How often should I change a mantle display? A quarterly refresh keeps things interesting — swap greenery, rotate artwork, or change candle colors with the season. The bones of the arrangement (anchor, height structure, groupings) can stay the same year-round.
Start with Step 1 this afternoon — clearing the mantle takes five minutes and completely changes how you see the space. Once that blank canvas stares back at you, the creative ideas follow naturally.
Pinterest cover for How to Decorate a Fireplace Mantle: 7 Steps to a Cozy Display
About the author
OBCD
CGI visualization and interior design content. We create detailed 3D renders and curate practical design ideas for every room in your home.