29 Home Decor Transformations For Your Space
We all reach that point where our rooms feel stale. The furniture sits in the same spot it landed three years ago, the walls still wear builder-grade beige, and the whole place whispers "I could be more." The good news is that a dramatic shift rarely requires gutting everything. Sometimes a single wall treatment, a rearranged layout, or a bold textile swap rewrites the entire story of a room. These twenty-nine transformations prove exactly that — each one achievable, each one visually striking.
Below you will find ideas spanning every room and every budget. We start with paint-driven overhauls, move through furniture and textile upgrades, and finish with lighting and detail work that polishes everything into place.
Table of Contents
- Dark Accent Wall Drama
- Rearranged Furniture Layout
- Statement Ceiling Paint
- Layered Rug Combination
- Gallery Wall Overhaul
- Curtain Upgrade Floor to Ceiling
- Open Shelving Swap
- Slipcover Sofa Refresh
- Wallpaper Feature Wall
- Brass Hardware Replacement
- Oversized Mirror Placement
- Indoor Plant Layering
- Painted Kitchen Cabinets
- New Light Fixture Statement
- Bathroom Tile Sticker Makeover
- Entryway Bench and Hook Wall
- Window Seat Creation
- Painted Staircase Risers
- Floating Shelf Vignettes
- Bedroom Canopy Addition
- Wainscoting Wall Treatment
- Color-Blocked Room Divider
- Fireplace Surround Makeover
- Thrifted Furniture Refinish
- Textile Headboard Wall
- Outdoor-to-Indoor Transition
- Peel-and-Stick Backsplash
- Mood Lighting Overhaul
- Seasonal Styling Rotation
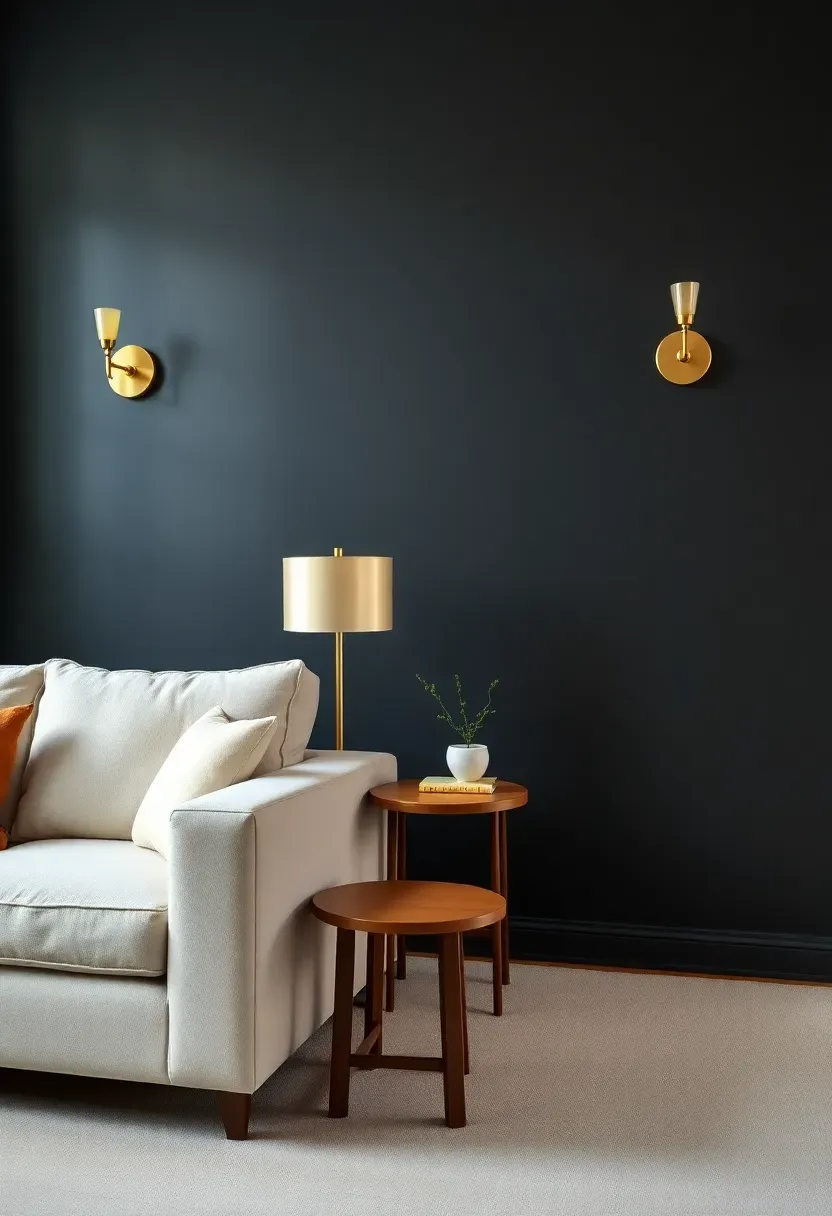
1. Dark Accent Wall Drama
Why It Works
A single dark wall behind your main seating area pulls the eye forward and makes everything in front of it pop. Creams look creamier, wood tones look warmer, metallics catch more light. The contrast is immediate and architectural without touching the structure of the room.
How to Pull It Off
Pick a wall that already anchors the room — typically behind the sofa or the bed. Go bold: charcoal, deep navy, forest green, or even matte black. Use flat or matte finish paint to absorb light and avoid a plastic look. Two coats are usually enough. Frame the wall with lighter furniture and a few brass or copper accents to keep the space from feeling heavy.
Watch Out For
- Avoid dark walls in rooms with zero natural light — they shrink rather than dramatize
- Test a large swatch before committing; screen colors lie
We picked a few things that go well with this idea: Utopia Bedding Throw Pillows (4-Pack) (★4.6), MIULEE Chenille Boho Pillow Covers (4-Pack) (★4.6) and MIULEE Sage Green Corduroy Pillow Covers (4-Pack) (★4.6). As an Amazon Associate we earn from qualifying purchases.
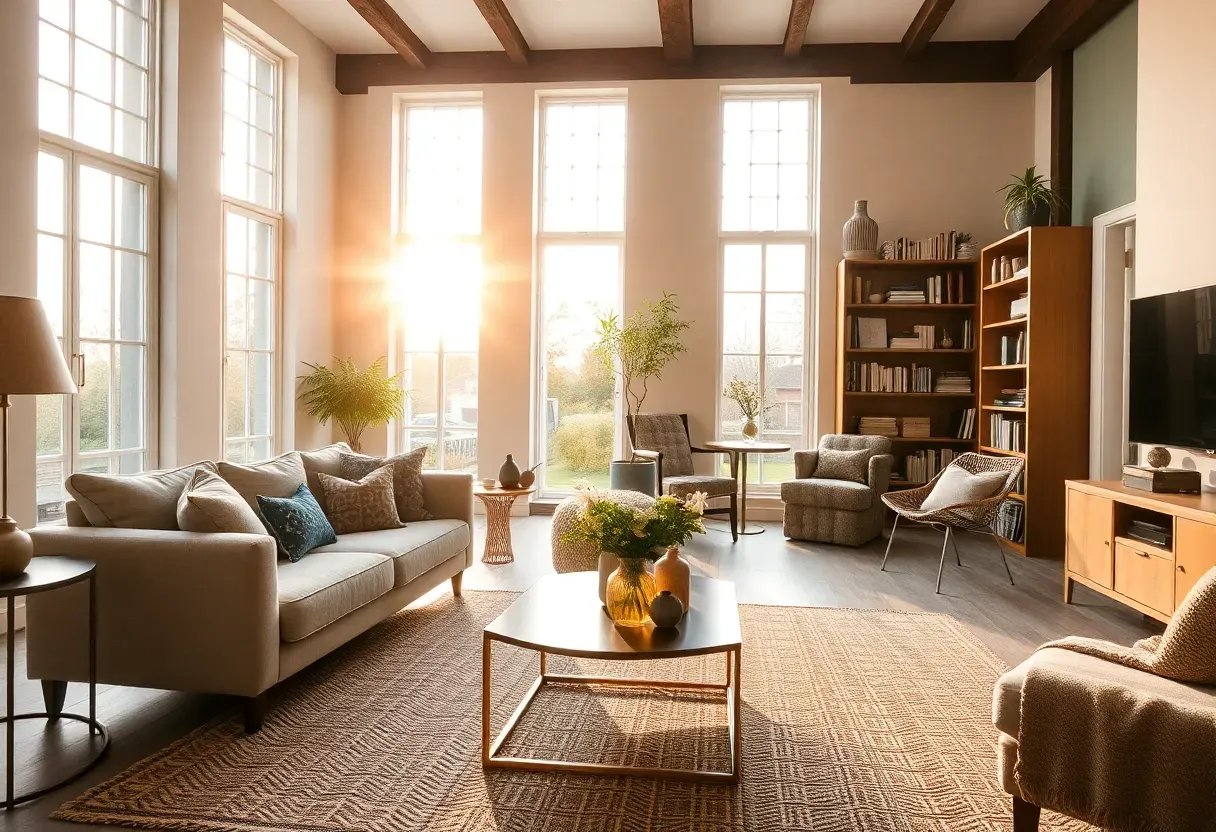
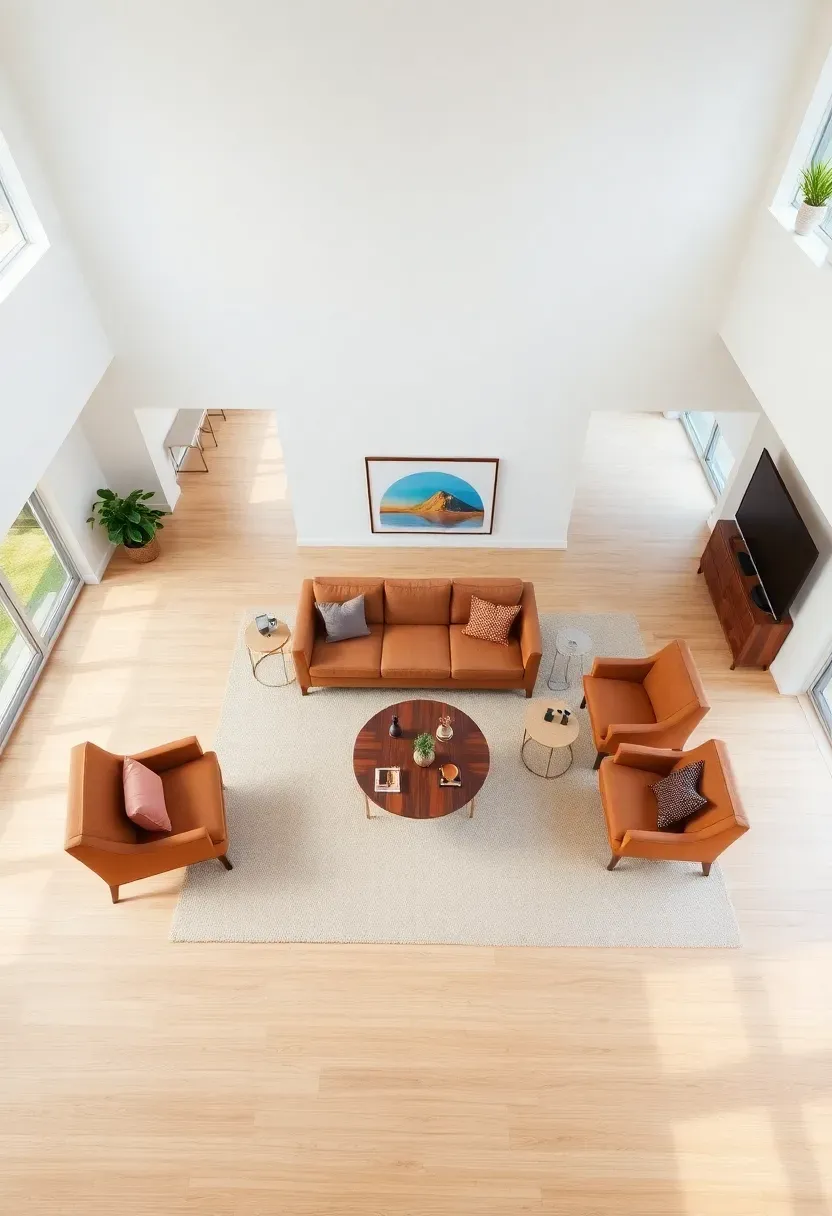
2. Rearranged Furniture Layout
Most people push furniture against walls out of habit. Pulling pieces even twelve inches forward creates the illusion of a larger, more intentional room. A sofa floating in the middle of the space with a console table behind it transforms a boxy living room into one with distinct zones.
Step 1: Map the Traffic Flow
Walk through your room and notice where you naturally step. Those paths should remain clear. Everything else is available for grouping.
Step 2: Create Conversation Zones
Angle chairs toward the sofa rather than lining them along the wall. A round coffee table in the center ties the zone together and softens hard angles.
Step 3: Reassess the Focal Point
The focal point might shift when furniture moves. Maybe the window becomes the star instead of the TV. Let the room tell you.

We picked a few things that go well with this idea: Ravinte Brushed Brass Cabinet Pulls (30-Pack) (★4.7), JOY DECOR Brushed Brass Cabinet Pulls (30-Pack) (★4.8) and Ravinte Square Brass Cabinet Handles (10-Pack) (★4.7). As an Amazon Associate we earn from qualifying purchases.
3. Statement Ceiling Paint
The Overlooked Surface
Ceilings are the largest untouched surface in most homes. Painting yours a saturated color — dusty rose, sage, terracotta, soft blue — wraps the room in warmth without overwhelming the walls. It feels like a gentle embrace from above.
The Practical Side
Pros:
- Costs the price of one gallon of paint
- Adds perceived height when paired with white walls
- Works in bedrooms, dining rooms, and bathrooms equally well
Cons:
- Neck strain during application; use a roller extension
- Dark ceilings in already dim rooms can feel oppressive
Best Color Pairings
Terracotta ceiling with white walls and natural wood. Sage ceiling with cream walls and rattan accents. Soft blue ceiling with warm grey walls and brass fixtures.
We picked a few things that go well with this idea: Art3d Wallpaper Smoothing Tool Kit (★4.6), Roman's Peel & Stick Wallpaper Helper (★4.2) and Black Silk Peel and Stick Wallpaper (★4.2). As an Amazon Associate we earn from qualifying purchases.
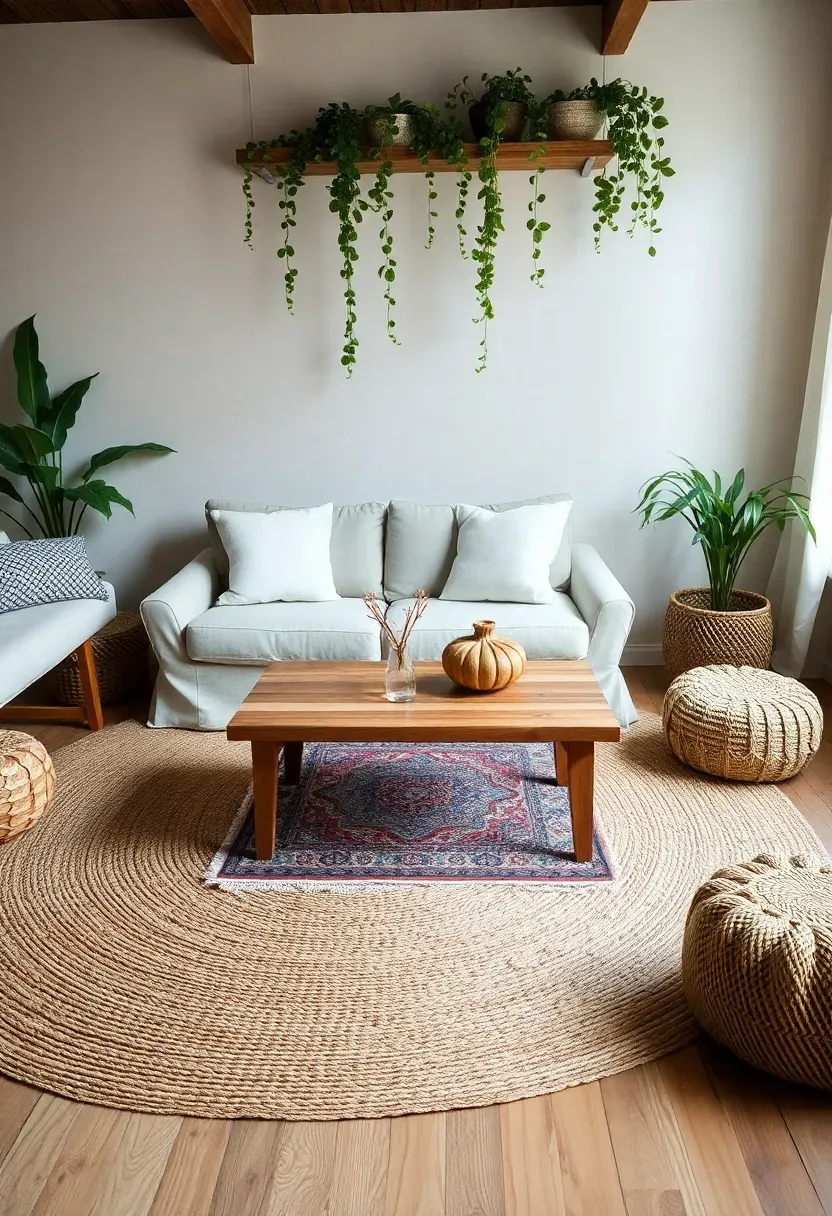
4. Layered Rug Combination
Layering rugs is the fastest way to inject texture and personality into a room that feels flat. Place a large neutral rug — jute, sisal, or a solid wool — as the base. Then set a smaller patterned or vintage rug on top at an angle. The effect is collected and lived-in, like a room that evolved over time rather than one ordered from a catalog in a single afternoon.
Tips for Getting the Layers Right
- Keep the base rug at least two feet wider than the top rug on every side
- Mix textures, not just patterns: a smooth kilim on rough jute creates depth
- Use rug tape between layers to prevent sliding on hard floors
- In bedrooms, layer a sheepskin or Moroccan rug at the foot of the bed over a larger flatweave
Recommended
Items for this idea
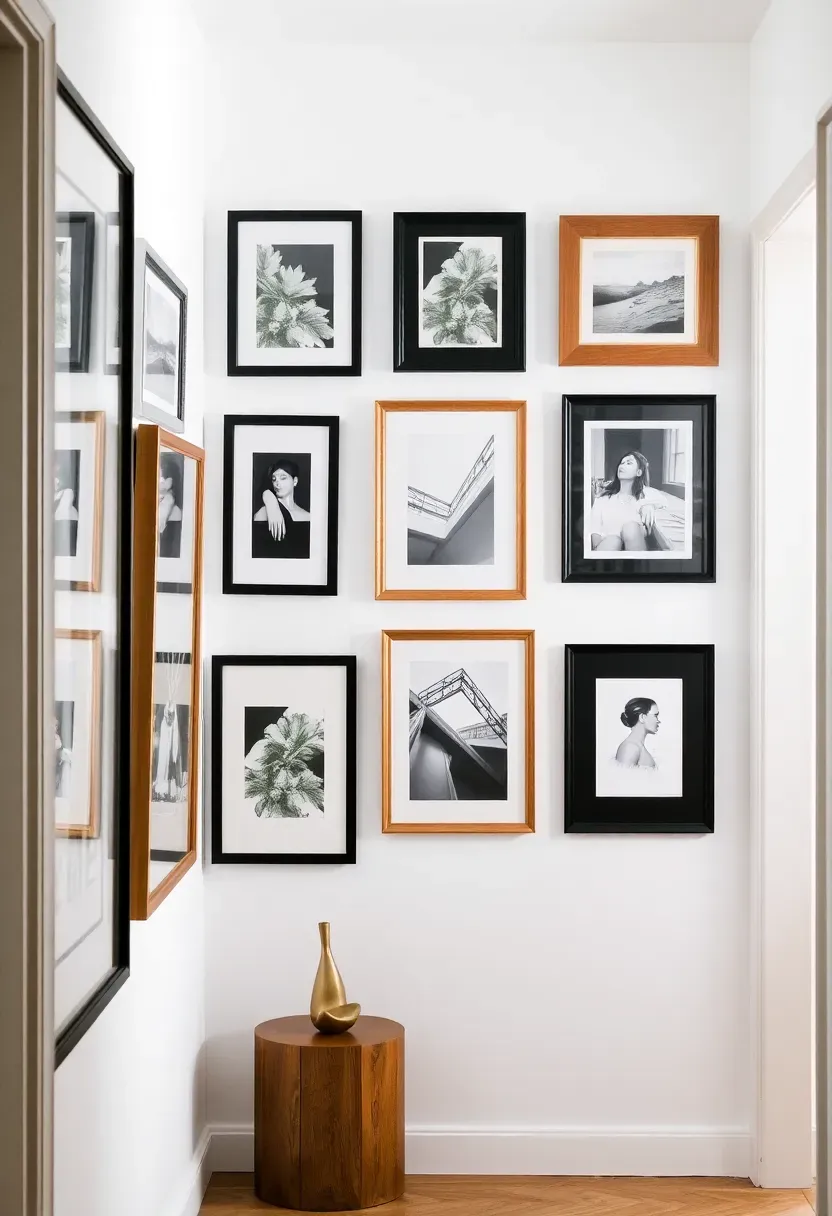
5. Gallery Wall Overhaul
The Problem
Random frames scattered across a wall with no visual logic. Different heights, clashing mats, a mix of vacation snapshots and motivational posters. It reads as clutter, not curation.
The Solution
Strip the wall bare. Lay every frame on the floor and arrange them there first. Choose a unifying element — either all black frames, all natural wood, or a deliberate mix of no more than three finish types. Space frames two to three inches apart. Anchor the arrangement with the largest piece at eye level slightly left of center. Build outward in a loose grid, alternating sizes to keep the eye moving.
The Result
A wall that feels intentional and gallery-worthy. Visitors notice the collection as a whole before examining individual pieces.
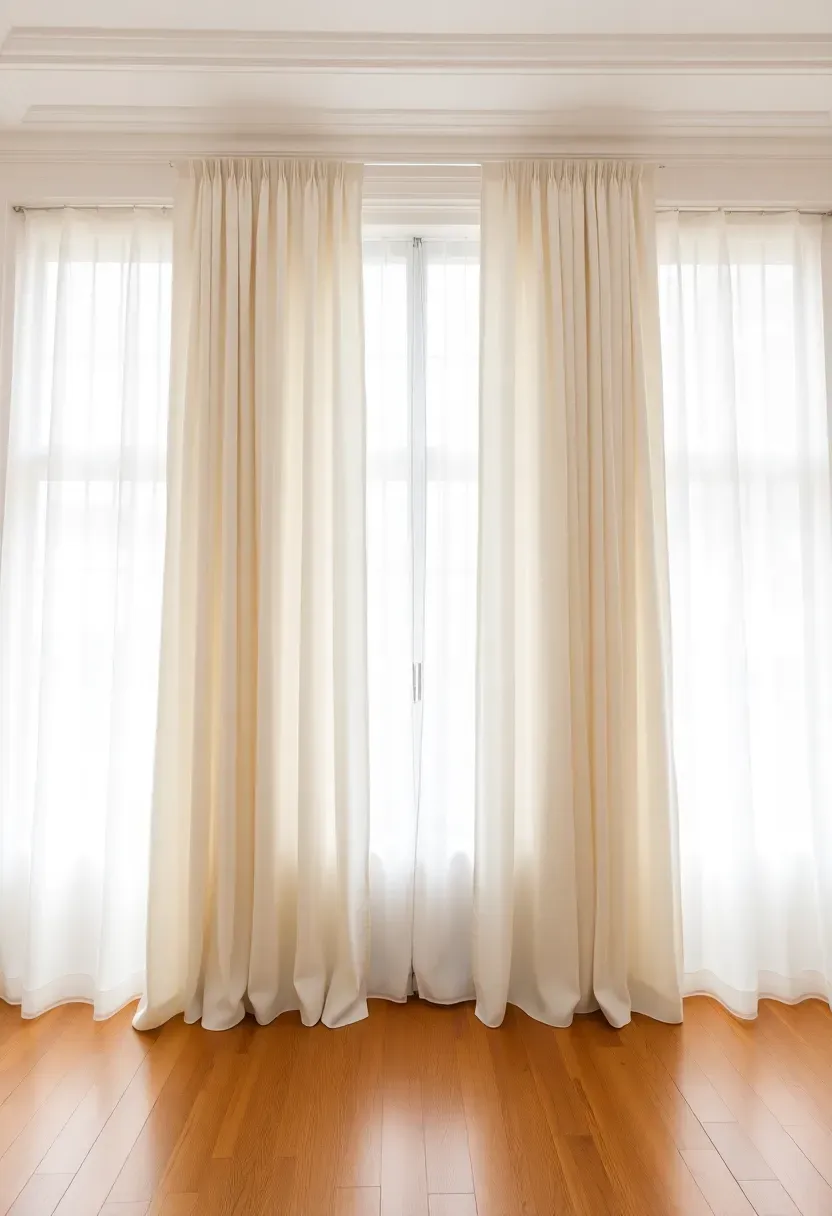
6. Curtain Upgrade Floor to Ceiling
Hang curtains as close to the ceiling as possible and let them graze the floor. This single change makes windows look twice their actual height and gives the entire room a sense of vertical grandeur. Swap thin polyester panels for linen, cotton-blend, or velvet depending on the mood you want. Linen filters light beautifully in living spaces. Velvet absorbs sound and adds luxury in bedrooms.
Quick Rules
- Rod should sit four to six inches below the ceiling line
- Panels should be at least one and a half times the window width for proper fullness
- Neutral tones extend space; deep tones frame the window like a theater curtain
- Iron or brush the panels before hanging to remove package creases
Recommended
Items for this idea
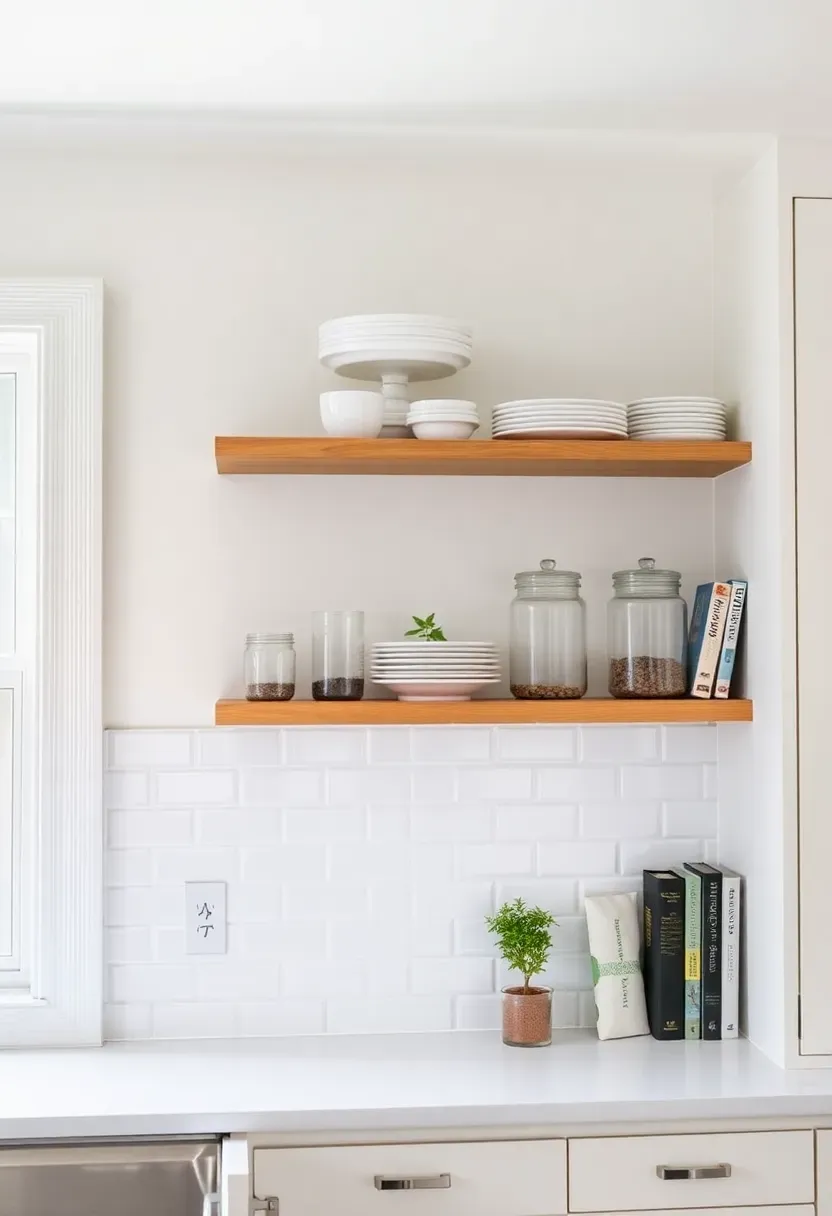
7. Open Shelving Swap
Removing upper kitchen cabinets and replacing them with open shelves transforms a closed, heavy kitchen into an airy, cafe-like space. The trade-off is real — you lose hidden storage and gain visual openness. For most people, doing this on one wall while keeping cabinets on the opposite side strikes the right balance.
What Works on Open Shelves
- Daily-use dishes in white or neutral stoneware
- Clear glass jars for dry goods
- A few small plants or herb pots
- One or two cookbooks leaned upright
What Does Not
- Mismatched plastic containers
- Rarely used appliances
- Anything you would be embarrassed for guests to see
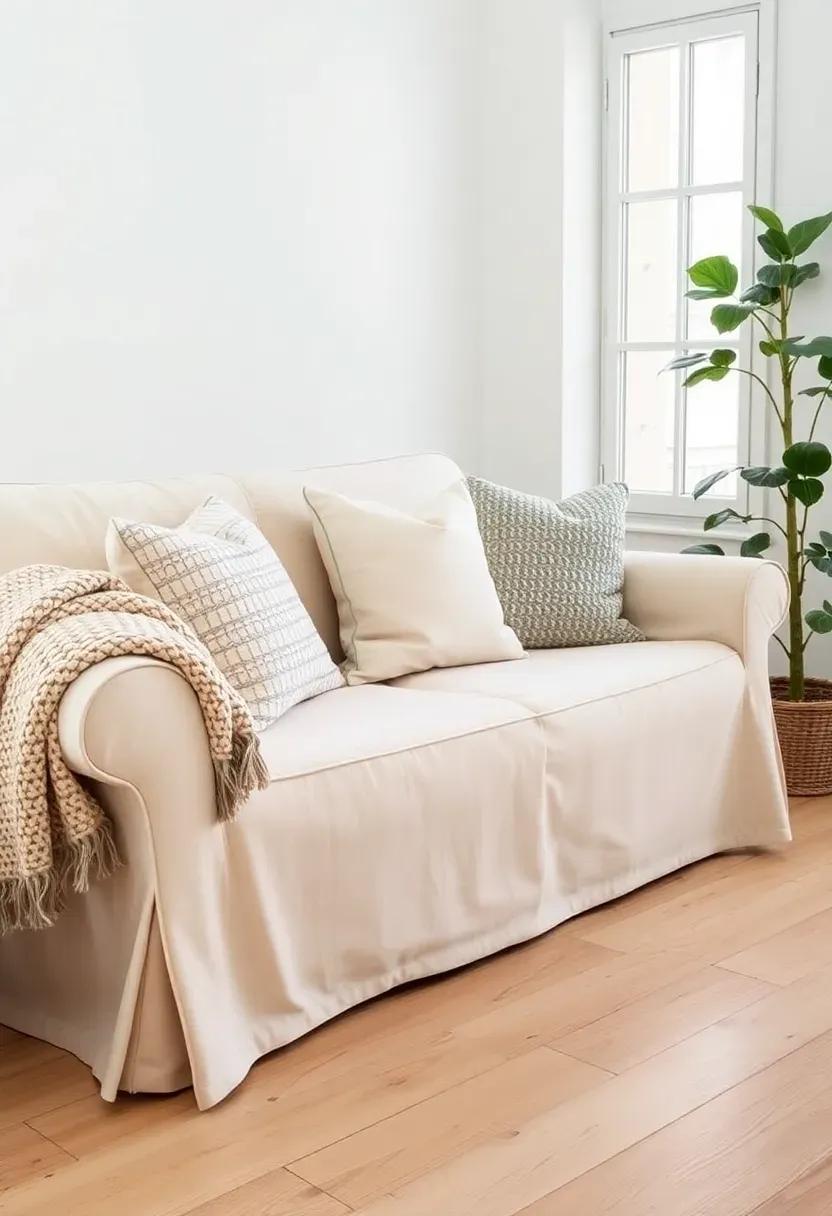
8. Slipcover Sofa Refresh
Before you spend two thousand dollars on a new sofa, consider what a fitted slipcover can do for a hundred. A quality linen or heavy cotton slipcover in ivory, oatmeal, or stone grey erases years of wear and stains. The look is relaxed, European, and surprisingly polished when paired with structured throw pillows.
Choosing the Right Fit
Measure your sofa precisely — arm height, seat depth, total width. Custom slipcovers fit best, but many brands now offer semi-custom sizing that works for standard frames. Machine-washable fabric is non-negotiable if you have kids or pets. Pre-wash the cover before fitting to account for shrinkage and you will avoid a too-tight surprise later.
Recommended
Items for this idea
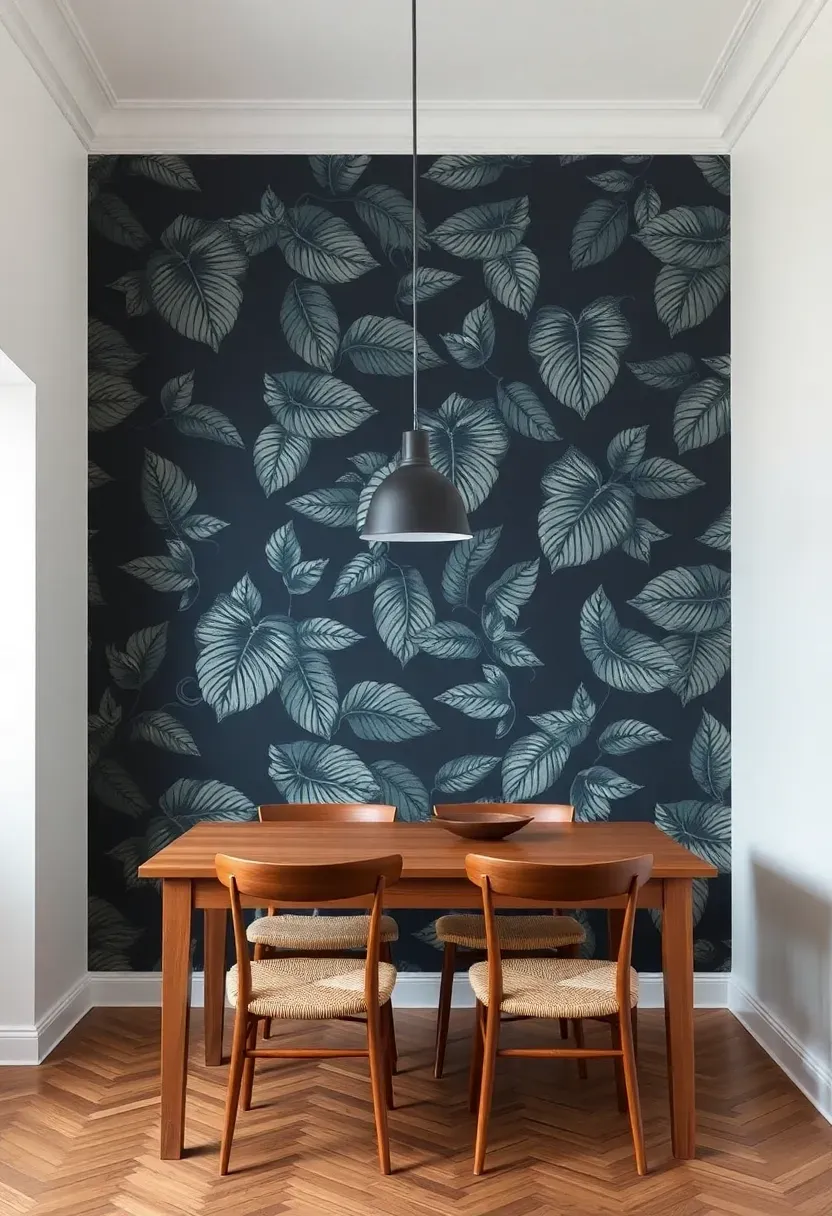
9. Wallpaper Feature Wall
Modern Wallpaper Is Not Your Grandmother's Florals
Peel-and-stick options have made wallpaper commitment-free. Today's patterns range from abstract geometrics to photographic botanicals to textured grasscloth. A single papered wall in a dining room or bedroom becomes the centerpiece of the space without the permanence anxiety.
Application Tips
Start from the center of the wall and work outward. Use a plastic smoother to push out air bubbles. Overlap edges by one millimeter and trim with a sharp blade for invisible seams. In rental spaces, peel-and-stick removes cleanly if you pull slowly at a forty-five degree angle.
Best Rooms for Wallpaper
Dining rooms benefit from drama because you spend focused time looking at the walls. Powder rooms are small enough that even bold patterns feel contained. Bedrooms work well when the papered wall sits behind the headboard.
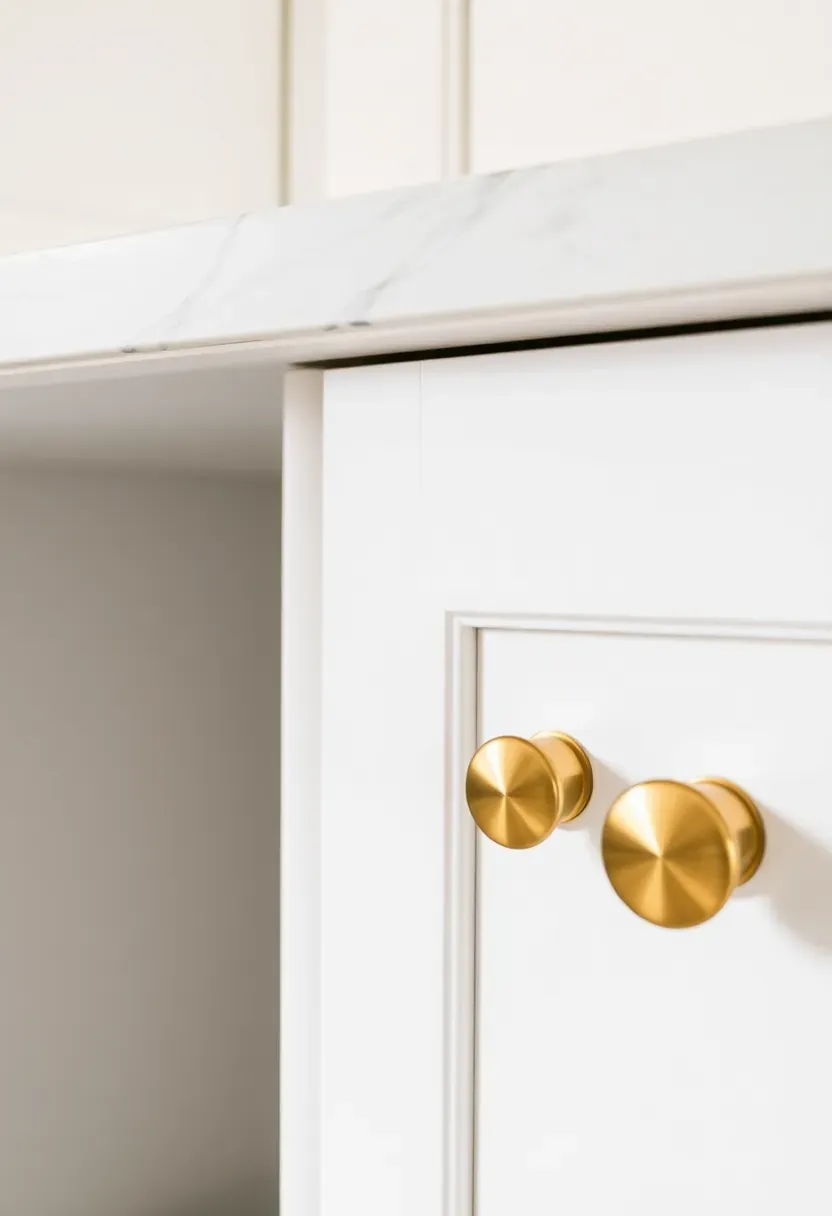
10. Brass Hardware Replacement
Swapping every knob and pull in a kitchen or bathroom takes about an hour and costs under a hundred dollars. The transformation, however, looks like a renovation. Brushed brass or satin gold hardware on white or dark cabinetry reads as intentional and elevated. The key is consistency — replace every single piece, including hinges if they are visible. Mixing old chrome with new brass creates a halfway look that undermines the whole effort.
Practical Notes
- Measure hole spacing before ordering; standard is 3 inches or 3.75 inches center-to-center
- Brushed brass hides fingerprints better than polished brass
- Match the hardware finish to at least one other metal in the room — the faucet, a light fixture, or a towel bar
Recommended
Items for this idea
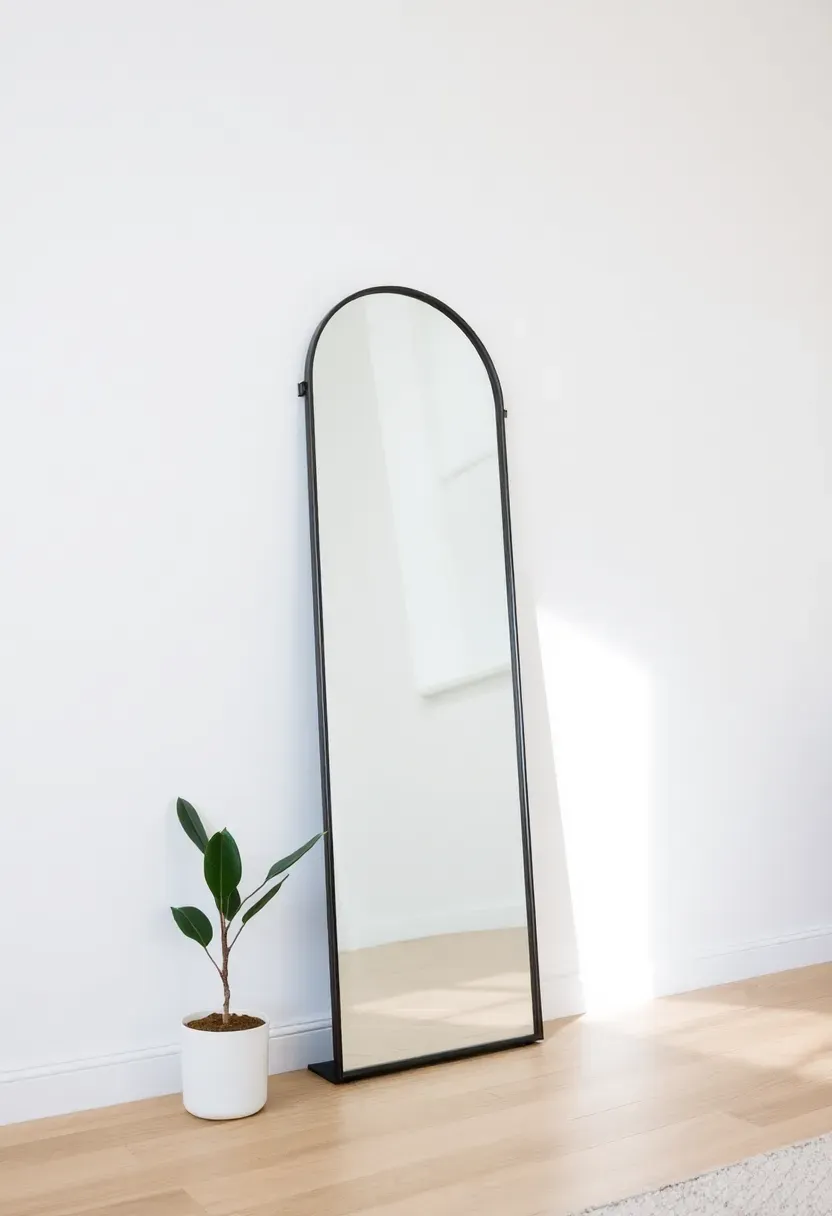
11. Oversized Mirror Placement
One large mirror does more for a room than three small ones. Lean a full-length arched or rectangular mirror against the wall opposite a window. It doubles the natural light, creates depth, and serves as a statement piece that rivals any artwork. The leaning angle matters — a slight backward tilt looks casual and modern, while flush mounting reads more formal.
Where Mirrors Make the Biggest Impact
- Narrow hallways: a tall mirror at the end visually extends the corridor
- Dark living rooms: positioned to catch and bounce whatever light exists
- Small dining areas: a mirror behind a sideboard makes the room feel twice its size
- Bedrooms: a floor mirror near the closet serves function and style simultaneously
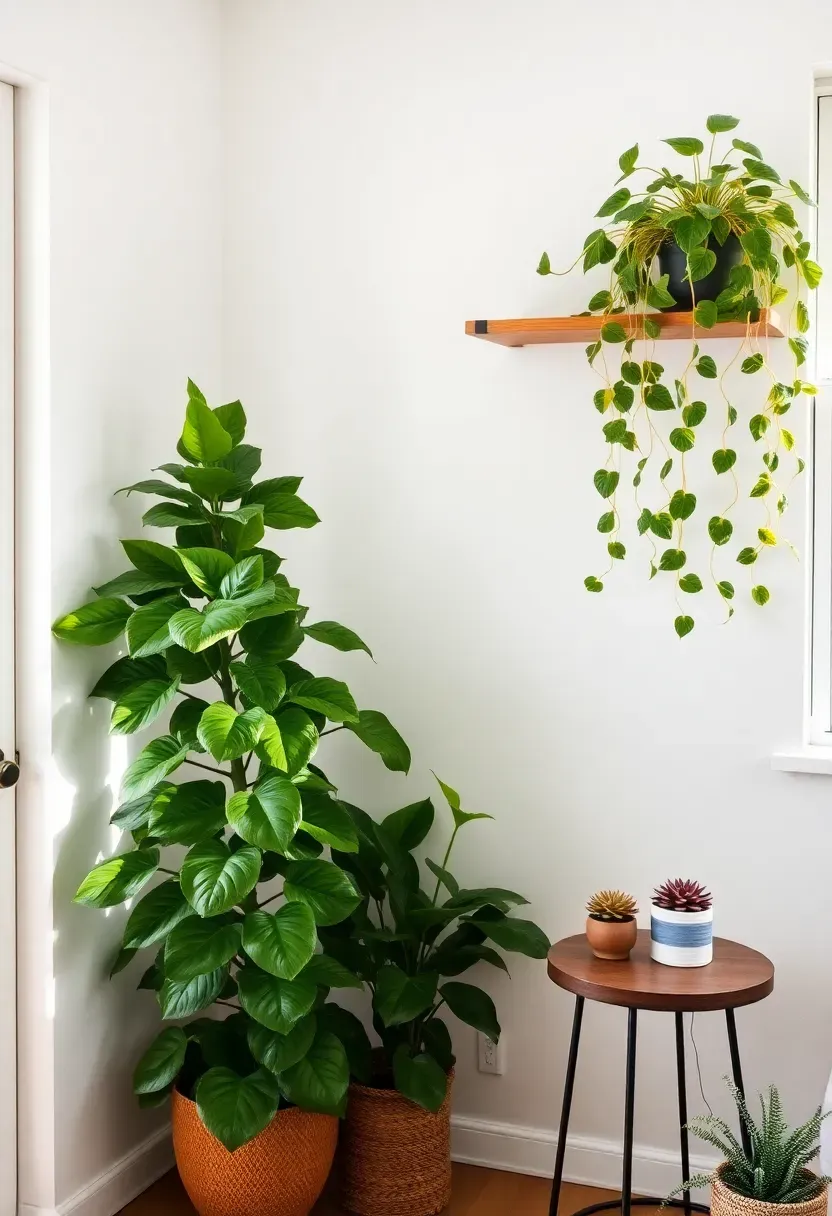
12. Indoor Plant Layering
A single potted plant on a windowsill does little. A deliberate arrangement at three different heights changes the energy of an entire corner. Place a tall statement plant — fiddle leaf fig, bird of paradise, or rubber tree — on the floor. Set a trailing plant like pothos or string of pearls on a shelf or hanging planter at mid-height. Finish with small succulents or herbs at table level.
Keeping It Alive
Not everyone has a green thumb, and that is fine. Start with low-maintenance varieties: pothos, snake plants, ZZ plants, and peace lilies tolerate neglect gracefully. Group plants with similar light needs together. Water on a schedule rather than guessing. A moisture meter costs five dollars and eliminates the number-one cause of houseplant death: overwatering.
Recommended
Items for this idea
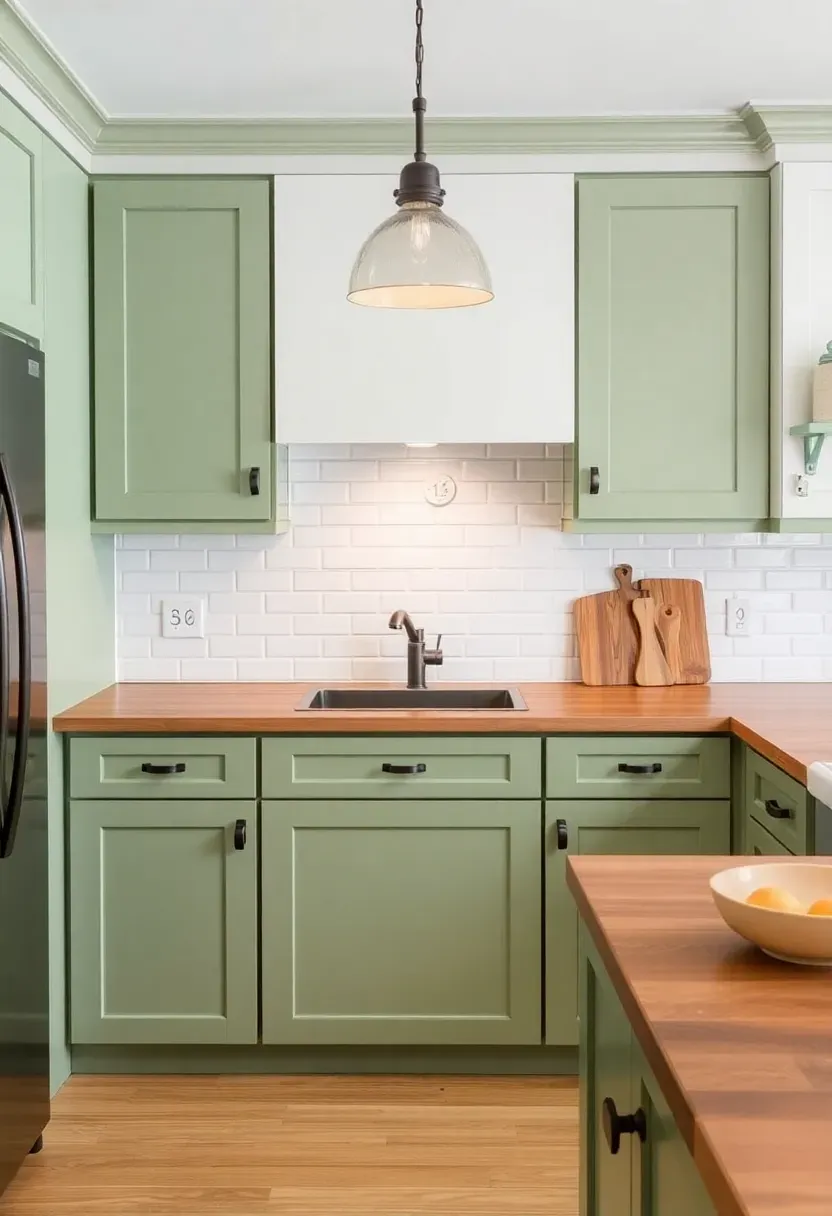
13. Painted Kitchen Cabinets
The Budget Renovation
Replacing kitchen cabinets costs thousands. Painting them costs a weekend and a few hundred dollars in supplies. The visual impact is nearly identical. Sage green, deep navy, warm white, and charcoal grey are the colors delivering the strongest transformations right now.
Step 1: Prep Is Everything
Remove doors and hardware. Clean all surfaces with TSP. Sand lightly with 220-grit. Prime with a bonding primer designed for slick surfaces.
Step 2: Apply Paint
Use a foam roller for flat panels and a good angled brush for details. Two thin coats beat one thick coat every time. Let each coat cure fully before applying the next.
Step 3: Reassemble
Wait at least seventy-two hours before reattaching doors. New hardware at this point completes the illusion of entirely new cabinets.
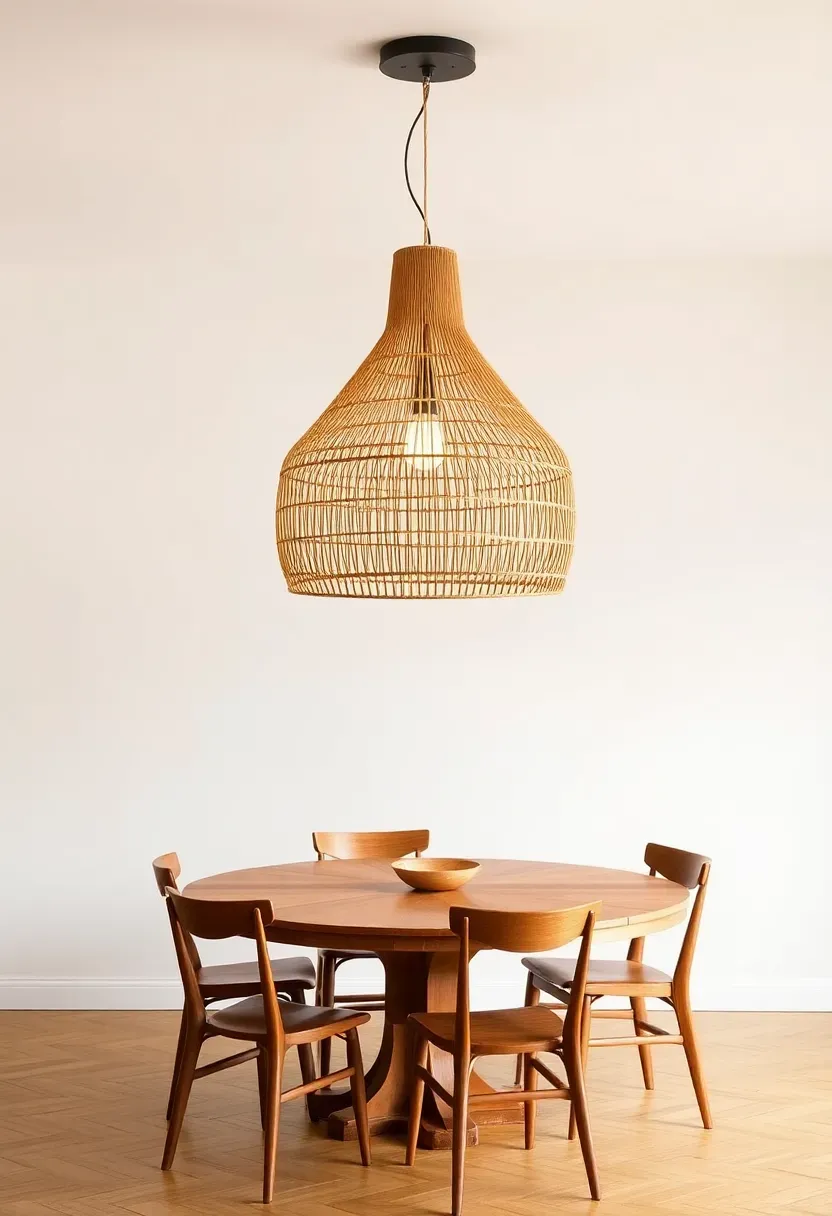
14. New Light Fixture Statement
The builder-grade flush mount in your dining room is doing nothing for you. Replacing it with a sculptural pendant, a cluster of glass globes, or a woven rattan drum light takes fifteen minutes of wiring and transforms the entire atmosphere. Dining rooms and entryways benefit most because the fixture hangs at eye level and becomes the first thing people notice.
Sizing Guide
- Fixture diameter should be roughly one-half to two-thirds the width of the table below it
- Bottom of the fixture should hang thirty to thirty-six inches above the table surface
- In hallways, allow at least seven feet of clearance from floor to fixture bottom
- Dimmer switches are worth the extra twenty dollars — they let you shift from task lighting to ambiance instantly
Recommended
Items for this idea
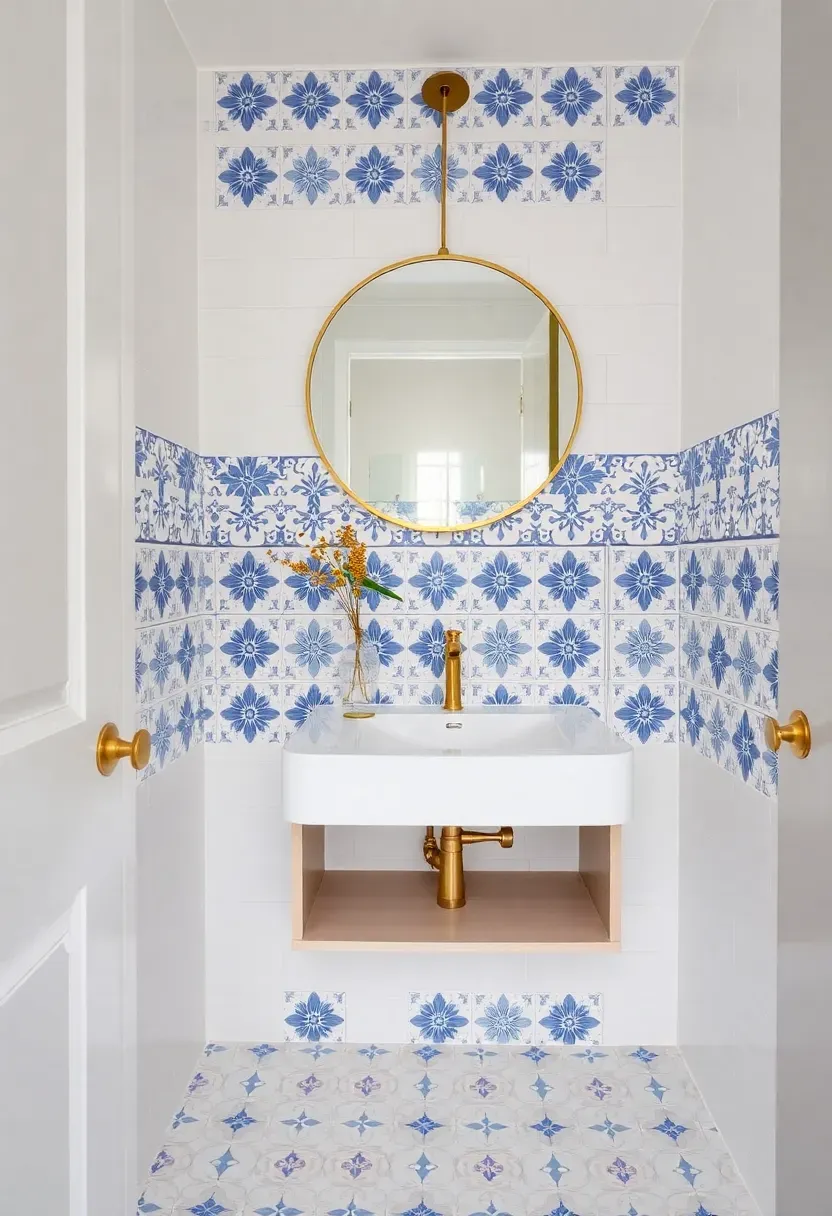
15. Bathroom Tile Sticker Makeover
The Problem
Dated ceramic tile in a rental or a bathroom you are not ready to gut. The grout lines are dingy, the color is wrong, and the pattern screams 1992.
The Solution
Waterproof peel-and-stick tile stickers overlay existing tile without adhesive damage. Available in Moroccan, subway, terrazzo, and marble patterns, they transform a bathroom floor or backsplash in an afternoon. Cut to fit with scissors. Apply from one corner and smooth outward.
Pros and Cons
Pros: Renter-friendly, removable, affordable at two to four dollars per square foot, no tools required
Cons: Edges can lift in high-moisture areas if not sealed, limited lifespan of two to three years, surface must be clean and dry for adhesion
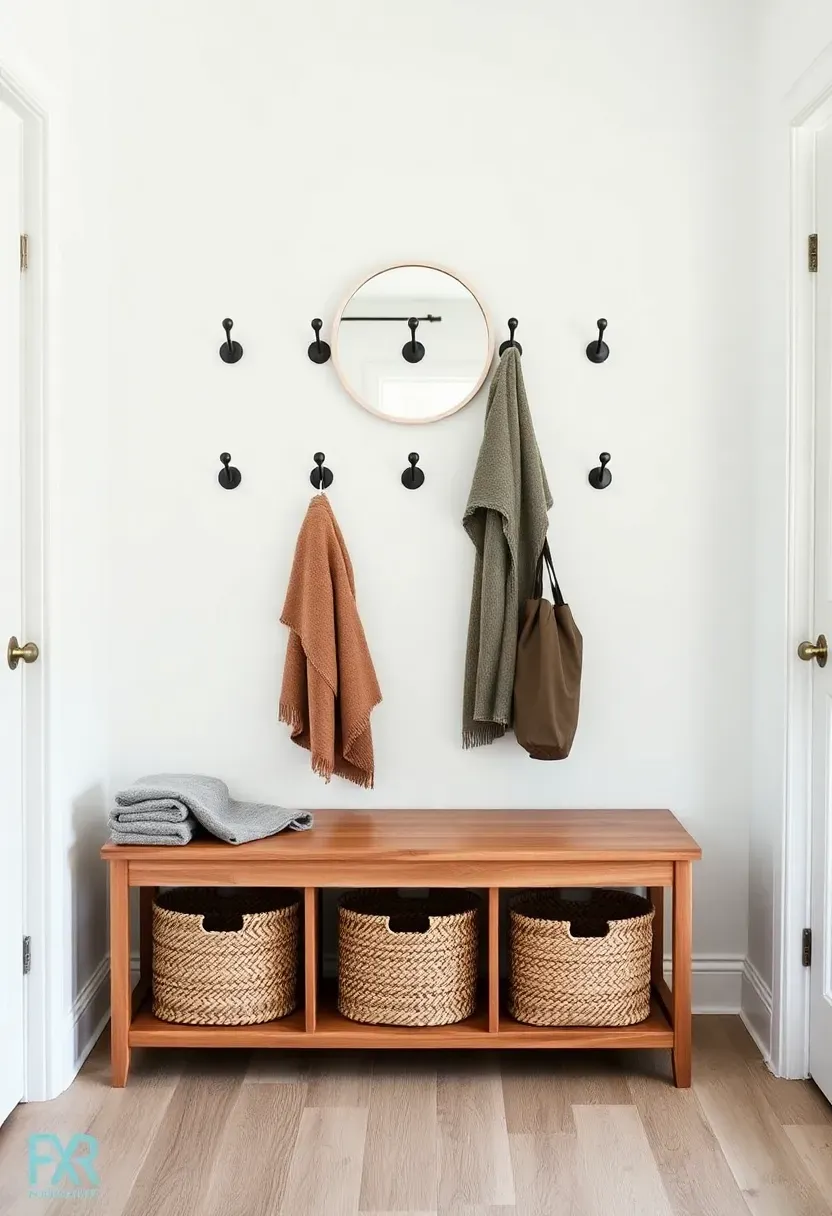
16. Entryway Bench and Hook Wall
An entryway without a landing zone turns into a dumping ground. A simple bench — wooden, upholstered, or even a repurposed church pew — paired with a row of hooks above it gives every family member a place for coats, bags, and keys. Add a basket or two under the bench for shoes and you have eliminated the chaos that greets you at the door.
Making It Look Styled
- Hooks should be evenly spaced at shoulder height
- A small mirror above the hooks lets you check yourself before heading out
- One plant or a small vase of dried flowers on the bench corner softens the utility
- Keep the bench clear except for a folded throw or a single decorative pillow
Recommended
Items for this idea
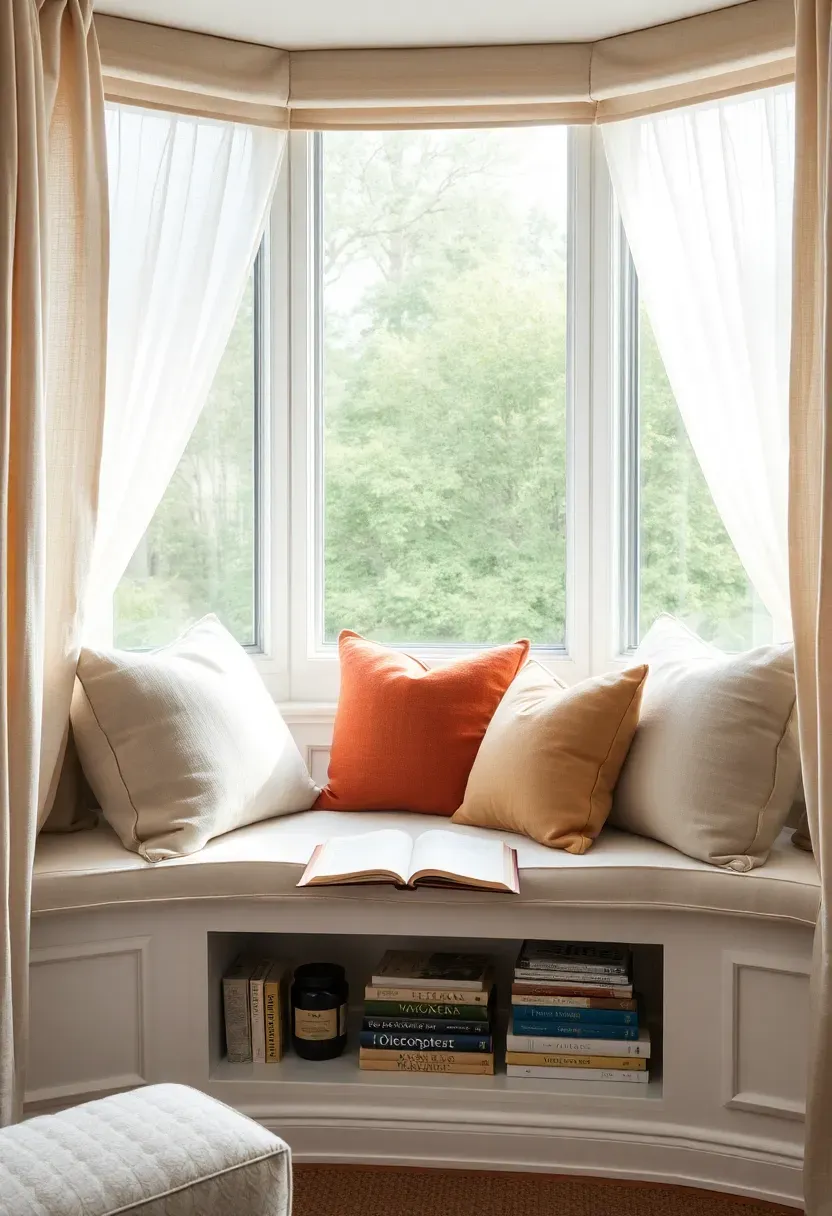
17. Window Seat Creation
That bay window or wide windowsill is wasted space until you add a cushion, a few pillows, and a shelf for books. A DIY window seat built from plywood, foam, and fabric costs under two hundred dollars and creates the coziest reading nook in the house. Storage drawers or cubbies below the seat turn dead space into hidden organization.
Construction Basics
Measure the window recess precisely. Cut plywood to fit as a bench top. Support it with simple wooden legs or side panels. Add three inches of high-density foam wrapped in your chosen fabric. Staple the fabric to the underside of the plywood. Set it in place and pile on the pillows.
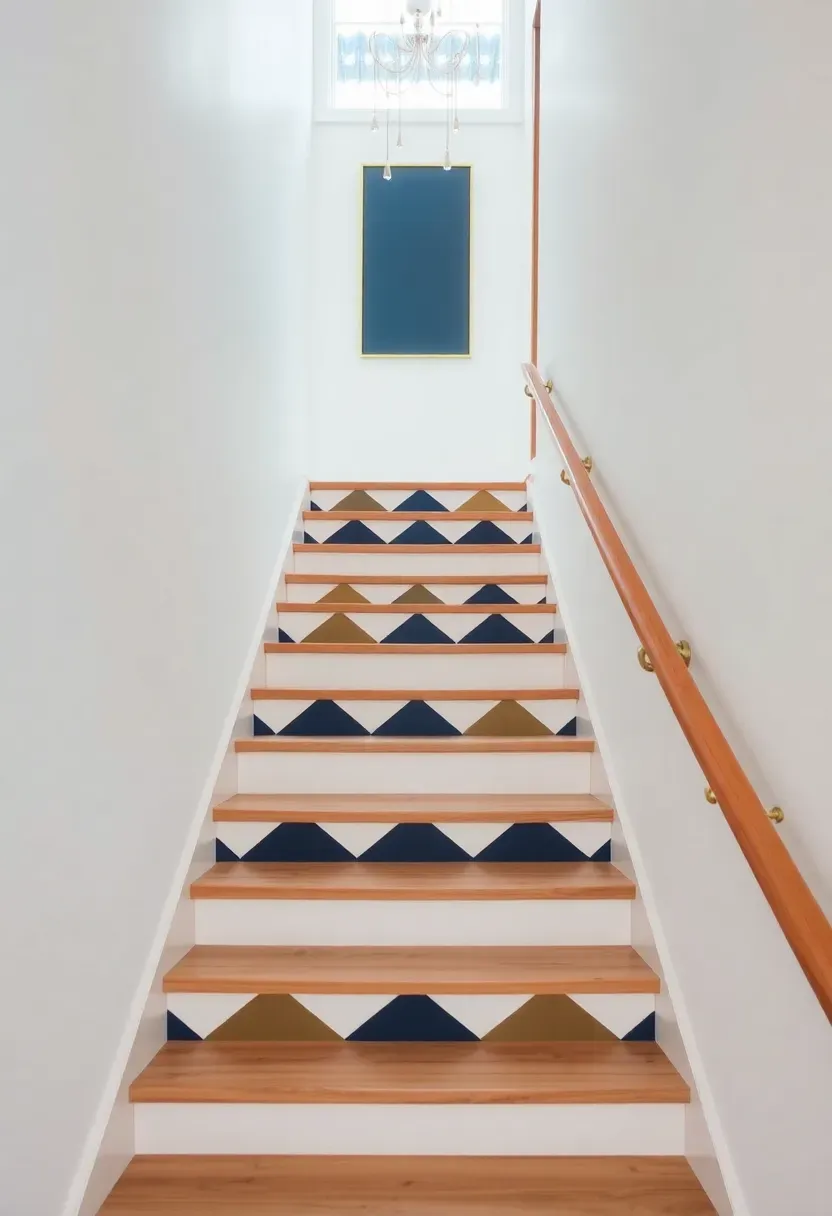
18. Painted Staircase Risers
Staircases occupy a huge visual area in two-story homes yet almost nobody decorates them. Painting the risers — the vertical face of each step — turns a functional structure into a design feature. Alternating patterns, ombre color gradations, or a single bold hue against natural wood treads all work beautifully.
Ideas That Deliver
- Navy risers with white treads for a classic nautical feel
- Each riser painted a slightly different shade of the same color, darkening as you ascend
- Geometric stencils in metallic paint on white risers
- Chalkboard paint on risers for seasonal messages or kid art
Preparation Matters
Sand each riser lightly, prime with a bonding primer, and use a semi-gloss or satin finish for durability. Steps take heavy foot traffic so quality paint and proper prep prevent peeling.
Recommended
Items for this idea
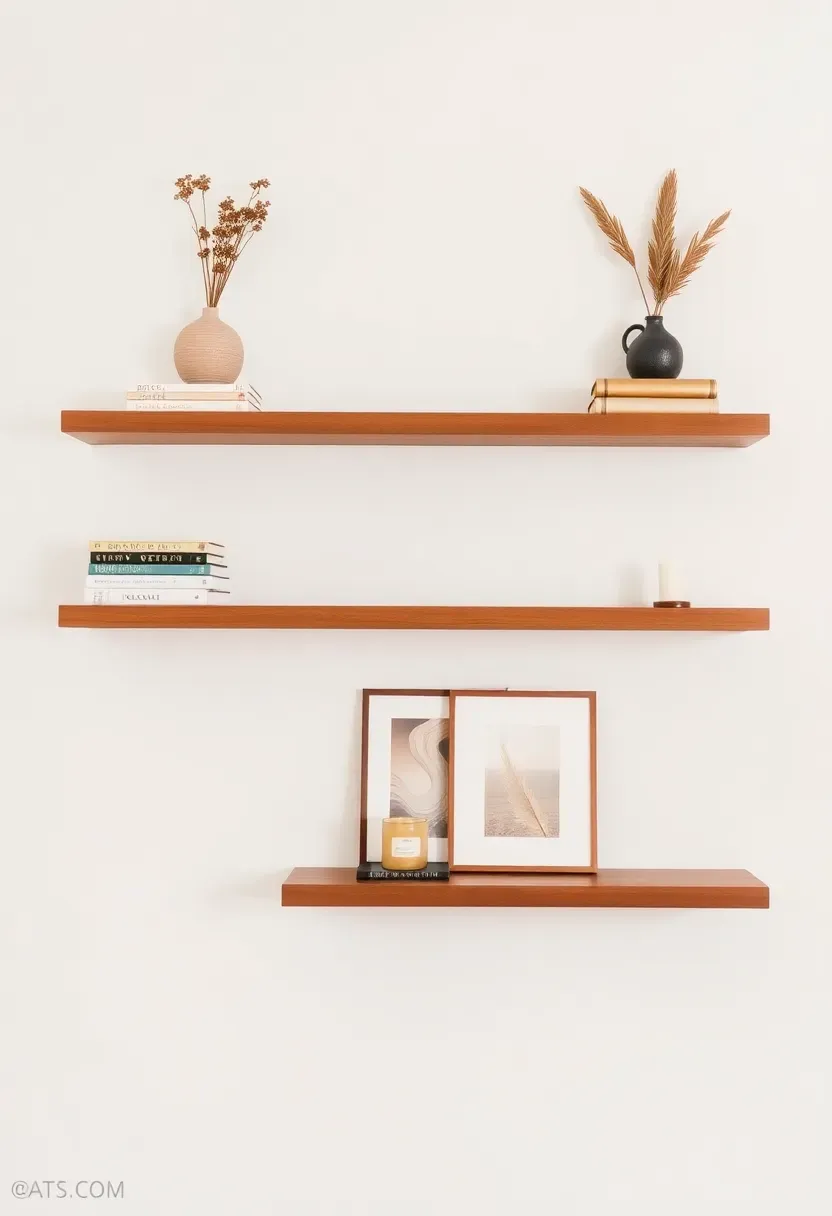
19. Floating Shelf Vignettes
A shelf full of books is a library. A shelf with books, a plant, a candle, and a small framed print is a vignette. The difference between cluttered shelves and styled ones comes down to the rule of threes: group items in clusters of three varying heights. Leave breathing room between clusters. Let at least thirty percent of the shelf surface stay empty.
Building a Vignette
Start with the tallest item at the back — a book stood upright or a tall vase. Place a medium-height object next to it at a slight angle. Set a small item in front. Step back and squint. If the grouping reads as one composed shape rather than scattered objects, you have it right. Repeat across multiple shelves, alternating which side holds the taller cluster.
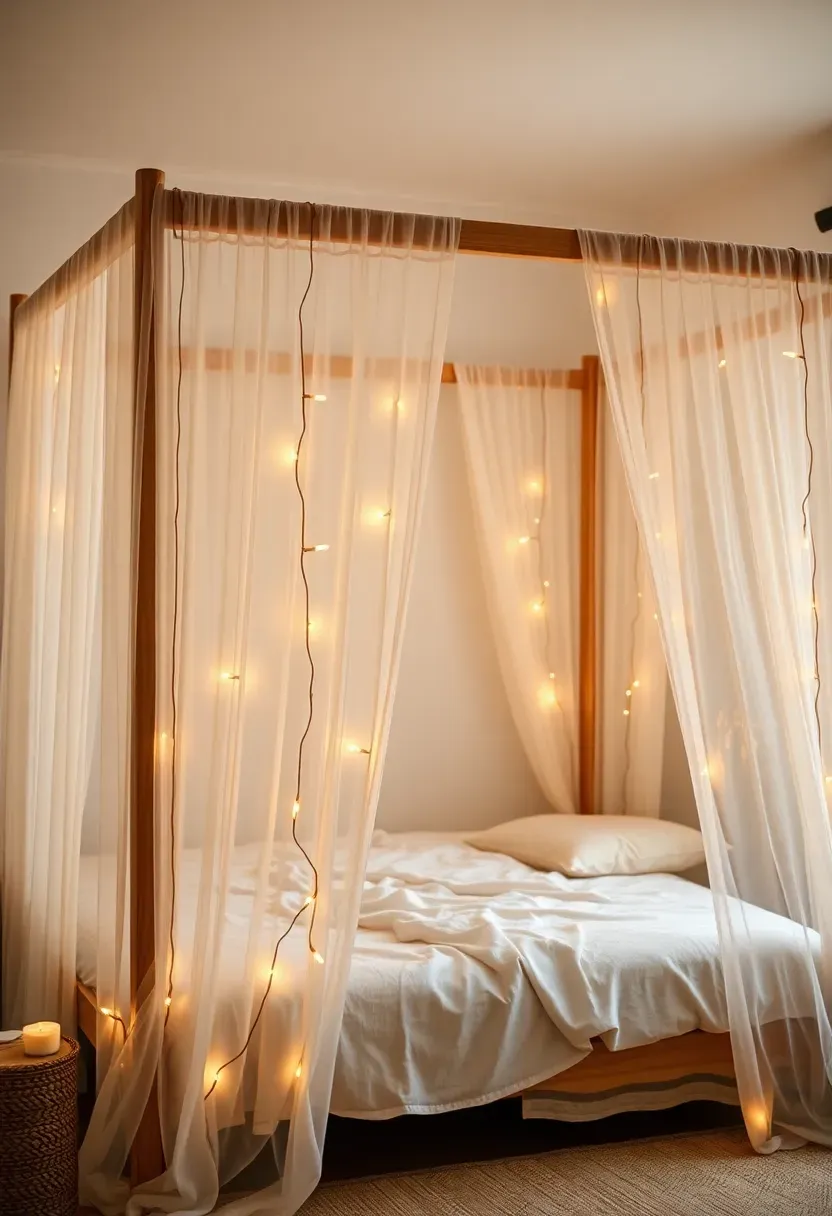
20. Bedroom Canopy Addition
Why Canopies Still Work
A canopy transforms a bed from a piece of furniture into an experience. The draped fabric creates intimacy, softens sound, and makes even a basic mattress setup feel like a boutique hotel. You do not need a four-poster frame — ceiling hooks and lightweight fabric achieve the same effect.
Three Approaches
Full frame canopy: Four-poster bed with fabric draped over the top rails. Classic, architectural, best in rooms with high ceilings.
Ceiling-mounted drapes: Two curtain rods mounted to the ceiling above the head and foot of the bed with panels hanging down the sides. Works in any room.
Single point cascade: A ceiling hook centered above the bed with a ring and sheer fabric cascading outward in all directions. Romantic and easy to install in fifteen minutes.

Recommended
Items for this idea
21. Wainscoting Wall Treatment
Board-and-batten, shaker-style panels, or beadboard on the lower third of a wall adds architectural character that plain drywall simply cannot match. The effect reads as custom millwork even when built from inexpensive MDF strips and a nail gun. Paint it the same color as the wall for a subtle textured look, or contrast it — white wainscoting below a moody green or navy above creates instant sophistication.
Cost Breakdown
MDF strips for a standard hallway run about fifty to eighty dollars. Adhesive and finish nails add another twenty. A weekend of measuring, cutting, and painting later, you have a feature that looks like a contractor charged two thousand dollars for it.
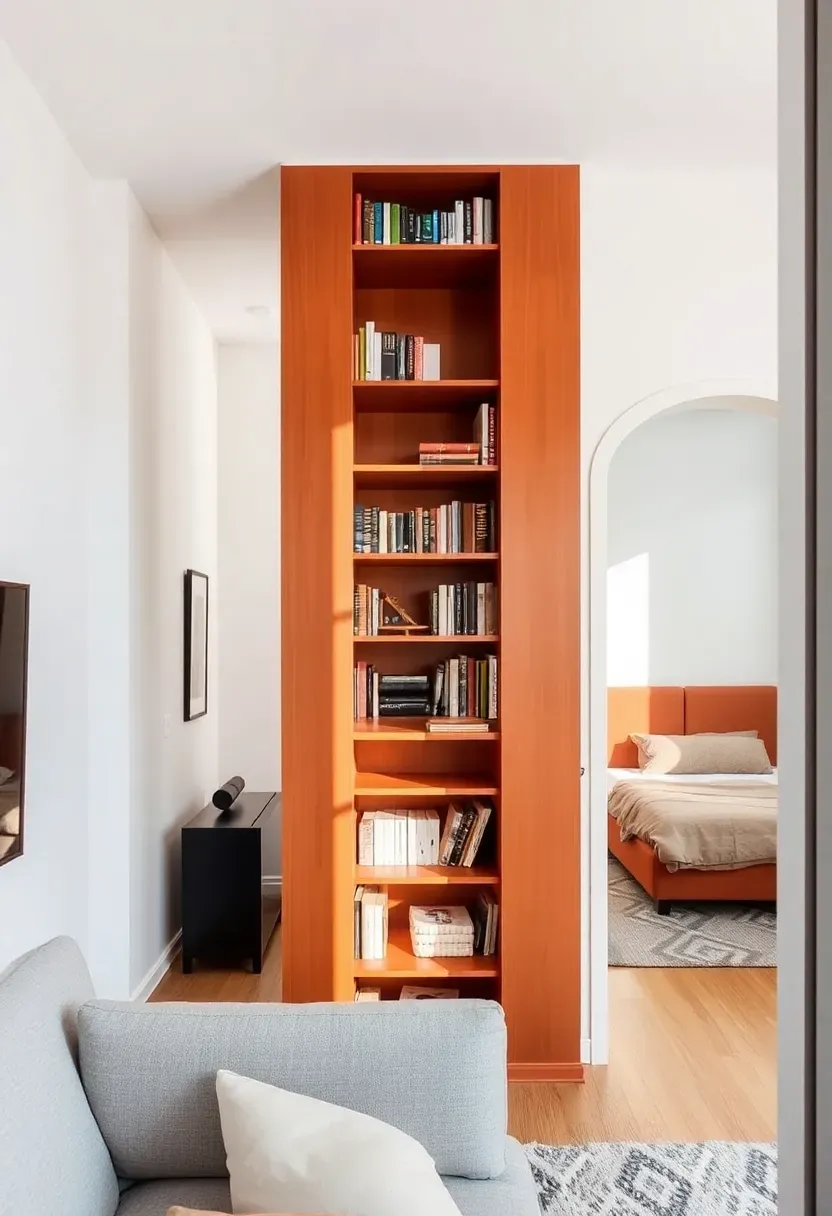
22. Color-Blocked Room Divider
For Open Spaces That Need Definition
Studio apartments and open-plan living areas benefit from visual separation without actual walls. A tall bookshelf, a folding screen, or even a curtain on a ceiling track can divide space. The transformation trick is color-blocking: paint the divider a bold color that contrasts with the surrounding walls. A terracotta shelf against white walls or a sage screen in a cream room defines zones while adding sculptural interest.
Alternative Dividers
- A row of tall potted plants on a low credenza
- Hanging macrame or beaded curtains for a textured separation
- A half-wall built from reclaimed wood pallets, sanded and sealed
Recommended
Items for this idea
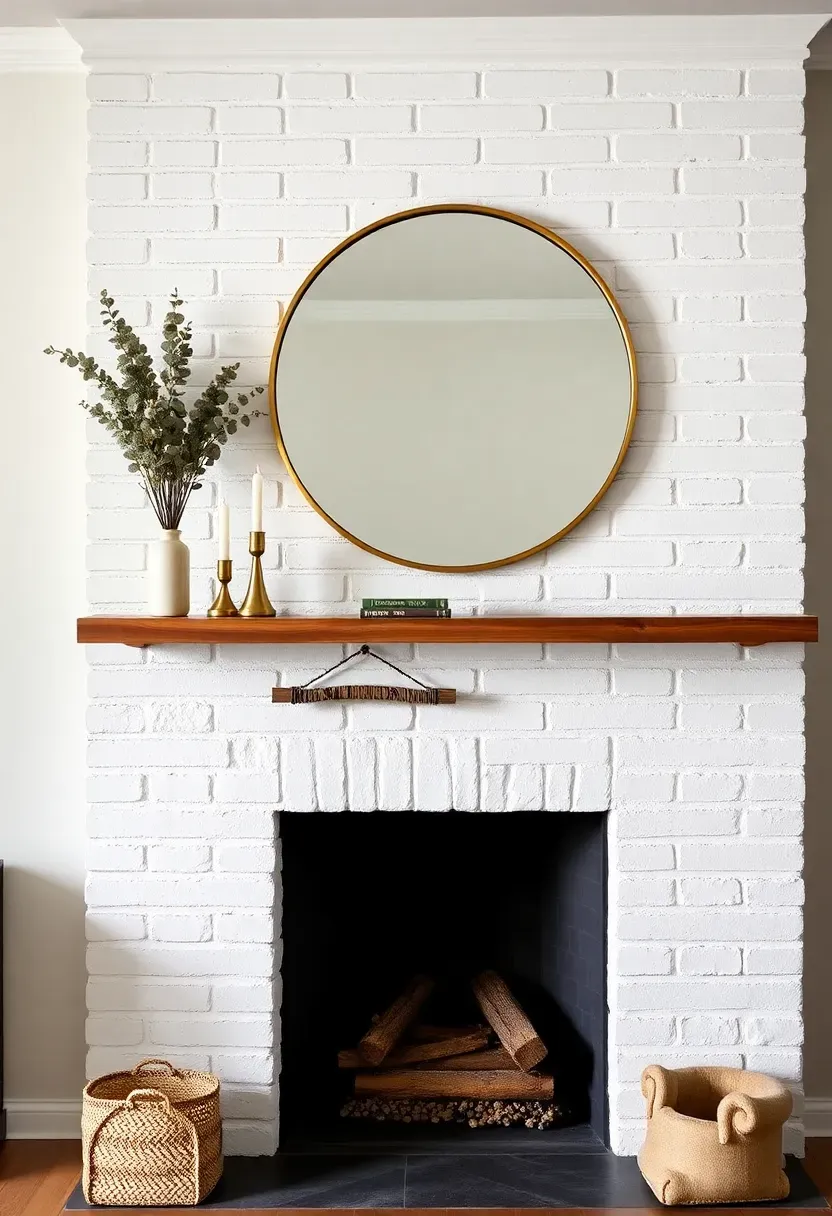
23. Fireplace Surround Makeover
An outdated brick or tile fireplace surround drags down an entire living room. Painting brick white or adding a simple wood mantel shelf updates the look without demolition. The transformation intensifies when you style the mantel — one oversized piece of art or a round mirror, a pair of candlesticks, and a sprig of dried greenery create a focal point that anchors the whole room.
Three Makeover Levels
Budget (under fifty dollars): Paint the brick and existing mantel white. Style with items you already own.
Mid-range (one to three hundred): Add a floating wood mantel shelf. Paint or limewash the brick. Install new fireplace screen.
Investment (five hundred plus): Tile over existing surround with marble-look porcelain. Add custom wood mantel. Install new gas insert.
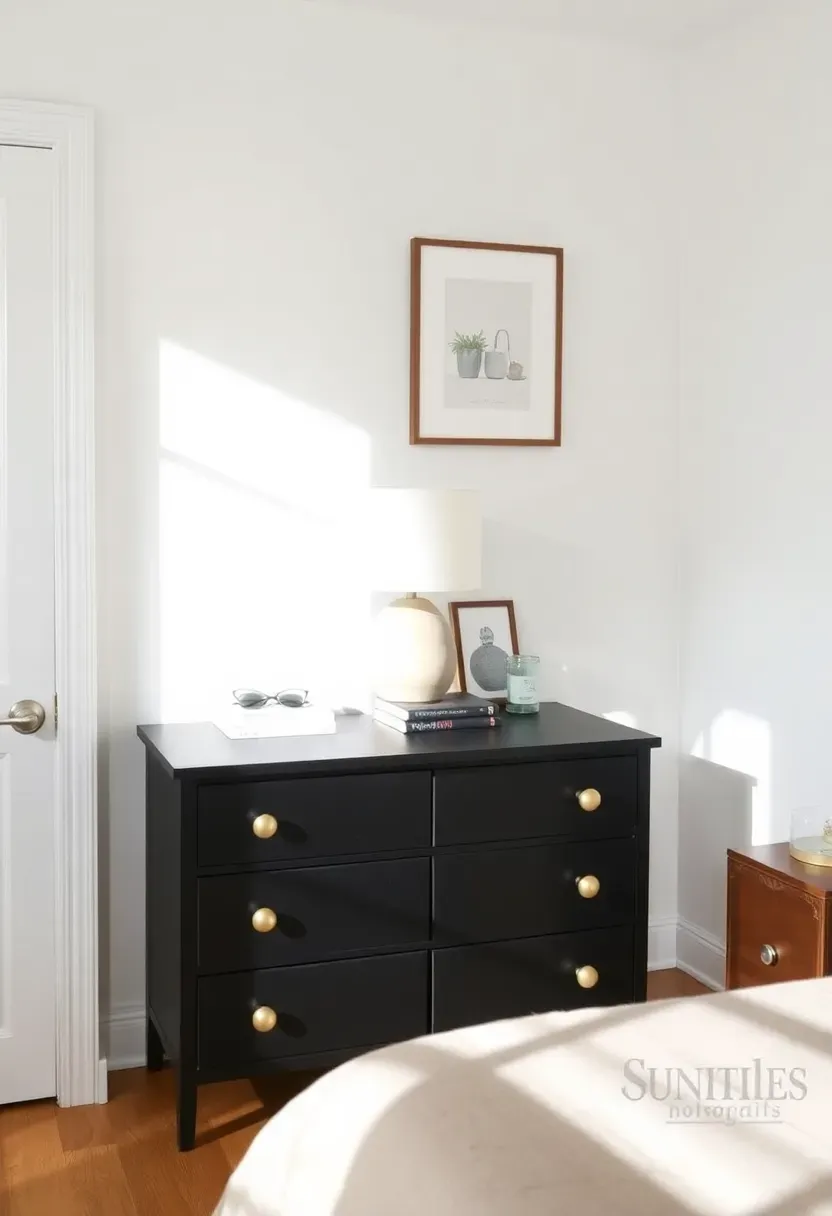
24. Thrifted Furniture Refinish
The best furniture transformations start at thrift stores, estate sales, and curbside finds. A solid-wood dresser with ugly veneer becomes a showpiece after stripping, sanding, and painting. Matte black, olive green, and warm white are the refinishing colors with the highest style return right now.
What to Look For When Thrifting
Ignore surface condition entirely — scratches, stains, and old paint are fixable. Focus instead on structural integrity. Open drawers and check for smooth gliding. Press on the top and sides to test for wobble. Solid hardwood pieces from the 1950s through 1970s are the best candidates because the construction quality far exceeds anything at today's budget price points.
The Refinishing Process
Strip old finish with a chemical remover or heat gun. Sand progressively from 120 to 220 grit. Apply primer formulated for wood. Paint with two coats of your chosen color using a foam roller for smooth finish. Seal with a clear matte polyurethane. Replace hardware with something modern.
Recommended
Items for this idea
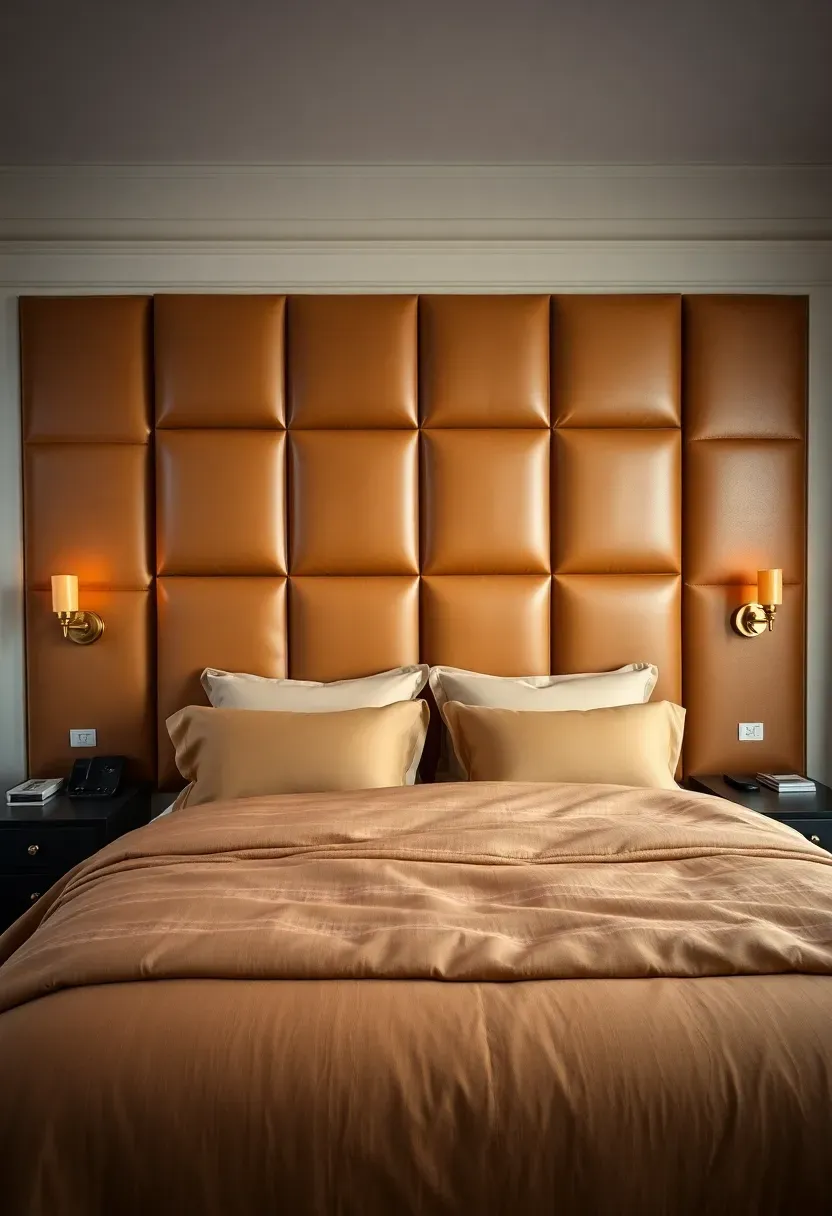
25. Textile Headboard Wall
Beyond the Standard Headboard
Instead of a single headboard, extend upholstered fabric panels across the entire wall behind the bed. The effect is immersive — the room feels softer, warmer, and acoustically quieter. Fabric panels absorb sound and create a cocoon-like sleeping environment that drywall alone cannot deliver.
DIY Panel Method
Cut plywood into rectangular sections. Wrap each section with batting and then your chosen fabric — linen, velvet, or boucle all work. Staple the fabric to the back. Mount panels edge-to-edge on the wall using French cleats. The modular approach means you can replace individual panels if tastes change or fabric wears.
Color Choices
Warm camel and cognac tones create a leather-lounge feel. Soft grey or oatmeal linen keeps the mood neutral and calming. Deep jewel tones like emerald or sapphire turn the wall into a dramatic statement.

26. Outdoor-to-Indoor Transition
The boundary between inside and outside disappears when you treat the transition deliberately. Match indoor and outdoor rugs so the floor pattern flows through glass doors. Place potted trees on both sides of the threshold. Coordinate cushion colors so seating inside echoes what is on the patio. The result is a living area that feels twice its actual size because the eye does not stop at the wall.
Practical Considerations
- Use performance fabrics indoors near the transition zone since foot traffic brings moisture and dirt
- Choose outdoor furniture that looks sophisticated enough to work inside if viewed through the glass
- Keep sightlines clear — avoid placing tall furniture that blocks the view from inside to outside
Recommended
Items for this idea
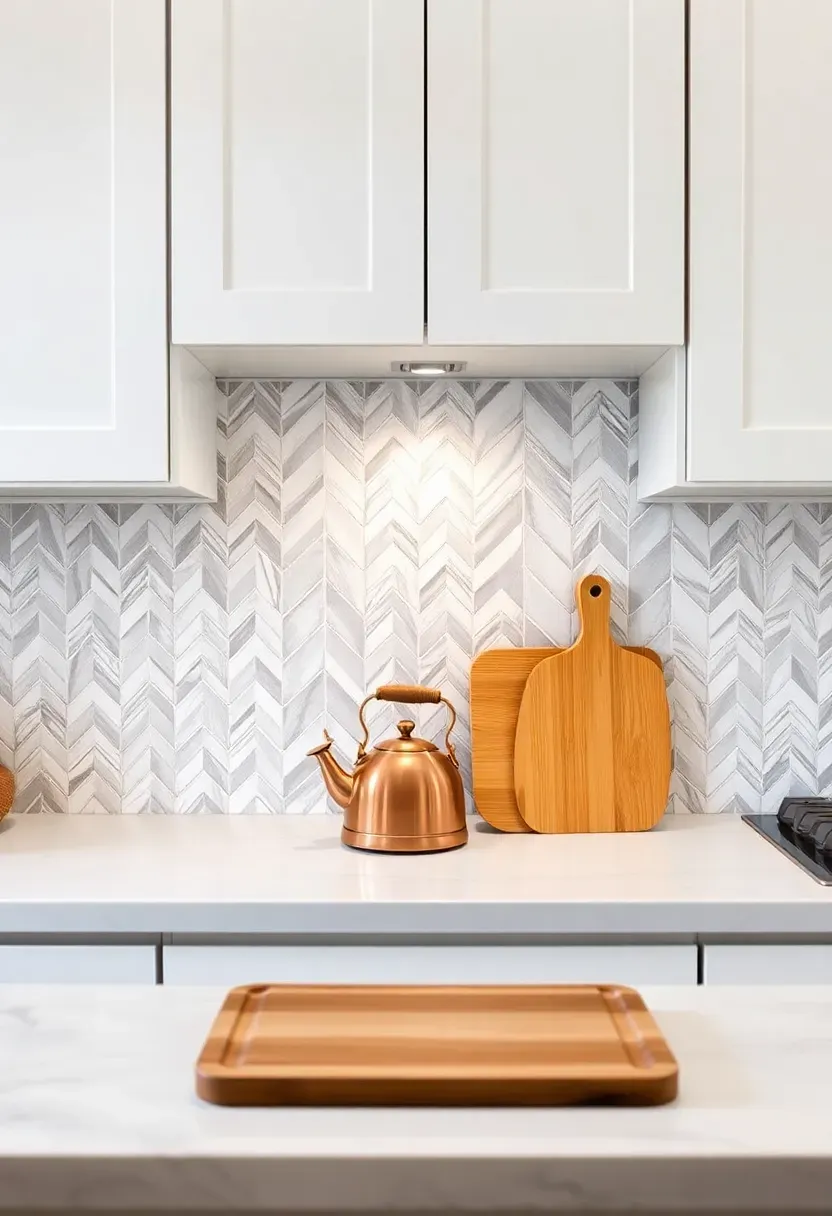
27. Peel-and-Stick Backsplash
Rental-Friendly Kitchen Upgrade
A backsplash defines the personality of a kitchen, and peel-and-stick tiles make it achievable in an afternoon with zero tools. Marble herringbone, white subway, and terrazzo patterns are the top sellers because they mimic the look of real tile convincingly.
Installation Steps
Clean the wall thoroughly with rubbing alcohol. Measure and mark a level line to guide the first row. Peel the backing and press firmly from center outward, smoothing with a credit card. Cut edge pieces with a utility knife. Seal the top and bottom edges with clear silicone for moisture protection.
Longevity Tips
Avoid placing peel-and-stick tiles directly behind the stove where heat and grease are intense. The area between the sink and upper cabinets is the safest and most visually impactful zone. Expect two to five years of wear depending on kitchen humidity and surface preparation quality.
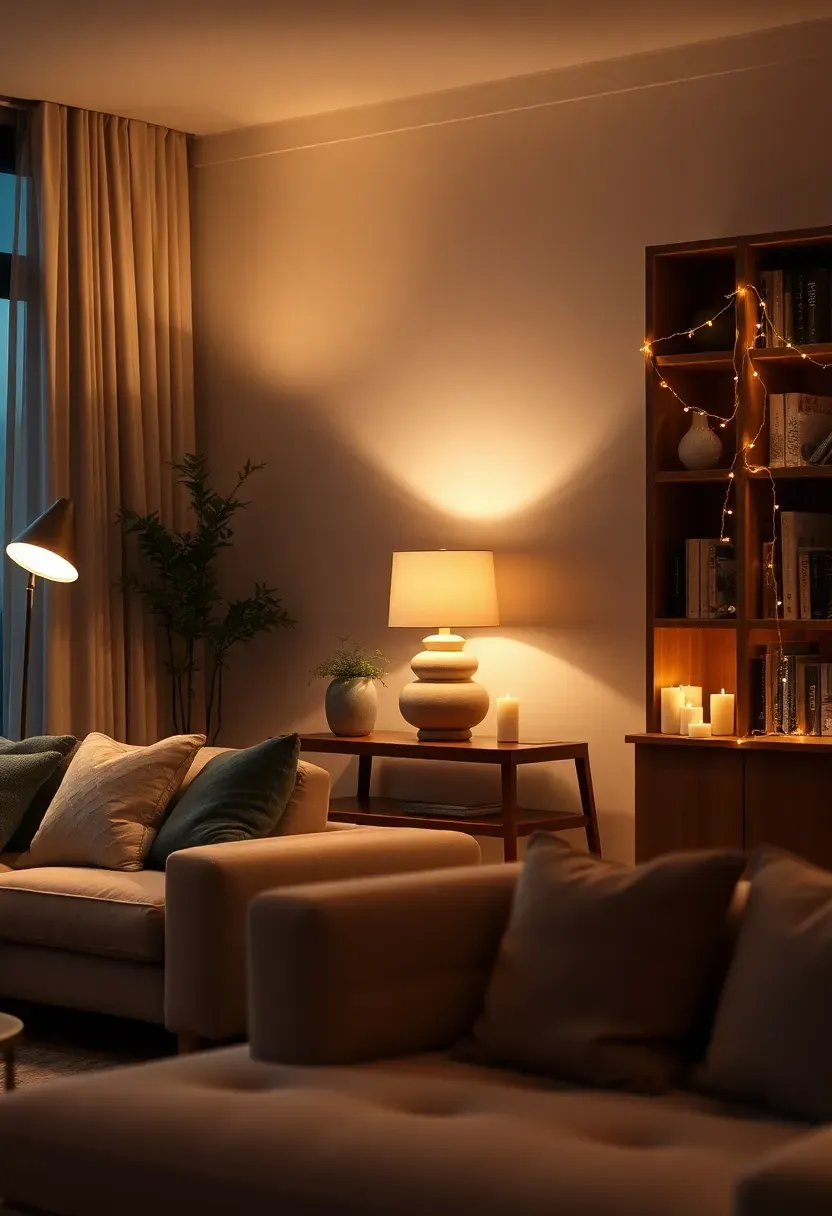
28. Mood Lighting Overhaul
Overhead lighting alone creates the ambiance of a doctor's waiting room. The transformation happens when you layer three types of light: ambient, task, and accent. A floor lamp beside the sofa provides ambient warmth. A table lamp on the console serves reading or task needs. LED candles, string lights, or a backlit shelf add accent glow that makes the room feel alive after dark.
The Warmth Rule
Every bulb in a living space should be 2700K or lower. That warm yellowish tone mimics candlelight and relaxes the nervous system. Anything above 3000K starts to feel clinical. Swap every bulb in the room to 2700K, add dimmers where possible, and the space will feel fundamentally different by evening.
Recommended
Items for this idea
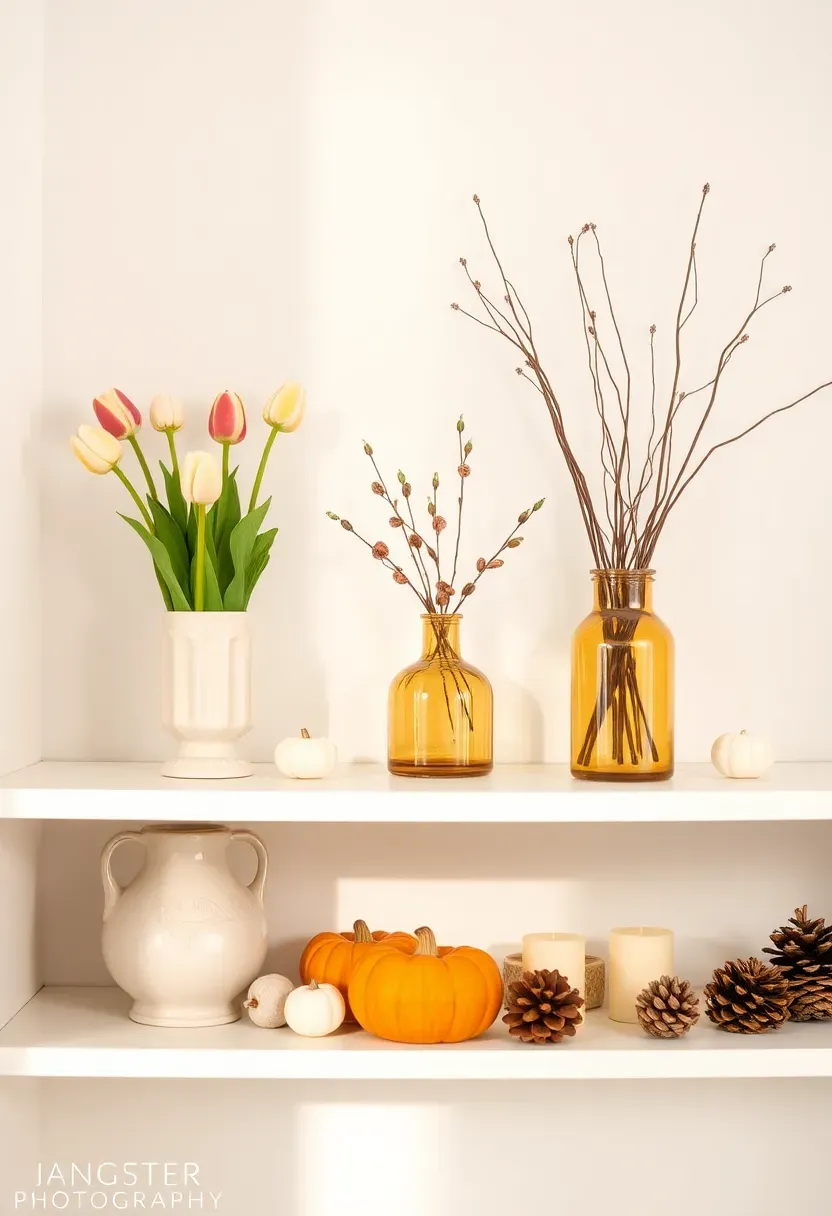
29. Seasonal Styling Rotation
The final transformation is not a single change — it is a system. Designate one shelf, one tabletop, and one entryway surface as your seasonal rotation zones. Every three months, swap the items on those surfaces to reflect the season. Spring gets fresh flowers and pastels. Summer brings shells, citrus, and linen. Autumn calls for dried branches, amber glass, and warm metals. Winter invites pinecones, candles, and evergreen sprigs.
Why This Works Long-Term
Your home never feels stale because something always shifts. The core furniture and paint stay consistent — only the accessories rotate. Store off-season items in labeled bins. Over time you build a collection of seasonal pieces that make each quarterly swap faster and more satisfying. Guests notice something different every visit, and you rediscover your own space four times a year.
Quick FAQ
Is it possible to transform a room without painting? Absolutely. Textile swaps, furniture rearrangement, new lighting, and accessories alone can overhaul a space. Paint is powerful but far from the only tool. Focus on what you touch and see most — the sofa covering, the rug, and the light fixtures.
Should I tackle one room at a time or the whole house? One room at a time keeps momentum high and costs manageable. Finish the room you spend the most waking hours in first. Seeing a completed transformation fuels the motivation to keep going with the rest of the house.
Which single change delivers the biggest visual impact? Lighting. Replacing a basic overhead fixture with a statement pendant and adding two lamps to a room changes the atmosphere more dramatically than any other single upgrade. The effect multiplies after dark when lighting becomes the primary design element.
What budget should I expect for a full room transformation? A meaningful transformation ranges from fifty dollars for paint and hardware swaps to five hundred for a comprehensive overhaul including textiles, lighting, and accessories. The ideas in this article deliberately span that range so you can start wherever your budget allows.
Do peel-and-stick products really last? Quality peel-and-stick tiles and wallpaper last two to five years in normal conditions. Avoid high-moisture and high-heat zones for maximum lifespan. Surface preparation is the biggest factor — clean, dry, smooth surfaces hold adhesive far longer than dusty or textured ones.
The rooms you live in shape how you feel every single day. Not one of these twenty-nine ideas requires a contractor, a building permit, or a trust fund. Start with the transformation that excites you most, finish it completely, and let that momentum carry you forward. A home that reflects who you are right now — not who moved in three years ago — is worth every hour you invest in it.
Pinterest cover for 29 Home Decor Transformations For Your Space
About the author
OBCD
CGI visualization and interior design content. We create detailed 3D renders and curate practical design ideas for every room in your home.