27 Creative Spring Craft Projects
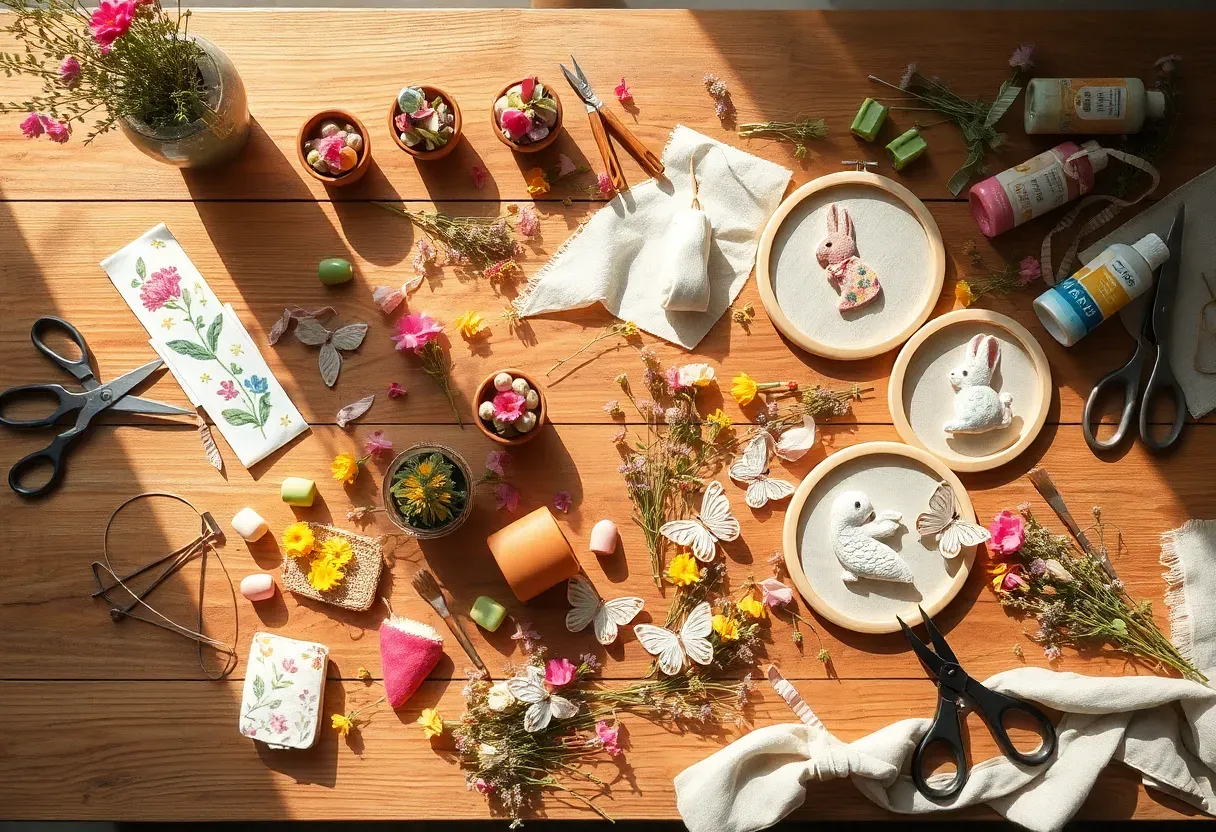
We have all experienced that restless energy when the first warm days arrive and the windows finally open. Suddenly the house feels stale, the winter decor looks heavy, and your hands itch to make something. Spring crafting is not just about the finished product — it is about the slow afternoon spent cutting, gluing, painting, and letting the season creep into your home one project at a time. These are the kind of projects that smell like fresh paint and damp soil, that leave glitter on the kitchen counter for a week, and that somehow make the whole house feel lighter.
Below you will find 27 spring craft ideas spanning floral designs, recycled material art, painted ceramics, textile projects, and nature-inspired builds. We start simple and build toward more ambitious creations.
Table of Contents
- Pressed Flower Bookmarks
- Painted Terra Cotta Herb Pots
- Fabric Scrap Bunny Garland
- Moss-Covered Letter Monogram
- Watercolor Resist Easter Eggs
- Upcycled Tin Can Planters
- Woven Paper Basket
- Seed Bomb Favors
- Botanical Sun Prints
- Clay Mushroom Garden Stakes
- Fabric Wrapped Wreath
- Decoupage Flower Tray
- Macrame Plant Hanger
- Paper Quilled Butterfly Frame
- Beeswax Wrap Set
- Embroidered Spring Hoop Art
- Concrete Leaf Stepping Stones
- Painted Rock Garden Markers
- Nature Weaving on a Stick Loom
- Floral Ice Candle Holders
- Dried Citrus Garland
- Hand-Stamped Linen Napkins
- Bird Feeder from Recycled Bottles
- Spring Terrarium in a Glass Jar
- Wax Dipped Flower Arrangements
- Lavender Sachets from Old Fabric
- Handmade Paper with Flower Petals
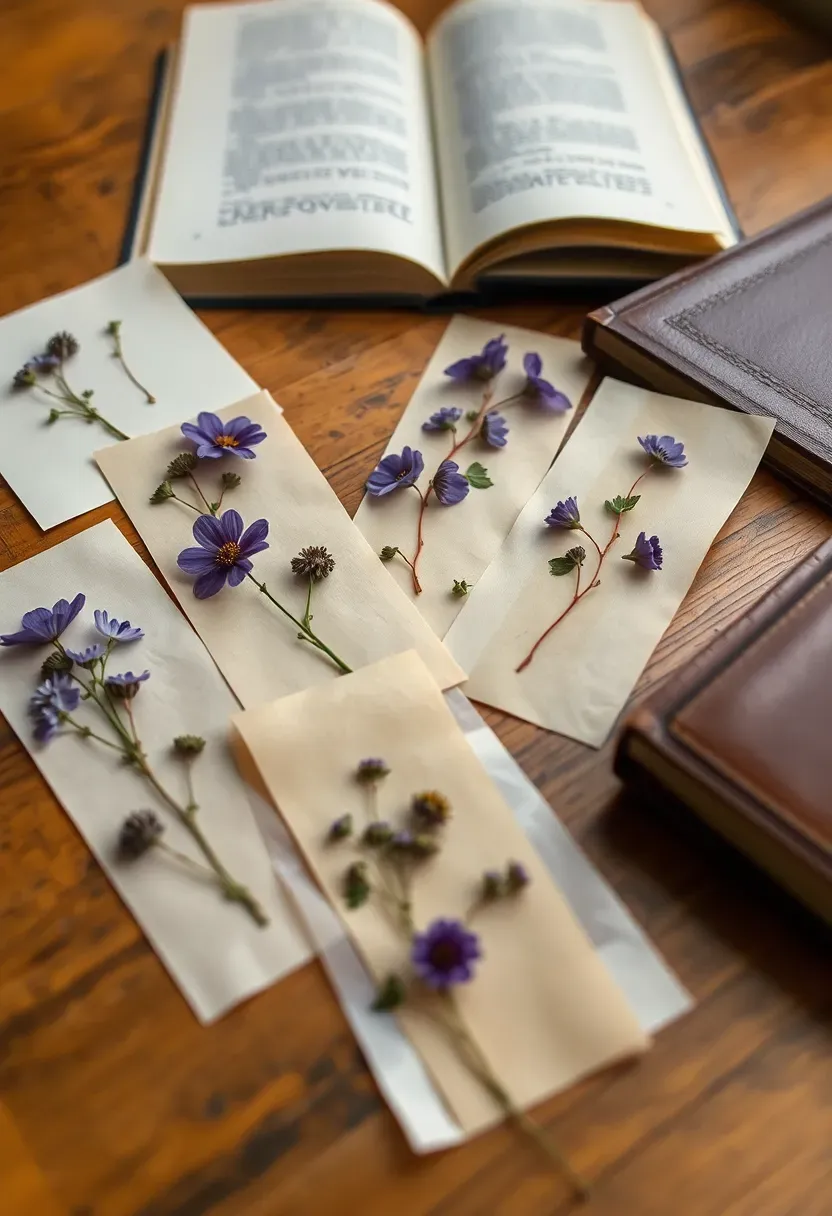
1. Pressed Flower Bookmarks
Pressing flowers is one of those crafts that feels like a quiet conversation with the season. You pick a handful of wildflowers — violets, clover, tiny daisies — tuck them between sheets of wax paper inside a heavy book, and wait. A week later you have translucent petals frozen in time. Laminate them onto card stock or slip them into self-seal laminating pouches, and suddenly you have gifts that cost almost nothing but feel deeply personal.
Materials You Need
- Fresh wildflowers or garden cuttings
- Heavy book or flower press
- Card stock or watercolor paper
- Self-seal laminating sheets or clear contact paper
- Twine or ribbon for a finishing touch
Tips for Best Results
- Pick flowers early in the morning when moisture is lowest
- Thinner petals press more cleanly than thick, fleshy blooms
- Allow at least seven days for full drying before laminating
We picked a few things that go well with this idea: Winlyn 36-Set Spring Flower Craft Kit (★4.9), Cinrobiye 30-Set Spring Umbrella Paper Craft (★4.2) and 48-Set Sunflower Wreath DIY Craft Kit (★4.3). As an Amazon Associate we earn from qualifying purchases.
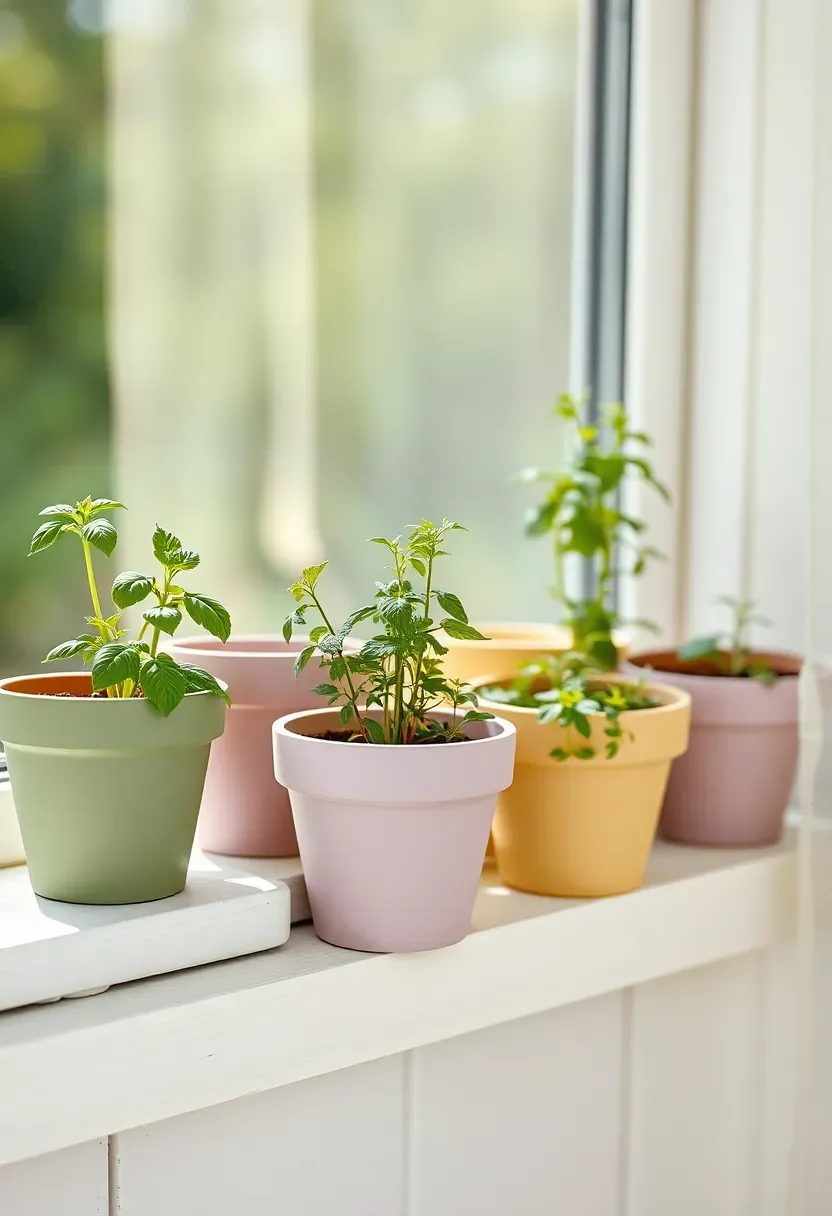
2. Painted Terra Cotta Herb Pots
Why This Project Works
Terra cotta pots are inexpensive, universally available, and absorb paint beautifully. A coat of chalk paint in sage green, dusty pink, or soft yellow transforms them from generic garden-center stock into something that belongs on a styled kitchen windowsill. Plant them with basil, rosemary, or mint and they become functional spring decor that doubles as a cooking resource.
How to Paint Them
Start with clean, dry pots. Apply a thin base coat of chalk paint and let it dry completely — usually thirty minutes. Add a second coat for even coverage. If you want geometric patterns or stripes, use painter's tape before the second layer. Finish with a matte sealant spray to protect against water marks.
Pros and Cons
Pros: extremely beginner-friendly, useful beyond decoration, cheap materials Cons: chalk paint can chip if pots are dragged across hard surfaces, requires sealant for outdoor use
We picked a few things that go well with this idea: CYANFOUR 5-Pack Floral Embroidery Beginner Kit (★4.4), COCOMOX 3-Set Flower Embroidery Practice Kit (★4.6) and Sutesloly 4-Set Floral Embroidery Starter Kit (★4.7). As an Amazon Associate we earn from qualifying purchases.
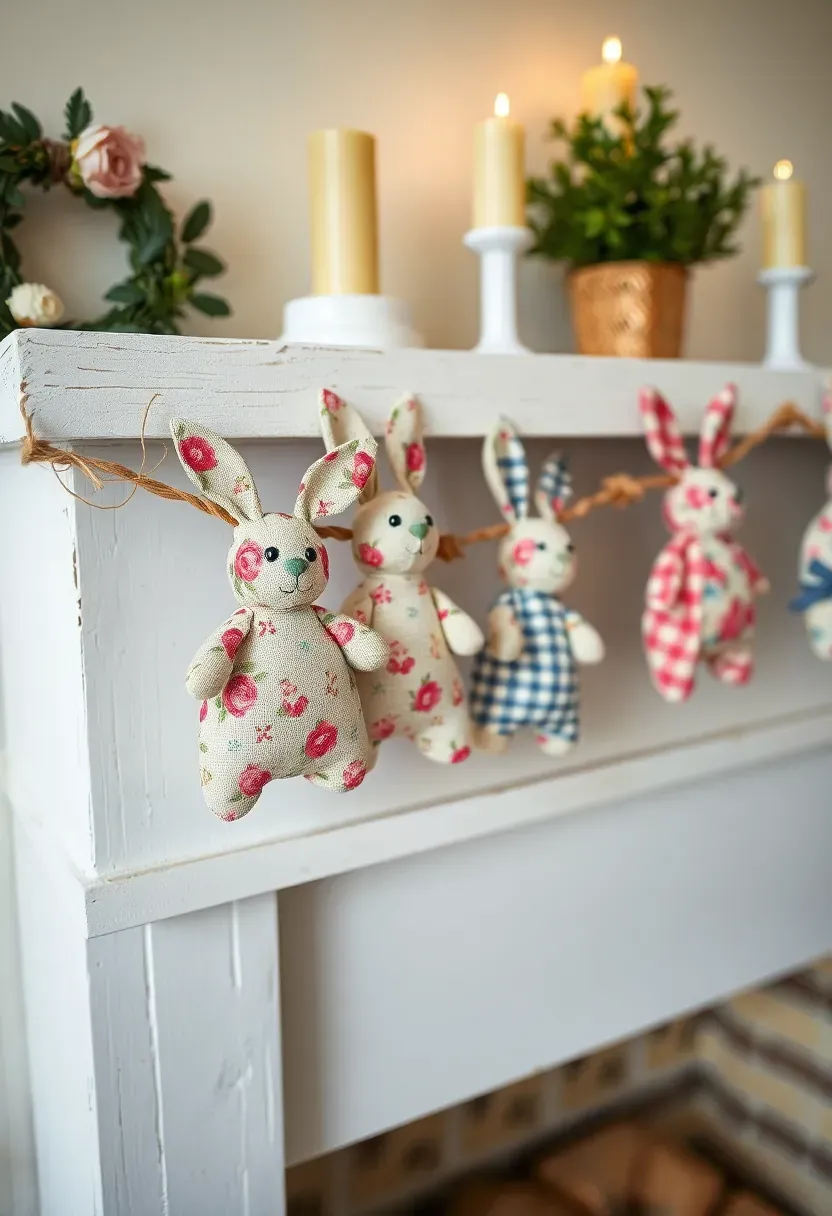
3. Fabric Scrap Bunny Garland
Take those leftover fabric scraps — the floral cotton from last summer's sewing project, the linen offcut from a curtain hem — and turn them into a garland of small stuffed bunnies. Each bunny is roughly palm-sized, stitched from a simple two-piece pattern, lightly filled with polyester stuffing or dried rice for weight, and strung on jute twine. Hang the garland across a mantel, along a bookshelf edge, or above a doorway for an Easter detail that avoids the usual plastic-egg territory.
What You Need
- Fabric scraps in complementary spring prints
- Basic sewing kit or sewing machine
- Polyester filling or dried rice
- Jute twine and a large needle
- Bunny template (search online for free patterns)
We picked a few things that go well with this idea: DIY Closed Ecosystem Terrarium Supply Kit (★4.1), PYEF CRAFTS Glass Terrarium DIY Kit (34oz) (★4.4) and SuperMoss Beach Terrarium DIY Kit (★4.3). As an Amazon Associate we earn from qualifying purchases.
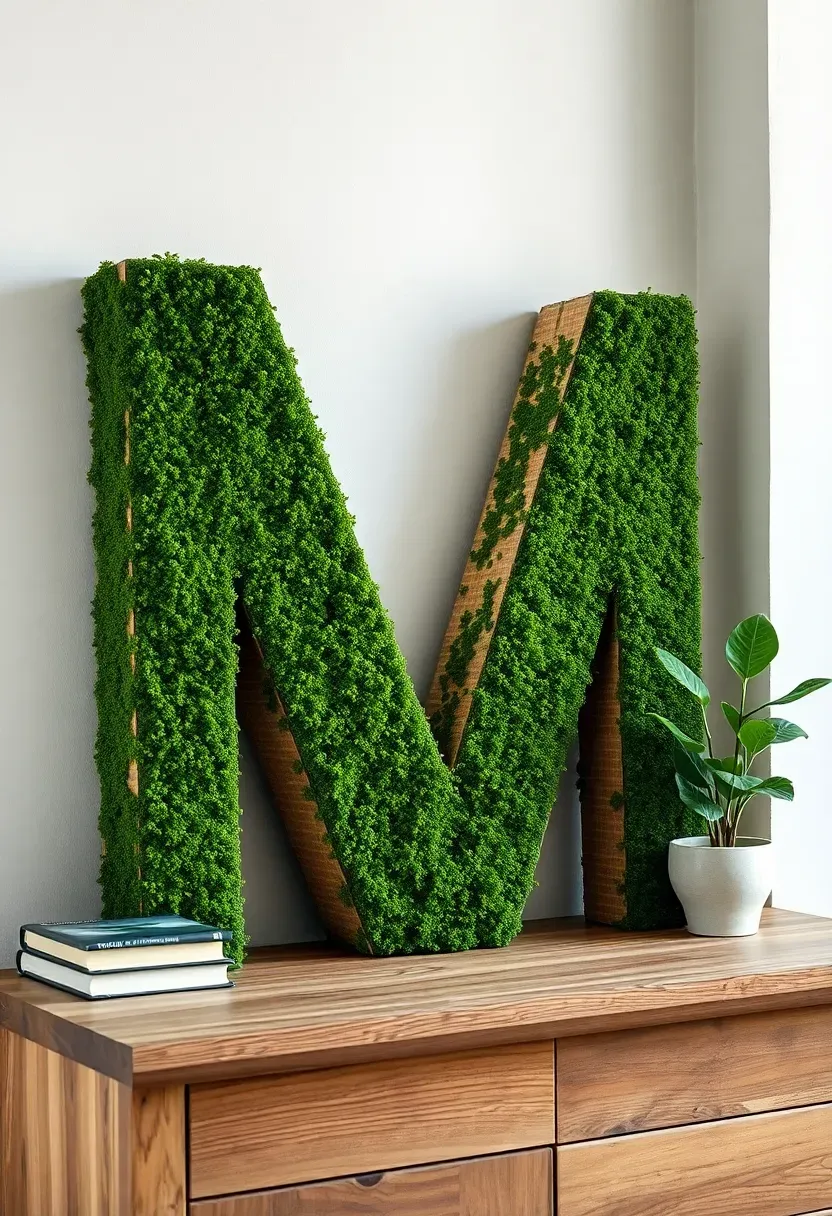
4. Moss-Covered Letter Monogram
The Concept
A single oversized letter — your family initial, perhaps — cut from thick cardboard or purchased as a wooden blank from a craft store, then entirely covered in preserved sheet moss using hot glue. The result is a living-looking piece of wall art that brings an immediate botanical quality to an entryway, nursery, or covered porch.
Step 1: Prepare the Base
Cut or purchase a letter at least twelve inches tall. Sand any rough edges on wooden blanks. If using cardboard, layer two pieces together for rigidity.
Step 2: Apply the Moss
Working in small sections, apply hot glue to the letter surface and press preserved moss firmly into place. Overlap edges slightly so no base material shows through.
Step 3: Finishing Touches
Trim any overhanging moss with scissors. Attach a sawtooth hanger to the back. For outdoor use, spray with a clear UV-resistant sealant to slow fading.

Recommended
Items for this idea
5. Watercolor Resist Easter Eggs
The Core Issue
Most egg dyeing kits produce flat, single-color results that look identical to what everyone else makes. After the novelty fades the eggs sit in a bowl looking unremarkable.
The Solution
Watercolor resist turns eggs into tiny abstract paintings. Draw patterns on blown-out white eggs using a white crayon or oil pastel — swirls, dots, leaf shapes, initials. Then brush liquid watercolors over the surface. The wax repels the paint, revealing your hidden design in crisp white against washes of lavender, sky blue, or coral. Each egg becomes one of a kind, and the technique is simple enough for older children to master.
Pros and Cons
Pros: no two eggs look alike, requires only basic supplies, works on blown-out eggs for long-term display Cons: blown eggs are fragile and require careful handling, watercolor can drip if over-applied
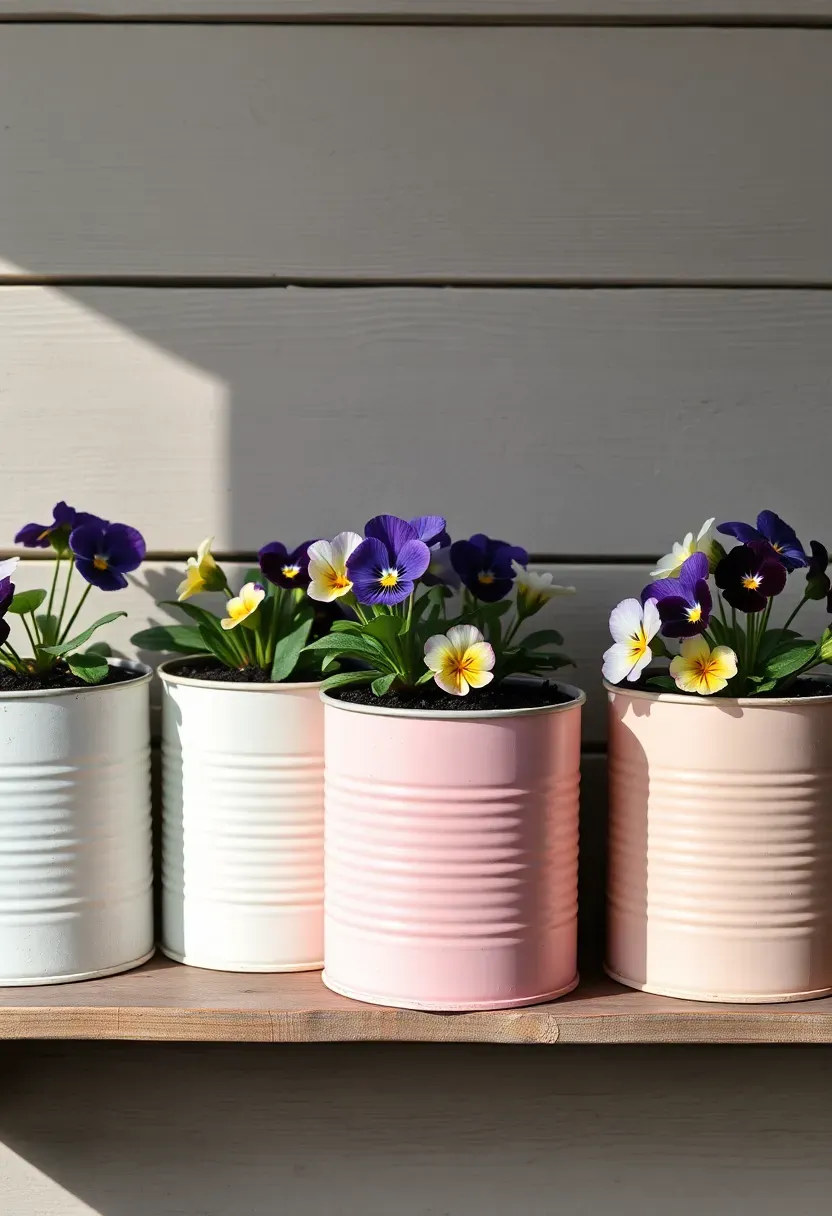
6. Upcycled Tin Can Planters
Save your soup cans and coffee tins for a week and you will have enough raw material for an entire windowsill garden. Clean them, remove labels, sand any sharp edges, and paint them in coordinating spring tones. Drill drainage holes in the bottom with a nail and hammer. Fill with potting soil and plant pansies, violas, or small succulents. Group them in odd numbers — three or five — for a display that looks curated rather than cluttered.
Why This Matters
- Keeps recyclable metal out of the waste stream
- Total cost per planter is under one dollar
- The industrial shape contrasts beautifully with soft spring blooms
Recommended
Items for this idea
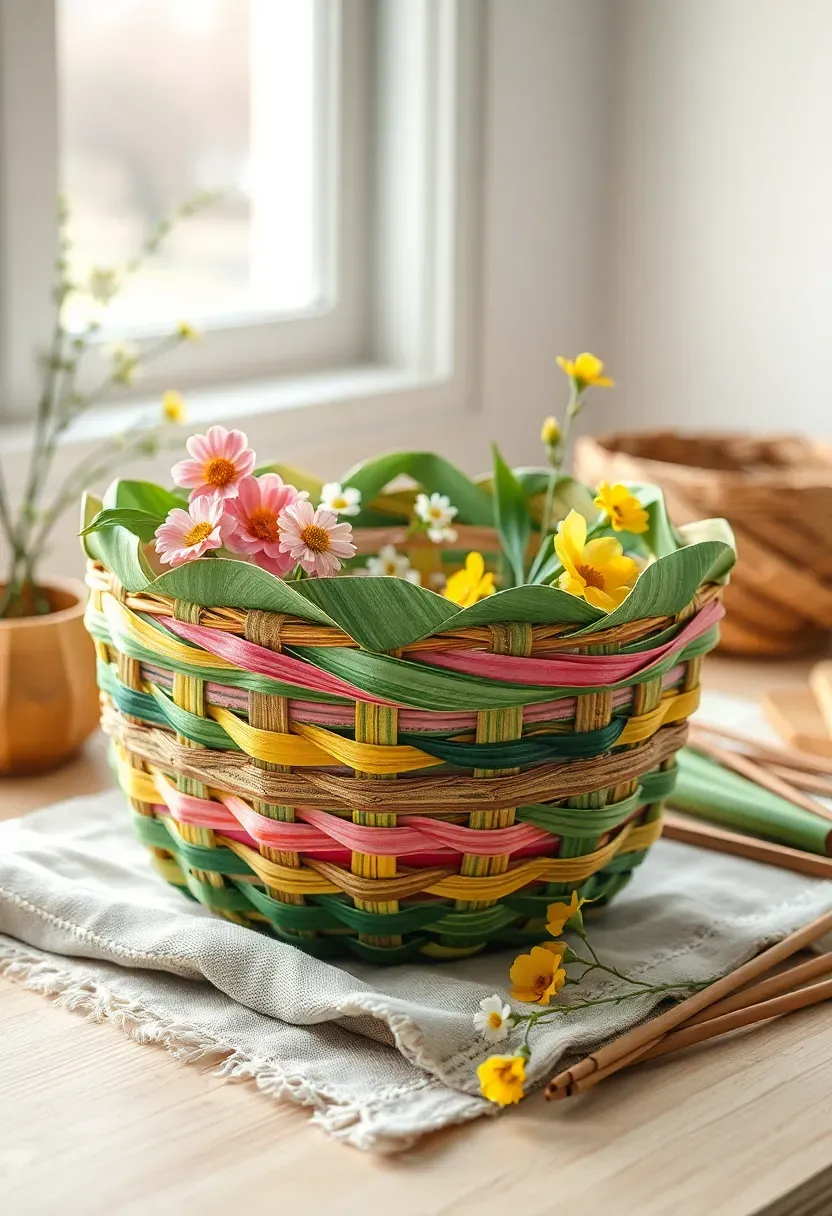
7. Woven Paper Basket
Paper weaving is meditative and surprisingly sturdy. Cut old magazines, wrapping paper, or painted watercolor sheets into half-inch strips. Weave a flat base in a simple over-under grid, then fold the strips upward and continue weaving to form walls. Secure the top edge by folding strips inward and gluing them down. Use the finished basket to hold potpourri, Easter candy, small potted plants, or craft supplies.
Practical Recommendations
- Stiffer paper (like card stock or magazine covers) creates more durable baskets
- Coat the finished basket with decoupage medium for water resistance
- Start with a small basket the first time — six-inch square is manageable
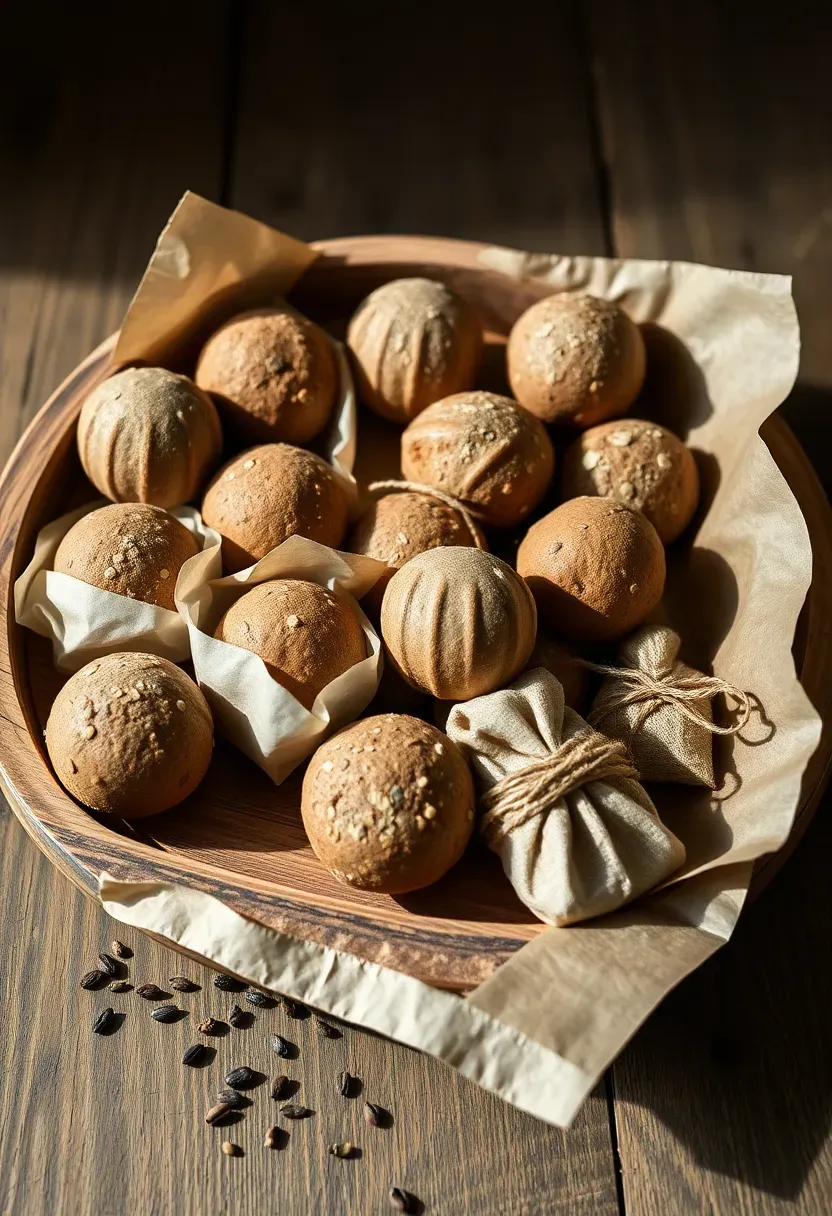
8. Seed Bomb Favors
What They Are
Seed bombs are marble-sized balls of clay, compost, and wildflower seeds that can be tossed into bare patches of garden and left to germinate with the spring rain. Wrapped in tissue paper or placed in small muslin bags, they make charming party favors for spring gatherings, baby showers, or Easter brunches.
How to Make Them
Mix five parts dry clay powder with one part compost and one part wildflower seed blend. Add water gradually until the mixture holds together when squeezed. Roll into small balls and let them dry on parchment paper for twenty-four to forty-eight hours. Once firm, wrap individually in tissue or place in small bags tied with twine.
What to Watch Out For
- Use native wildflower seeds appropriate for your growing zone
- Over-watering the mix makes it too sticky to shape
- Seed bombs need to dry fully before packaging or they will mold
Recommended
Items for this idea
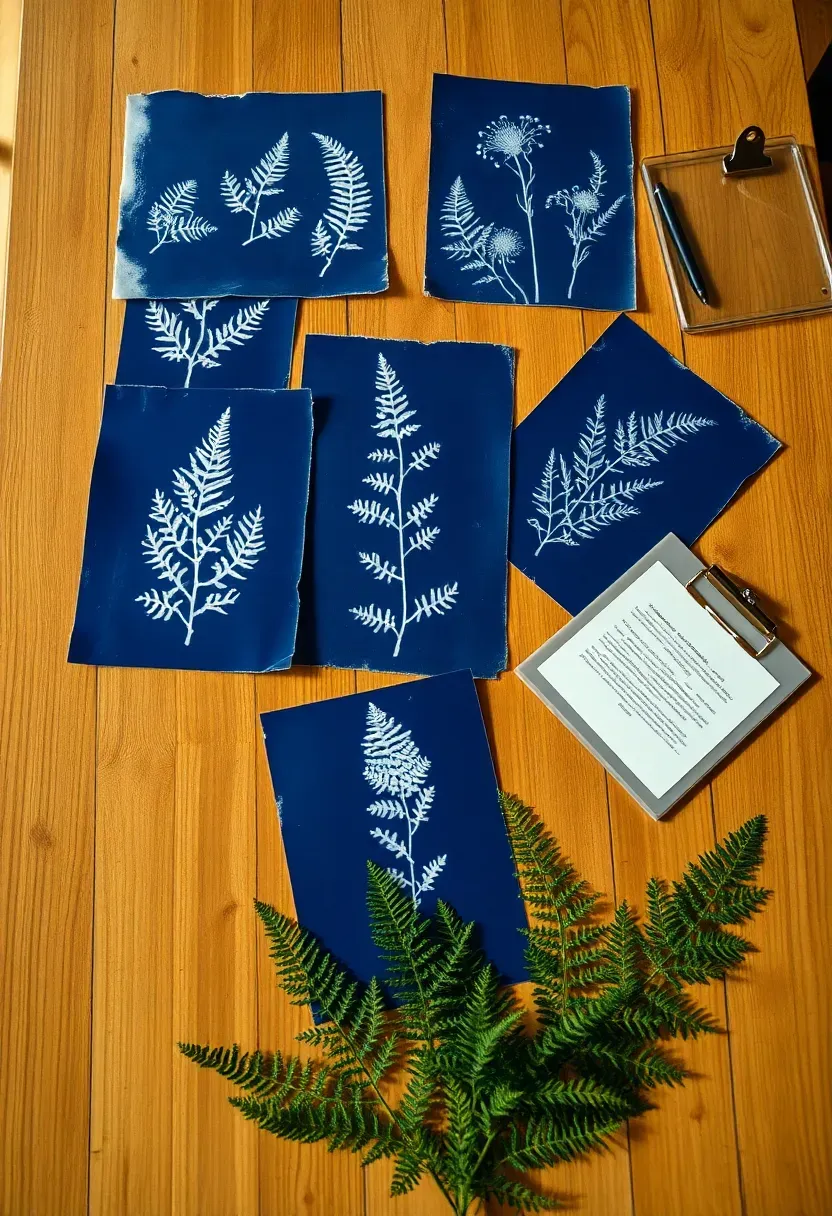
9. Botanical Sun Prints
Sun printing — cyanotype — is one of the oldest photographic processes, and it requires nothing more than pre-treated paper, sunlight, and flat objects to create silhouettes. Lay fern fronds, flower heads, lace, or keys on cyanotype paper, expose it to direct sunlight for three to five minutes, then rinse in water. The result is a Prussian blue print with ghostly white silhouettes of your chosen objects. Frame them as botanical art or use them as handmade cards.
Materials You Need
- Cyanotype paper kit (available online, roughly ten dollars)
- Flat botanical specimens — ferns work exceptionally well
- A clipboard or sheet of glass to hold specimens flat
- Water for rinsing
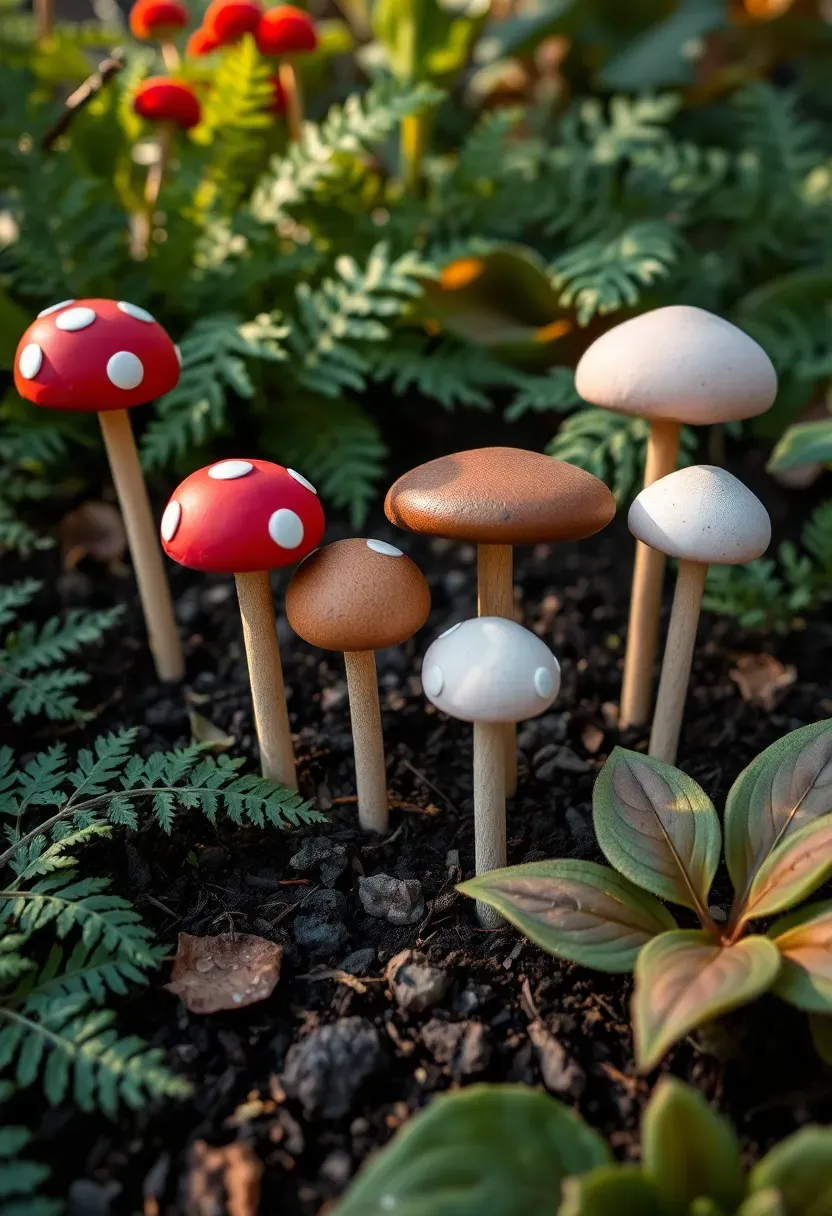
10. Clay Mushroom Garden Stakes
Origins and Inspiration
Mushroom motifs have deep roots in European folk art and cottage garden tradition. These clay stakes channel that heritage into a simple project suitable for anyone comfortable with basic sculpting.
Modern Interpretation
Air-dry clay makes this project accessible without a kiln. Shape small mushroom caps — some round, some flat, some with wavy edges for variety — and push them onto wooden dowel stems. Once dry, paint them in classic red with white spots, earthy brown with cream gills, or whimsical pastels. Seal with outdoor polyurethane and push them into garden beds, potted plants, or window boxes. A cluster of three at different heights looks especially charming near ferns or hostas.
How to Make Them Last
- Use a waterproof sealant rated for outdoor exposure
- Push dowels at least four inches into soil for stability
- Bring them indoors during heavy frost or storms
Recommended
Items for this idea
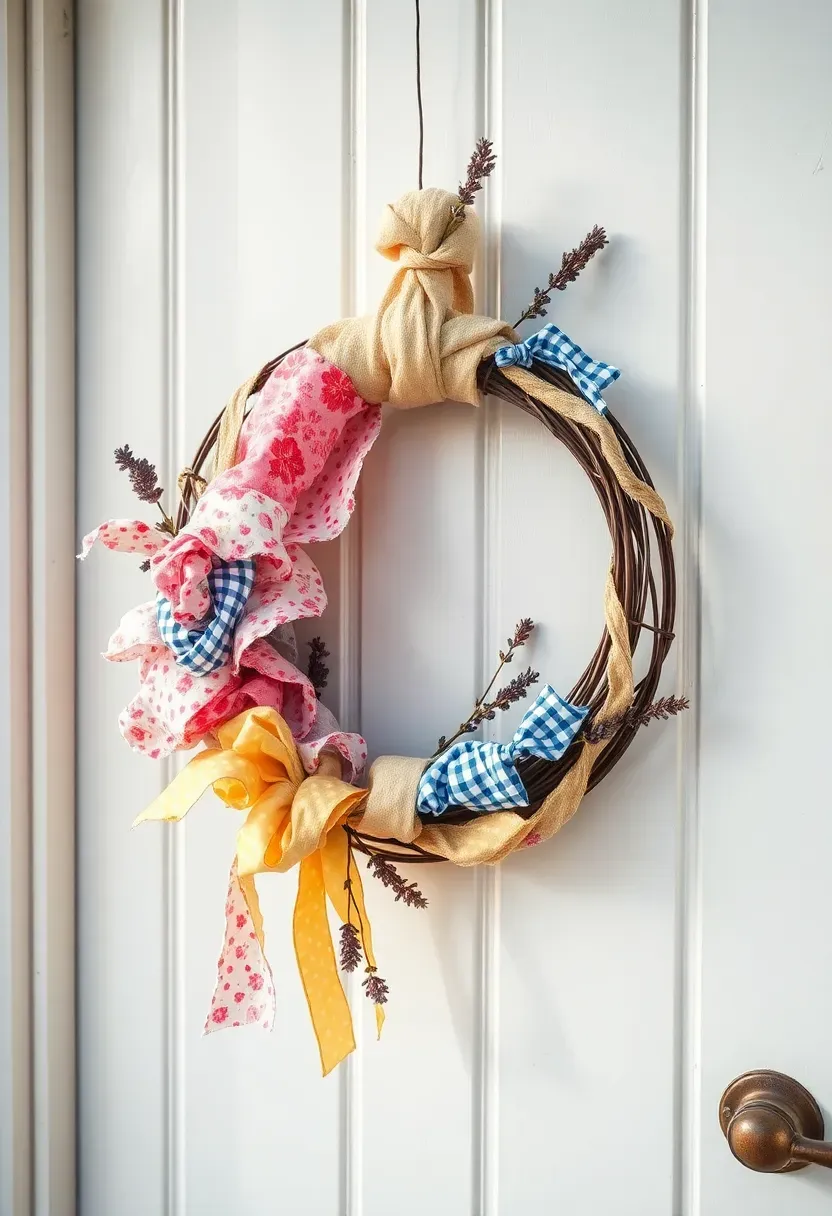
11. Fabric Wrapped Wreath
Forget the fussy hot-glue-and-silk-flower wreath. This version uses a simple wire or foam wreath form wrapped entirely in torn fabric strips — think vintage quilting cotton, linen, or even old bedsheets cut into one-inch ribbons. Tie each strip in a knot around the form, alternating colors and patterns, until the entire ring is covered in a fluffy, textured mass. The result is tactile, colorful, and entirely unique. It takes an evening of television watching to complete and costs next to nothing if you use fabric from your scrap bin.
Tips
- Tear fabric rather than cutting for a softer, more organic edge
- Alternate between three to five coordinating prints
- Add a few sprigs of dried lavender or eucalyptus tucked into the knots for fragrance
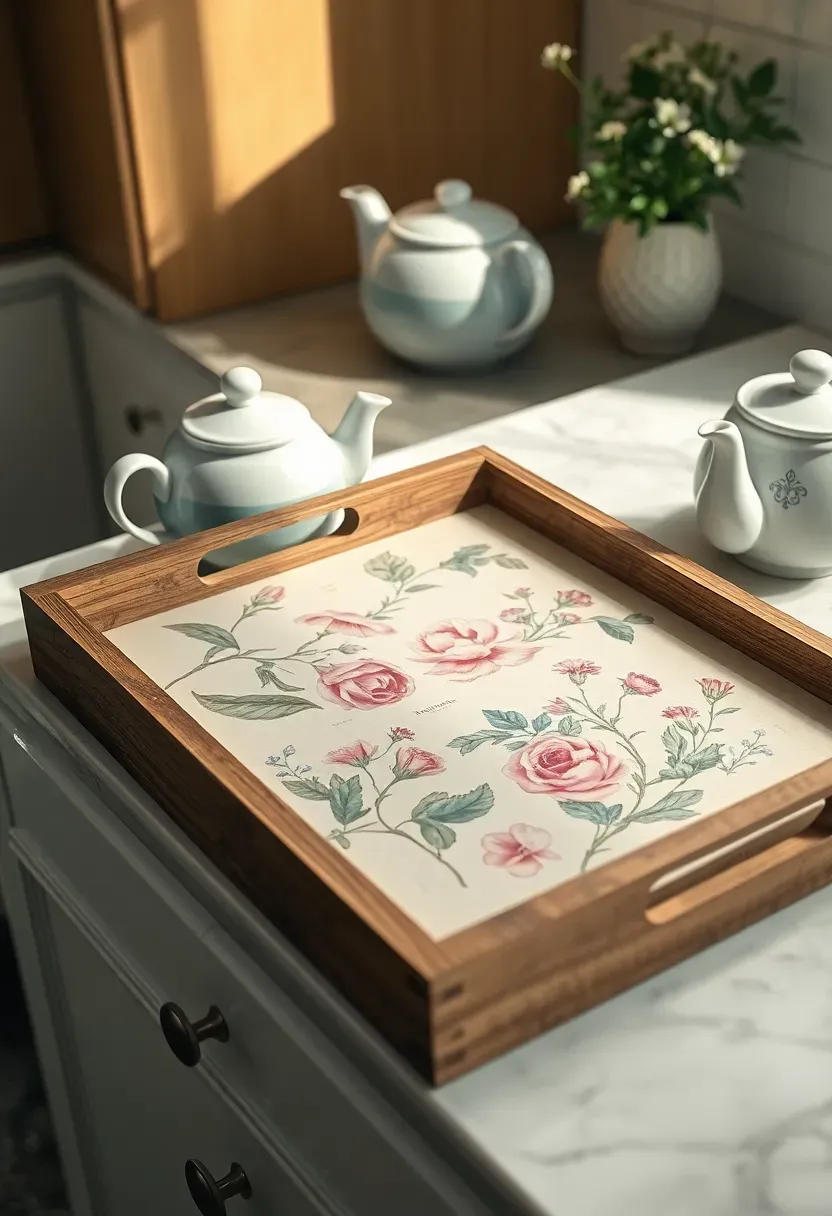
12. Decoupage Flower Tray
Comparing: Decoupage vs Hand Painting
Both techniques transform plain wooden trays into statement pieces, but they require very different skill sets.
Decoupage
Cut floral images from napkins, wrapping paper, or seed catalogs. Brush decoupage medium onto the tray surface, lay the cutouts in your desired arrangement, and seal with additional coats of medium. Drying time between coats is about twenty minutes. The result is smooth, polished, and forgiving of imperfect hand skills.
Hand Painting
Requires brushes, acrylic paint, and some drawing confidence. Offers more control over composition but takes longer and is harder to correct.
What to Choose
Choose decoupage if: you want reliable, professional-looking results without artistic training Choose hand painting if: you enjoy freehand work and want a truly original piece
Recommended
Items for this idea
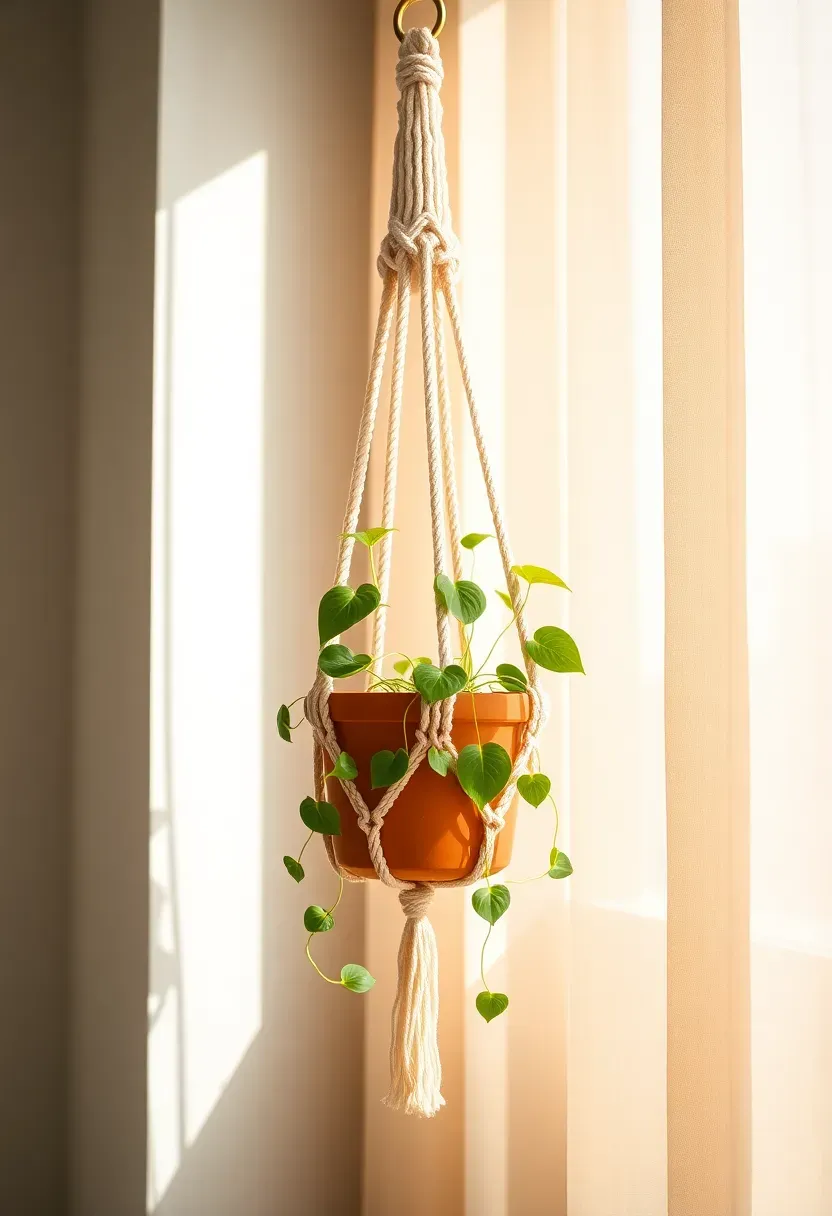
13. Macrame Plant Hanger
Macrame plant hangers cycle in and out of trend, but their usefulness never fades. A basic hanger requires roughly eight feet of cotton cord, a metal ring, and four knots repeated in a pattern. The spiral knot version takes about thirty minutes and creates an elegant cradle for a six-inch pot. Hang it near a south-facing window with a trailing pothos or string of hearts, and you have a piece of living decor that works in every season but feels especially fitting when spring light streams through.
What to Watch Out For
- Natural cotton cord stretches slightly under weight — test with a filled pot before hanging permanently
- Use a ceiling hook rated for at least fifteen pounds
- Mist plants carefully to avoid soaking the cord, which can develop mildew
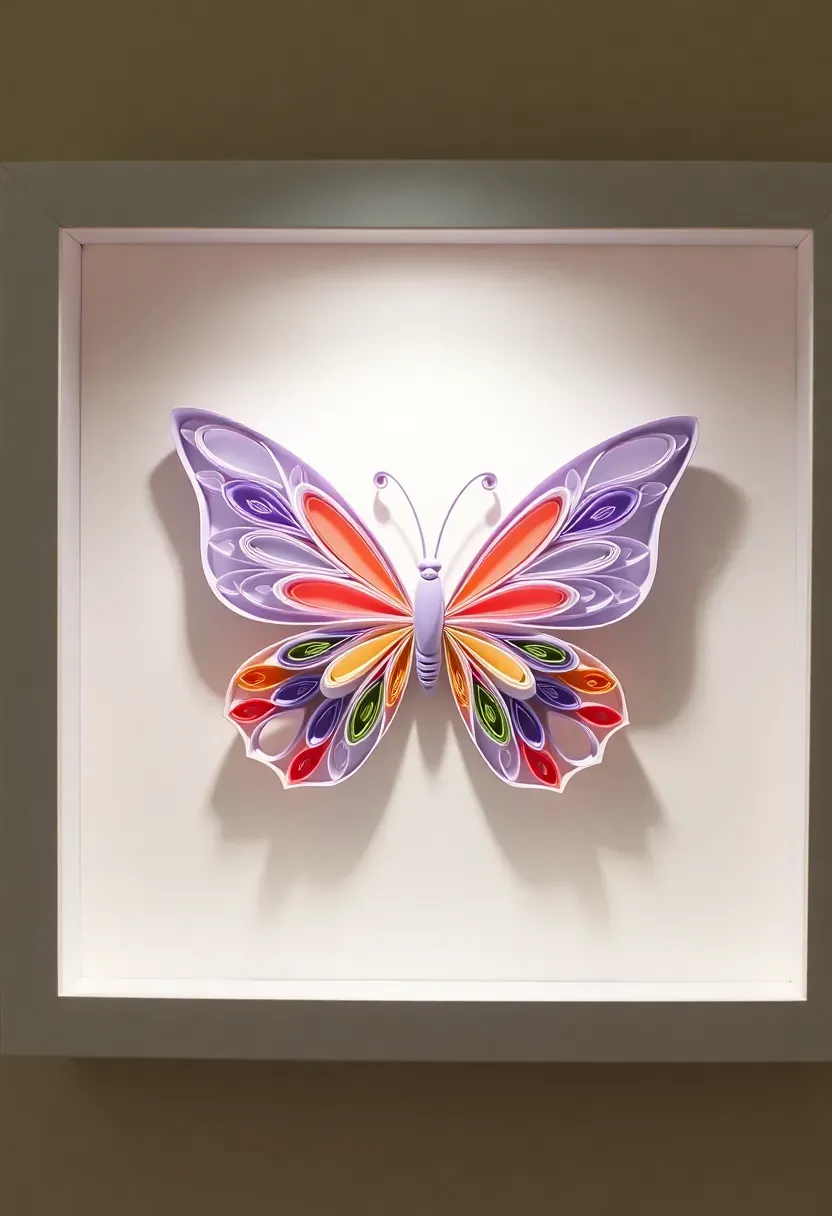
14. Paper Quilled Butterfly Frame
Paper quilling transforms thin strips of colored paper into intricate coiled shapes. For a spring project, create a butterfly using tight coils for the body and loose, teardrop-shaped coils for the wings. Arrange them on a contrasting card stock background and mount inside a shadow box frame. The three-dimensional quality of quilling gives the butterfly a sculptural presence that flat paper art cannot match.
Step 1: Cut and Coil
Slice cardstock into quarter-inch strips. Roll each strip around a quilling needle or toothpick, then release to the desired tightness. Glue the end to secure.
Step 2: Shape the Wings
Pinch coils into teardrop, marquise, or crescent shapes. Arrange four large shapes for upper and lower wings, with smaller accent coils filling gaps.
Step 3: Assemble and Frame
Glue the assembled butterfly onto card stock. Let dry fully. Mount in a shadow box with foam adhesive squares to create depth.
Recommended
Items for this idea
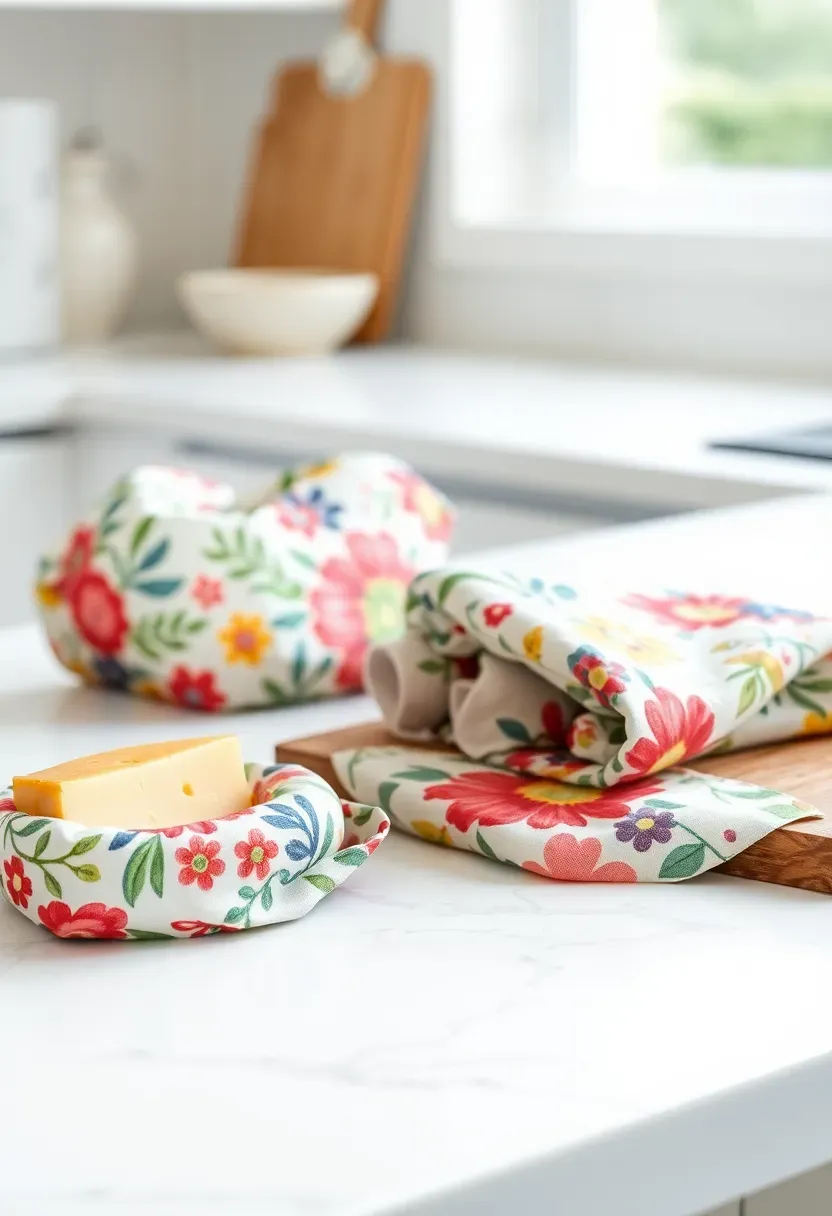
15. Beeswax Wrap Set
A practical craft that replaces plastic wrap in your kitchen. Cut cotton fabric into useful sizes — small squares for covering bowls, medium rectangles for wrapping cheese, large sheets for bread. Grate beeswax over each piece, lay on parchment-lined baking sheets, and melt in a 200-degree oven for three minutes. Remove, let cool, and you have pliable, reusable food wraps that cling with the warmth of your hands. They last roughly a year with regular use.
Why Make Your Own
- Commercial beeswax wraps cost eight to fifteen dollars for a set of three
- Homemade versions use about two dollars' worth of materials
- You control the fabric pattern, size, and wax thickness
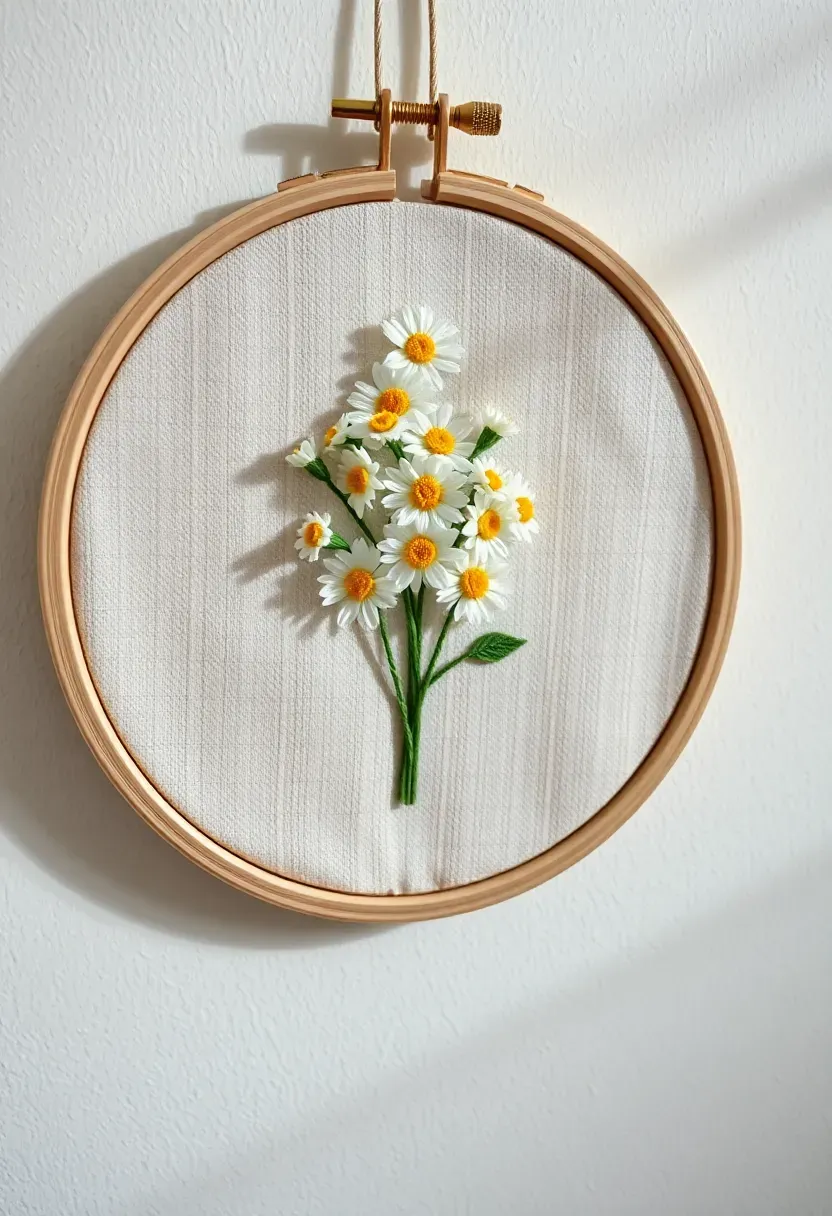
16. Embroidered Spring Hoop Art
Embroidery hoops as wall art have earned their place in the craft world because they combine accessibility with genuine beauty. Stretch a piece of natural linen in a six or eight-inch hoop. Transfer a simple spring design — a cluster of daisies, a branch of cherry blossoms, a wreath of tiny leaves — using a water-soluble pen. Stitch with cotton embroidery floss using basic stitches: stem stitch for lines, satin stitch for petals, French knots for flower centers. Trim the excess fabric, glue it to the back of the hoop, and hang.
Practical Recommendations
- Start with a kit if you are new to embroidery — they include pre-printed fabric and all materials
- Three to four thread colors keep the design cohesive without overwhelming
- Iron the fabric before stretching to avoid wrinkles that distort the design
Recommended
Items for this idea
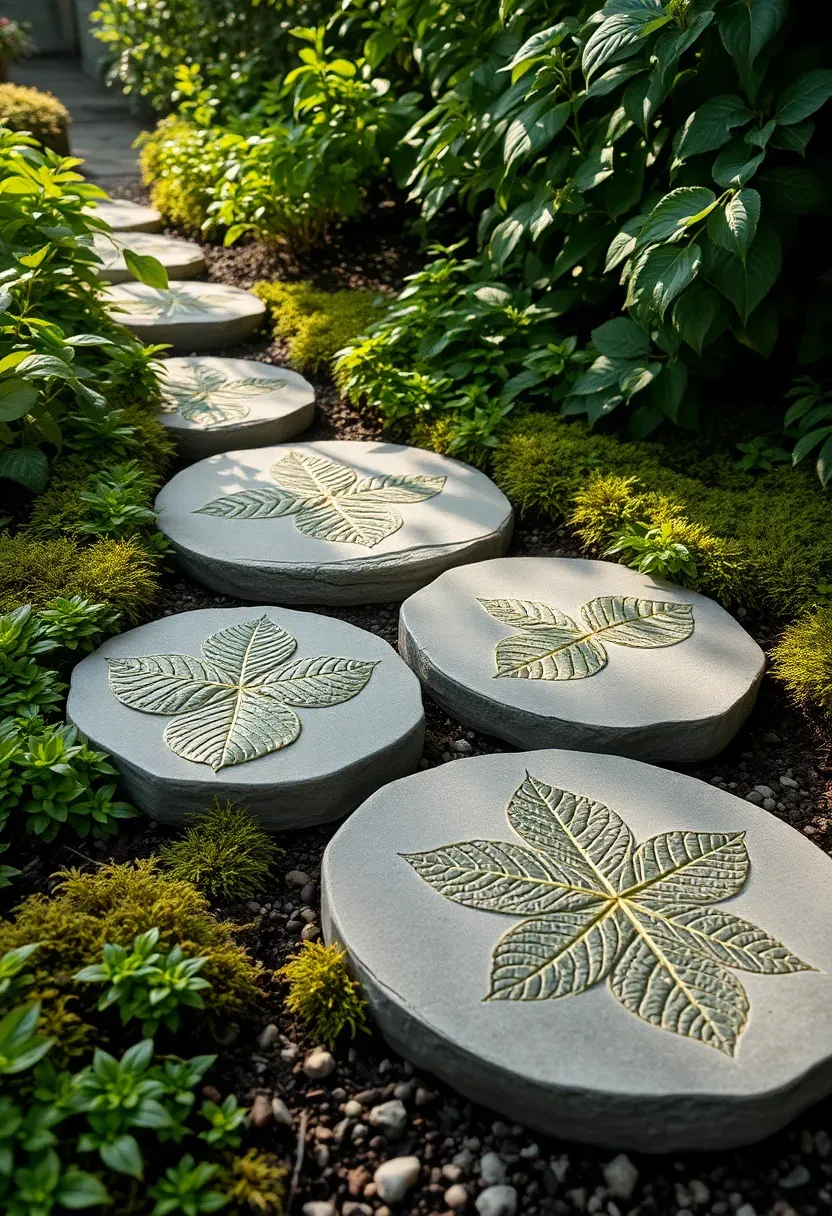
17. Concrete Leaf Stepping Stones
The Core Issue
Garden paths made from store-bought pavers look functional but impersonal. They lack the character that handmade elements bring to outdoor spaces.
The Solution
Large rhubarb, hosta, or elephant ear leaves serve as natural molds for concrete stepping stones. Mix quick-setting concrete, pour it over the back of a well-oiled leaf placed in a sand bed, and let it cure for forty-eight hours. Peel the leaf away to reveal every vein and curve imprinted in the stone. Arrange the finished stones along a garden path or nestle them among ground cover plants for a walkway that looks like it grew there.
Pros and Cons
Pros: each stone is completely unique, materials cost under five dollars per stone, the process is surprisingly simple Cons: requires two days of curing time, stones are heavy once set, quick-setting concrete has a short working window
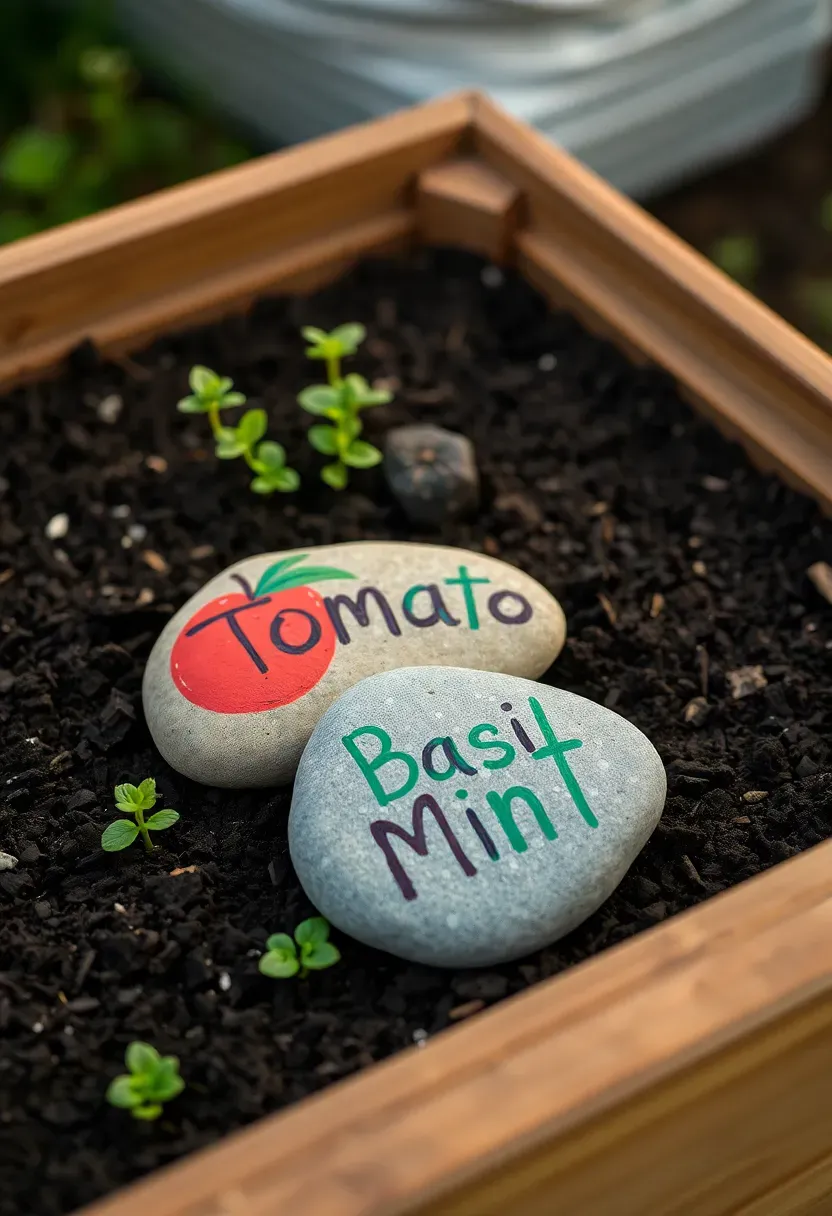
18. Painted Rock Garden Markers
Smooth river rocks painted with vegetable names, herb illustrations, or simple icons serve double duty in the spring garden. They mark your planting rows and add a handmade touch to raised beds. Use acrylic paint pens for clean lettering, or brush on designs with small artist brushes. Seal with clear polyurethane spray for weather resistance. A set of twelve covers most kitchen-garden staples — tomatoes, basil, peppers, lettuce, and so on — and makes a thoughtful gift for anyone starting their first garden.
Tips for Best Results
- Choose flat, palm-sized rocks with a smooth surface
- White or light gray stones show colors most vividly
- Let each paint layer dry completely before adding the next
Recommended
Items for this idea
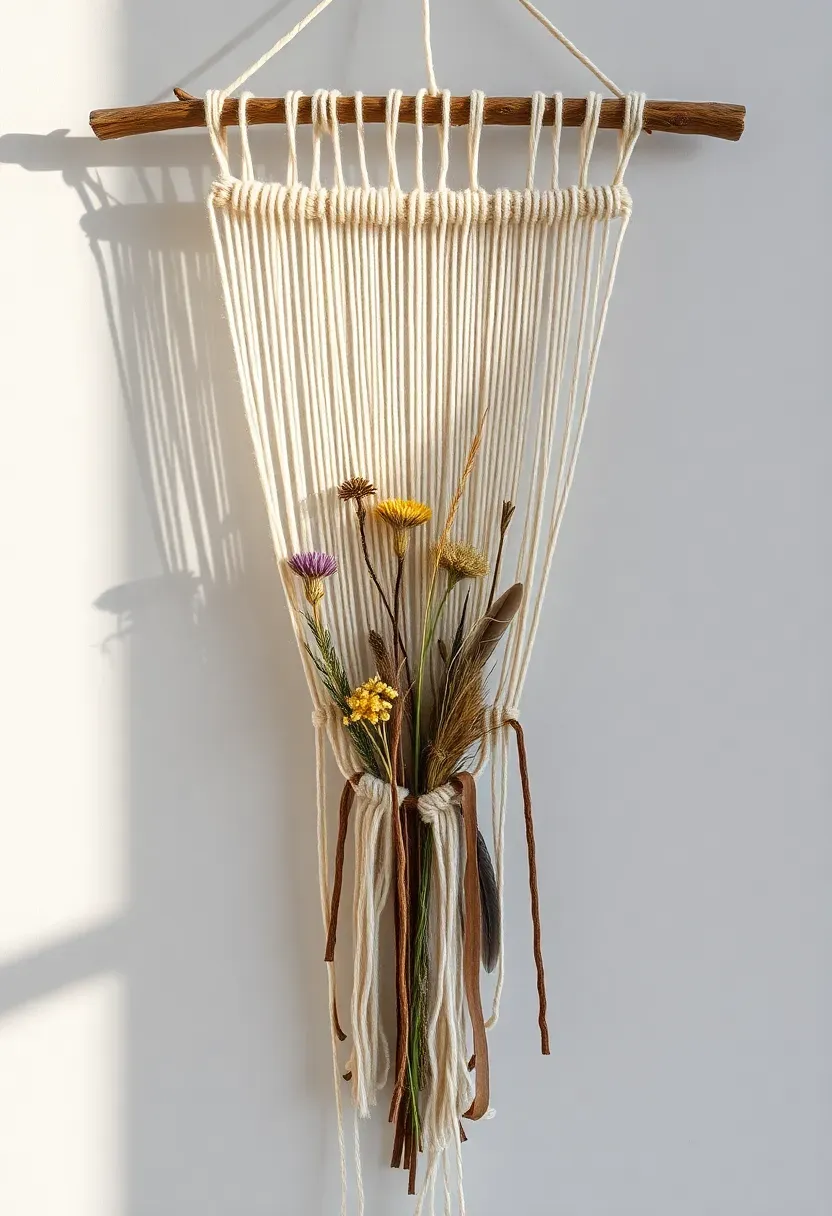
19. Nature Weaving on a Stick Loom
Find a sturdy Y-shaped branch — about twelve inches long — and wrap yarn back and forth between the fork to create a simple loom. Now weave natural materials through the yarn: long grasses, feathers, dried flowers, strips of bark, seed pods. The finished piece hangs on a wall as a seasonal art installation that connects indoor space to the landscape outside. This is an ideal project for walks — collect materials along the trail and weave them in when you get home.
What You Need
- Y-shaped branch or two straight sticks tied together
- Yarn or twine for the warp threads
- Collected natural materials: grasses, flowers, feathers, leaves
- Scissors
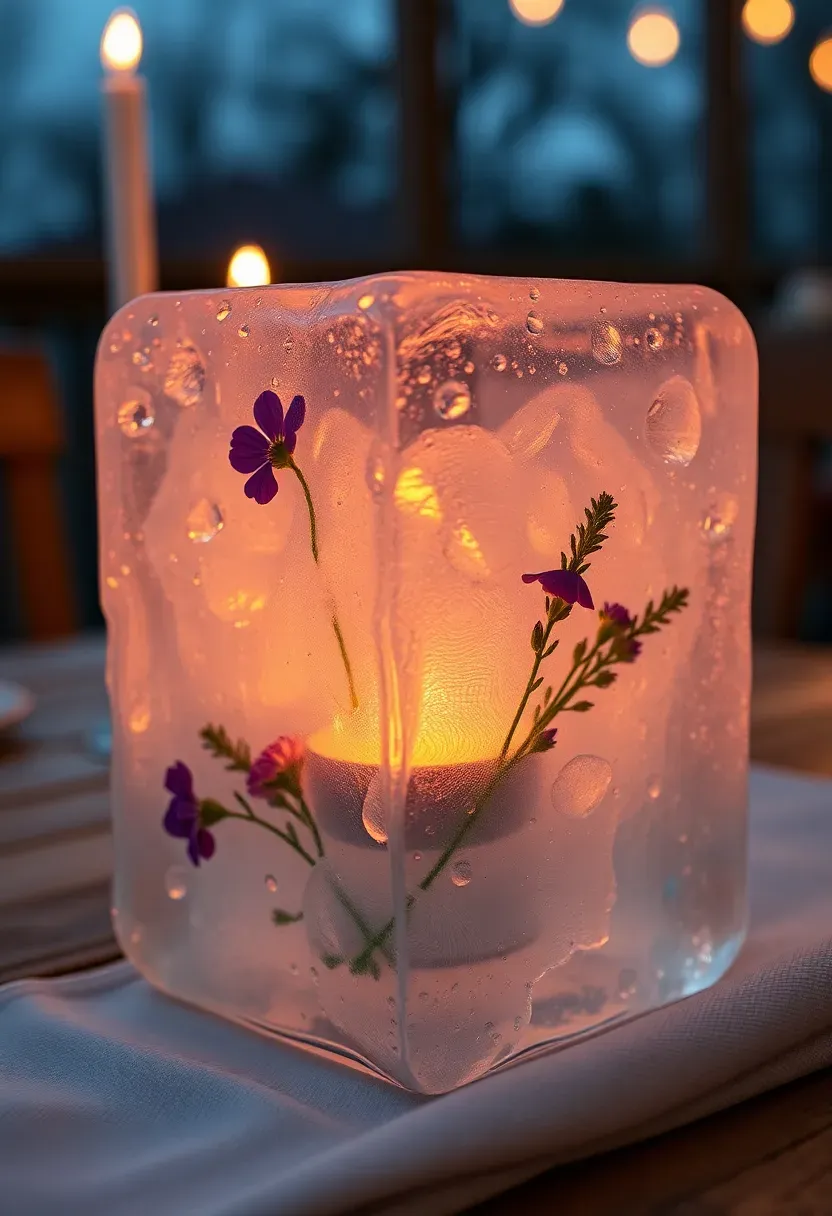
20. Floral Ice Candle Holders
The Concept
Place a small container inside a larger one, fill the gap with water and spring flowers — pansies, small roses, sprigs of thyme — and freeze overnight. Remove both containers and place a tea light inside the hollow center. As the ice slowly melts throughout an evening dinner party, the flowers shift and glow in the candlelight. Ephemeral, dramatic, and completely free if you grow your own flowers.
Execution Details
Use plastic containers for easy release. Tape the inner container in place so it does not float upward. Weight it down with pebbles if necessary. Remove from the freezer ten minutes before lighting to let the surface thaw slightly and become translucent rather than frosty.
Best Occasions
- Outdoor spring dinner parties
- Easter celebrations
- Garden wedding receptions
- Any gathering where temporary beauty feels appropriate
Recommended
Items for this idea
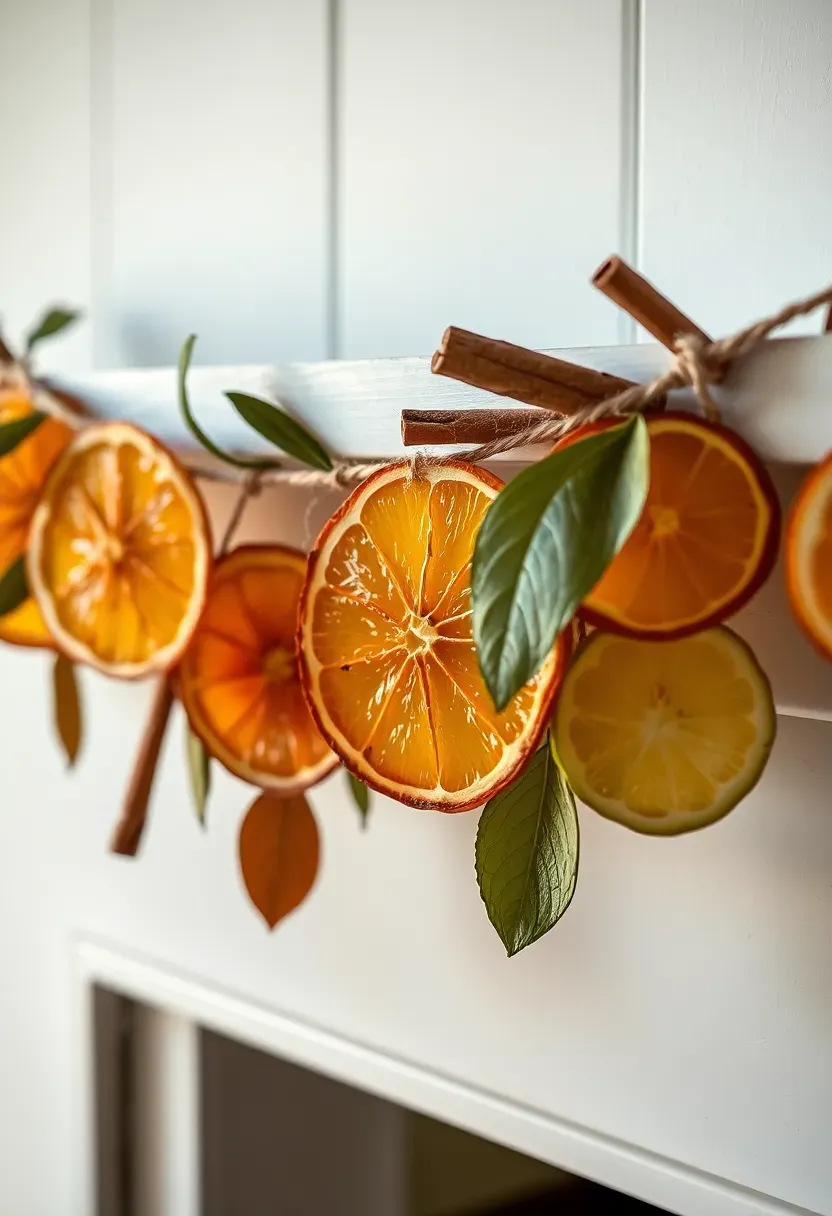
21. Dried Citrus Garland
Slice oranges, lemons, and limes into thin rounds — about a quarter inch thick. Arrange on a wire cooling rack set over a baking sheet and dry in a 200-degree oven for three to four hours, flipping once halfway through. When they are papery and translucent, thread them onto jute twine using a large needle, alternating citrus types and adding cinnamon sticks or dried bay leaves between slices. The garland smells faintly of citrus for weeks and looks striking against a white wall or draped along a mantel.
Why It Works
- The translucent quality of dried citrus catches light beautifully
- Lasts for months in dry conditions without refrigeration
- Uses fruit that might otherwise go to waste if overripe
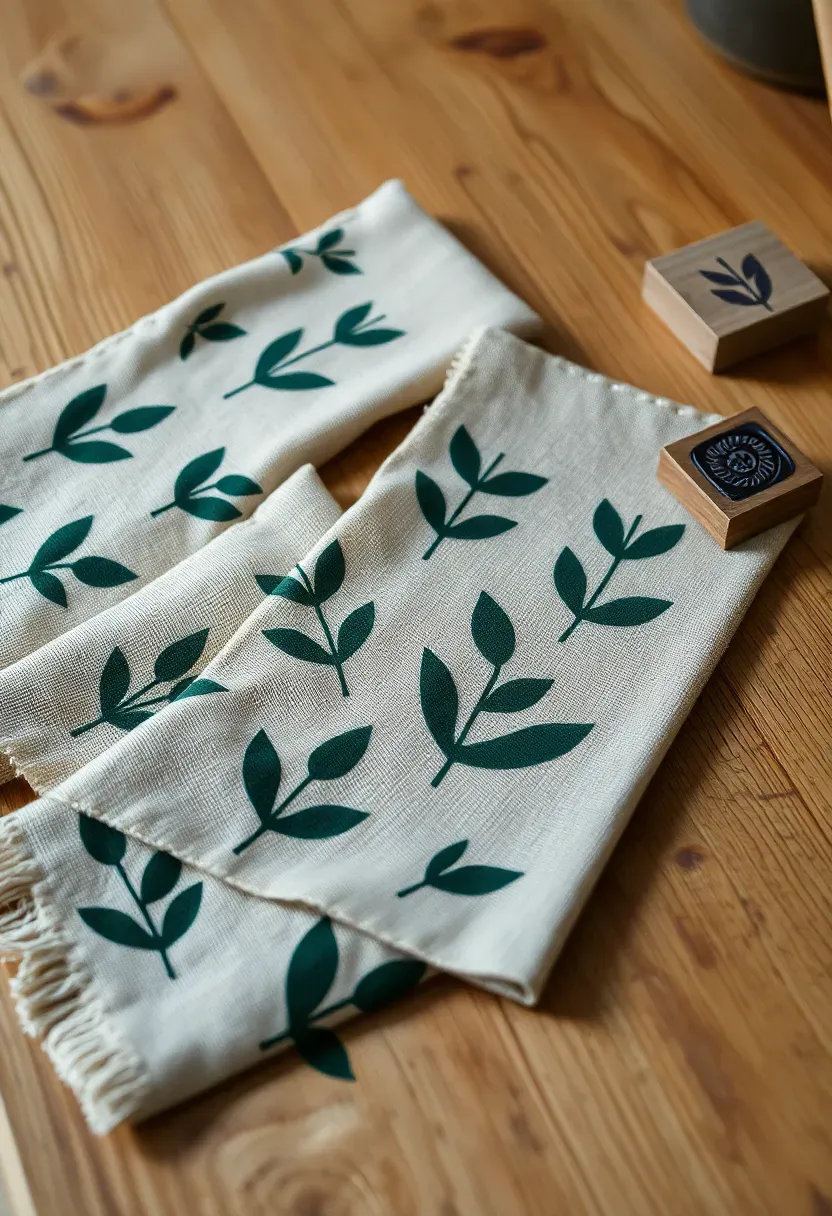
22. Hand-Stamped Linen Napkins
How to Make Them
Buy plain linen or cotton napkins in a neutral tone — oatmeal, white, or soft gray. Carve a simple stamp from a rubber eraser or potato: a leaf shape, a small flower, or an abstract dot pattern. Press the stamp into fabric ink and apply to the napkin in a repeating pattern or a single corner motif. Heat-set with an iron according to the ink manufacturer's instructions. The napkins become washable, reusable, and entirely yours.
Step 1: Carve the Stamp
Draw your design on the eraser with a pencil. Use a craft knife to cut away everything outside the design, leaving the motif raised.
Step 2: Print the Pattern
Load the stamp evenly with fabric ink. Press firmly onto the napkin without rocking or sliding. Lift straight up. Repeat at regular intervals.
Step 3: Set the Ink
Once the ink is dry, cover the design with a pressing cloth and iron on high heat for thirty seconds per area. This bonds the ink permanently to the fibers.
Recommended
Items for this idea
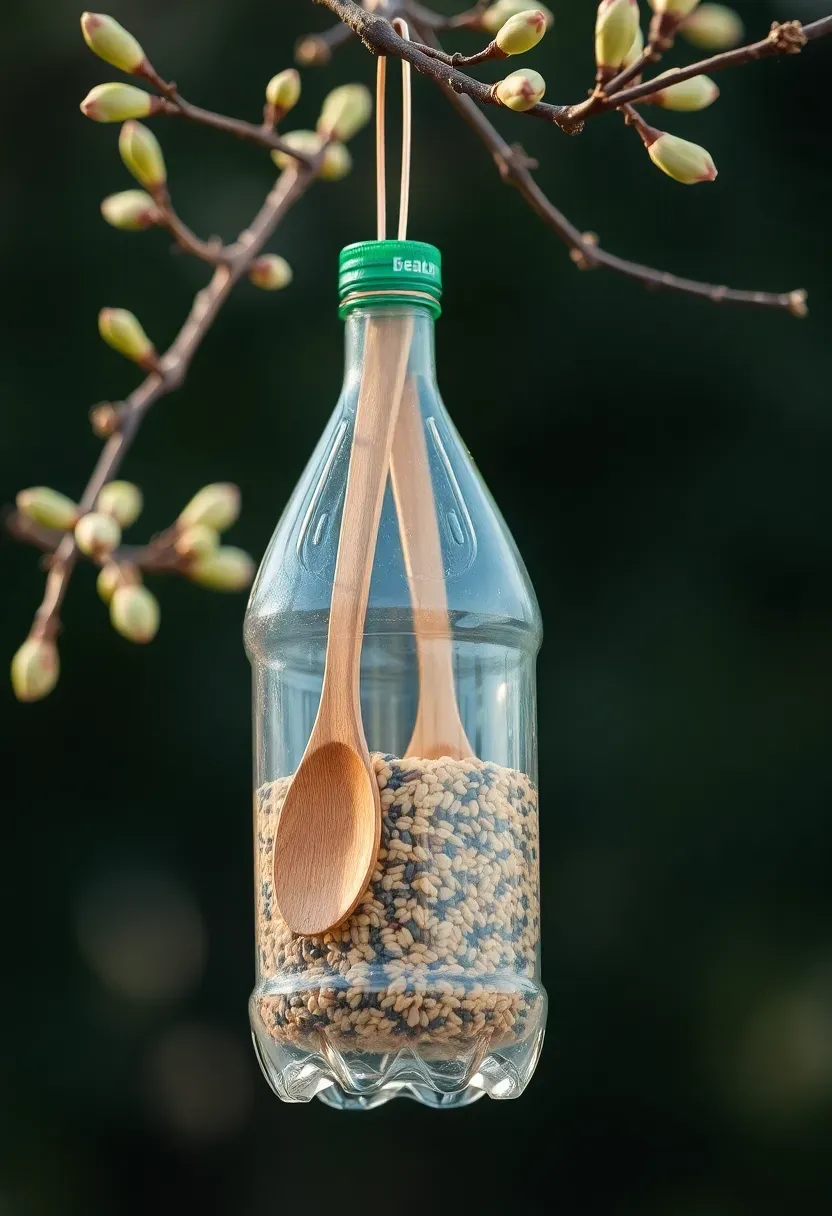
23. Bird Feeder from Recycled Bottles
A two-liter plastic bottle, two wooden spoons, and a handful of birdseed — that is the full materials list. Cut small holes on opposite sides of the bottle, push a wooden spoon through so the bowl end sits below the hole as a seed tray, and repeat at a perpendicular angle higher up with a second spoon. Fill the bottle with seed, screw the cap on, hang with wire from a branch. Birds perch on the spoon handles, eat from the bowls, and you have turned trash into a functioning backyard feature.
Practical Recommendations
- Poke drainage holes in the bottom to prevent seed from getting waterlogged
- Clean and refill every two weeks to avoid mold
- Position away from areas where cats can ambush feeding birds
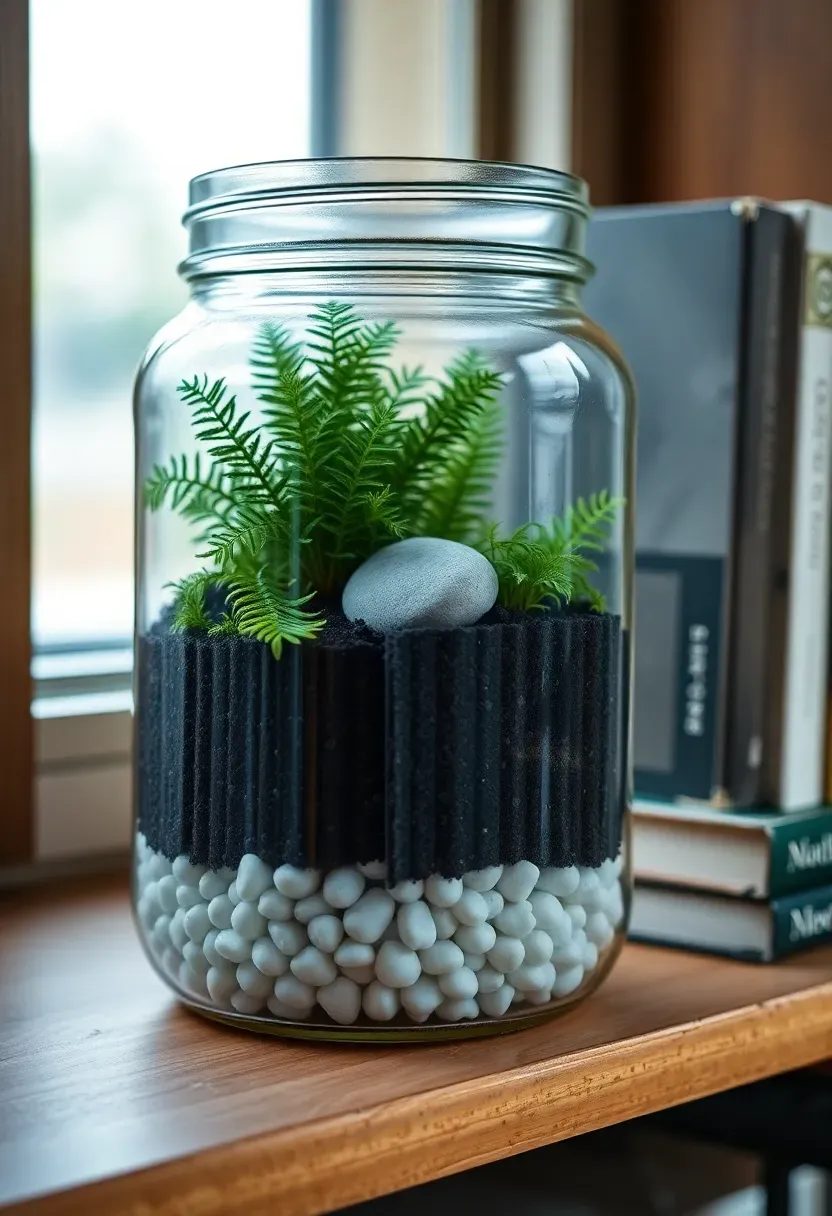
24. Spring Terrarium in a Glass Jar
Origins and History
Terrariums date to the Victorian era, when Dr. Nathaniel Ward accidentally discovered that plants thrive in sealed glass containers. His "Wardian cases" allowed botanists to ship live specimens across oceans.
Modern Interpretation
Today's terrariums are simpler but no less captivating. Layer pebbles, activated charcoal, and potting soil in a wide-mouth mason jar or apothecary jar. Plant small ferns, moss, or selaginella. Add a miniature figurine or a smooth stone for visual interest. Mist lightly and seal — or leave open for air circulation if using succulents. The layered cross-section visible through the glass is part of the appeal, creating a tiny ecosystem you can watch evolve throughout the season.
How to Keep It Healthy
- Closed terrariums need very little watering — once a month at most
- Place in bright indirect light, never direct sun
- Remove any dead leaves immediately to prevent mold
- Trim plants that outgrow their space with small scissors
Recommended
Items for this idea
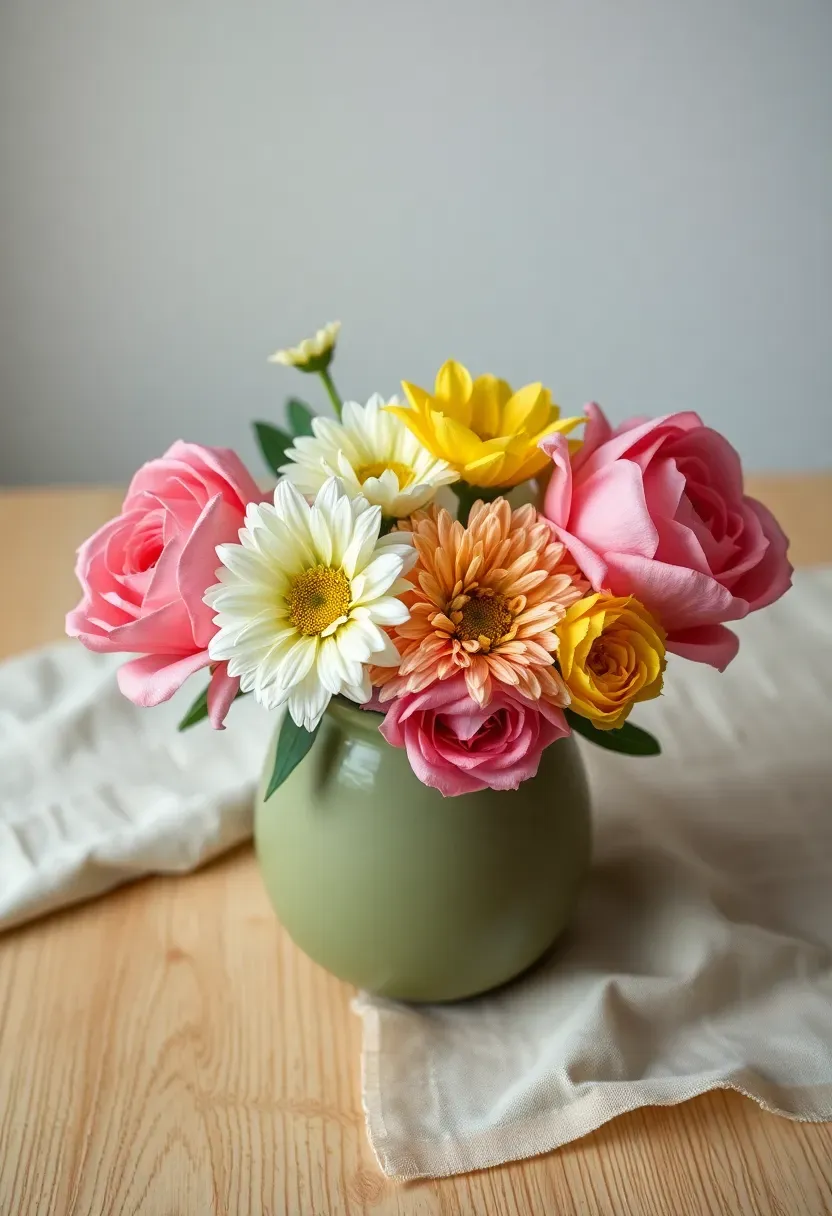
25. Wax Dipped Flower Arrangements
Dipping fresh-cut flowers in melted paraffin wax extends their beauty well beyond their natural lifespan. Melt paraffin in a double boiler to about 130 degrees Fahrenheit. Hold each flower by the stem, dip quickly into the wax, lift and rotate to let excess drip off, then hang upside down to set. The thin wax coating preserves the color and shape for weeks. Arrange the wax-coated flowers in a vase without water. They look almost alive but hold their form indefinitely — a strange and beautiful tension between preservation and nature.
What to Watch Out For
- Temperature matters: too hot and petals scorch, too cool and the wax clumps
- Roses, daisies, and carnations dip best; delicate flowers like sweet peas are too fragile
- Work in a well-ventilated area and protect surfaces with newspaper
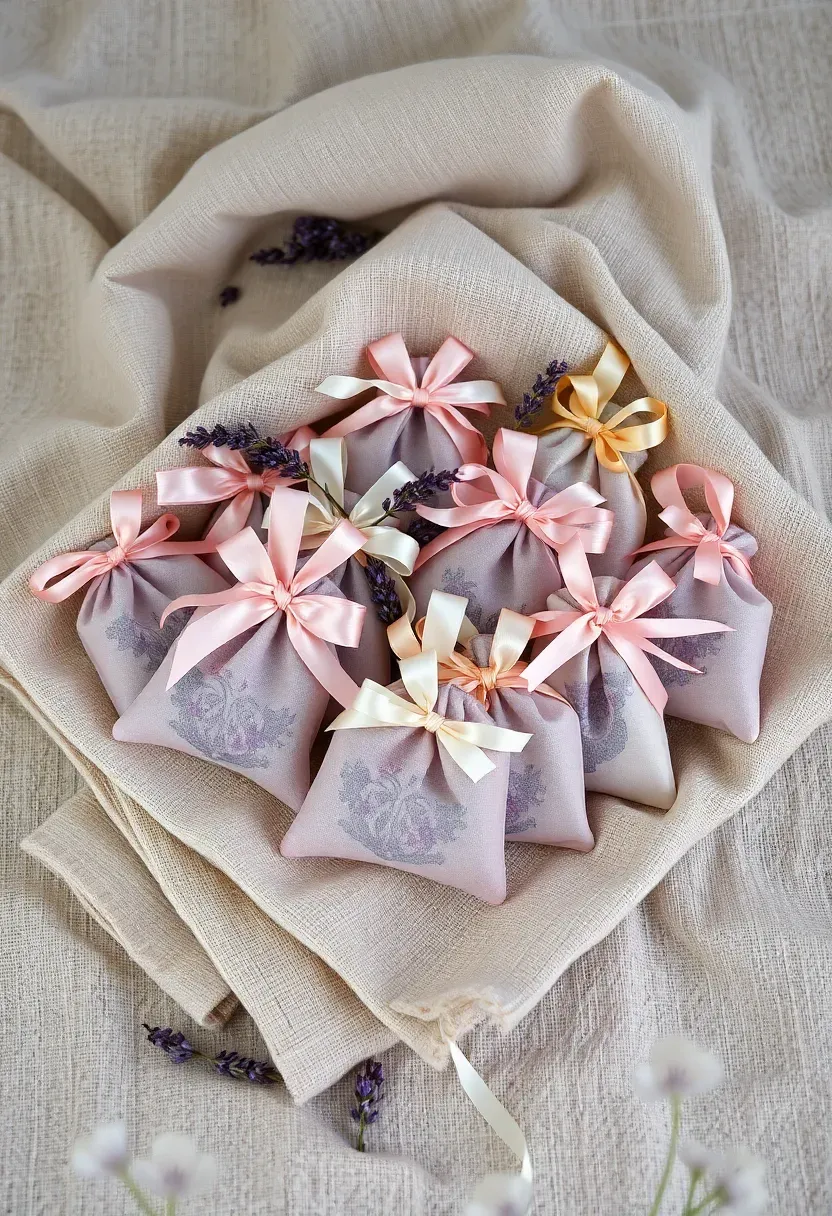
26. Lavender Sachets from Old Fabric
Cut squares of fabric from worn-out shirts, pillowcases, or vintage linens — roughly five inches per side. Place a tablespoon of dried lavender buds in the center, gather the edges, and tie with ribbon or twine. These sachets tuck into dresser drawers, linen closets, or gym bags. The scent lasts months and refreshes when gently squeezed. Making a dozen takes under thirty minutes and uses materials that would otherwise end up in a donation bin or landfill.
Why Make These
- Dried lavender is inexpensive in bulk, around six dollars per pound
- Natural moth deterrent for stored woolens and linens
- Ideal small gift for spring events — showers, teacher appreciation, hostess gifts
Recommended
Items for this idea
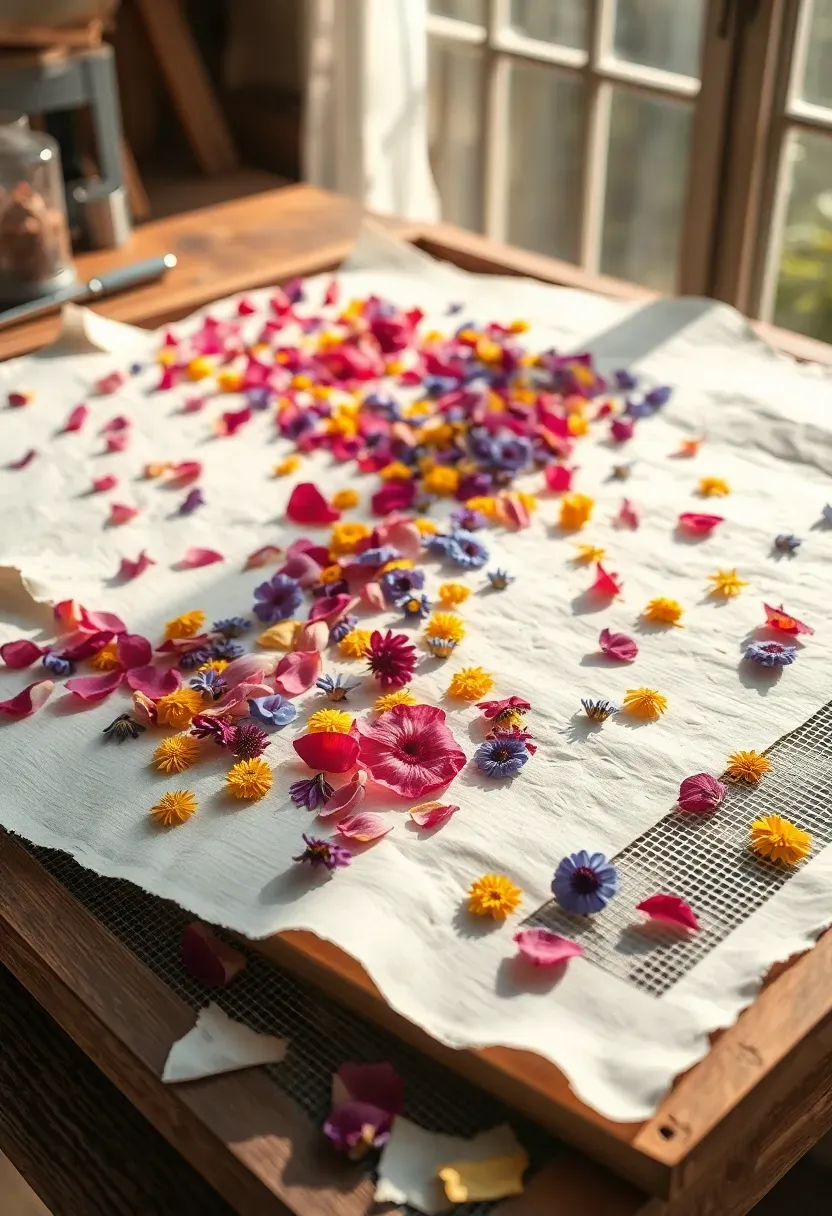
27. Handmade Paper with Flower Petals
The Process
Blend scraps of used paper — junk mail, old notebooks, tissue paper — with water until you have a pulpy slurry. Stir in dried flower petals, thin leaves, or bits of herb. Pour the mixture onto a flat screen (a simple frame with window screen mesh works perfectly), spread evenly, and let it drain. Press gently with a sponge to remove excess water, then lay flat to dry for twenty-four hours. The finished sheets are thick, textured, and speckled with botanical fragments.
What You Can Make with It
- Handmade cards for spring occasions
- Journal covers or book wraps
- Gift tags tied with natural twine
- Framed as abstract botanical art
Important Notes
- The blender will be stained, so use one dedicated to crafts
- Thinner sheets dry faster and are easier to write on
- Add a tablespoon of white glue to the slurry for stronger, less crumbly paper
Quick FAQ
Is it possible to do these crafts with young children? Many of these projects adapt well for kids ages five and up. Pressed flower bookmarks, painted rocks, and seed bombs are particularly child-friendly because they do not require sharp tools or heat. Supervise any project involving hot glue, ovens, or craft knives.
Should I invest in specialty craft supplies or work with what I have? Start with what is already in your home. Most projects here use recycled materials, kitchen staples, or basic supplies found at any hardware store. Specialty items like cyanotype paper or quilling needles are worth purchasing once you know you enjoy the technique.
What differentiates spring crafts from general DIY projects? Spring crafts lean into seasonal materials — fresh flowers, budding branches, garden soil, citrus fruits — and tend to incorporate natural textures and pastel palettes. They also often tie to seasonal events like Easter, Mother's Day, or garden planting season.
Which project takes the least amount of time? Painted rock garden markers can be completed in under an hour including drying time. Seed bombs take about thirty minutes of active work plus drying overnight. Pressed flower bookmarks require the longest passive time — a full week of pressing — but only five minutes of active effort.
Can these projects serve as gifts? Absolutely. Beeswax wraps, lavender sachets, seed bomb favors, and hand-stamped napkins are all practical gifts that feel personal. Package them in kraft paper with a sprig of dried herbs and they look as polished as store-bought items.
Spring crafting is less about perfection and more about participation — getting your hands into materials, experimenting without pressure, and letting the season's energy shape what you make. Pick one project that catches your eye this weekend. Start there. The rest of the list will be waiting when you are ready.
Pinterest cover for 27 Creative Spring Craft Projects
About the author
OBCD
CGI visualization and interior design content. We create detailed 3D renders and curate practical design ideas for every room in your home.