25 Mother's Day Craft Projects For All Ages
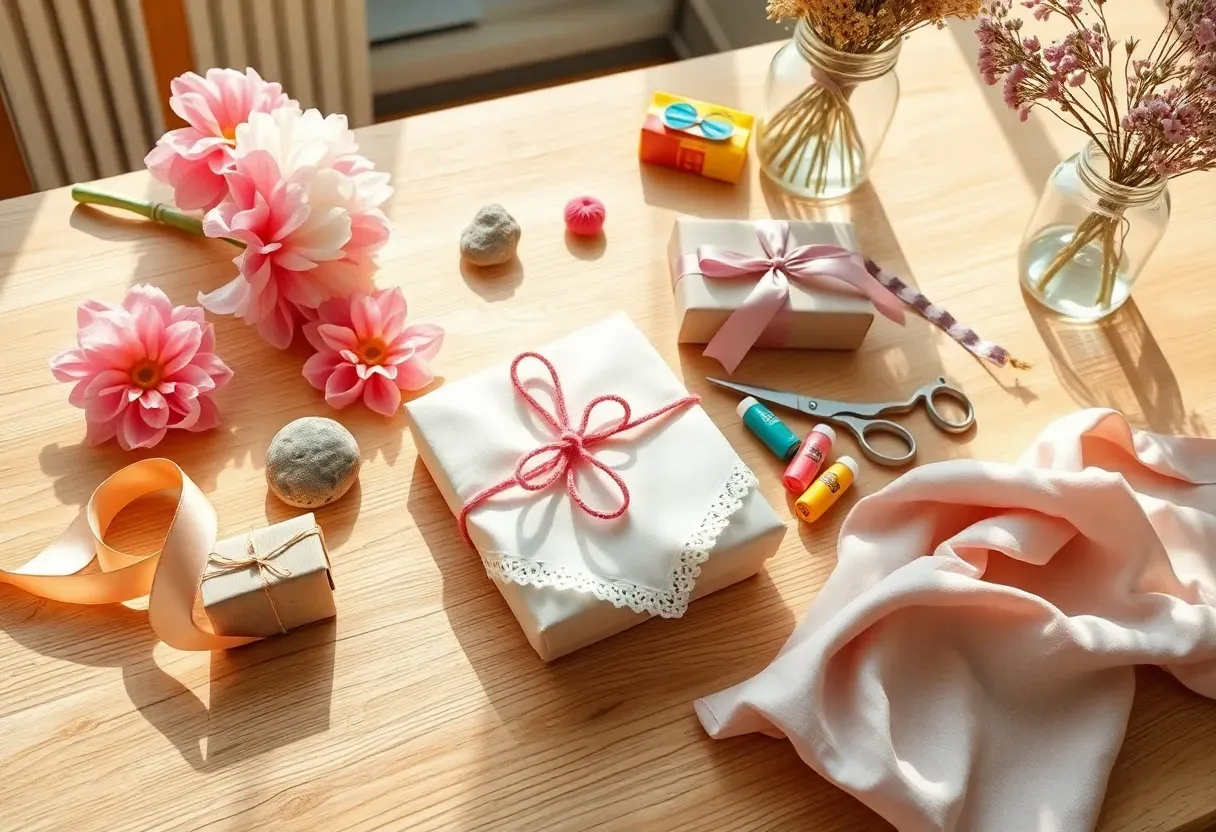
There is something about a handmade gift that store-bought presents simply cannot replicate. A toddler's paint-smudged card, a teenager's carefully woven bracelet, an adult child's hand-poured candle — each one carries the unmistakable fingerprint of effort and affection. Mother's Day is the perfect excuse to slow down, gather materials, and create something with your hands that says what words sometimes cannot. The projects here range from fifteen-minute quickies to weekend-long labors of love, so every skill level finds a home.
We have organized these 25 ideas roughly by complexity, starting with projects even the youngest crafters can tackle and building toward more ambitious creations for experienced makers.
Table of Contents
- Fingerprint Flower Bouquet Card
- Tissue Paper Carnations
- Painted Handprint Apron
- Paper Plate Photo Frame
- Beaded Pipe Cleaner Rings
- Salt Dough Handprint Keepsake
- Coupon Book for Mom
- Washi Tape Decorated Vase
- Pressed Flower Bookmark Set
- Fabric Scrap Sachets
- Decorated Wooden Spoons
- Mosaic Tile Coasters
- Painted Rock Paperweights
- Origami Flower Bouquet
- Braided T-Shirt Headband
- Hand-Stamped Tea Towels
- Macrame Keychain
- Decoupage Trinket Dish
- Embroidered Handkerchief
- Soy Wax Candle in a Teacup
- Ceramic Pinch Pot with Lid
- Resin Photo Coaster Set
- Hand-Sewn Linen Tote Bag
- Watercolor Portrait from Photo
- Memory Jar with Decorated Notes
1. Fingerprint Flower Bouquet Card
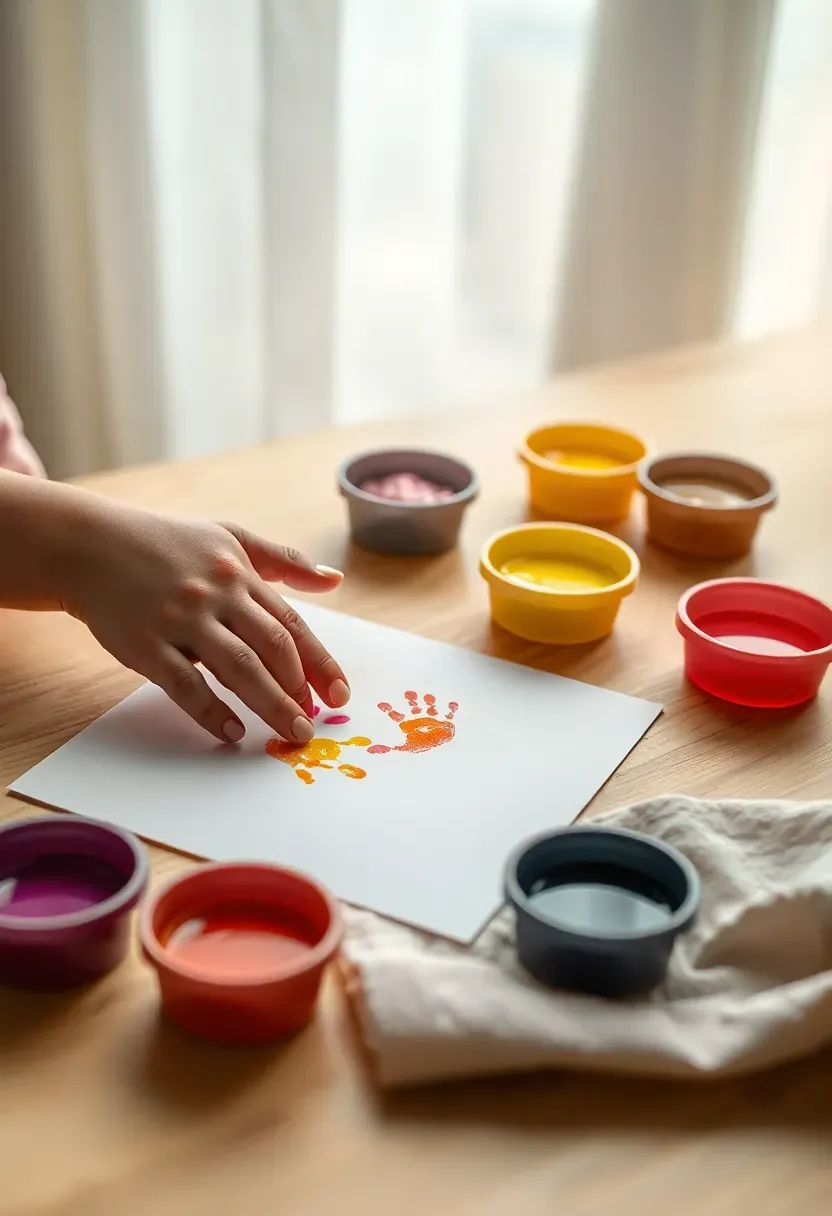
Even two-year-olds can make this one, which is precisely its charm. Dip tiny fingers into washable paint — pink, yellow, purple, orange — and press them onto heavy card stock to form petal clusters. An adult draws green stems and leaves underneath once the prints dry. The result is a one-of-a-kind garden that captures the exact size of those little hands at this exact moment in time. Moms who receive these tend to keep them for decades.
What You Need
- Washable finger paint in bright colors
- Heavy white card stock or watercolor paper
- Green marker or paint pen for stems
- Wet wipes for quick cleanup between colors
We picked a few things that go well with this idea: BeYumi Flower Bouquet Craft Kit (24Pcs) (★4.4), Mother's Day Card Making Kit (36 Set) (★4.8) and Menkxi Wood Frame DIY Craft Kit (24 Pcs) (★4.5). As an Amazon Associate we earn from qualifying purchases.
2. Tissue Paper Carnations
Why Tissue Paper Works
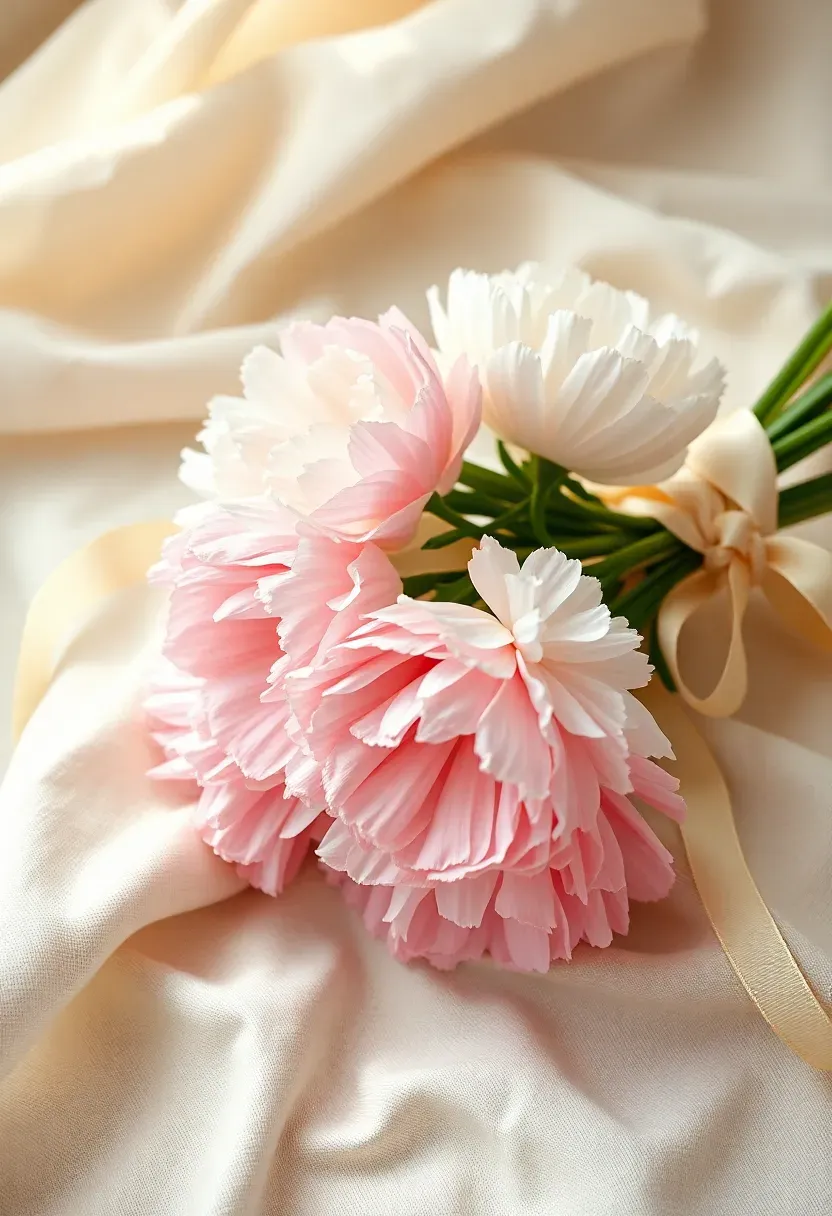
Real carnations last a week. Tissue paper carnations last forever, cost almost nothing, and look surprisingly convincing when done right. The ruffled texture of tissue paper mimics the natural folds of carnation petals in a way that no other craft paper can match.
How to Make Them
Stack five or six sheets of tissue paper and fold them accordion-style in one-inch pleats. Pinch the center and secure it with floral wire. Gently pull each layer upward and outward, separating them into a rounded bloom. Shape the outer petals first, then fluff the inner layers until the flower looks full. Trim petal edges with pinking shears for a realistic serrated look.
Pros and Cons
Pros: no wilting, allergen-free, perfect for kids ages five and up Cons: tissue paper tears easily if pulled too aggressively, not water-resistant for outdoor display
We picked a few things that go well with this idea: Soy Wax Candle Making Kit with Melter (★4.6), SoftOwl Premium Soy Candle Making Kit (★4.6) and SAEUYVB Candle Making Kit with Wax Melter (★4.6). As an Amazon Associate we earn from qualifying purchases.
3. Painted Handprint Apron
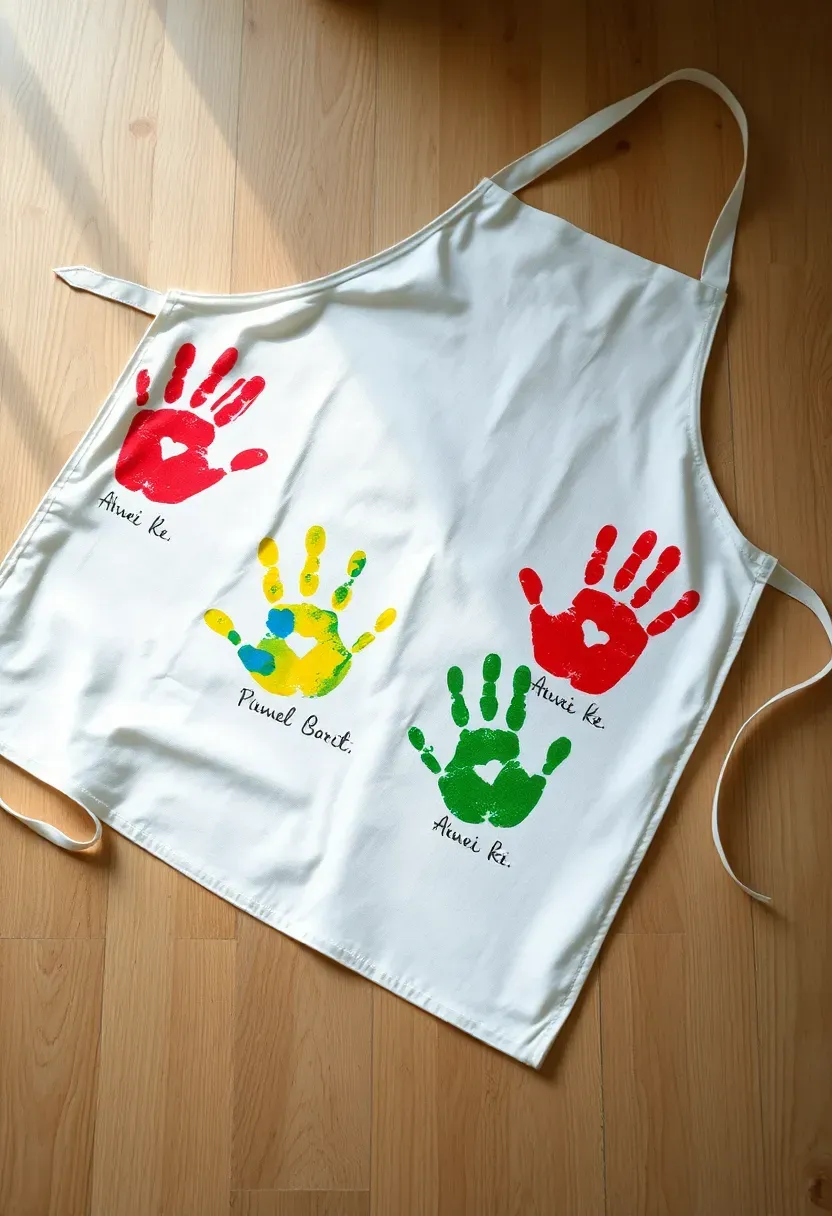
A plain white cotton apron becomes wearable art when small hands get involved. Pour fabric paint onto paper plates, press palms flat into the color, and stamp them across the apron front. Write names and the year underneath each print with a fabric marker. After heat-setting with an iron, the paint survives the washing machine. Mom gets a kitchen apron that doubles as a growth record — repeat the project annually and watch the handprints get bigger.
Tips for Clean Results
- Use fabric-specific paint, not regular acrylics
- Practice the hand press on scrap fabric first
- Let each print dry fully before adding names
- Heat-set with a hot iron for at least three minutes per print
We picked a few things that go well with this idea: CYANFOUR Embroidery Kit (38 Stitches) (★4.4), ETSPIL Embroidery Kit 3-Pack with Hoops (★4.4) and Craftwiz 4-Piece Starter Embroidery Kit (★4.8). As an Amazon Associate we earn from qualifying purchases.
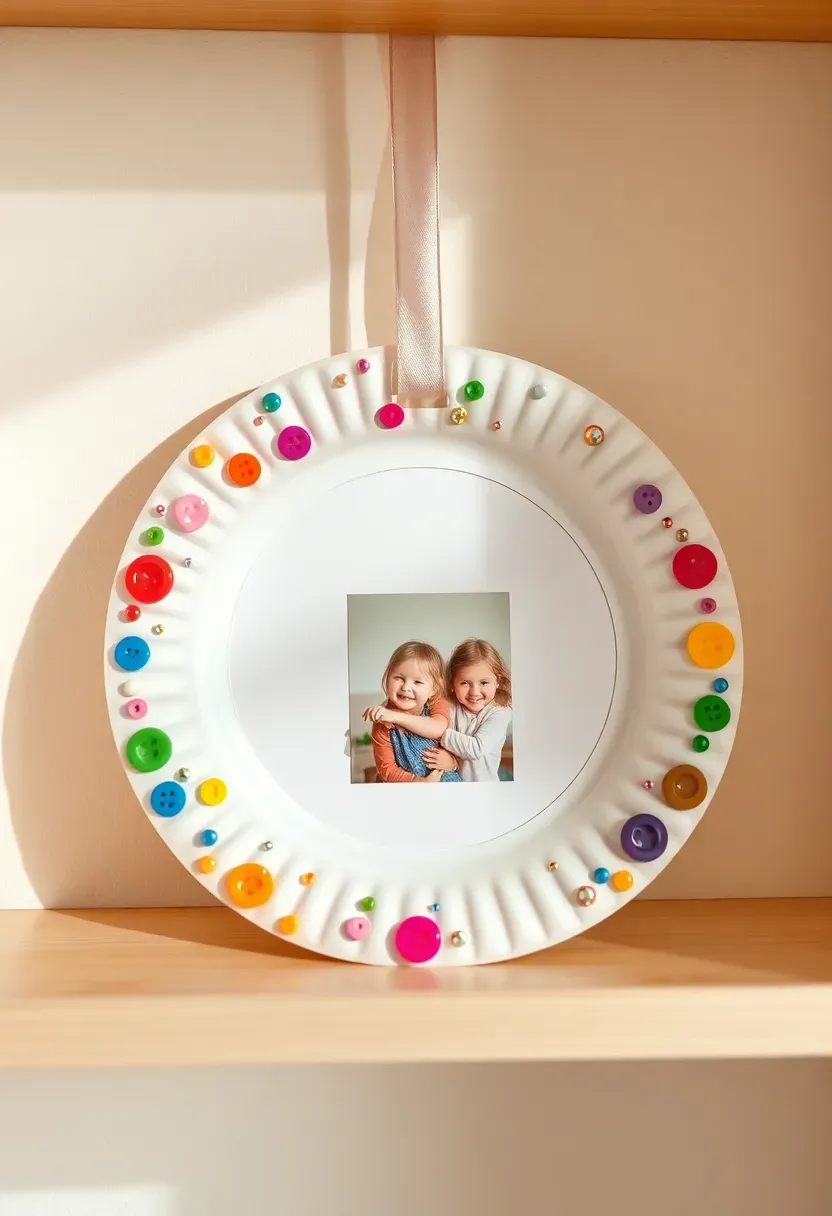
4. Paper Plate Photo Frame
The Concept
Cut the center from a sturdy paper plate to create a circular frame. Decorate the rim with buttons, sequins, stickers, dried pasta shapes, or torn paper collage. Tape a favorite family photo to the back so it shows through the opening. Attach a loop of ribbon for hanging. The entire project takes under twenty minutes and costs less than a dollar in materials, making it ideal for classroom Mother's Day parties.
Step 1: Cut the Center
Use scissors or a craft knife to remove the flat center of the plate, leaving a two-inch border all the way around.
Step 2: Decorate the Border
Glue decorations onto the plate rim. Let children choose their own combination for a personal touch.
Step 3: Attach the Photo
Tape a printed photo to the back of the plate, centering it in the opening. Add a ribbon loop at the top for hanging.
Recommended
Items for this idea
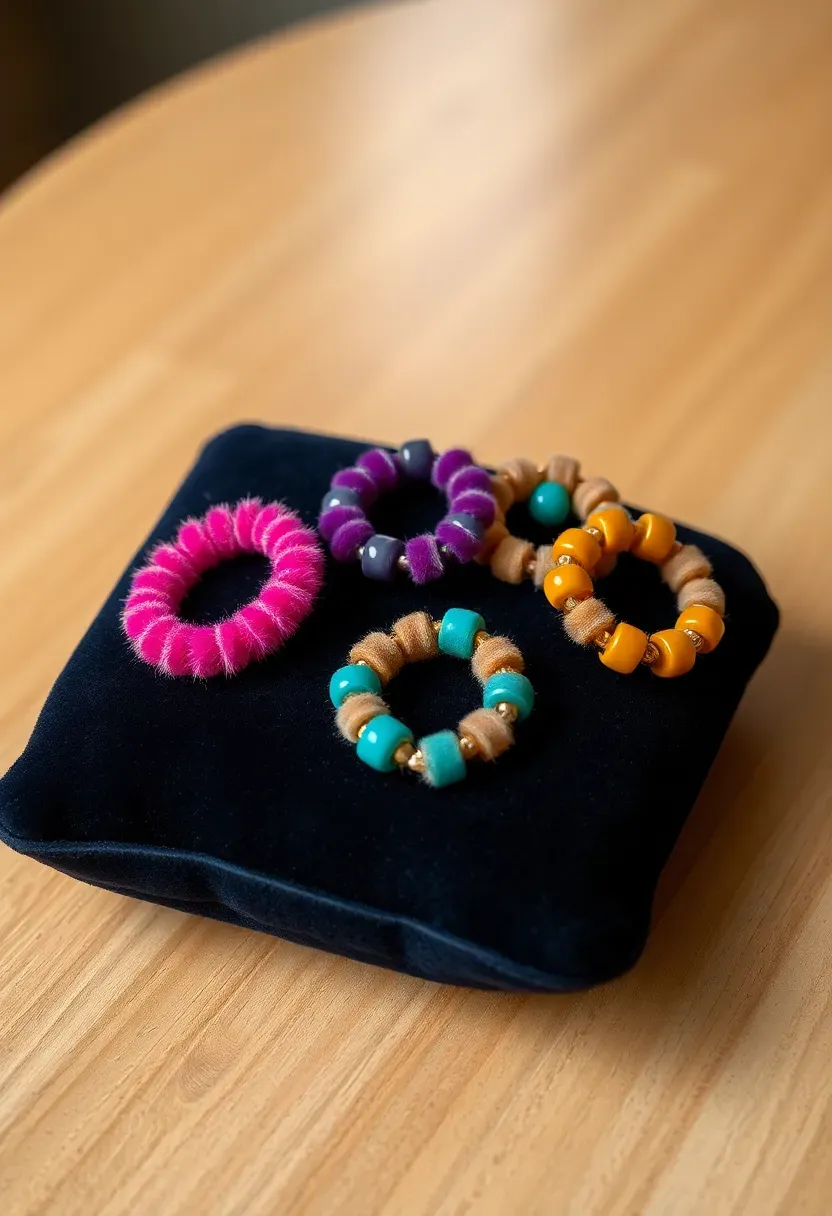
5. Beaded Pipe Cleaner Rings
Thread pony beads onto a pipe cleaner in a pattern — alternating colors, graduating sizes, or spelling out MOM with letter beads. Twist the ends together to form a ring and tuck the sharp wire tips inside the nearest bead for safety. A five-year-old can finish one in under ten minutes. Make a whole set in coordinating colors and present them in a small box lined with cotton wool for a jewelry-store effect that costs pennies.
Why Kids Love This Project
- Instant gratification — no drying or curing time
- Color choices give creative freedom
- The rings are wearable immediately
- Letter beads allow personalized messages
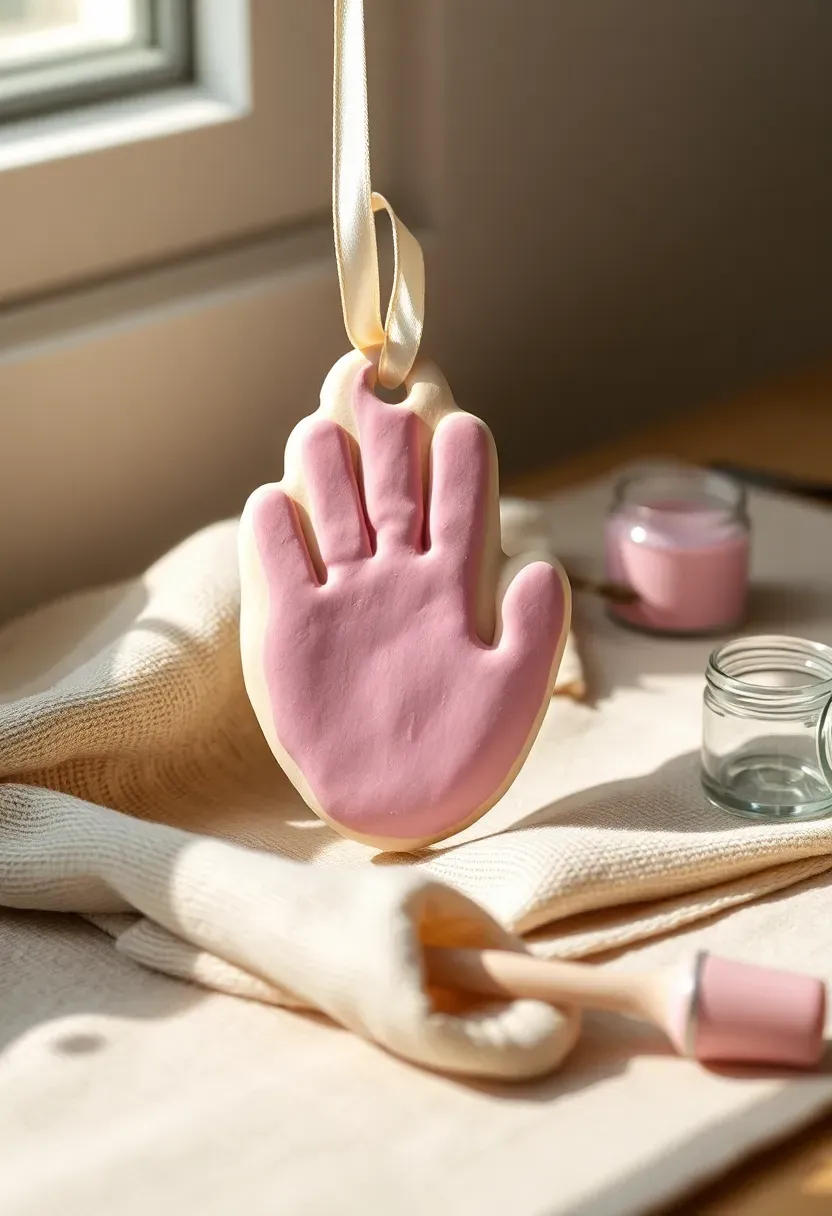
6. Salt Dough Handprint Keepsake
The Core Issue
Children grow shockingly fast. Those chubby toddler fingers stretch into school-age hands before you fully register the change, and there is no undo button.
The Solution
Salt dough freezes a moment in three dimensions. Mix one cup flour, half a cup salt, and half a cup water into a smooth dough. Roll it flat to about half-inch thickness, press a child's hand firmly into the surface, and cut around the impression with a cookie cutter or knife. Poke a hole at the top for hanging, bake at 200 degrees for two hours, then paint and seal. Each keepsake becomes a physical timestamp that Mom can hang on the wall or prop on a shelf for years.
Pros and Cons
Pros: ingredients are already in your pantry, captures fine detail including fingerprint lines, lasts for years when sealed Cons: baking takes patience, dough can crack if rolled too thin
Recommended
Items for this idea
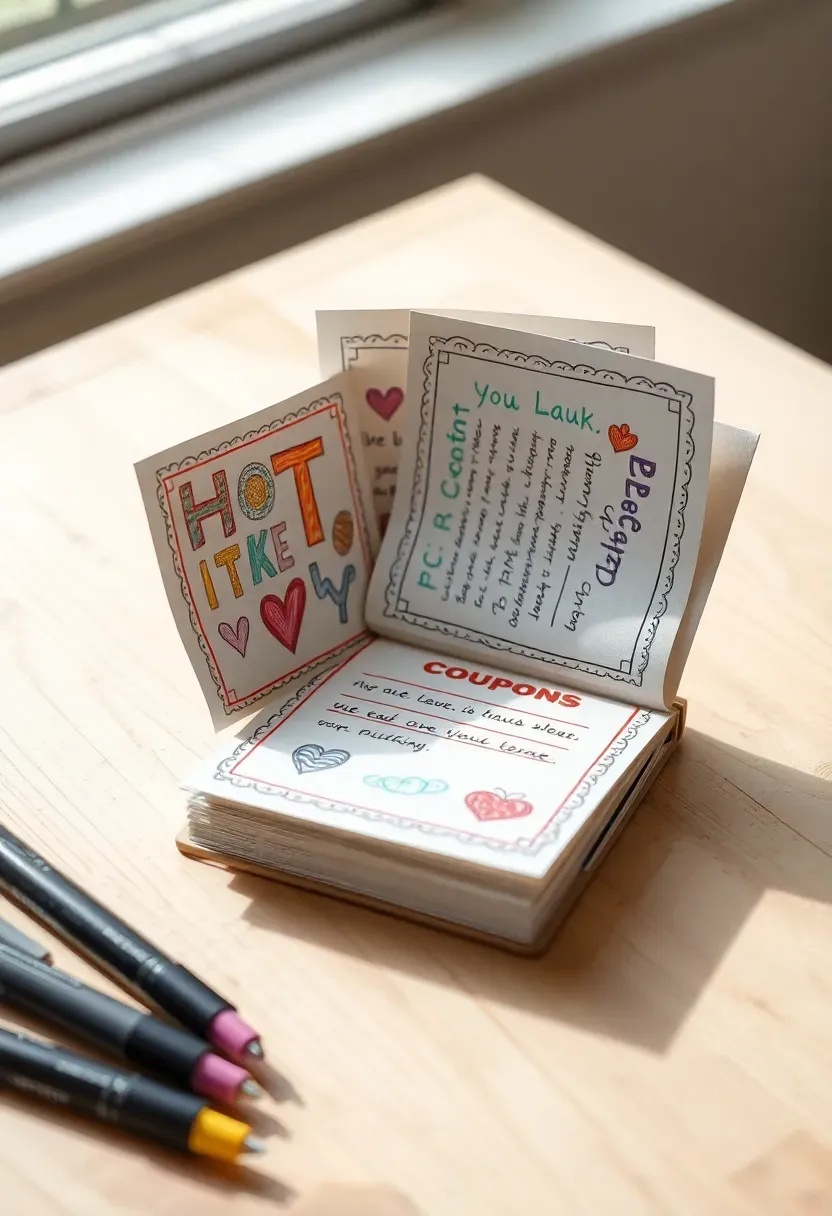
7. Coupon Book for Mom
This craft requires no supplies beyond paper, markers, and imagination. Fold several sheets of paper in half, staple the spine, and fill each page with a redeemable coupon: breakfast in bed, one load of laundry, thirty minutes of uninterrupted quiet, a back rub, choosing the movie on Friday night. Older kids can add illustrations, decorative borders, and expiration dates for humor. The gift costs nothing but promises everything — and the real value shows up when Mom actually redeems them.
Making It Special
- Use card stock for a sturdier feel
- Add a decorated cover with Mom's name
- Include a mix of silly and practical coupons
- Laminate the cover for a polished finish
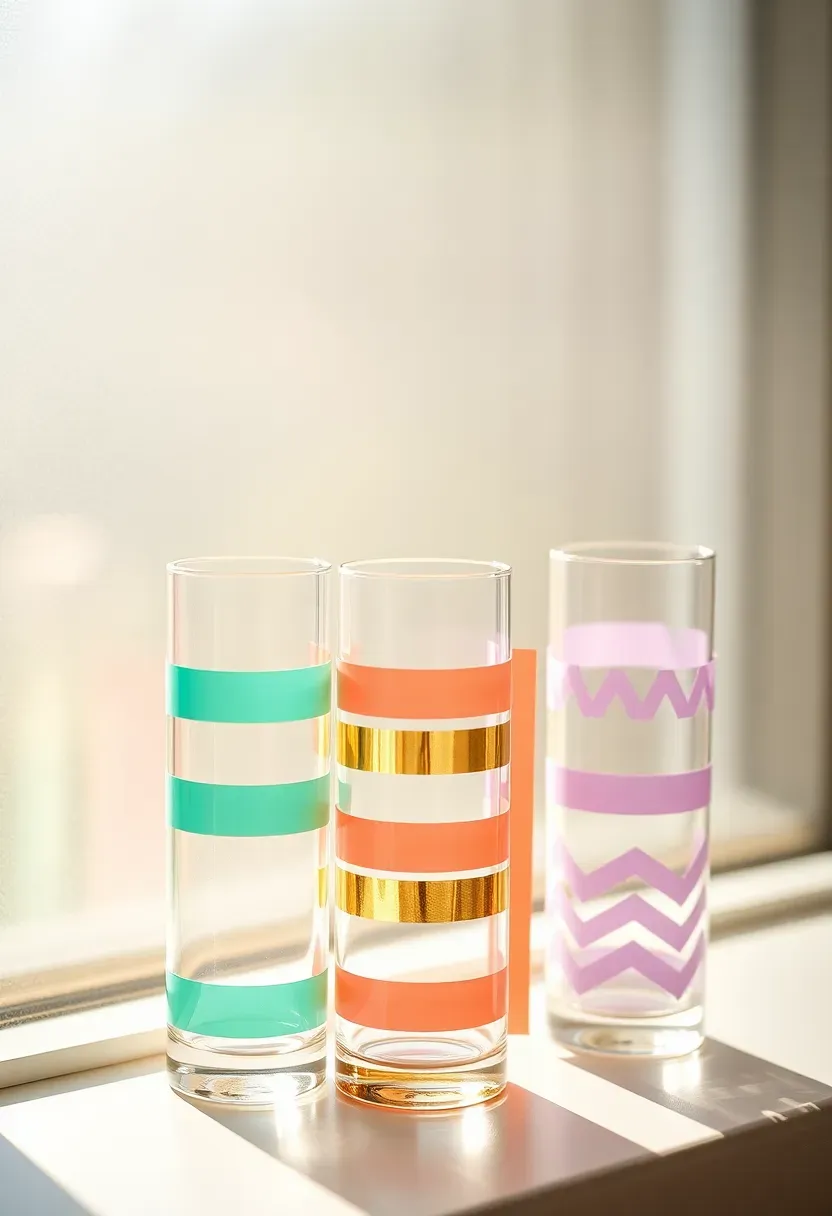
8. Washi Tape Decorated Vase
Start with a plain glass vase from the dollar store — cylindrical is easiest. Wrap strips of washi tape around it in horizontal bands, diagonal lines, or chevron patterns. The semi-transparent quality of washi tape lets light pass through, creating a stained-glass effect when the vase sits on a sunny windowsill. Fill it with fresh flowers or dried botanicals. If Mom's taste changes, peel the tape off and redesign without any residue or damage to the glass.
Practical Recommendations
- Choose tapes with coordinating patterns for a cohesive look
- Overlap tape edges slightly to prevent peeling
- Smooth out air bubbles with a credit card edge
- Hand wash only to preserve the tape adhesion
Recommended
Items for this idea
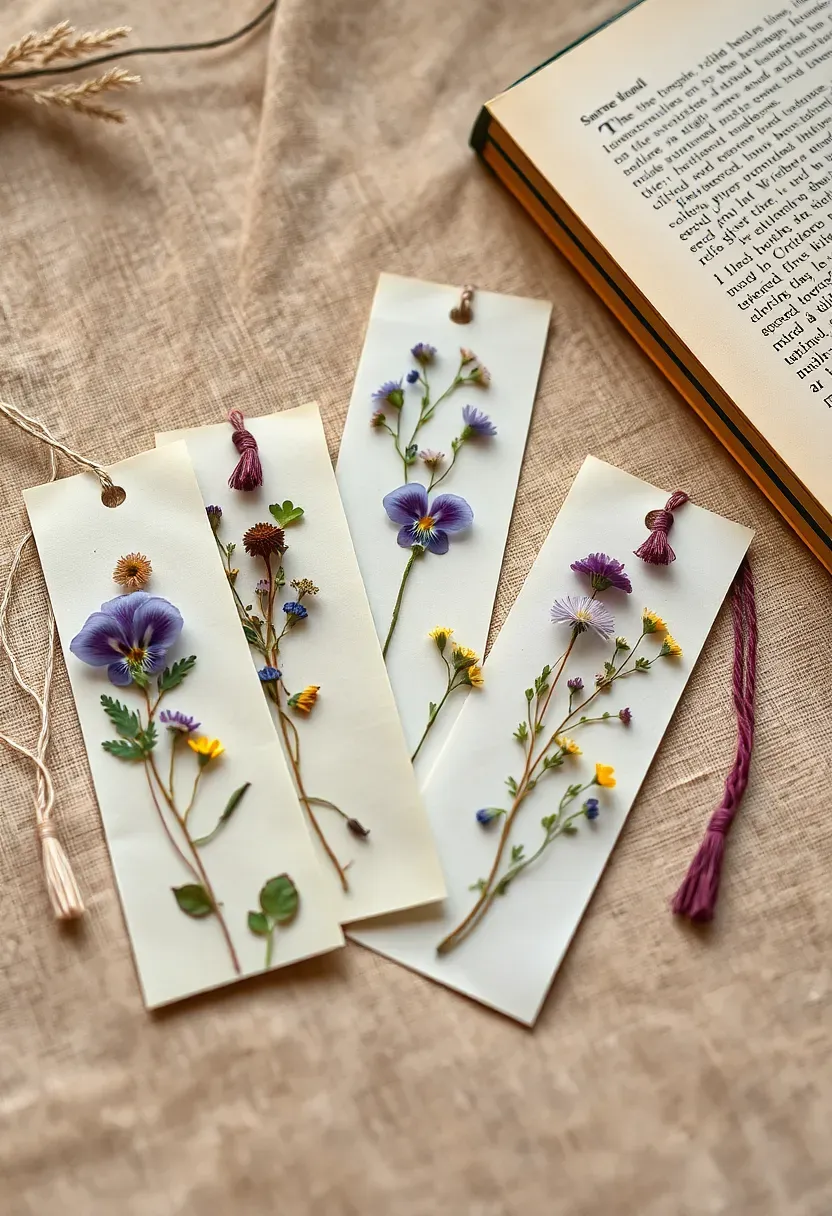
9. Pressed Flower Bookmark Set
Gather small flowers and leaves from the garden — violets, clover, fern fronds, tiny daisies — and press them between sheets of wax paper inside a heavy book. After a week of drying, arrange the flattened botanicals on strips of watercolor paper and seal them inside self-adhesive laminating pouches. Punch a hole at the top, thread a tassel of embroidery floss through it, and you have a bookmark that is both practical and beautiful. Make a set of three or four tied with twine for a complete gift.
What to Watch Out For
- Thick, fleshy flowers press poorly — stick to thin-petaled varieties
- Moisture trapped during pressing causes mold, so dry flowers thoroughly first
- Laminating with heat can brown delicate petals, so self-seal pouches are safer
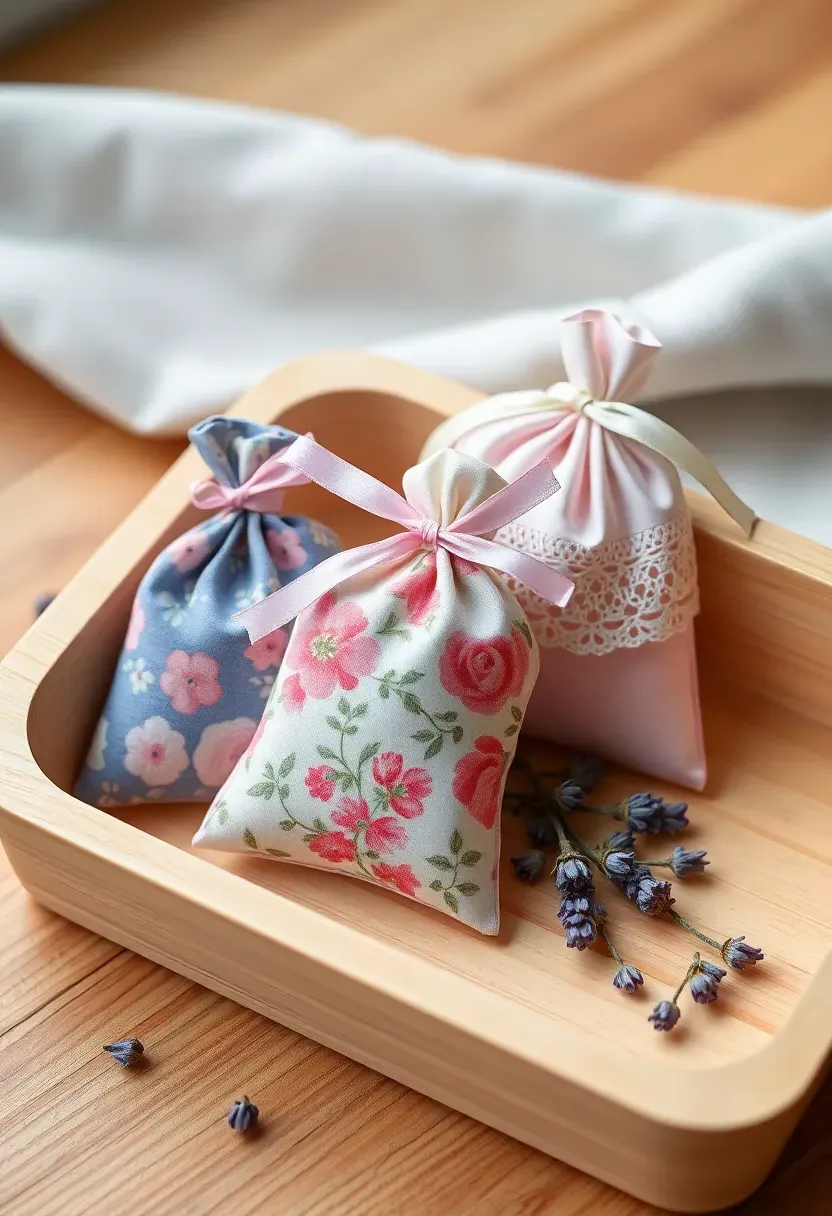
10. Fabric Scrap Sachets
Why This Makes a Thoughtful Gift
Lavender sachets are the kind of present that quietly works in the background — tucked into a dresser drawer, slipped under a pillow, hung in a closet — releasing a calming scent every time Mom reaches for something. They transform fabric scraps that would otherwise go to waste into something genuinely useful.
How to Assemble Them
Cut two matching squares of fabric, roughly four inches each. Place them right sides together, stitch three edges with a quarter-inch seam, turn right side out, fill with dried lavender buds, and stitch the opening closed by hand. Tie a small ribbon bow around the middle. A set of three in coordinating prints, tucked into a small box, feels like a boutique purchase.
Recommendation
Even non-sewers can manage this project using fabric glue instead of stitching. Iron-on hem tape works as a no-sew alternative that holds up surprisingly well.
Recommended
Items for this idea
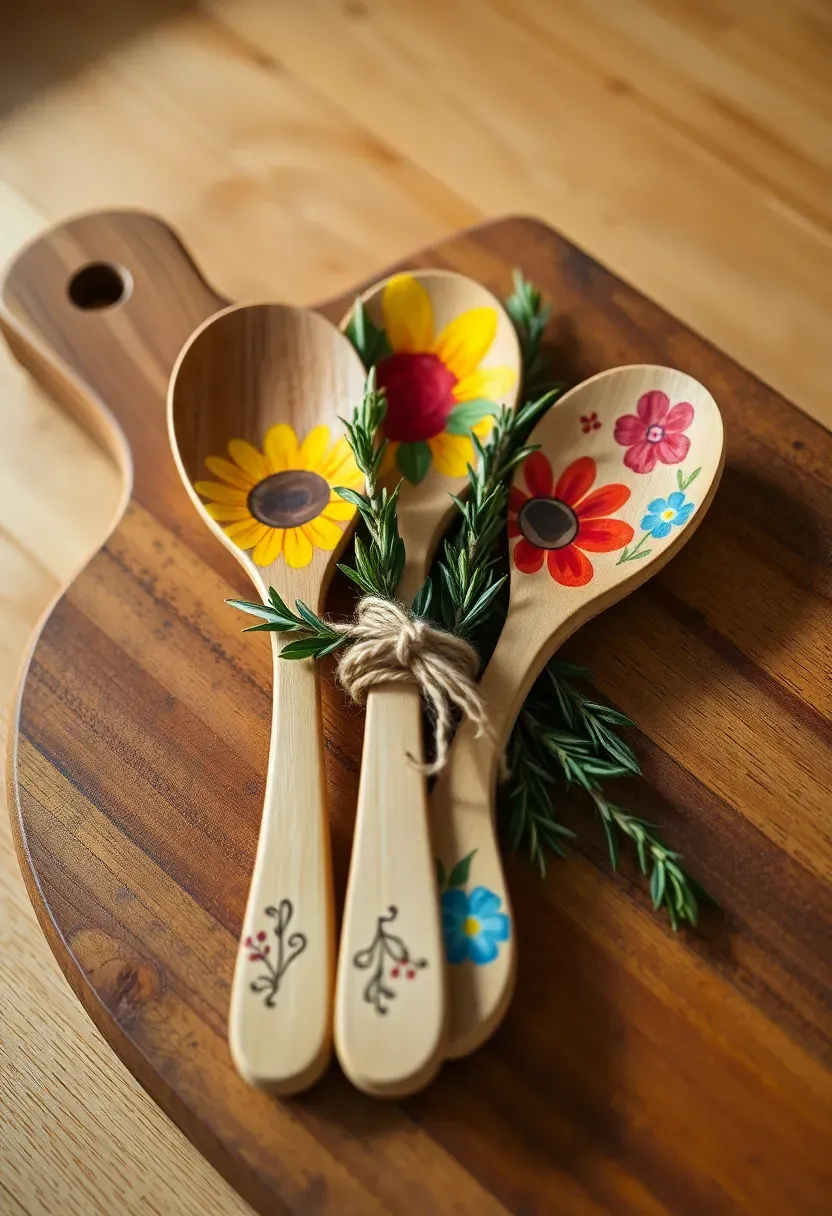
11. Decorated Wooden Spoons
Buy a pack of plain wooden spoons from a kitchen supply store. Paint the handles with acrylic paint in bold colors or delicate floral patterns. Once dry, seal with food-safe polyurethane so they remain usable in the kitchen. Alternatively, use a wood-burning tool to etch designs or messages into the handle for a rustic look. Bundle three spoons together with baker's twine and a sprig of dried herbs for a presentation that feels like it came from an artisan market stall.
Tips for Lasting Results
- Sand the handles lightly before painting for better adhesion
- Apply two thin coats rather than one thick coat
- Food-safe sealant is essential if the spoons will touch food
- Wood-burned designs never chip or fade
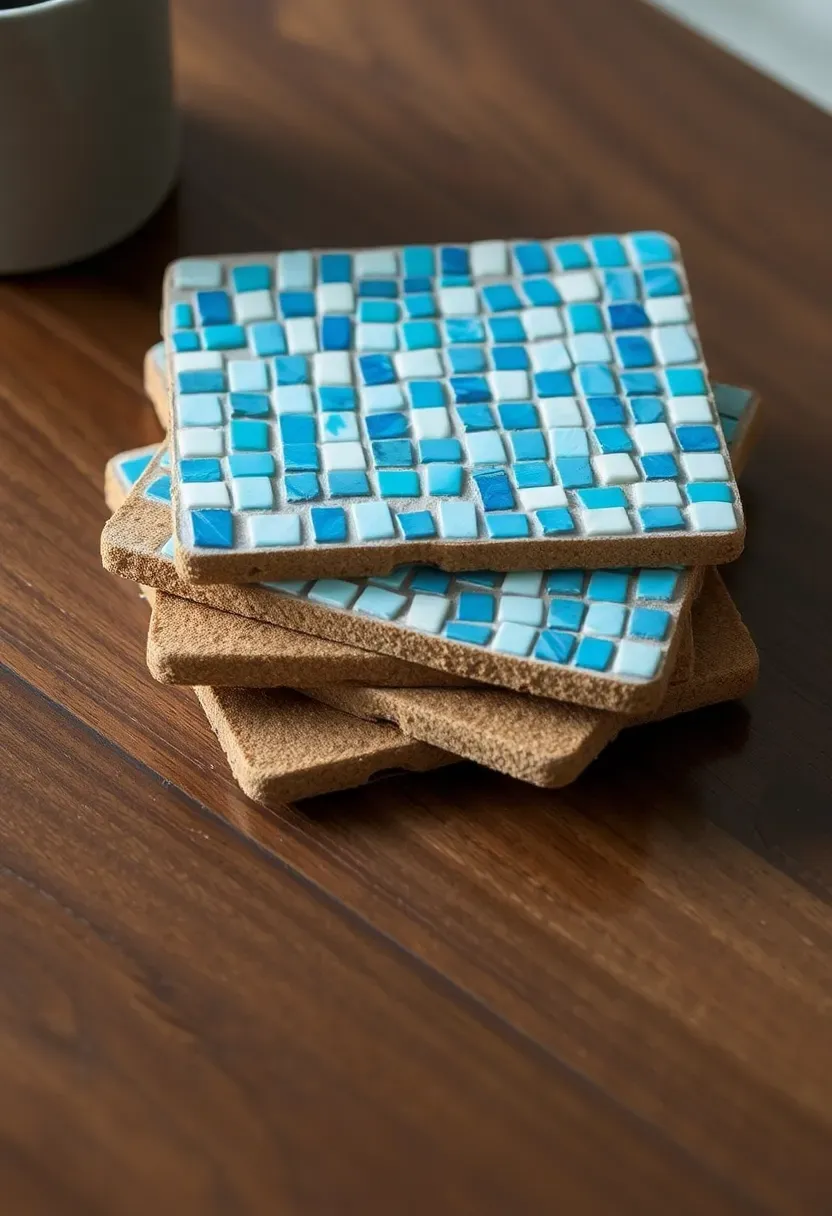
12. Mosaic Tile Coasters
Comparing: Pre-Cut Tiles vs Broken Ceramic
Both approaches produce beautiful coasters, but the process and final look differ significantly.
Pre-Cut Tiles
Small glass or ceramic mosaic tiles from a craft store come in uniform squares. They create clean, geometric patterns with even grout lines. Best for beginners who want predictable results and neat edges.
Broken Ceramic
Smashing old plates or tiles with a hammer inside a towel produces irregular shards that fit together like a puzzle. The result looks more organic and artistic, with unpredictable color combinations. Requires tile nippers for shaping and more grouting skill.
What to Choose
Choose pre-cut if: you want a controlled, tidy result and this is your first mosaic project. Choose broken ceramic if: you enjoy improvisation and have old dishes to repurpose.
Recommended
Items for this idea
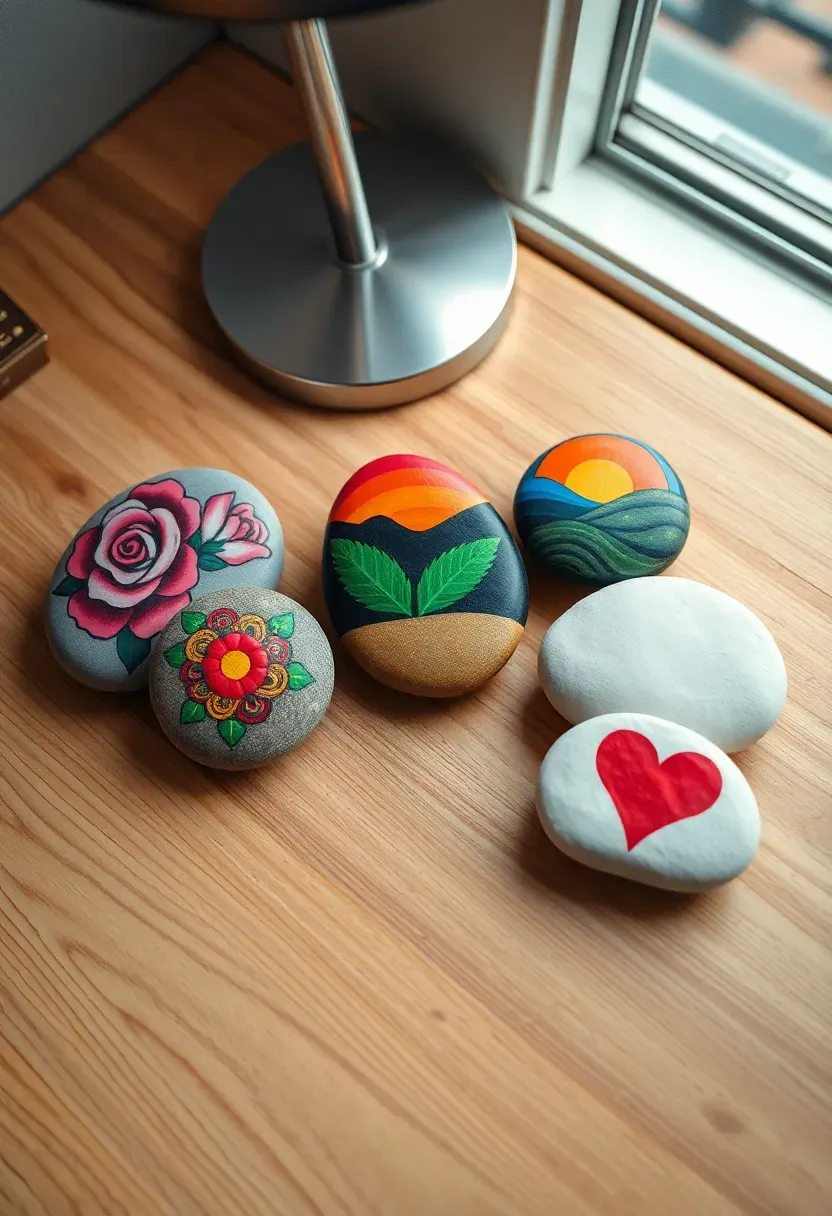
13. Painted Rock Paperweights
Collect smooth, flat river rocks — check garden centers if the nearest river is too far. Wash them, let them dry completely, then paint them with acrylics. Floral designs, geometric patterns, landscapes, abstract swirls, or simple words like LOVE, BREATHE, or MOM all work well. Seal with clear acrylic spray for a polished finish. A single painted rock on a desk holds papers and holds meaning simultaneously. Group several in a shallow dish for a decorative arrangement.
Practical Recommendations
- Base coat the entire rock in white first for more vivid colors
- Fine-tip paint pens work better than brushes for detailed lettering
- Two coats of clear sealant prevent chipping and color fading
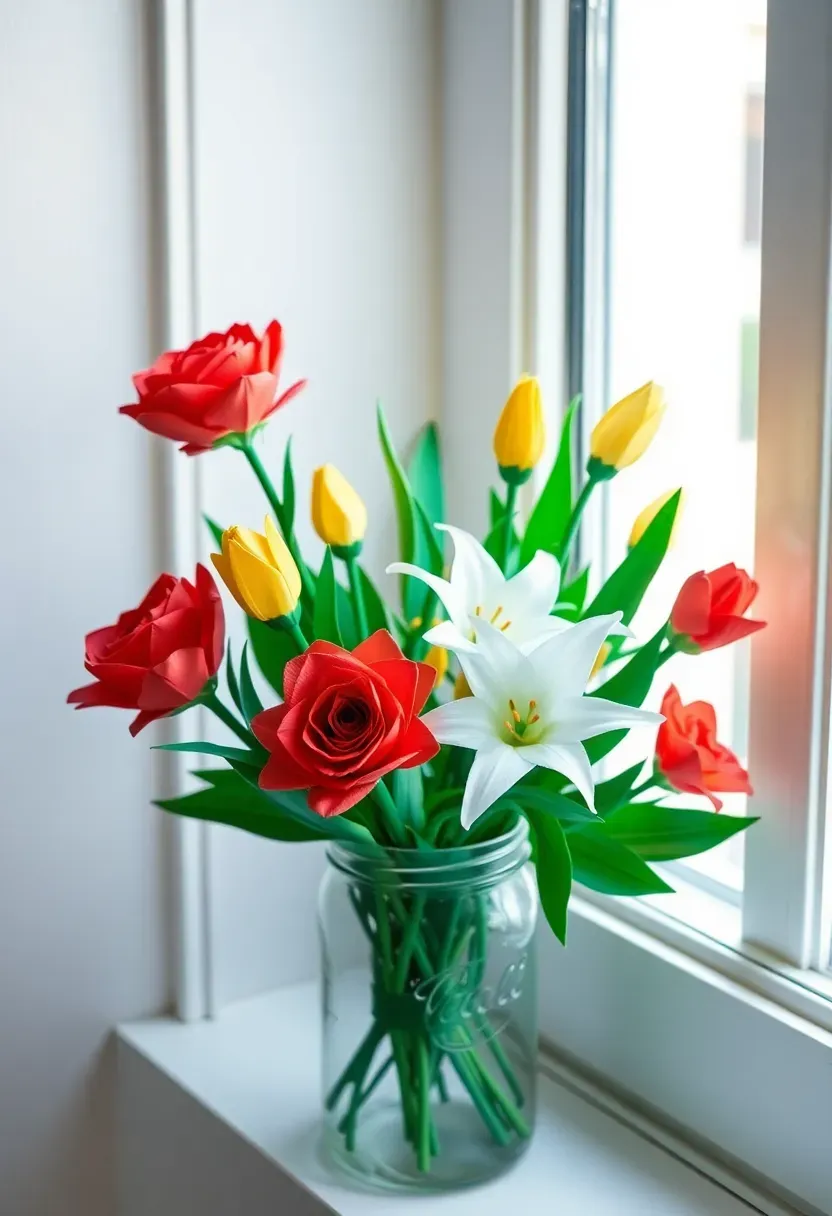
14. Origami Flower Bouquet
Origins and Appeal
Paper folding has roots stretching back centuries across Japanese and Chinese traditions. The discipline of transforming a flat square into a three-dimensional form without cutting or gluing carries a meditative quality that most modern crafts lack entirely.
Modern Interpretation
An origami bouquet for Mother's Day takes this tradition and turns it into a lasting gift. Fold roses from red origami paper, tulips from yellow, lilies from white, and leaves from green. Attach each bloom to a floral wire stem wrapped in green tape. Arrange the finished flowers in a mason jar or small vase. Unlike real flowers, this bouquet never wilts, never needs water, and carries the quiet statement that someone sat patiently folding each petal by hand.
How to Get Started
- Begin with simple tulip folds before attempting roses
- Use six-inch square paper for standard-size blooms
- YouTube tutorials for each flower type are invaluable
- Count on ten to fifteen minutes per flower once you find your rhythm
Recommended
Items for this idea
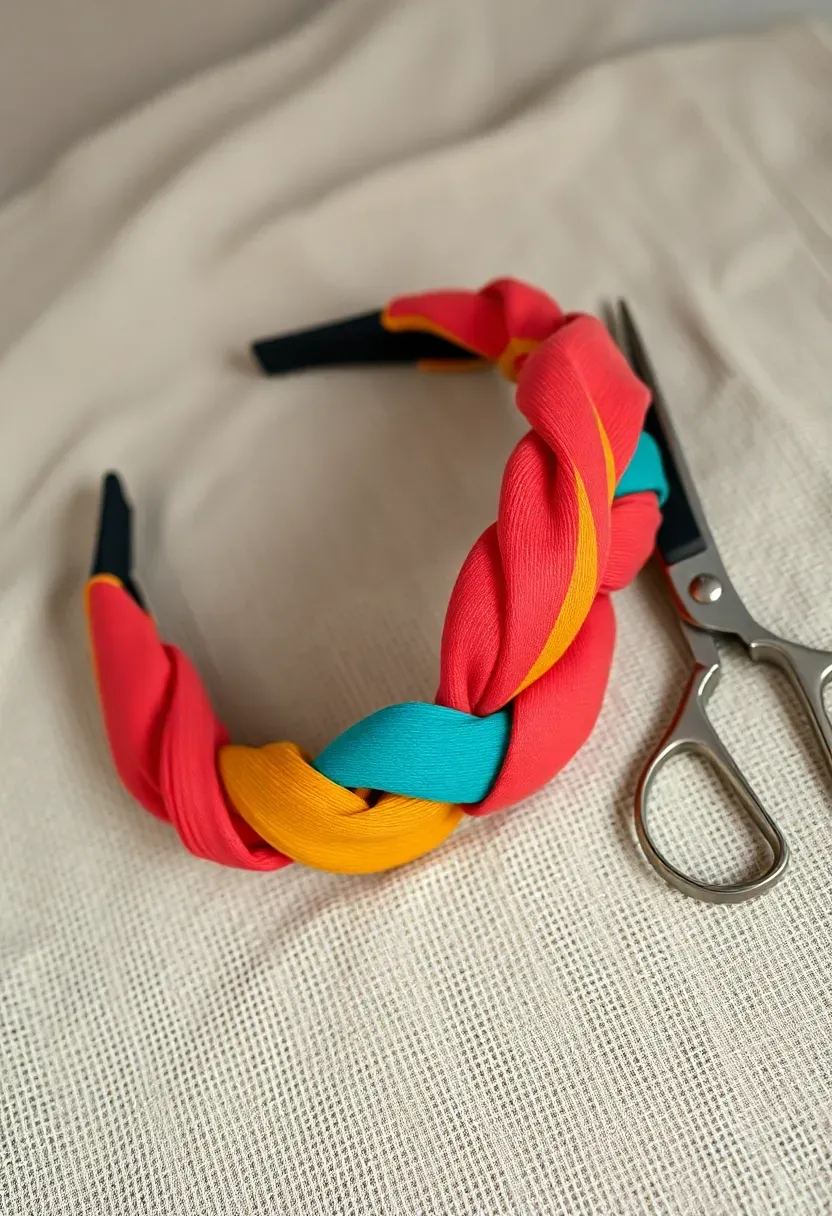
15. Braided T-Shirt Headband
Old t-shirts get a second life as stretchy, comfortable headbands. Cut three strips about two inches wide and eighteen inches long from a soft cotton tee. Stretch each strip so it curls into a tube — jersey knit does this naturally. Tie the three tubes together at one end, braid tightly, and tie the other end. Stitch or knot the two ends together to form a loop sized to fit Mom's head. The stretchy fabric makes sizing forgiving, and the braided texture looks intentional rather than recycled.
Why This Works for Teens
- No sewing machine needed
- Completed in under fifteen minutes
- Customizable with multiple shirt colors
- Genuinely wearable and practical
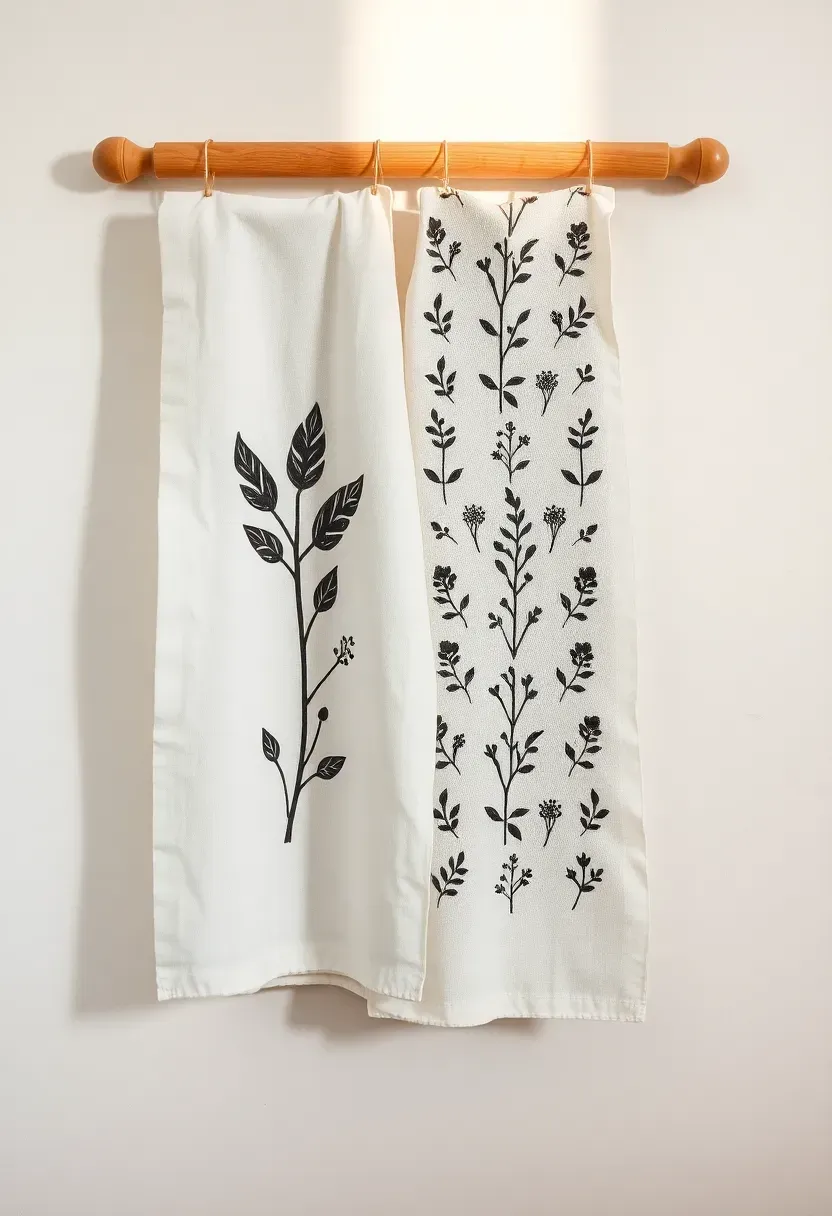
16. Hand-Stamped Tea Towels
Purchase plain white or natural linen tea towels. Carve a simple design — a leaf, a flower, a heart, a monogram — into a rubber block using a linoleum cutting tool, or use pre-made rubber stamps from a craft store. Apply fabric ink to the stamp, press firmly onto the towel, and lift cleanly. Repeat the motif in a pattern across the fabric. Heat-set the ink with an iron after drying. The finished towels look like they belong in a curated kitchen shop, yet the entire project takes an afternoon.
Materials You Need
- Plain linen or cotton tea towels
- Rubber stamp or carving block with tools
- Fabric-specific stamp ink
- Iron for heat-setting
- Scrap fabric for test prints
Recommended
Items for this idea
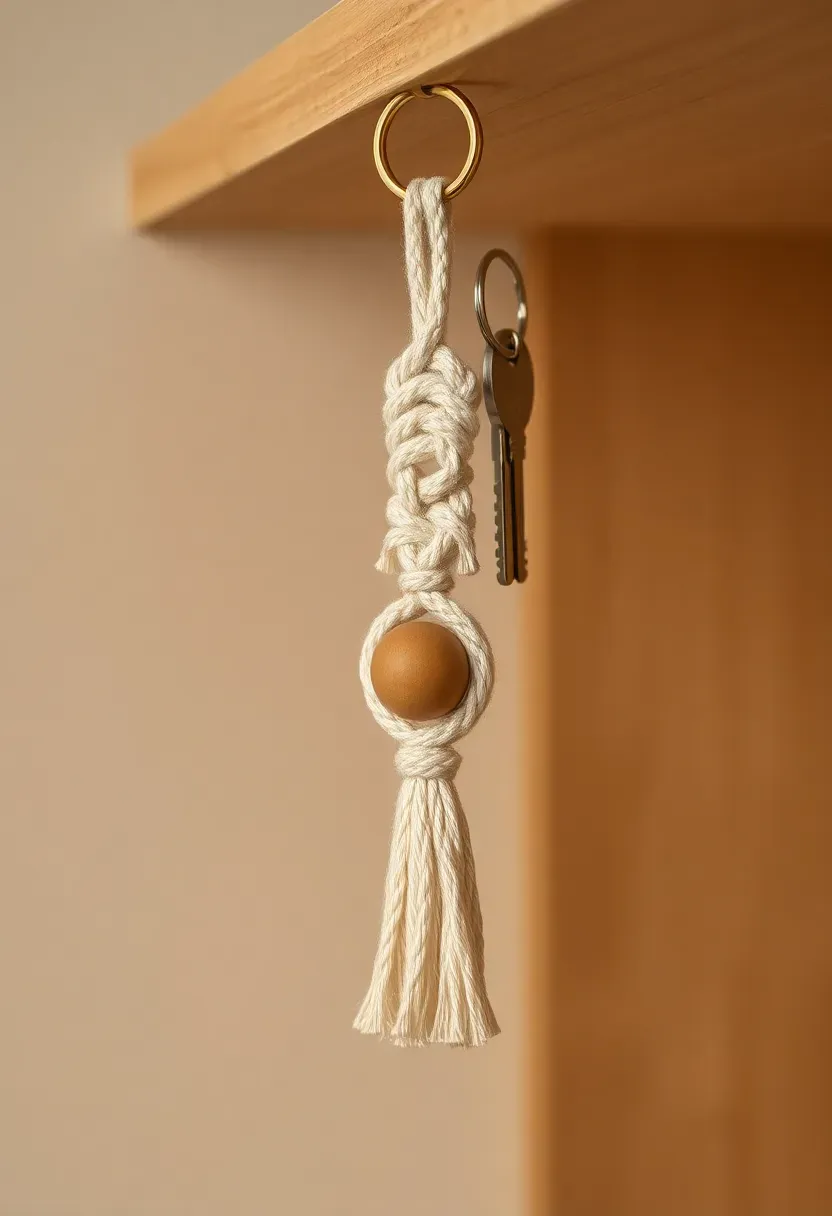
17. Macrame Keychain
Macrame is having a sustained revival, and a keychain is the perfect entry-level project. Cut four lengths of cotton macrame cord, each about twelve inches long. Fold them in half through a keyring, then tie a series of square knots working downward. Add a wooden bead partway through for visual interest. Finish with a gathered wrap knot and trim the tails into a tassel. The whole process takes twenty minutes once you learn the square knot rhythm, and the result is a small, tactile accessory Mom will use every day.
What to Watch Out For
- Waxed cord holds knots tighter than unwaxed
- Pull each knot to the same tension for even spacing
- A clipboard holds the keyring steady while you work
- Trim tassel ends at an angle for a polished finish
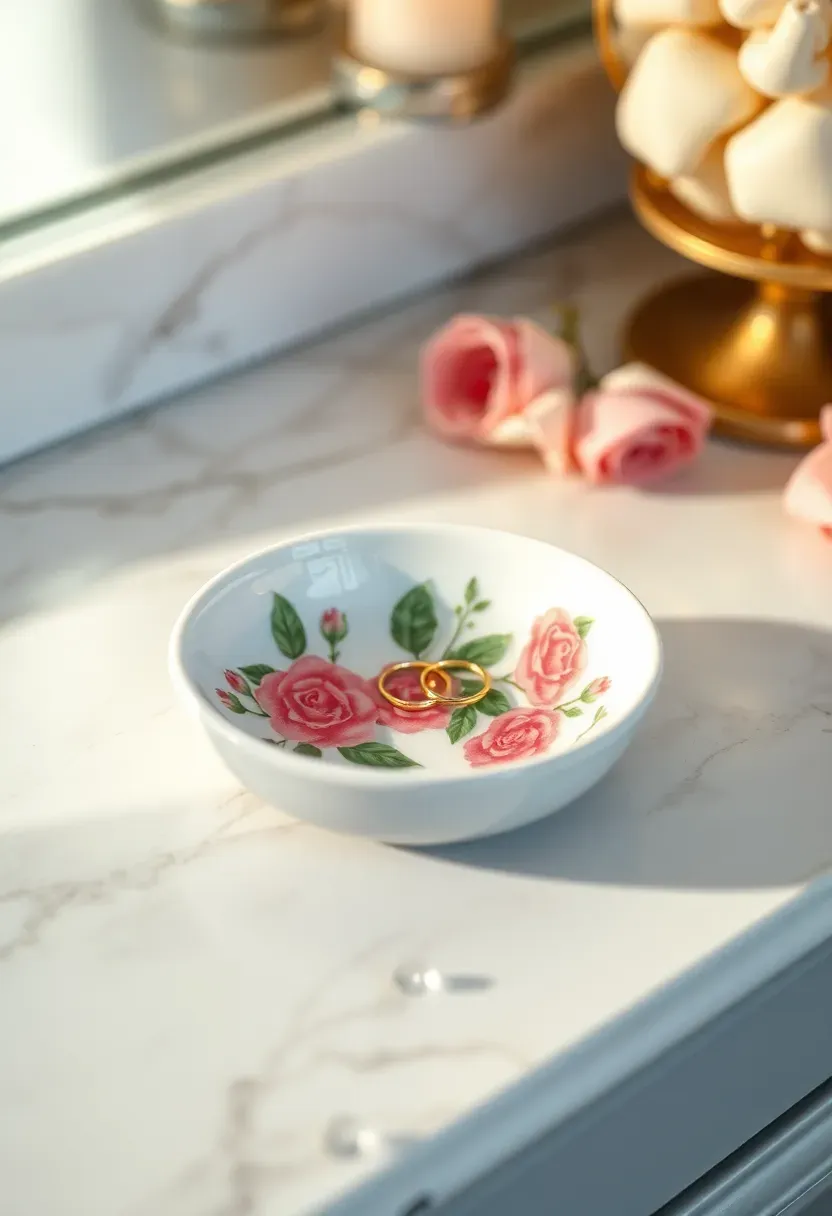
18. Decoupage Trinket Dish
The Concept
A plain white ceramic dish from a thrift store or dollar store becomes a personalized jewelry holder with the help of decoupage medium and decorative paper. The technique is simple — brush on the medium, lay paper cutouts over the surface, brush another layer on top — but the results can look remarkably refined depending on your paper choice.
Step 1: Select Your Paper
Floral napkins (separated to the printed layer only), vintage book pages, botanical prints, or tissue paper with patterns all work beautifully. Cut or tear shapes to fit the dish interior.
Step 2: Apply and Seal
Brush a thin, even layer of decoupage medium onto the dish. Lay paper pieces down, smoothing out bubbles with your fingers. Apply two more coats on top, drying between each. The medium dries clear and hard.
Step 3: Finish
Once fully cured, the dish is water-resistant enough for daily use as a ring holder, earring tray, or key catch by the front door.
Recommended
Items for this idea
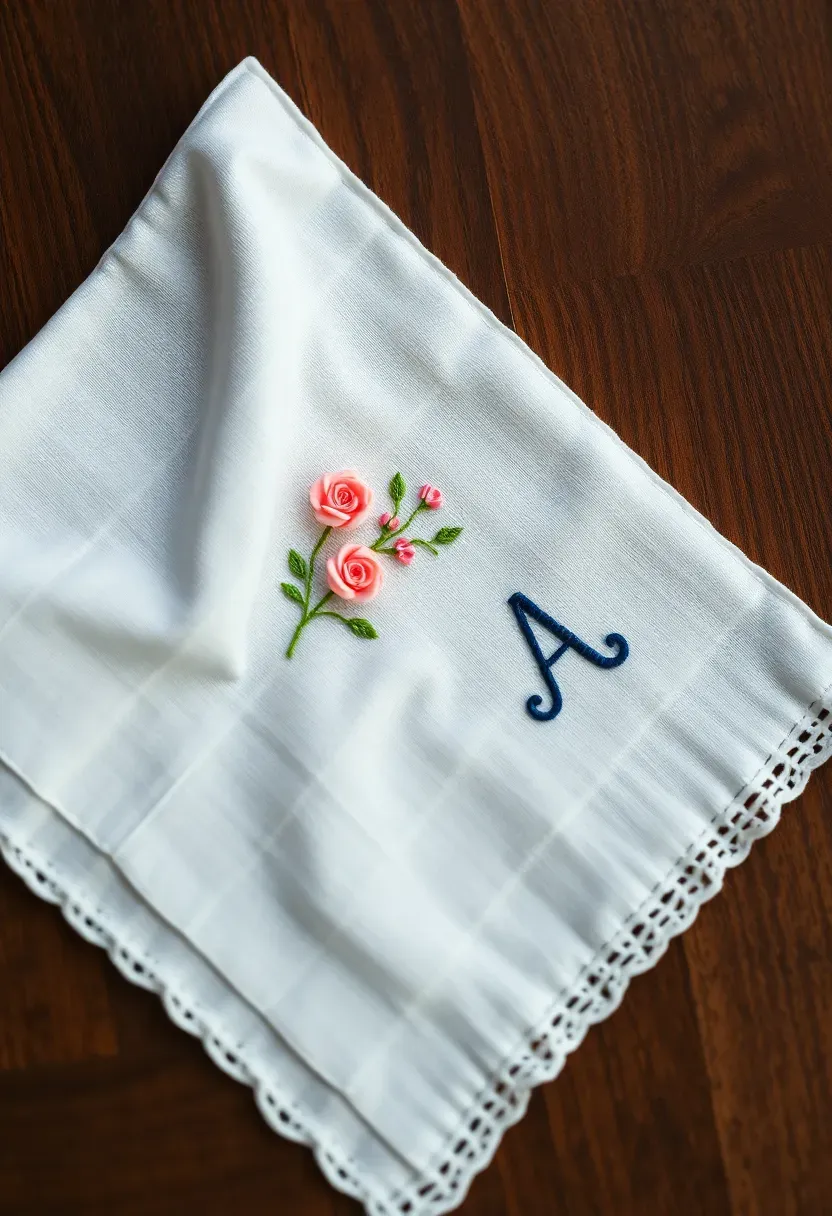
19. Embroidered Handkerchief
A white linen handkerchief with hand-embroidered flowers in one corner and Mom's initials in another is the kind of gift people used to give routinely and somehow stopped. Bringing it back feels both nostalgic and intentional. Use satin stitch for flower petals, stem stitch for leaves and lettering, and French knots for flower centers. Even a beginner can complete a simple design in an evening. The finished handkerchief is useful, washable, and carries a level of personal effort that no purchased gift can match.
Practical Recommendations
- Pre-wash the handkerchief to prevent shrinkage after embroidering
- Use an embroidery hoop to keep fabric taut while stitching
- Transfer your design with a water-soluble pen that washes out
- Three strands of embroidery floss give good coverage without bulk
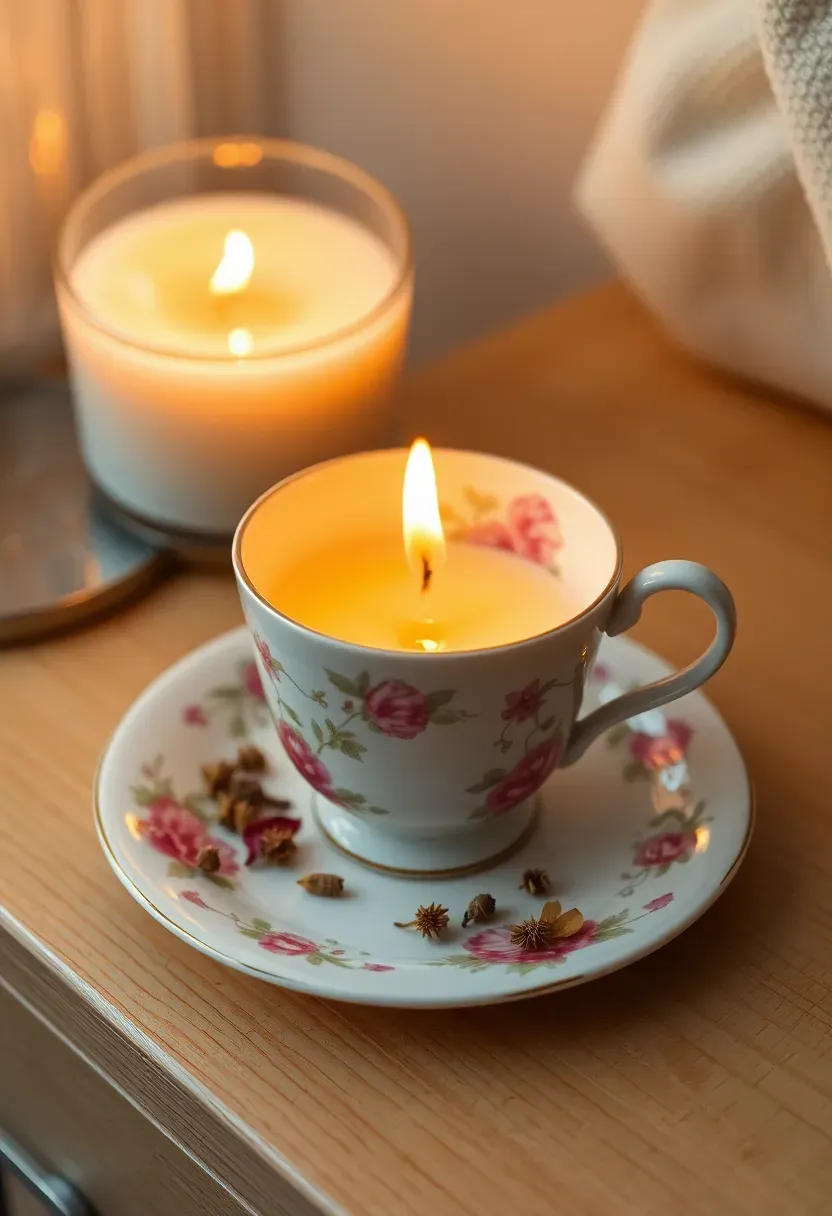
20. Soy Wax Candle in a Teacup
Why Teacups Work Perfectly
Thrift stores overflow with orphaned teacups — beautiful porcelain pieces separated from their original sets, too pretty to throw away, too mismatched to use for tea. Filling them with scented soy wax gives them a new purpose and creates a candle that looks like a piece of decor even when unlit.
How to Pour the Candle
Melt soy wax flakes in a double boiler to 170 degrees. Add fragrance oil — lavender, vanilla, or rose — and stir gently. Dip a cotton wick tab in the melted wax, press it to the bottom center of the teacup, and hold it upright with a pencil laid across the rim. Pour the wax slowly, leaving a quarter inch of space below the rim. Allow twelve hours to cure before trimming the wick to a quarter inch.
Recommendation
Pair the finished candle on its saucer with a small box of matches tied with a ribbon for a complete gift presentation.

Recommended
Items for this idea
21. Ceramic Pinch Pot with Lid
Air-dry clay makes pottery accessible without a kiln. Start with a ball of clay the size of a tennis ball. Press your thumb into the center and gradually pinch the walls outward while rotating, creating an even bowl shape. For the lid, flatten a smaller ball into a disc slightly wider than the pot opening, then attach a small clay knob on top. Let both pieces dry for 48 hours, sand smooth, and paint with acrylics. Seal with a clear matte varnish. Mom gets a handmade vessel for rings, earrings, or small treasures.
Tips for Smooth Results
- Keep fingers slightly damp while pinching to avoid cracks
- Rotate the pot constantly for even wall thickness
- Score and slip the knob attachment point to prevent the lid handle from breaking off
- Sand with fine-grit paper after drying for a professional finish
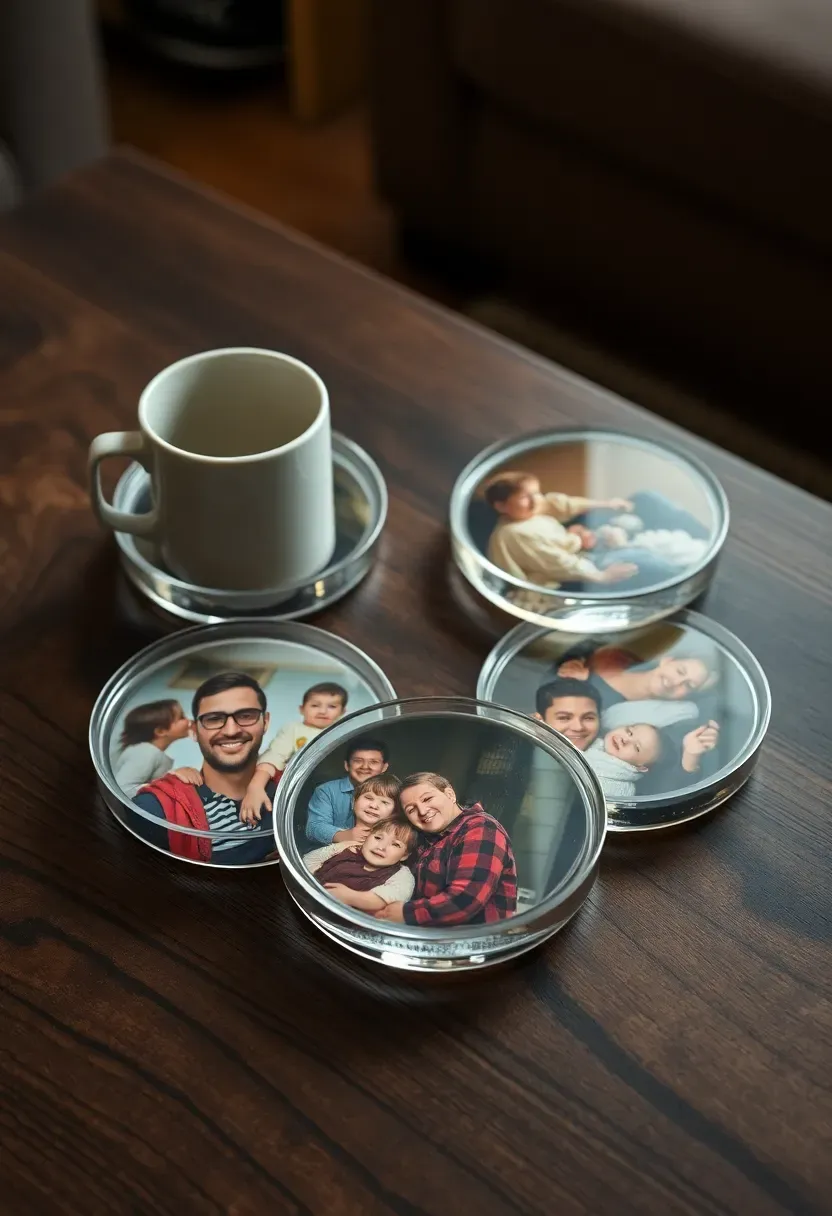
22. Resin Photo Coaster Set
The Core Issue
Digital photos live on phones and computers where they are seen once, liked, and forgotten. Printing them helps, but framed photos compete for limited wall space.
The Solution
Embed printed photos inside clear resin coasters and suddenly those images become functional objects Mom uses daily. Print photos slightly smaller than your silicone coaster mold. Pour a thin layer of resin, let it partially cure until tacky, place the photo face-down, then pour a second layer to encase it. After 24 hours of curing, demold and sand any rough edges. The photo floats permanently inside crystal-clear resin, protected from spills, scratches, and fading.
Pros and Cons
Pros: completely waterproof, photos are preserved indefinitely, conversation-starting gift Cons: resin requires careful mixing ratios, proper ventilation is mandatory during pouring, 24-hour cure time

Recommended
Items for this idea
23. Hand-Sewn Linen Tote Bag
Cut two rectangles of medium-weight linen, roughly 14 by 16 inches each. Pin them right sides together and sew three edges with a half-inch seam. Fold the top edge down twice to create a clean hem and sew it flat. For straps, cut two strips of matching linen 3 inches wide and 24 inches long, fold and press them into one-inch bands, and stitch them to the inside of the bag at even intervals. The finished tote is simple, durable, and endlessly useful — for groceries, library books, beach supplies, or farmers market runs.
Making It Personal
- Embroider Mom's initials on one side
- Add an interior pocket for keys and phone
- Stitch a small heart or flower near the top edge
- Choose a linen color that matches her wardrobe
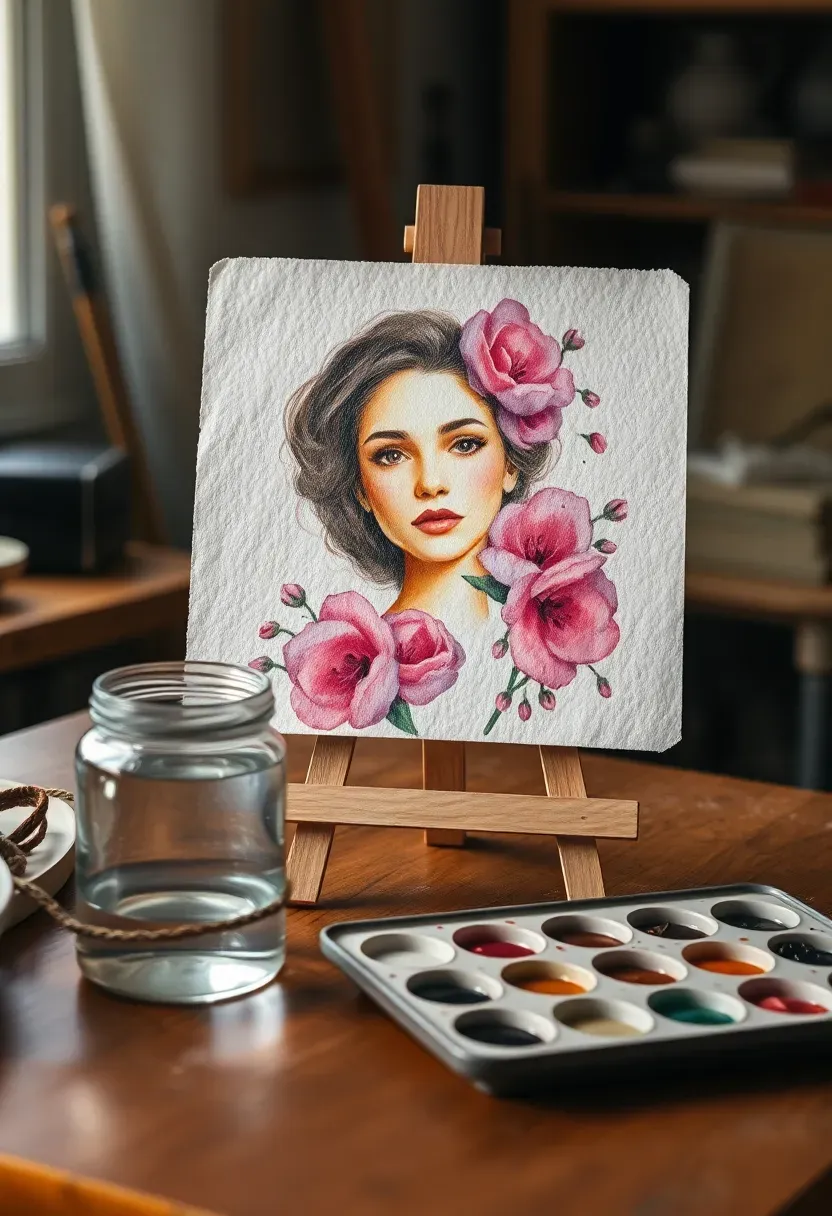
24. Watercolor Portrait from Photo
Origins and Appeal
Portrait painting once required years of formal training and expensive materials. Modern watercolor techniques and accessible tutorials have democratized the process, making it possible for patient amateurs to produce genuinely moving results.
Modern Interpretation
Choose a favorite photo of Mom — candid moments work better than posed shots. Sketch the basic outlines lightly in pencil on watercolor paper, then build up washes of color from light to dark. Focus on capturing the overall impression rather than photographic accuracy. Let the watercolors bleed and bloom naturally at the edges — those happy accidents give watercolor its distinctive warmth. Frame the finished piece in a simple mat and frame for a gift that is irreplaceable in the truest sense.
How to Approach It
- Print the reference photo in black and white to simplify value reading
- Start with the lightest skin tones and build darker layers gradually
- Leave white paper showing for highlights rather than adding white paint
- Accept imperfection — the handmade quality is the entire point
Recommended
Items for this idea
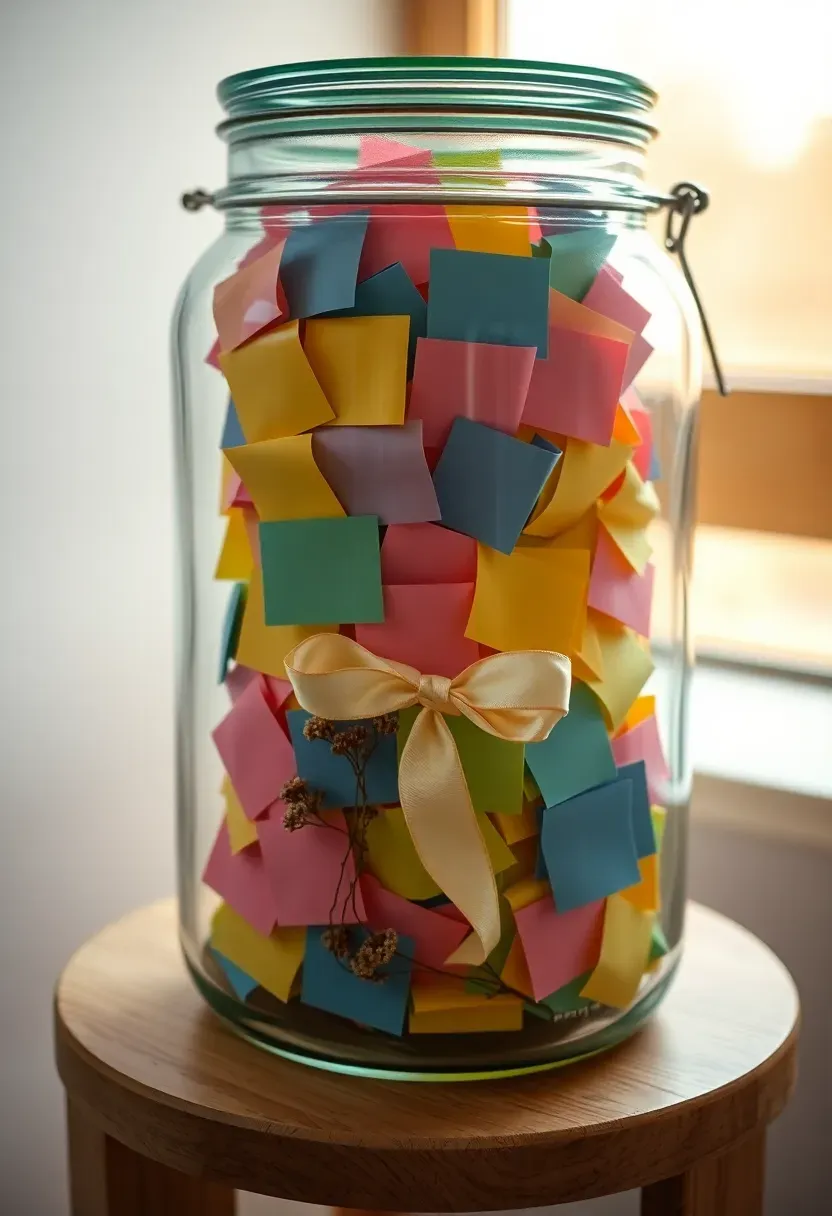
25. Memory Jar with Decorated Notes
Gather the family — siblings, Dad, grandchildren, close friends — and ask each person to write favorite memories, inside jokes, reasons they love Mom, and wishes for the year ahead on small slips of colorful paper. Fold each note and drop it into a large glass jar. Decorate the jar with a ribbon, a hand-lettered label, and a few dried flowers tucked around the lid. Mom opens one note each morning with her coffee, stretching the gift across weeks or even months. The jar itself is pretty, but the real gift is the accumulated weight of all those private, honest words.
Why This Project Stands Apart
- It involves the entire family rather than a single crafter
- The emotional impact grows with each note opened
- No artistic skill required — sincerity is the only material
- The jar remains as decor long after all notes are read
Quick FAQ
Is it better to buy craft supplies in bulk or per project? Buying in bulk saves money if you plan multiple projects or have several children crafting. For a single project, buying only what you need prevents clutter and wasted materials. Dollar stores and thrift shops are goldmines for affordable basics.
Should kids make the gift entirely by themselves? It depends on age. Children under five need adult help with cutting, gluing, and anything involving heat. Kids aged six to ten can handle most steps with light supervision. Teenagers and adults can work independently. The key is letting the child's effort show — overpolished results defeat the purpose.
Which projects work best for a classroom Mother's Day party? Fingerprint flower cards, paper plate frames, beaded pipe cleaner rings, and coupon books are all low-mess, quick-completion projects that work well in group settings. Avoid anything requiring drying time, sharp tools, or individual supervision.
Can these crafts be adapted for grandmothers or other mother figures? Absolutely. Swap "Mom" for "Grandma," "Auntie," or any name that fits. Personalized projects like embroidered handkerchiefs, memory jars, and coupon books are especially easy to customize for any recipient.
What if the finished craft does not look perfect? That is precisely the point. Handmade gifts carry value because of their imperfections — the slightly uneven stitching, the paint that bled outside the lines, the crooked letters. These marks prove a real person sat down and made something with care. Perfection is what stores sell. Love is what handmade delivers.
The best Mother's Day gift is never about the price tag or the polish. It is about the hour spent at the kitchen table with paint on your fingers, the quiet concentration of threading beads, the laughter when the salt dough cracks in an unexpected place. Pick one project from this list, gather your materials, and give Mom something no store can stock — proof that someone took the time.
Pinterest cover for 25 Mother's Day Craft Projects For All Ages
About the author
OBCD
CGI visualization and interior design content. We create detailed 3D renders and curate practical design ideas for every room in your home.