27 Wall Decor Ideas That Turn Bare Walls Into Statement Pieces

For centuries, walls have been more than structural necessities — they are canvases that reveal taste, memory, and personality. Yet most homes treat them as afterthoughts, leaving vast blank expanses that drain energy from otherwise thoughtful rooms. The gap between an empty wall and a finished one is rarely about money. It comes down to knowing what works, where to place it, and how different materials interact with light and furniture. These 27 ideas cover every approach from oversized canvas art to living moss panels, giving you practical starting points whether you rent a studio apartment or own a sprawling farmhouse.
Below you will find each idea broken into clear sections with tips you can act on this weekend.
Table of Contents
- Oversized Abstract Canvas
- Salon-Style Gallery Wall
- Woven Textile Hanging
- Floating Shelf Vignette
- Architectural Mirror Cluster
- Plaster Art Panel
- Vintage Plate Wall Display
- Peel-and-Stick Wallpaper Accent
- Wooden Slat Feature Wall
- Botanical Print Grid
- Macrame Statement Piece
- Industrial Metal Wall Sculpture
- Minimalist Line Art Trio
- Photo Ledge Display
- Arched Niche Cutout
- Living Moss Wall Panel
- Wainscoting with Contrast Paint
- Tapestry as Headboard Alternative
- Mixed-Media Collage Wall
- Ceramic Tile Art Installation
- Pegboard Organization Wall
- Oversized Clock as Focal Point
- Dried Floral Wall Arrangement
- Limewash Textured Accent Wall
- Neon Sign Accent
- Map or Blueprint Display
- Shadow Box Collection Wall
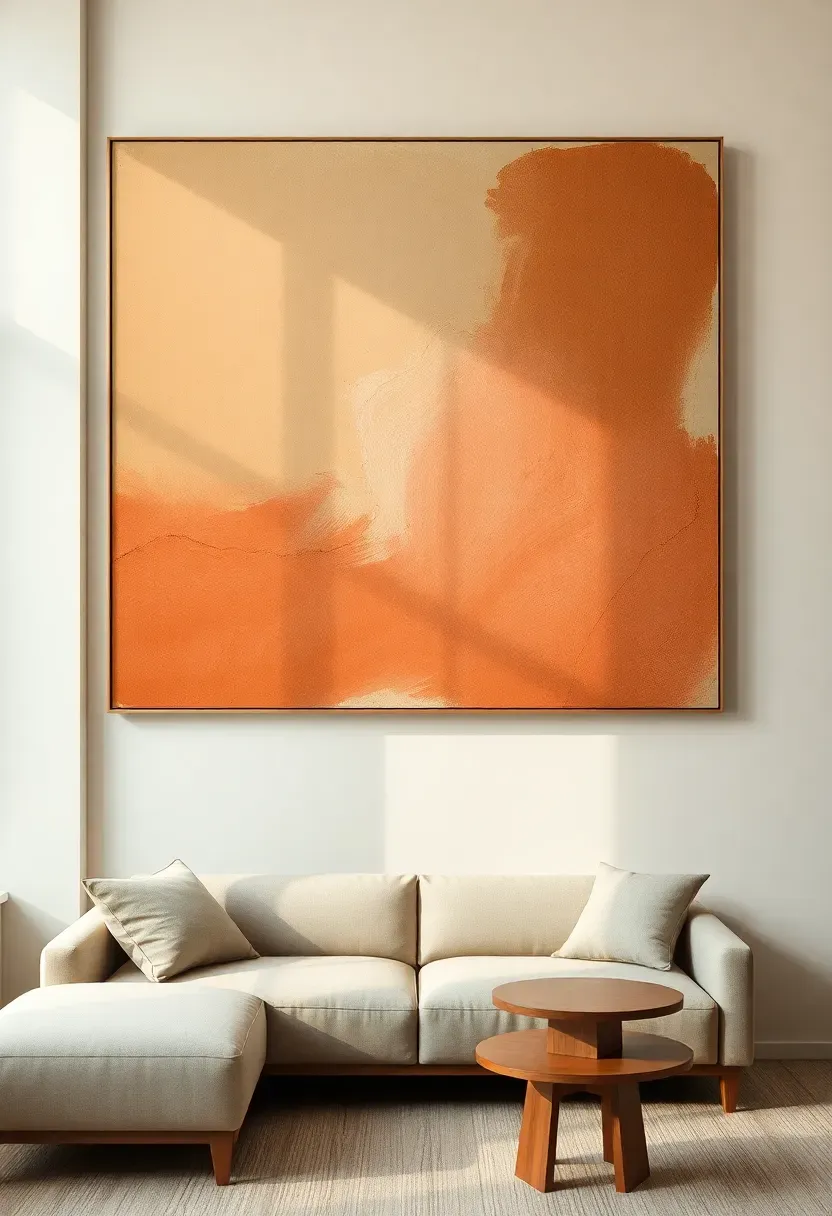
1. Oversized Abstract Canvas
One large piece of art can accomplish what a dozen smaller ones struggle to do: give a room an unmistakable anchor. The key is scale. A canvas that occupies at least two-thirds of the wall width above your sofa or console creates a gravitational center that pulls the entire room together.
Choosing the Right Piece
- Match the dominant color to your existing upholstery or rug palette
- Lean toward muted tones if the room already has strong textures
- Canvas depth of 1.5 inches or more eliminates the need for framing
Hanging Tips
- Center the canvas at eye level (57 to 60 inches from floor to center)
- For above-sofa placement, leave 6 to 8 inches between the furniture top and canvas bottom
- Use two hooks instead of one for anything wider than 24 inches
2. Salon-Style Gallery Wall
Why It Works So Well
Salon-style hanging — frames packed tightly in an intentional jumble — traces back to 18th-century Parisian salons where paintings covered walls floor to ceiling. The look feels collected, personal, and impossible to replicate exactly, which is precisely why it reads as authentic rather than staged.
Modern Interpretation
Today's version mixes framed photographs, prints, small mirrors, and even three-dimensional objects like ceramic plates. The trick is maintaining one constant thread: consistent frame color, a shared color palette across the art, or a uniform mat width. Without that thread, the arrangement tips from curated into chaotic.
How to Build One
- Lay all pieces on the floor first and photograph the arrangement from above
- Start with the largest piece slightly off-center, then build outward
- Keep gaps between frames to 2 to 3 inches for visual cohesion
- Include one unexpected element: a small clock, a letter, a textile swatch

Recommended
Items for this idea
3. Woven Textile Hanging
Textiles absorb sound, add warmth, and introduce a handmade quality that prints and paintings cannot match. A single large weaving above a bed or in an entryway softens hard surfaces and brings organic texture into spaces dominated by drywall and wood.
What to Look For
- Hand-loomed pieces with visible knot variations — the irregularity is the charm
- Natural fibers like wool, cotton, or jute for longevity
- Dimensions that span at least half the wall width for visual weight
Practical Tips
- Mount using a wooden dowel threaded through the top channel and secured with two cup hooks
- Keep the bottom hem at least 12 inches above any furniture to prevent snagging
- Vacuum gently every few months with an upholstery attachment to prevent dust buildup
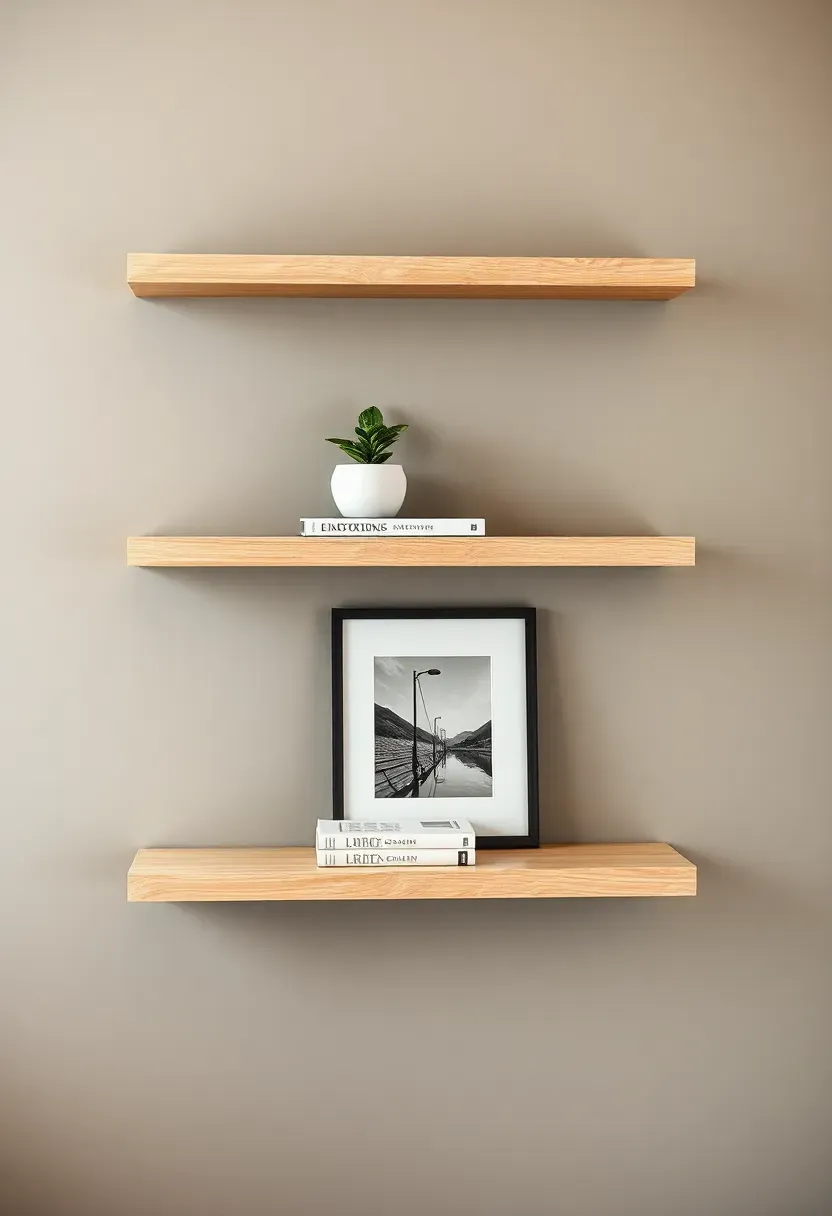
4. Floating Shelf Vignette
The Core Issue
Hanging art commits you to a fixed arrangement. If your taste shifts, you are left with holes in the wall and a pile of unused frames.
The Solution
Floating shelves let you rotate decor endlessly without lifting a hammer again. Install two or three staggered shelves at different heights and curate small vignettes on each — a potted plant beside a framed postcard, a ceramic vase next to a stack of hardcovers. The shelves become frames for ever-changing displays that grow with your style.
Pros and Cons
Pros: Maximum flexibility for renters and indecisive decorators; adds storage and display in one move; easy to restyle seasonally
Cons: Requires finding studs or using heavy-duty anchors; shelves collect dust faster than flat wall art; overloading looks cluttered quickly
Recommended
Items for this idea
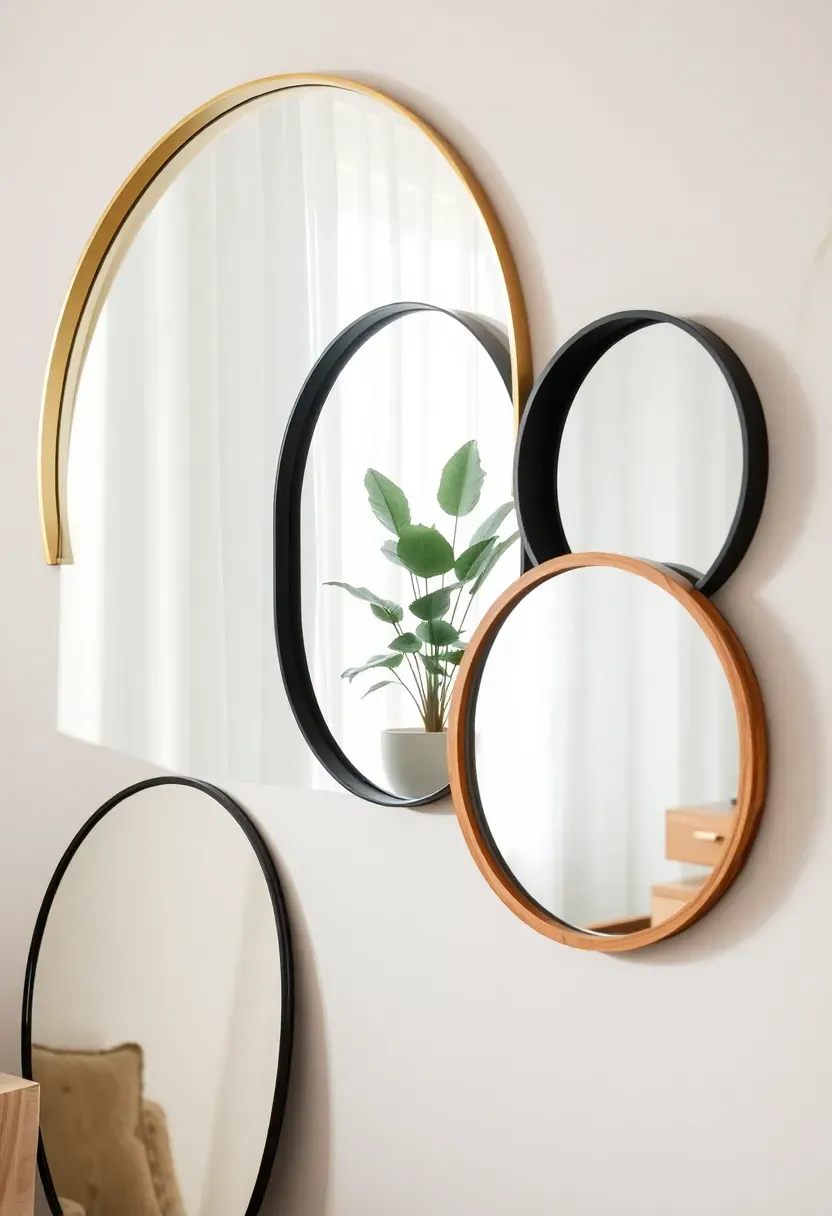
5. Architectural Mirror Cluster
Mirrors do double duty: they decorate the wall and amplify the room's light and perceived depth. Grouping three to five mirrors of varying shapes — arched, round, and rectangular — creates an architectural moment that feels collected over time rather than bought in one trip.
Styling Tips
- Position the cluster opposite a window to maximize reflected natural light
- Mix frame materials: one brass, one matte black, one natural wood
- Overlap mirrors slightly for a layered look or space them 1 to 2 inches apart for cleaner geometry
Where It Works Best
Narrow hallways, small dining rooms, and any north-facing room that needs a brightness boost. Avoid placing mirror clusters directly opposite a cluttered area unless you want to double the visual noise.
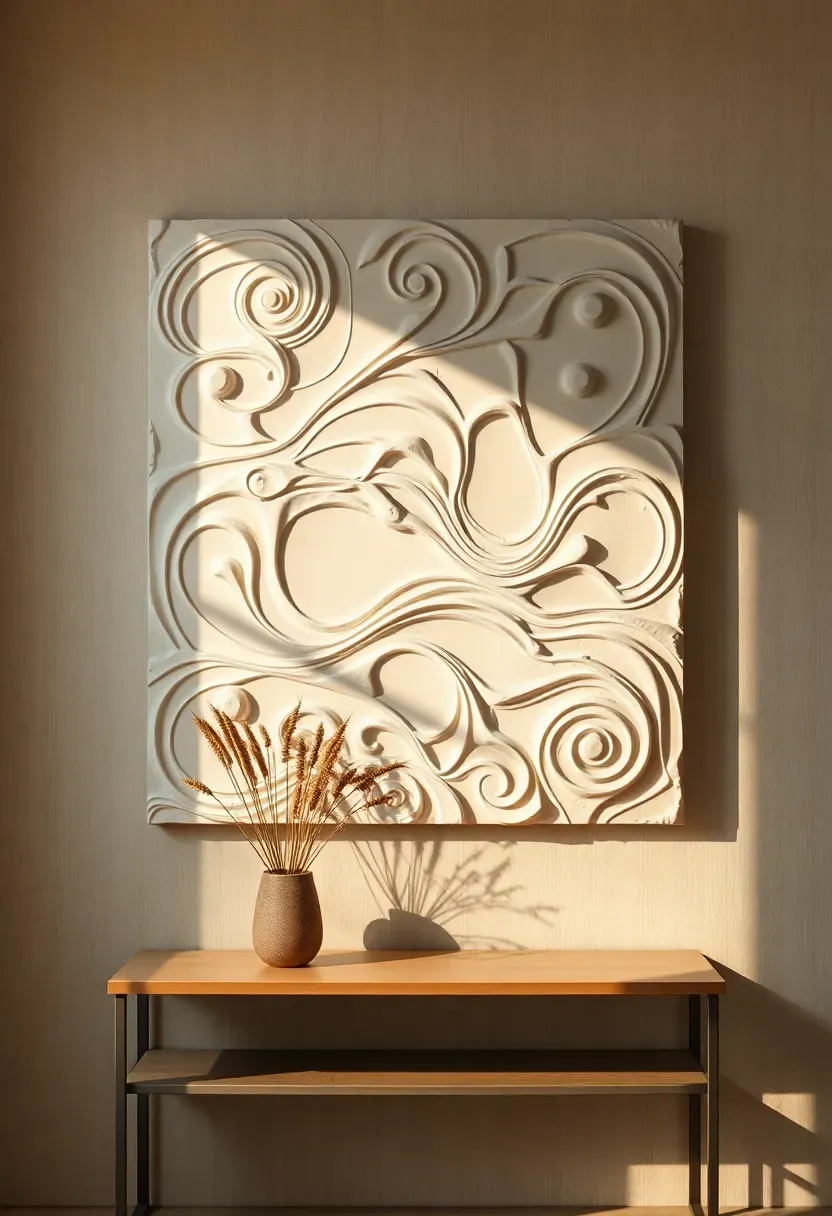
6. Plaster Art Panel
Plaster art has surged in popularity because it occupies a space between painting and sculpture. The raised texture catches light at different angles throughout the day, giving a single piece more visual complexity than flat prints.
How to Make Your Own
- Start with a stretched canvas or MDF board as your base
- Apply joint compound or modeling paste in thick, sweeping strokes using a palette knife
- Let each layer dry for 24 hours before adding the next
- Seal with matte medium and leave white, or tint with diluted acrylic paint
What to Watch Out For
- Joint compound can crack if applied thicker than half an inch in one layer
- Heavier pieces need French cleat mounting rather than standard hooks
- Matte sealant preserves the chalky texture; gloss sealant changes the character entirely
Recommended
Items for this idea
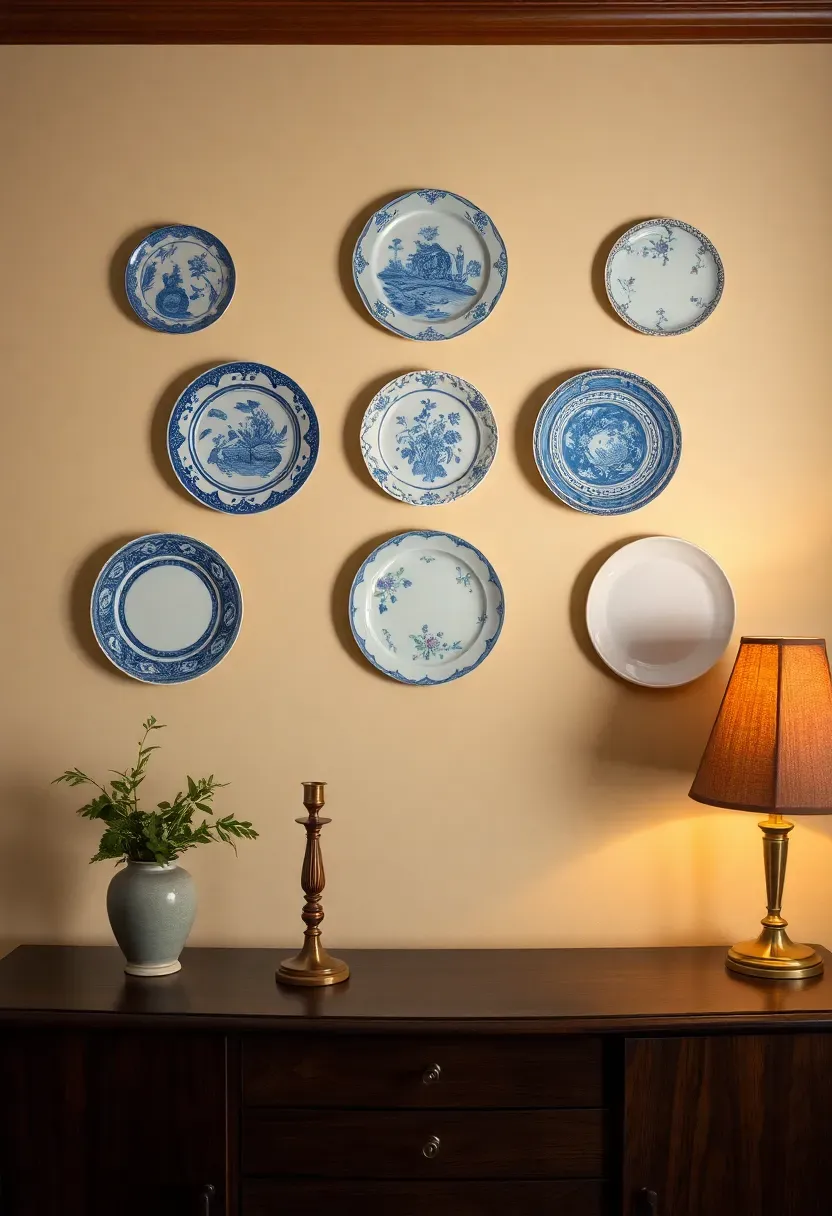
7. Vintage Plate Wall Display
There is something unexpectedly sophisticated about plates on a wall. When selected with intention — matching a color family or sticking to a single era — they read as curated art rather than grandmother's kitchen overflow.
Tips for Sourcing
- Thrift stores, estate sales, and flea markets yield the best finds at two to five dollars per plate
- Look for plates in the 8 to 12 inch diameter range for wall display
- Blue and white transferware, mid-century florals, and hand-painted pottery photograph beautifully
Mounting Options
- Disc-style adhesive plate hangers leave no visible hardware from the front
- Spring-loaded wire hangers work for heavier stoneware
- Plate rails allow display without any wall damage — ideal for renters
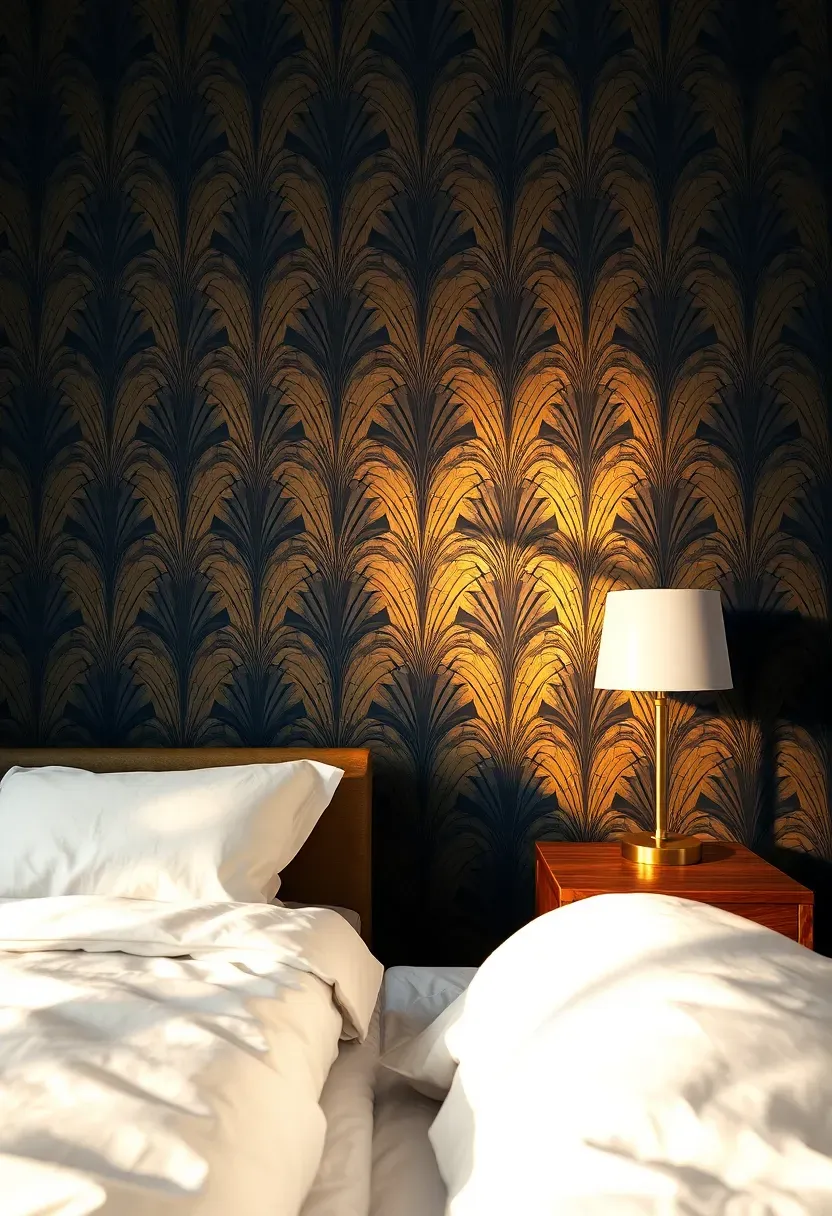
8. Peel-and-Stick Wallpaper Accent
Comparing: Traditional vs Peel-and-Stick Wallpaper
Wallpaper transforms a room faster than almost any other wall treatment, but commitment anxiety keeps most people from trying it. Peel-and-stick has changed the equation entirely.
Traditional Wallpaper
Requires paste, precise alignment, and professional removal. Lasts decades but leaves residue and sometimes damages drywall underneath. Best for homeowners who have settled on a long-term design direction.
Peel-and-Stick
Applies in under an hour for a single accent wall. Removes cleanly without tools or chemicals. Costs less upfront but may not adhere well in humid bathrooms or unfinished surfaces. Perfect for renters, seasonal refreshes, or testing a bold pattern before committing.
What to Choose
Choose traditional if: you own the home, want longevity, and have chosen a timeless pattern
Choose peel-and-stick if: you rent, change your mind often, or want to cover only one wall
Recommended
Items for this idea
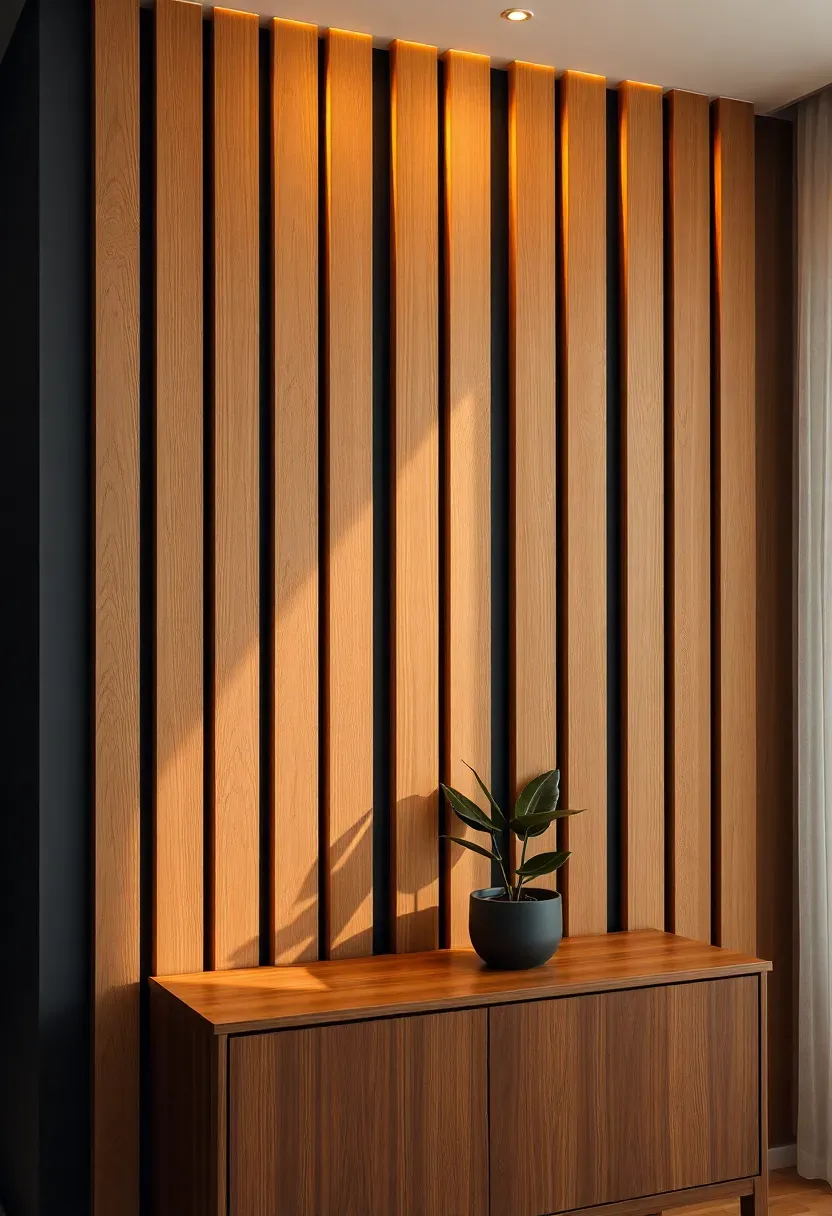
9. Wooden Slat Feature Wall
Vertical wooden slats add rhythm, warmth, and architectural depth to any flat wall. The repeated lines create visual movement that plain paint simply cannot achieve, and the natural grain of each slat introduces subtle variation that keeps the surface interesting at close range.
Step 1: Choose Your Wood
Select between solid oak, pine, or MDF slats depending on budget. Pine accepts stain well and costs less; MDF comes pre-finished but cannot be sanded down later.
Step 2: Plan Spacing
A 1-inch gap between 2-inch slats is the most popular ratio. Wider gaps feel airier; tighter gaps look more dramatic.
Step 3: Install
Use construction adhesive on a painted backing panel for the cleanest result. Nail guns speed up the process but are not required — liquid nails and clamps work for patient builders.
What to Watch Out For
- Paint the backing wall a dark tone (charcoal or black) before mounting slats — the color visible in the gaps adds depth
- Slat walls amplify sound reflection; pair with soft furnishings in the room to balance acoustics
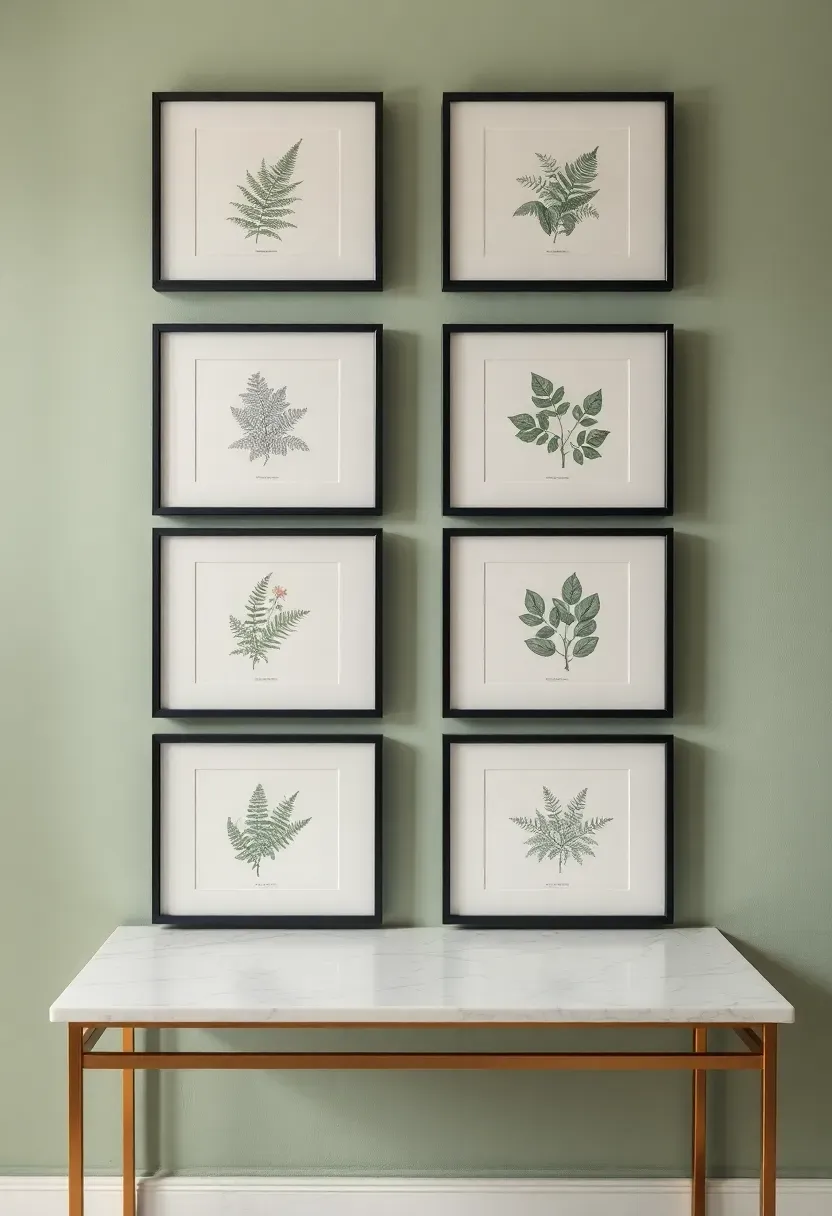
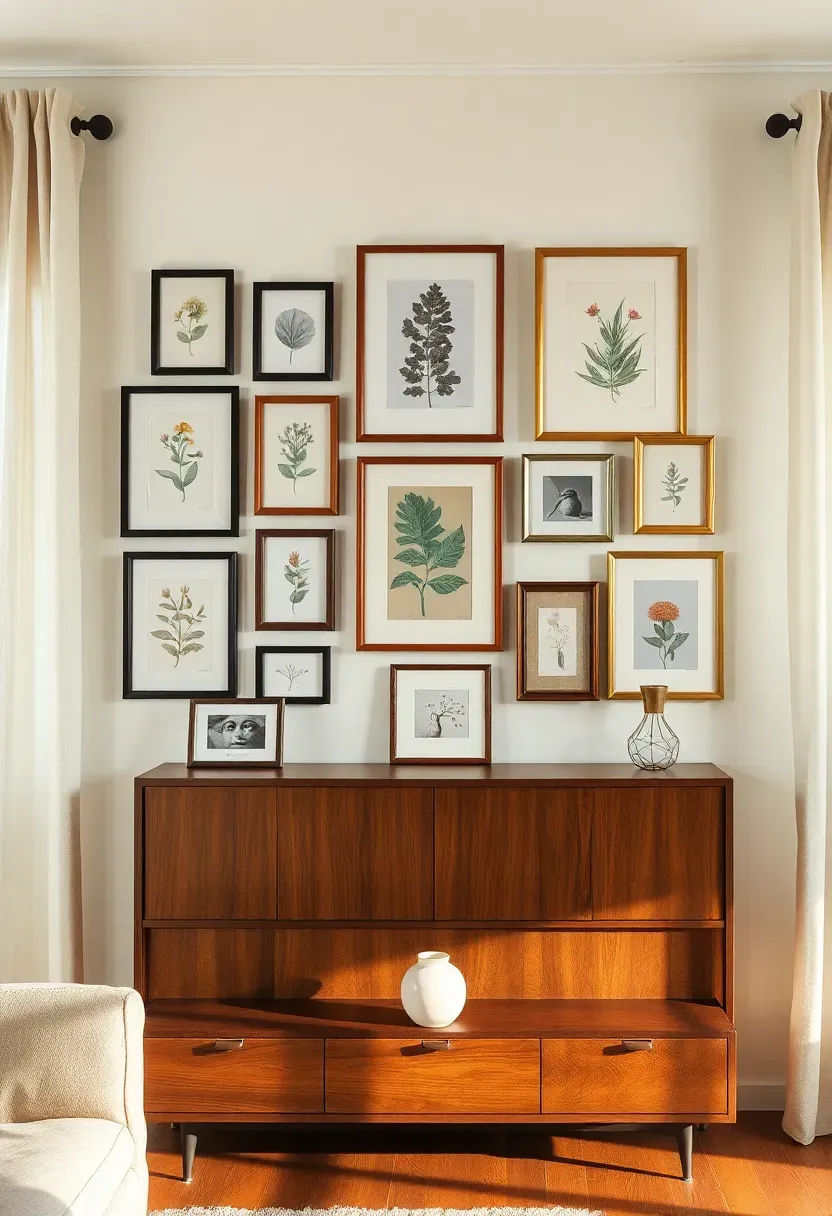
10. Botanical Print Grid
A symmetrical grid of framed botanical illustrations brings order and natural beauty to a wall simultaneously. Unlike a salon-style arrangement, the grid format feels calm, structured, and particularly effective in dining rooms, hallways, and bathrooms.
Making It Work
- Use identical frames in a single color for the strongest grid effect
- Four, six, or nine prints arranged in a rectangle or square work best
- Print size between 8x10 and 11x14 inches balances detail with visual impact
- Leave exactly 2 inches between each frame for consistent geometry
Where to Find Prints
Vintage botanical illustrations are largely in the public domain. Libraries like the Biodiversity Heritage Library offer free high-resolution scans that you can print at any local shop for a few dollars each.
Recommended
Items for this idea
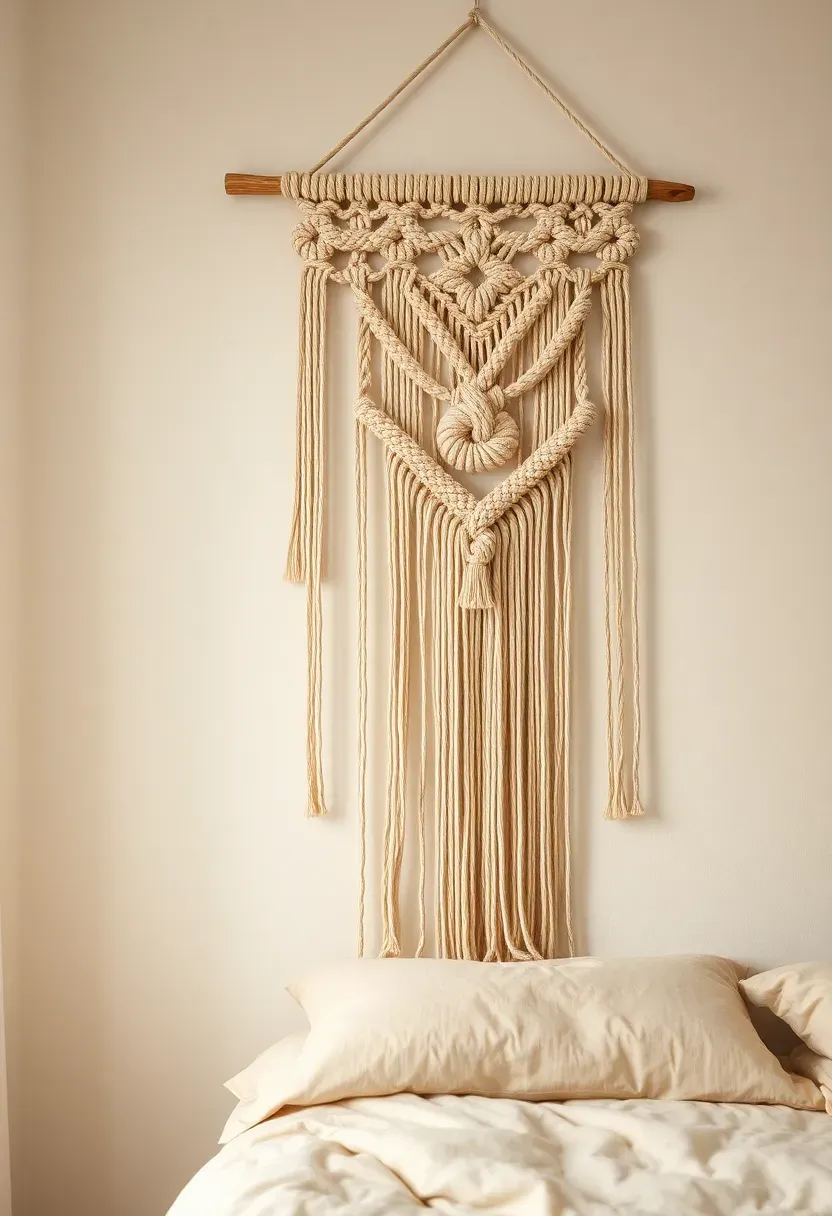
11. Macrame Statement Piece
Macrame occupies a unique position in wall decor — it is both art and textile, flat and dimensional, modern and deeply traditional. A large knotted piece in natural cotton rope brings instant bohemian warmth to bedrooms, nurseries, and living rooms.
Selecting the Right Piece
- Width should span at least one-third of the wall for statement impact
- Single-tone cotton reads more modern; mixed fibers and beads lean boho
- Dense knot patterns photograph better and hold shape longer than loose, stringy designs
Care and Longevity
- Shake gently outdoors every few months to release trapped dust
- Avoid direct sunlight exposure, which yellows natural cotton over time
- Spot clean with a damp cloth and mild soap; never machine wash
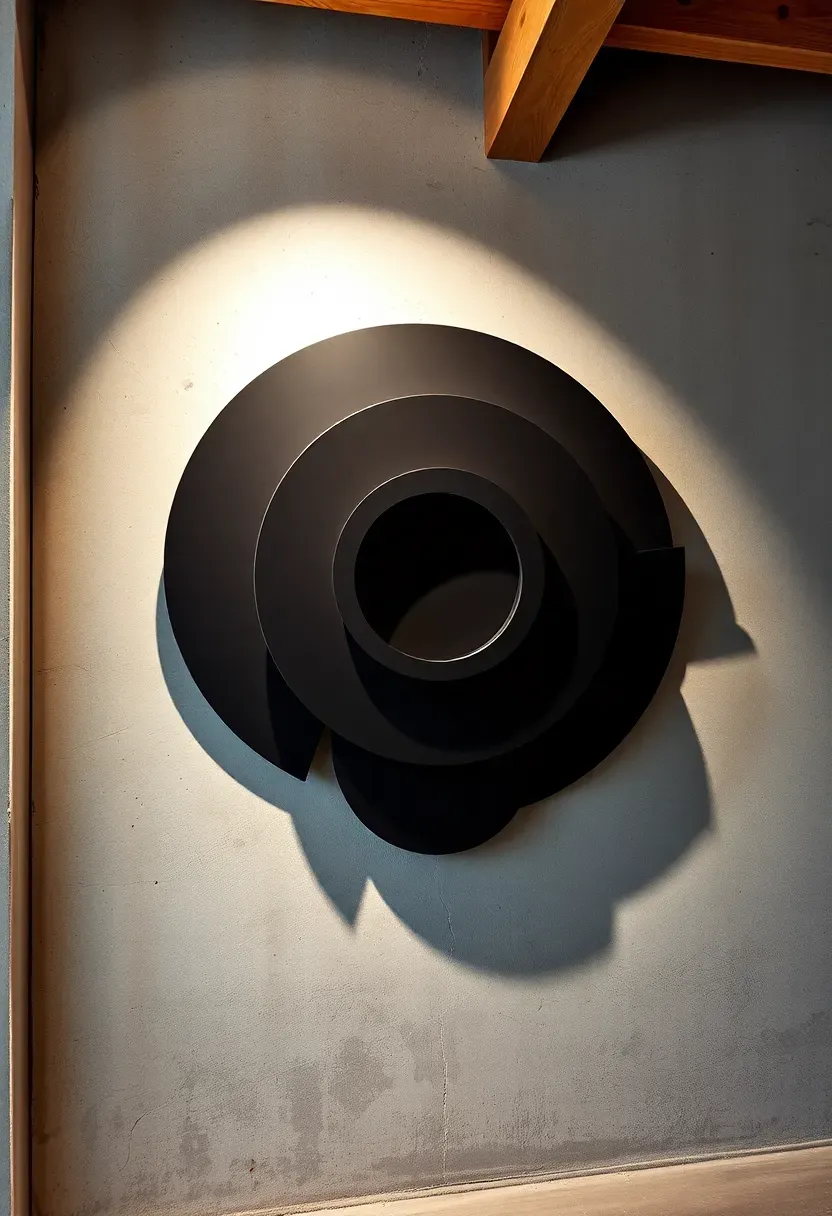
12. Industrial Metal Wall Sculpture
Metal wall art introduces an edge that softer materials cannot replicate. The weight, sheen, and shadow-casting properties of steel, iron, or brass create a presence that commands attention in modern lofts, industrial spaces, and minimalist rooms.
What Makes It Work
Look for pieces with depth — overlapping geometric forms, cut-out silhouettes, or welded abstract shapes. Flat metal prints exist but miss the point. The best metal sculptures interact with light, casting shadows that shift as the sun moves and overhead lighting changes intensity.
Practical Considerations
- Metal art is heavy; always mount into studs or use toggle bolts rated for the piece's weight
- Matte black finishes suit industrial and Scandinavian interiors
- Brass and gold-toned metal pairs well with mid-century and art deco rooms
- Avoid humid bathrooms — even powder-coated metal can develop surface corrosion over years
Recommended
Items for this idea
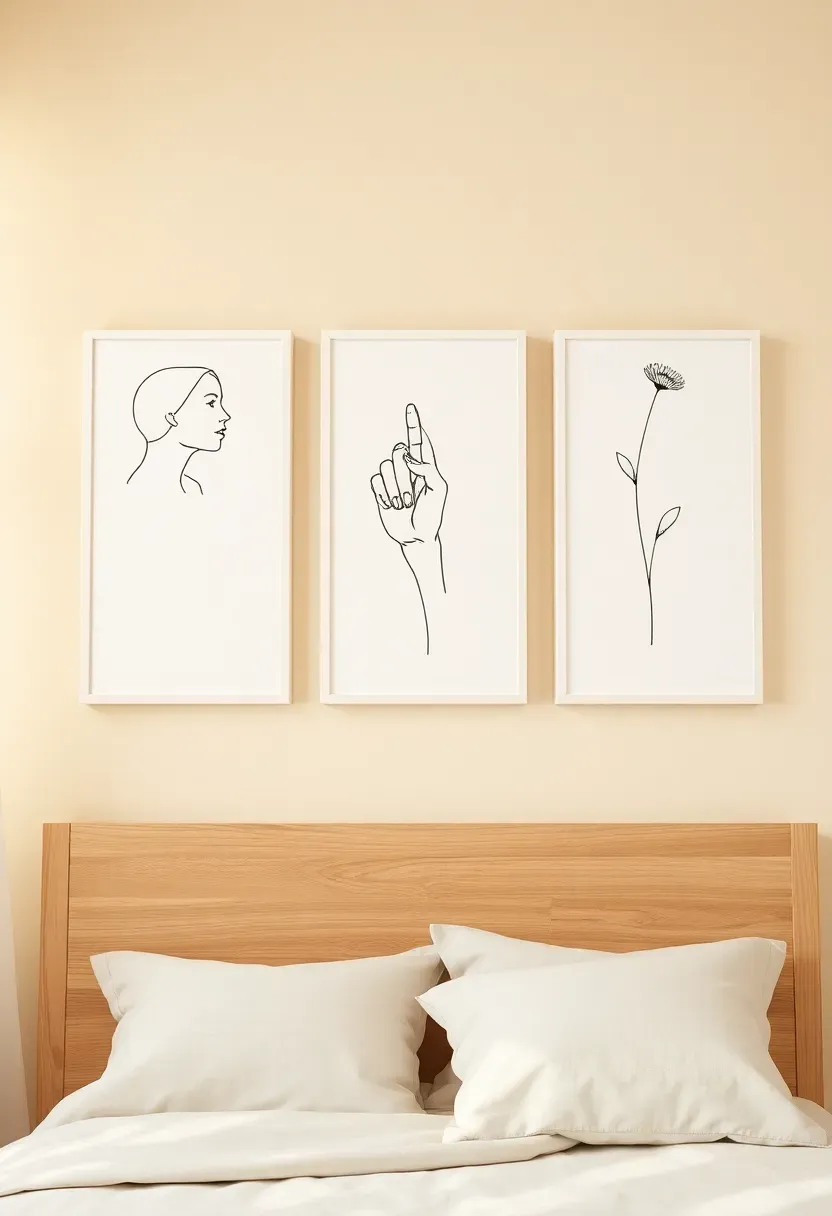
13. Minimalist Line Art Trio
Why People Love It
Line art strips a subject down to its essence. A face rendered in a single continuous stroke, a body suggested by three curves, a landscape captured in five lines. The simplicity feels modern, approachable, and endlessly versatile because it carries just enough detail to suggest without dictating.
How to Display It
Hang three related prints in a horizontal row at equal height and spacing. Use slim frames — white, natural wood, or thin black — that do not compete with the delicate linework. Mat the prints generously; the white space around each drawing amplifies its minimalist quality.
Best Rooms For This
Bedrooms, home offices, and powder rooms. Line art thrives in quiet spaces where visual noise is low and the viewer has a moment to actually look.
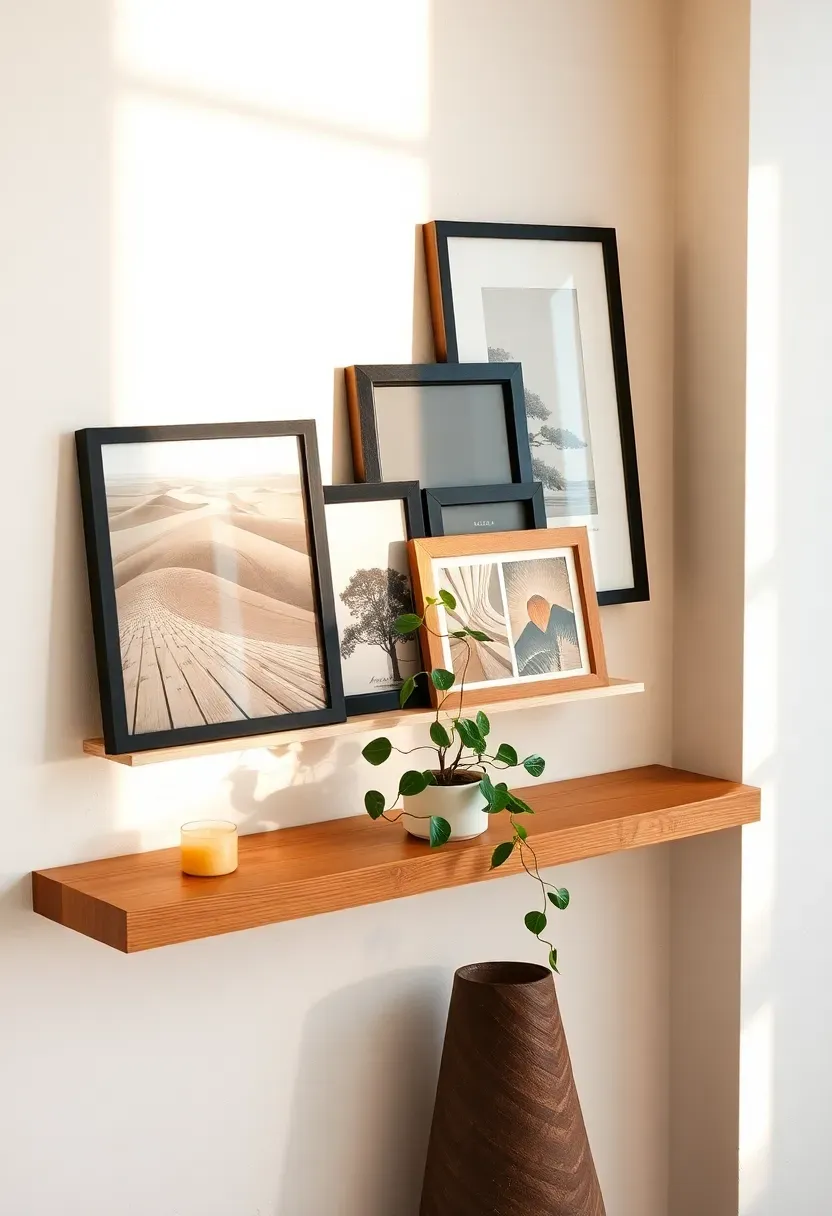
14. Photo Ledge Display
A photo ledge is the most forgiving display system you can install. Lean frames against the wall, overlap them, swap them out with the seasons — no measurements, no new holes, no commitment.
Setting It Up
Install a shallow ledge (3 to 4 inches deep) using two L-brackets or a purpose-built picture rail. Place it at seated eye level in living rooms or standing eye level in hallways. Layer frames from large in the back to small in front. Tuck in a small plant, a postcard, or a candle for dimension.
Why It Beats Traditional Hanging
- Rearranging takes seconds, not an afternoon with a level and hammer
- You can test new art before committing to permanent placement
- The layered look creates depth that single-plane hanging lacks
Recommended
Items for this idea
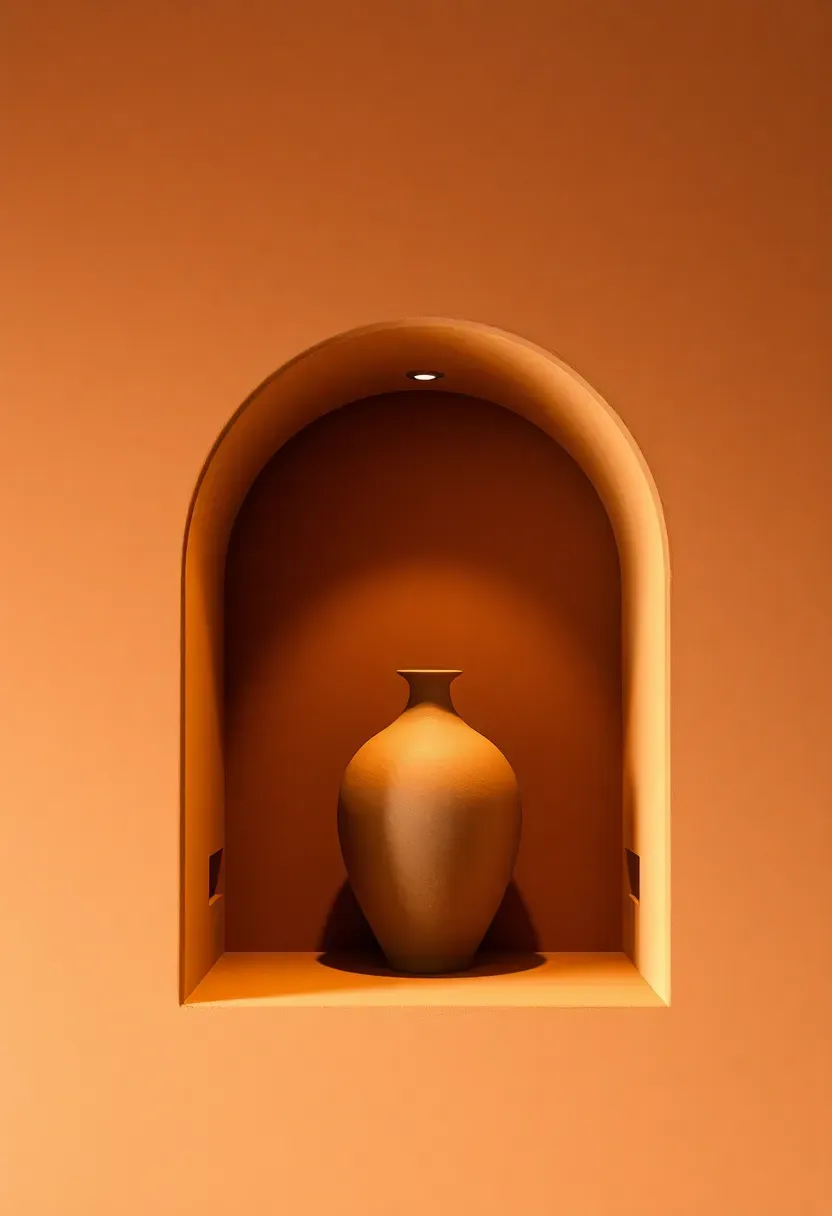
15. Arched Niche Cutout
Recessed wall niches — especially arched ones — borrow from Mediterranean and Middle Eastern architecture to create built-in display alcoves that feel permanent and intentional. They turn ordinary drywall into something that looks custom-built.
How to Create One
For new construction or major renovation, a contractor can frame and drywall a niche in a few hours. For existing walls, consider a faux niche: mount a pre-made arched frame against the wall with the interior painted a contrasting color. The shadow cast by the frame's depth creates the illusion of a true cutout at a fraction of the cost.
Styling the Niche
- One sculptural object works better than a crowd of small pieces
- Add a small puck light or LED strip at the top for museum-quality illumination
- Paint the niche interior two to three shades darker than the surrounding wall
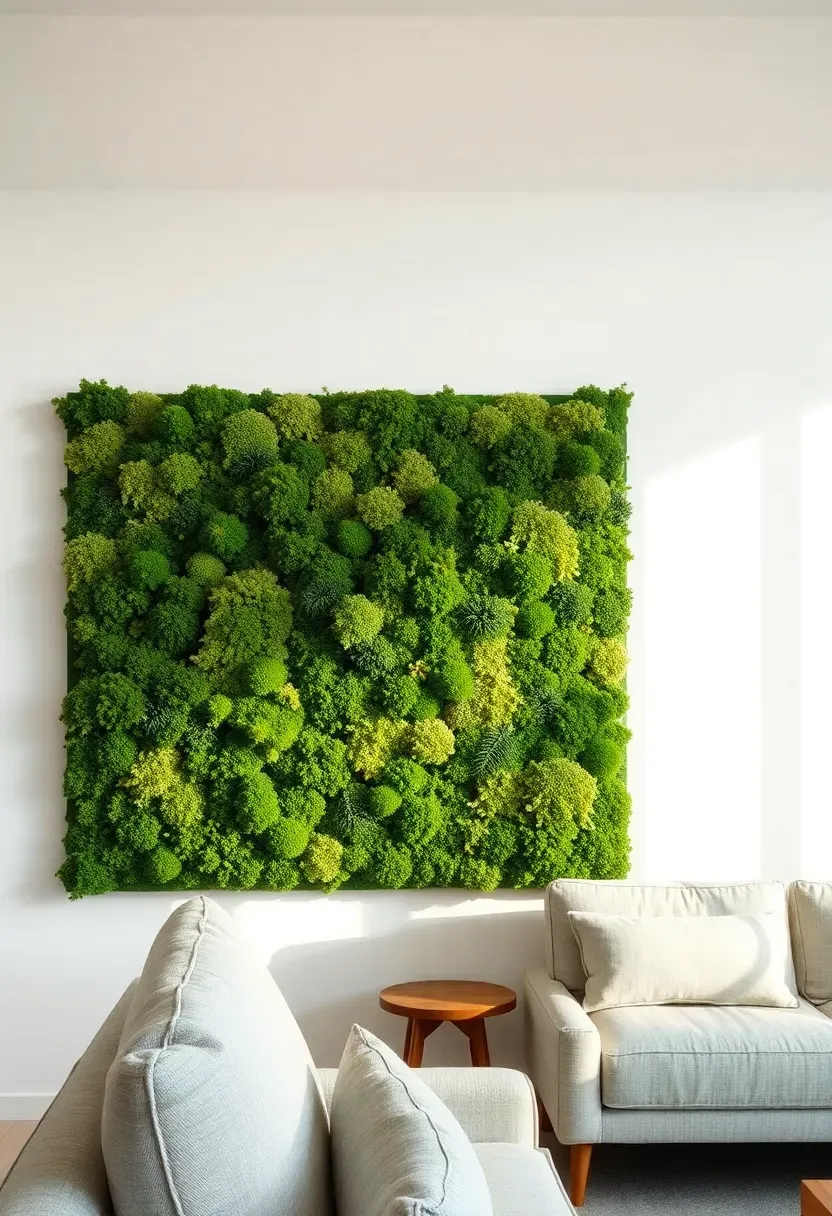
16. Living Moss Wall Panel
Preserved moss panels bring the outdoors inside without any of the maintenance demands of living plants. The deep green texture reads as alive and organic, adds acoustic dampening, and works as a statement in spaces where potted plants are impractical.
Step 1: Choose Your Moss Type
Reindeer moss (fluffy, mounded) and sheet moss (flat, carpet-like) are the two most common. Reindeer moss adds more dimensional texture; sheet moss provides a smoother, more uniform look.
Step 2: Select Panel Size
Pre-made panels in 12x12-inch or 24x24-inch squares tile together easily. Custom shapes and full-wall installations require a specialist.
Step 3: Install
Preserved moss panels are lightweight and attach with construction adhesive or Velcro strips. No watering, no sunlight, no soil — just a periodic light misting to maintain color vibrancy in dry climates.
What to Watch Out For
- Keep panels away from direct sunlight, which fades preserved moss from green to brown
- Avoid high-humidity areas; excess moisture can reactivate mold in the preservation medium
Recommended
Items for this idea
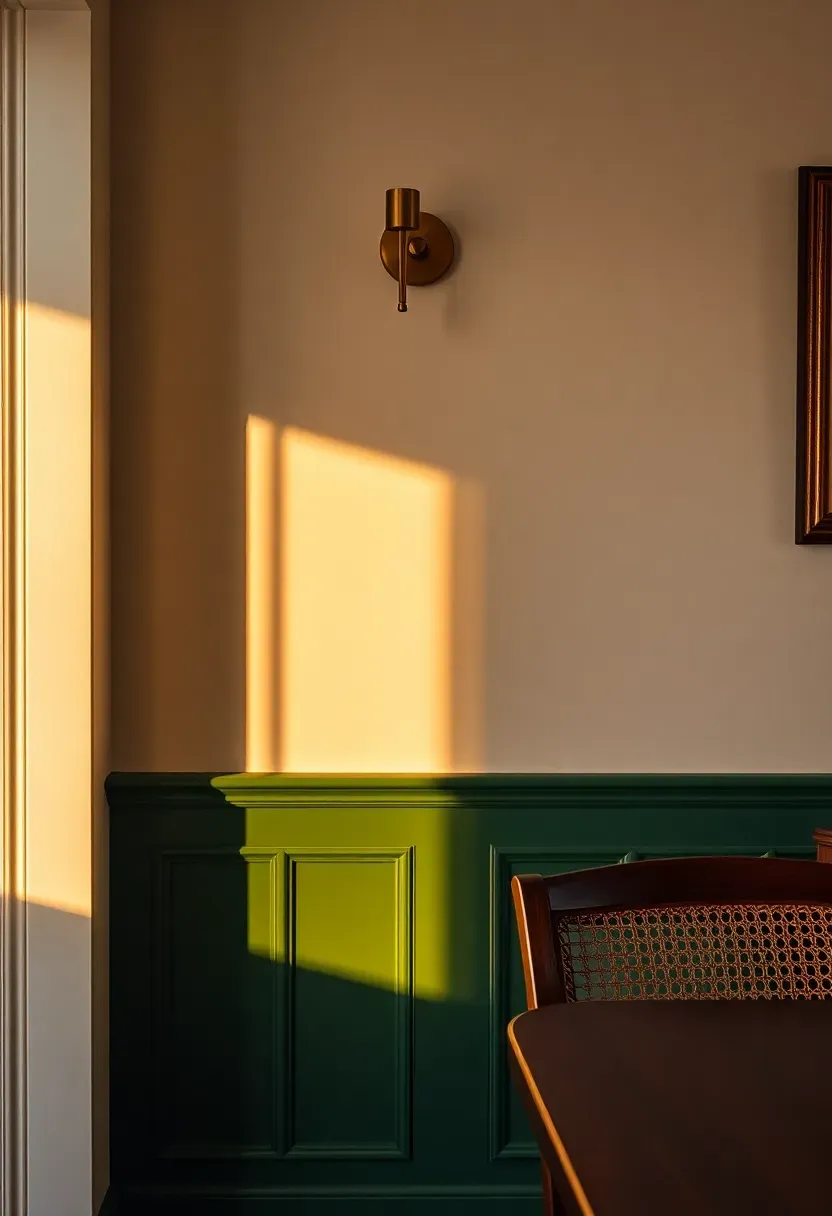
17. Wainscoting with Contrast Paint
Wainscoting divides a wall into two distinct zones: a paneled lower section and an open upper section. When the panel section takes a bold color — deep green, navy, rich plum — while the upper wall stays neutral, the contrast creates architectural drama that flat paint alone cannot achieve.
Choosing Your Style
- Board and batten: vertical strips with simple geometry, farmhouse to modern
- Raised panel: traditional molding profiles, best for formal dining rooms and entryways
- Shaker panel: flat recessed rectangles, clean and versatile for any room
Paint Pairing Ideas
- Forest green wainscoting with warm white walls
- Charcoal gray panels with pale blush above
- Navy wainscoting with cream and brass accents throughout the room
Installation Reality
Pre-made MDF panel kits have simplified what was once a carpenter-only project. Most kits attach with adhesive and finish nails, and a handy homeowner can cover a 10-foot wall in a weekend.
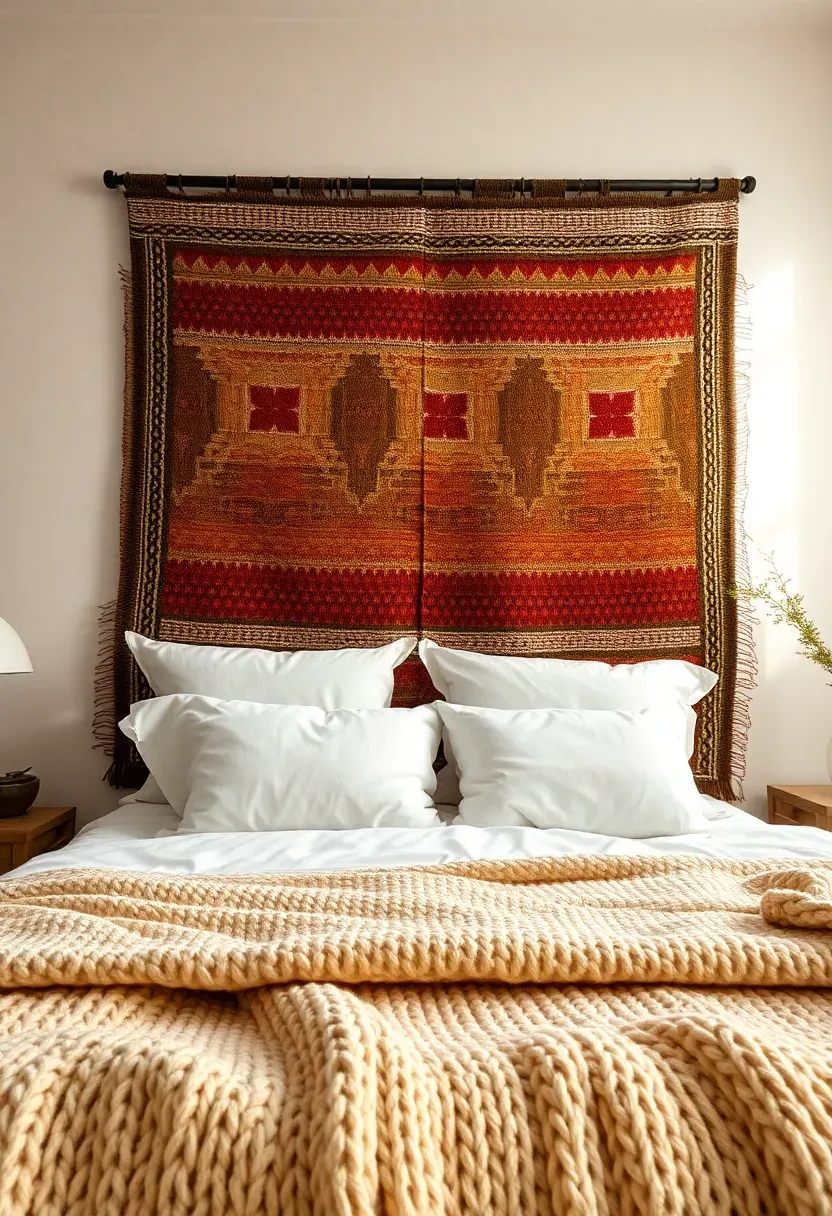
18. Tapestry as Headboard Alternative
A tapestry mounted behind the bed eliminates the need for a traditional headboard while adding color, pattern, and softness to the room's focal wall. It is one of the fastest ways to make a bedroom feel finished without drilling into the wall for a heavy headboard.
Why It Works
Tapestries cover large areas inexpensively, muffle sound in echo-prone bedrooms, and can travel with you from apartment to apartment without damage. Rolled and stored flat, they survive moves that would destroy a padded headboard.
How to Hang It
- Use a curtain rod mounted 6 to 10 inches above the mattress top
- Thread the tapestry's rod pocket or fold the top edge over the rod and secure with clips
- For a cleaner look, mount directly to the wall with hidden Velcro strips along the top edge
Practical Tips
- Choose tapestries at least as wide as the bed frame
- Machine-washable fabrics simplify upkeep in a bedroom where dust accumulates nightly
- Keep the bottom edge tucked behind pillows so the bed and tapestry blend into one composition
Recommended
Items for this idea
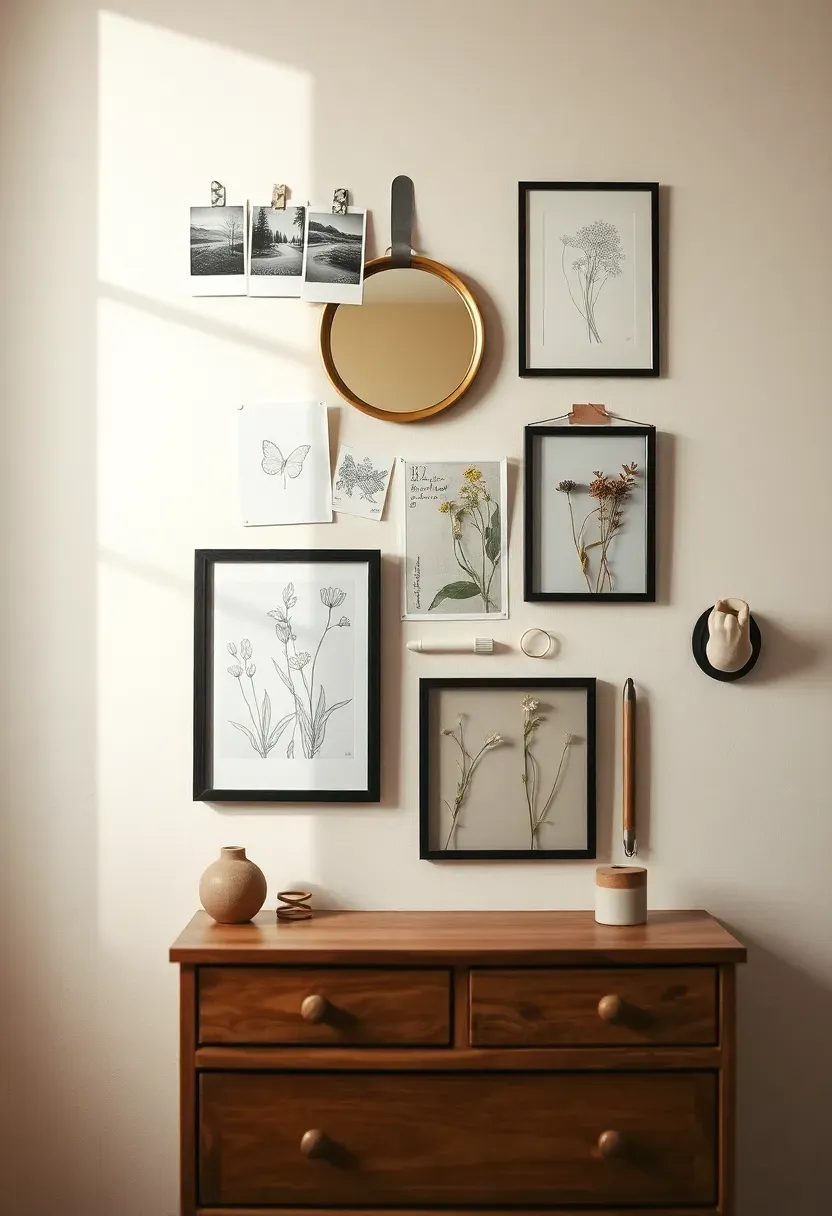
19. Mixed-Media Collage Wall
The Core Issue
Most wall arrangements stick to one medium — all framed prints, all photos, or all shelves. The result can feel safe but also flat and predictable.
The Solution
A mixed-media collage wall deliberately breaks that uniformity. Combine framed art with unframed sketches pinned directly to the wall, postcards held by washi tape, a small mirror, pressed flowers in acrylic frames, and a mounted ceramic hand or face. The mixing of mediums, sizes, and mounting methods creates visual richness that a single-type display struggles to achieve.
Pros and Cons
Pros: Deeply personal; no two are alike; easy to add new pieces over time; uses items you already own
Cons: Requires a strong color or theme thread to avoid looking random; washi tape and pins leave minor marks; harder to keep dust-free
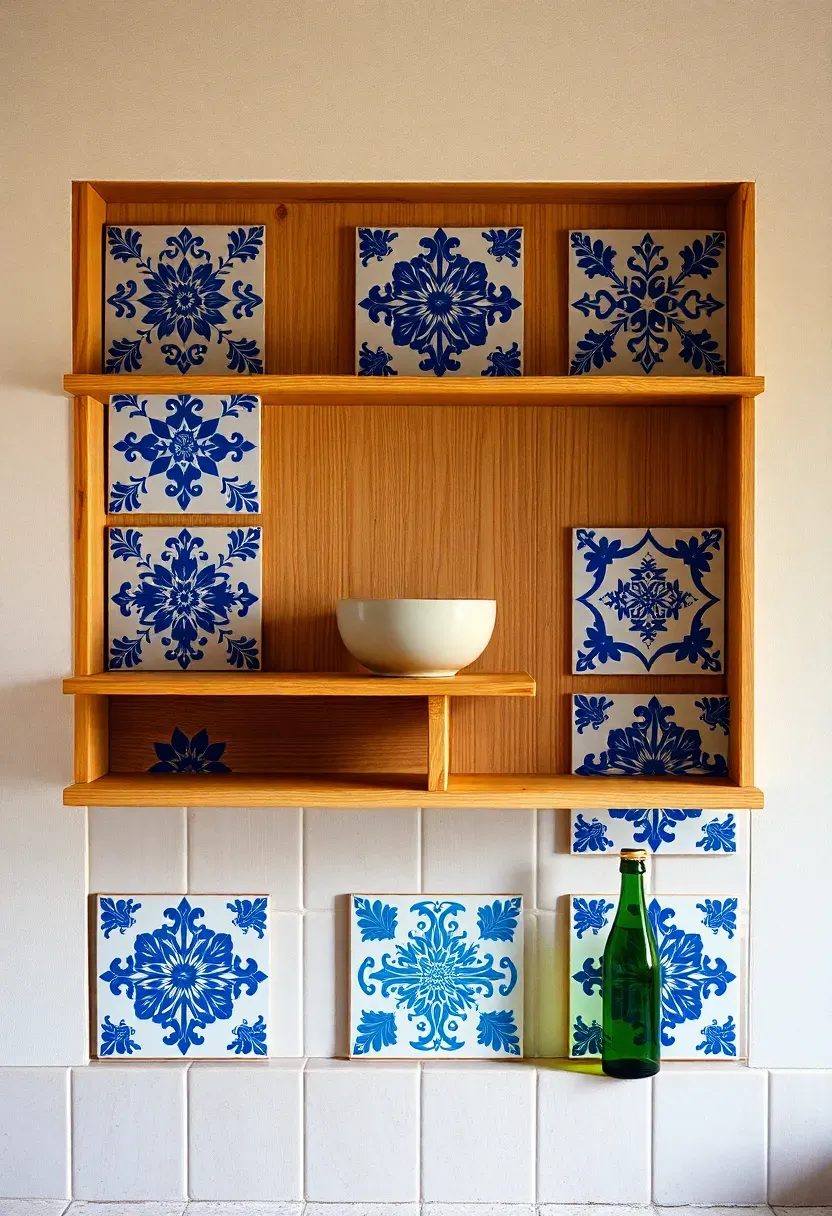
20. Ceramic Tile Art Installation
Hand-painted or patterned ceramic tiles mounted on the wall function as mosaic art without the grouting commitment of a full tile installation. A cluster of nine to twelve decorative tiles in a loose grid becomes a permanent art piece with texture and depth that canvas cannot match.
Where It Shines
- Kitchen walls above open shelves
- Bathroom feature walls that need moisture-resistant art
- Outdoor patios and covered porches
How to Install
Mount individual tiles on the wall using tile adhesive or heavy-duty double-sided tape for lighter tiles. Arrange in a tight grid or offset pattern. For a non-permanent option, mount tiles on a large backing board first and hang the board as a single piece.
Recommended
Items for this idea
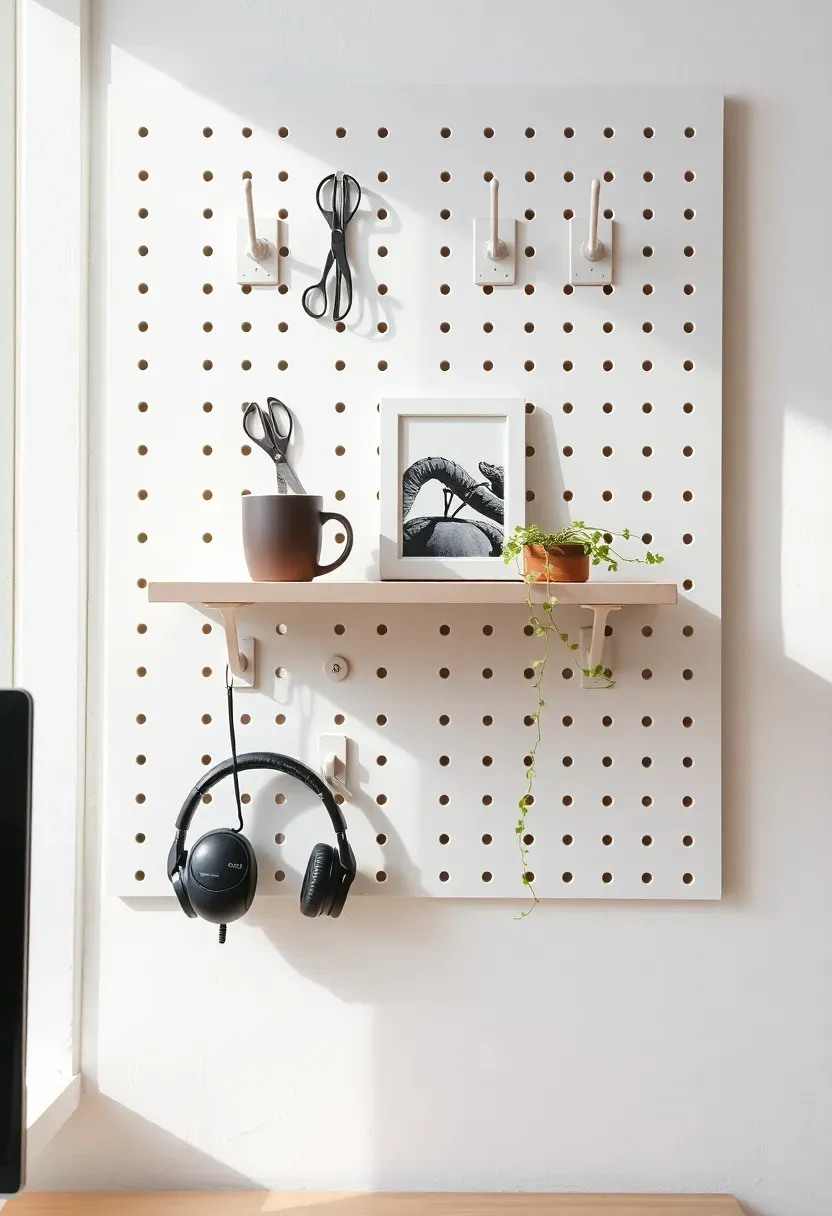
21. Pegboard Organization Wall
Pegboards bridge the gap between decoration and function more honestly than almost any other wall treatment. What started as workshop storage has been refined into a genuine design element for kitchens, offices, and entryways.
Making It Look Good
- Paint the pegboard the same color as the wall for a seamless, tonal look
- Use matching hardware: all brass hooks, all matte black, or all white
- Arrange items in a rough grid with breathing room — resist the urge to fill every hole
- Include decorative objects alongside functional ones: a small framed print, a trailing plant in a wall pocket
Best Applications
Home offices benefit most — hang scissors, tape, headphones, and a small shelf for coffee. Kitchens use pegboards for utensils, small herb pots, and towels. Entryways hold keys, sunglasses, and dog leashes.
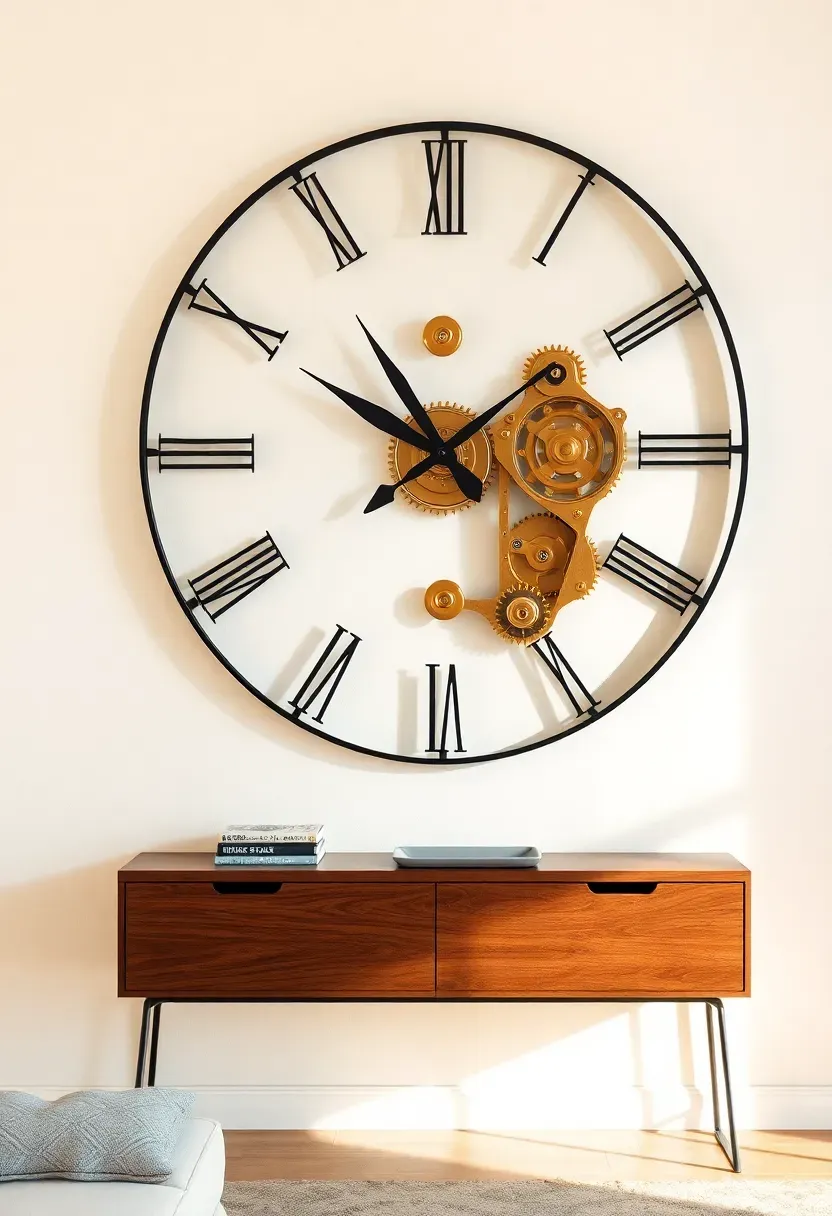
22. Oversized Clock as Focal Point
An oversized wall clock — 24 inches or larger — serves as functional art. It fills wall space, anchors a room, and gives visitors something to look at that also tells time. The best options have open frames or minimalist dials that feel more like sculpture than timepiece.
Style Matching
- Roman numeral dials for traditional and farmhouse rooms
- Bare metal skeleton clocks for industrial and modern lofts
- Wooden frames for Scandinavian and mid-century spaces
- Brass or gold-finished for glam and art deco interiors
Placement
Center above a console table, mantel, or sofa. The clock center should sit at approximately 57 inches from the floor. Avoid placing directly above a TV — the eye cannot serve two masters on the same wall.
Recommended
Items for this idea
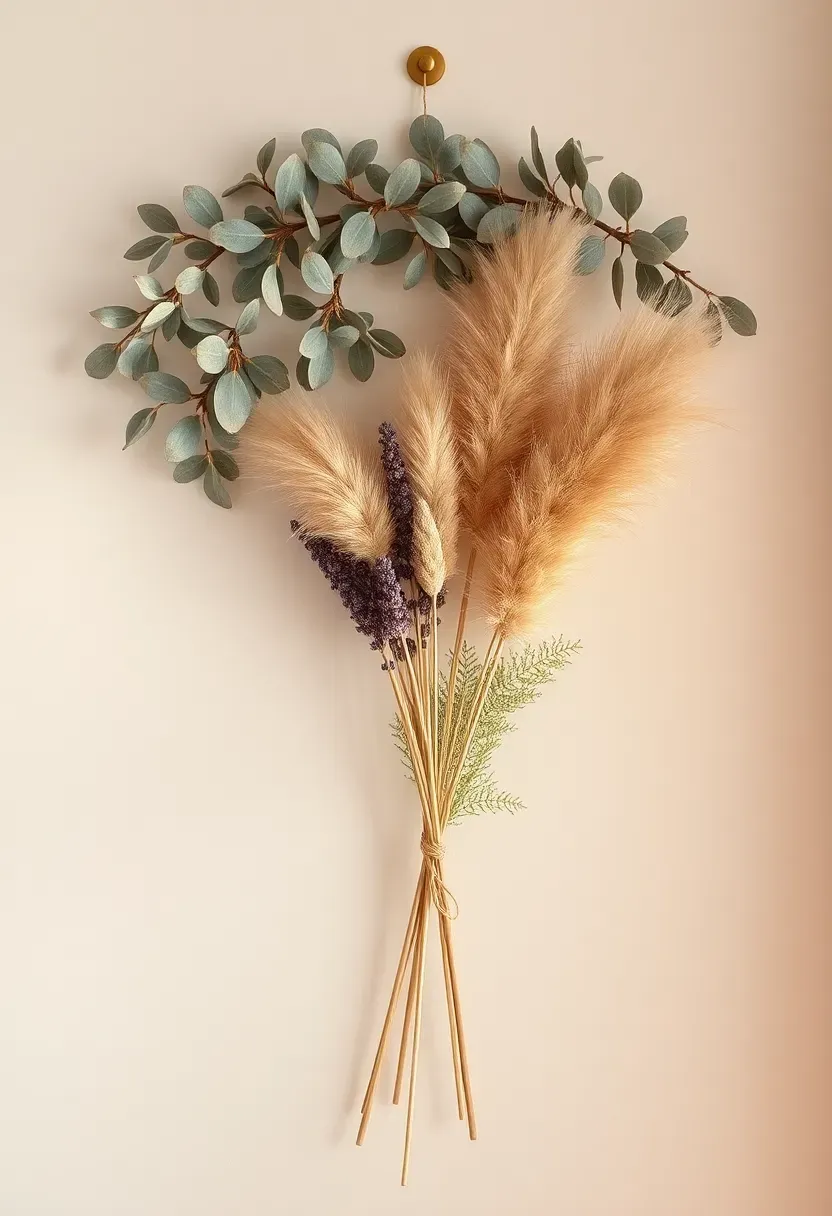
23. Dried Floral Wall Arrangement
Dried flowers have shed their dusty reputation. Modern arrangements featuring pampas grass, eucalyptus, and preserved roses offer the warmth of fresh florals without the weekly replacement. Mounted on the wall, they become lightweight, textured art.
Building Your Arrangement
- Start with a base of dried eucalyptus branches fanned into an arc shape
- Layer in pampas plumes for height and volume
- Add smaller elements: dried lavender, bunny tails, or preserved ferns
- Secure the bundle with floral wire and attach to the wall with a single nail or adhesive hook
Longevity Tips
- Spray with a light coat of hairspray to prevent shedding
- Keep away from vents and high-traffic areas where brushing causes breakage
- Replace individual stems as they fade rather than discarding the entire arrangement
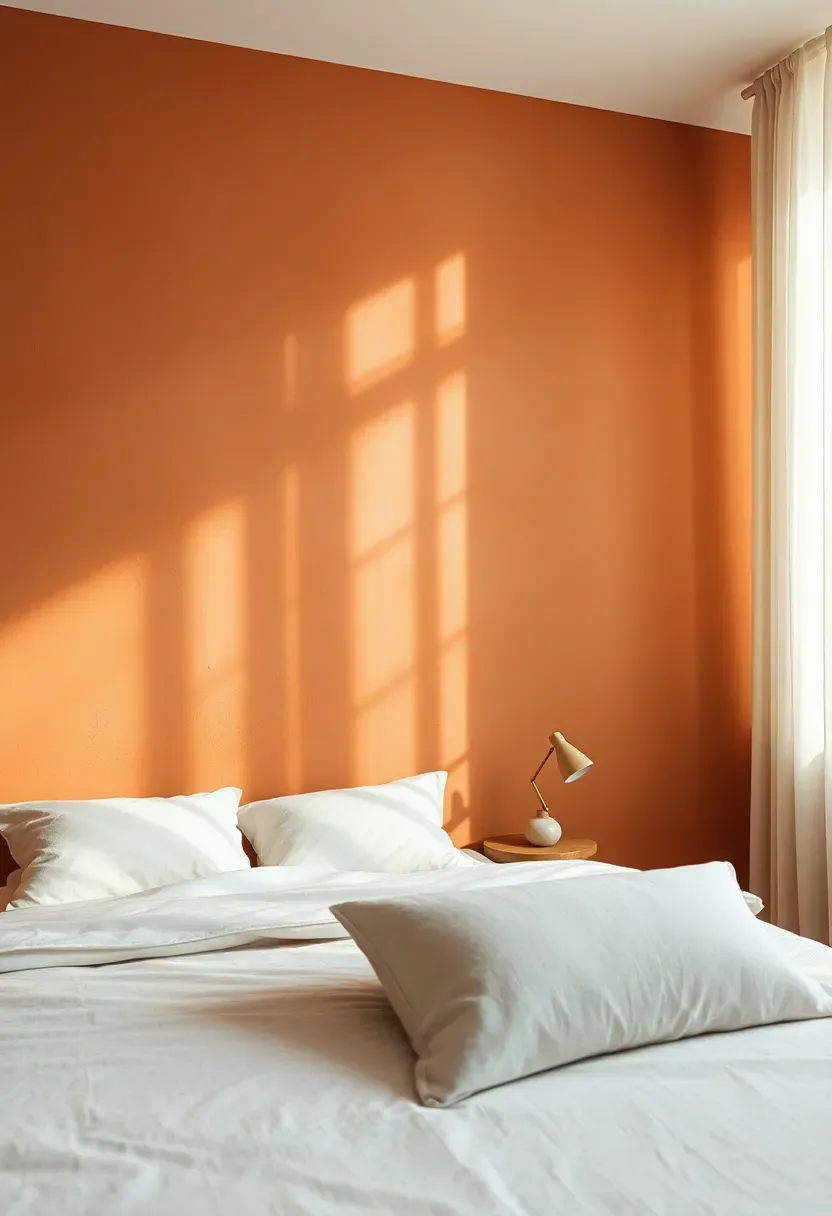
24. Limewash Textured Accent Wall
Origins and History
Limewash paint dates back thousands of years to ancient Rome and the Mediterranean, where mineral-rich lime coatings protected exteriors and gave interiors their characteristic chalky glow. The technique fell out of fashion with the rise of latex paints but has returned dramatically in contemporary design.
Modern Interpretation
Today's limewash products come pre-mixed and apply with a large brush in overlapping strokes. The result is a wall with visible depth, subtle color variation, and a matte, slightly chalky finish that photographs beautifully and shifts appearance as natural light changes throughout the day. Popular tones include warm terracotta, soft blush, sage green, and creamy stone — all colors that feel organic and handmade compared to flat latex walls.
How to Apply at Home
- Prep the wall with a dedicated limewash primer for adhesion
- Apply in large X-shaped strokes using a wide masonry brush
- Build color in two to three thin coats rather than one heavy pass
- Accept the variation — imperfection is the entire point of this technique
Recommended
Items for this idea
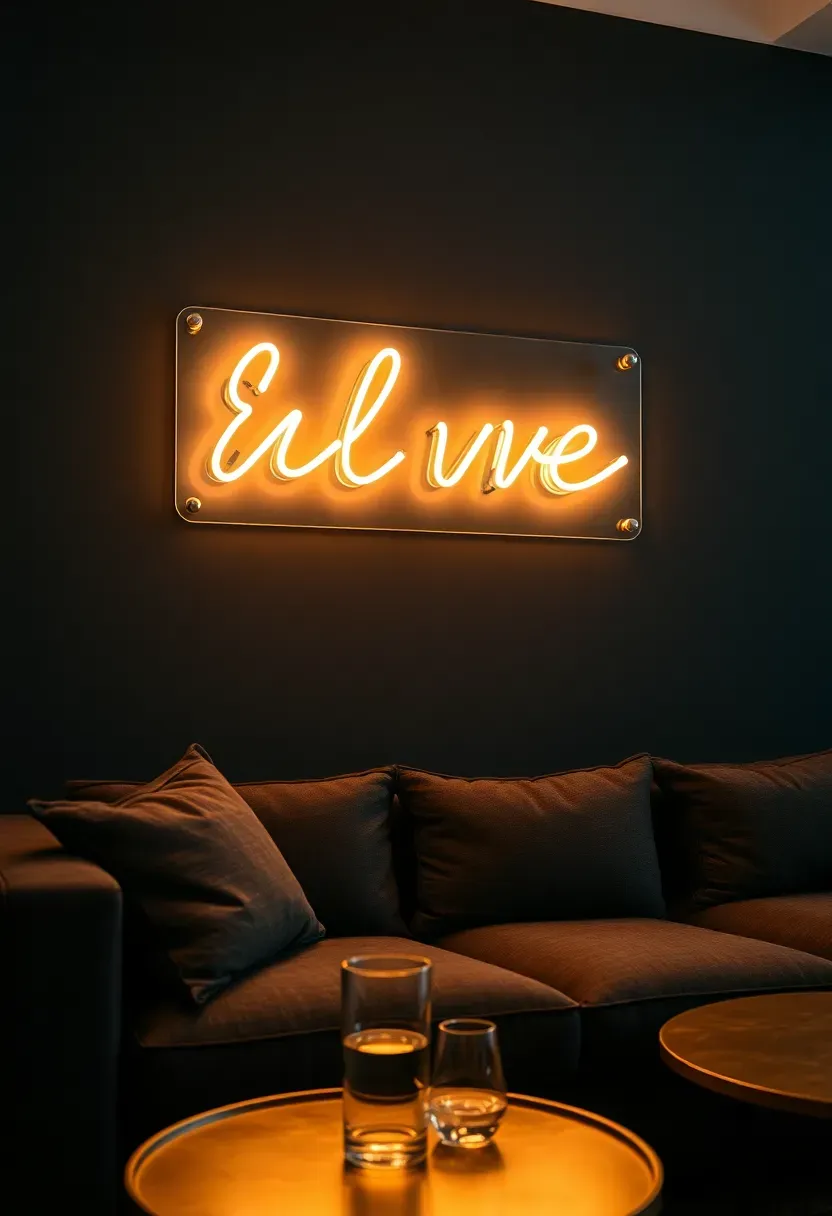
25. Neon Sign Accent
Neon signs — or their modern LED flex equivalents — inject personality and warm ambient light simultaneously. A single word, a short phrase, or a custom shape mounted on a dark-painted wall creates a focal point that doubles as mood lighting after sundown.
Choosing Between Glass Neon and LED Flex
Glass neon produces a warmer, more authentic glow with slight imperfections that feel artisanal. It runs hotter, consumes more energy, and breaks easily.
LED flex neon is cooler to the touch, energy efficient, and shatterproof. The light is slightly more uniform, which some find less characterful.
Placement Ideas
- Above a bar cart or drinks station
- Behind a sofa as ambient backlighting
- In a bedroom as a nightlight alternative
- Home office accent above a desk
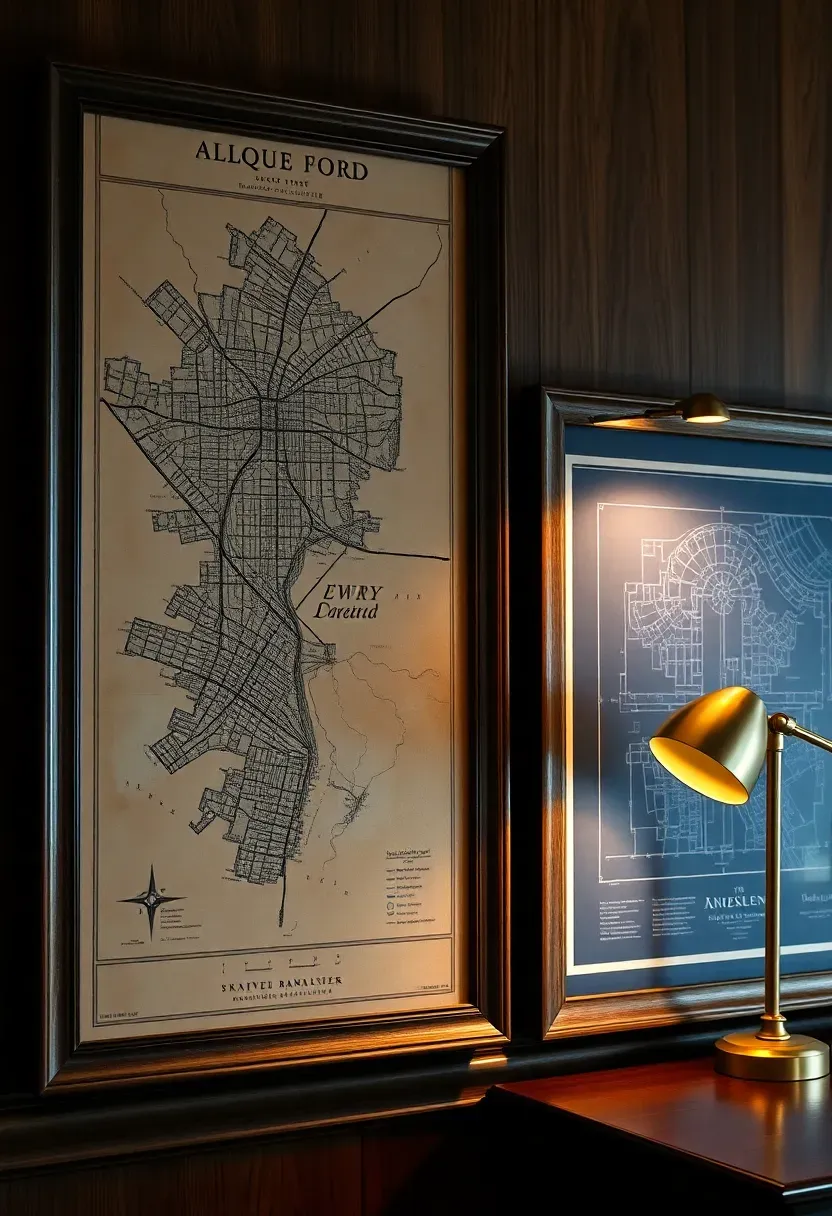
26. Map or Blueprint Display
Vintage maps and architectural blueprints carry a visual weight that generic art cannot replicate. The dense linework, aged paper tones, and informational content give viewers something to study rather than simply glance at.
Sourcing Authentic Pieces
- Antique shops and estate sales often have rolled maps priced between ten and fifty dollars
- University libraries periodically deaccession duplicate maps
- Online archives offer high-resolution scans of historical city plans, rail networks, and topographic surveys
Display Methods
- Float-mount behind museum glass for a clean, contemporary look
- Pin directly to a cork board or the wall with brass map tacks for a casual study vibe
- Frame without glass to let the paper's texture show — just keep away from direct sunlight to prevent fading
Recommended
Items for this idea
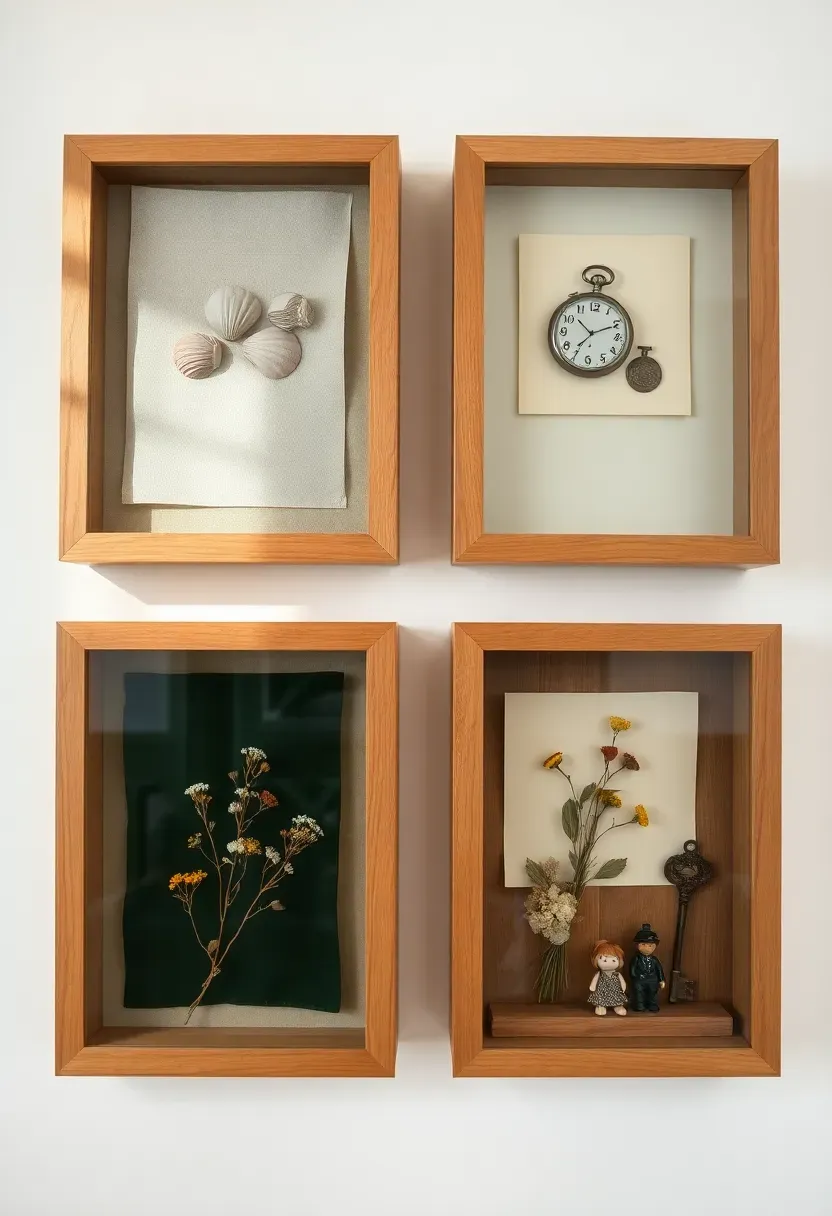
27. Shadow Box Collection Wall
Shadow boxes turn small three-dimensional objects into wall-mounted art. Seashells from a beach vacation, vintage pocket watches, dried flowers, miniature figurines, or ticket stubs — anything with personal meaning gains visual importance when isolated behind glass in a dedicated frame.
Building the Display
- Use matching shadow box frames in a uniform size for a clean grid, or mix sizes for an organic gallery feel
- Line the back panel with linen, velvet, or painted board for a finished look
- Hot glue or museum putty secures objects without permanent damage
Why This Approach Resonates
Shadow boxes solve a universal problem: you have small meaningful objects sitting in drawers because they do not belong on a shelf. Mounting them on the wall gives them a permanent home, preserves them from handling damage, and transforms everyday keepsakes into conversation-starting decor.
Quick FAQ
Is it possible to decorate walls without making holes? Absolutely. Adhesive hooks rated for the weight, peel-and-stick wallpaper, magnetic paint, leaning art on shelves, and washi tape galleries all leave walls untouched. These methods work especially well in rental apartments where security deposits are at stake.
Should I match wall decor across every room? Not necessarily. Each room serves a different function and mood. A cohesive thread — similar frame finishes, a shared color family, or consistent material choices — provides enough visual continuity without making the entire home feel like a catalog showroom.
What is the best wall decor for small rooms? Mirrors rank first because they reflect light and create the illusion of depth. A single oversized piece outperforms a busy gallery wall in tight spaces. Light-colored art with generous matting keeps the room feeling open rather than cluttered.
Which wall should I decorate first? Start with the wall you see when entering the room. This focal wall sets the tone and is the only one most visitors consciously register. Secondary walls can remain simpler — a single shelf, a clock, or a lean-to frame.
Do wall decor trends change frequently? Surface trends shift every couple of years — materials go in and out of style. But the principles stay constant: scale to the wall, relate to the room's palette, and mix dimensions. If your wall art follows those rules, it will outlast any trend cycle.
The most memorable rooms are not the ones with the most expensive art on the walls. They are the rooms where every surface tells a fragment of the story being lived inside them. Pick two or three ideas from this list, start with the wall that greets you each morning, and build from there. Bare walls are just stories waiting to be told.
Pinterest cover for 27 Wall Decor Ideas That Turn Bare Walls Into Statement Pieces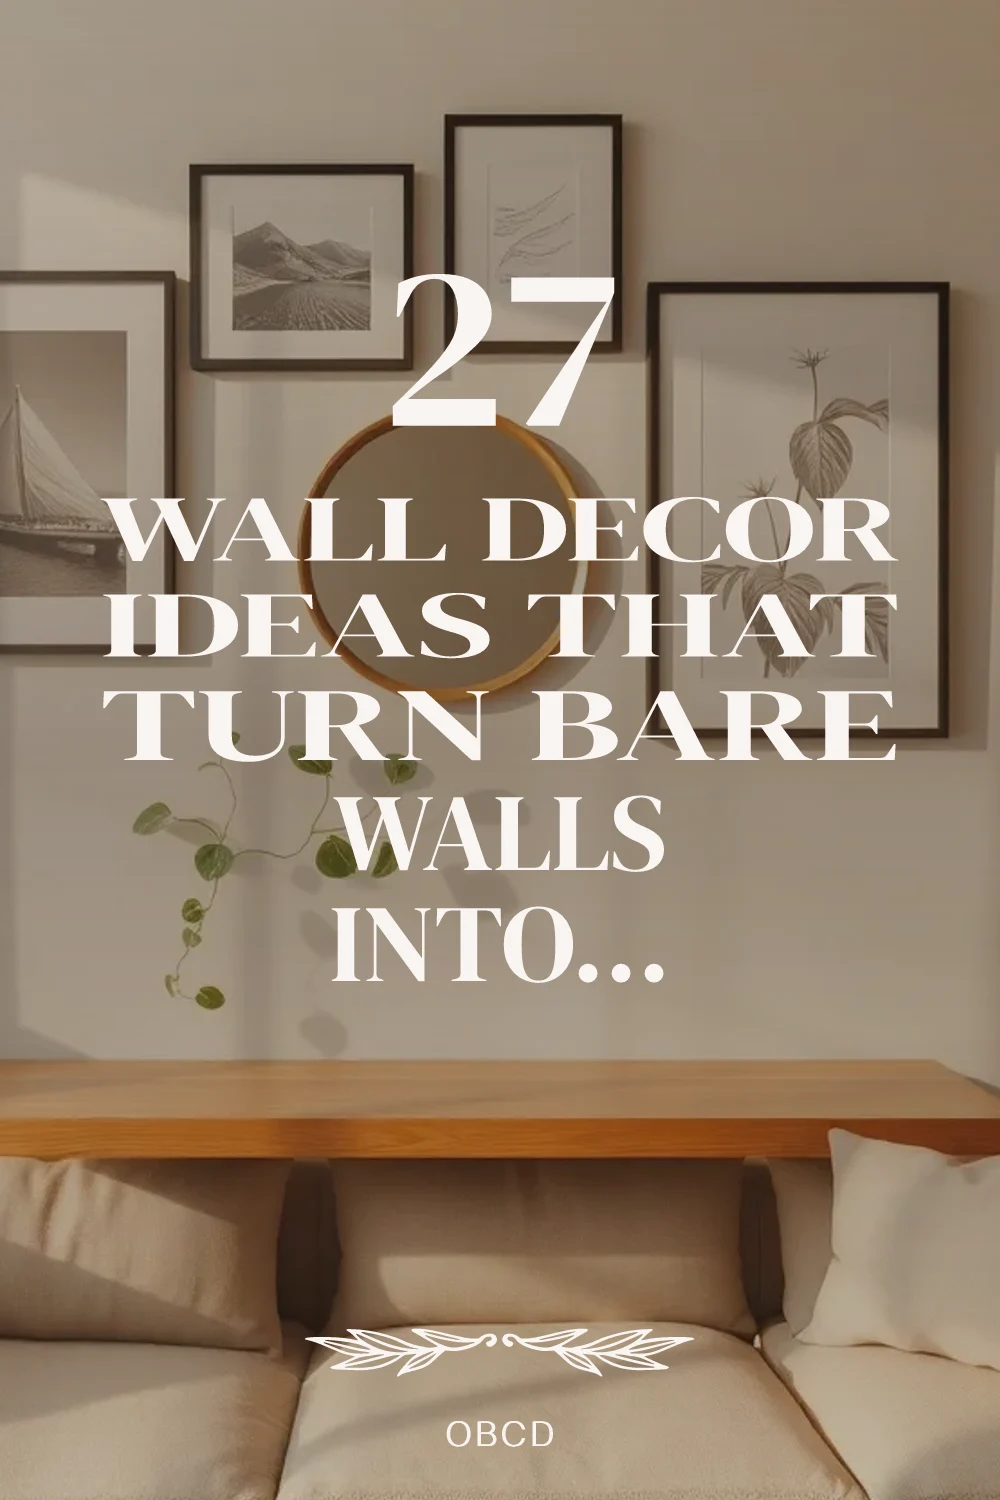
About the author
OBCD
CGI visualization and interior design content. We create detailed 3D renders and curate practical design ideas for every room in your home.