21 Apartment Entryway Ideas That Make Every Square Foot Count
Picture walking through your front door and feeling — for the first time in a long time — genuinely welcomed by your own home. That pause at the threshold, that five seconds between outside and inside, shapes the whole mood of the evening. Most apartments give you almost nothing to work with: a few feet of awkward corridor, bare walls, nowhere to drop your bag. But those few feet are worth everything. A thoughtfully arranged entryway sets the tone for every room beyond it.
Ready? Let's work through 21 practical, renter-friendly, and visually satisfying ideas — from furniture choices to finishes — that transform even the tiniest apartment hallway into a space worth savoring.
Table of Contents
- Floating Console Table
- Wall Mirror Gallery
- Coat Hooks Rail
- Bench with Hidden Storage
- Wallpaper Accent Wall
- Statement Pendant Light
- Slim Shoe Cabinet
- Umbrella Stand
- Layered Entryway Rug
- Key and Mail Organizer
- Small Plant Shelf
- Floating Shelf Gallery
- Pegboard Organizer
- Sliding Barn Door
- Pocket Door Upgrade
- Wainscoting Panel Wall
- Picture Ledge Display
- Vintage Trunk as Storage
- Color-Blocked Accent Wall
- Magnetic Chalkboard Panel
- Curtain Room Divider
1. Floating Console Table
The Core Issue
Most apartment entryways lack any surface at all — nowhere to rest a bag, set down keys, or drop mail. The result is constant clutter migrating into the living room.
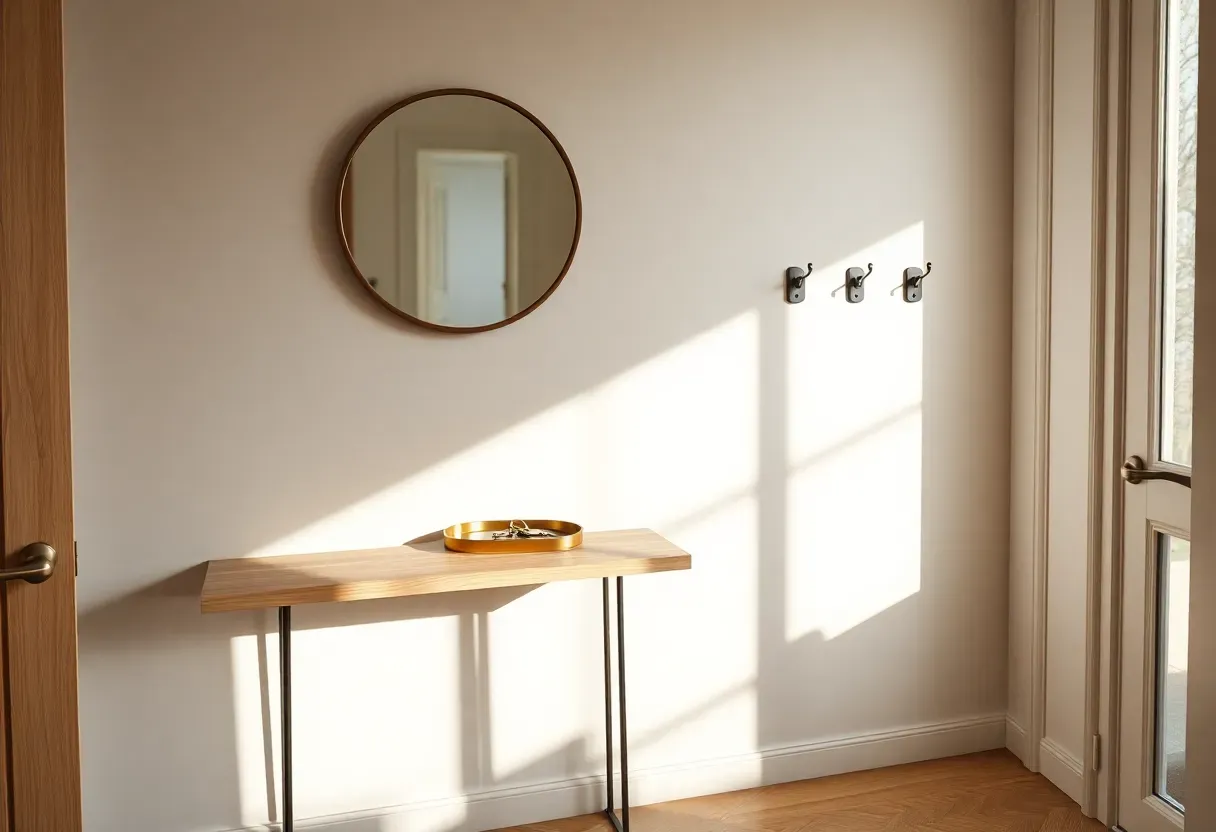
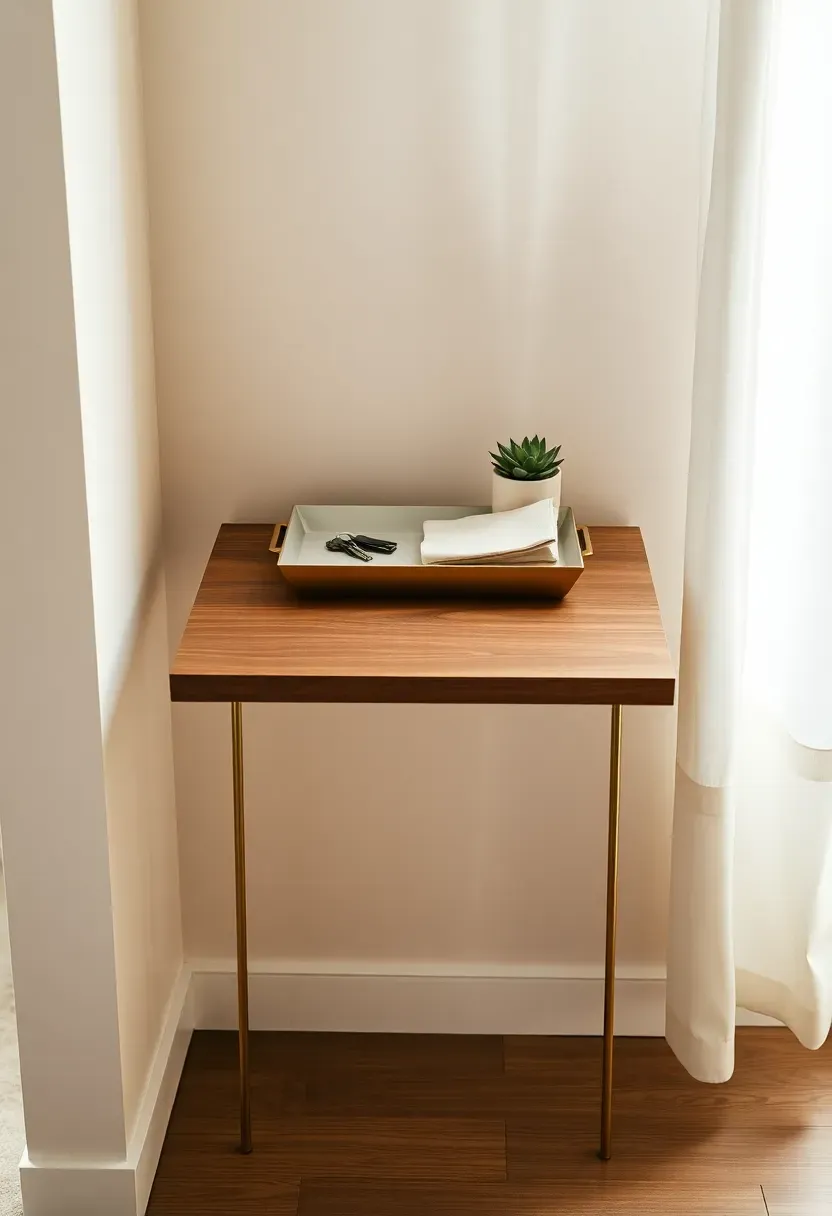
The Solution
A floating console table changes everything without taking up floor footprint. Mount a slim walnut or oak shelf at waist height with hairpin legs or invisible brackets. Style it with a small ceramic tray for keys, one plant, and nothing else. Keep the surface edited — restraint is the whole point. Floating designs (versus freestanding) make the floor feel longer, which matters enormously when every inch of corridor is precious.
Pros and Cons
Pros: Zero floor footprint, easy to install, endlessly stylable. Cons: Weight limit on wall-mounted versions — check your wall type before loading with heavy objects.
We picked a few things that go well with this idea: HOOBRO Narrow Entryway Console Table (29.5") (★4.4), Bamboo Narrow Console Hallway Table (39") (★4.7) and YATINEY 2-Tier Narrow Industrial Console Table (★4.5). As an Amazon Associate we earn from qualifying purchases.
2. Wall Mirror Gallery
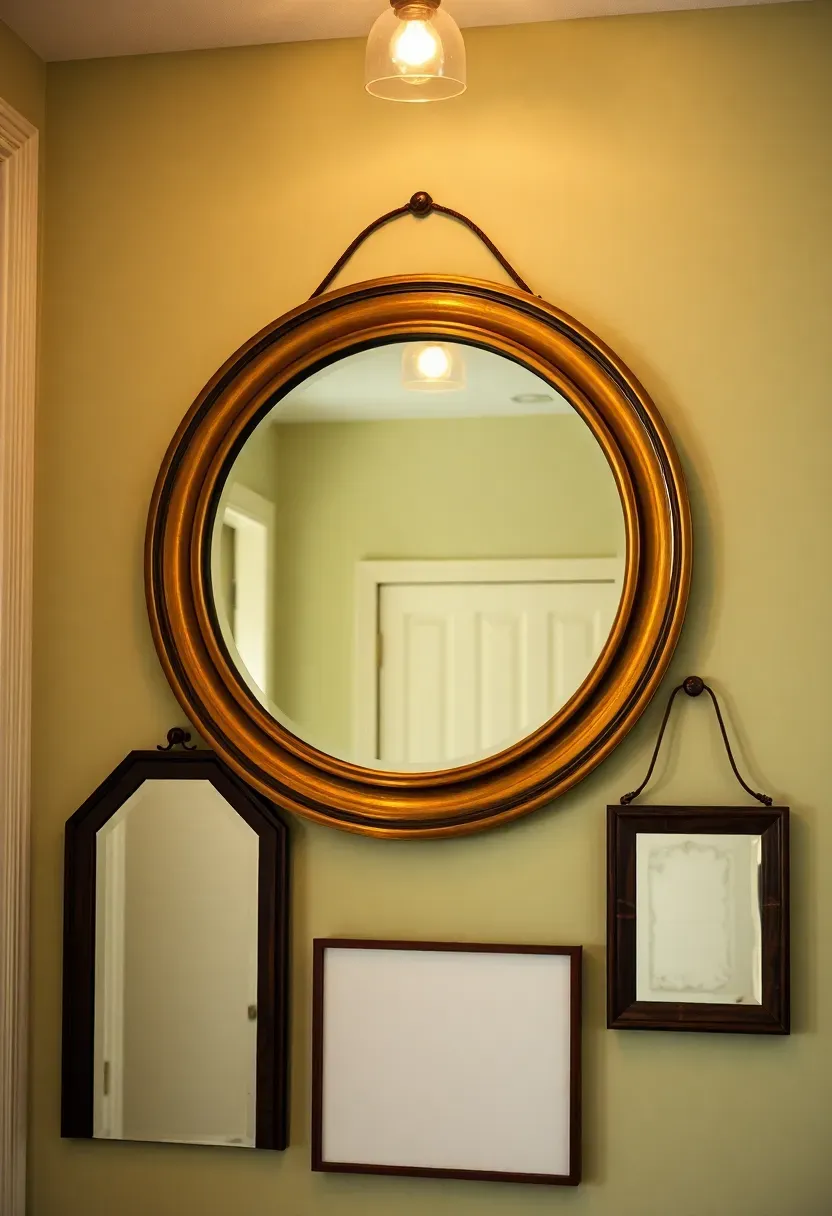
Why Mirror Galleries Work
A single small mirror disappears in a narrow hallway. A curated grouping of two or three mirrors at different scales creates depth, bounces light, and functions as genuine wall art — without a single nail hole more than a standard gallery wall.
How to Arrange It
Start with your largest piece centered at eye level (approximately 57–60 inches from floor to center). Flank with two smaller mirrors, keeping the gaps between frames tight (3–4 inches). Mixing shapes — round, rectangular, arch — prevents the arrangement from looking like a showroom display.
What to Watch Out For
- Avoid all-matching frames: different metals and materials add character.
- Angle one mirror slightly off-center if your hallway is very narrow — it exaggerates the sense of width.
- Anti-ligature mirror hooks exist if you need to be careful about wall anchor weight.
We picked a few things that go well with this idea: Dseap Steel Coat Rack Rail (2-Pack) (★4.6), IBosins Rustic Wood Coat Hooks Rail (34") (★4.6) and IBosins Metal Wood Coat Hook Rail (8 Hooks) (★4.4). As an Amazon Associate we earn from qualifying purchases.
3. Coat Hooks Rail
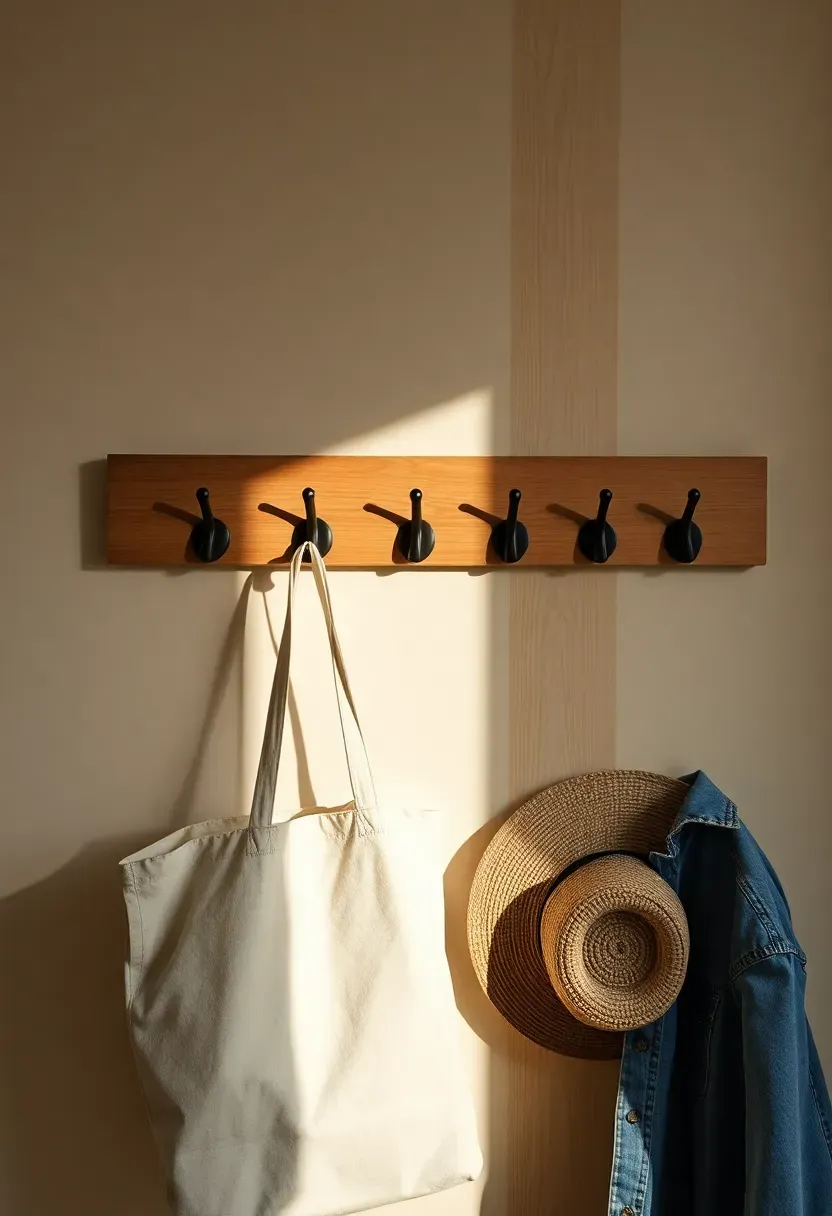
A horizontal rail with hooks sounds simple — because it is. But simplicity executed well is its own kind of sophistication.
Step 1: Choose the Rail Material
A solid oak or pine board (roughly 24–36 inches long) with five evenly spaced hooks is the standard. Matte black steel hooks on light wood create a Scandinavian contrast that ages beautifully.
Step 2: Mount at the Right Height
Install the rail so the lowest hook sits at approximately 60–64 inches from the floor. This keeps jackets from dragging while keeping hats reachable.
Step 3: Curate What Hangs There
Resist hanging everything. A rail crowded with raincoats, bags, scarves, and sports gear looks chaotic. Keep it to 2–3 items in daily rotation. Seasonal overflow goes in the closet.
What to Watch Out For
Drywall anchors alone rarely hold a rail loaded with multiple heavy coats. Locate at least one stud or use toggle bolt anchors rated for the combined weight.
We picked a few things that go well with this idea: Natural Jute Runner Rug Non-Slip (2x6) (★4.4), CAMILSON Herringbone Seagrass Runner Rug (2x7) (★4.3) and LIVEBOX Jute Geometric Scalloped Runner Rug (2x8) (★4.5). As an Amazon Associate we earn from qualifying purchases.
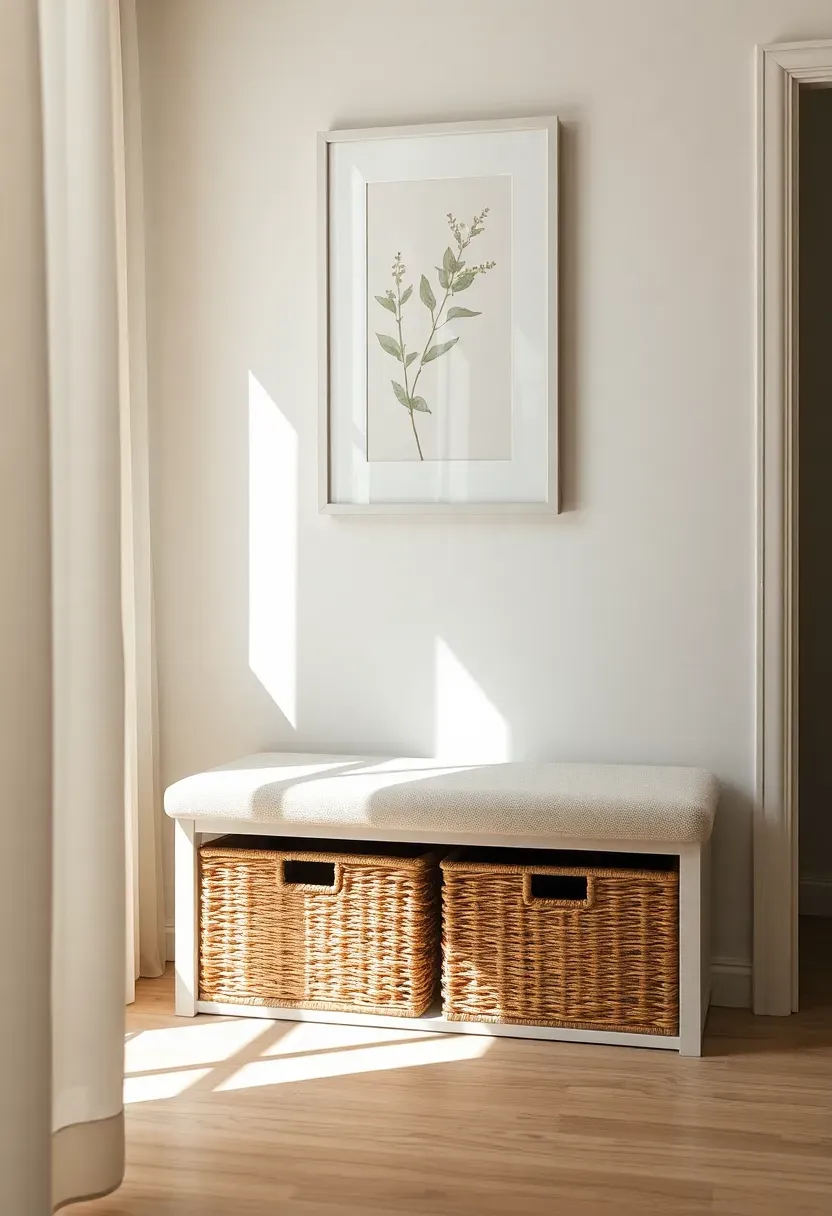
4. Bench with Hidden Storage
Comparing: Open Shelf Bench vs. Drawer Bench
Introduction: both versions give you seating for putting on shoes — the real difference is how they handle the visual mess.
Open Shelf Bench
A bench with an open lower shelf holds baskets, bags, and shoes visibly. Easy to grab things in a hurry; difficult to keep looking neat. Best for people with a small number of consistently used items.
Drawer Bench
A bench with push-open drawers or pull-out bins completely hides contents. The entryway looks uncluttered whether or not you've had time to organize. Slightly harder to access in a rush.
What to Choose
Choose open shelf if: You own few items, use the bench frequently, and don't mind styling the lower section. Choose drawer bench if: Storage habits are inconsistent and you want the space to look polished with minimal effort.
Recommendation
For most apartment entryways, a drawer bench wins — it forgives imperfect organization while maintaining a clean visual baseline.
Recommended
Items for this idea
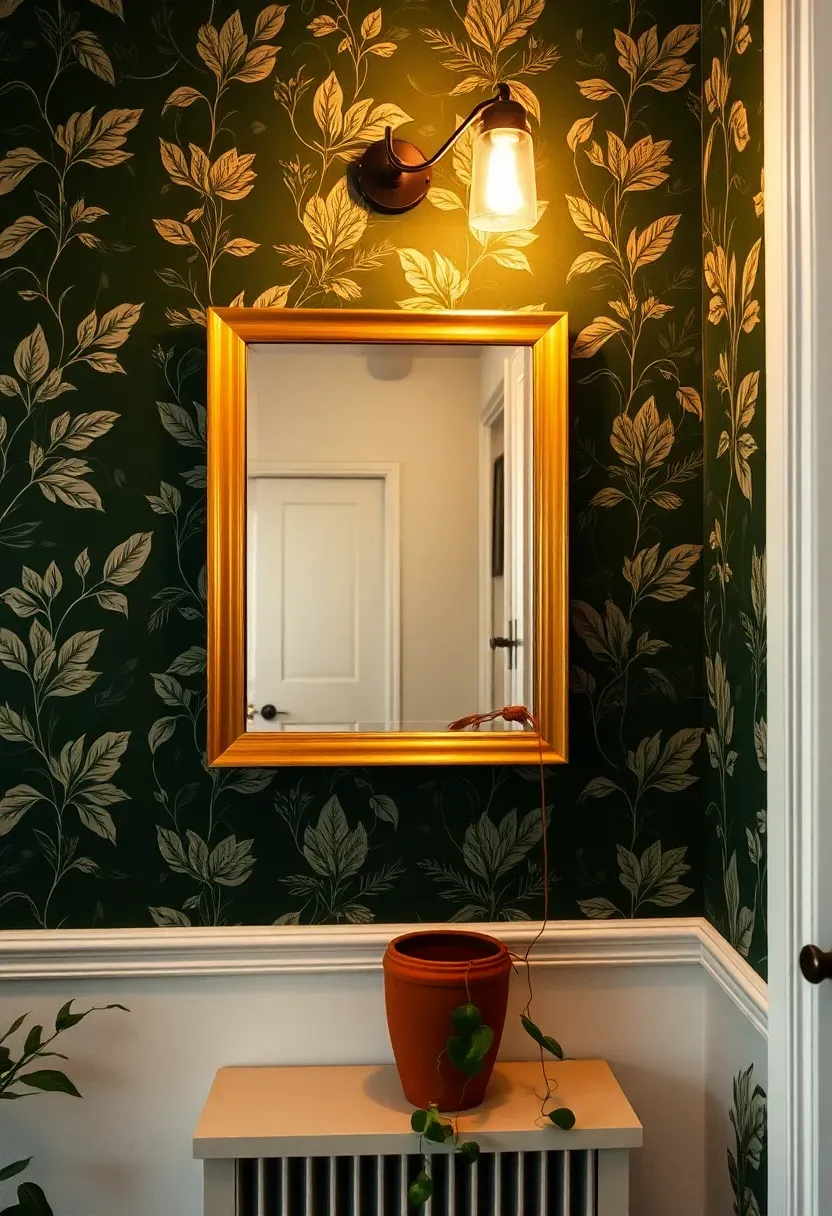
5. Wallpaper Accent Wall
We still paper entryways the same way we have for a century — yet it remains one of the highest-impact moves in the smallest space. A single accent wall covered in a statement wallpaper transforms a utilitarian corridor into a room.
Origins / History
Wallpaper reached peak popularity in 18th-century European homes, where entry halls were intentionally dramatic — designed to impress arriving guests before they saw the rest of the house. The tradition translates perfectly to modern apartments.
Modern Interpretation
Today's peel-and-stick wallpaper is genuinely renter-friendly: no paste, no damage, removable when you move. Botanical prints, geometric tile patterns, and painterly abstracts all work well in narrow spaces. Darker patterns — deep greens, navy, rich terracotta — actually make small entryways feel more intentional rather than cramped.
How to Apply at Home
- Choose one wall only — usually the one facing the door.
- Start panels from the center of the wall and work outward for the best pattern alignment.
- Trim carefully around outlets and light switches with a sharp craft knife.
- Remove slowly at the end of a tenancy to avoid surface damage.
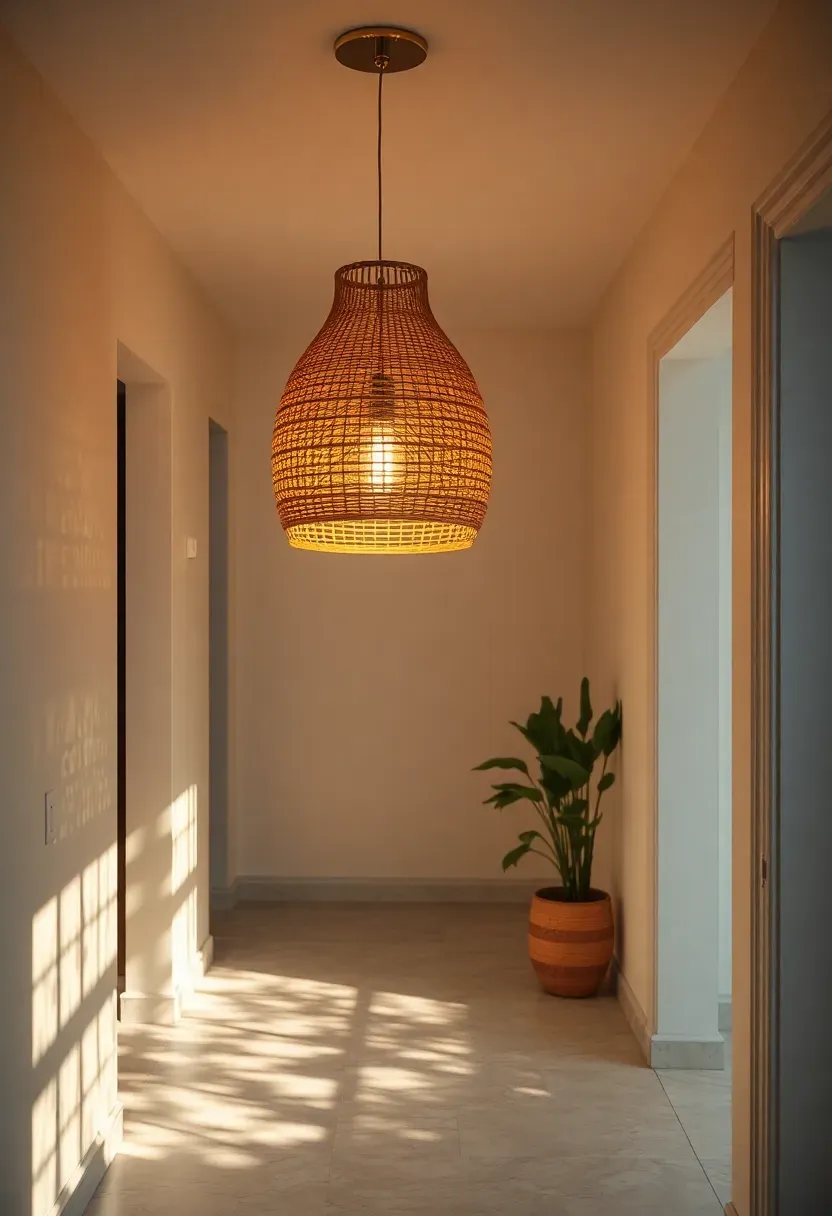
6. Statement Pendant Light
The Core Issue
Most apartment entryways ship with a single flush-mount ceiling fixture producing flat, institutional light. It does nothing to create atmosphere at the one moment when atmosphere most matters.
The Solution
Swapping the shade or the fixture entirely changes everything. A woven rattan pendant or a sculptural paper shade casts dappled warm light that feels welcoming rather than interrogating. If hardwiring isn't possible, plug-in pendant kits thread cable along the wall and require no electrician. Choose a bulb in the 2700K range for warmth; avoid cool white in any entryway.
Pros and Cons
Pros: Enormous visual impact, relatively low cost, plug-in options require no renovation. Cons: Very low ceilings (under 7.5 feet) may not accommodate a pendant — use a semi-flush fitting instead.
Recommended
Items for this idea
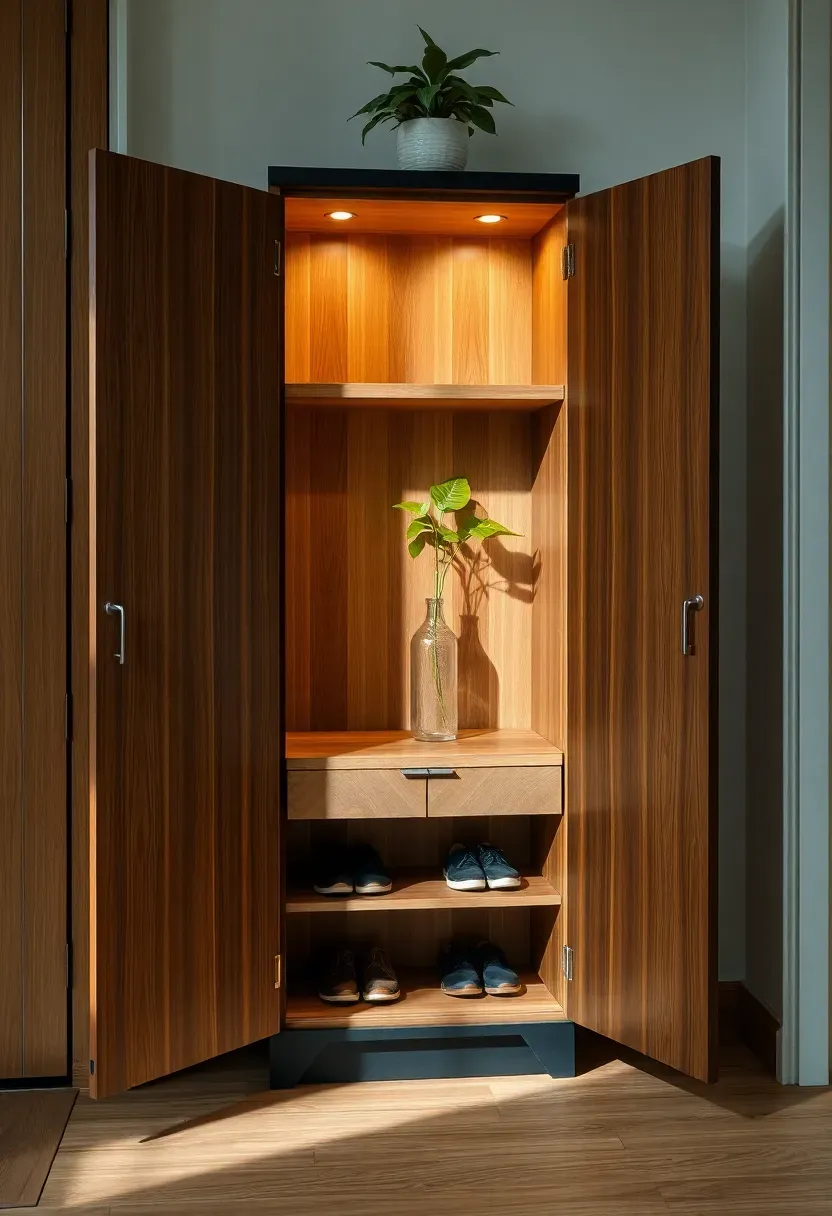
7. Slim Shoe Cabinet
Shoes are the single biggest contributor to entryway chaos in apartments. A dedicated slim shoe cabinet — typically 12–14 inches deep — solves the problem without projecting far into the corridor.
Step 1: Measure Your Clearance
Measure the narrowest point of your hallway and subtract the depth of the cabinet plus comfortable passing room (at minimum 28 inches for a single person, 36 inches for two to pass comfortably). This determines the maximum cabinet depth and width.
Step 2: Choose Tipping Style
Push-open cabinets (no visible hardware) look the cleanest but require a gentle tap to operate. Finger-pull styles are more intuitive. Avoid anything with projecting handles in tight corridors.
Step 3: Style the Top Surface
The cabinet top becomes a secondary console. Keep it to one object — a plant, a small tray, a sculptural object. Resist the temptation to store more.
What to Watch Out For
Poorly ventilated shoe cabinets trap odors. Choose a model with ventilation gaps or leave doors open for an hour after each use.
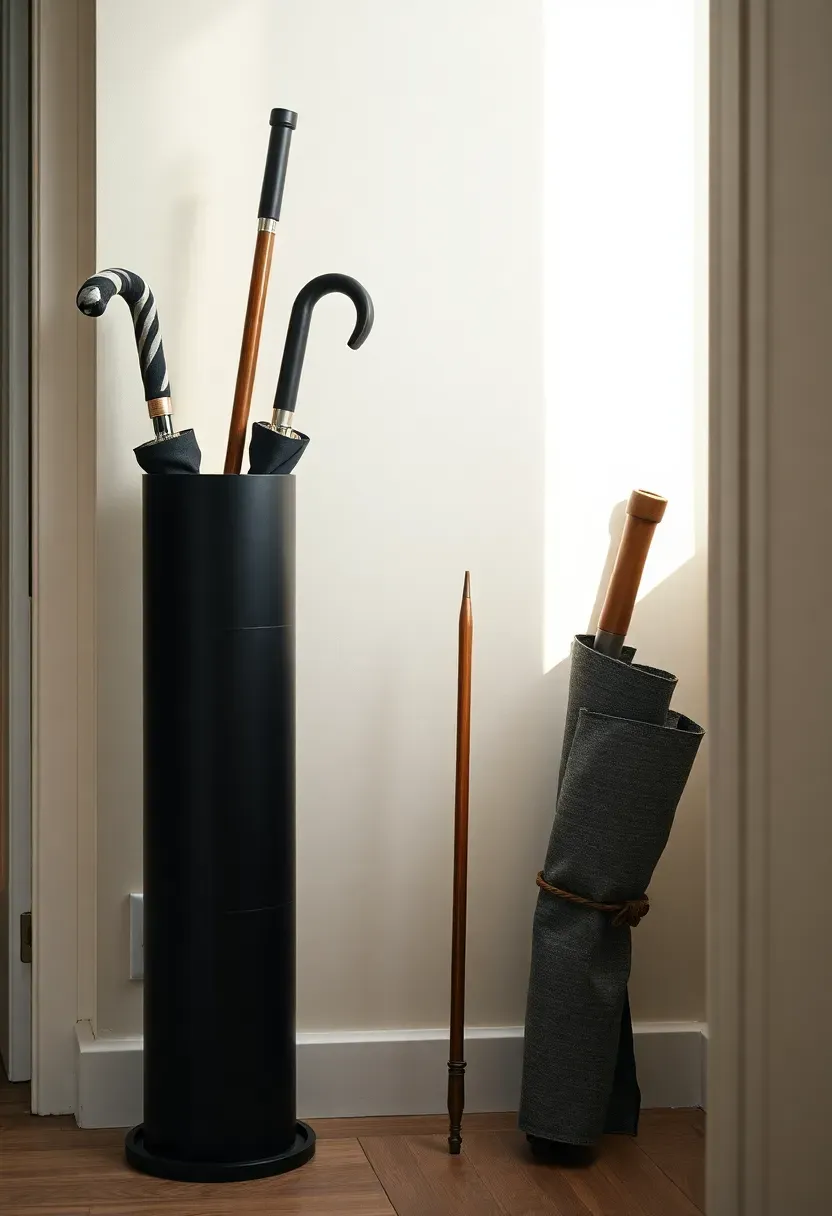
8. Umbrella Stand
This is the most underestimated entryway object. A well-chosen umbrella stand signals that the entryway has been considered as a complete system, not assembled piece by piece.
Comparing: Cylinder vs. Divided Stand
Introduction: the shape of the stand determines how it handles multiple umbrellas — and whether it looks purposeful or improvised.
Cylinder Stand
A tall cylindrical form holds two to four umbrellas bundled together. Clean and architectural. Best for minimalist aesthetics. Weak point: umbrellas can clump and drip on each other.
Divided Stand
A stand with individual compartments keeps each umbrella separate and upright. More practical in a rainy climate or a shared apartment. Often bulkier in appearance.
What to Choose
Choose cylinder if: Minimal aesthetic, small umbrella collection, dry climate. Choose divided if: Multiple household members, frequent rain, practicality first.
Recommendation
A matte black steel cylinder is the most versatile choice — it works with virtually any entryway style and disappears visually when not in use.

Recommended
Items for this idea
9. Layered Entryway Rug
A rug grounds an entryway the same way a foundation anchors a building. Without it, furniture floats; with it, the space becomes a room.
The Core Issue
A single flat doormat is functional but does little for the visual. It covers only the threshold and leaves the corridor looking like a bare passageway.
The Solution
Layer two rugs: a large natural fiber base (jute or sisal, 2×4 feet minimum) laid flat, with a smaller patterned runner angled slightly over it. The base provides texture and coverage; the runner introduces color and personality. Together they give the entryway the layered quality of a styled room. Choose a base rug in a neutral tone and let the runner do the work.
Pros and Cons
Pros: Inexpensive, renter-friendly, highly personal, absorbs sound. Cons: Two rugs require a non-slip mat beneath both, especially on hardwood, to prevent sliding.
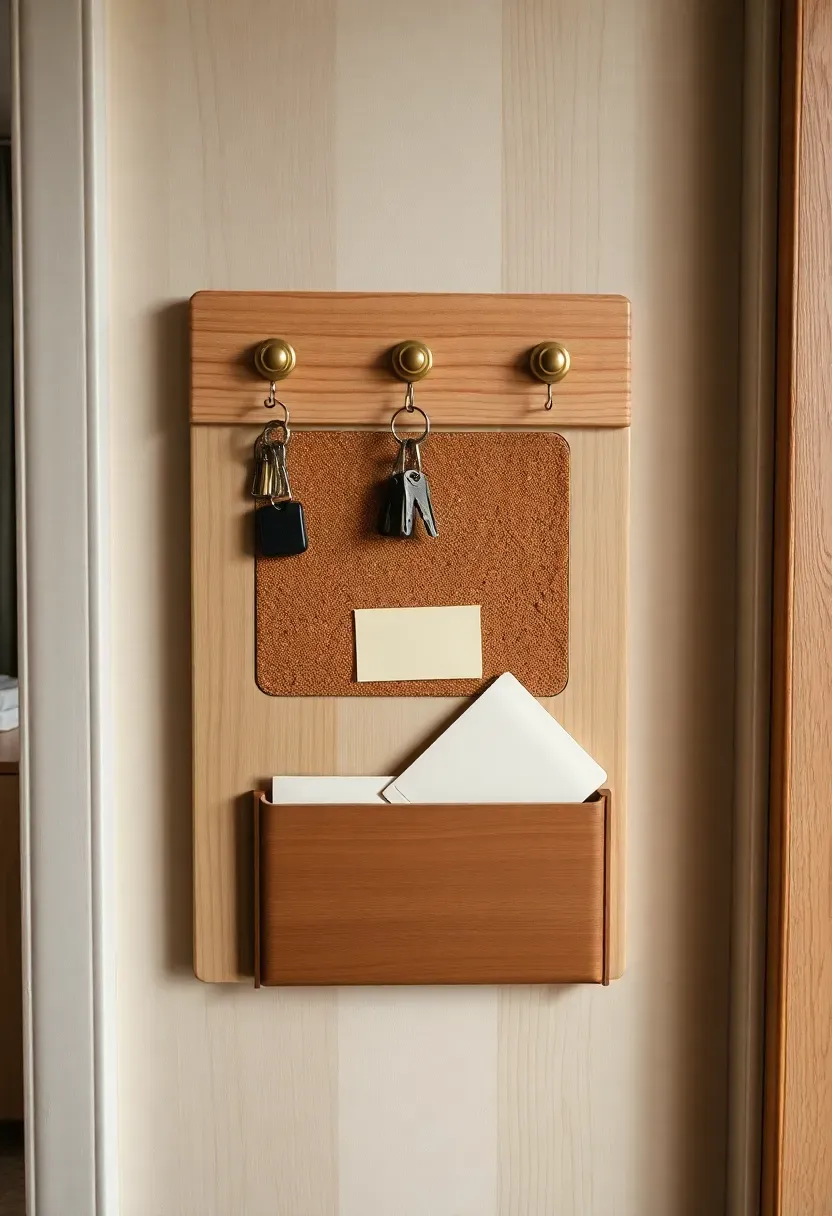
10. Key and Mail Organizer
Why This Matters
The average person spends nearly two and a half minutes per day looking for keys. A dedicated wall-mounted organizer is the single most practically useful addition to any entryway — and takes up exactly zero floor space.
How to Build or Buy One
A pre-made oak organizer panel with hooks, a corkboard section, and a mail slot covers every need. Mount it at eye level beside the door, within arm's reach of the lock. If buying a kit feels too generic, assemble one from individual components: a wooden board, three brass coat hooks screwed at intervals, a small corkboard square glued to the upper half, and a metal magazine rack mounted below.
What to Watch Out For
- Corkboard sections tend to become pinning graveyards — edit weekly.
- Mail slots fill up fast; sort incoming mail the same day it arrives.
- Label each hook by user if multiple people share the entry.
Recommended
Items for this idea
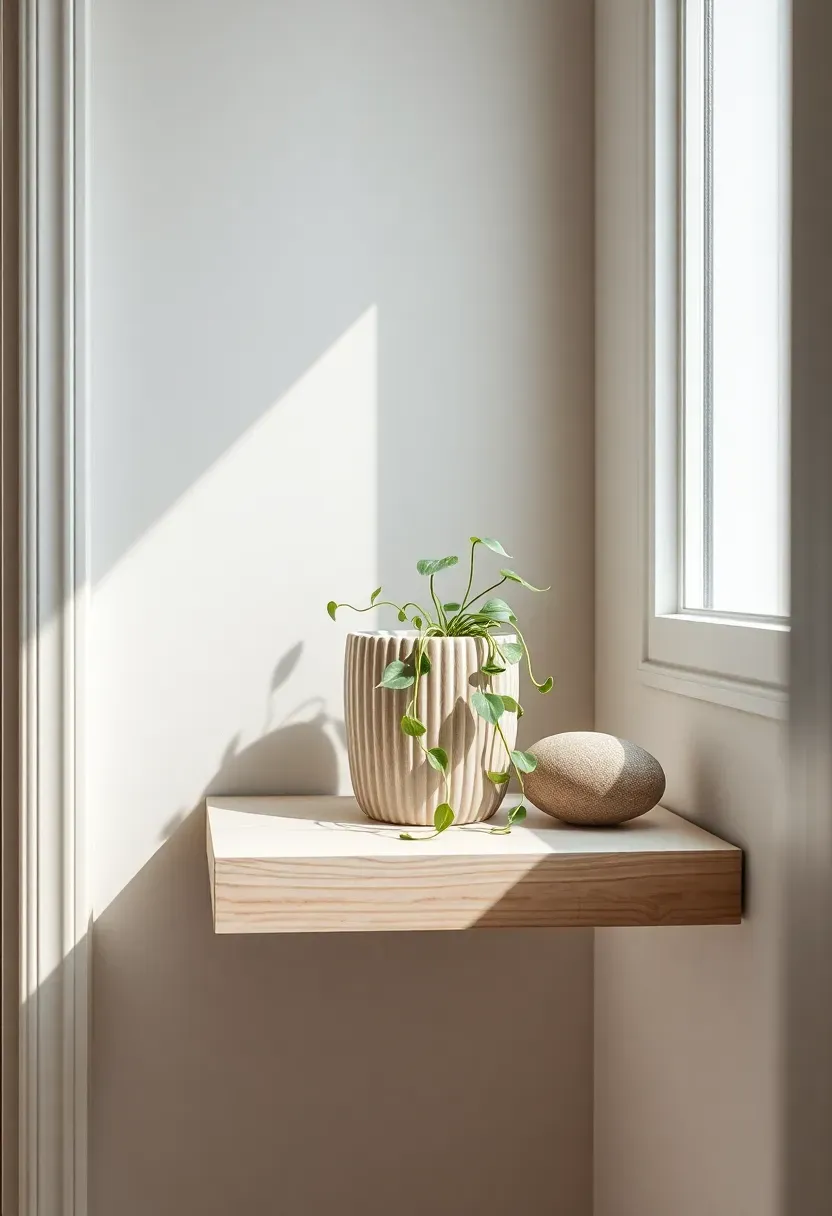
11. Small Plant Shelf
Plants in an entryway do two things: they signal life and attention, and they make the air feel genuinely different — not in any mystical sense, but in the way any organic object in an otherwise hard-surfaced corridor adds softness.
Step 1: Choose Tolerant Varieties
Entryways typically have low natural light and experience cold blasts every time the door opens. Choose accordingly: pothos, ZZ plants, snake plants, and air plants all thrive in low-light, inconsistently watered conditions.
Step 2: Mount the Shelf Low Enough to Water
A shelf at shoulder height looks dramatic but becomes impossible to water without a stool. Mount at roughly 54–60 inches from the floor — high enough to clear a console table below, low enough to tend comfortably.
Step 3: Style Sparingly
One trailing plant, one small air plant, one river stone or ceramic object. The shelf is a vignette, not a greenhouse. Three objects maximum keeps it from looking like overflow from the living room.
What to Watch Out For
Use a saucer or sealed ceramic pot — water runoff on a painted entryway wall leaves marks that are difficult to remove.
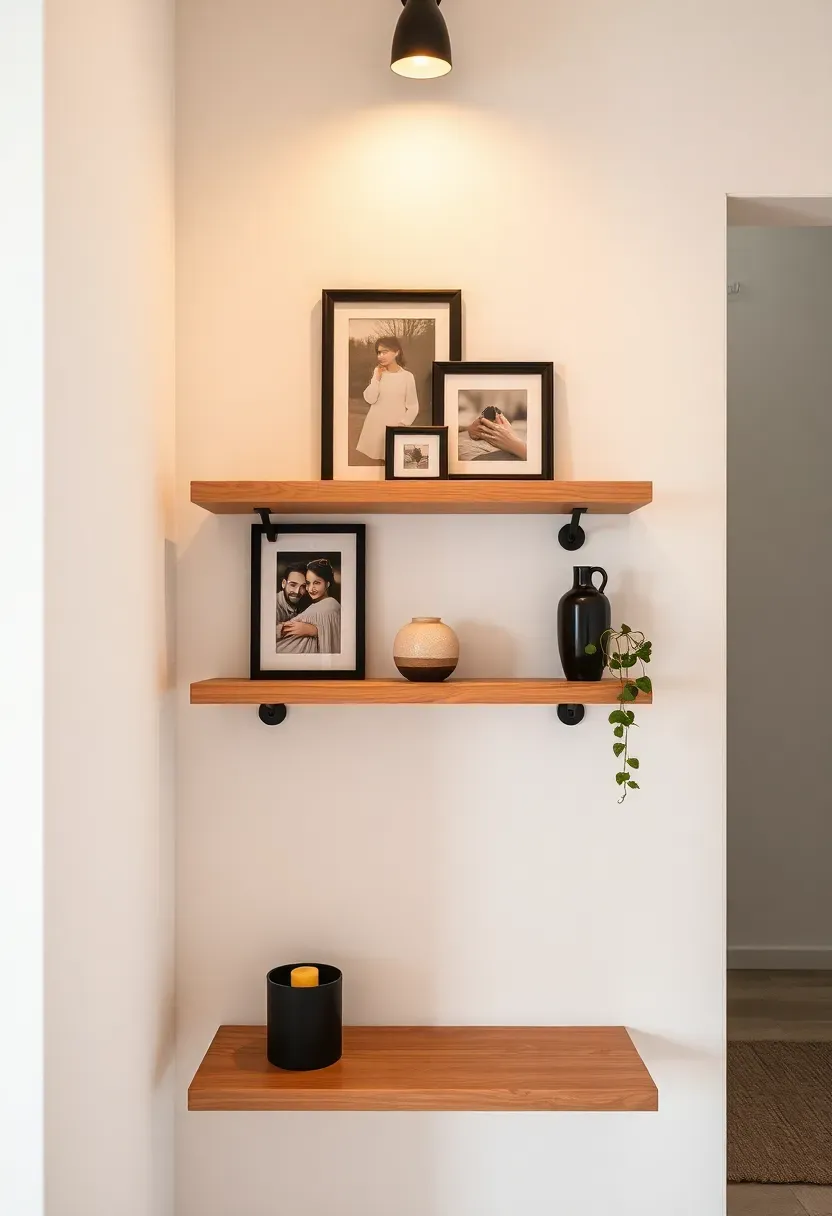
12. Floating Shelf Gallery
The Trend
Floating shelf galleries have crossed from Instagram trend to genuine interior design staple — because they solve a real problem: how to make a blank wall feel personal without committing to a single large piece of art.
Origins / History
The "shelf shelfie" as a format emerged around 2016 as apartment dwellers discovered that staggered floating shelves photographed well and could be updated seasonally without repainting. The underlying impulse — displaying small meaningful objects at eye level — is as old as the mantelpiece.
Modern Interpretation
Three shelves of different widths, staggered in height, create more visual movement than three identical shelves in a column. Mix functional objects (a candle, a small plant) with personal ones (a framed photo, a postcard) on each shelf. Change objects with the seasons to keep the display fresh.
How to Apply at Home
- Use invisible shelf brackets for the cleanest look.
- Stagger shelf heights by at least 10 inches to prevent the arrangement from reading as a storage unit.
- Keep each shelf to three objects maximum — edit ruthlessly.
- Photograph the arrangement before dismantling it during a move for easy reassembly.
Recommended
Items for this idea
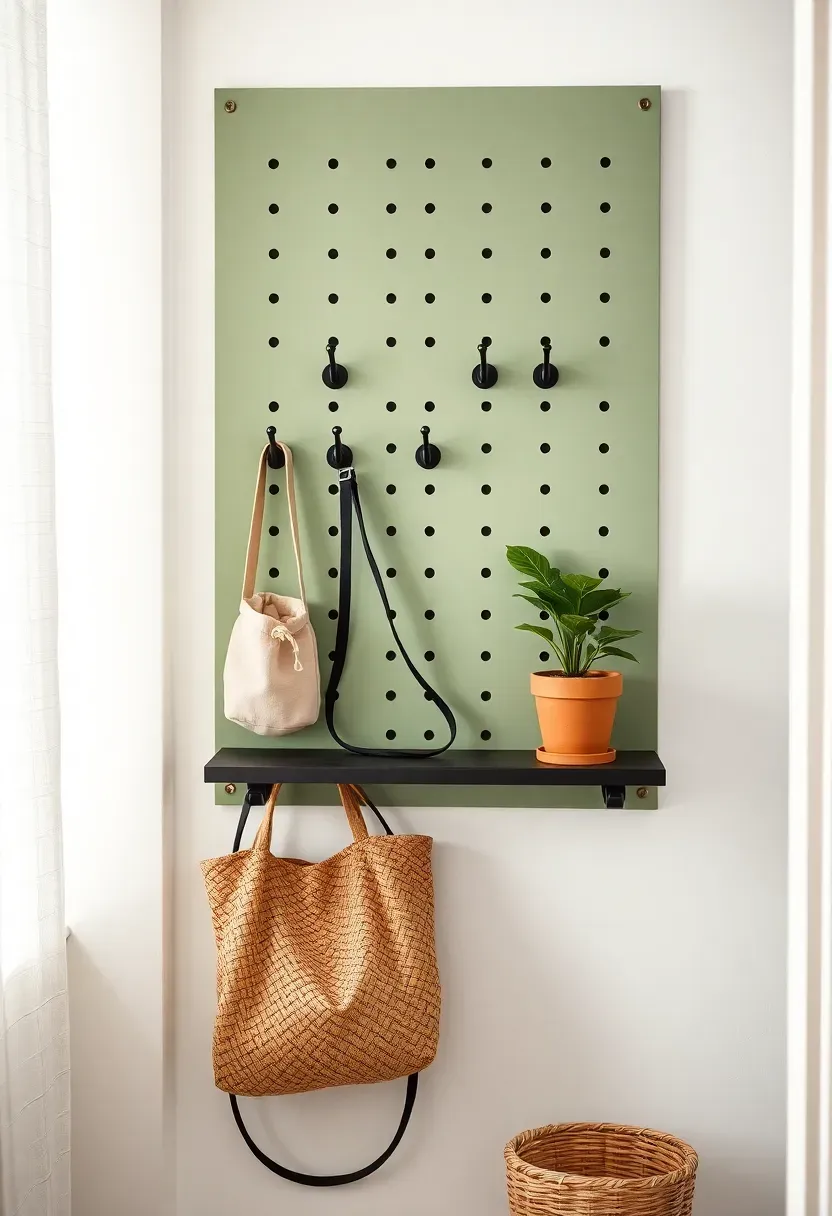
13. Pegboard Organizer
Comparing: Pegboard vs. Floating Shelves
Introduction: both cover a wall and create organized storage — the difference lies in flexibility and visual texture.
Pegboard
A pegboard panel is a grid of evenly spaced holes accepting interchangeable metal pegs, hooks, and small shelves. Everything is repositionable. An accidentally overstocked pegboard looks messier than an overstocked shelf — because all the geometry is visible.
Floating Shelves
Fixed in position, shelves require physical reinstallation to rearrange. But they look cleaner at a glance because the support structure disappears behind the wall.
What to Choose
Choose pegboard if: Your storage needs change frequently, you enjoy customizing, and you have a clear vision of styling restraint. Choose floating shelves if: Storage needs are stable and you prioritize a clean, calm visual.
Recommendation
Paint the pegboard the same shade as the wall (sage green, off-white, terracotta) to tone down its visual busyness — then it reads as textured wall art rather than a utility panel.
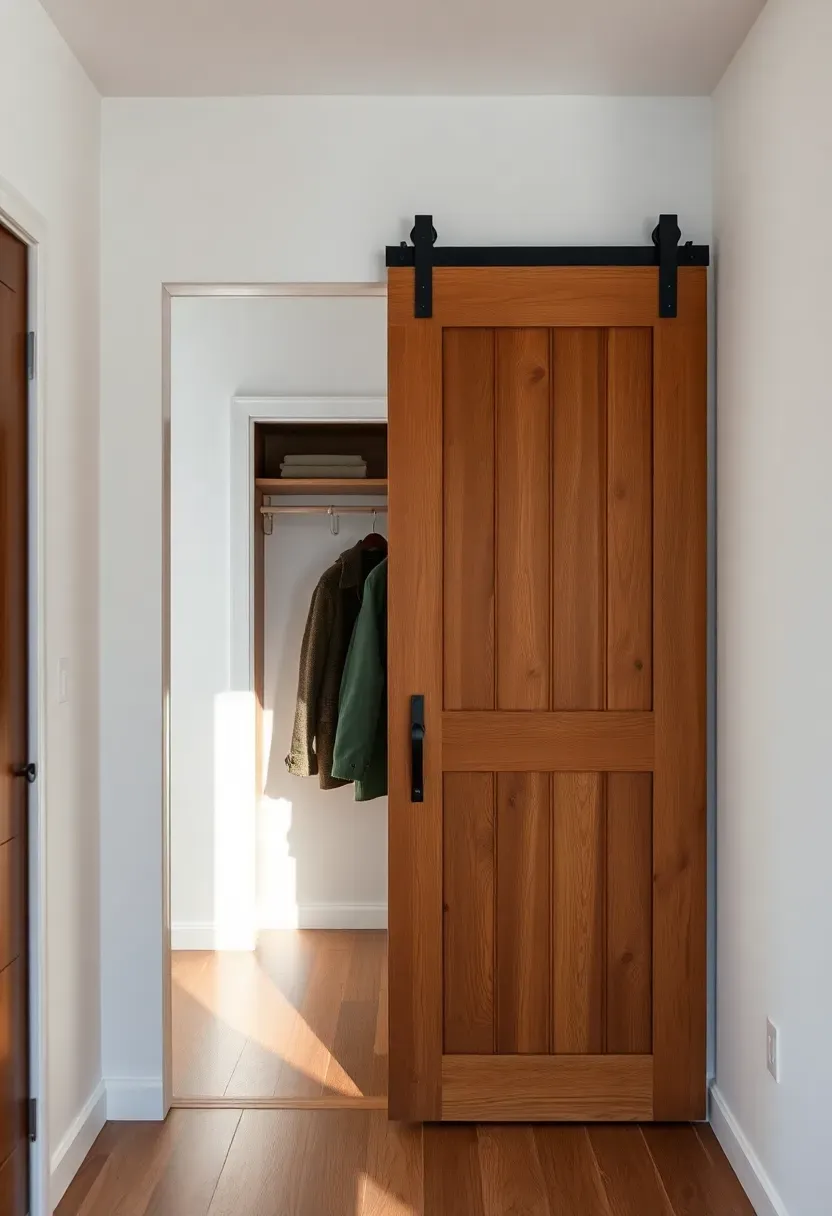
14. Sliding Barn Door
Why Barn Doors in Apartments
Apartments often have closets in entryways with swinging doors that cut into usable floor space — especially problematic in corridors under 40 inches wide. A sliding barn door eliminates the swing arc entirely, reclaiming meaningful floor area.
How to Install It
A surface-mounted barn door track installs entirely on the wall above the door opening using standard lag screws. No structural modification to the door frame required. The door panel hangs from the track on roller hardware, sliding left or right. Most hardware kits handle doors from 30 to 48 inches wide.
What to Watch Out For
- Barn doors don't create an airtight seal — sound and some light pass around the edges. For a coat closet, this is rarely a problem.
- Ensure the wall beside the door has enough clearance to fully park the open door without hitting a light switch or adjacent door frame.
- Check lease terms if drilling into drywall requires landlord approval.
Recommended
Items for this idea
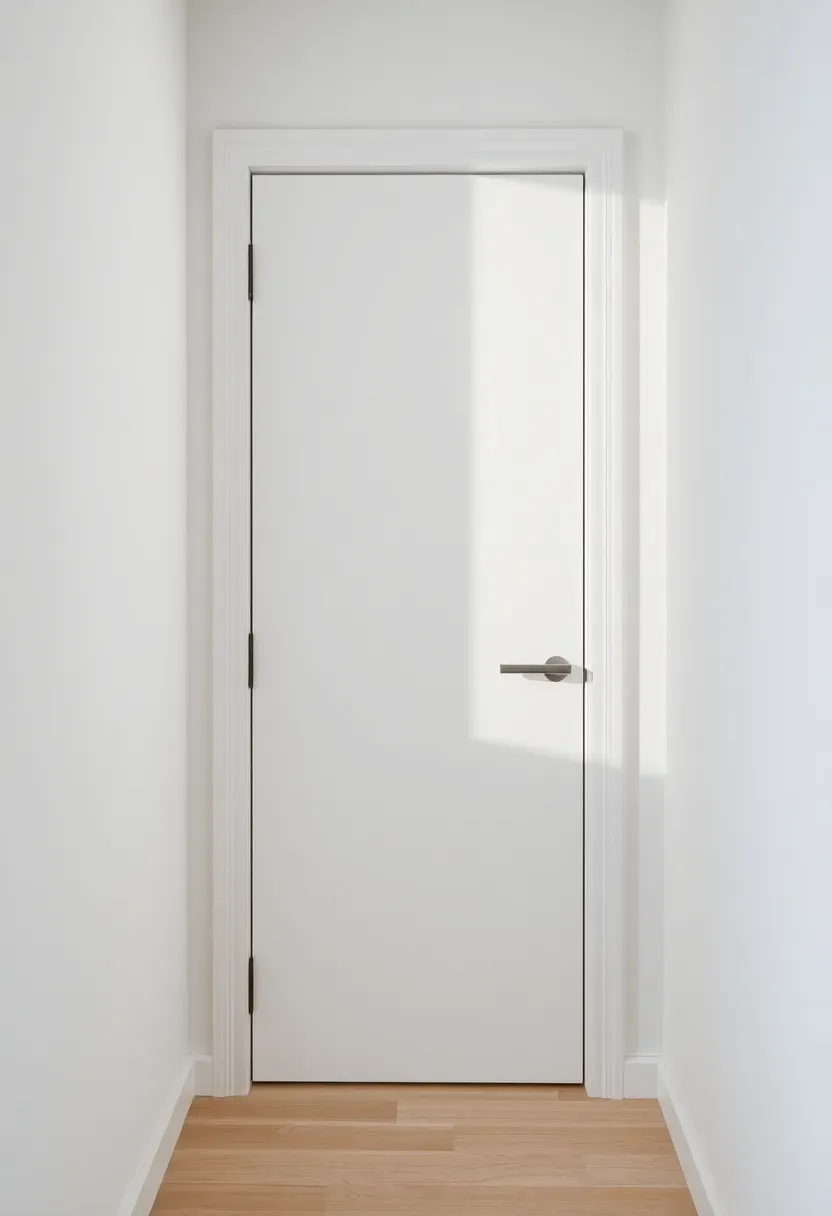
15. Pocket Door Upgrade
A pocket door slides into the wall cavity rather than swinging or tracking along the surface. In a new renovation context, it's the most space-efficient door solution available. In an existing apartment, the upgrade is only possible if the adjacent wall is not load-bearing and there is no wiring or plumbing inside.
Step 1: Assess Feasibility
Tap the wall adjacent to the existing door opening. A hollow sound suggests a simple stud-framed wall — potentially cutable. A solid or reverberant sound indicates masonry or a load-bearing structure. When in doubt, consult a contractor before proceeding.
Step 2: Choose the Door Style
A flush lacquered panel in white or off-white is the most universally compatible choice. For a premium feel, choose a solid core door (heavier, quieter, more sound-resistant) over hollow core.
Step 3: Hardware Selection
Minimal hardware reads best for a pocket door. A recessed edge pull (a small finger-length slot in the door edge) is the cleanest option and avoids any projecting handle.
What to Watch Out For
Pocket door frames require precise carpentry. Hire a professional for the framing and track installation — an out-of-plumb track causes sticking and misalignment that becomes increasingly frustrating over time.
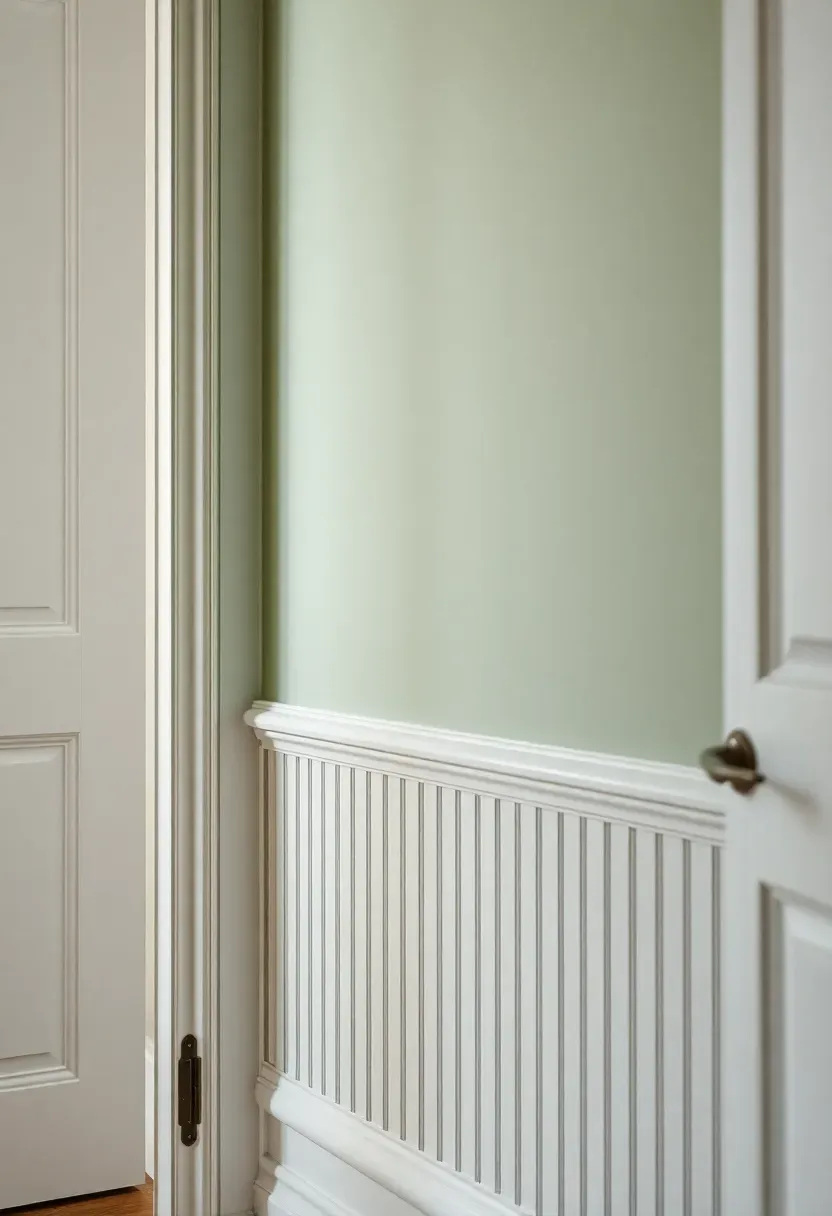
16. Wainscoting Panel Wall
Wainscoting — wood paneling on the lower third or half of a wall — is one of those moves that looks expensive and architectural but can be executed affordably with peel-and-stick panels or painted MDF boards.
Origins / History
Originally a practical feature in 17th-century European homes, wainscoting protected plaster walls from chair backs and foot traffic in frequently used passages. The entry hall was always among the first rooms to receive it.
Modern Interpretation
Today it functions almost purely decoratively, adding texture, visual weight, and a sense of craftsmanship to walls that would otherwise be flat painted drywall. Beadboard wainscoting (vertical grooved panels) works in cottage, farmhouse, and transitional styles. Flat-panel board-and-batten works better in contemporary or modern contexts.
How to Apply at Home
- Adhesive wainscoting panels are genuinely renter-friendly — no nails required if the wall is clean and dry.
- Cap the top of the wainscoting with a slim rail painted to match (or contrast slightly) for a finished look.
- Two-tone: paint above the rail a shade darker than the panels below for quiet drama.
- Keep the color palette in the same family — don't contrast so sharply that the two zones compete.
Recommended
Items for this idea
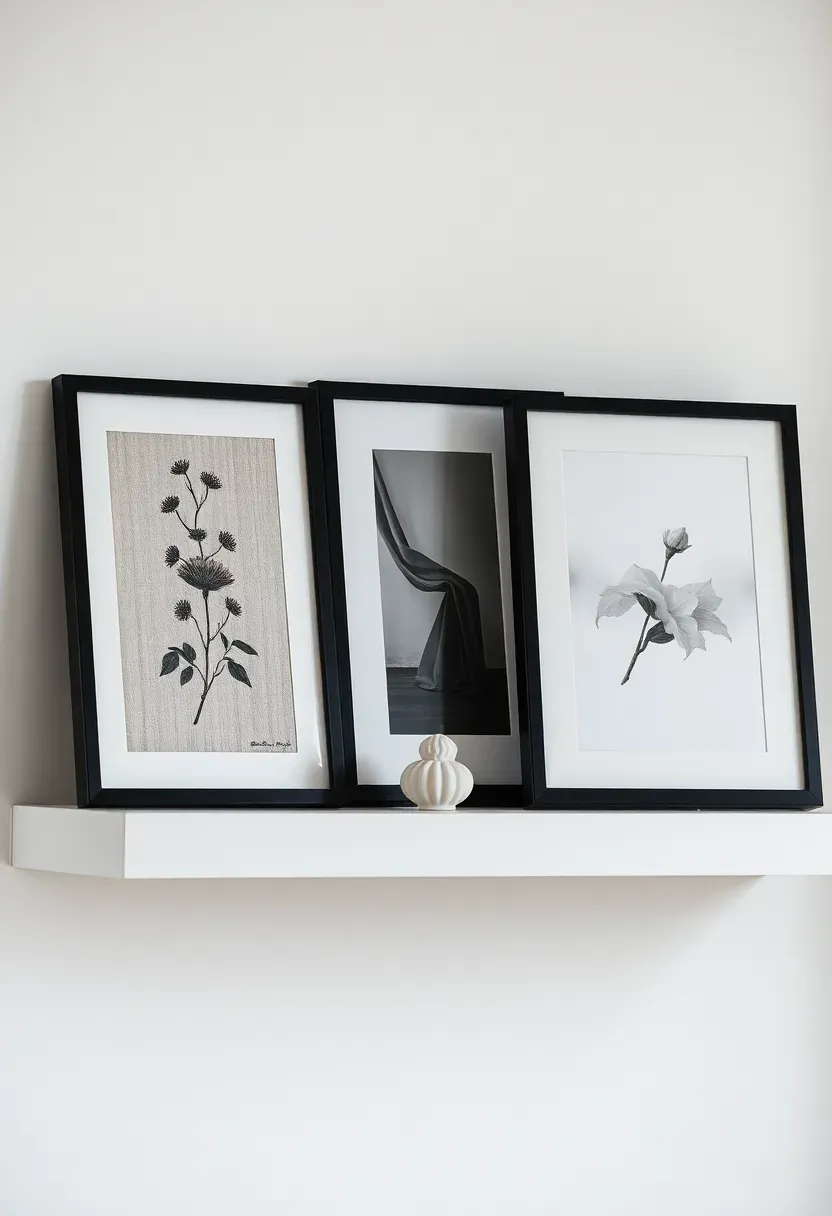
17. Picture Ledge Display
The Core Issue
Gallery walls require committing nail holes to specific locations — a problem in rentals and a commitment for anyone who likes to rearrange. Once you've hung five frames, changing the layout means patching and repainting.
The Solution
A picture ledge (a slim shelf with a raised front lip) holds leaning frames instead of hanging them, making the display fully flexible. Rearrange, add, or swap prints anytime without touching a wall. A single 24-inch ledge holds three to five frames at varying depths — large print at back, smaller pieces leaning against it in front. The result looks deliberately layered rather than rigidly planned.
Pros and Cons
Pros: Fully flexible, renter-friendly, no nail commitment, works at any budget. Cons: Frames can shift if the ledge is not perfectly level; check with a spirit level before mounting.
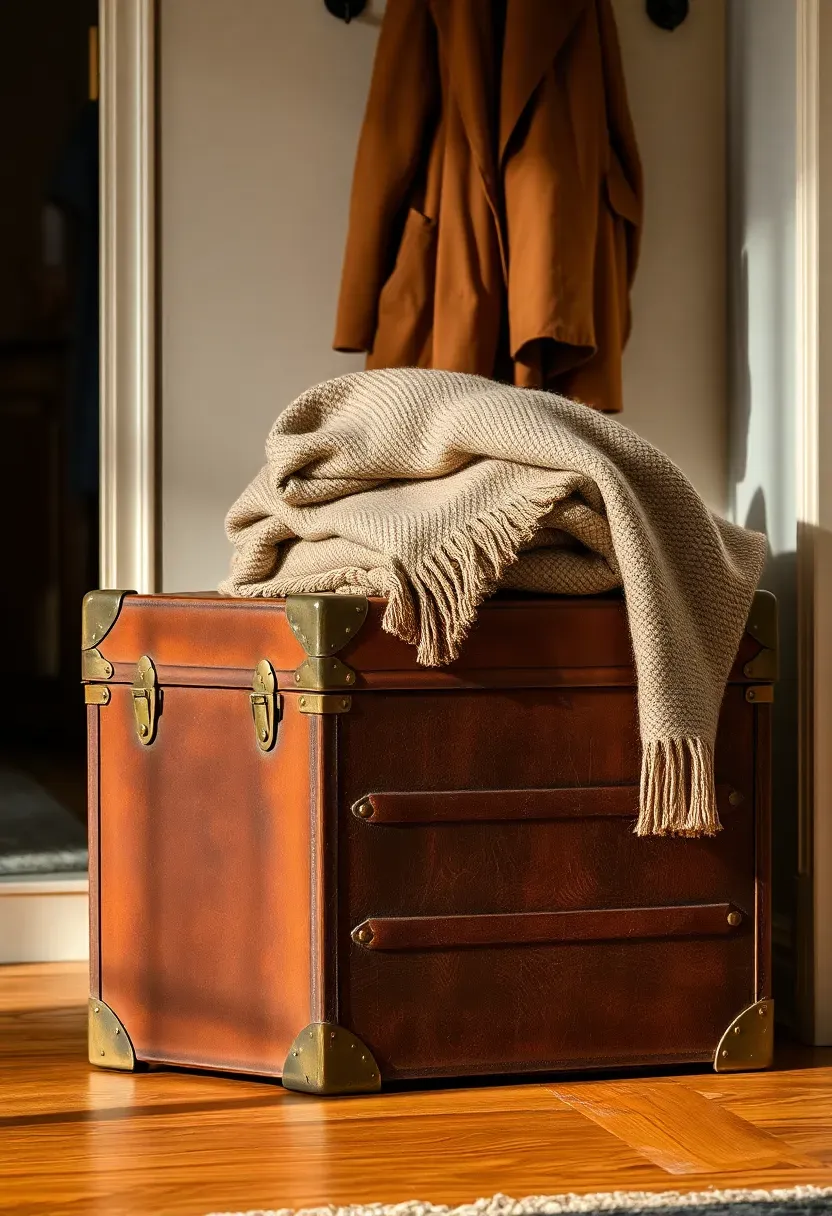
18. Vintage Trunk as Storage
There's something endlessly satisfying about a piece of furniture with a past life. A vintage steamer trunk in an entryway is simultaneously a storage unit, a side table, and a conversation piece — three functions in one footprint.
Step 1: Find the Right Trunk
Estate sales, flea markets, and online secondhand platforms regularly surface leather or canvas-covered steamer trunks in decent condition. Look for trunks with intact hardware (hinges, latches, corner pieces) even if the exterior is worn — patina is the point.
Step 2: Clean and Condition
Wipe the exterior with a damp cloth; for leather trunks, apply a leather conditioner to restore suppleness. Line the interior with cedar sheets or a cedar block to manage any residual musty odor.
Step 3: Style the Top
A folded throw blanket draped casually over one edge is the classic styling. Alternatively, a small tray with objects works well. Keep the top usable — not permanently stacked.
What to Watch Out For
Older trunks can be heavy even when empty. Confirm the floor beneath (especially on upper-story apartments with older buildings) can handle the additional load before filling with winter clothing.
Recommended
Items for this idea
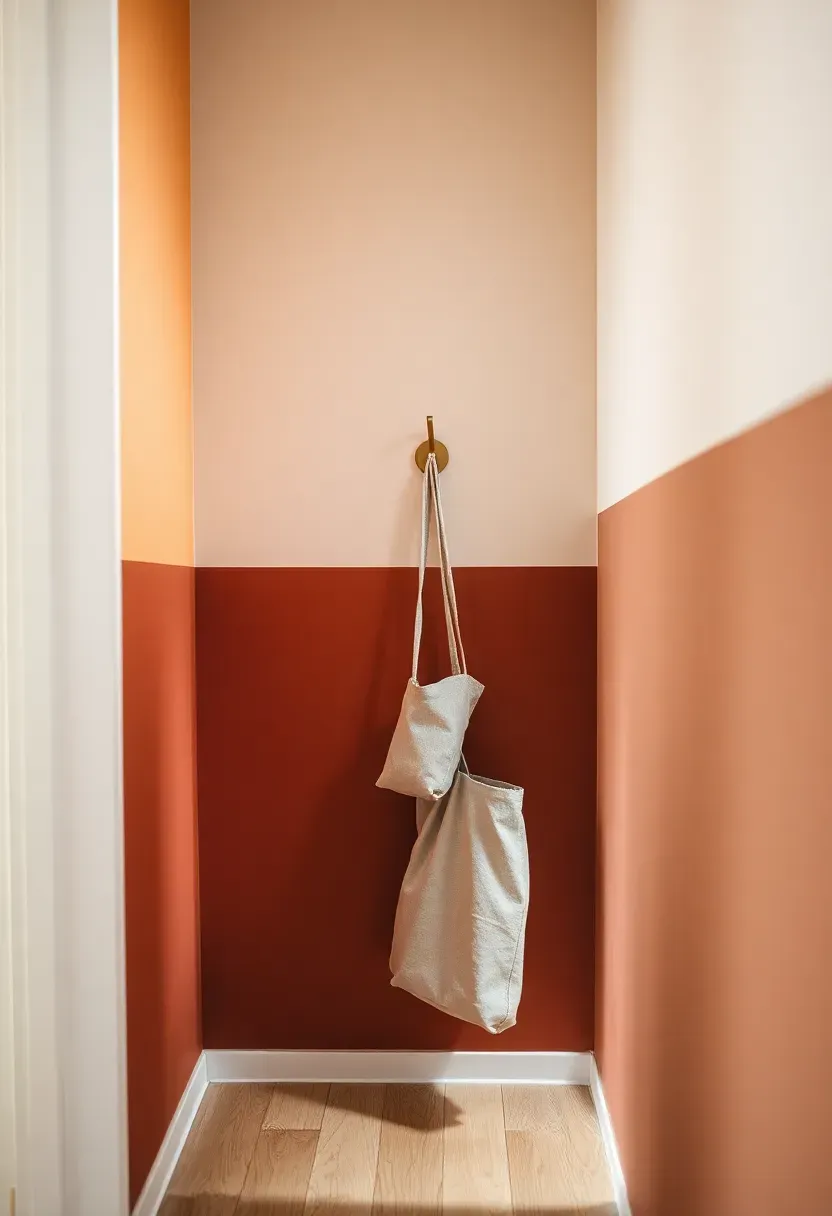
19. Color-Blocked Accent Wall
The Trend
Color blocking in interiors peaked in mainstream design around 2021 — and unlike many trends, it has stayed. Painting just the lower third or half of a wall in a contrasting color is the kind of technique that photographs well and feels genuinely original in person.
Origins / History
Color blocking as a concept traces back to the De Stijl movement of the 1920s (think Mondrian) and was adapted in fashion in the 1960s. Its domestic interior application is more recent — driven partly by the growing confidence of apartment dwellers willing to paint, even in rentals.
Modern Interpretation
A terracotta lower half with off-white above. Navy below, pale sage above. Charcoal to dust pink. The dividing line can be painted precisely with tape or left slightly hand-drawn for a looser, more artisanal look. A single brass hook mounted on the colored section adds functional purpose to a decorative move.
How to Apply at Home
- Mark the dividing line with painter's tape at the desired height (typical: 36–42 inches for a dado height effect, 54–60 inches for a more dramatic half-wall).
- Paint the upper color first, let it dry, then paint the lower — pulling tape while the lower coat is still slightly wet for a sharp edge.
- A single accent object (hook, small shelf) mounted in the colored zone reinforces the zone's purpose.
- Use a semi-matte finish on the lower color to handle scuffs more gracefully.
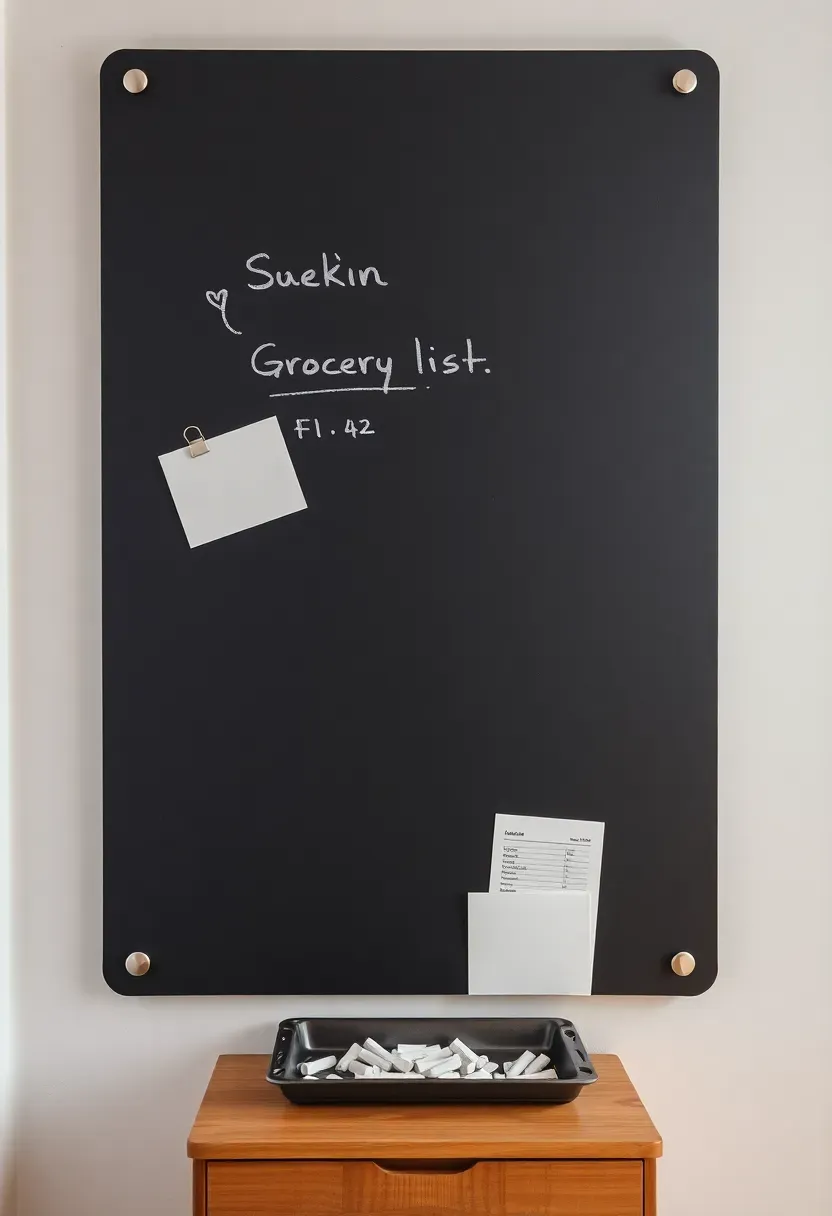
20. Magnetic Chalkboard Panel
A chalkboard in the entryway sounds slightly school-canteen. In practice, it's one of the most used surfaces in an apartment — especially in households that share the space.
Step 1: Choose the Right Size
A 16×24-inch panel covers the practical basics. Larger (24×36 inches) becomes more of a weekly planner. Smaller panels look like afterthoughts. Go larger than you think you need.
Step 2: Season the Surface
New chalkboard surfaces must be seasoned before use: rub the flat side of a piece of chalk over the entire surface, then erase completely. This prevents ghost marks from permanently imprinting the first thing you write.
Step 3: Mount at Eye Level
Mount the center of the panel at approximately 57 inches from the floor — the standard picture-hanging height, which puts the writing zone in a comfortable range for most adults.
What to Watch Out For
Chalk dust accumulates on surfaces and objects directly below the panel. Mount it above a console table rather than above a fabric bench — chalk dust on upholstery is tedious to remove.
Recommended
Items for this idea
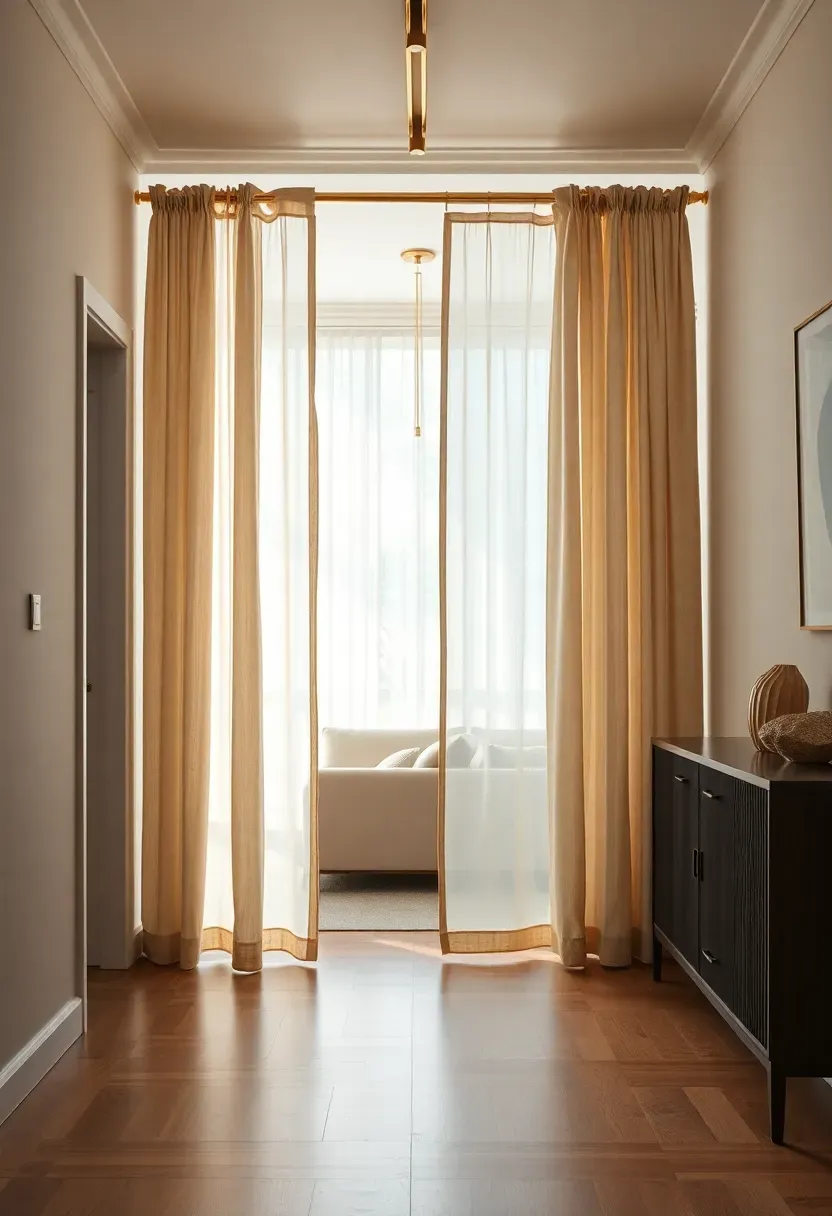
21. Curtain Room Divider
Why This Works in Apartments
Open-plan apartments often merge the entryway and living area into a single undifferentiated space. This is comfortable in theory and slightly awkward in practice — guests walk in and immediately see the whole apartment, and there is no psychological threshold between outside and inside.
How to Install a Curtain Divider
A ceiling-mounted curtain track (flush to the ceiling in brushed brass or matte black) running perpendicular to the main room creates a soft visual divide with no structural work. Two to four panels of sheer or semi-sheer linen hang from the track, drawn closed when you want privacy or separation and pulled to one side when the space should feel open. The track installs into ceiling joists with standard wood screws — check joist location with a stud finder before drilling.
What to Watch Out For
- Floor-to-ceiling panels require fabric that is long enough. Standard curtains are typically 84–96 inches; measure your ceiling height carefully.
- Sheer linen is the most forgiving fabric choice: it doesn't crowd the space visually, allows light to filter through, and moves gently when the door opens.
- For apartments with popcorn or textured ceilings, a wall-mounted rod near the ceiling works as an alternative to a flush track.
Quick FAQ
Is it possible to create a functional entryway in an apartment smaller than 40 square feet? Yes — in fact, many of the most satisfying apartment entryways are under 20 square feet. The key is vertical thinking: wall-mounted hooks, floating shelves, and slim cabinets use height rather than floor space. A single console table, one mirror, and a coat rail transform even a five-foot corridor into a complete entry zone.
Should the entryway match the rest of the apartment's decor? Not necessarily. The entryway is a transitional space, and a degree of visual distinction can actually be pleasing — like a brief pause between the outside world and your interior. That said, pulling one element (a color, a material, a finish) from an adjacent room creates coherence without imposing sameness.
What's the difference between a console table and an entryway table? Functionally, nothing. The terms are interchangeable. Stylistically, a console table tends to be slimmer (12–15 inches deep) and is specifically designed for against-wall placement, while "entryway table" can describe any piece at that location regardless of depth. In a narrow corridor, console depth matters: anything over 14 inches becomes an obstacle.
Which flooring works best in an apartment entryway? Hard surfaces — tile, hardwood, vinyl plank — are far more practical than carpet for an entryway since they handle wet shoes, tracked-in dirt, and dog paws without absorbing stains. If the existing floor is carpet, a durable flat-woven rug on top creates a practical and visually defined zone at the entry.
Can renter-friendly changes still look designed and permanent? Absolutely. Peel-and-stick wallpaper, adhesive wainscoting panels, plug-in pendant lights, removable picture ledges, and tension-rod curtain dividers all create a completely designed appearance while leaving zero permanent marks. The key is choosing high-quality products and applying them carefully — rushed renter-friendly installs look renter-friendly; deliberate ones look designed.
Trends come and go, but a welcoming entryway is one of those permanent improvements that quietly improves every day you live with it. Start with the single change that matters most to you — whether that's a coat rail that stops the jacket-pile problem, or a mirror that finally gives your hallway a sense of depth — and build from there. The best apartment entryways aren't expensive or elaborate. They're just considered.
Pinterest cover for 21 Apartment Entryway Ideas That Make Every Square Foot Count
About the author
OBCD
CGI visualization and interior design content. We create detailed 3D renders and curate practical design ideas for every room in your home.