17 Along Fence Simple Backyard Landscaping Ideas
That strip of bare soil running along your fence is one of the most overlooked opportunities in the entire backyard. Homeowners spend thousands redesigning patios and decks while this narrow corridor — sometimes 40 or 50 feet long — sits ignored and muddy. Yet fence lines are where some of the most dramatic garden transformations happen. A few well-chosen plants, a trellis, or even string lights can turn a boundary you barely notice into the focal point that guests comment on first.
Below I've gathered 17 ideas ranging from weekend projects to longer-term plantings, so you can pick the scale that suits your time and budget.
Table of Contents
- Climbing Roses on a Wooden Fence
- Annual Flower Border Strip
- Raised Garden Beds Against the Fence
- Evergreen Privacy Hedge
- Ornamental Grasses in a Row
- String Light Canopy Along the Fence
- Clematis and Trellis Panels
- Low-Maintenance Lavender Strip
- Bamboo Privacy Screen Planting
- Wildflower Seed Mix Border
- Espalier Fruit Trees
- Stacked Stone Planter Edge
- Fern and Shade Plant Corridor
- Solar Post Cap Lights with Shrubs
- Tall Sunflower Row
- Boxwood and Seasonal Color Mix
- Native Plant Pollinator Strip
1. Climbing Roses on a Wooden Fence
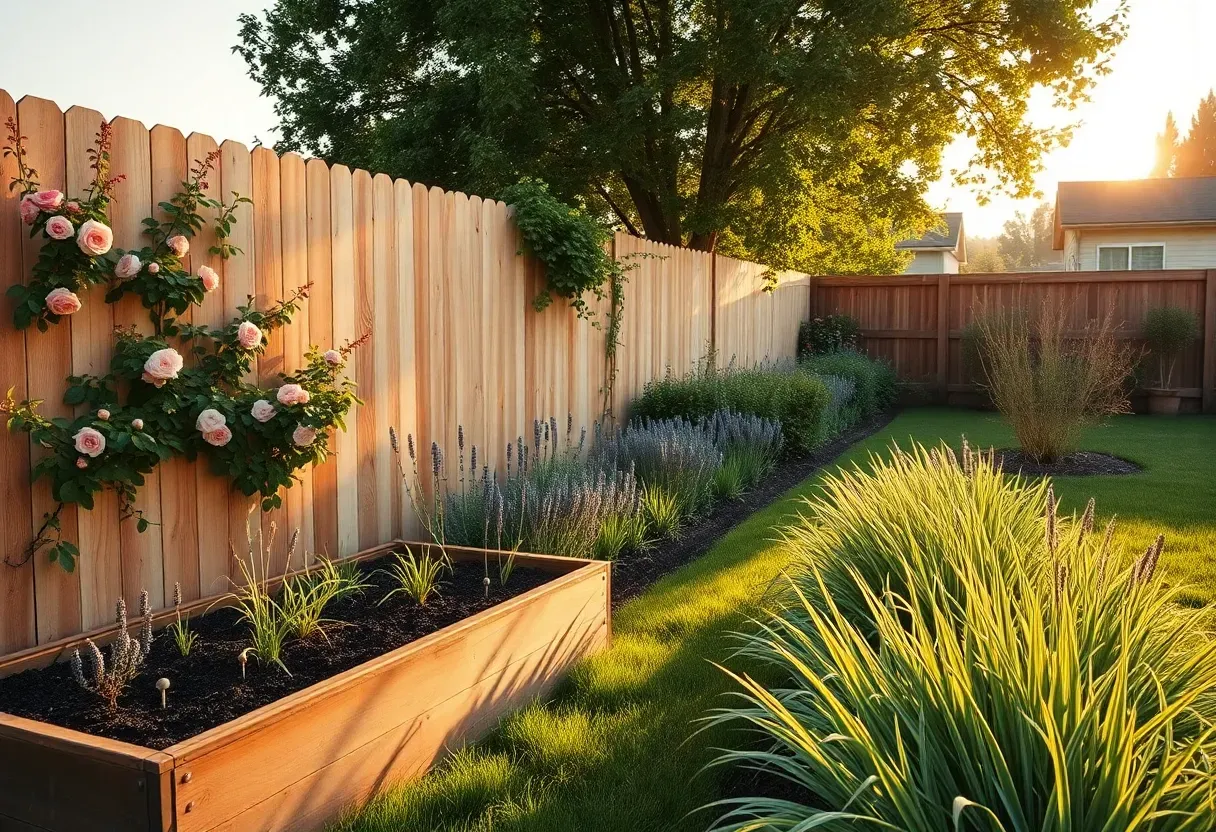
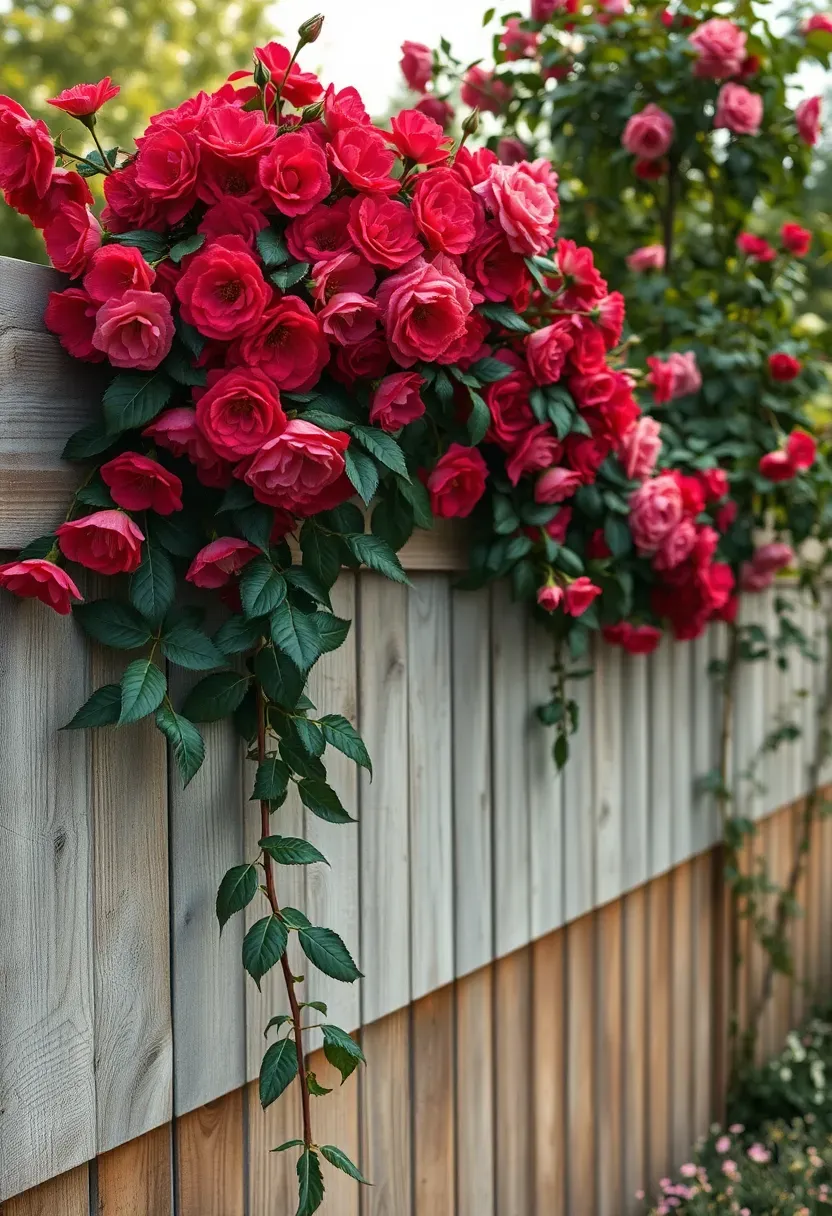
Few fence treatments match the timeless appeal of climbing roses. Varieties like 'New Dawn', 'Zephirine Drouhin', or 'Don Juan' can reach eight to twelve feet in a single season once established, turning a plain board fence into a living wall of fragrant color. Plant bare-root canes in early spring about eighteen inches from the fence base. Use soft garden ties to guide new shoots horizontally along the rails — horizontal training encourages more blooms than letting canes grow straight up. Deadhead spent flowers weekly through summer for a continuous display.
Tips for Success
- Choose a variety rated for your USDA zone — some climbers are only hardy to zone 6
- Improve drainage before planting by mixing compost into the native soil
- Leave at least 12 inches of clearance between canes and the fence for air circulation
We picked a few things that go well with this idea: Macteyia Metal Wire Trellis Panel (2-Pack) (★4.6), Jesosia PE-Coated Rose Trellis Privacy Screen (★4.5) and Expandable Willow Lattice Fence Trellis (36x92) (★4.5). As an Amazon Associate we earn from qualifying purchases.
2. Annual Flower Border Strip
The Core Issue
Most fence lines accumulate weeds because the soil is compacted and shaded for part of the day. Annuals solve this by growing fast, producing color within weeks, and tolerating imperfect conditions better than perennials.
The Solution
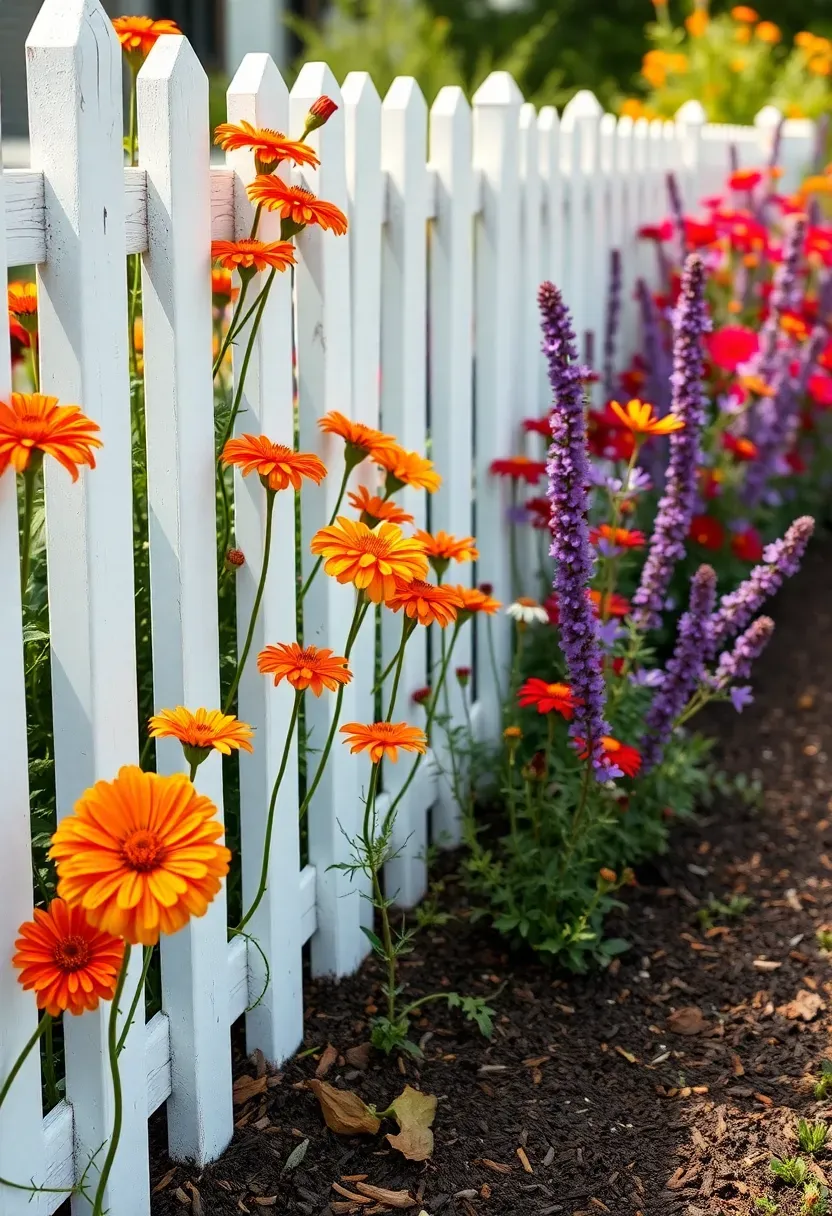
Prepare a strip 18 to 24 inches wide by loosening the soil to a depth of eight inches and raking in a two-inch layer of compost. Sow direct-seed annuals — zinnias, cosmos, marigolds, and bachelor's buttons — in late spring once soil temperature hits 60°F. For instant color, transplant starts from a nursery. Combine tall varieties (cosmos at 4 feet) at the back near the fence with shorter types (marigolds at 12 inches) at the front edge to create depth and keep the bed looking intentional.
Pros and Cons
Pros: Fast results, low cost, easy to change color scheme each year, deer-resistant options available Cons: Requires replanting each season, watering every few days in heat
We picked a few things that go well with this idea: BlueWish Elevated Cedar Garden Bed (72" L) (★5.0), Infinite Cedar Raised Garden Bed (4x8 ft) (★5.0) and AMERLIFE U-Shaped Raised Bed with Deer Fence (★3.9). As an Amazon Associate we earn from qualifying purchases.
3. Raised Garden Beds Against the Fence
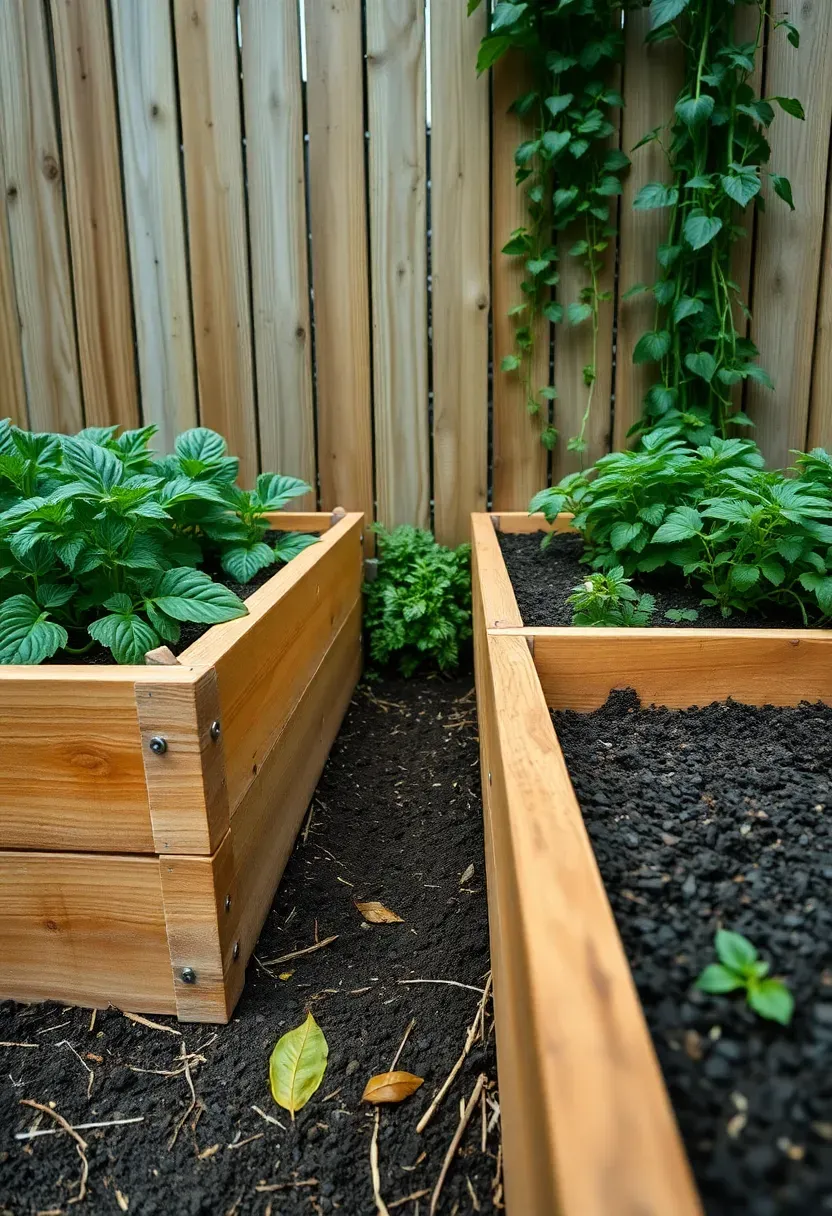
The space along a fence is ideal for raised beds because the fence provides wind shelter and, if the fence faces south, reflected warmth that extends the growing season. Build frames from cedar or composite lumber in widths no wider than three feet — you want to reach the center from the outside without stepping in. Stack boards two or three high for an 11- to 16-inch growing depth, which suits most vegetables. Fill with a mix of topsoil, compost, and perlite. The fence itself becomes a natural trellis for cucumbers, pole beans, and indeterminate tomatoes.
How to Set Up
- Position beds 2 to 3 inches away from the fence to allow air circulation and protect the fence from moisture
- Run a soaker hose through each bed before filling to simplify irrigation
- Add a simple weed barrier under the frame, but never solid plastic — roots need drainage
We picked a few things that go well with this idea: Peasur Solar Post Cap Lights (2-Pack) (★4.4), Dynaming Solar Post Cap Lights (6-Pack) (★4.4) and Solar Fence Post Cap Lights (12-Pack) (★4.7). As an Amazon Associate we earn from qualifying purchases.
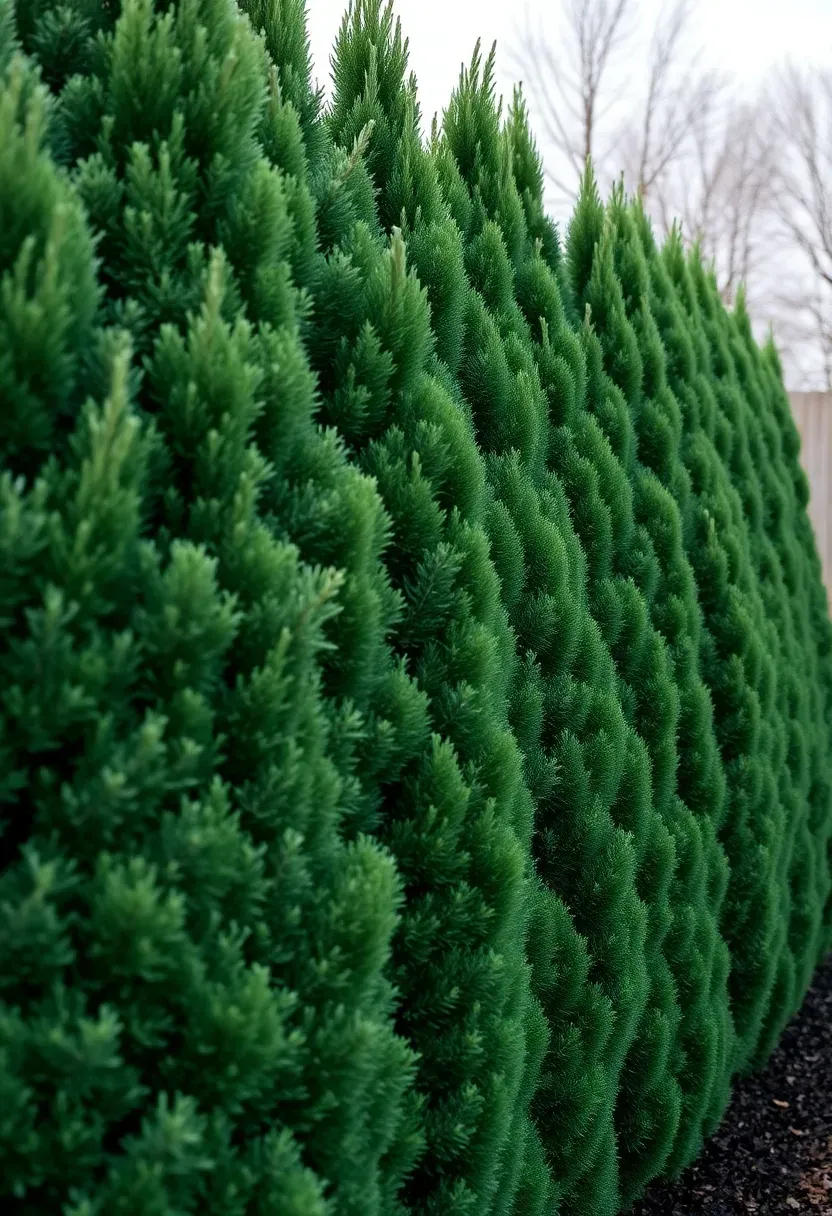
4. Evergreen Privacy Hedge
Imagine walking into your backyard and finding a wall of dense, year-round green rather than the neighbor's garage. That's what a well-placed hedge delivers — and unlike a wooden privacy panel, a living hedge improves with age. 'Emerald Green' arborvitae is the most popular choice: columnar, deer-resistant in most regions, and topping out at 12 to 14 feet with only a 3-foot spread. For faster coverage, try 'Green Giant' arborvitae, which adds up to 3 feet per year. Plant in fall or early spring, staggering two rows if you have the depth. Water deeply twice a week for the first growing season to establish roots.
Tips for Success
- Space 'Emerald Green' arborvitae 3 to 4 feet apart for a tight screen within 3 to 4 years
- Mulch the root zone generously to retain moisture and suppress weeds
- Avoid planting too close to the fence — allow at least 18 inches for root development
Recommended
Items for this idea
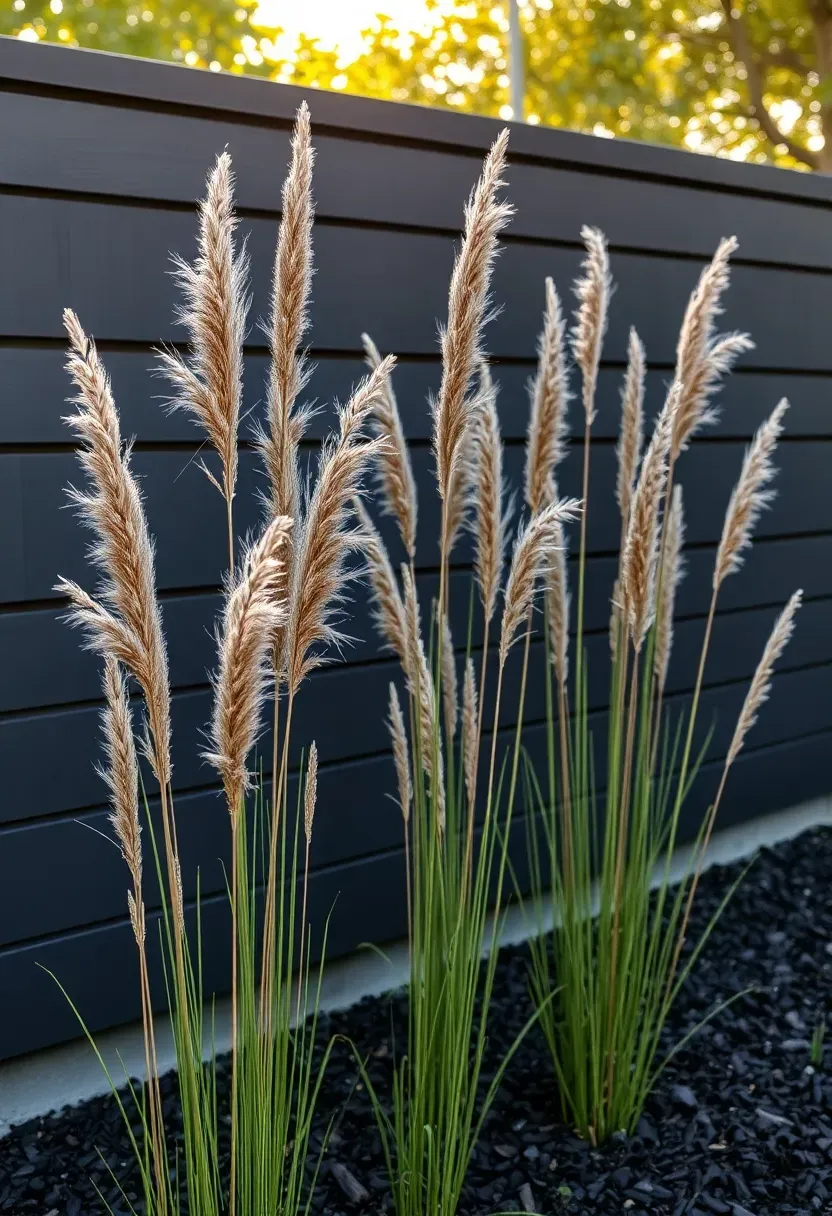
5. Ornamental Grasses in a Row
Comparing: Feather Reed Grass vs. Maiden Grass
Two grasses dominate fence-line plantings, and they serve different needs.
Feather Reed Grass (Calamagrostis)
Upright, clumping habit reaching 5 to 6 feet. The stiff vertical form holds all winter, providing structure even in snow. Tolerates wet clay soil and partial shade better than most ornamentals. The fluffy bronze plumes emerge in early summer and persist through frost.
Maiden Grass (Miscanthus sinensis)
Arching, wider habit reaching 6 to 8 feet with an equally wide spread. More visually dramatic with silver-white fall plumes, but needs more room and performs best in full sun. Some Miscanthus varieties can self-seed aggressively in certain climates.
What to Choose
Choose Feather Reed Grass if: your fence line gets afternoon shade or your soil drains slowly Choose Maiden Grass if: you have full sun, ample width, and want maximum visual drama in autumn
Recommendation
For most suburban fences, Feather Reed Grass wins on adaptability and lower maintenance. Mix in 'Karl Foerster' with a few Purple Fountain Grasses for color contrast.
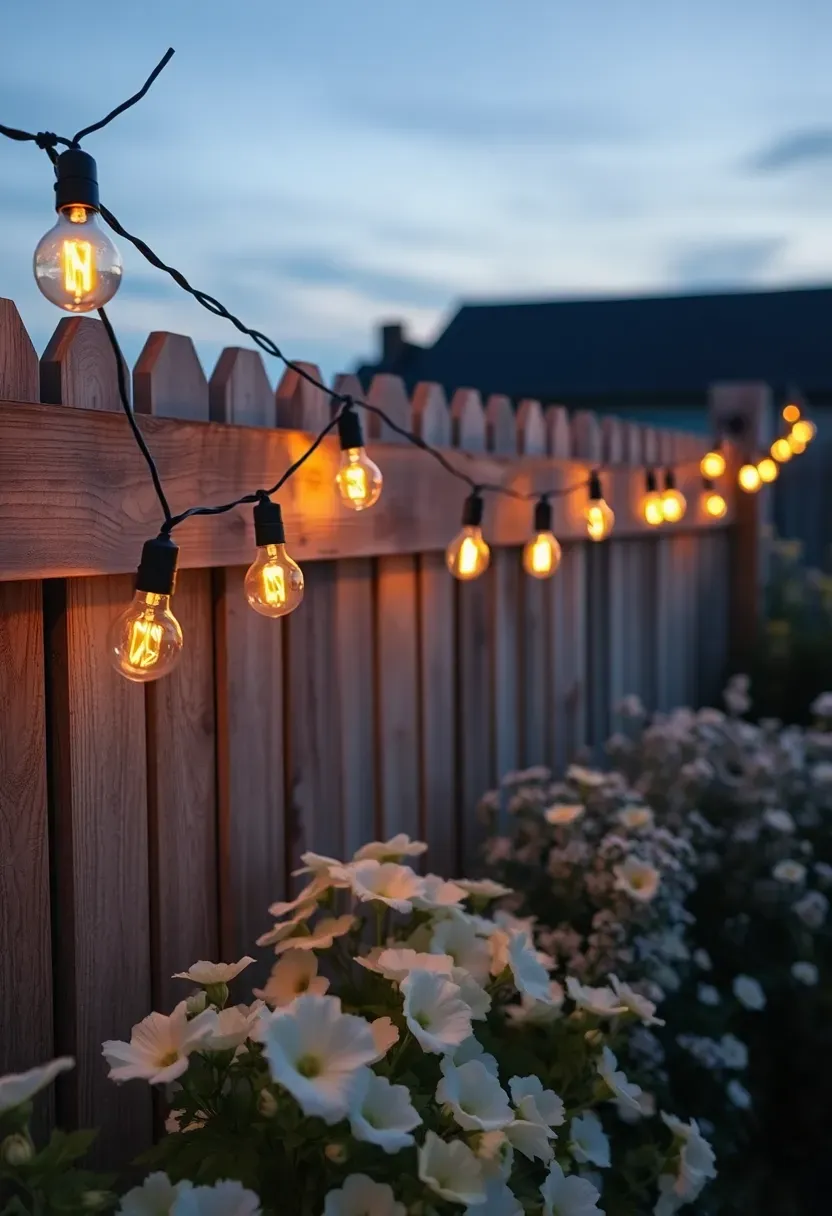
6. String Light Canopy Along the Fence
Lighting transforms a fence line more quickly than any plant. Run heavy-duty outdoor string lights (at least IP65-rated) from fence posts to a matching set of shepherd's hook poles planted 8 to 10 feet from the fence. The resulting canopy creates a ceiling of warm light over a seating area and makes the plantings below glow dramatically after dark. Combine globe bulbs with low-growing white flowers — dusty miller, white petunias, or candytuft — along the fence base to amplify the reflected glow. Solar-powered strings eliminate wiring, though they are dimmer than plug-in versions.
Tips for Implementation
- Use posts or metal conduit to anchor shepherd's hooks into soil — they tip over in wind without a secure base
- Choose 2700K color temperature bulbs for the warmest, most flattering outdoor light
- Add a timer so lights run automatically from dusk to midnight
Recommended
Items for this idea
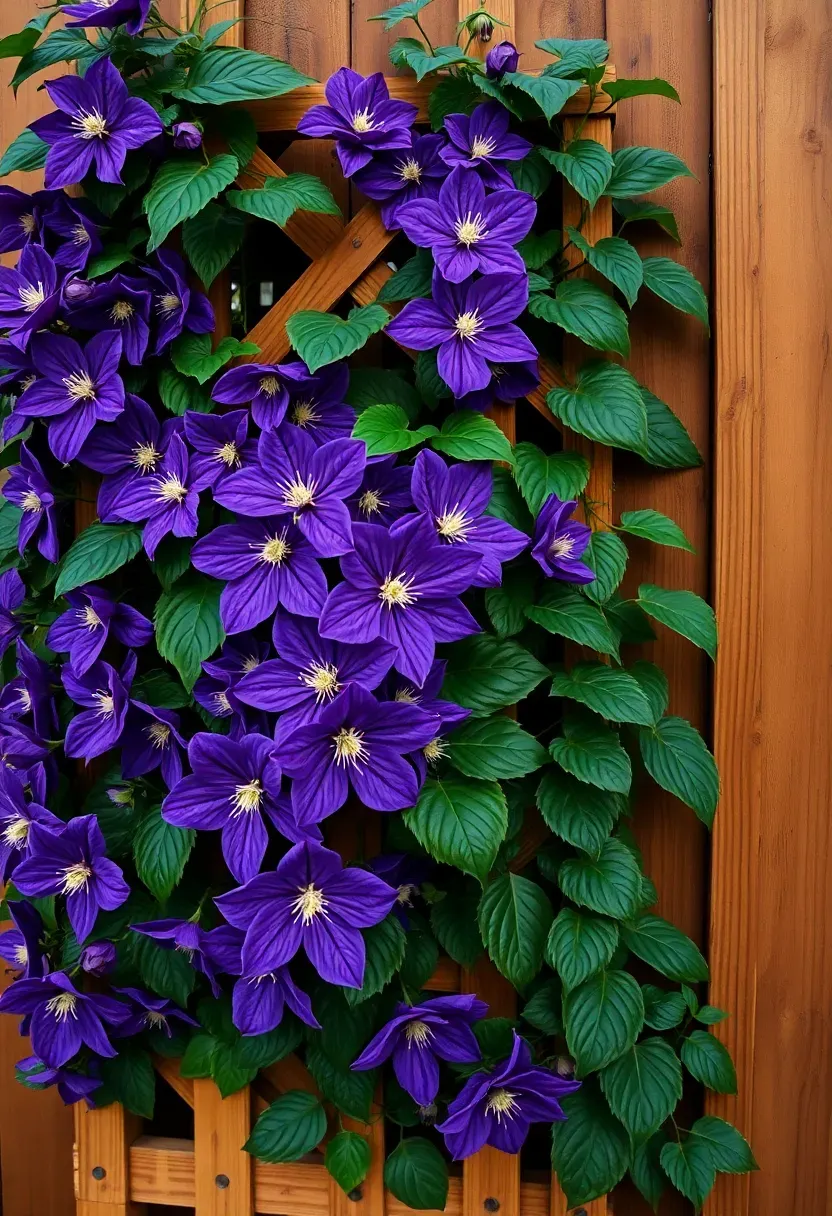
7. Clematis and Trellis Panels
How to Create a Clematis Trellis Display
Trellis panels mounted to a fence give any climbing plant a structured framework and prevent the scrambling habit that makes some climbers look messy.
Step 1: Install the Trellis
Fix cedar or metal diamond-grid trellis panels to the fence using 2-inch standoffs so there is a gap between the panel and the fence. This air gap prevents rot on wood fences and allows vines to wrap the frame.
Step 2: Choose Your Clematis Group
Group 2 clematis (like 'Nelly Moser' and 'The President') bloom in late spring on old wood, then again in late summer. They need only light pruning. Group 3 ('Jackmanii', 'Ville de Lyon') bloom on new growth and get cut to 12 inches every February — easier to manage.
Step 3: Train the First Season
Tie new shoots loosely to the trellis in early spring. Once established, clematis grabs the lattice on its own using leaf stalks.
What to Watch Out For
- Plant clematis deep — two inches below the crown level — to help it recover if stems break or die back
- Clematis prefers cool roots: mulch heavily or plant a low groundcover at the base
- Avoid planting directly under the fence eave where rain shadow creates dry conditions

8. Low-Maintenance Lavender Strip
When the goal is beauty without effort, lavender is nearly unbeatable. A strip of 'Hidcote' or 'Munstead' English lavender planted 18 inches apart along a sunny fence creates dense silver-green mounds that erupt in purple spikes from June through August, perfuming the air and drawing bees and butterflies. English lavender is hardy to zone 5, evergreen in mild winters, and once established needs watering only during extreme drought. Cut the stems back by one-third immediately after the first flush of bloom fades — this triggers a second flowering in late summer.
Tips for a Lasting Display
- Lavender demands excellent drainage: if your soil is heavy clay, build up a raised berm of 50% grit and 50% topsoil before planting
- Full sun is non-negotiable — fewer than six hours and the plants go leggy without blooming well
- Avoid fertilizing; rich soil produces floppy growth and reduces flower production
Recommended
Items for this idea
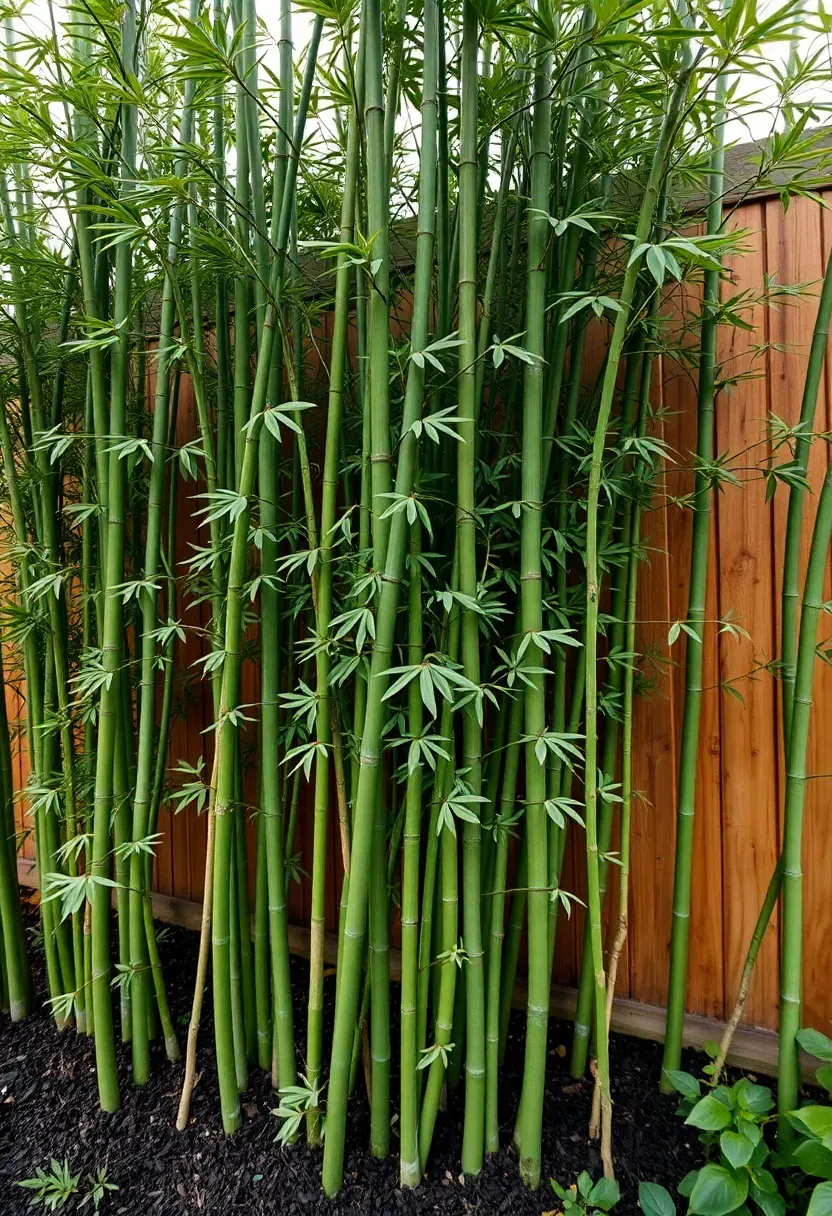
9. Bamboo Privacy Screen Planting
The Core Issue
Standard fence heights of 6 feet often feel inadequate when neighbors have elevated decks or when houses sit on sloped lots. Most solid-panel additions violate local ordinances and look harsh.
The Solution
Clumping bamboo species — Fargesia robusta, Fargesia murielae — grow 10 to 15 feet tall, stay tightly columnar without spreading, and create a living green wall that sways gently in wind rather than blocking it like a solid barrier. Plant stems in clusters of three, spacing clusters 4 feet apart along the fence line. Within two growing seasons, the clusters merge into a continuous screen. Unlike running bamboo, clumping species stay exactly where you plant them, making them safe near property lines.
Pros and Cons
Pros: Reaches fence-topping height faster than most shrubs, year-round green, unique texture Cons: Needs consistent moisture for the first two seasons; clumping species cost more than running types

10. Wildflower Seed Mix Border
There's something honest about wildflowers. They ask for minimal preparation, reseed themselves year after year, and support native pollinators in a way that hybrid bedding plants cannot. To establish a wildflower strip along a fence, scalp the existing vegetation with a sharp spade, rough up the soil surface, and broadcast a native seed mix formulated for your region. Water lightly for the first three weeks. After that, the plants largely take care of themselves. Leave the dried stems standing through winter — they provide shelter for ground-nesting bees and look architectural under frost.
Tips for a Natural Display
- Use a mix weighted toward perennial species so the planting thickens over time without annual reseeding
- A low border of contrasting plants (creeping thyme, edging lobelia) at the front keeps the bed looking intentional rather than accidental
- Resist the urge to weed aggressively in year one; many wildflower seedlings look indistinguishable from weeds until they're six inches tall
Recommended
Items for this idea
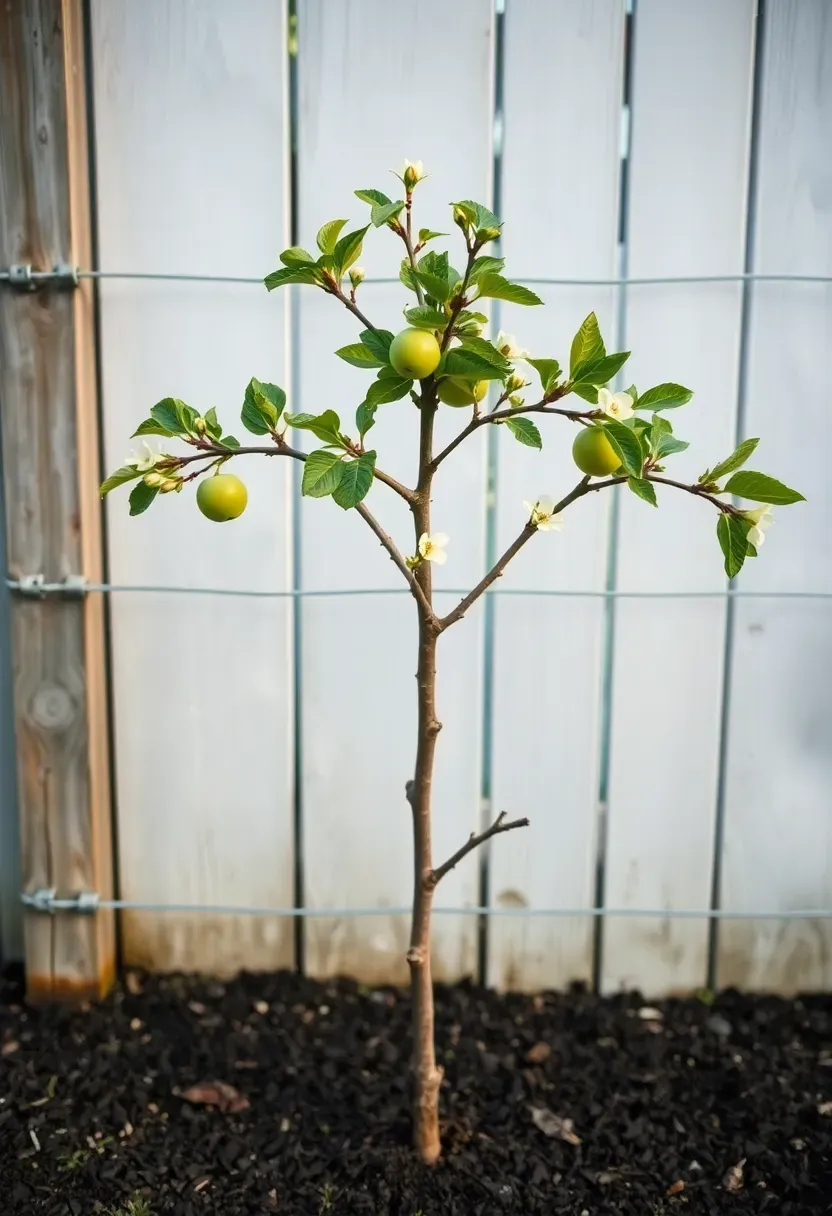
11. Espalier Fruit Trees
How to Train an Espalier Apple or Pear
Espalier — training a tree flat against a support — is a centuries-old technique that transforms a productive tree into living garden architecture. It suits fence lines perfectly because the resulting plant is only 12 to 18 inches deep but can spread 15 feet wide.
Step 1: Set Up the Wire Framework
Attach three or four horizontal galvanized wires to the fence at 18-inch intervals, starting 18 inches from the ground. Use eyebolts and tensioners so wires stay taut as the tree grows.
Step 2: Select and Plant
Choose a semi-dwarf apple or pear on a dwarfing rootstock (M9 or M26 for apples). Plant in early spring about 12 inches from the fence, angling the trunk at 45 degrees toward the first wire to encourage horizontal branching.
Step 3: Train Shoots Each Summer
Tie new lateral branches to the wires using soft garden ties. Pinch or cut any shoots growing directly toward or away from the fence. Fruit spurs develop on the horizontal framework within two to three years.
What to Watch Out For
- Espalier requires pruning two to three times per year; skip a season and the form becomes unruly
- Two compatible varieties are needed for cross-pollination and fruit set
- Full sun (minimum 6 hours) is essential for reliable cropping
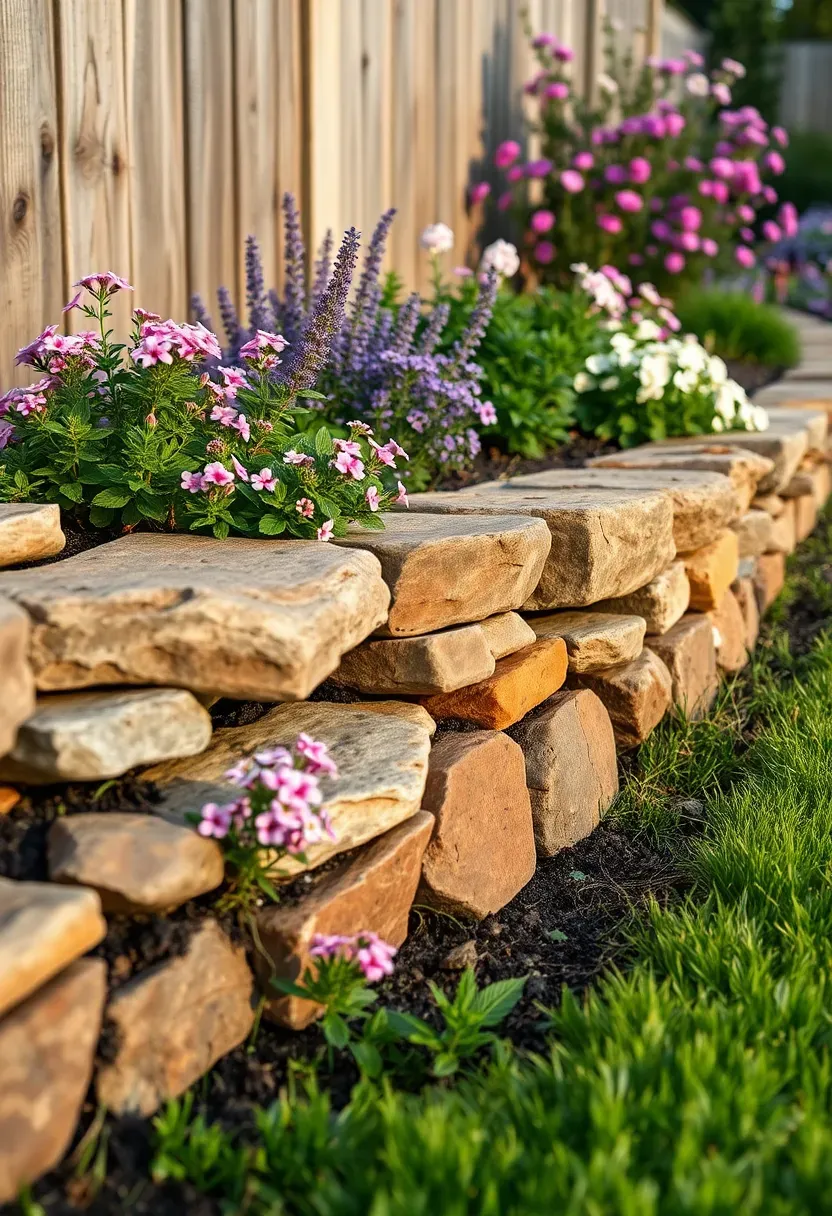
12. Stacked Stone Planter Edge
A dry-stacked stone edge along the fence base does triple duty: it defines the planting bed, retains slightly raised soil for drainage, and adds a natural material that ages beautifully over time. Use fieldstone or Pennsylvania bluestone pieces roughly 3 to 6 inches thick. Stack two or three courses without mortar — dry-stacking allows water to drain through and prevents frost heaving. The raised bed behind the stone can be filled with improved soil and planted with cascading perennials (catmint, creeping phlox, hardy geraniums) that spill over the stone edge and soften the boundary.
Tips for Lasting Structure
- Slope each course slightly into the hillside for stability — never stack straight vertical layers
- Use the largest, flattest stones for the base course; reserve smaller pieces for upper courses
- Plant creeping thyme or wooly thyme in the gaps between stones to prevent weeds and add fragrance
Recommended
Items for this idea
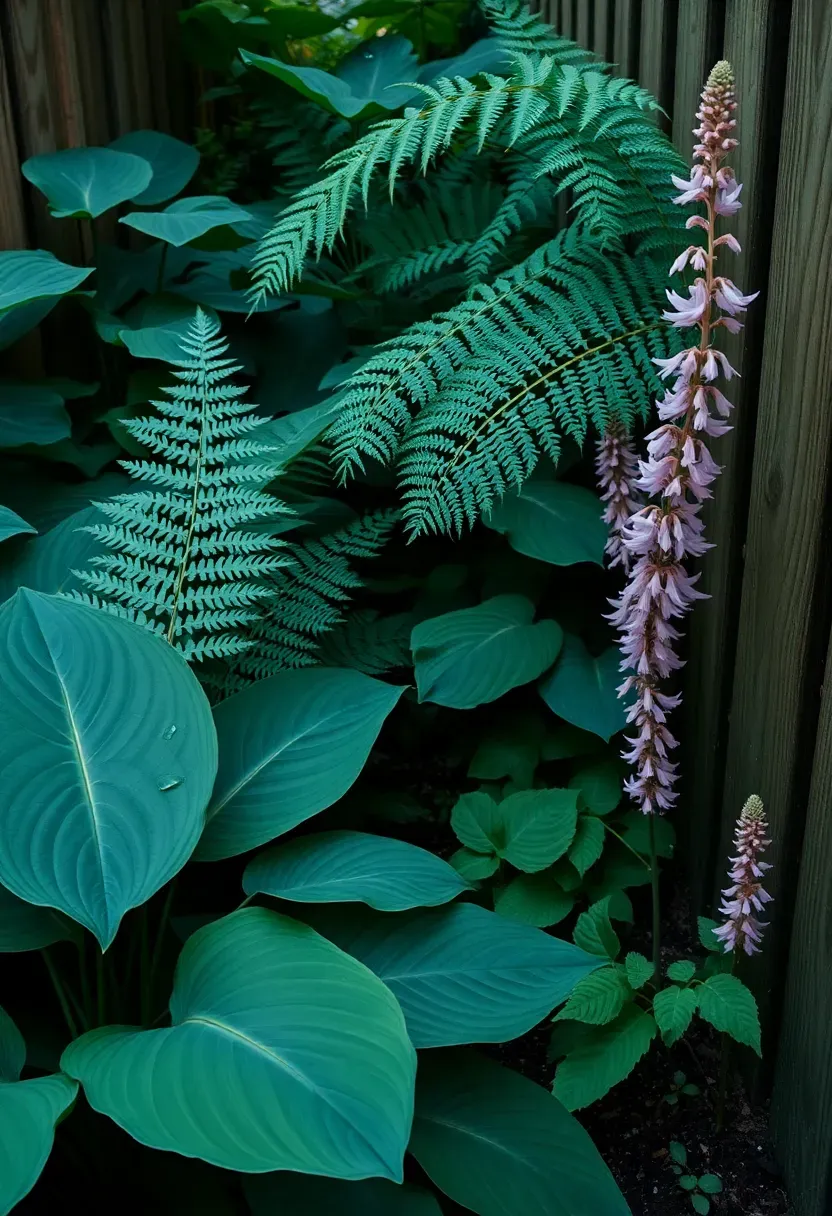
13. Fern and Shade Plant Corridor
North-facing fence lines or sections shaded by the house are often dismissed as problem areas. Flip that perspective: shade is actually an asset when you plant ferns, hostas, and astilbe together, creating a lush green corridor that looks cool and elegant even in the hottest months. Combine the bold paddle-leaf texture of hostas with the delicate fronds of ostrich fern and the feathery plumes of astilbe for a three-layer planting that ranges from ground level to four feet tall. This combination thrives in consistently moist soil — a condition many shaded fence lines already provide.
Tips for a Thriving Shade Border
- Water at the base rather than overhead to prevent fungal issues on hosta leaves
- Divide hostas every three years to maintain plant vigor and fill new sections of the corridor
- Edge the border with contrasting light-colored stones or a mowing strip to define it clearly
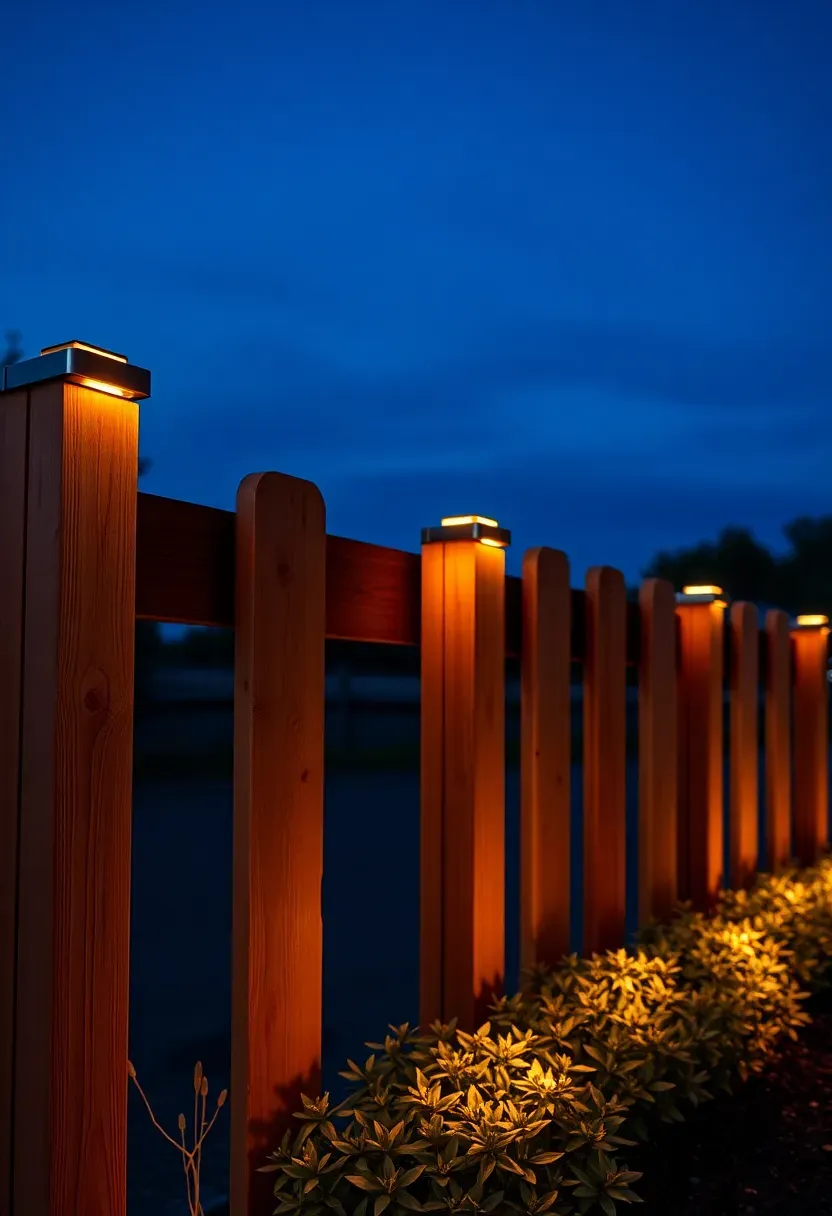
14. Solar Post Cap Lights with Shrubs
Comparing: Solar Post Caps vs. Low-Voltage Stake Lights
Both systems illuminate fence-line plantings beautifully, but they work differently and suit different situations.
Solar Post Caps
Fit directly onto the top of fence posts — no wiring, no electrician needed. Modern solar caps charge in partial sun and run 6 to 8 hours after a full day of charging. The warm amber glow highlights the fence structure and creates a row of soft illumination. Pair with rounded shrubs (spirea, abelia, dwarf boxwood) that the light will silhouette from above.
Low-Voltage Stake Lights
Positioned in the bed itself, these shine up through foliage for a dramatic effect. They require a transformer and buried cable, making them a bigger project, but the output is more consistent regardless of cloud cover.
What to Choose
Choose Solar Post Caps if: you want zero-effort installation and don't need high brightness Choose Low-Voltage Stake Lights if: consistent output matters, such as along an entertaining area used nightly
Recommendation
For most fence-line planting strips, solar caps are the practical choice. Install them first; add stake lights to specific focal points later if needed.

Recommended
Items for this idea
15. Tall Sunflower Row
Sometimes the simplest ideas are the ones that make the biggest summer statement. A single row of tall sunflower varieties — 'Mammoth Russian', 'Skyscraper', 'American Giant' — planted 12 inches apart along the fence in mid-spring will reach 8 to 10 feet by July. They need full sun and nothing else. No staking, no complicated soil prep, no special irrigation beyond normal summer rain in most climates. The fence supports the stalks against wind and the display is visible from inside the house, turning an ordinary summer afternoon into a moment that feels like the countryside. After flowering, leave the seed heads for goldfinches.
Tips for a Bold Summer Display
- Sow seeds directly after the last frost date — sunflowers dislike root disturbance from transplanting
- Thin seedlings to 12 to 18 inches once they reach 4 inches tall for sturdier, better-branched plants
- Plant a secondary row of dwarf cosmos or zinnias in front for a layered look while sunflowers are establishing
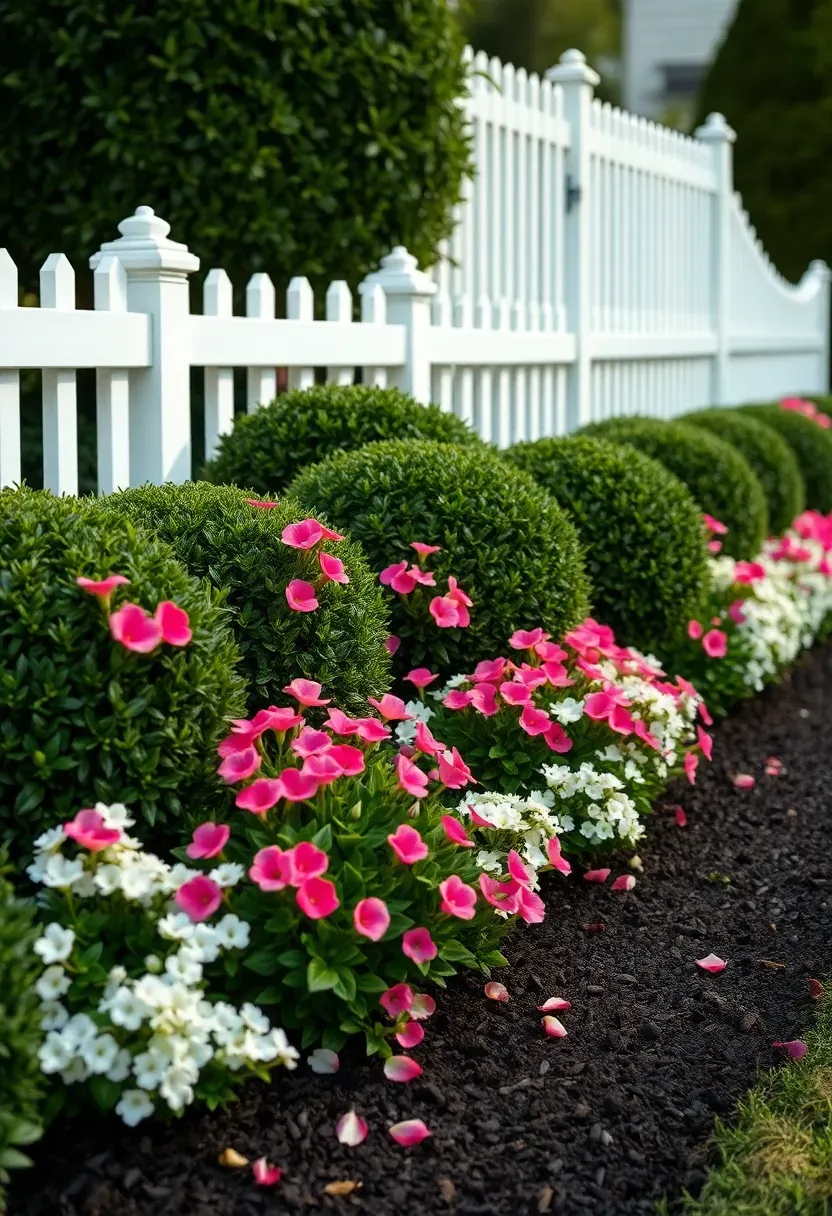
16. Boxwood and Seasonal Color Mix
For a fence line that looks polished year-round, nothing beats the combination of evergreen boxwood structure with seasonal annuals woven between. Plant dwarf boxwood ('Baby Gem', 'Green Velvet') every 3 feet along the fence, trimmed into consistent rounded mounds about 18 inches high. Between each shrub, plant seasonal annuals that change with the year: tulip bulbs and pansies in spring, impatiens or begonias in summer, ornamental kale and mums in fall. The boxwood provides the constant, architectural backbone; the annuals provide the rotating color narrative that keeps the bed visually interesting month after month.
Tips for Year-Round Interest
- Avoid boxwood varieties susceptible to blight — 'Baby Gem' and 'Glencoe' have better disease resistance than the common English boxwood
- Cut annuals back by one-third halfway through their season to refresh blooming
- Mulch the entire bed to suppress weeds and reduce watering frequency
Recommended
Items for this idea
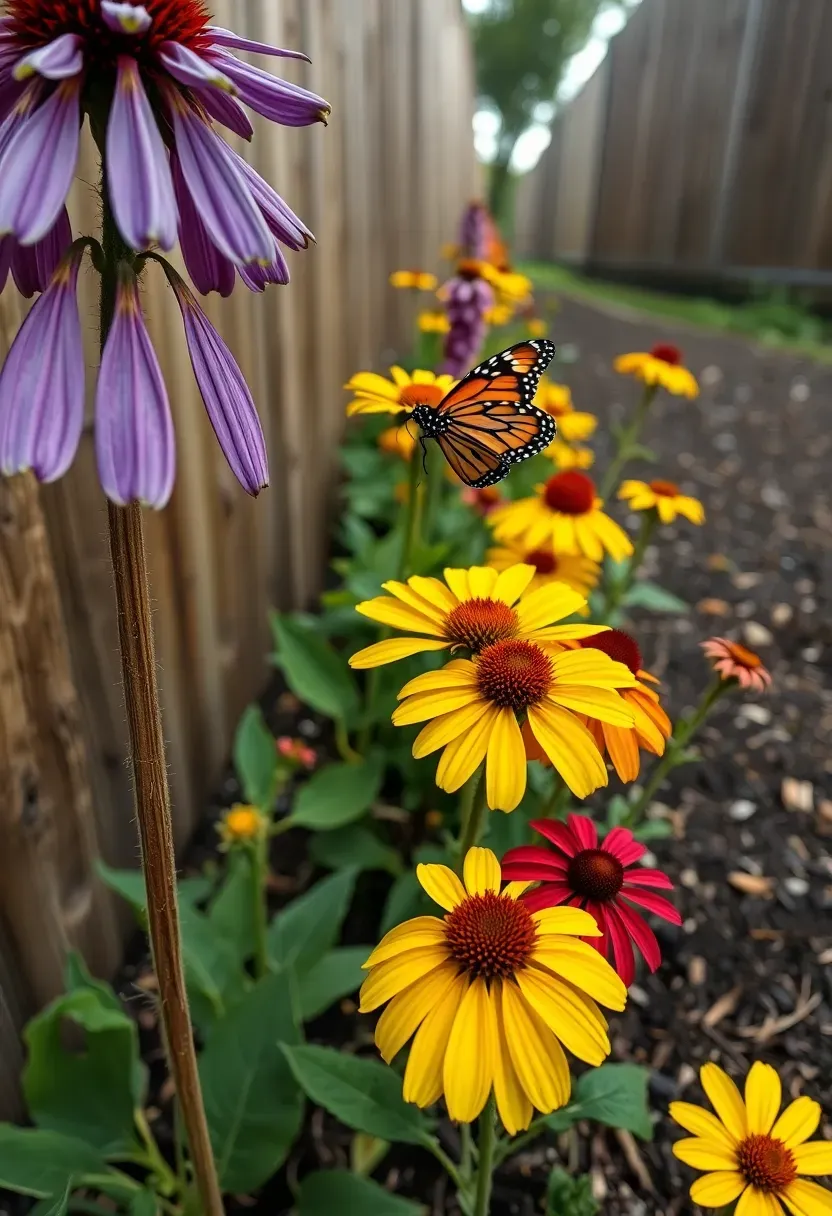
17. Native Plant Pollinator Strip
The most ecologically valuable thing you can do with a fence line is plant it with regionally native perennials. A strip combining purple coneflower (Echinacea purpurea), black-eyed Susan (Rudbeckia fulgida), bee balm (Monarda didyma), and common milkweed (Asclepias syriaca) supports dozens of butterfly and bee species and requires almost no intervention once established. Native plants evolved alongside local rainfall patterns, soil types, and pest pressures, so they rarely need fertilizing, supplemental irrigation after year one, or chemical protection. The fence backdrop gives the planting a defined frame that prevents it from looking unkempt.
Tips for a Pollinator-Friendly Planting
- Choose plants native to your specific ecoregion, not just your country — Eastern US natives perform differently than Pacific Northwest species
- Leave a small patch of bare soil somewhere in the planting zone for ground-nesting native bees
- Avoid cutting plants back in fall; seed heads and hollow stems provide critical winter habitat
Quick FAQ
Is it possible to landscape along a fence without digging up the grass? Yes — raised beds or weed-suppressing landscape fabric topped with mulch allow you to build up a planting strip directly over existing turf. Use the "lasagna mulching" method: layer cardboard over grass, add 4 inches of compost, then plant directly into the compost layer. The cardboard decomposes and the grass beneath dies without digging.
Should I get my neighbor's permission before planting right against the shared fence? Technically, you can plant on your side of the property line without permission. However, roots and overhanging branches can become a point of friction. A quick conversation about your plans — and choosing non-invasive species — prevents most disputes before they start.
What's the difference between a privacy hedge and a privacy screen? A privacy screen is typically a structural element — lattice, wood panel, or fabric — that provides immediate coverage. A privacy hedge is a planted solution that takes years to mature but provides a living, sound-buffering, visually softer result. Screens suit renters or those who need coverage now; hedges suit long-term homeowners.
Which low-maintenance plants work best in dry, shaded fence lines? Japanese forest grass (Hakonechloa macra), epimedium, and liriope handle both drought and shade better than most perennials. Once established, they spread slowly to fill the strip without watering. All three stay attractive across seasons and require only an annual cutback in late winter.
How do I keep weeds out of a fence-line planting strip permanently? A two-inch layer of hardwood bark mulch renewed every spring suppresses roughly 80% of weed germination. For the remainder, pulling when weeds are young (before they set seed) takes minutes rather than hours. A mowing edge — metal or aluminum edging buried at grade — prevents grass from creeping in from the lawn side and is the single most effective long-term weed control tool.
Trends come and go, but a well-planted fence line is one of those improvements that keeps paying dividends every season. Start with the idea that fits your current budget and available weekend time — whether that's a single bag of wildflower seeds scattered along 20 feet of fence, or a properly installed raised bed filled with vegetables. Every foot of fence-line planting you establish now becomes more beautiful as the years pass. Begin with one section, see how it transforms the feel of the whole yard, and let that momentum carry you to the next idea on this list.
Pinterest cover for 17 Along Fence Simple Backyard Landscaping Ideas
About the author
OBCD
CGI visualization and interior design content. We create detailed 3D renders and curate practical design ideas for every room in your home.