19 Backsplash Designs That Actually Look Good in Real Kitchens
A backsplash does more work than most people give it credit for. It protects your walls from grease splatter and water damage, sure, but it also sets the visual tone for the entire kitchen. Pick the wrong material or pattern and the room feels dated before you even move in. Pick the right one and suddenly the whole space clicks together — countertops, cabinets, hardware, all of it. These 19 backsplash designs cover materials ranging from hand-glazed ceramic to natural stone slabs, at price points from budget-friendly peel-and-stick to full custom installations.
Below you will find a mix of classic looks that have held up for decades alongside newer approaches gaining traction in 2026. Each section includes material specifics and practical considerations so you can narrow down what works for your kitchen.
Table of Contents
- Classic White Subway Tile
- Herringbone Pattern Marble
- Zellige Tile in Warm Neutrals
- Full-Height Marble Slab
- Penny Round Mosaic
- Stacked Vertical Subway Tile
- Handmade Ceramic in Sage Green
- Chevron Pattern Porcelain
- Exposed Brick as Backsplash
- Terrazzo Tile Backsplash
- Dark Moody Zellige
- Hexagonal Tile Grid
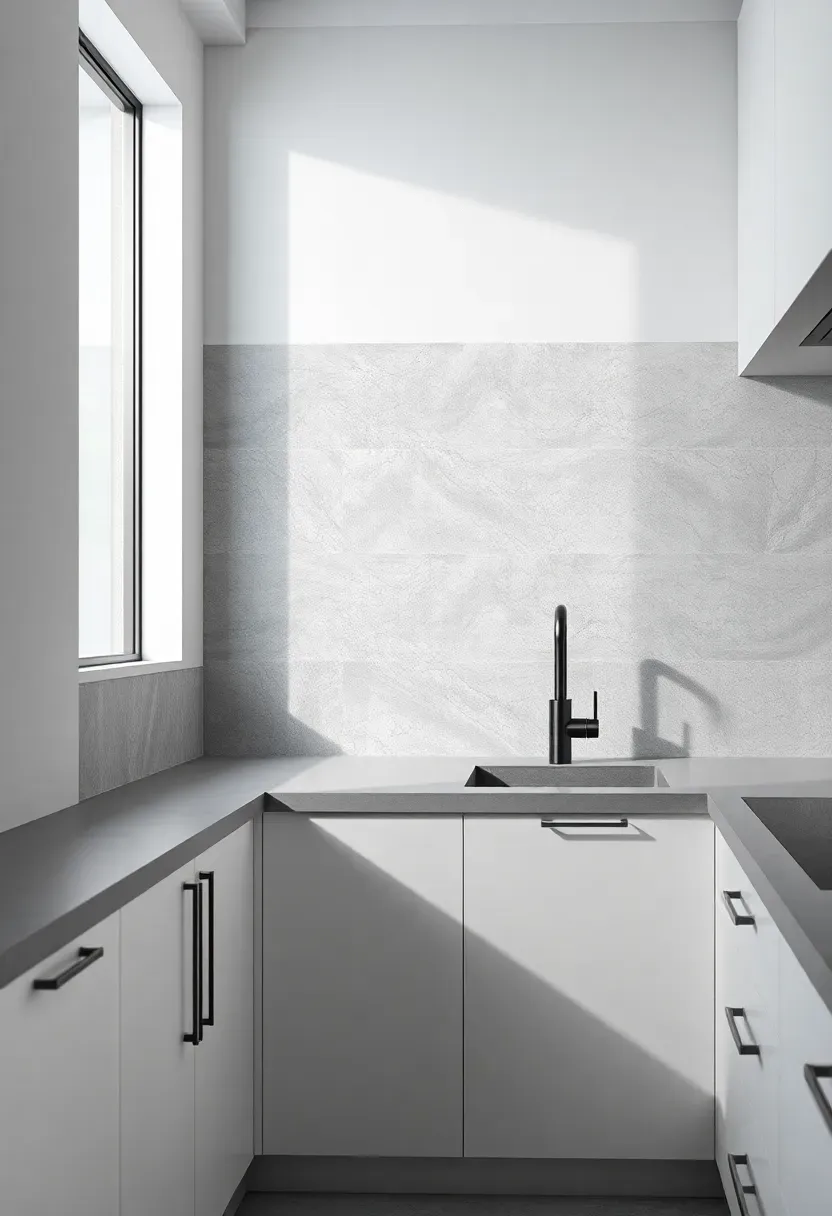
- Concrete-Look Porcelain Slab
- Basketweave Marble Mosaic
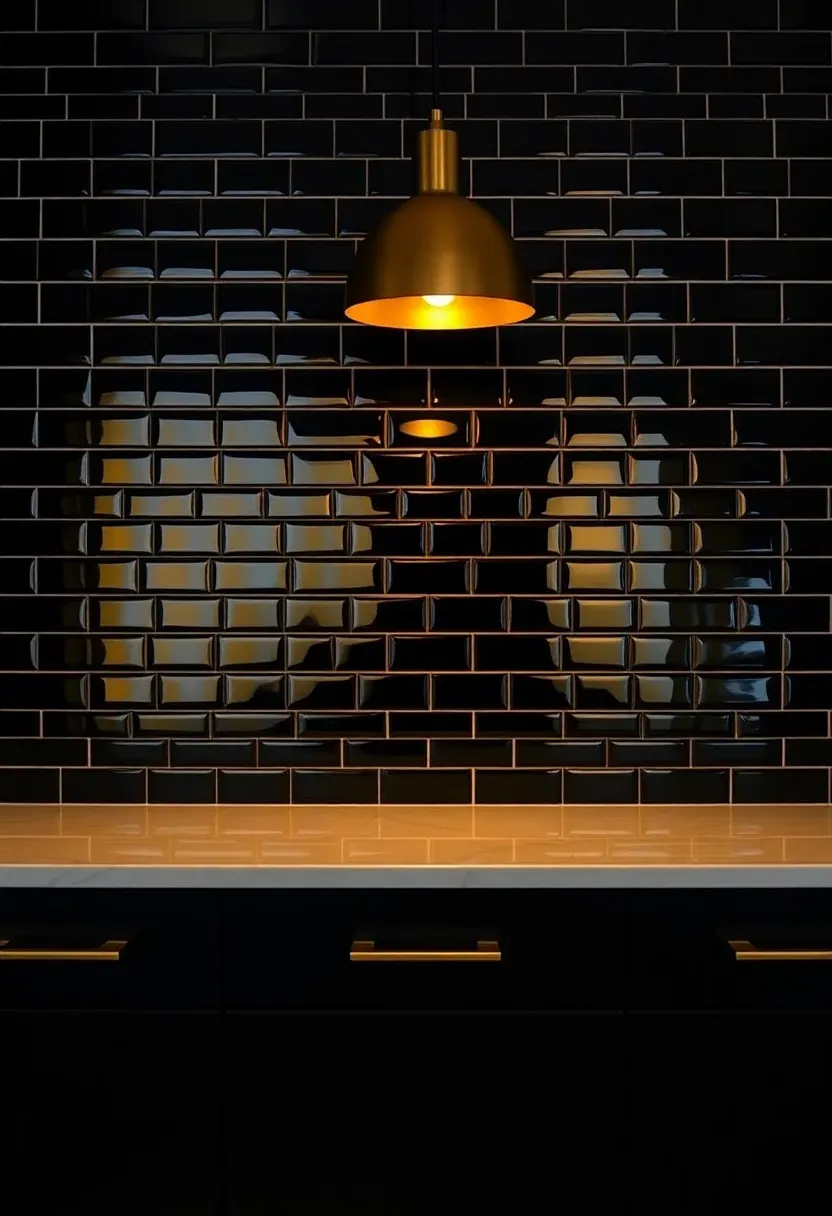
- Glossy Black Subway Tile
- Peel-and-Stick Geometric Tile
- Fluted Glass Panel
- Terracotta Tile Backsplash
- Mixed-Width Stacked Stone
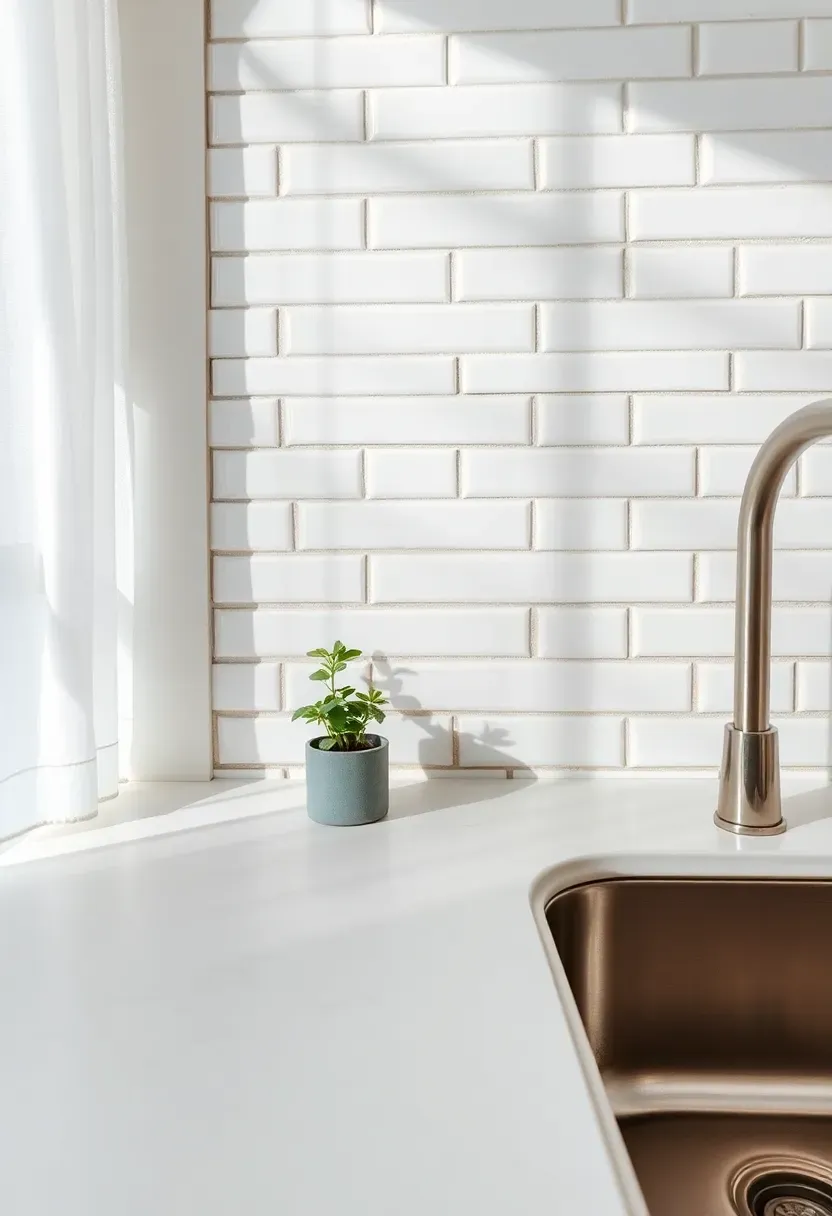
1. Classic White Subway Tile
There is a reason white subway tile has been around since the early 1900s and still shows up in new builds today. The 3x6 format is forgiving during installation, easy to source at nearly any budget, and pairs with everything from farmhouse cabinets to flat-panel modern doors. The key variable is grout color. White grout creates a seamless, clean look. Medium gray grout reveals the brick-lay pattern and adds depth. Dark charcoal grout makes a graphic statement that reads almost industrial.
Tips
- Use unsanded grout for joints narrower than 1/8 inch to prevent cracking
- Beveled edges catch light differently than flat edges — beveled reads more traditional
- Order 15% extra tile to account for cuts and future spot repairs
We picked a few things that go well with this idea: Art3d Peel-and-Stick White Subway Tile (10-Pack) (★4.2), STICKGOO White Subway Backsplash Tile (10-Sheet) (★4.2) and StyloVue Glossy White Subway Tile (100-Piece) (★4.4). As an Amazon Associate we earn from qualifying purchases.
2. Herringbone Pattern Marble
Why the Pattern Matters More Than the Material
The Core Issue
Standard running-bond marble tile can look flat and predictable, especially in lighter marbles where veining is subtle. The material deserves a layout that shows it off.
The Solution
Cutting marble into 2x6 or 1x4 strips and laying them in a herringbone pattern creates movement across the entire wall. Each piece catches light at a slightly different angle, which brings out the veining in ways a flat grid never could. Carrara, Calacatta, and Statuario all work here, though Carrara is the most affordable at $8-15 per square foot for the tile alone.
Pros and Cons
Pros: Timeless visual impact, works with both polished and honed finishes, increases perceived value Cons: More labor-intensive to install (higher labor cost), marble requires periodic sealing against stains
We picked a few things that go well with this idea: Soulscrafts Carrara Herringbone Marble Tile (5-Sheet) (★3.8), Diflart Carrara Herringbone Marble Mosaic (5-Pack) (★4.5) and V-MOZZA Peel-and-Stick Herringbone Stone Tile (5-Sheet) (★4.3). As an Amazon Associate we earn from qualifying purchases.
3. Zellige Tile in Warm Neutrals
Zellige is a Moroccan glazed terracotta tile, hand-cut and fired in wood kilns, which means no two pieces are exactly alike. That irregularity is the entire point. In warm neutrals — think bone, sand, pale clay — zellige gives a backsplash a handmade, textural quality that factory-produced tile cannot replicate. Light bounces off each tile differently because the glaze thickness varies, creating a rippled, almost liquid effect across the wall. Expect to pay $15-30 per square foot for authentic zellige, with cheaper look-alikes available in porcelain.
Tips
- Hire a tile setter experienced with handmade tile — uneven thickness requires more mastic adjustment
- Wider grout lines (1/8 inch) complement zellige's rustic character better than tight joints
- Seal the tile before grouting to prevent staining the porous terracotta body
We picked a few things that go well with this idea: AQUA-X Clear Grout and Tile Sealer (16oz) (★4.3), Miracle Sealants 511 Penetrating Tile Sealer (Pint) (★4.5) and Miracle Sealants Grout Sealer (6oz) (★4.2). As an Amazon Associate we earn from qualifying purchases.
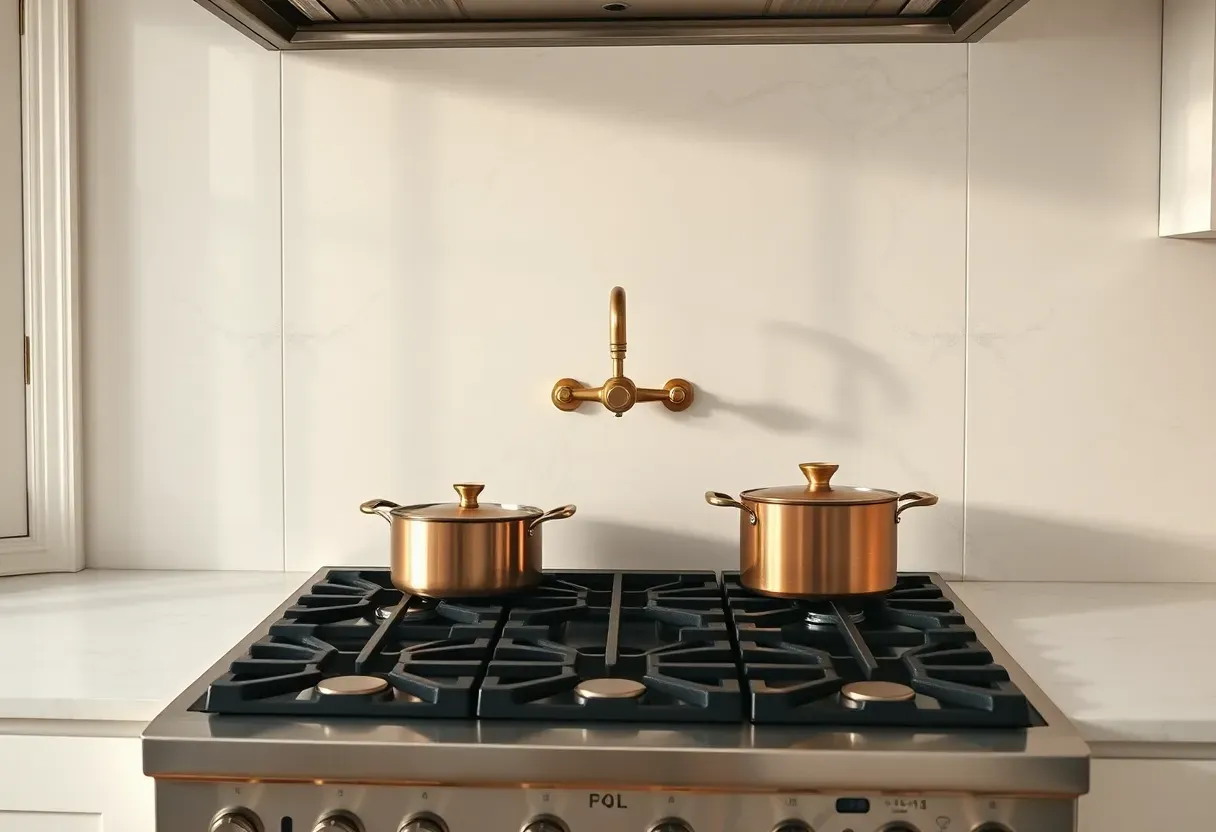
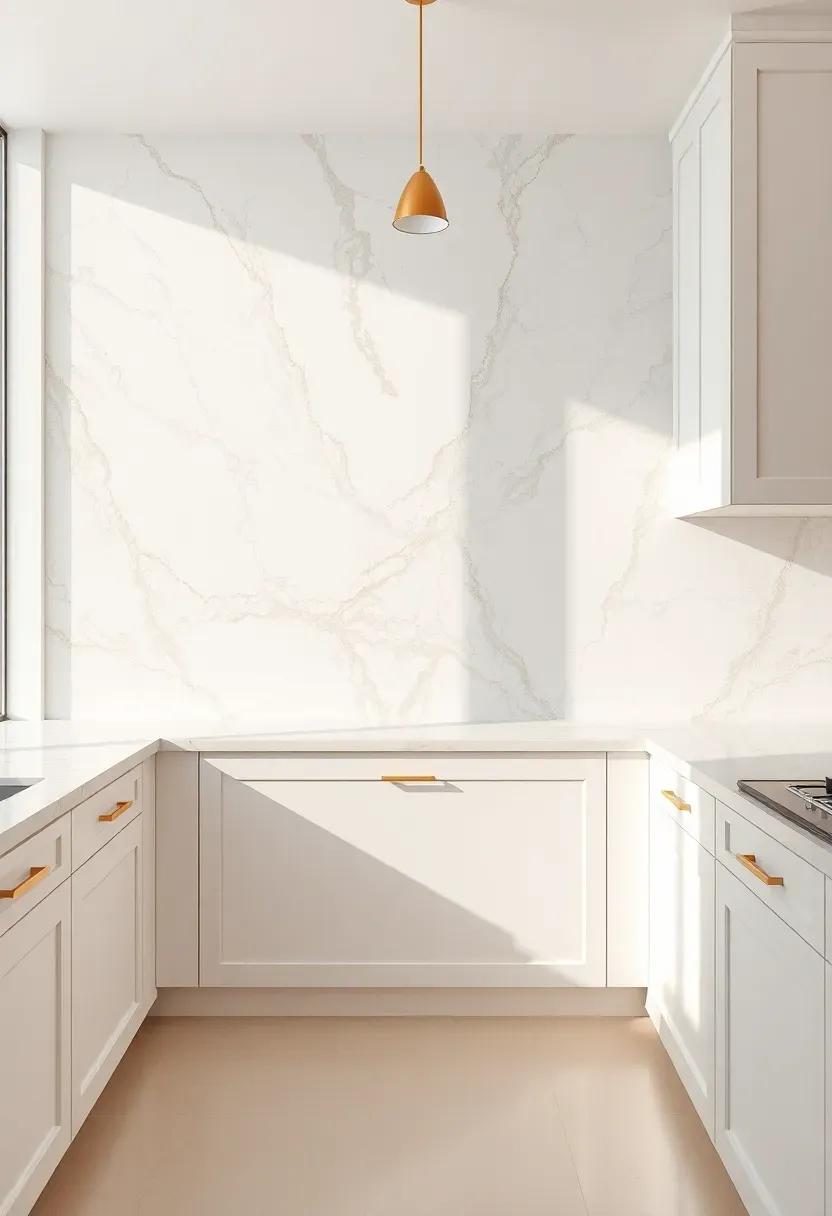
4. Full-Height Marble Slab
How to Pull Off a Slab Backsplash
A slab backsplash means one continuous piece of stone running from countertop to upper cabinets — no grout lines, no pattern interruption, just unbroken veining.
Step 1: Book-Match Your Slabs
Visit the stone yard in person and select slabs cut from the same block. When opened like a book, the veining mirrors itself across the seam, creating a butterfly effect that looks intentional rather than random.
Step 2: Template After Cabinets Are Installed
The fabricator needs exact measurements including outlet cutouts, window placements, and hood vent dimensions. Templating happens after cabinetry is complete.
Step 3: Seal Immediately After Installation
Apply an impregnating sealer within 24 hours of installation and reapply annually. Marble is porous — coffee, wine, and lemon juice will etch unprotected surfaces.
What to Watch Out For
- Slab backsplashes typically cost $50-100+ per square foot installed — budget accordingly
- Hairline cracks during transport are a real risk; confirm the fabricator's damage policy upfront
Recommended
Items for this idea
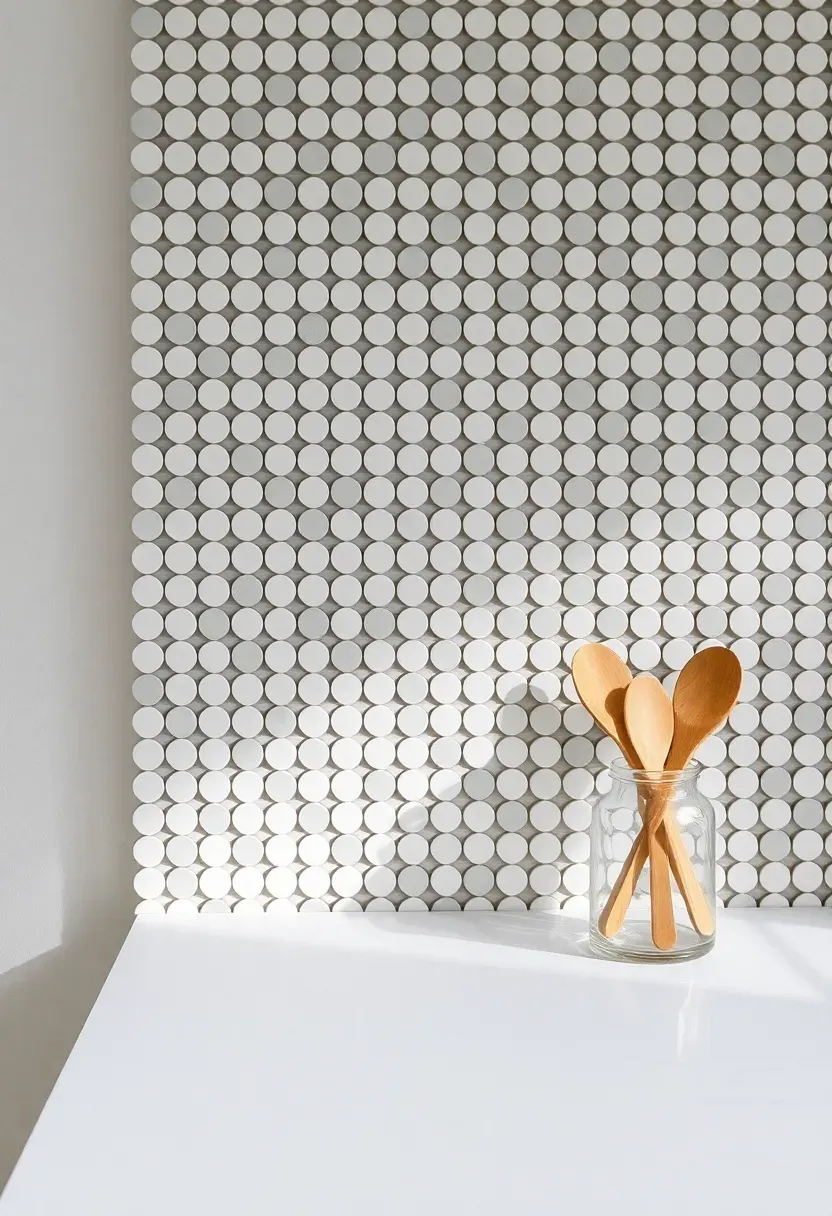
5. Penny Round Mosaic
Small, circular tiles arranged in tight sheets give a backsplash a texture you can almost feel from across the room. Penny rounds work especially well in smaller kitchens because the scale of the individual tiles makes the wall surface feel expansive rather than busy. Stick to a two-tone palette — matte white with scattered gray or pale blue accents — to keep the look grounded. Mesh-backed sheets make installation faster than you might expect, since you are laying 12x12 inch sections rather than individual coins.
Tips
- Epoxy grout resists staining better than cement grout on tight mosaic joints
- Mix in 10-15% accent-color tiles randomly rather than in a fixed pattern for a more organic feel
- Penny rounds pair well with simple shaker cabinets — both are unfussy forms that complement each other
6. Stacked Vertical Subway Tile
Comparing: Running Bond vs. Stacked Vertical Layout
Both use the same 3x6 subway tile, but the orientation changes everything about how the kitchen reads.
Option A: Running Bond (Traditional Offset)
The classic half-overlap pattern. Familiar, safe, and universally flattering. Reads as traditional or transitional depending on grout color and tile finish.
Option B: Stacked Vertical
Tiles stand upright with edges perfectly aligned in a grid — no offset. The vertical lines draw the eye upward, making ceilings feel taller. The look is distinctly modern, almost Scandinavian in its restraint.
What to Choose
Choose A if: you want a proven, crowd-pleasing layout that works with any cabinet style Choose B if: you prefer clean, contemporary lines and your tile setter can maintain precise alignment over large areas
Recommendation
For kitchens with 8-foot ceilings, stacked vertical is worth the extra installation effort — the visual height gain is real and noticeable.
Recommended
Items for this idea
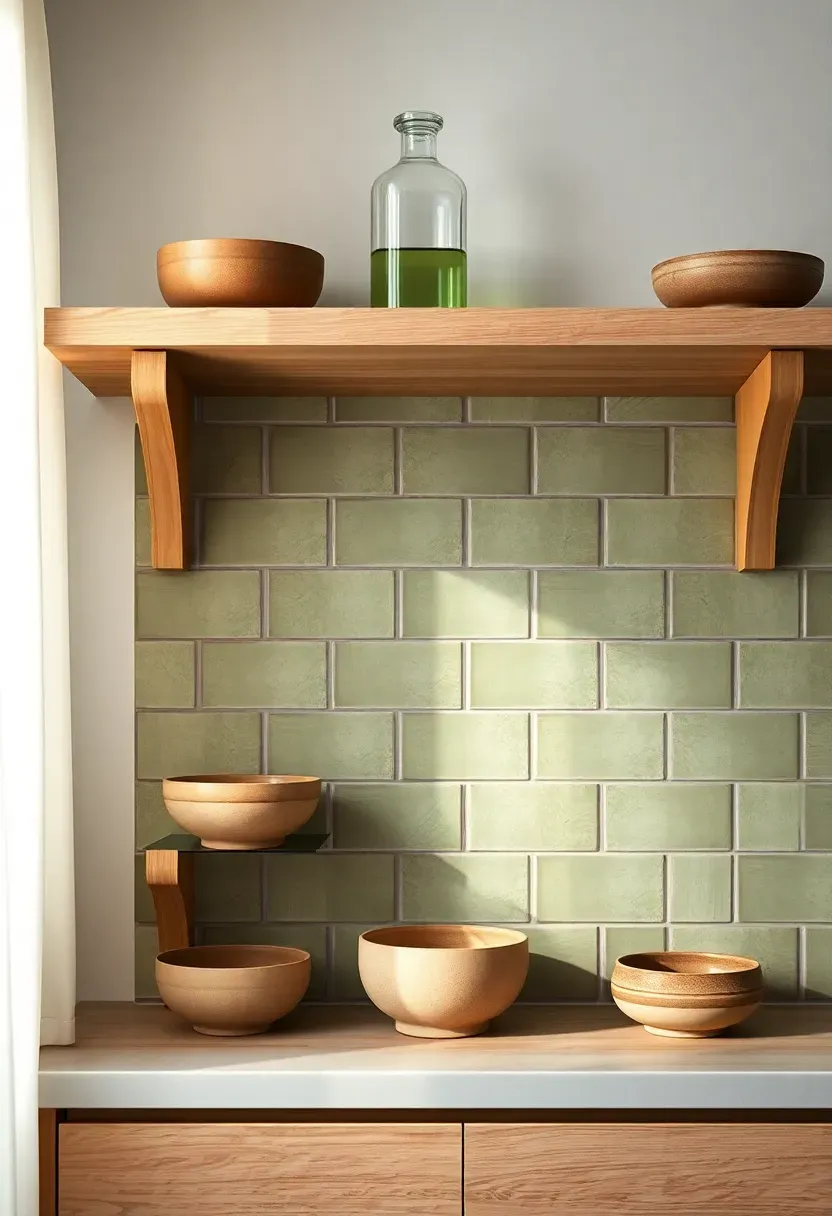
7. Handmade Ceramic in Sage Green
Sage green has been quietly building momentum in kitchens since 2024, and it shows no signs of fading. Handmade ceramic tiles in this color bring a softness that machine-made equivalents miss — the slight wobble in the edges, the variation in glaze depth from tile to tile, the way some pieces read more olive and others lean toward mint. Against white oak cabinets or warm brass hardware, sage green ceramic creates a kitchen that feels collected over time rather than assembled from a single catalog page.
Tips
- Request samples from at least two dye lots before ordering — handmade tiles vary batch to batch
- Matte finishes hide water spots better than glossy ones in splash-heavy zones near the sink
- Pair sage green tile with warm-toned countertops (butcher block, warm quartz) rather than cool gray
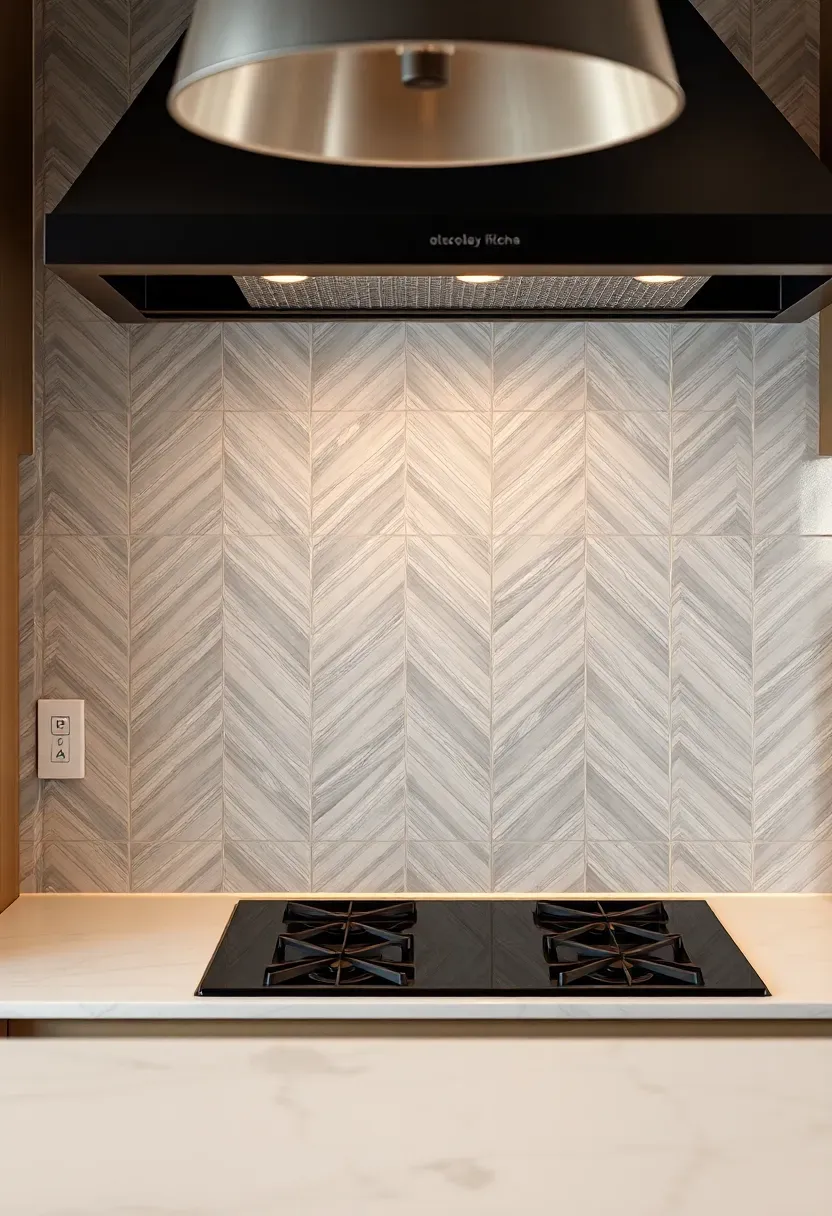
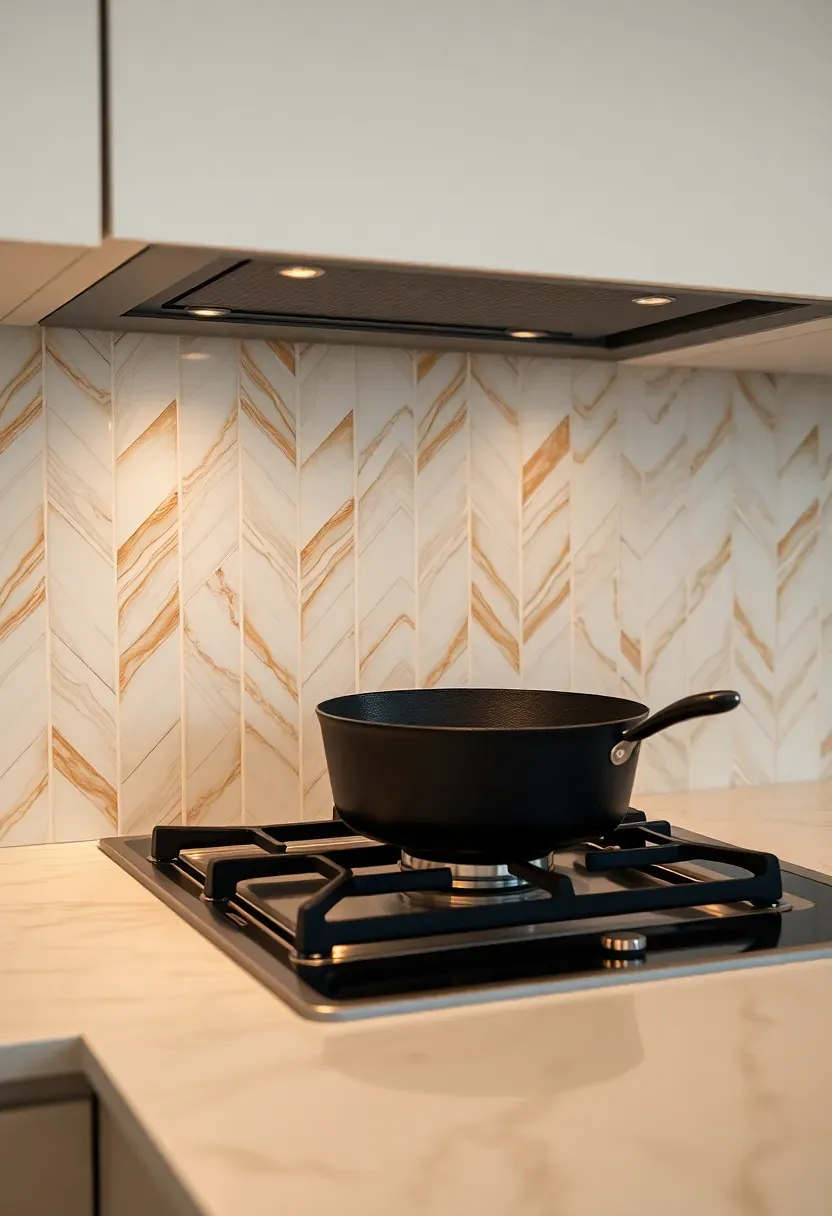
8. Chevron Pattern Porcelain
Why Chevron Reads Differently Than Herringbone
The Core Issue
People often confuse chevron and herringbone, but the visual effect is quite different. Herringbone uses rectangular tiles at 90-degree angles. Chevron uses tiles with angled ends that meet in a continuous zigzag — the lines flow uninterrupted across the wall.
The Solution
Chevron porcelain tiles, particularly in pale gray or warm white, create a sense of motion that works well behind ranges and cooktops where the eye naturally rests. Porcelain is harder and less porous than ceramic, making it lower-maintenance for backsplash duty. Most chevron tiles come in elongated formats (2x8 or 3x12) that emphasize the directional flow.
Pros and Cons
Pros: Distinctive pattern without being overwhelming, porcelain durability means no sealing required, widely available Cons: Pattern alignment is critical — one tile off by a millimeter and the zigzag breaks; waste factor is higher due to angled cuts at edges
Recommended
Items for this idea
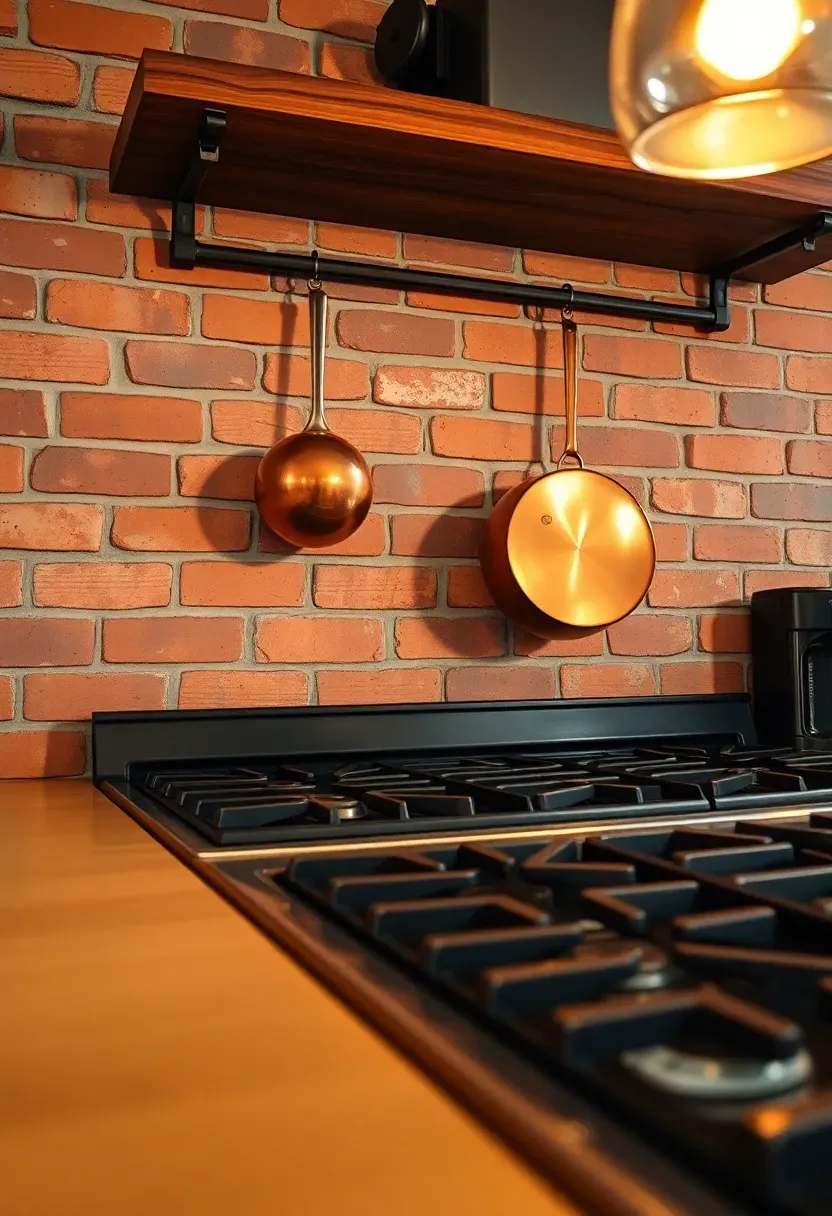
9. Exposed Brick as Backsplash
If your home has brick walls hiding behind plaster or drywall, exposing them in the kitchen creates a backsplash with actual history. The color variation in old brick — from burnt sienna to faded salmon to near-black headers — adds a warmth that manufactured materials struggle to match. The main challenge is practical: raw brick is porous and rough. You need to seal it thoroughly for kitchen use, and even sealed brick is harder to wipe down than glazed tile. But for kitchens that lean industrial, loft-style, or rustic, nothing else quite delivers the same weight and character.
Tips
- Apply two coats of matte polyurethane sealer designed for masonry — avoid glossy finishes that make brick look plastic
- Install a clear glass shield behind the immediate stove area for grease protection while keeping the brick visible
- If you do not have real brick, thin brick veneer (1/2 inch thick) achieves a convincing look over drywall

10. Terrazzo Tile Backsplash
The Revival of a 1970s Material
Origins
Terrazzo originated in 15th-century Venice, where workers used leftover marble chips set in clay. It hit American homes hard in the mid-20th century, fell out of fashion by the 1980s, and has made a full comeback thanks to designers rediscovering its speckled, playful texture.
The Modern Version
Today's terrazzo backsplash tiles use marble, quartz, or glass chips embedded in cement or epoxy bases. Large-format terrazzo slabs (24x24 or larger) minimize grout lines and let the chip pattern shine. Color options range from neutral (white base with gray and blush chips) to bold (teal base with brass and white fragments).
How to Apply at Home
Pair terrazzo backsplash tiles with solid-color countertops and simple cabinet fronts. The tile itself provides all the visual interest the kitchen needs — layering it with patterned counters or busy hardware creates competition rather than harmony.
Recommended
Items for this idea
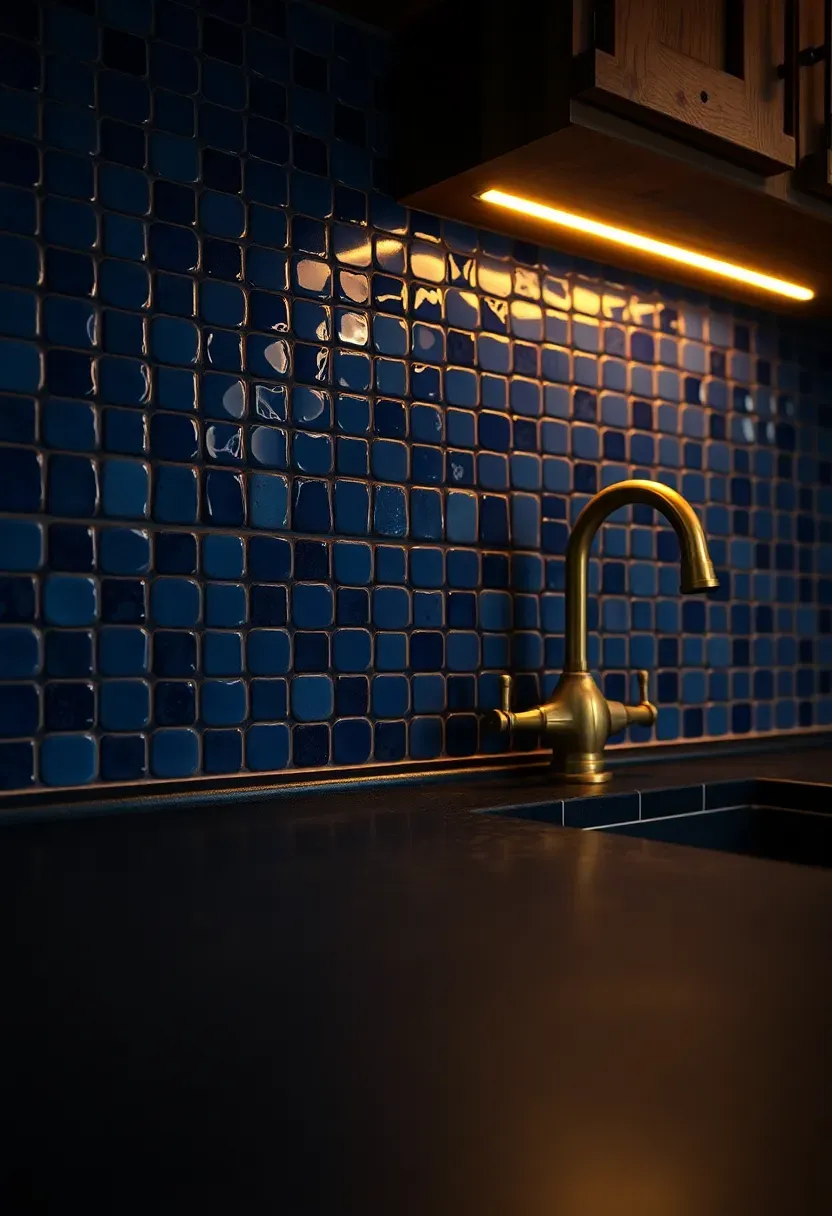
11. Dark Moody Zellige
Everything said about zellige in neutral tones applies here, but the mood shifts completely when you go dark. Midnight blue, forest green, deep eggplant, or near-black zellige tiles absorb light and create an intimate, almost enveloping feel behind the cooking zone. The hand-glazed surface means dark zellige is never truly flat in color — you get flashes of lighter tones where the glaze pooled thinner during firing. Against brass or unlacquered copper hardware, dark zellige looks rich without trying too hard.
Tips
- Dark backsplashes show grease splatter less than white tile — a practical bonus for behind-the-stove placement
- Use a contrasting light grout only if you want to emphasize the tile grid; matching dark grout creates a more seamless, dramatic surface
- Pair with lighter countertops to avoid making the kitchen feel cave-like
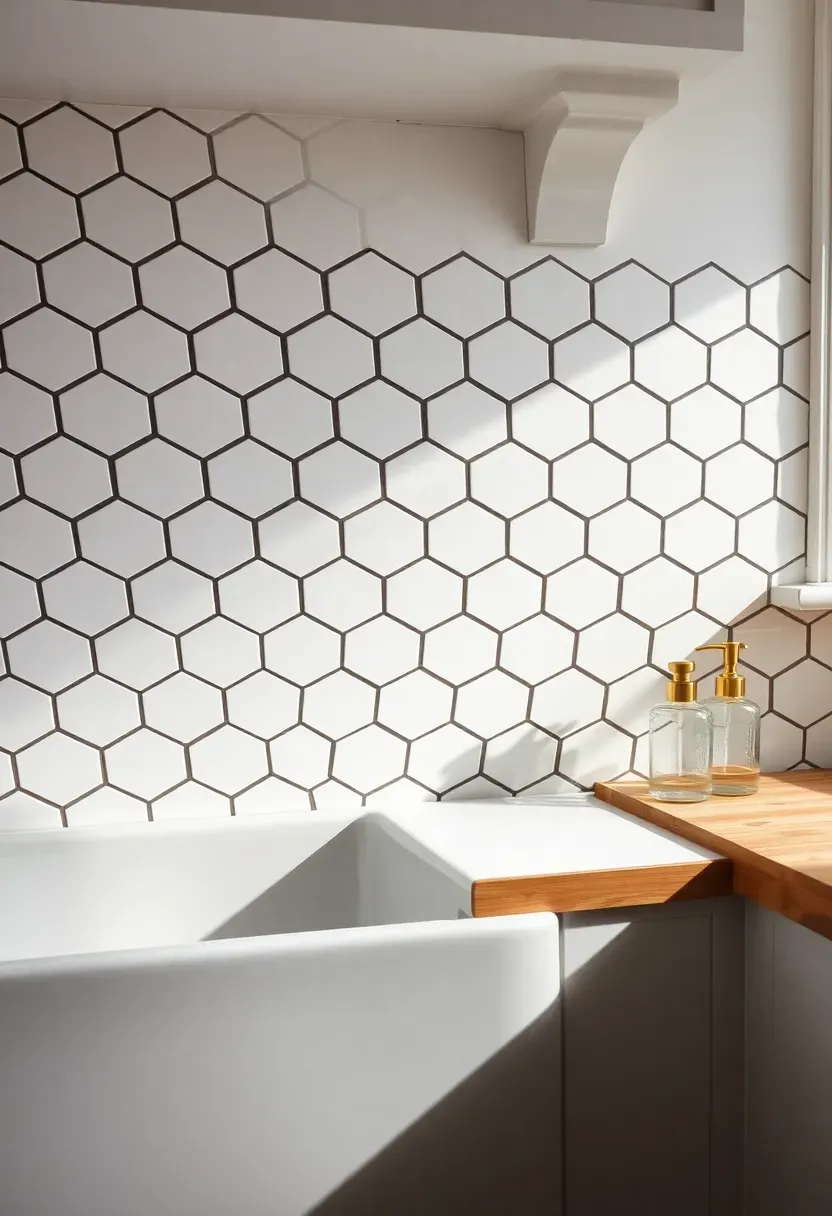
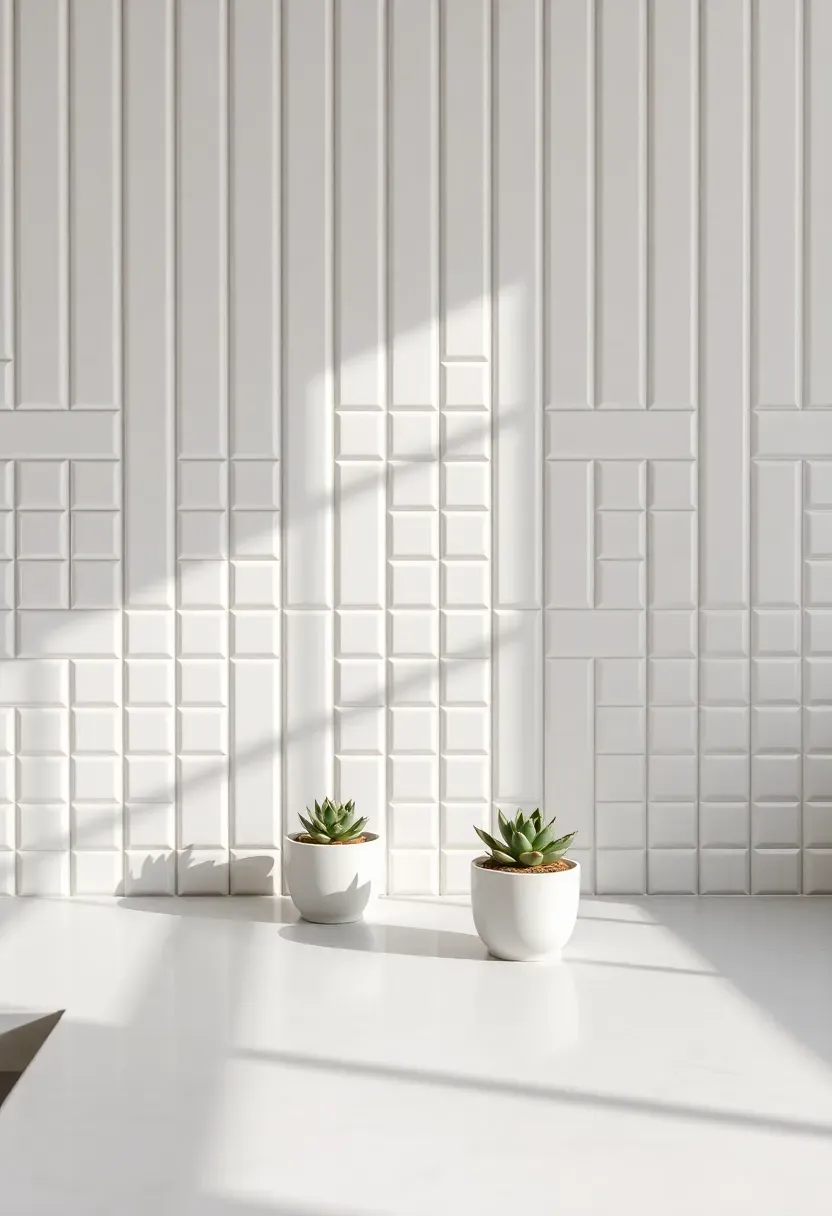
12. Hexagonal Tile Grid
Hex tiles break the rectangular monotony that dominates most kitchen backsplashes. The six-sided shape creates a honeycomb grid that reads as both geometric and organic — structured enough to feel intentional, but softer than a square grid. Standard hex sizes range from 1-inch penny hex (which reads almost as texture from a distance) to 8-inch large-format hex (which reads as a bold pattern). For backsplashes, 3-4 inch hex tiles hit the sweet spot — large enough that the shape registers clearly, small enough that you get plenty of repetition across the wall.
Tips
- Large hex tiles require careful layout to avoid awkward partial tiles at edges and corners
- Matte finishes in hex format pair naturally with modern and Scandinavian kitchens
- Consider extending the hex pattern past the backsplash area onto an adjacent wall for a wrap-around effect
Recommended
Items for this idea
13. Concrete-Look Porcelain Slab
Comparing: Real Concrete vs. Porcelain That Mimics It
Both deliver that raw, industrial-meets-minimal aesthetic — but the practical differences are significant.
Option A: Actual Poured or Paneled Concrete
Authentic patina that develops over time. Heavy, porous, requires regular sealing, and can develop hairline cracks. Custom-mixed colors available.
Option B: Concrete-Look Porcelain Slab
Printed to mimic concrete's surface variation. Nonporous, zero maintenance, lighter weight, available in large-format slabs (up to 60x120 inches) that minimize seams. Nearly indistinguishable from real concrete at arm's length.
What to Choose
Choose A if: you genuinely want the material to age and patina, and you accept the maintenance Choose B if: you want the look without the upkeep — and most people do
Recommendation
For backsplash specifically (not countertops), porcelain slab is the smarter call. You get the visual impact without worrying about staining from cooking splatter.
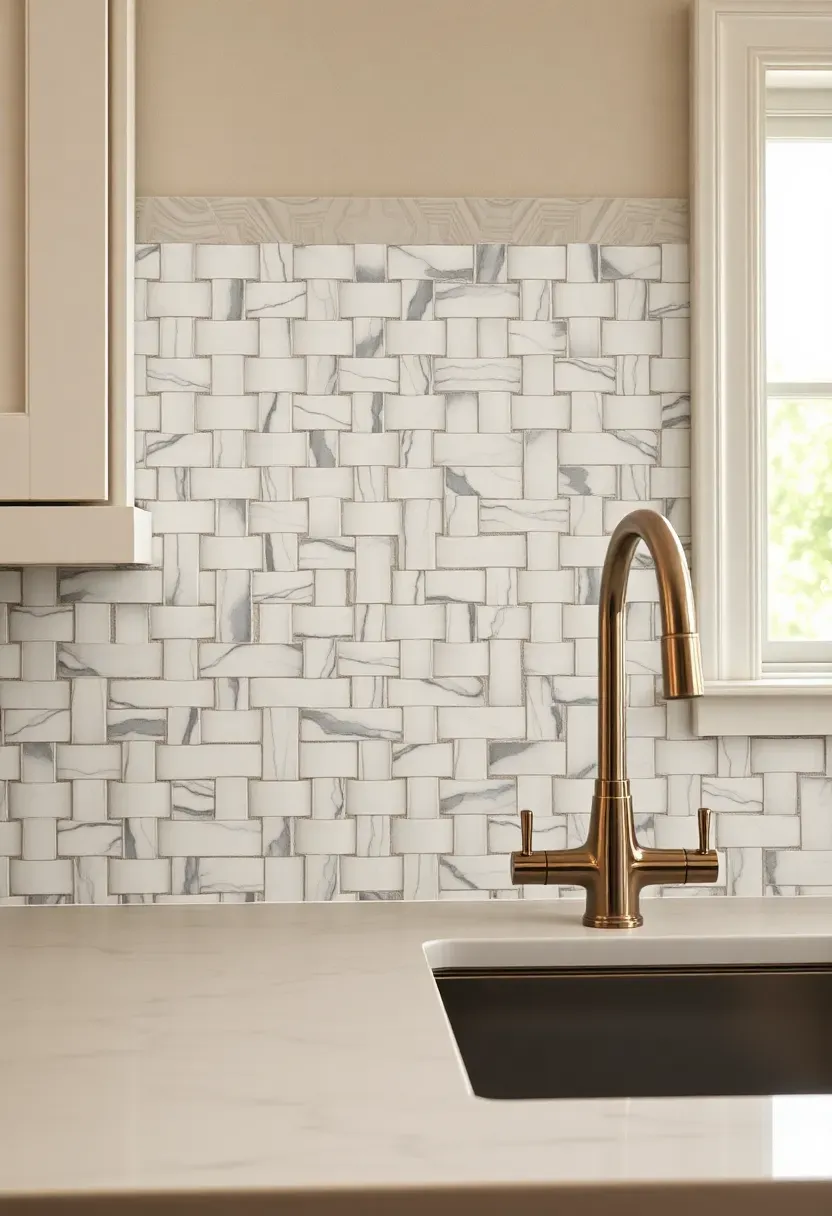
14. Basketweave Marble Mosaic
Basketweave is one of those patterns that sounds complicated but reads as elegantly simple once installed. Two rectangular tiles sit side by side, then the next pair rotates 90 degrees — creating an interlocking weave. In Carrara marble with a honed finish, basketweave feels traditional without being stuffy. It works especially well in kitchens that blend classic and contemporary elements — think shaker cabinets with modern hardware, or a farmhouse sink paired with a sleek faucet. The pattern adds visual interest in a quieter way than herringbone or chevron.
Tips
- Honed marble shows fewer scratches and water spots than polished in a backsplash application
- Order mesh-backed sheets for easier installation — setting individual pieces is unnecessarily tedious
- Basketweave pairs well with simple rectangular field tile on adjacent walls if you want pattern variety without chaos
Recommended
Items for this idea
15. Glossy Black Subway Tile
Black subway tile is a commitment, but the payoff is a kitchen with immediate presence. The glossy finish reflects overhead and pendant lighting, creating depth that matte finishes cannot achieve in dark colors. What makes this work rather than just look heavy: contrast. White or light gray grout reveals the tile pattern. Light countertops (white marble, pale quartz, butcher block) ground the dark wall. Brass or gold hardware adds warmth against the cool black surface.
Tips
- Glossy tile shows fingerprints and water spots more readily — wipe down weekly with a vinegar solution
- Keep the black tile to one feature wall; wrapping the entire kitchen in dark tile can feel oppressive
- Pair with under-cabinet lighting to bounce light off the glossy surface and prevent the backsplash from reading as a dark void
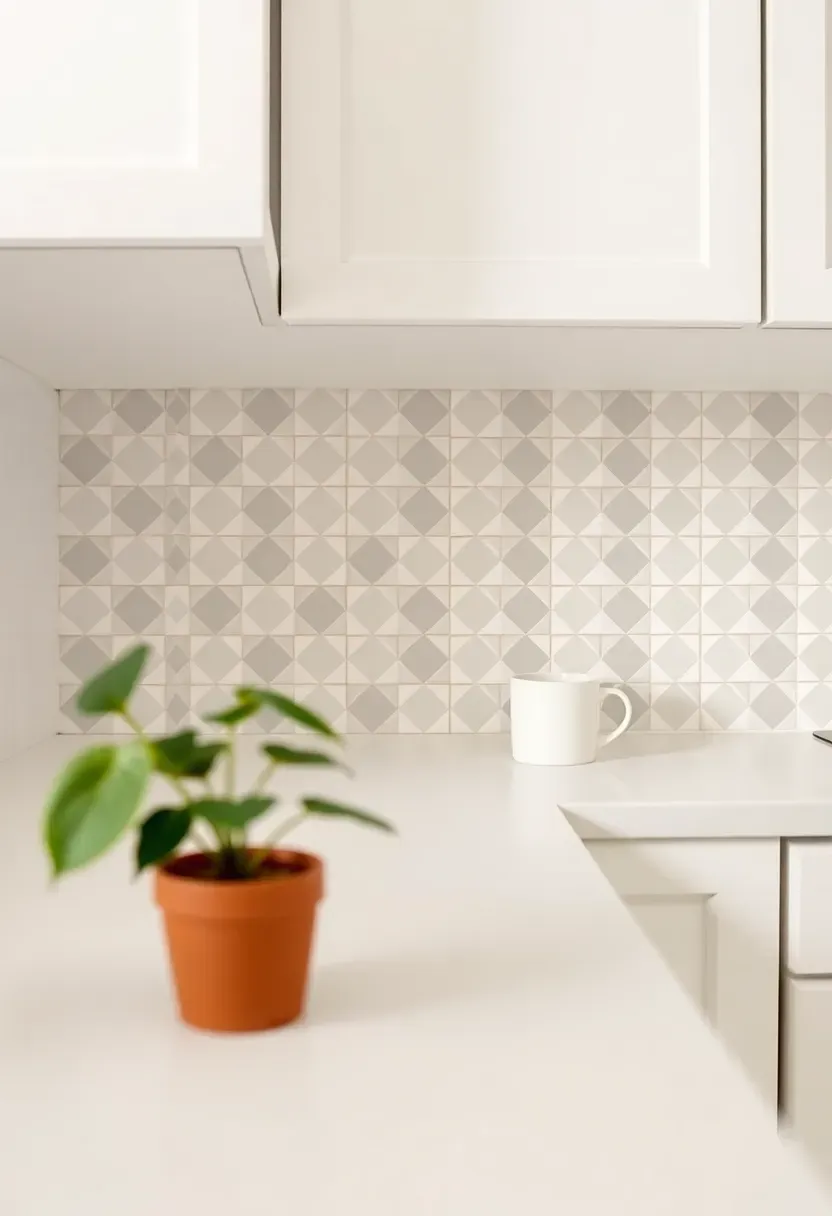
16. Peel-and-Stick Geometric Tile
Making Temporary Tile Look Permanent
Renters and commitment-averse homeowners have more options than ever. Peel-and-stick backsplash tiles have improved dramatically — the best current products use thick vinyl or real gel-coated composites that mimic ceramic convincingly.
Step 1: Prep the Wall Surface
Clean the wall with isopropyl alcohol and let it dry completely. Peel-and-stick adhesive bonds poorly to dusty, greasy, or textured surfaces. Flat, smooth drywall or existing tile works best.
Step 2: Start from the Center
Find the horizontal center of your backsplash area and work outward. This ensures symmetric cuts at both ends rather than a full tile on one side and a sliver on the other.
Step 3: Use a J-Roller for Adhesion
Press each tile firmly with a rubber J-roller after placement. This eliminates air bubbles and activates the pressure-sensitive adhesive fully. Skip this step and tiles will curl at the edges within weeks.
What to Watch Out For
- Avoid placing peel-and-stick directly behind gas burners — heat can soften the adhesive
- Some products yellow over time in direct sunlight; check UV-resistance ratings before buying
Recommended
Items for this idea
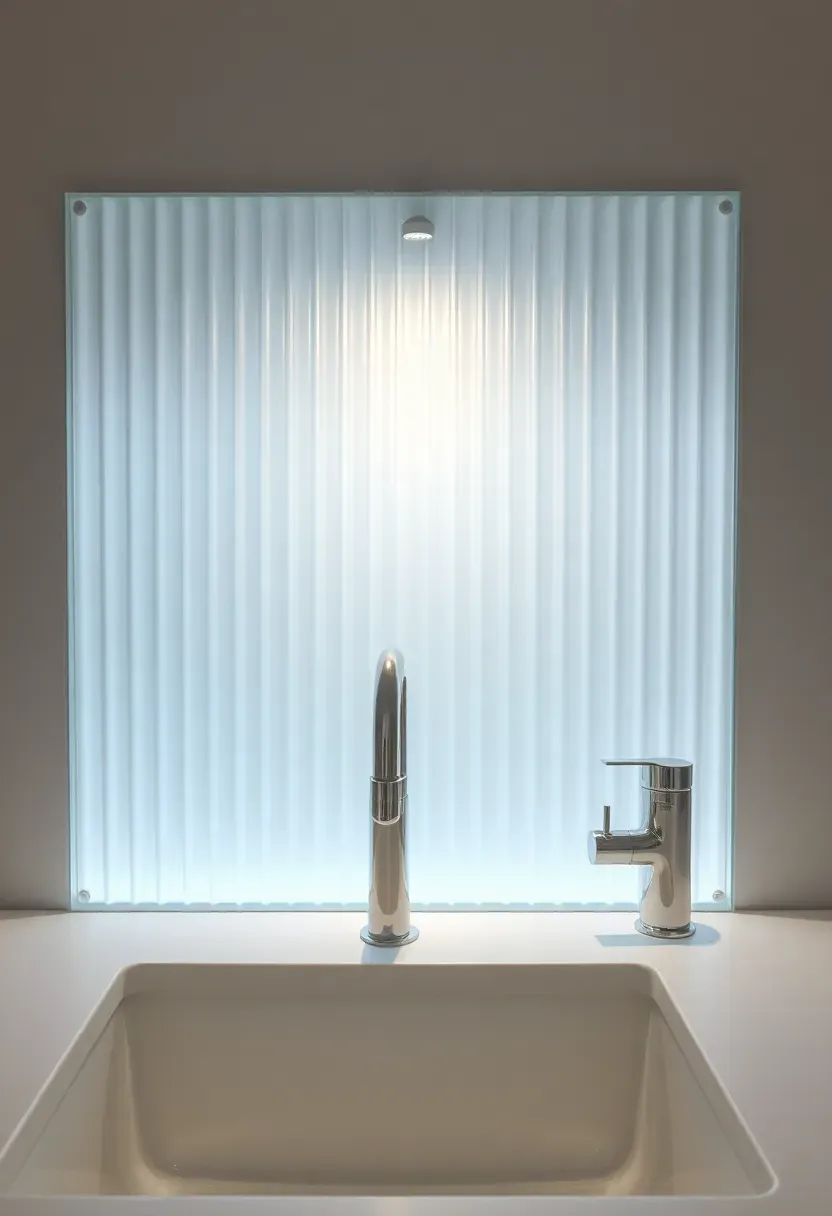
17. Fluted Glass Panel
Fluted (also called reeded or ribbed) glass brings a different quality of light to a backsplash. The vertical ridges refract and soften light rather than reflecting it sharply, creating a gentle glow that changes throughout the day. Backlit fluted glass is particularly effective — install LED strip lighting behind the panel and the entire backsplash becomes an ambient light source. Clear fluted glass over a painted wall lets you change the background color later without removing the backsplash. Frosted fluted glass hides the wall entirely and reads as a self-contained material.
Tips
- Use tempered glass rated for kitchen use — standard glass is a safety hazard near cooking surfaces
- Fluted glass panels install with construction adhesive or standoff clips depending on the wall substrate
- Clean the grooves with a soft brush; standard wipe-downs miss the recessed channels
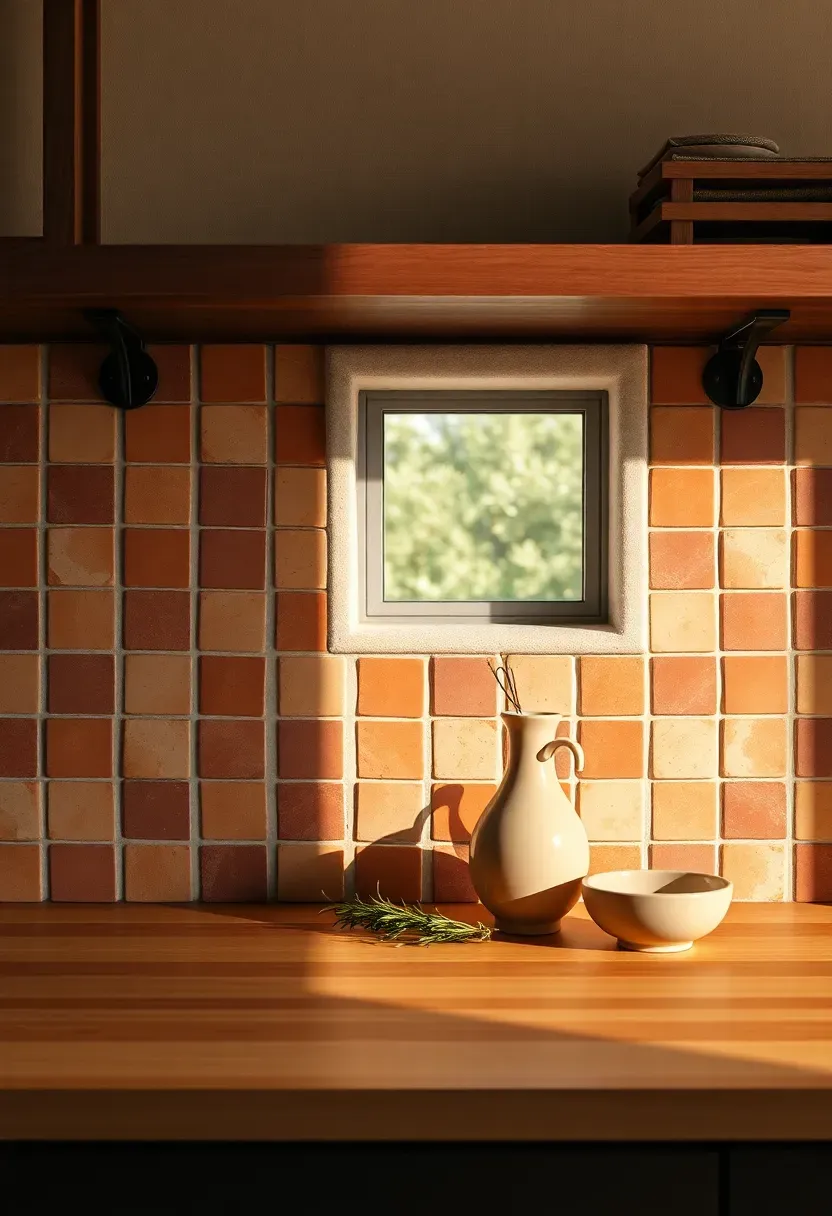
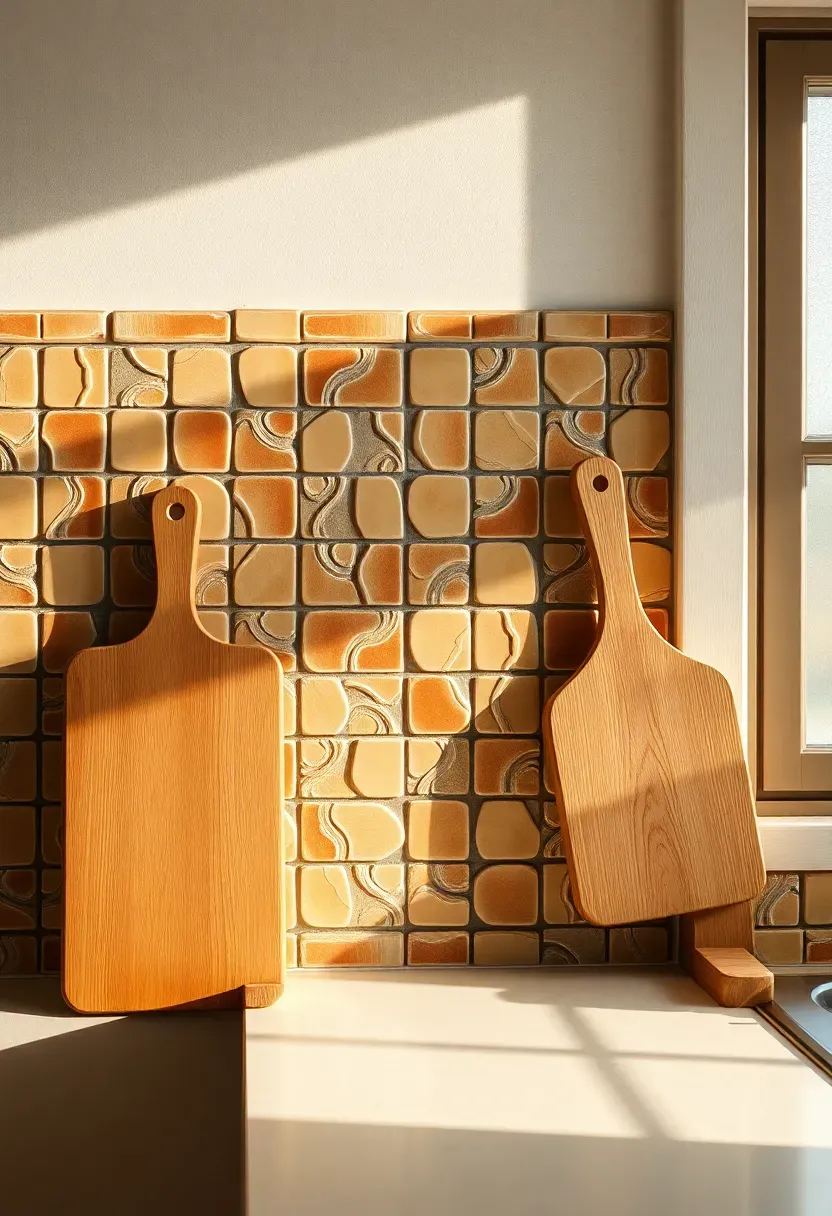
18. Terracotta Tile Backsplash
A Material with 4,000 Years of History
Origins
Terracotta — literally "baked earth" in Italian — has been used as a building material since ancient Mesopotamia. In Mediterranean and Latin American kitchens, it never went out of style. Northern European and American designers have recently rediscovered it as an antidote to the all-white-everything trend that dominated the 2010s.
The Modern Version
Contemporary terracotta backsplash tiles come in square, rectangular, and arabesque shapes. Colors range from pale peachy-clay to deep rust, depending on the iron content of the local clay and firing temperature. Factory-made versions offer more uniform sizing; handmade tiles from Mexico, Portugal, or Morocco carry more character and variation.
How to Apply at Home
Seal terracotta before installation — the raw clay body absorbs moisture and stains like a sponge. Pair with warm wood tones, matte black fixtures, and open shelving stocked with stoneware for a kitchen that feels grounded and inviting without relying on trendy finishes.
Recommended
Items for this idea
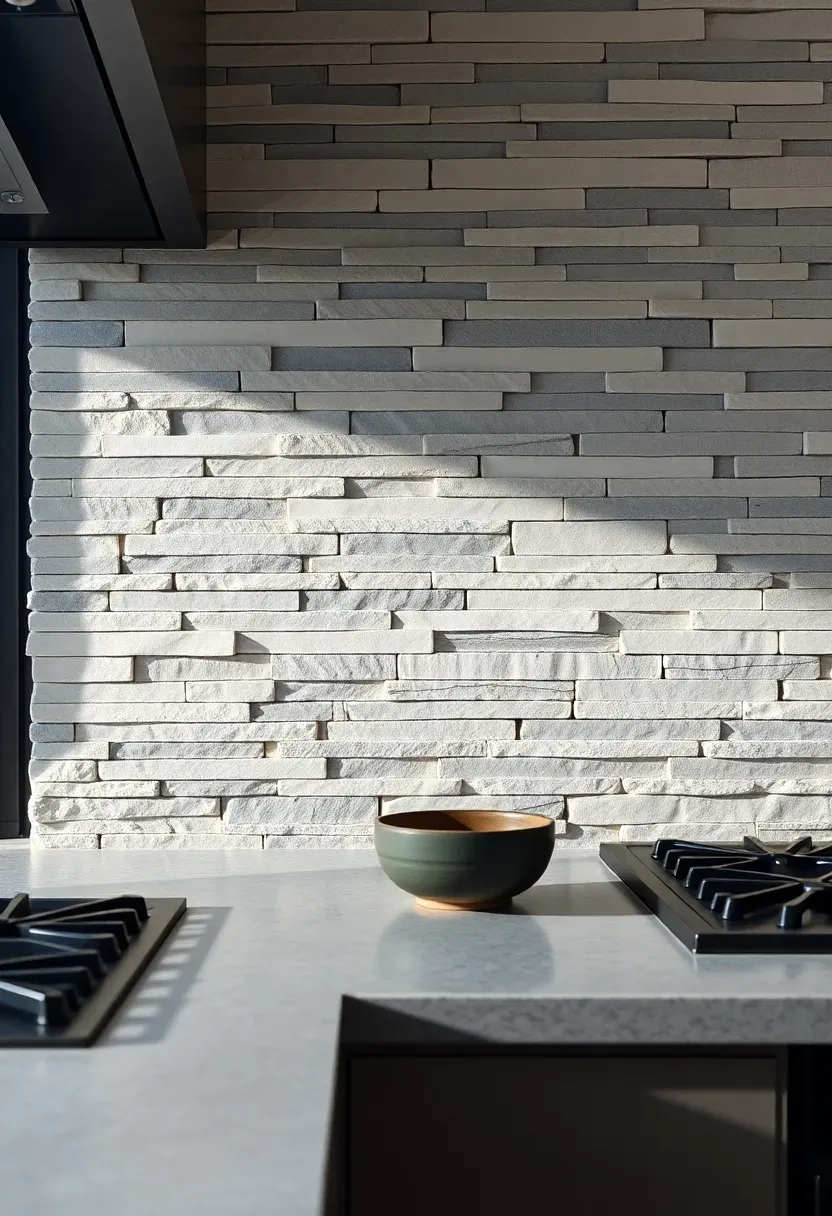
19. Mixed-Width Stacked Stone
Stacked stone backsplashes use thin strips of natural stone — slate, quartzite, limestone, or travertine — cut to the same height but varying widths. The strips install flush with tight joints, creating a textured surface with clean horizontal lines and an irregular vertical rhythm. The look splits the difference between rustic and modern: the natural material brings warmth, while the precise horizontal stacking keeps things orderly. Gray-toned slate reads contemporary. Cream travertine reads Mediterranean. Mixed warm-and-cool quartzite reads earthy and balanced.
Tips
- Stacked stone creates real depth on the wall (1/2 to 1 inch of projection) — plan for outlet box extenders
- Seal natural stone strips before grouting to prevent discoloration from grout haze
- Use stacked stone on one accent section (behind the range or sink) rather than wall-to-wall — the texture can overwhelm in large doses
Quick FAQ
Which backsplash material is easiest to keep clean? Large-format porcelain slabs and glossy ceramic tiles with minimal grout lines are the lowest maintenance options. Fewer grout joints means fewer places for grease and food particles to accumulate. A simple wipe with warm soapy water handles daily cleaning.
Can I install a backsplash over existing tile? Yes, as long as the existing tile surface is flat, firmly bonded, and clean. Lightly sand the old tile for adhesion, apply a bonding primer, then set new tile directly over it. This avoids the dusty, messy work of demolition.
How high should a kitchen backsplash go? Standard backsplash height runs from countertop to the bottom of upper cabinets — typically 15-18 inches. Full-height backsplashes that extend to the ceiling create a more dramatic look and are especially effective with slab materials or simple tile patterns.
Are peel-and-stick tiles worth it for a long-term home? For renters, absolutely. For homeowners, they serve well as a temporary solution while you save for permanent tile. The best peel-and-stick products last 3-5 years before edges begin lifting, but they will never match the durability or resale value of real tile.
What backsplash pairs best with white cabinets? Almost anything — that is white cabinets' greatest advantage. For a classic look, try Carrara marble herringbone. For warmth, go with zellige in bone or sand. For drama, glossy black subway tile creates a high-contrast focal point. The cabinet color stays neutral while the backsplash carries the personality.
Choosing a backsplash is one of those kitchen decisions that punches above its weight. A 15-square-foot section of wall can set the entire character of the room — warm or cool, rustic or sleek, quiet or bold. Start by identifying what your kitchen is missing rather than chasing trends. If the space feels cold, look at handmade ceramics and terracotta. If it feels dated, consider a slab or a stacked vertical layout. If it just feels boring, that dark zellige might be exactly the shake-up it needs. Whatever you choose, bring home samples first, live with them against your countertop and cabinet fronts for a week, and trust what you see in your own light.
Pinterest cover for 19 Backsplash Designs That Actually Look Good in Real Kitchens
About the author
OBCD
CGI visualization and interior design content. We create detailed 3D renders and curate practical design ideas for every room in your home.