27 Bar Backsplash Ideas for a Stylish Home Bar
I spent a weekend helping a friend tile the backsplash behind his basement wet bar. He picked the same white subway tile from his kitchen renovation because it was leftover and free. It looked fine — technically. But the bar felt like an extension of the kitchen instead of its own space. That is the thing about a bar backsplash: it is one of the few places in a house where you can go bolder, darker, or weirder than you would anywhere else. Nobody is cooking against it. Nobody is scrubbing tomato sauce off it at 10 p.m. The primary job is looking good behind bottles and glassware while handling the occasional splash.
These 27 ideas range from materials you can install in an afternoon to custom treatments that need a professional. Each one notes what it pairs best with and what to watch for during maintenance.
Table of Contents
- Antique Mirror Panels
- Stacked Natural Stone Ledger
- Copper Sheet Backsplash
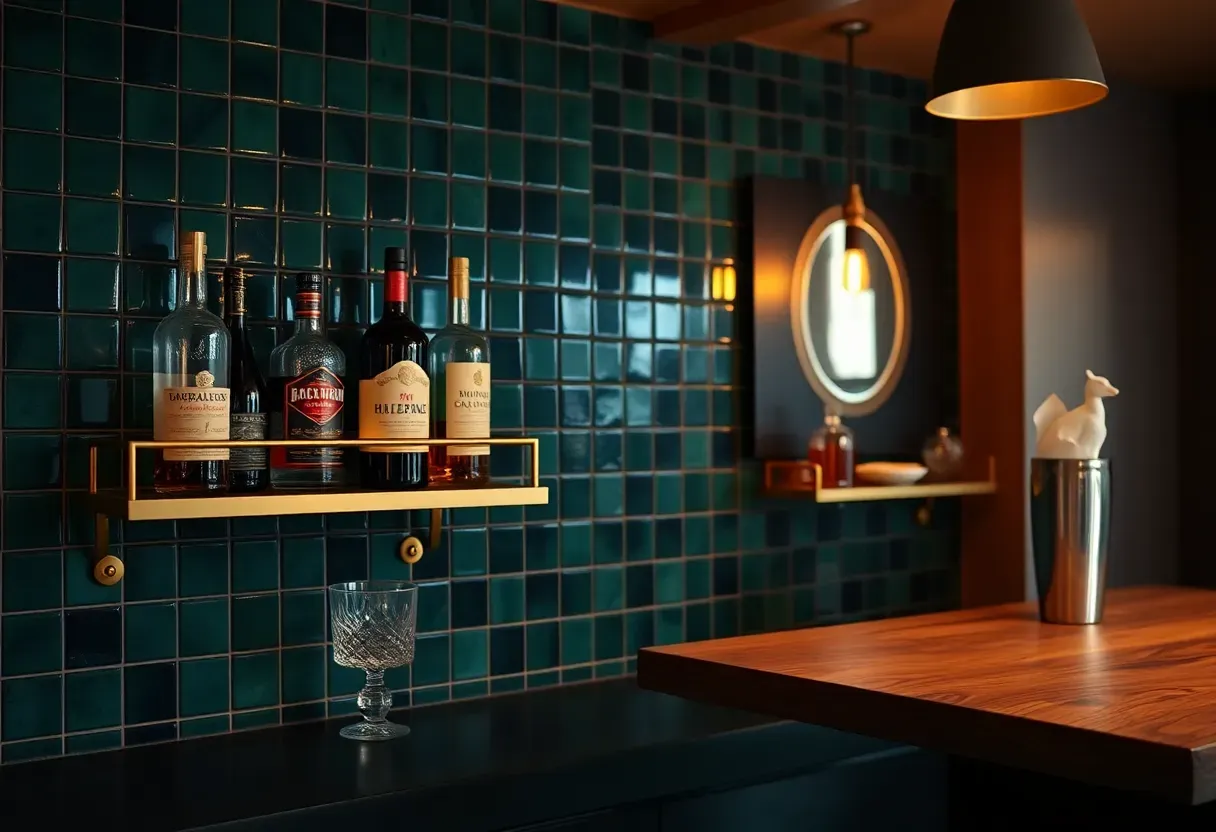
- Dark Green Zellige Tile
- Reclaimed Brick Veneer
- Black Hexagon Mosaic
- Walnut Wood Slat Wall
- Brass and Glass Shelving Wall
- Penny Round Tiles in Metallic
- Chalkboard Paint Panel
- Herringbone Marble Mosaic
- Fluted Glass Panels
- Tin Ceiling Tile Backsplash
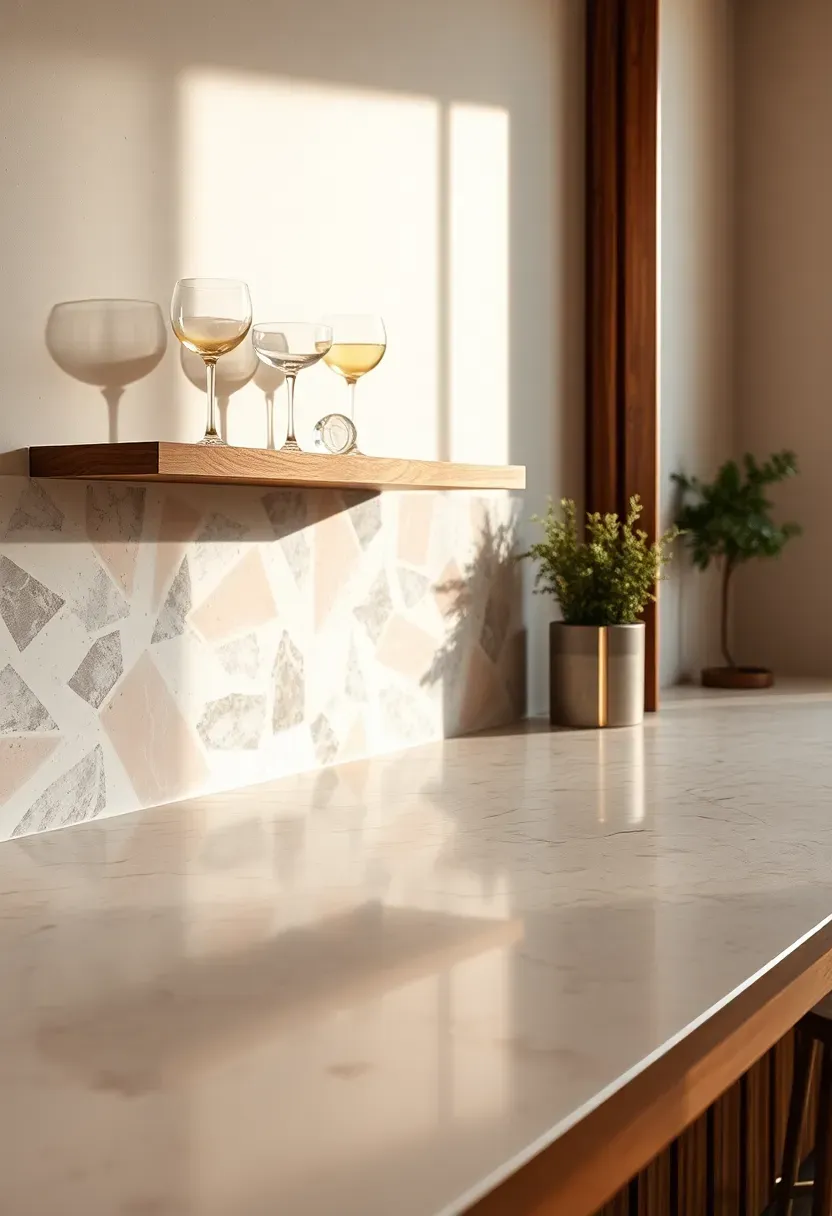
- Terrazzo Slab
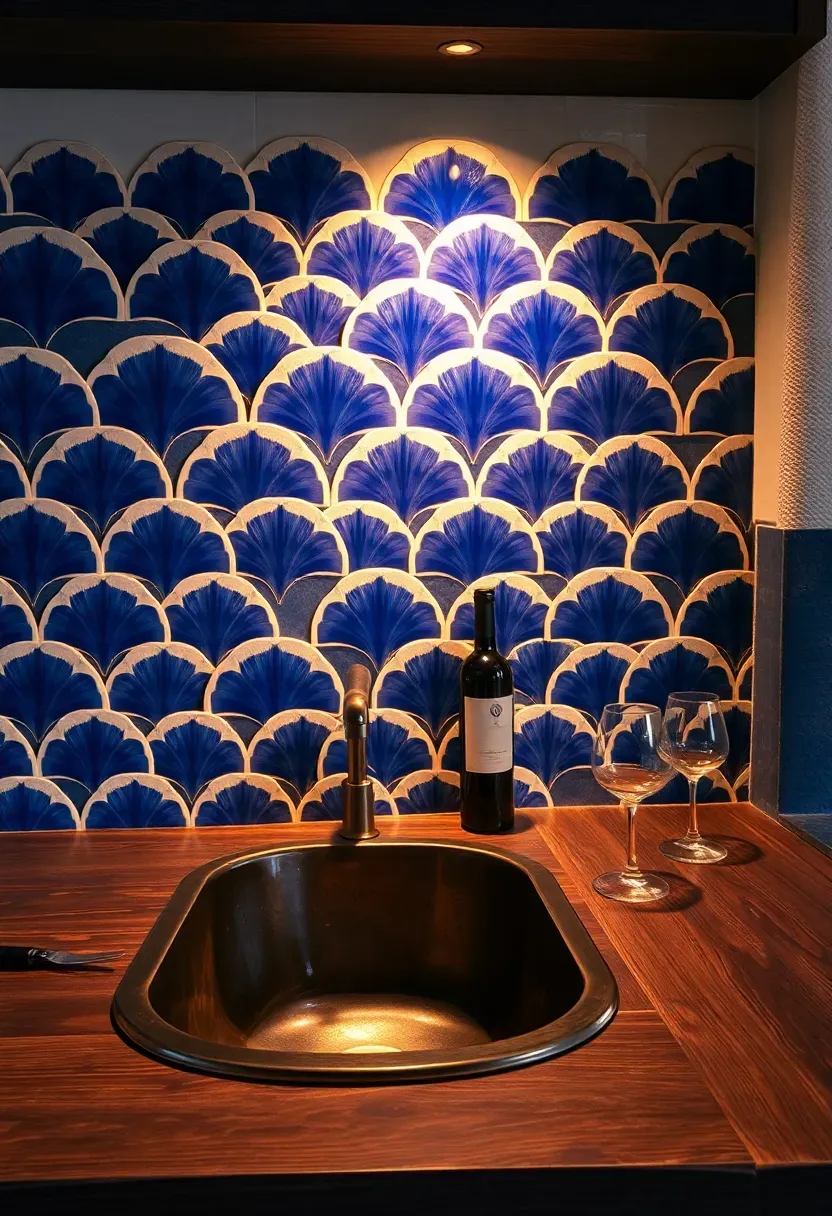
- Moroccan Fish Scale Tile
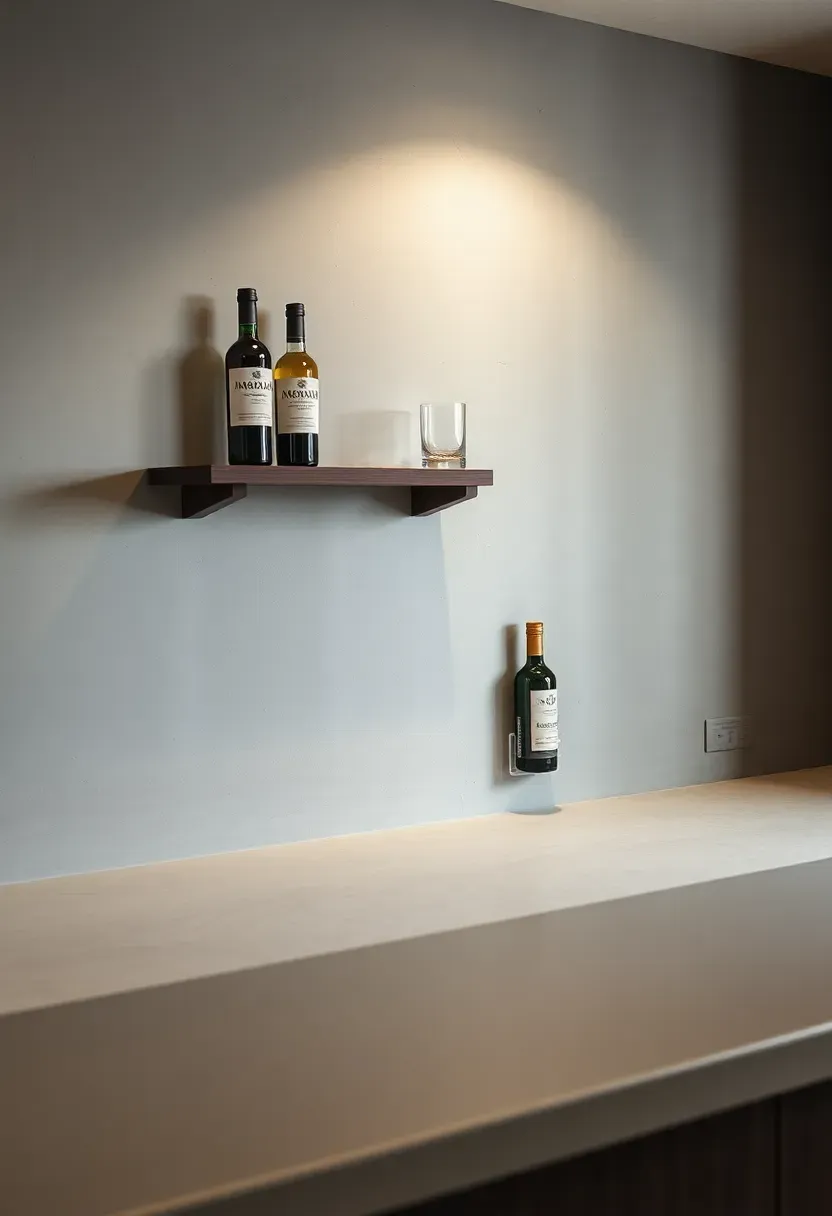
- Concrete Skim Coat
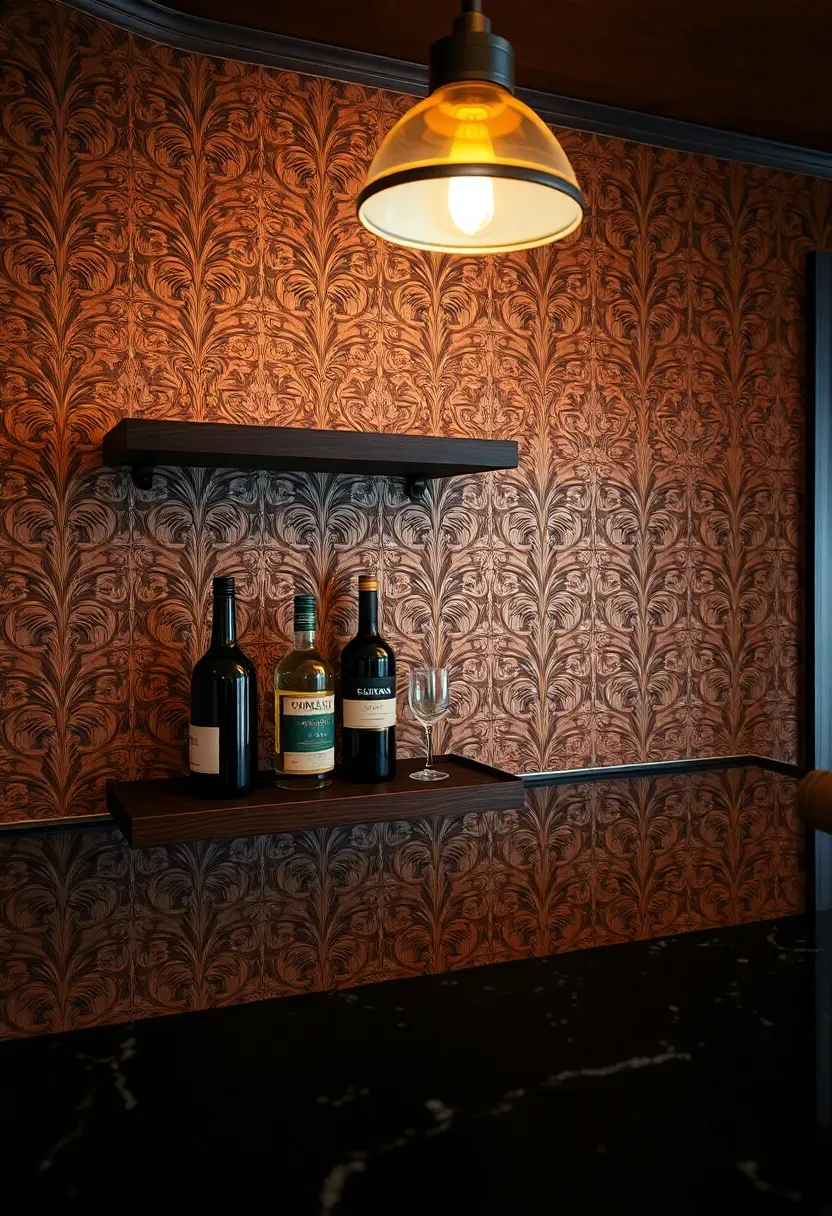
- Leather Tile Panels
- Smoked Mirror Strips
- Blue Encaustic Cement Tile
- Wine Cork Wall
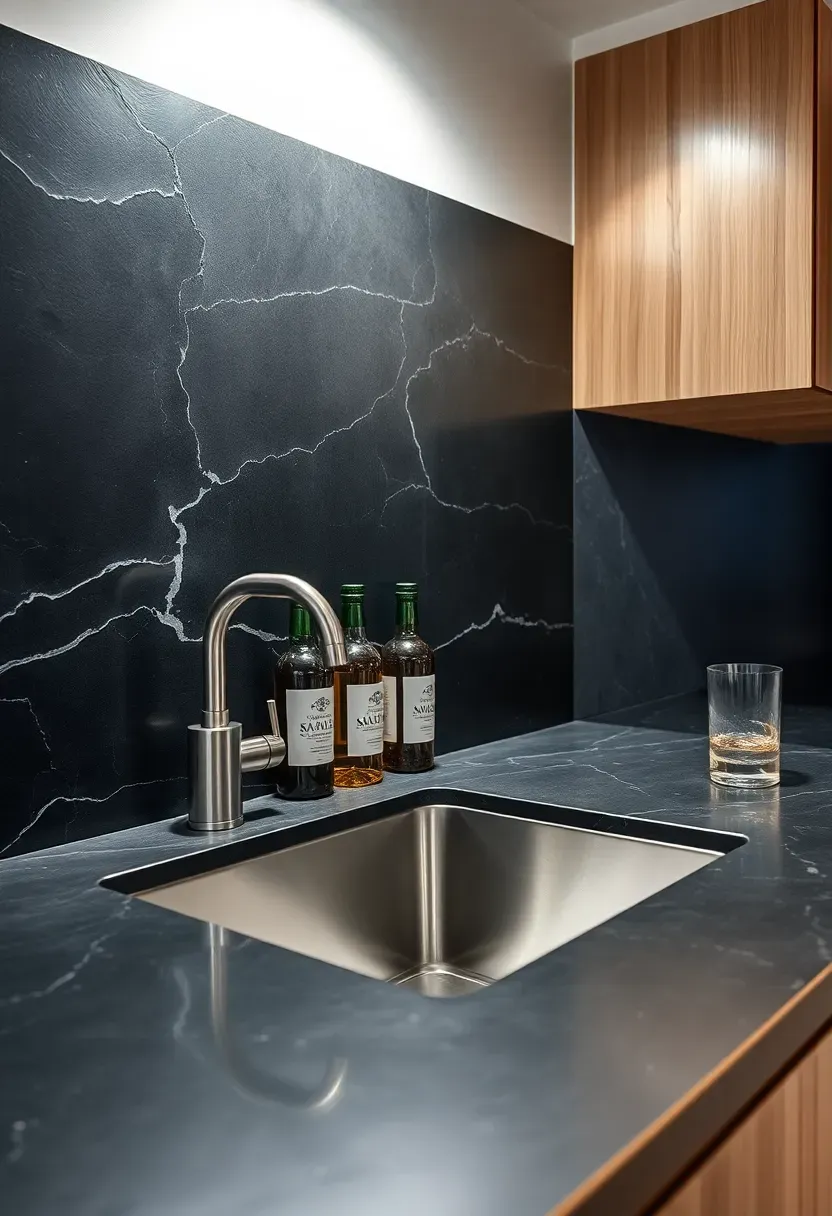
- Black Soapstone Slab
- Geometric Brass Inlay Tile
- Exposed Aggregate Concrete
- Glazed Lava Stone
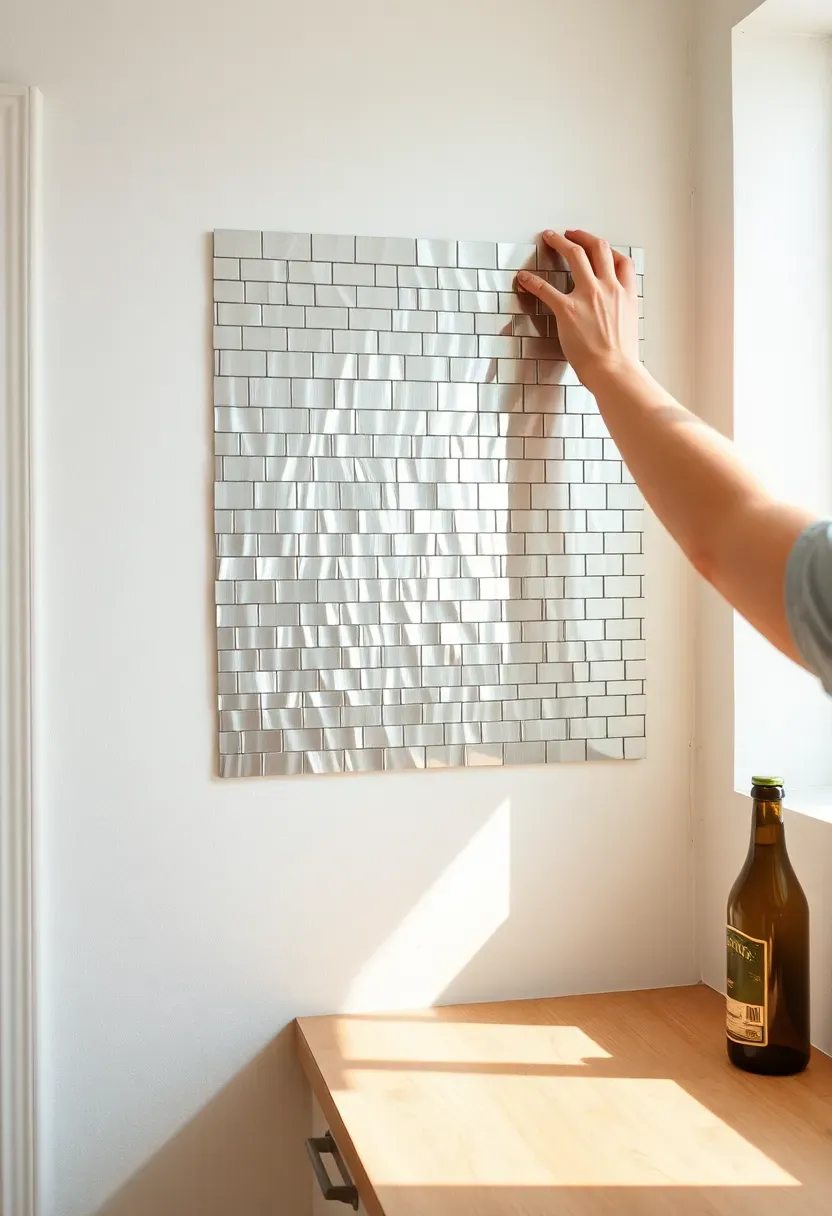
- Peel-and-Stick Metal Mosaic
- Hand-Painted Portuguese Azulejo
- Blackened Steel Panels
1. Antique Mirror Panels
Antique mirror — the kind with that foxed, cloudy patina — does something no other bar backsplash material can. It reflects light and bottles without the sharpness of a regular mirror, so the space feels bigger and moodier at the same time. You can order panels pre-cut from glass shops in sizes up to 36 by 60 inches. Mount them with mirror adhesive directly to drywall, and add a thin brass channel at the seams if you are tiling multiple pieces together.
Tips
- Use 1/4-inch thickness for residential applications — thinner panels warp
- Pair with dark wood shelving so the reflection has depth
- Avoid areas with direct water spray since moisture degrades the backing over time
We picked a few things that go well with this idea: STICKGOO Peel and Stick Metal Backsplash (10 Sheets) (★4.5), Yipscazo Stainless Steel Peel and Stick Backsplash (20 Sheets) (★4.5) and STICKGOO Silver Metal Peel and Stick Tile (20 Sheets) (★4.5). As an Amazon Associate we earn from qualifying purchases.
2. Stacked Natural Stone Ledger
The Appeal
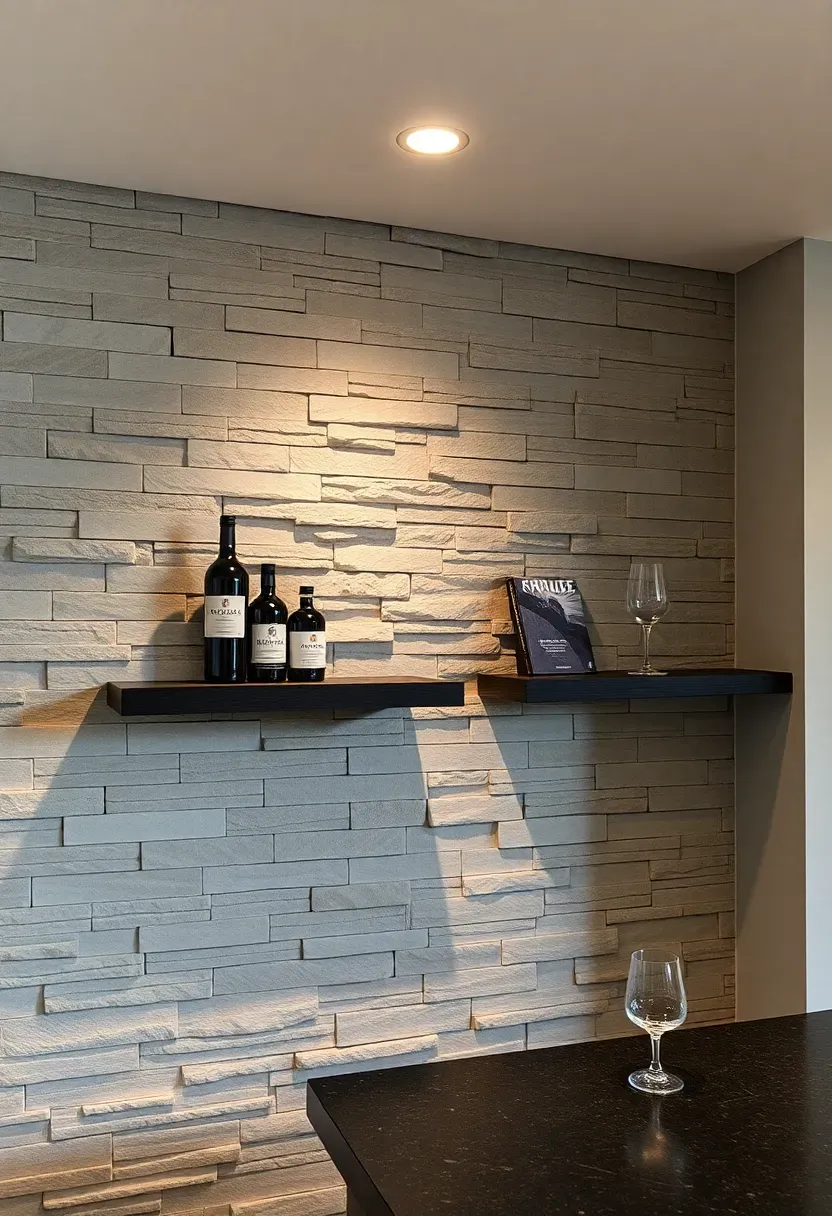
Stacked ledger stone brings genuine texture that flat tile cannot replicate. Each piece has slight depth variation — usually 1/2 to 1-1/2 inches of projection — creating shadow lines that shift as the lighting changes throughout the evening.
Installation
Ledger panels come in interlocking strips (typically 6x24 inches) that mount directly to cement board with thinset. Cut individual stones with a wet saw fitted with a diamond blade. Budget roughly $8–14 per square foot for natural quartzite or slate ledger. Total install time for a standard 3x8-foot bar backsplash is about 4 hours for someone comfortable with thinset.
Watch Out
- Dust collects in the crevices — hit it with a soft brush monthly
- Seal porous stone like slate before grouting to prevent staining
- Not ideal if you plan to mount floating shelves directly against it
We picked a few things that go well with this idea: JQK Brushed Gold Glass Wall Shelf (16-Inch) (★4.7), Gatco Brushed Brass Tempered Glass Shelf (22.5-Inch) (★4.6) and Brown and Gold Floating Shelves Set (2-Pack) (★4.7). As an Amazon Associate we earn from qualifying purchases.
3. Copper Sheet Backsplash
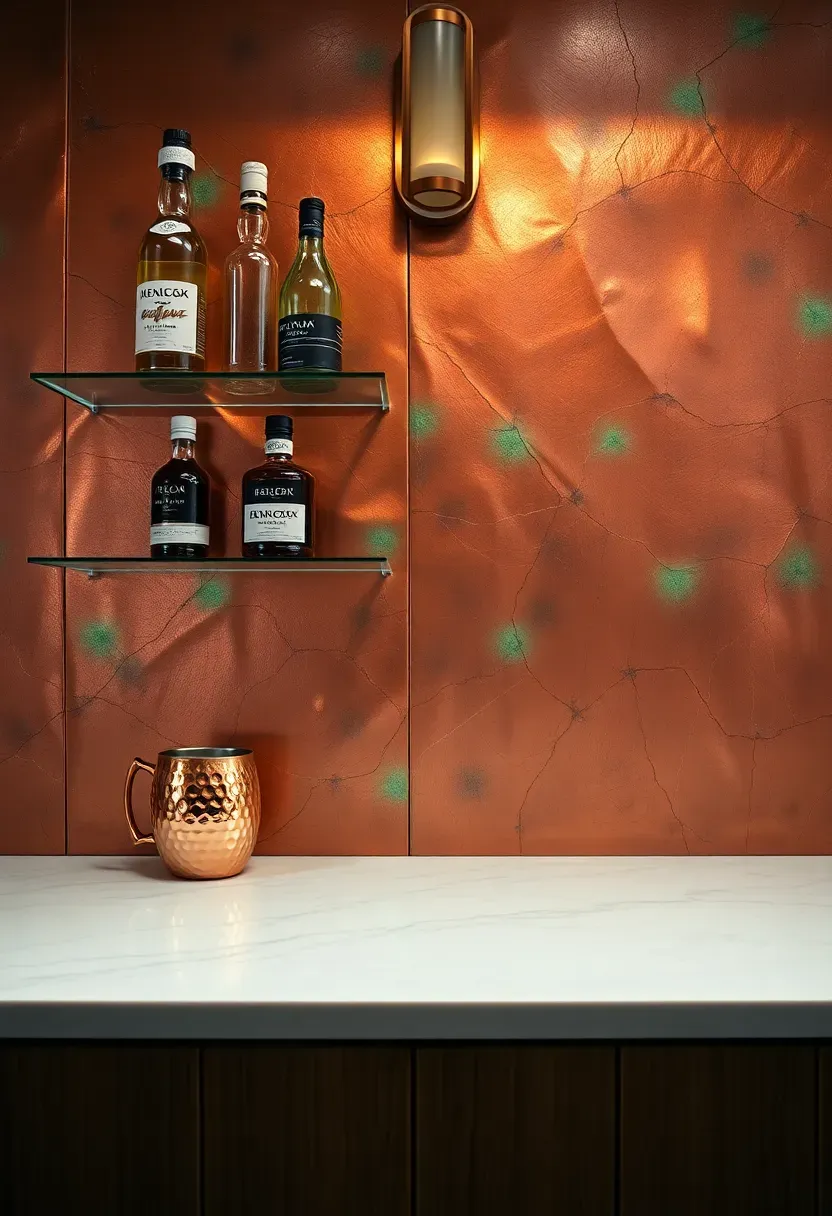
Copper is one of those materials that actively improves with neglect. A freshly installed sheet looks penny-bright, almost too shiny. Within a few months, it darkens to a warm brown. Leave it longer and you get patches of green patina, especially near the sink where water hits. You can speed the process with vinegar and salt or freeze it at any stage with a clear lacquer coat. Standard 20-gauge copper sheets come in 36x120-inch rolls, enough to cover most bar backsplashes in a single piece with no seams.
Tips
- Attach with construction adhesive to plywood backer — screws leave visible holes
- Acidic liquids (citrus juice, wine) accelerate patina, which may or may not be what you want
- Pair with matte black fixtures for contrast rather than matching warm metals
We picked a few things that go well with this idea: Govee Warm White LED Strip (16.4ft) (★4.6), JUSJUBR Slim LED Under Cabinet Light (12-Inch) (★4.5) and UNO-UT Warm White Under Cabinet LED Bar (12-Inch) (★4.5). As an Amazon Associate we earn from qualifying purchases.
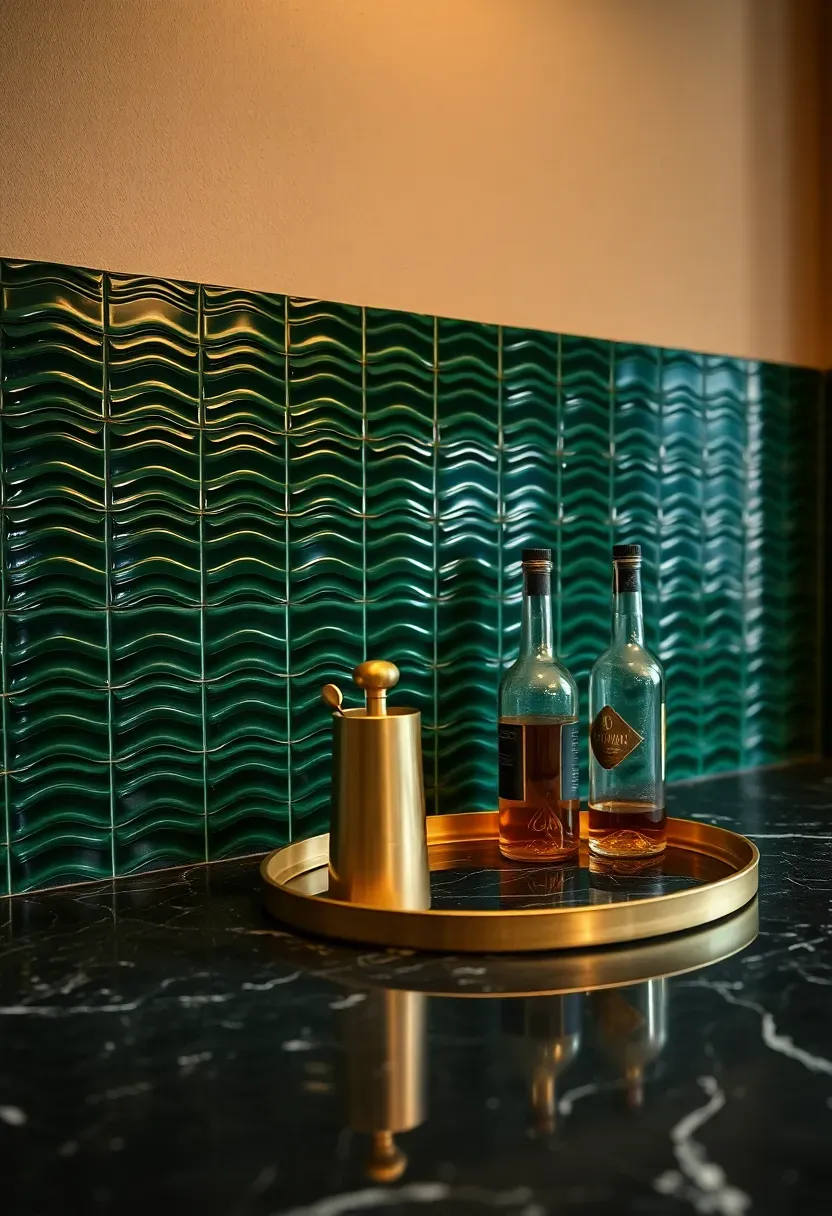
4. Dark Green Zellige Tile
Why It Works for Bars
Zellige — hand-cut Moroccan clay tile — has a surface that is never truly flat. Each piece catches light at a different angle, producing a rippled, jewel-like effect. Dark green (think deep hunter or forest tones) reads rich without going as heavy as black, and it photographs well behind bottles, which matters if you post your drinks on social media.
How to Install
Set 2x2-inch squares with white thinset on cement board. Use unsanded grout in a contrasting color (charcoal works well) at 1/16-inch joints. Expect roughly 15 percent waste because the tiles are hand-cut and irregular. Budget $18–30 per square foot depending on the supplier.
Choose Green Zellige If
- Your bar countertop is light — marble, white quartz, butcher block
- You want texture without the physical depth of stone ledger
- You are comfortable with imperfection as a design feature
Recommended
Items for this idea
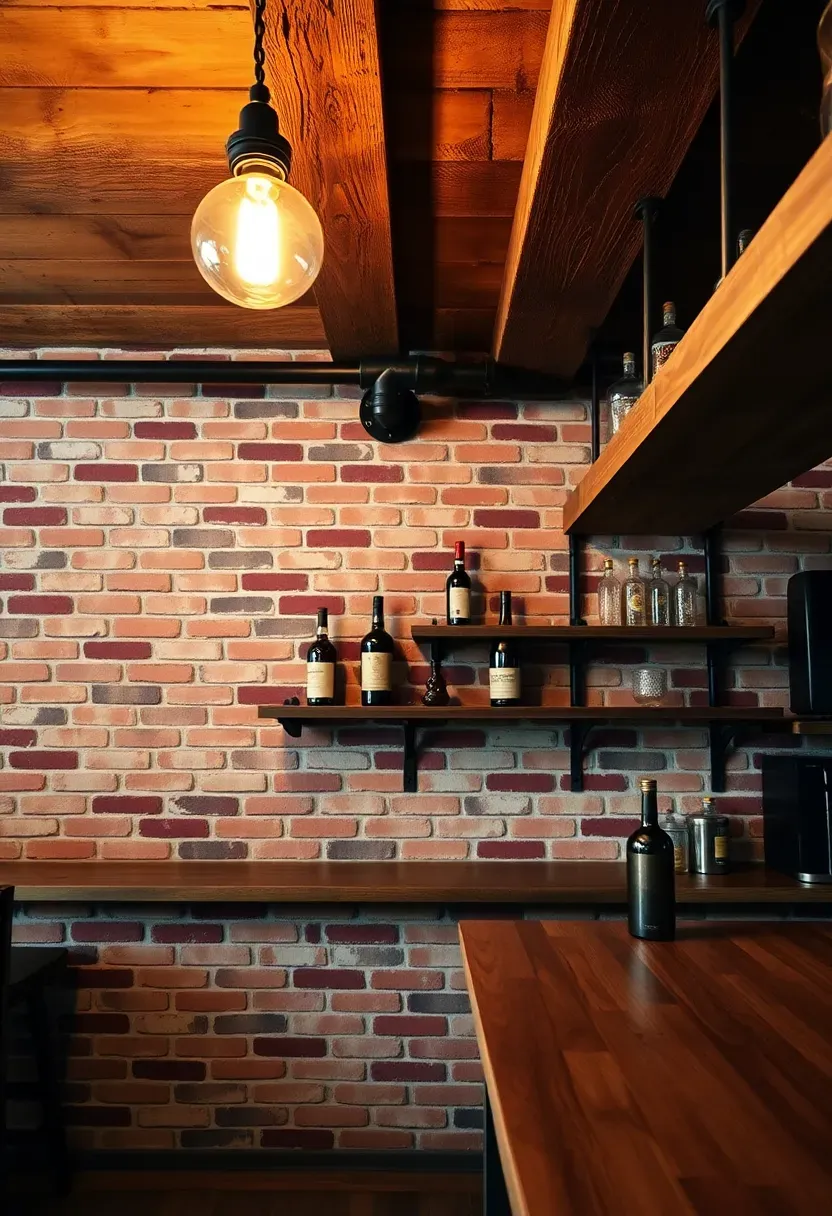
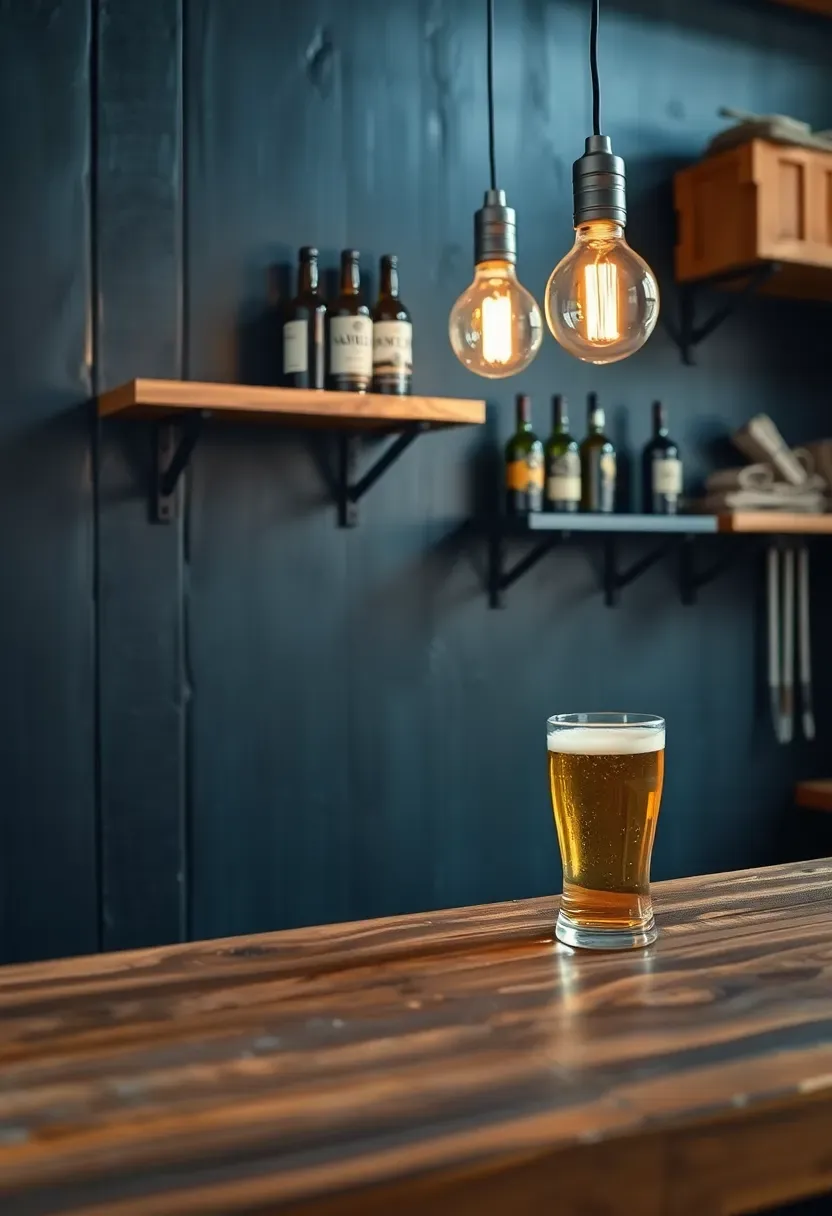
5. Reclaimed Brick Veneer
Real brick is too thick and heavy for most bar backsplashes. Brick veneer — sliced to 1/2-inch thickness from salvaged full bricks — gives you the same aged surface, mortar shadows, and color variation without the structural demands. Install it on cement board with modified thinset, then grout with a mortar bag for an authentic look. Color ranges from pale cream to deep red-brown depending on the salvage source. One pallet covers about 50 square feet.
Tips
- Seal the face with a matte penetrating sealer to prevent dust shedding
- Pair with industrial pipe shelving and Edison bulb fixtures
- Works best in bars with 8-foot or taller ceilings — brick reads heavy in tight spaces
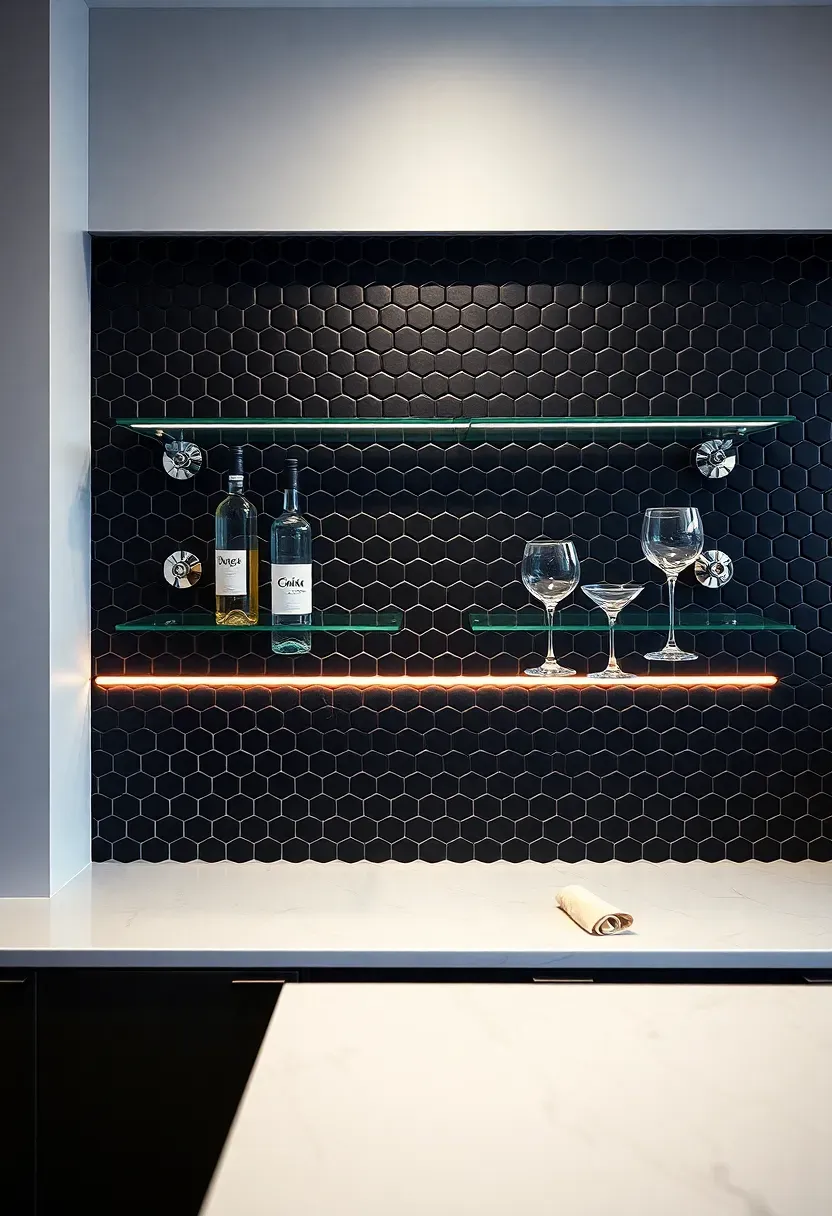
6. Black Hexagon Mosaic
The Look
Small-format hexagons (2-inch diameter) in matte black create a bar backsplash that reads bold without competing with your glassware or bottles. The geometric pattern adds enough visual interest to carry a wall on its own. Mesh-backed sheets make installation straightforward — each sheet covers about one square foot.
A vs B: Matte vs Glossy Black
Matte black hides water spots and fingerprints far better than glossy. Glossy reflects more light, which works in dark basements but shows every smudge. For a bar where people lean, reach, and splash, matte is the practical pick. If you want some sheen, try a satin finish as a middle ground.
Recommendation
Go matte if your bar gets regular use; save glossy for a purely decorative display bar nobody actually touches.

Recommended
Items for this idea
7. Walnut Wood Slat Wall
Vertical wood slats turn a bar backsplash into an architectural feature. Use 1x2-inch walnut strips spaced 1/2 inch apart, mounted to a plywood backer painted black so the gaps read as shadow lines. The total depth is under 2 inches. LED strip lighting tucked behind the top edge washes down through the gaps and creates a glow effect that gets better after dark. Seal the walnut with a waterborne polyurethane — two coats minimum — to handle splashes without yellowing.
Tips
- Pre-stain the backer board black before mounting slats
- Sand walnut to 220 grit for a smooth finish that does not snag bar towels
- Space slats with consistent 1/2-inch plywood shims during glue-up
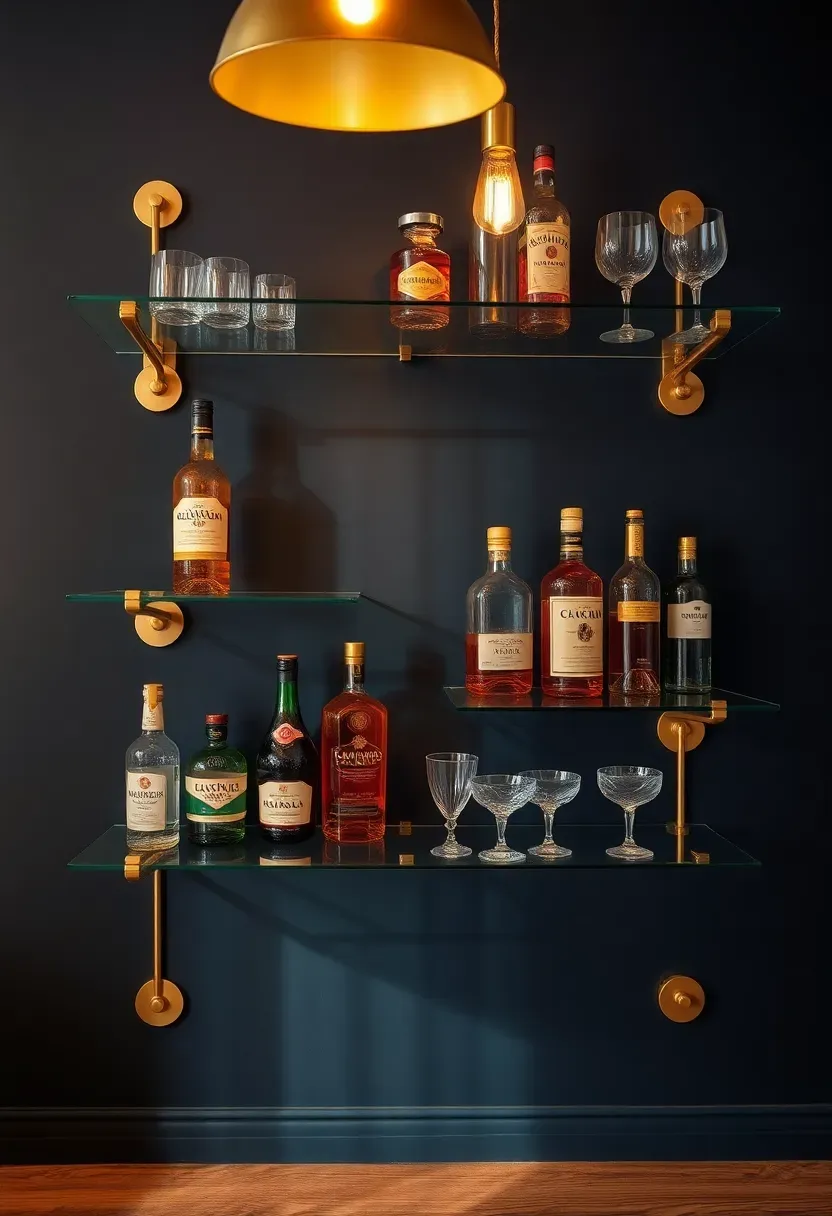
8. Brass and Glass Shelving Wall
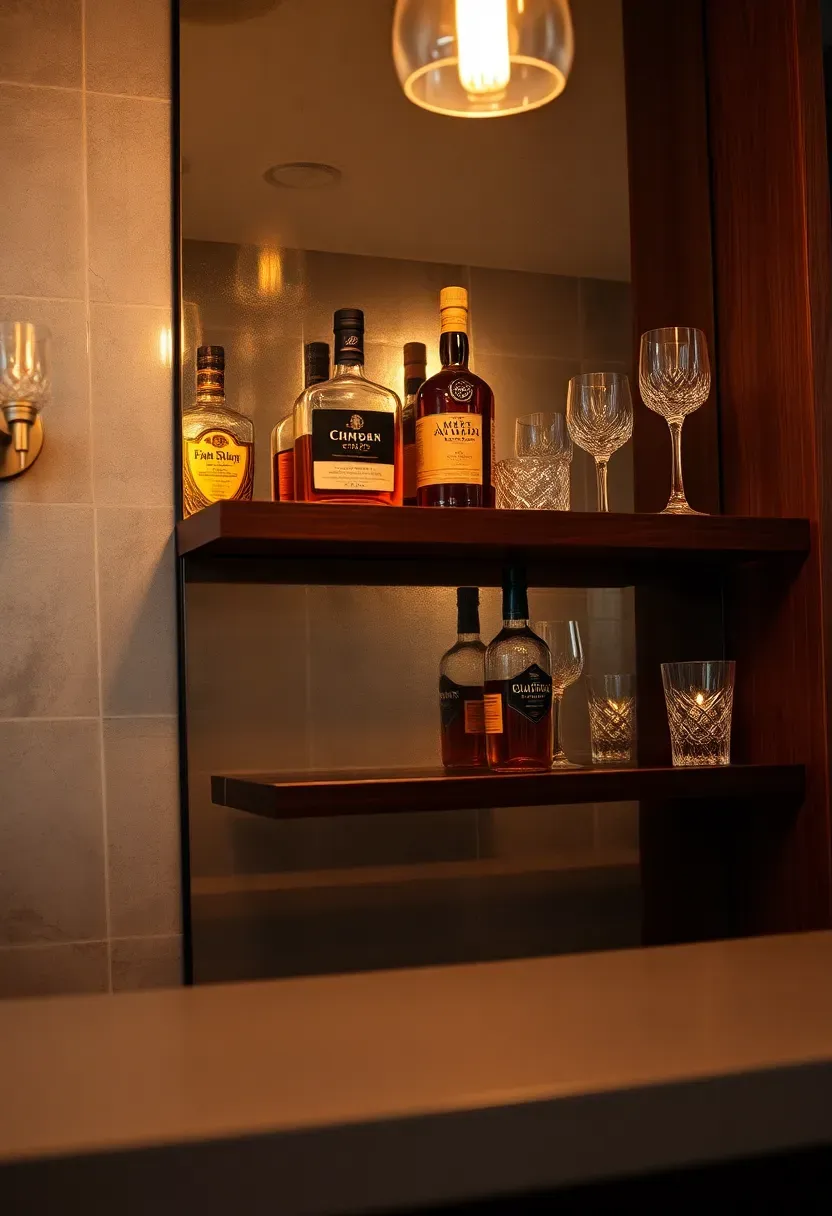
The Problem with Blank Walls
A home bar with a plain painted wall behind it looks unfinished, even if the paint color is perfect. The wall needs some structure to anchor the display of bottles and glassware.
The Solution
Mount a full-wall brass bracket system (like Rejuvenation's catalog line or a custom welded grid) with tempered glass shelves at 10-inch intervals. The brass acts as the backsplash — there is no tile behind it, just a dark-painted wall. Bottles sit on the shelves, and the combination of metal, glass, and color fills the visual space. Total material cost runs $300–600 for a 4-foot-wide section depending on whether you buy prefab or custom.
Pros and Cons
- Pros: Easy to rearrange, doubles as storage, no thinset or grout involved
- Cons: Requires wall studs for heavy bottle loads, glass shelves need regular dusting
Recommended
Items for this idea
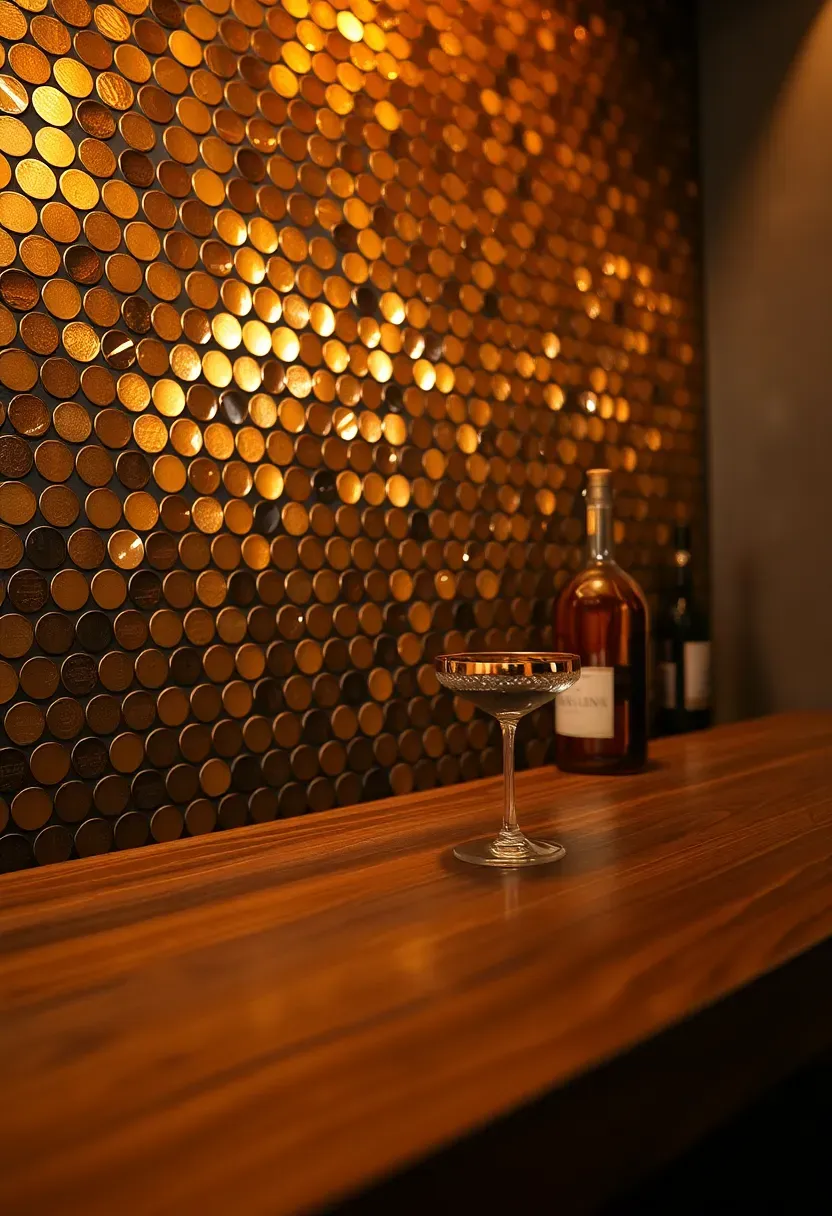
9. Penny Round Tiles in Metallic
Penny rounds — those small circular tiles typically 3/4 inch in diameter — come in metallic glazes that shift between bronze, gold, and copper depending on the light angle. Mesh-mounted sheets install the same way as any mosaic. The tiny grout lines create a chainmail-like texture that reads sophisticated at bar scale. Use dark grout (charcoal or black) to make the metallic faces pop. Budget $12–20 per square foot.
Tips
- Stick to one metallic tone per wall — mixing gold and silver penny rounds looks busy
- Sanded grout fills the small joints better than unsanded at this scale
- Pair with a simple dark countertop so the backsplash stays the star
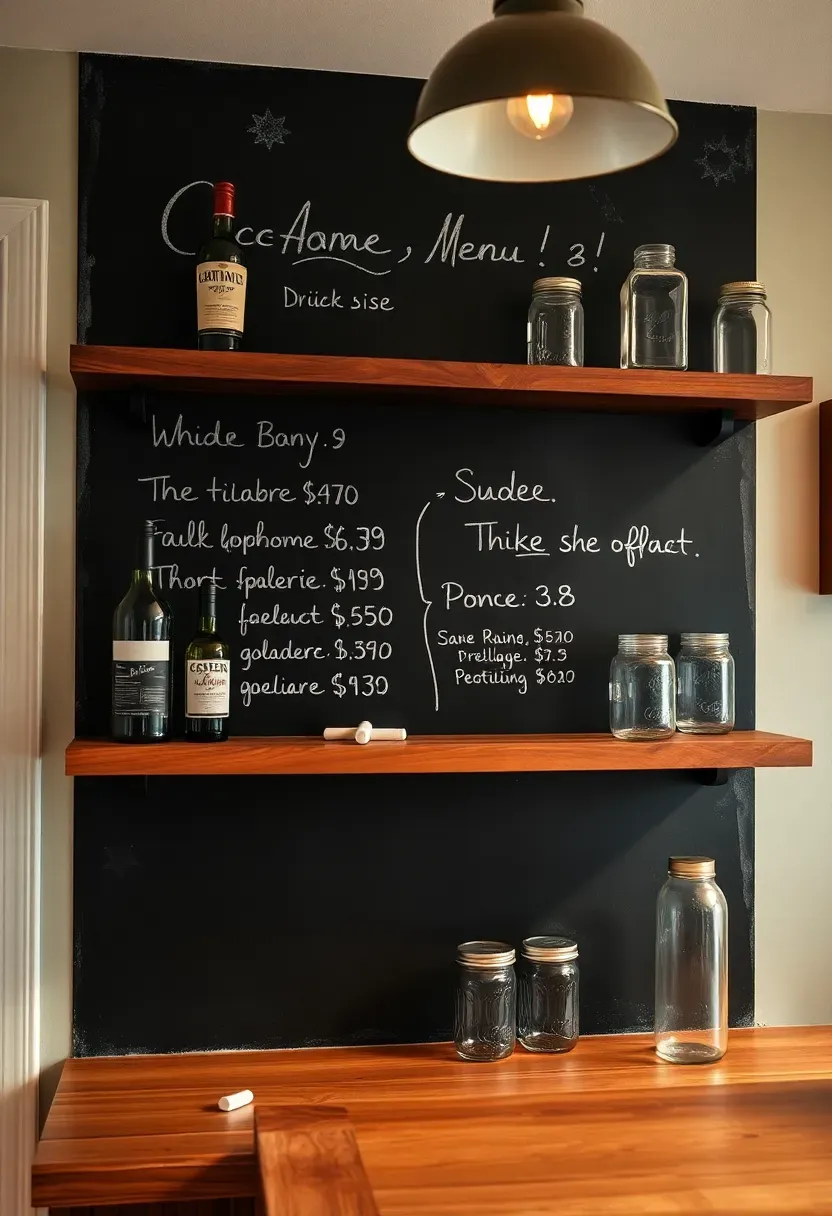
10. Chalkboard Paint Panel
How To Set It Up
- Prep the surface. Sand the wall smooth, then apply a coat of primer. Any bumps will show through chalkboard paint.
- Apply chalkboard paint. Use a roller for even coverage — two coats with 4 hours of drying between them. Rust-Oleum and Benjamin Moore both make reliable formulas.
- Season the surface. After 72 hours of curing, rub the entire face with the side of a chalk stick, then wipe clean. This prevents ghosting from your first real writing.
- Add a shelf ledge. Mount a narrow (2-inch) wood ledge at the base to hold chalk and an eraser.
Watch Out
Chalk dust settles on open bottles and glassware below. Keep a damp cloth nearby and consider liquid chalk markers if dust is a concern — they wipe clean with water and leave no residue.
Recommended
Items for this idea
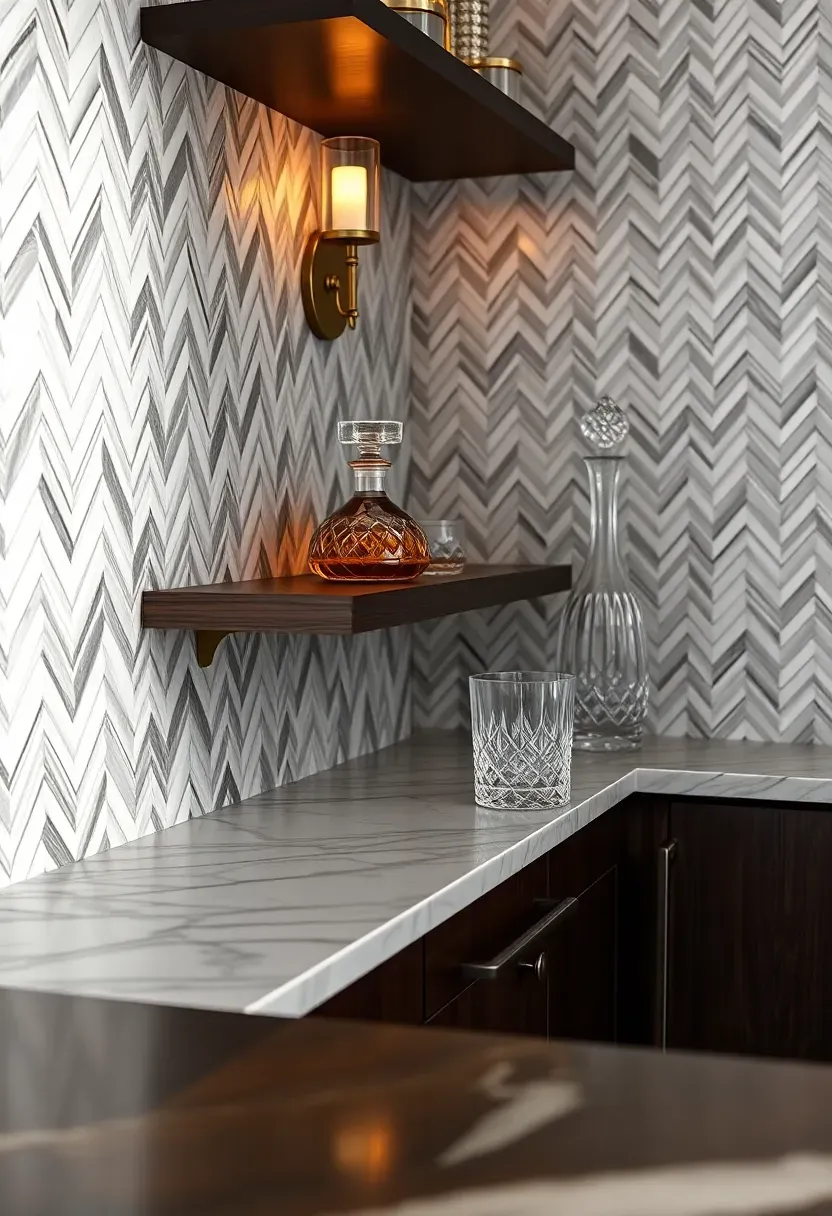
11. Herringbone Marble Mosaic
Herringbone layout adds movement to marble that a straight stack or subway pattern cannot match. For a bar backsplash, use 1x3-inch Calacatta or Carrara sticks on mesh-backed sheets. The gray veining against the white base gives the wall enough variation to hold attention without overwhelming the bottles in front. Set with white thinset, grout with a matching white unsanded grout, and seal the entire surface twice — marble is porous and a bar environment means contact with wine, citrus, and spirits that will stain unprotected stone.
Tips
- Pre-seal marble tiles before grouting to prevent grout haze from penetrating the stone
- Herringbone requires precise 45-degree cuts at the edges — rent a tile saw if you do not own one
- Budget $15–25 per square foot for natural marble herringbone sheets
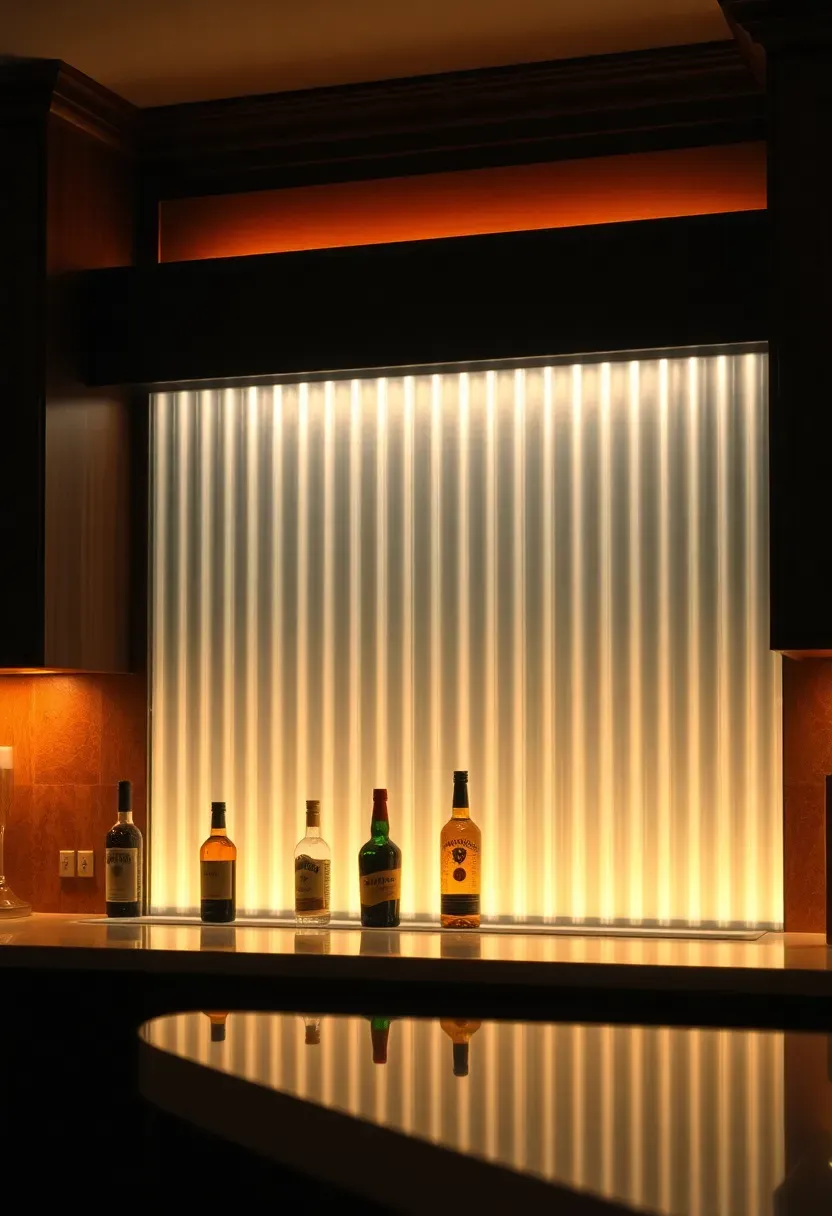
12. Fluted Glass Panels
Origins
Fluted (or reeded) glass has been a fixture in commercial bars and restaurants since the Art Deco era. The vertical ridges diffuse light while still letting color and shape come through, creating a frosted-but-not-opaque effect.
Modern Application
Mount 1/4-inch fluted glass panels in front of LED strip lighting on the bar wall. The light passes through the ridges and casts soft vertical lines across the space. You can backlight the entire panel in warm white for a cocktail lounge feel, or use color-changing LEDs for a more playful setup. Panels are cut to size by any glass shop and mounted with standoff clips that create a 1-inch gap for the LED channel.
Apply at Home
Start with a single panel behind the main bottle display. A 24x48-inch piece costs around $60–90 at a local glass supplier. Add the LED channel behind it for another $30.
Recommended
Items for this idea
13. Tin Ceiling Tile Backsplash
Pressed tin tiles — the ornate panels originally designed for Victorian ceilings — make surprisingly effective bar backsplashes. The embossed patterns cast fine shadows, and the metallic surface bounces ambient light across bottles and glassware. Standard 2x2-foot panels nail directly to plywood backer with small brad nails. You can buy them in raw tin, pre-painted white, or with a faux-aged copper finish. Raw tin develops a subtle patina over time, which suits a bar better than a bright factory finish.
Tips
- Overlap panel edges by 1/2 inch to hide seams
- Touch up brad nail heads with a dab of matching paint
- Pair with dark wood shelving and warm-toned pendant lights
14. Terrazzo Slab
The Case for Terrazzo
Terrazzo is concrete embedded with chips of marble, glass, or granite, then ground smooth. A single slab behind a bar creates a monolithic look with no grout lines — just a continuous field of speckled color. It pairs naturally with mid-century bar furniture and brass fixtures.
What to Specify
Order a 3/4-inch-thick slab from a terrazzo fabricator with large-format marble chips (1/2 to 1 inch) in a palette that complements your countertop. White cement matrix with gray and blush marble chips is a classic combination. The slab mounts to the wall with construction adhesive and mechanical fasteners. Expect $40–70 per square foot fabricated and delivered.
Choose Terrazzo If
- You want zero grout lines and minimal maintenance
- Your bar aesthetic leans mid-century or contemporary
- You have budget for a custom-fabricated piece
Recommended
Items for this idea
15. Moroccan Fish Scale Tile
Fish scale (or fan) tiles arranged in overlapping rows create a scalloped pattern that reads organic and slightly exotic. In deep blue or teal, they give a bar wall the visual weight of a statement piece. Each tile is about 3 inches across. Install bottom-up, overlapping each row by about 1/4 inch. Use a contrasting grout — white against dark blue — to emphasize the scallop shape, or match the grout color for a subtler effect.
Tips
- Expect 20 percent waste — the curved shape means more cuts at edges and corners
- Handmade versions have slight size variation that adds character but demands patience during install
- Works best on a single focal wall rather than wrapping corners
16. Concrete Skim Coat
A concrete skim coat is exactly what it sounds like: a thin (1/8-inch) layer of micro-cement troweled directly over drywall or existing tile. The result is a raw, industrial surface with subtle trowel marks and tonal variation. No grout lines, no pattern — just texture. Apply with a steel trowel in two passes, sanding lightly between coats. Seal with a food-safe penetrating sealer. Total material cost is under $3 per square foot, making it one of the cheapest bar backsplash options that still looks intentional.
Tips
- Practice your trowel technique on scrap drywall first — the finish is only as good as your wrist
- Add pigment to the mix for color (charcoal and warm gray are popular for bars)
- Not ideal behind a sink without aggressive sealing — water penetration causes staining
Recommended
Items for this idea
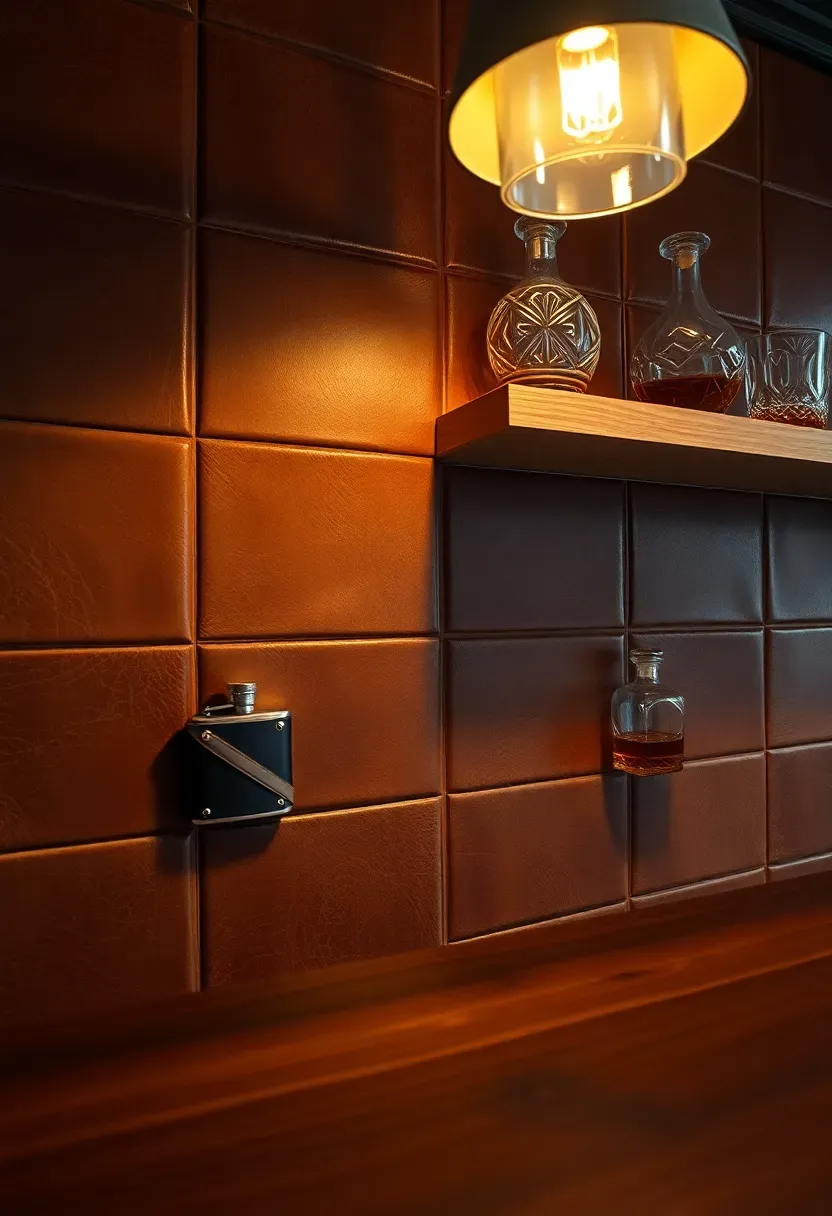
17. Leather Tile Panels
Why Leather Behind a Bar
Leather is unexpected on a wall, which is exactly what makes it work in a bar setting. The material absorbs sound, adds warmth, and develops character with age — qualities that suit a space designed for conversation and slow drinks. Leather wall tiles come in 12x12 or 6x12-inch panels backed with a rigid substrate for easy mounting.
Installation
Attach panels to the wall with construction adhesive, butting edges tightly with no grout lines. The leather surface should sit at least 12 inches away from any sink or water source. Treat with a leather conditioner twice a year to prevent drying and cracking.
Pros and Cons
- Pros: Sound absorbing, warm to the touch, unique visual texture
- Cons: Not water-resistant, scratches show, premium price ($20–40/sq ft)
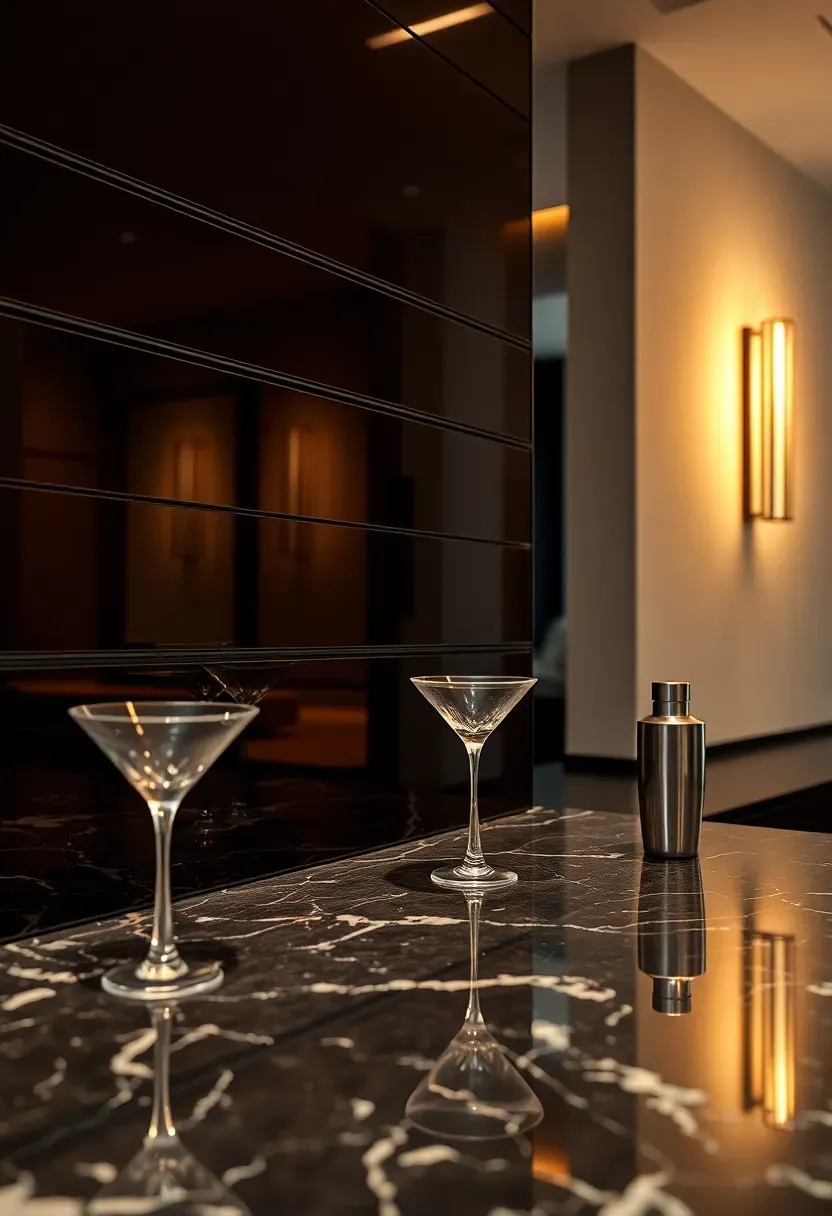
18. Smoked Mirror Strips
Smoked mirror — tinted to a gray or bronze tone — cut into horizontal strips (typically 4 inches tall by the full width of the bar) creates a banded, contemporary look. The strips mount with mirror adhesive, staggered vertically or aligned with thin metal channels between them. Smoked glass hides reflections enough that you get depth without seeing a clear image of yourself every time you reach for a bottle. It works particularly well in basement bars where natural light is scarce.
Tips
- Order strips from a glass shop pre-cut to exact width — field cuts risk chipping
- Bronze-tinted smoke pairs with warm metals; gray smoke pairs with chrome and nickel
- Leave a 1/16-inch gap between strips and fill with black silicone for a clean reveal line
Recommended
Items for this idea
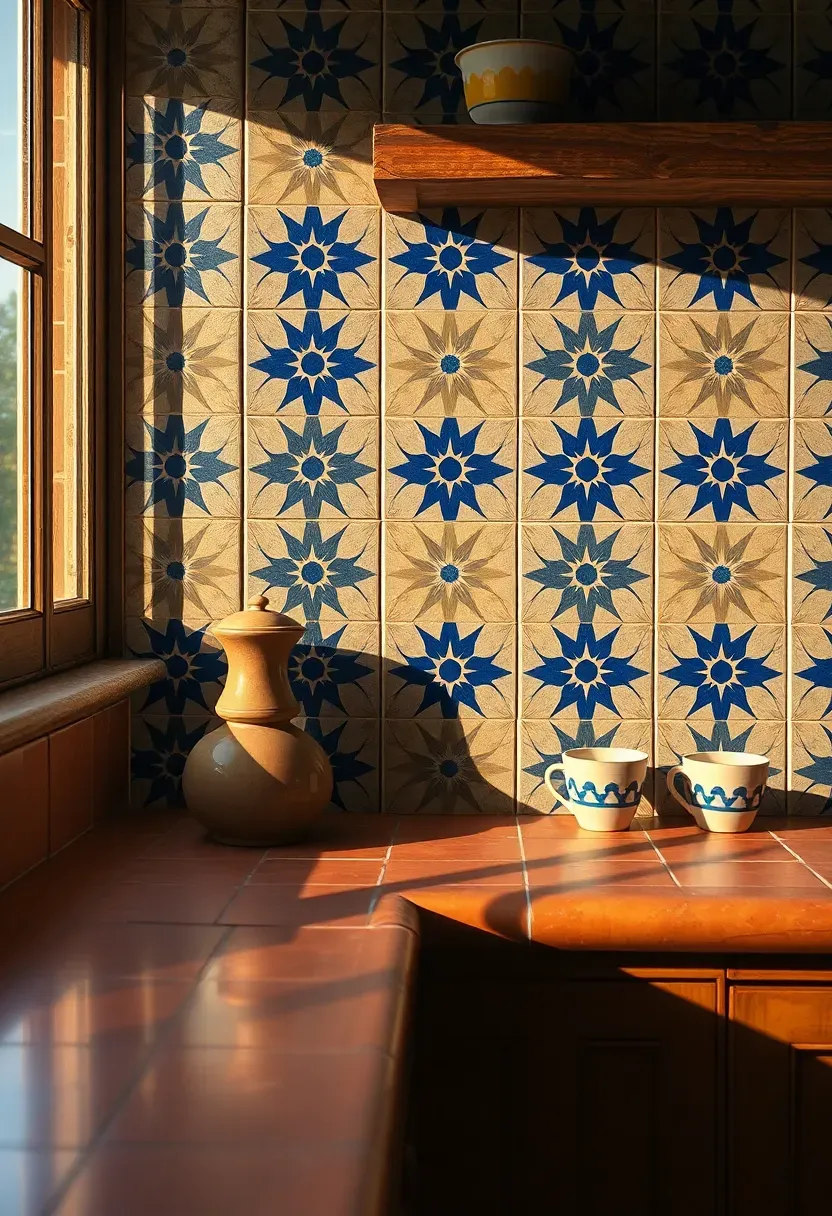
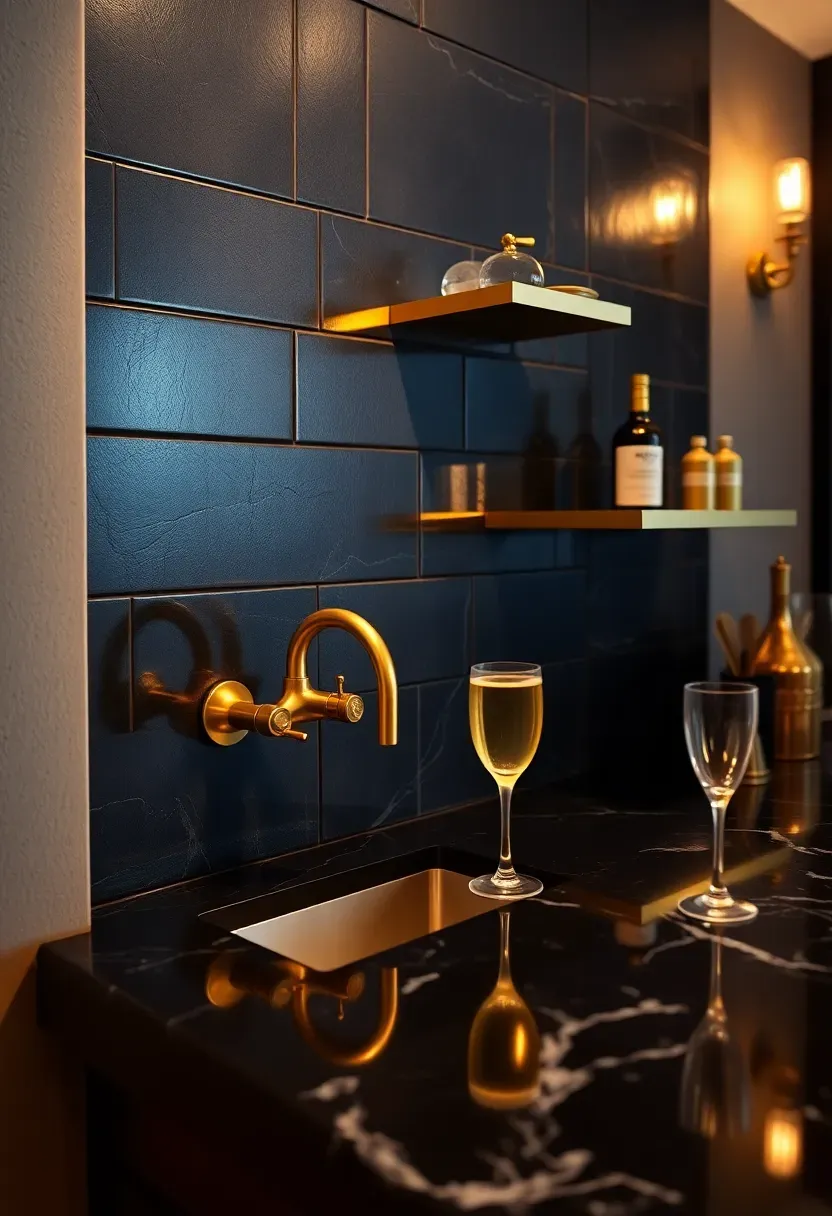
19. Blue Encaustic Cement Tile
What Makes Encaustic Different
Encaustic cement tiles are not glazed or fired at high temperatures. The pattern is created by pouring colored cement into a mold, then pressing it under hydraulic force. The color goes all the way through the tile, so chips and wear expose the same pigment underneath. This durability, combined with bold geometric patterns, makes them a natural fit for a bar that gets actual use.
Best Patterns for Bars
Star-and-cross, Moorish geometric, and simple diamond patterns in navy blue with white or cream accents read well at bar scale (typically 8x8-inch tiles). Avoid overly intricate patterns that get lost behind bottles. Seal before and after grouting — cement tile is porous.
Apply at Home
A 3x6-foot bar backsplash needs about 18 square feet of tile. At $8–15 per tile, budget $200–400 for materials. Install with white thinset on cement board.
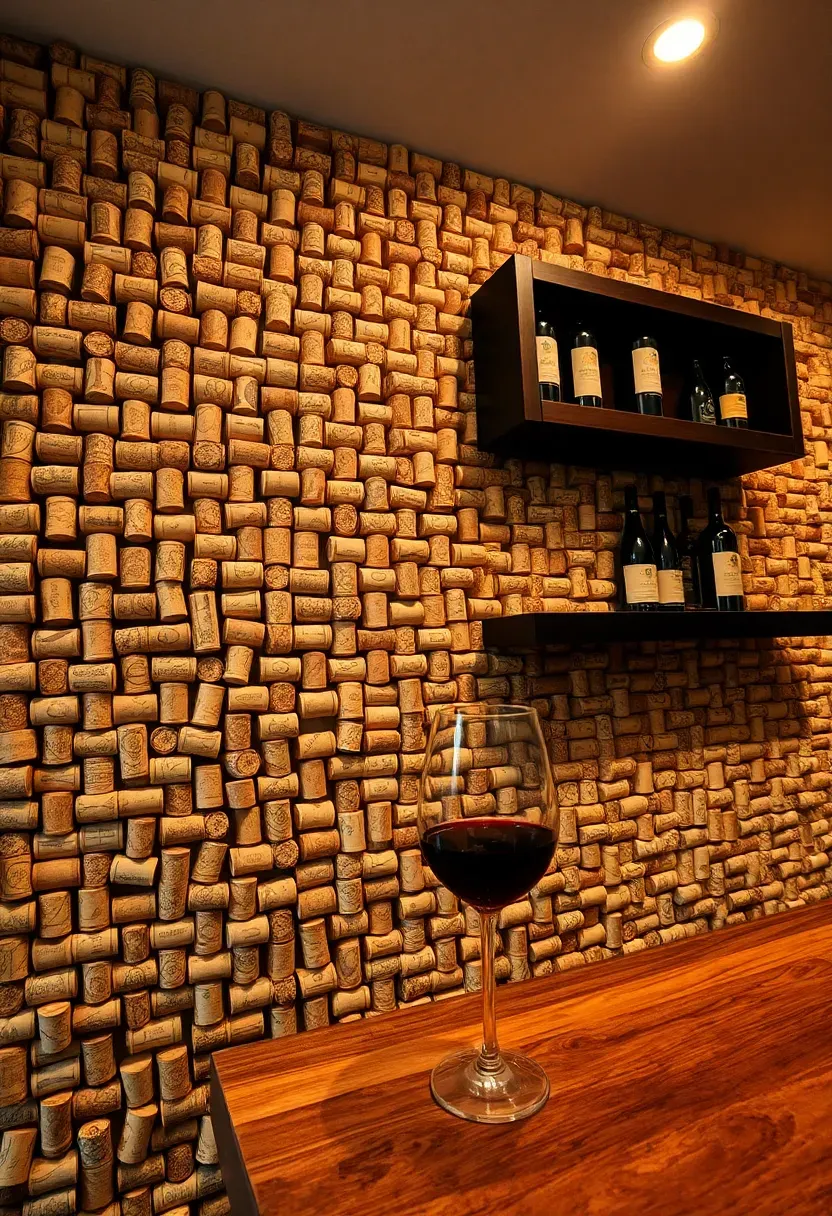
20. Wine Cork Wall
If you have been saving corks — or know someone who has — a cork wall backsplash is a genuinely personal touch behind a wine bar. Slice corks in half lengthwise and glue them flat-side down to a plywood backer with construction adhesive. Arrange them in rows, herringbone, or random orientation. The natural color variation between wine-stained and clean corks creates an organic pattern. Seal the finished wall with a matte polyurethane spray to prevent crumbling.
Tips
- You need roughly 300 half-corks per square foot — start collecting now or buy in bulk online
- Synthetic corks do not look as good; stick to natural cork for color variation
- Add a clear acrylic border at the edges to create a finished frame
Recommended
Items for this idea
21. Black Soapstone Slab
Soapstone is softer than granite and denser than marble, which gives it a matte, almost chalky surface that darkens over time with mineral oil application. A single slab behind a bar — typically 3/4 inch thick — eliminates grout lines and provides a dark, quiet backdrop for bottles. The veining is subtler than marble, usually light gray or silver threads against charcoal black. Soapstone resists acids and staining better than marble, making it practical where wine and citrus are involved.
Tips
- Apply mineral oil every few weeks initially, then monthly once the patina stabilizes
- Soapstone scratches easily but scratches blend into the patina — most people consider this a feature
- Have a fabricator template and install; the weight requires mechanical anchoring to studs
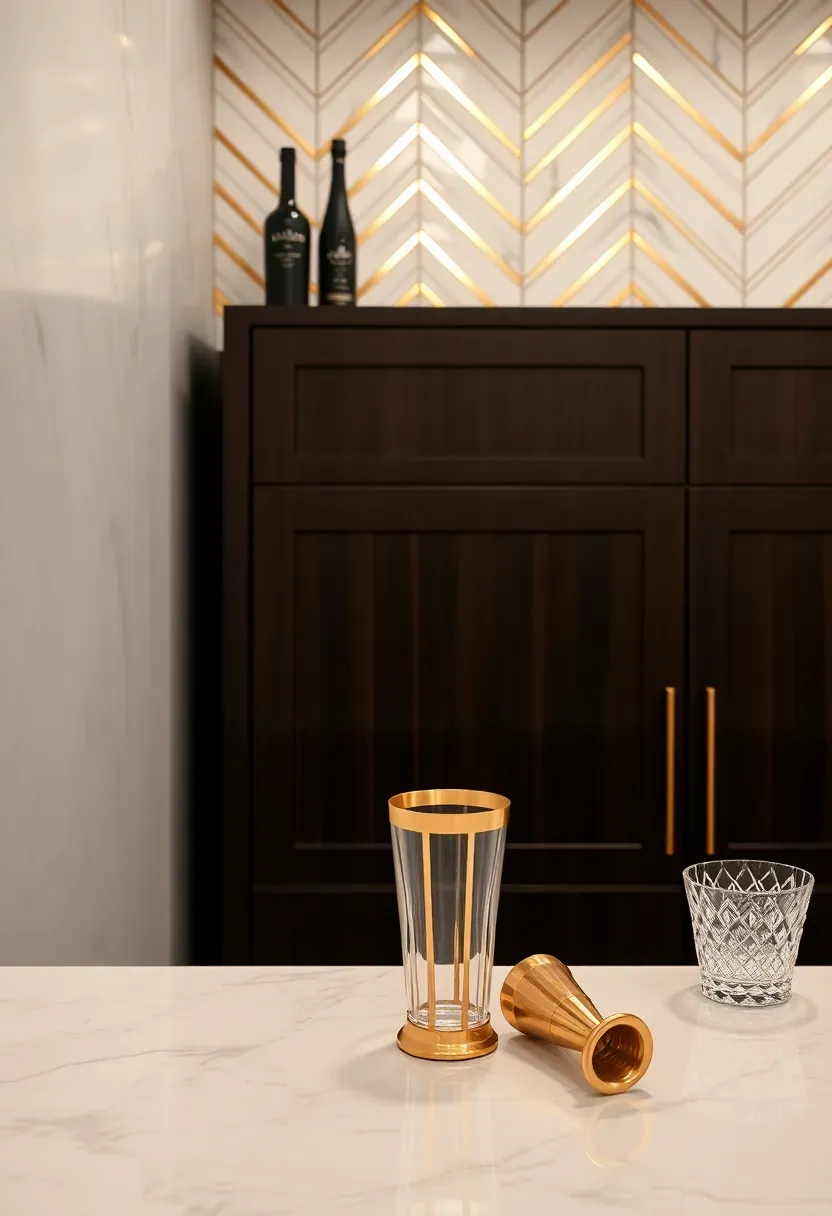
22. Geometric Brass Inlay Tile
The Look
White marble or black granite tiles with thin brass strips inlaid along geometric lines — diagonals, chevrons, or hexagonal frames. The brass catches light and creates a subtle grid pattern that references Art Deco bar interiors without copying them directly.
How It Is Made
These are specialty tiles where a narrow channel is routed into the stone face and a brass strip is pressed and glued into the groove. They come pre-assembled. Install like standard stone tile with thinset and grout. The brass sits flush with the stone surface so there is no lip to catch on.
Recommendation
Reserve for a focal section — a 2x4-foot zone behind the main bottle display — rather than the entire backsplash. The pattern is strong enough that a full wall can feel overwhelming. Budget $30–50 per square foot.
Recommended
Items for this idea
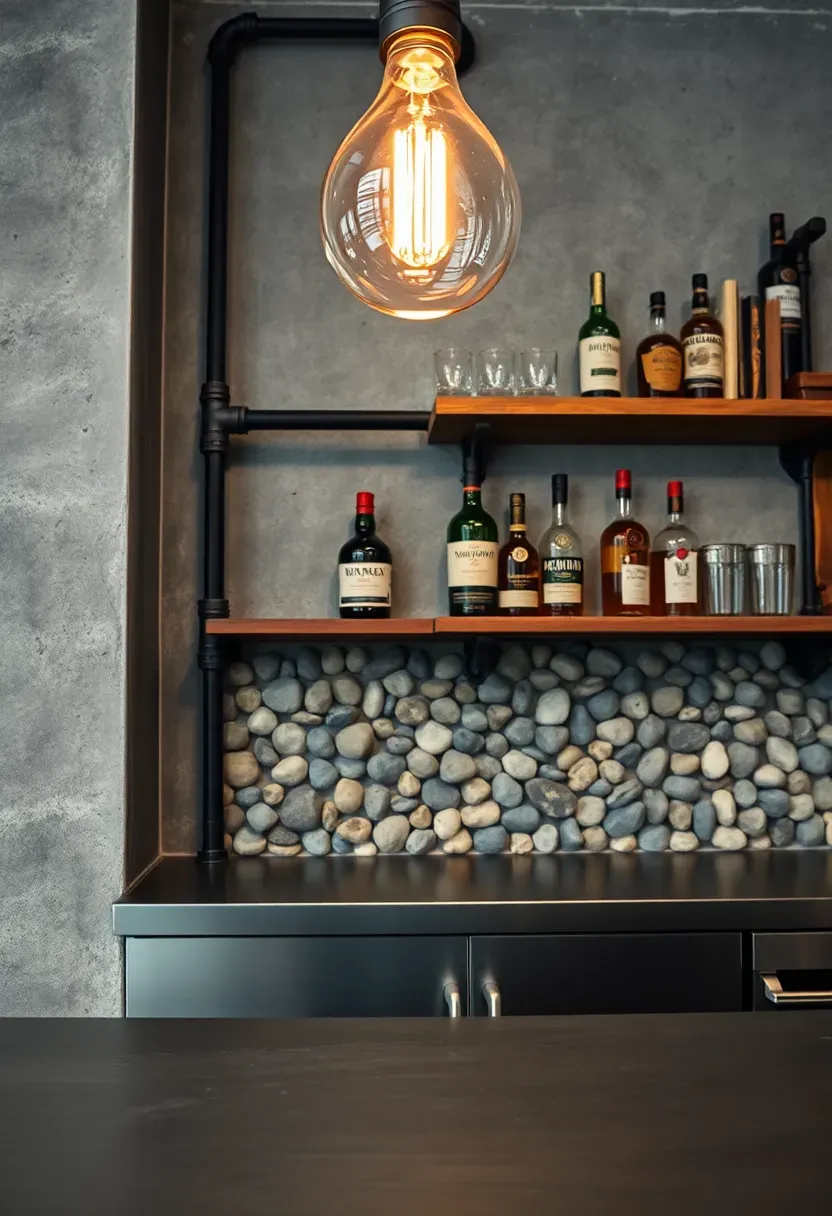
23. Exposed Aggregate Concrete
Exposed aggregate takes the concrete skim coat idea (see idea 16) further by revealing the stones inside the mix. Pour a 1-inch-thick panel with river pebbles, recycled glass, or marble chips mixed into standard concrete, then wash and brush the surface before it fully cures to expose the aggregate. The texture is rough, tactile, and completely unique to each pour. Mount the finished panel to the wall with heavy-duty construction adhesive and toggle bolts.
Tips
- Cast panels flat on a melamine form for a smooth back surface
- Control aggregate size — 1/4 to 1/2 inch pebbles work best at bar scale
- Seal with a penetrating concrete sealer to prevent dust shedding
24. Glazed Lava Stone
Origins
Glazed lava stone originated in Provence, where artisans enameled volcanic basalt at 1000 degrees Celsius to create a glass-hard surface in any color. The material has been used on French kitchen countertops for centuries but remains relatively unknown in American homes.
Modern Bar Application
Order custom-colored lava stone tiles (typically 6x6 or 4x12 inches) in deep charcoal, midnight blue, or oxblood. The glaze is impervious to stains, acids, heat, and UV — making it essentially indestructible behind a bar. Install with standard thinset on cement board. The surface has a depth of color that painted ceramic cannot match because the enamel bonds chemically to the stone at kiln temperature.
Apply at Home
Expect $25–45 per square foot. Lead times run 6–8 weeks since most pieces are made to order from European suppliers.
Recommended
Items for this idea
25. Peel-and-Stick Metal Mosaic
The Problem with Rental Bars
If you rent, or you are building a temporary bar for a finished basement that might become a bedroom later, permanent backsplash materials are not realistic. You need something that goes up fast and comes down without damage.
The Solution
Peel-and-stick metal mosaic tiles use real aluminum or stainless steel faces bonded to a flexible adhesive backing. They stick directly to clean, smooth walls and remove without damaging paint. Each tile sheet is about 12x12 inches and costs $6–12. The metal faces are real enough to catch light and give the bar a finished look, but the entire install is reversible.
Pros and Cons
- Pros: No tools, no mess, removable, genuinely metallic surface
- Cons: Edges can lift in humid environments, limited pattern options, visible seams up close
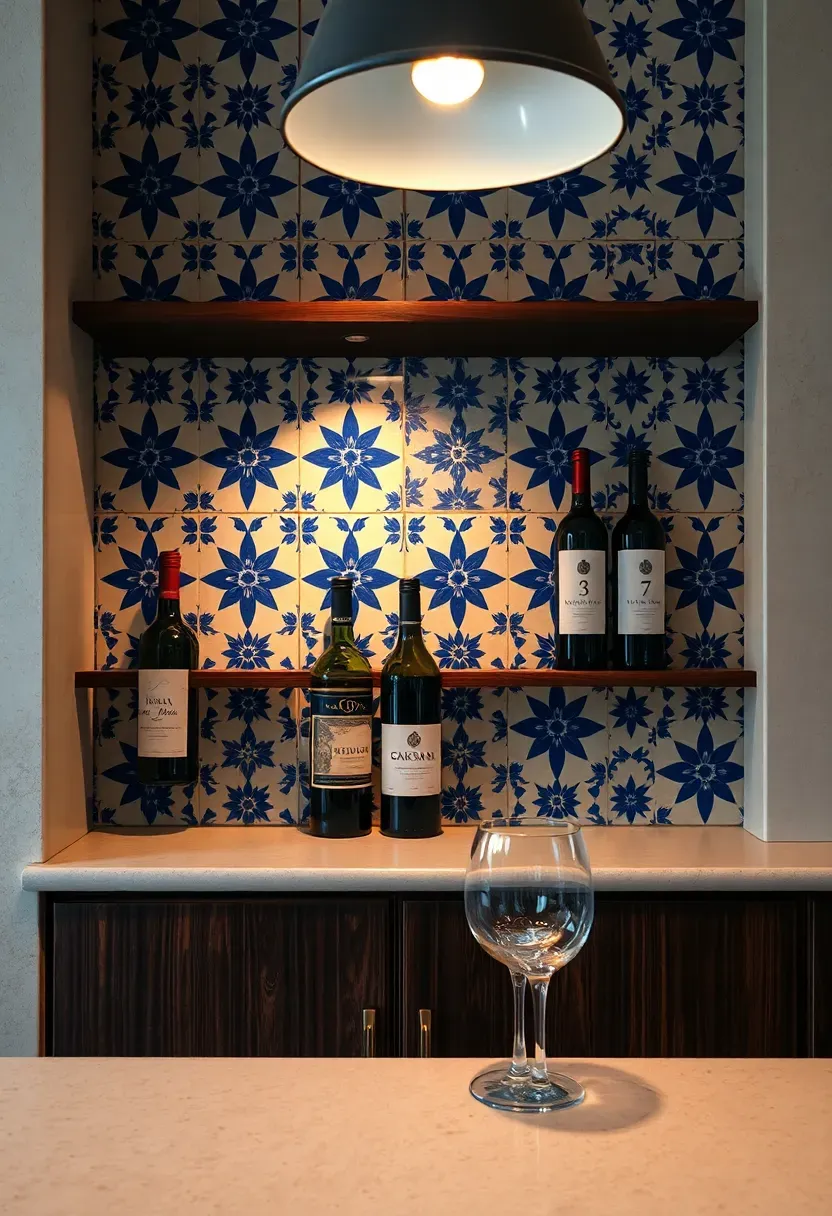
26. Hand-Painted Portuguese Azulejo
Portuguese azulejo tiles — those blue-and-white hand-painted ceramics you see on buildings in Lisbon — carry centuries of pattern-making tradition into a home bar setting. Each tile is individually painted before glazing, so no two are exactly identical. A classic 6x6-inch format with traditional motifs (interlocking stars, floral medallions, or border patterns) creates a backsplash that tells a specific cultural story. Install with white thinset and matching white grout to keep the focus on the painted design.
Tips
- Buy 10 percent extra — hand-painted tiles occasionally arrive with kiln defects
- Mix border tiles with field tiles for an authentic panel composition
- Source from Portuguese suppliers like Viuva Lamego or Cortico and Netos for genuine handwork
Recommended
Items for this idea
27. Blackened Steel Panels
Hot-rolled steel sheets treated with a blackening solution (gun blue or a proprietary patina formula) produce a matte, dark surface with subtle blue-black tonal variation. Cut 16-gauge panels to fit your bar wall, drill mounting holes, and bolt them to the studs with exposed hex bolts for an industrial look. The patina is sealed with paste wax (Renaissance Wax is the standard for blackened metal) to prevent rust. Over time the wax wears and the steel develops localized patina where it is touched most, adding character specific to your bar.
Tips
- Wear gloves during installation — oils from your hands create visible fingerprints in the patina
- Apply paste wax every 3–6 months in humid climates
- Pair with reclaimed wood shelving and copper pipe accents for full industrial effect
Quick FAQ
Can I use kitchen backsplash tile behind my bar? Absolutely. Any tile rated for kitchen use works behind a bar. The difference is creative: a bar backsplash does not need to coordinate with a stove, range hood, or major appliances, so you can take more risks with color, pattern, and material.
How tall should a bar backsplash be? Standard height is 18 inches from the countertop to the underside of upper cabinets or shelving. If you have open wall above the bar with no cabinets, take the backsplash all the way to the ceiling for a more finished look. Stopping at an arbitrary height mid-wall looks incomplete.
Do bar backsplashes need to be waterproof? Only directly behind a sink. The rest of a bar backsplash handles occasional splashes at most, so water-resistant materials (sealed stone, ceramic tile, glass) are sufficient. Avoid unsealed wood or raw concrete in the sink splash zone.
What is the cheapest bar backsplash that still looks good? Chalkboard paint (idea 10) and concrete skim coat (idea 16) both cost under $3 per square foot in materials. Peel-and-stick metal mosaic (idea 25) runs $6–12 per square foot and requires zero tools.
Should the bar backsplash match the kitchen? Not necessarily. A home bar benefits from having its own identity. If the bar is visible from the kitchen, pick a backsplash material in a complementary color family rather than an exact match. Contrast is more interesting than coordination in this case.
A bar backsplash is the rare home project where going bold actually makes sense. The space is small enough that expensive materials stay affordable, the functional demands are low, and the whole point of a home bar is to create a mood. Pick the material that makes you want to pour a drink and stand behind the counter — the rest of the design will follow from there.
Pinterest cover for 27 Bar Backsplash Ideas for a Stylish Home Bar
About the author
OBCD
CGI visualization and interior design content. We create detailed 3D renders and curate practical design ideas for every room in your home.