19 Bar Ideas for Basement Spaces
A basement bar does not need a contractor or a five-figure budget to work well. Some of the best setups I have seen started with a repurposed dresser, a mini fridge tucked underneath, and a few floating shelves for bottles. Others went all in with plumbing, a kegerator, and custom millwork. What matters more than the price tag is getting the layout right for how you actually use the space. Do you want a place to mix cocktails for two people on a Friday night, or a full pub setup for game day crowds? That answer drives every decision that follows — counter depth, seating count, storage type, and whether you need a sink at all.
Here are 19 basement bar ideas organized by style, complexity, and budget range.
Table of Contents
- Reclaimed Wood Pub Bar
- L-Shaped Wet Bar
- Floating Shelf Cocktail Station
- Kegerator Built-In
- Industrial Pipe Bar Frame
- Under-Stair Bar Nook
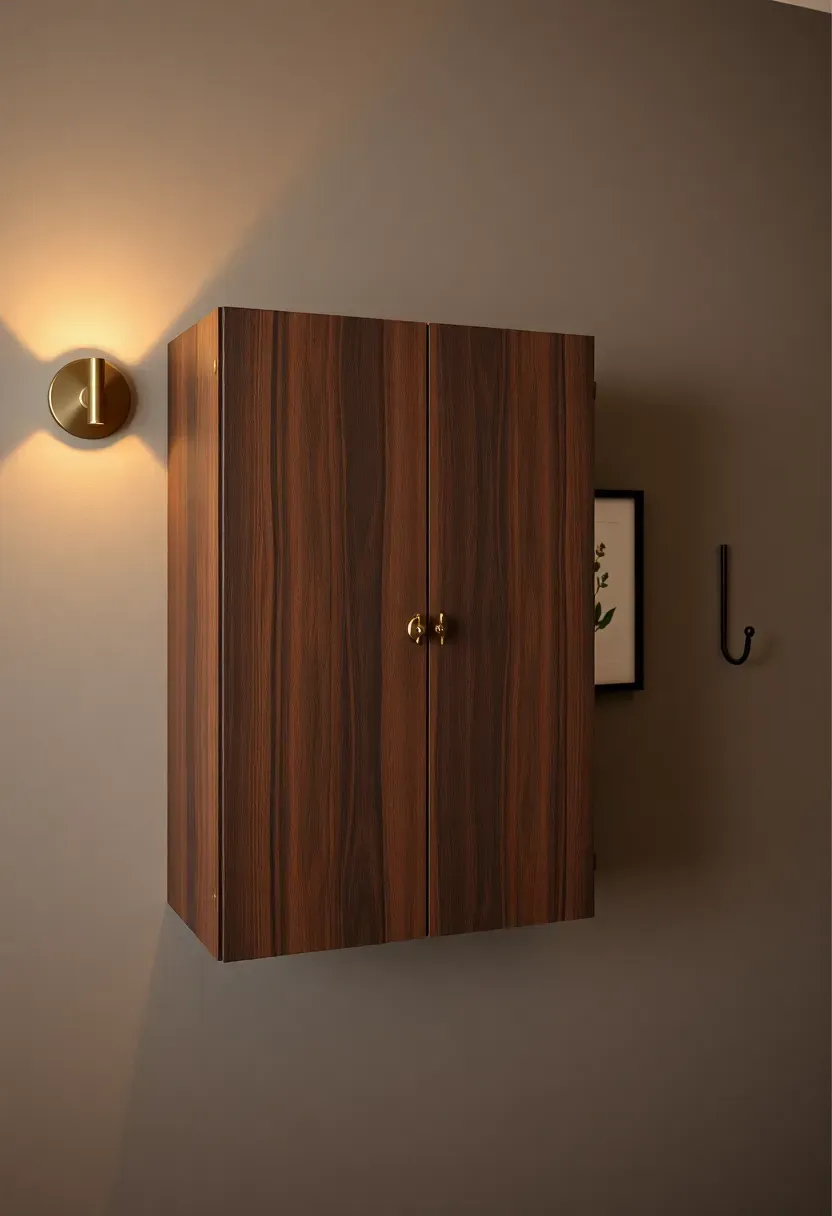
- Mid-Century Modern Bar Cabinet
- Stone Veneer Bar Front
- Corner Wet Bar with Sink
- Sports Bar Media Wall
- Speakeasy Dark Moody Bar
- IKEA Cabinet Bar Hack
- Concrete Countertop Bar
- Wine and Spirits Vault
- Tiki Bar Corner
- Rustic Barrel Bar Table
- LED Backlit Shelving Display
- Fold-Down Murphy Bar
- Full Basement Pub Layout
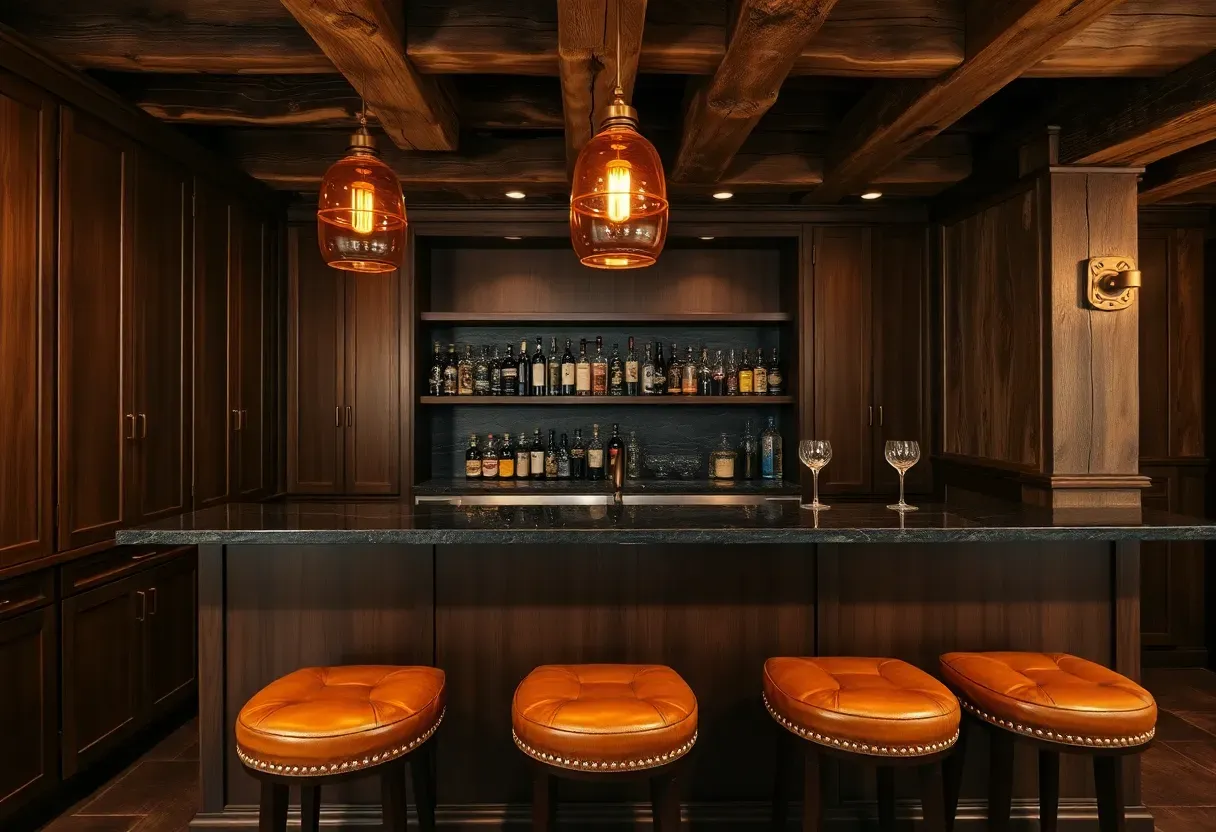
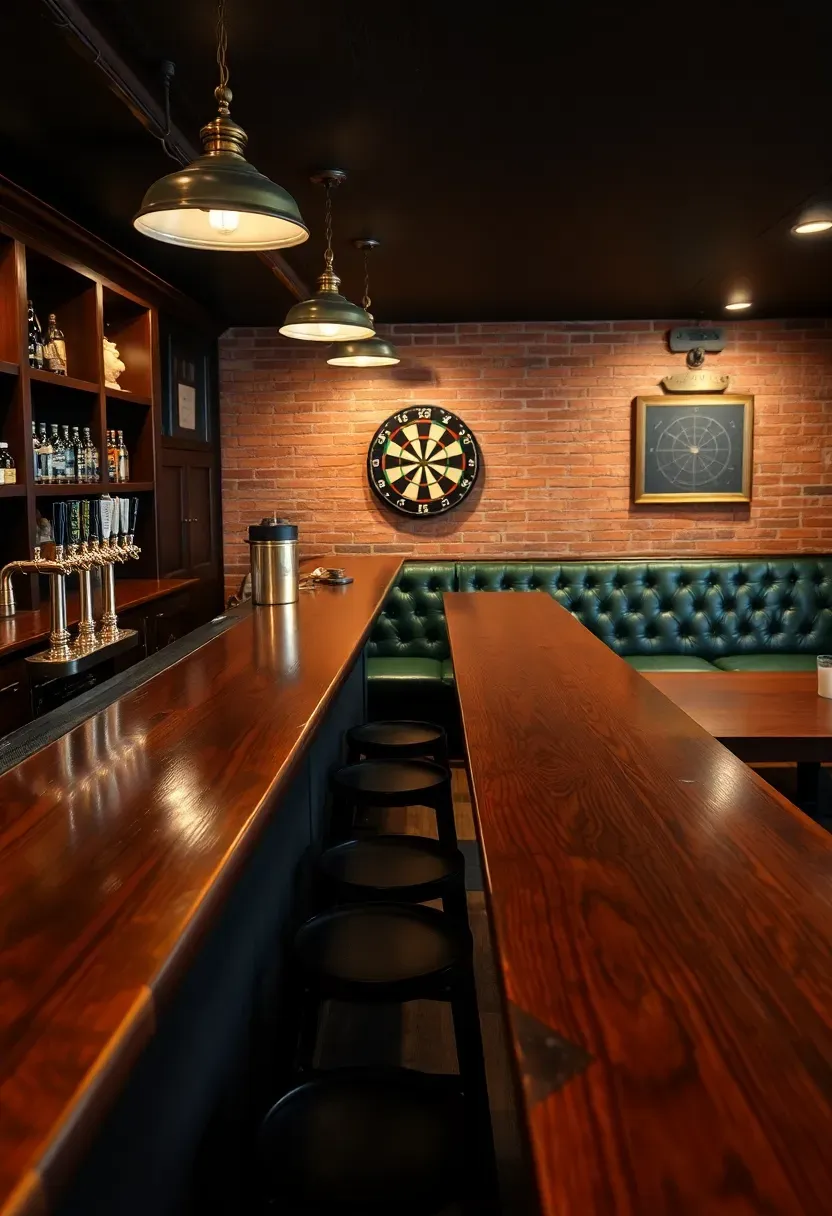
1. Reclaimed Wood Pub Bar
There is something about old wood that makes a basement bar feel like it has been there for decades, even when you built it last month. Reclaimed barn boards, scaffolding planks, or salvaged gym flooring all work as bar top material. The imperfections — nail holes, saw marks, weathering — add character that new lumber cannot replicate. Sand the surface enough to prevent splinters but not so much that you erase the patina. Seal with a bar-top epoxy or marine-grade polyurethane for spill resistance. Expect to spend between two hundred and six hundred dollars on wood depending on your source.
Tips
- Check Craigslist and salvage yards before buying from specialty reclaimed wood dealers — prices vary wildly
- Apply at least three coats of polyurethane, sanding lightly between each coat
- Pair with black iron pipe legs or brackets for a cohesive industrial-pub look
We picked a few things that go well with this idea: Trapezoidal Freestanding Liquor Cabinet Rack (★4.5), BROTTAR Bar Cabinet with Fridge and LED (★4.2) and KLM 3-Step Countertop Liquor Display Shelf (★4.8). As an Amazon Associate we earn from qualifying purchases.
2. L-Shaped Wet Bar
Why L-Shaped
An L-configuration gives you the most counter space per square foot of floor area. One arm handles prep and mixing, the other serves as a seating bar with stools. The corner where the arms meet is dead space unless you plan it — a sink fits perfectly there.
Layout Details
Run the longer arm along the wall (eight to ten feet works well) and the shorter arm (four to five feet) extends into the room. Place the sink and dishwasher on the wall side where plumbing access is simpler. The room-facing arm needs an overhang of at least twelve inches for comfortable knee clearance with bar stools. Budget around three thousand to seven thousand dollars if you are adding plumbing and cabinetry.
Pros and Cons
- Pro: Maximizes both workspace and guest seating in one footprint
- Pro: Natural separation between the bartender zone and the guest side
- Con: Requires plumbing rough-in if you want a working sink, which adds cost
We picked a few things that go well with this idea: HOOBRO Industrial Saddle Bar Stools (Set of 2) (★4.4), COLAMY Mid Century Upholstered Counter Stools (Set of 2) (★3.4) and Ashley Skempton Ladder-Back Counter Stools (2-Count) (★4.5). As an Amazon Associate we earn from qualifying purchases.
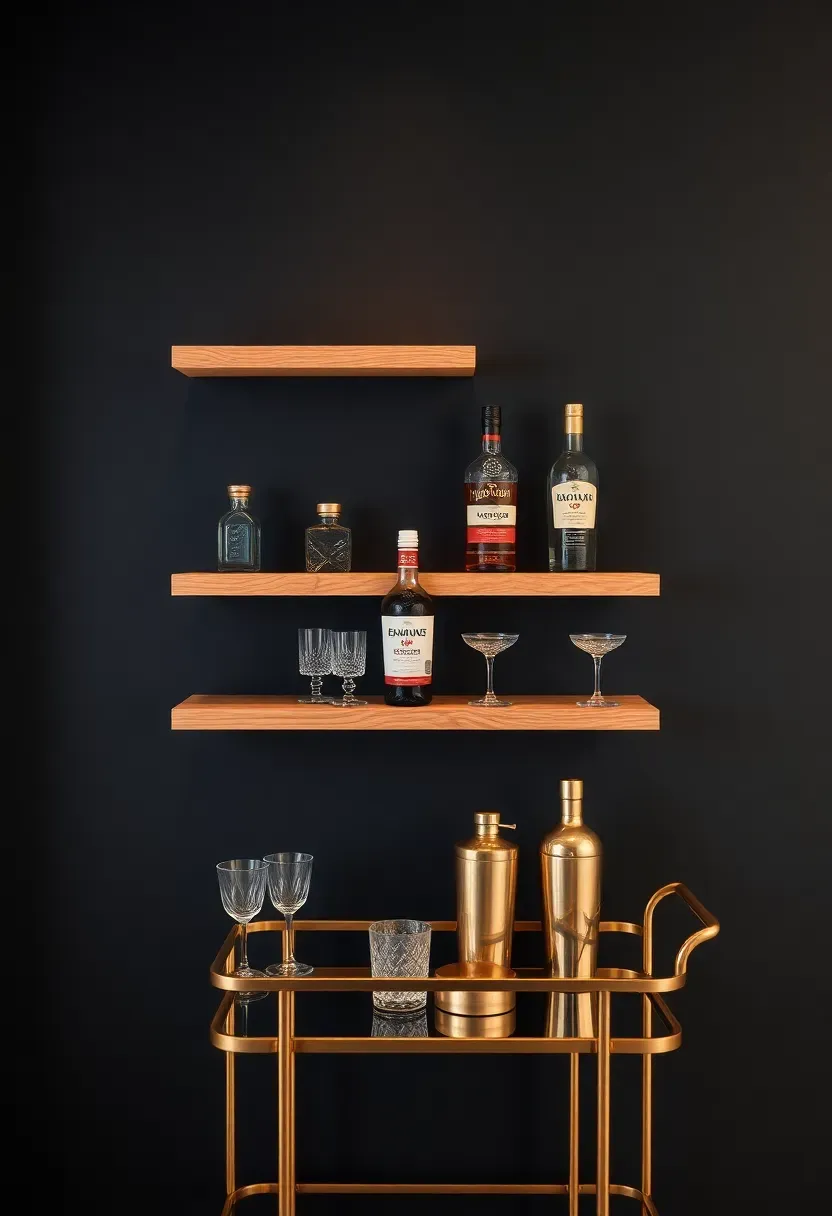
3. Floating Shelf Cocktail Station
You do not need a full bar build to have a functional drink station. Three floating shelves on a blank wall, a bar cart or console table below, and you are set. The shelves hold bottles and glassware at eye level, the cart holds ice buckets, shakers, and mixers. Total footprint is about four feet wide by eighteen inches deep. This approach works especially well in basements where you do not want to commit to permanent construction, or in rentals where you cannot modify walls beyond a few screws.
Tips
- Use 2-inch thick shelves rated for at least 50 pounds each — glass bottles add up fast
- Space shelves 12 to 14 inches apart vertically for standard bottle heights
- Add a small LED puck light under each shelf for a backlit display effect
We picked a few things that go well with this idea: 3-Tier Acrylic LED Liquor Bottle Display (★4.4), Boss Premium LED Bar Shelf Display (16 Inch) (★4.5) and MESAlLUP 3-Tier LED Bar Shelf (60 Inch) (★4.5). As an Amazon Associate we earn from qualifying purchases.
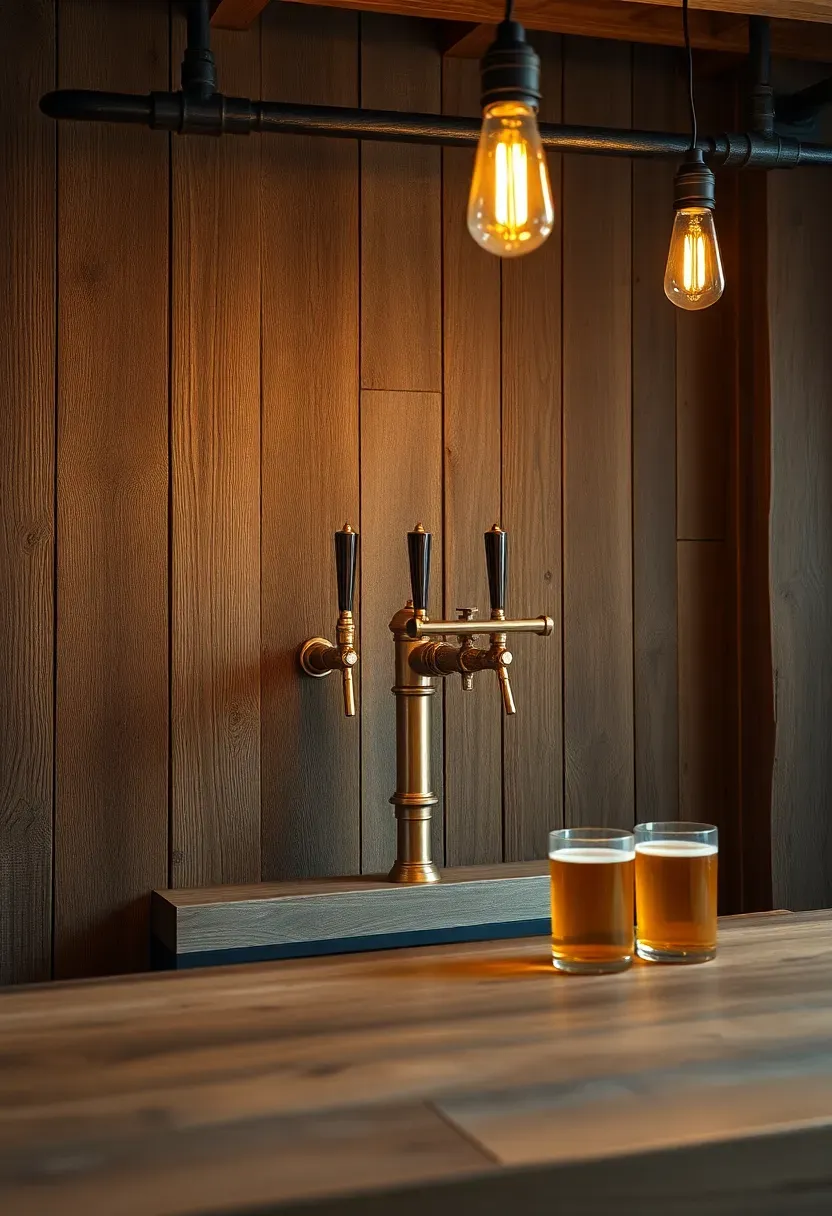
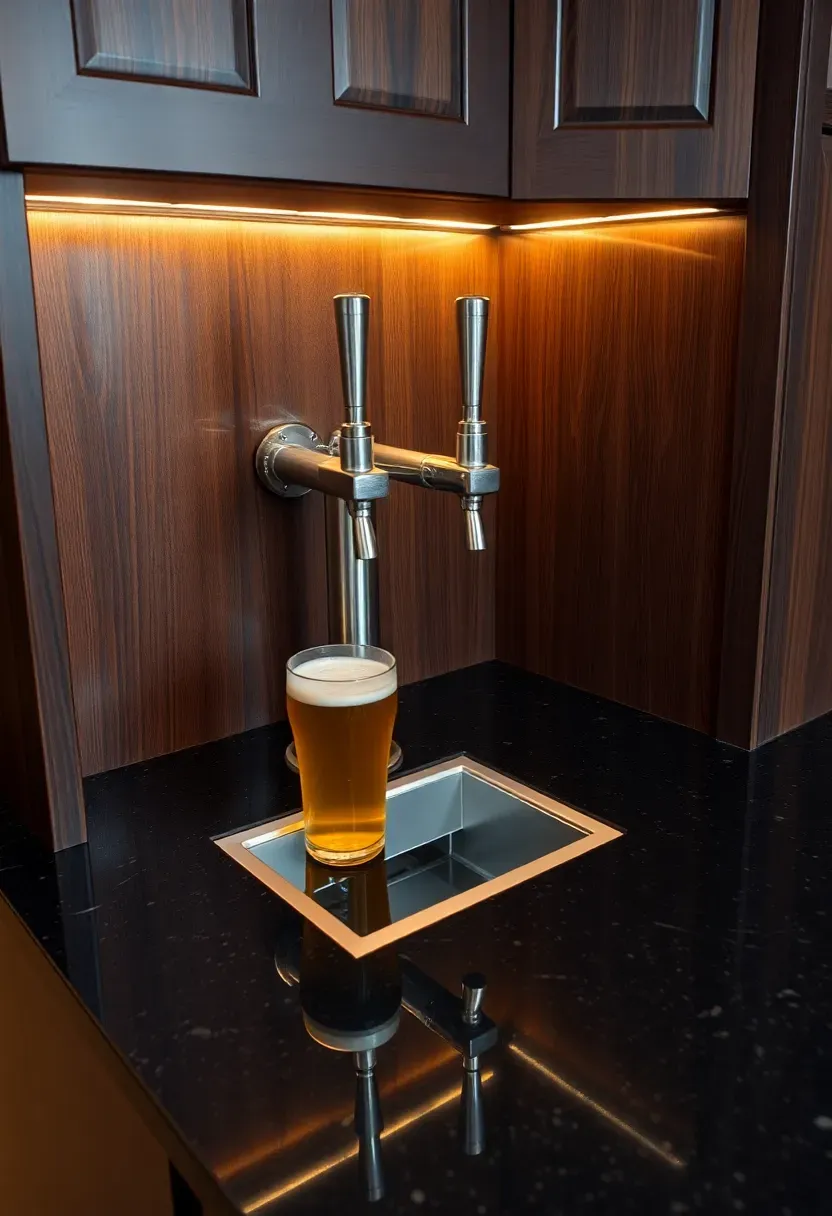
4. Kegerator Built-In
The Problem
Store-bought bottled beer is fine for casual drinking, but kegs offer better cost per ounce, less packaging waste, and the feel of pouring a proper pint at home. A freestanding kegerator works, but it looks like a dorm room appliance sitting next to your bar.
The Fix
Build the kegerator into your bar cabinetry. Most under-counter kegerator units fit in a standard 24-inch cabinet opening. Route the tap tower through the countertop and add a recessed drip tray. You need adequate ventilation behind the unit — leave at least two inches of clearance on the sides and back. A single-tap setup handles one sixth-barrel keg. Dual-tap models hold two sixtels or one half-barrel. Expect to pay six hundred to twelve hundred dollars for the unit alone.
Watch Out
- Ventilation is critical — kegerators generate heat and will burn out without airflow
- CO2 tank access needs to be reachable for replacement without disassembling cabinetry
- Clean the lines every two weeks or the beer will taste off
Recommended
Items for this idea
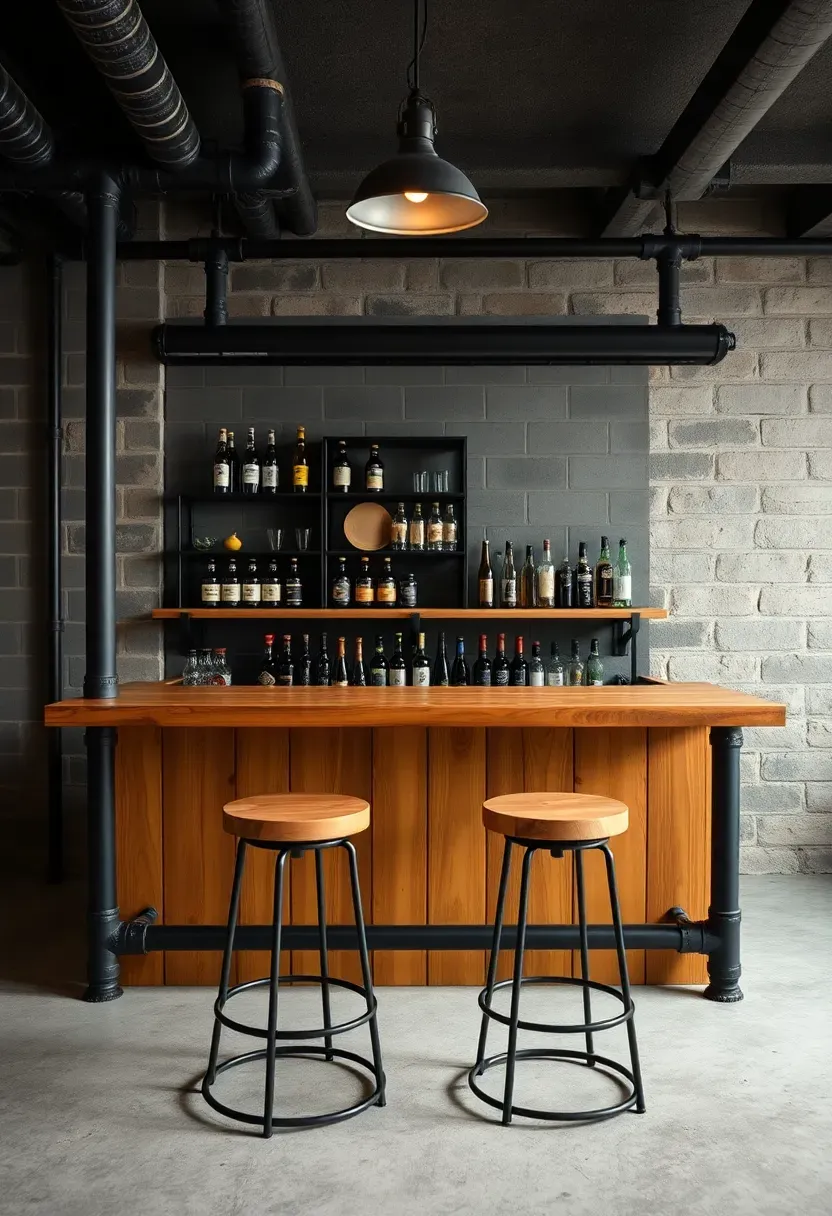
5. Industrial Pipe Bar Frame
Black iron pipe from the plumbing aisle makes a surprisingly solid bar frame. The threaded connections mean no welding — just hand-tighten with a wrench and add floor flanges to anchor it. Build a rectangular frame, add a wood plank top, and you have a freestanding bar that looks like it belongs in a Brooklyn brewery. The pipe itself runs about one to two dollars per foot for three-quarter inch diameter. Fittings (elbows, tees, flanges) add up, so plan your cuts carefully. A standard six-foot bar requires roughly forty dollars in pipe and eighty in fittings.
Tips
- Clean pipes with acetone before assembly to remove the oily factory coating
- Spray with clear matte lacquer to prevent rust without adding shine
- Add pipe-mounted hooks underneath for towel bars or utensil storage

6. Under-Stair Bar Nook
How It Works
The triangular void under a basement staircase is one of the most wasted spaces in any house. The tallest point (where the stairs start from the upper floor) gives you enough headroom for standing and shelving. As the ceiling slopes down, you transition to seated-height counters, then low storage at the narrowest end.
Step 1: Measure the height at every two-foot interval along the staircase underside. Mark where the clearance drops below 42 inches — that is your counter cutoff.
Step 2: Install a countertop in the taller section. A 30-inch deep surface fits a sink and still leaves room for a cutting board.
Step 3: Use the low-ceiling zone for wine fridges, mini fridges, or pull-out drawer storage.
Step 4: Add recessed puck lighting along the sloped ceiling to compensate for the lack of overhead room.
Watch Out
- Check for structural elements (posts, HVAC runs) before framing anything
- Soundproofing the stair treads from above helps — footsteps overhead get loud during parties
Recommended
Items for this idea
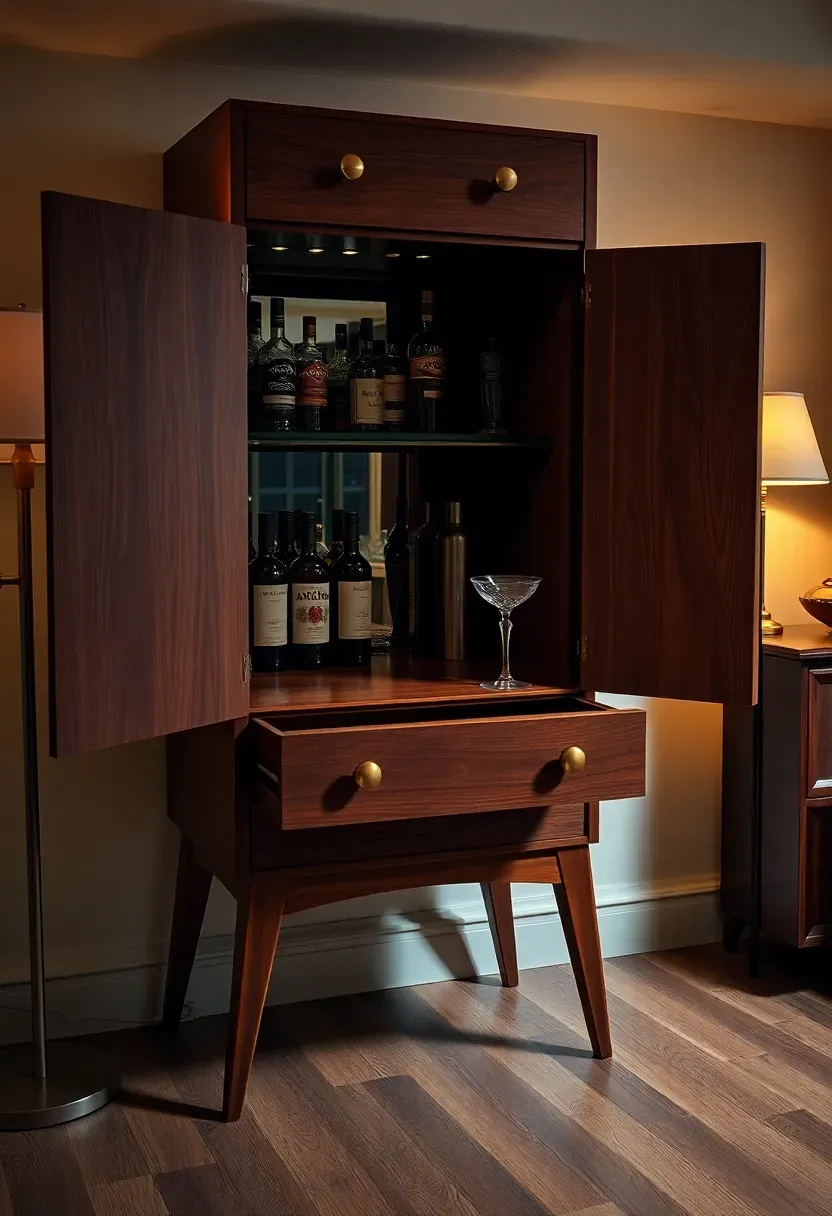
7. Mid-Century Modern Bar Cabinet
Not every basement bar needs to be built in. A mid-century bar cabinet — the kind with tapered legs, a drop-down front that becomes a serving surface, and mirrored interior panels — works as a self-contained cocktail station. Close it up and the bar disappears into a piece of furniture. This style suits basements that double as guest rooms or home offices where a permanent bar setup would feel out of place. Vintage originals from the 1960s run three hundred to eight hundred dollars at estate sales. Reproductions from West Elm or Article cost about the same.
Tips
- Look for models with a built-in stemware rack on the underside of the top shelf
- The mirrored back panel doubles the visual depth of the bottles on display
- Add adhesive felt pads under bottles to prevent scratching the interior finish
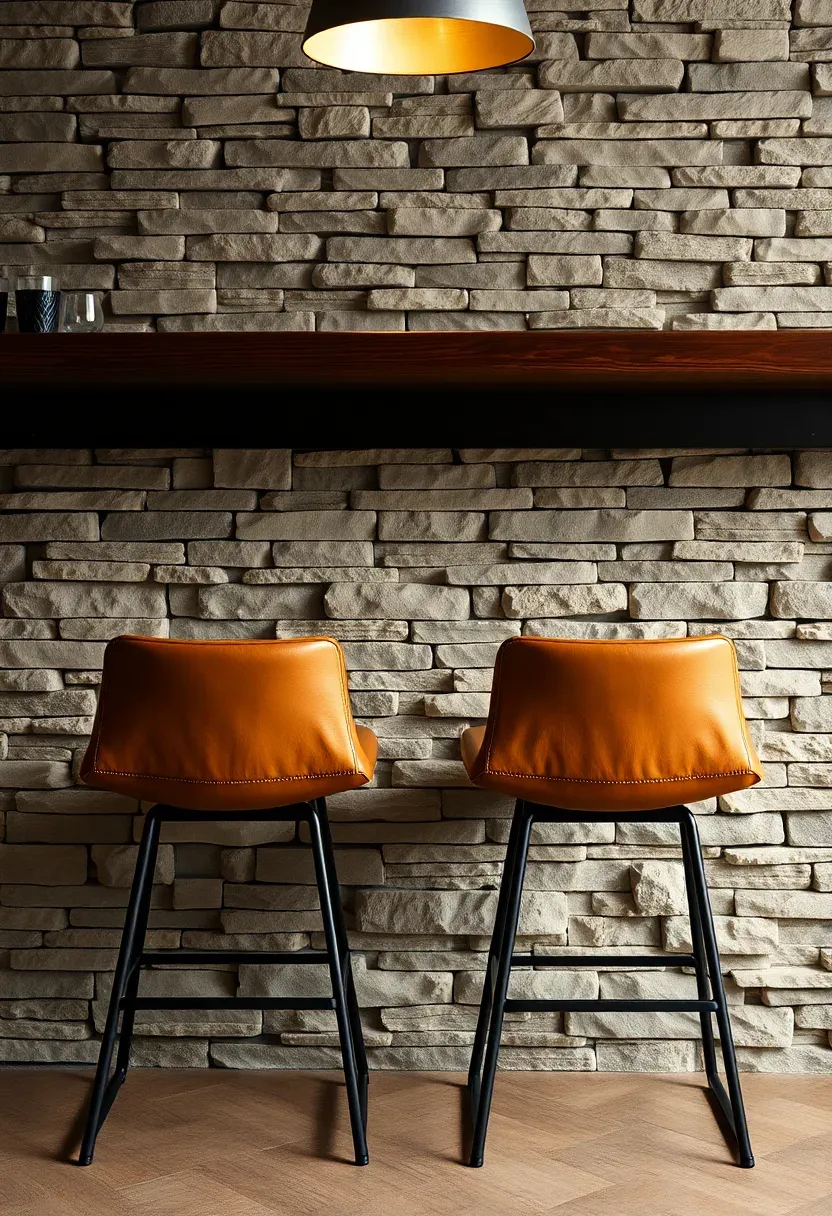
8. Stone Veneer Bar Front
A plain drywall bar front does the job, but it looks like every other basement wall in the house. Stone veneer panels — thin-cut natural stone or manufactured faux stone — add weight and texture to the guest-facing side without the cost or structural load of real stacked stone. Panels are typically half an inch to one inch thick and adhere directly to drywall or cement board with construction adhesive. Choose a dark ledger stone for a moody pub feel, or lighter stacked travertine for a more polished look.
Comparing Options
Natural stone veneer: Real stone, irregular texture, heavier (about 8 pounds per square foot). Costs $8-15/sq ft.
Manufactured faux stone: Molded concrete, consistent pattern, lighter (about 4 pounds per square foot). Costs $5-10/sq ft.
Choose natural if: you want authentic variation and do not mind extra weight on the framing.
Choose manufactured if: budget matters more and you prefer uniform color and pattern.
Recommended
Items for this idea
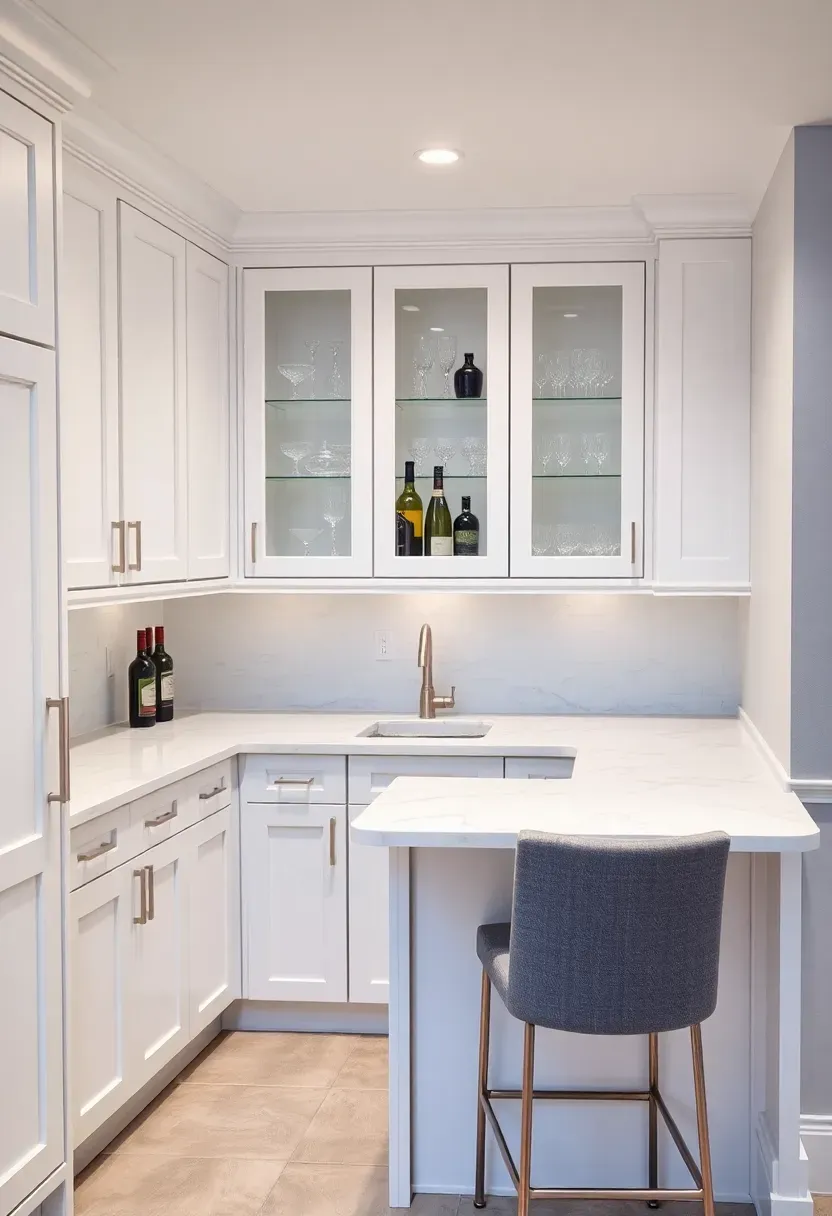
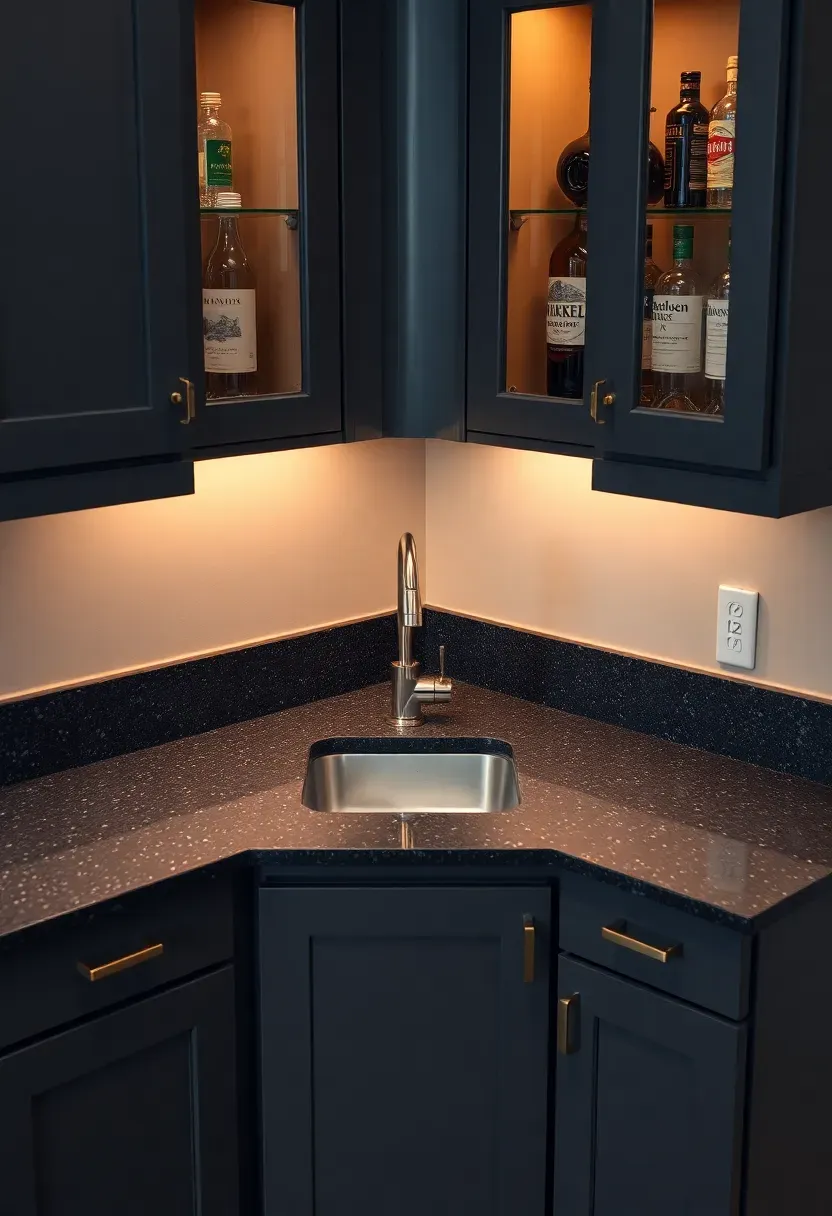
9. Corner Wet Bar with Sink
Why Add a Sink
Carrying dirty glasses upstairs after every gathering gets old fast. A small bar sink (typically 15 by 15 inches) in the corner of your basement bar eliminates that chore. You also gain the ability to rinse shakers, dump ice, and wash hands without leaving the room.
What You Need
Plumbing is the main hurdle. If your basement has an existing bathroom rough-in or a floor drain nearby, tapping into those lines is relatively straightforward. Without existing plumbing, you will need to cut into the concrete slab for drain access — a job that usually costs eight hundred to fifteen hundred dollars on its own. The sink, faucet, and connection run another two to four hundred. Pair with a small under-counter dishwasher if the budget allows.
Pros and Cons
- Pro: Makes cleanup immediate and keeps the upstairs kitchen free during parties
- Pro: Adds resale value as a finished wet bar with plumbing
- Con: Concrete cutting and drain work can be expensive if no plumbing exists nearby
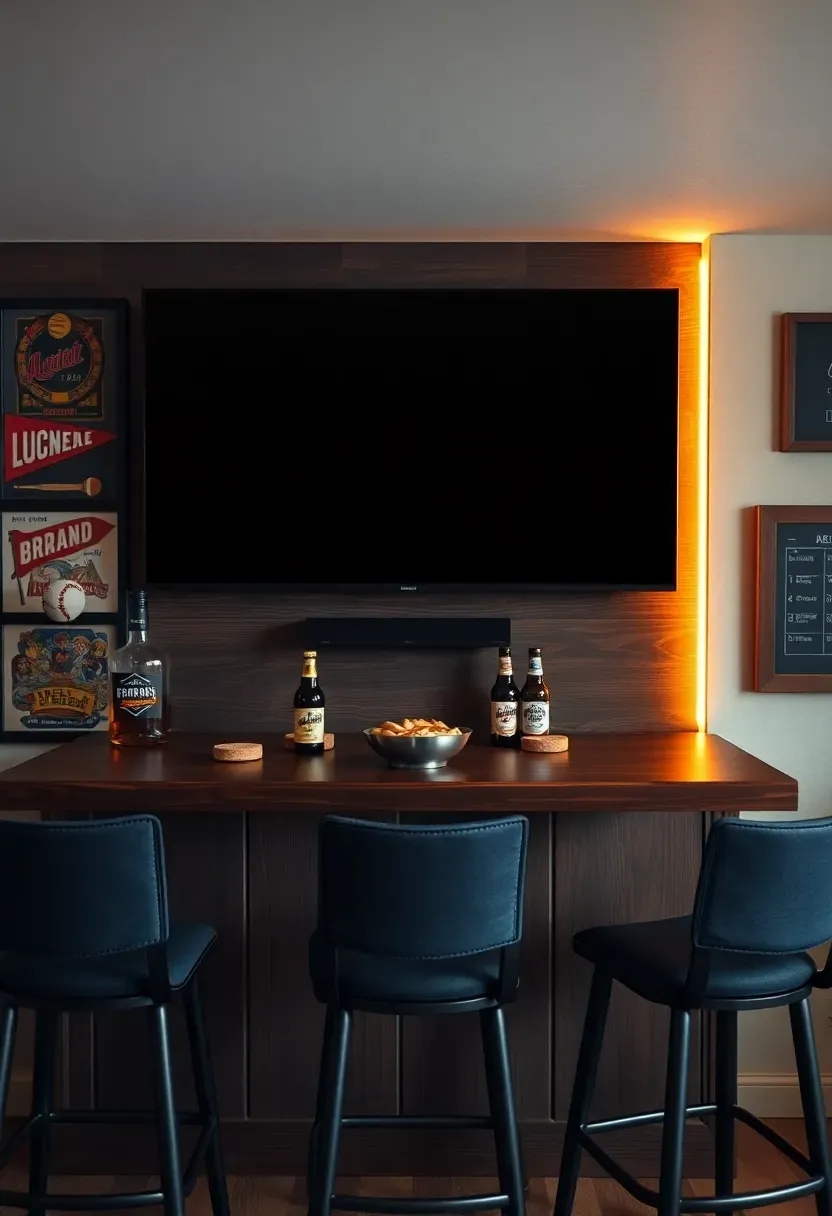
10. Sports Bar Media Wall
Build the bar facing a large wall-mounted TV and you have a dedicated game-day setup. The key is sightlines — every stool position should have a clear view of the screen without neck strain. Mount the TV at eye level from a seated position at the bar, which is typically 42 to 48 inches from the floor to screen center. A 65 to 75 inch TV works for bars up to twelve feet from the screen. Add a soundbar underneath and a mini fridge within arm's reach of the bartender position. Frame the TV with sports memorabilia, pennants, or a chalkboard for game schedules.
Tips
- Run HDMI and power cables through the wall before finishing for a clean look
- A bias lighting strip behind the TV reduces eye strain during long games
- Consider a second smaller screen at the end of the bar for split-game viewing

Recommended
Items for this idea
11. Speakeasy Dark Moody Bar
Origins
The speakeasy aesthetic traces back to Prohibition-era hidden bars where the entrance was concealed and the interior was deliberately intimate. Dark walls, low light, rich materials — the look was born from necessity (hiding from authorities) but the atmosphere stuck because it genuinely feels good.
Modern Adaptation
In a basement, the lack of windows actually helps this style. Paint walls charcoal or deep navy. Install dimmable brass sconces instead of overhead lights. Add a tufted leather panel behind the bar shelves. Use dark-stained wood or black marble for the countertop. The materials cost roughly the same as any other finish — the mood comes from color and lighting choices, not expensive materials. A single pendant light over the bar top centered at about 30 inches above the surface creates a pool of warm light that pulls people in.
Apply at Home
- Keep one wall slightly lighter to prevent the room from feeling like a cave
- Candles (real or LED) on the bar surface add depth without wiring
- A hidden bookcase door to the bar area sells the speakeasy concept completely
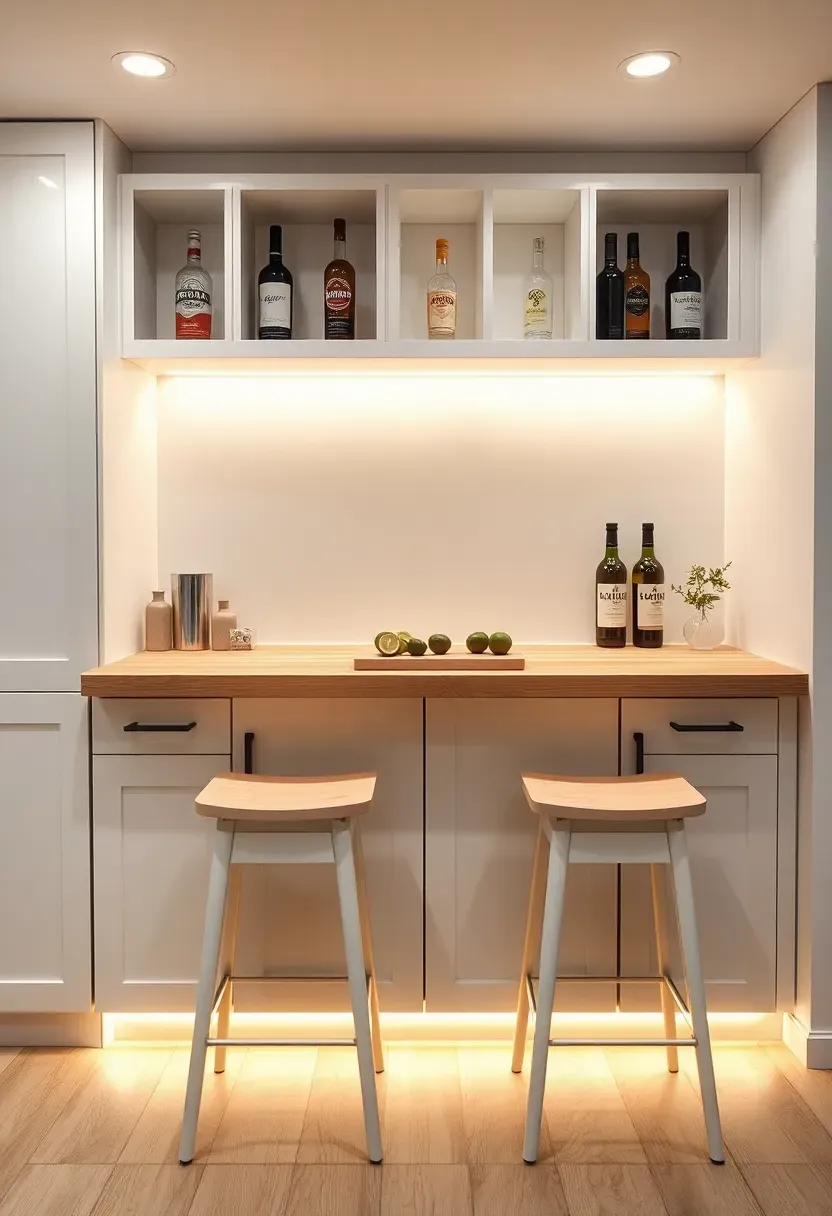
12. IKEA Cabinet Bar Hack
IKEA kitchen base cabinets (the SEKTION line) make excellent bar cabinetry at a fraction of custom pricing. A six-foot run of base cabinets with doors and drawer fronts costs around four to six hundred dollars. Add a butcher block countertop from the same store for another hundred to two hundred. The cabinets are designed for kitchens, so they handle the weight of bottles and glassware without any modifications. The trick is making them look built-in: add filler strips at the wall edges, install a toe kick that matches your basement flooring, and use a countertop overhang on the guest side for seating.
Tips
- KALLAX shelving units mounted above the counter work as bottle display storage
- Replace the stock handles with brass or leather pulls for an upgraded look
- Peel-and-stick tile on the wall behind serves as a quick backsplash
Recommended
Items for this idea
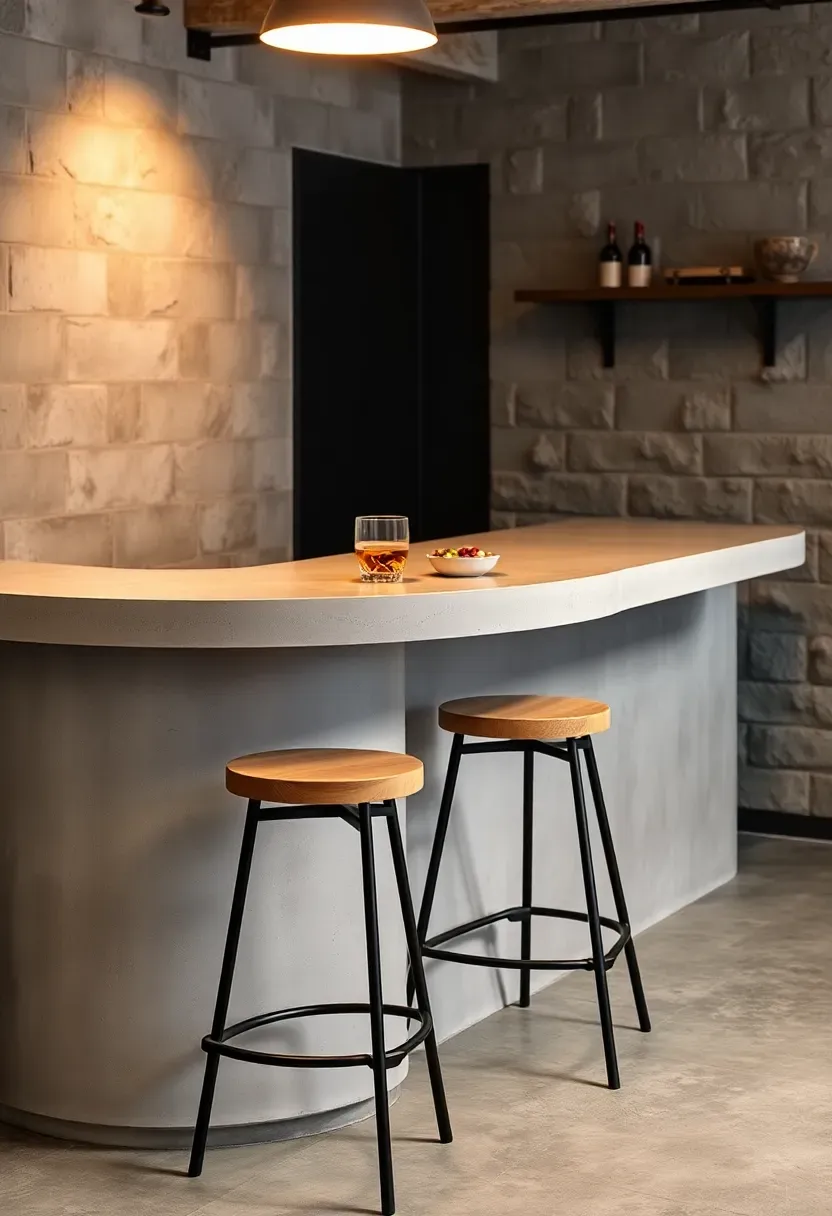
13. Concrete Countertop Bar
How to Build One
Poured concrete countertops sound intimidating, but the process is actually forgiving for a first-timer if you take it step by step.
Step 1: Build a melamine form to your countertop dimensions. Caulk every seam — concrete finds every gap.
Step 2: Mix Quikrete Countertop Mix (not regular concrete) to a thick pancake-batter consistency. Pour in two lifts, vibrating between pours to release air bubbles.
Step 3: Screed the surface flat with a straight board. Let it cure covered with plastic for at least five days.
Step 4: Flip the form, sand with progressively finer grits (120, 220, 400), and seal with a food-safe concrete sealer.
Watch Out
- Concrete countertops weigh about 12 pounds per square foot at 1.5 inches thick — make sure your bar frame can handle it
- Skip integral color on your first attempt; use a concrete stain after curing for more control
- Hairline cracks are normal and add character, but large cracks mean the mix was too wet
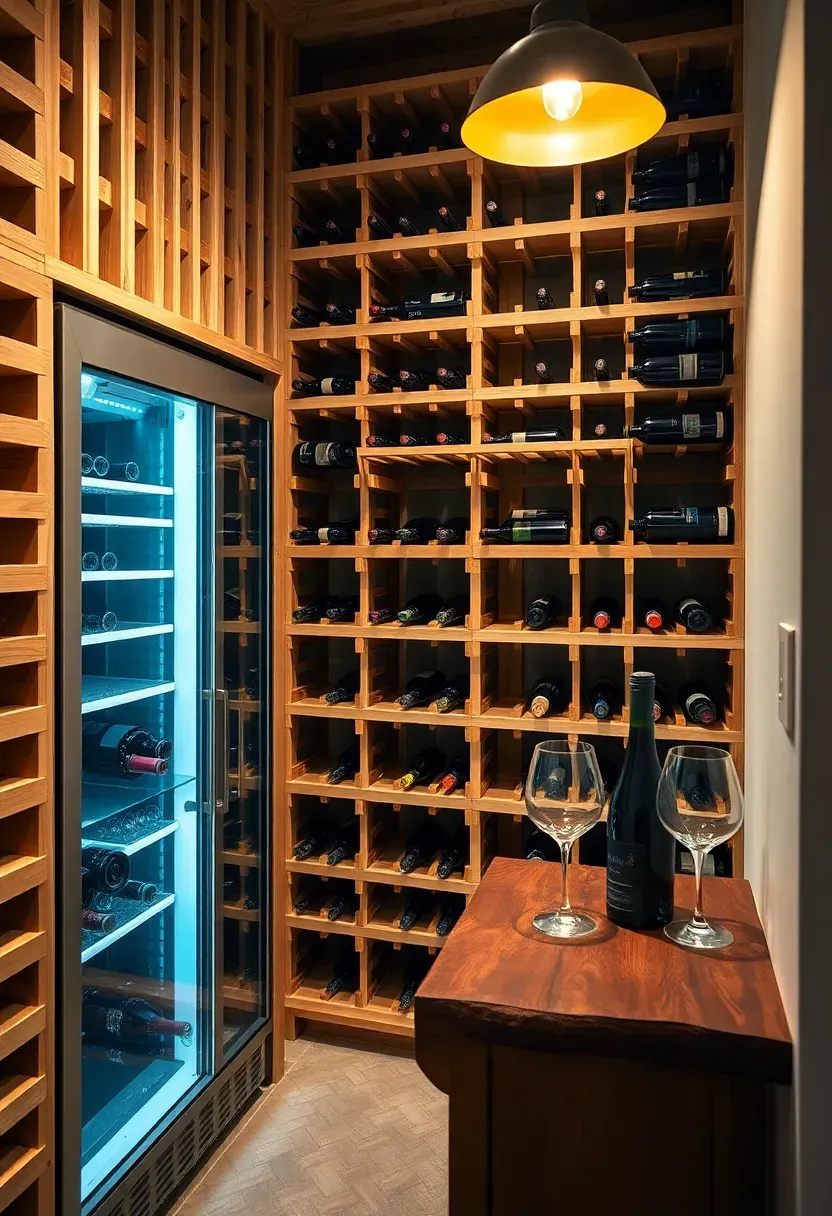
14. Wine and Spirits Vault
If your collection outgrew the kitchen wine rack years ago, dedicate a section of the basement bar area to proper storage. Basements naturally stay cooler and more humidity-stable than upper floors, which is exactly what wine wants — 55 degrees and 60 to 70 percent humidity. Build floor-to-ceiling wine racking along one wall (modular kits from Wine Enthusiast or IWA start around two hundred dollars for 60-bottle capacity). Add a glass-front wine fridge for bottles that need precise temperature control. A small tasting counter in front turns storage into an experience. Keep spirits on open shelves nearby since they do not need climate control.
Tips
- Insulate the wine wall if it shares a boundary with a furnace room — heat is wine's enemy
- Track inventory with a simple spreadsheet or the Vivino app to avoid buying duplicates
- LED lighting generates less heat than incandescent — important near stored wine
Recommended
Items for this idea
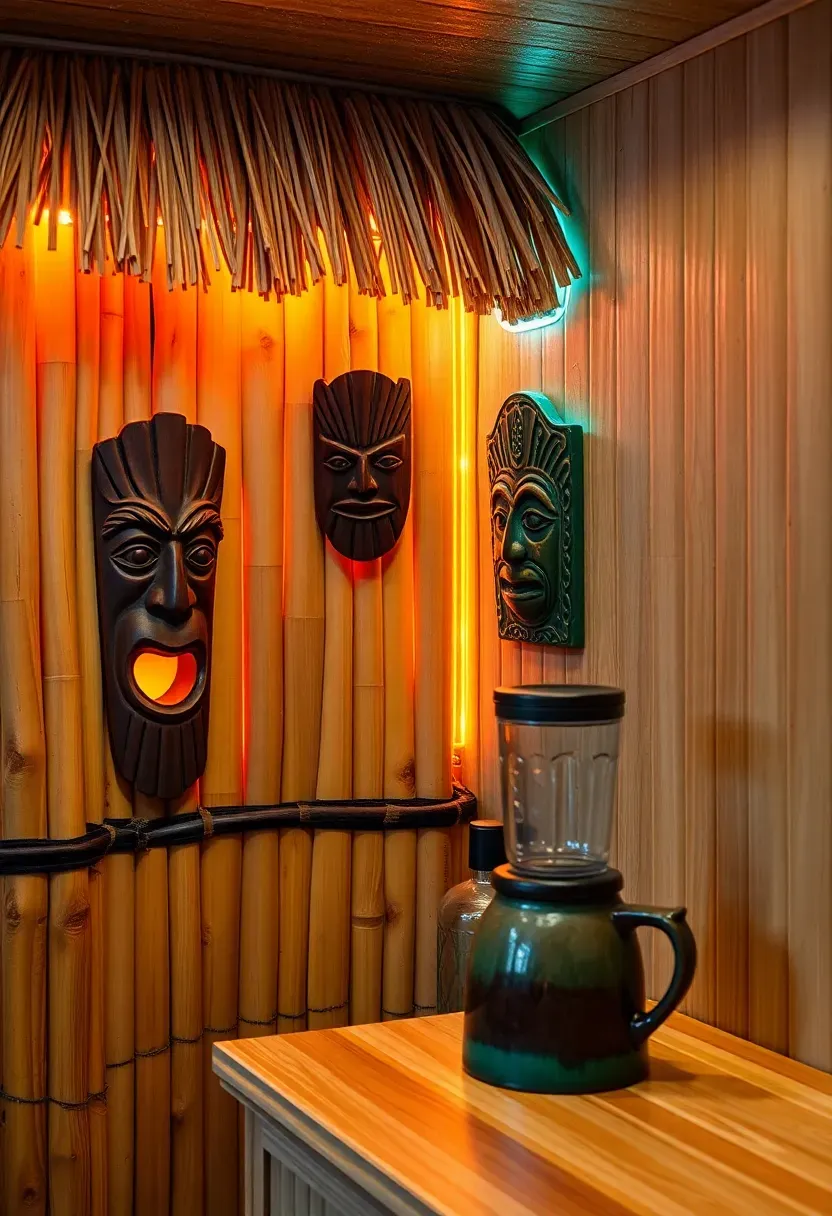
15. Tiki Bar Corner
A tiki bar in the basement works better than it has any right to. The enclosed, windowless environment actually enhances the immersive feel — there is no view of your backyard to break the illusion. Wrap the bar front in split bamboo fencing (about twenty dollars per eight-foot roll at garden centers). Add a small thatch awning or umbrella above. Tiki mugs, string lights, and a couple of carved masks on the wall do the rest. The whole setup can cost under three hundred dollars and takes a weekend to build. It sounds kitschy on paper, but in a dim basement with the right lighting, it genuinely transports.
Tips
- Use color-changing LED strip lights behind the bamboo for that tropical glow
- A blender station is non-negotiable for frozen drinks — dedicate counter space for it
- Hang dried palm fronds or fake tropical plants from the ceiling joists for canopy depth
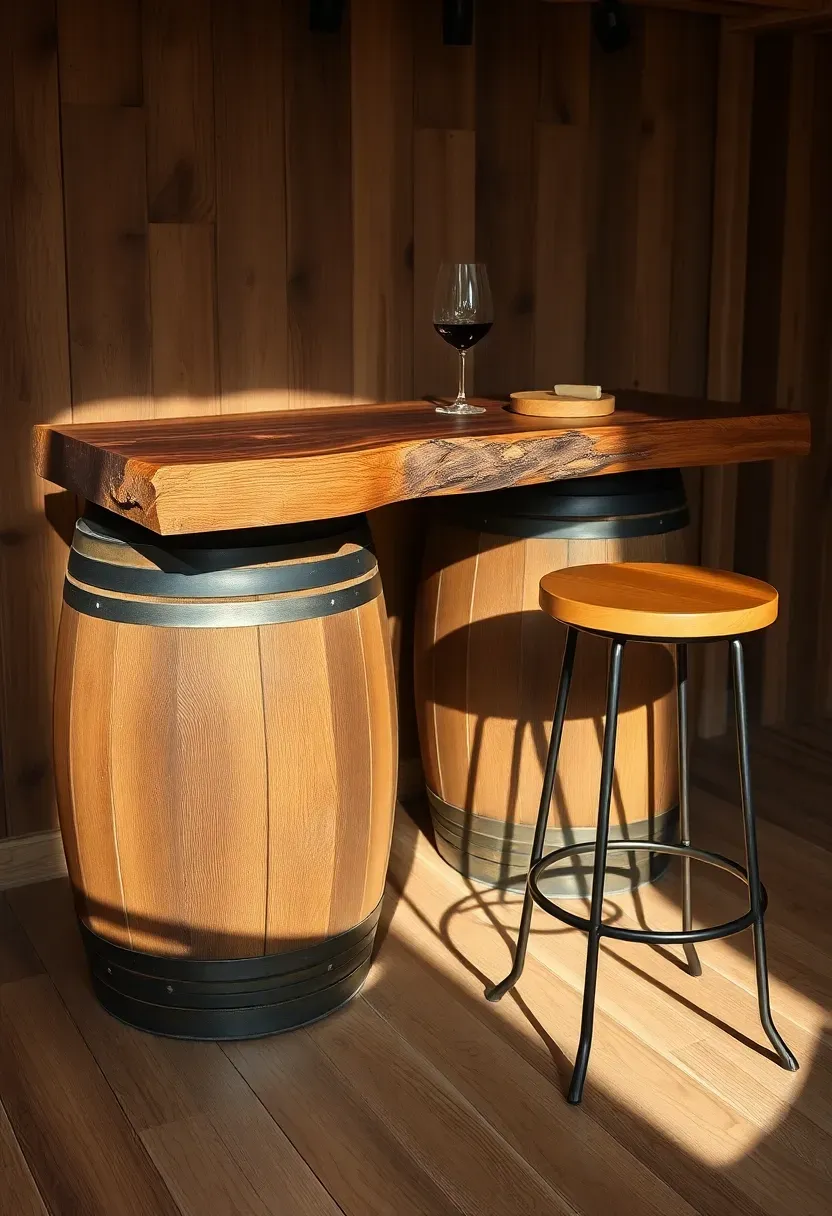
16. Rustic Barrel Bar Table
Wine Barrel vs. Whiskey Barrel
Both make great bar bases, but they differ. Wine barrels are slightly smaller (59 gallons, about 35 inches tall) and often have a reddish-purple stain inside from years of use. Whiskey barrels are larger (53 gallons, about 36 inches tall) and carry a charred interior with a distinct smoky smell that fades over a few months.
Choose a wine barrel if: you want a shorter cocktail-height table (pair with counter-height stools around 24 inches).
Choose a whiskey barrel if: you prefer bar height (pair with 30-inch stools) and like the charred aesthetic.
For the top: Cut a round slab from a hardwood — walnut, maple, or oak — at 36 to 42 inches diameter and 2 inches thick. Sand and seal it, then secure to the barrel with L-brackets from underneath. Two barrels with a plank between them make a longer serving surface. Used barrels cost forty to eighty dollars from local wineries or distilleries.
Recommended
Items for this idea
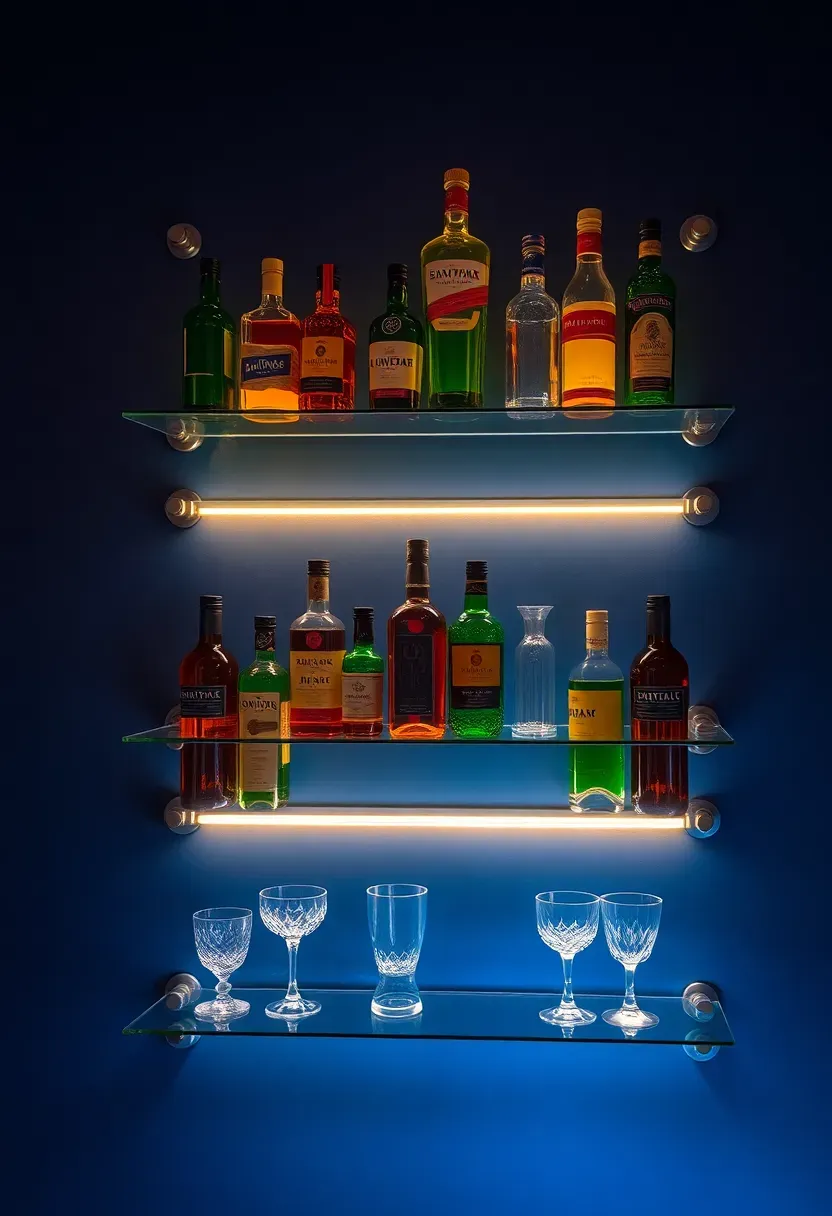
17. LED Backlit Shelving Display
Lighting changes everything about how a bar reads in a room, and backlit shelving is the single highest-impact, lowest-cost upgrade you can make. Mount tempered glass or thick acrylic shelves on brackets with an LED strip adhered to the wall behind each shelf. When the lights hit the bottles from behind, every label becomes visible and the colors glow. Use warm white (2700K) for a cozy pub feel or RGB strips for a color-changing party mode. The entire setup — three shelves, LED strips, power supply, and dimmer — runs about sixty to ninety dollars.
Tips
- Frosted glass shelves diffuse the LED light more evenly than clear glass
- Run all strips from a single controller so colors and brightness stay in sync
- Position the LED strip at shelf midpoint height, not at the base, to avoid hotspots at the bottom
18. Fold-Down Murphy Bar
The Problem
Not every basement has room for a permanent bar. Some basements pull double duty as playrooms, guest bedrooms, or home gyms. A fixed bar eats floor space that you need for other activities during the week.
The Solution
A murphy bar mounts to the wall and folds down when you want it, then locks flat against the wall when you do not. The front face looks like a framed cabinet or wall art when closed. Open it and the door drops to become a shelf or serving surface, revealing bottle storage, a mirror, and a small rack for glasses inside. You can buy prefab murphy bar cabinets from Etsy makers for three hundred to six hundred dollars, or build one from a wall-mounted drop-leaf desk plan with modifications. Mount at 42 inches from floor to the open serving surface for standing bar height.
Pros and Cons
- Pro: Zero floor space when closed
- Pro: Looks like decor, not a bar, which suits multi-use rooms
- Con: Limited storage — holds maybe 8 to 10 bottles and a dozen glasses at most
Recommended
Items for this idea
19. Full Basement Pub Layout
This is the go-big option — dedicating a significant portion of your basement to a complete pub experience. A ten to twelve foot bar counter with four to six stools anchors one wall. Behind it: a back bar with shelving, a sink, a kegerator, and a glass washer. On the opposite side: a booth or banquette for groups who prefer table seating. A dartboard, shuffleboard table, or pool table fills the remaining floor area. Budget realistically for ten to twenty thousand dollars for a full buildout with plumbing, electrical, and custom cabinetry. The payoff is that you stop going out for the bar experience because the one downstairs is better.
Planning Checklist
- Run a dedicated 20-amp electrical circuit for the bar area (kegerator, glass washer, blender, and TV draw significant power)
- Install a floor drain near the sink and kegerator for overflow and cleaning
- Add sound insulation in the ceiling between the basement and the floor above
- Verify local code requirements — some jurisdictions restrict bar sink drainage in basements without a sump or ejector pump
Quick FAQ
How much does a basic basement bar cost to build? A simple setup with IKEA cabinets, a butcher block top, and no plumbing runs around eight hundred to twelve hundred dollars including stools and accessories. Adding a sink and running water raises the total to two to four thousand depending on your existing plumbing access.
Do I need a permit for a basement bar? If you are adding plumbing or electrical work, most municipalities require permits. A dry bar (no sink, no new circuits) typically does not need one. Check your local building department — inspectors care most about egress, smoke detectors, and proper electrical work, not whether you have a bar.
What is the best countertop material for a basement bar? Butcher block is the most forgiving for DIY installation and repair. Quartz handles spills and stains without sealing. Concrete gives an industrial look but needs periodic resealing. Avoid marble — it stains easily from alcohol and citrus, which is exactly what a bar encounters most.
Can I put a bar in an unfinished basement? Yes. A freestanding bar cart, a shelving unit, and a couple of stools work in an unfinished space. The exposed joists and concrete walls actually suit industrial and rustic bar styles. Focus your finishing budget on the bar area itself rather than the whole basement.
What bar height should I use? Standard bar height is 42 inches from floor to countertop. This pairs with 30-inch stools. Counter height (36 inches) pairs with 24-inch stools and feels more casual. Pick one height and buy stools to match — mismatched heights are the number one comfort complaint in home bars.
Building a basement bar is one of those projects where starting small actually makes sense. Begin with a cart or a set of shelves, figure out how you use the space over a few months, then invest in the permanent version once you know exactly what you need. The best home bars I have visited all evolved over time rather than appearing fully formed. Grab a spot on your basement wall, set up something simple, and let it grow from there.
Pinterest cover for 19 Bar Ideas for Basement Spaces
About the author
OBCD
CGI visualization and interior design content. We create detailed 3D renders and curate practical design ideas for every room in your home.