27 Basement Floor Paint Ideas
Most basements come with the same thing: bare concrete that collects dust, shows every stain, and feels cold underfoot. Paint changes that faster than any other upgrade. A single weekend with a roller and a bucket of epoxy can turn a gray slab into something that actually looks intentional. The cost sits between $0.50 and $3.00 per square foot for materials, depending on the product, which makes it one of the cheapest ways to finish a basement floor. These 27 ideas cover everything from basic solid-color coatings to decorative techniques that mimic tile, stone, and even marble.
Pick a look that fits your basement's purpose — a bright workshop, a cozy hangout, a home gym — and work from there.
Table of Contents
- Solid Gray Epoxy
- Classic Checkerboard
- Acid-Stained Concrete
- Metallic Epoxy Swirl
- Speckled Garage-Style Flake
- White Painted Concrete
- Faux Tile Grid
- Two-Tone Zone Painting
- Water-Based Concrete Stain
- Dark Charcoal Matte
- Painted Diamond Pattern
- Terracotta Warm Tone
- Faux Flagstone
- High-Gloss Black
- Stenciled Border Detail
- Industrial Polyurea Coating
- Sage Green Floor
- Painted Compass Rose Medallion
- Faux Wood Grain
- Rust-Oleum Basement Kit
- Navy Blue Solid Coat
- Geometric Triangle Pattern
- Pearlescent Mica Coat
- Concrete Dye Marbling
- Anti-Slip Textured Coating
- Color-Blocked Playroom Floor
- Tinted Polyurethane Sealer
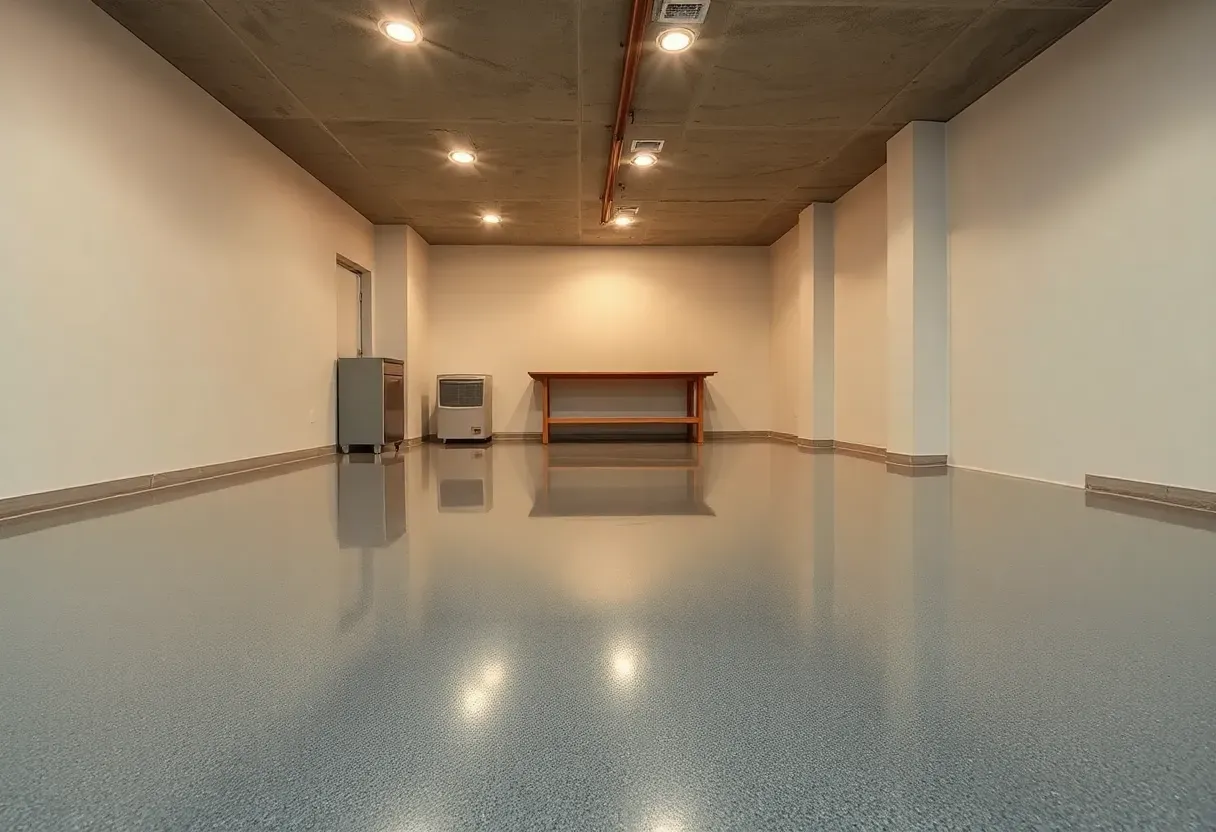
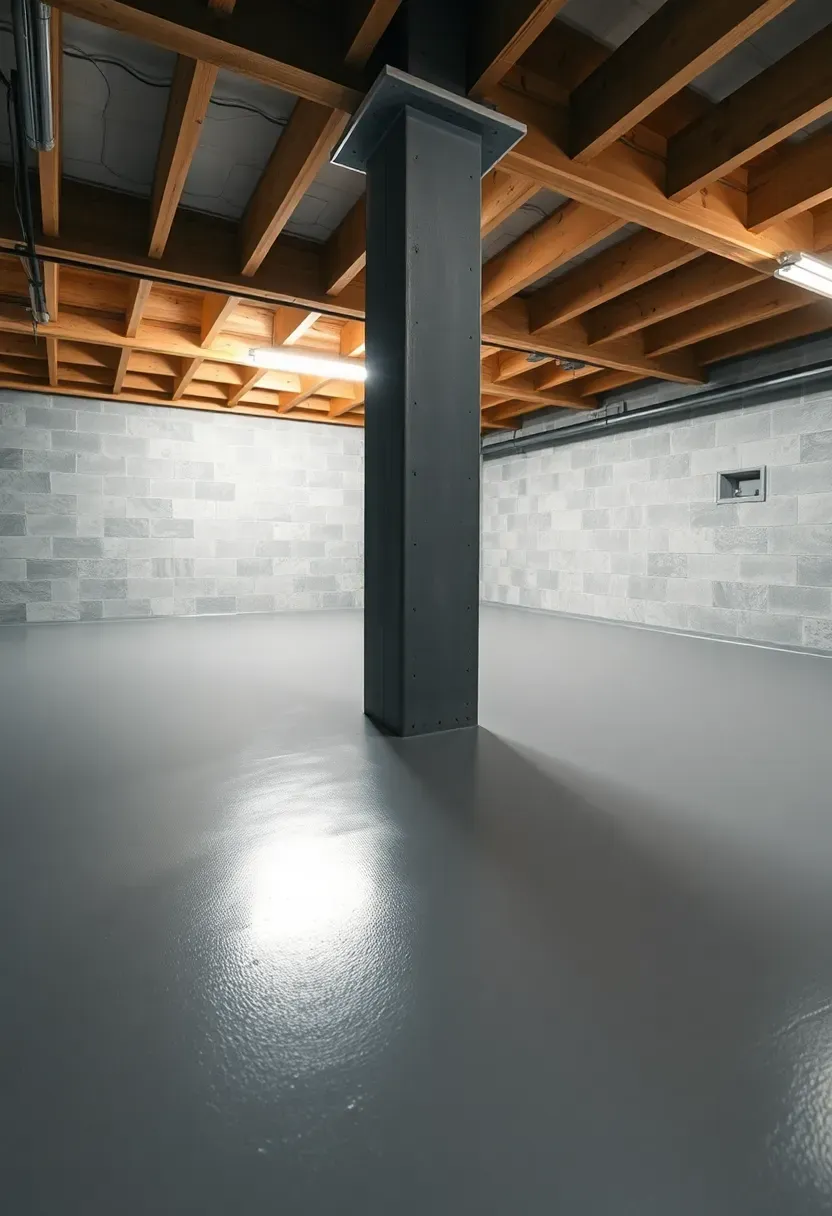
1. Solid Gray Epoxy
Gray epoxy is the baseline — the starting point most homeowners land on and few regret. A two-part epoxy kit from Rust-Oleum or BEHR runs about $80-120 for a 250-square-foot basement and cures to a surface harder than the concrete underneath. The color hides dust and minor scuffs better than any other option. Medium gray (think Rust-Oleum "Battleship Gray") reads as clean without showing every footprint the way lighter shades do. Apply in two thin coats with a 3/8-inch nap roller, allowing 12-16 hours between coats.
Tips
- Etch the concrete with muriatic acid or a commercial etcher before coating — epoxy will peel from smooth concrete within a year
- Keep the room above 55 degrees F during cure time or the epoxy stays tacky
- Add a clear topcoat for extra abrasion resistance if the basement sees heavy foot traffic
We picked a few things that go well with this idea: Rust-Oleum EpoxyShield Basement Floor Kit (★4.4), Gorilla Epoxy Garage Floor Kit (550 sqft) (★4.2) and Rust-Oleum RockSolid Polycuramine Floor Kit (★4.0). As an Amazon Associate we earn from qualifying purchases.
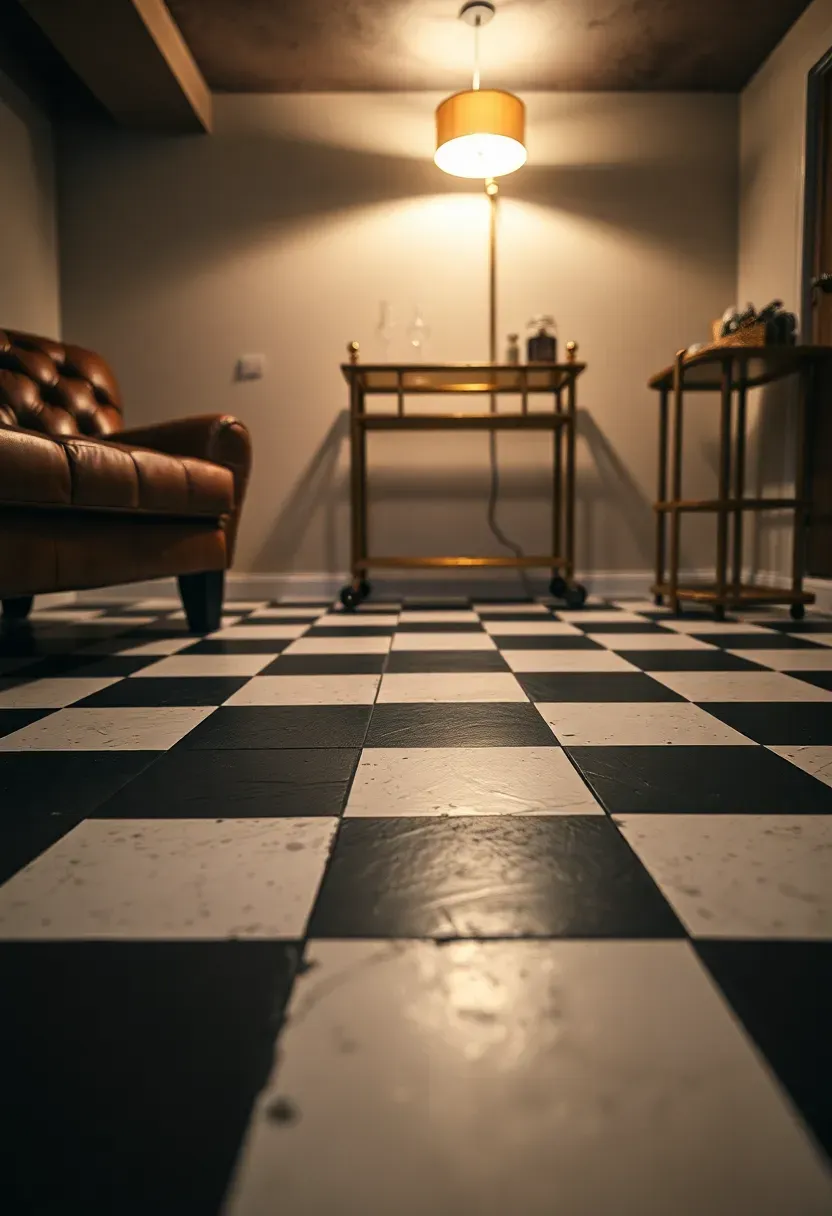
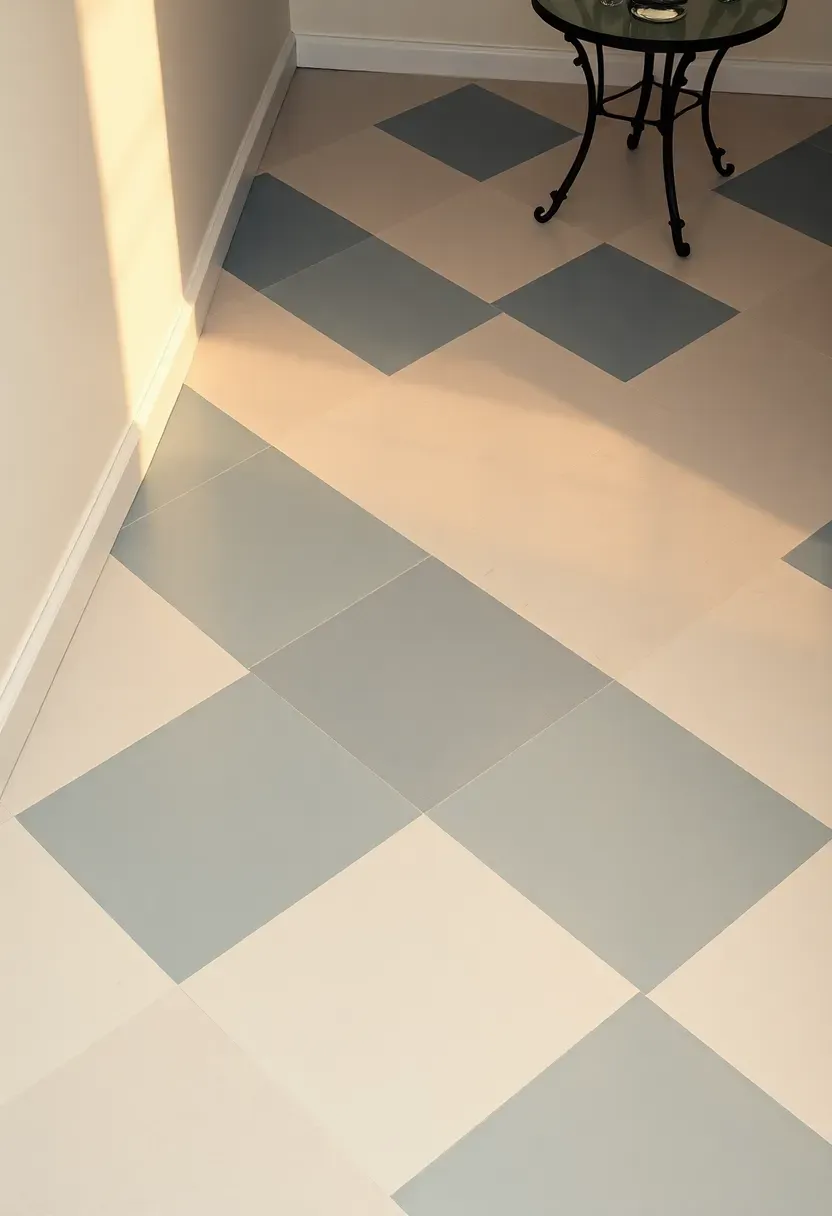
2. Classic Checkerboard
Why it still works
Checkerboard floors have been around since the 1700s, and they persist because the high-contrast grid creates a sense of order that makes even unfinished spaces feel deliberate. On a basement slab, you achieve this with painter's tape and two colors of floor paint — typically black and white, though charcoal and cream reads more modern. Measure your floor and calculate tile size so you end with full "tiles" along the most visible wall. Twelve-inch or eighteen-inch squares work for most basements.
How to lay it out
- Snap chalk lines in a grid from the room's center point outward
- Paint the entire floor in the lighter color and let it cure fully
- Tape off alternating squares and roll the darker color on
Watch out for
- Rushing the tape removal — pull at a 45-degree angle while the top coat is still slightly tacky for the cleanest lines
- Skipping the base coat cure — if the lighter color is not fully dry, the tape pulls it up
We picked a few things that go well with this idea: KILZ Epoxy Acrylic Concrete Floor Paint (Slate Gray) (★4.3), KILZ Epoxy Acrylic Concrete Floor Paint (Silver Gray) (★4.3) and Rust-Oleum EpoxyShield Basement Coating Kit (★4.4). As an Amazon Associate we earn from qualifying purchases.
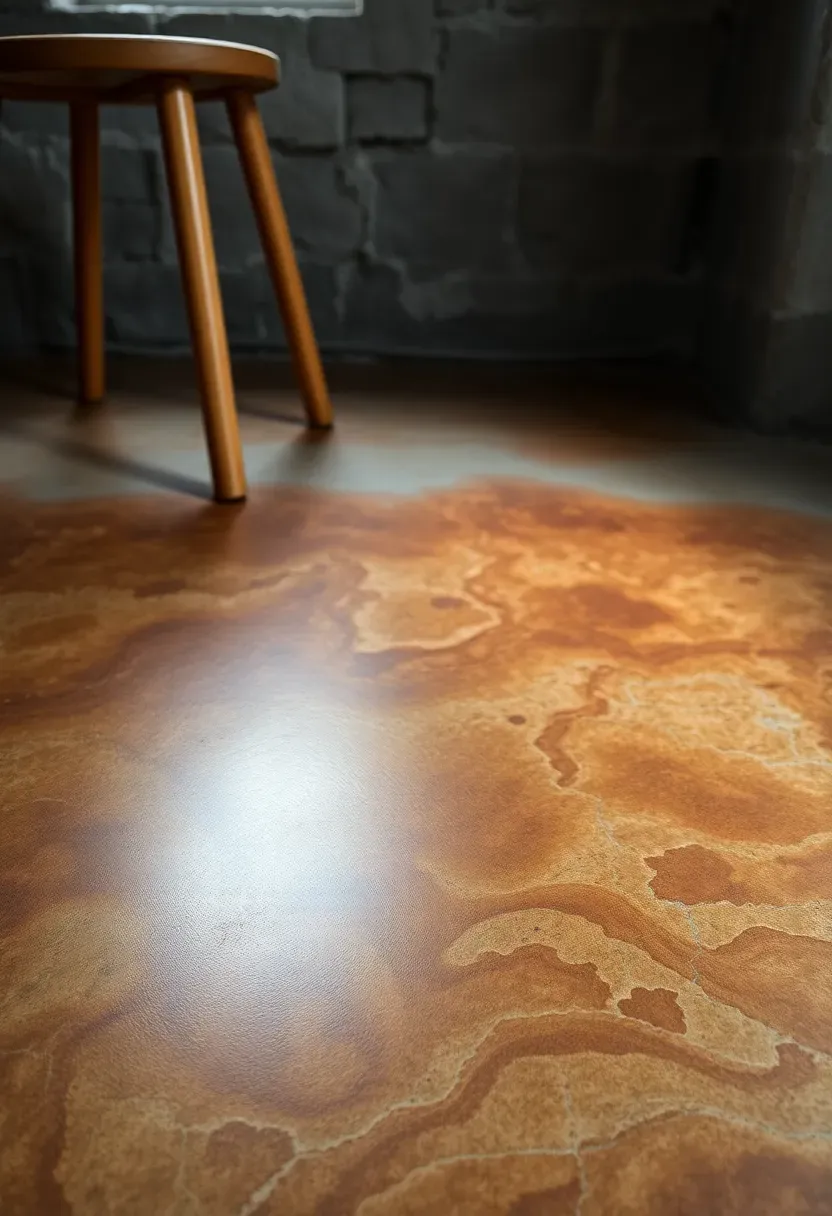
3. Acid-Stained Concrete
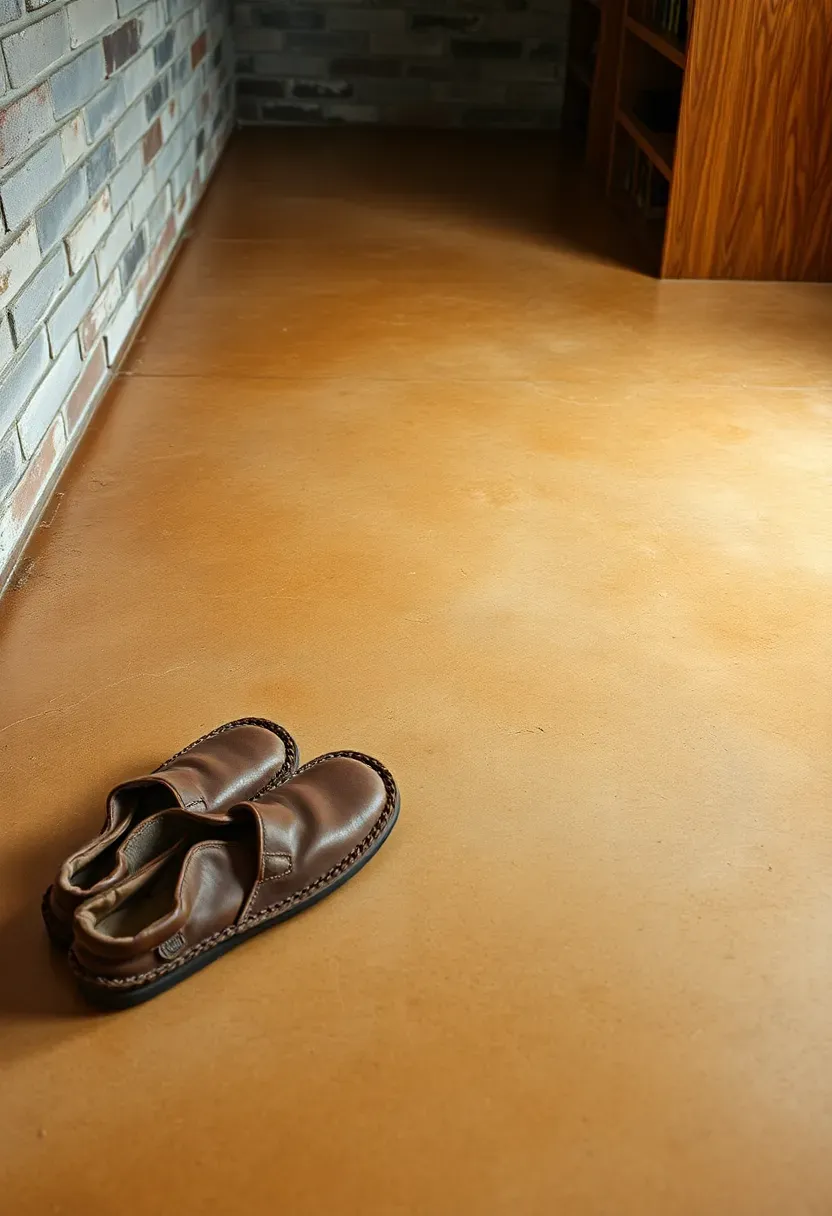
Acid stain is not paint. It is a chemical reaction between metallic salts and the lime in concrete, which means every floor comes out different. The result looks like aged leather or natural stone — mottled, translucent, and impossible to replicate exactly. Colors tend toward earth tones: amber, walnut, turquoise-green, and rust. You spray or brush the stain onto clean concrete, let it react for 4-8 hours, neutralize with baking soda and water, rinse thoroughly, then seal with a concrete sealer. The process is messy and the fumes are serious — full respirator, rubber boots, chemical-resistant gloves.
Tips
- Test a 2x2-foot patch in a hidden corner first; color depends on your specific concrete mix
- Old paint, adhesive residue, or sealers block the reaction — grind or strip them completely
- Apply two coats of acrylic or polyurethane sealer after staining to protect the color
We picked a few things that go well with this idea: Acid Stain DIY Kit with Acrylic Sealer (★4.3), Acid Stain DIY Kit Blue (250 sqft) (★4.3) and Acid Stain DIY Kit Ebony with Sealer (★4.3). As an Amazon Associate we earn from qualifying purchases.
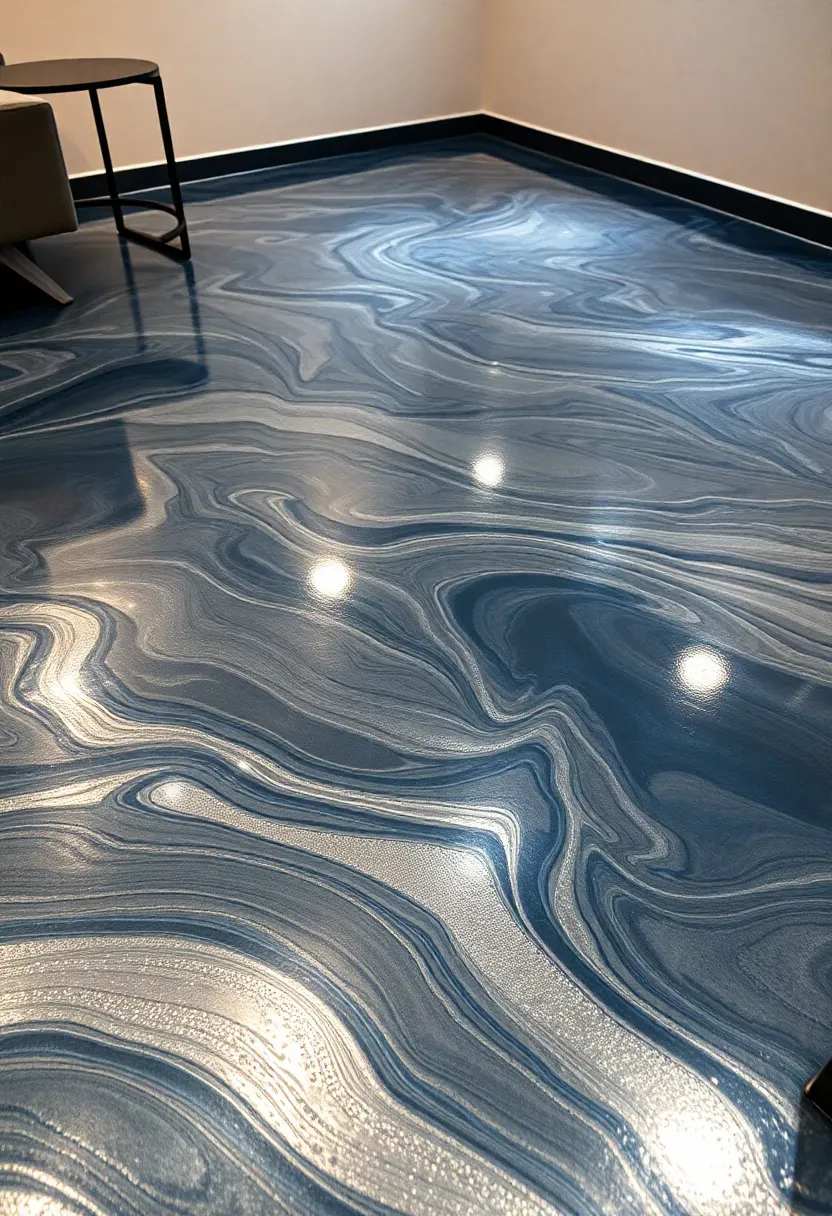
4. Metallic Epoxy Swirl
Metallic epoxy uses a pigmented metallic powder suspended in clear epoxy resin. When you roll it onto the floor and then manipulate it with a roller, squeegee, or leaf blower, the metallic particles shift and settle into swirling patterns that look like molten metal or a river current. The effect is dramatic — silver, copper, blue, and champagne are the most common base colors. This is a higher-skill application than standard epoxy. The material stays workable for only 20-30 minutes at 70 degrees F, so you need to work fast and have a plan for direction before you pour.
Tips
- Practice on a piece of plywood or cardboard first to understand how the pigment moves
- Use a spiked roller or a heat gun lightly to pop air bubbles before the epoxy sets
- Plan your pour in sections if the basement exceeds 300 square feet — you cannot cover a large floor before the material begins to gel
Recommended
Items for this idea
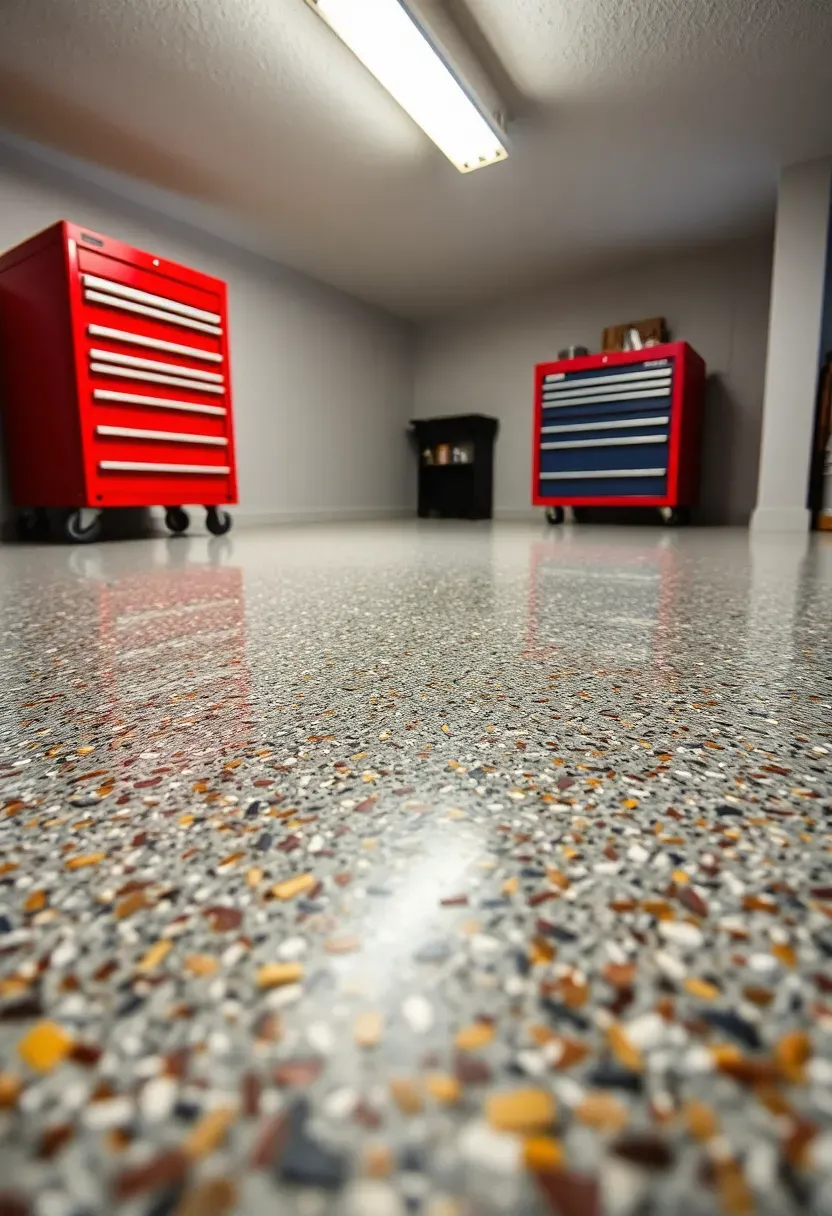
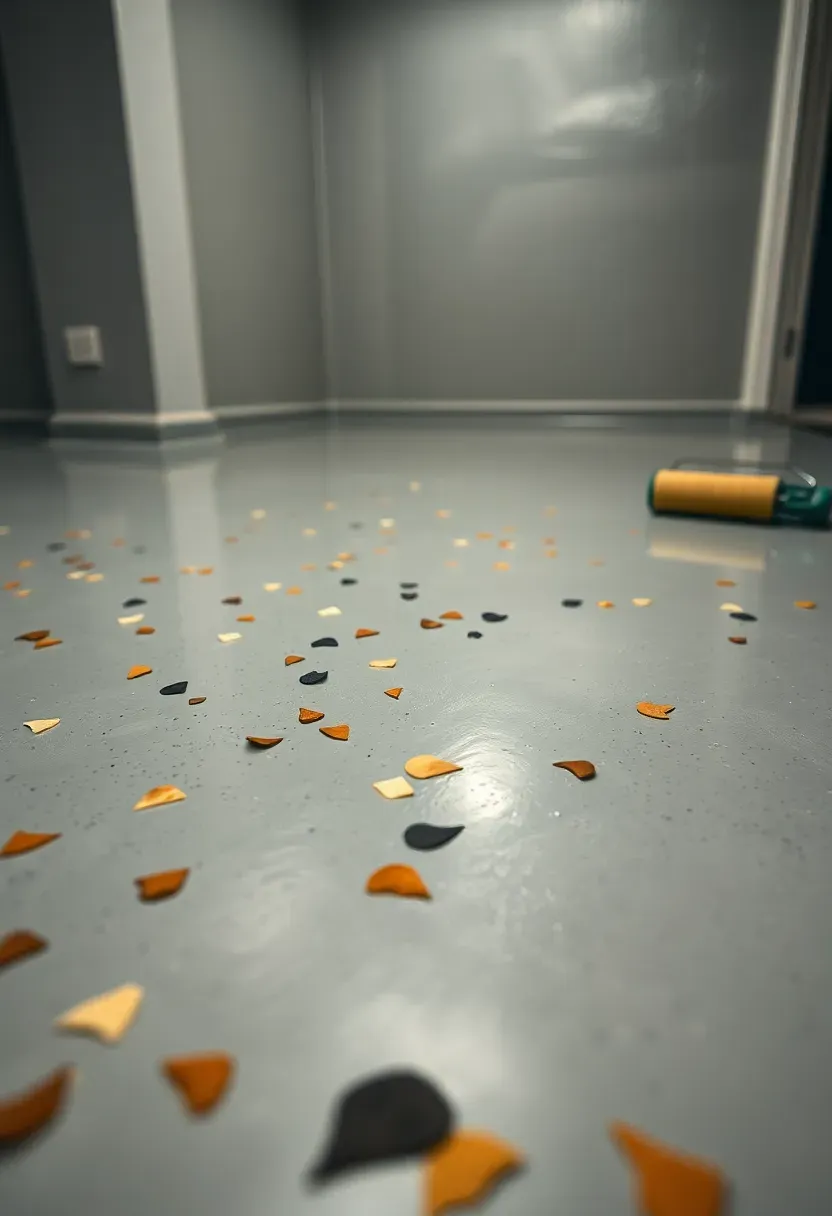
5. Speckled Garage-Style Flake
The most forgiving DIY option
Decorative vinyl flakes (also called chips or confetti) get broadcast into wet epoxy by hand. The flakes serve two purposes: they hide imperfections in the concrete surface, and they add grip. The speckled result is what you see in commercial garages, showrooms, and mechanics' shops. For a basement, tone down the density — a light broadcast looks cleaner than a full-coverage chip floor. Most kits include a base coat, flakes, and a clear polyaspartic topcoat that cures fast and resists hot tire marks.
Pros and cons
- Pro: Forgiving application — uneven spots get masked by the random flake pattern
- Pro: Kits from companies like Epoxy-Coat or Versatile run $200-350 for a two-car garage, so partial coverage for a basement costs less
- Con: Full flake coverage traps dirt in crevices between chips unless you apply a thick clear topcoat and sand it smooth
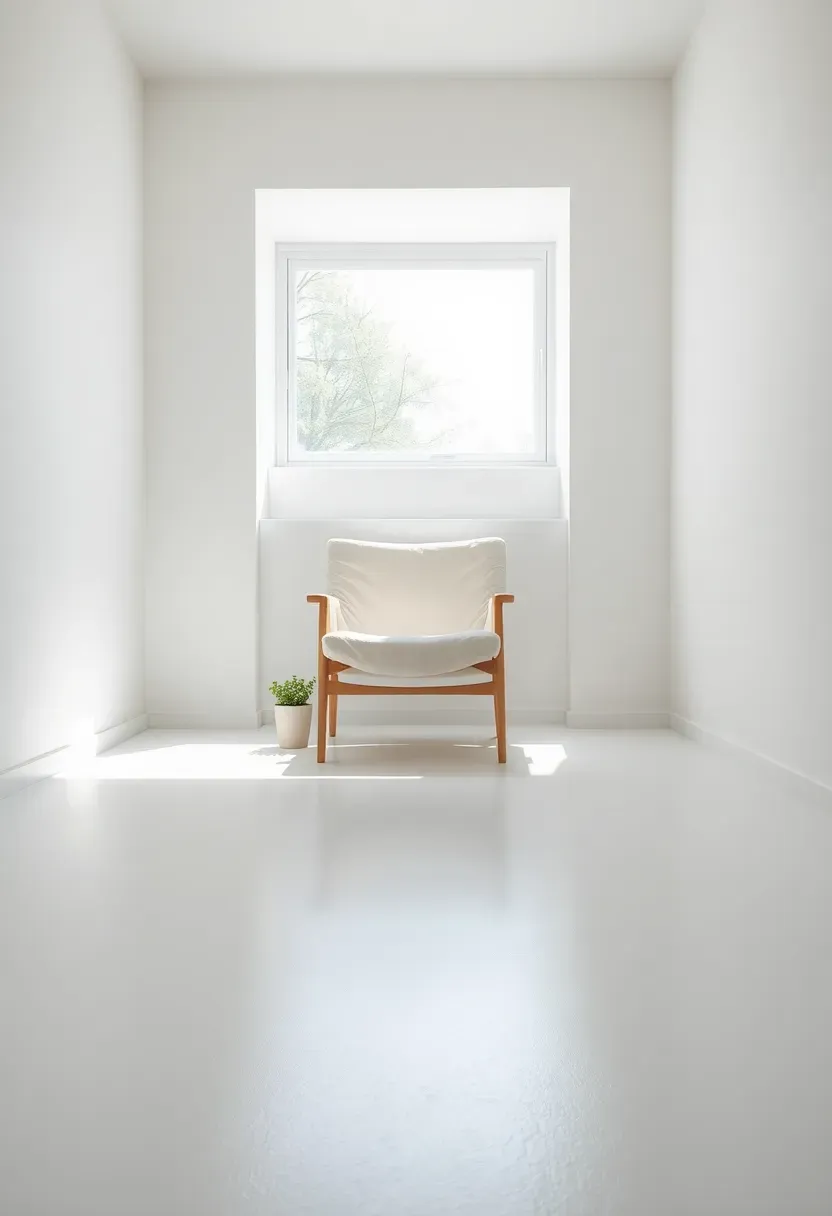
6. White Painted Concrete
Painting a basement floor white sounds reckless until you see the result. The room instantly feels larger, brighter, and cleaner. The practical concern — dirt — is real but manageable. Use a semi-gloss or satin concrete floor paint (not flat) so you can mop without leaving marks. BEHR Premium Porch and Patio Floor Paint in "Ultra Pure White" handles basement conditions well. The key is maintenance: sweep weekly and damp-mop biweekly. White works best in basements used as studios, creative spaces, or light-colored living areas where you control shoe traffic.
Tips
- Apply three coats instead of two for full opacity over dark concrete
- A polyurethane topcoat in satin adds scuff resistance and makes cleaning easier
- Place dark mats at entry points to catch tracked-in dirt before it spreads
Recommended
Items for this idea
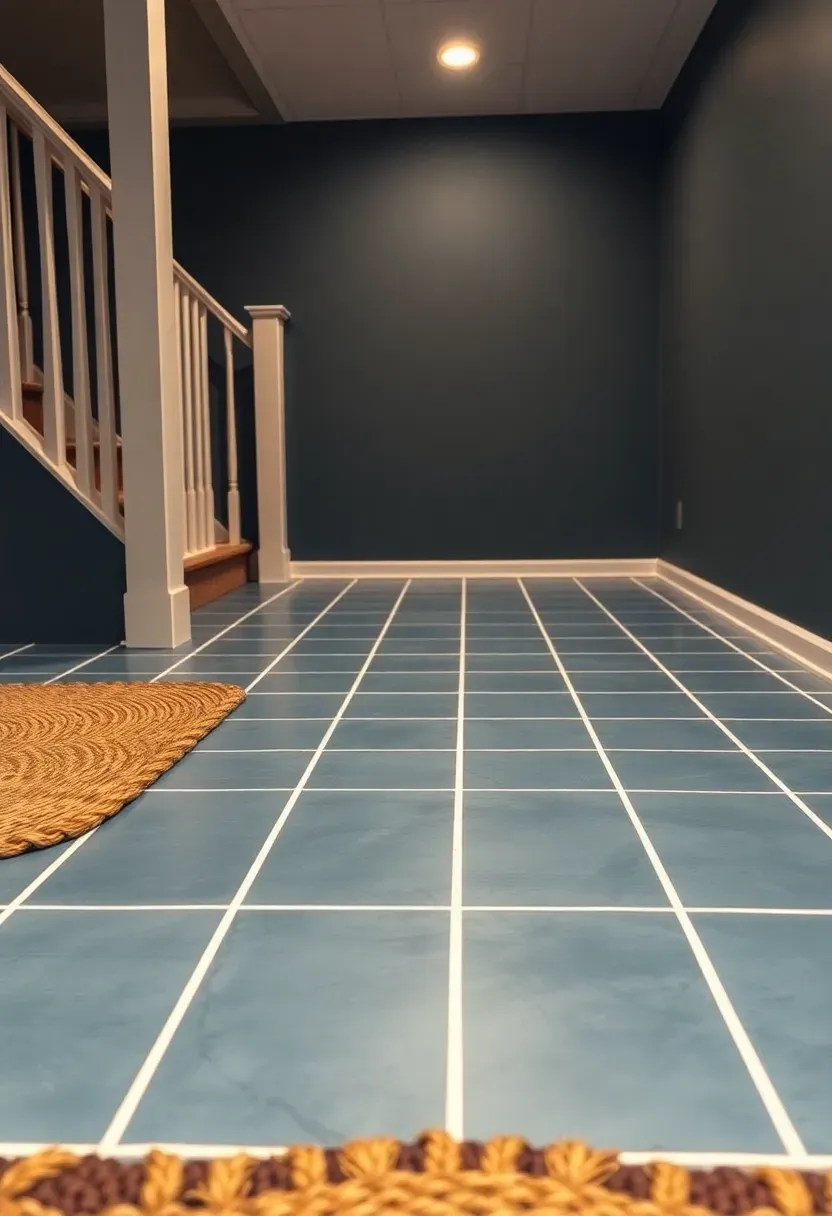
7. Faux Tile Grid
How to get the tile look without tile
Real tile on a basement slab requires crack isolation membrane, thinset, grout, and a tile saw. Painted faux tile requires tape and two colors of floor paint. Choose a base color (slate blue, warm gray, sage), paint the entire floor, let it cure, then tape off a grid at your desired "tile" size — 18x18 or 24x24 inches looks proportional in most basements. Roll a contrasting lighter or darker shade into the "grout" lines, or simply let the lighter base peek through by taping and painting the tile fields in the darker tone.
Steps
- Paint the entire floor in your grout-line color and let it dry 48 hours
- Tape off your grid using 1/4-inch automotive pinstripe tape for thin grout lines
- Roll the tile color over the taped grid and pull tape while slightly tacky
Watch out for
- Measure twice — offset tiles require more tape and precision than straight grids
- Use a laser level or chalk lines snapped from center to keep the grid square
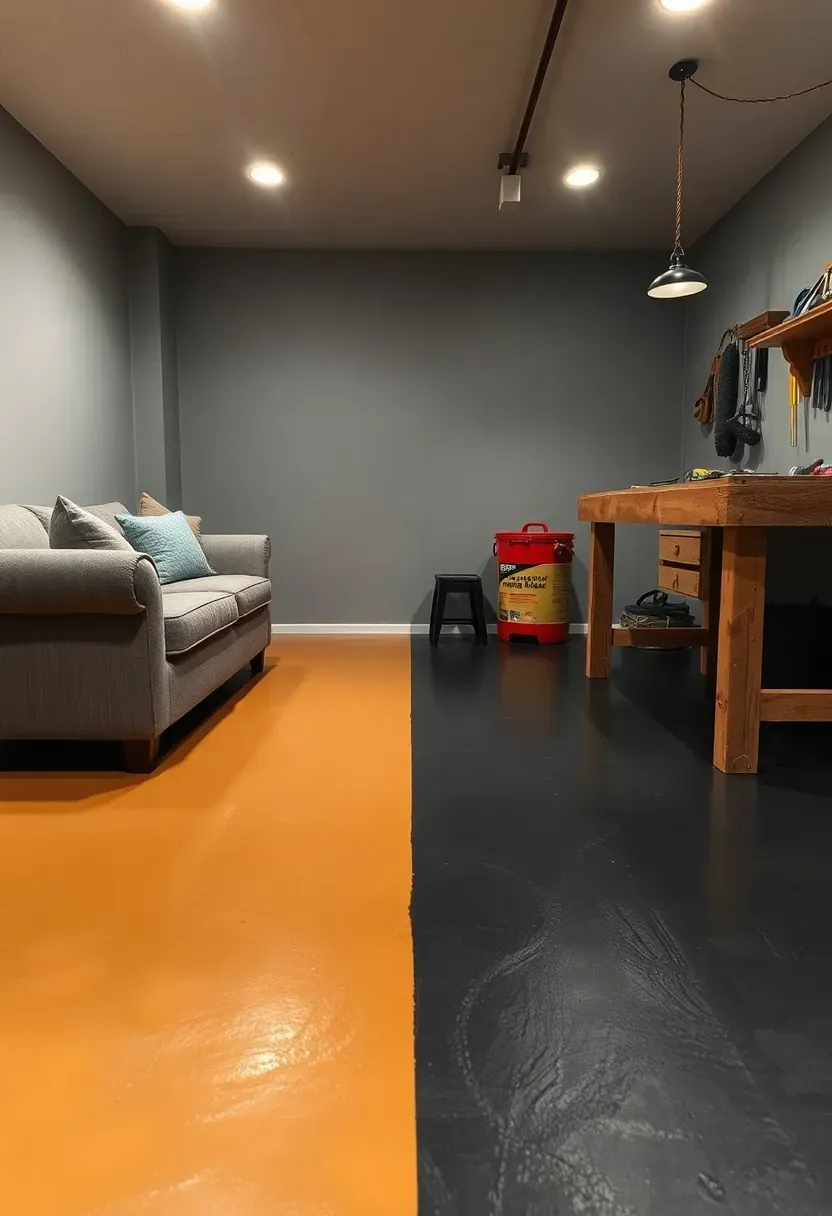
8. Two-Tone Zone Painting
If your basement serves two purposes — half workshop, half hangout — paint each zone a different color. The color boundary becomes a visual divider that defines the space without building a wall. Use a warm tone (tan, terracotta) for the living area and a practical darker shade (charcoal, forest green) for the utility side. Run the dividing line along an existing feature like a support column, a change in ceiling treatment, or the edge of an area rug. Tape the line with 2-inch painter's tape and paint each side independently.
Tips
- Choose colors from the same paint brand and product line so the sheen matches
- The dividing line does not have to be straight — an angled or curved boundary adds interest
- If the zones get different use levels, apply a tougher coating (epoxy) on the high-traffic side and standard floor paint on the other
Recommended
Items for this idea
9. Water-Based Concrete Stain
Water-based stains are the gentler alternative to acid stains. They deposit pigment into the concrete surface without a chemical reaction, so the color is more predictable and the application is less hazardous. You get a wider color range too — blues, greens, and even reds that acid stains cannot achieve. The tradeoff is that water-based stains sit closer to the surface and can wear in high-traffic paths over several years. Brands like Kemiko and Brickform offer contractor-grade options. Apply with a pump sprayer in thin, overlapping passes, building color gradually rather than flooding the surface.
Tips
- Two light coats produce better color depth than one heavy coat
- Clean and profile the concrete with a diamond pad or sander before staining — the stain needs pores to absorb into
- Seal with two coats of a water-based polyurethane for durability and easy recoating later
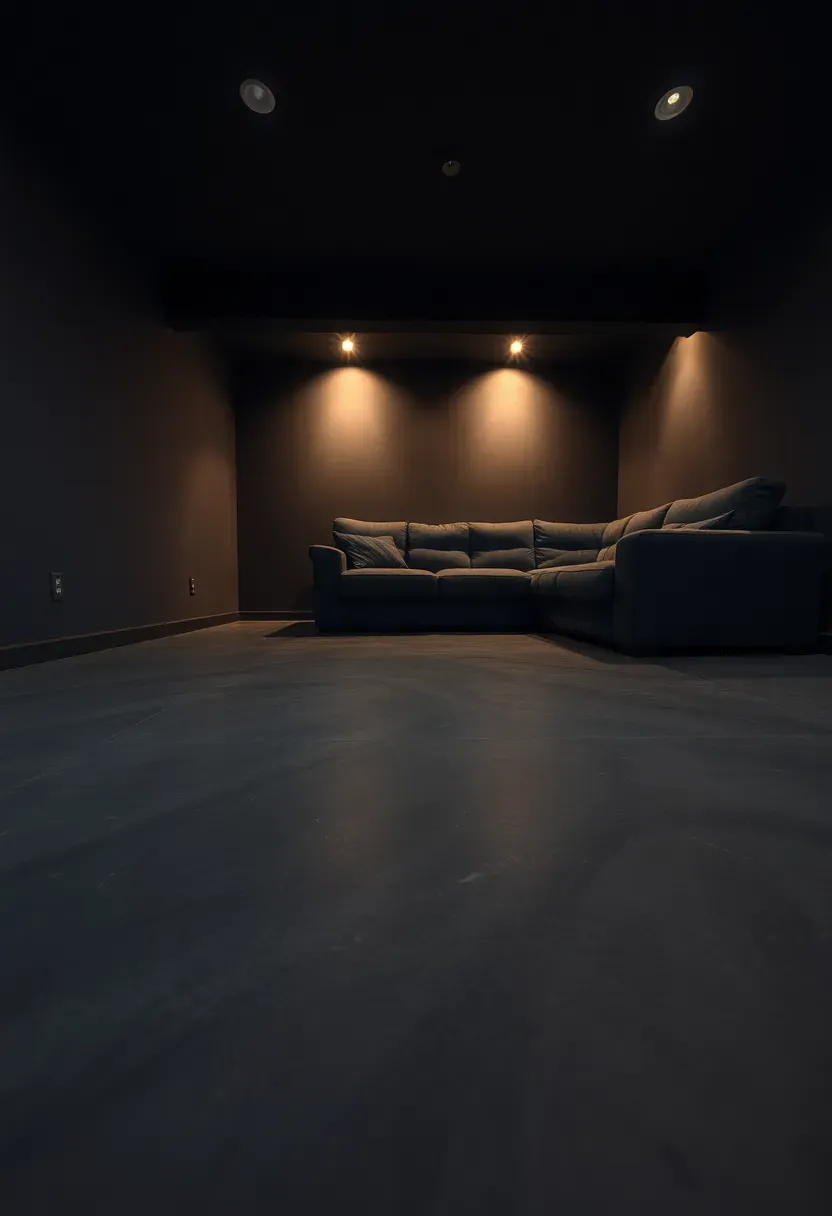
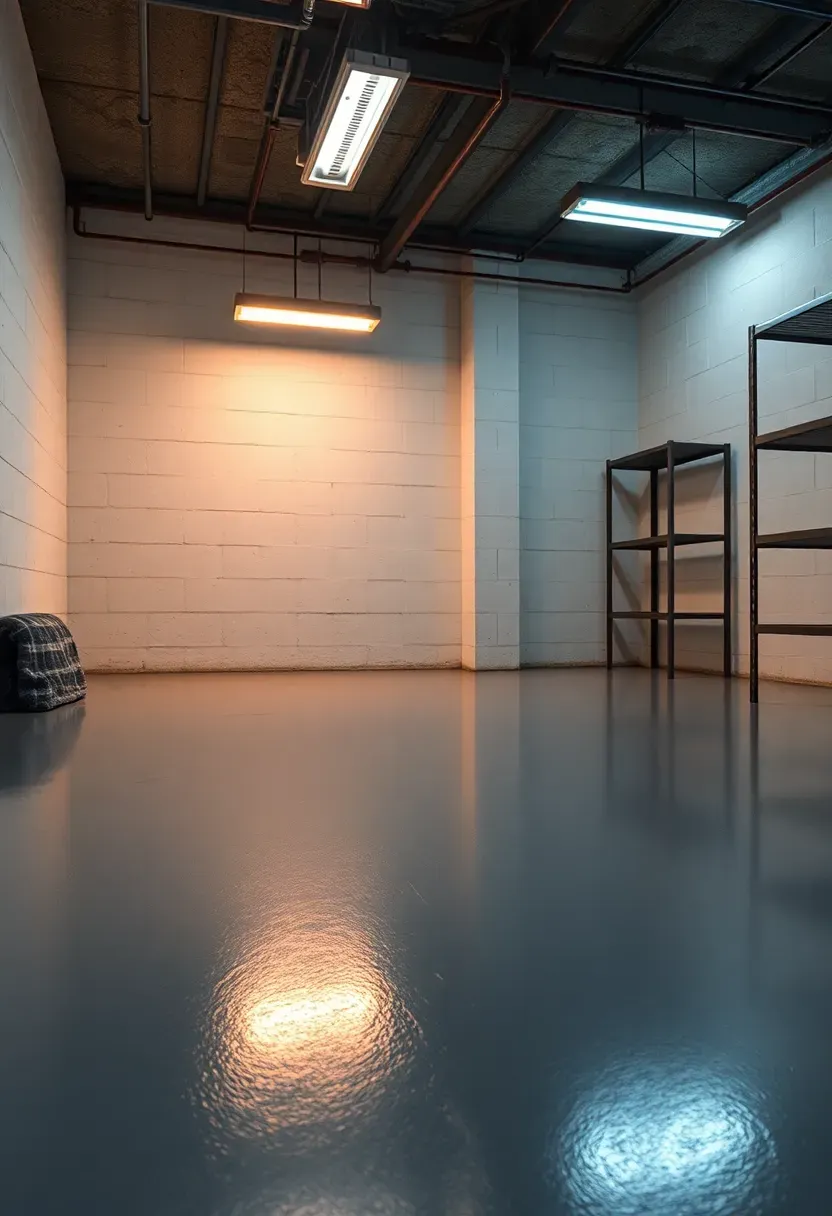
10. Dark Charcoal Matte
A charcoal matte floor anchors a room the way a dark hardwood floor does in a living room. It recedes visually, making furniture and wall colors pop. In basements used as home theaters, music rooms, or lounges, dark floors reduce light bounce and create a more immersive atmosphere. Use a true matte or eggshell finish — anything glossier shows every scratch and dust mote. Benjamin Moore's "Wrought Iron" or Sherwin-Williams' "Iron Ore" mixed into a concrete floor paint gives you that deep, nearly-black charcoal without going full black.
Tips
- Dark floors show dust more than medium tones — commit to regular sweeping or use a robot vacuum
- Pair dark floors with lighter walls and warm lighting to avoid a cave-like feel
- Apply a matte-finish sealer rather than a glossy topcoat to maintain the flat look
Recommended
Items for this idea
11. Painted Diamond Pattern
A checkerboard turned 45 degrees
Diamonds are just squares set on point. The diagonal orientation makes a room feel wider because the eye follows the longer diagonal line rather than measuring wall-to-wall. Lay out the pattern by snapping diagonal chalk lines from corner to corner, then building your grid from that center X. The math matters more here than with a straight checkerboard — calculate your diamond size so you end with clean half-diamonds at the walls. Cream and slate blue is a combination that reads traditional without being as stark as black and white.
Steps
- Find the exact center of the floor and snap two diagonal lines corner to corner
- Measure equal intervals along each diagonal and snap parallel lines to create the diamond grid
- Paint the base color, cure, tape alternating diamonds, and apply the second color
Watch out for
- Diagonal lines magnify any error — if your starting lines are off by half an inch at center, they will be off by two inches at the walls
- Use a chalk line reel, not a straightedge, for lines longer than 8 feet
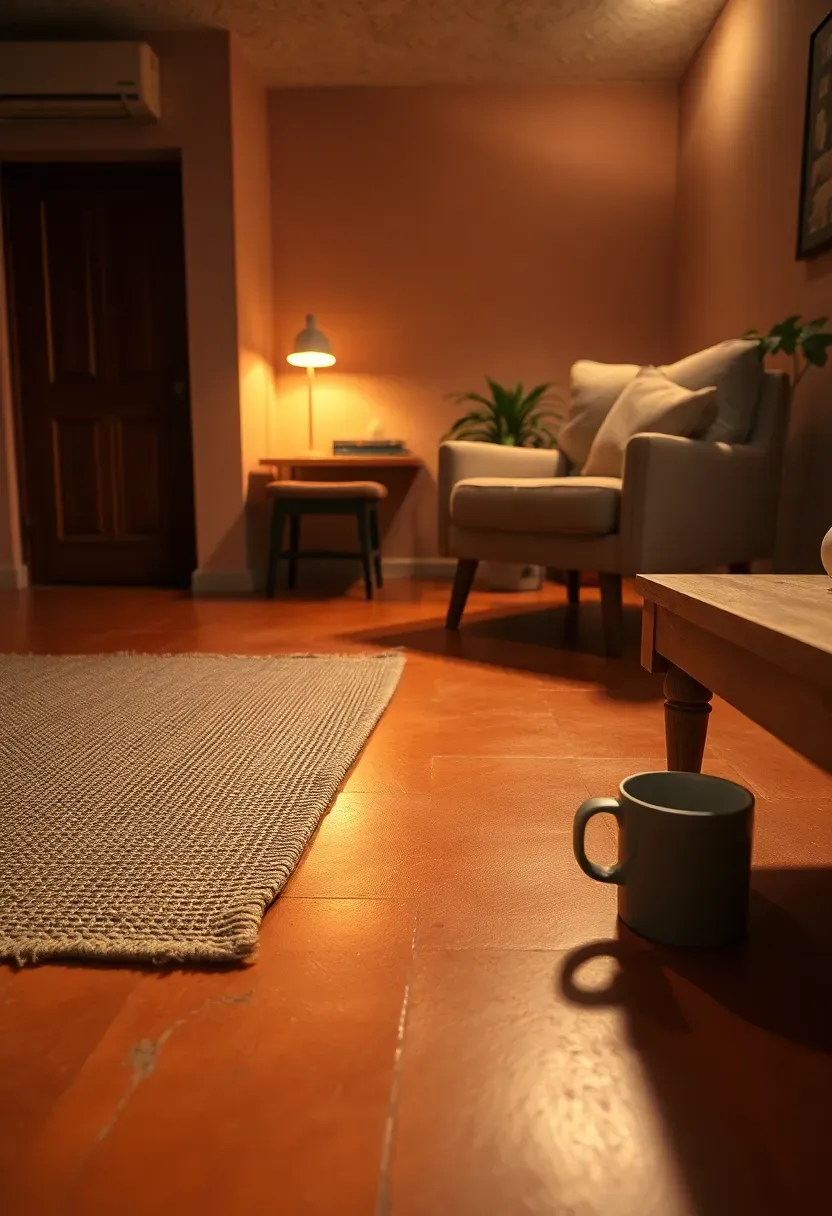
12. Terracotta Warm Tone
Terracotta floor paint brings Mediterranean warmth to an underground room. The color — a burnt orange-red — works against the cool, damp feeling that basements tend to have. It pairs well with cream walls, iron furniture, and natural textiles like jute and linen. Use a satin-finish concrete paint in a mid-tone terracotta (not too orange, not too brown). Rust-Oleum Concrete Floor Paint can be custom-tinted at most hardware stores. Two coats over etched concrete gives you solid coverage. The color hides red-brown dust and minor stains better than lighter alternatives.
Tips
- Test the color on a sample board in your actual basement lighting — terracotta shifts heavily under warm vs. cool light
- Pair with a clear satin sealer for easy cleaning without adding shine
- If the color feels too bold, dilute the intensity by choosing a "dusty" or "muted" terracotta rather than a saturated one
Recommended
Items for this idea
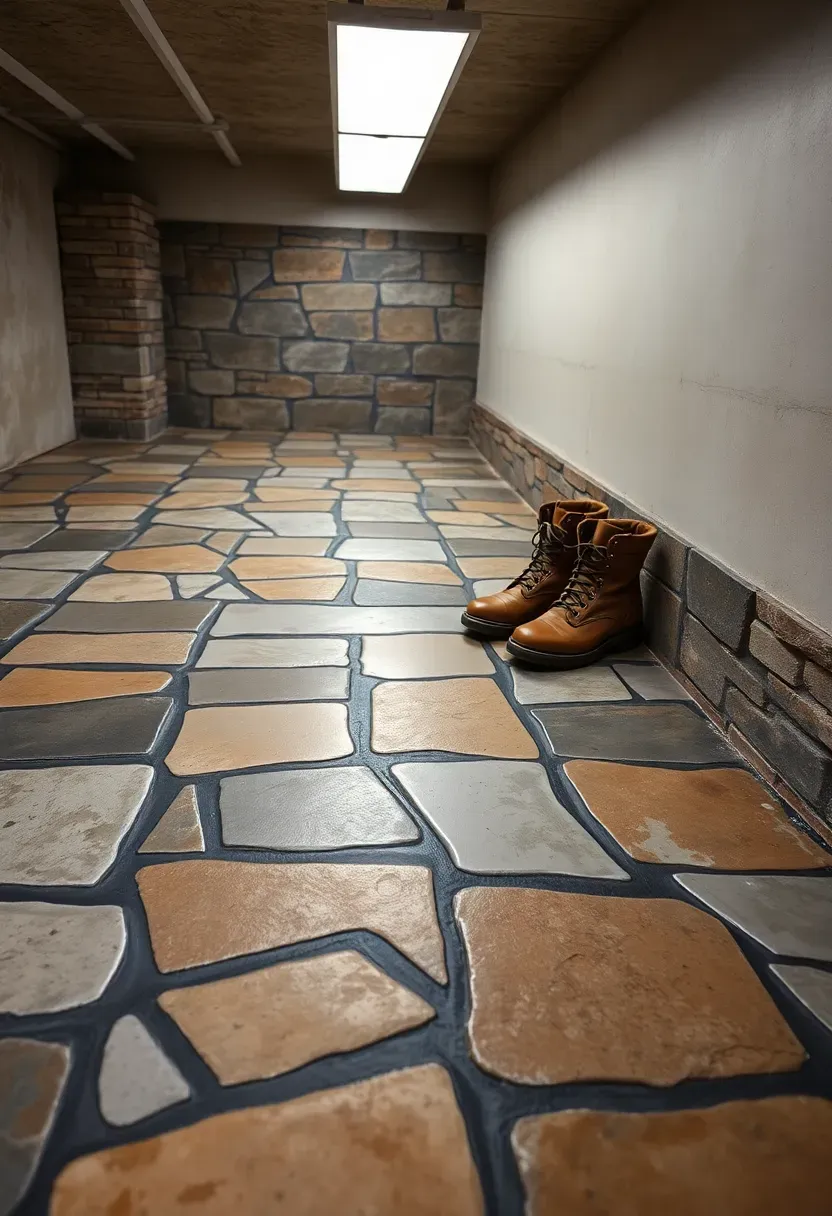
13. Faux Flagstone
Faux flagstone painting mimics the look of irregular natural stone using nothing but concrete paint, a sponge, and patience. Start by painting the entire floor in a dark grout color (charcoal or dark brown). Once dry, sketch irregular stone shapes with chalk — vary the sizes between 10 and 24 inches, keeping the outlines organic rather than geometric. Tape outside each stone shape and sponge-paint the interior using layered colors: a base of medium gray, then dabs of tan, brown, and a touch of mossy green. Remove tape to reveal the grout lines. The whole effect is surprisingly convincing from standing height.
Tips
- Study photos of real flagstone floors before sketching — the stones interlock without large gaps
- Use a natural sea sponge rather than a synthetic one for more realistic texture variation
- Seal with three coats of polyurethane to protect the detailed paintwork from foot traffic
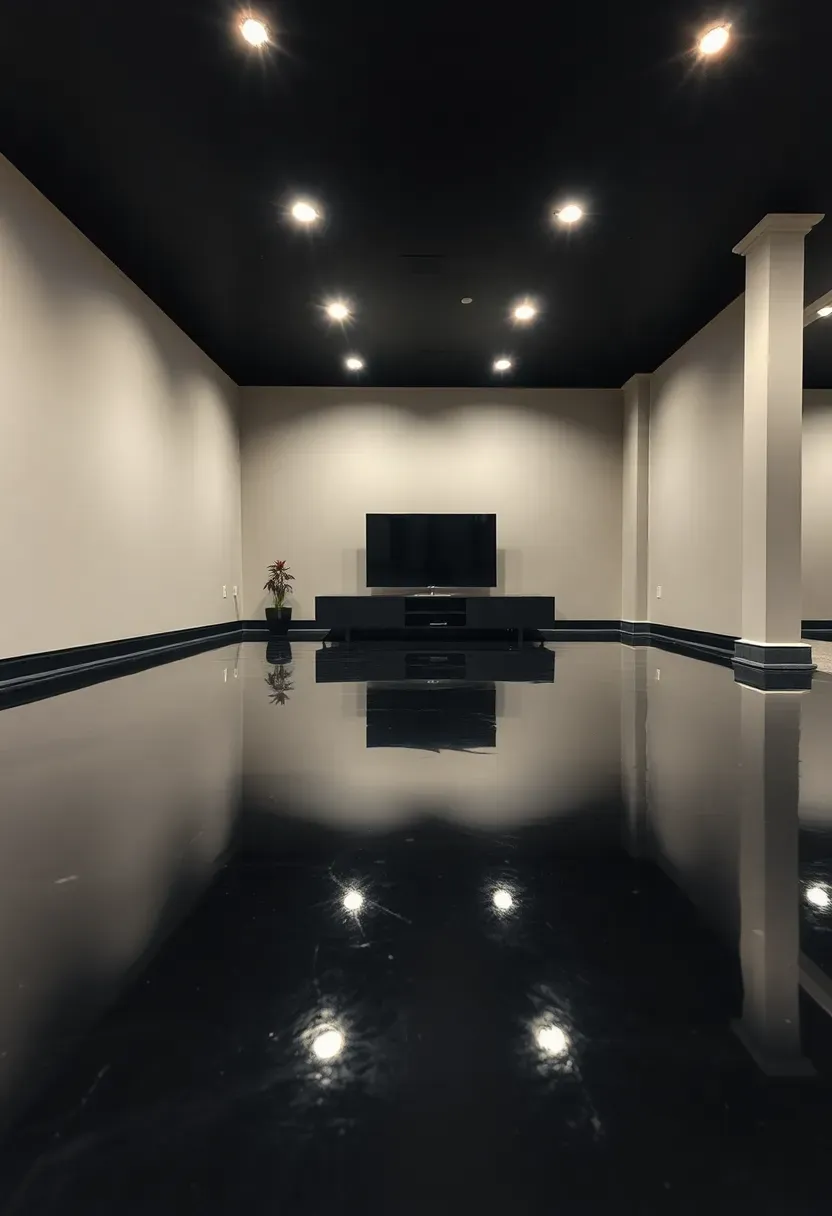
14. High-Gloss Black
A high-gloss black floor is a specific choice for a specific space. It works in home theaters, modern entertainment rooms, and photography studios where the reflective surface serves a purpose. The mirror-like finish doubles the visual impact of overhead lighting and creates depth in an otherwise flat room. Use a two-part black epoxy with a gloss clear topcoat for maximum reflection. The surface scratches visibly and shows every speck of dust, so this is not for high-traffic family basements. It is for rooms where the floor is part of the aesthetic statement.
Pros and cons
- Pro: Creates a dramatic, gallery-like atmosphere in low-ceiling spaces
- Pro: Reflects light from above, which can actually make the room feel taller
- Con: Maintenance is constant — expect to Swiffer daily and avoid dragging furniture
Recommended
Items for this idea
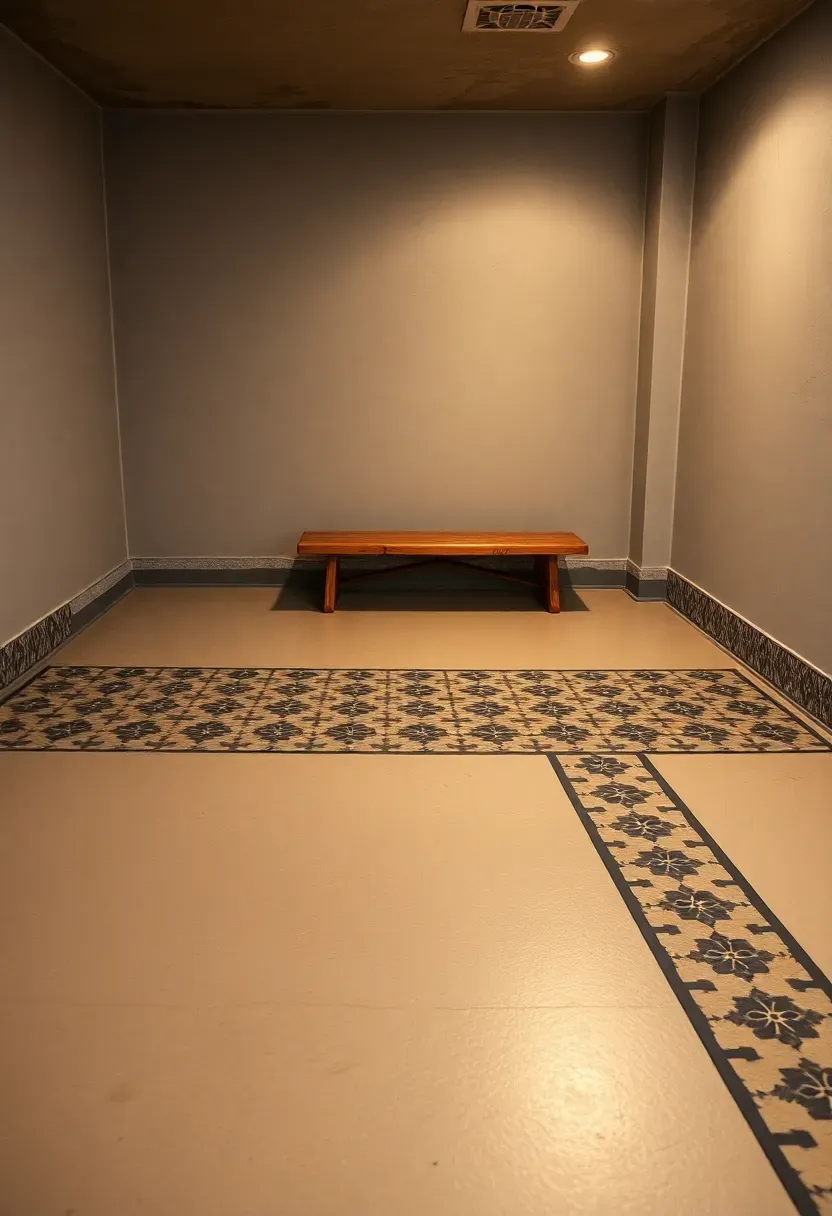
15. Stenciled Border Detail
Adding detail without painting the whole floor
If a full-floor pattern feels like too much, paint a decorative border instead. A stenciled band running 12-18 inches from the walls frames the room like a rug border frames a rug. Use a large-format stencil — Moroccan geometric, Greek key, or a simple repeating tile motif — and work your way around the perimeter. Paint the center field in a solid color and the stenciled border in a complementary tone. The border gives the room visual structure and draws the eye along the walls rather than to the plain center.
Steps
- Paint the full floor in your base color and let it cure completely
- Measure and tape a straight guide line 12-18 inches from each wall
- Align your stencil along the guide, paint through it with a foam roller, reposition, and repeat around the room
Watch out for
- Corners require careful stencil alignment — dry-fit the stencil at corners before painting to plan the pattern break
- Use a nearly dry roller to prevent paint bleeding under the stencil edges
16. Industrial Polyurea Coating
Polyurea is the professional upgrade from DIY epoxy. It is a two-component spray-applied coating that cures in hours instead of days, bonds harder than epoxy, and flexes with concrete movement without cracking. Commercial installers use it in warehouses, airplane hangars, and hospital floors. For basements, it is overkill in the best way — you get a floor that handles flooding, heavy furniture dragging, and decades of foot traffic without chipping or peeling. The cost runs $4-8 per square foot installed, which puts it at the high end of basement floor coatings but below the cost of tile or LVP.
Pros and cons
- Pro: UV stable, so it will not yellow under fluorescent or LED lighting over time
- Pro: Full cure in 24 hours — you can move furniture back the next day
- Con: Requires professional application with specialized spray equipment; not a DIY product
Recommended
Items for this idea
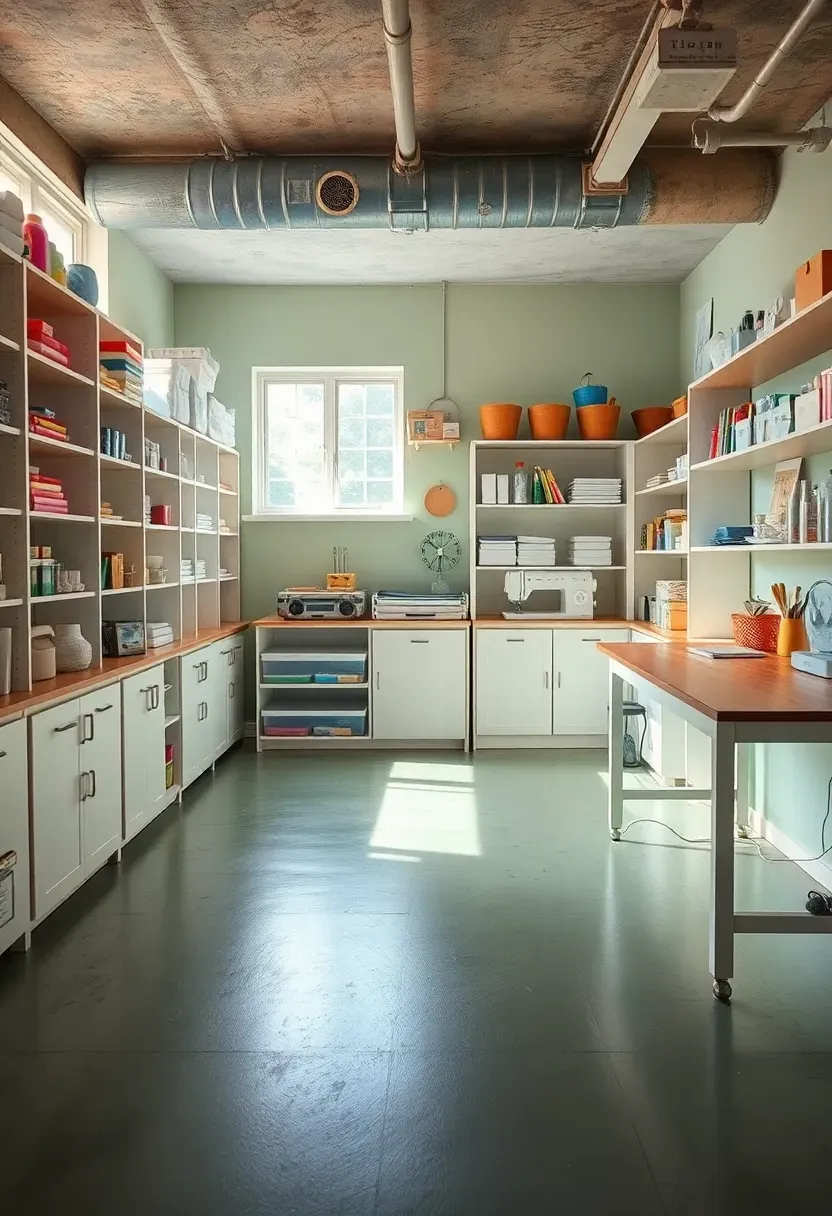
17. Sage Green Floor
Sage green sits in a narrow color range that reads as both calming and grounded. On a basement floor, it softens the industrial feel of concrete while avoiding the coldness of gray. The color works particularly well in basements that get some natural light from window wells or walkout doors, where the green picks up a natural, garden-adjacent quality. Use a satin or semi-gloss floor paint for durability. Sage pairs with white trim, natural wood shelving, and warm metals like brass or copper. It is a strong choice for craft rooms, yoga spaces, or reading nooks.
Tips
- Choose a sage with gray undertones rather than yellow undertones — yellow-sage can look sickly under artificial light
- Apply over a light gray primer for the truest color representation
- Test the color at night under your actual basement lighting before committing
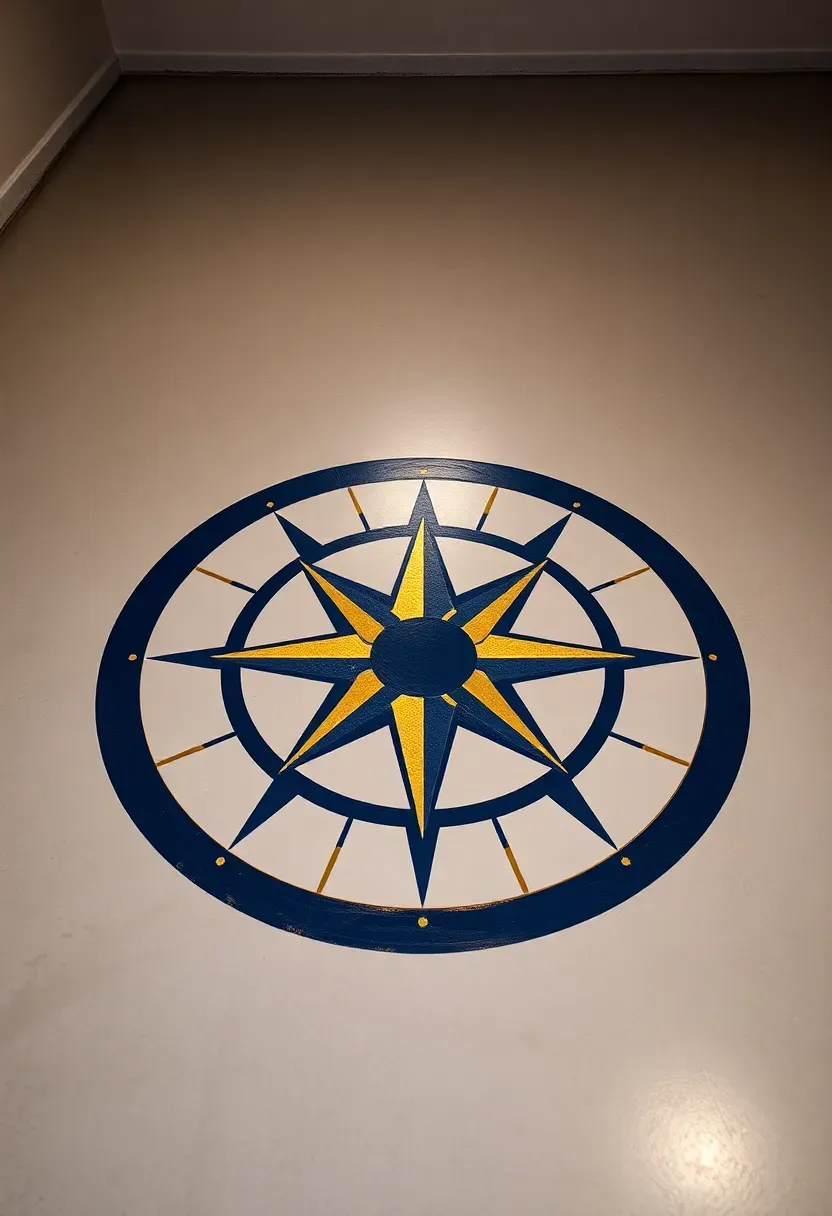
18. Painted Compass Rose Medallion
A focal point for the center of the room
A compass rose painted in the center of the floor turns an otherwise plain surface into a conversation piece. This works best in open basement layouts where the medallion will not be covered by furniture. Project the design onto the floor using an overhead projector or a printed template scaled to 4-6 feet in diameter. Trace the outline, tape the sections, and paint each segment. Navy and gold on a gray field is a classic nautical combination, but you can adapt the palette to match your room. The rest of the floor stays in a solid base color.
Steps
- Paint the entire floor in your base color and let it cure
- Find the room's center, project or trace the compass design, and outline with pencil
- Tape each segment individually and paint from the center outward, letting each color dry before taping the adjacent section
Watch out for
- Complex designs require 3-5 taping sessions — budget a full weekend
- Use artist's acrylic paint for fine detail work and seal the entire floor with polyurethane afterward
Recommended
Items for this idea
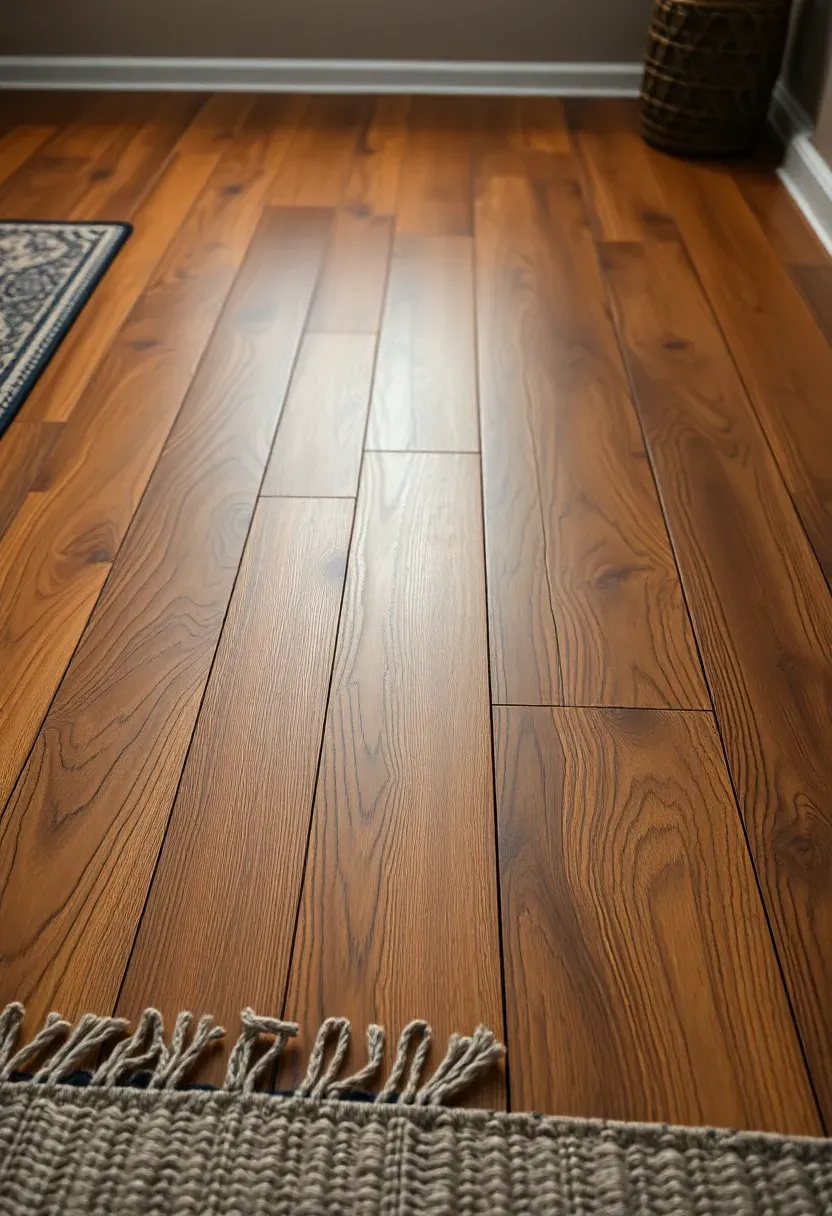
19. Faux Wood Grain
Faux wood grain painting uses a wood-graining tool (a rubber rocker) dragged through wet glaze to create plank-like lines. The technique has been used on furniture and walls for centuries, and it translates to concrete floors with some adaptation. Paint the floor in a light tan or honey base coat. Mix a darker brown glaze (one part paint, one part glazing medium), apply it in plank-width sections (about 5 inches), and drag the graining tool through the wet glaze to create the grain pattern. Work one plank at a time. Snap chalk lines first to keep your planks straight.
Tips
- Vary the pressure and angle of the graining tool between planks for a more natural look
- After graining, lightly drag a dry brush along the length of each plank to soften the lines
- Three coats of satin polyurethane protect the glaze work and add the sheen of finished wood
20. Rust-Oleum Basement Kit
The Rust-Oleum EpoxyShield Basement Floor Coating Kit is the most widely available DIY basement floor product in North America. The kit includes an etching solution, a two-part epoxy base coat, decorative chips, and sometimes a clear topcoat. It runs about $80-95 at Home Depot or Lowe's and covers 200-250 square feet. The application is straightforward: etch, rinse, dry, mix the two epoxy parts, roll it on, broadcast chips into the wet surface, and let it cure for 72 hours before heavy use. It is not the most durable coating on this list, but for the price and ease, it is hard to argue against.
Pros and cons
- Pro: Everything you need in one box including the etching compound
- Pro: Color options beyond gray: tan, tint base for custom colors, and dark gray
- Con: The coating is thinner than professional epoxies and may need recoating after 3-5 years in heavy-use basements
Recommended
Items for this idea
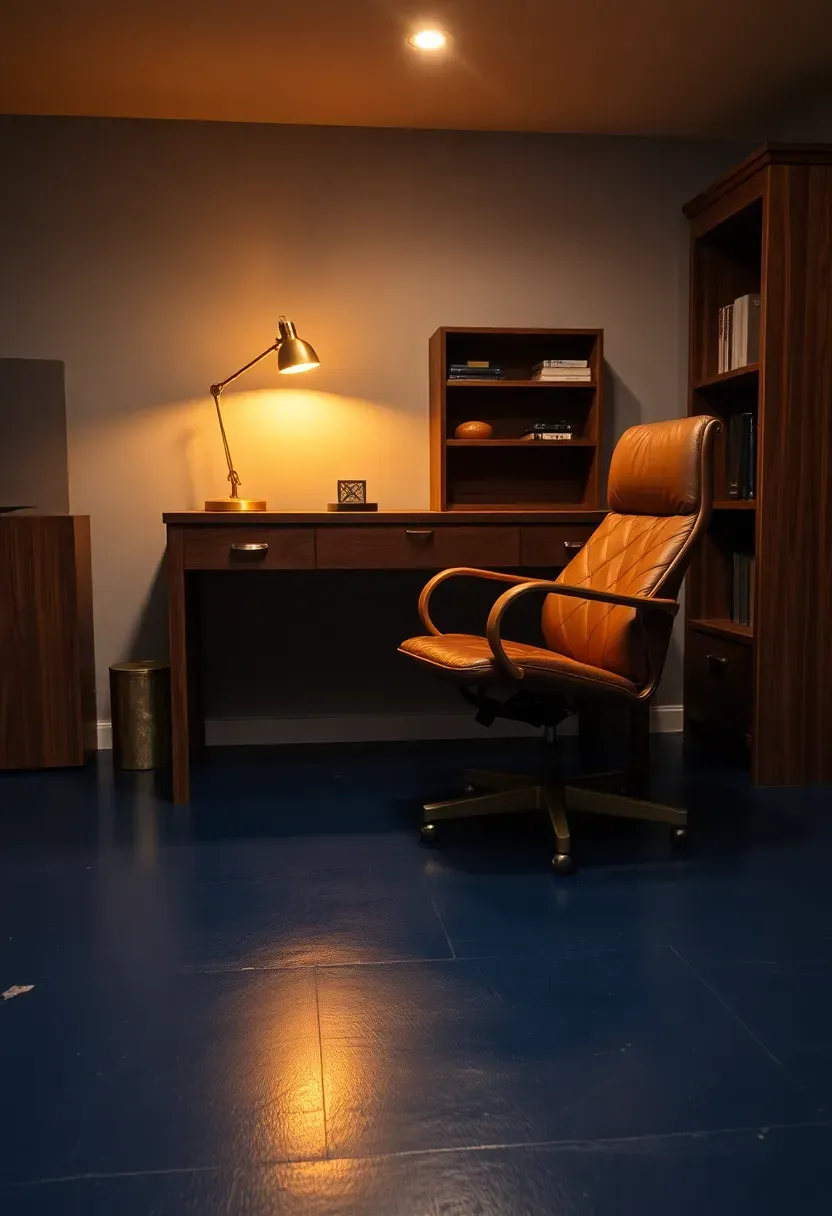
21. Navy Blue Solid Coat
Navy blue is an underused floor color that reads as sophisticated without being as stark as black or as neutral as gray. It pairs naturally with white walls, brass hardware, and warm wood furniture. In basement offices, dens, and libraries, a navy floor anchors the room with the same visual weight as a dark hardwood but at a fraction of the cost. Use a porch and floor paint rated for concrete in a satin finish. Navy hides scuffs and dust reasonably well — not as forgiving as medium gray, but far better than black or white.
Tips
- Navy can look almost black in basements with poor lighting — add warm-toned lamps or recessed lights with 3000K bulbs to keep the blue visible
- Two coats minimum over white or gray primer for full, even color
- Pair with a lighter area rug to break up the dark field and add contrast
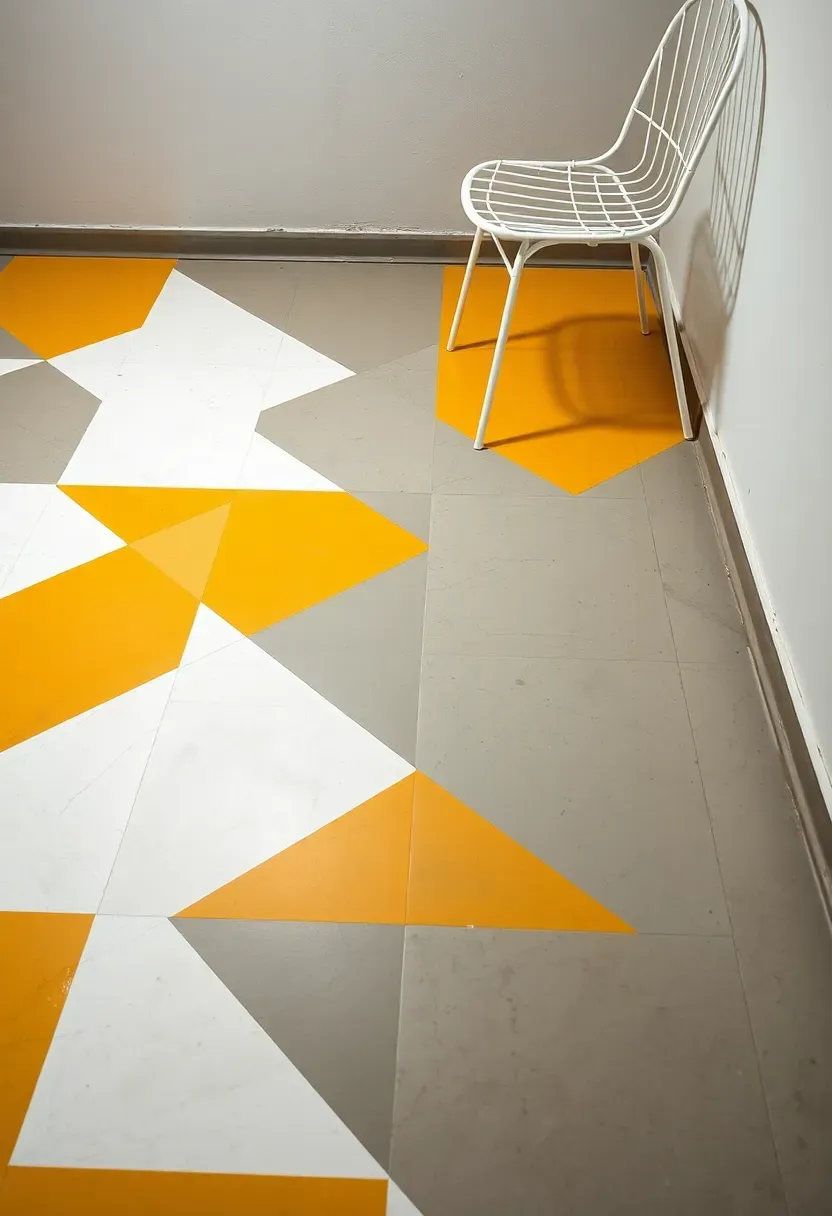
22. Geometric Triangle Pattern
Beyond squares and diamonds
Triangles create more visual energy than checkerboards because the diagonal lines point in multiple directions. A triangular grid uses three or more colors and produces a modern, almost kaleidoscopic effect. Start with a grid of equilateral triangles — each side 12-15 inches works at residential scale. Snap your baseline, use a protractor or template to mark 60-degree angles, and build the grid outward. Assign colors to triangles in a repeating or random pattern. White, gray, and mustard yellow is a combination that feels contemporary without overwhelming the room.
Steps
- Paint the full floor in your lightest color and let it cure
- Snap a baseline along the longest wall and mark triangle points at equal intervals
- Use 60-degree angles to complete the grid, tape each triangle individually, and paint one color at a time across the whole floor
Watch out for
- Triangles require more tape and more precision than squares — expect the taping phase to take twice as long
- Paint from lightest to darkest color to minimize visible bleed-through at edges
Recommended
Items for this idea
23. Pearlescent Mica Coat
Mica-based coatings contain fine mineral particles that catch light and produce a subtle shimmer — less dramatic than metallic epoxy, more refined. The effect is a floor that shifts slightly in tone as you walk across it, depending on the angle of the light. Champagne, pearl white, and soft bronze are the most popular shades. Apply over a primed concrete surface using a microfiber roller for the smoothest finish. The mica particles settle naturally during cure time and distribute the shimmer evenly. Two coats of clear topcoat protect the finish and enhance the depth.
Tips
- Stir the product frequently during application — mica particles settle to the bottom of the can quickly
- Apply in long, continuous strokes rather than short back-and-forth passes to avoid streaking the mica distribution
- Works best in basements with directional lighting (recessed cans or track lights) that activates the shimmer
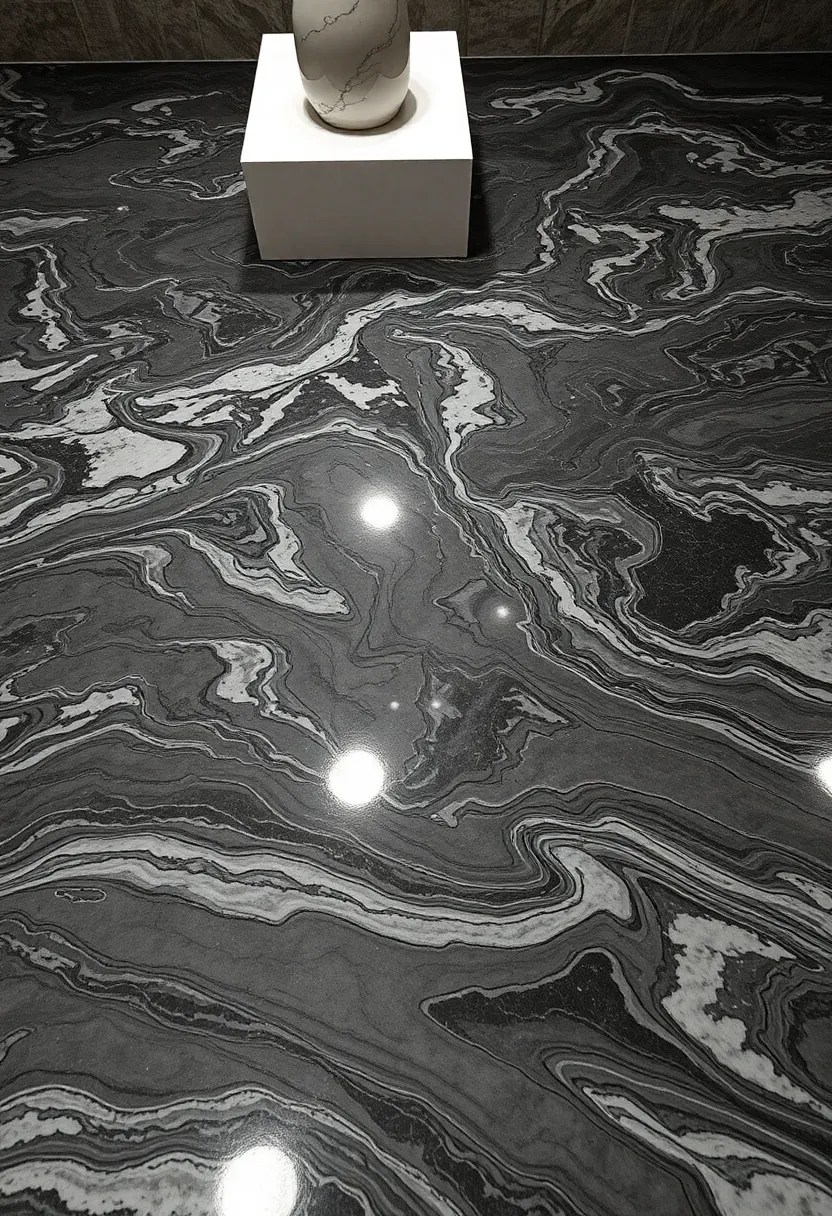
24. Concrete Dye Marbling
Faux marble without the marble price
Concrete dye marbling uses solvent-based concrete dyes applied in layered washes to mimic the veining of natural marble. Start with a white or very light gray base coat. While the base is still workable, drizzle thin lines of charcoal and medium gray dye across the surface using a squeeze bottle. Feather the veins with a dry paintbrush or a crumpled plastic bag, pulling and softening the lines until they resemble natural stone veining. The randomness is what makes it look real — plan the general direction of the veins but let each one develop organically.
Steps
- Apply a white base coat of concrete paint and let it dry to tacky
- Drizzle charcoal and gray dye in thin, irregular lines across the surface
- Feather with a dry brush, blend intersections, and seal with high-gloss polyurethane for the polished marble look
Watch out for
- Practice the veining technique on a scrap piece of drywall or plywood first — you only get one shot on the floor
- High-gloss sealer is essential to sell the marble illusion; matte sealer makes it look like painted concrete
Recommended
Items for this idea
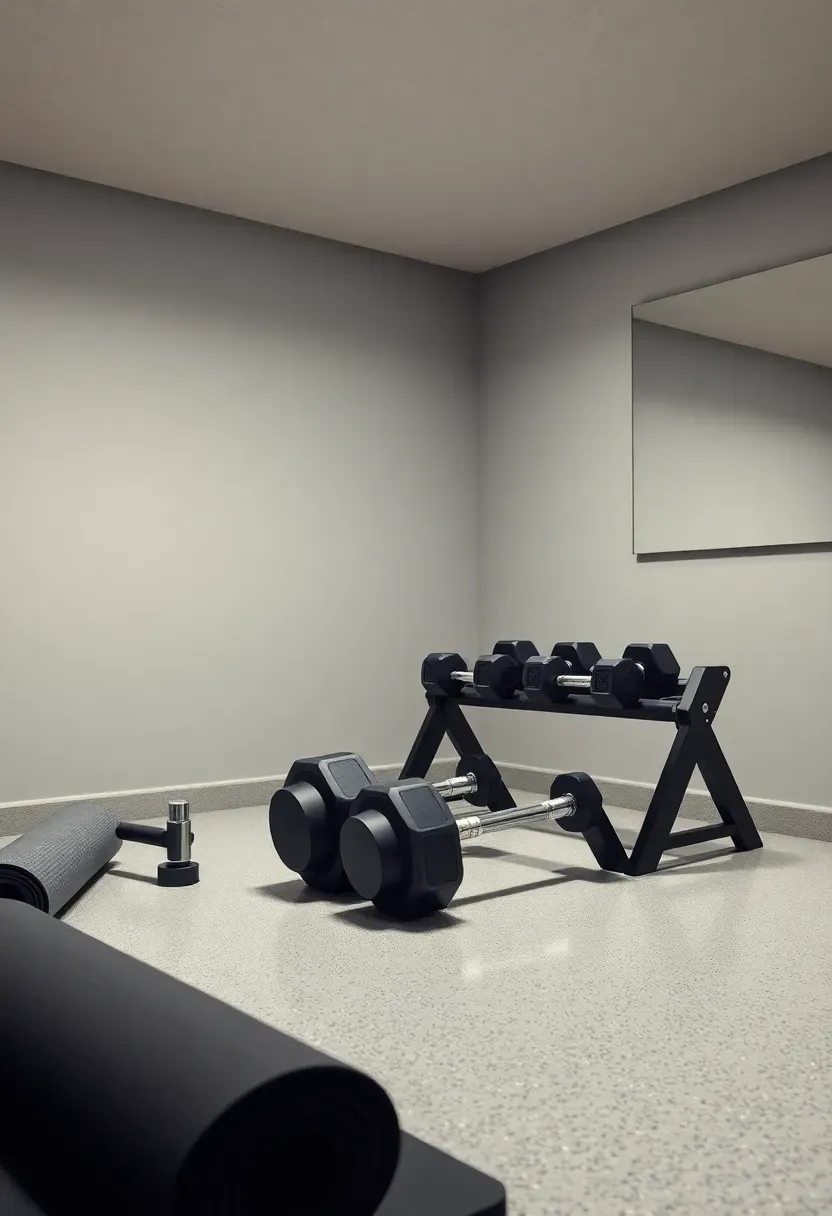
25. Anti-Slip Textured Coating
Basements prone to condensation or occasional water intrusion need a floor coating that stays grippy when wet. Anti-slip coatings contain fine aggregate — aluminum oxide, sand, or polymer beads — mixed into the paint or epoxy. The texture is subtle, like fine sandpaper, and does not feel rough underfoot with shoes on. This is the practical choice for walkout basements, laundry areas, home gyms, and workshop zones where spills happen. Drylok, Seal-Krete, and BEHR all make concrete floor coatings with built-in anti-slip grit, or you can broadcast the aggregate into any wet coating yourself.
Tips
- Fine aluminum oxide grit (60-80 mesh) gives the best balance between grip and cleanability
- Broadcast the grit into the first coat, then apply a second smooth coat on top — this locks the grit in place and makes mopping easier
- Reapply the top coat every 2-3 years in heavy-traffic zones to maintain the texture
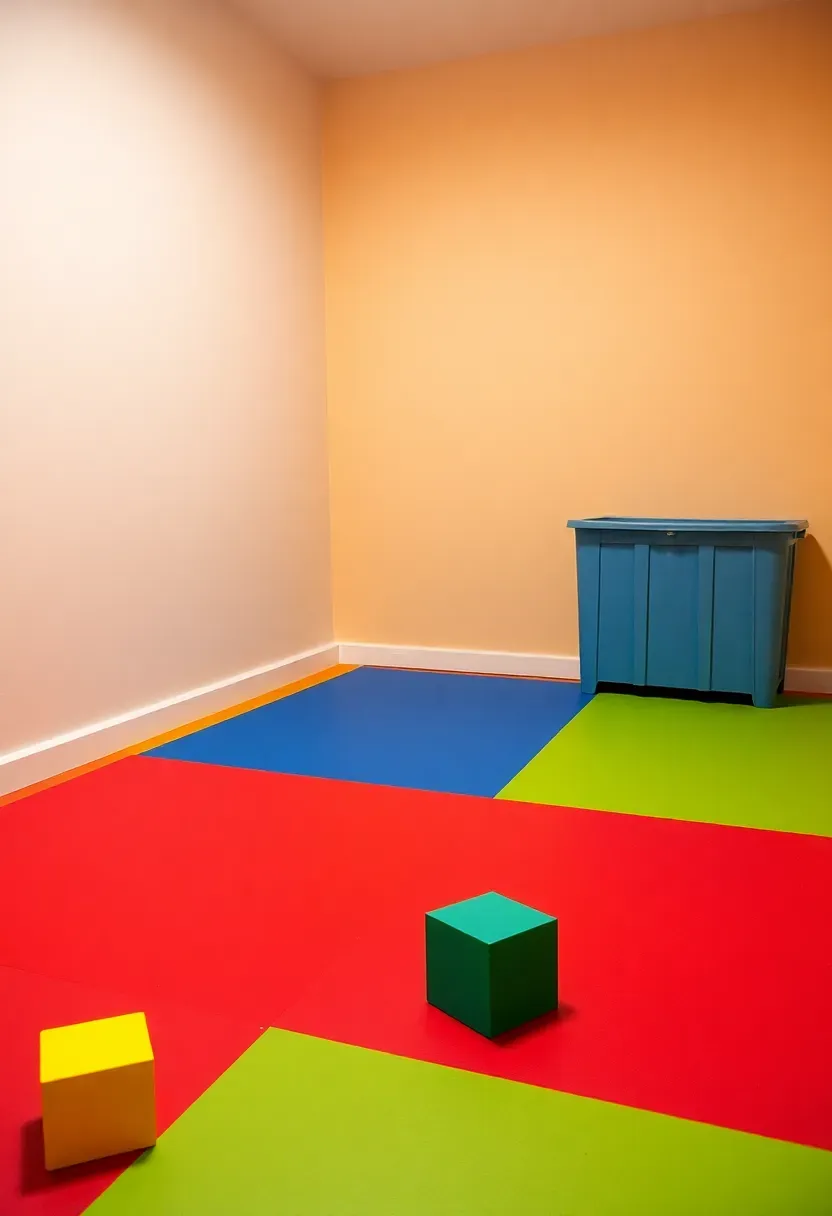
26. Color-Blocked Playroom Floor
For a kids' playroom, paint the floor in large color blocks — four to six bold sections in primary or pastel colors. Each block can define a play zone: red for the building area, blue for reading, yellow for art supplies, green for active play. The blocks teach spatial organization while making the room feel fun and intentional. Use painter's tape and floor paint in a satin finish that cleans up easily. The block sizes do not need to be equal — vary them based on how much space each activity requires.
Tips
- Use a low-VOC concrete floor paint since kids sit directly on the surface
- Apply a clear matte topcoat for easy cleanup of crayon, marker, and paint spills
- Soften the look with rounded block edges instead of hard lines — use flexible curve tape or freehand with a steady brush
Recommended
Items for this idea
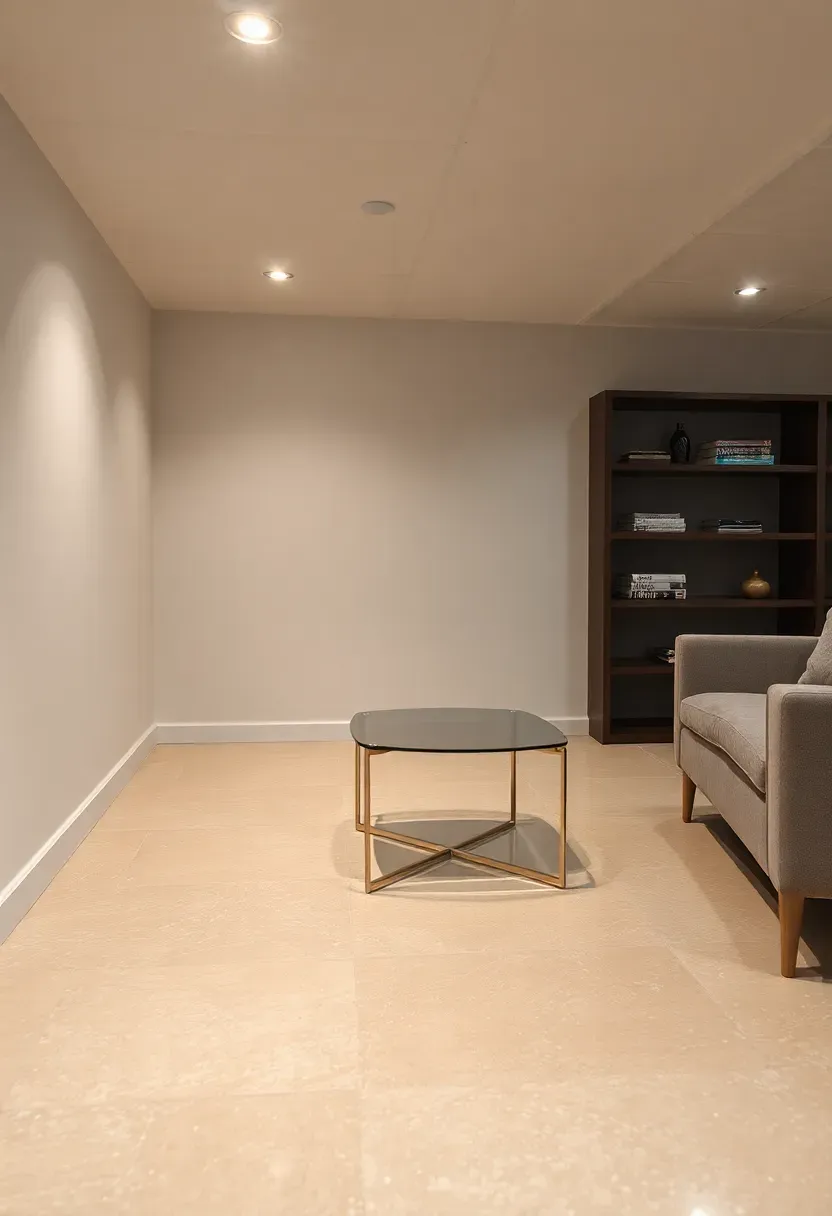
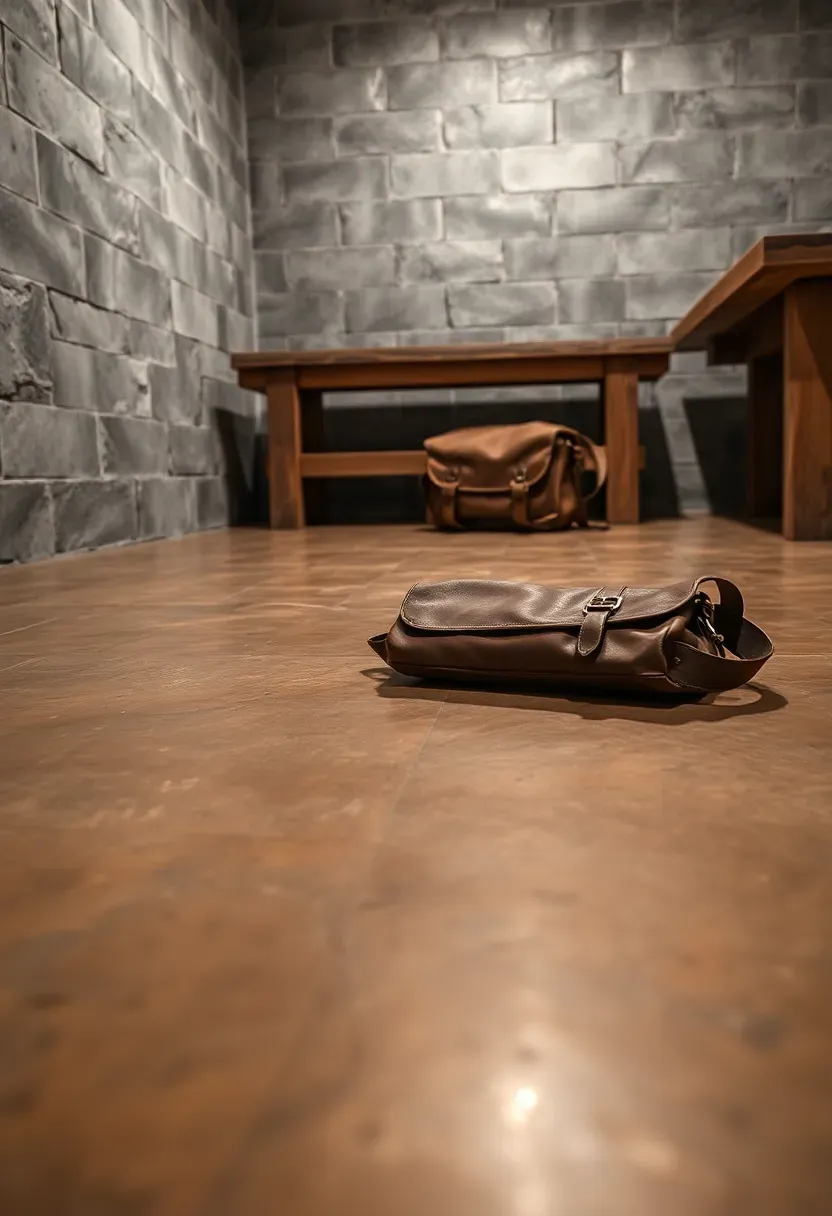
27. Tinted Polyurethane Sealer
The subtlest option
Sometimes the best approach to a basement floor is to leave it looking like concrete — just better concrete. A tinted polyurethane sealer deepens the natural color of your slab, adds a slight warm tone (amber, honey, or light gray), and protects the surface from dusting, staining, and moisture vapor. The concrete texture and character show through completely. This is the right choice if you like the industrial or minimalist look of raw concrete but want protection and a finished feel. Apply two coats with a lambswool applicator or T-bar for even coverage.
Pros and cons
- Pro: Fastest application of any option on this list — most floors take under two hours
- Pro: Does not hide the concrete's natural character, patches, and aggregate texture
- Con: Provides the least dramatic visual change; visitors may not realize you did anything at all
Quick FAQ
Does basement floor paint hold up to moisture? Epoxy and polyurea coatings handle surface moisture well, but no paint stops water coming through the slab from below. Test for vapor transmission first by taping a plastic sheet to the floor for 48 hours. If condensation forms underneath, you need a moisture-mitigating primer before any coating.
Which basement floor paint lasts the longest? Polyurea coatings last 15-20 years with normal use. Two-part epoxy lasts 5-10 years. Standard concrete floor paint lasts 2-5 years depending on traffic and preparation quality.
Can I paint over old basement floor paint? Yes, if the existing paint is well-adhered. Scuff it with 80-grit sandpaper, clean with TSP, and apply a bonding primer before your new coating. If the old paint is peeling, strip it completely — painting over loose paint guarantees failure.
How long before I can walk on a freshly painted basement floor? Light foot traffic is usually safe after 24 hours for latex floor paint and 48-72 hours for two-part epoxy. Full cure for heavy furniture and normal use takes 7 days for most products. Temperature and humidity affect these timelines significantly.
Is epoxy or concrete paint better for a basement floor? Epoxy is harder, more chemical-resistant, and lasts longer. Concrete paint is cheaper, easier to apply, and easier to recoat. Choose epoxy for high-traffic, long-term applications. Choose paint for low-traffic areas or when you want to change colors frequently.
A painted basement floor is one of those projects where the effort-to-impact ratio is genuinely in your favor. The materials are cheap, the tools are basic (roller, tray, tape), and the worst that happens if you dislike the result is you paint over it next year. Start with solid-color epoxy if you want reliability. Try a pattern if you want personality. Either way, you are turning a slab that nobody thinks about into a surface that actually contributes to the room.
Pinterest cover for 27 Basement Floor Paint Ideas
About the author
OBCD
CGI visualization and interior design content. We create detailed 3D renders and curate practical design ideas for every room in your home.