23 Basement Remodeling Ideas
Most basements start the same way — concrete walls, exposed pipes, a pull-chain light bulb, and a pile of boxes nobody has opened since the last move. It is easy to forget that this is usable square footage, sometimes 800 to 1,200 square feet sitting idle beneath your main floor. A basement remodel does not need to happen all at once. Some of the best finished basements I have seen were done in phases over two or three years, tackling moisture issues first, then framing and electrical, then finishes. The key is having a clear plan for how you want to use the space before you start swinging a hammer.
Here are 23 basement remodeling ideas organized from structural upgrades through dedicated rooms to finishing details.
Table of Contents
- Open Concept Layout
- Drop Ceiling with Recessed Lights
- Exposed Ceiling with Painted Joists
- Egress Window Installation
- Built-In Storage Wall
- Wet Bar with Sink and Mini Fridge
- Dedicated Home Theater
- Basement Guest Suite
- Full Laundry Room
- Kids Play Area with Rubber Flooring
- Home Gym with Mirror Wall
- Craft and Hobby Room
- Wine Cellar Nook
- Basement Office with Soundproofing
- Bathroom Addition
- Game Room with Pool Table
- Daylight Basement Sunroom
- Mudroom Entry from Garage
- Music Practice Room
- Sauna or Steam Room
- Under-Stair Pantry Conversion
- Basement Kitchenette
- Multi-Zone Family Space
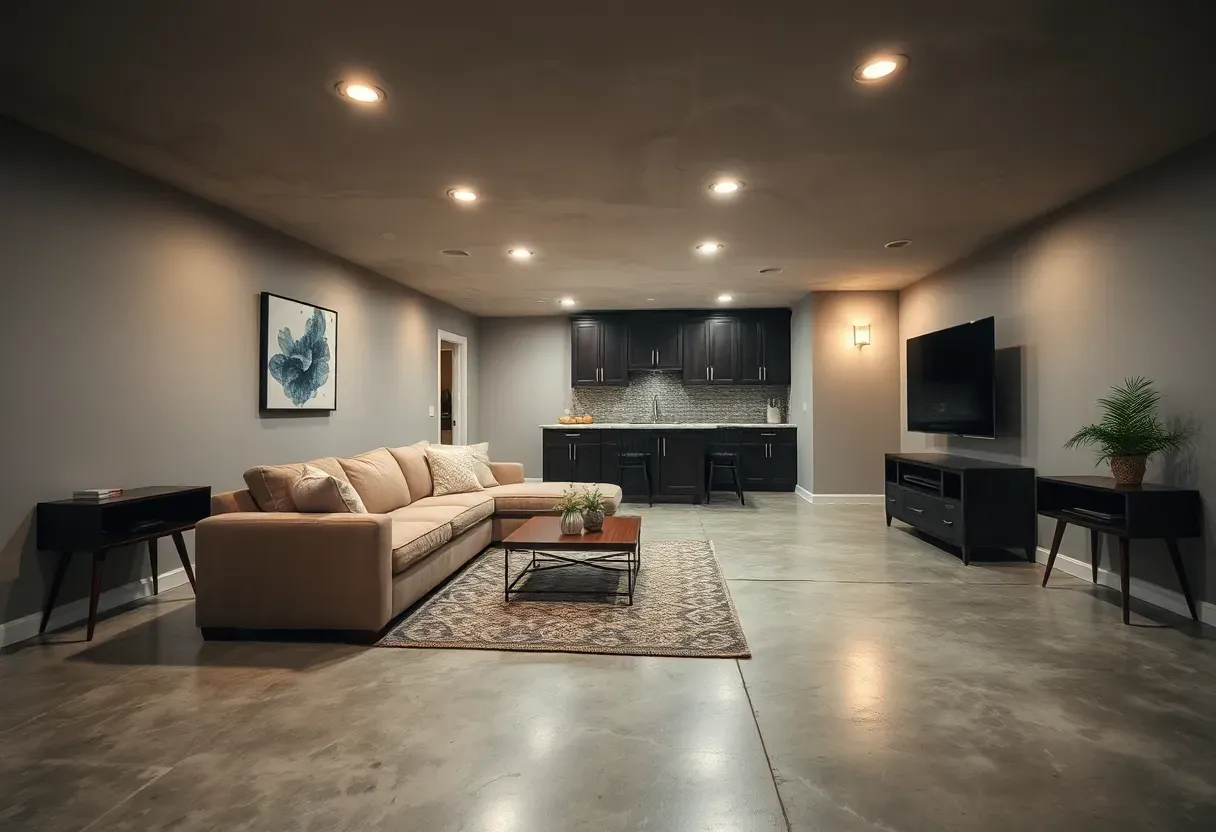
1. Open Concept Layout
Knocking down non-load-bearing partition walls is often the single most impactful move in a basement remodel. Most basements were originally divided into small utility rooms that made sense when the space was purely mechanical, but a finished basement benefits from sight lines and airflow. An open floor plan lets natural light from any windows reach deeper into the space. You define zones with furniture groupings, area rugs, and ceiling-mounted track lighting rather than drywall. Budget roughly $1,500 to $3,000 for demo and patching on a typical half-wall removal, assuming no plumbing or electrical rerouting.
Tips
- Have a structural engineer confirm which walls are load-bearing before demo day — steel beam headers can replace bearing walls but add $4,000 to $8,000
- Use different flooring materials to visually separate zones without building walls
- A single long ceiling beam with pendant lights creates a natural divider between living and dining areas
We picked a few things that go well with this idea: Amico 6-Inch LED Recessed Lights (12-Pack) (★4.7), Amico 5CCT Retrofit LED Can Lights (12-Pack) (★4.5) and Ensenior Dimmable LED Recessed Lights (12-Pack) (★4.7). As an Amazon Associate we earn from qualifying purchases.
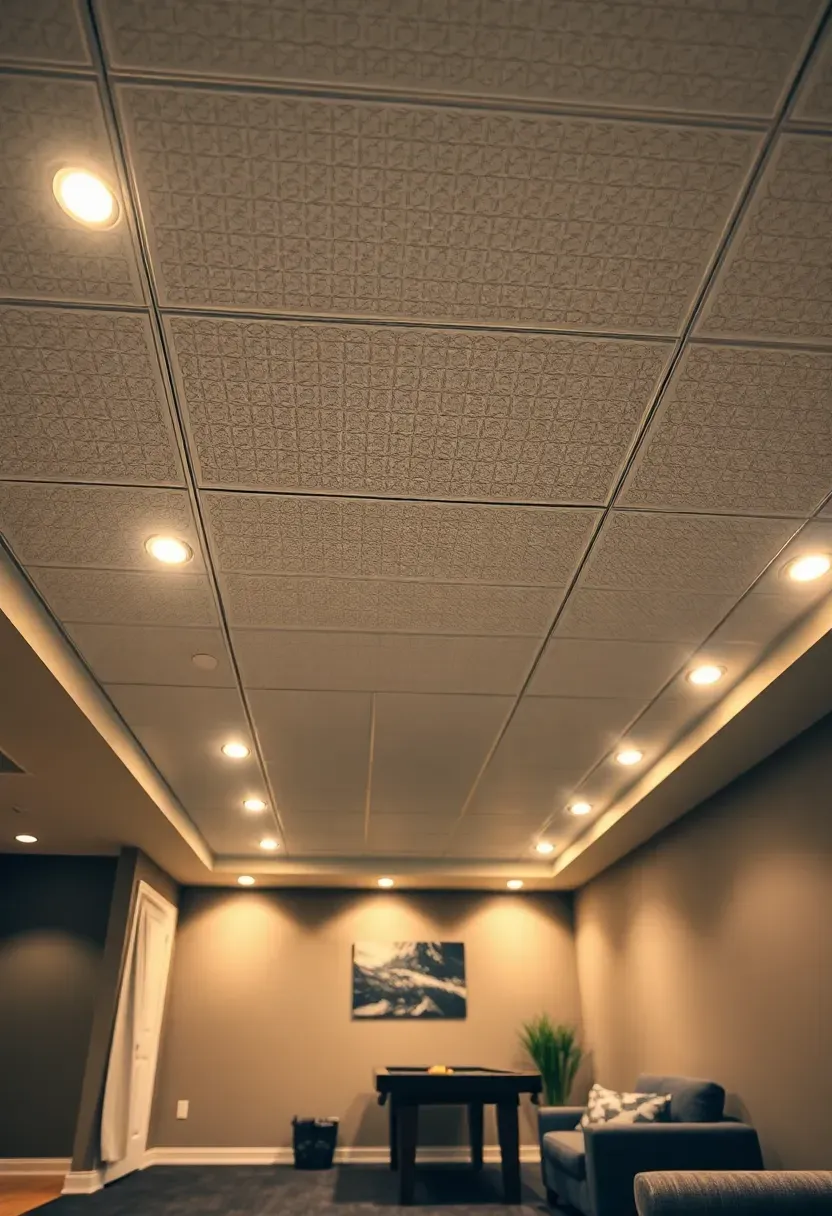
2. Drop Ceiling with Recessed Lights
Why drop ceilings still make sense
Suspended ceilings get dismissed as outdated office fixtures, but modern drop ceiling tiles look nothing like the yellowed panels from the 1980s. The real advantage is access. Every pipe, wire, and duct above those tiles remains reachable without cutting into drywall. For basements where plumbing runs overhead or HVAC ducts cross the room, that maintenance access saves thousands over the life of the house.
Modern options
Today's tiles come in smooth paintable surfaces, faux wood grain, and even coffered patterns. Pair them with slim LED recessed lights rated for plenum spaces. The total ceiling drop is usually 3 to 4 inches from the bottom of the joists, which matters less than people expect when you start at 8-foot ceilings.
Choose drop ceiling if
- Your basement has multiple plumbing drains or HVAC runs crossing the ceiling
- You want even lighting without surface-mount fixtures
- Future maintenance access matters more than maximum ceiling height

We picked a few things that go well with this idea: ProsourceFit Interlocking Floor Tiles (36-Pack) (★4.6), bemaxx EVA Interlocking Gym Floor Tiles (18-Pack) (★4.4) and PRAISUN Thick Rubber Gym Floor Mats (12-Pack) (★4.7). As an Amazon Associate we earn from qualifying purchases.
3. Exposed Ceiling with Painted Joists
Painting the entire joist bay — joists, subfloor, pipes, ducts, everything — one uniform dark color is the fastest way to make a basement ceiling look intentional. Matte black is the go-to, but dark charcoal and deep navy also work. The uniform color makes the eye skip over mechanical clutter instead of cataloging every pipe and wire. You gain every inch of ceiling height since nothing is being lowered. A single weekend with a paint sprayer covers most basement ceilings. Use a bonding primer first so paint adheres to metal ducts and PVC pipes alongside the wood.
Tips
- Wrap any fiberglass insulation in black landscape fabric before painting — paint alone will not hide the texture
- Spray rather than roll; the irregular surfaces have too many angles for a roller to reach efficiently
- Hang pendant lights at varying heights to draw the eye downward and away from the busy ceiling plane
We picked a few things that go well with this idea: VEAGASO 34-Pint Basement Dehumidifier (2500 Sq Ft) (★4.5), AEOCKY 80-Pint Smart Dehumidifier (4500 Sq Ft) (★4.5) and Waykar 80-Pint Energy Star Dehumidifier (5000 Sq Ft) (★4.3). As an Amazon Associate we earn from qualifying purchases.
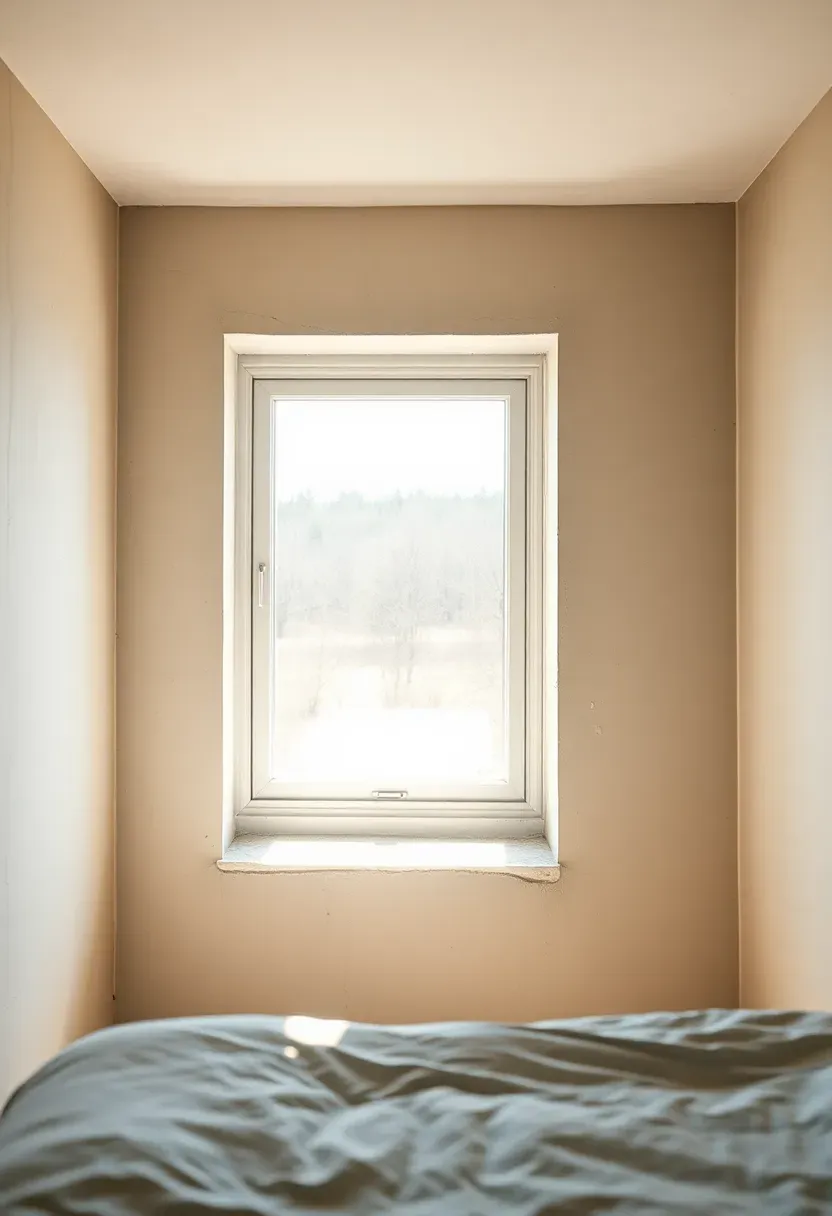
4. Egress Window Installation
The code requirement most people miss
If you plan to call any basement room a bedroom, building code in most jurisdictions requires an egress window — a window large enough for a person to climb through in an emergency. The minimum opening is typically 5.7 square feet with no dimension less than 20 inches wide and 24 inches tall. The sill height must be no more than 44 inches from the finished floor.
What the project involves
Installation means cutting through your foundation wall, which sounds dramatic but is routine for contractors who specialize in it. Expect $2,500 to $5,000 per window including the window well, drainage, and finishing. The payoff goes beyond code compliance — egress windows bring in real daylight that changes how the entire basement feels.
Watch out for
- Verify utility line locations before cutting the foundation — gas, water, and electrical often run along basement walls
- The window well needs its own drain connected to your footing drain or a small sump pit
- Polycarbonate window well covers keep rain and leaves out while still allowing the window to open
Recommended
Items for this idea
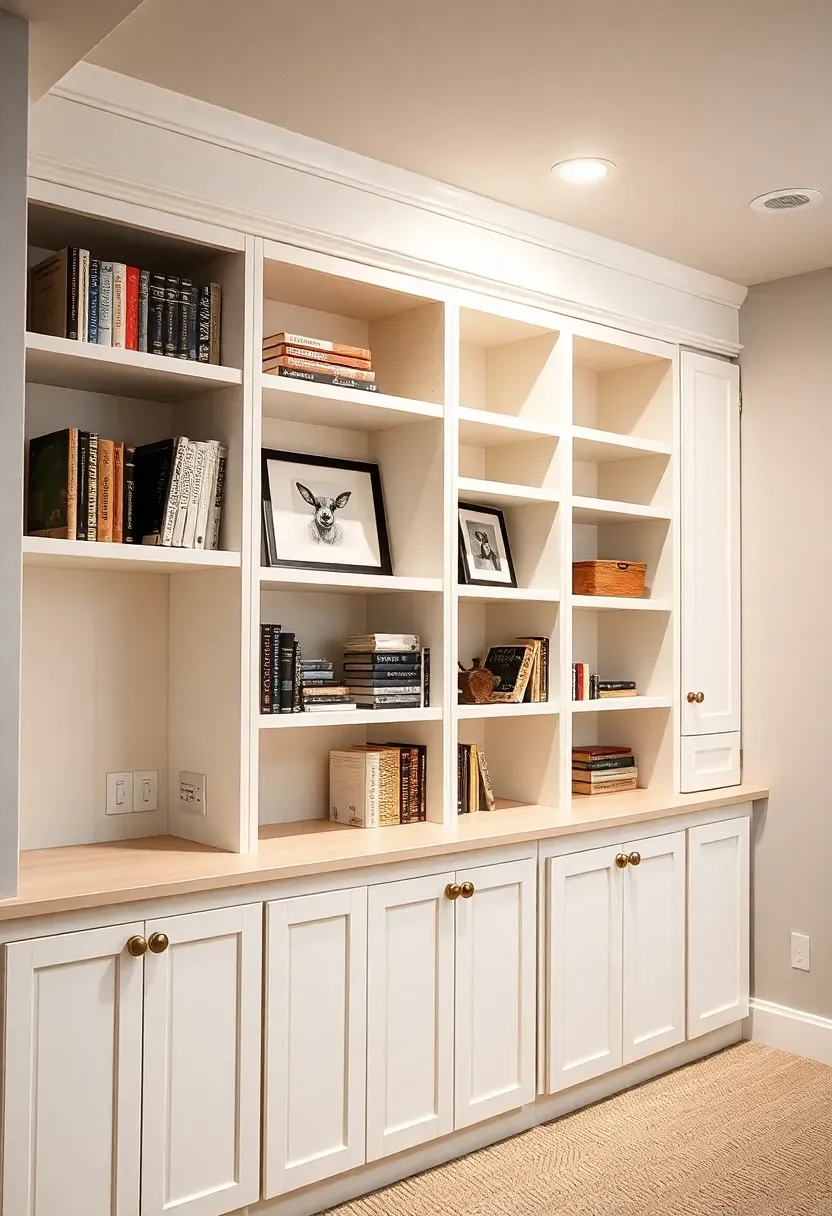
5. Built-In Storage Wall
A full-wall built-in turns dead basement wall space into organized storage without eating floor area the way freestanding shelves and cabinets do. The most functional designs mix open shelving up top for display items with closed cabinets below for things you want hidden. Base cabinets with doors keep seasonal gear, tools, and holiday decorations dust-free. Upper open shelves hold books, photos, or decorative objects that make the basement feel like a real living space. Use 3/4-inch plywood rather than particle board for shelves that will not sag under load over the years.
Tips
- Build the unit 12 to 16 inches deep — deep enough for storage bins but shallow enough that it does not dominate the room
- Paint built-ins the same color as the wall to make them recede, or a contrasting color to make them a feature
- Include at least one section with adjustable shelf pins so you can reconfigure as storage needs change
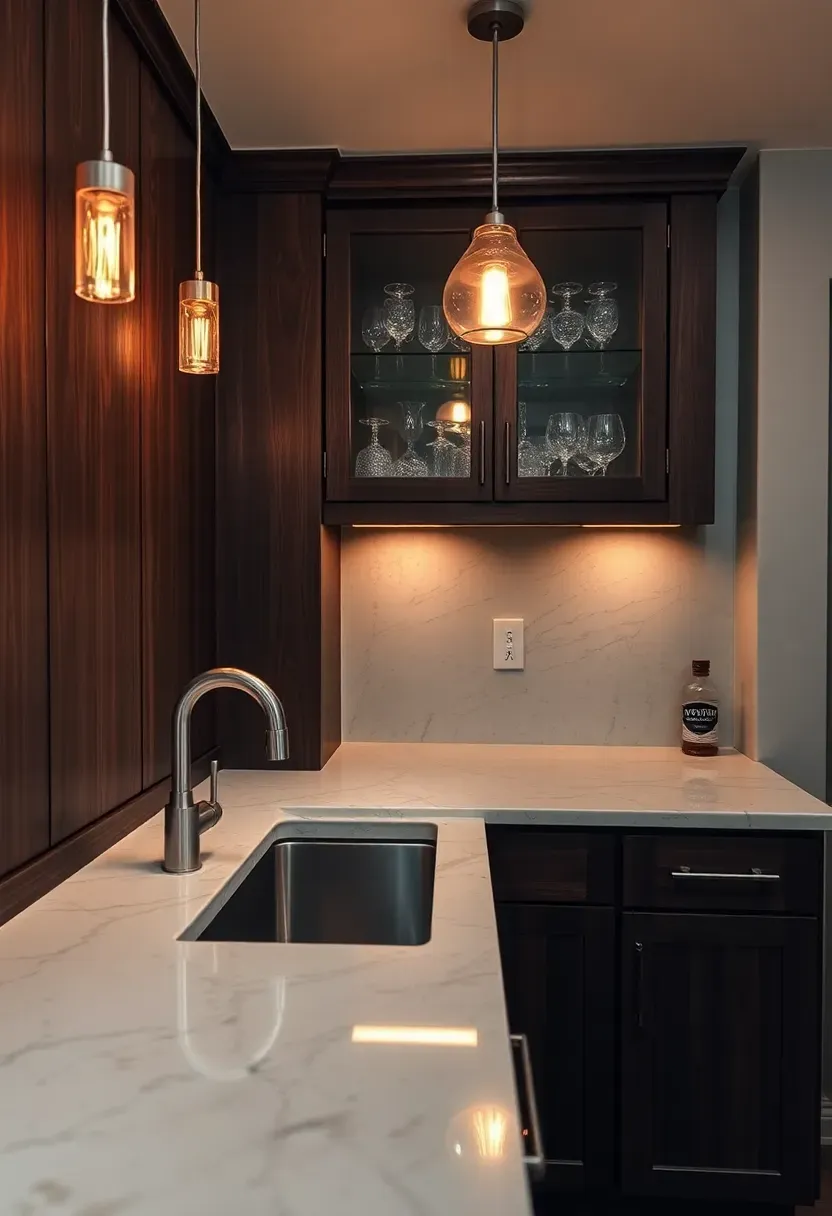
6. Wet Bar with Sink and Mini Fridge
A wet bar gives the basement its own beverage station so nobody has to run upstairs during movie night or a football game. The minimum footprint is about 6 linear feet of counter space with an undermount bar sink, an under-counter mini fridge, and some glass shelving or cabinetry above. Running water supply lines is straightforward if you are near existing basement plumbing. The drain is the harder part — if your main drain is above the bar location, you will need a small sewage ejector pump or a macerating pump, which adds $800 to $1,200 to the project.
Pros and cons
- Pro: Keeps traffic and mess out of the upstairs kitchen during gatherings
- Pro: Adds resale value — finished basements with wet bars consistently appraise higher
- Con: Plumbing adds cost and complexity versus a dry bar with just a fridge and counter
- Con: Requires a dedicated 20-amp circuit for the fridge and any blender or ice maker

Recommended
Items for this idea
7. Dedicated Home Theater
Basements are naturally suited for home theaters. No windows to cause glare, solid concrete walls that block exterior noise, and enough distance from upstairs bedrooms that late-night movie volume is not a problem. The dedicated approach means building a separate enclosed room — not just mounting a TV in the rec room. Frame the walls with staggered studs or resilient channel to decouple them from the structure, fill cavities with mineral wool insulation, and use double layers of 5/8-inch drywall. This assembly cuts sound transmission by 15 to 20 decibels compared to standard framing.
Steps to plan
- Choose screen size first and work backward — a 120-inch screen needs at least 12 feet of viewing distance for the front row
- Wire for 5.1 or 7.1 surround during framing, before drywall goes up
- Build a riser for the second row of seats using 2x10 joists on a plywood platform — 8 inches of rise is enough
- Install dimmable LED rope lighting along the riser step edges for safety
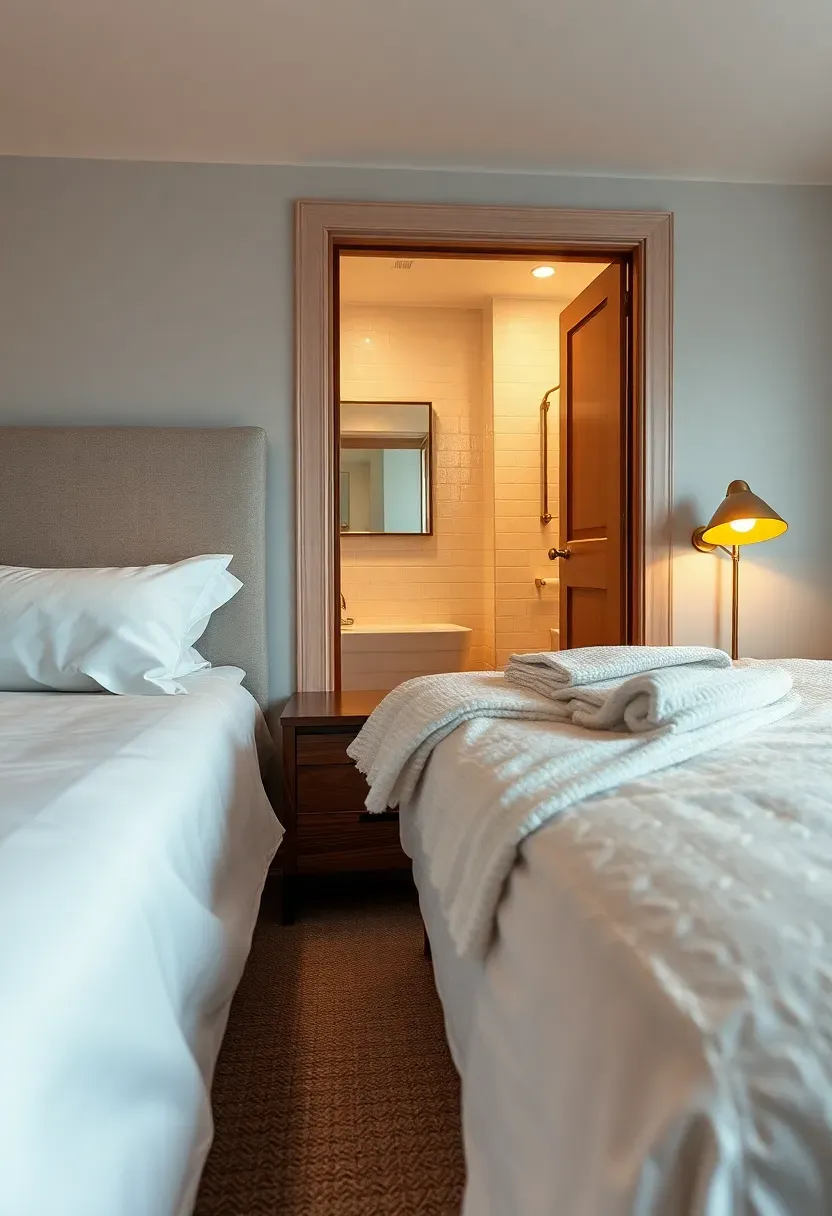
8. Basement Guest Suite
Making guests actually comfortable underground
A guest suite is more than a bed in the basement. Guests need privacy, their own bathroom access, a place to set a suitcase, and enough lighting that the room does not feel like a cave. Start with an egress window (see idea 4) — it is required by code if you are calling this a bedroom, and guests will notice the daylight. Add a full or queen bed, two nightstands, a small dresser or closet alcove, and a dedicated bathroom or at least a half-bath nearby.
Finishing details
- A solid-core door (not hollow-core) blocks sound between the guest room and the rest of the basement
- Provide a white noise machine or fan — basement mechanical equipment can cycle on and off at night
- Include a luggage rack or bench at the foot of the bed so guests are not living out of a suitcase on the floor
Recommended
Items for this idea
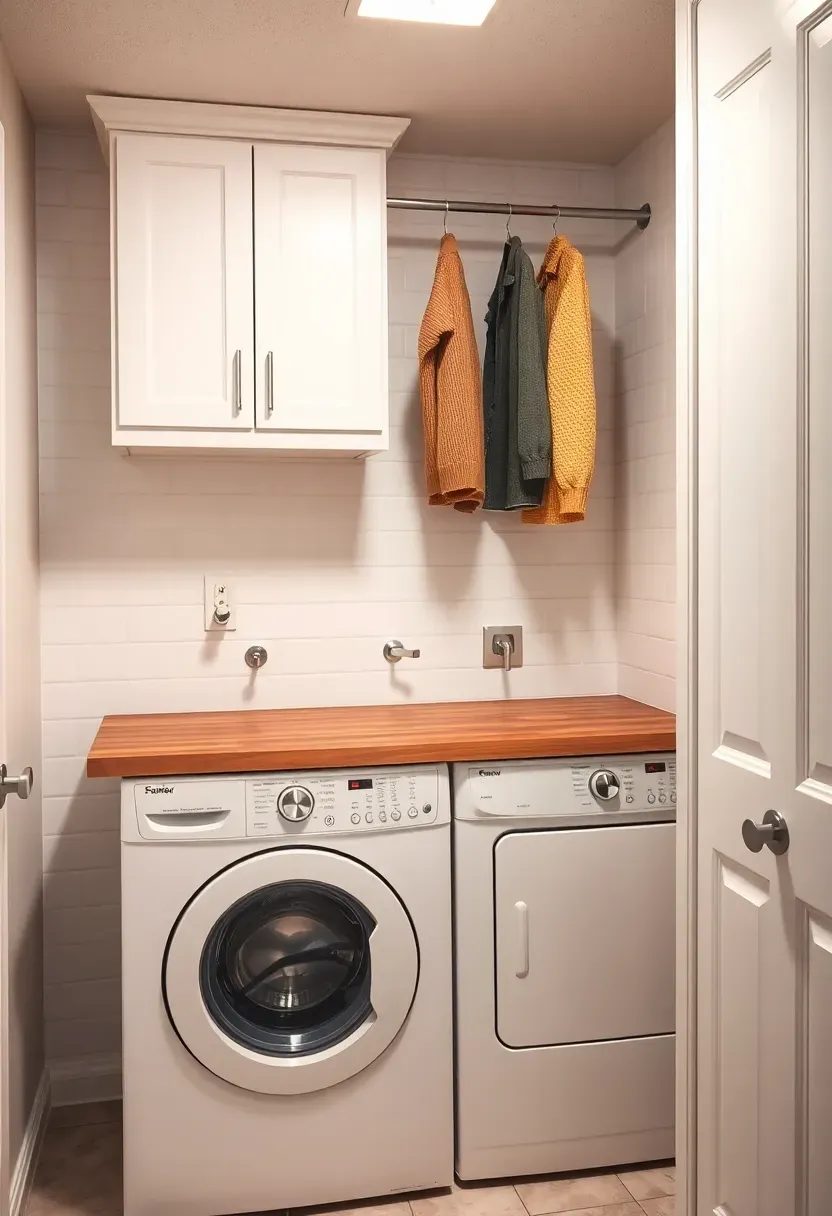
9. Full Laundry Room
Moving laundry to the basement makes practical sense in many homes because the water supply, drain stack, and gas line are already there. A dedicated laundry room — not just a washer and dryer in a corner — includes a folding counter at 36 inches high, an overhead hanging rod for air-dry items, cabinetry for detergent and supplies, and a utility sink for hand washing or soaking. If you are starting from scratch, position the washer on an exterior wall to keep the dryer vent run as short as possible. Shorter vents dry clothes faster and reduce fire risk from lint buildup.
Tips
- Install a floor drain within 3 feet of the washer in case of overflow or hose failure
- Use moisture-resistant drywall (green board or purple board) on walls behind the machines
- A retractable clothesline mounted between two walls gives you 15 feet of drying space that disappears when not in use
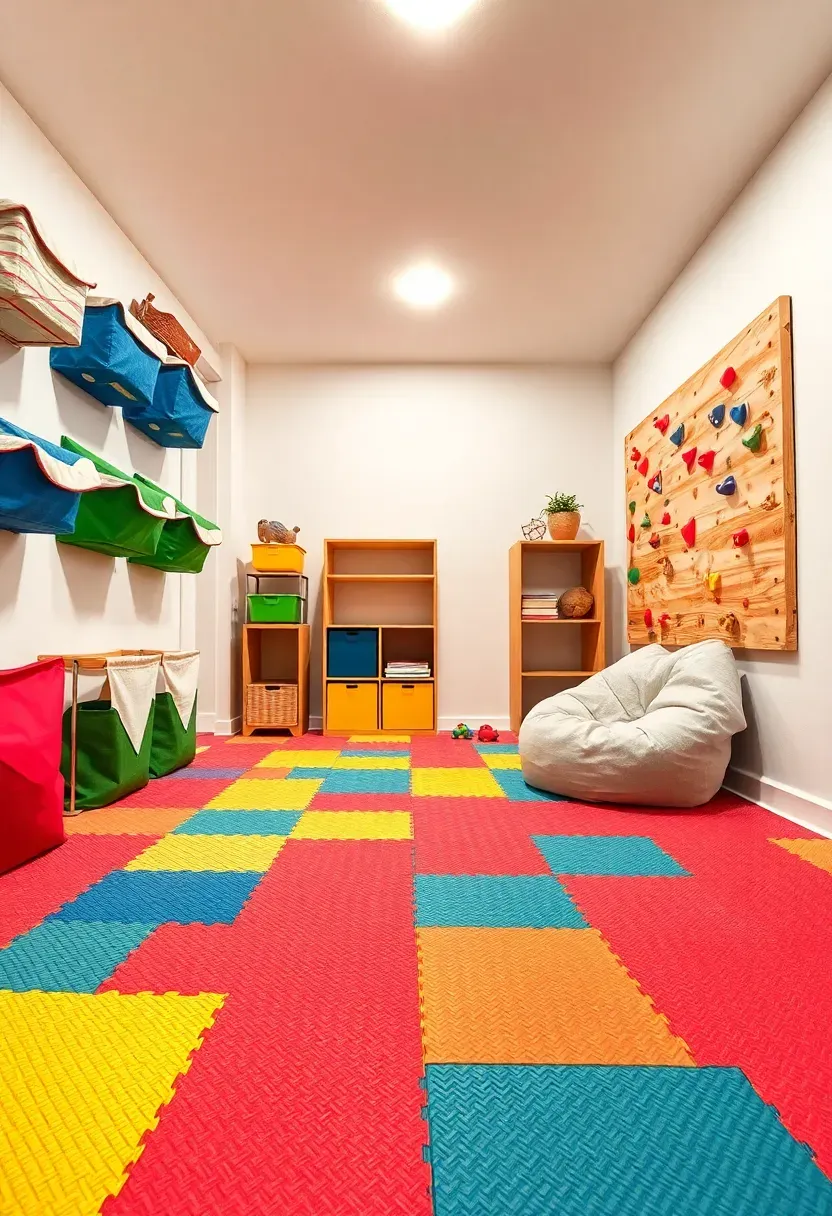
10. Kids Play Area with Rubber Flooring
Basements handle kid chaos better than any other room in the house. Concrete subfloors do not care about spilled paint or dropped toys, and the sound isolation means the rest of the household gets a break. The key upgrade is flooring — interlocking rubber tiles (the same kind used in gym floors) come in 2x2-foot squares, install without adhesive, and cushion falls. They run $2 to $5 per square foot. Wall-mounted bins and pegboard keep toys off the floor and visible so kids actually put things back. Dedicate one corner to a reading nook with a beanbag and a low bookshelf.
Watch out for
- Check basement humidity before installing any flooring directly on concrete — moisture readings above 75% relative humidity need a vapor barrier first
- Avoid carpet tiles in play areas; they absorb spills and harbor dust mites in the humid basement environment
- Mount a baby gate at the top of the basement stairs, not the bottom, if small children are using the space
Recommended
Items for this idea
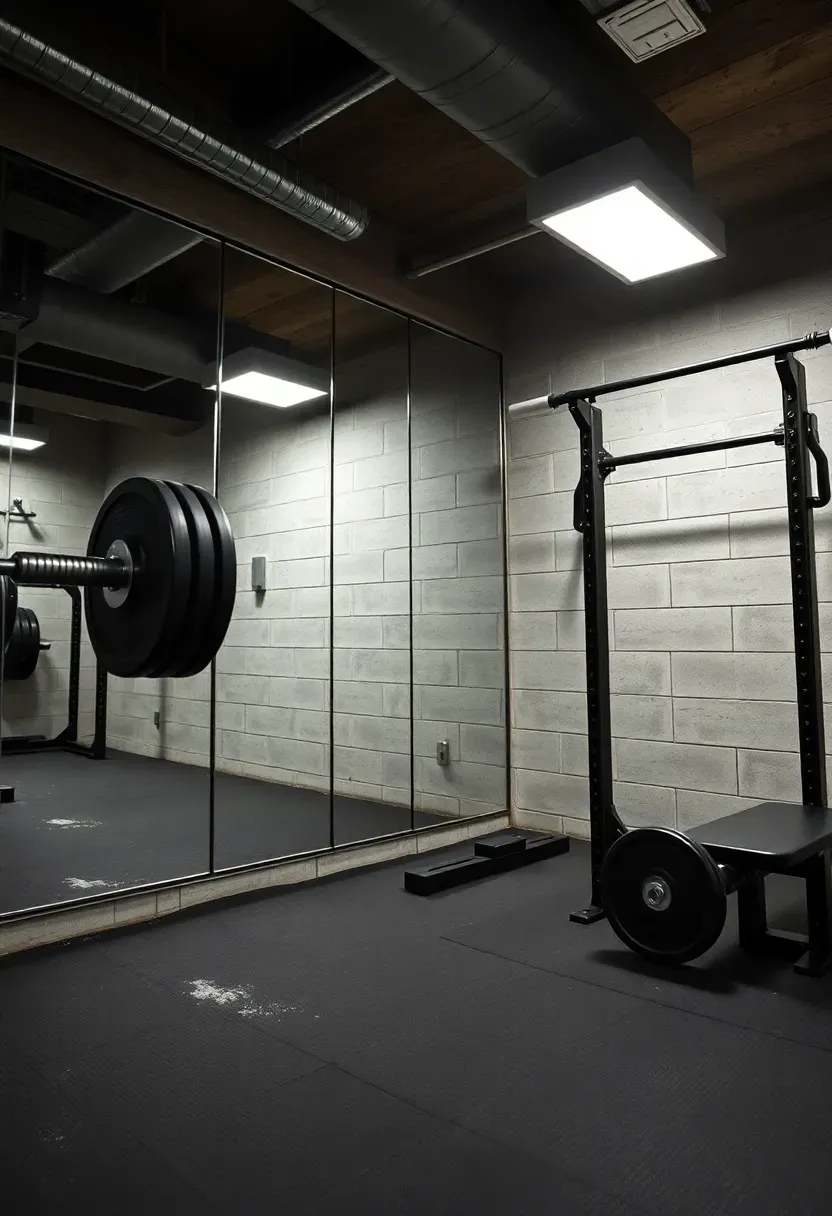
11. Home Gym with Mirror Wall
Setting up properly
A basement gym needs three things most home gym guides skip: adequate ceiling height for overhead presses (7.5 feet minimum for most people), proper ventilation since basements lack natural airflow, and a floor that protects both the concrete and your joints. Rubber horse stall mats from a farm supply store are the best value — 4x6-foot mats, 3/4-inch thick, roughly $45 each. They absorb dropped weights, do not shift, and last decades.
The mirror wall difference
A full mirror wall along one side does double duty. It lets you check form during lifts and visually doubles the apparent size of the room. Use 1/4-inch mirror panels from a glass supplier rather than gym mirror tiles — the panels give a seamless reflection without wavy distortion at the seams.
Choose this if
- You are paying $50 or more monthly for a gym membership you use inconsistently
- You want a workout space that is private and always available
- Your basement has at least a 12x14-foot clear area to dedicate
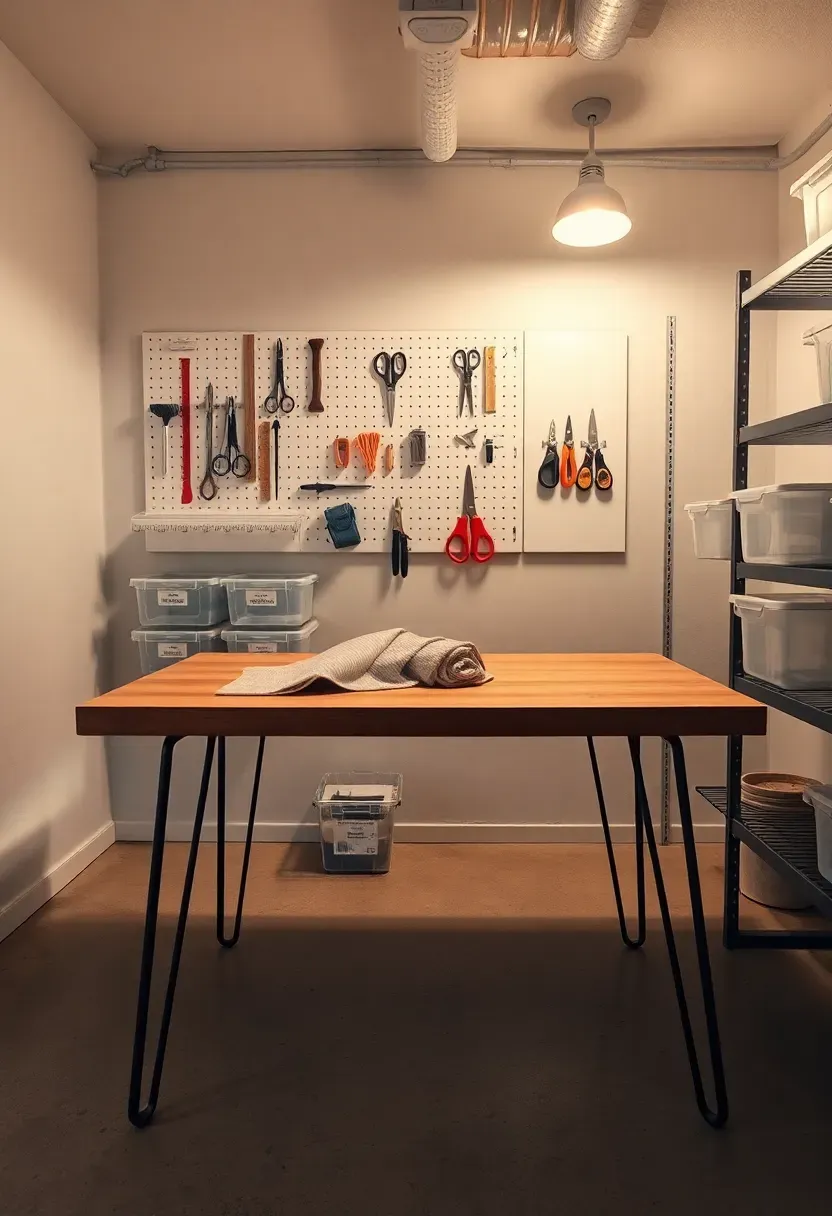
12. Craft and Hobby Room
Crafting supplies expand to fill whatever space you give them. A basement craft room works because you can leave projects in progress without cluttering the main living areas. The centerpiece is a large worktable — a solid-core door on adjustable-height legs gives you a 3x7-foot surface for under $150. Surround it with vertical storage: pegboard walls for frequently used tools, clear-front bins on shelving for fabric, paper, or beads, and a dedicated cutting mat area. Good task lighting is non-negotiable — mount two 4-foot LED shop lights directly above the worktable for shadow-free illumination.
Tips
- A rolling cart with drawers lets you bring supplies to the table and roll them back to the wall when you need the surface clear
- Install a paper towel holder and a small trash can within arm's reach of the main work surface
- If you use a Cricut or sewing machine, add a dedicated outlet strip at table height to avoid cord tangles on the floor
Recommended
Items for this idea
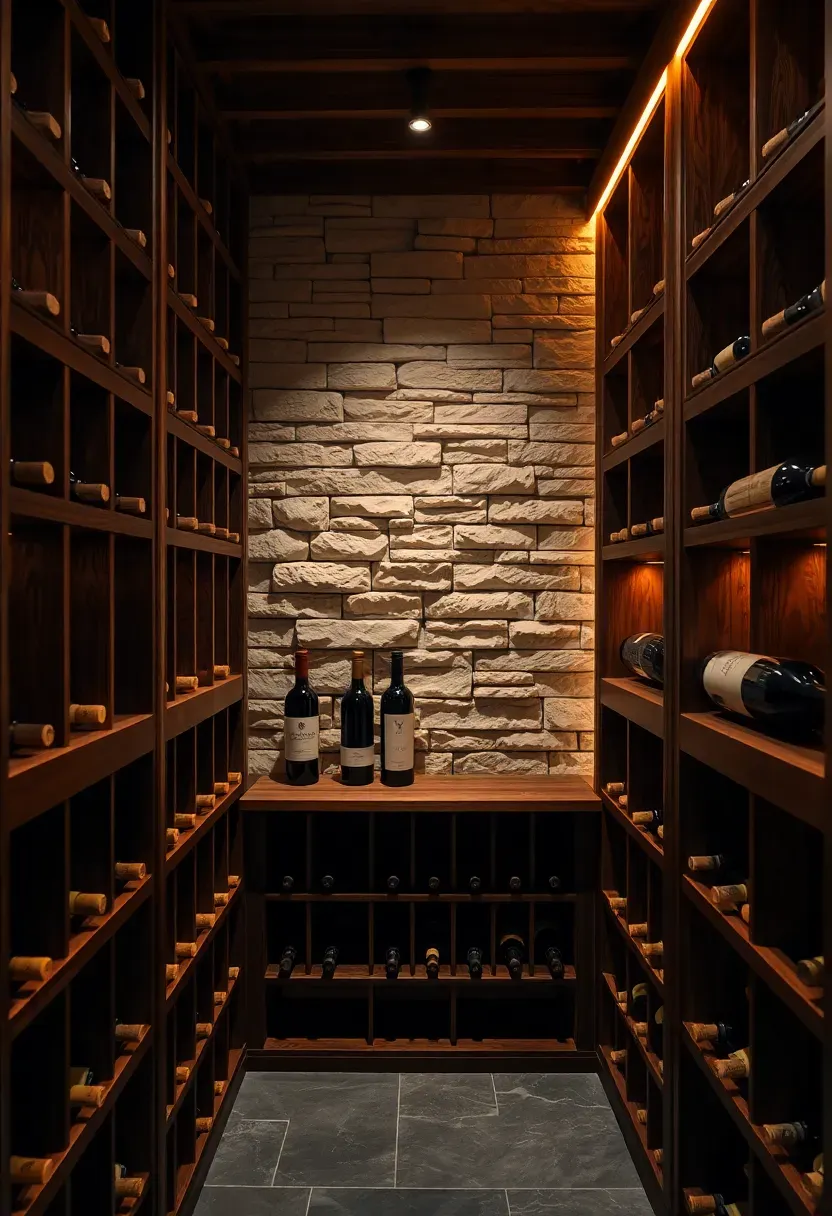
13. Wine Cellar Nook
You do not need an entire room. A closet-sized alcove — 4 feet wide by 6 feet deep — holds 200 to 300 bottles when fitted with floor-to-ceiling racking. Basements already run cooler and more stable in temperature than upper floors, which is exactly what wine needs. The critical addition is a small cooling unit if your basement temperatures exceed 65 degrees Fahrenheit in summer. Through-wall wine coolers sized for closets run $500 to $1,500 and maintain 55-degree temps reliably. Insulate the nook walls and install a solid or glass-pane door to keep the cool air contained.
Pros and cons
- Pro: Basements naturally provide the darkness and stable temps wine storage requires
- Pro: A compact nook costs a fraction of a full cellar buildout — $2,000 to $4,000 total
- Con: Humidity control matters; too dry corks shrink, too wet labels mold — aim for 60 to 70 percent
- Con: Glass doors look great but insulated solid doors maintain temperature more efficiently
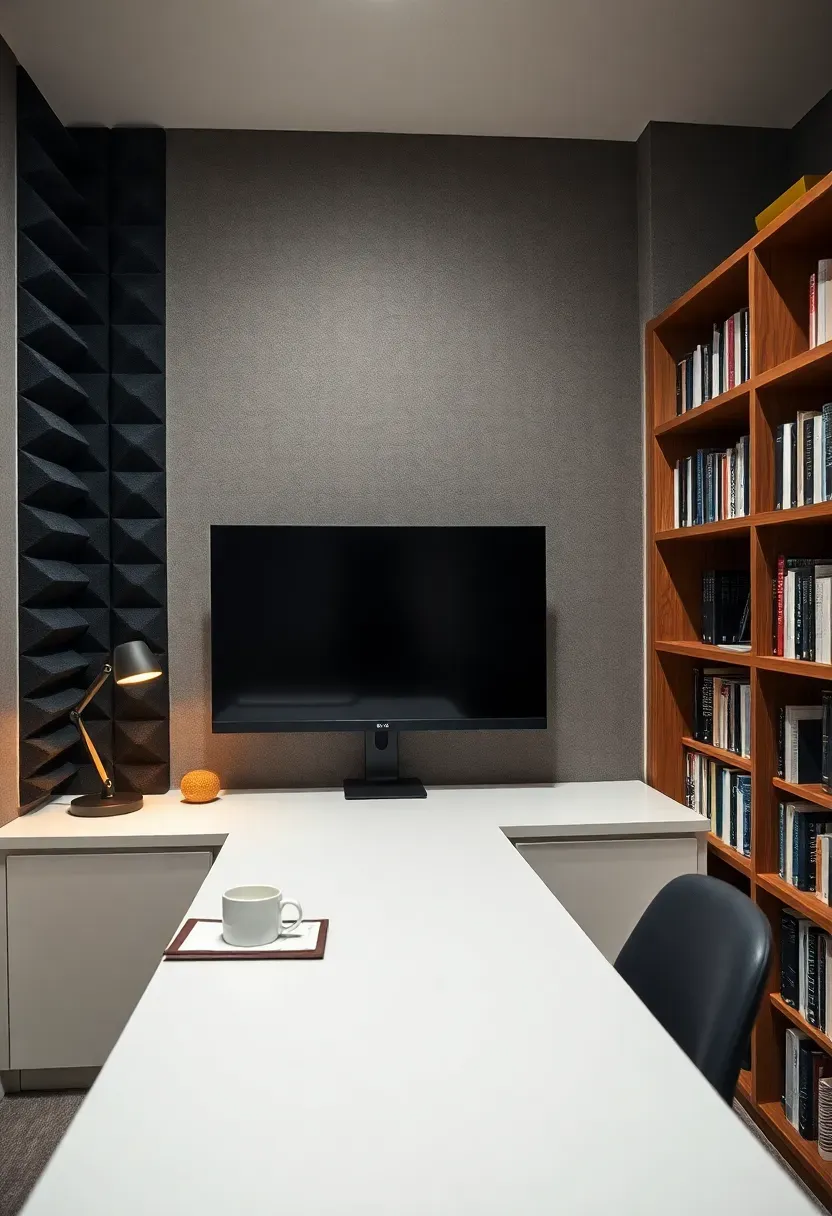
14. Basement Office with Soundproofing
Working from home in a basement puts you below the footsteps, vacuum cleaners, and dog barking that plague main-floor offices. Add deliberate soundproofing and you get a workspace quieter than most commercial offices. The basics: insulate interior walls with mineral wool batts (better sound absorption than fiberglass), use resilient channel on at least the ceiling to decouple drywall from joists, and install a solid-core door with weatherstripping on all four edges. These three moves cut sound transmission enough that video calls sound professional without background noise.
Steps to set up
- Frame walls with 2x4 studs 16 inches on center, fill cavities with mineral wool
- Install resilient channel horizontally on ceiling joists, 24 inches on center, then attach drywall to the channel only
- Add a solid-core prehung door with an automatic door bottom sweep
- Run two dedicated 20-amp circuits — one for computer equipment, one for lighting and HVAC — to avoid tripping breakers during video calls
Recommended
Items for this idea
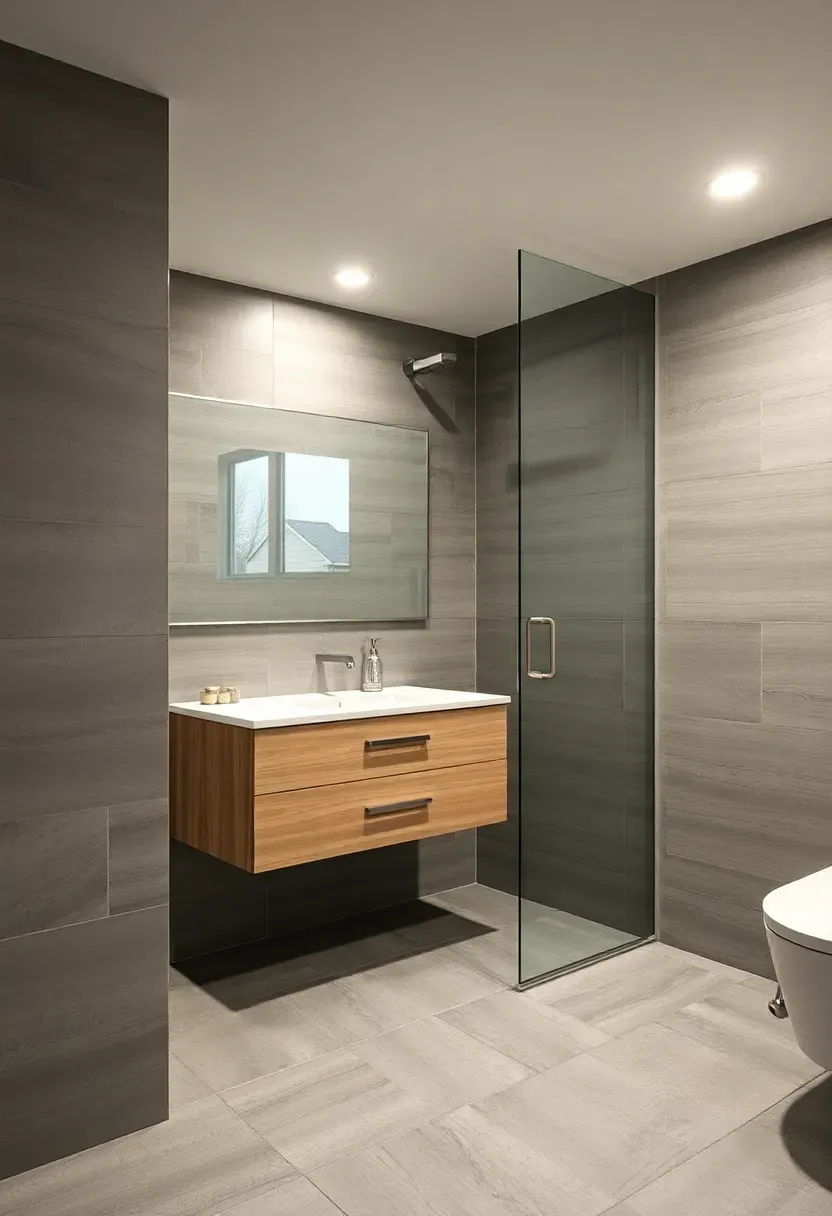
15. Bathroom Addition
Adding a bathroom is the single upgrade that makes every other basement idea work better. A home theater without a nearby bathroom means guests traipse upstairs. A guest suite without its own bath is just a bedroom in the basement. The cost driver is the drain — if your main sewer line runs under or through the basement slab, gravity drainage works and costs are moderate ($8,000 to $15,000 for a basic three-piece bath). If the sewer exits above the basement floor level, you need an up-flush system or sewage ejector pit, adding $2,000 to $3,500 to the project.
Tips
- A curbless walk-in shower feels more spacious than a tub/shower combo in a basement where every inch of openness counts
- Large format tiles (12x24 or bigger) have fewer grout lines, which reduces moisture entry points and mold risk
- Install a bathroom exhaust fan ducted to the exterior even if code in your area does not require it for below-grade baths
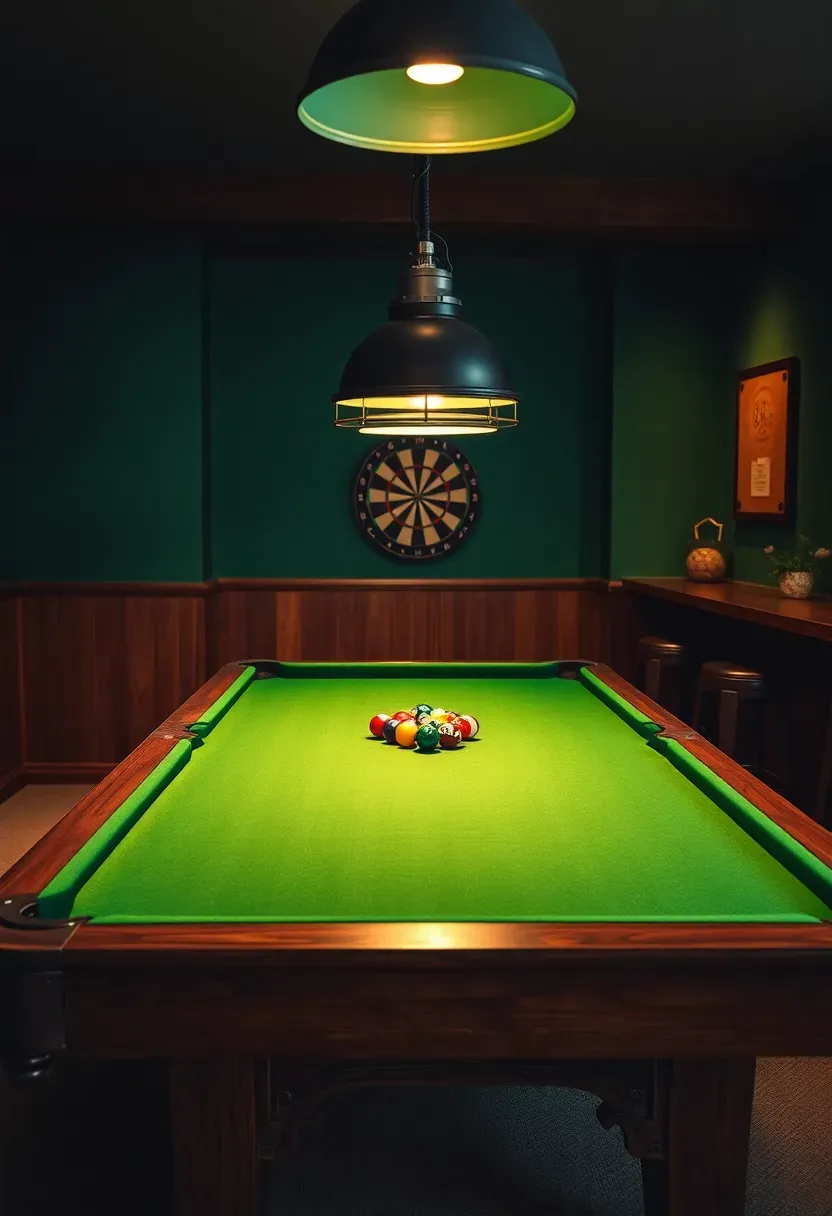
16. Game Room with Pool Table
A regulation 8-foot pool table needs a room at least 13 feet by 17 feet to allow full cue swing on all sides — measure your basement before you start shopping. The table itself weighs 700 to 1,000 pounds, so the concrete slab is actually the ideal surface since it will never flex or settle like a wood subfloor. Position the table under a pair of pendant lights hung 32 to 36 inches above the playing surface for even, glare-free illumination. Surround the table with wall-mounted cue racks, a dartboard zone with a protective surround, and a small seating area with bar-height stools.
Pros and cons
- Pro: Concrete basements are the most stable foundation for a pool table — no shimming needed
- Pro: The enclosed space keeps noise contained during rowdy game nights
- Con: Getting a one-piece slate table down basement stairs may require disassembly and professional reassembly ($300 to $500)
- Con: You need clear overhead height of at least 7.5 feet for comfortable cue handling on elevated shots
Recommended
Items for this idea
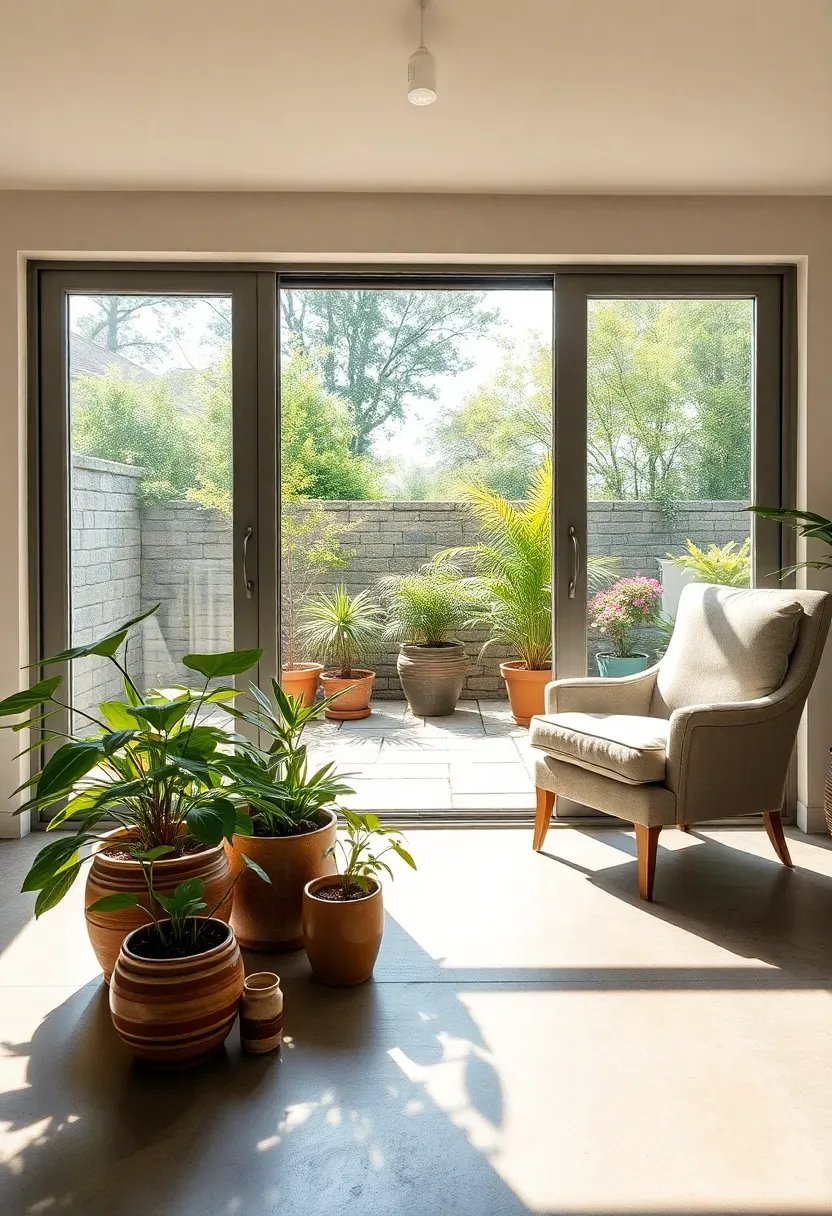
17. Daylight Basement Sunroom
If your lot slopes and one side of the basement is at or near grade level, you have an opportunity most homeowners overlook. A walkout or daylight basement can support full-height windows or sliding glass doors on the exposed wall, creating a sunroom that gets genuine natural light. The key is orienting the glass toward the south or southeast for maximum daylight hours. Frame a bump-out or simply replace the existing foundation wall section with a window wall. Costs vary widely — $5,000 for retrofitting large windows into an existing opening up to $25,000 for a structural bump-out with glass doors.
Watch out for
- Grade the exterior soil away from the foundation to prevent water pooling against the glass
- Use low-E glass to manage heat gain in summer and heat loss in winter — basements with big glass can swing 15 degrees seasonally without it
- Provide an overhang or exterior shade if the glass faces west — afternoon sun in summer will cook an unshaded basement sunroom
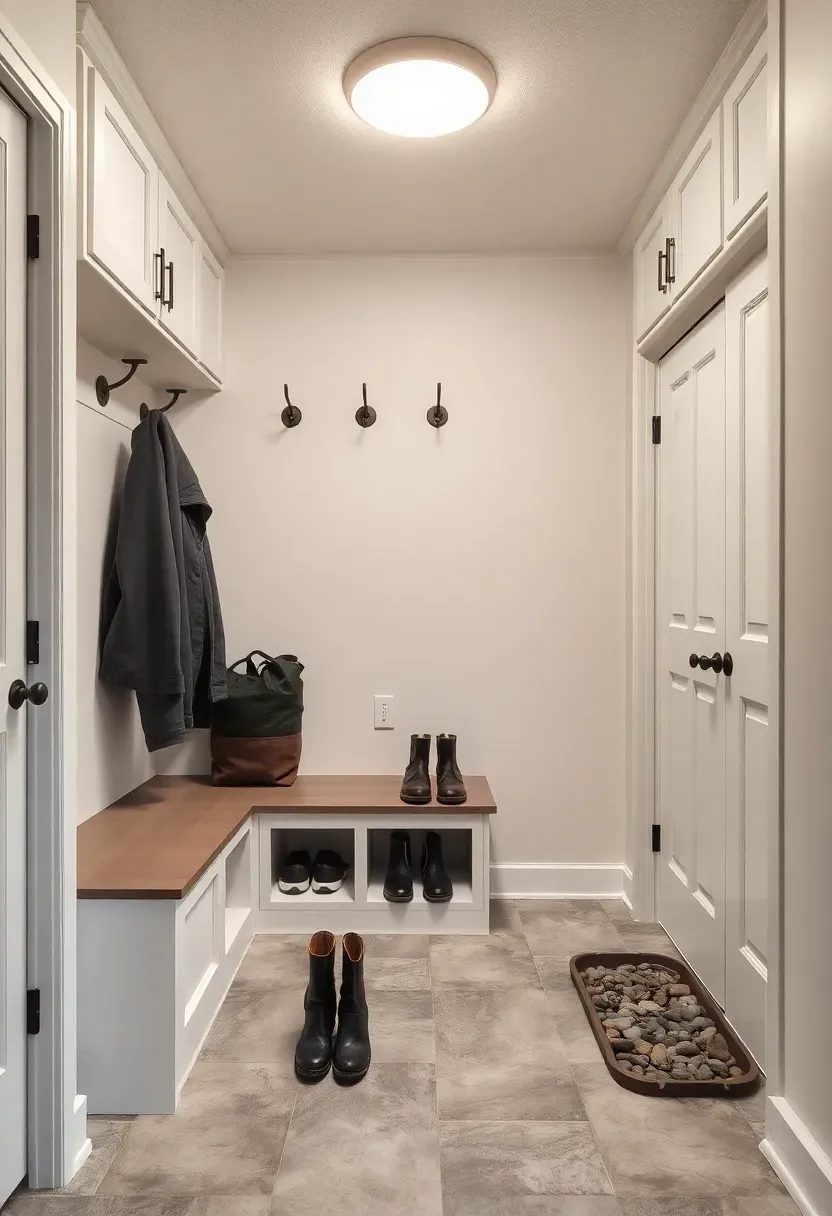
18. Mudroom Entry from Garage
Many attached garages connect to the house through the basement. That transition zone is usually a bare concrete landing and a hollow-core door. Converting it into a proper mudroom gives everyone a place to drop shoes, coats, and bags before entering the main house. Install a built-in bench with shoe cubbies beneath, wall-mounted hooks at two heights (adult and kid), and a row of overhead cabinets for hats, gloves, and seasonal gear. Use porcelain or ceramic tile on the floor — it handles wet boots, road salt, and mud without staining.
Tips
- A boot tray lined with river rocks catches dripping snow and lets it evaporate without puddles
- Add a small wall-mounted heater if the space gets cold from the garage door opening
- Include a charging station with USB outlets on the bench wall for phones, earbuds, and tablets that get grabbed on the way out

Recommended
Items for this idea
19. Music Practice Room
Why basements beat every other room
Basement concrete walls are already dense enough to block a significant amount of sound from reaching neighbors and upper floors. Add interior soundproofing — double drywall on resilient channel, mineral wool insulation, a solid-core door with seals — and you can play drums at 10 PM without complaints. The mass of the concrete foundation does what expensive commercial studios achieve with layered wall assemblies.
Setting up the room
Start with acoustic treatment inside the room: 2-inch rigid fiberglass panels wrapped in fabric at first reflection points on the walls and ceiling. These control reverb and flutter echo so instruments sound clean rather than washed out. A 10x12-foot room is the minimum for a drum kit with enough space for a guitar amp and a small recording desk. Run a dedicated 20-amp circuit for audio equipment and keep it separate from circuits serving motors or fluorescent lights to avoid electrical noise in recordings.
Choose this if
- You play an instrument that annoys housemates after 8 PM
- You record music and need a quiet, controlled environment
- You want a practice space available 24/7 without studio rental fees

20. Sauna or Steam Room
A basement sauna is a realistic project, not a luxury fantasy. Prefab sauna kits sized for two to four people start around $2,500 and fit in a 5x7-foot footprint. They arrive as tongue-and-groove cedar panels that assemble against framed walls. Electric sauna heaters (4.5 to 6 kW for a small room) run on a 240-volt circuit, which an electrician can pull from your panel in half a day. The basement location helps with ventilation — you need a low intake vent near the floor and a high exhaust vent near the ceiling, both easily routed through basement walls to the exterior.
Steps to install
- Frame a small room with 2x4 walls, insulate with mineral wool (not fiberglass — it handles heat better)
- Install a vapor barrier on the warm side of the insulation using aluminum foil kraft paper
- Line walls and ceiling with cedar tongue-and-groove planks — western red cedar is the standard
- Mount the heater on the wall opposite the door, install benches at two heights, and connect the 240-volt circuit
Recommended
Items for this idea
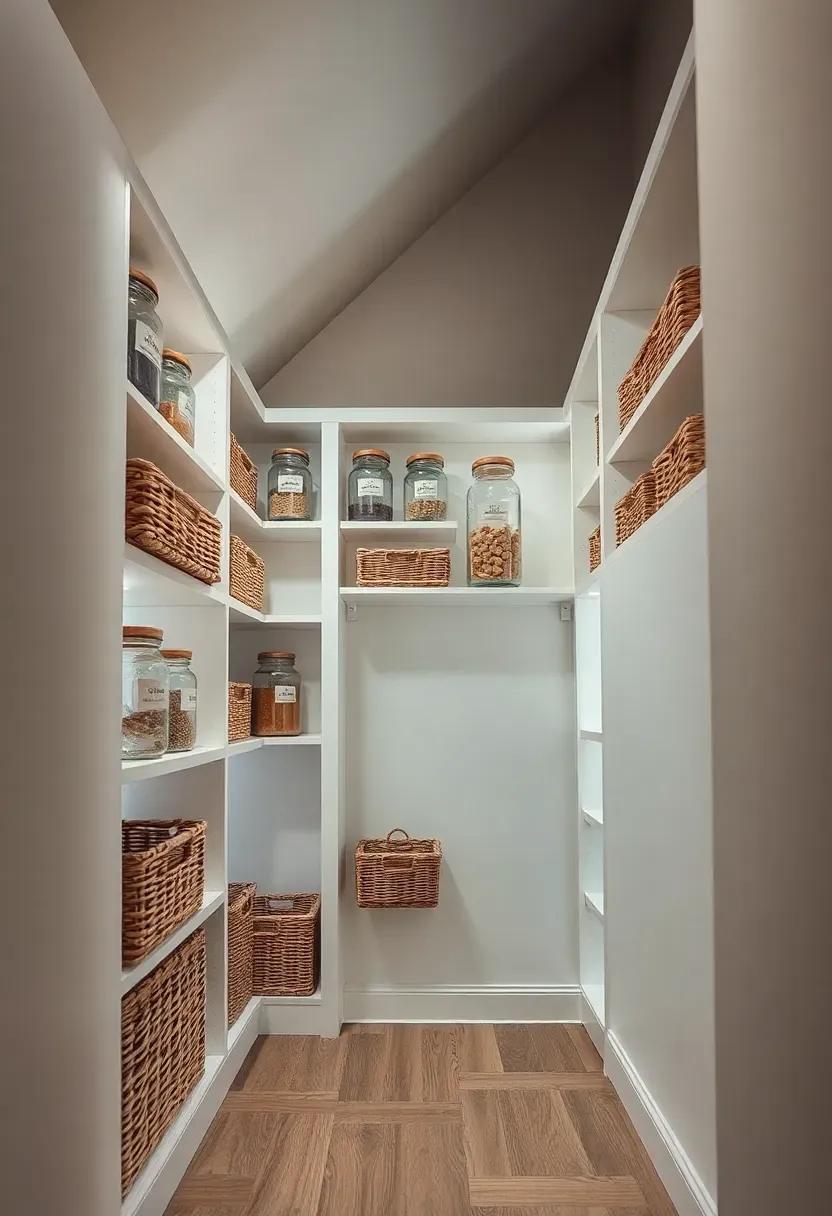
21. Under-Stair Pantry Conversion
The triangular space beneath basement stairs is almost always wasted — sealed off behind drywall or left as an open junk catchall. Converting it into a walk-in pantry or deep storage closet reclaims 30 to 50 square feet depending on your staircase. Frame a simple doorway, install a prehung door, and build shelving that follows the angled ceiling line. The tallest section near the bottom of the stairs handles standing-height items like a vacuum or mop. The shorter section toward the top works for shallow shelves holding canned goods, paper products, or cleaning supplies.
Tips
- Install a battery-operated puck light or a motion-activated LED strip since most under-stair closets lack existing wiring
- Use adjustable shelving brackets so you can reconfigure as your storage needs change
- A tension rod across the taller section creates instant hanging space for brooms, dustpans, or reusable shopping bags
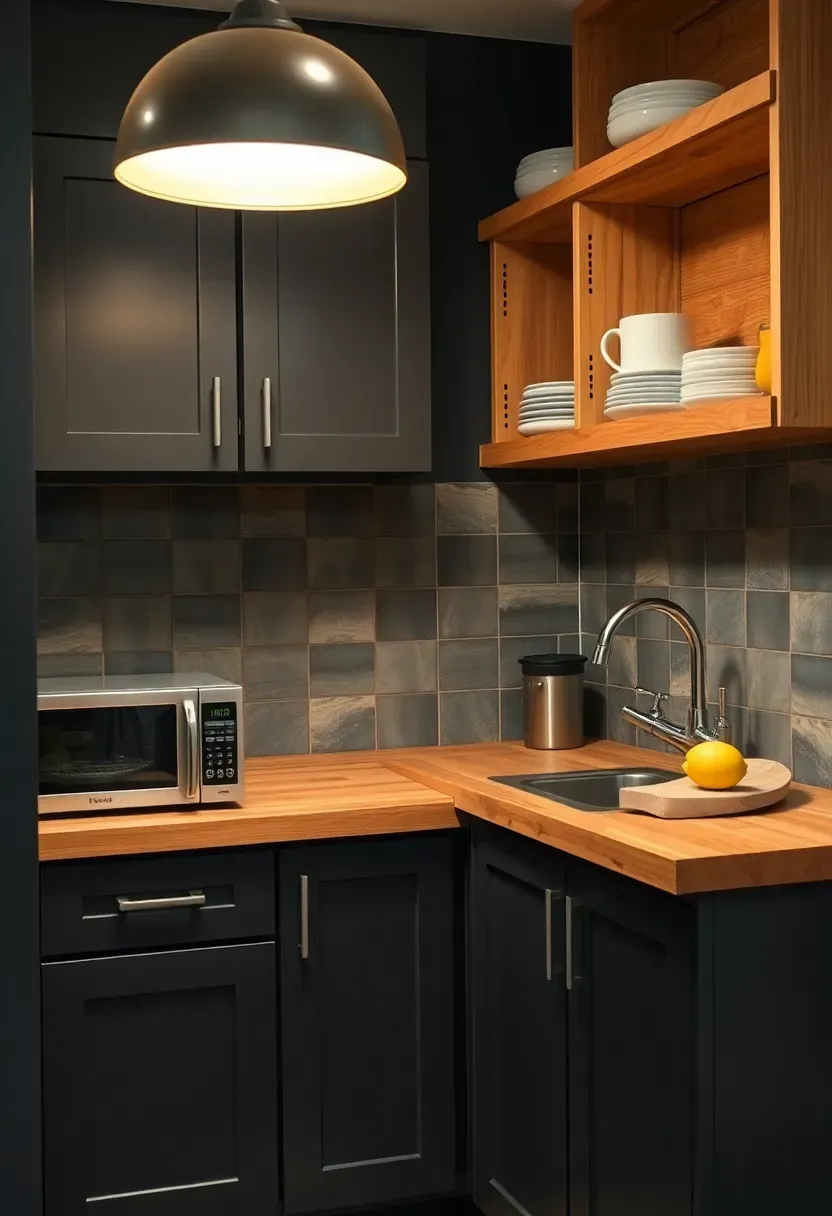
22. Basement Kitchenette
When a full kitchen is too much
A kitchenette bridges the gap between a wet bar and a real kitchen. You get enough counter space to prep snacks, reheat food, and serve drinks without duplicating your upstairs kitchen. The standard setup is 8 to 10 linear feet of counter with a bar sink, a microwave or toaster oven, a mini fridge, and overhead open shelving. Skip the range and dishwasher — they require gas lines and heavy plumbing that inflate costs. A kitchenette built this way runs $4,000 to $8,000 depending on countertop and cabinet choices.
Installation notes
- Run a single hot/cold water supply and a drain to the sink — this is the only plumbing needed
- Provide a dedicated 20-amp small appliance circuit plus a separate circuit for the refrigerator
- Butcher block counters add warmth and cost less than quartz, but seal them well since basements run humid
Recommended
Items for this idea
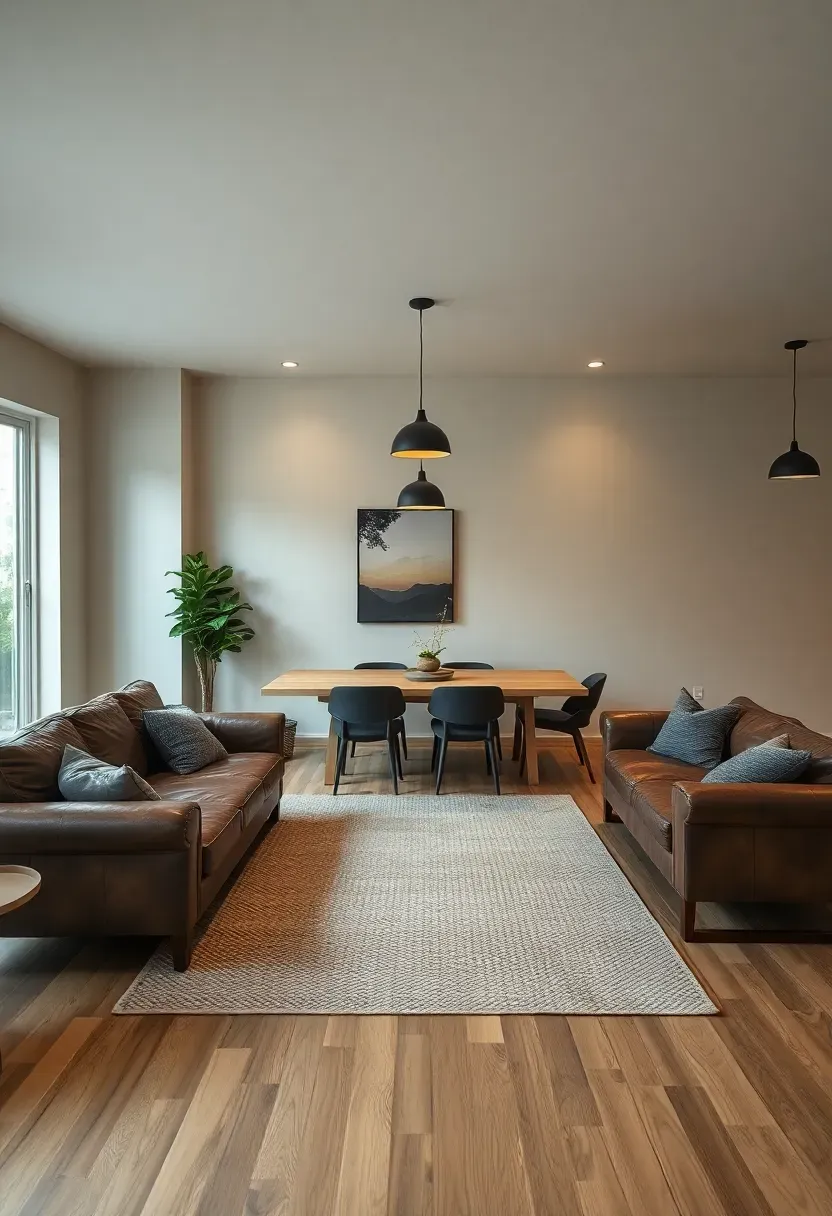
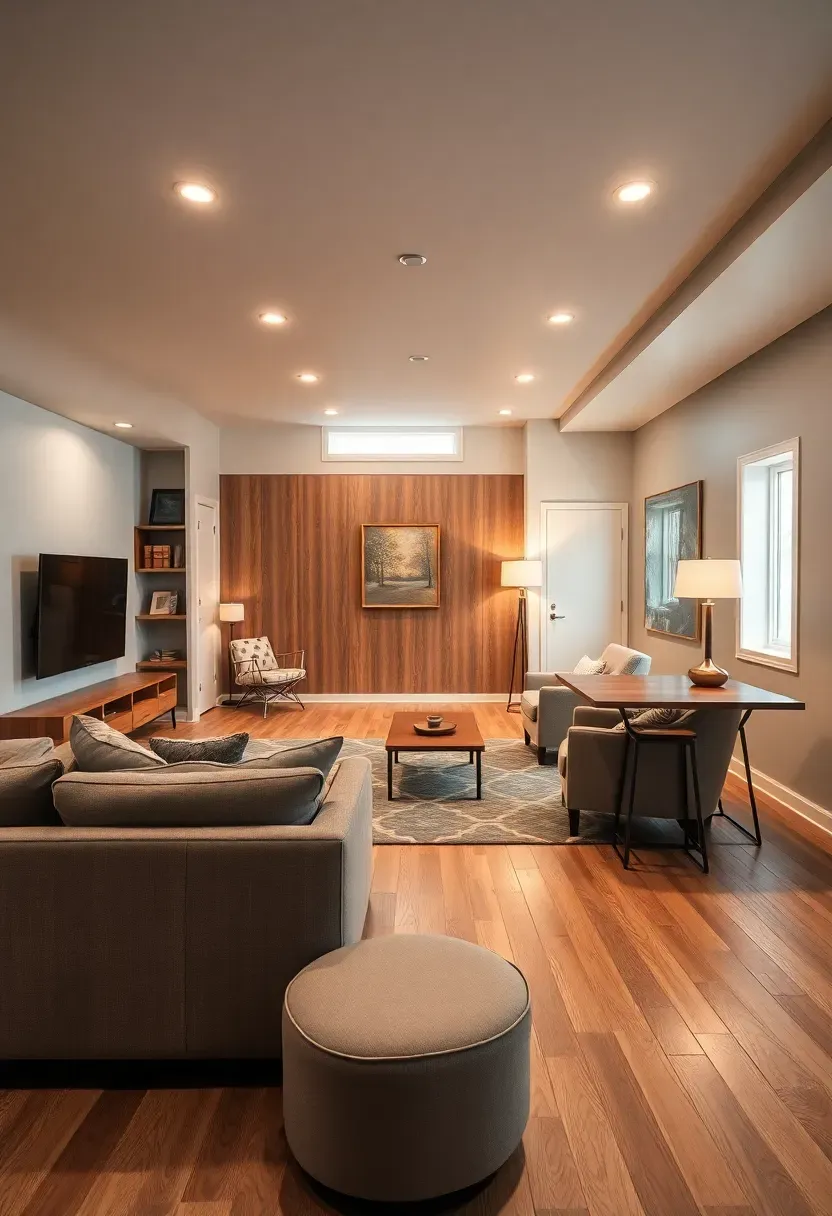
23. Multi-Zone Family Space
The most versatile basement remodel avoids committing the entire space to one use. Instead, divide the open floor plan into three or four zones that serve different family members at the same time. A typical layout: a TV and sofa area anchored by a large rug, a game table or bar zone with its own lighting, a reading nook or study corner near the best light source, and a flex area with clear floor space for yoga, play, or projects. Partial walls (pony walls at 42 inches tall) or open shelving units define zones without blocking light or making the space feel chopped up.
How to zone effectively
- Assign each zone its own lighting circuit so you can dim the movie area without darkening the homework corner
- Use consistent flooring throughout for visual continuity but add area rugs to anchor individual zones
- Keep the center of the room open as a shared circulation path between zones
- Mount a ceiling-hung curtain track if you occasionally need to close off the TV area for a dedicated movie experience
Quick FAQ
Does finishing a basement require a building permit? In most municipalities, yes — any work involving framing, electrical, plumbing, or egress changes requires a permit and inspections. Cosmetic work like painting or laying floating floors typically does not. Pull permits early because failed inspections after the fact can mean tearing out finished walls.
What is the average cost per square foot for a basement remodel? Expect $25 to $50 per square foot for a basic finish (framing, drywall, flooring, lighting) and $50 to $100 for mid-range with a bathroom and kitchenette. High-end finishes with home theaters, custom bars, and saunas push past $100 per square foot.
Should I address moisture before starting any remodeling? Absolutely. No amount of drywall and flooring will survive if water is coming through the foundation. Fix exterior grading, extend downspouts, and apply interior waterproofing membrane to walls before framing. A dehumidifier rated for the square footage should run year-round in most climates.
Can I increase basement ceiling height? Technically yes, through bench footing (lowering the slab while supporting the existing footings) or underpinning. Both are structural projects costing $10,000 to $30,000 or more. For most homeowners, the cost only makes sense if existing ceiling height is below 7 feet and the basement is otherwise a prime candidate for finishing.
Which basement remodeling ideas add the most resale value? A bathroom addition and a bedroom with an egress window consistently return the most at resale because they allow the space to count as legal living area in the home listing. A wet bar and home theater are desirable but considered lifestyle features rather than square-footage multipliers.
A basement remodel is one of the few home projects where the cost per usable square foot beats any addition or bump-out. You already own the space. The foundation is poured, the roof is overhead, and the footprint is defined. What changes is how that space earns its keep. Start with moisture control, tackle the ceiling decision early, and build outward from whatever zone matters most to your household. The basement that collects boxes today could be the room everyone fights over tomorrow.
Pinterest cover for 23 Basement Remodeling Ideas
About the author
OBCD
CGI visualization and interior design content. We create detailed 3D renders and curate practical design ideas for every room in your home.