19 Basement Gym Ideas
Two years ago I converted half of my 800-square-foot basement into a training space. The other half stayed as storage, which turned out to be smarter than taking over the whole area — having a defined boundary forced me to plan every square foot carefully. I spent roughly $3,500 total, spread over three months of weekend work. The floor was the biggest single expense at $900 for rolled rubber. Everything else was secondhand equipment, DIY shelving, and a few electrical upgrades. What surprised me most was how much the ceiling height dictated which exercises were even possible down there. Measure before you buy anything.
Here are 19 ideas organized around layout, equipment zones, surfaces, and the finishing details that make a basement gym a place you actually want to train in.
Table of Contents
- Zoned Floor Plan With Tape Lines
- Rolled Rubber Flooring Over Concrete
- Low-Ceiling Workout Adaptations
- Natural Light Well Installation
- Adjustable Dumbbell Station
- Functional Trainer Cable Machine
- Wall-Mounted Barbell Storage
- DIY Plywood Lifting Platform
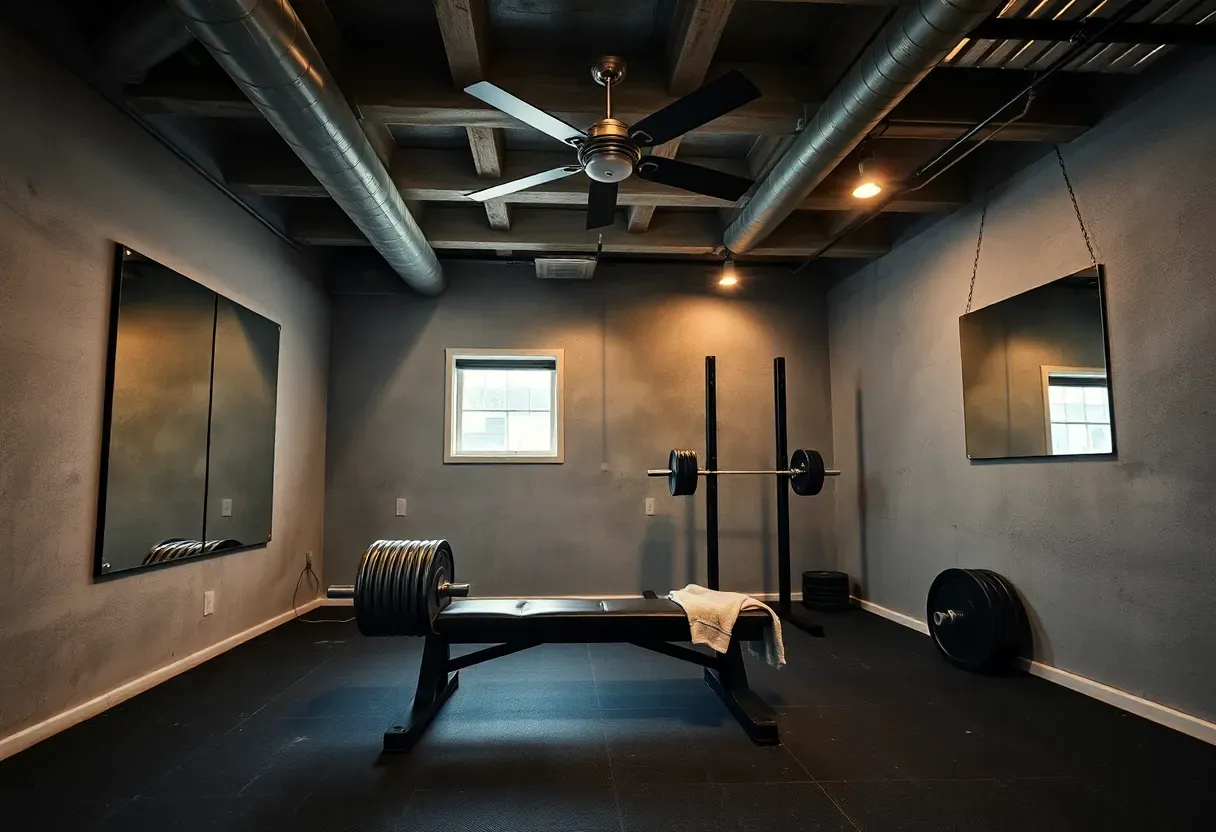
- Ceiling-Mounted Fan and Ventilation
- Full-Length Mirror Wall on a Budget
- Bluetooth Speaker Shelf System
- Resistance Band Door Anchor Setup
- Rowing Machine Alcove
- Gymnastics and Mobility Corner
- Chalkboard Paint Tracking Wall
- Dehumidifier and Air Quality Setup
- Pegboard Tool Wall for Accessories
- Compact Sauna Closet
- Under-$500 Starter Gym Build
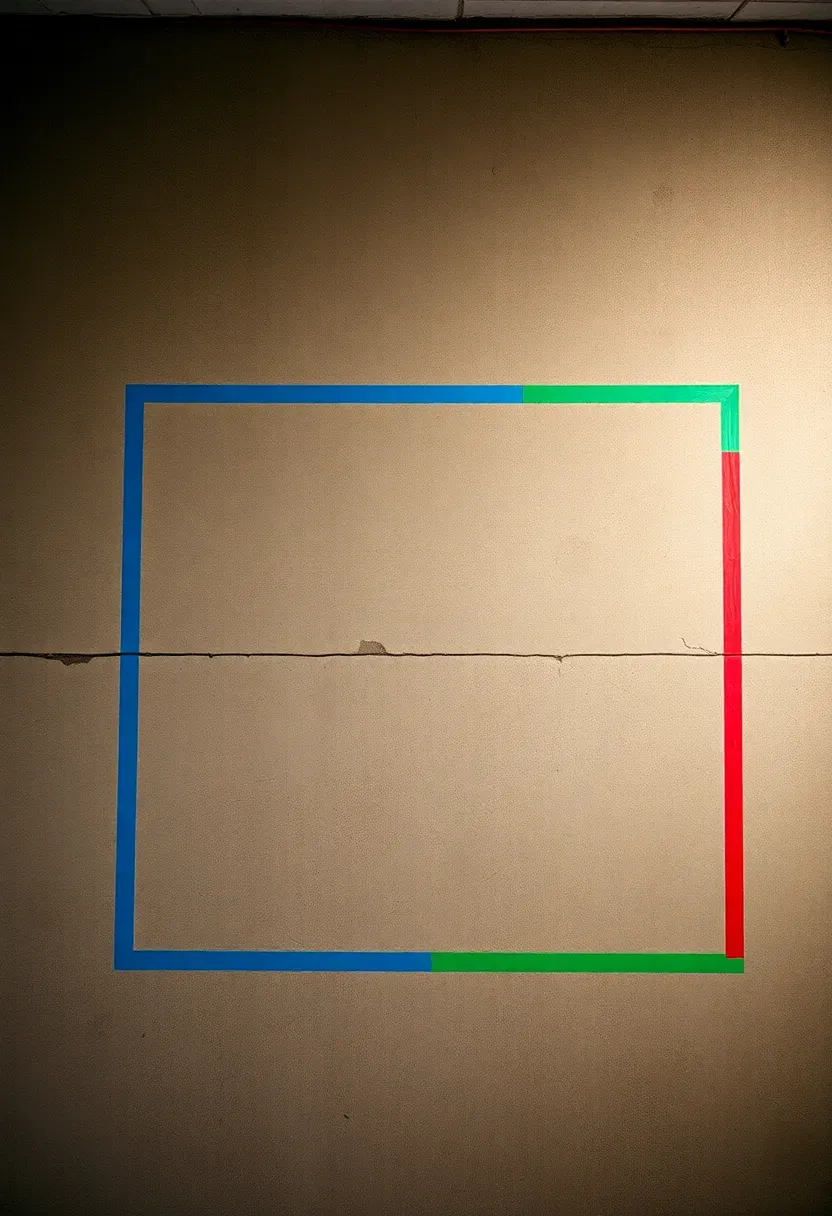
1. Zoned Floor Plan With Tape Lines
Before buying a single piece of equipment, tape out your zones on the bare floor. Use painter's tape in different colors: blue for lifting, red for cardio, green for stretching and mobility. Walk through a typical workout and see if the flow makes sense — you should not have to cross the cardio zone carrying a loaded barbell. Leave 3-foot buffer zones around any equipment where you move dynamically. This 30-minute planning step prevents the most common basement gym mistake, which is cramming everything against the walls and leaving a dead zone in the middle that never gets used.
Tips
- Photograph the taped layout from the top of the stairs for a bird's-eye perspective before committing
- Account for ceiling obstructions like ductwork, pipes, and low beams in each zone
- Keep the stretching zone nearest the entrance so it doubles as a warm-up area
We picked a few things that go well with this idea: Flooring Inc 1/4" Rubber Gym Roll (★4.4), SUPERJARE 96 Sq Ft Rubber Gym Tiles (★4.5) and Flooring Inc Tough Rubber Roll Black (★4.4). As an Amazon Associate we earn from qualifying purchases.
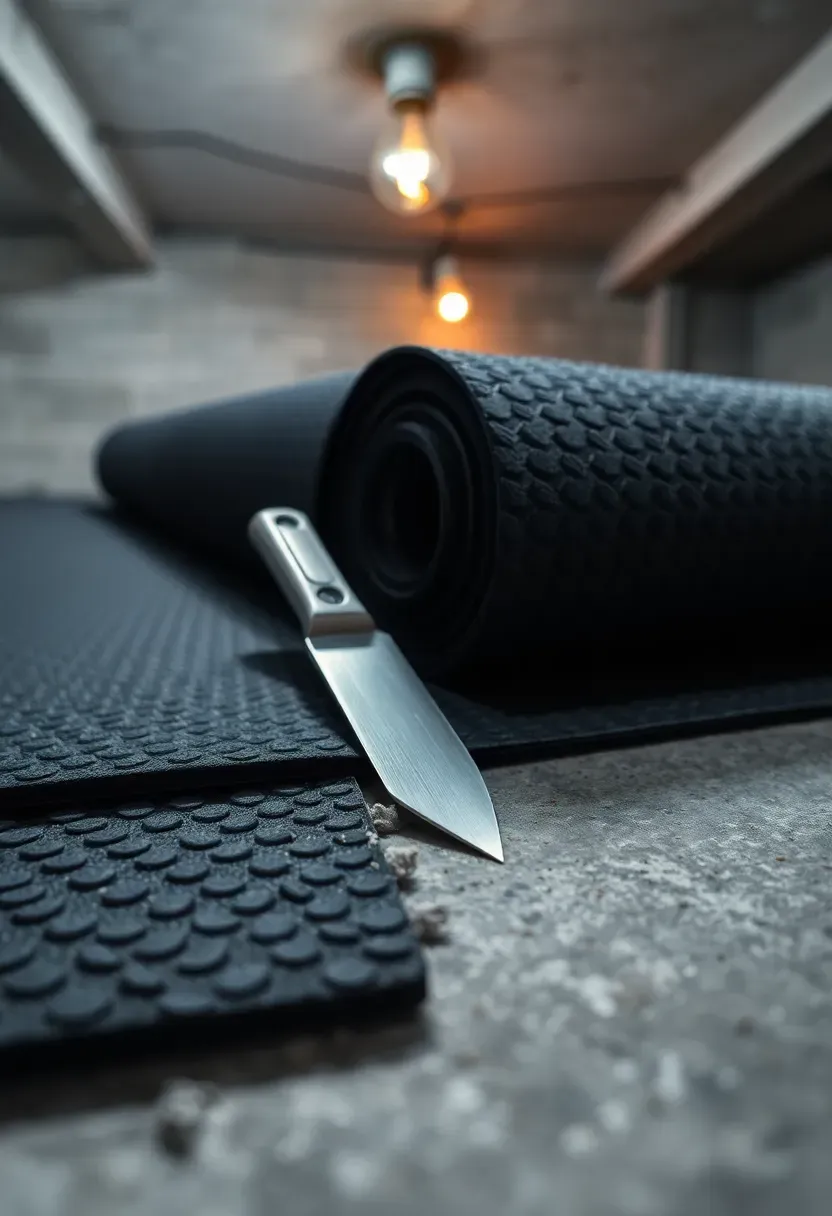
2. Rolled Rubber Flooring Over Concrete
Why rolled rubber beats interlocking tiles
Interlocking tiles shift under heavy loads and create seams that trap sweat, chalk, and dust. Rolled rubber in 4-foot-wide sheets lies flat, stays put, and gives you a seamless surface across the entire floor. The 3/8-inch thickness handles dumbbell drops and bodyweight work. Go with 1/2-inch if you plan to deadlift over 300 pounds regularly.
How to install it
Clean the concrete with a degreaser and let it dry for 48 hours. Unroll the rubber and let it acclimate flat for 24 hours — it ships curled and needs time to relax. Trim edges with a sharp utility knife against a straight edge. Butt the seams tight. No adhesive needed for most applications; the weight holds it down. For high-traffic areas near a squat rack, use double-sided carpet tape at the seams.
Pros and cons
- Pro: No gaps or shifting under lateral movement like lunges and sled drags
- Pro: Easy to clean with a damp mop and mild soap
- Con: Heavy rolls are awkward to maneuver down basement stairs — recruit a helper
We picked a few things that go well with this idea: TYZDMY 52.5 lb Adjustable Dumbbells (Pair) (★4.6), 5-in-1 Adjustable Dumbbell Barbell Set (★4.3) and FEIERDUN 5-in-1 Adjustable Dumbbell Set (★4.4). As an Amazon Associate we earn from qualifying purchases.
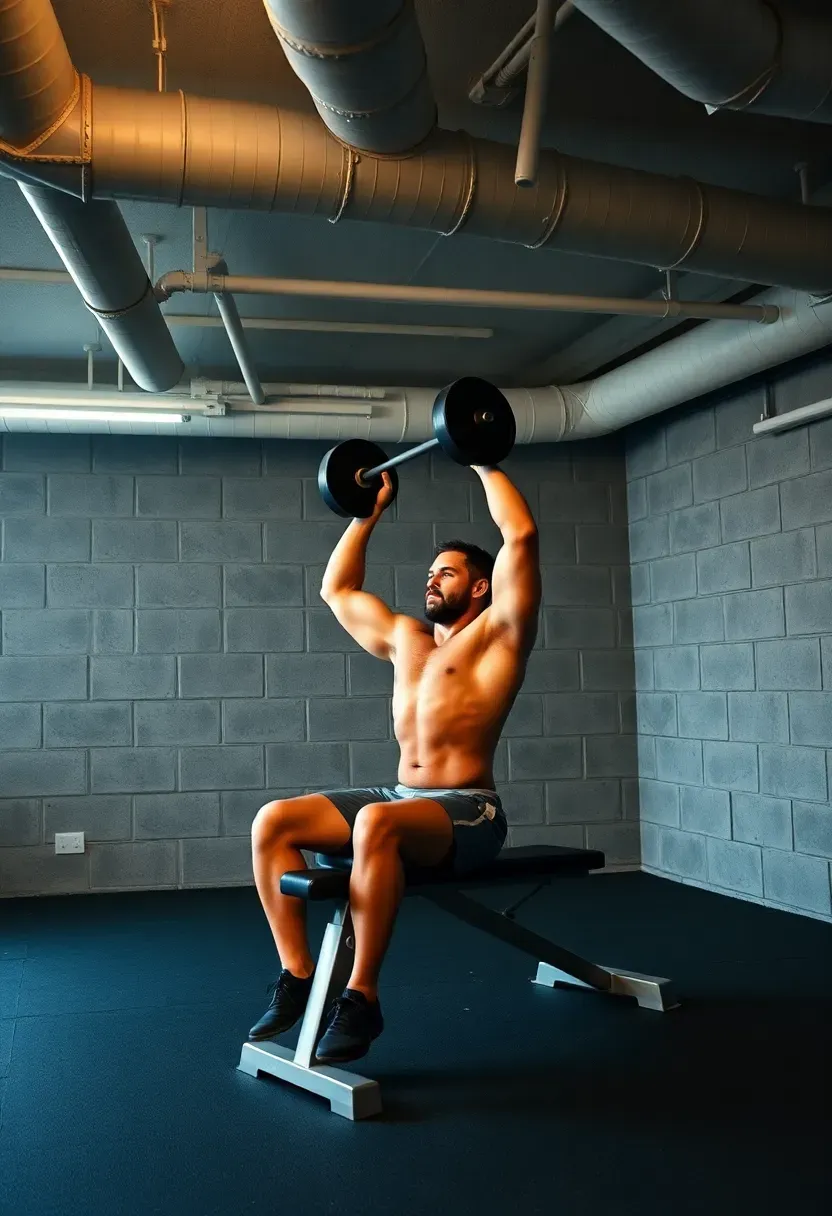
3. Low-Ceiling Workout Adaptations
Most basements have 7 to 8 feet of clearance, and ductwork or beams can drop that to 6.5 feet in spots. This rules out standing overhead presses, box jumps, and kipping pull-ups for anyone over 5'8". Instead of fighting the architecture, adapt your programming. Seated overhead press replaces standing. Step-ups replace box jumps. Strict pull-ups on a low bar replace kipping. Landmine presses work at an angle that clears most ceilings. Map your ceiling height across the entire space and note the lowest points — put your squat rack under the highest section and keep low-clearance exercises in the tight spots.
Tips
- Wrap exposed pipes and ductwork with foam pipe insulation where your hands might reach during pull-ups
- A half-rack is shorter than a full power cage and fits under 7-foot ceilings
- Floor-to-ceiling measurements should account for your flooring thickness — 1/2-inch rubber plus shoes adds nearly 2 inches
We picked a few things that go well with this idea: Spampur Metal Pegboard Panels (4-Pack, 50 Hooks) (★4.4), INCLY 278-Piece Pegboard Hooks Accessory Kit (★4.6) and Wall Control 4ft Metal Pegboard Kit (★4.7). As an Amazon Associate we earn from qualifying purchases.
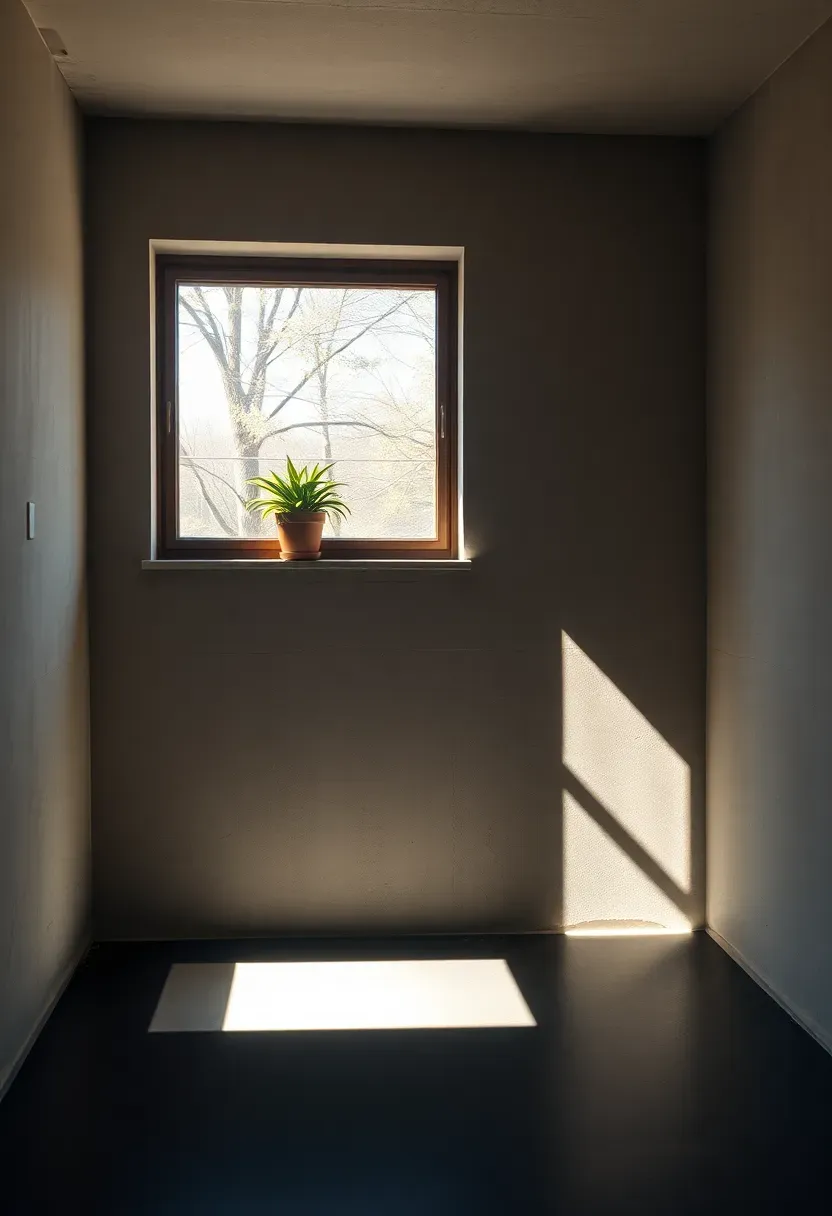
4. Natural Light Well Installation
The problem with windowless basements
Training under artificial light every session affects mood and energy. Basements are often entirely below grade with no windows, which makes the space feel cave-like no matter how well you light it. Seasonal motivation dips hit harder when your gym feels like a bunker from November through March.
The solution
An egress window well, cut into the foundation wall, brings in real daylight. A contractor uses a concrete saw to cut the opening, installs a window frame, and adds a galvanized steel well outside with gravel drainage at the bottom. Cost runs $2,500 to $5,000 depending on foundation thickness and local codes. Even a single 36x24-inch window changes the feel of the room dramatically. Position it on the south-facing wall if possible for maximum light hours.
Pros and cons
- Pro: Natural light reduces reliance on overhead fixtures and improves training mood
- Pro: Doubles as emergency egress, which may be required by code if the basement is habitable
- Con: Significant structural work that requires permits and a licensed contractor

Recommended
Items for this idea
5. Adjustable Dumbbell Station
A full dumbbell rack from 5 to 75 pounds takes up 8 feet of wall space and costs $1,500+. A pair of adjustable dumbbells like the Bowflex 552 or PowerBlock Elite covers 5 to 52.5 pounds in a 2x2-foot footprint for $300 to $500. Place them on a small stand next to a flat-to-incline bench. The trade-off is speed — changing weight takes 5 to 10 seconds instead of grabbing the next pair. For most basement gym owners who train alone, that delay is irrelevant compared to the space savings. If you need heavier than 50 pounds, the PowerBlock EXP goes to 90 with expansion kits.
Tips
- Keep the stand at knee height so you are not bending to the floor for every set
- Store the dumbbells with the weight selector at the starting position to avoid jams
- A rubber mat under the stand catches any accidental drops and protects the floor
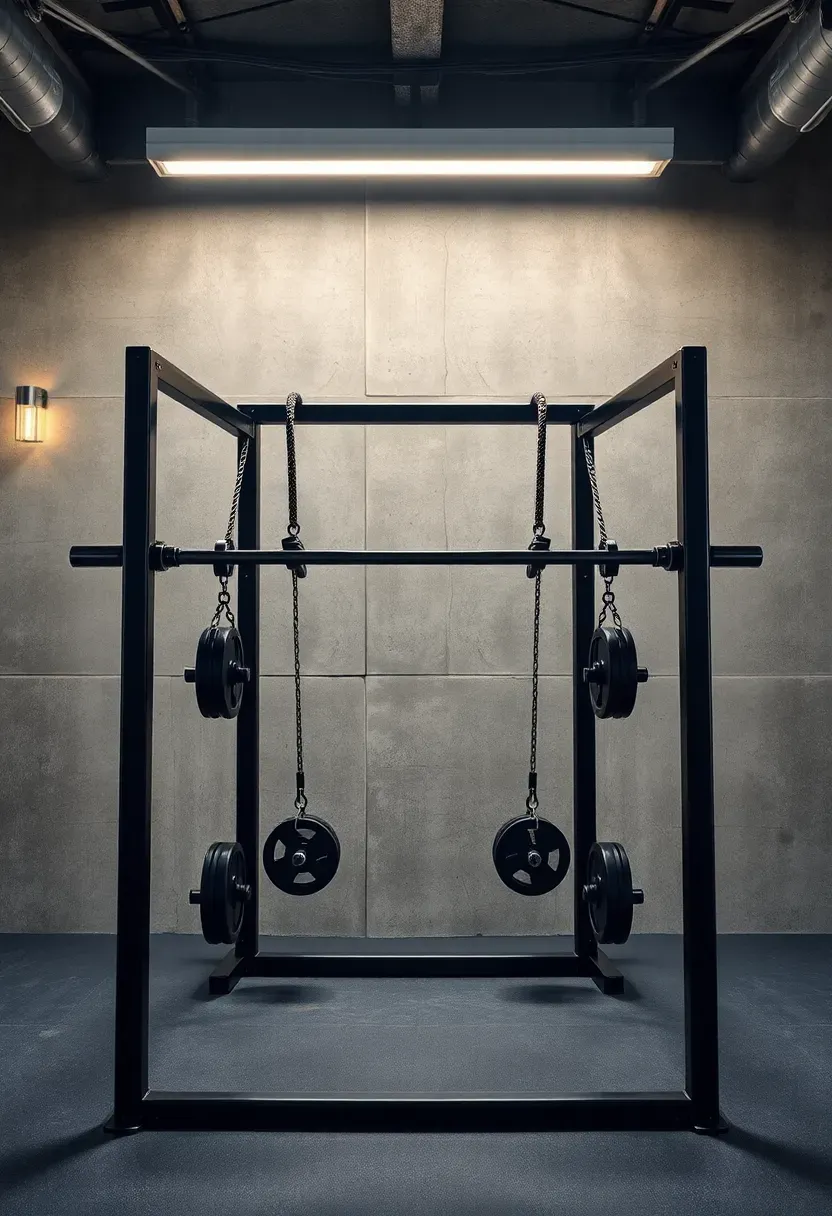
6. Functional Trainer Cable Machine
Cable machine vs. free weights
Free weights handle the big compound lifts, but cables fill the gaps. Face pulls, cable woodchops, pallof presses, tricep pushdowns, and lat pulldowns are difficult or impossible to replicate with barbells and dumbbells alone. A dual-pulley functional trainer offers over 100 exercise variations in a single machine footprint of roughly 4x3 feet.
Choosing the right one
Look for machines with a 2:1 or 4:1 pulley ratio and at least 150 pounds per stack. Brands like REP Fitness (FT-3000) and Titan Fitness offer solid units between $700 and $1,200. Bolt it to the floor if your concrete is smooth — the machine can shift during heavy single-arm pulls. Ceiling height matters here too: you need the high pulley to clear any ductwork when the carriage is at the top.
Choose if...
- Cable machine: You want exercise variety and rehab-friendly movements
- More free weights: You prioritize raw strength and barbell compounds
Recommended
Items for this idea
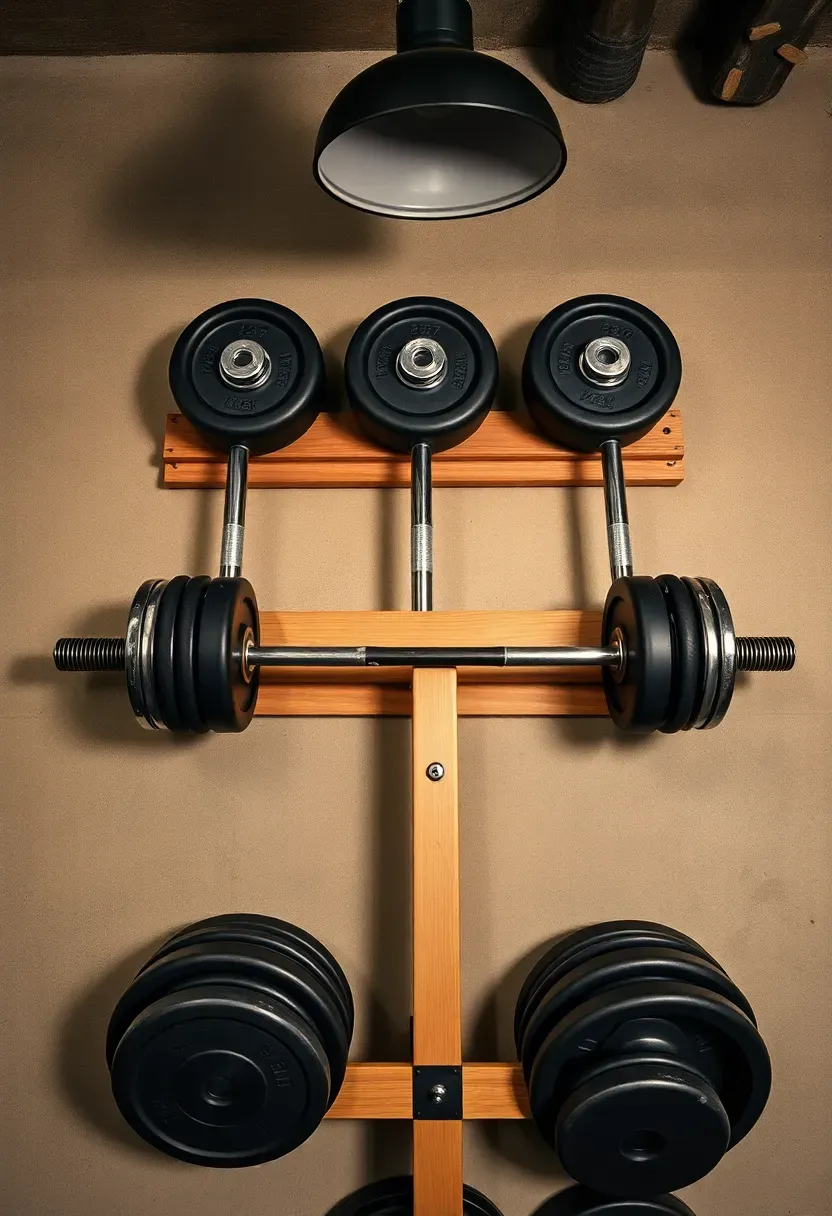
7. Wall-Mounted Barbell Storage
Barbells leaning in corners get knocked over, roll across the floor, and damage the knurling. Wall-mounted horizontal holders (gun-rack style) keep them organized, visible, and off the ground. A basic two-bar holder runs $30 to $60 and mounts into concrete with tapcon screws or into studs with 3/8-inch lag bolts. Mount them at chest height so you can lift bars in and out without straining. Space the holders 18 inches apart vertically if you are stacking multiples. Below the barbell holders, position a weight tree or plate pegs on the same wall section to create a single equipment station.
Tips
- Wrap the cradle contact points with felt or rubber to prevent knurling wear
- Label each holder position if you own specialty bars — trap bar, curl bar, Olympic bar
- Install holders near your lifting platform so the walk from storage to training is two steps
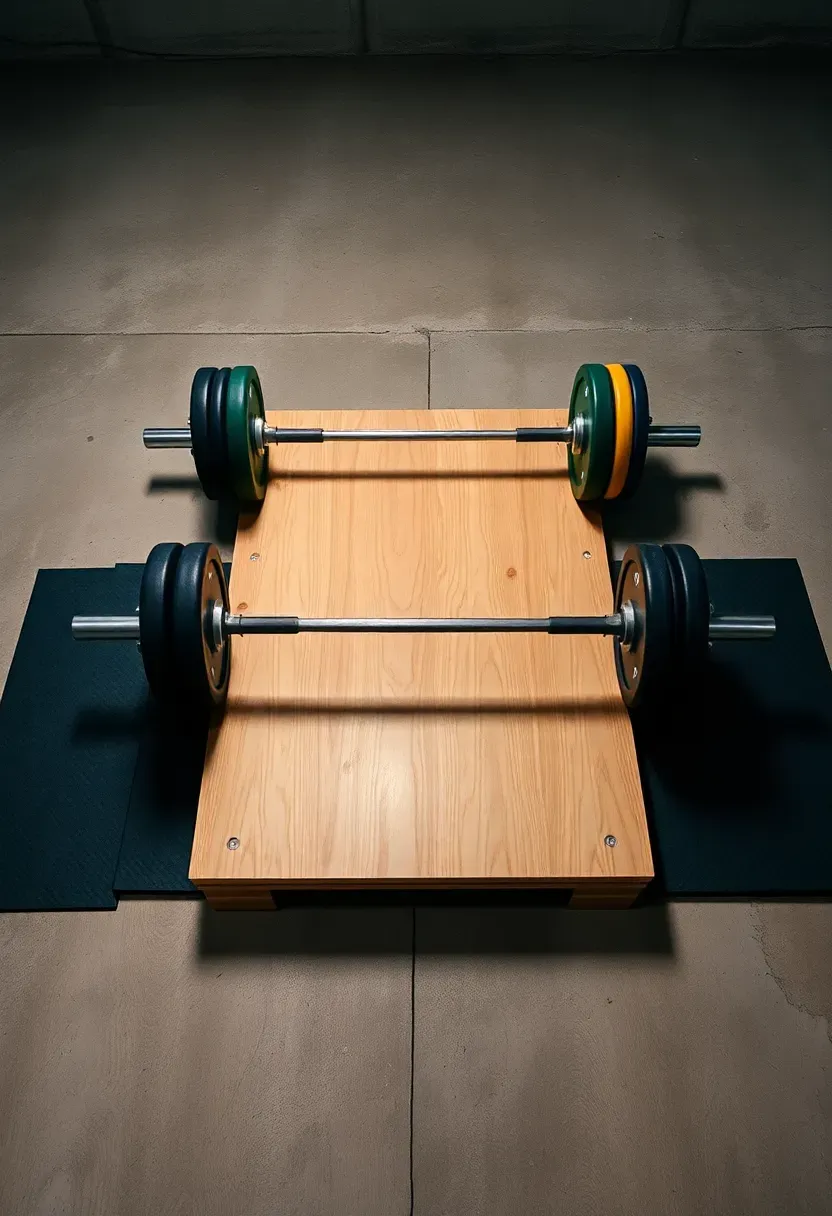
8. DIY Plywood Lifting Platform
Building your own platform costs $120 to $200 and takes about three hours. You need two 4x8-foot sheets of 3/4-inch plywood, one 4x4-foot section of horse stall mat, and 2-inch wood screws.
Steps
Step 1: Prepare the base. Lay the first plywood sheet directly on the sealed concrete floor. If your floor is uneven, shim low spots with thin plywood strips before setting the second layer.
Step 2: Build the second layer. Cut the second plywood sheet into three pieces — a 4x4-foot center section and two 2x4-foot side panels. Screw the center piece to the base sheet every 8 inches in a grid pattern.
Step 3: Add the rubber. Cut the horse stall mat to match the two side panels and lay it on top. The rubber absorbs plate drops. The center plywood stays exposed for a firm, non-slip standing surface.
Watch out
- Do not use OSB instead of plywood — it delaminates when exposed to moisture or sweat
- Pre-drill all screw holes to prevent splitting at the edges
Recommended
Items for this idea
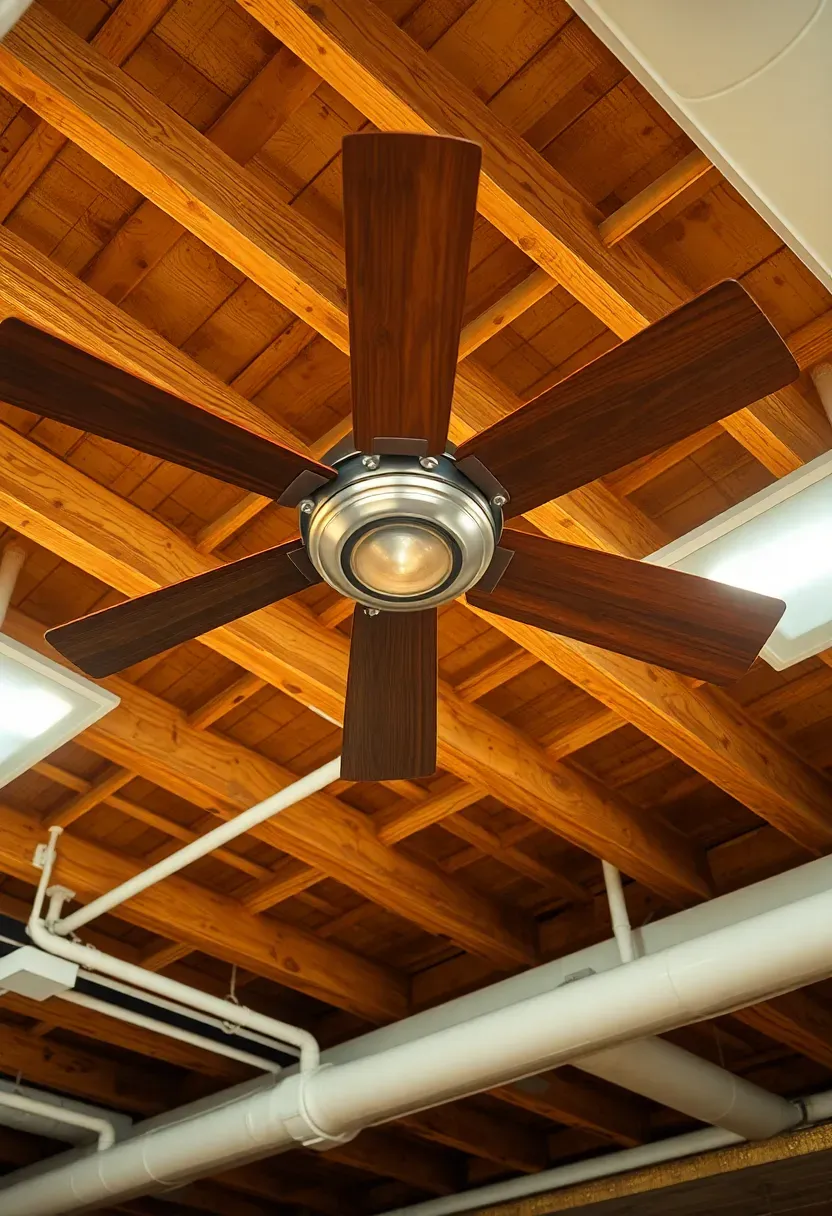
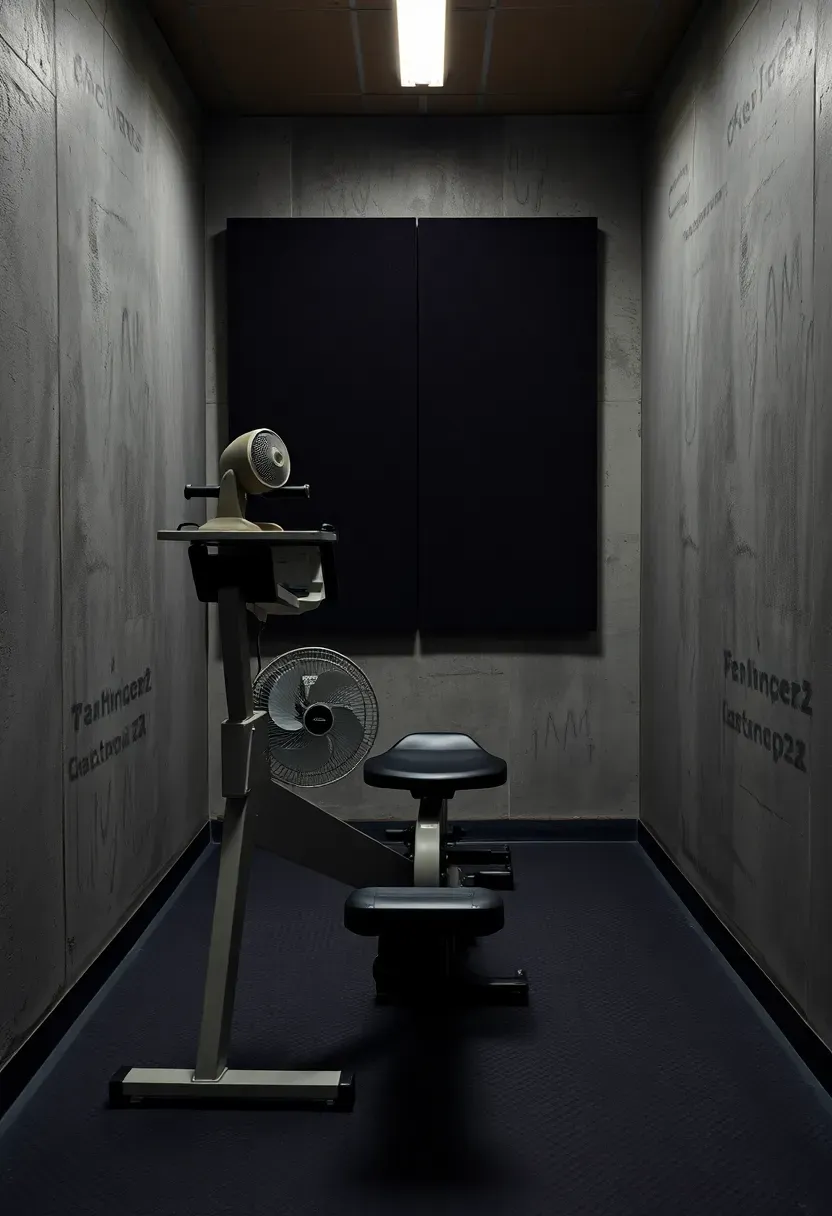
9. Ceiling-Mounted Fan and Ventilation
Basements trap heat and humidity during intense training. A 52-inch ceiling fan rated for damp locations moves enough air to keep a 400-square-foot space breathable. Mount it in the center of your main training zone, not over the squat rack where it might interfere with bar path at the top of a press. If your ceiling is too low for a standard fan, a wall-mounted oscillating fan at floor level pushes air across the room without taking overhead space. Pair either option with a basement window or vent to create cross-ventilation — air movement without fresh air input just recirculates the same stale air.
Tips
- A fan with a remote control lets you adjust speed mid-set without leaving the platform
- Run the fan for 30 minutes after your session to dry sweat from equipment and flooring
- Industrial drum fans ($80 to $150) on the floor move more air than ceiling models and work in very low ceilings
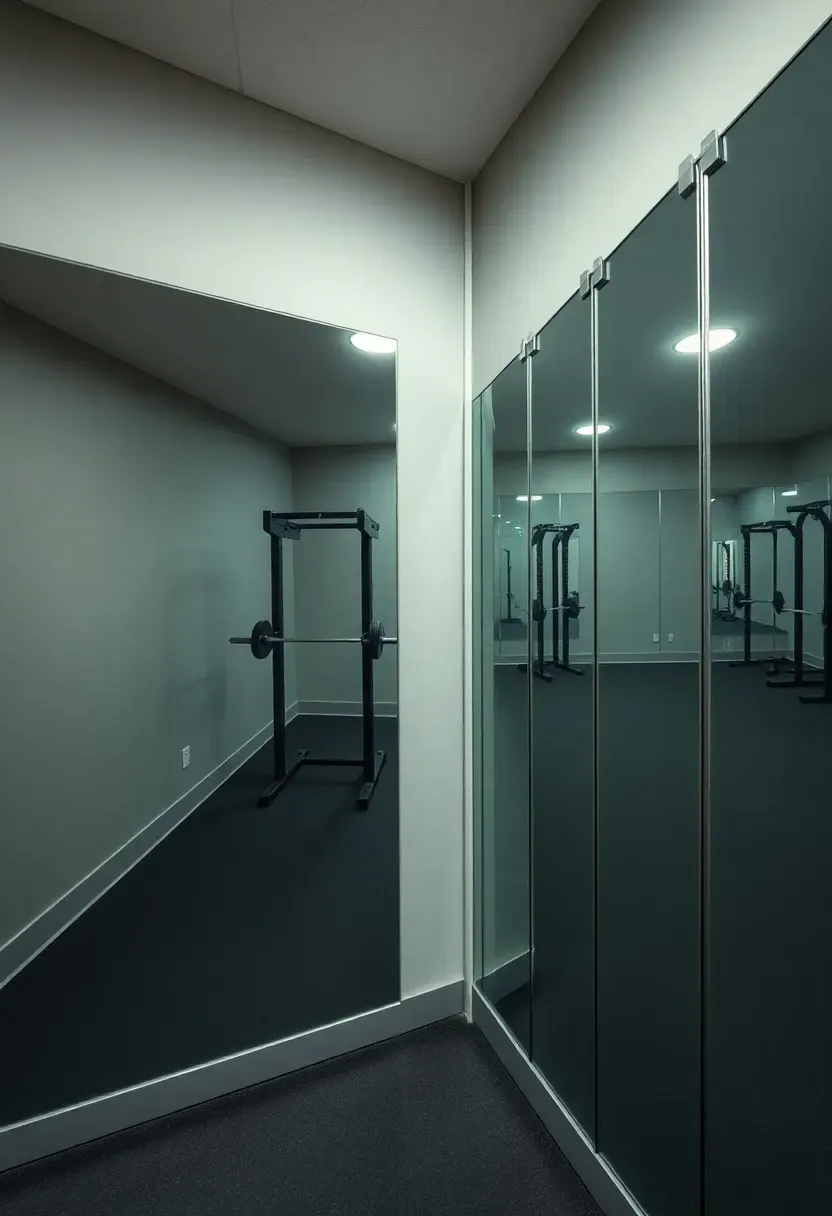
10. Full-Length Mirror Wall on a Budget
Gym mirrors from fitness equipment companies cost $200 to $500 per panel. The budget move: buy 4x8-foot acrylic mirror sheets from a plastics supplier for $60 to $100 each. They weigh a fraction of glass, will not shatter if something hits them, and give a reasonably clear reflection. Mount them with heavy-duty mirror adhesive and a few mechanical clips at the top edge for safety. Three panels cover a 12-foot wall section for under $300 total. The reflection is not as crisp as commercial glass mirrors, but it is more than adequate for form checks during squats, deadlifts, and pressing movements.
Tips
- Clean acrylic mirrors with a microfiber cloth and water only — ammonia-based cleaners cloud the surface
- Leave a 1-inch gap at the bottom between the mirror and floor to allow airflow and prevent moisture trapping
- Position mirrors opposite your lifting station, not behind it, so you can see your form without turning your head
Recommended
Items for this idea
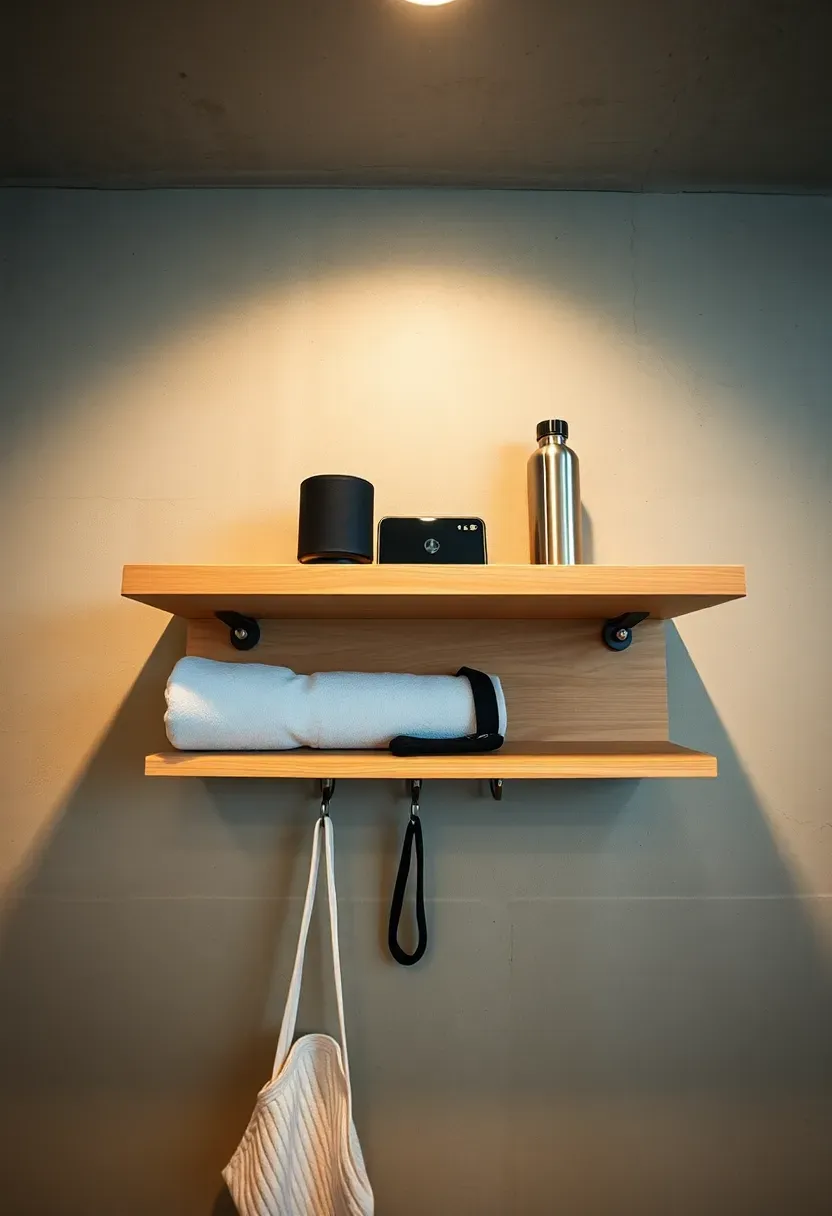
11. Bluetooth Speaker Shelf System
A simple build that keeps electronics safe
A floating shelf mounted 6 feet high on the wall keeps your speaker and phone out of the drop zone. Build it from a 24x8-inch piece of 3/4-inch plywood with a 2-inch lip on the front edge to prevent items from sliding off during heavy sets nearby. Route a power strip behind the shelf for charging. Screw two small hooks underneath for a towel and resistance bands.
Modern setup details
A single JBL Charge or similar $100 to $150 speaker fills a basement room. The concrete walls actually help — hard surfaces reflect sound better than drywall, giving you louder perceived volume at lower actual output. If you share the house with people who sleep odd hours, add a pair of bone conduction headphones as a backup so you can train at 5 AM without complaints.
Apply at home
- Mount the shelf near the entrance so you can start music before stepping into the gym zone
- A wireless charger pad on the shelf keeps your phone topped up during long sessions
- Attach a small whiteboard below the shelf for daily workout notes
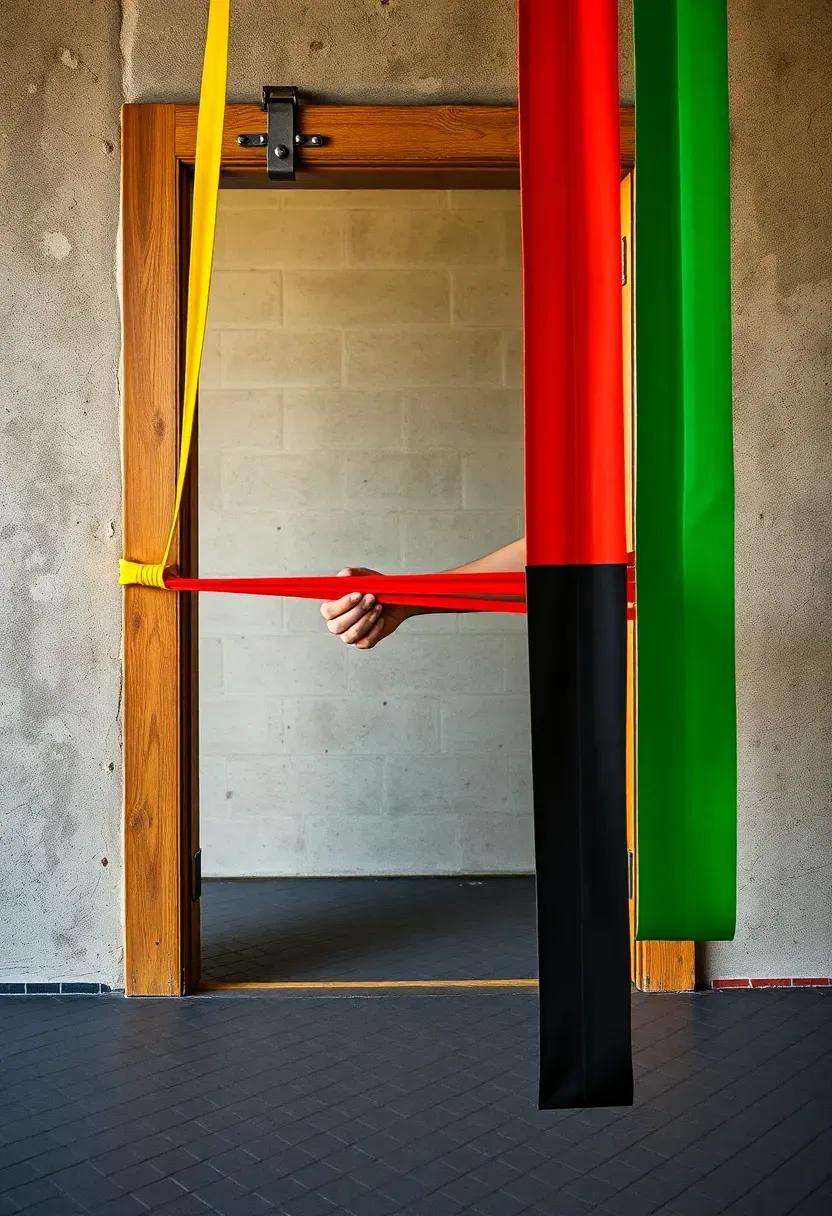
12. Resistance Band Door Anchor Setup
Door anchors cost $8 and turn any solid door frame into a cable machine substitute. Anchor the band at the top for lat pulldowns and face pulls, at the middle for chest presses and rows, and at the bottom for bicep curls and woodchops. The key is using a door that opens away from you during the exercise — if the door opens toward you, the anchor can slip out under tension. For a dedicated band station, install three eye bolts directly into a basement wall stud or concrete at 12, 36, and 72 inches high. This is more permanent but eliminates the door anchor risk entirely.
Tips
- Color-code your bands by resistance level and hang them on hooks near the anchor points
- Loop two bands together for custom resistance levels between standard sizes
- Replace bands annually — rubber degrades with UV and ozone exposure, even in basements
Recommended
Items for this idea
13. Rowing Machine Alcove
A rowing machine needs about 9 feet of length and 3 feet of width during use, making it a natural fit for a narrow basement alcove or the space alongside a wall. The Concept2 Model D, the industry standard at $990, stores upright when not in use and leans against a wall in a 2x2-foot footprint. Position it facing a mirror or window if you have one — staring at a concrete wall during a 20-minute row gets old fast. Sound-dampening foam panels on the wall behind the rower reduce the chain noise echo that concrete amplifies.
Tips
- Place a rubber mat under the rower even on top of gym flooring — the feet generate vibration that transfers to the slab
- A small clip-on fan at the front of the rower provides airflow during long pieces
- Mount a phone holder at eye level for training apps or video coaching
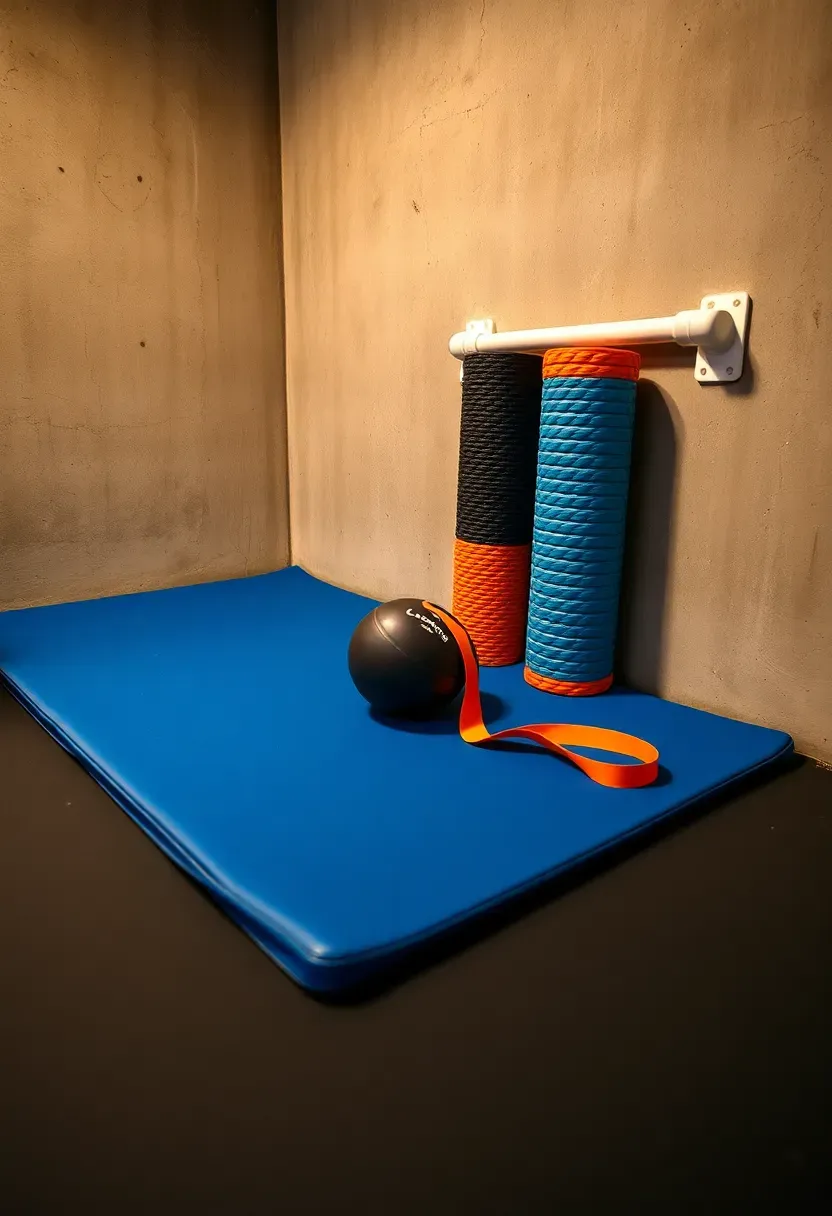
14. Gymnastics and Mobility Corner
Dedicate a 6x8-foot section to floor work. Layer a 2-inch thick folding gymnastics mat over your rubber flooring for a cushioned surface that handles handstands, rolling patterns, and deep stretching. Store foam rollers in a vertical PVC pipe holder mounted on the wall — cut a 6-inch diameter PVC pipe to 18 inches and screw it to the studs. Keep a lacrosse ball, peanut roller, and stretch strap in a small hanging basket nearby. This zone doubles as your warm-up area and post-workout cooldown spot.
Tips
- A gymnastics mat that folds into quarters stores flat against the wall when the space is needed for other exercises
- Hang a pull-up bar low enough (6 feet) in this area for dead hangs and scapular work
- A timer visible from the floor helps hold stretches for the full 60 to 90 seconds most people cut short
Recommended
Items for this idea
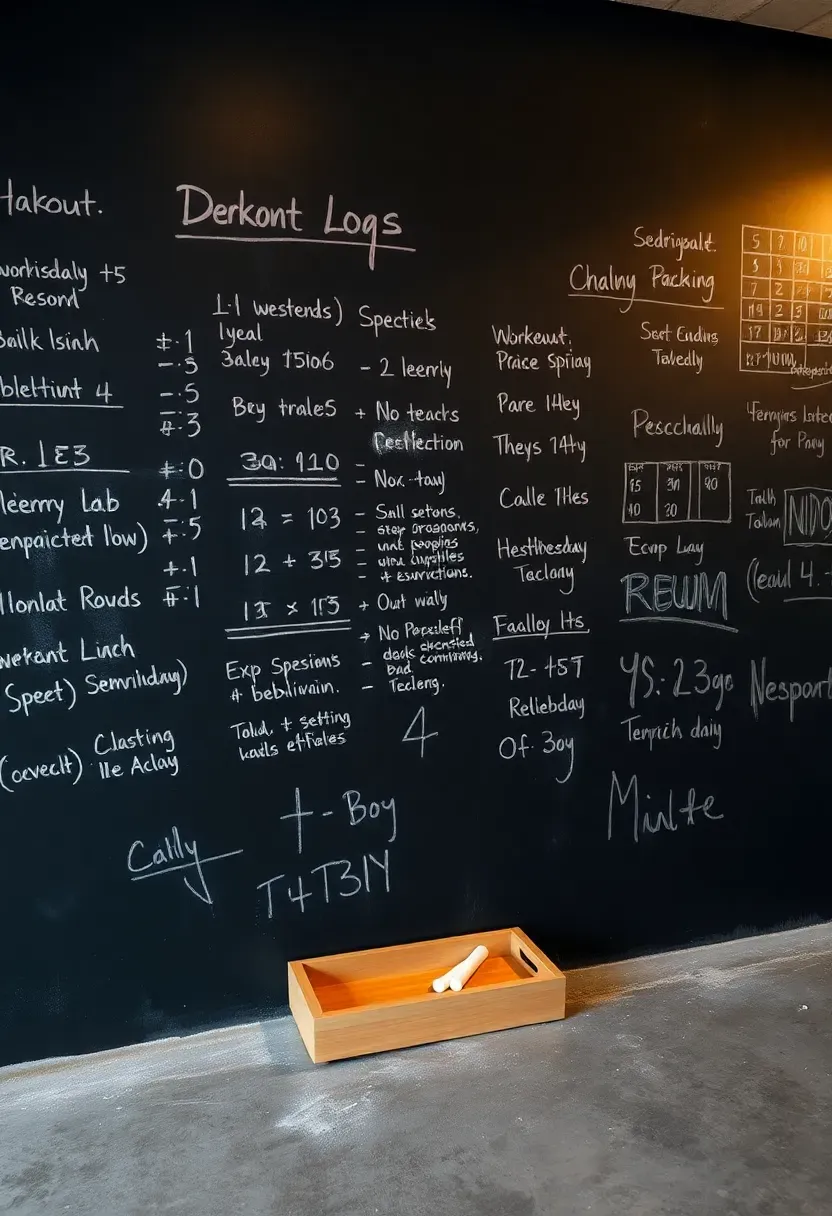
15. Chalkboard Paint Tracking Wall
Paint a 4x6-foot section of your basement wall with two coats of black chalkboard paint ($12 per quart, covers 50 square feet). Use it to track PRs, write daily workouts, and tally weekly volume. Divide the surface into columns: lifts across the top, dates down the side, weights in the cells. It is faster than pulling up an app mid-session and more satisfying to update by hand. The chalk dust stays contained if you keep a small tray and eraser at the bottom of the wall. After three or four months, photograph the wall before erasing and starting fresh.
Tips
- Apply three coats for a smoother writing surface that erases cleanly
- Use liquid chalk markers for semi-permanent records like all-time PRs
- Frame the section with painter's tape during application to keep clean edges against the surrounding wall
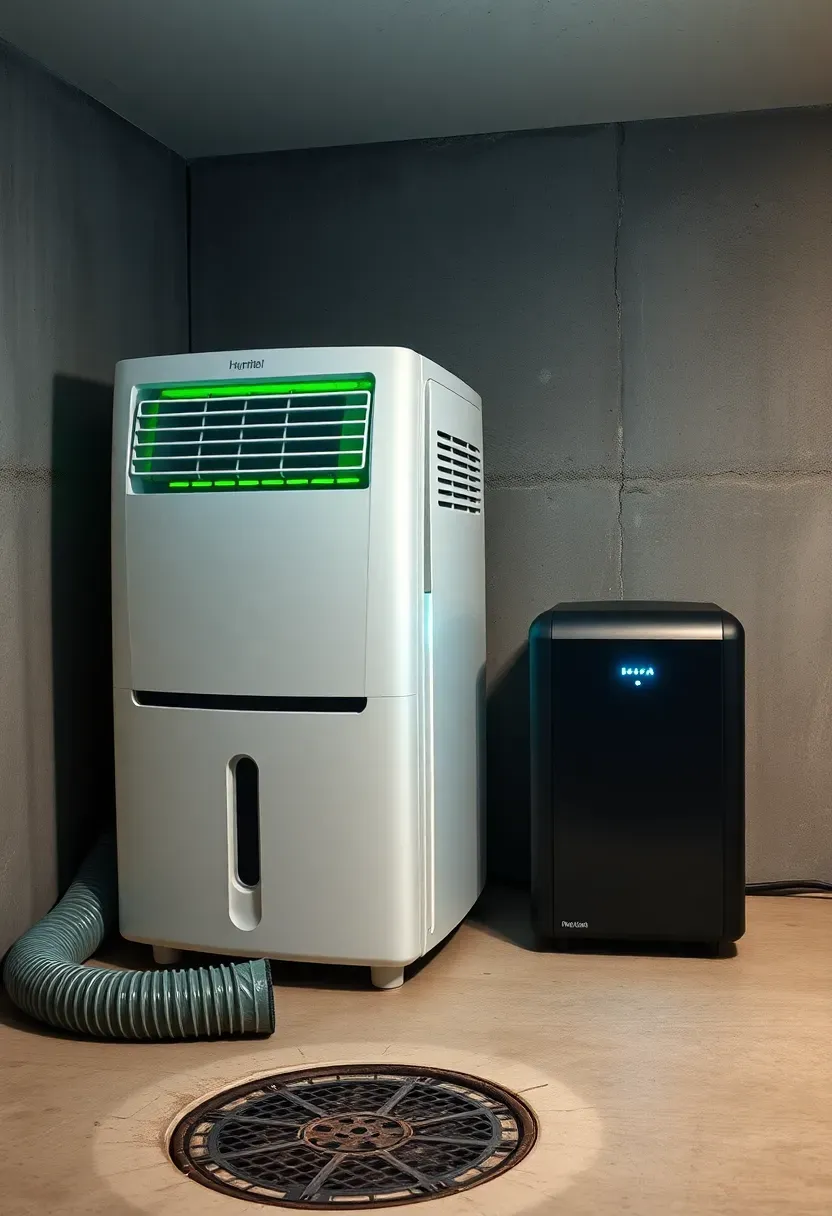
16. Dehumidifier and Air Quality Setup
Why moisture control matters in a basement gym
Basements naturally sit at 50 to 70 percent relative humidity. Add body sweat, heavy breathing, and hot equipment, and you can push past 70 percent easily. At that level, rubber flooring gets slippery, metal equipment rusts, and mold finds a foothold on any porous surface — drywall, wood, gym bags left on the floor.
What to install
A 50-pint dehumidifier ($250 to $350) handles up to 1,500 square feet. Connect a garden hose to the drain port and run it to a floor drain or sump pump so you never empty a tank. Set the target humidity to 45 percent. Add a standalone air purifier with a HEPA filter if you use chalk — the fine particulate lingers in stagnant basement air and irritates lungs over time.
Choose if...
- Dehumidifier only: Your basement is dry but gets humid during workouts
- Dehumidifier plus purifier: You use chalk, have limited ventilation, or notice musty smells
Recommended
Items for this idea
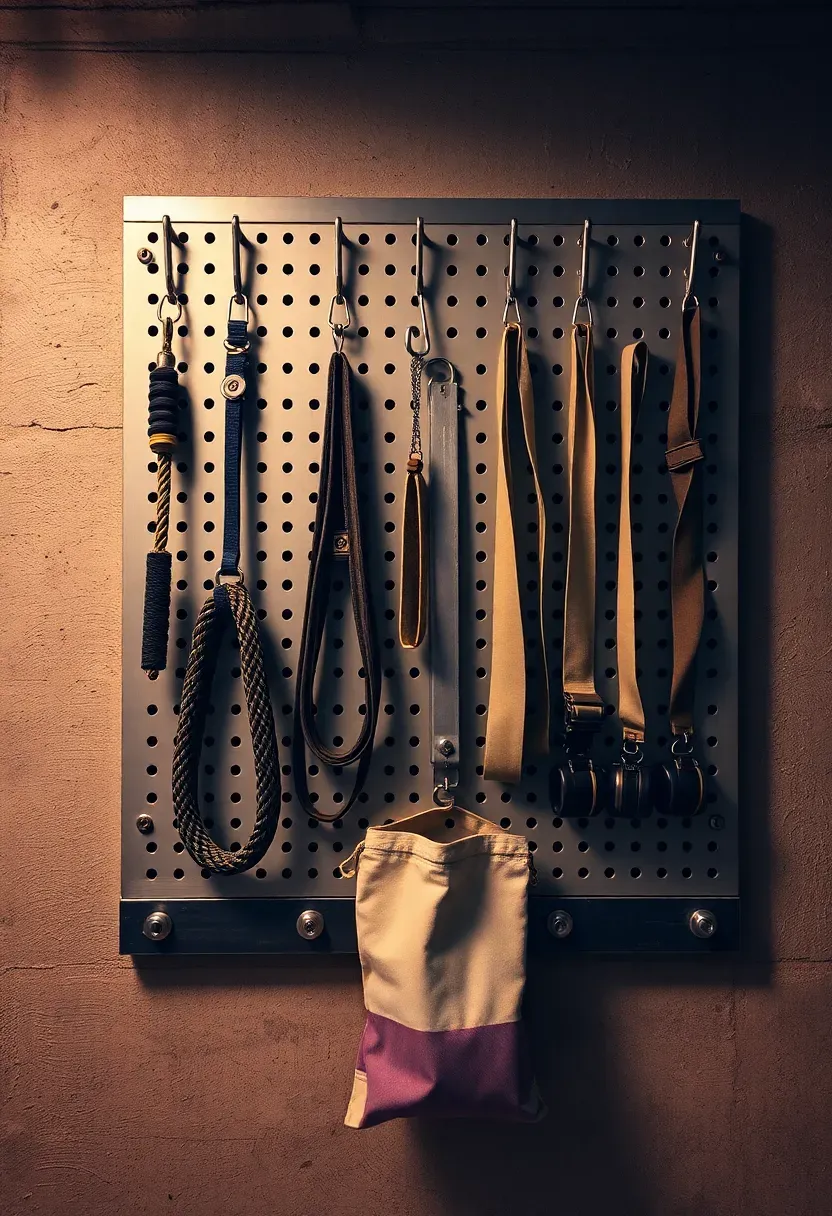
17. Pegboard Tool Wall for Accessories
A 4x2-foot metal pegboard with 1/4-inch holes accepts standard hooks, bins, and shelves. Mount it near your main lifting area for quick access to chalk, wrist wraps, lifting straps, bands, collars, and a lifting belt. The visual layout means you can see every accessory at a glance and notice if something is missing. Metal pegboard runs $40 to $70 at hardware stores. Add a mix of J-hooks ($1 each), small baskets ($5 each), and shelf brackets ($3 each) to customize the layout. Total setup cost stays under $100 for a well-organized accessory wall.
Tips
- Group items by workout type: pulling accessories on the left, pressing accessories on the right
- Paint the pegboard a contrasting color to the wall so items stand out visually
- Add a small magnetic strip along the bottom for storing loose barbell collars and clips
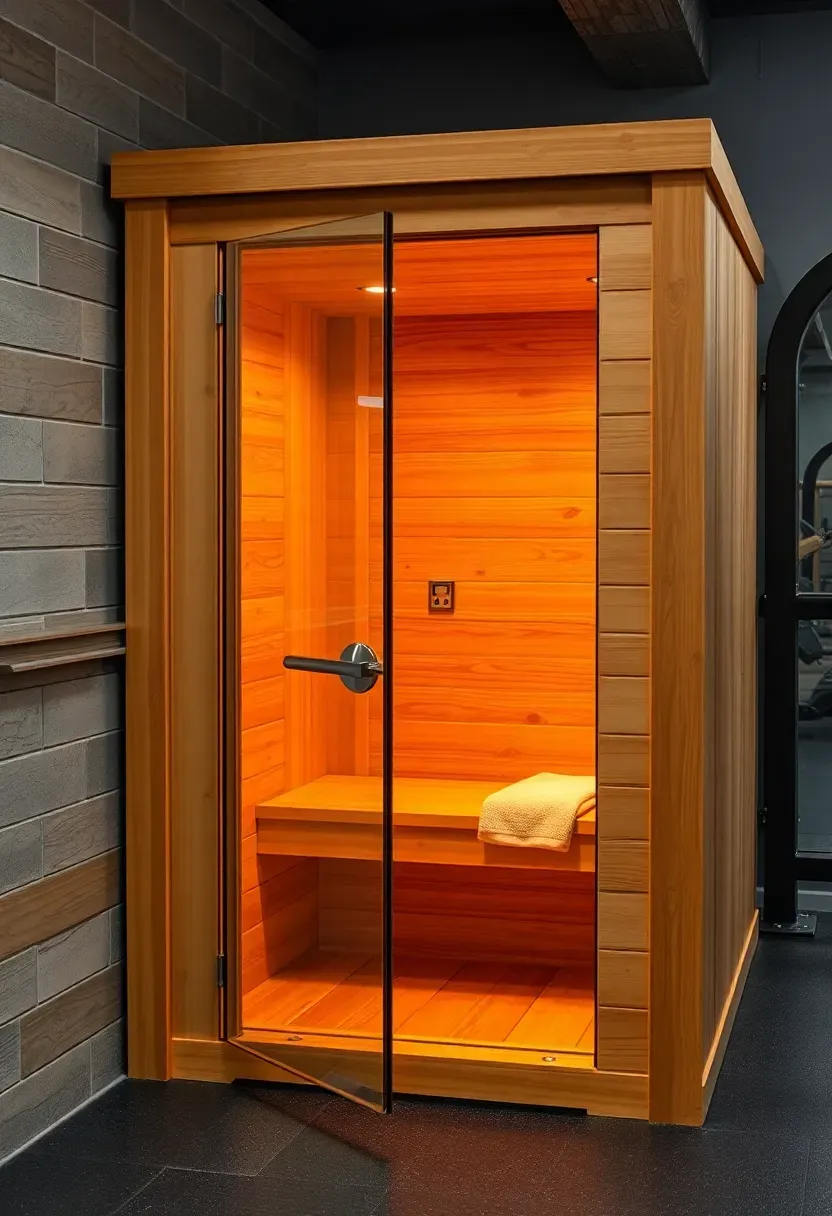
18. Compact Sauna Closet
A one-person infrared sauna cabin fits in a 3x4-foot footprint and plugs into a standard 120V outlet. Brands like Radiant Saunas and JNH Lifestyles sell units for $800 to $1,500 that arrive flat-packed and assemble in under an hour. Position it in a corner away from your lifting zone — you do not want radiant heat warming your barbell handles. The infrared panels heat your body directly rather than the air, so the cabin reaches operating temperature in 10 to 15 minutes versus 30 to 45 for a traditional sauna. Use it after training for 20 to 30 minutes to loosen tight muscles and accelerate recovery.
Tips
- Place a waterproof mat under the sauna to catch sweat drips and protect the floor
- Run a small exhaust fan or open a window nearby to vent moisture after each session
- Keep a towel on the bench and wipe down the interior after use to prevent wood staining
Recommended
Items for this idea
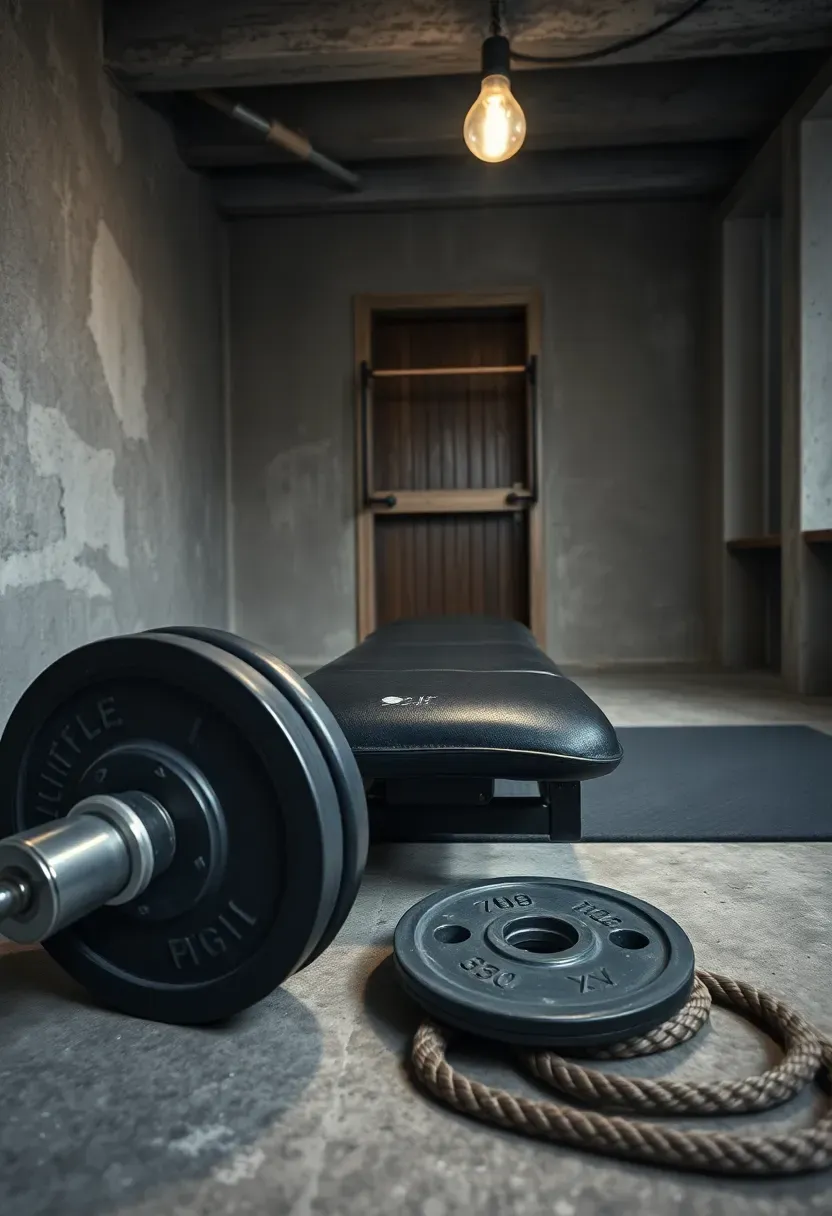
19. Under-$500 Starter Gym Build
You do not need $5,000 to start training at home. Here is a working basement gym for under $500, all purchased secondhand from Facebook Marketplace and Craigslist.
Steps
Step 1: Floor protection — $80. Buy two 4x6-foot horse stall mats from a feed store. They are 3/4-inch thick rubber, weigh about 100 pounds each, and handle any weight you will drop in your first two years of training.
Step 2: Barbell and plates — $200. A used 300-pound Olympic barbell set (bar plus plates) goes for $150 to $250 secondhand. Check the bar for straightness by rolling it on a flat surface.
Step 3: Pull-up bar — $30. A doorframe pull-up bar handles pull-ups, chin-ups, and hanging leg raises. Bolt-mount models are sturdier than tension-rod types.
Step 4: Accessories — $60. A jump rope ($10), two resistance bands ($20), a foam roller ($15), and a bag of chalk ($5) round out the essentials.
Step 5: Bench — $100. A used flat bench appears on Marketplace constantly. Test the padding — if it is cracked or compressed to less than 2 inches thick, pass. A firm, intact pad matters for stability during pressing.
Watch out
- Inspect used plates for cracks, especially around the center hole on older cast iron
- Budget an extra $50 for unexpected costs like mounting hardware and cleaning supplies
Quick FAQ
How much does it cost to build a basement gym? A bare-bones setup starts around $500 for secondhand equipment on rubber mats. A mid-range gym with proper flooring, a rack, cable machine, and accessories runs $3,000 to $6,000. High-end builds with finished walls, sauna, and commercial-grade equipment can exceed $15,000.
Do I need a permit to convert my basement into a gym? Generally no, unless you are cutting into the foundation for windows, adding electrical circuits, or changing the room's classification. Check local building codes — egress window requirements and ceiling height minimums vary by municipality.
What ceiling height do I need for a basement gym? Seven feet is the minimum for most exercises if you train seated overhead presses and use a half-rack. Eight feet opens up standing presses and pull-up bars. Below seven feet, focus on floor-based exercises, machines, and seated movements.
Will heavy weights damage my basement floor? Bare concrete can crack under repeated drops of 200+ pounds. Rubber flooring plus a lifting platform distributes the impact and protects the slab. For everyday dumbbell work and machine use, 3/8-inch rubber over concrete is sufficient.
How do I deal with basement moisture affecting gym equipment? Run a dehumidifier set to 45 percent humidity and wipe down metal equipment after each session. Store barbells horizontally on wall mounts rather than standing in a corner where condensation collects. Apply a light coat of 3-in-1 oil to bar sleeves monthly to prevent rust on the bearings.
A basement gym does not need to look like a commercial facility to work like one. Start with the floor, plan your zones, and add equipment as your training demands it rather than filling the space all at once. The best home gyms I have seen were built over 12 to 18 months, one piece at a time, by people who knew exactly what they needed because they had been training with the basics long enough to identify the gaps.
Pinterest cover for 19 Basement Gym Ideas
About the author
OBCD
CGI visualization and interior design content. We create detailed 3D renders and curate practical design ideas for every room in your home.