27 Basement Bar Designs
I spent two years helping a friend plan his basement bar, and the biggest lesson was that the plumbing decision comes first and everything else follows. A wet bar with a sink opens up cocktail-making, cleanup, and even a small dishwasher — but it adds $2,000 to $5,000 in plumbing rough-in costs depending on how far you are from the main drain stack. A dry bar skips all of that and still gives you a countertop, shelving, fridge, and a place to pour drinks. Knowing which route you want before picking finishes saves you from redesigning halfway through.
These 27 basement bar designs cover wet bars, dry bars, corner setups, full pub recreations, and compact options for tight spaces.
Table of Contents
- Classic Wet Bar with Sink and Dishwasher
- Rustic Reclaimed Wood Dry Bar
- L-Shaped Bar with Seating for Six
- Industrial Pipe and Concrete Bar
- Under-Stair Bar Nook
- Mid-Century Modern Cocktail Bar
- Irish Pub Recreation
- Minimalist White Quartz Bar
- Sports Bar with Multiple Screens
- Wine Bar with Climate-Controlled Storage
- Corner Bar for Small Basements
- Tiki Bar with Bamboo and Thatch
- Farmhouse Bar with Shiplap Back Wall
- Speakeasy-Style Dark Lounge Bar
- Portable Rolling Bar Cart Station
- Craft Beer Tap Wall
- Built-In Bar Inside a Closet
- Black and Gold Glam Bar
- Outdoor-Indoor Walkout Bar
- Game Room Bar Combo
- Floating Shelf Bar with No Base Cabinet
- Stone Veneer Pub-Style Bar
- Compact Beverage Station
- Live Edge Slab Bar Top
- Basement Bar with Pass-Through Window
- Moody Dark Paint and Brass Accents
- Full Commercial-Style Bar
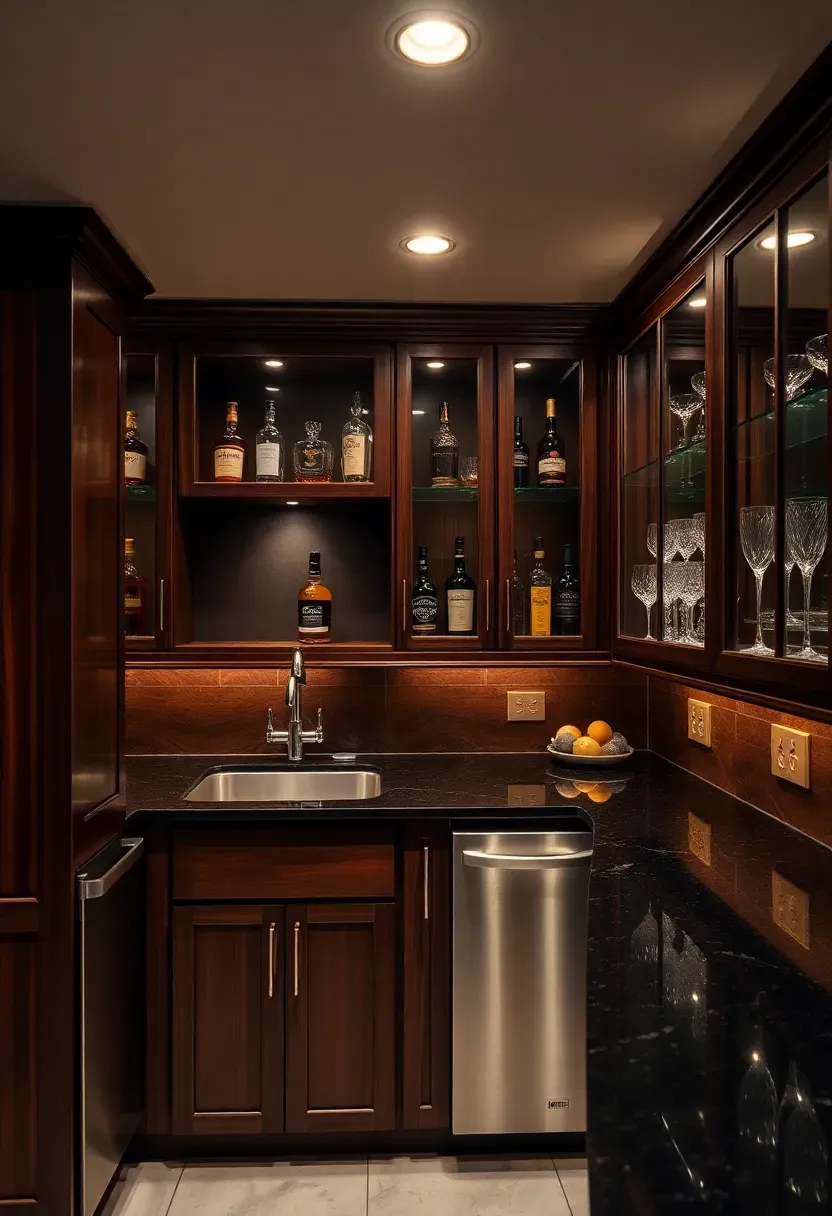
1. Classic Wet Bar with Sink and Dishwasher
A wet bar is the gold standard for basement entertaining because having running water downstairs means you mix, rinse, and clean up without climbing stairs. The typical setup runs 8 to 12 linear feet of base cabinets with a stainless undermount sink off to one side, a compact 18-inch dishwasher beside it, and a beverage fridge on the opposite end. Budget roughly $6,000 to $15,000 for cabinets, countertop, plumbing, and appliances — though you can cut that significantly by using stock kitchen cabinets from a home center instead of custom millwork.
Tips
- Position the sink as close to the main drain stack as possible to reduce plumbing costs
- Install a check valve on the drain line to prevent sewage backup during heavy rain
- Use a granite composite sink instead of stainless — it muffles noise better in an open basement
We picked a few things that go well with this idea: Rustic Freestanding Wine Bar Cabinet (★4.6), GDLF Large Bar Cabinet with Fridge Space (★4.7) and BROTTAR LED Bar Cabinet with Fridge Included (★4.2). As an Amazon Associate we earn from qualifying purchases.
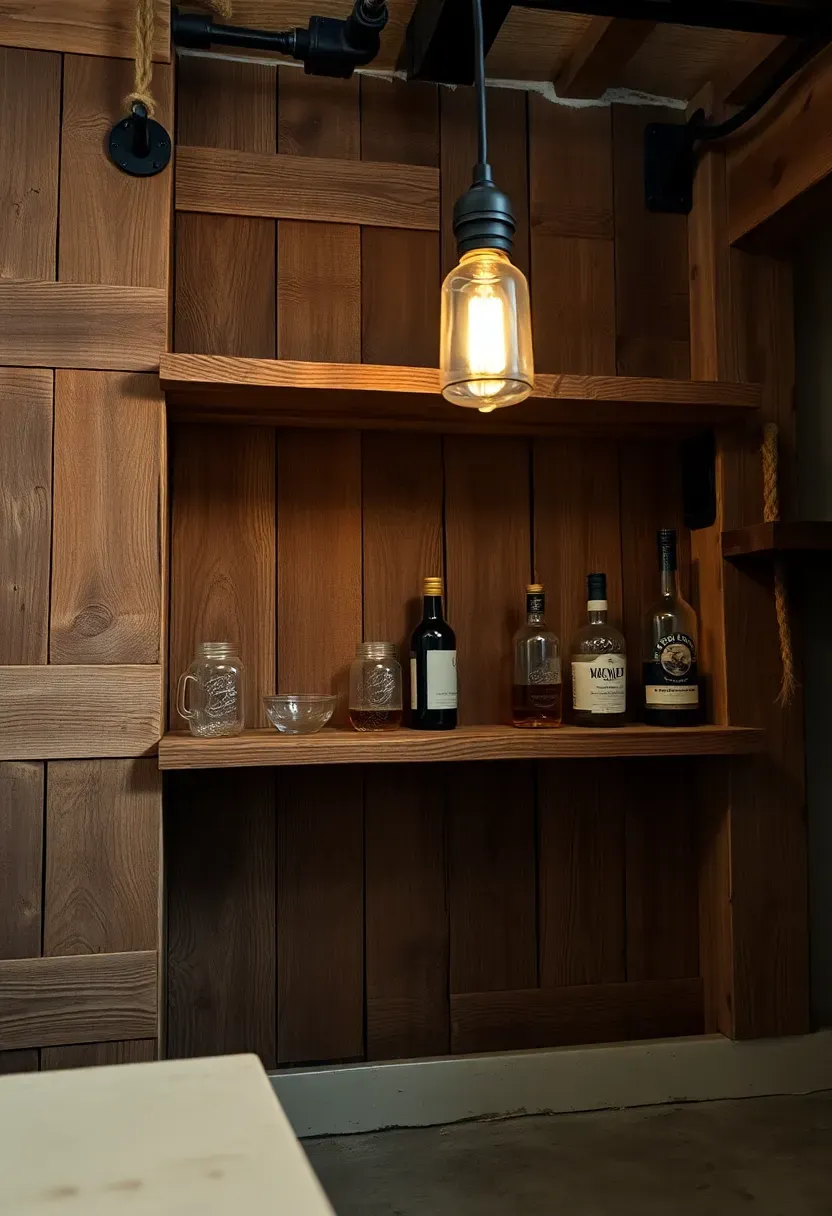
2. Rustic Reclaimed Wood Dry Bar
Why people keep choosing this look
Reclaimed wood brings texture and warmth that new materials struggle to replicate. The nail holes, saw marks, and color variation tell you immediately that these boards had a previous life. In a basement where walls can feel sterile after a fresh drywall finish, a bar faced with old barn siding or pallet wood becomes the focal point without any extra decoration needed.
How to build it
- Source reclaimed lumber — barn siding, fence boards, or demolition wood all work
- Build a standard 42-inch-high bar frame from 2x4s and plywood
- Face the front and sides with reclaimed planks using construction adhesive and brad nails
- Sand lightly to remove splinters but keep the weathered character intact
Watch out for
- Reclaimed wood can carry mold, insects, or lead paint — inspect and treat before bringing it inside
- Seal with a matte polyurethane to protect against spills without adding unwanted shine
We picked a few things that go well with this idea: DUMOS Faux Leather Bar Stools (Set of 4) (★4.6), DUMOS Black Faux Leather Bar Stools (Set of 4) (★4.6) and Sweetcrispy Adjustable Swivel Bar Stools (Set of 4) (★4.5). As an Amazon Associate we earn from qualifying purchases.
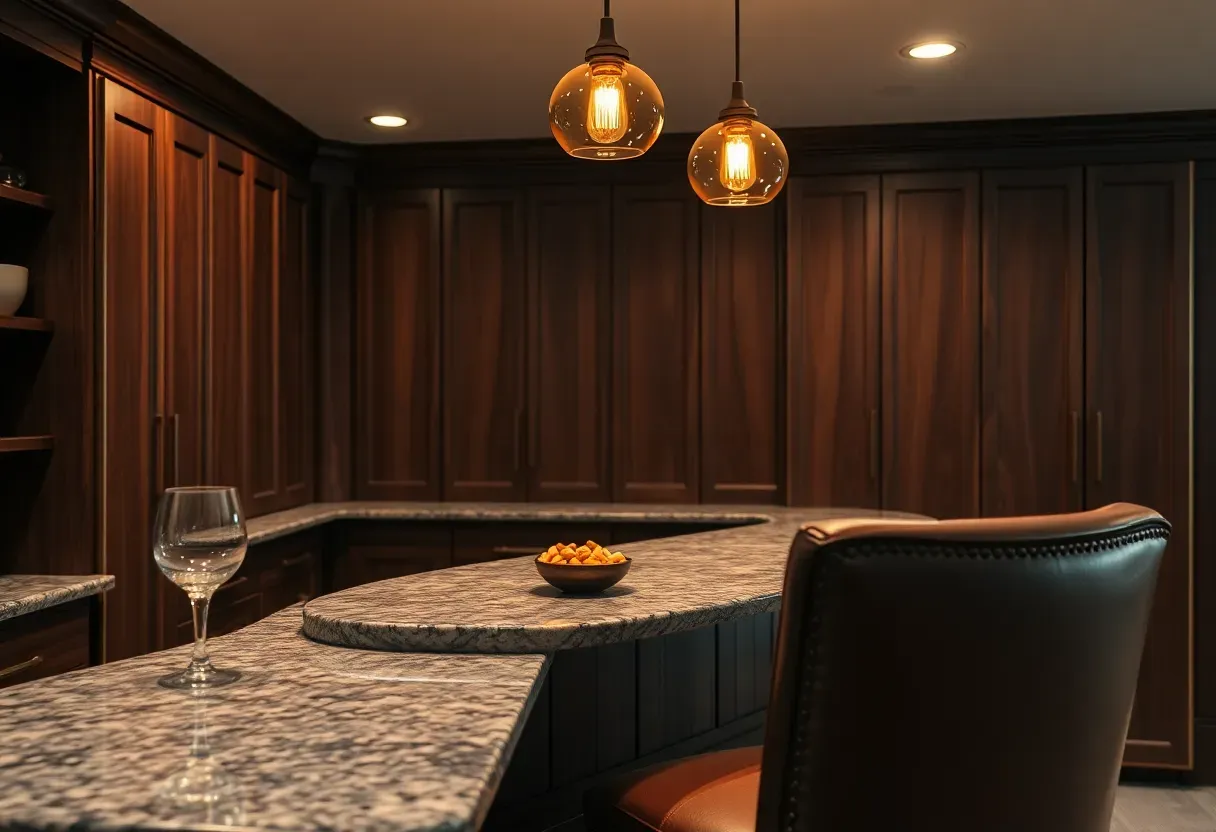
3. L-Shaped Bar with Seating for Six
The L-shape gives you the most seating per square foot of any bar layout. One arm handles the working side — sink, fridge, glassware — while the return provides a long run of countertop for guests. At standard 24-inch spacing per stool, a 12-foot total bar length seats six comfortably. The corner where the two arms meet is dead space from the seating side, so use it for a speed rail or garnish station on the bartender side. Keep the overhang at 10 to 12 inches so guests have knee room without the top feeling flimsy.
Tips
- Angle the corner at 45 degrees instead of a hard 90 to prevent a dead zone at the bend
- Run an electrical outlet strip under the bar top overhang for phone charging
- Standard bar height is 42 inches — do not go lower or standard stools will not fit
We picked a few things that go well with this idea: KITESSENSU Cocktail Shaker Bartender Kit with Stand (★4.7), 15-Piece Cocktail Shaker Set with Acrylic Stand (★4.6) and HMYBAR 22-Piece Mixology Bartender Kit (★4.8). As an Amazon Associate we earn from qualifying purchases.
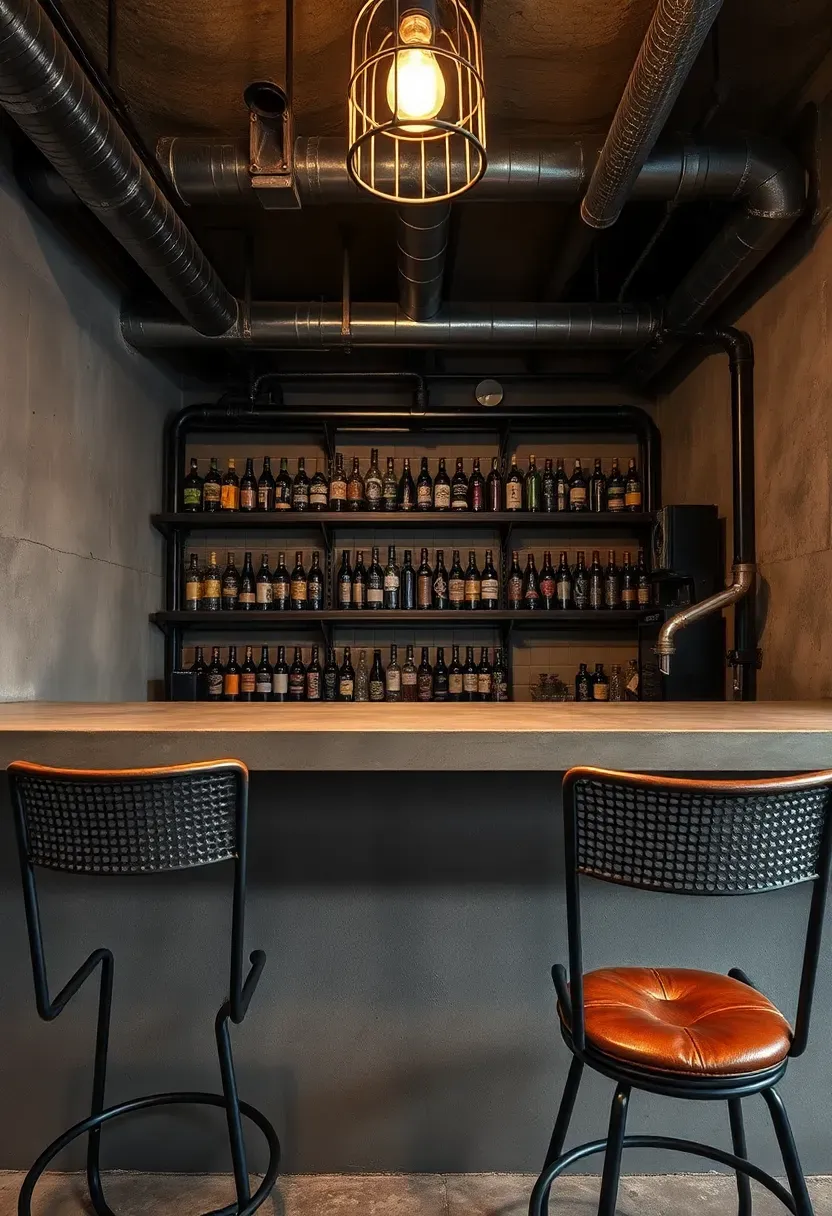
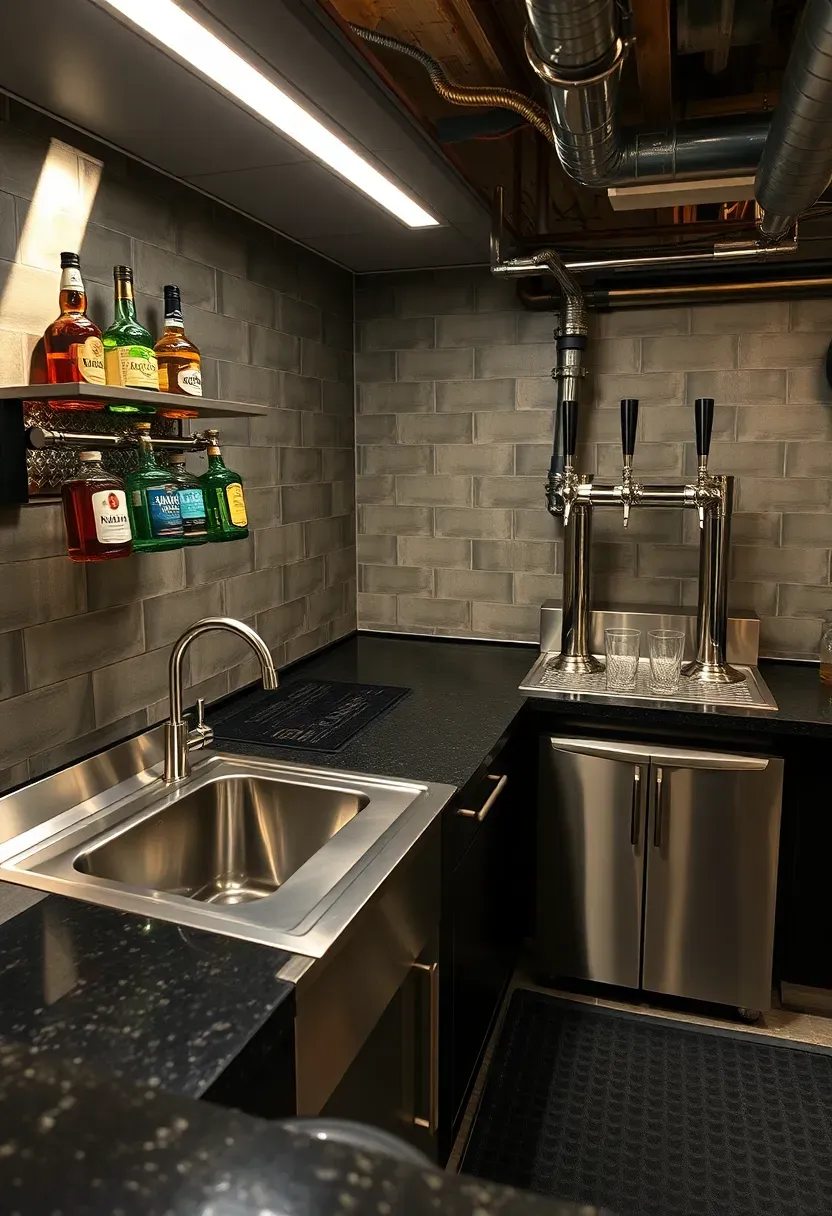
4. Industrial Pipe and Concrete Bar
The concept
Industrial style works naturally in basements because you can leave ductwork, pipes, and joists exposed instead of hiding them behind a dropped ceiling. The bar itself follows the same logic — concrete countertops, black iron pipe shelving, raw steel brackets, and minimal finish work. The look says function-first, and it costs less than polished alternatives because imperfections are part of the design.
Materials breakdown
- Countertop: Poured-in-place concrete using Quikrete Countertop Mix runs about $5 to $8 per square foot for materials. Seal with a food-safe penetrating sealer.
- Shelving: 3/4-inch black iron pipe from any plumbing supply, assembled with floor flanges screwed into studs. Three shelves behind the bar cost roughly $120 to $200 in pipe fittings.
- Bar face: Sheet metal panels, corrugated steel, or just painted plywood with visible bolt heads.
Choose this if
You want a bar that feels like a brewpub taproom and you are comfortable with surfaces that patina over time rather than staying pristine.
Recommended
Items for this idea
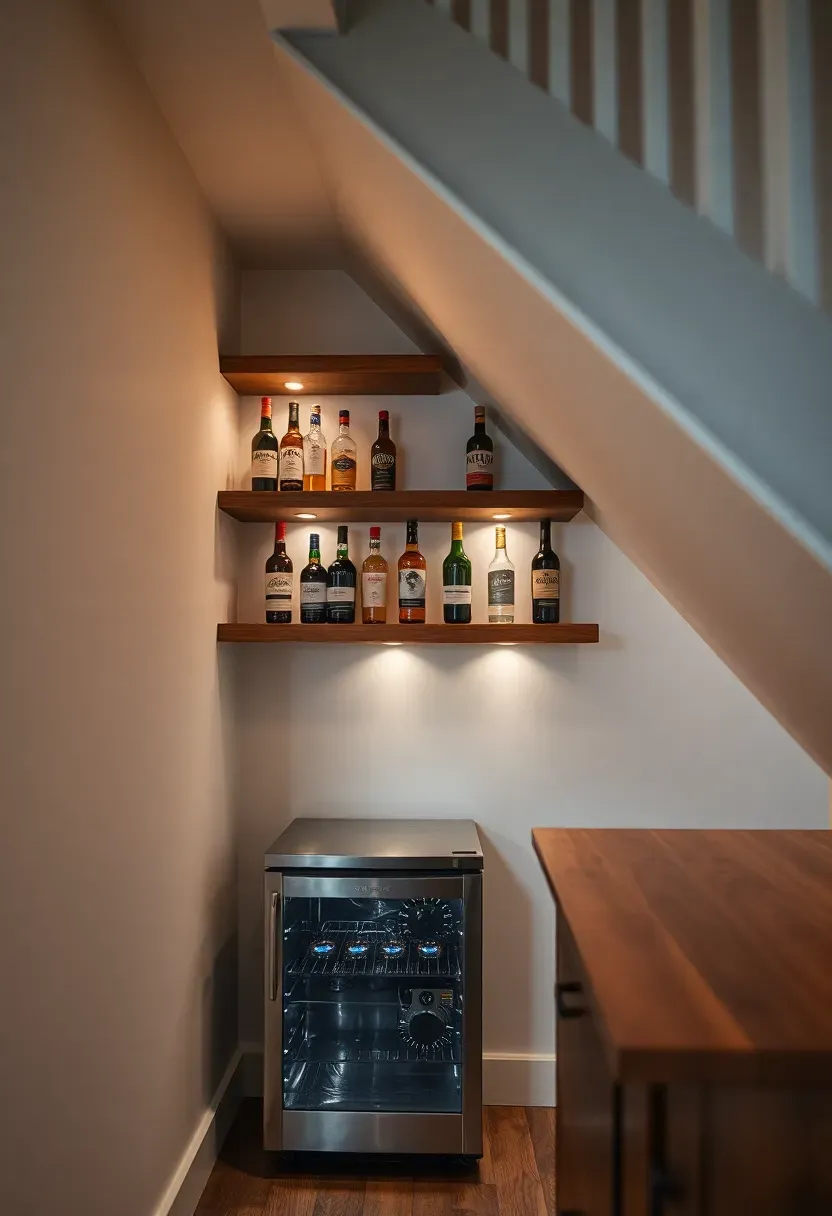
5. Under-Stair Bar Nook
The space under a basement staircase usually collects boxes and forgotten holiday decorations. Converting it into a bar nook gives you a built-in feel without losing usable floor space from the main room. The triangular shape works in your favor — the tallest section at the front fits a counter, the middle section holds shelving, and the shallow rear section stores bottles on their sides like a wine rack. A single mini fridge tucks in at floor level where head clearance is already too low for anything else.
Tips
- Add puck lights or LED strips to the underside of each shelf — under-stair spaces get zero natural light
- Frame out the opening with trim to make it look intentional, not like a closet conversion
- Measure twice — stair angles vary and off-the-shelf shelving rarely fits without cutting
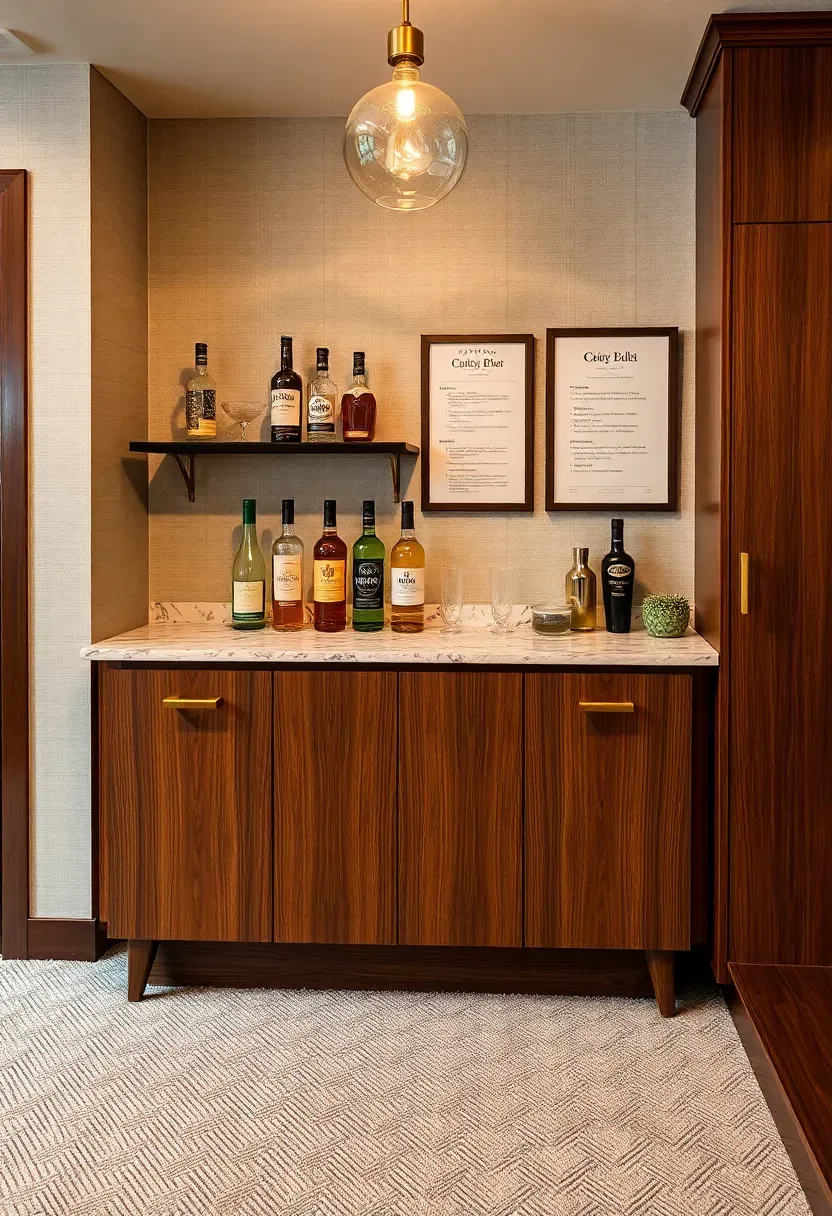
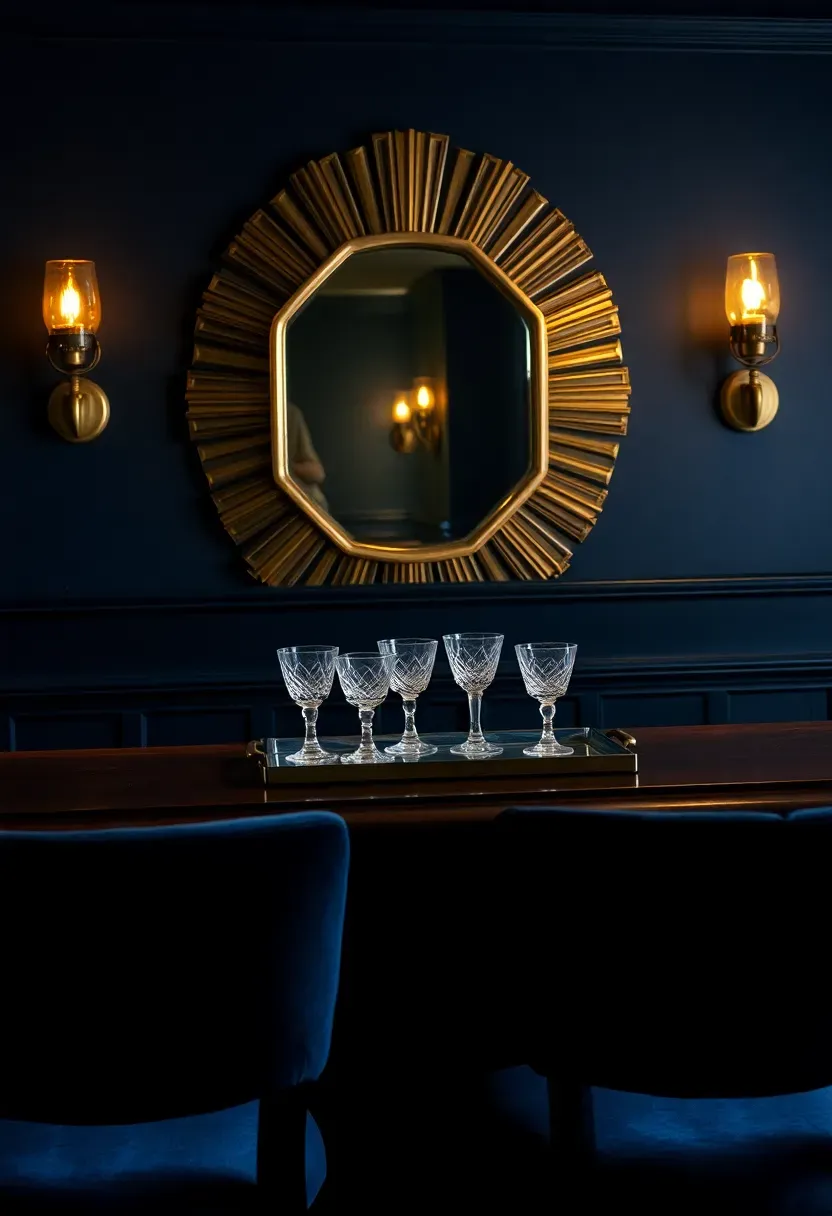
6. Mid-Century Modern Cocktail Bar
The era that never goes out of style
Mid-century cocktail culture peaked in the 1950s and 60s, and the aesthetic — walnut wood, tapered legs, brass hardware, and clean geometric lines — remains one of the most requested bar designs today. The key is restraint. Two or three signature elements carry the theme without turning your basement into a costume set. A walnut-veneered bar with hairpin legs, a starburst mirror behind the shelves, and a couple of vintage cocktail prints give you the vibe.
Modern updates
Pair the vintage look with modern conveniences. A drawer-style beverage cooler looks period-appropriate when paneled to match the cabinetry. Quartz countertops in terrazzo patterns echo the mid-century flooring style while being far more practical than actual terrazzo for a bar surface. Under-cabinet LED strips in warm white (2700K) mimic the incandescent glow of the era.
Apply at home
Start with a credenza-style base from a furniture store. Add a butcher block or stone top, mount a mirror and floating shelves behind it, and stock it with proper glassware. Total cost for this approach runs $800 to $2,000.
Recommended
Items for this idea
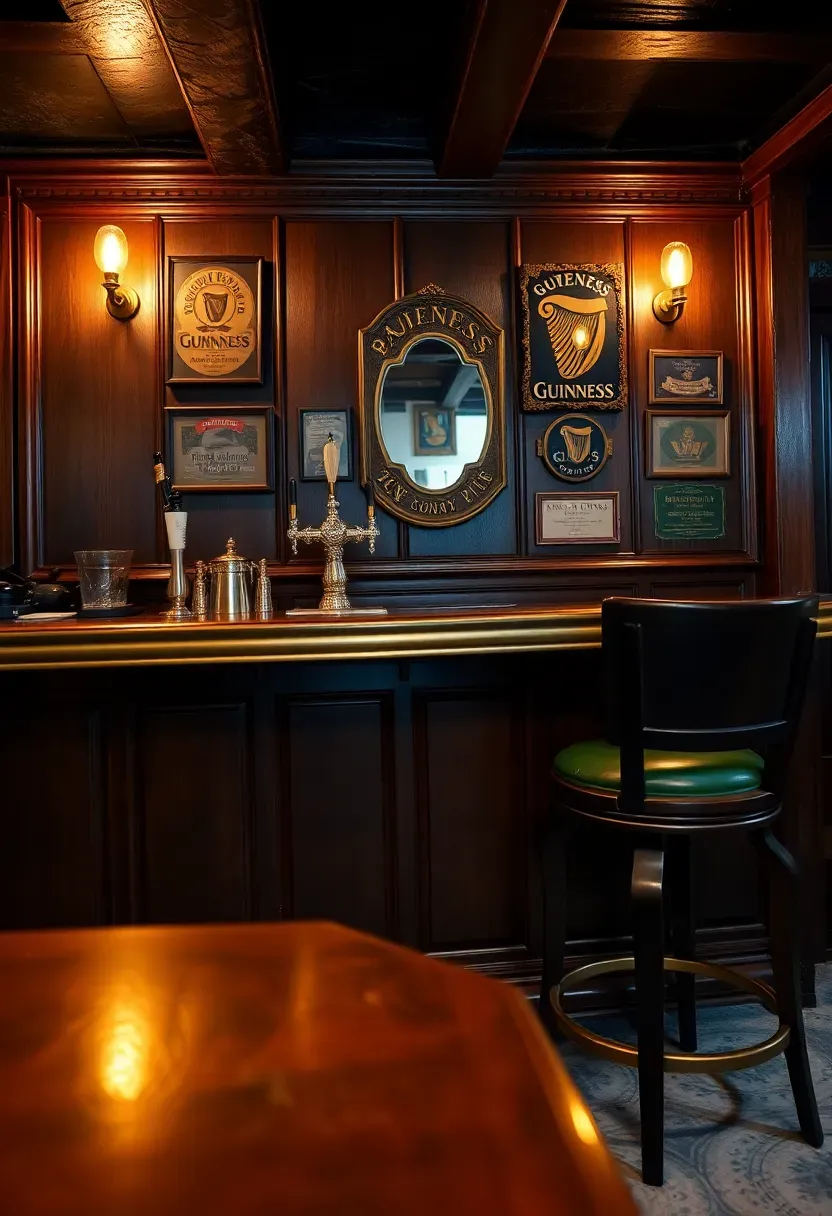
7. Irish Pub Recreation
Building a pub in your basement is less about perfection and more about atmosphere. The essential ingredients are dark-stained wood everywhere you look, a brass or chrome foot rail along the bar base, soft amber lighting (never overhead fluorescents), and enough wall space for signs, mirrors, and memorabilia. Real pub bars run 12 to 16 inches deep on the patron side and 24 inches deep behind for the working area. The bar top itself should be hardwood — oak or mahogany — sealed with marine-grade polyurethane to handle wet glasses and spills for years.
Tips
- Install a foot rail 6 inches off the ground along the bar face — it changes the whole feel
- Hang a dart board on an adjacent wall with proper 7-foot-9.25-inch throw line
- Use warm-dimmed bulbs at 40 to 60 watts equivalent so the room feels like a proper pub at night
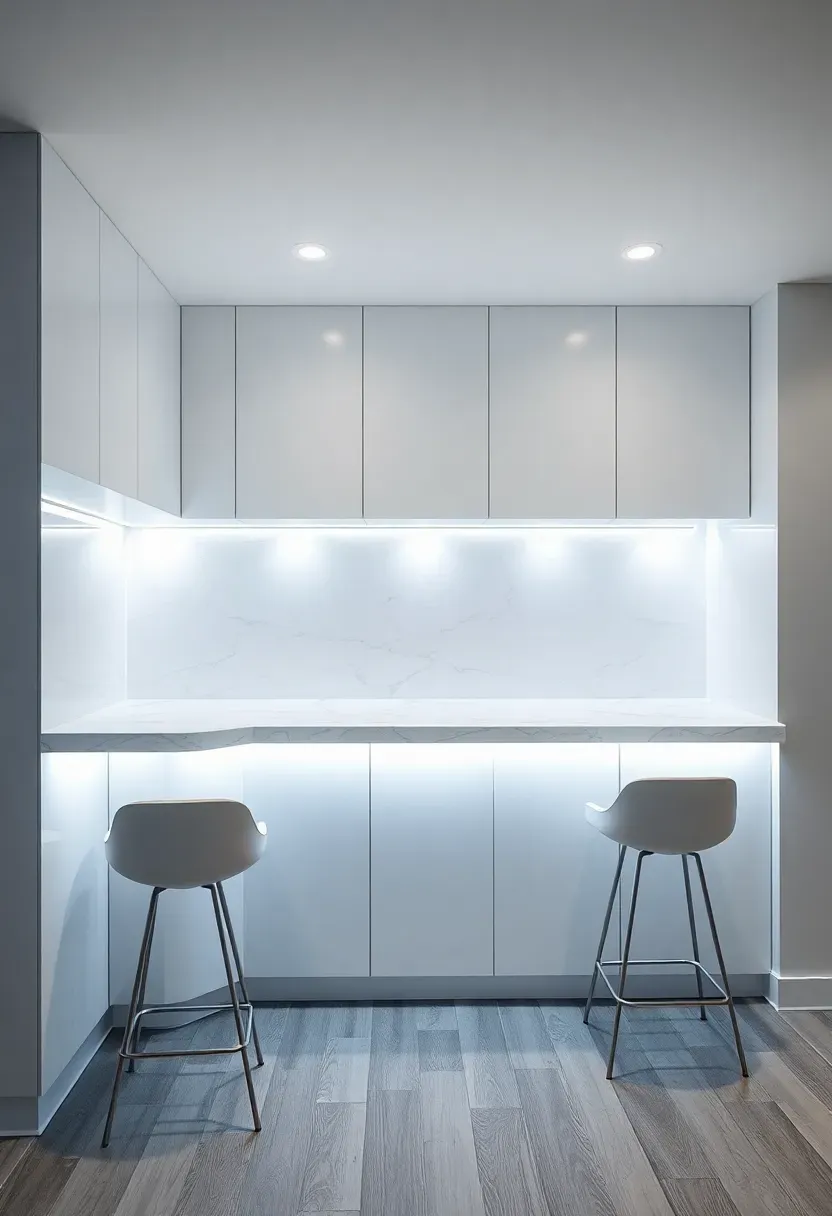
8. Minimalist White Quartz Bar
Why minimalism works underground
A white bar in a basement defies the expectation that below-grade spaces need to be dark and moody. White quartz countertops and flat-panel cabinets reflect the light you do have — whether from recessed cans, LED strips, or a walkout window — and make the bar area feel like it belongs in a high-end kitchen rather than a converted storage room.
Practical details
- Choose a quartz with subtle veining (Calacatta pattern) rather than pure solid white, which shows every fingerprint
- Use slab-style cabinet doors with push-to-open hardware for a handle-free front
- Install under-cabinet lighting on a dimmer so you can shift from bright task light to ambient evening glow
Watch out for
- Pure white surfaces in a basement near a sump pump or laundry area will show dust and lint constantly
- Pair white with one warm material — wood shelving, brass pulls — or the space risks feeling clinical
Recommended
Items for this idea
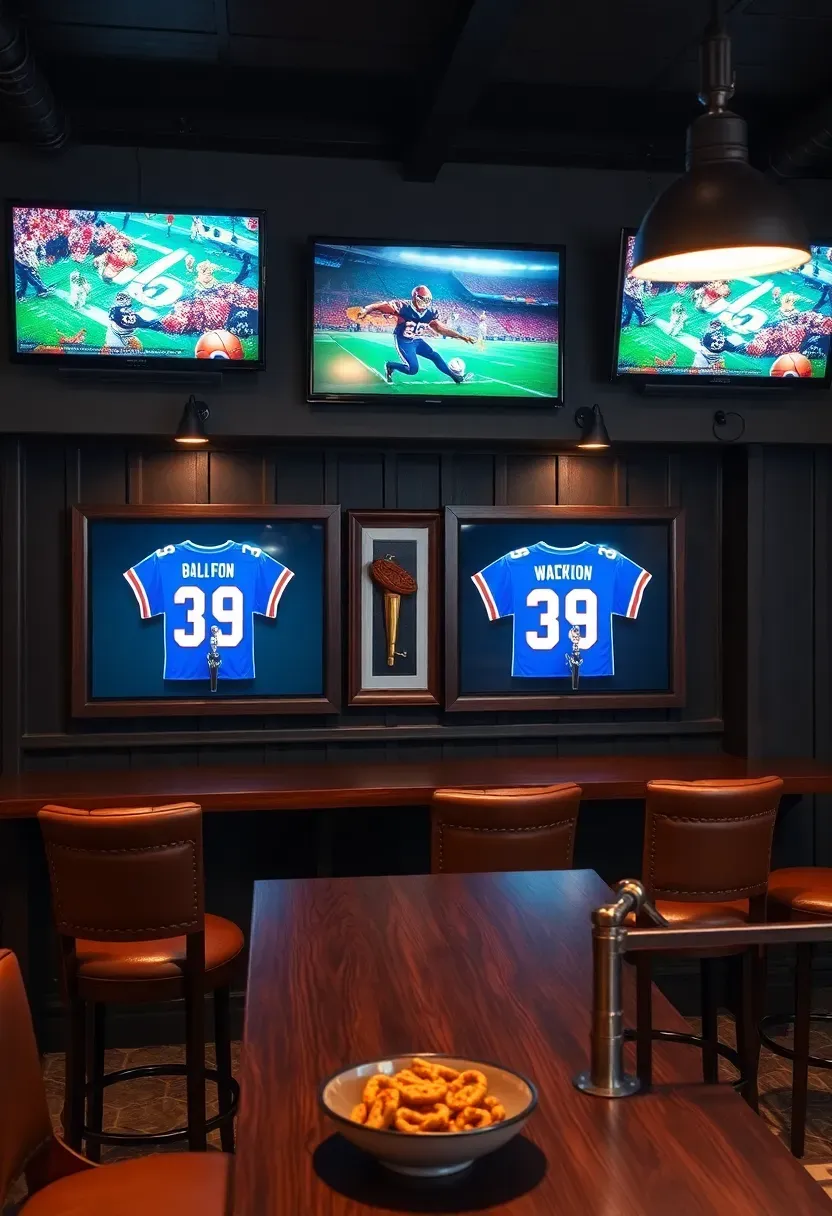
9. Sports Bar with Multiple Screens
A sports bar setup works best when the screens are visible from every seat. Mount two to four TVs above or behind the bar at varying heights so sightlines clear each other. Use matching TV models so color temperature and brightness stay consistent across screens. Behind the bar, leave room for a kegerator or beverage fridge where the bartender (probably you) can pour without turning away from the action. Add a chalkboard or digital scoreboard for fantasy league tracking during football season.
Tips
- Wire each TV to its own streaming device so you can run different games simultaneously
- Mount TVs on articulating arms so you can angle them toward different seating zones
- A soundbar under the primary screen prevents audio chaos from competing channels
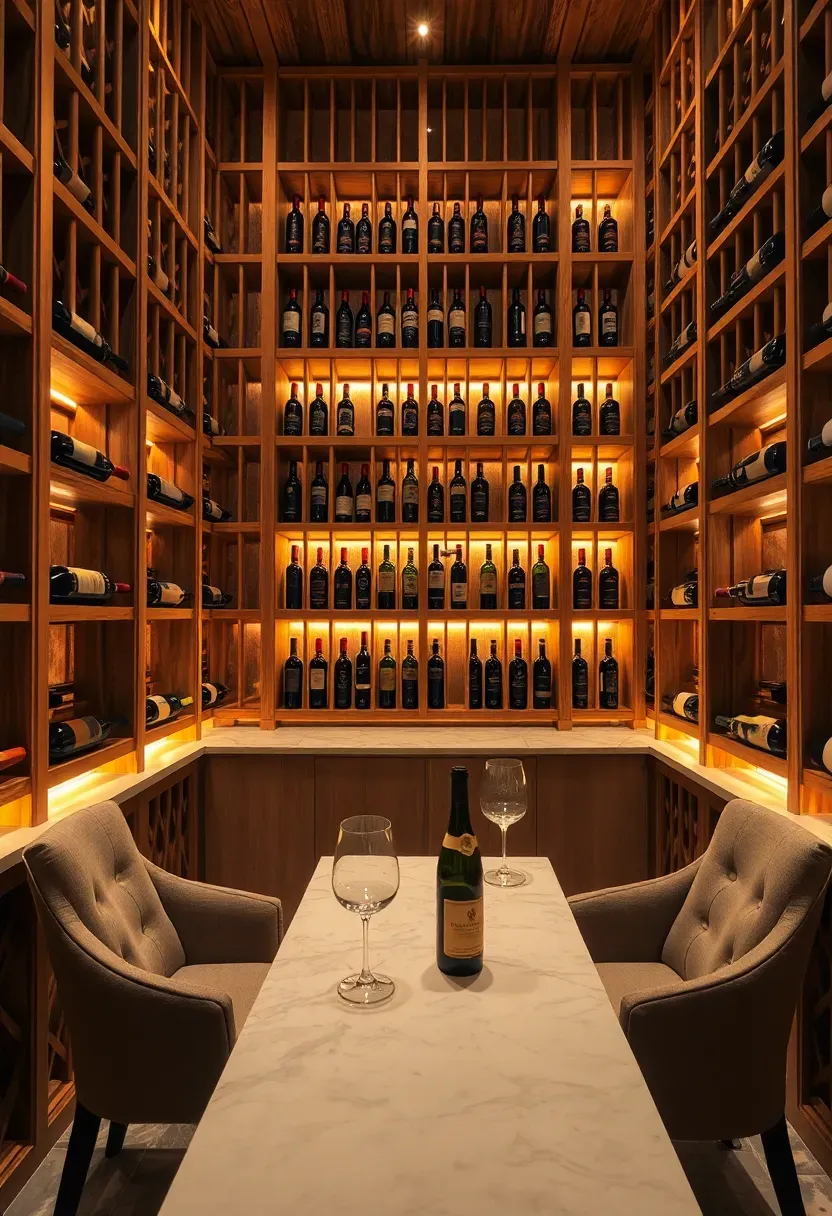
10. Wine Bar with Climate-Controlled Storage
The setup
A wine bar differs from a standard bar in one critical way — temperature matters. Wine needs consistent 55-degree storage, which basements naturally approach but rarely hold perfectly year-round. A through-wall or built-in wine cooling unit maintains that target in a sealed cabinet or closet section while the rest of your bar stays at room temperature. Pair the cooler with a marble or granite tasting counter, proper stemware storage, and a small sink for rinsing glasses.
Sizing the storage
- Casual collector (24 to 50 bottles): A freestanding dual-zone wine fridge fits under the bar counter
- Serious collector (100 to 300 bottles): Built-in racking with a dedicated cooling unit in a sealed alcove
- Cellar-level (300-plus): Full room conversion with vapor barrier, insulation, and commercial cooling — budget $5,000 to $15,000 for the climate system alone
Choose this if
You buy wine by the case rather than the bottle and want a proper tasting experience at home without opening your main cellar every time guests visit.
Recommended
Items for this idea
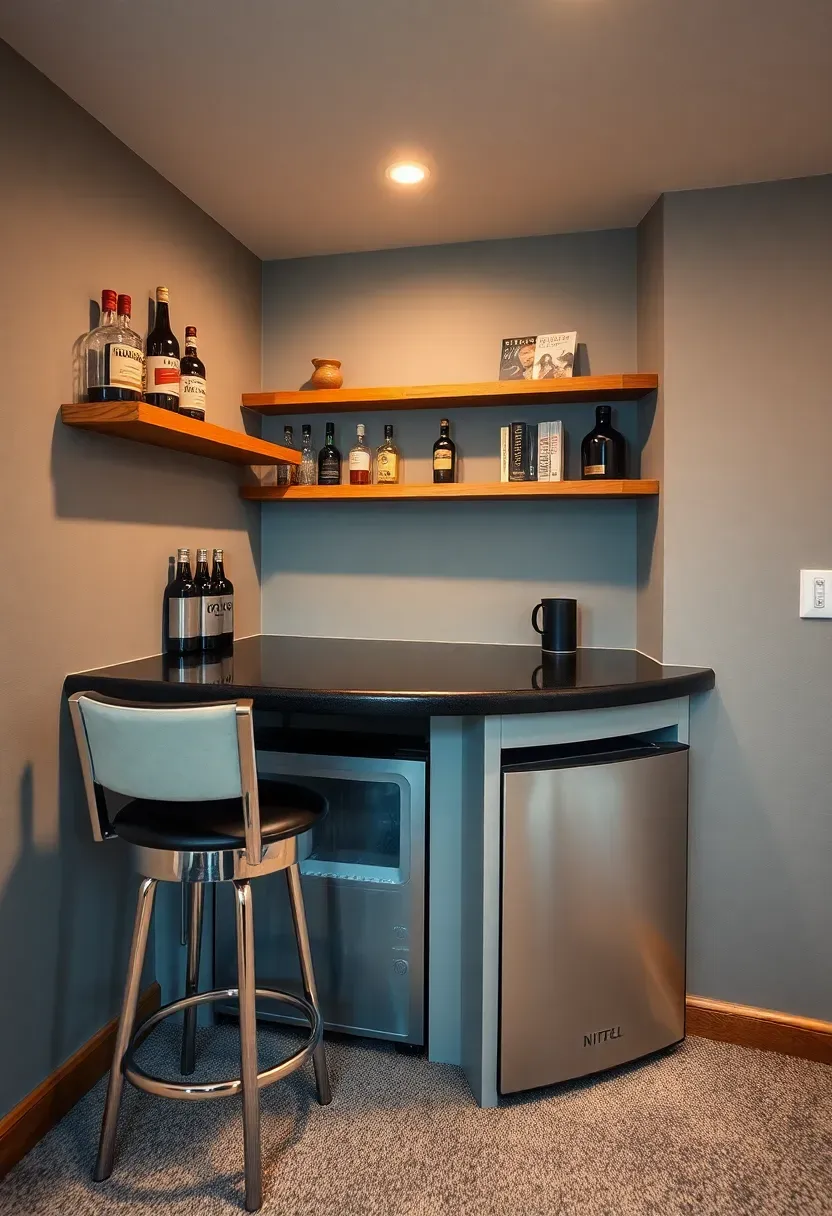
11. Corner Bar for Small Basements
Corners eat square footage in basements that are already tight on space. A purpose-built corner bar reclaims that dead zone and keeps the center of the room open for furniture or movement. Build an angled countertop that spans 4 to 5 feet along each wall and meets at a curved or 45-degree front. Two stools fit at the front face, and the back walls hold floating shelves for bottles and glassware. A mini fridge and a small trash bin tuck underneath. This entire setup fits in a 5-by-5-foot footprint.
Tips
- Curve the front face instead of meeting at a sharp angle — it is more comfortable for sitting
- Mount a mirror on one of the back walls to visually double the shelf display
- Add a fold-down extension panel for extra counter space during parties
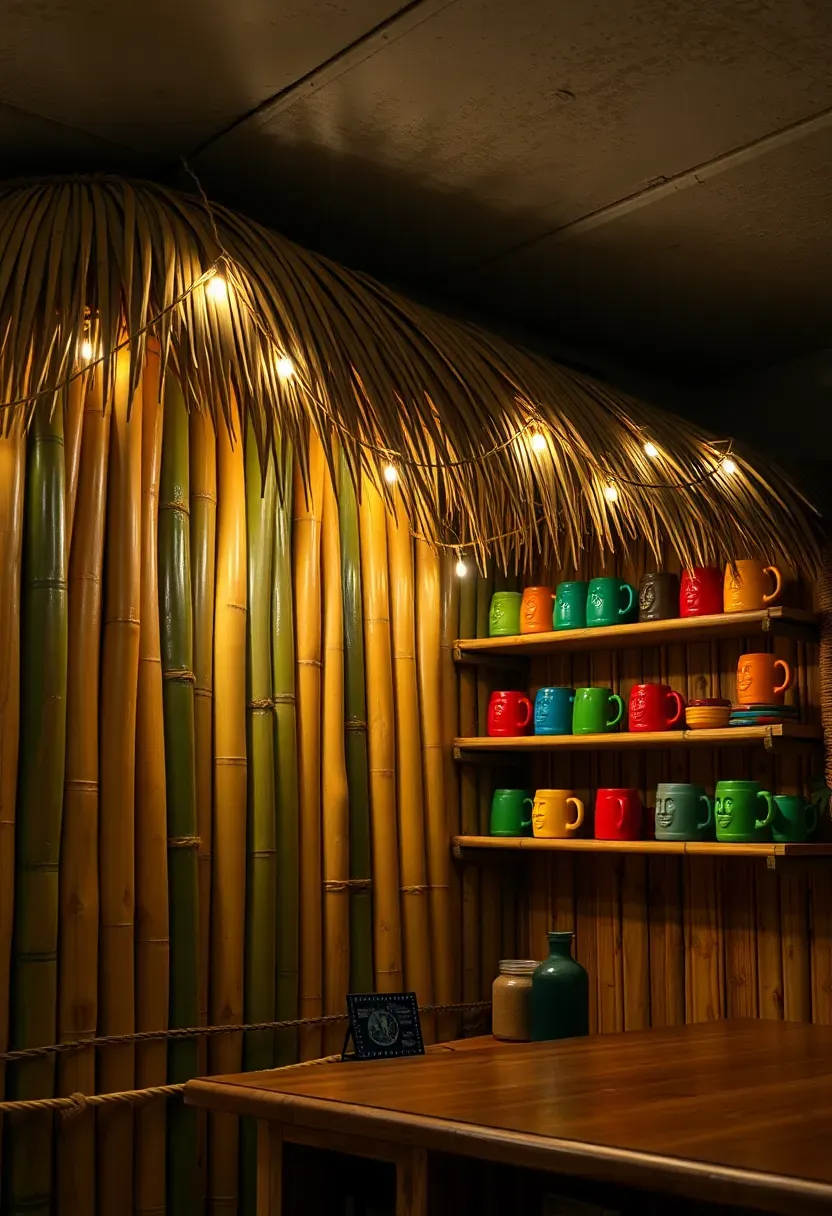
12. Tiki Bar with Bamboo and Thatch
A tiki bar in the basement commits fully to a theme, and that is what makes it work. Half-measures look awkward — go all in with bamboo pole facing on the bar front, a thatched palm or reed roof extension over the serving area, carved tiki masks on the walls, and colored rope lights instead of standard fixtures. The bar itself can be basic plywood construction behind the bamboo facing. Stock it with rum, tropical mixers, and a blender, and the atmosphere does the rest.
Tips
- Real bamboo poles range from $3 to $8 per 8-foot pole — you need about 30 to cover a standard bar front
- Use dried palm thatch panels (available online in 4x4-foot sections) for the roof overhang
- Keep a fire extinguisher accessible — thatch and string lights near alcohol require precaution
Recommended
Items for this idea
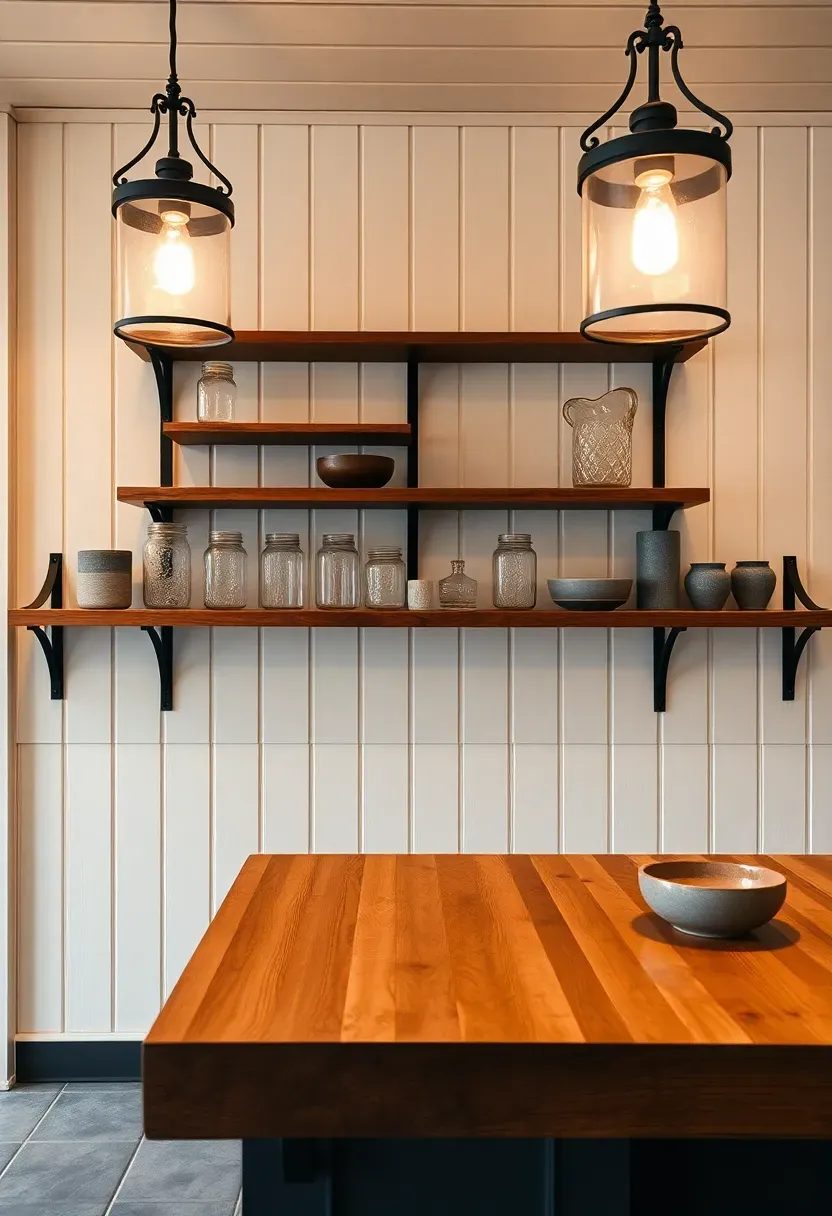
13. Farmhouse Bar with Shiplap Back Wall
Issue: basement bars often lack character
Drywall behind a bar is functional but forgettable. In a basement where every surface tends to be the same flat white or beige, the bar blends into the wall instead of standing out as a destination within the room.
Solution
Shiplap planks on the wall behind the bar add horizontal texture and shadow lines that immediately break up the monotony. Paint it white for classic farmhouse, leave it natural for a warmer rustic feel, or go dark for modern farmhouse contrast. Pair with a butcher block countertop, open wood shelving with black iron brackets, and pendant lights with wrought iron or galvanized metal shades. The combination reads as intentional and finished without being fussy.
Pros and cons
- Pro: Shiplap costs $2 to $5 per square foot and installs in a weekend with a nail gun
- Pro: The horizontal lines make low basement ceilings feel wider
- Con: Gaps between boards collect dust and are harder to clean than flat drywall
- Con: The farmhouse trend has peaked in some markets — consider how long you will want this look
14. Speakeasy-Style Dark Lounge Bar
Basements are inherently private and closed off from the main house, which makes them perfect for a speakeasy concept. Paint the walls dark — deep green, navy, or charcoal — and use low-wattage wall sconces instead of overhead lighting. The bar itself should feel substantial: thick wood or stone top, paneled front, brass or antique-finish hardware. Velvet-upholstered stools and a tufted leather bench along the opposite wall complete the lounge atmosphere. Add a bookshelf door or curtained entry for the full hidden-room effect.
Tips
- Install a dimmer on every light source — the mood lives or dies on light level control
- Stock cocktail ingredients from the 1920s canon: rye whiskey, gin, sweet vermouth, bitters, absinthe
- Frame vintage prohibition-era photos or newspaper front pages as wall decor
Recommended
Items for this idea
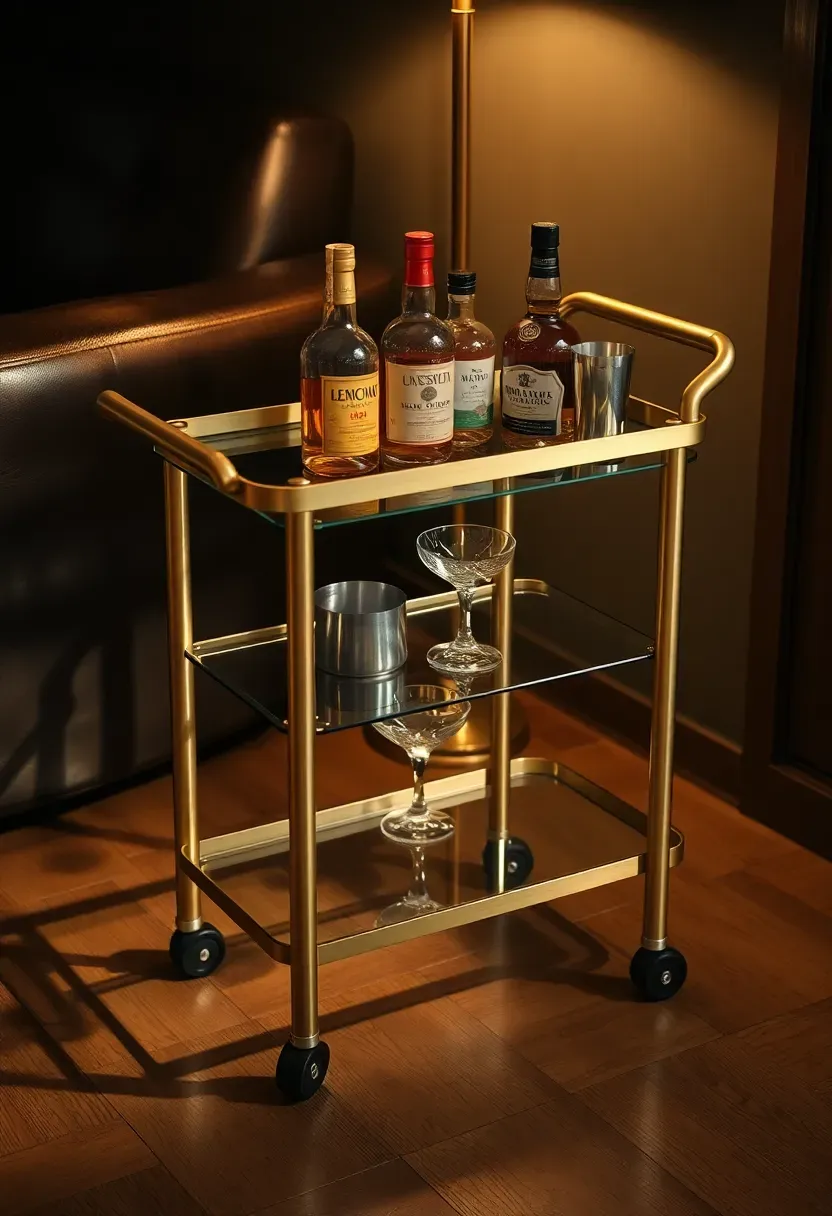
15. Portable Rolling Bar Cart Station
Why skip the built-in
Not every basement needs a permanent bar. If you entertain occasionally, share the space with a home gym or playroom, or rent and cannot make structural changes, a rolling bar cart gives you everything you need without committing to a fixed installation. A well-stocked cart with two to three shelves holds a dozen bottles, a set of glassware, a shaker kit, and an ice bucket. Roll it out for parties, roll it back against the wall or into a closet when the space serves another purpose.
What to look for
- Metal frame with locking casters — you want it to stay put once positioned
- At least two tiers with a lip or railing to prevent bottles from sliding off
- A handle on one end for easy steering across basement flooring
Watch out for
- Cheap carts wobble under the weight of full bottles — test the stability before loading it up
- Glass-shelf carts look beautiful but shatter if a heavy bottle drops during transport
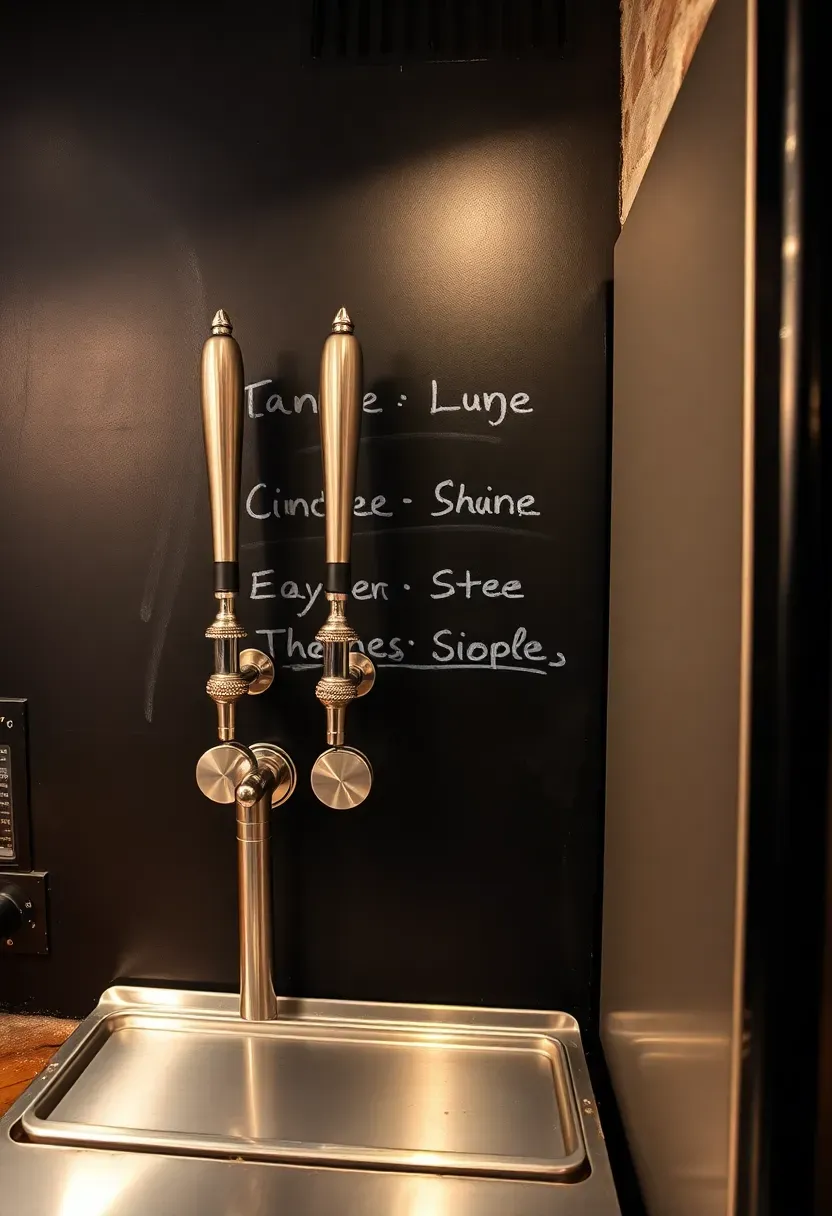
16. Craft Beer Tap Wall
A dedicated tap wall turns your basement into a genuine taproom. The basic system uses a commercial kegerator (or a converted chest freezer) connected via beer lines running through the wall to shanks and faucets on the other side. Four taps is the sweet spot — enough variety without the cleaning burden of a larger system. Paint the wall behind the taps with chalkboard paint so you can update the beer list as kegs rotate. Install a stainless drip tray below the taps to catch foam and splashes.
Tips
- Beer lines need to stay cold — insulate them with foam tubing from kegerator to tap shank
- Clean lines with a BLC solution every two weeks or every keg change, whichever comes first
- Budget $800 to $1,500 for a four-tap system including kegerator, tower, lines, and CO2 tank

Recommended
Items for this idea
17. Built-In Bar Inside a Closet
The concept
Convert an existing basement closet into a bar by removing the clothes rod, adding shelves, installing a small countertop at 36 to 40 inches high, and running a dedicated electrical circuit for a mini fridge and LED lighting. When the doors are open, it is a fully stocked bar. When the doors close, the room looks like it has no bar at all. This works especially well in multi-use basements where the bar needs to disappear when the room serves as a guest bedroom or office.
Step by step
- Remove the existing rod and shelf — you need the full depth (typically 24 inches) for counter space
- Install a plywood countertop at comfortable pouring height
- Add adjustable shelving above for bottles and glassware at two or three levels
- Mount an LED strip under each shelf pointing downward
- Plug in a compact fridge at floor level
Choose this if
You want a bar that hides completely when not in use, or your basement serves double duty as a guest space.
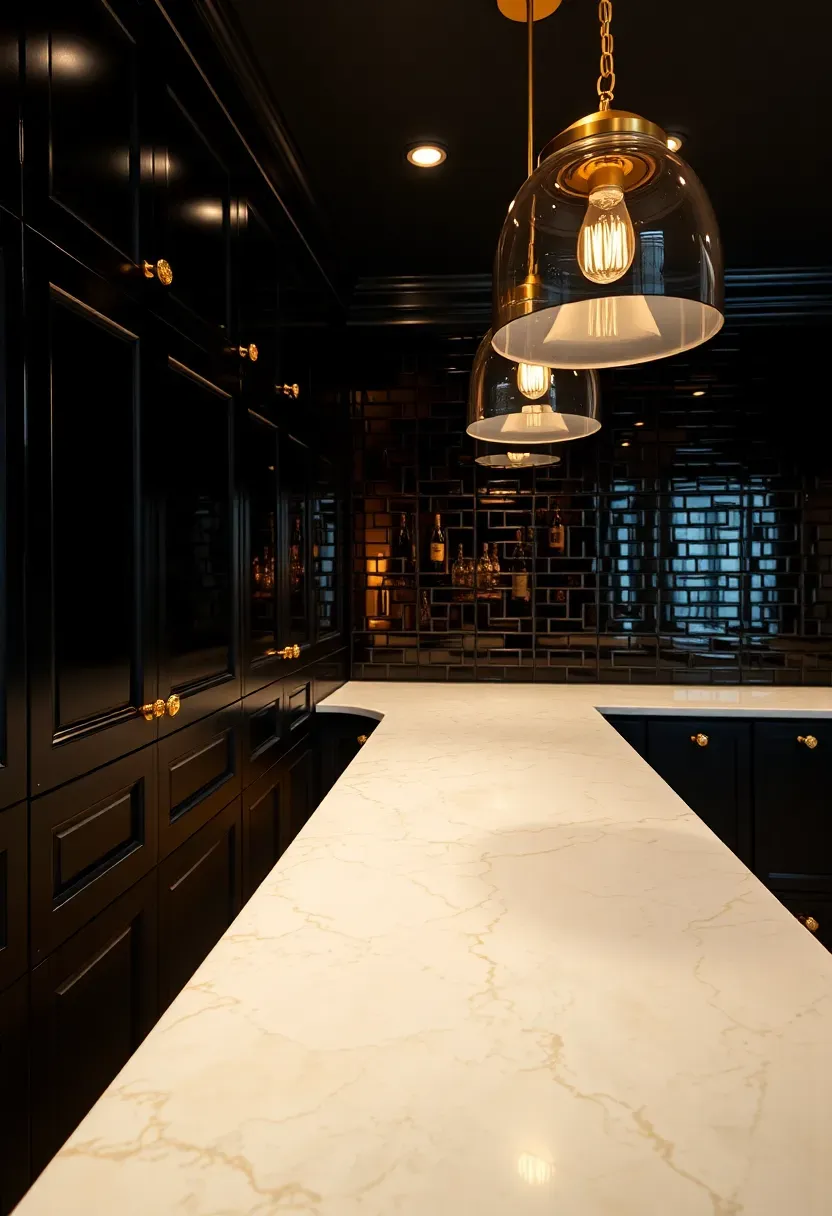
18. Black and Gold Glam Bar
Black cabinetry with gold or brass hardware delivers a high-end look that photographs well and feels like an event space. The key materials are black lacquer or matte black painted cabinets, a light-colored stone countertop (white marble or quartzite) for contrast, a smoked mirror or antiqued mirror tile backsplash, and pendant lights with brass or gold-finished fixtures. This is not a casual beer-and-chips bar — it is a cocktail bar where presentation matters and the glassware is actually nice.
Tips
- Use antiqued mirror tile instead of plain mirror — it hides fingerprints and smudges better
- Matte black shows fewer scratches than high-gloss lacquer in daily use
- Float one or two glass shelves on brass brackets for a display section behind the main counter
Recommended
Items for this idea
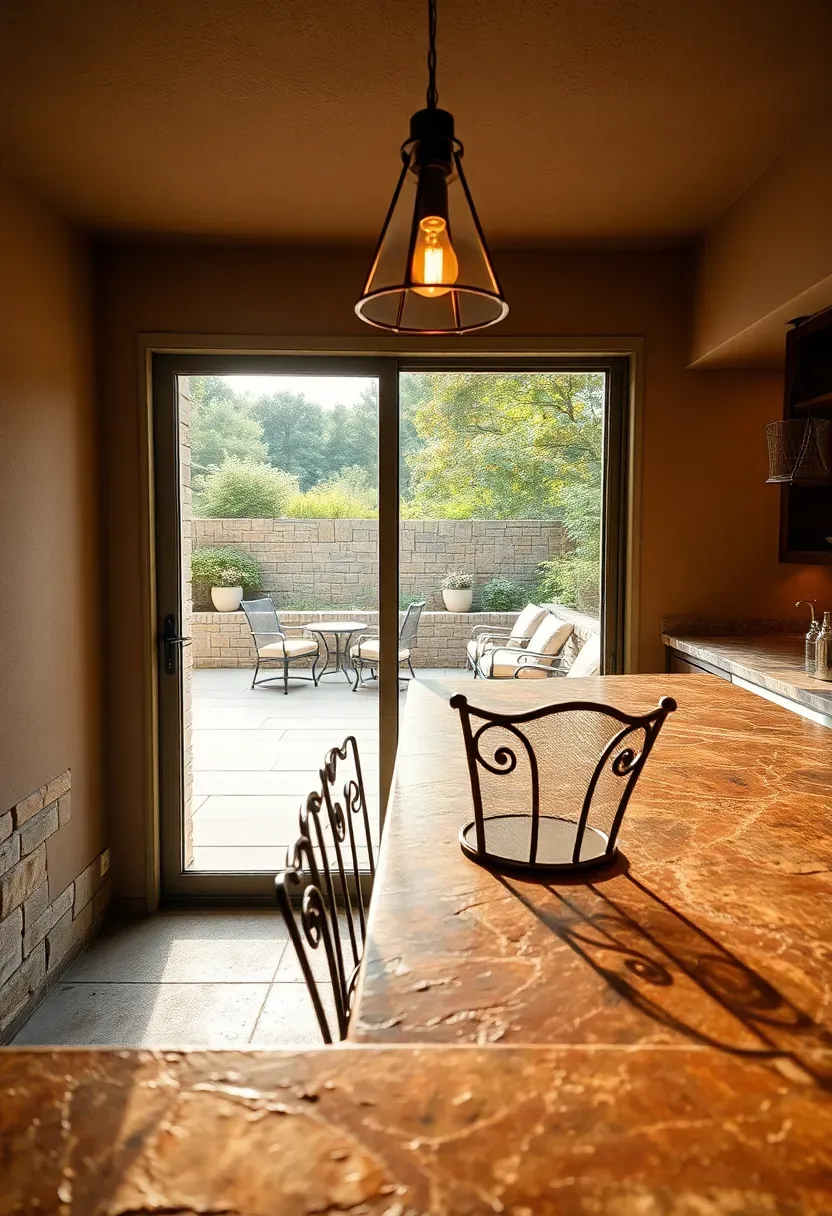
19. Outdoor-Indoor Walkout Bar
Why walkout basements have an advantage
If your basement has a walkout to ground level — sliding doors or French doors opening to a patio, yard, or pool area — you have a natural indoor-outdoor bar opportunity. Position the bar near the door so it serves guests on both sides. A pass-through window or a countertop that extends through the wall opening lets the bartender hand drinks to people outside without leaving the bar. During warm months this setup handles twice the traffic of an interior-only bar.
Practical details
- Use weather-resistant materials on the exterior-facing side: stone, composite, or sealed concrete
- Install a screen or storm door to keep insects out when the bar is open but the weather is borderline
- Grade the patio surface away from the door — water pooling at the threshold is the fastest way to damage flooring
Watch out for
- Humidity from open doors affects wine storage and wood finishes inside the bar area
- Check local code — some jurisdictions require a separate permit for outdoor serving areas attached to a dwelling
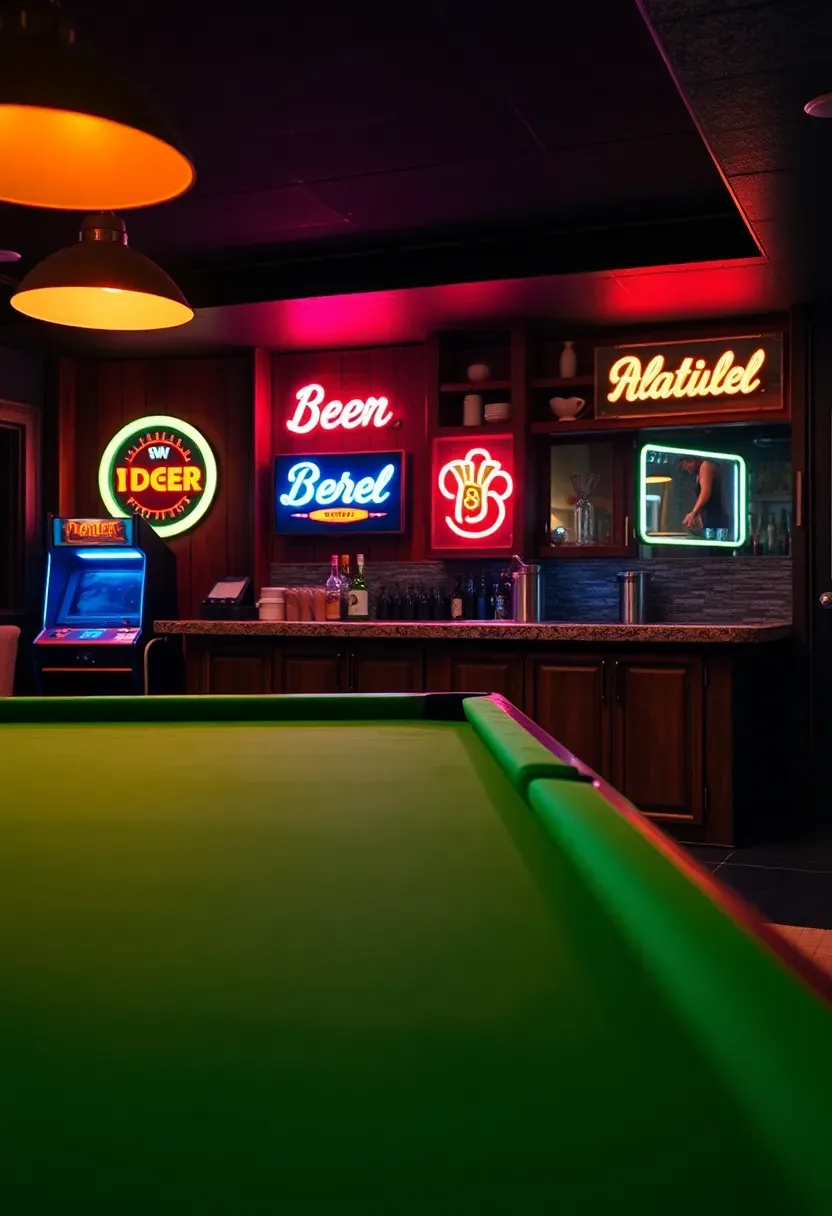
20. Game Room Bar Combo
A bar paired with a game room creates the ultimate basement hangout. The layout matters more than the finishes here — you need clearance around the game tables (5 feet minimum behind a pool table for a cue stroke) and the bar should sit along a wall that does not interfere with play. Keep the bar simple: a straight 8-foot counter with a fridge underneath, open shelves above, and good overhead lighting on a separate switch from the game area so you can dim the bar without darkening the table. Neon signs, vintage arcade machines, and sports memorabilia fill the walls.
Tips
- Position the bar where spectators naturally stand so they can watch games while holding a drink
- Use rubber bar mats on the countertop to prevent glasses from sliding during animated conversations
- Install a separate light fixture directly over the pool table on its own switch and dimmer
Recommended
Items for this idea
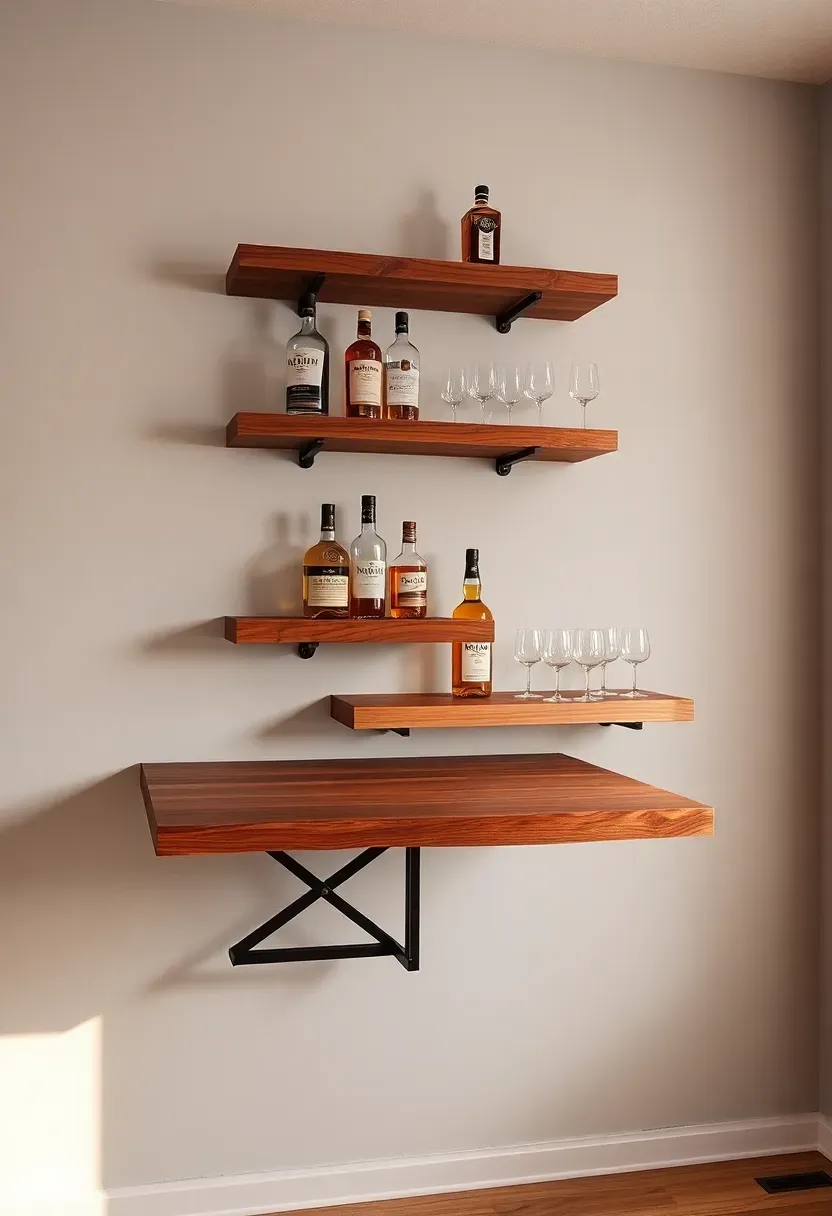
21. Floating Shelf Bar with No Base Cabinet
Skip the lower cabinets entirely and build a bar from wall-mounted shelves alone. Three thick floating shelves at different heights hold bottles, glassware, and bar tools. A fold-down or wall-mounted drop-leaf counter provides a prep surface when you need it and folds flat when you do not. This approach takes up zero floor space, costs under $500 in materials, and works in basements where every square foot is spoken for. It is a bar in concept more than construction — and that is enough.
Tips
- Use shelves rated for at least 50 pounds each — glass bottles add up fast
- Mount the fold-down counter with a piano hinge and a folding leg brace for stability
- Group bottles by type and height for a clean display that doubles as decor
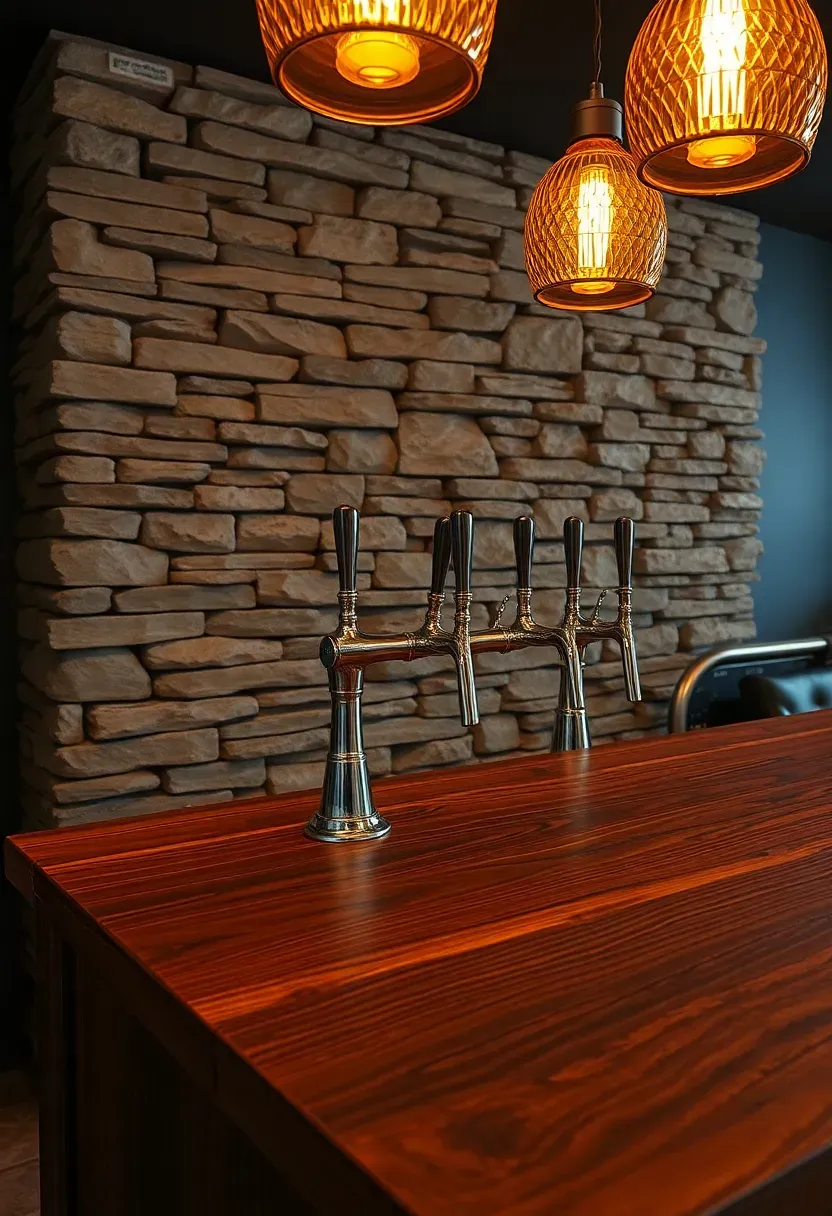
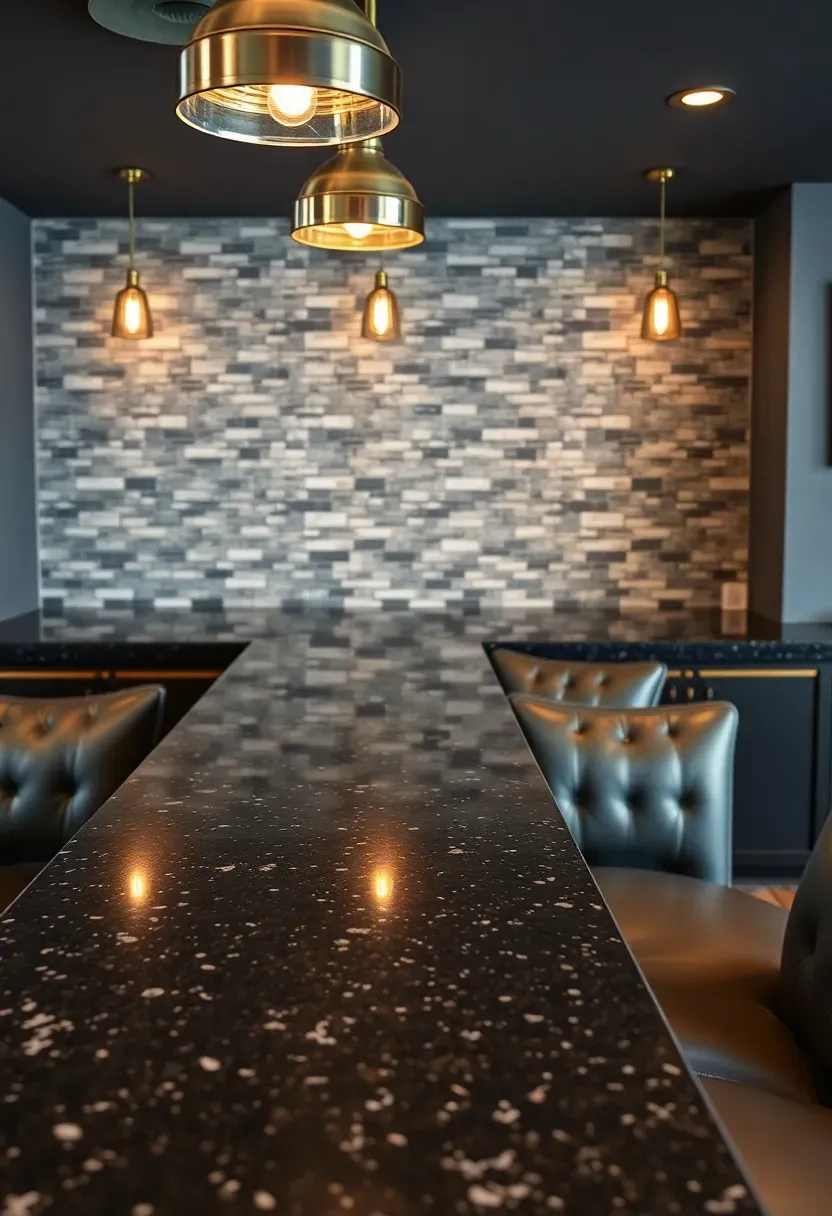
22. Stone Veneer Pub-Style Bar
Stone veneer on the bar face gives you the weight and presence of a real stone bar at a fraction of the cost and installation difficulty. Manufactured stone panels weigh 8 to 12 pounds per square foot versus 25-plus for natural stone, and they attach to cement board or plywood with construction adhesive and mortar. Pair the stone front with a thick wood slab top — at least 1.75 inches — stained dark, and brass tap handles if you are running a draft system. The combination looks like a bar that has been there for decades.
Tips
- Choose a stacked ledger stone pattern for a modern pub feel, or tumbled fieldstone for traditional
- Leave 1 inch of clearance between the stone and the floor so moisture cannot wick upward
- Seal the stone with a penetrating sealer to prevent beer and cocktail stains from absorbing
Recommended
Items for this idea
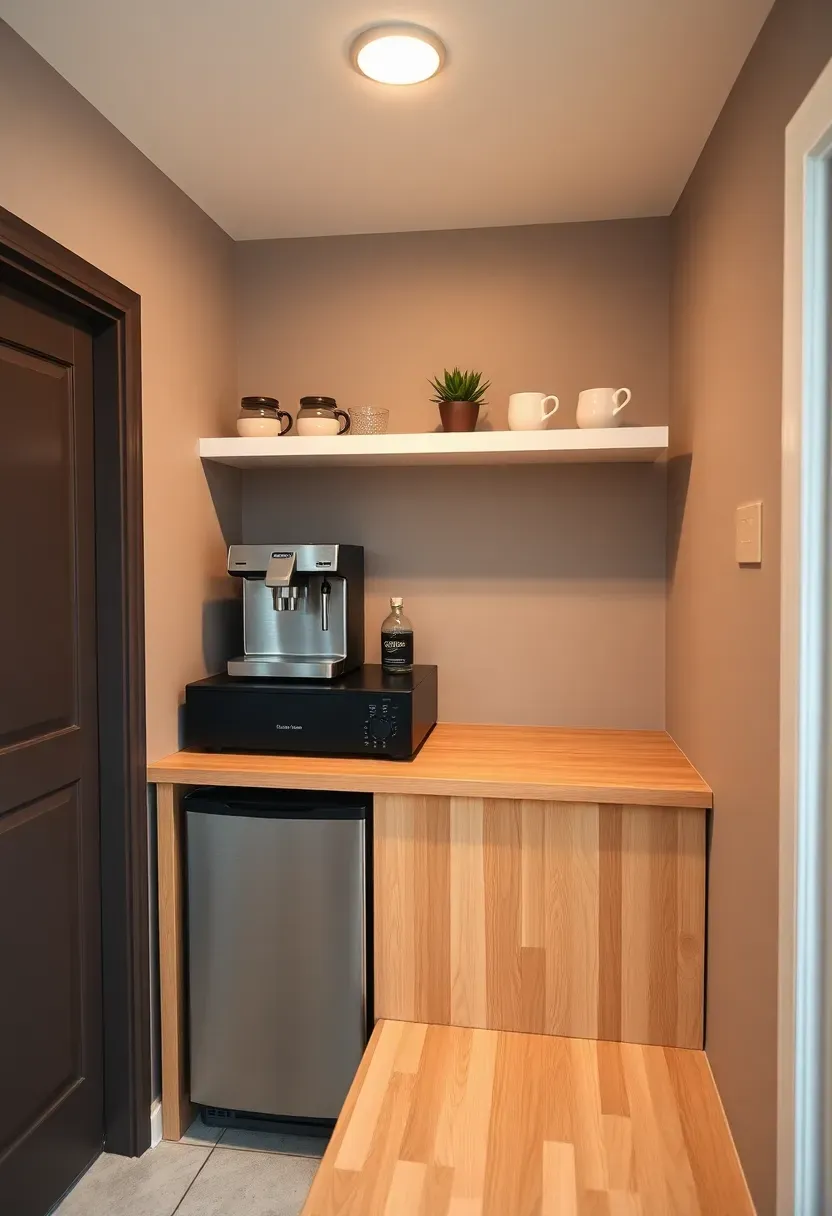
23. Compact Beverage Station
Issue: not everyone needs a full bar
Maybe you do not drink much, or your household runs on coffee and sparkling water more than cocktails. A full bar build feels like overkill, but you still want a dedicated spot for drinks that is not the upstairs kitchen.
Solution
A beverage station fills that gap. Set up a 3 to 4-foot section of counter with a mini fridge underneath, a coffee machine or espresso maker on top, and floating shelves for mugs, tumblers, and a few bottles for the occasional drink. Add a small sink if plumbing is accessible, or skip it and keep a water dispenser nearby. The footprint is compact enough to fit beside a media area or in a hallway alcove.
Pros and cons
- Pro: Costs $300 to $800 total versus $5,000-plus for a full wet bar
- Pro: Serves the household daily, not just during parties
- Con: Limited entertaining capacity — two people at the counter is the practical max
- Con: No sink means carrying glasses upstairs for washing unless you add a dishpan solution
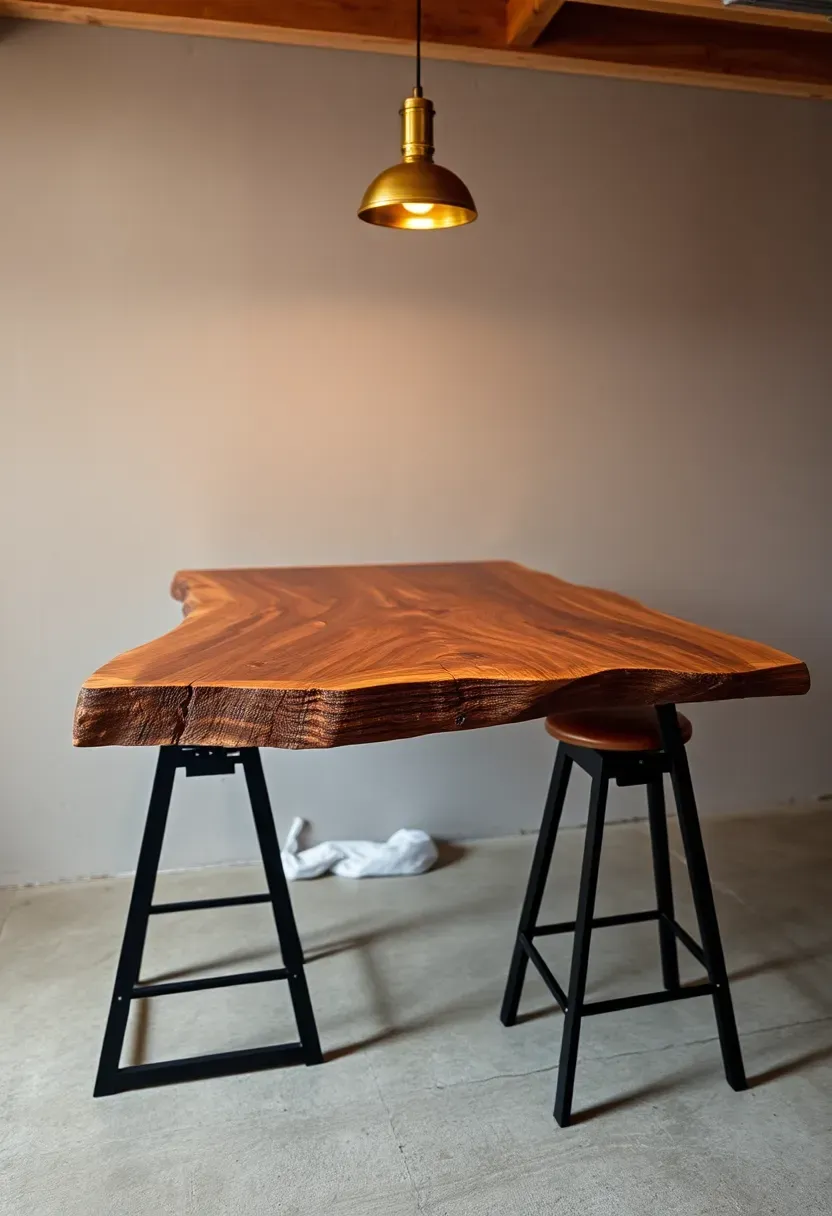
24. Live Edge Slab Bar Top
A live edge slab makes every bar unique because no two pieces of wood share the same grain pattern, bark line, or natural curve. Black walnut is the most popular choice for bars — the grain is dramatic, the color deepens with age, and the wood is hard enough to resist dings from bottles and glasses. A 2-inch-thick slab running 8 to 10 feet long costs $400 to $1,200 depending on species and quality. Mount it on welded steel legs or a built base cabinet and finish it with bar-top epoxy or marine polyurethane for a waterproof, glass-smooth surface.
Tips
- Kiln-dried slabs are essential — air-dried wood will crack and warp in heated basement air
- Fill bark voids and cracks with clear or tinted epoxy before applying the final finish
- Sand to 220 grit minimum before finishing — rougher surfaces trap dirt in the open grain
Recommended
Items for this idea
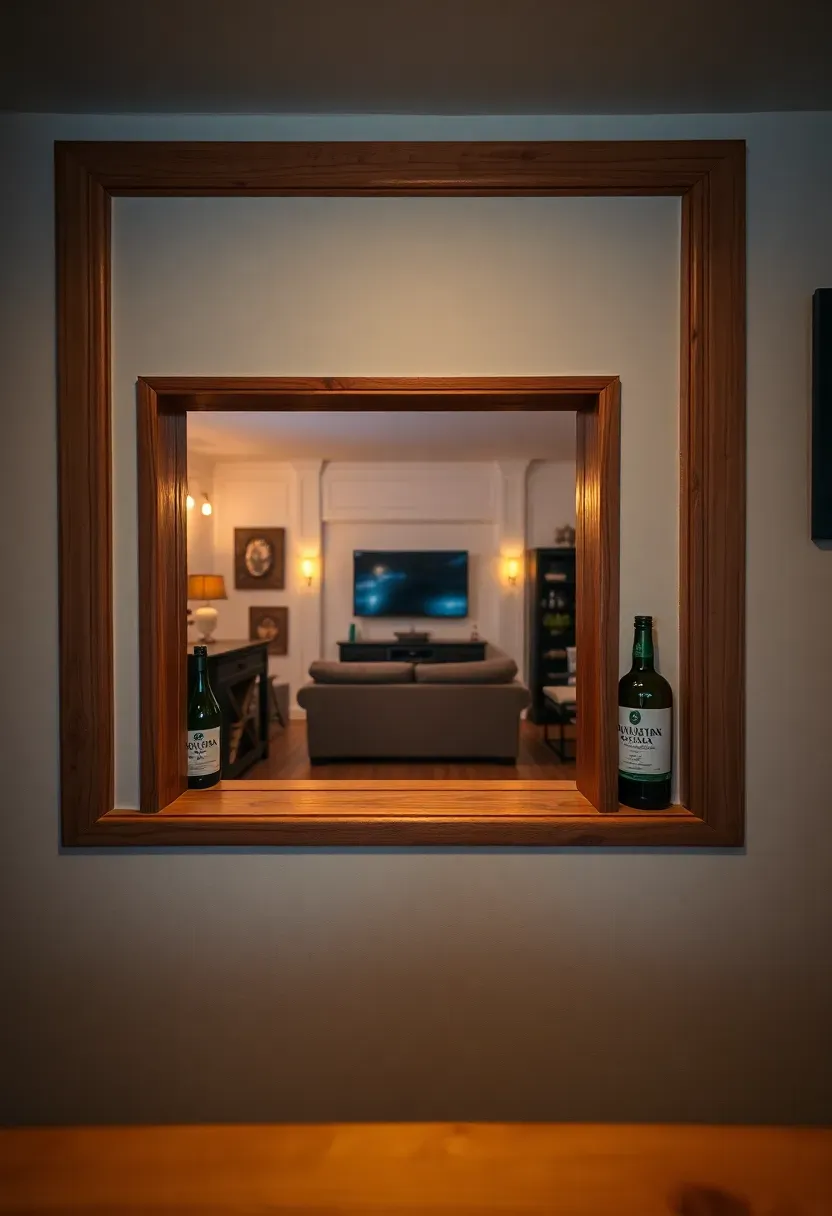
25. Basement Bar with Pass-Through Window
The concept
A pass-through window between the bar area and an adjacent room — a media room, game room, or second seating area — lets you serve drinks without walking around. Cut an opening in a non-load-bearing interior wall, frame it out, add a small counter or shelf on each side, and optionally install a barn door slider or shutters to close it off when not in use.
Step by step
- Confirm the wall is not load-bearing — if it runs parallel to the floor joists above, it usually is not
- Cut the opening at bar height (36 to 42 inches from the floor) and frame with 2x4s and a header
- Add a 10-inch-deep shelf on each side of the opening for setting drinks
- Trim the edges with stained wood or painted MDF to match the bar finish
- Install a sliding panel or shutter if you want to close it for noise control or visual separation
Choose this if
Your basement has two distinct zones and you want to serve both without duplicating bar equipment in each room.
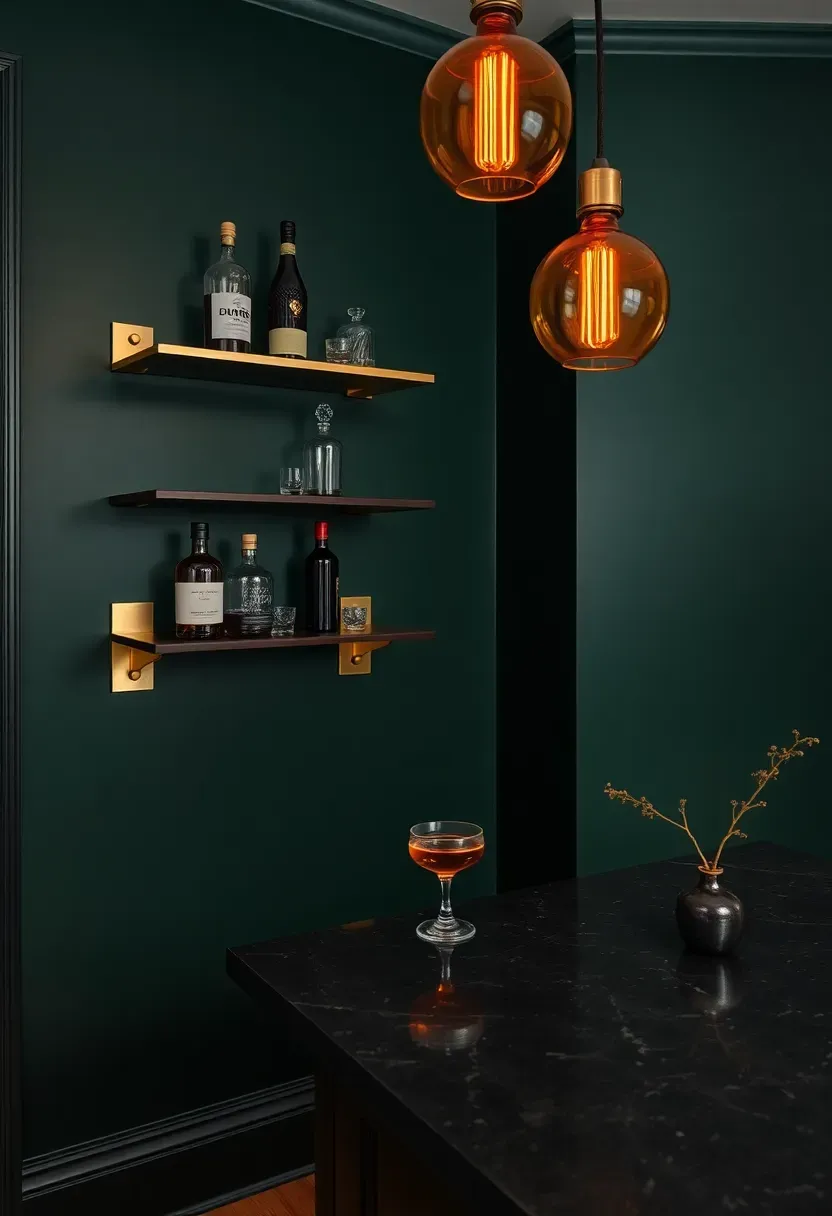
26. Moody Dark Paint and Brass Accents
Dark paint colors that feel oppressive in bright upstairs rooms work perfectly in basements where you control the light entirely. Deep forest green, midnight blue, or charcoal gray on the walls surrounding the bar create a cocoon effect that makes the space feel intentional and intimate rather than like a room that happens to be underground. Brass accents — shelf brackets, cabinet pulls, pendant light fixtures, a bar rail — catch and reflect the warm light you add, breaking up the darkness with points of glow.
Tips
- Use eggshell or satin finish paint — flat absorbs too much light and matte fingerprints easily
- Limit brass to 3 or 4 elements so it reads as an accent, not a theme
- Install picture lights above framed artwork to create focal points on the dark walls
Recommended
Items for this idea
27. Full Commercial-Style Bar
The setup
This is for the person who takes bartending seriously and wants professional-grade equipment at home. A commercial-style bar includes a three-compartment sink (required by code for actual bars, optional but useful at home), a speed rail for frequently used bottles, an under-counter glass washer, rubber anti-fatigue floor mats behind the bar, and a multi-tap draft system with glycol-cooled lines. The countertop is stainless steel or thick hardwood, and the bar face is built to restaurant spec with a drink rail and armrest pad.
Practical details
- Three-compartment sinks need a dedicated drain and hot water supply — budget $500 to $1,200 for the sink and plumbing
- Commercial glass washers run $800 to $2,000 but clean and sanitize in under two minutes per rack
- Rubber floor mats cost $30 to $60 per 3x5-foot section and save your legs during long hosting nights
Choose this if
You are a serious home mixologist, host large parties frequently, or plan to convert the space for actual commercial use down the road and want to build to that standard from the start.
Quick FAQ
How much does a basement bar cost to build? Budget $2,000 to $5,000 for a basic dry bar with stock cabinets and a prefab countertop. A wet bar with plumbing runs $6,000 to $15,000. A fully custom bar with premium finishes, draft system, and professional appliances can reach $20,000 to $40,000. The plumbing rough-in is typically the single largest cost factor — if you can position the bar near an existing drain line, you save significantly.
Do I need a permit to build a bar in my basement? It depends on what you are adding. Electrical and plumbing work almost always requires a permit. Cosmetic changes like cabinetry, countertops, and shelving typically do not. If your basement is not already a finished permitted space, the bar project may trigger a broader inspection of the entire basement finish. Check with your local building department before starting.
What is the standard height for a home bar? Bar height is 42 inches from the floor to the top of the counter. Counter height is 36 inches. Bar-height stools seat at 28 to 30 inches, counter-height stools at 24 to 26 inches. Do not mix heights — pick one and size everything to match.
Can a basement bar increase home value? A well-built basement bar in a finished basement can add perceived value and help sell the home faster, but it rarely returns dollar-for-dollar on the build cost. Appraisers treat below-grade finished space differently than above-grade square footage. The real value is in daily enjoyment and entertaining utility while you live there.
What flooring works best around a basement bar? Luxury vinyl plank is the top choice — it handles spills, resists moisture from below the slab, and installs as floating floor over concrete. Tile works well behind the bar where drops are frequent. Avoid carpet anywhere near the bar area. Rubber mat runners behind the bar protect the floor and your feet during long hosting sessions.
A basement bar is one of those projects where the planning takes longer than the build, and that is a good thing. Figure out whether you want plumbing before you pick out countertop materials. Decide on seating count before you commit to a layout shape. And be honest about how you actually use the space — a beverage cart you stock and enjoy every weekend beats a custom wet bar you built once and never maintain. Start with the version you will actually use, and upgrade later if the habit sticks.
Pinterest cover for 27 Basement Bar Designs
About the author
OBCD
CGI visualization and interior design content. We create detailed 3D renders and curate practical design ideas for every room in your home.