21 Basement Kitchenette Ideas
A basement kitchenette lives or dies by two things: how well it handles moisture, and whether the layout actually fits how you cook down there. Nobody is preparing Thanksgiving dinner in a below-grade alcove. You are making coffee before anyone else wakes up, reheating leftovers during a movie marathon, or setting out drinks when friends come over. That shift in purpose changes every decision — counter depth, appliance selection, ventilation, even the backsplash material. The 21 ideas below are built around that reality. Each one keeps the footprint tight and the function honest.
From grab-and-go beverage setups to full wet-bar hybrids, here is what works in a basement kitchenette.
Table of Contents
- Beverage-Only Kitchenette
- Pull-Out Pantry Wall
- Galley-Style Kitchenette
- Floating Shelf Open Kitchenette
- Murphy-Door Hidden Kitchenette
- Concrete Countertop Industrial Kitchenette
- Corner Nook Kitchenette
- Daylight Well Kitchenette
- Home Gym Recovery Kitchenette
- Mid-Century Modern Kitchenette
- Duplex Rental-Ready Kitchenette
- Farmhouse Basement Kitchenette
- Peninsula Kitchenette with Stools
- Pocket Door Concealed Kitchenette
- Craft Room Combo Kitchenette
- Black Cabinet Moody Kitchenette
- Outdoor-Access Walkout Kitchenette
- Butcher Block Prep Kitchenette
- Game Room Snack Kitchenette
- Induction Cooktop Kitchenette
- Budget IKEA Kitchenette Build

1. Beverage-Only Kitchenette
Skip the sink entirely and build a station that does one thing well: drinks. A 4-foot run of countertop with a built-in espresso machine, electric kettle, and an undercounter wine or beverage fridge covers coffee mornings and cocktail evenings. No plumbing means no ejector pump, no drain tie-in, and no permit headaches in most jurisdictions. The whole setup plugs into a standard 20-amp circuit. Use a drip tray beneath the espresso machine and fill the water reservoir from a pitcher you carry downstairs.
Tips
- A single 20-amp dedicated circuit can power a coffee machine and beverage fridge simultaneously without tripping
- Mount a magnetic knife strip or hooks along the backsplash for bar tools and bottle openers
- Add a small ice maker (countertop portable models pull about 2 amps) to avoid running upstairs for ice
We picked a few things that go well with this idea: Electactic 130-Can Beverage Refrigerator (3.2 Cu.Ft) (★4.3), EUHOMY 24-Inch Built-In Beverage Cooler (180 Can) (★4.4) and Electactic 130-Can Digital Beverage Cooler (3.2 Cu.Ft) (★4.3). As an Amazon Associate we earn from qualifying purchases.
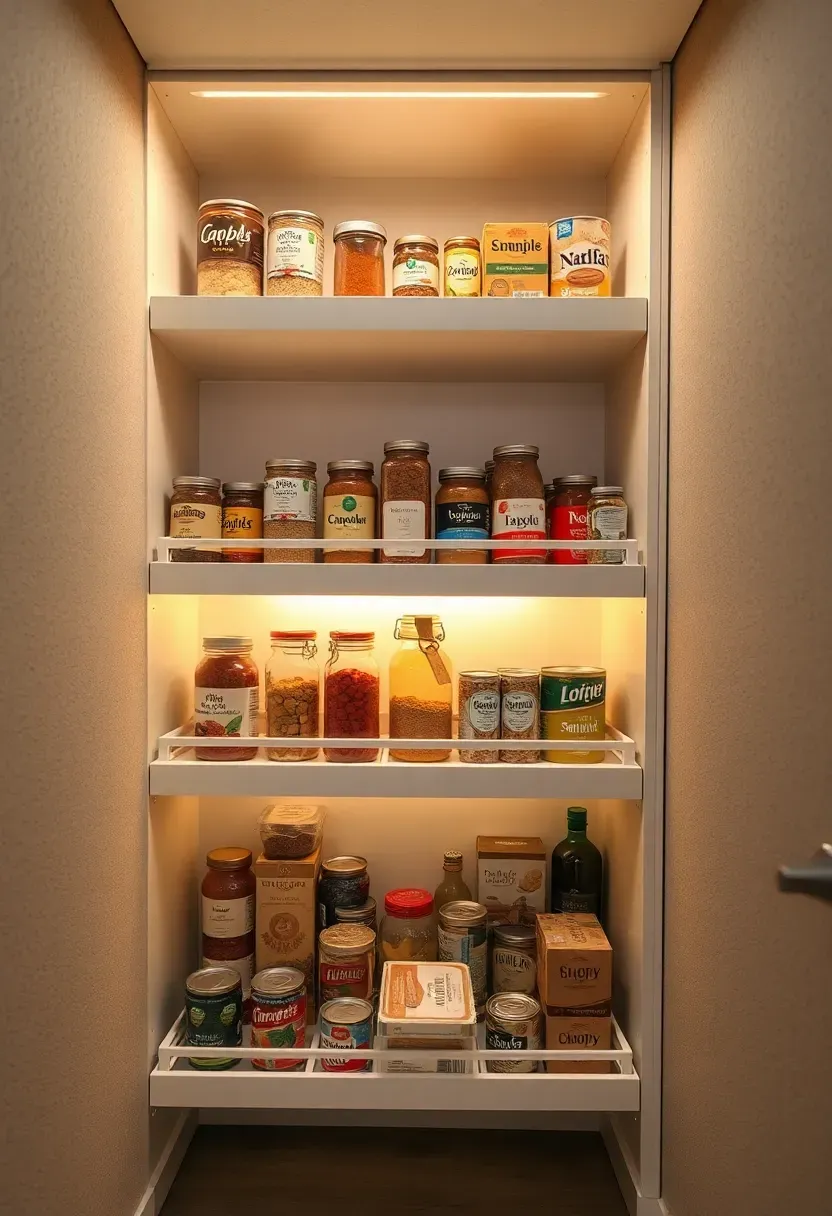
2. Pull-Out Pantry Wall
Why storage defines a kitchenette
Basements have limited floor area for a kitchenette, and cabinets eat into that fast. A pull-out pantry wall borrows 8 inches of depth from a non-structural partition and returns serious storage. Three or four vertical pull-out trays, each 6 inches wide, slide on full-extension drawer slides. They hold canned goods, spices, snack boxes, and bottles without taking any counter space at all.
How to build it
Frame a 4-foot section of wall with 2x6 studs instead of 2x4s. That gives you 5.5 inches of cavity depth. Install full-extension slides rated for 100 pounds on each tray. Face the wall with drywall — the pull-out fronts sit flush and look like trim panels. A push-to-open latch eliminates hardware on the face.
Pros and cons
- Keeps the kitchenette footprint minimal while adding real storage volume
- Requires building or modifying a non-structural wall, which adds cost
- Items at the back of deep trays can be hard to see without interior lighting
We picked a few things that go well with this idea: CONSDAN Maple Butcher Block Countertop (48x25) (★4.7), CONSDAN Maple Butcher Block Countertop (30x25) (★4.7) and DuraSteel Maple Butcher Block Countertop (24x36) (★4.4). As an Amazon Associate we earn from qualifying purchases.
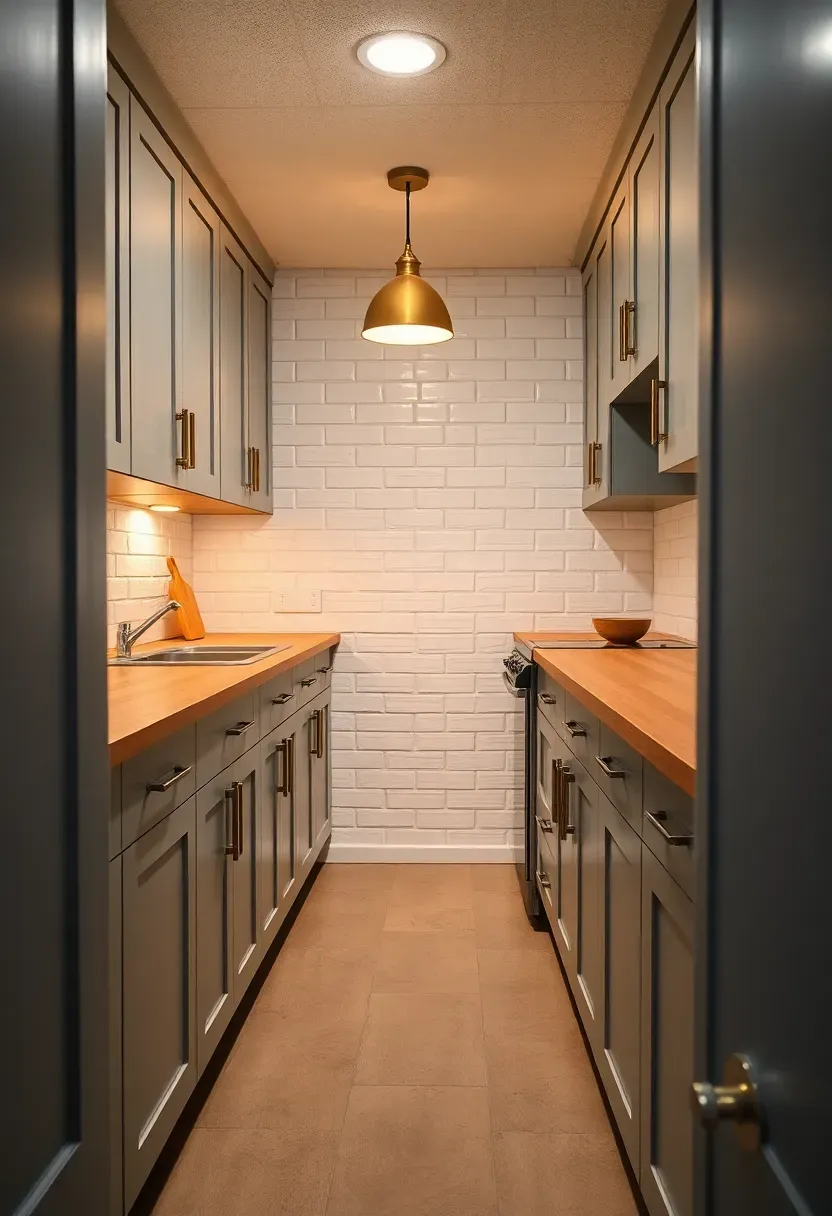
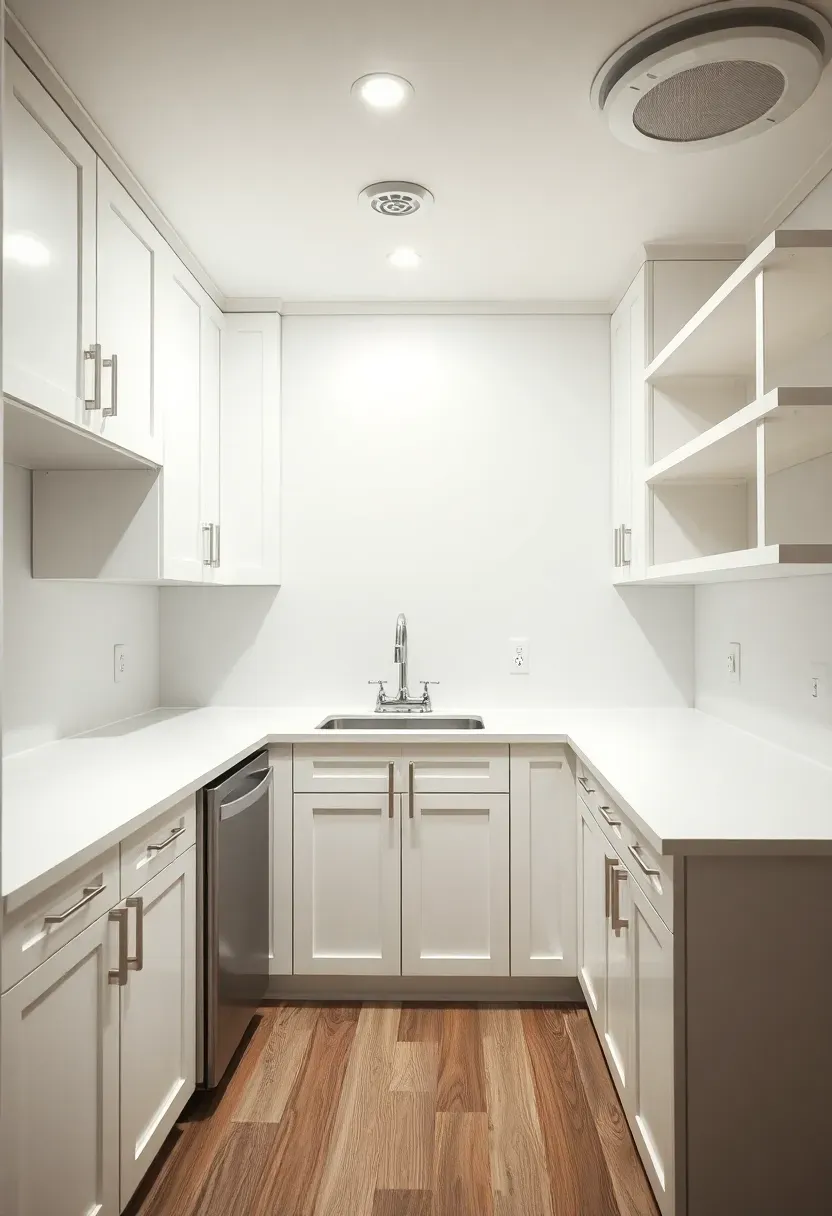
3. Galley-Style Kitchenette
Two facing counters with 36 to 42 inches of walkway between them create the most efficient kitchenette footprint per square foot. One side holds the sink and undercounter fridge. The opposite side is all prep surface and storage — open shelving or shallow cabinets (12-inch depth works well here since you are storing mugs, plates, and pantry items, not full-size pots). The galley format naturally limits your footprint to about 4 by 8 feet of usable floor area while giving you roughly 16 linear feet of counter and shelf space.
Tips
- Use 12-inch-deep wall cabinets on the non-plumbing side to keep the walkway open
- A single pendant at center or two recessed cans beat fluorescent strips for making the space feel less like a corridor
- Place the microwave at counter height on the non-sink side to keep the plumbing wall simple
We picked a few things that go well with this idea: Govee Dimmable White LED Strip (16.4ft) (★4.6), DAYBETTER Under Cabinet LED Lights (6-Pack) (★4.3) and Rechargeable Motion Sensor Cabinet Lights (2-Pack) (★4.5). As an Amazon Associate we earn from qualifying purchases.
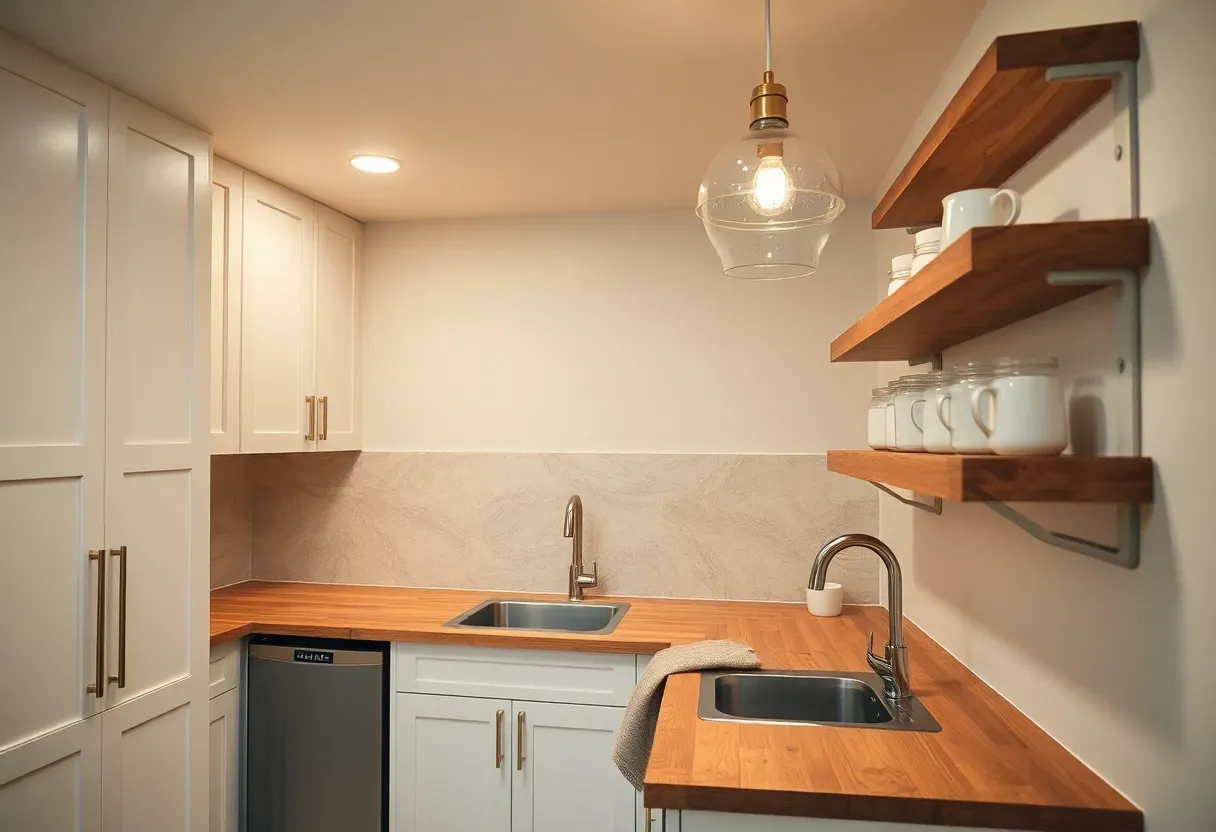
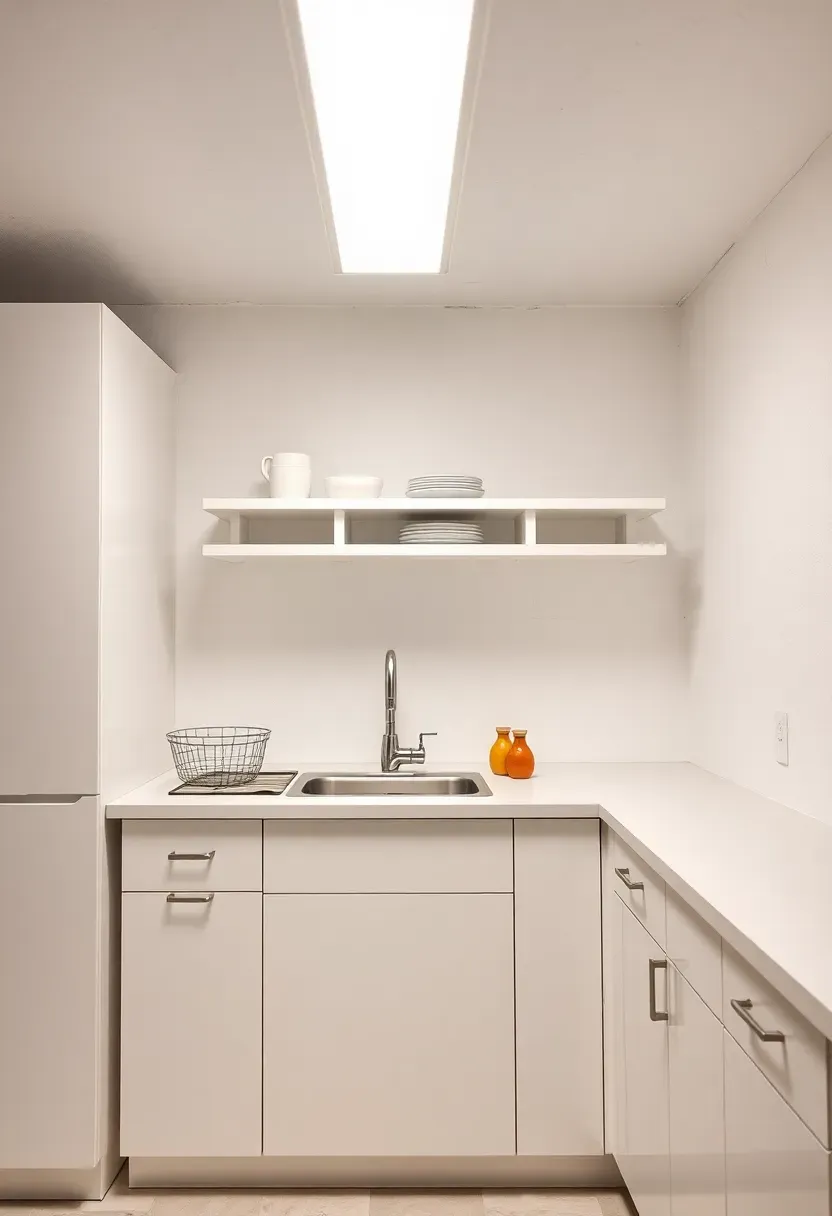
4. Floating Shelf Open Kitchenette
The issue
Upper cabinets in a low-ceiling basement — anything under 8 feet — make the space feel like it is closing in on you. Standard 30-inch uppers leave only 18 inches of backsplash before they start, and in a 7.5-foot basement ceiling, the tops of those cabinets nearly touch the ceiling with no room for crown molding or visual breathing space.
The solution
Replace every upper cabinet with floating shelves. Three rows of 10-inch-deep shelves at 18, 30, and 42 inches above the counter give you the same linear storage with zero visual weight. Anchor them into studs with heavy-duty French cleats — basement drywall over concrete block does not hold toggle bolts well under load. Display your everyday dishes, mugs, and glass containers. The open look makes a 7-foot ceiling feel significantly taller.
Pros and cons
- Open shelves make a low basement ceiling feel less oppressive
- Dust collects faster on open shelving than behind cabinet doors
- Everything stays visible, which forces you to keep things organized (or it looks messy)
Recommended
Items for this idea
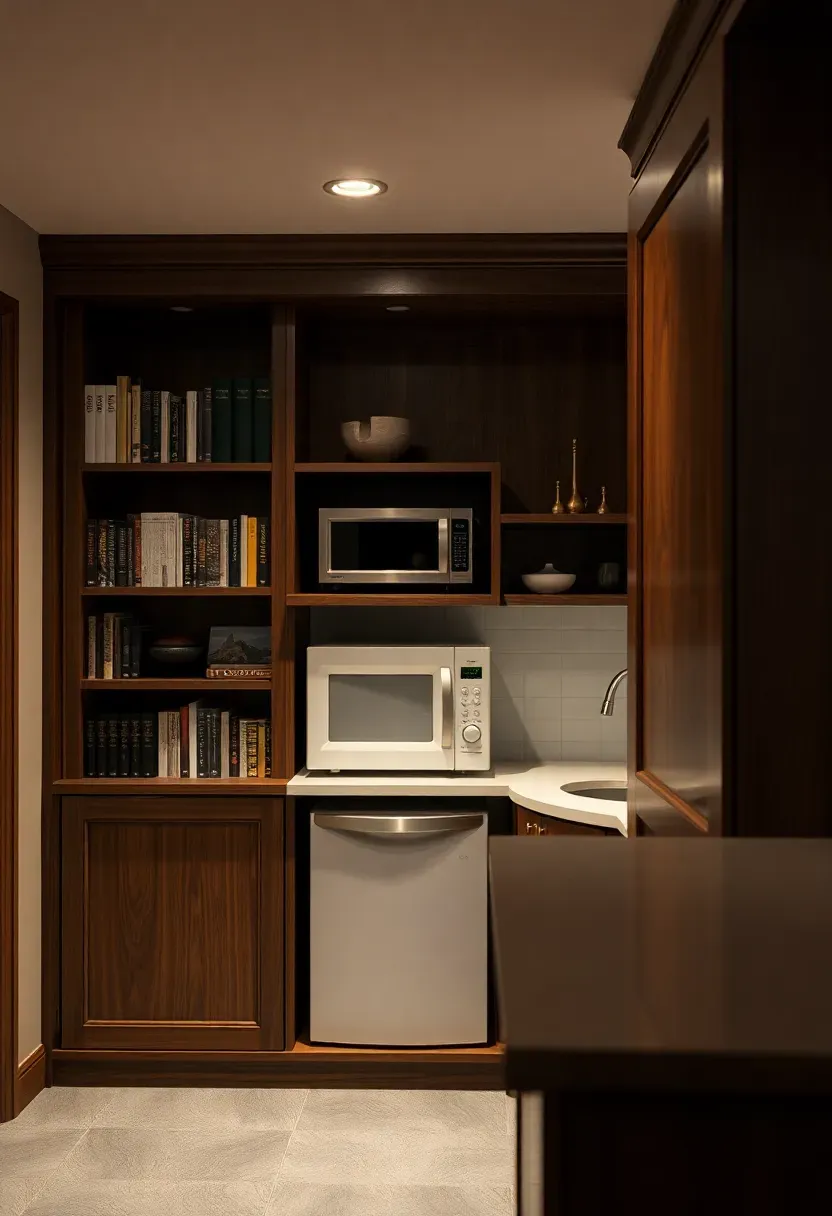
5. Murphy-Door Hidden Kitchenette
Build your kitchenette behind a bookshelf that doubles as a hinged door. Murphy door hardware (the brand and generic versions both work) supports a loaded bookshelf up to 400 pounds and swings on a hidden pivot. Behind it, a 6-foot wide alcove holds a sink, undercounter fridge, microwave, and two feet of counter space. When closed, guests see a bookshelf. When open, you have a functional prep area. This works particularly well in finished basements where you want the main room to read as a lounge or media room, not a kitchen-adjacent space.
Tips
- Use the outward-facing bookshelf for actual books and objects — it needs to weigh at least 50 pounds to stay balanced on the pivot
- Ensure adequate ventilation inside the alcove; a small exhaust fan vented to an exterior wall prevents trapped moisture and odors
- Run plumbing through the back wall, not the floor, so the alcove can be converted back to storage later if needed
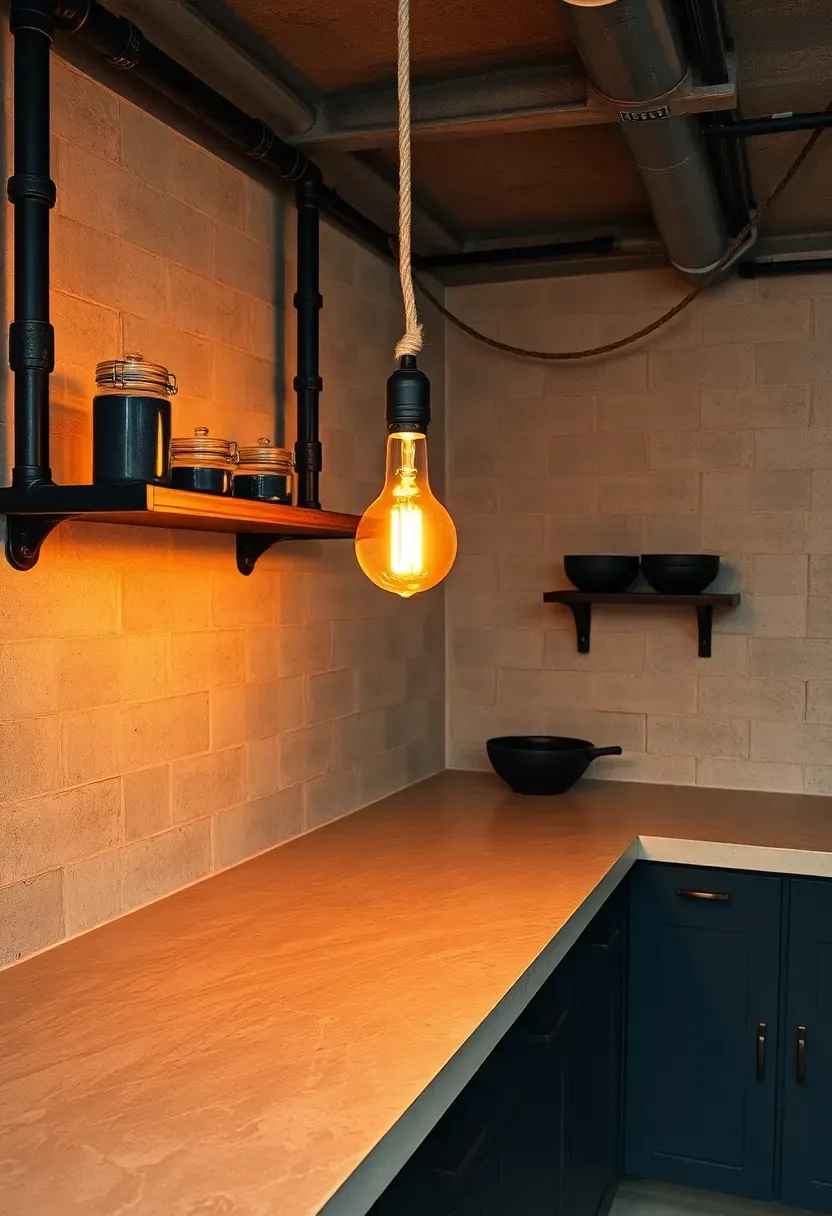
6. Concrete Countertop Industrial Kitchenette
Poured concrete counters pair naturally with basements because the material vocabulary already exists down there — concrete floors, block walls, exposed ductwork. A 2-inch-thick concrete counter over plywood substrate costs about $8 to $12 per square foot in materials (Portland cement, sand, aggregate, sealer). The pour is straightforward for a 6-foot run. Form it in place or cast on a table and flip. Pair it with black iron pipe open shelving and industrial pendant lighting. The aesthetic is intentional rather than unfinished.
Tips
- Seal concrete counters with a food-safe penetrating sealer (not topical acrylic) — reapply every 12 to 18 months
- Embed a fiber mesh in the pour to prevent hairline cracks, especially if the basement has seasonal temperature swings
- Round the front edge with a foam strip in the form; sharp concrete edges chip easily and feel rough
Recommended
Items for this idea
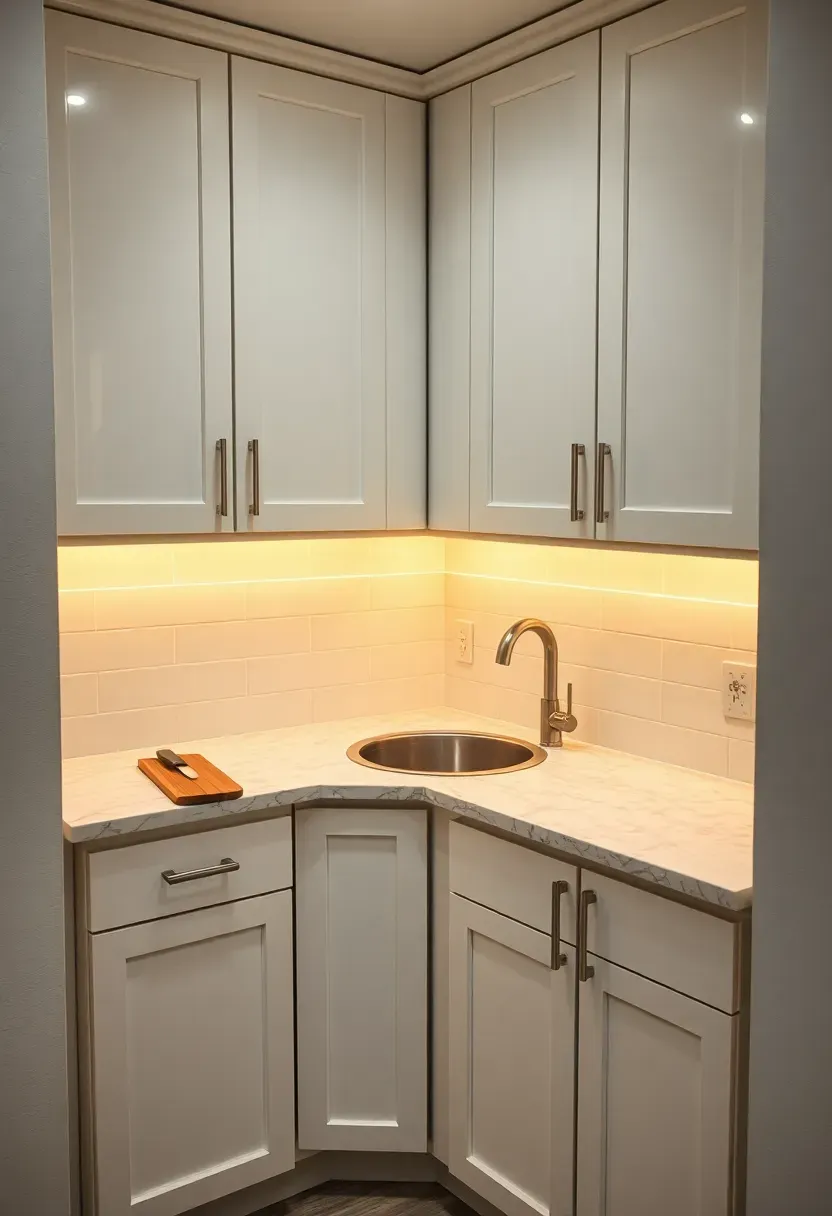
7. Corner Nook Kitchenette
How to use a dead corner
Most basement layouts have at least one corner that is too small for a couch and too awkward for storage furniture. An L-shaped kitchenette fits 3 feet of counter on each wall — 6 linear feet total — with the sink at the junction. This avoids the wasted diagonal cabinet that full-size corner kitchens need because the counters are shallow (22 inches deep instead of 25). The corner itself holds a small lazy Susan or just acts as extra prep surface.
Step 1: Position the sink
Place it right in the corner where both walls meet. Use a small bar sink (15 by 15 inches) — it fits the tight geometry and your plumbing rough-in stays in one spot.
Step 2: Assign appliance zones
Undercounter fridge on one leg. Microwave and storage on the other. Each leg only needs to be 36 inches long to feel functional.
Step 3: Light the corner
Corners are dark. One recessed can directly above the sink plus undercabinet LED strips on both legs fix it.
Watch out for
- Corner sinks can be hard to reach for washing; keep the faucet tall with a pull-down sprayer
- Both walls must be plumb for the counter to meet cleanly; shim as needed before installing
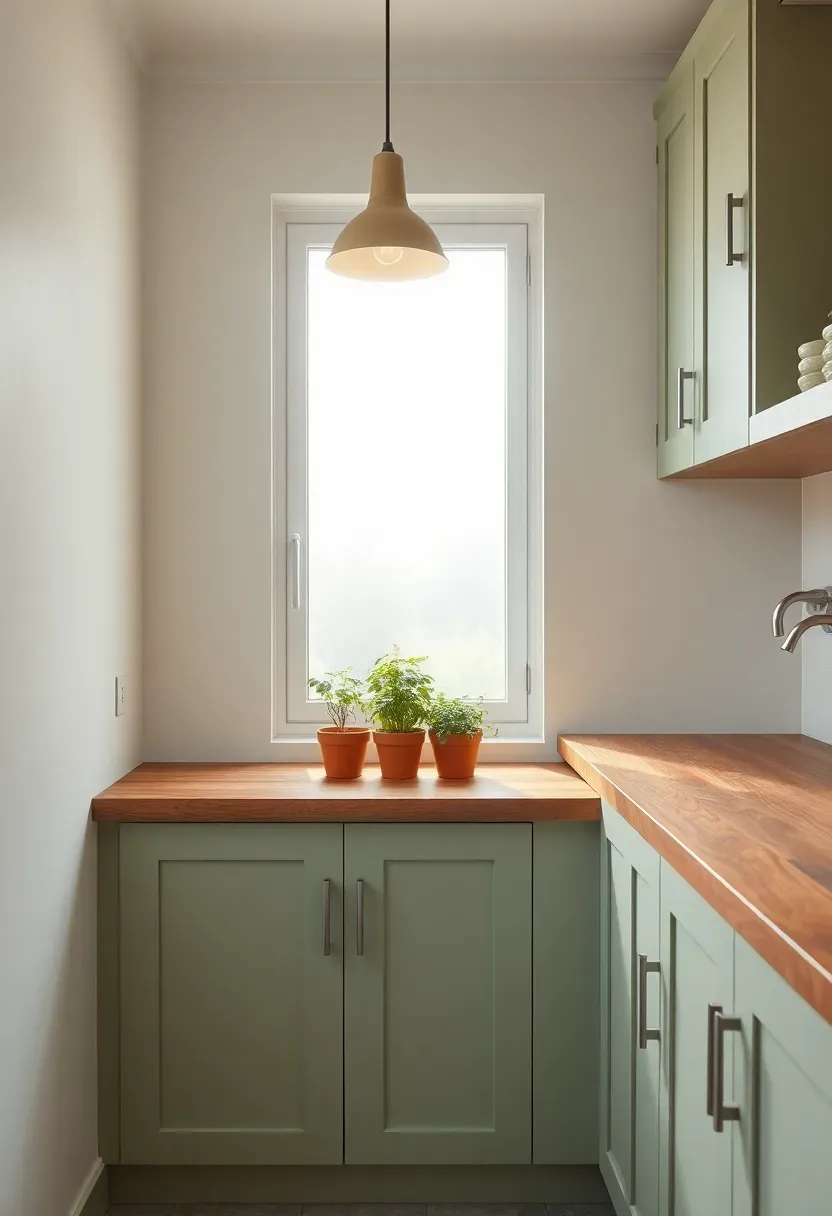
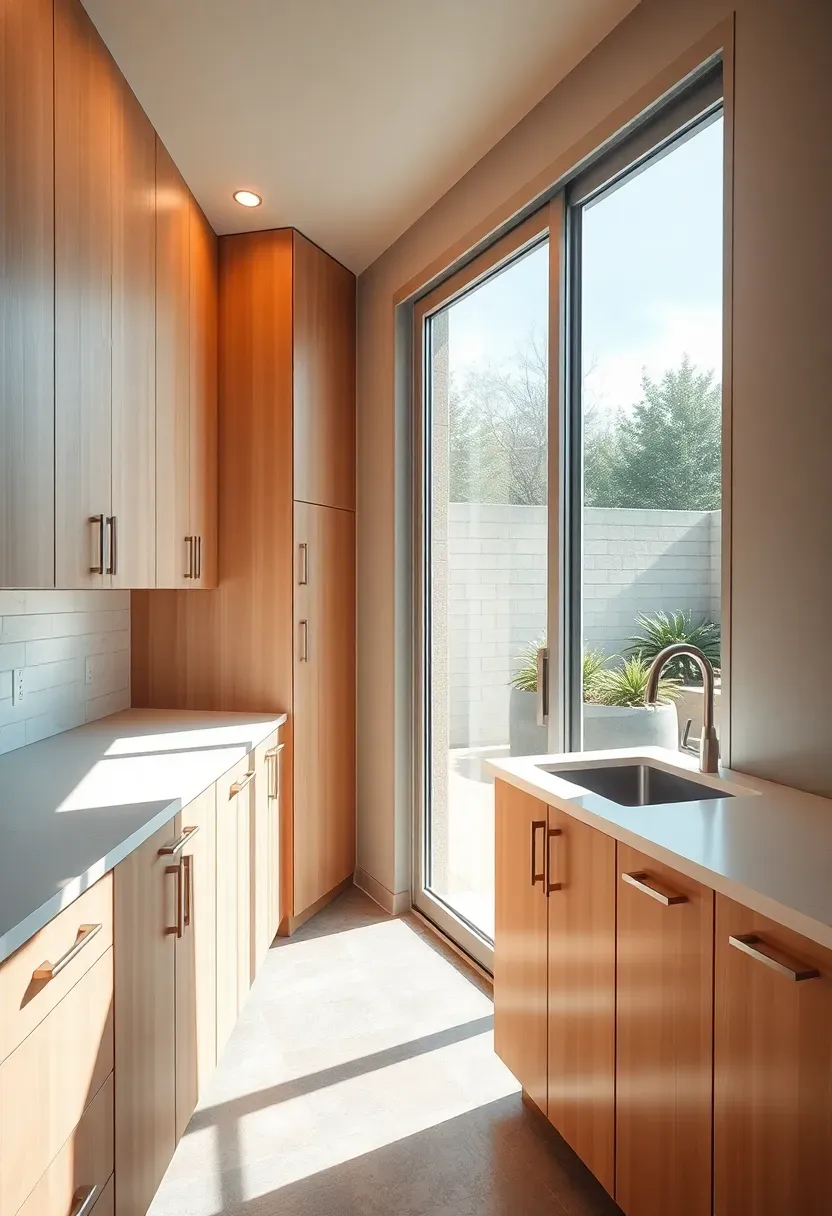
8. Daylight Well Kitchenette
If your basement has a window well or egress window, build the kitchenette next to it. Natural light changes everything about how a below-grade cooking space feels. Even a 3-by-3-foot window well lets in enough daylight to eliminate that underground gloom during the day. Orient the counter so you face the window while prepping. Grow herbs on the sill — basil and mint do fine in the indirect light that a window well provides. The psychological difference between cooking under fluorescent tubes and cooking with real daylight is hard to overstate.
Tips
- Keep the window well clean and the drain clear; a clogged well during heavy rain sends water straight toward your kitchenette
- Use light-colored counters and backsplash to reflect what natural light you get deeper into the room
- A sheer Roman shade over the window softens direct sun without blocking useful light
Recommended
Items for this idea
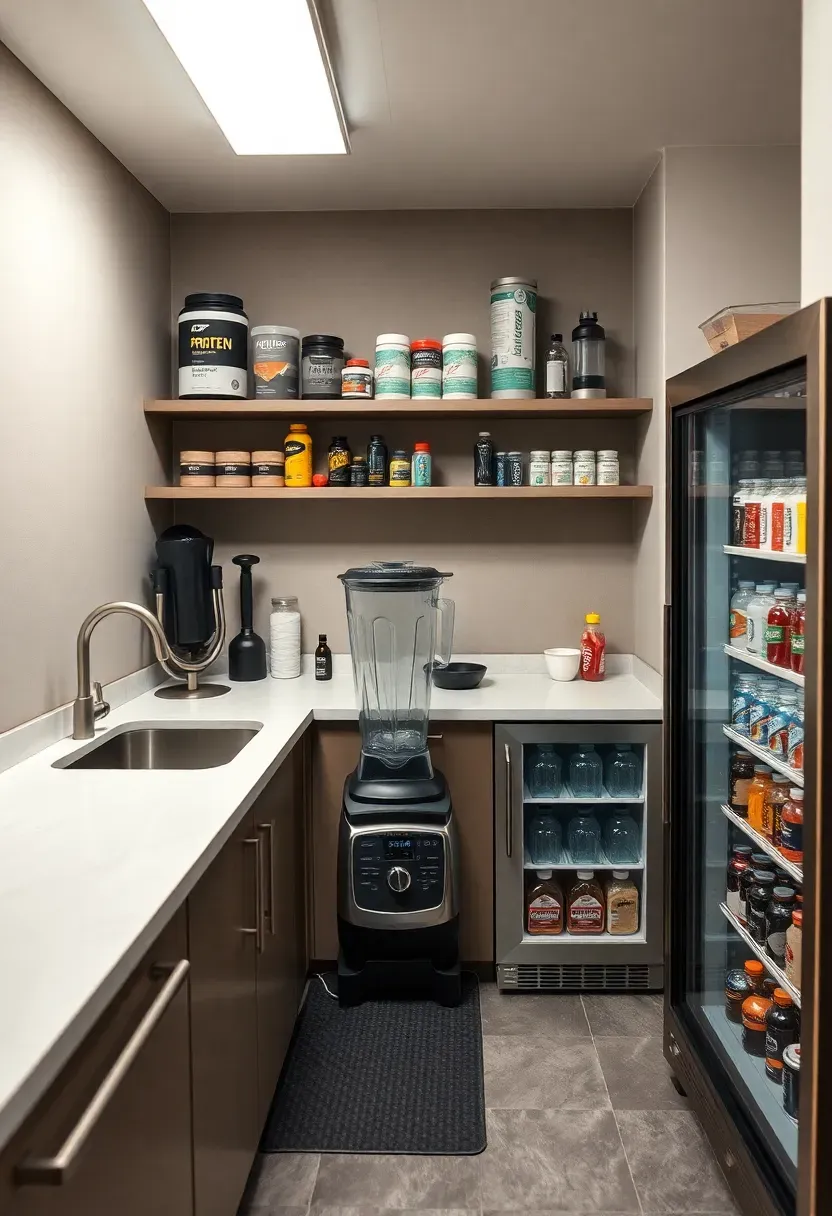
9. Home Gym Recovery Kitchenette
Why pair a kitchenette with your basement gym
If you already work out downstairs, adding a small kitchenette nearby saves you from trudging upstairs sweaty and dehydrated to make a protein shake. The requirements are specific: a blender-ready counter (heavy-duty outlet, vibration-dampening mat under the blender), a glass-door beverage fridge stocked with water and recovery drinks, a deep single-bowl sink for rinsing shaker bottles immediately, and open shelving for supplements and dry ingredients.
What to skip
No cooktop, no oven, no toaster oven. This is a hydration and nutrition station, not a cooking space. Keeping the scope narrow means the whole thing fits in a 3-foot-wide alcove.
Choose this if
- You work out at home at least four days per week and currently carry drinks up and down stairs
- Your basement already has plumbing roughed in from a bathroom or laundry area nearby
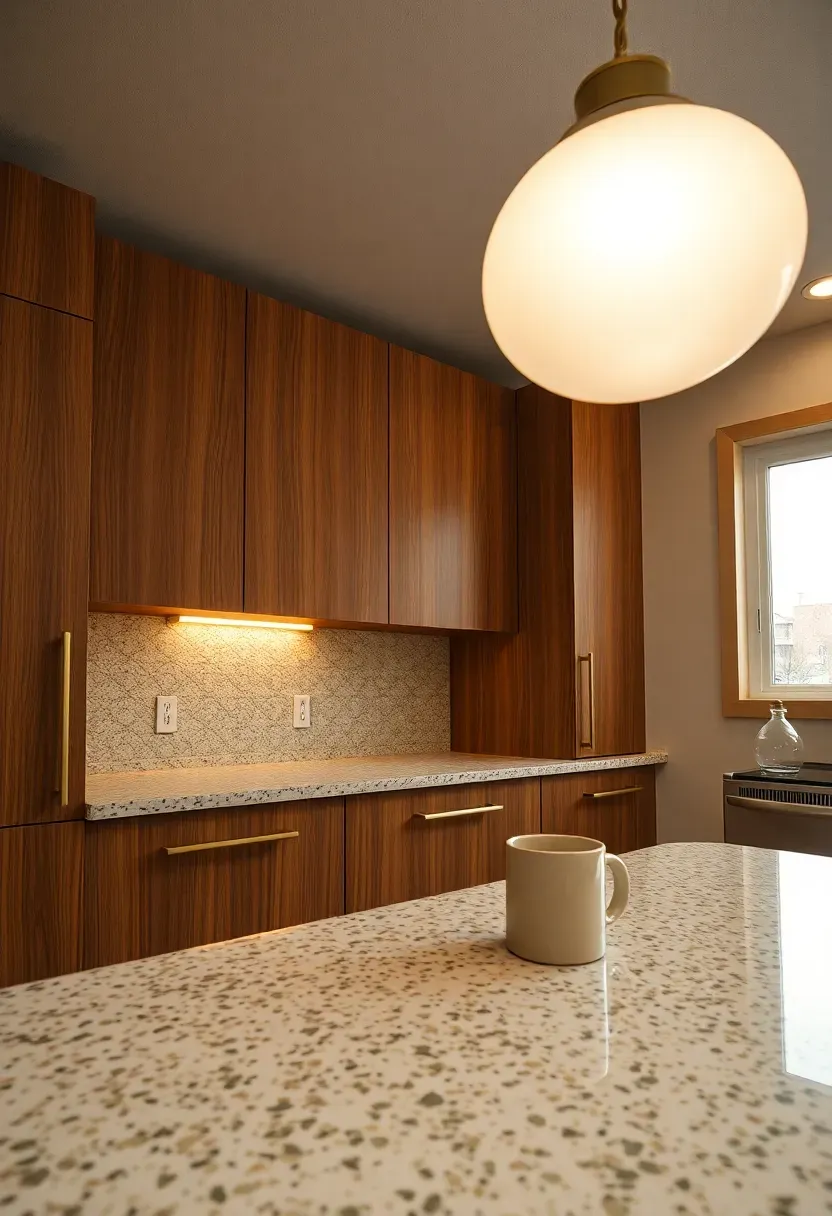
10. Mid-Century Modern Kitchenette
Flat-front walnut or teak-veneer cabinets with slim brass pulls. A terrazzo or white quartz countertop. One statement pendant — a Sputnik or globe shape — centered over the counter. The mid-century look works in basements because it favors low-profile furniture and clean horizontal lines, both of which make low ceilings feel less pressing. Keep hardware minimal. Use integrated handles (a routed finger pull along the bottom edge of upper doors) to maintain the clean face. A single open shelf in walnut plywood with hairpin brackets replaces a row of uppers.
Tips
- Walnut veneer needs UV protection even in a basement; apply a matte polyurethane or hardwax oil finish
- Terrazzo countertops can be heavy; ensure your base cabinets have adequate structural support
- Stick to two materials (wood plus one stone or composite) and one metal finish (brass or chrome, not both)
Recommended
Items for this idea
11. Duplex Rental-Ready Kitchenette
Building a basement kitchenette for a rental unit brings code requirements that a personal-use space can sometimes skip. Most jurisdictions require a separate electrical panel (or at minimum dedicated circuits), a proper sink with hot and cold water, GFCI protection on every outlet, and a fire-rated ceiling assembly between floors. The kitchenette itself can be modest — 8 linear feet of counter with a sink, undercounter fridge, microwave, and dishwasher drawer — but the behind-the-wall infrastructure needs to meet residential occupancy standards. Check with your local building department before framing a single wall.
Tips
- Some municipalities require a second egress point (door or window) for a rental unit; verify before investing in the kitchen portion
- Install a separate water shut-off valve for the kitchenette so you can service it without affecting the main house
- Use commercial-grade LVP flooring rated for moisture — tenant turnover means this floor will see heavy use
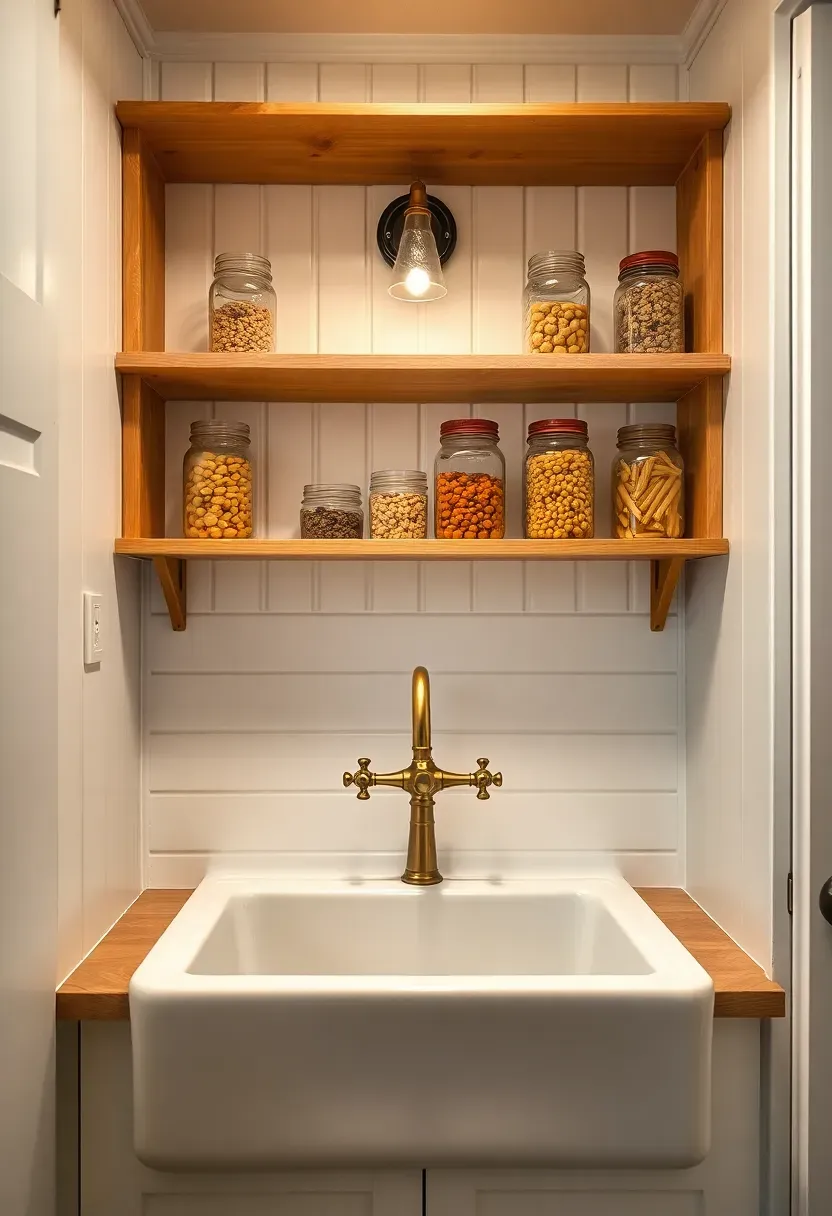
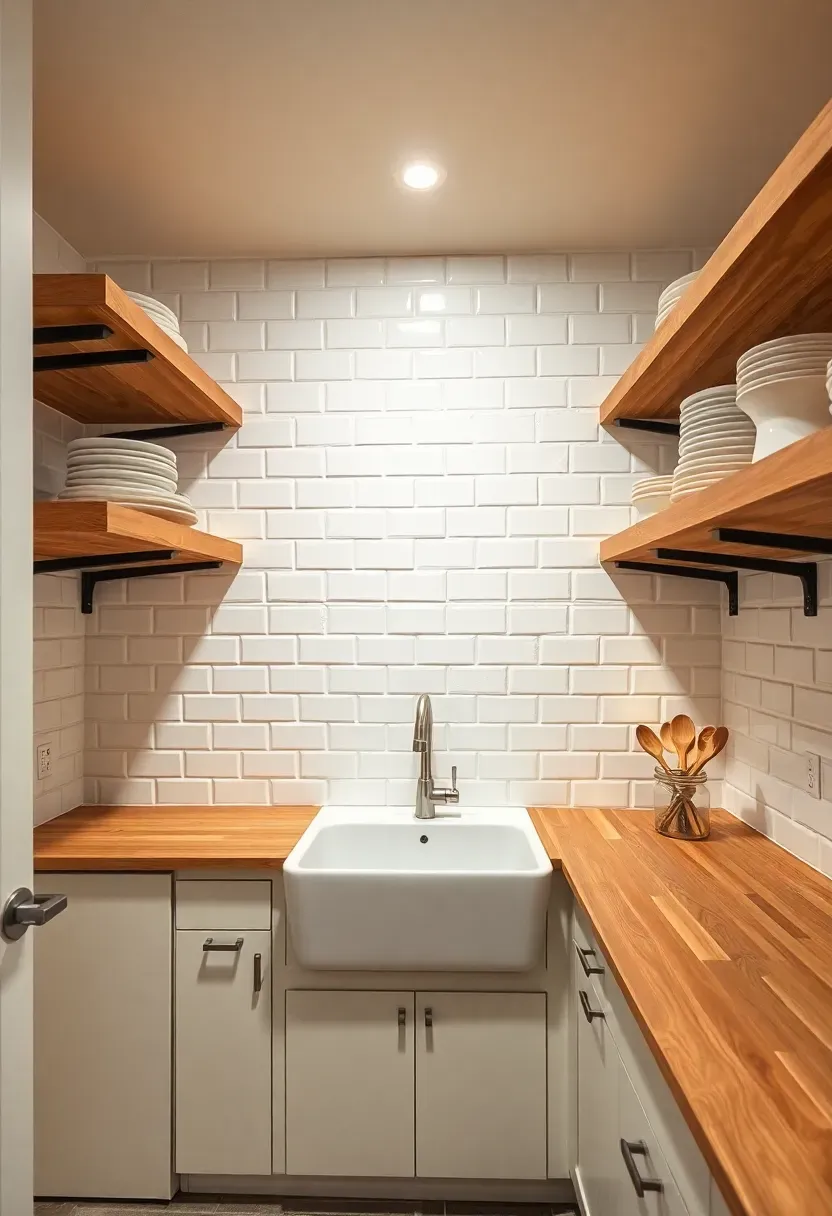
12. Farmhouse Basement Kitchenette
Beadboard backsplash, a small apron-front sink (they make 24-inch versions for compact spaces), and open shelving with mason jars and stoneware. The farmhouse look translates well to basements because it already accepts imperfection — slightly uneven shelves, visible wood grain, aged brass hardware. Use shiplap or beadboard on the walls behind the kitchenette to warm up what would otherwise be painted drywall over concrete. A butcher block counter in maple or oak completes the vocabulary. Skip the barn door hardware (overdone) and use simple board-and-batten cabinet fronts instead.
Tips
- Seal beadboard and shiplap with a moisture-resistant primer before installation; basement humidity warps untreated wood paneling
- An apron-front sink needs a modified base cabinet — the front panel is removed and the sink sits forward of the cabinet face
- Vintage-style bridge faucets in brushed brass sell the farmhouse aesthetic more than any other single fixture choice
Recommended
Items for this idea
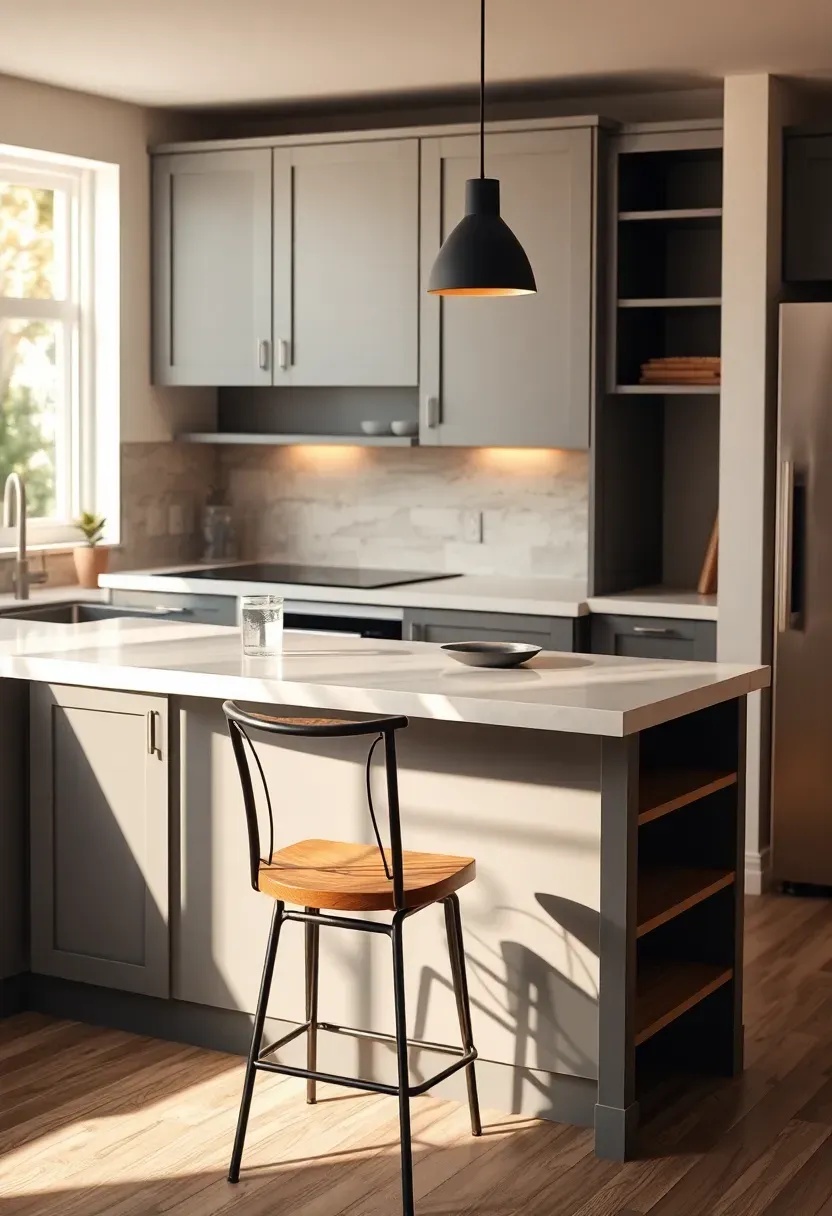
13. Peninsula Kitchenette with Stools
A vs B: Peninsula or Island
Peninsula: Attaches to the end of your counter run. Borrows zero floor space from the walkway because it extends from existing cabinetry. Works in kitchenettes as narrow as 5 feet wide. The kitchen side of the peninsula holds shelving or cabinets; the room side overhangs 12 inches for seating.
Island: Freestanding. Needs 36 inches of clearance on all sides, which means your basement room needs to be at least 12 feet wide for a kitchenette-plus-island to work. Rarely practical in a true kitchenette footprint.
Recommendation
Go with the peninsula. A 36-inch extension from the end of a single-wall kitchenette adds two stool seats and a casual dining surface without requiring any additional floor area. The stools tuck under when not in use.
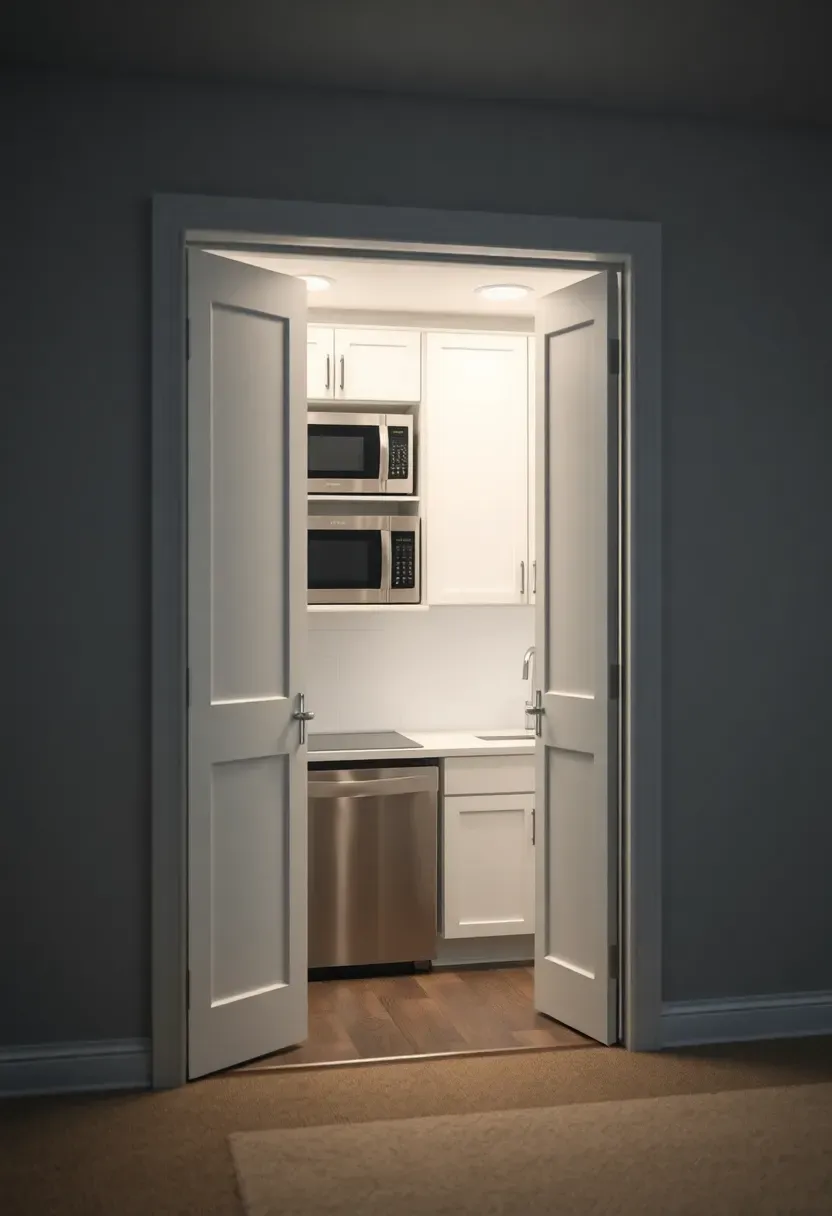
14. Pocket Door Concealed Kitchenette
Two pocket doors — one sliding left, one right — close over a kitchenette alcove and make it disappear. When closed, you see flat wall panels or paneling that matches the rest of the room. When open, the doors slide into the wall cavity and the kitchenette is fully accessible. This is cleaner than bifold doors (no folding panels jutting into the room) and more finished than a curtain. The wall cavity needs to be 2x6 framing to accommodate the door pocket hardware. Standard 30-inch doors cover a 5-foot opening; 36-inch doors cover 6 feet.
Tips
- Soft-close pocket door hardware prevents slamming and costs about $30 more per door than standard kits
- Frame the opening with trim that matches the room's door casings so it reads as an intentional architectural element
- Leave 4 inches of clearance above the kitchenette counter when sizing the door height to avoid interference
Recommended
Items for this idea
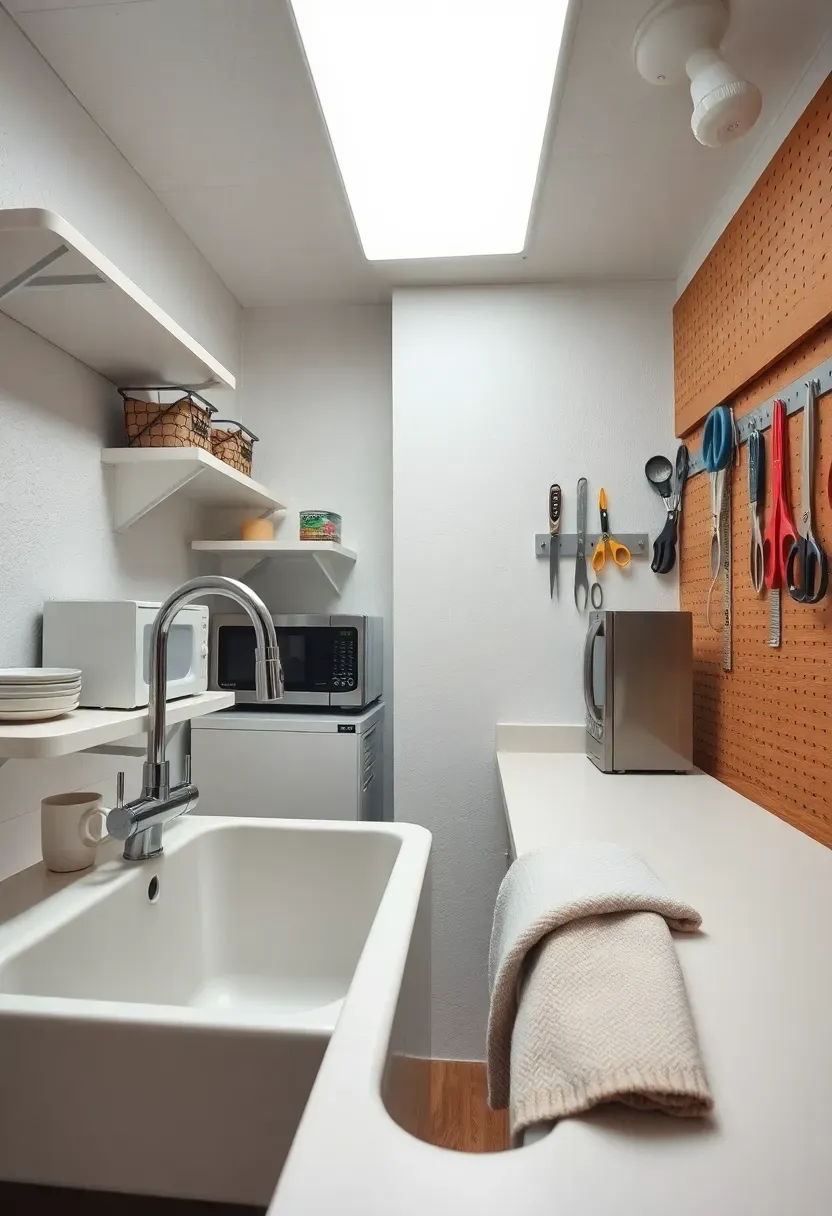
15. Craft Room Combo Kitchenette
If your basement doubles as a craft or hobby workshop, a kitchenette at one end keeps you working without going upstairs for water, coffee, or lunch. The crossover piece is the sink — a utility sink works for both cleaning paintbrushes and rinsing dishes. Separate the food zone from the craft zone with at least 3 feet of clear counter or a physical divider like a rolling cart. Use a pegboard wall on the craft side and tile backsplash on the kitchen side. The microwave and mini fridge sit on the kitchen end. Keep solvents, paints, and adhesives well away from food prep areas.
Tips
- Install a utility sink with a high-arc faucet and sprayer — it handles both craft cleanup and kitchen tasks
- A rolling cart between zones can move to create more kitchen or more craft space as needed
- Label dedicated food-only shelves to prevent cross-contamination with craft supplies
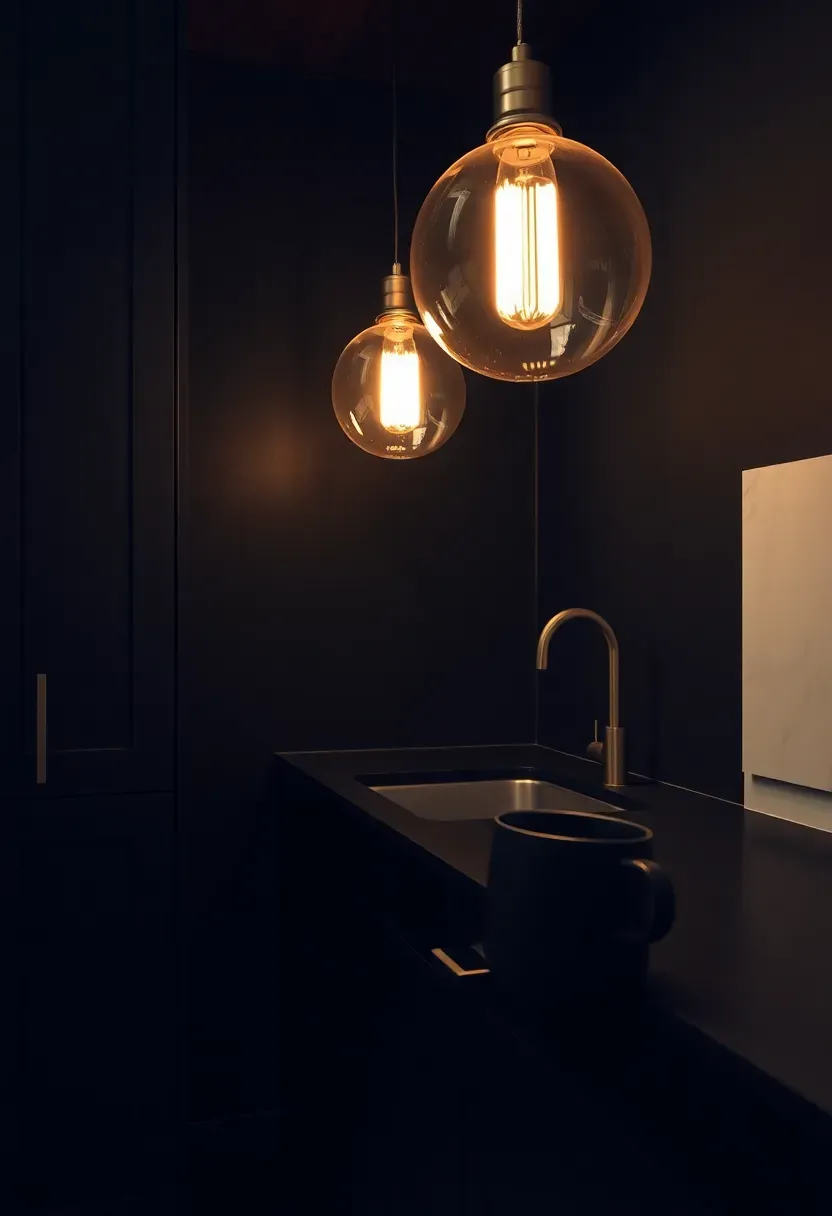
16. Black Cabinet Moody Kitchenette
Basements are already dark. Instead of fighting it with white paint and bright lights, lean into it. Matte black cabinets (painted MDF or thermofoil in graphite), a dark soapstone or black quartz counter, and deep charcoal walls create a kitchenette that feels like a cocktail lounge. The trick is contrast: brushed gold or brass hardware, warm-toned pendant lighting (2700K bulbs, never higher), and one element in a lighter material — a marble backsplash, a light wood shelf, or a brass bar rail. Without that contrast point, the space collapses into a dark void.
Tips
- Matte black finishes show fingerprints less than gloss; choose matte or satin for cabinet fronts
- Under-cabinet lighting is mandatory, not optional, in a dark-palette kitchenette — without it the counter is unusable
- Limit the moody palette to the kitchenette zone; extending it across the full basement room can feel oppressive
Recommended
Items for this idea
17. Outdoor-Access Walkout Kitchenette
A walkout basement with a patio door or ground-level exit gives you something most basement kitchenettes lack: a natural connection to outdoor space. Position the kitchenette next to the door so it serves both the indoor room and the patio. A pass-through window or a countertop that extends through a sliding partition lets you prep inside and serve outside. Use moisture-resistant materials throughout — porcelain tile floor, solid surface counters, stainless pulls — because that open door introduces rain splash, humidity, and temperature swings that a sealed basement avoids.
Tips
- A screen door or retractable screen keeps insects out while maintaining the indoor-outdoor flow during warm months
- Slope the floor slightly toward a drain near the door to handle water that tracks in
- Choose appliances rated for humid environments; standard steel hardware will rust faster near an open exterior door
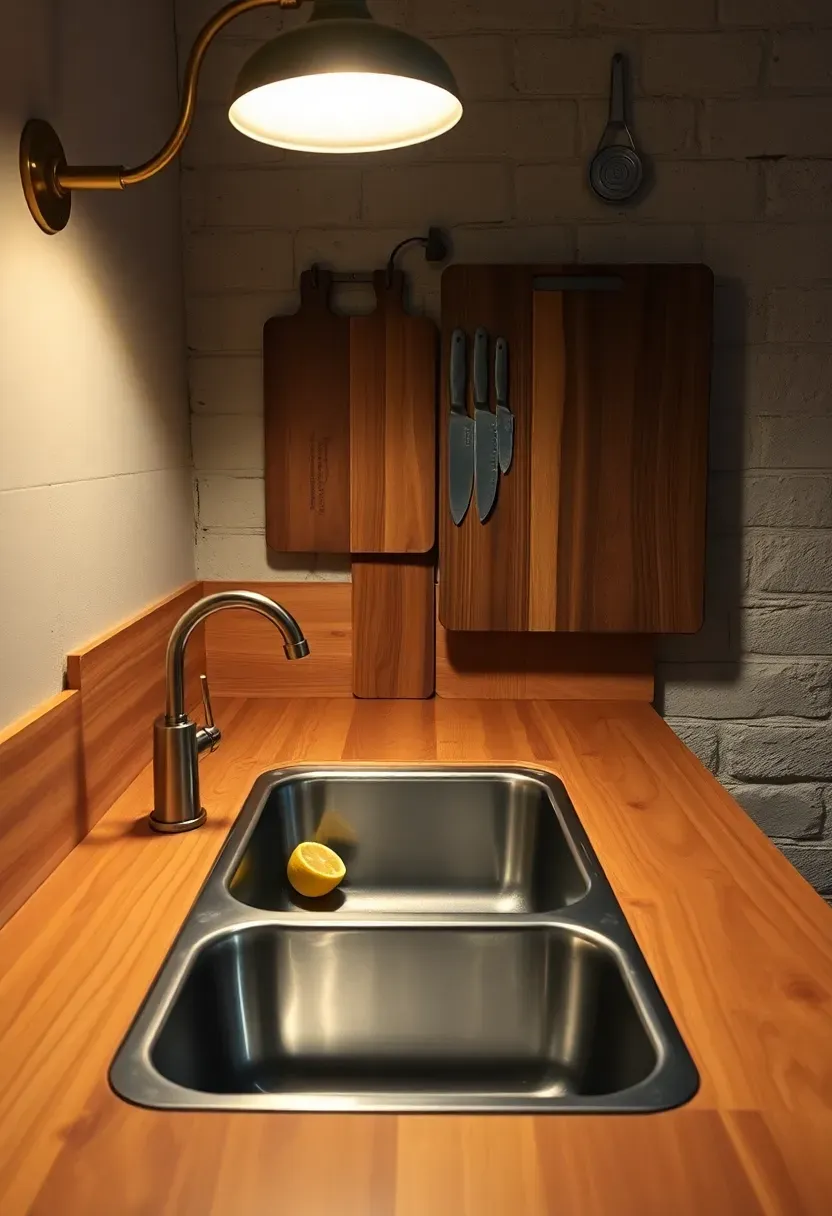
18. Butcher Block Prep Kitchenette
How to build a prep-focused kitchenette
This layout prioritizes food preparation over cooking. A long butcher block counter — 8 feet of edge-grain maple, 1.5 inches thick — gives you a serious prep surface for chopping, rolling dough, and assembling platters. No cooktop, no oven. Instead, the appliances are utilitarian: a food processor shelf at counter height, a deep single-bowl sink, and an undercounter fridge for ingredients.
Step 1: Choose the right butcher block
Edge-grain maple or walnut in 1.5-inch thickness. End-grain is prettier but harder to install and more expensive. Finish with food-grade mineral oil, never polyurethane.
Step 2: Mount the block
Support it every 24 inches with L-brackets into studs. Butcher block is heavy — an 8-foot slab of 1.5-inch maple weighs about 90 pounds.
Step 3: Add task lighting
Mount adjustable-arm wall lamps at each end of the counter so you can direct light exactly where you are cutting.
Watch out for
- Butcher block near a basement sink needs diligent drying; standing water causes black mold stains in the grain
- Do not place a butcher block counter against an exterior foundation wall without a vapor barrier between them
Recommended
Items for this idea
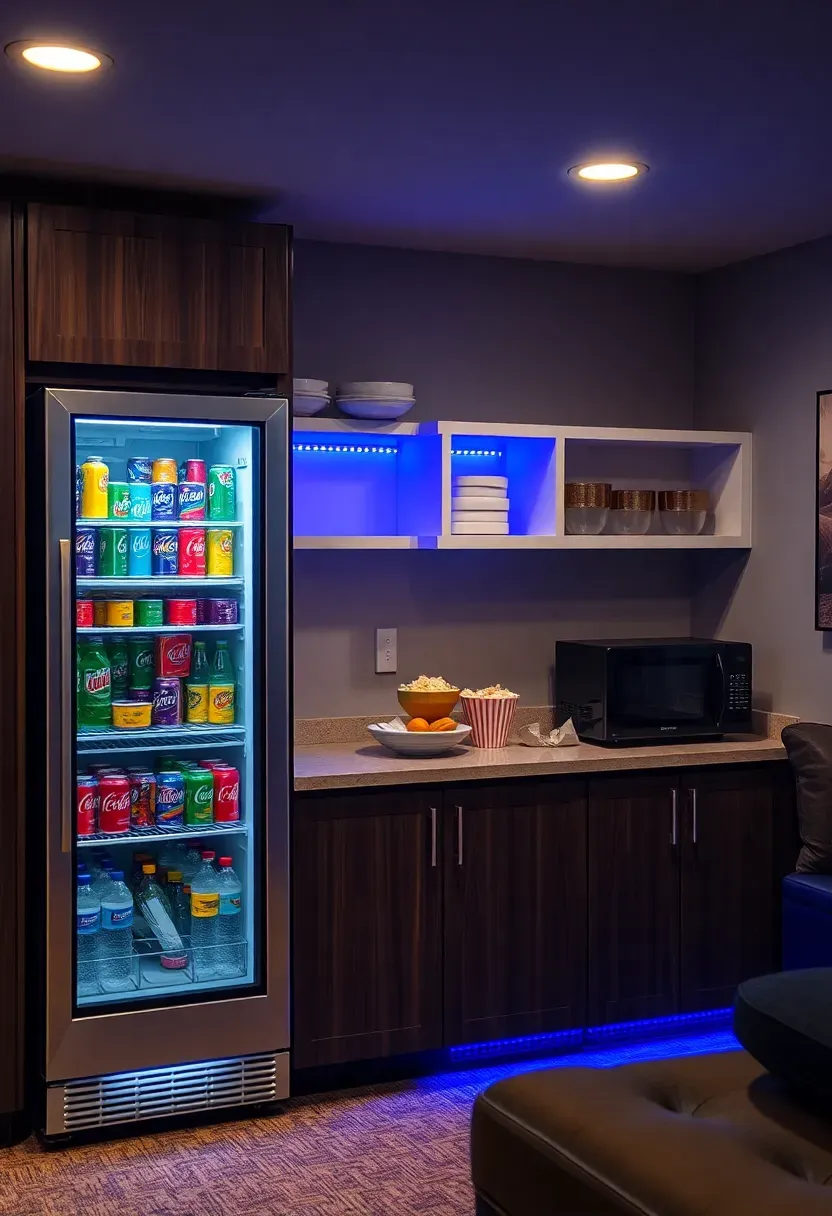
19. Game Room Snack Kitchenette
Build the kitchenette around what people actually consume during game night: popcorn, chips, dips, sodas, and maybe nachos from a toaster oven. A glass-door beverage fridge goes at one end. A countertop popcorn maker or a microwave sits at the other. Between them, open shelving holds bowls, snack containers, and paper goods. No sink is necessary if you keep it to packaged and microwaveable items — use disposable trays and carry dishes upstairs later. A strip of RGB LED lighting under the counter shelf adds atmosphere without costing more than $25.
Tips
- Mount a paper towel holder and a small trash can at the end of the counter to contain mess during game sessions
- A countertop ice maker (no water line needed — you fill the reservoir manually) eliminates the most common trip upstairs
- Skip the popcorn machine if ceiling height is under 7.5 feet; the steam and oil vapor have nowhere to go
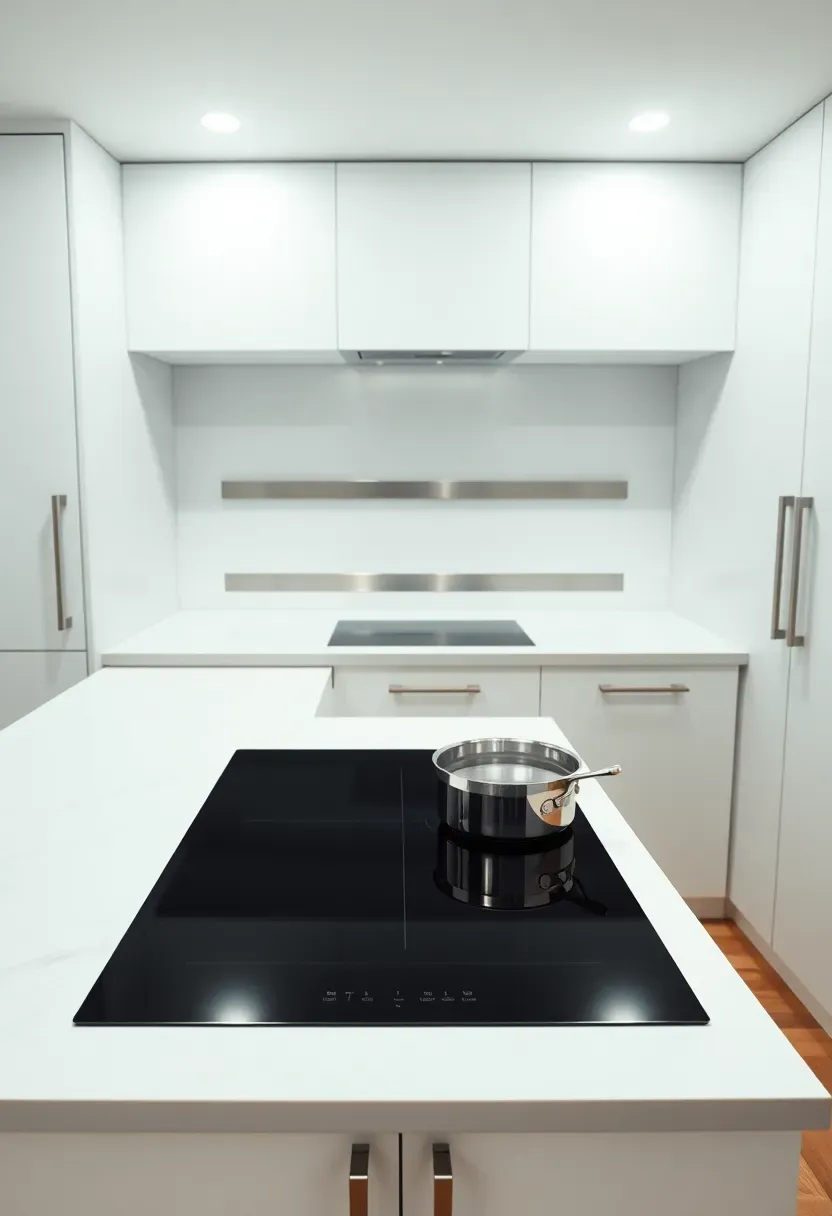
20. Induction Cooktop Kitchenette
A vs B: Induction or Gas in a Basement
Induction: Needs a 240-volt, 40-amp circuit. No combustion, no carbon monoxide, no gas line to run through the foundation. The cooktop surface stays cool except directly under the pan. Ventilation requirements are lighter — a recirculating range hood (no exterior duct needed) handles the grease and steam from induction cooking at kitchenette scale.
Gas: Requires running a gas line through or under the foundation wall. Produces combustion byproducts that demand a vented hood to the exterior. In a basement with limited ceiling height, ducting a hood outside often means cutting through the rim joist and siding — a $1,500 job on top of the gas line cost.
Recommendation
Induction wins in basements by a wide margin. A portable single-burner induction unit ($60 to $120) lets you test the concept before committing to a built-in. If you decide it works, a 24-inch two-burner built-in induction cooktop runs $400 to $700 and drops flush into the countertop.
Recommended
Items for this idea
21. Budget IKEA Kitchenette Build
How to build a full kitchenette for under $1,500
Step 1: Cabinets. The IKEA KNOXHULT freestanding kitchen series includes a base cabinet with a sink and faucet ($250), a base cabinet with drawers ($150), and a wall cabinet ($70). Total for a 6-foot run: roughly $470. The cabinets are freestanding — they do not require wall mounting on the base units, which avoids drilling into concrete block.
Step 2: Appliances. A 3.2 cubic foot mini fridge ($180), a 700-watt microwave ($70), and an electric kettle ($25). Total: $275.
Step 3: Plumbing. If you have an existing water line and drain nearby, a licensed plumber can tie in the sink for $300 to $500. If you need a sewage ejector pump, add $400 to $800.
Step 4: Finishing. Peel-and-stick subway tile backsplash ($50 for 10 square feet), under-cabinet LED strip ($20), and a few accessories. Total finishing: about $100.
Watch out for
- KNOXHULT cabinets are particleboard with melamine coating; any standing water on exposed edges causes swelling
- The included countertop is laminate and only 24 inches deep — do not overhang it more than 1 inch without additional support
Quick FAQ
Do basement kitchenettes need a building permit? In most US jurisdictions, yes — if you are adding plumbing or electrical circuits. A beverage station that only plugs into an existing outlet typically does not require a permit. Adding a sink, running a new water line, or installing a 240-volt circuit for an induction cooktop almost always does. Call your local building department before starting work; permit fees usually run $100 to $300.
What is the best flooring for a basement kitchenette? Luxury vinyl plank (LVP) rated for below-grade installation handles moisture better than hardwood or laminate. Porcelain tile is another strong option but costs more and feels cold underfoot without radiant heat. Avoid carpet anywhere near a kitchenette — spills are inevitable and moisture gets trapped in carpet padding.
How do you ventilate a kitchenette without exterior walls? A recirculating range hood with a charcoal filter removes grease and some odors but does not vent moisture. For better airflow, run a 4-inch duct from an inline fan through the ceiling and connect it to an existing duct run or out through the rim joist. If neither option works, a standalone HEPA air purifier near the cooking zone catches airborne grease particles.
Can you put a dishwasher in a basement kitchenette? A standard 24-inch dishwasher fits under most kitchenette counters, but you need both a hot water supply and a drain connection. In basements below the main sewer line, the dishwasher drain must connect to a sewage ejector pump. A dishwasher drawer (half-size) uses less water and fits in tighter layouts.
How much does a basement kitchenette cost on average? A no-plumbing beverage station runs $300 to $800. A basic kitchenette with sink, mini fridge, and microwave costs $2,000 to $5,000 including plumbing. A full kitchenette with induction cooktop, dishwasher drawer, and custom cabinets can reach $8,000 to $15,000. The biggest variable is always plumbing — if you have existing rough-in nearby, costs drop significantly.
A basement kitchenette does not need to rival your main kitchen. The best ones accept their limitations and optimize for the specific tasks you will actually perform down there. Pick the layout that matches your use case, invest in moisture-resistant materials, and keep the footprint honest. Start with the simplest version that solves your problem — you can always add a sink or upgrade appliances later, but you cannot easily move plumbing once it is in the slab.
Pinterest cover for 21 Basement Kitchenette Ideas
About the author
OBCD
CGI visualization and interior design content. We create detailed 3D renders and curate practical design ideas for every room in your home.