19 Basement Kitchen Ideas
I spent three months renovating our basement into a rental unit, and the kitchen was the part that nearly broke me. Rough-in plumbing sat two feet from where I wanted the sink. The ceiling cleared seven and a half feet — fine for living, tight for a range hood duct. Every decision had a constraint attached to it that you would never deal with on a main floor. But the finished result works better than I expected, partly because limitations forced smarter choices. If you are planning a basement kitchen, the 19 ideas below cover layouts, materials, and practical workarounds drawn from real below-grade conditions.
Here is a collection of basement kitchen ideas organized from simple additions to full renovations.
Table of Contents
- Compact Galley Kitchen
- Wet Bar Kitchenette
- L-Shaped Layout with Peninsula
- Open-Concept Kitchen and Living Area
- In-Law Suite Kitchen
- Rental Unit Full Kitchen
- Snack Station and Beverage Center
- Industrial Concrete and Steel Kitchen
- Bright White Basement Kitchen
- Rustic Basement Kitchen with Exposed Beams
- Under-Stair Kitchenette
- Basement Kitchen Island with Seating
- Butler's Pantry Extension
- Home Theater Concession Kitchen
- Teen or Guest Suite Mini Kitchen
- Daylight Basement Kitchen
- Moisture-Resistant Coastal Kitchen
- Dark and Moody Basement Kitchen
- Outdoor-Access Walkout Kitchen
1. Compact Galley Kitchen
Galley layouts make sense below grade because basements rarely offer wide open spans between load-bearing walls. Two parallel counters with 42 inches of walkway between them fit into a space as narrow as 8 feet wide. The efficiency is hard to beat — everything is within two steps. Keep upper cabinets on only one side to avoid the hallway feeling. On the opposite wall, use open shelving or a single row of floating shelves that stops a foot below the ceiling, leaving room for recessed lights to bounce off the wall and keep things from feeling cramped.
Tips
- Run a continuous LED strip under all upper cabinets to eliminate shadows on your work surface
- A single-bowl undermount sink saves counter space over a double-bowl in tight galley layouts
- Place the refrigerator at one end rather than mid-run so door swing does not block the walkway
We picked a few things that go well with this idea: Govee Dimmable LED Strip Lights (16.4ft) (★4.6), DAYBETTER Under Cabinet Lights (6-Pack) (★4.3) and Rechargeable Motion Sensor Under Cabinet Lights (2-Pack) (★4.5). As an Amazon Associate we earn from qualifying purchases.
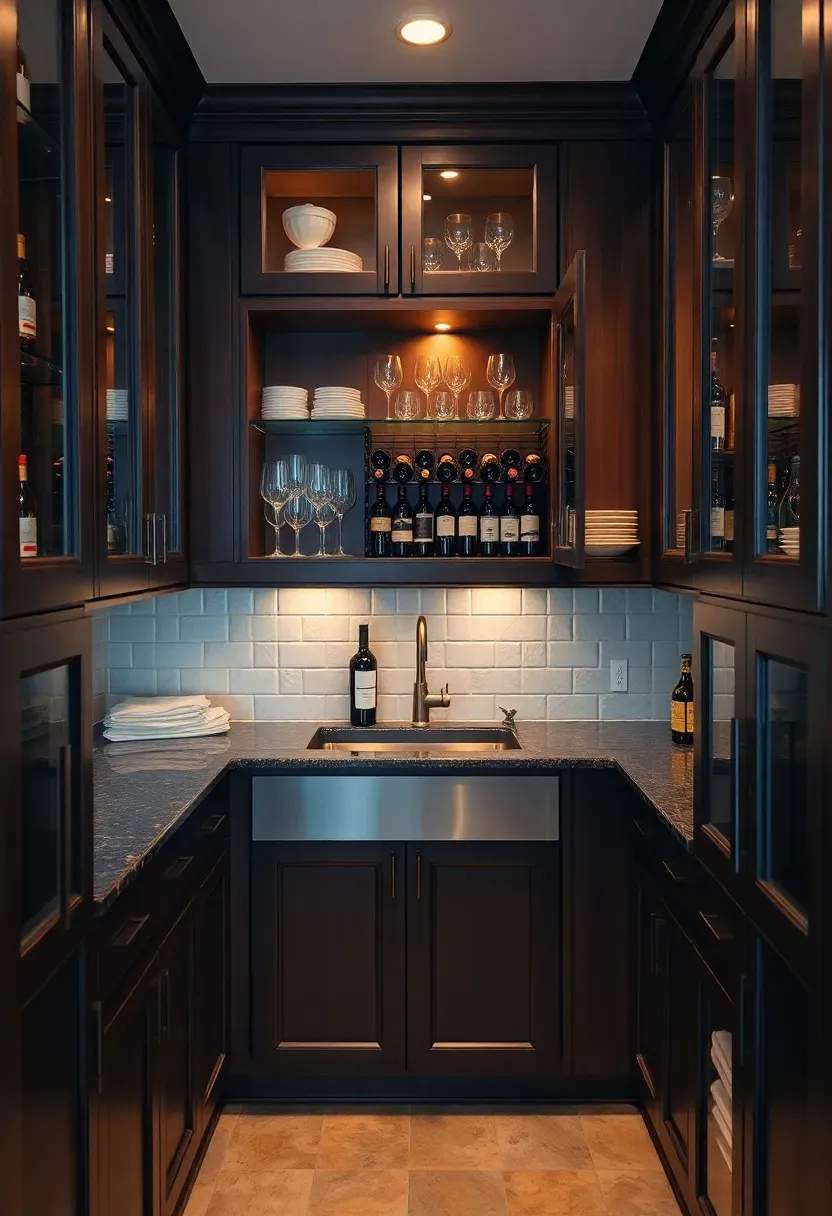
2. Wet Bar Kitchenette
Why this works in most basements
A wet bar needs only a cold water line and a drain, which makes plumbing far cheaper than a full kitchen rough-in. If your basement already has a bathroom, you can often tap into that existing drain line with a short horizontal run.
What to include
The essentials: a bar sink (15 by 15 inches is plenty), an undercounter beverage fridge, and about 6 linear feet of counter space. Add a small dishwasher drawer if the budget allows — hand-washing glasses in a bar sink gets old fast. Glass-front upper cabinets display glassware and add visual depth. This setup works for entertaining without requiring a stove or full-size fridge.
Pros and cons
- Affordable plumbing — often under $2,000 for the rough-in if you are near existing lines
- No ventilation requirements since there is no cooking surface
- Limited to cold prep and drinks; you cannot cook a full meal here
We picked a few things that go well with this idea: Folding Kitchen Trolley with Two Stools, Lakeside Living Breakfast Cart with Stool Storage (★5.0) and MAHANCRIS Rolling Kitchen Island with Drop Leaf (★4.5). As an Amazon Associate we earn from qualifying purchases.
3. L-Shaped Layout with Peninsula
The L-shape tucks the working kitchen into a corner and uses the peninsula as a divider between cooking and living zones. This matters in basements where you typically share one large open space. The peninsula doubles as a breakfast bar — three stools fit comfortably along a 6-foot run. Route plumbing along the exterior foundation wall (the L's back) where you can access the sewer line with a shorter vertical drop. Electrical is simpler too, since both legs of the L share a corner junction.
Tips
- A peninsula needs at least 36 inches of clearance on the walkthrough side for comfortable traffic flow
- Waterfall countertop edges on the peninsula hide the base cabinet ends and look clean in open layouts
- Place the sink in the peninsula facing out so the cook can see the rest of the room
We picked a few things that go well with this idea: VEAGASO 2500 Sq.Ft Basement Dehumidifier (34 Pint) (★4.5), Compact 1000 Sq.Ft Dehumidifier with Auto Shutoff (★4.3) and AEOCKY 4500 Sq.Ft Smart Dehumidifier (80 Pint) (★4.5). As an Amazon Associate we earn from qualifying purchases.
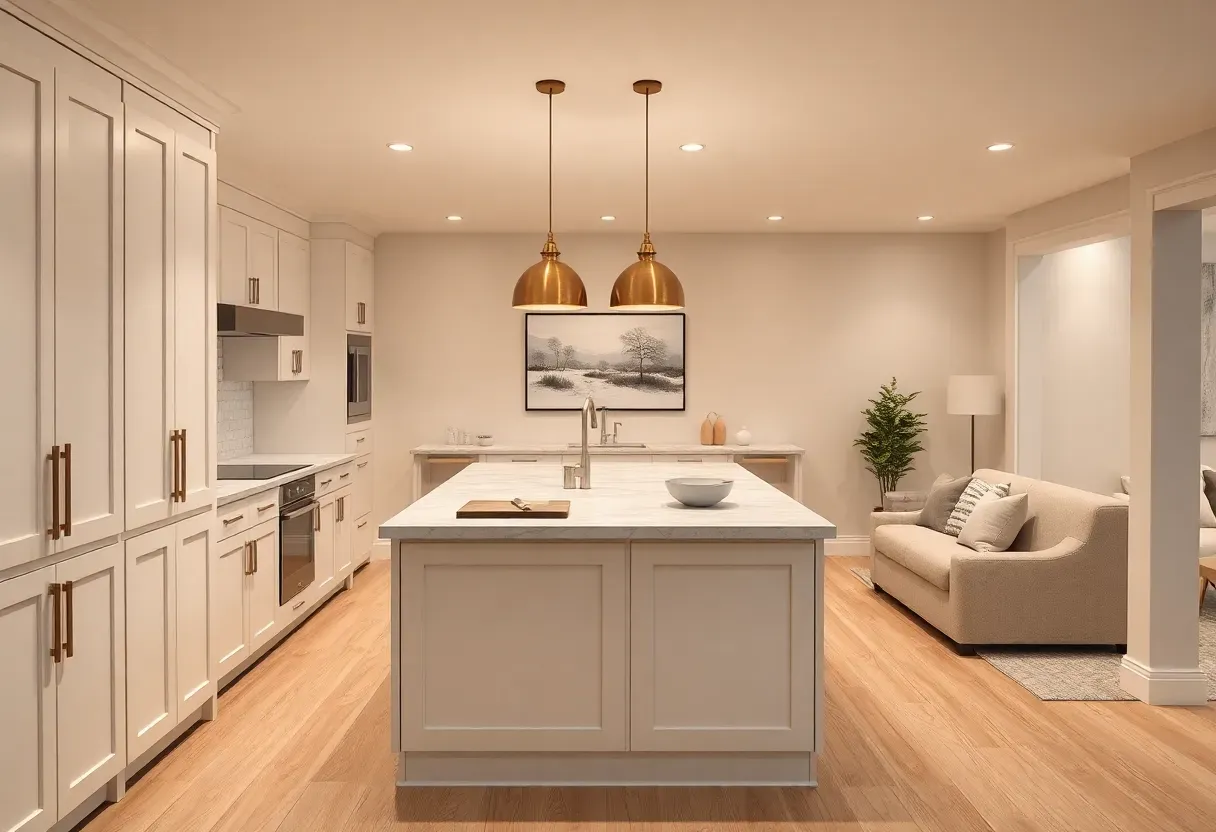
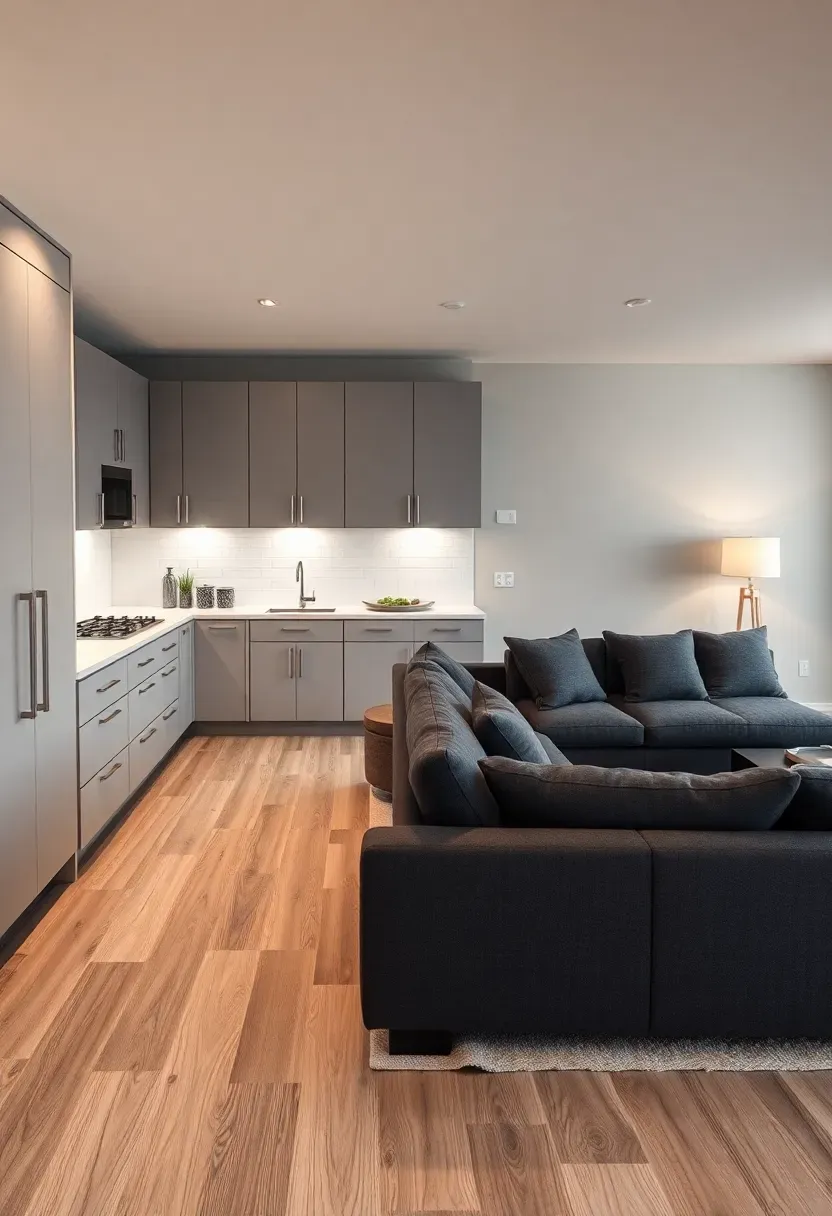
4. Open-Concept Kitchen and Living Area
Step 1: Define zones without walls. Use flooring transitions — tile or luxury vinyl plank in the kitchen area, carpet or a large rug in the living section. A change in ceiling treatment (drywall with recessed lights over the kitchen, painted exposed joists in the lounge) reinforces the boundary visually.
Step 2: Handle the sightlines. Everything in the kitchen is visible from the couch. Choose integrated appliances with panel fronts, keep counters clear, and add a 42-inch-high counter lip to hide dirty dishes from the seating area.
Step 3: Ventilate without ductwork. A recirculating range hood with charcoal filters avoids the problem of routing a duct through the floor above. Replace filters every six months and you will manage cooking odors in the shared space.
Watch out for
- Sound carries in open basements — a range hood on full blast will drown out conversation or TV
- Grease and moisture from cooking will reach soft furnishings; keep the sofa at least 12 feet from the stove
Recommended
Items for this idea
5. In-Law Suite Kitchen
The accessibility angle
Building a kitchen for aging parents or a relative with mobility needs means thinking about clearances, heights, and reach. Standard 36-inch counters work for most people, but a section at 34 inches accommodates seated work. Pull-out shelves in base cabinets eliminate bending. Lever-handle faucets require less grip strength than knobs.
Code requirements
Most jurisdictions require a separate entrance, egress windows in bedrooms, and interconnected smoke detectors for accessory dwelling units. The kitchen needs its own electrical panel or subpanel with dedicated circuits. Check local ADU regulations before starting — permit requirements vary wildly between cities.
Choose this if
- You want a self-contained living space that adds long-term property value
- Privacy matters for both households — separate cooking means separate schedules
- You might convert it to a rental unit later
6. Rental Unit Full Kitchen
A rental-grade basement kitchen needs to survive tenants while meeting code. That means durable finishes everywhere: quartz or laminate counters (not butcher block, which tenants rarely oil), porcelain tile backsplash, and LVP flooring rated for below-grade moisture. Go with a 30-inch slide-in range rather than a cooktop-plus-wall-oven combo — it is cheaper to repair or replace as a single unit. White shaker cabinets in thermofoil resist moisture better than solid wood and cost roughly 40 percent less. Spec a GFI-protected circuit for every outlet within 6 feet of the sink.
Tips
- Install a water shutoff valve accessible from outside the unit so you can stop leaks without entering
- A stacking washer-dryer closet near the kitchen shares plumbing and adds rental appeal
- Photograph the kitchen thoroughly before the first tenant moves in for deposit documentation
Recommended
Items for this idea
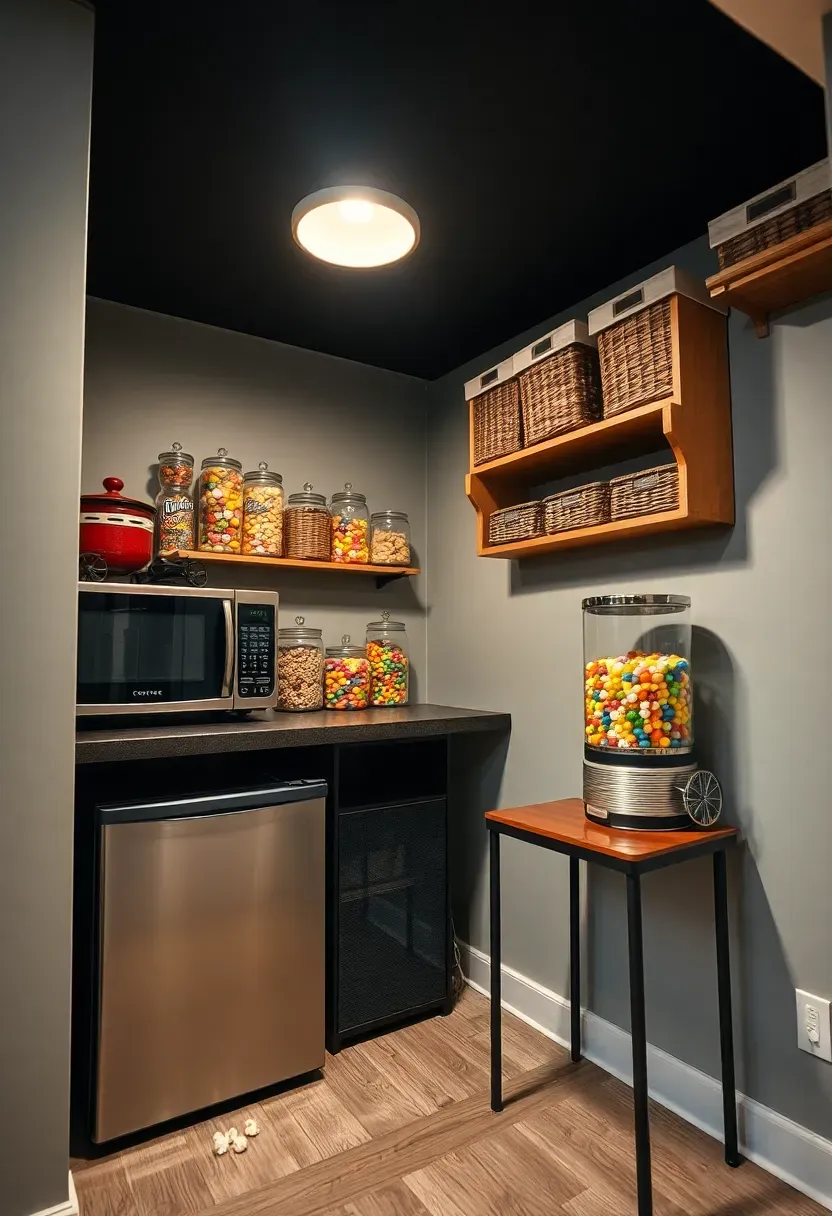
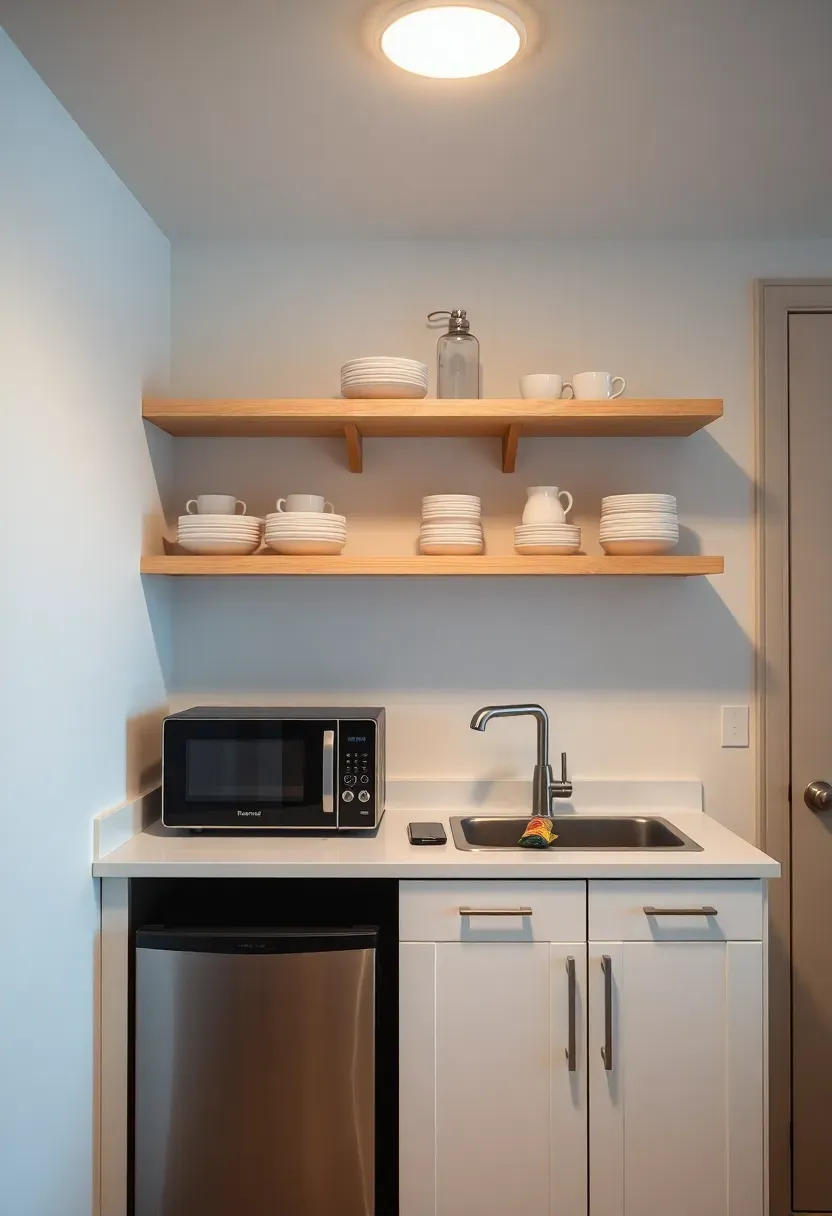
7. Snack Station and Beverage Center
No plumbing needed
This is the easiest basement kitchen idea because it requires zero plumbing. A countertop along one wall — even 4 feet is enough — holds a microwave, a mini fridge, and a coffee maker. Add a shelf above for mugs and snack storage. The only utility you need is electrical: two dedicated 20-amp circuits handle the fridge and microwave without tripping breakers.
Perfect for
- Basements used primarily as media rooms or game rooms
- Families who want kids to grab snacks without running upstairs
- Spaces where plumbing access would cost more than the setup is worth
Upgrade path
- Start here and add a wet bar sink later when the budget allows — just leave a 2-foot gap in the counter with capped drain and water lines behind the wall

8. Industrial Concrete and Steel Kitchen
Basements already have concrete floors and exposed mechanicals. Instead of covering everything up, lean into it. Seal and polish the existing concrete slab — it costs about $3 to $8 per square foot versus $5 to $12 for new flooring on top. Leave the ceiling joists and ductwork exposed but paint them all one color (matte black or dark charcoal unifies the look). Stainless steel countertops on welded steel-frame base cabinets fit the aesthetic and handle moisture better than wood. This approach often costs less than a traditional finished kitchen because you skip the drywall ceiling and subfloor entirely.
Tips
- Apply a penetrating concrete sealer, not a topical one — topical sealers peel in high-humidity basements
- Wrap water heater and HVAC ducts in the same paint color so they blend rather than distract
- Add under-cabinet task lighting to compensate for the dark ceiling absorbing ambient light
Recommended
Items for this idea
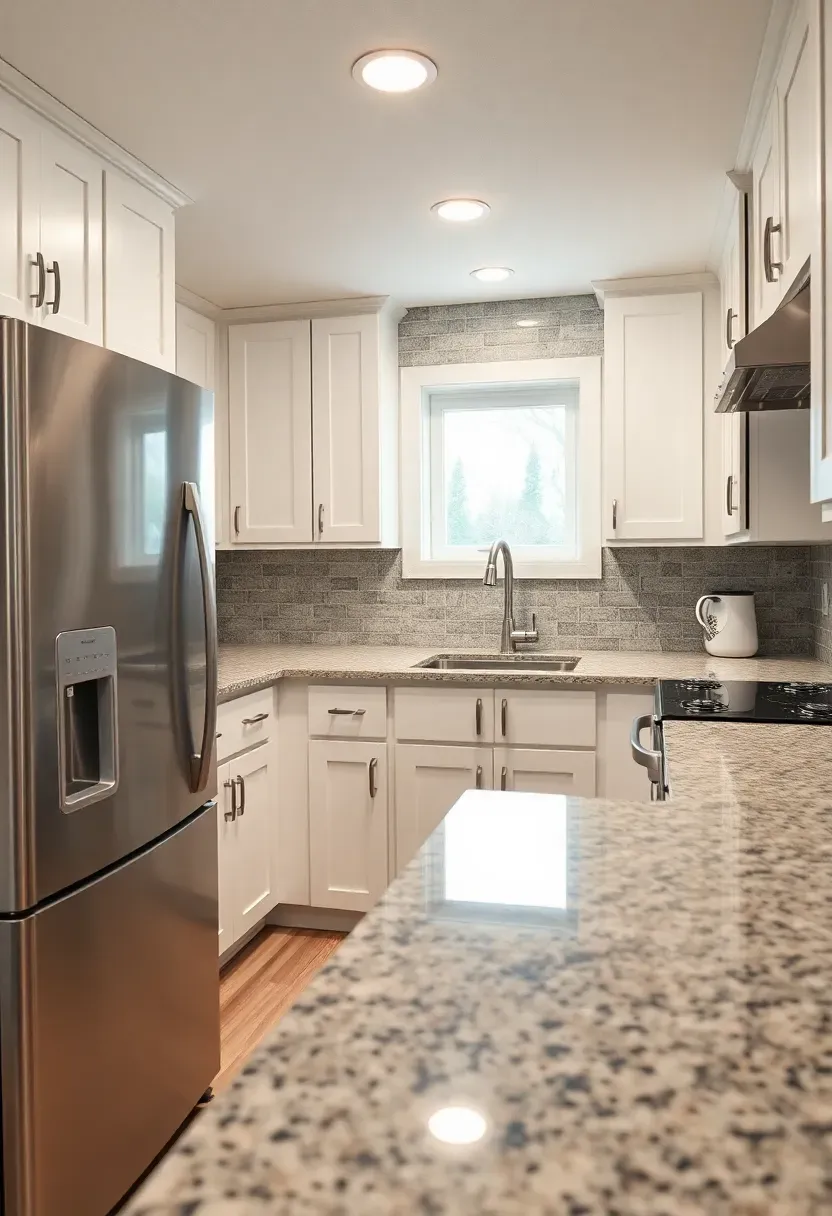
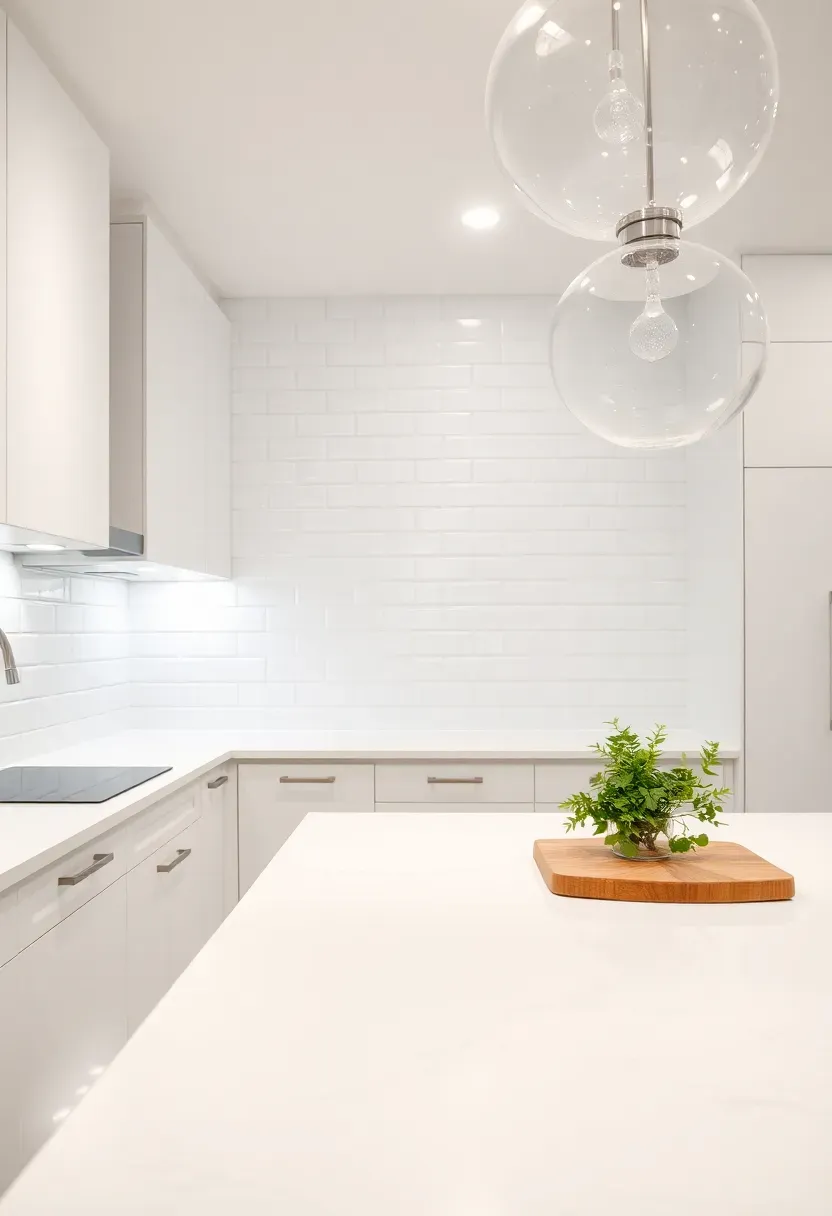
9. Bright White Basement Kitchen
The problem with dark basements
Limited natural light makes most basements feel like caves. Dark cabinets and matte finishes absorb what little light exists. This is the one room type where going all-white actually solves a real problem rather than just following a trend.
The solution
White gloss or semi-gloss cabinet fronts reflect light back into the room. White quartz counters with minimal veining keep surfaces bright. A glossy subway tile backsplash adds another reflective layer. Pair these with recessed LED downlights on a dimmer — 6 fixtures per 100 square feet of kitchen area provides even coverage.
Pros and cons
- The reflective surfaces can double the perceived brightness of artificial lighting
- White shows dirt faster, which is actually helpful — you clean more often and the space stays hygienic
- Can feel sterile without warmth; add natural wood cutting boards, woven baskets, or a wood-tone floating shelf to break the monotony
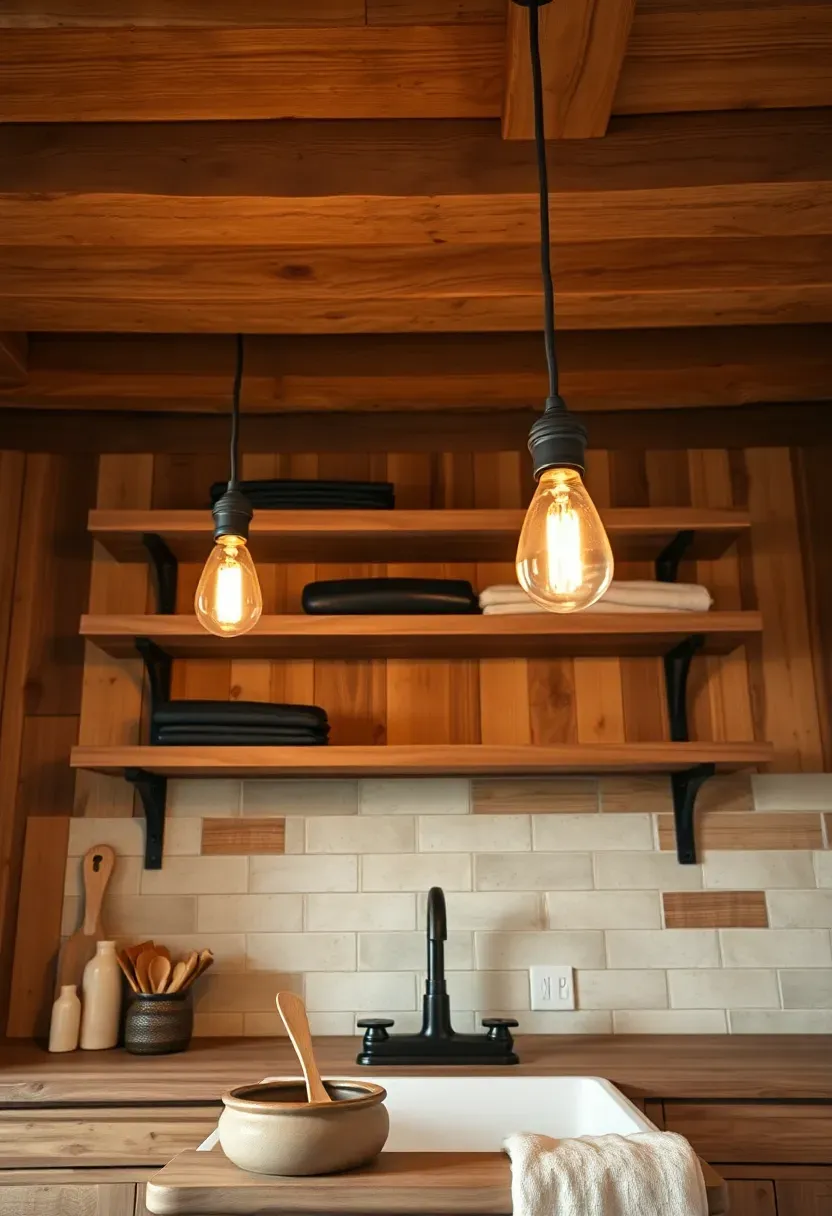
10. Rustic Basement Kitchen with Exposed Beams
Low basement ceilings (7.5 to 8 feet) actually benefit the rustic look. Exposed joists feel intentional when stained a warm walnut or honey tone — they read as beams rather than unfinished structure. Sand the bottom faces smooth and apply a water-based polyurethane for a natural grain look. Below, keep the kitchen simple: shaker cabinets in a sage or cream, butcher block counters (seal with mineral oil monthly in the higher basement humidity), and an apron-front sink. Open shelving made from reclaimed lumber replaces upper cabinets and keeps the ceiling from feeling lower.
Tips
- Check joist spacing — if pipes or wires run between joists, you can box them in selectively while leaving the rest exposed
- Edison-style LED bulbs in pendant fixtures provide warm light without the heat or energy cost of real filament bulbs
- A matte-finish backsplash tile in a handmade or slightly irregular shape complements the rustic texture
Recommended
Items for this idea
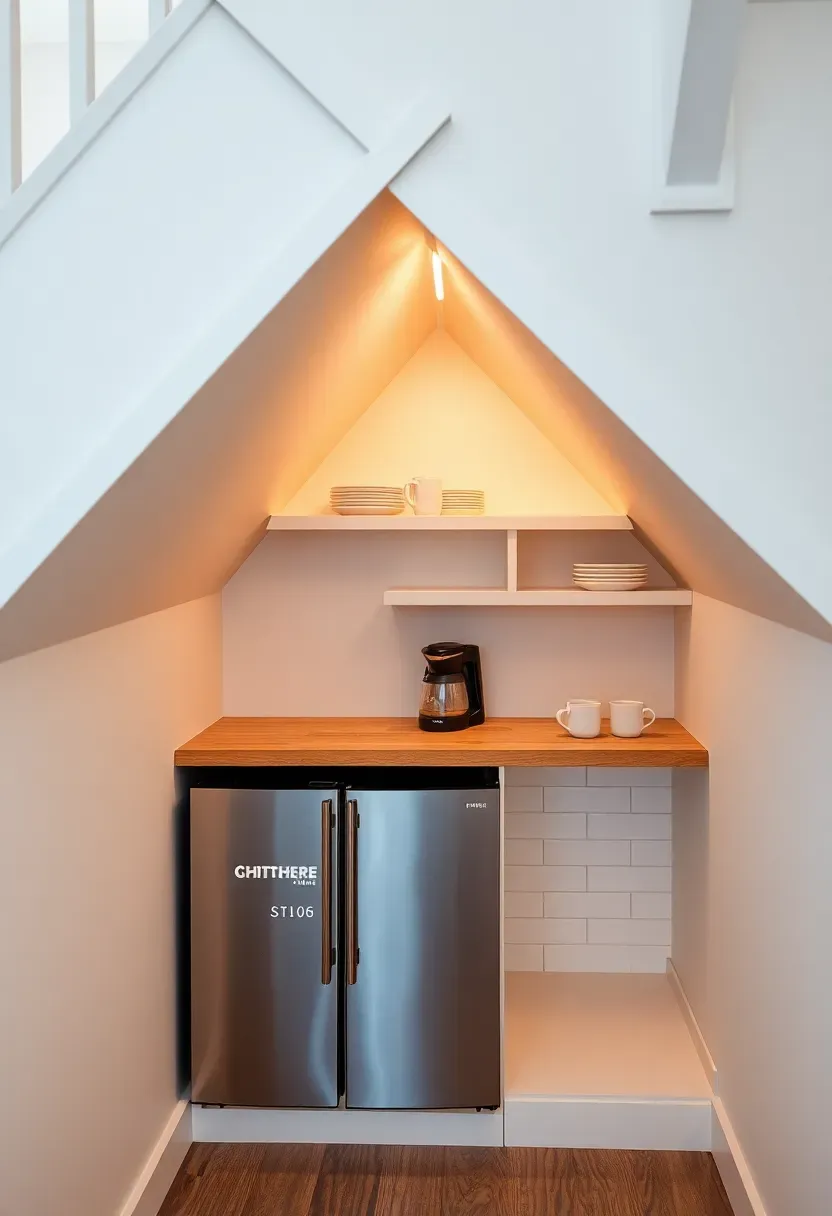
11. Under-Stair Kitchenette
The triangular space beneath a basement staircase usually becomes a closet or dead storage. Converting it into a kitchenette uses this awkward geometry productively. You get roughly 25 to 35 square feet of usable space depending on stair width and rise. The tall end (near the bottom of the stairs) fits a full-height fridge or pantry cabinet. The counter runs along the middle section where you have 36 to 42 inches of headroom — enough for a countertop microwave and coffee setup. The short end works for pull-out drawers or a small wine rack.
Tips
- Measure headroom at every foot along the run before committing to appliance placements
- A single electrical circuit with 4 outlets handles the load for this size setup
- Build the counter at standard 36-inch height and let the stair soffit angle above it naturally
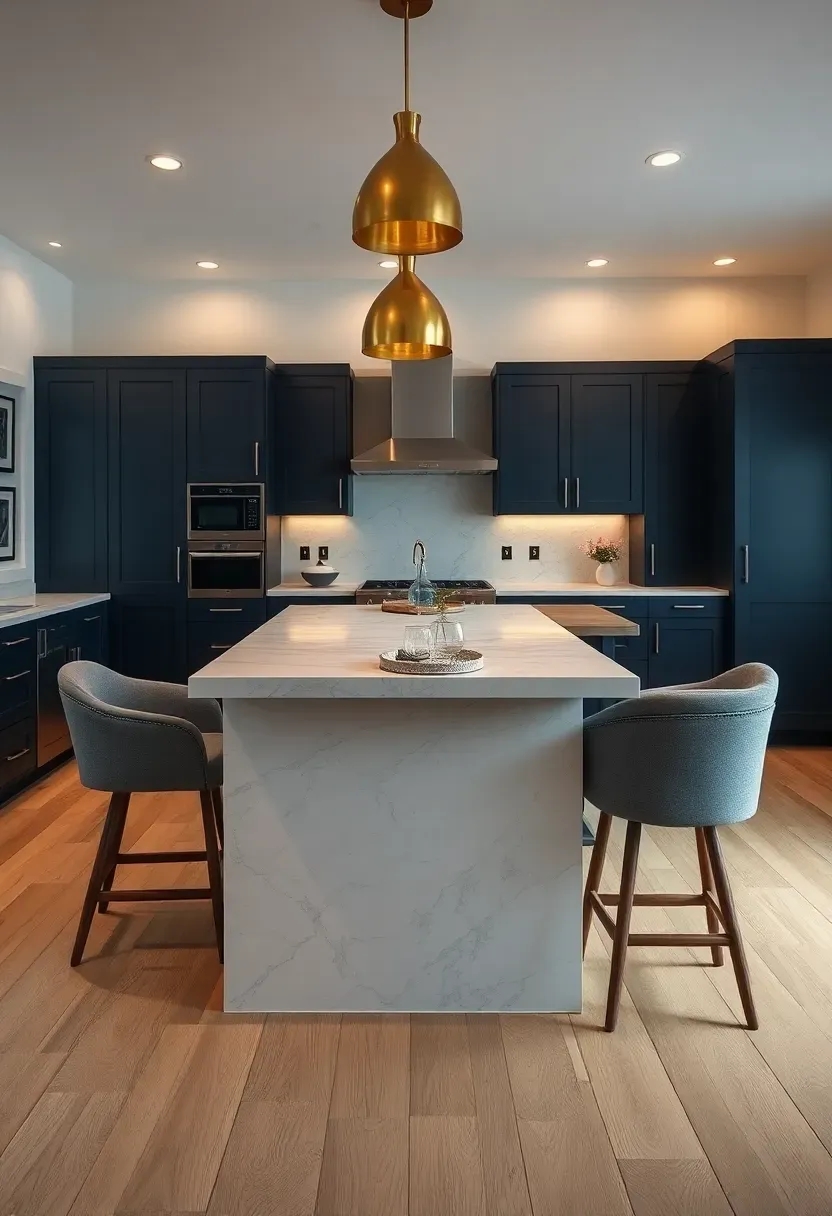
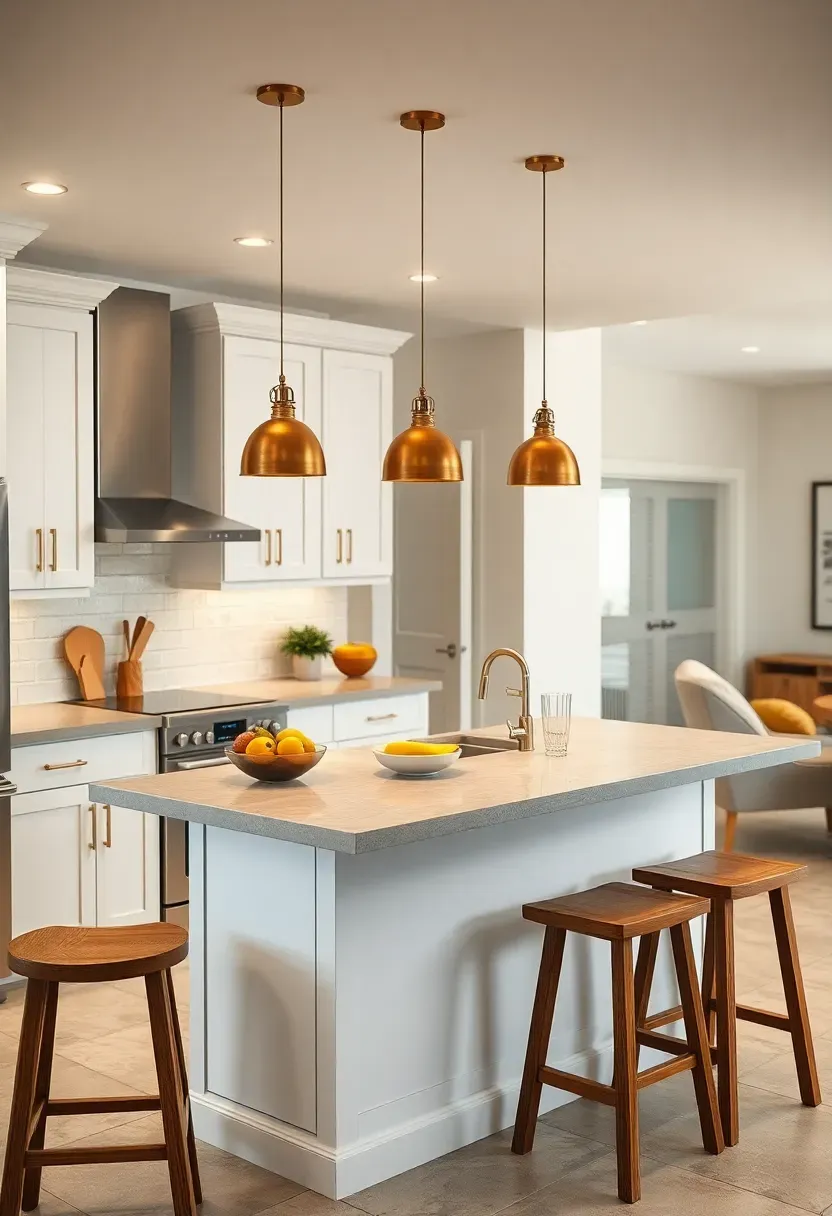
12. Basement Kitchen Island with Seating
Island vs. peninsula — which works below grade?
An island needs clearance on all four sides (36 inches minimum, 42 preferred). That means your basement kitchen area should be at least 12 by 14 feet to fit a 3-by-6-foot island with walkways. If you have less space, a peninsula attached to a wall saves one clearance zone and gives you the same counter area.
Making the plumbing work
Putting a sink in a basement island means cutting into the concrete slab to run drain and water lines. Budget $2,500 to $5,000 for this work depending on the distance to the main stack. An easier alternative: keep the sink against the wall and use the island purely for prep and seating.
Choose this if
- Your basement has enough square footage for proper clearances on all sides
- You want a gathering point that works for both cooking and casual dining
- The slab is accessible and a plumber has confirmed a viable drain route
Recommended
Items for this idea
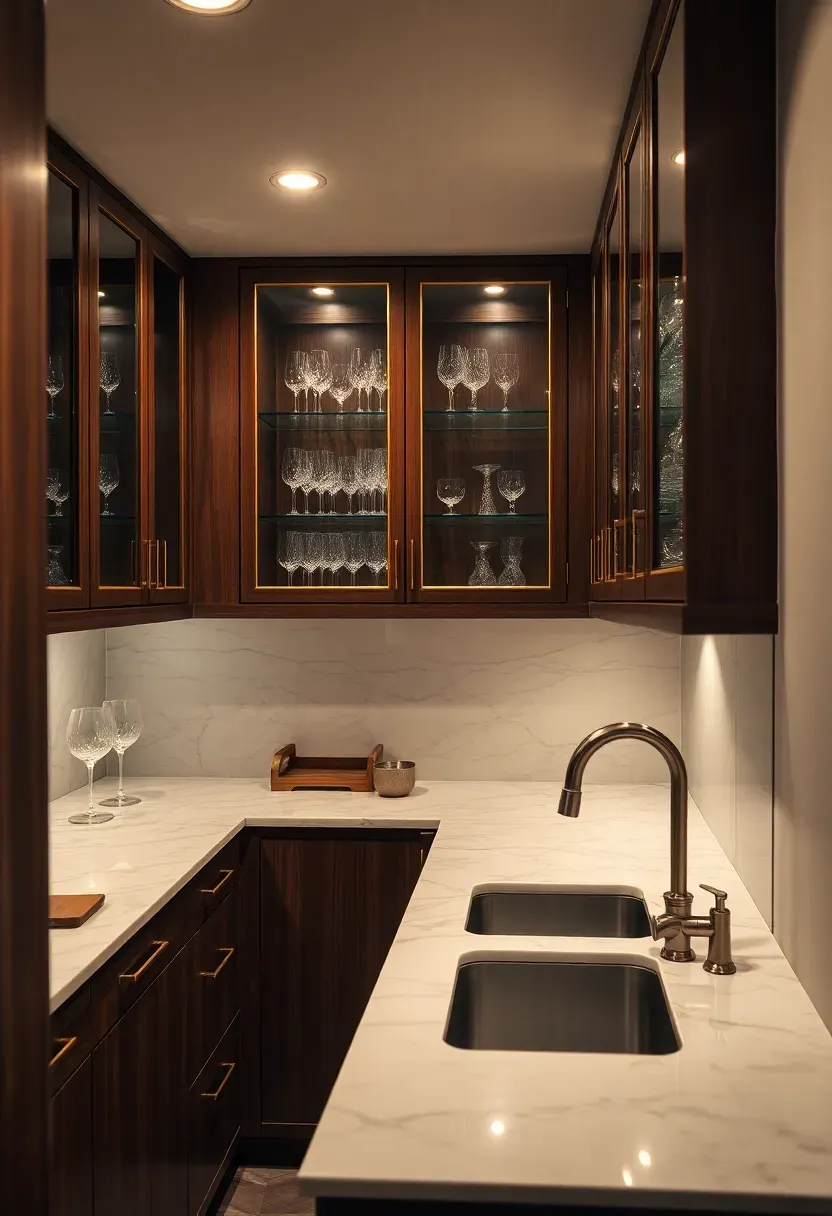
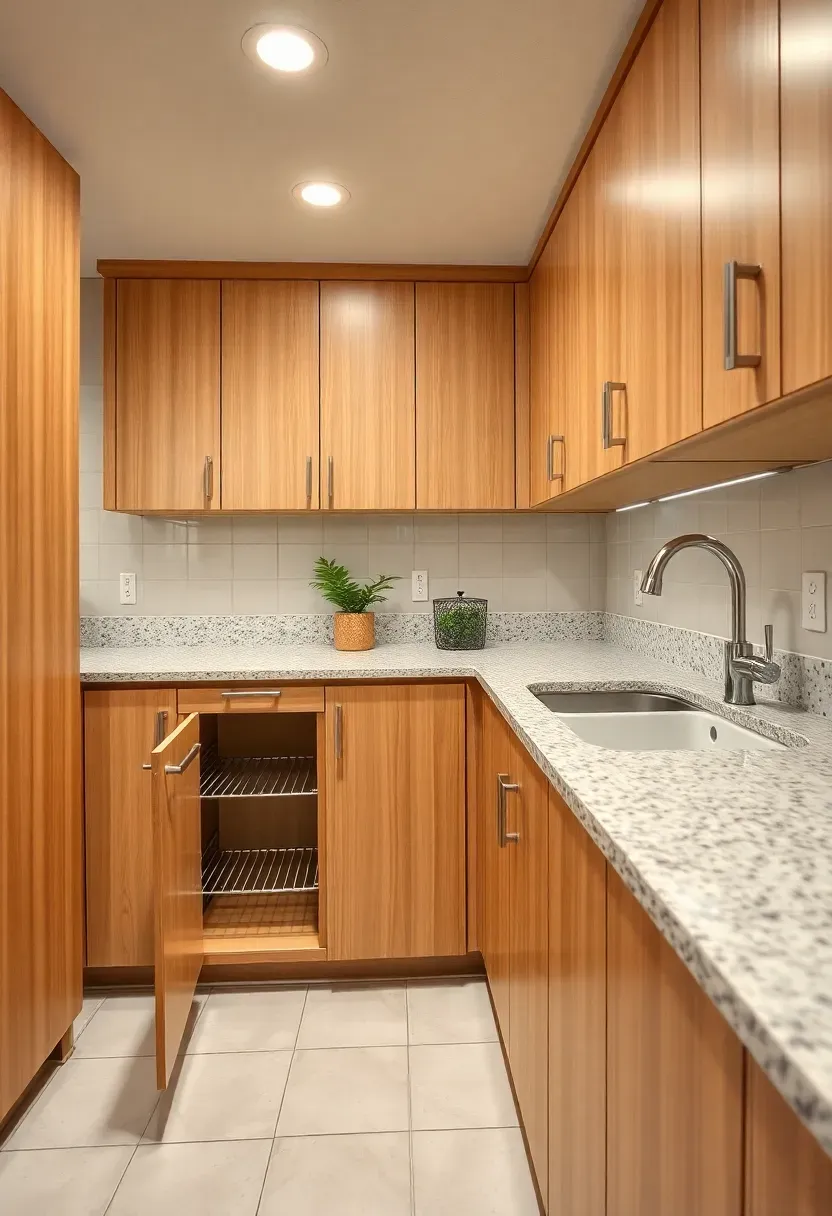
13. Butler's Pantry Extension
A basement butler's pantry supplements your main kitchen upstairs. It handles overflow storage, drink prep during parties, and staging for big meals. Position it near the basement stairs so carrying dishes between floors is convenient. The ideal setup includes 10 to 12 feet of counter space, a prep sink, a second dishwasher (or dishwasher drawer), a beverage fridge, and deep pantry cabinets for bulk storage and small appliances that clutter the upstairs kitchen. Glass-front cabinets on the upper section display serving pieces and keep the room from feeling like a storage closet.
Tips
- A dumbwaiter between floors eliminates the most annoying part of a two-level kitchen — carrying heavy dishes up stairs
- Install the same countertop material used upstairs for visual continuity if guests see both spaces
- Wire for a sound system so you can listen to the same music playing upstairs during events

14. Home Theater Concession Kitchen
Step 1: Plan the layout. Place the concession area in the entry zone of your theater room or in an adjacent alcove. Guests grab food on the way in rather than walking past seated viewers during the movie. A 6-foot counter with a pass-through window into the theater room is the classic setup.
Step 2: Pick the right appliances. A commercial-style popcorn machine ($150 to $300) is the centerpiece. Add a mini fridge for drinks, a microwave for nachos, and a small hot dog roller if you want to commit to the theme. None of these require special electrical beyond standard 20-amp outlets.
Step 3: Nail the atmosphere. LED neon signs, a chalkboard menu, and a glass candy display case sell the experience. Red and gold color schemes nod to classic movie theaters without being too literal.
Watch out for
- Popcorn machines produce grease vapor — mount a small exhaust fan or use a recirculating filter unit nearby
- Sugar and butter spills on carpet are miserable; use tile or sealed concrete in the concession area even if the theater has carpet
Recommended
Items for this idea
15. Teen or Guest Suite Mini Kitchen
This sits between a snack station and a full kitchenette. The goal is independence without a full renovation. A 5-foot counter section with a mini fridge below, a microwave above, and a single-basin bar sink covers the basics: reheating leftovers, making sandwiches, pouring drinks, and washing a few dishes. No stove, no oven, no range hood needed. Total cost including plumbing for the sink runs $1,500 to $3,000 for materials, significantly less if you skip the sink entirely and just run two electrical circuits.
Tips
- A hot plate or induction burner stored in a cabinet provides occasional cooking ability without permanent ventilation
- Install a small over-counter shelf for spices and basics so the limited counter stays clear
- A compact trash pullout in the cabinet next to the sink keeps garbage out of sight
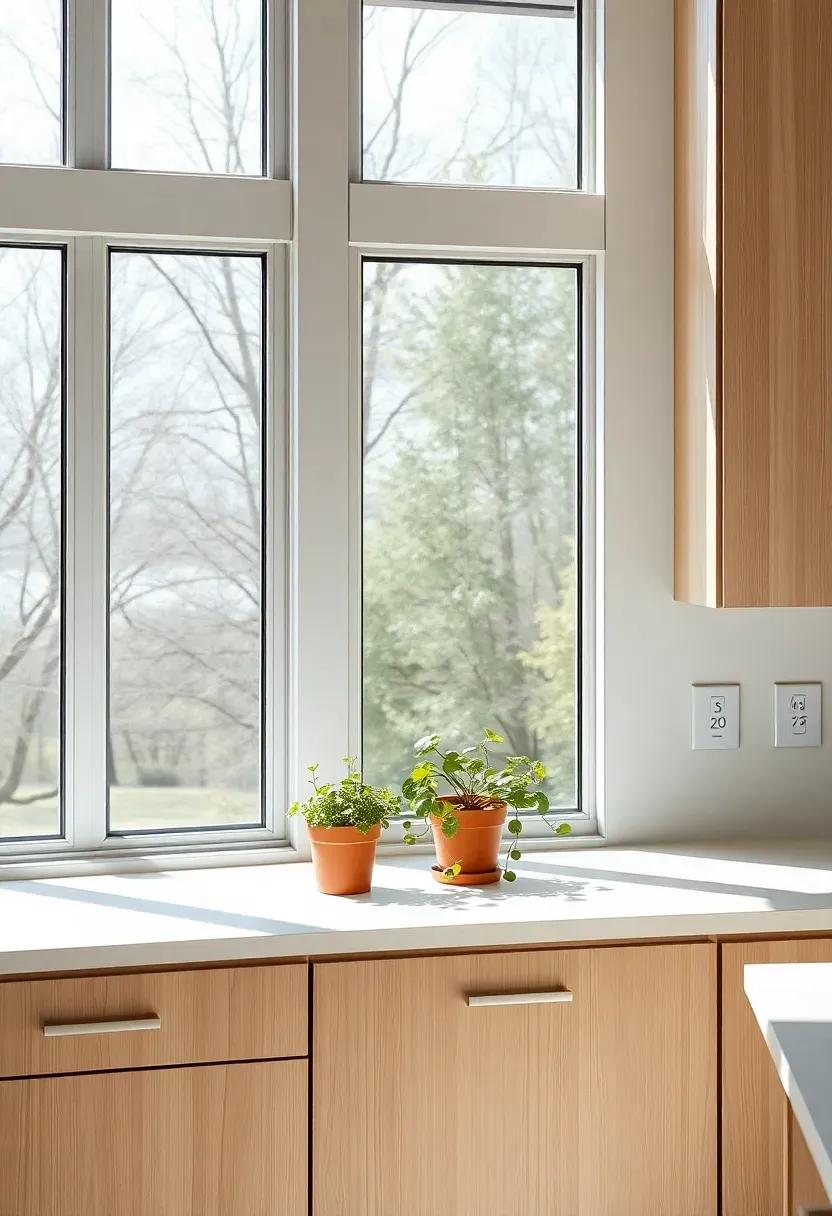
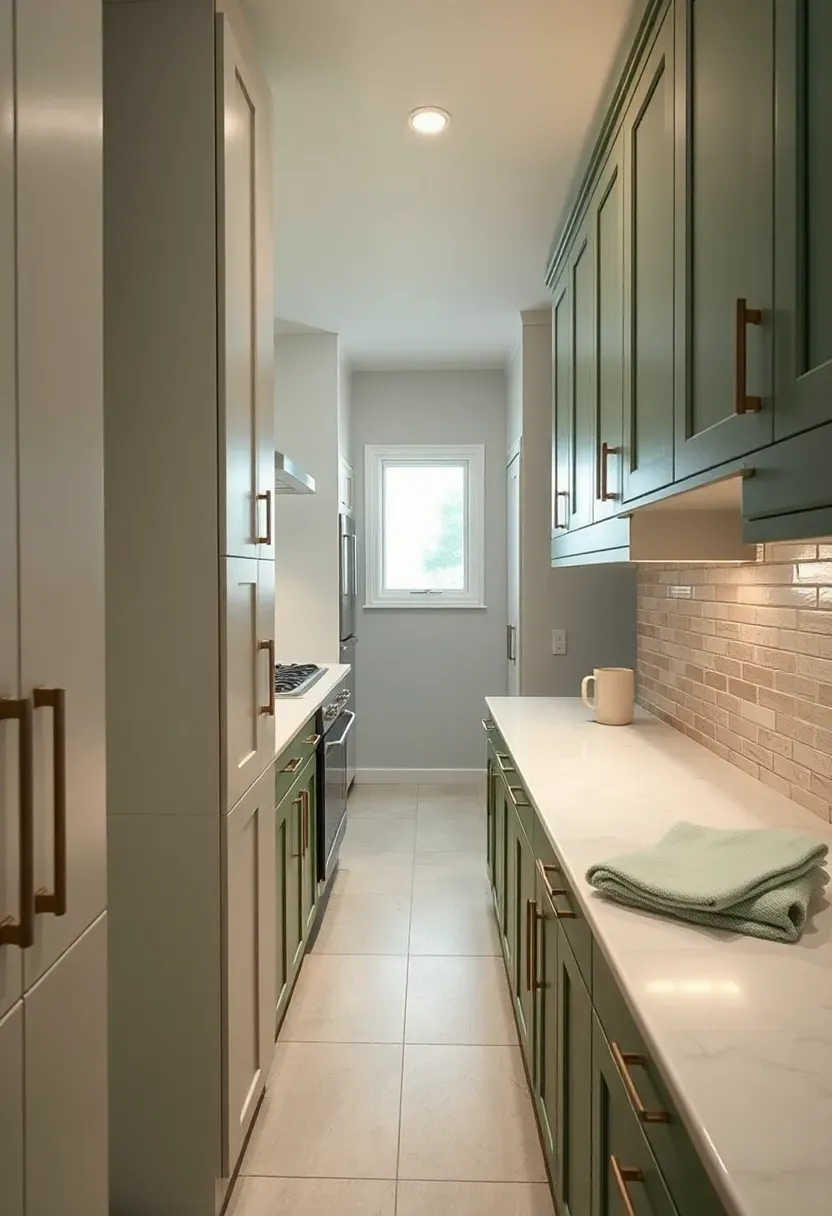
16. Daylight Basement Kitchen
What makes a daylight basement different
A daylight or walkout basement has one or more walls partially or fully above grade, allowing standard windows or even sliding doors. This changes everything about kitchen design — you get natural light, natural ventilation, and direct exterior access. Position the kitchen along the windowed wall so the sink and prep area get daylight. A window above the sink is no longer a luxury here; it is actually feasible.
Modern take
Use the natural light advantage to support finishes that would feel dark elsewhere: deep green cabinets, walnut wood tones, natural stone counters. The sunlight balances these heavier materials. Large-format windows (if the wall allows) eliminate the need for as many recessed fixtures during daytime hours.
Apply at home
- Orient the cooking zone toward the windowed wall and the pantry storage against the interior wall
- Operable windows provide free ventilation that supplements or replaces a range hood
- If you have a walkout door, position it away from the stove to avoid wind-driven drafts while cooking
Recommended
Items for this idea
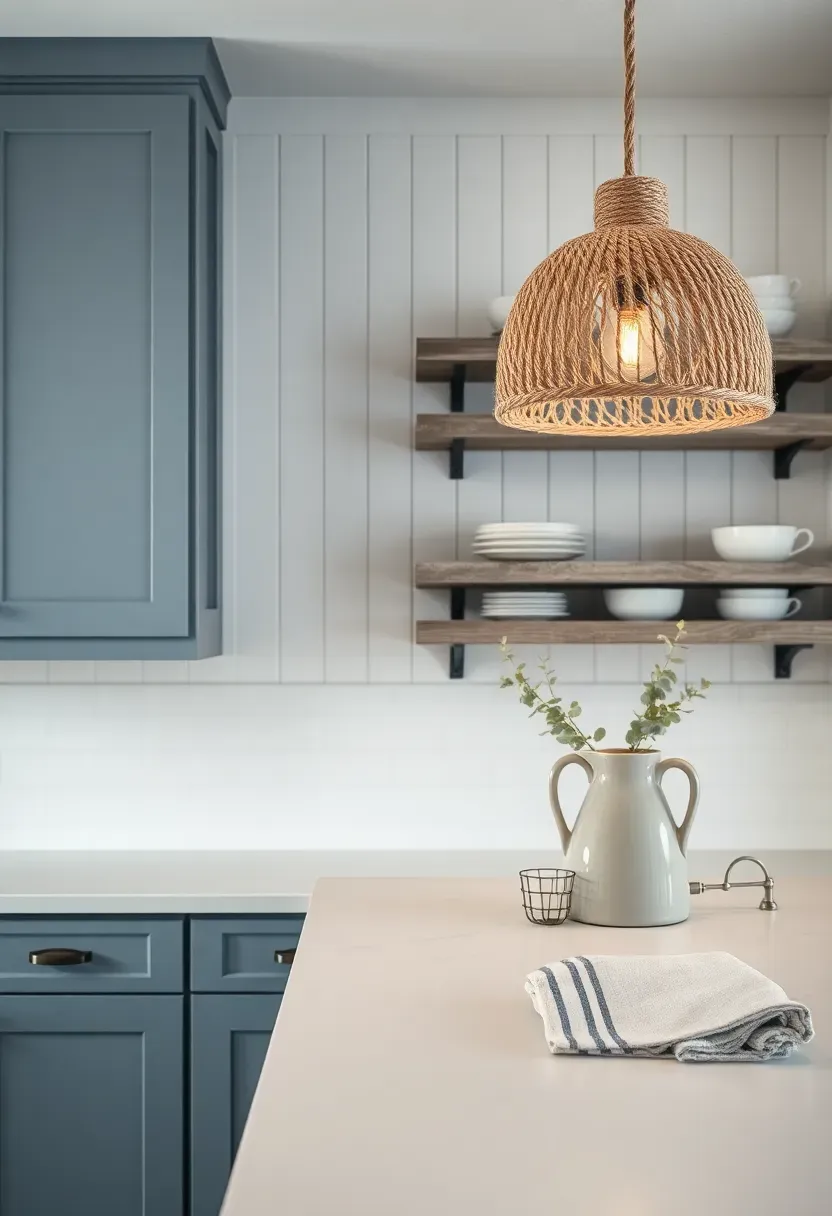
17. Moisture-Resistant Coastal Kitchen
Basements and moisture are inseparable. Rather than fighting it, build a kitchen that handles humidity gracefully. PVC or thermofoil cabinet doors will not warp, swell, or delaminate the way solid wood does at 60 percent relative humidity. Porcelain tile floors with epoxy grout resist mold and clean easily. Stainless steel or quartz counters ignore water entirely. The coastal aesthetic — blue-gray tones, beadboard textures, white finishes — happens to align perfectly with moisture-resistant materials, which makes this style both practical and attractive for basements.
Tips
- Run a dehumidifier on a humidistat set to 50 percent — this protects the entire space, not just the kitchen
- Use marine-grade plywood for any custom shelving; standard MDF swells and crumbles in humid conditions
- Silicone caulk every joint between counter, backsplash, and wall; grout alone will not keep moisture out in a basement
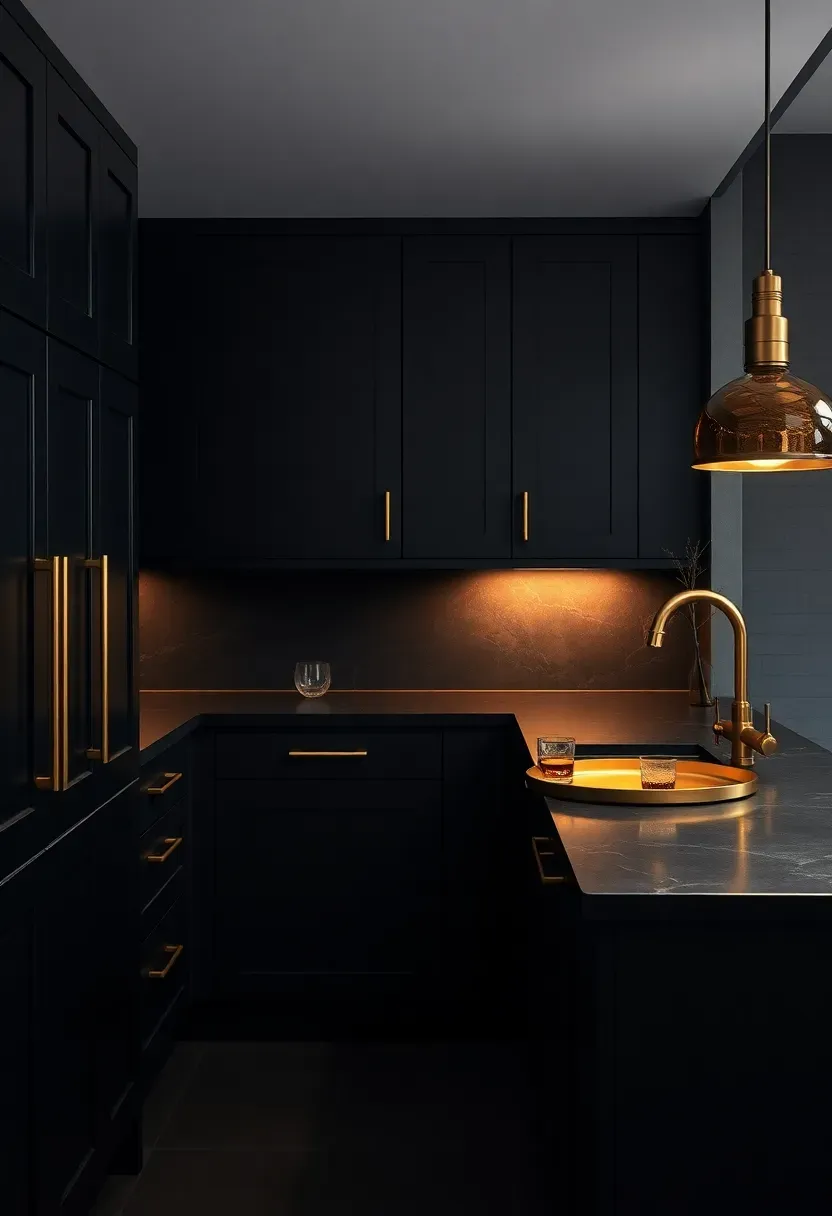
18. Dark and Moody Basement Kitchen
Going dark on purpose
Most advice says to brighten basements. But if you accept the darkness and design around it, you can create a kitchen with the atmosphere of a high-end restaurant. Matte black or deep charcoal cabinets, soapstone or black granite counters, and dark grouted tile form the base. The trick is layered lighting: under-cabinet strips for task work, pendant fixtures with warm bulbs (2700K) for ambiance, and one or two accent lights aimed at open shelving or a display piece.
The tradeoffs
You need more artificial light, and every crumb shows on dark counters (though that keeps you tidier). Dark finishes absorb heat from lighting, so LED fixtures are mandatory — incandescent would make the space uncomfortably warm. Brass or brushed gold hardware and fixtures break up the darkness without lightening the mood.
Choose this if
- Your basement has no windows and fighting the darkness feels futile
- You want a space that feels distinct from the bright, practical kitchen upstairs
- The basement kitchen is primarily for entertaining rather than daily family cooking
Recommended
Items for this idea
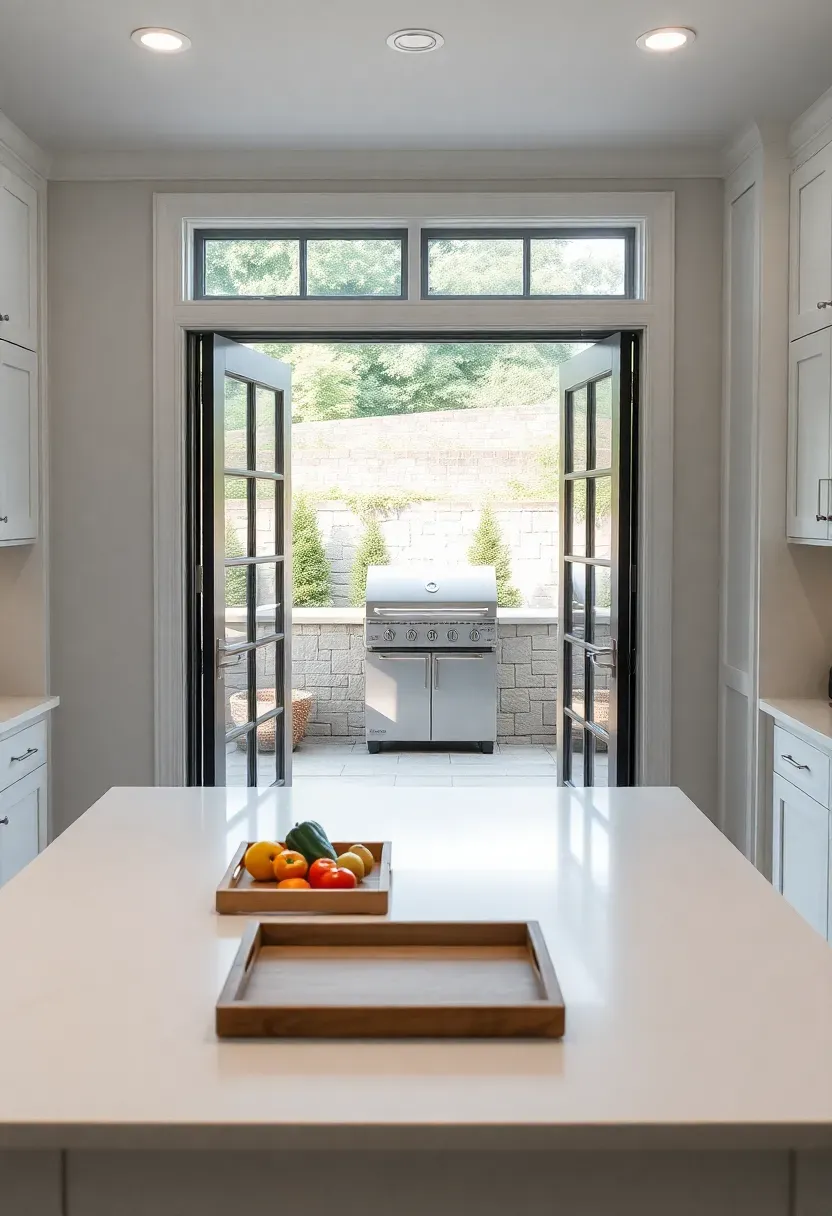
19. Outdoor-Access Walkout Kitchen
A walkout basement with direct patio or yard access creates an opportunity no other basement kitchen has: a genuine indoor-outdoor cooking setup. Position the kitchen counter near the exterior door and extend it through a pass-through window or alongside the open doorway during warm months. The indoor section handles prep, the sink, and the fridge. Outside, a built-in grill and a small counter handle the hot cooking. You avoid filling the basement with smoke and grease while keeping everything within a few steps.
Tips
- A bi-fold or accordion-style door opening maximizes the connection between inside and outside
- Grade the patio away from the door at 2 percent slope — water intrusion through a walkout door is the number one moisture complaint
- Run a gas line to the outdoor grill during the kitchen rough-in rather than relying on propane tanks
Quick FAQ
Do I need a permit to build a basement kitchen? Almost always. Any project involving new plumbing, electrical circuits, or gas lines requires permits in most municipalities. Even a simple kitchenette with just a sink usually triggers a plumbing permit. Pull permits before starting — unpermitted work can create problems when selling the house.
How much does a basement kitchen cost on average? A basic kitchenette with a sink, mini fridge, and microwave runs $5,000 to $12,000. A full kitchen with standard appliances, cabinets, counters, and plumbing falls between $15,000 and $40,000. The biggest variable is plumbing — breaking into a concrete slab for new drain lines adds $2,000 to $6,000 alone.
Can I install a gas stove in a basement kitchen? Yes, but it requires a dedicated gas line, proper ventilation to the exterior, and a carbon monoxide detector. Some local codes restrict gas appliances in basements or require additional safety measures like automatic gas shutoff valves. An induction cooktop is a simpler alternative that avoids gas concerns entirely.
What flooring holds up best in a basement kitchen? Luxury vinyl plank rated for below-grade installation handles moisture better than hardwood or laminate. Porcelain tile is the most durable option but needs proper subfloor prep on concrete. Avoid solid hardwood — it will cup and buckle from basement humidity within a year or two.
Is a basement kitchen worth the investment for resale? It depends on your market. In areas where finished basements or ADUs are common, a kitchen adds real value — particularly if it creates a rentable unit. In markets where basements are typically unfinished, the return is lower. A well-built kitchenette costs less and appeals to more buyers than a full kitchen in most cases.
A basement kitchen is one of those projects where planning saves more money than any other single factor. Know your plumbing routes before you pick a layout. Test your humidity levels for a full season before selecting materials. And start smaller than you think you need — a well-built kitchenette that handles 90 percent of what you want costs half of a full kitchen and leaves room to expand later if the need actually materializes.
Pinterest cover for 19 Basement Kitchen Ideas
About the author
OBCD
CGI visualization and interior design content. We create detailed 3D renders and curate practical design ideas for every room in your home.