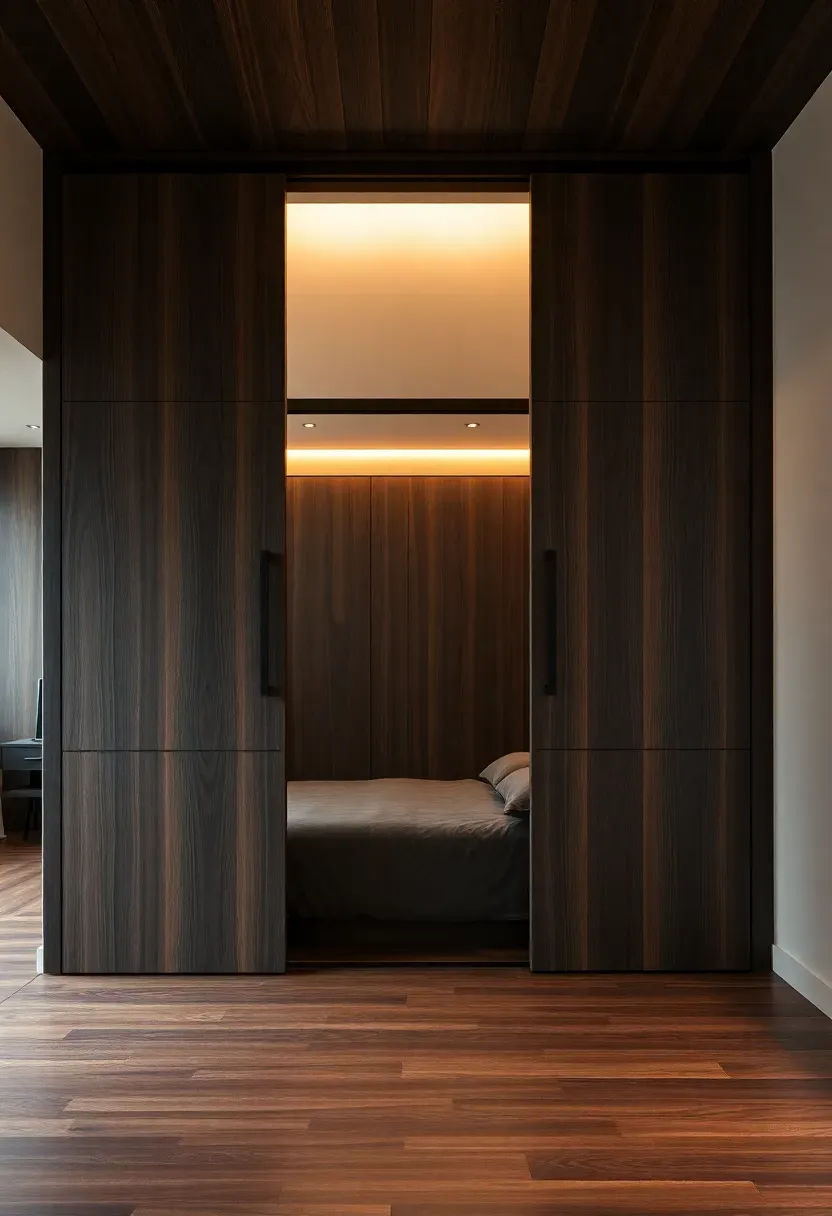
27 Barn Door Closet Ideas for Every Bedroom Style
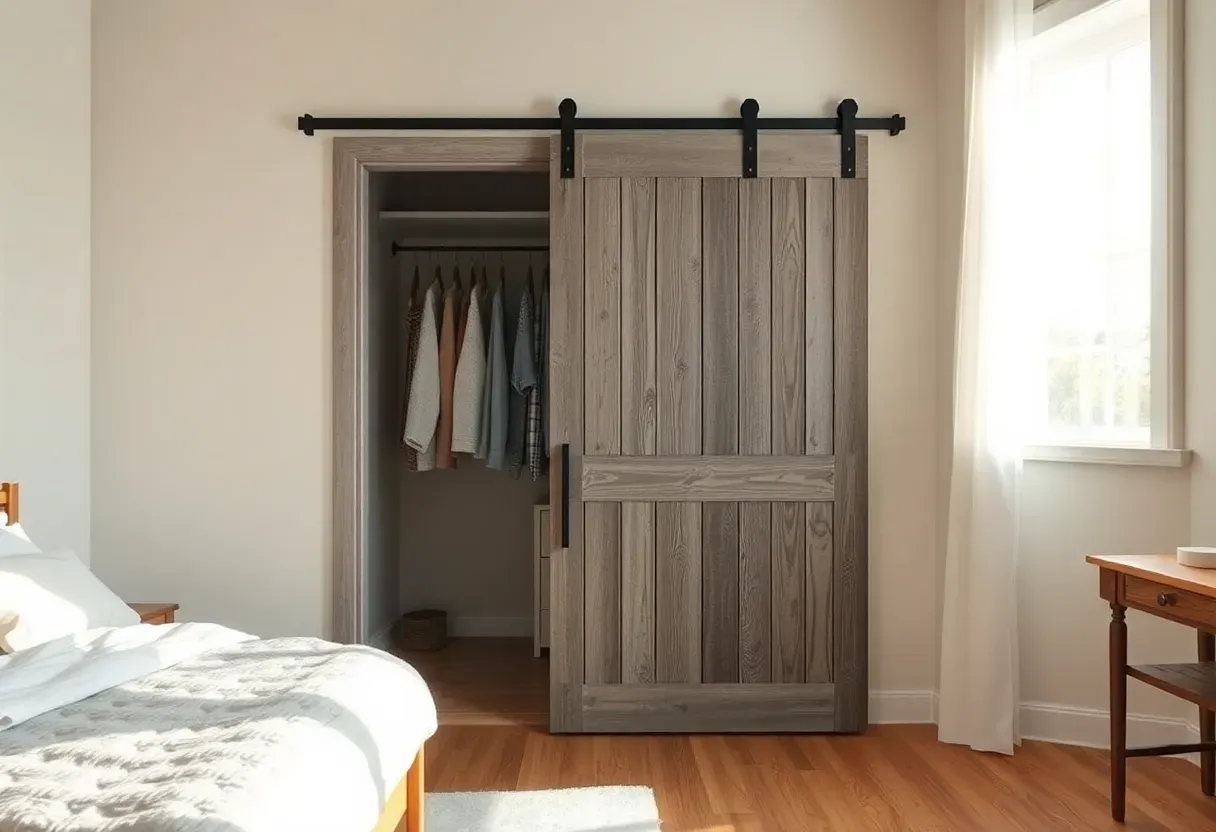
I replaced my bedroom's bifold closet doors with a single barn door three years ago, mostly because the bifolds kept jumping off their track. What surprised me was how much the room changed just from that one swap. The barn door freed up floor space, killed the daily rattling noise, and gave the wall a purpose beyond holding a light switch. Since then I have seen barn doors work in farmhouse bedrooms, modern lofts, kids' rooms, and even walk-in closets where the opening is wider than most standard doors can handle.
Here are 27 barn door closet ideas organized by material, finish, and style so you can match one to whatever your bedroom already looks like.
Table of Contents
- Reclaimed Pallet Wood Door
- Flat Panel Mid-Century Door
- Whitewashed Plank Door
- Mirrored Barn Door
- Chevron Pattern Door
- Black Steel Frame with Glass
- Shaker Style Barn Door
- Live Edge Slab Door
- Board and Batten Door
- Painted Chalkboard Door
- Double Sliding Bypass Doors
- Dutch Barn Door Split
- Woven Cane Panel Door
- Corrugated Metal Accent Door
- Arched Top Barn Door
- Japanese Shoji Inspired Door
- Barn Door with Built-In Shelves
- Distressed Turquoise Door
- Frosted Acrylic Panel Door
- Sliding Barn Door Room Divider
- X-Brace Farmhouse Door
- Reclaimed Tin Ceiling Tile Door
- Louvered Barn Door
- Sliding Barn Door with Soft Close
- Stained Glass Insert Door
- Kids Room Barn Door with Cutout
- Floor-to-Ceiling Barn Door
1. Reclaimed Pallet Wood Door
Pallet wood gives you a barn door with real history in the grain. Each board carries nail holes, sun bleaching, and color shifts that no stain can replicate. Source pallets stamped HT (heat treated) rather than MB (methyl bromide) to avoid chemical-treated lumber in your bedroom. Sand the faces with 120-grit to remove splinters but leave enough roughness to keep the character. A coat of matte polyurethane locks in the patina without adding shine. Mount the finished door on a flat-bar track with 2-inch roller hangers rated for at least 150 pounds, since pallet boards are denser than they look.
Build Tips
- Attach boards to a 1x4 pine frame on the back to keep them flat
- Stagger board lengths at the top and bottom for a raw edge, or trim flush for a cleaner look
- Leave 1/8-inch gaps between boards to allow seasonal wood movement
We picked a few things that go well with this idea: SMARTSTANDARD 6.6ft Bypass Barn Door Kit (★4.5), WINSOON 6ft Mini Barn Door Hardware Kit (★4.6) and DonYoung 8ft Heavy Duty Barn Door Track (★4.4). As an Amazon Associate we earn from qualifying purchases.
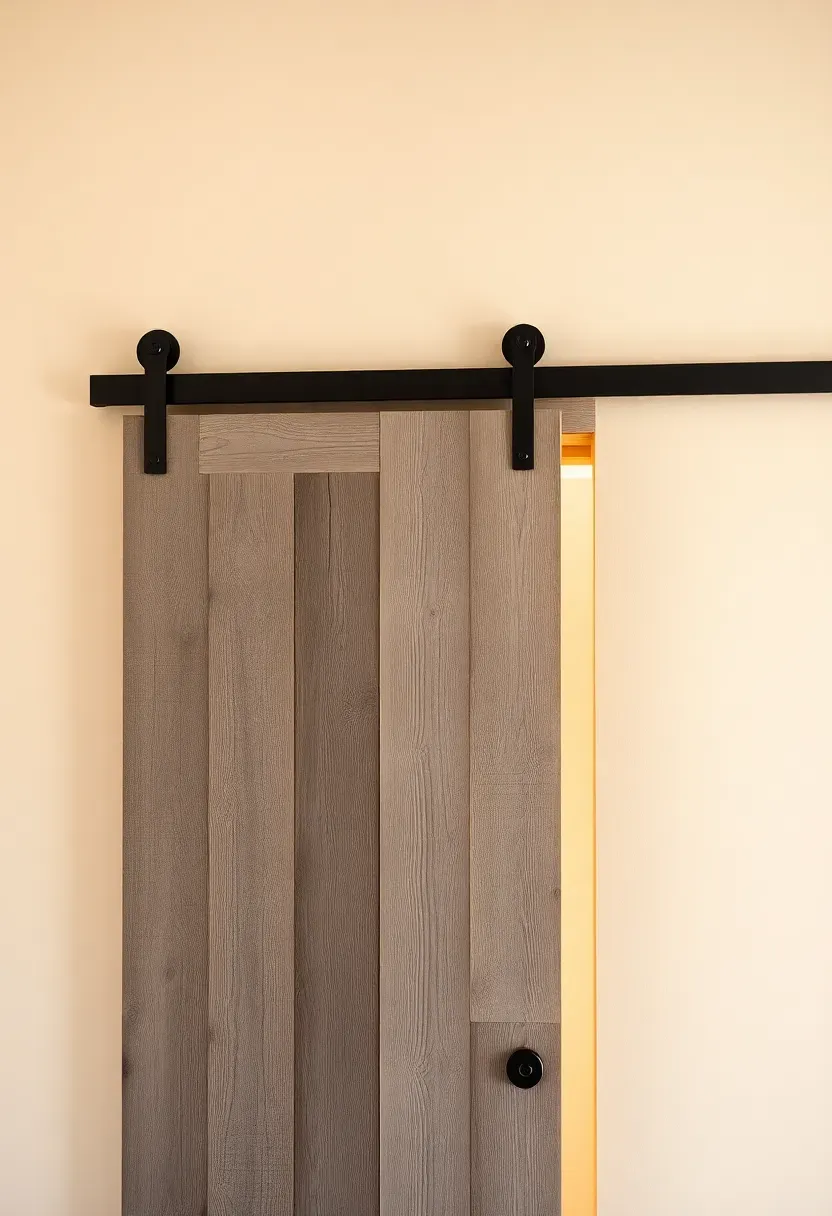
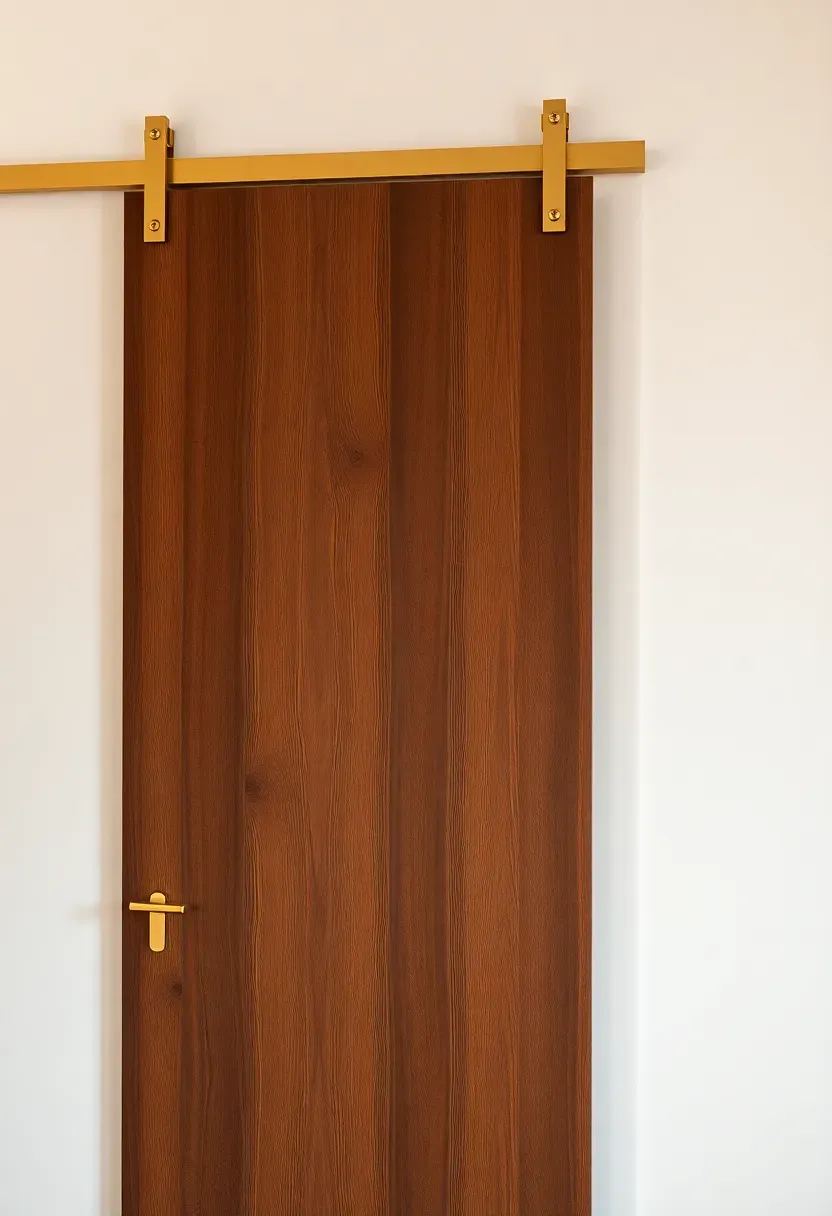
2. Flat Panel Mid-Century Door
Why It Works
Not every barn door needs to look like it came from a farm. A flat panel door in walnut or white oak veneer paired with slim brass hardware fits cleanly into mid-century and modern bedrooms. The absence of cross braces and decorative trim lets the wood grain do the talking, and the overall profile stays thin enough (usually 1-3/8 inches) that the door doesn't dominate the wall when open.
Installation Notes
Use a top-mount track in brushed brass or satin gold to match the mid-century palette. Set the track 2 inches above the header so the door clears the trim. A bottom roller guide mounted to the floor keeps the panel from swinging.
Pros and Cons
Pros: clean silhouette; works in apartments with minimal visual weight; lightweight and easy to hang solo Cons: veneer can chip at edges if bumped repeatedly; less sound dampening than solid wood
We picked a few things that go well with this idea: SMARTSTANDARD 36x84 Solid Spruce Barn Door Kit (★4.4), S&Z TOPHAND 36x84 British Brace Barn Door (★4.1) and White PVC 36x84 Barn Door with Hardware (★4.5). As an Amazon Associate we earn from qualifying purchases.
3. Whitewashed Plank Door
Whitewashing is just watered-down latex paint (roughly 1:1 paint to water) brushed onto raw wood and wiped back before it dries. The result lets the grain show through a milky haze that reads coastal, Scandinavian, or cottage depending on the rest of the room. Pine planks take whitewash especially well because the softer early-wood absorbs more color than the harder late-wood rings, creating natural contrast without any extra effort. Seal with a water-based matte topcoat to keep the finish from transferring onto clothing when you brush past.
Tips
- Apply the wash with a wide chip brush in long strokes following the grain
- Wipe excess with a lint-free rag within 30 seconds for a lighter effect
- Two coats give more coverage while still keeping the wood visible underneath
We picked a few things that go well with this idea: SMARTSTANDARD Adjustable Barn Door Floor Guide (★4.7), EaseLife U-Shape Barn Door Floor Guide (★4.6) and Homode T-Shape Floor Guide (2-Pack) (★4.6). As an Amazon Associate we earn from qualifying purchases.
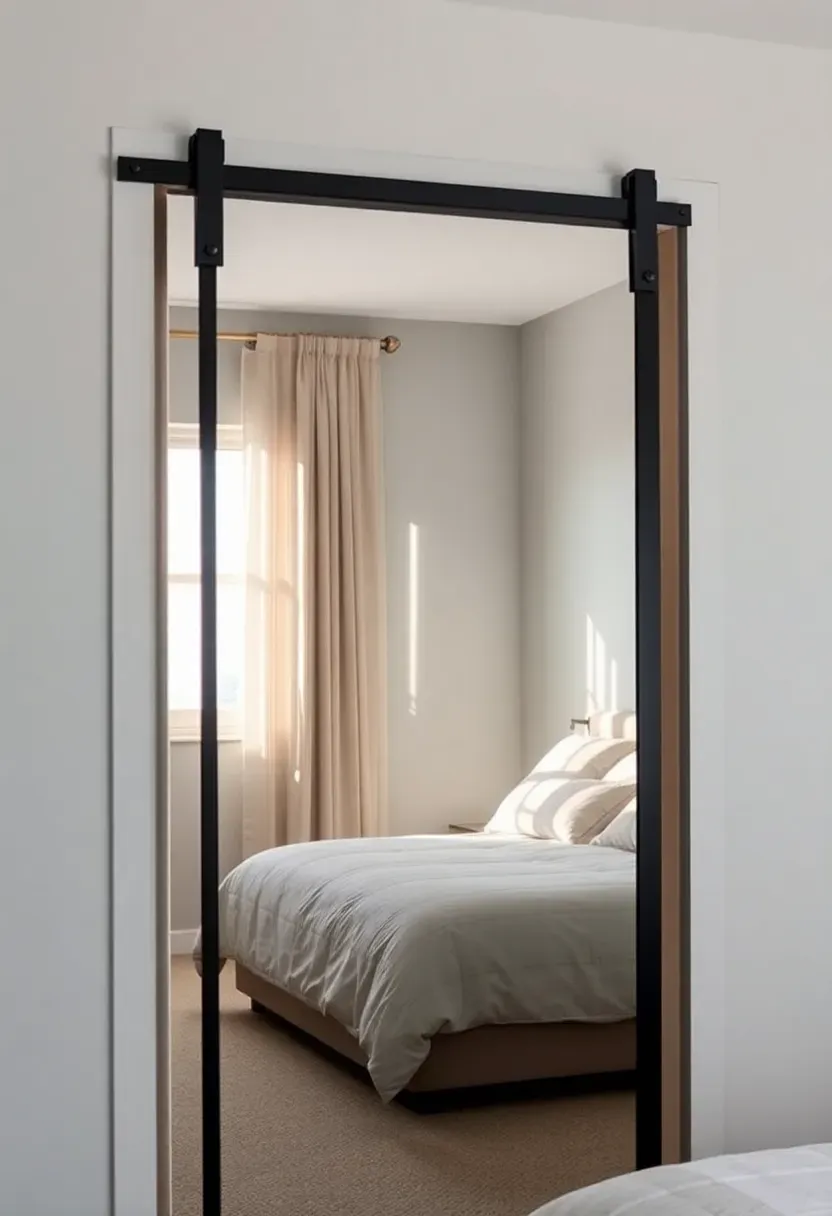
4. Mirrored Barn Door
The Core Idea
A mirrored barn door handles two jobs at once: it hides closet contents and gives you a full-length dressing mirror without needing extra wall space. Most versions bond a 1/4-inch mirror panel to a 3/4-inch MDF or plywood backer using construction adhesive, which keeps the weight manageable and the mirror secure.
How to Build One
Step 1: Cut MDF to your door dimensions (standard is 36 by 84 inches for a single closet).
Step 2: Apply mirror adhesive in a grid pattern on the MDF face. Press the mirror panel into place and clamp edges overnight.
Step 3: Frame the mirror edge with 1/2-inch flat bar steel or paint-grade wood trim to protect against chips.
Recommendation
Mirrored barn doors work best in bedrooms under 150 square feet where a standing mirror would eat floor space you don't have.

Recommended
Items for this idea
5. Chevron Pattern Door
Chevron demands precision at the miter joints, but the payoff is a door that draws the eye immediately. Cut 1x4 boards at matching 45-degree angles and attach them to a flat plywood backer starting from the center seam and working outward. Light-toned oak or ash shows off the pattern better than dark stains because the shadow lines between boards stay visible. The finished door weighs more than a flat panel because of the double-layer construction, so step up to heavy-duty roller hangers rated for 200 pounds or more.
Tips
- Use a digital angle finder rather than eyeballing the miter cuts
- Glue and brad-nail each strip to the backer for a bond that won't loosen
- Sand the face after assembly so all strips sit perfectly flush
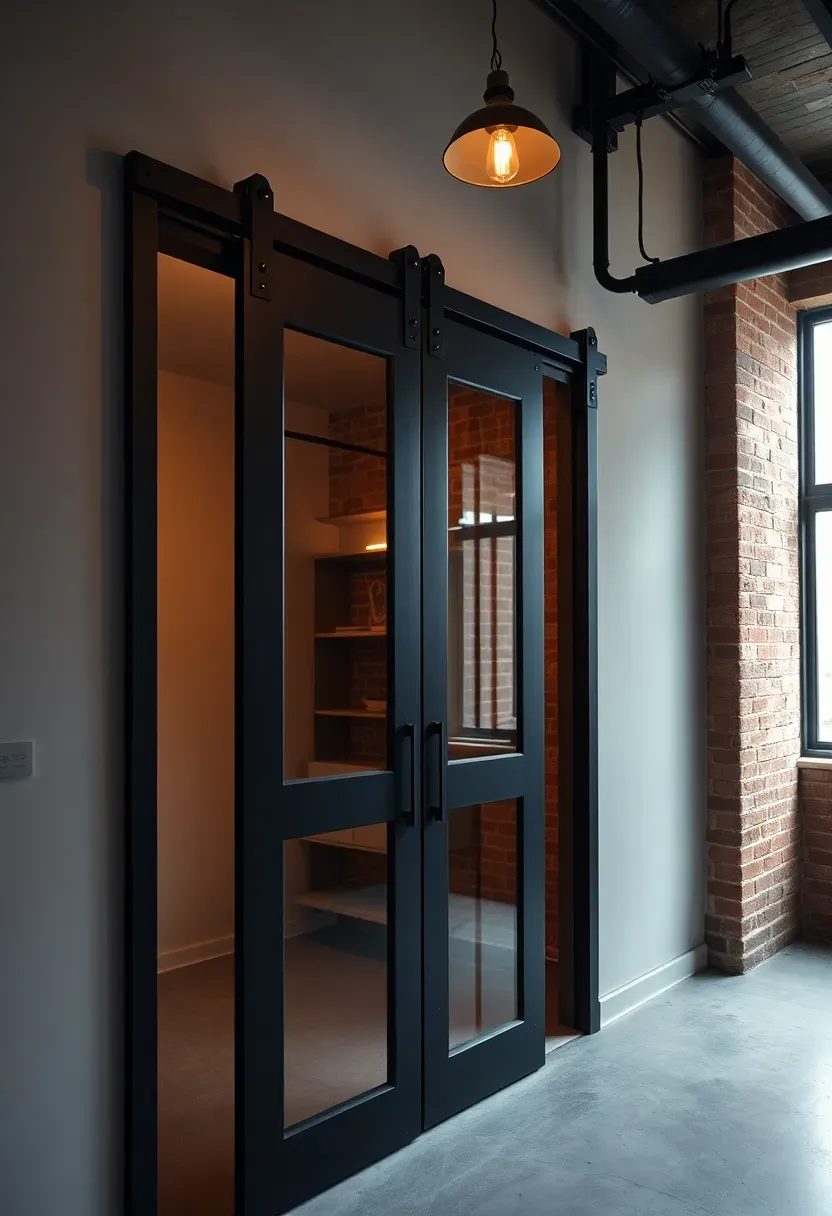
6. Black Steel Frame with Glass
Steel vs. Wood: What Changes
A steel-framed barn door with glass inserts sits squarely in the industrial and modern camp. The frame is typically 1-inch square tube steel welded at the corners, with clear or seeded glass panels set into rabbeted channels. Compared to a solid wood door, this option lets light pass between rooms, which matters if your closet has its own overhead fixture or a window.
Choose Glass Type
Clear glass if you keep your closet organized and want it visible. Frosted glass if you want light transfer without showing clutter. Seeded glass for a vintage industrial feel that partially obscures contents.
Choose If
You live in a loft or open-plan space where solid barriers feel heavy. Skip this option if sound isolation between the bedroom and closet matters to you.
Recommended
Items for this idea
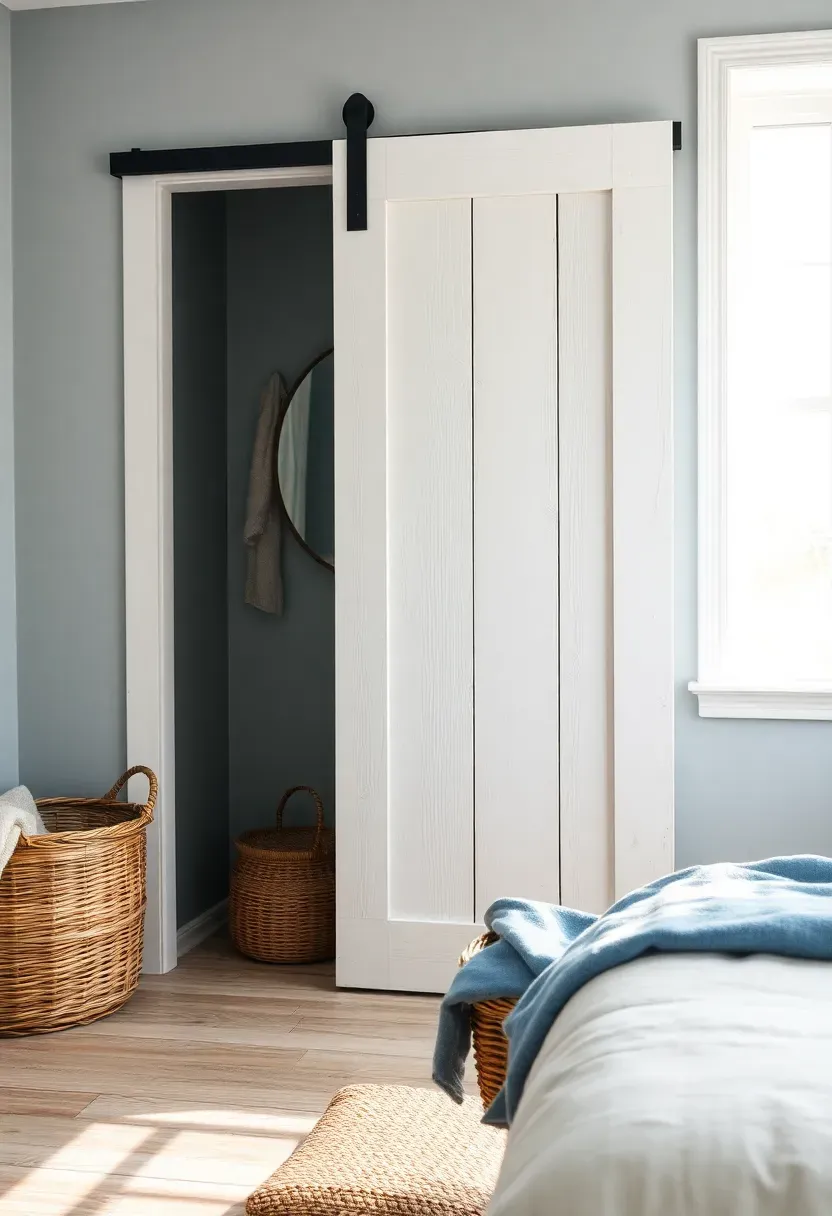
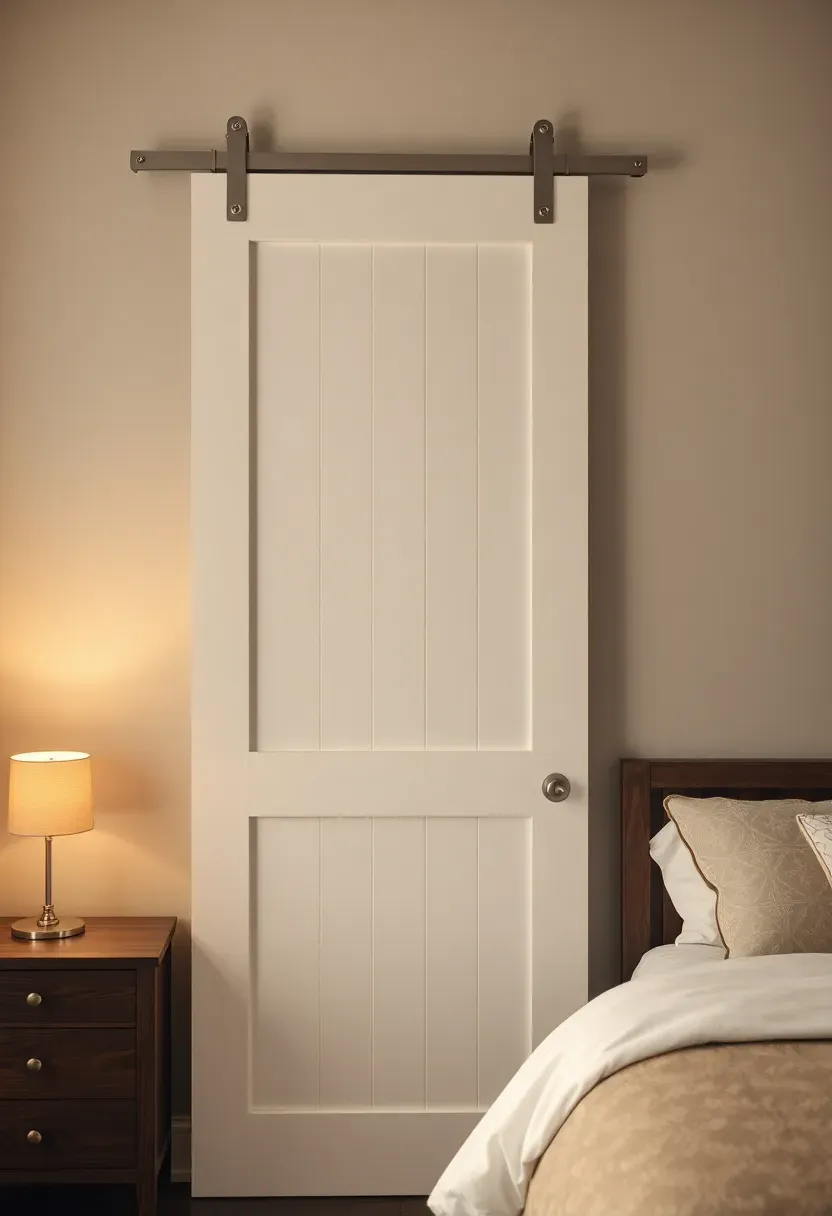
7. Shaker Style Barn Door
Shaker doors rely on a simple rail-and-stile frame surrounding a flat recessed panel. That restraint is exactly what makes them work in traditional, transitional, and even modern bedrooms without competing with other furniture. Paint-grade poplar is the go-to material because it machines cleanly and takes primer without blotching. A single coat of cabinet-grade paint in white, warm gray, or sage green gives the door a finished look that coordinates with trim and baseboards. The recessed panel can be 1/4-inch plywood or MDF backed with panel adhesive.
Tips
- Match the door paint to your existing door casing for a built-in appearance
- Use a rail-and-stile router bit set to cut the joinery in one pass
- Keep stile width between 3-1/2 and 4-1/2 inches for correct Shaker proportions
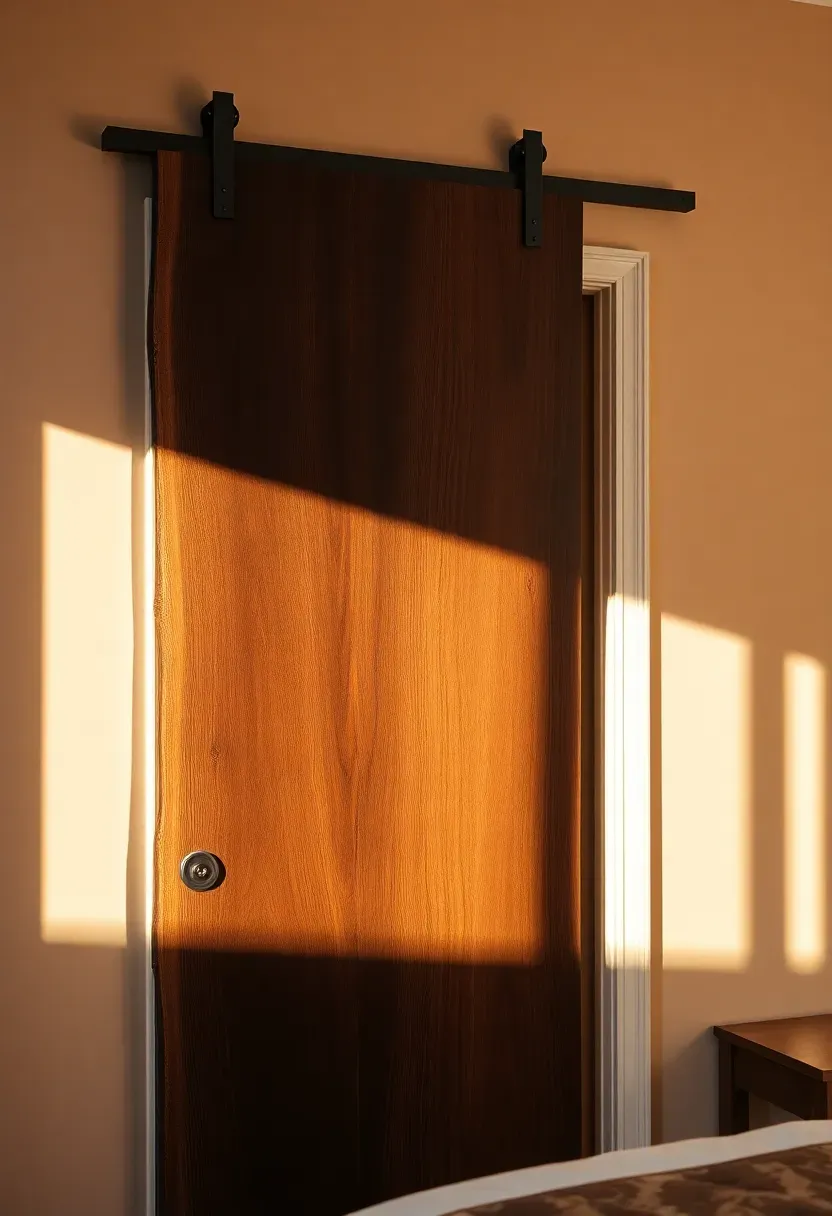
8. Live Edge Slab Door
A single slab of walnut or maple with the bark edge left intact turns a closet door into something closer to furniture. Slabs wide enough for a standard closet opening (36 inches) come from trees at least 20 inches in diameter, so expect to pay more than dimensional lumber. The slab needs to be kiln-dried to 6-8 percent moisture content or it will warp after hanging. Flatten both faces with a router sled or wide belt sander, then finish with hardwax oil to preserve the natural color without building a plastic-looking film.
Watch Out For
- Slabs over 40 inches wide may need a steel flat bar bolted to the back to prevent cupping
- Bark edges shed if not stabilized with thin CA glue or epoxy
- Weight can reach 120 pounds for a full-size walnut slab, so use heavy-duty hardware
Recommended
Items for this idea
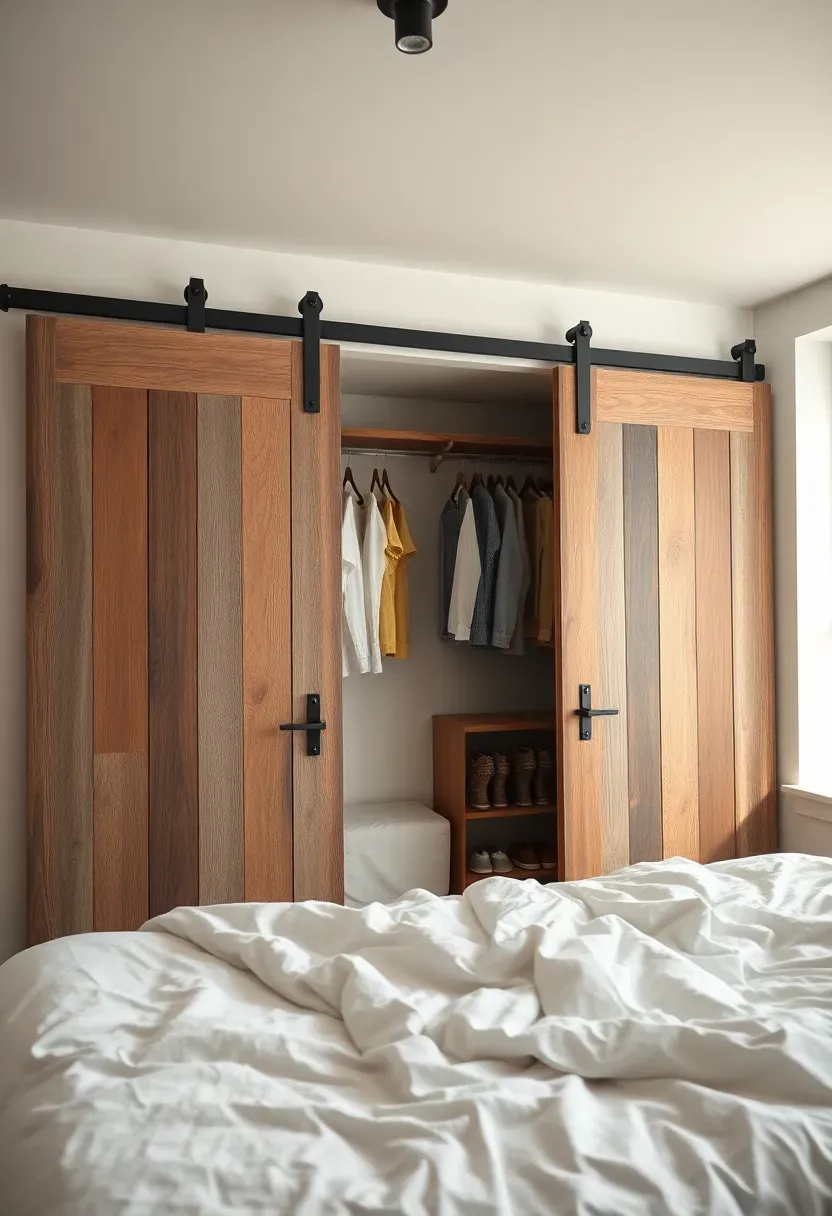
9. Board and Batten Door
Board and batten is the most forgiving barn door to build from scratch because slight imperfections in board width or spacing disappear under the battens. Vertical 1x6 tongue-and-groove boards form the face, and horizontal 1x3 battens on the back at top, middle, and bottom hold everything together. The construction is the same method used on actual barn doors for centuries, which is why it looks right at home in farmhouse and rustic bedrooms. Paint it a single color for a refined version, or stain the boards and paint the battens for subtle contrast.
Tips
- Pre-drill batten screw holes to prevent splitting
- Use stainless steel or exterior-grade screws so they don't leave rust streaks under paint
- A diagonal batten running from the bottom hinge-side corner to the opposite top corner prevents sagging over time
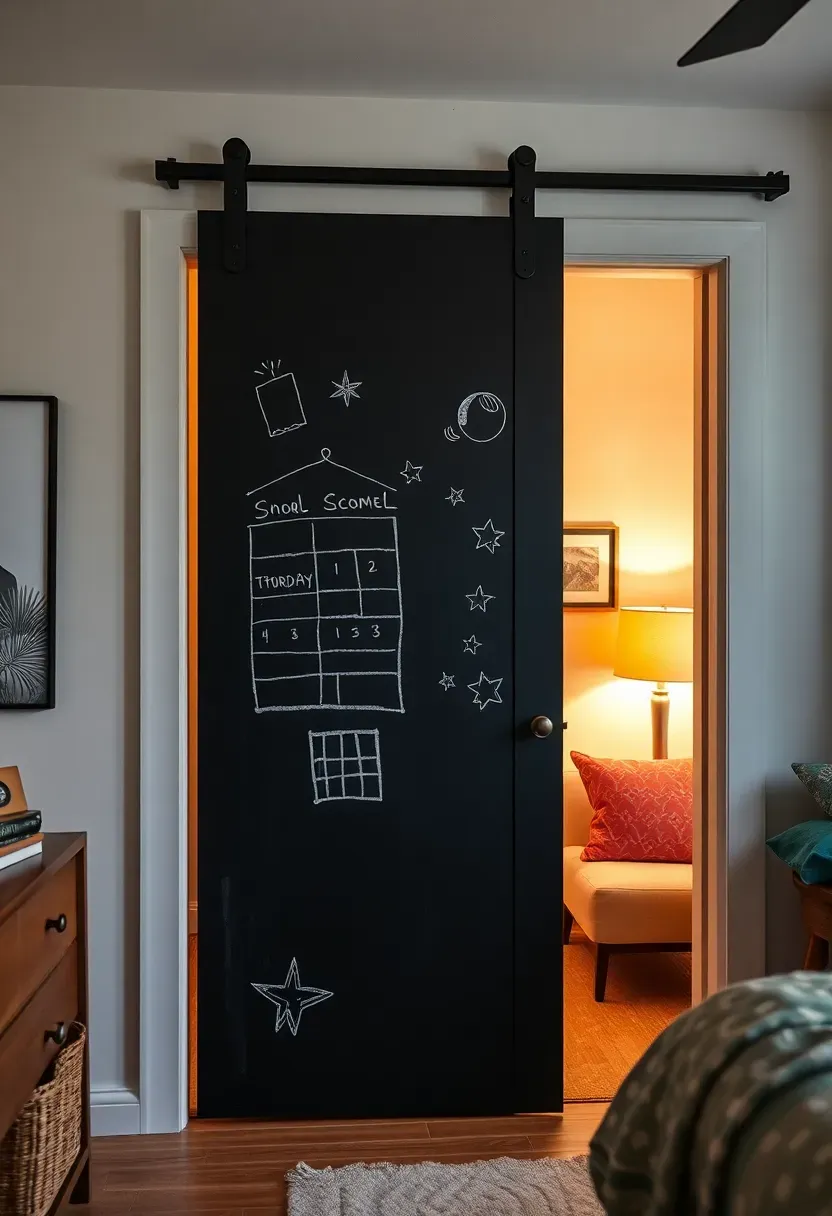
10. Painted Chalkboard Door
The Problem
Teen and kid bedrooms need surfaces for self-expression, but taping posters to walls damages paint and tacking up corkboards leaves holes.
The Solution
A barn door coated in chalkboard paint gives kids a full-height drawing surface that slides out of the way when the closet needs to open. Apply three coats of chalkboard paint over a primed MDF or plywood panel, letting each coat dry fully before the next. After the final coat cures for 72 hours, condition the surface by rubbing the side of a chalk stick across the entire face and wiping clean. This prevents ghosting from the first real use.
Pros and Cons
Pros: endlessly reusable surface; doubles as a message board; easy to repaint if damaged Cons: chalk dust settles on the floor track and roller hardware; needs periodic reconditioning
Recommended
Items for this idea
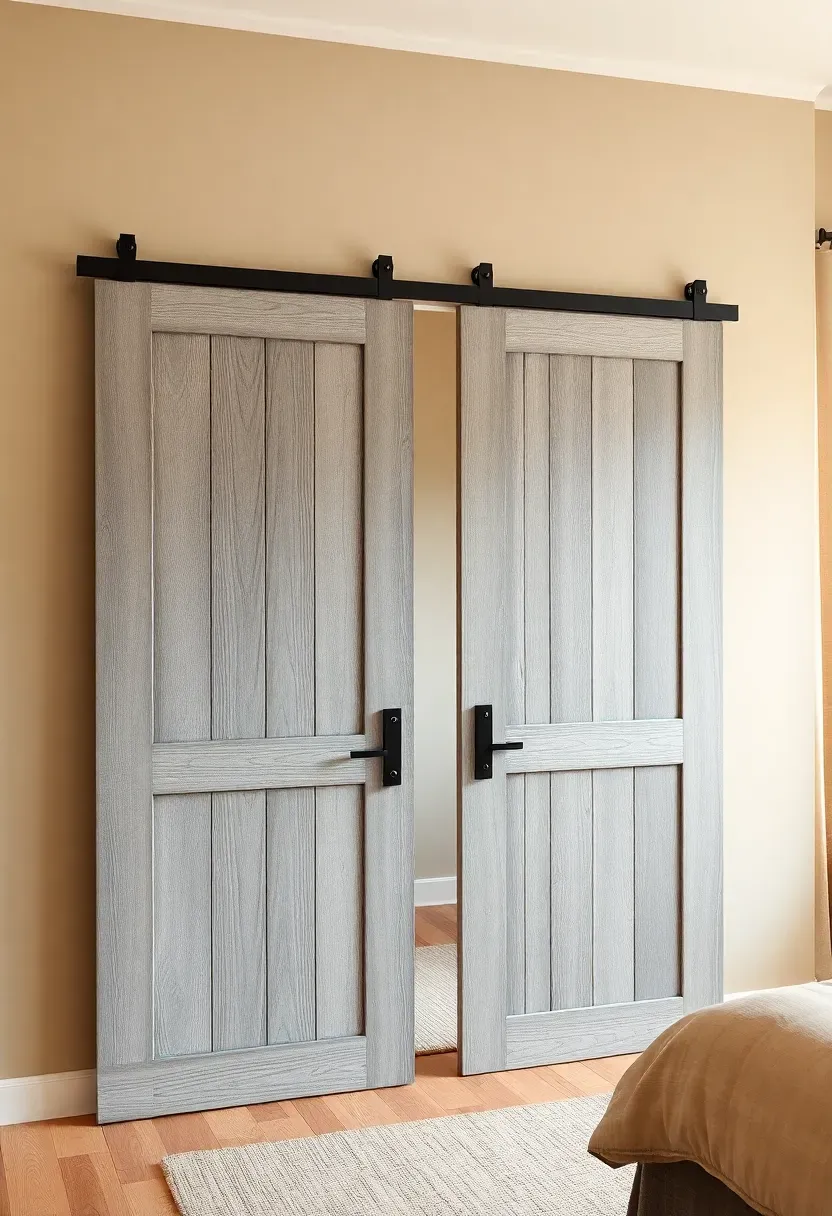
11. Double Sliding Bypass Doors
Wide closet openings (60 inches or more) are too big for a single barn door unless you have enough adjacent wall space for the door to slide completely clear. Bypass hardware solves this by running two doors on parallel tracks, one in front of the other. Each door covers half the opening and slides in the opposite direction. The front door rides about 1-1/2 inches out from the wall, the rear door sits flush. This arrangement means you can always access at least half the closet, and both doors overlap at center when closed.
Tips
- Buy a bypass-specific track kit rather than trying to stack two single tracks
- Match the door finish on both panels so the overlap zone looks intentional
- Add felt bumpers where the doors meet to prevent scratching
12. Dutch Barn Door Split
Origins
Dutch doors were designed for farmhouses so the top half could open for ventilation while the bottom kept animals out. Applied to a closet, the concept lets you reach the upper shelves or see what's on hangers without fully opening the door.
Modern Application
Build the door as two separate panels with a shared track. Each half hangs from its own pair of rollers and slides independently. A barrel bolt on the back locks them together when you want to move the full door as one unit. The split point typically sits at 40 to 42 inches from the floor, which aligns with a standard closet shelf divider.
Try This If
You sort clothing by season and want to access the upper storage zone without exposing the full closet. Also useful in nurseries where the lower half can block a toddler from pulling everything off the bottom shelf.
Recommended
Items for this idea
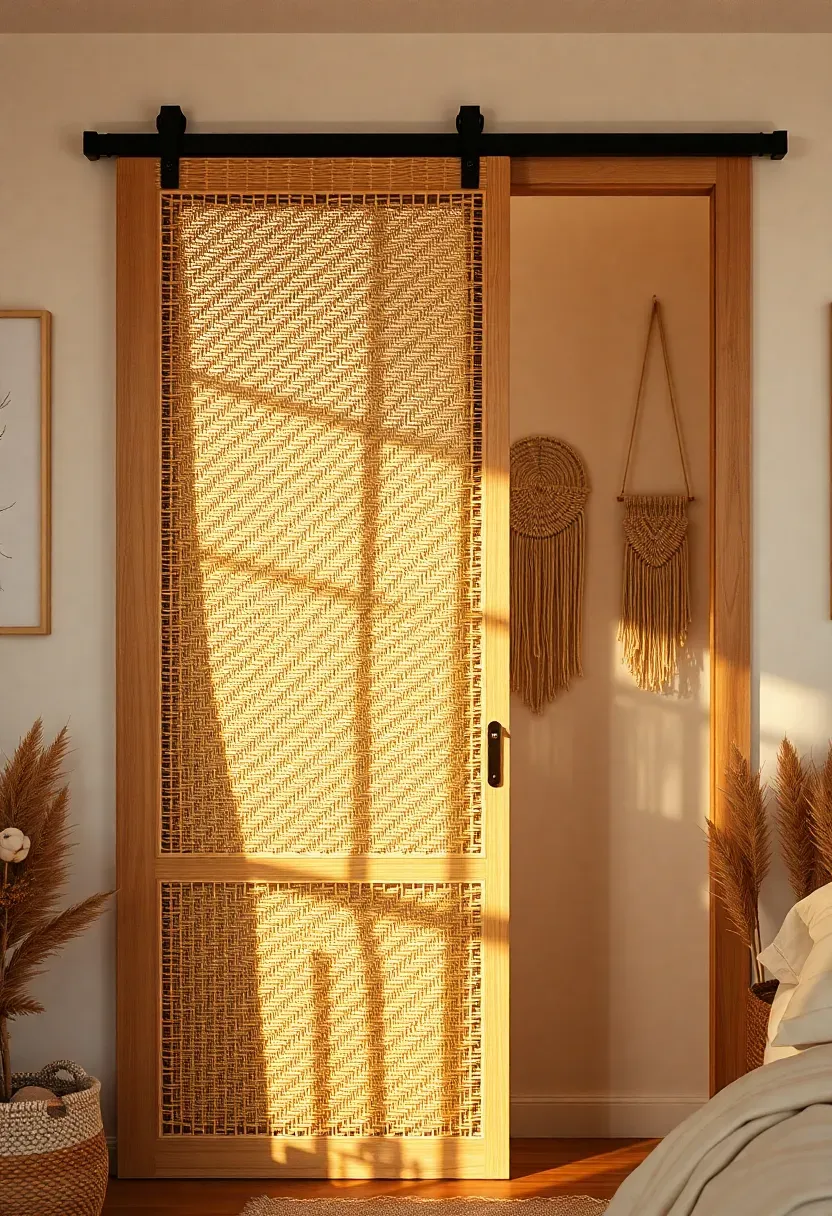
13. Woven Cane Panel Door
Cane webbing (the same material used on mid-century chair seats) stretched across a wood frame produces a barn door that filters light and air while partially concealing closet contents. Pre-woven cane sheets come in rolls and install by pressing the cane into a routed channel with a reed spline, identical to the process for caning a chair. The natural rattan weave adds texture without bulk, and the open mesh promotes airflow that keeps stored fabrics from developing musty odors in humid climates.
Tips
- Soak cane webbing in warm water for 30 minutes before installation so it stretches into the channel without cracking
- Use a cedar-toned or natural birch frame to complement the warm rattan color
- Apply a light coat of tung oil to the cane to prevent it from drying and splitting over time
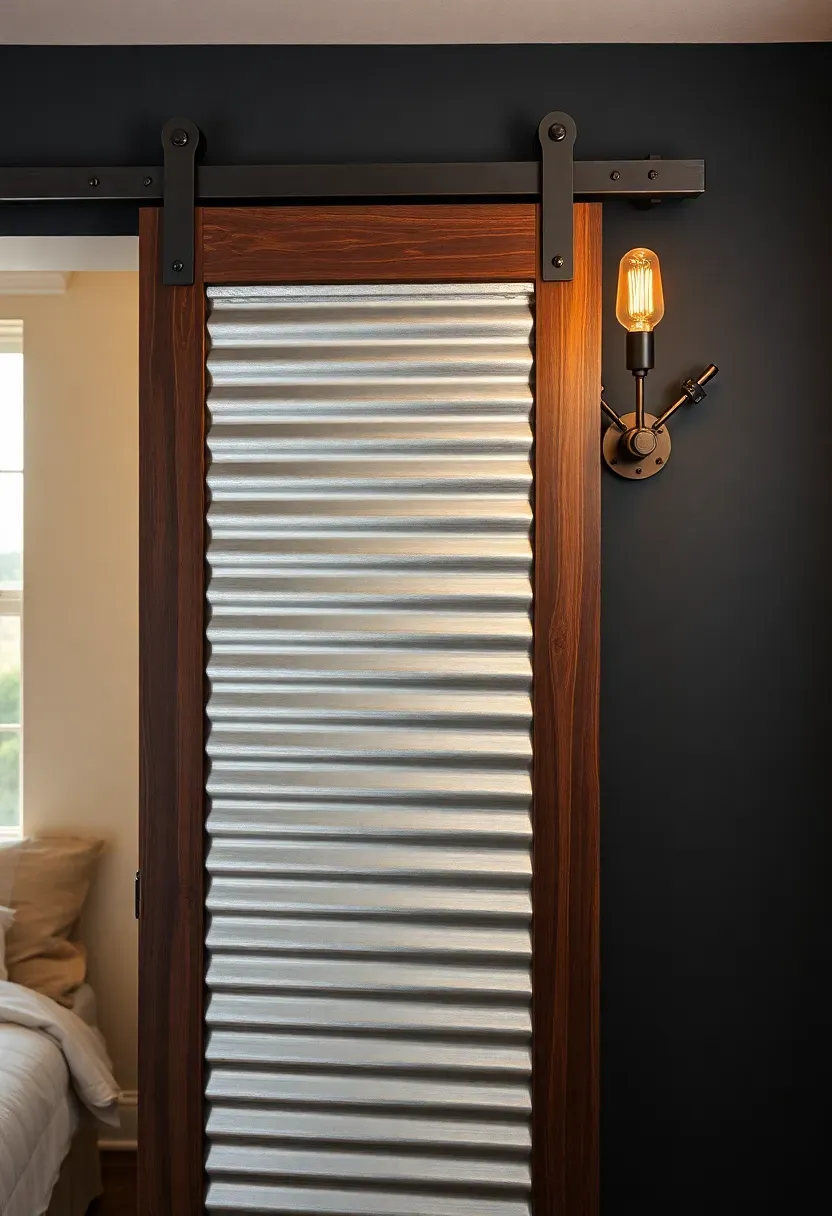
14. Corrugated Metal Accent Door
Metal vs. All-Wood: What Changes
Replacing the center panel of a traditional barn door frame with a sheet of corrugated galvanized steel shifts the look firmly into industrial or modern farmhouse territory. The ridged metal catches overhead light and creates a subtle play of shadow that flat panels cannot produce. One 26-gauge corrugated sheet is light enough (about 8 pounds for a 36x80-inch piece) that it barely changes the door weight.
How to Install the Panel
Cut the corrugated sheet with aviation snips or a nibbler tool. File all cut edges to remove burrs. Set the sheet into the frame's rabbet and secure with small wood screws through the corrugation valleys. The screw heads disappear in the low points of the profile.
Recommendation
Pair with a flat-bar track in raw steel or matte black. Avoid polished chrome hardware since it clashes with the galvanized finish.
Recommended
Items for this idea
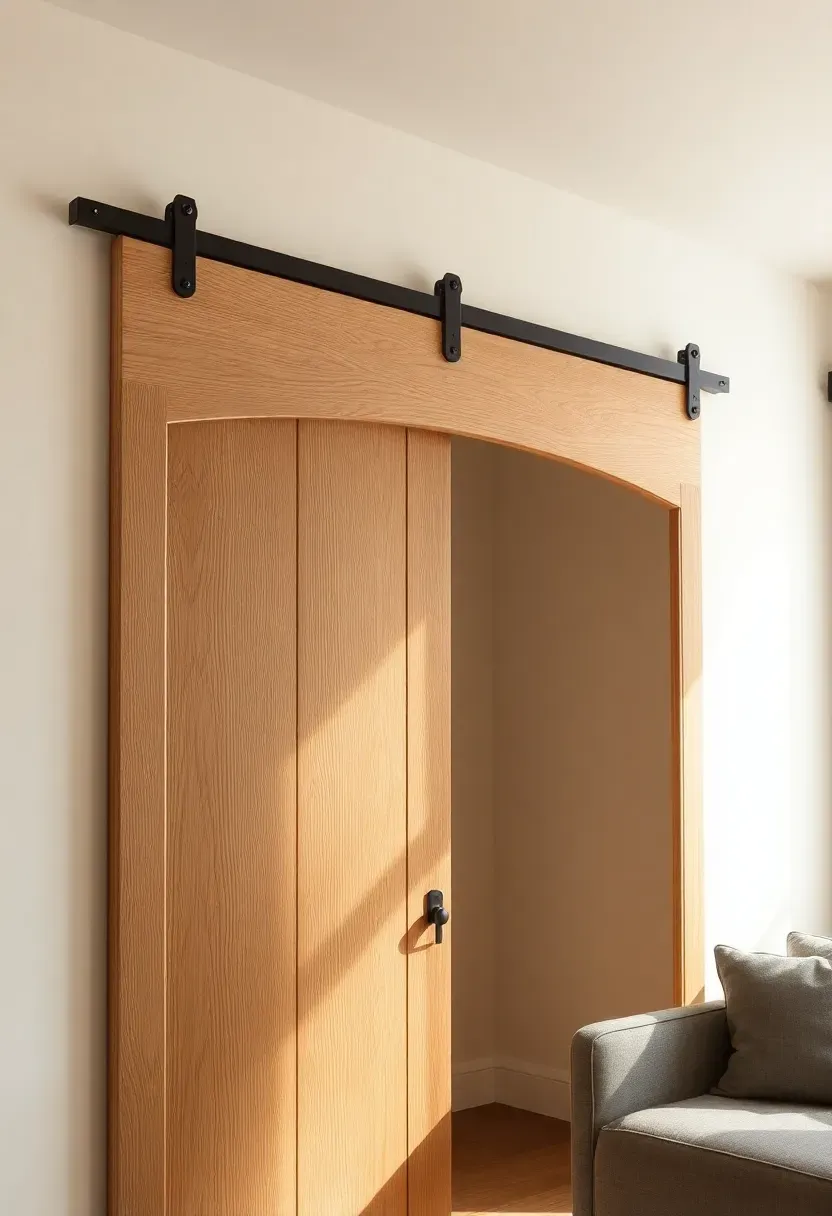
15. Arched Top Barn Door
An arched top adds a European or Mediterranean feel that flat-topped doors never achieve. The curve can be a full semicircle or a gentle segmental arch depending on the ceiling height available above the closet opening. Cut the arch from a laminated blank (three layers of 1/4-inch bending plywood glued in a form) or use a bandsaw on a solid 2-inch board. The track mounts to the ceiling rather than the wall header so the curved top has room to pass below the rollers without interference.
Tips
- Template the arch with a flexible batten bent to the desired curve and traced onto the workpiece
- Sand the curve with a random orbit sander using 150-grit to avoid flat spots
- Ceiling mount tracks need blocking between joists if your ceiling is drywall over open framing

16. Japanese Shoji Inspired Door
History and Adaptation
Shoji screens have divided rooms in Japanese homes since the Heian period. The traditional construction uses thin kumiko lattice strips joined without nails and backed with washi paper. A barn door version scales up the concept: build a maple or Douglas fir grid frame, then back it with translucent rice paper, plastic shoji film, or thin white fabric.
Modern Materials
Traditional washi tears easily, so most Western adaptations use Warlon (a laminated shoji paper bonded to a thin plastic core). It transmits soft diffused light, resists punctures, and wipes clean with a damp cloth.
Try This If
Your bedroom leans minimalist or Japandi and you want the closet door to glow softly when the closet light is on, creating an ambient lantern effect at night.
Recommended
Items for this idea
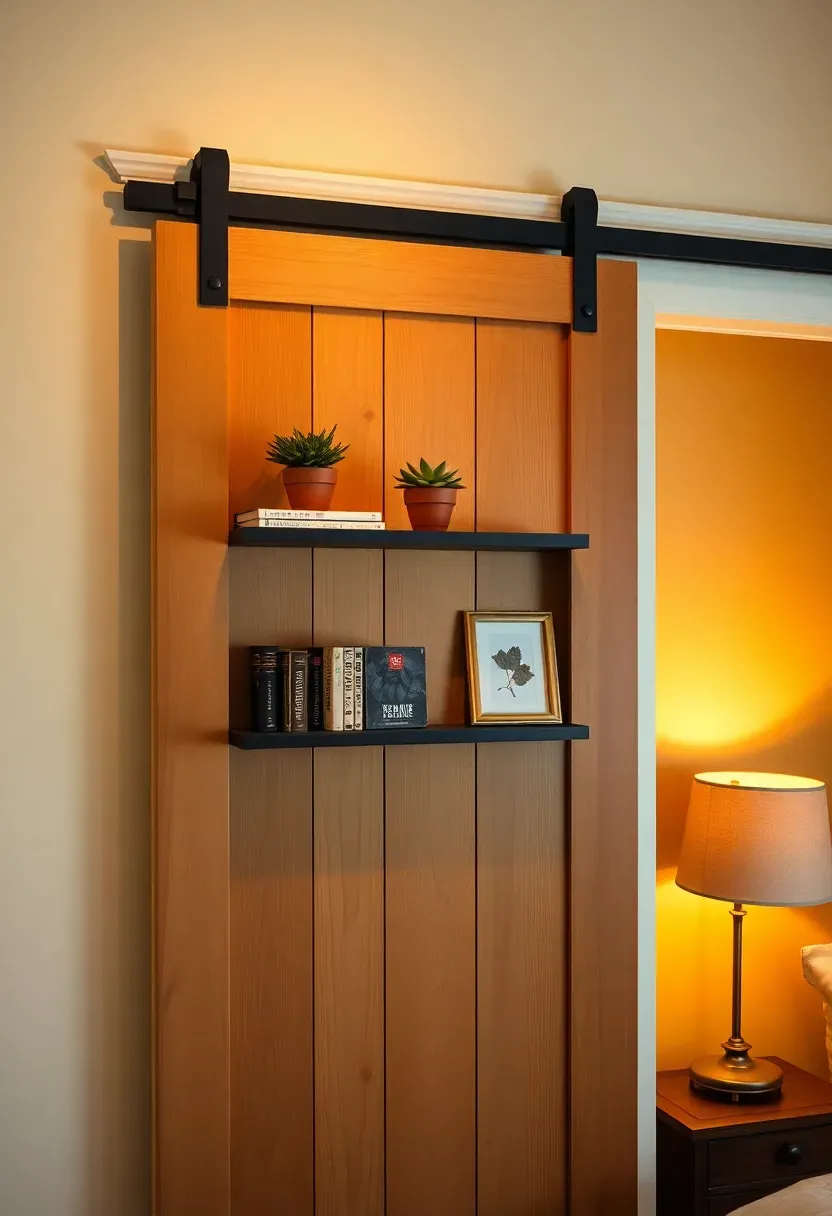
17. Barn Door with Built-In Shelves
Attaching shallow open shelves (4 to 5 inches deep) to the face of a barn door turns dead wall space into display storage. When the door slides over the closet, the shelves are accessible. When it slides open, the shelves park beside the opening and stay usable. Keep shelf contents lightweight: small plants, paperbacks, framed photos, a clock. The added weight of the shelves and their contents means you need to calculate total load and spec the hardware accordingly. A 36x84-inch pine door with three shelves and contents runs roughly 100 to 130 pounds.
Watch Out For
- Items slide off shelves when the door moves unless you add a low rail or lip on each shelf edge
- Center the shelf brackets over the door's structural frame, not just into the face panel
- Heavy-duty soft-close track hardware prevents the door from slamming and shaking items loose
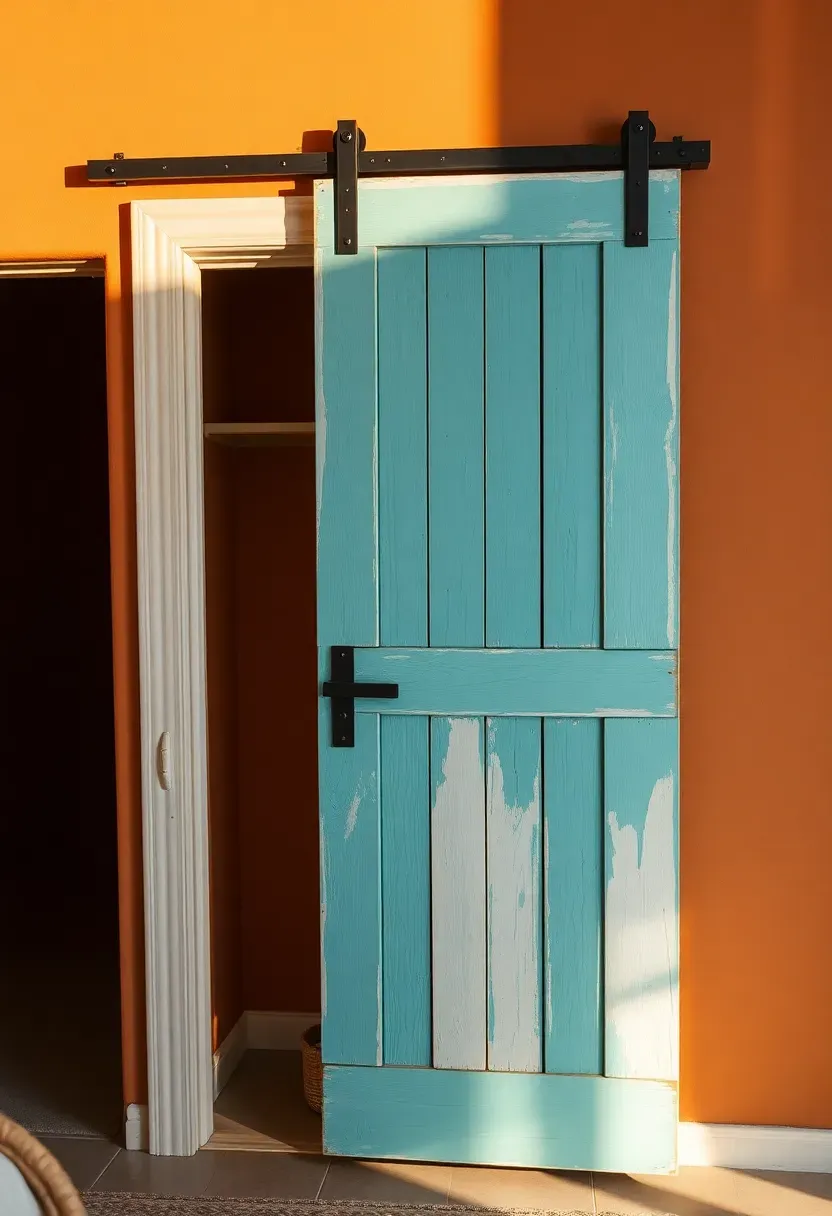
18. Distressed Turquoise Door
Layered paint with deliberate distressing creates a door that looks like it spent decades weathering on a Southwestern ranch. Start with a coat of white primer, then a layer of mustard or warm cream, then your topcoat of turquoise. After everything dries, sand through the top layer at edges, corners, and knots where real wear would happen. The underlying colors peek through in random patterns that no two doors share. Seal with paste wax rather than polyurethane to keep the matte chalky texture that makes distressed finishes convincing.
Tips
- Use a candle wax resist technique between layers for easier sanding
- Concentrate distressing on the bottom third and around the handle area
- Pair with matte black or oil-rubbed bronze hardware to avoid a competing visual
Recommended
Items for this idea
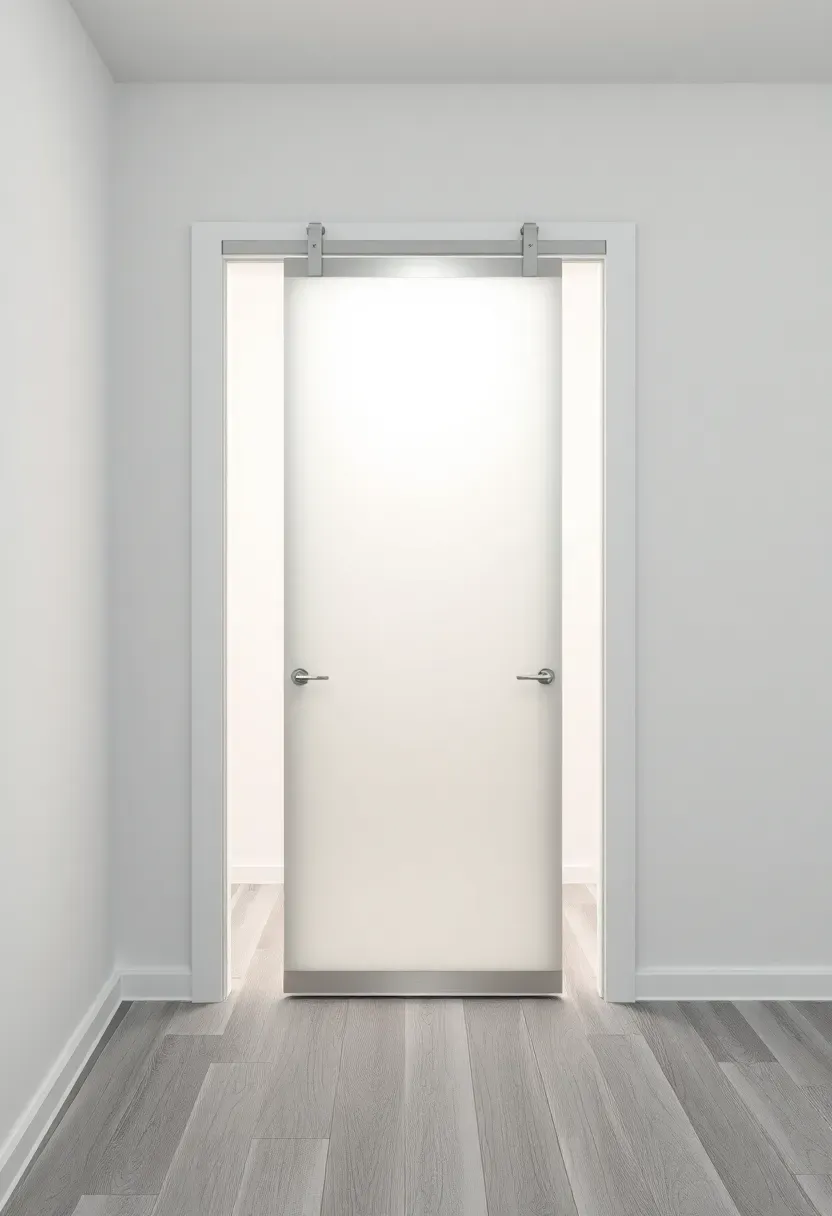
19. Frosted Acrylic Panel Door
Acrylic vs. Glass: A Practical Comparison
Both materials transmit light, but acrylic weighs half as much as glass at the same thickness, won't shatter if bumped, and costs less per square foot. A 1/4-inch frosted acrylic panel in a slim aluminum channel frame produces a barn door that weighs under 30 pounds total, making it one of the lightest options on this list.
Choose Acrylic If
You want a modern, nearly frameless look and your priority is keeping the door light and easy to slide with one finger.
Choose Glass If
You want superior scratch resistance and don't mind the extra weight.
Recommendation
In bedrooms where kids or pets might bump the door, acrylic is the safer bet. Use P400 sandpaper on clear acrylic to create your own frosted finish, or buy pre-frosted sheets.
20. Sliding Barn Door Room Divider
When a walk-in closet shares an open floor plan with the bedroom, a barn door on a ceiling-mounted track works as a room divider that creates a separate dressing area. The door doesn't need to seal against a frame like a traditional door would. It just needs to be wide enough (or paired as doubles) to visually separate the two zones. Ceiling tracks keep the floor clear and allow the door to swing slightly as it slides, which adds movement that wall-mounted tracks prevent. Use reclaimed wood or a material that matches the bedroom's existing finishes so the divider reads as intentional architecture rather than an afterthought.
Tips
- Install a floor guide channel rather than a single pin to allow slight lateral movement without derailing
- Add weather stripping to the edges if you want to block light when one person sleeps while the other uses the closet
- Consider a track with a quiet nylon roller system to avoid waking a sleeping partner
Recommended
Items for this idea
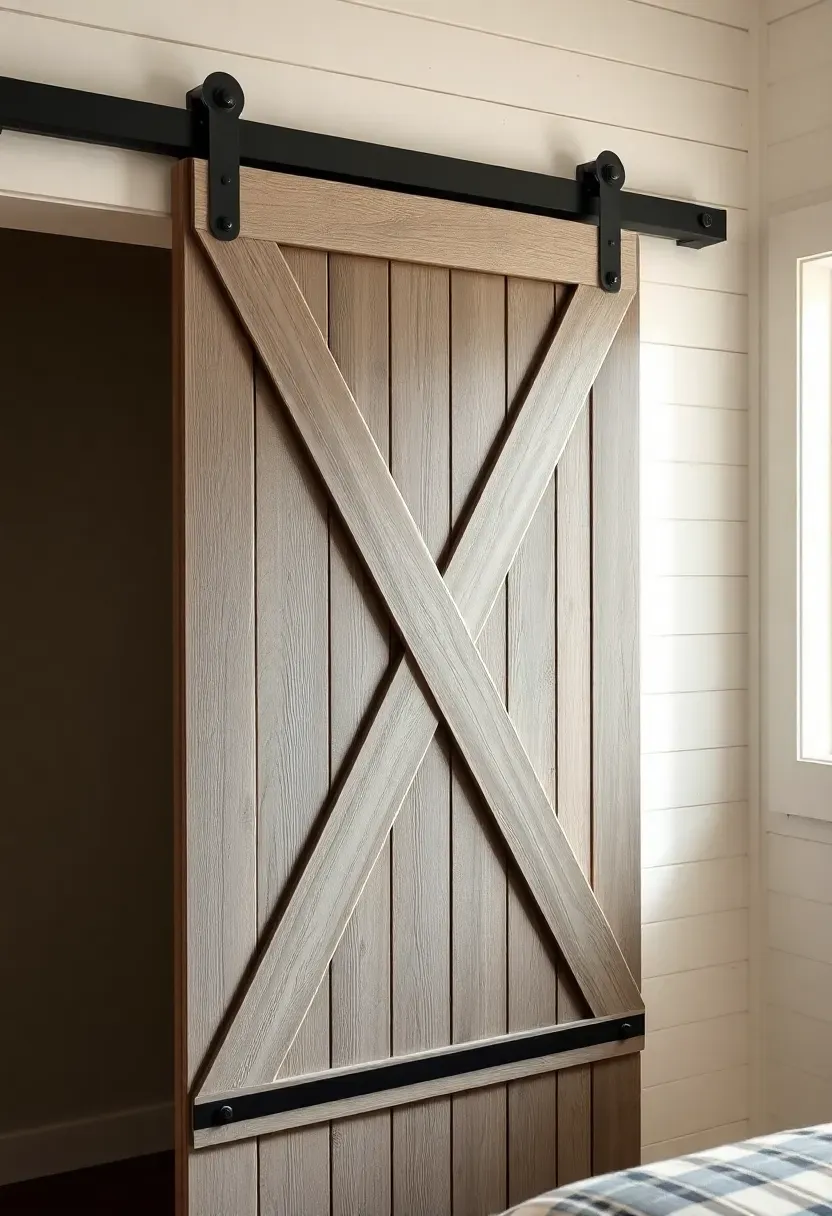
21. X-Brace Farmhouse Door
The X-brace pattern is probably the image most people picture when they hear "barn door." Two diagonal boards cross in the center of a frame made of horizontal rails and vertical stiles, forming the X that gives the design its structural rigidity and its unmistakable look. The cross brace prevents racking (the tendency of a rectangular frame to shift into a parallelogram under its own weight), which is why actual barns used this configuration for centuries. Finish the door in a gray weathered stain or leave it natural and let it patina on its own over a few years.
Tips
- Half-lap the X joints where the diagonals cross for a cleaner intersection
- Use 2x6 boards for the frame and 1x6 for the X pattern on a standard 36-inch-wide door
- Decorative strap hinges (non-functional) on the face add authenticity even though the door slides rather than swings
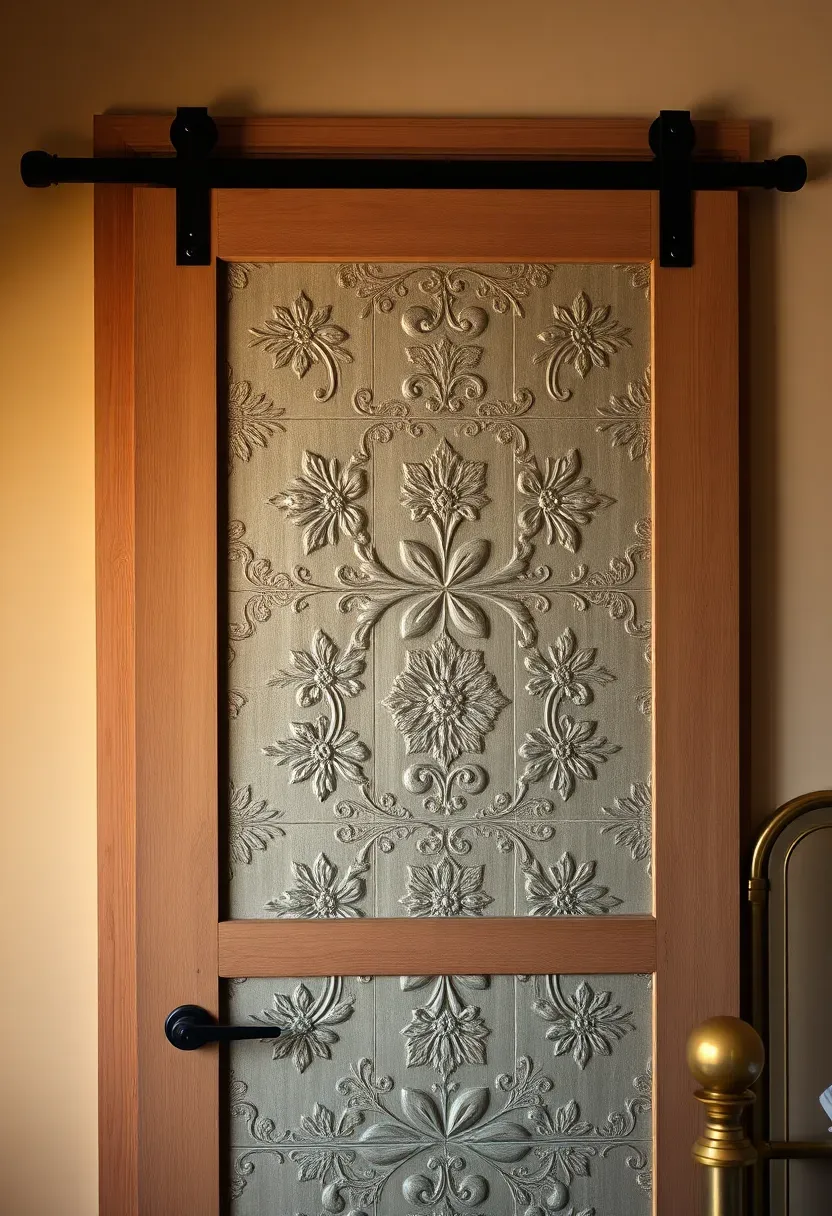
22. Reclaimed Tin Ceiling Tile Door
Where to Find the Material
Architectural salvage yards and demolition resale shops sell pressed tin ceiling tiles pulled from old buildings. Common patterns include floral rosettes, geometric grids, and egg-and-dart borders. Each tile is typically 24x24 inches, so you need about six tiles for a standard door face.
Assembly
Build a pine or poplar frame sized to your closet opening. Lay tiles on the face panel in a grid, overlapping edges by 1/2 inch. Secure with short screws or small nails through the flat areas of the pattern. The raised embossing hides most fastener heads. Leave the patina as-is for a vintage effect, or spray a clear lacquer to freeze the current level of oxidation.
Best Paired With
Cottage, eclectic, and vintage bedroom styles. The textured metal face catches lamplight in a way that flat surfaces cannot.
Recommended
Items for this idea
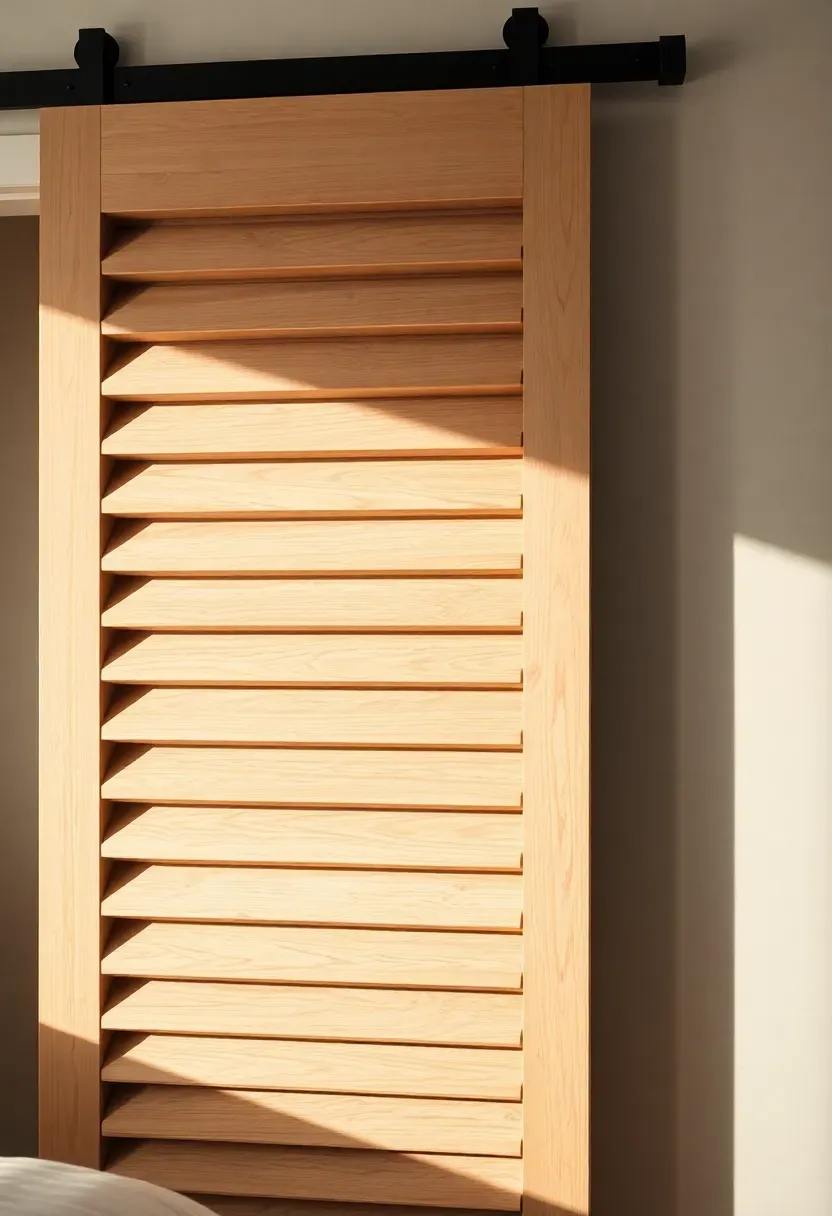
23. Louvered Barn Door
Louvered doors existed long before the barn door trend, mostly on closets in Southern and tropical homes where airflow mattered more than total concealment. Adding a barn door track to a louvered panel gives you the sliding mechanism with the ventilation benefit intact. The angled slats block direct sightlines into the closet while allowing continuous air exchange, which prevents moisture buildup on stored leather goods, shoes, and seasonal wool. Buy a pre-made louvered door blank from a building supply store and retrofit it with barn door hardware rather than building louvers from scratch, which requires a jig and precise spacing.
Tips
- Louvered blanks come in standard widths up to 36 inches; wider openings need bypass pairs
- Dust the slats with a microfiber duster bent into a C-shape that wraps each louver
- Paint both sides of each slat before assembly for even coverage
24. Sliding Barn Door with Soft Close
The Problem
Standard barn door stops are rubber bumpers bolted to the end of the track. They prevent the door from sliding off the rail but do nothing to slow it down. The result: a 70-pound door slamming into the bumper hard enough to rattle picture frames on adjacent walls.
The Solution
Soft-close track kits include a pneumatic or spring-loaded damper recessed into each end of the rail. When the door reaches the last 3 to 4 inches of travel, the damper engages and pulls the door gently to a stop. Some systems also pull the door fully closed from a few inches out, similar to soft-close cabinet hinges.
Pros and Cons
Pros: eliminates slamming; safer around children's fingers; the slow close looks and feels premium Cons: adds $40 to $80 to the track cost; dampers wear out after roughly 50,000 cycles and need replacement
Recommended
Items for this idea
25. Stained Glass Insert Door
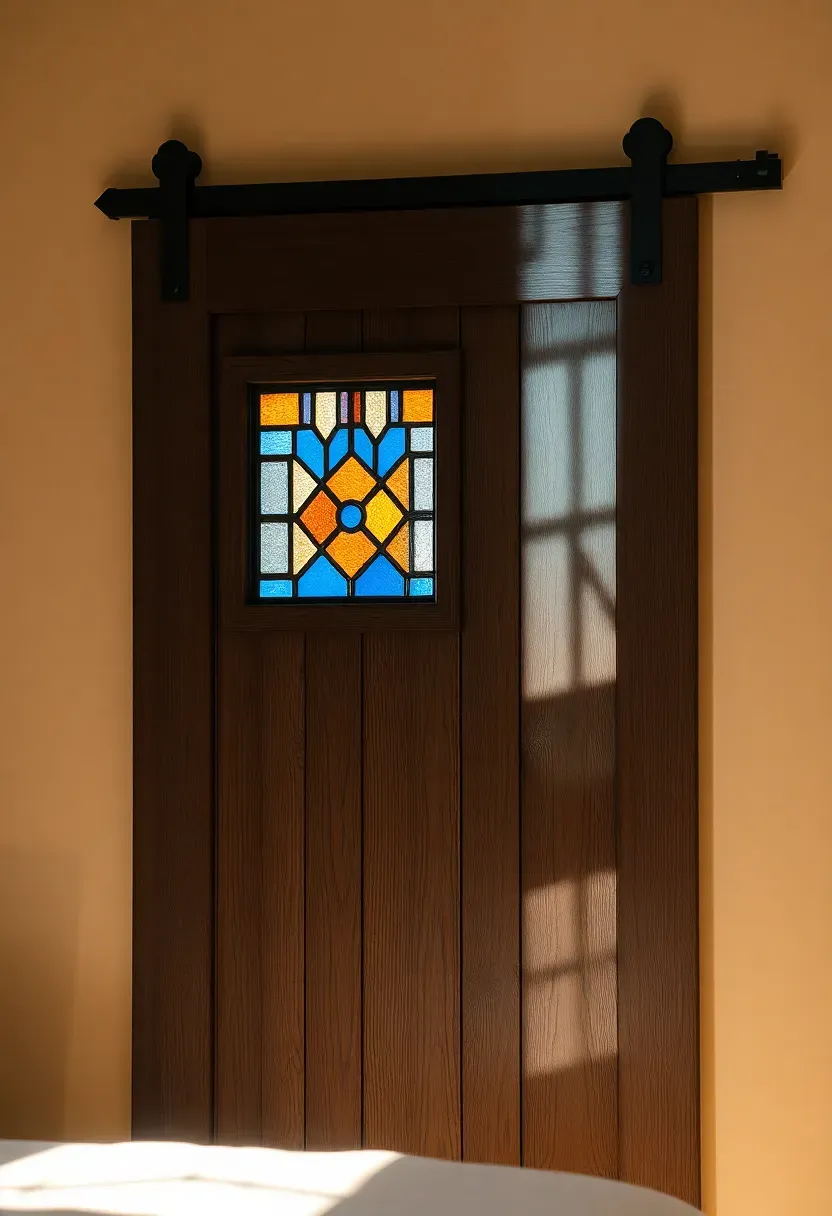
A small stained glass panel (12x18 inches or so) set into the upper third of a solid barn door adds color and a focal point without the fragility of a full glass door. Source the panel from a stained glass artist or salvage one from a reclaimed window. Build the door frame with a rabbeted opening sized to the glass, set the panel against a bead of silicone, and secure it with a wood retainer strip screwed from the back side. When bedroom light hits the glass, it throws colored shadows across the closet contents and the opposite wall.
Tips
- Position the glass high enough that it won't get hit by elbows or hangers
- Use a panel with zinc came (lead-free) for a bedroom application
- Pair with a simple door design below the glass so the stained piece stays the focal point

26. Kids Room Barn Door with Cutout
Making It Playful
A shaped cutout in a painted barn door gives a kids' room personality that a standard door never will. Common cutout shapes include stars, animals, initials, and clouds. Fill the cutout with a contrasting colored acrylic sheet screwed to the back so light passes through. Use 1/2-inch acrylic rather than glass for obvious safety reasons.
Step by Step
Step 1: Draw or trace the shape on the door face. Drill a starter hole inside the outline.
Step 2: Cut along the line with a jigsaw fitted with a fine-tooth blade to minimize tear-out.
Step 3: Sand the cutout edges smooth with a spindle sander or wrapped sandpaper.
Step 4: Screw the acrylic panel to the back of the door over the opening using flat-head screws and fender washers.
Watch Out For
- Keep cutout dimensions under 18 inches in any direction so the door retains structural strength
- Round all interior corners of the cutout with a 1/2-inch radius to prevent stress cracks in the wood
Recommended
Items for this idea
27. Floor-to-Ceiling Barn Door
Standard barn doors hang from a track above the opening and leave a gap at the bottom. A floor-to-ceiling version extends the door all the way from the floor to the ceiling line, eliminating visible hardware at the top and creating a flush wall plane when closed. The track mounts inside a recessed channel in the ceiling, hiding the rollers completely. This approach suits modern and minimalist bedrooms where visible hardware would break the clean lines. The door itself needs to be dimensionally stable material like torsion box construction or an engineered core, since a solid wood panel this tall (96 to 108 inches) will almost certainly bow over time.
Tips
- Use an engineered core (LVL or particleboard) wrapped in veneer for dimensional stability
- Recess the track into a ceiling channel with a drywall return so the mechanism disappears
- A floor-to-ceiling door can weigh 120+ pounds, so verify ceiling framing can support the load before installation
Quick FAQ
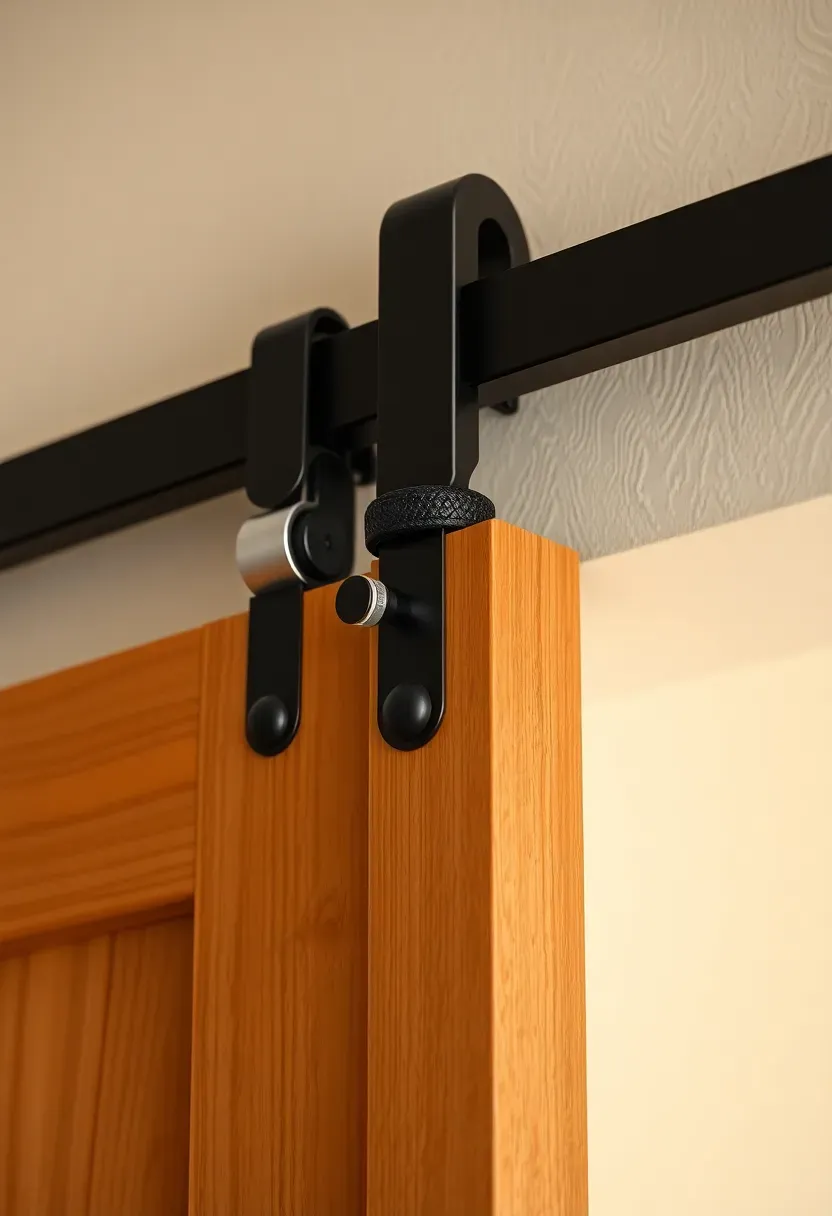
Can I install a barn door on a closet without removing the existing trim? Yes. Most barn door track brackets mount to the wall above the casing. The door slides in front of the trim rather than inside the opening. You lose about 1-1/2 inches of depth from the wall face, but the existing trim stays untouched.
How much wall space do I need beside the closet for a sliding barn door? The door needs room to slide completely clear of the opening. For a 36-inch-wide closet, you need at least 36 inches of unobstructed wall to one side. If that space is not available, consider a bypass system with two smaller doors.
Do barn doors provide sound insulation for closets? Very little. A typical barn door has gaps at the top, bottom, and sides that allow sound to pass freely. If noise isolation matters, add adhesive-backed weatherstripping to the back edges of the door and a brush sweep at the bottom. This won't match a sealed hinged door but does reduce ambient noise transfer noticeably.
Are barn door closets practical for daily use or mostly decorative? Completely practical. I use mine multiple times a day and it has held up for three years with zero maintenance beyond occasionally tightening the roller bolts. The sliding motion is actually faster than opening a hinged or bifold door since there is no swing arc to navigate around.
What is the average cost to add a barn door to an existing closet? A pre-made door with hardware runs $200 to $600 depending on material and finish. Building your own from reclaimed wood brings the cost down to $80 to $150 for materials plus the track kit. Professional installation typically adds $150 to $300 for labor.
Barn doors work on closets because they solve a real problem: the lost floor space that swinging and bifold doors demand. Pick a style that matches what your bedroom already has going on rather than forcing a rustic door into a modern room or vice versa. The hardware is standardized enough that you can swap the door panel later without replacing the track, so start with whichever idea catches your attention and adjust down the road if your taste changes.
Pinterest cover for 27 Barn Door Closet Ideas for Every Bedroom Style
About the author
OBCD
CGI visualization and interior design content. We create detailed 3D renders and curate practical design ideas for every room in your home.