27 Bathroom Backsplash Ideas That Actually Hold Up
A backsplash does two jobs in a bathroom. First, it keeps water from ruining your drywall. Second, it gives you a surface where you can make a design statement without committing to a full renovation. Unlike kitchen backsplashes, bathroom versions deal with slower, more consistent moisture from sinks and showers rather than grease and heat. That changes what materials work best and opens up options you might not consider in a cooking space. Porous natural stone, delicate glass mosaics, even wallpaper behind glass panels — all fair game here.
Below you will find 27 backsplash concepts organized by material, style, and budget. Some are weekend DIY projects. Others require a tile setter and patience. All of them protect your walls while giving the room a finished look it probably needs.
Table of Contents
- Classic White Subway Tile
- Marble Slab Behind the Vanity
- Zellige Tile in Warm Neutrals
- Hexagonal Mosaic Pattern
- Peel-and-Stick for Renters
- Herringbone Ceramic Layout
- Terrazzo Composite Panel
- Black Penny Round Tile
- Stacked Vertical Subway Tile
- Natural Stone Ledger Panel
- Glass Mosaic in Blues and Greens
- Concrete-Look Porcelain
- Bold Patterned Cement Tile
- Beveled Mirror Tile
- Handmade Ceramic in Earthy Glaze
- Full-Height Porcelain Slab
- Scallop Fan Tile
- Beadboard Wainscoting
- Thin Brick Veneer
- Geometric Laser-Cut Metal
- Encaustic Tile with Border
- Japanese Wabi-Sabi Crackle Glaze
- Penny Tile Ombre Gradient
- Reclaimed Wood with Sealant
- Tadelakt Plaster Finish
- Large-Format Textured Tile
- Mixed Material Patchwork
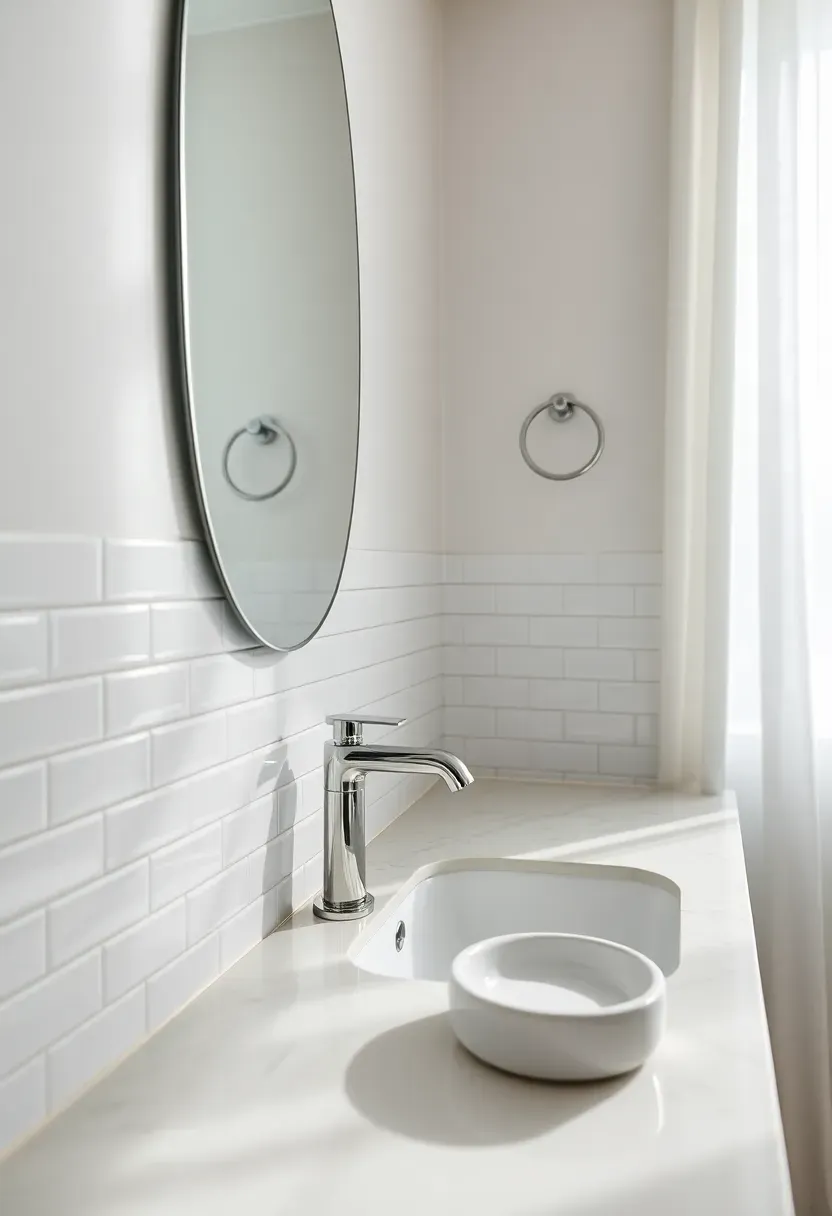
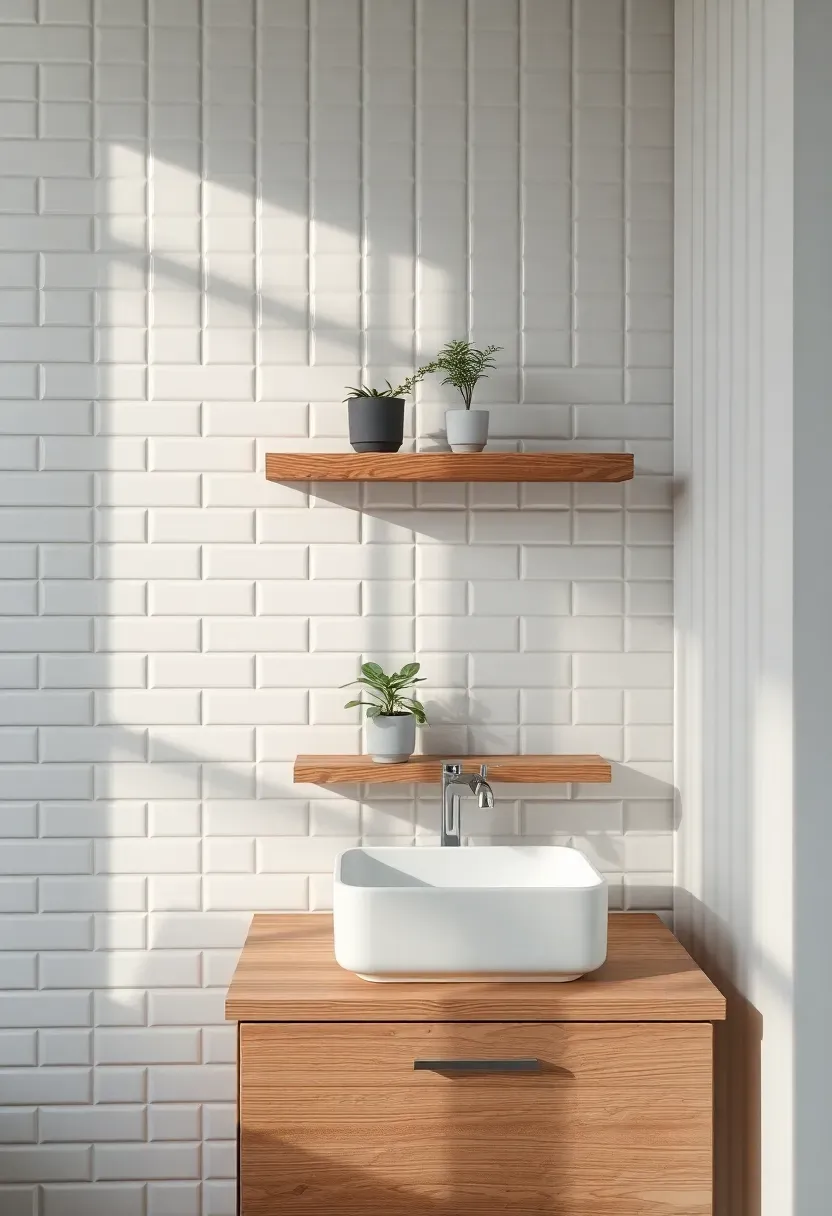
1. Classic White Subway Tile
There is a reason white subway tile has survived every design trend since the early 1900s. The 3x6 format is cheap, widely available, and creates a clean grid that reads as polished without trying. In a bathroom, the glazed surface repels water effortlessly and wipes clean with a damp cloth. Where subway tile gets interesting is in the details: the grout color, the layout pattern, and how high you run it up the wall. A dark charcoal grout turns the same tile from neutral background to graphic statement. Running it all the way to the ceiling makes a small bathroom feel taller.
Tips
- Use unsanded grout for the narrow joints — sanded grout can scratch glazed surfaces
- Consider a slightly off-white shade like Daltile Arctic White to avoid a sterile look
- Bullnose edge pieces give the top row a finished look without exposed tile edges
We picked a few things that go well with this idea: Art3d Peel and Stick Subway Tile (102-Piece) (★4.4), Vamos Glossy White Subway Backsplash Tile (100-Piece) (★4.4) and STICKGOO Peel and Stick Subway Tile (10-Sheet) (★4.2). As an Amazon Associate we earn from qualifying purchases.
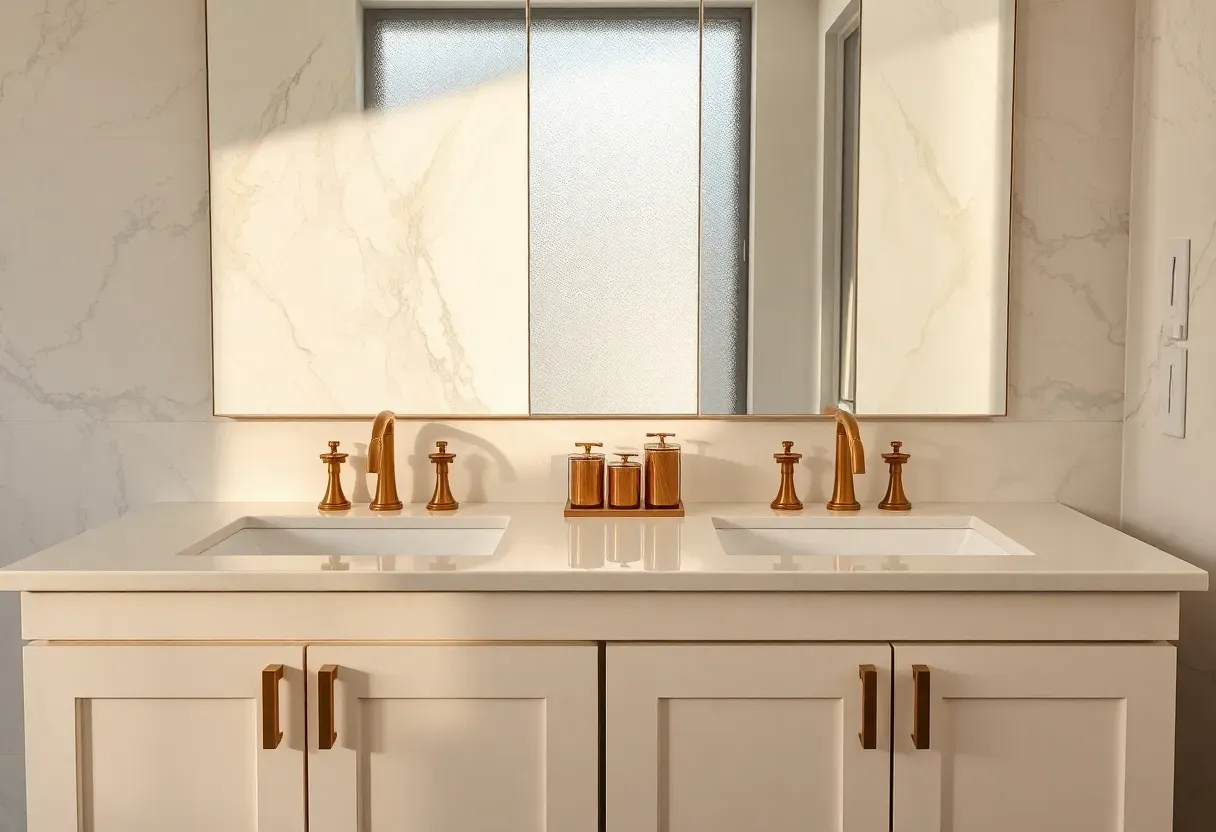
2. Marble Slab Behind the Vanity
The Core Issue
Tile grout lines behind a bathroom sink collect soap scum, toothpaste splatter, and water stains. No amount of sealing eliminates the maintenance headache entirely. You end up scrubbing grout every few weeks or watching it discolor.
The Solution
A single marble slab eliminates grout lines altogether. Cut to fit your vanity wall, a marble backsplash offers continuous veining that flows uninterrupted from countertop to mirror. Calacatta and Statuario marbles deliver the most dramatic veining, but even a quieter Carrara slab adds depth that tile cannot replicate. The seamless surface means cleanup is a single wipe — no grout channels to trap residue.
Pros and Cons
Pros: zero grout maintenance, continuous veining pattern, high-end appearance, easy to clean Cons: expensive material and fabrication costs, marble is porous and needs periodic sealing, chips are difficult to repair
We picked a few things that go well with this idea: AQUA-X Clear Grout and Tile Sealer (16oz) (★4.3), Miracle Sealants 511 Penetrating Tile Sealer (★4.5) and Seal It Green Heavy Duty Grout Sealer (★4.4). As an Amazon Associate we earn from qualifying purchases.
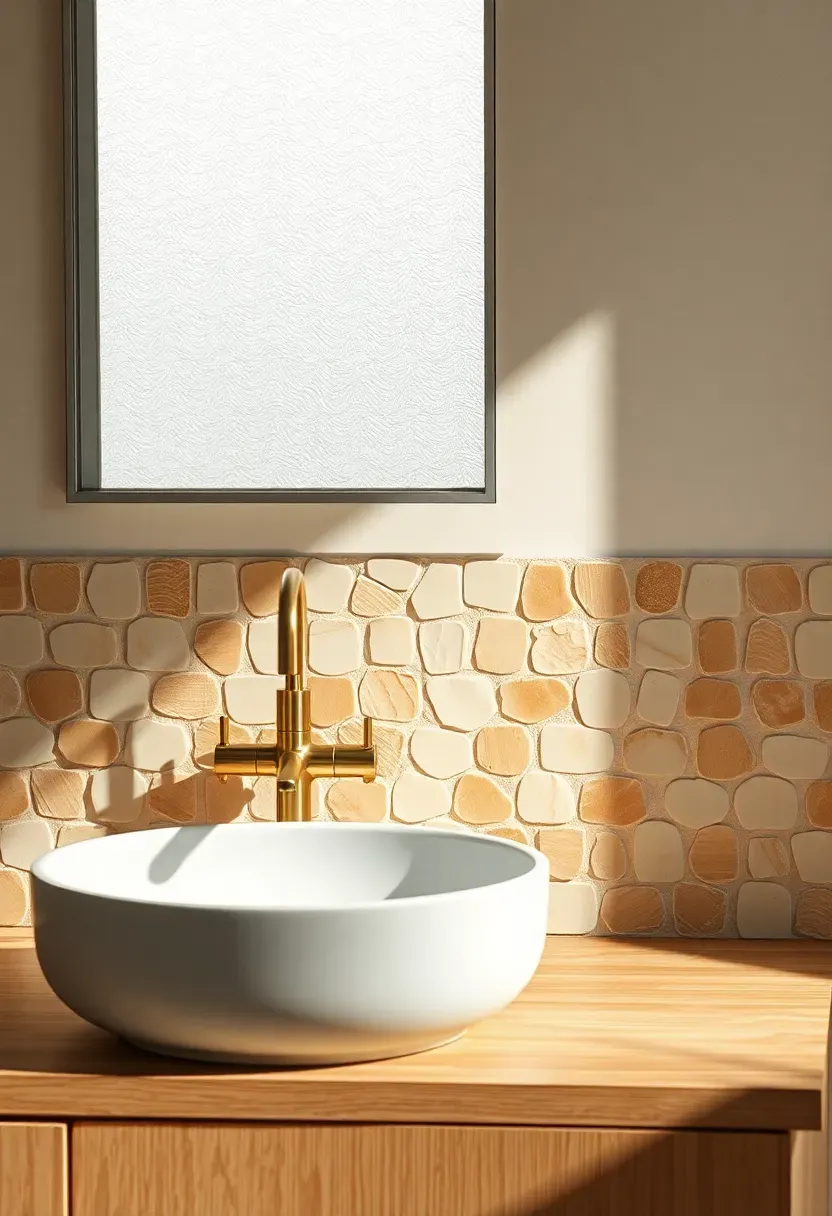
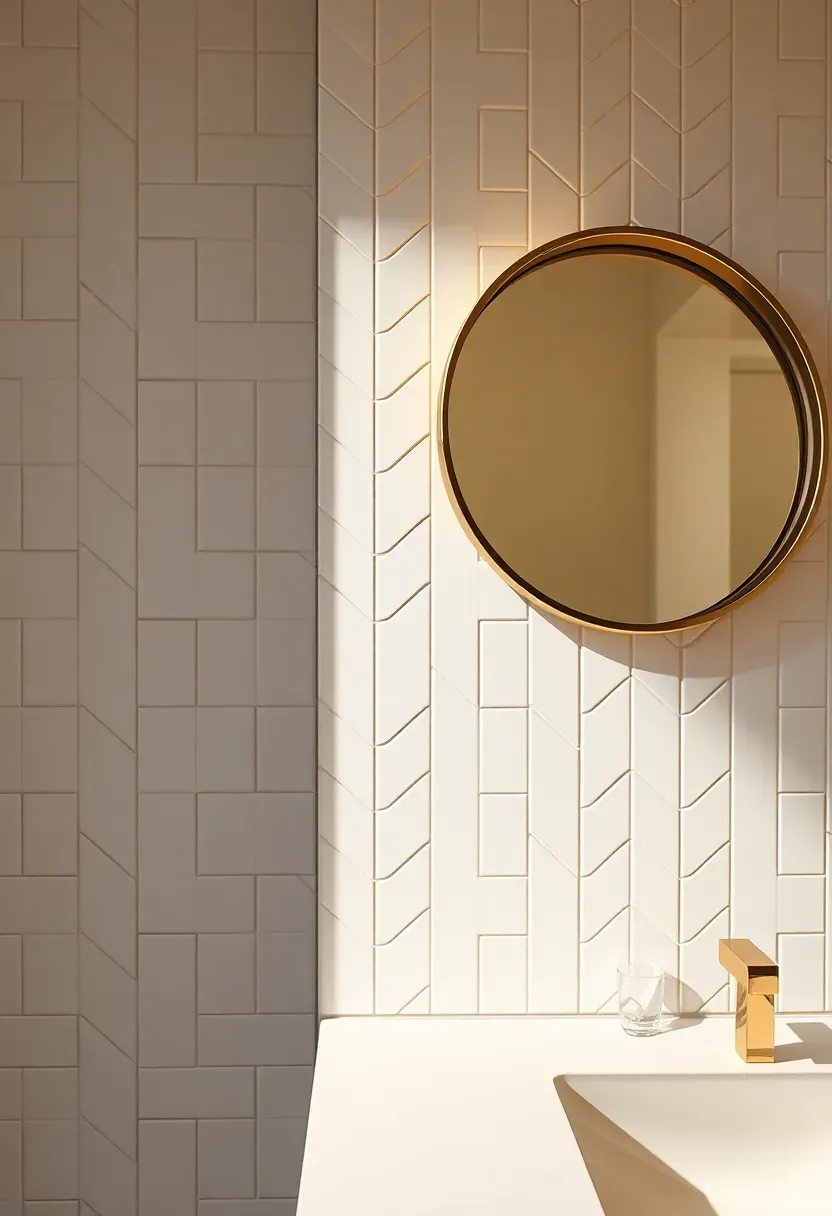
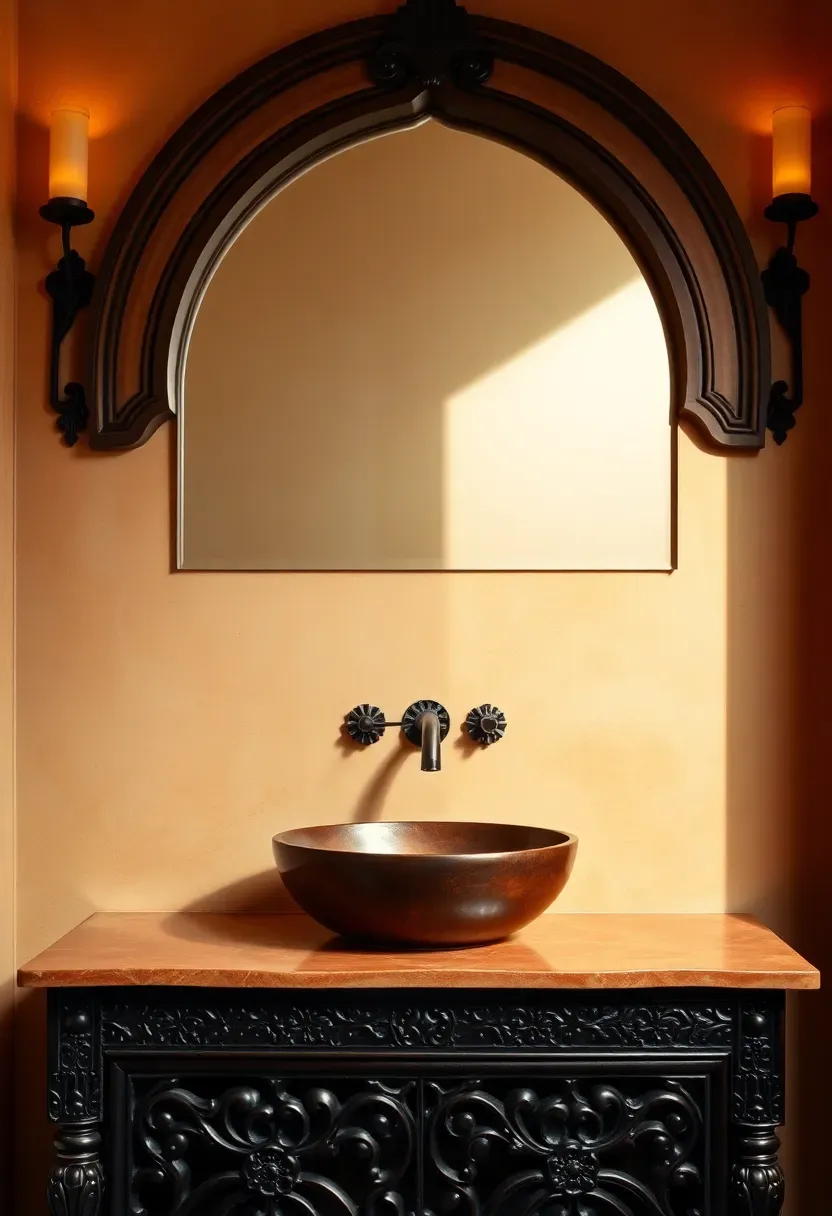
3. Zellige Tile in Warm Neutrals
Zellige is a Moroccan tile tradition dating back to the 10th century. Each piece is hand-cut and glazed individually, which means no two tiles are identical. That irregularity is the entire point. When installed behind a bathroom vanity, the slight variations in surface angle catch light differently throughout the day, creating a backsplash that shifts from matte to luminous depending on the hour. In warm neutrals — cream, sand, pale terracotta — Zellige adds texture and character without competing with other fixtures in the room. The glazed surface handles bathroom moisture well, though the uneven surface does require slightly more grout than machine-made alternatives.
Tips
- Order 15-20% extra — the handmade nature means more breakage and variation than standard tile
- Use a matching or slightly darker grout to emphasize the organic grid pattern
- Pair with simple matte hardware so the tile remains the focal point

We picked a few things that go well with this idea: Parrotile Antique Glass Mosaic Backsplash (5-Sheet) (★4.8), DICOFUN Rainbow Glass Mosaic Tiles (40-Sheet) (★4.4) and V-MOZZA Beveled Mirror Mosaic Tiles (40-Pack) (★4.5). As an Amazon Associate we earn from qualifying purchases.
4. Hexagonal Mosaic Pattern
Step 1: Choose Your Scale
Hexagonal tile comes in sizes from tiny 1-inch mosaics on mesh sheets to large 8-inch individual pieces. For a backsplash, the 2-inch mosaic sheets give you the geometric impact without overwhelming a small wall area. They come pre-mounted, which speeds installation considerably.
Step 2: Plan the Edge Treatment
Unlike rectangular tiles with clean edges, hexagons create a jagged border. You have two options: cut individual hex tiles to create a straight edge, or embrace the organic boundary and let the pattern terminate naturally. Straight edges look cleaner. Natural edges add visual interest.
Step 3: Install and Grout
Spread thinset with a small V-notch trowel, press mesh-backed sheets into place, and adjust individual tiles that shift. Let cure for 24 hours before grouting. With hex mosaics, grouting takes longer because there are significantly more joints per square foot than rectangular tile.
What to Watch Out For
- Mesh-backed sheets can curl if stored improperly — lay them flat before install day
- Color matching between boxes can vary; blend tiles from multiple boxes during installation
- Cleaning grout in hexagonal patterns takes extra time due to the number of joints

Recommended
Items for this idea
5. Peel-and-Stick for Renters
The Core Issue
Renters face an impossible choice: live with a bare, water-stained wall behind the sink, or risk losing a security deposit by installing permanent tile. Neither option is great.
The Solution
Modern peel-and-stick tiles have come a long way from the flimsy contact paper of a decade ago. Products from brands like Tic Tac Tiles and Smart Tiles use a rigid gel component that gives them genuine dimension and a convincing tile appearance. They adhere to clean, flat walls and remove without damage when you move out. In a bathroom, stick with options rated for wet areas — some cheaper versions lose adhesion in humid environments. A full vanity backsplash typically takes under an hour to install with no tools beyond a utility knife and a level.
Pros and Cons
Pros: no tools needed, removable without wall damage, costs under $50 for most vanity backsplashes Cons: limited style options compared to real tile, edges can lift in very humid bathrooms, visible up close as not real tile
6. Herringbone Ceramic Layout
Same tile, completely different feel. Taking a standard rectangular ceramic tile and setting it in a herringbone pattern — each piece angled at 45 degrees against its neighbor — creates a dynamic zigzag that draws the eye upward. The pattern has roots in Roman road construction and later European parquet floors, and it carries that same sense of deliberate craftsmanship into a bathroom setting. White ceramic in herringbone reads as both classic and energetic. The labor cost runs higher than a standard running bond layout because every cut must be precise at a 45-degree angle, but the material cost stays the same since you are using identical tiles.
Tips
- Start from the center of the wall and work outward to keep the pattern symmetrical
- A 2x6 or 2x8 tile works better for herringbone than the standard 3x6 subway size
- Minimize grout width to 1/16 inch for a tight, refined look
Recommended
Items for this idea
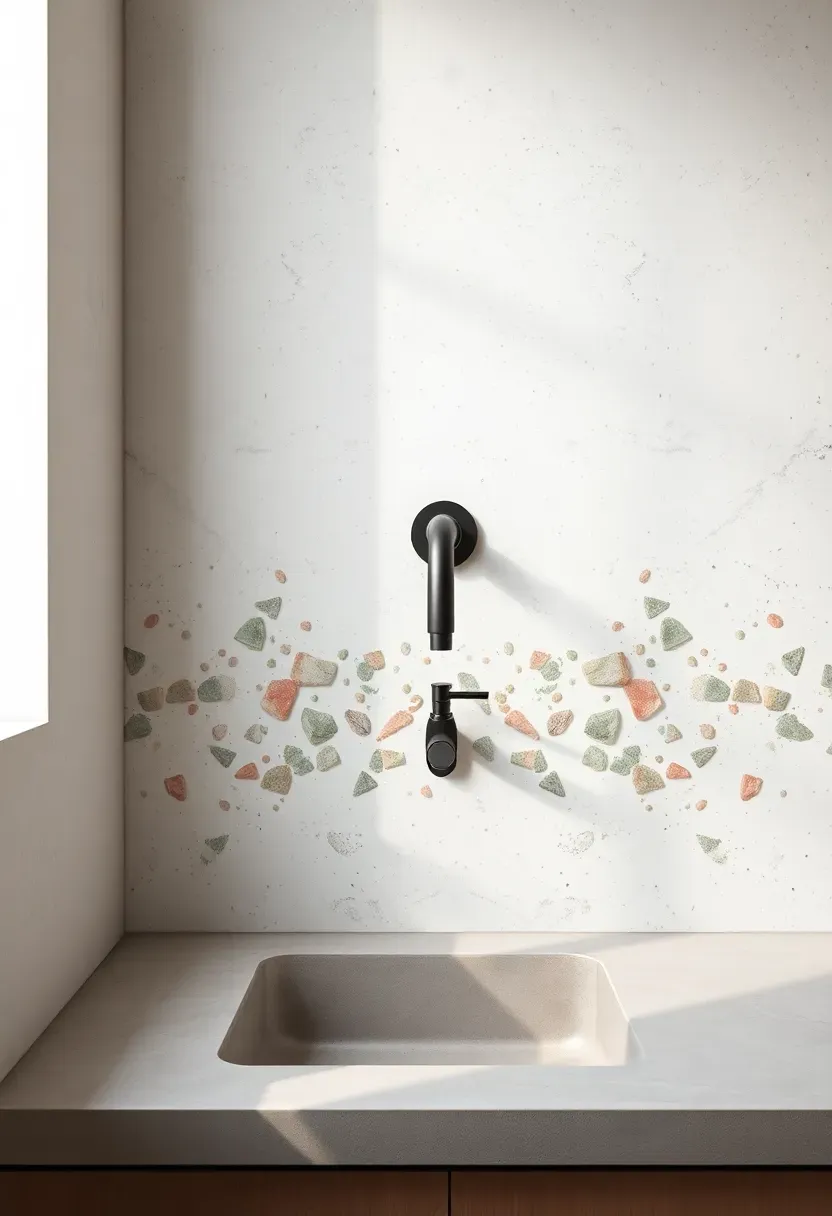
7. Terrazzo Composite Panel
Terrazzo had its golden era in mid-century commercial buildings, then vanished from residential design for decades. It is back now, and the composite panel format makes it far more accessible than traditional poured terrazzo. These panels come in large sheets — typically 24x48 inches — that mount directly to the wall with construction adhesive. The chip pattern varies: small uniform flecks for a subtle look, or large irregular stone pieces for something bolder. Behind a bathroom vanity, terrazzo composite adds color and pattern depth without the installation complexity of small-format tile. The surface is non-porous, stain-resistant, and needs nothing beyond a damp cloth to maintain.
Tips
- Match chip color to other bathroom elements — pull a vanity or floor color into the terrazzo
- Large panels mean fewer seams, which is the main advantage over terrazzo-look tile
- The material cuts with a diamond blade; measure twice because replacement panels may differ in chip placement

8. Black Penny Round Tile
Small-scale tile with high contrast. Black penny rounds — typically 3/4 inch in diameter, mounted on mesh sheets — create a dense, textured surface that feels bold without being aggressive. The glossy glaze catches light at hundreds of slightly different angles, giving the backsplash a subtle shimmer that flat tile cannot achieve. Against a white countertop and light walls, the effect is graphic and intentional. Against dark cabinetry, it adds tonal depth. White grout turns the installation into a distinct dotted pattern. Black grout creates a near-solid dark surface with just enough texture to keep it interesting.
Tips
- Glossy finish shows water spots more than matte — keep a microfiber cloth handy
- Use epoxy grout for penny rounds; the small joints trap moisture and standard grout will stain
- Limit the backsplash to the vanity area to avoid overwhelming the room
Recommended
Items for this idea
9. Stacked Vertical Subway Tile
The Core Issue
Running bond subway tile — the standard offset brick pattern — is so ubiquitous that it barely registers anymore. It is the default choice, which means it does not add any design personality to a space.
The Solution
Take the same subway tile and stack it vertically with aligned joints. Suddenly, the pattern feels modern and intentional rather than safe. Vertical lines draw the eye upward, making ceilings appear higher, and the straight grout lines create a clean geometric grid that pairs well with contemporary fixtures. The material cost is identical to horizontal subway tile. The labor is slightly easier because vertical stacking requires fewer cuts than offset patterns.
Pros and Cons
Pros: uses inexpensive standard tile, creates a modern look with zero premium, makes low ceilings appear higher Cons: aligned joints are less forgiving of uneven walls, any tilt in the tile is immediately visible, may look too commercial in traditional bathrooms
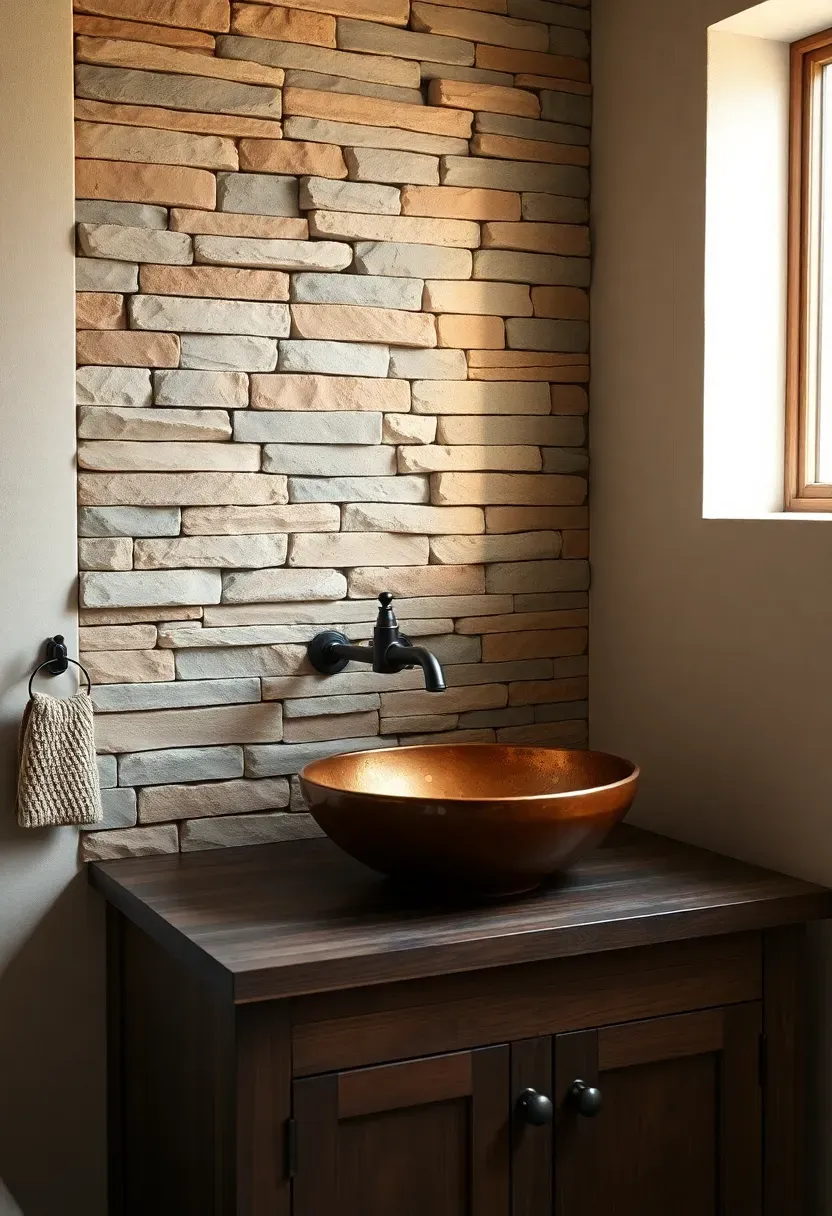
10. Natural Stone Ledger Panel
Ledger panels are thin strips of natural stone — slate, quartzite, travertine, or sandstone — mounted on a backing panel for easy installation. They bring genuine rock texture to a bathroom wall without the weight or cost of full stone veneer. The split-face surface creates shadows and depth that flat tile simply cannot match. Behind a rustic or farmhouse vanity, ledger stone adds an earthy anchor that grounds the entire room. The texture works best as a focal point rather than wall-to-wall coverage; a single accent section behind the mirror and vanity gives you the impact without making the bathroom feel like a cave.
Tips
- Seal the stone before and after installation — natural stone is porous and will absorb water
- Keep ledger panels away from direct shower spray; the textured surface traps moisture
- Pair with simple, smooth countertops to balance the busy texture
Recommended
Items for this idea
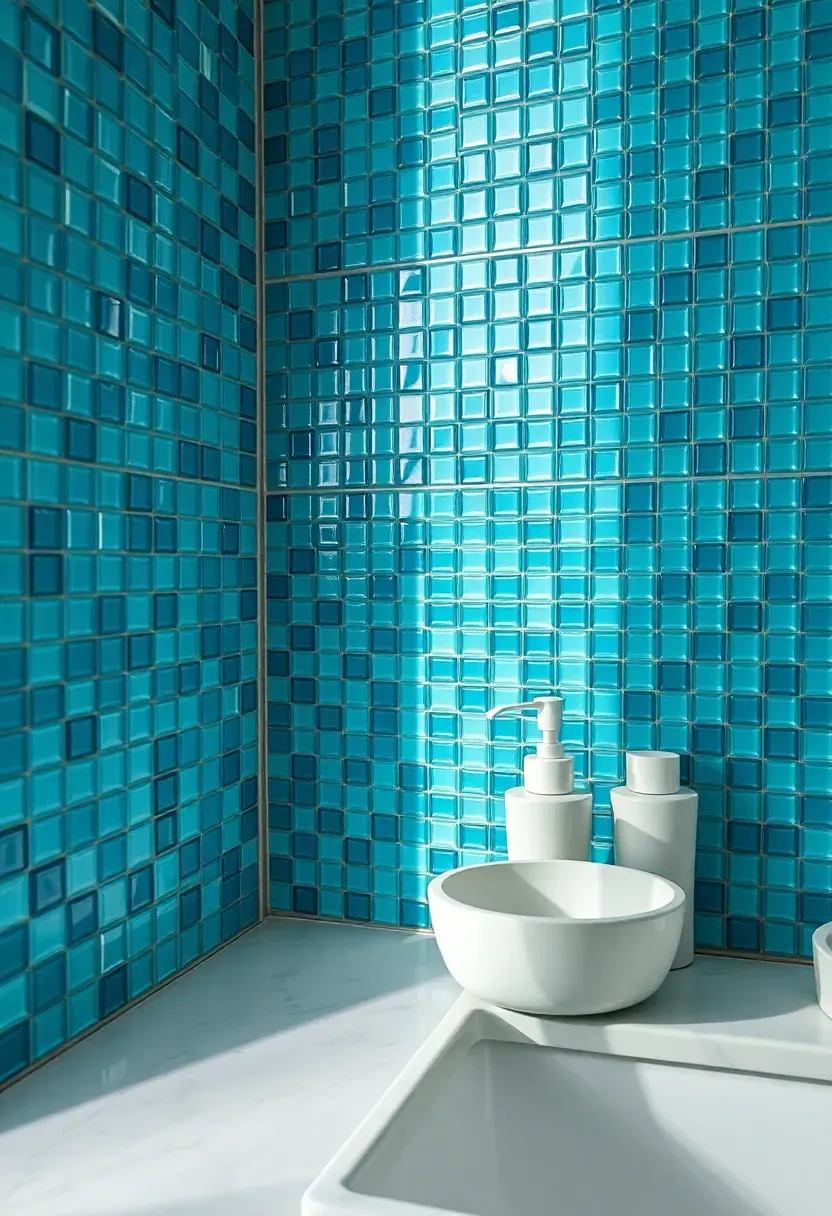
11. Glass Mosaic in Blues and Greens
Glass tile does something no other material can: it transmits light. Where ceramic and stone reflect light off their surface, glass lets some light pass through and bounce off the wall behind it, creating a luminous quality that shifts with changing conditions throughout the day. A mosaic blend of blues and greens behind a bathroom vanity echoes water without being literal about it. The colors stay vibrant permanently because the pigment is baked into the glass itself, not applied as a surface glaze that can wear. Cleaning is simple — glass is non-porous, so nothing penetrates the surface. The main caution is that glass shows any imperfection in the wall beneath it, so substrate preparation matters more than with opaque tile.
Tips
- Use white thinset, not gray — it shows through translucent glass and affects the color
- Glass tile requires a different thinset than ceramic; confirm compatibility before starting
- Mix matte and glossy finishes within the mosaic for added depth
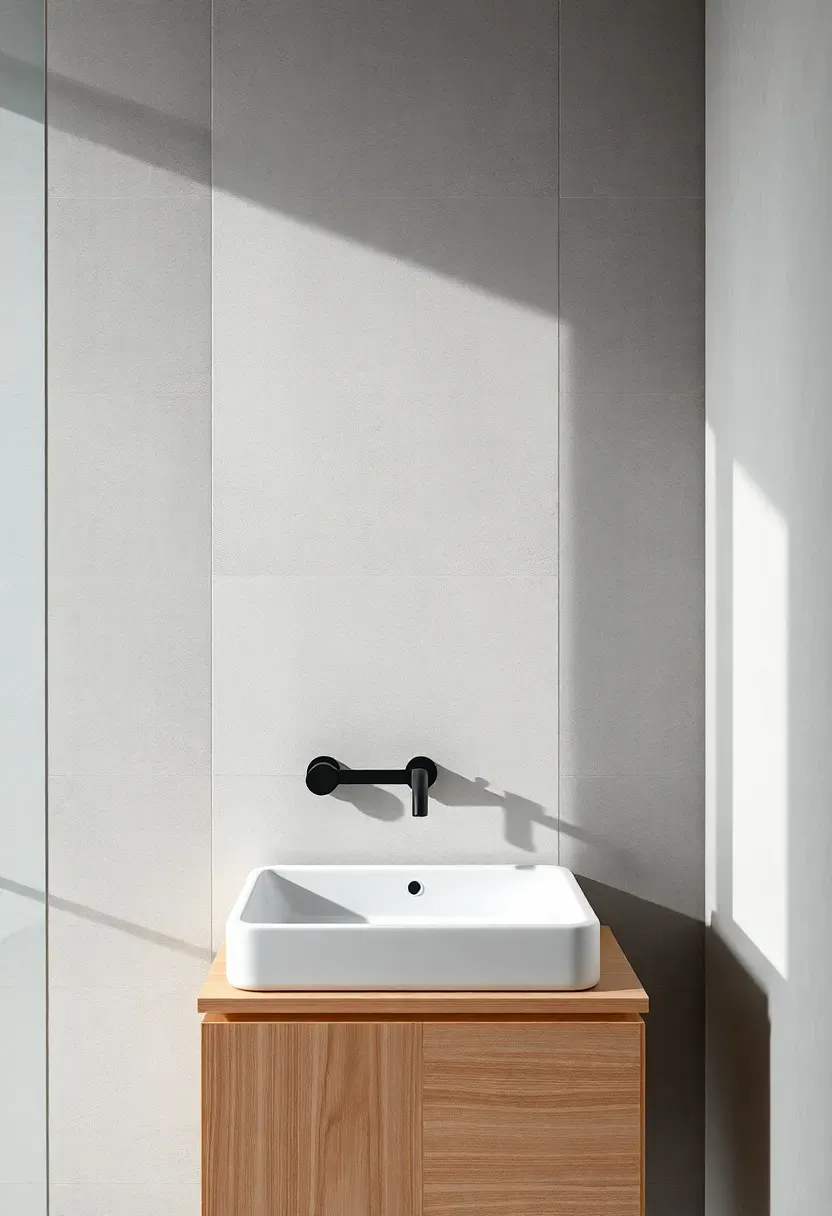
12. Concrete-Look Porcelain
Step 1: Select the Right Shade
Concrete-look porcelain comes in a range from near-white to dark charcoal. For a backsplash, lighter shades keep the space feeling open while still delivering that raw industrial edge. Look for tiles with subtle mottling rather than uniform color — real concrete is never perfectly even.
Step 2: Go Large Format
The whole point of concrete-look tile is to minimize visual interruptions. Choose the largest format your wall can accommodate — 24x48 or even 32x64 inch panels. Fewer grout lines mean a more convincing concrete appearance. Rectified edges allow for minimal grout joints, sometimes as narrow as 1/16 inch.
Step 3: Keep Fixtures Simple
Concrete-look surfaces pair best with matte black or brushed stainless hardware. Chrome can look out of place against the industrial texture. Wall-mounted faucets that emerge directly from the tile surface reinforce the minimalist aesthetic.
What to Watch Out For
- Large-format tile requires a perfectly flat wall; lippage is unforgiving at this scale
- These tiles are heavy; ensure your wall backing can support them
- Transport carefully — corners chip easily on large porcelain panels

Recommended
Items for this idea
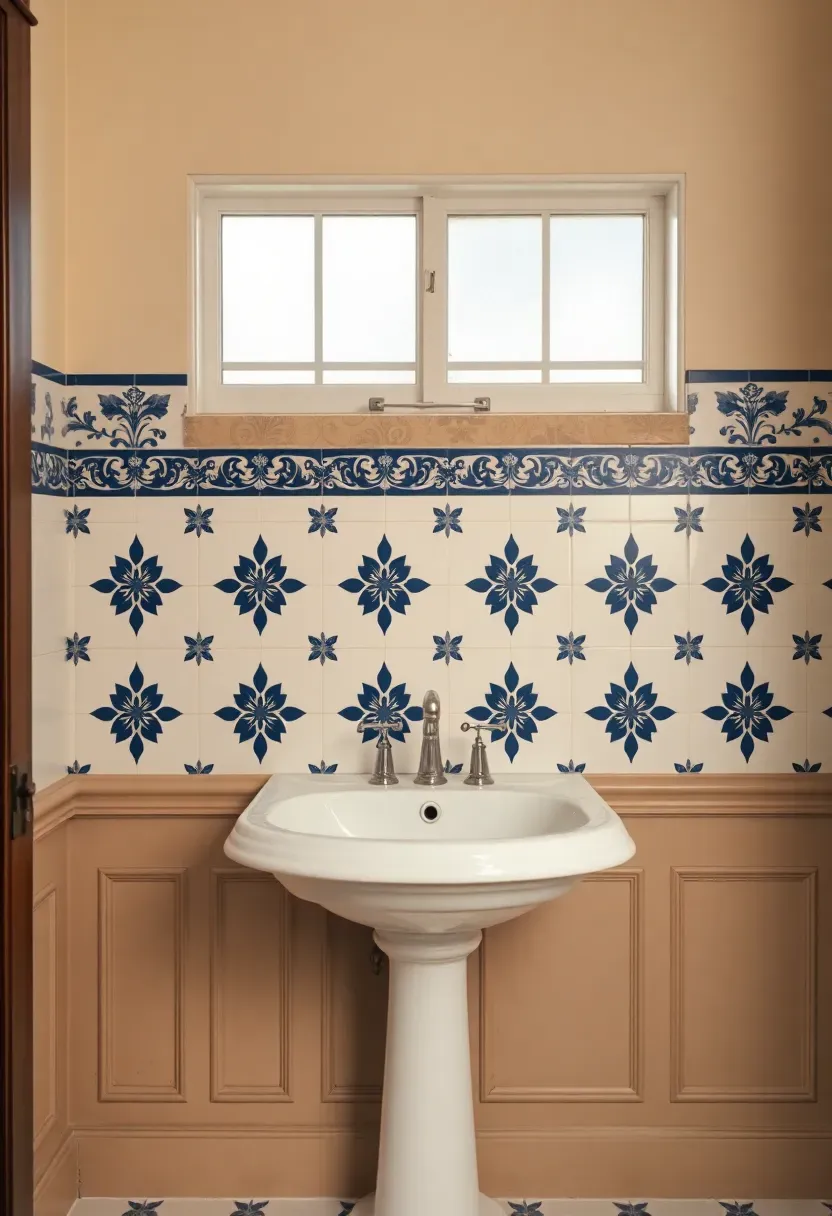
13. Bold Patterned Cement Tile
Cement tile — sometimes called encaustic tile, though technically different — carries pigment through its full thickness rather than just on a glazed surface. The patterns are pressed into the tile during manufacturing, which gives them a depth and matte richness that printed ceramic cannot replicate. Behind a bathroom vanity, a bold geometric cement tile pattern turns the backsplash into the room's primary design feature. Moroccan, Portuguese, and Mexican traditions each offer distinct pattern vocabularies ranging from intricate florals to stark geometry. The trade-off is maintenance: cement tile is porous and requires sealing before grouting, after grouting, and periodically thereafter.
Tips
- Seal before grouting — unsealed cement tile absorbs grout pigment permanently
- Use a penetrating sealer, not a topical one, to maintain the matte finish
- Keep the rest of the bathroom simple; patterned cement tile needs visual breathing room
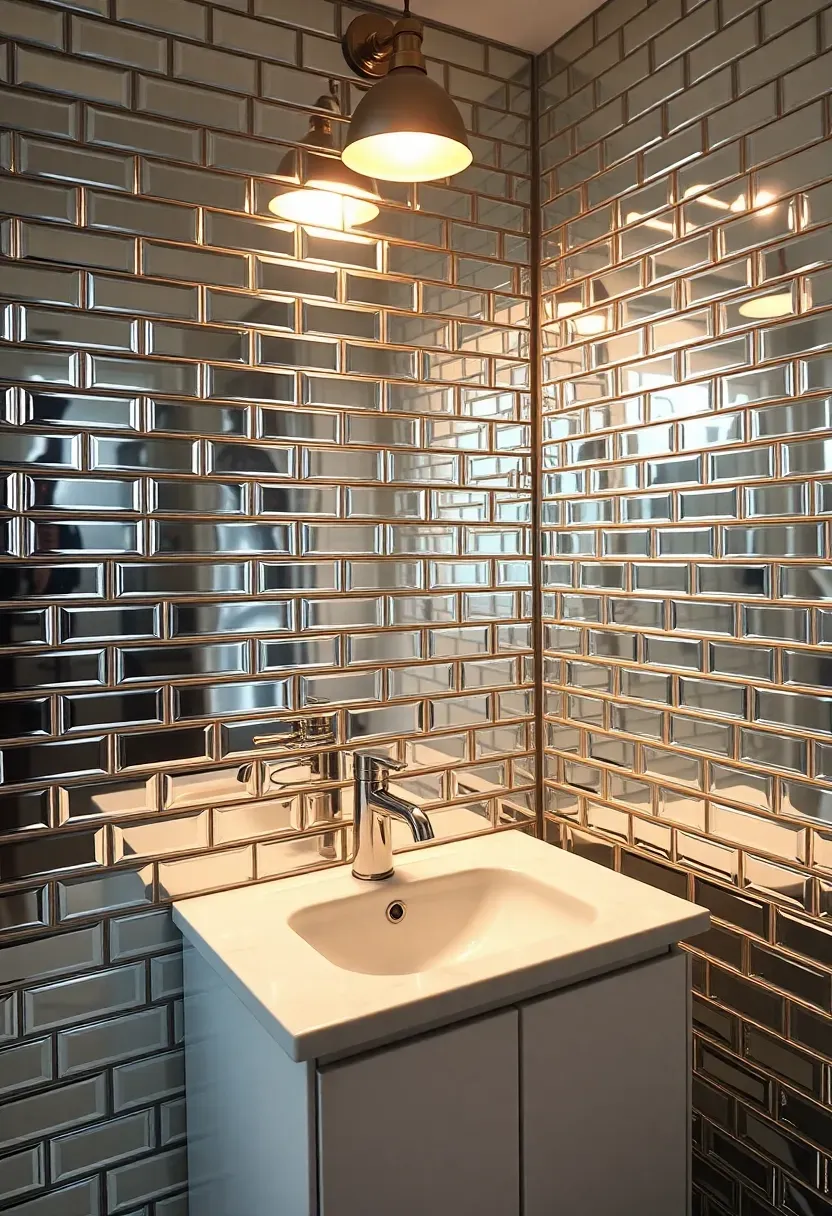
14. Beveled Mirror Tile
Mirror tile works double duty in a bathroom. It protects the wall from water while making the space appear roughly twice its actual size. The beveled edges on each piece catch light and create a subtle frame effect that distinguishes it from a plain mirror. Installed in a running bond pattern behind the vanity, beveled mirror tile generates an Art Deco quality that feels glamorous without the fuss of ornate fixtures. The material is especially effective in small bathrooms or powder rooms where every square inch of visual expansion counts. Installation requires mirror mastic rather than standard thinset — regular adhesives can damage the reflective backing.
Tips
- Use mirror-specific adhesive only; standard thinset will corrode the silver backing
- Clean with glass cleaner and a lint-free cloth — paper towels leave fibers on the surface
- Consider antique mirror tile for a softer, less reflective variation that hides water spots better

Recommended
Items for this idea
15. Handmade Ceramic in Earthy Glaze
The Core Issue
Mass-produced tile achieves consistency at the cost of character. Every piece is identical, every surface is flat, and the result can feel sterile in a bathroom that is supposed to be a personal space.
The Solution
Handmade ceramic tile fixes this. Each piece carries the marks of its maker — slight warping, glaze pooling at edges, brush strokes visible beneath the surface. In earthy tones like olive, ochre, burnt sienna, and clay, these tiles create a backsplash that feels like it belongs in a Tuscan farmhouse or a Japanese pottery studio. The imperfections are the design. Pair them with natural materials — stone countertops, wooden vanities, brass fixtures — and the bathroom gains a warmth that machine-made products struggle to deliver.
Pros and Cons
Pros: unique character in every tile, rich glaze depth, ages beautifully, supports small makers Cons: higher cost per square foot, irregular thickness complicates installation, limited availability requires advance ordering
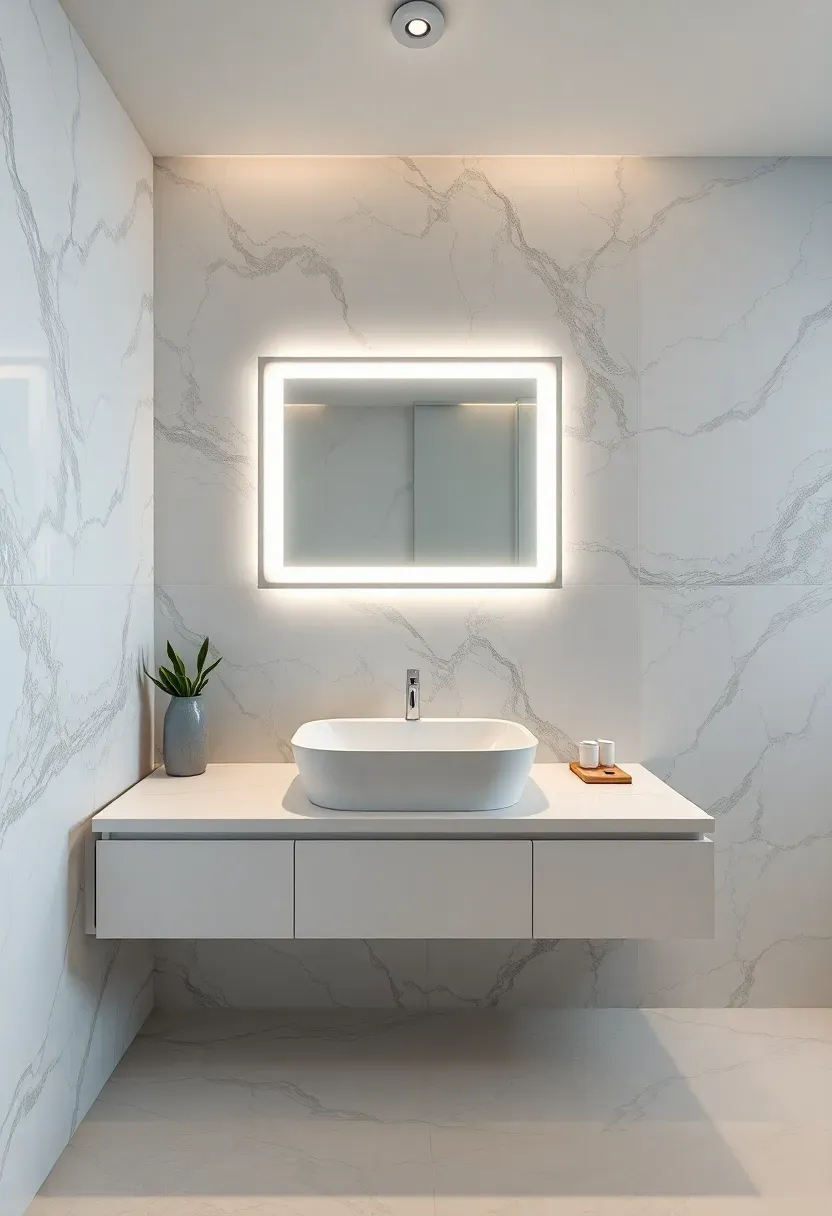
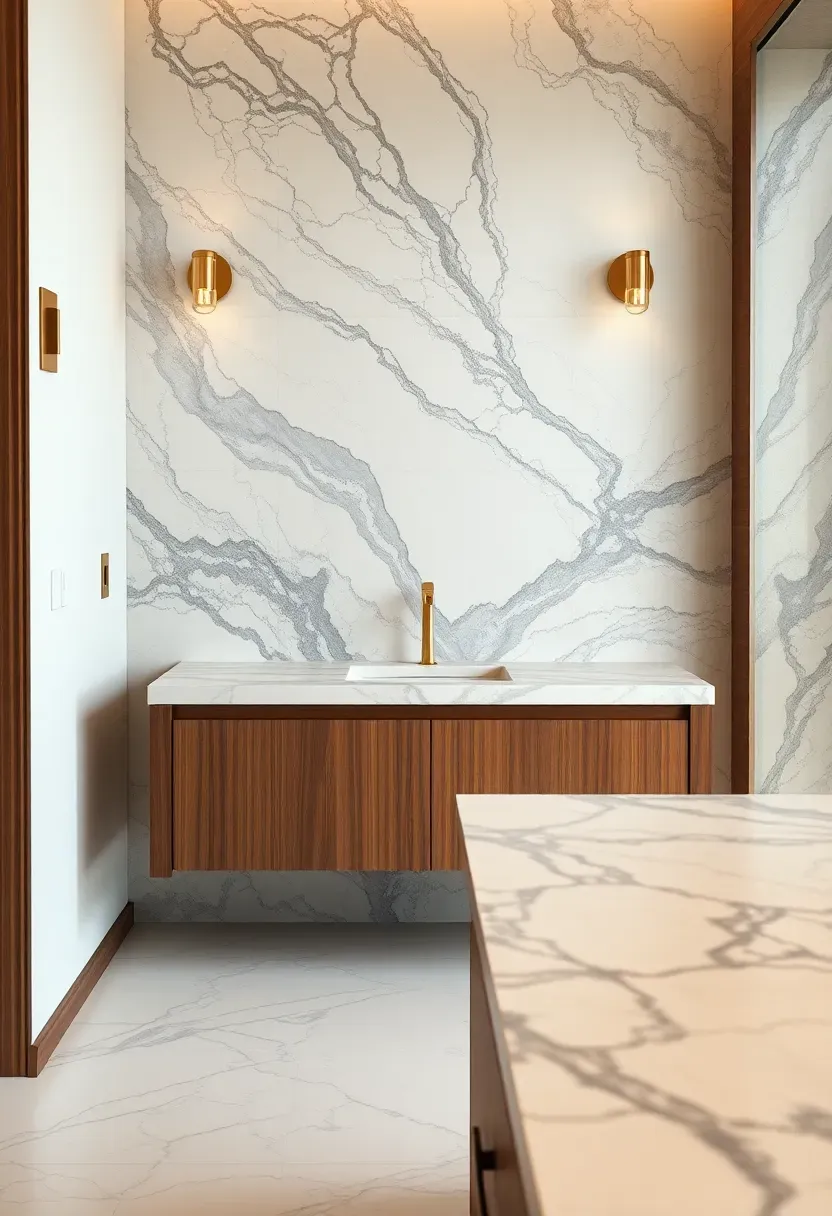
16. Full-Height Porcelain Slab
Porcelain slab technology has made it possible to get the look of marble, concrete, or onyx in a completely non-porous, maintenance-free format. Slabs come as large as 5x10 feet, which means a typical vanity backsplash requires a single piece with no seams and no grout. The surface resists staining, does not need sealing, and holds up to any bathroom chemical you might use. Compared to natural marble, porcelain slab costs less, weighs less, and requires no ongoing maintenance. The trade-off is that even the best porcelain replica lacks the depth and luminosity of real stone — but in a bathroom where practicality matters as much as appearance, that compromise makes sense for most homeowners.
Tips
- Hire a professional fabricator — porcelain slab cutting and handling requires specialized equipment
- Book-match two slabs for a symmetrical veining pattern that reads as a single continuous stone
- Choose a matte or soft-touch finish rather than high-gloss; it hides water spots and fingerprints
Recommended
Items for this idea
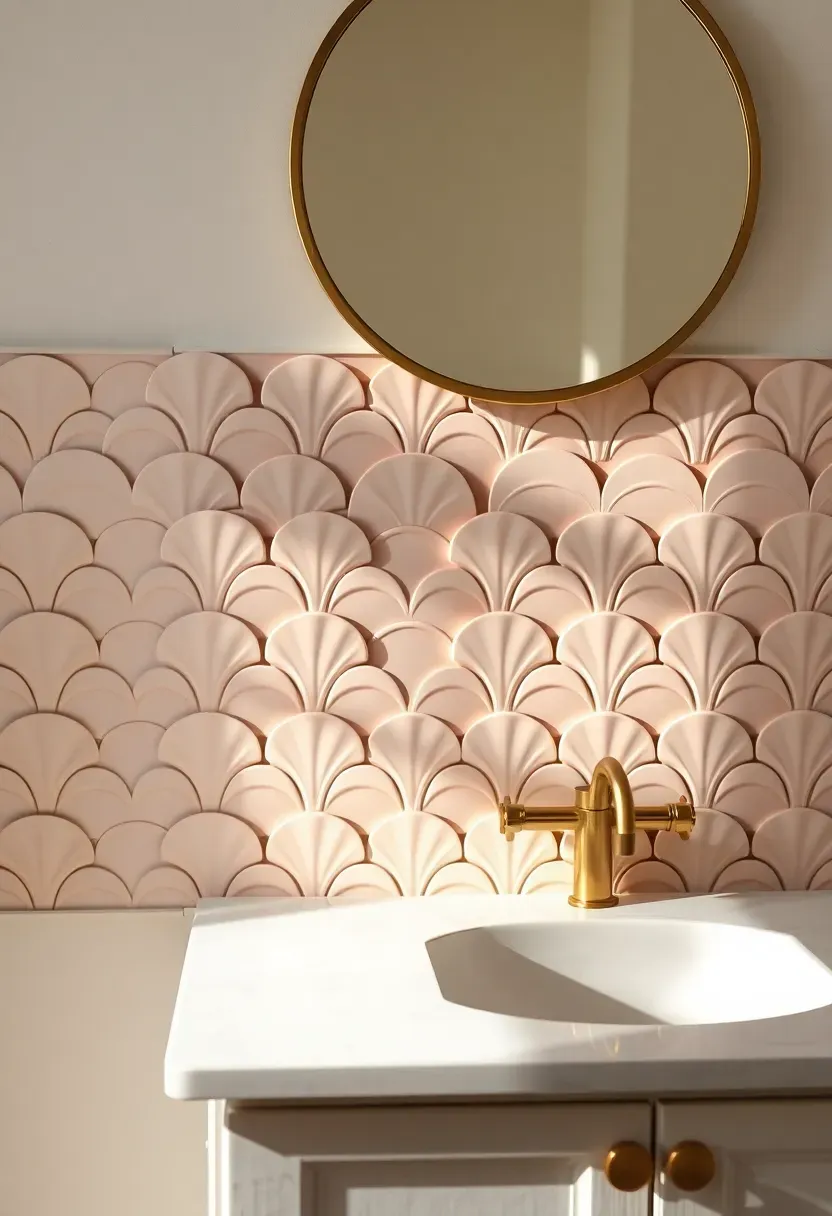
17. Scallop Fan Tile
Scallop tile — also called fish scale or fan tile — introduces curves into a space dominated by right angles. The rounded shape softens the geometry of countertops, mirrors, and cabinetry, creating a visual rhythm that feels organic and playful. In a bathroom backsplash, scallops work particularly well because the scale of the tile matches the scale of the vanity area. Each row overlaps the one below it, producing a layered effect reminiscent of roof tiles or fish scales. The shape has roots in Art Nouveau and Mediterranean architecture, lending historical weight to what might otherwise feel like a trend-driven choice.
Tips
- Start installation from the bottom and work up — gravity helps seat each overlapping row
- Grouting scallop tile takes patience; the curved edges create irregular joint widths
- Neutral colors let the shape do the talking; busy colors and busy shapes compete with each other
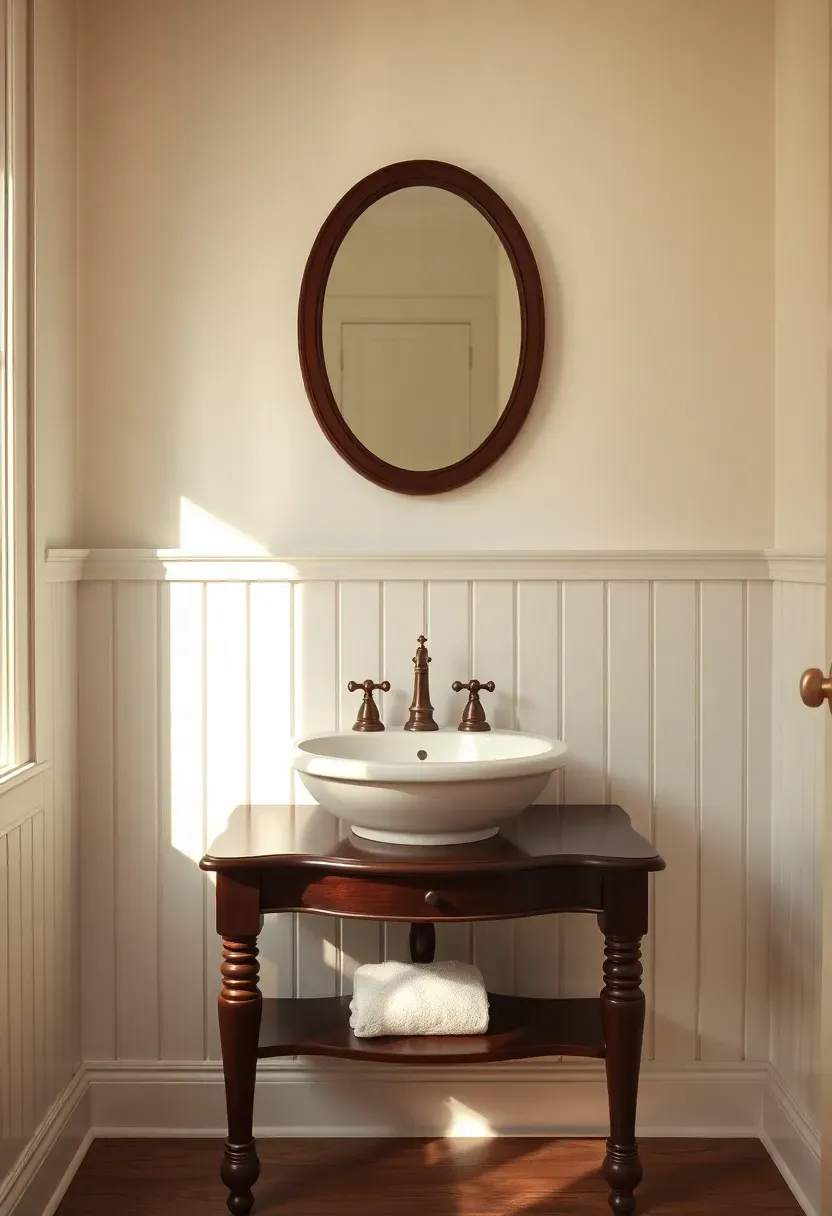
18. Beadboard Wainscoting
Not every backsplash needs to be tile. Beadboard — those narrow planks with a routed groove running down the center — has protected bathroom walls in New England homes since the 1800s. It is affordable, easy to install with basic carpentry skills, and provides a texture that painted drywall lacks. The vertical grooves add visual height and cast thin shadow lines that give the wall dimension. Paint it with a semi-gloss or high-gloss bathroom-rated paint and the surface handles splashes from the sink without issue. Where beadboard fails is in direct shower zones; it is strictly a vanity-area or wainscoting treatment. Keep it below the chair rail line for the most traditional look, or run it floor to ceiling for cottage character.
Tips
- PVC beadboard panels are completely waterproof and look identical to wood once painted
- Caulk the joint where beadboard meets the countertop to prevent water from seeping behind
- White is classic, but a deep navy or sage green beadboard adds unexpected personality
Recommended
Items for this idea
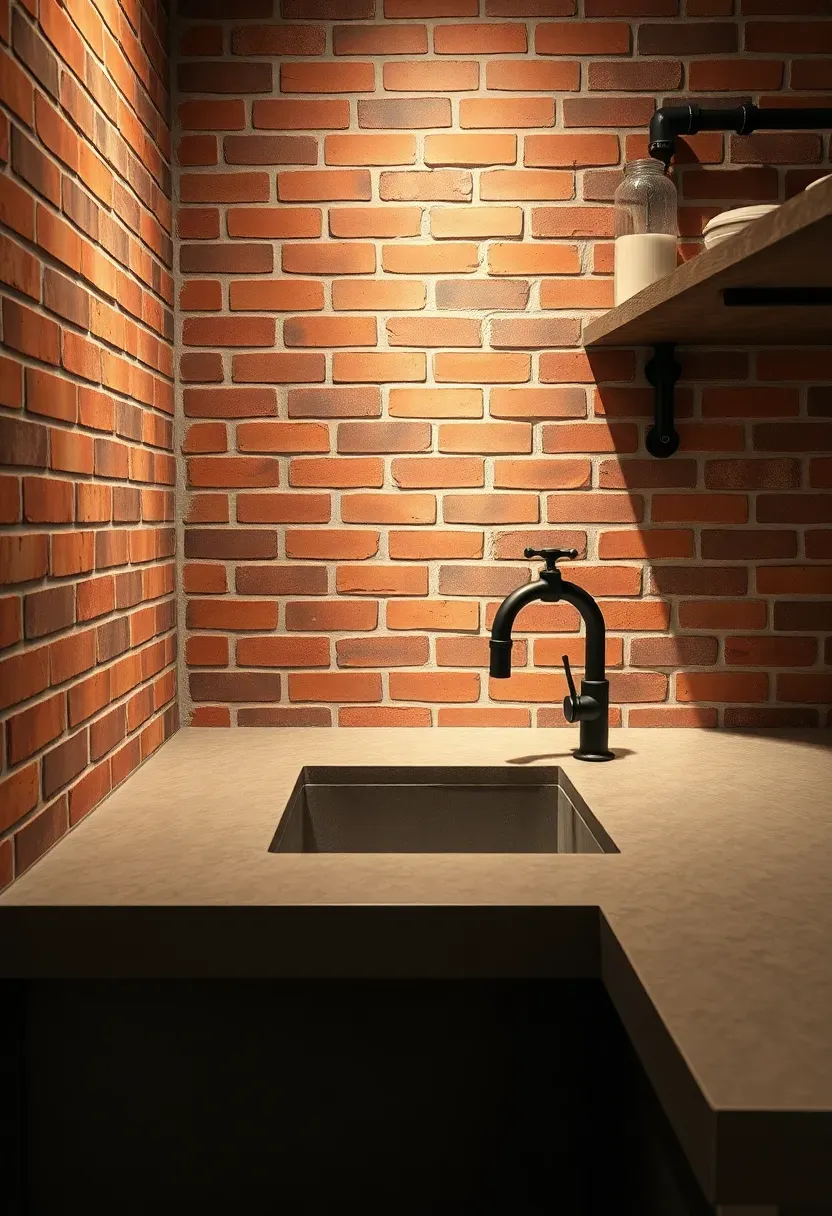
19. Thin Brick Veneer
Step 1: Select Your Brick Style
Thin brick veneer comes in dozens of profiles — from clean modern pressed brick to weathered reclaimed looks. For a bathroom, lighter-colored bricks keep the space feeling open. Darker, more textured bricks suit larger bathrooms or powder rooms where a moody atmosphere is the goal.
Step 2: Prepare the Wall
Apply a scratch coat of modified thinset to the wall surface, creating a rough base for the brick to grip. Some thin brick products come with adhesive backing, but a thinset application gives a stronger, more permanent bond in wet environments.
Step 3: Install with Proper Spacing
Set bricks with consistent 3/8-inch mortar joints. Use spacers to maintain alignment. After the thinset cures, fill joints with mortar using a grout bag, then tool the joints with a concave jointer for a professional finish.
What to Watch Out For
- Thin brick is porous — seal it thoroughly before use in a bathroom
- The textured surface catches dust; plan for occasional brushing with a soft bristle brush
- Mortar color dramatically changes the final appearance; test samples before committing
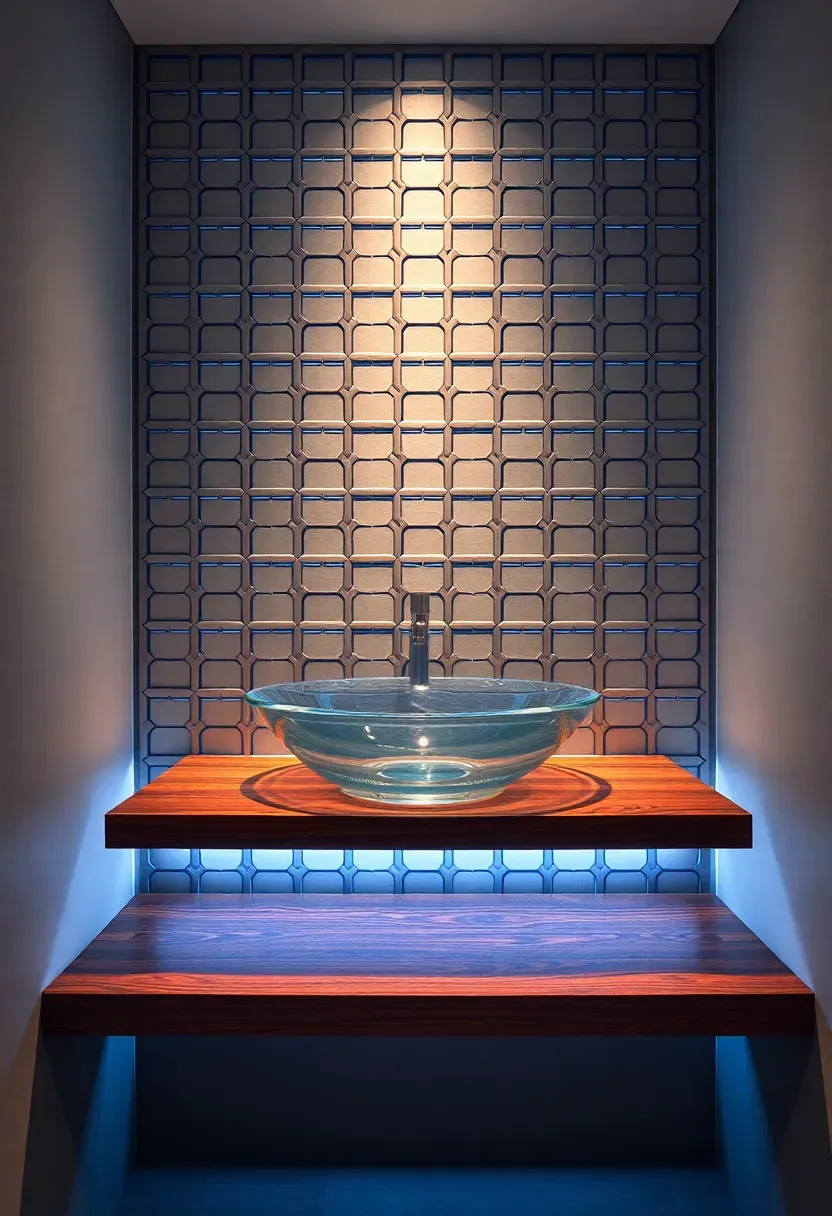
20. Geometric Laser-Cut Metal
Metal backsplash panels bring a material to the bathroom that most people associate exclusively with kitchens. Laser-cut geometric patterns — hexagons, chevrons, interlocking circles — add visual complexity while the metal itself provides a completely waterproof, mold-resistant surface. Stainless steel reads as modern and industrial. Brass or copper develops a patina over time that adds character. Aluminum stays lightweight and resists corrosion. These panels typically mount with construction adhesive directly to the wall and require no grout, no sealing, and minimal maintenance beyond occasional polishing.
Tips
- Matte or brushed finishes hide water spots and fingerprints better than polished mirror finishes
- Ensure the panel sits flush with the countertop to prevent water from pooling at the joint
- Combine with warm materials like wood or leather to prevent the bathroom from feeling cold
Recommended
Items for this idea
21. Encaustic Tile with Border
Encaustic tile takes on a different dimension when you add a border row. The main field establishes the pattern — a geometric repeat, a floral motif — while the border frames it like a piece of art on the wall. This approach comes directly from Victorian and Edwardian interiors, where decorative tile was treated as seriously as wallpaper or molding. In a bathroom, the border gives the backsplash a defined beginning and end rather than letting it trail off into blank wall. The combination works especially well in powder rooms and half bathrooms where the backsplash area is compact enough to appreciate the detail up close.
Tips
- Order border tiles from the same manufacturer as the field tiles to ensure thickness matches
- Lay out the entire pattern dry on the floor before starting wall installation
- Center the pattern on the vanity, not the wall, so it looks intentional from the primary viewpoint
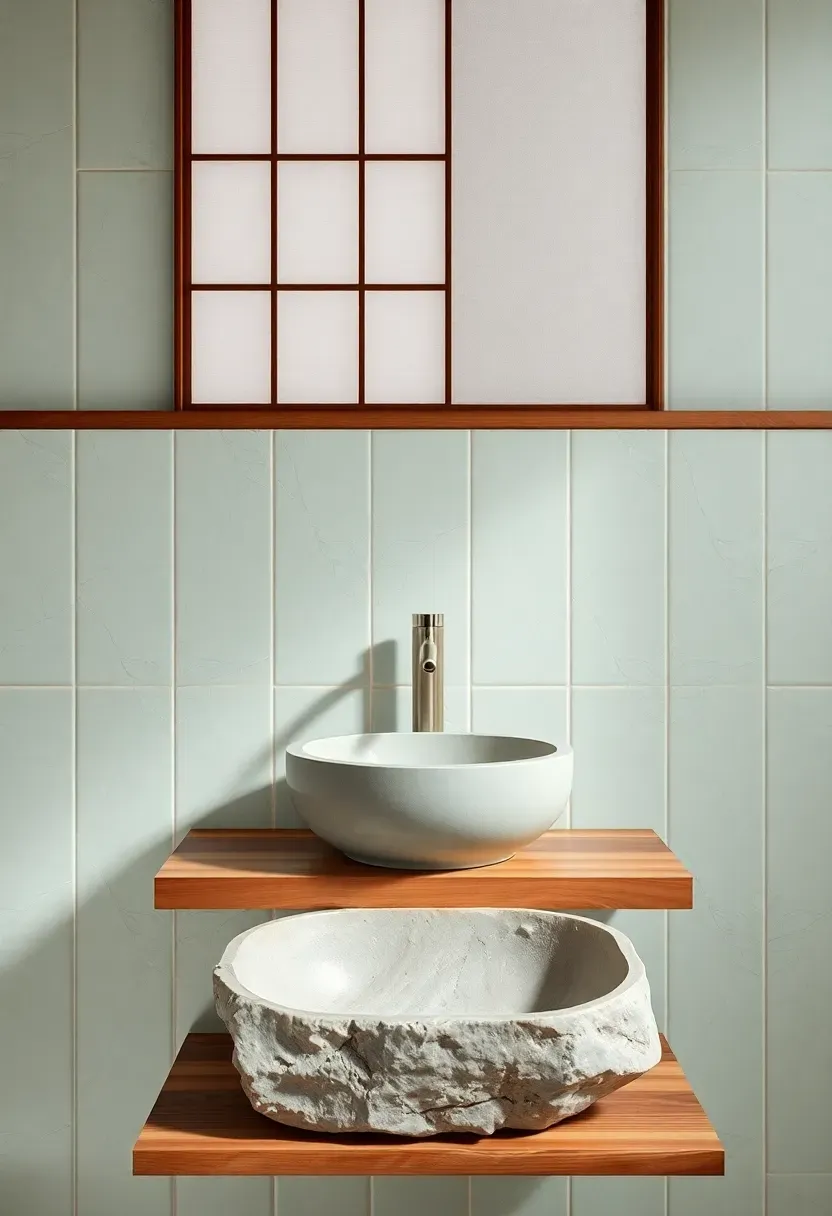
22. Japanese Wabi-Sabi Crackle Glaze
Crackle glaze, known as kannyu in Japanese ceramics, produces a web of fine lines across the tile surface that most Western manufacturers would consider a defect. In the wabi-sabi tradition, this controlled imperfection is the beauty. The crazing pattern develops during cooling when the glaze contracts at a different rate than the clay body beneath it. Each tile cracks differently, creating a one-of-a-kind surface that ages and deepens over time as the cracks accumulate trace minerals and natural patina. In pale celadon, cream, or ash gray, crackle glaze tiles produce a backsplash with the quiet depth of antique pottery. The aesthetic demands restraint elsewhere in the bathroom — simple shapes, natural materials, minimal hardware.
Tips
- Accept that the crackle lines will darken with age; this is the intended behavior, not deterioration
- Pair with simple matte fixtures and natural stone or wood surfaces
- Avoid harsh chemical cleaners that can discolor the exposed crackle lines prematurely
Recommended
Items for this idea
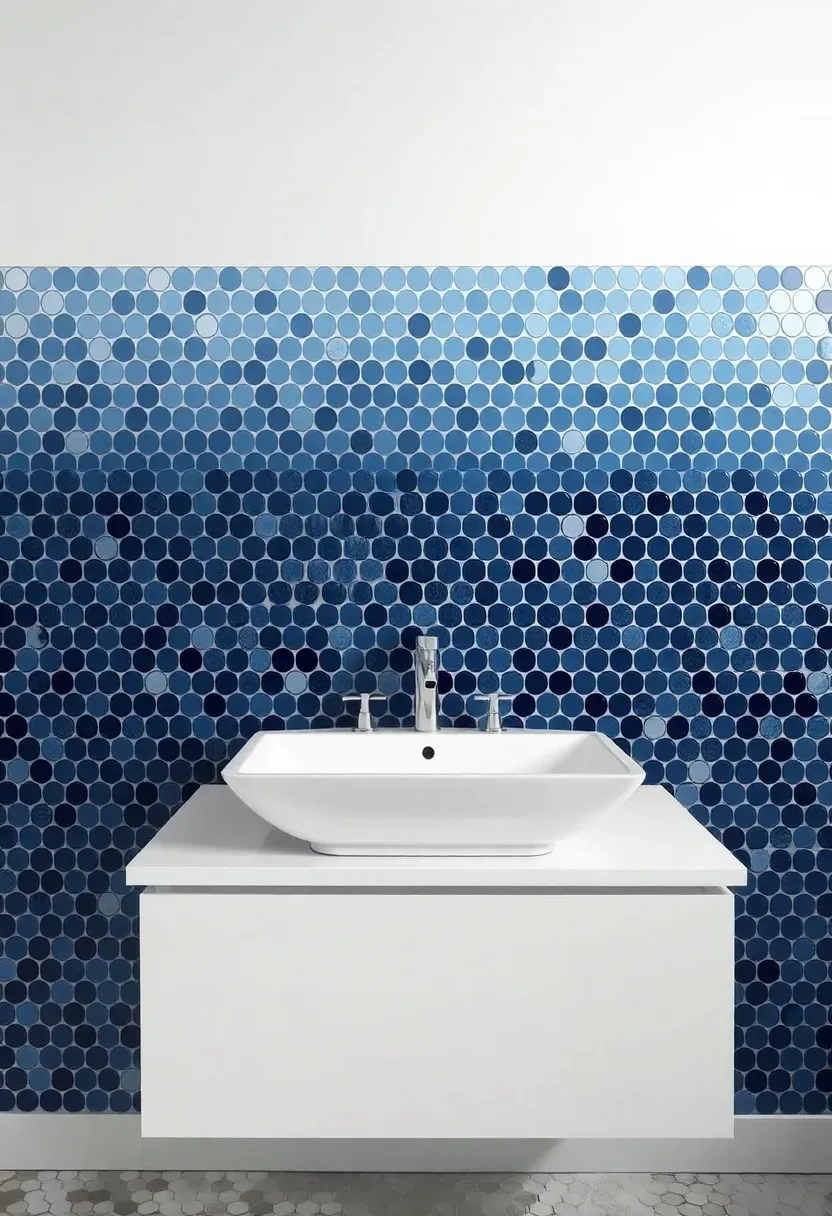
23. Penny Tile Ombre Gradient
Step 1: Source the Colors
An ombre effect requires four to six shades that transition smoothly from dark to light. Penny round tiles from manufacturers like Merola or SomerTile often offer coordinating colorways within the same product line. Lay the colors out in sequence before ordering to confirm the gradient reads naturally.
Step 2: Map the Transition Rows
On paper or digitally, plan exactly where each color transition happens. The shift should be gradual — blend colors in the transition rows by mixing tiles from adjacent shades rather than making hard cuts between colors. Each transition row should mix roughly 50/50 with its neighbors.
Step 3: Install Bottom to Top
Start with the darkest shade at the bottom. As you work upward, introduce the next shade according to your map. Keep mesh-backed sheets in labeled order to avoid confusion. The gradient reads best when the dark end is at counter level and the lightest tone meets the ceiling or mirror.
What to Watch Out For
- Different color glazes from the same manufacturer can have slightly different thicknesses — test fit before committing
- Photograph the dry layout before starting; it is nearly impossible to rearrange once thinset is applied
- Ombre works best on a single continuous wall; wrapping corners disrupts the gradient
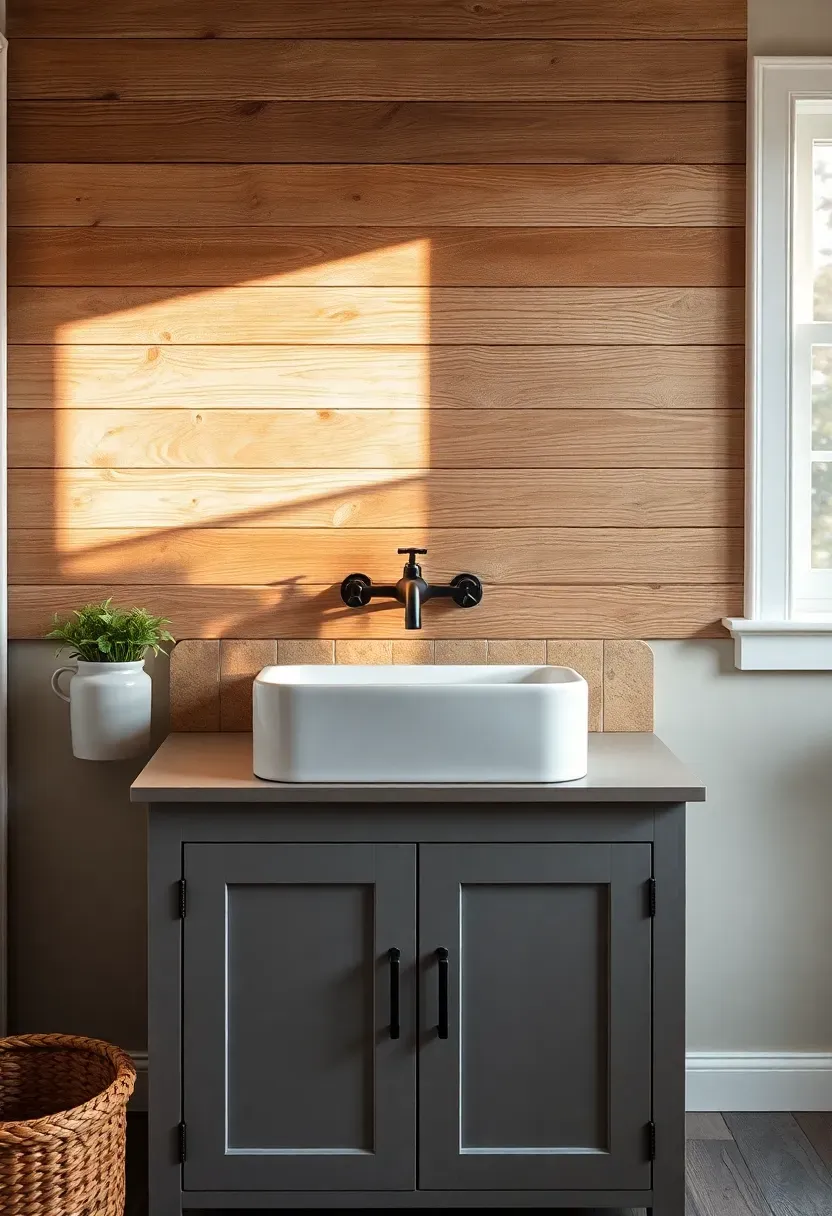
24. Reclaimed Wood with Sealant
Wood in a bathroom sounds like a terrible idea until you remember that boats are made of the stuff. The key is proper sealing. Reclaimed barn wood, pallet wood, or salvaged fence boards bring a texture and history that no manufactured product can match — nail holes, saw marks, weathering patterns, and color variations that took decades to develop. Mounted behind a vanity and sealed with a marine-grade polyurethane or epoxy, reclaimed wood becomes a waterproof backsplash with genuine character. The rough surface adds acoustic warmth too, softening the hard echoes that tile-heavy bathrooms tend to produce.
Tips
- Apply three coats of marine-grade polyurethane minimum, sanding lightly between coats
- Check reclaimed wood for lead paint, especially from pre-1978 structures
- Leave a small gap between the wood and the countertop for caulk; wood expands with humidity changes
Recommended
Items for this idea
25. Tadelakt Plaster Finish
Tadelakt is a traditional Moroccan lime plaster that becomes waterproof through a process of polishing with river stones and treating with olive oil soap. The result is a smooth, undulating surface with a soft sheen that looks like nothing else — not quite stone, not quite plaster, but something organic that invites touch. Unlike tile, tadelakt has no seams, no grout lines, and no hard edges. It flows around corners and curves naturally. Behind a bathroom vanity, tadelakt creates a seamless backsplash that connects visually to the wall above it, erasing the boundary between functional surface and decorative finish. The application is labor-intensive and requires a skilled plasterer, but the result justifies the cost in bathrooms where you want something genuinely distinctive.
Tips
- Hire an experienced tadelakt applicator — the technique requires specific timing and pressure
- Tadelakt cannot be patched invisibly; protect the surface during any adjacent construction work
- Reapply olive oil soap treatment annually to maintain the water-resistant surface
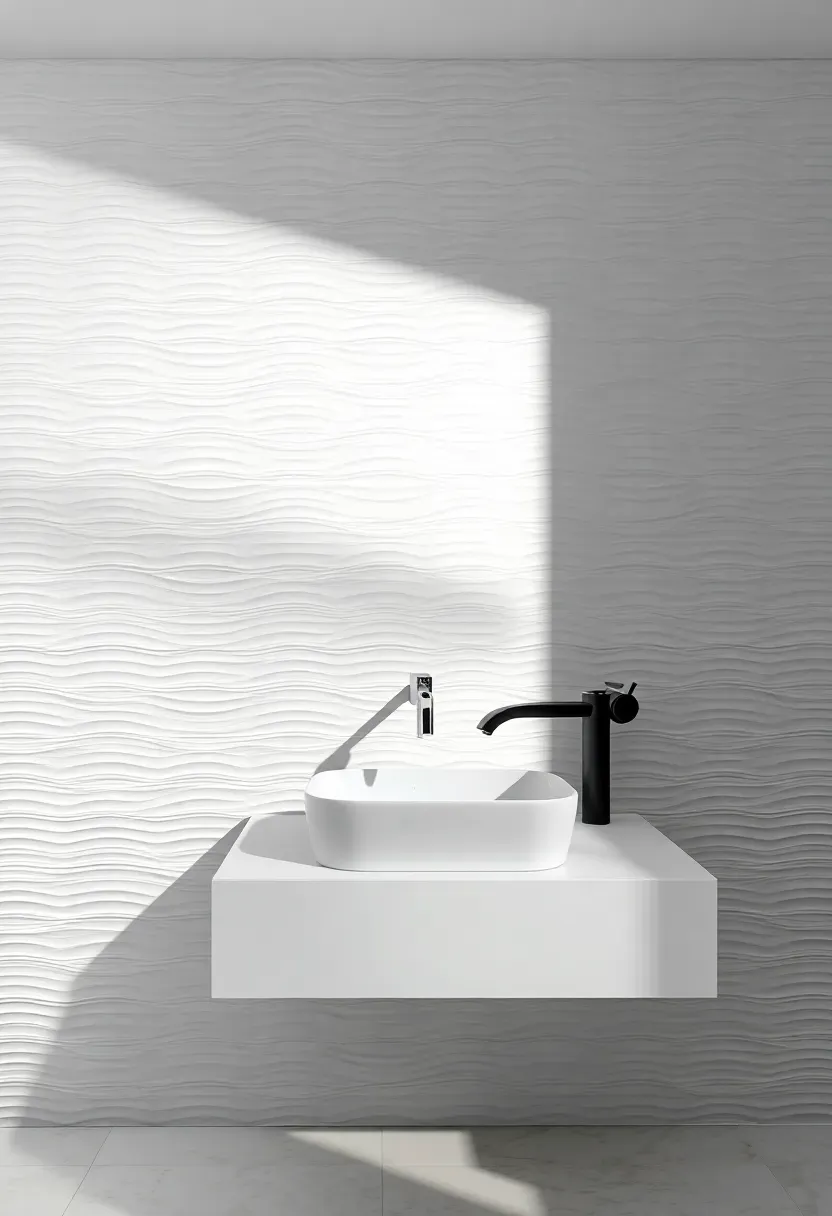
26. Large-Format Textured Tile
The Core Issue
Flat tile backsplashes can look lifeless in bathrooms with limited natural light. Without direct sunlight hitting the surface, glazed tile can appear dull and one-dimensional, especially in interior bathrooms or powder rooms without windows.
The Solution
Three-dimensional textured tiles solve this problem by creating their own light and shadow. Ribbed, wave-pattern, or geometric relief tiles catch even the weakest ambient light and turn it into surface interest. Large-format versions — 12x24 inches or bigger — reduce grout lines while maximizing the sculptural effect. In white or neutral tones, the texture becomes the design element rather than color or pattern. The result is a backsplash that changes appearance based on lighting angle, time of day, and fixture placement, keeping the surface visually active even in a windowless bathroom.
Pros and Cons
Pros: creates visual interest without color, works in low-light bathrooms, minimal grout lines, tactile quality Cons: textured surfaces trap dust and require more cleaning effort, difficult to cut cleanly, higher cost than flat tile
Recommended
Items for this idea
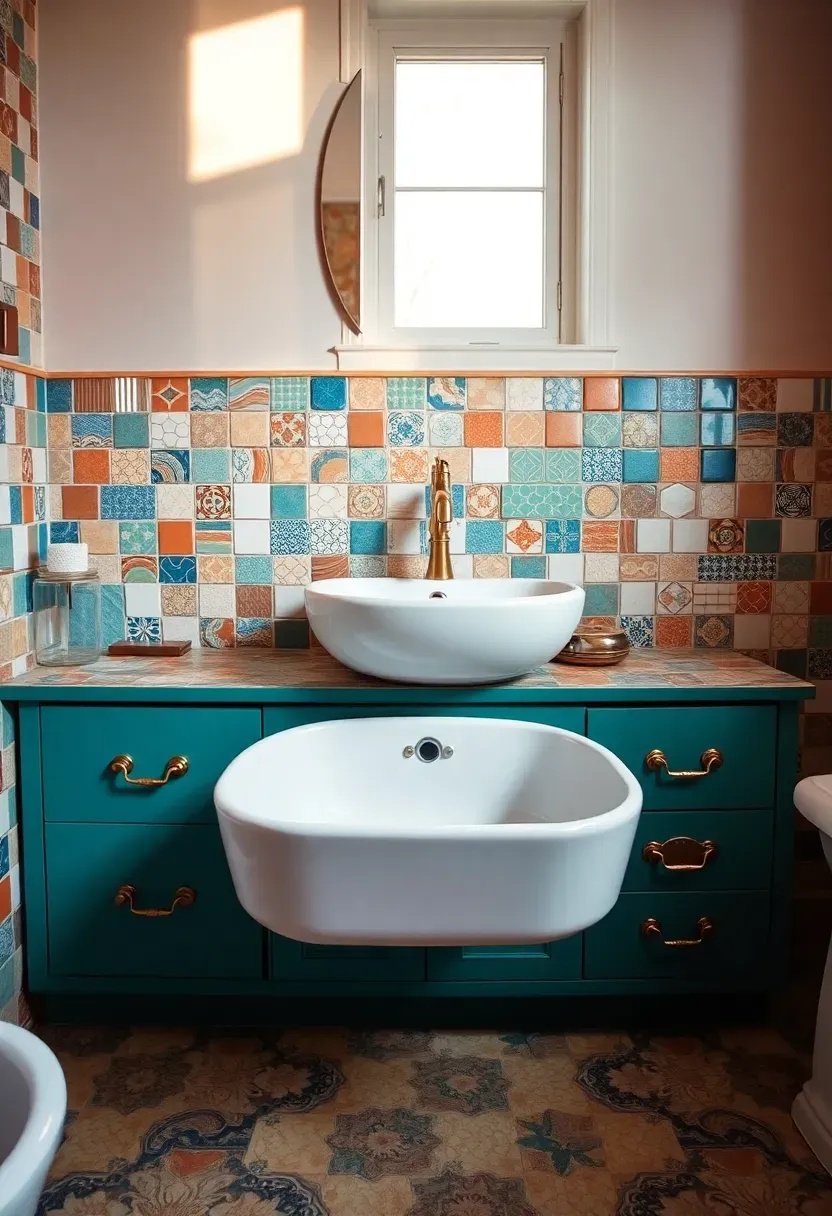
27. Mixed Material Patchwork
The rules say your backsplash should be one material, one pattern, one cohesive design. Patchwork backsplashes break every one of those rules and somehow work. The concept is simple: combine leftover tiles from other projects, thrift store finds, sample tiles from showrooms, and intentional purchases into a backsplash that tells a story. The key to making patchwork look intentional rather than chaotic is maintaining consistent grout width and keeping the color palette within a defined range — even randomness needs some constraint. This approach works especially well in bohemian, eclectic, or maximalist bathrooms where personality outweighs polish. It is also the most sustainable option on this list, since it gives new life to materials that would otherwise end up in a landfill.
Tips
- Sort tiles by thickness before starting — you will need to adjust thinset depth for each piece
- Maintain a consistent grout joint width throughout; this single element unifies the patchwork
- Step back frequently during layout to check overall balance of color and pattern distribution
Quick FAQ
Do bathroom backsplashes need to be waterproof? Water-resistant is the minimum. Behind a vanity sink, splashes are light and intermittent, so materials like sealed wood and plaster can handle the exposure. Behind a bathtub or shower, you need fully waterproof materials like glazed tile, glass, or porcelain with proper waterproof membrane beneath.
How high should a bathroom backsplash go? Standard height is 4 to 6 inches above the countertop. Full-height backsplashes that reach the mirror or ceiling create a more finished, dramatic look and offer better wall protection. There is no wrong answer — it depends on your budget and how much visual impact you want.
Can I install a backsplash over existing tile? Yes, if the existing tile is firmly bonded and flat. Rough up the old surface with sandpaper, apply a bonding primer, then set new tile over it. This avoids the mess and expense of demolition. The wall will be slightly thicker, which can affect outlet box depth and trim alignment.
What is the most budget-friendly bathroom backsplash option? Peel-and-stick tiles cost under $50 for a typical vanity backsplash and require no tools. For a permanent solution, basic white ceramic subway tile runs about $2-4 per square foot and covers a vanity backsplash area for under $30 in materials.
Is grout color really that important for a backsplash? It changes the entire look. White grout on white tile disappears, creating a seamless surface. Dark grout on the same white tile outlines every piece, turning the layout into a bold graphic pattern. Matching grout to tile minimizes the grid; contrasting grout emphasizes it. Test your combination on a sample board before committing to the full wall.
A backsplash is one of those rare projects where the effort-to-impact ratio heavily favors doing it. A few square feet of well-chosen material can define the character of an entire bathroom. Start with what your walls actually need — moisture protection, visual weight, a focal point — and work backward from there to find the right material. The 27 options above cover a range from under $50 peel-and-stick solutions to custom tadelakt plaster, so budget does not have to be the limiting factor. Pick the one that fits your bathroom and your willingness to maintain it, and get started.
Pinterest cover for 27 Bathroom Backsplash Ideas That Actually Hold Up
About the author
OBCD
CGI visualization and interior design content. We create detailed 3D renders and curate practical design ideas for every room in your home.