27 Bathroom Floor Ideas That Actually Last
The floor takes more abuse than any other surface in a bathroom. Splashes from the shower, drips from the tub, daily foot traffic, and constant temperature swings all fight against whatever you put down. The right material has to handle that punishment for ten or fifteen years without warping, staining, or feeling cold under bare feet at 6 a.m. Cheap vinyl can look great for a season and curl at the seams by year three. Real marble photographs beautifully but stains if you ignore a single drop of red wine. The 27 bathroom floor ideas below cover what genuinely works — from heated slate to renter-friendly vinyl plank — with the trade-offs spelled out so you can pick a floor that survives your real life, not just your Pinterest board.
Each idea includes material notes, installation difficulty, and styling cues so you can match the floor to your bathroom size, climate, and budget.
Table of Contents
- Hexagon Marble Mosaic Floor
- Large-Format Porcelain Slabs
- Herringbone Wood-Look Tile
- Penny Round Vintage Tile
- Pebble Stone Shower Floor
- Black and White Checkerboard
- Terrazzo Speckled Floor
- Heated Slate Tile
- Moroccan Cement Tile Pattern
- Subway Tile on the Floor
- Concrete Microcement Floor
- Vinyl Plank for Renters
- Honed Travertine Tiles
- Bold Geometric Encaustic
- Wood and Tile Transition Border
- Matte Black Pebble Mosaic
- Limestone Tumbled Tiles
- Faux Wood Porcelain Planks
- Pink Terracotta Hex Tile
- Patterned Vinyl Sheet
- Granite Slab Flooring
- Mixed Material Mosaic Inlay
- Underfloor Heating with Tile
- Vintage Victorian Tile Pattern
- Brick-Look Tile Floor
- Oversized Marble Veined Tiles
- Cork Flooring for Bathrooms
1. Hexagon Marble Mosaic Floor
Marble hex sheets are the workhorse of high-end small bathrooms because the tiny grout lines double as built-in slip resistance. Standard 2-inch Carrara hex comes face-mounted on 12-by-12 sheets, so a single person can lay an entire powder room floor in an afternoon. Sealed marble shrugs off shampoo splashes, but you do need to wipe up anything acidic — citrus, wine, lemon cleaner — within a few minutes to avoid etching.
Tips
- Seal honed marble twice on day one, then once a year afterward
- Use a light grey unsanded grout for the cleanest joint look
- Cut sheets cleanly with a wet saw rather than nippers for a professional edge
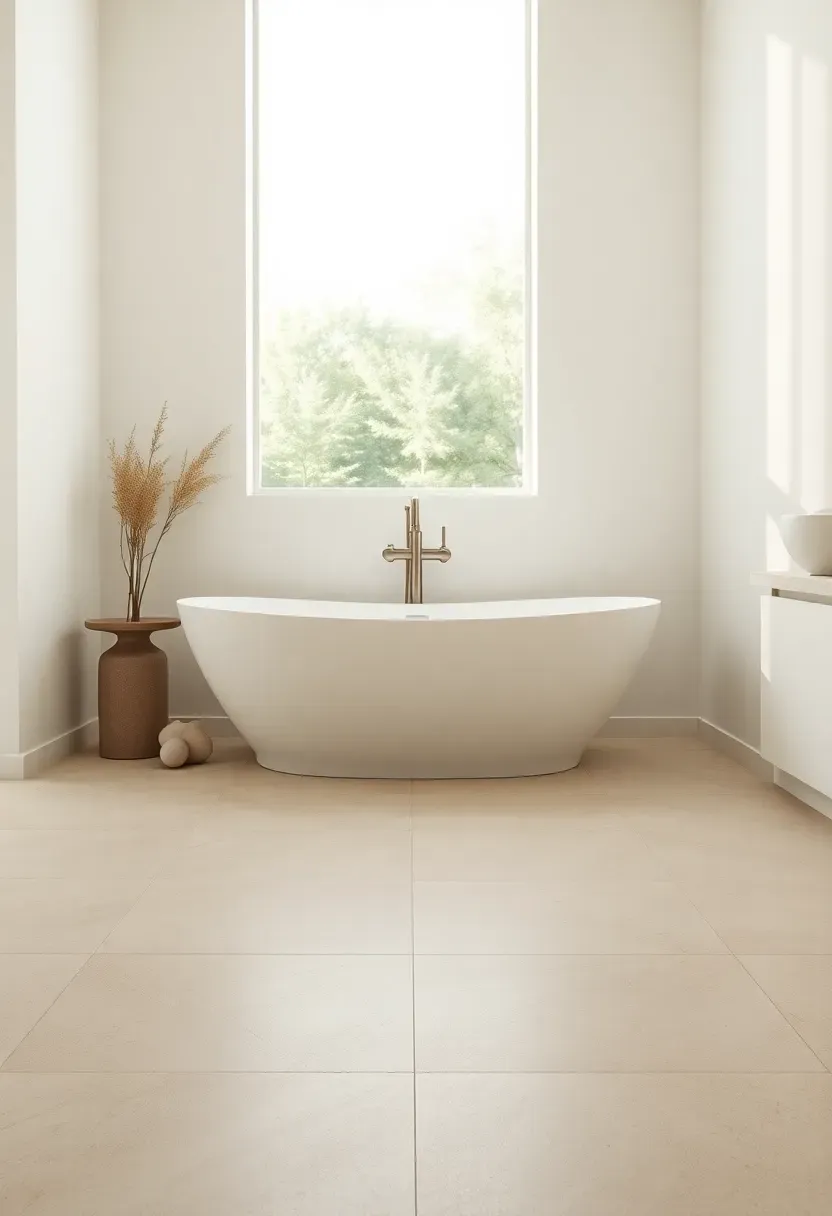
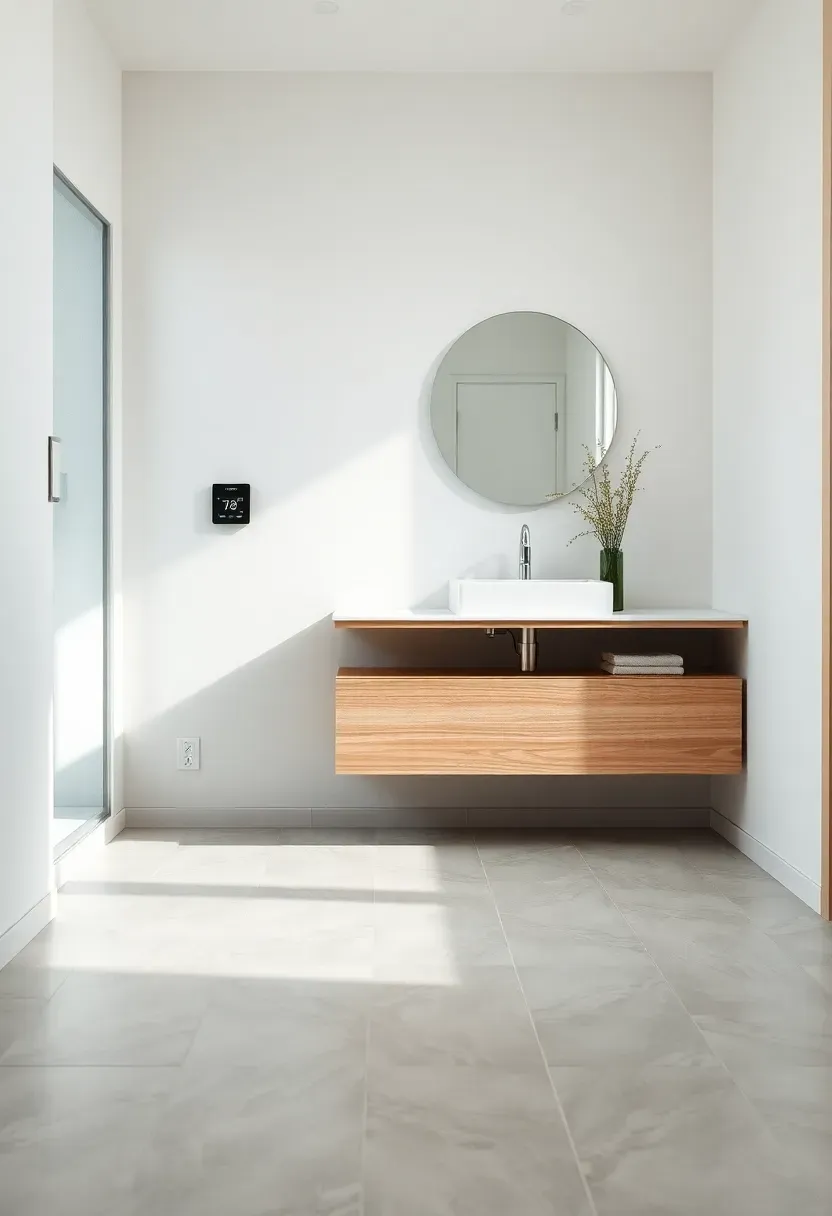
2. Large-Format Porcelain Slabs
Why It Works
Big tiles read calm. A 24-by-48 porcelain slab cuts grout joints down to a single faint line every two feet, which makes a tight 5-by-8 bathroom feel about thirty percent larger. The continuous surface also bounces light evenly, so the room looks brighter without adding fixtures.
Installation Approach
Large-format requires a flatter substrate than mosaic — you want under 1/8 inch deflection across ten feet. Most installers add a self-leveling underlayment before tiling. A back-buttering technique on each slab plus a 1/4-inch trowel on the floor prevents lippage. Budget professional installation here; DIY rarely lands flat.
Pros and Cons
Pros: visually expansive, fewer grout lines to clean, very durable Cons: demands flat substrate, heavier slabs need two people, professional cuts required
Recommended
Items for this idea
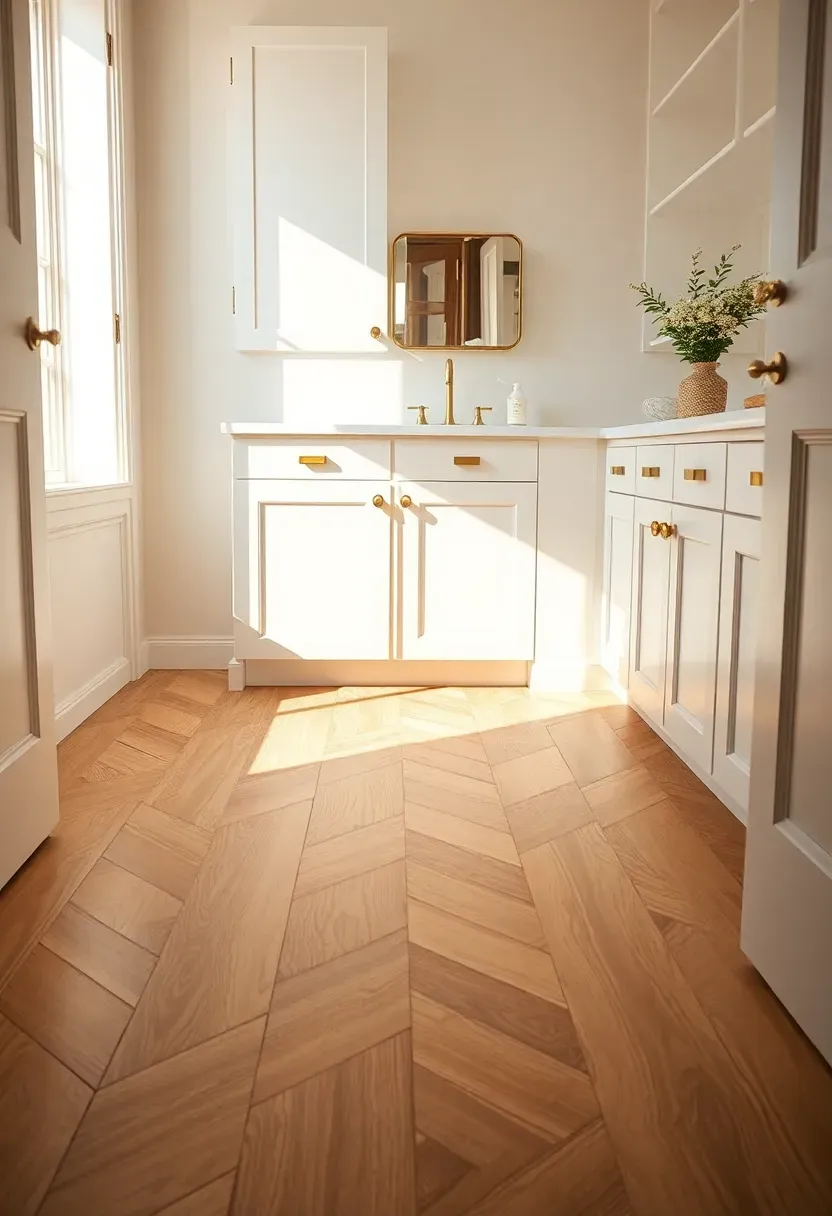
3. Herringbone Wood-Look Tile
Wood-look porcelain laid in a herringbone pattern gives you the warm visual of a parquet floor without the moisture problems real wood faces in a bathroom. Each plank typically measures 6 by 24 inches or 8 by 48, and the 90-degree zigzag adds movement that keeps the eye traveling across the floor. The pattern wastes about 12 to 15 percent more tile than a straight lay, so order accordingly.
Tips
- Snap chalk lines on the substrate before laying the first row to keep the pattern square
- Pick a grout that matches the lightest tone in the wood print so seams disappear
- Stagger plank cuts at room edges to maintain the herringbone rhythm
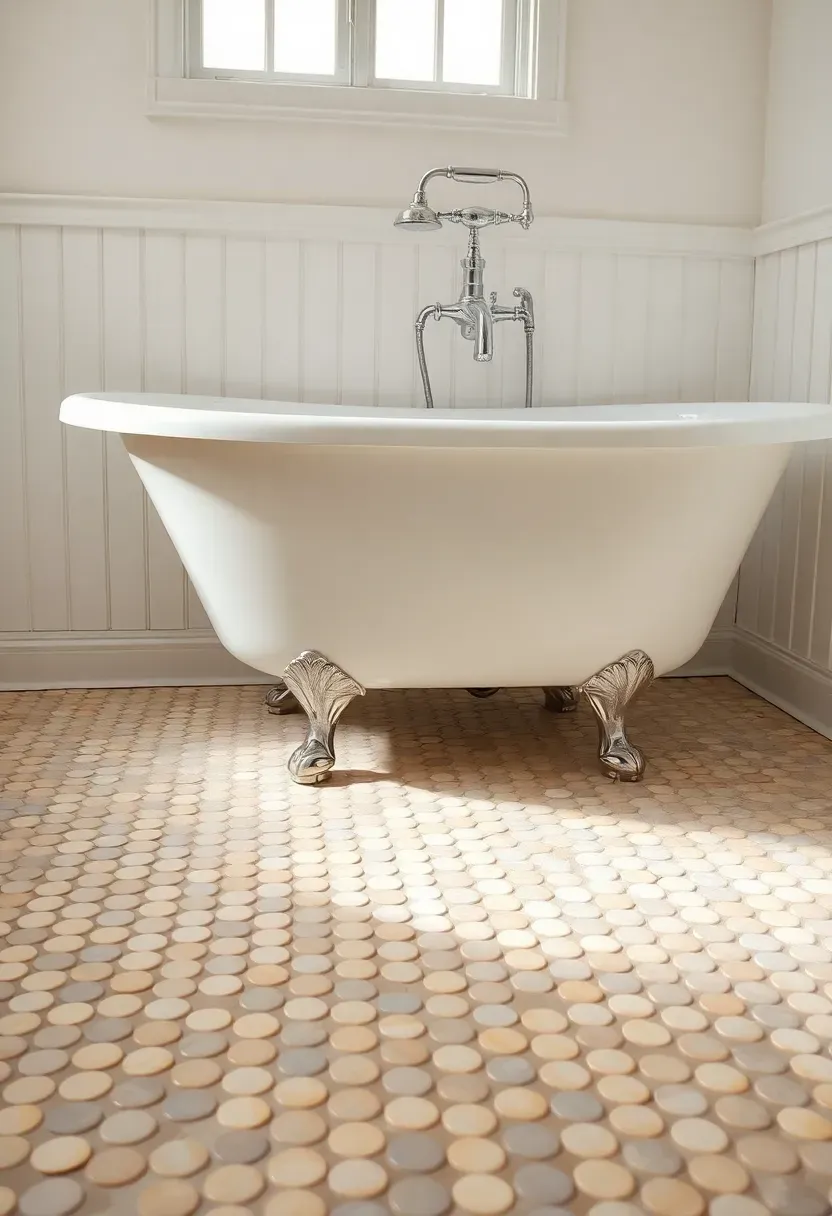
4. Penny Round Vintage Tile
Penny rounds belong to a specific era of American bathrooms — roughly 1905 to 1935 — and bringing them back gives a small bathroom an instant period feel. The dense circles pack more grout per square foot than any other tile shape, which actually translates to excellent traction even when wet. Most penny round sheets are 12 inches square with around 600 individual penny tiles per sheet.
Tips
- A pure white penny round with charcoal grout reads classic; cream with sand grout reads softer
- Plan for slightly more cleaning effort because of the grout density
- Use an epoxy grout if you want a maintenance-free penny round floor
Recommended
Items for this idea
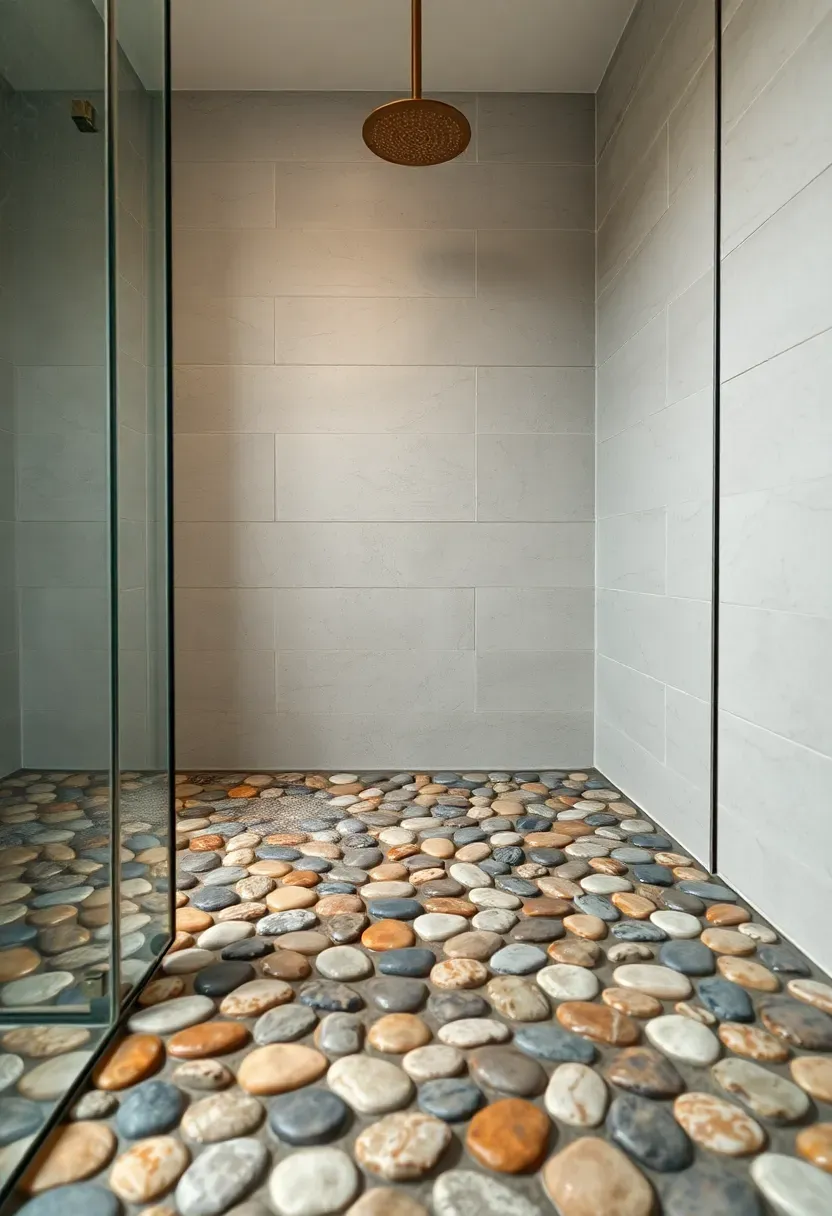
5. Pebble Stone Shower Floor
A pebble floor inside the shower stall reads like a riverbed underfoot — uneven in the best way, with each stone pressing into different spots on your soles. The rounded surface drains faster than flat tile because water sheets between the pebbles instead of pooling. Pre-mounted mesh sheets with sliced pebbles (flat backs, rounded tops) install easier than fully rounded river rock and offer better foot comfort.
Tips for Getting It Right
- Always pick sliced pebbles for showers — fully rounded ones trap water under the curve
- Use a pre-mixed sanded grout rated for variable joint widths
- Seal the entire pebble surface, including grout, every 18 months

6. Black and White Checkerboard
The Core Idea
A checkerboard floor is the most photographed tile pattern of the last century for a reason: the high-contrast grid grounds a bathroom no matter what's happening on the walls. Twelve-inch squares laid on a 45-degree diagonal feel grand; six-inch squares laid square-set feel diner-classic.
Modern Interpretation
Today's checkerboard often swaps pure black for a softer charcoal porcelain and uses a creamy off-white instead of bright white. The contrast still reads as checkerboard but feels less like a 1950s diner and more like a Parisian apartment. A diagonal layout in a small powder room makes the space appear wider.
How to Apply at Home
- Order 10 percent extra tile in each color for diagonal cuts at edges
- Use a medium-grey grout to soften the contrast slightly
- Keep walls neutral so the floor reads as the focal point
Recommended
Items for this idea
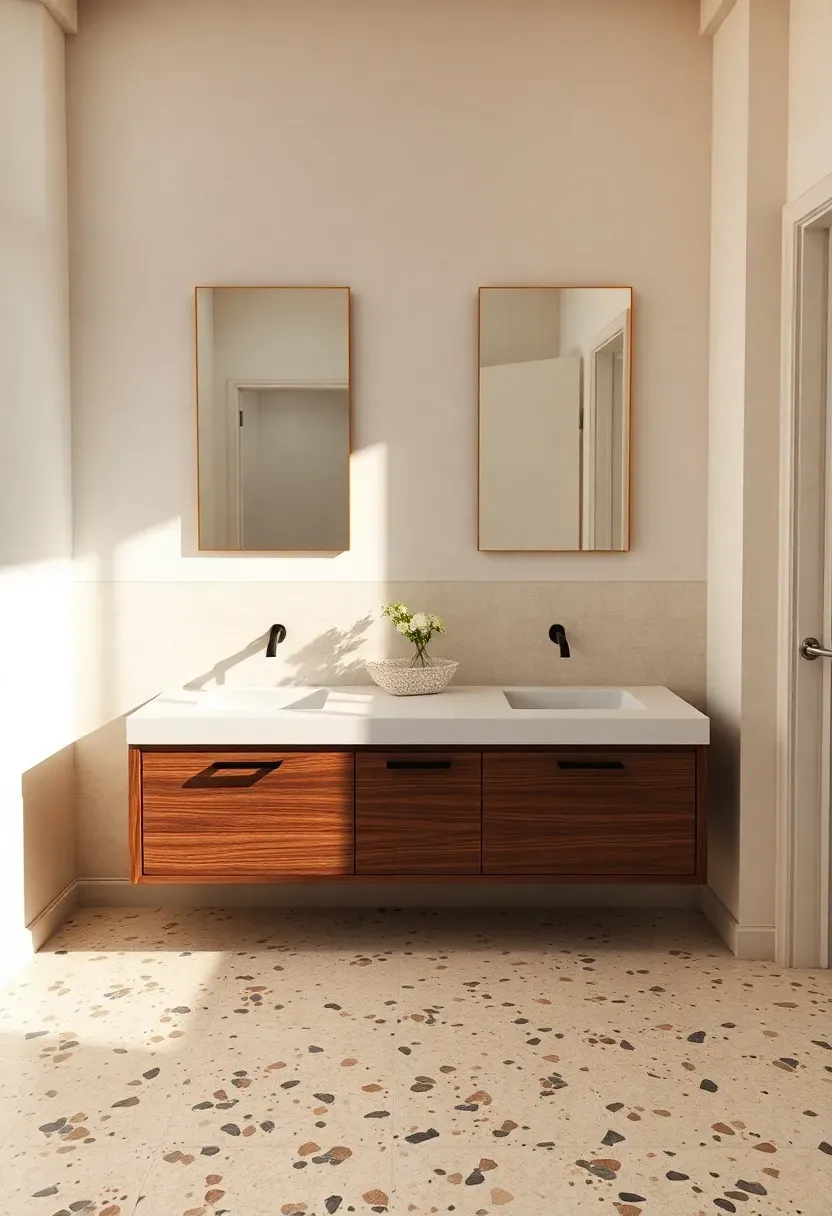
7. Terrazzo Speckled Floor
Terrazzo went from mid-century institutional to peak design trend, and the modern porcelain version makes the look accessible without the in-situ pour. Tile-format terrazzo comes in slabs up to 36 by 36, and the chip mix can be subtle — black and white in a grey base — or playful, with green, pink, and ochre chips in cream. The pattern hides hair, dust, and small stains better than any solid color floor.
Tips
- Match the smallest chip color to your grout for a seamless look
- Mix slabs from at least three different boxes to avoid pattern repetition
- Pair with solid-color walls; busy walls plus terrazzo overwhelms the eye
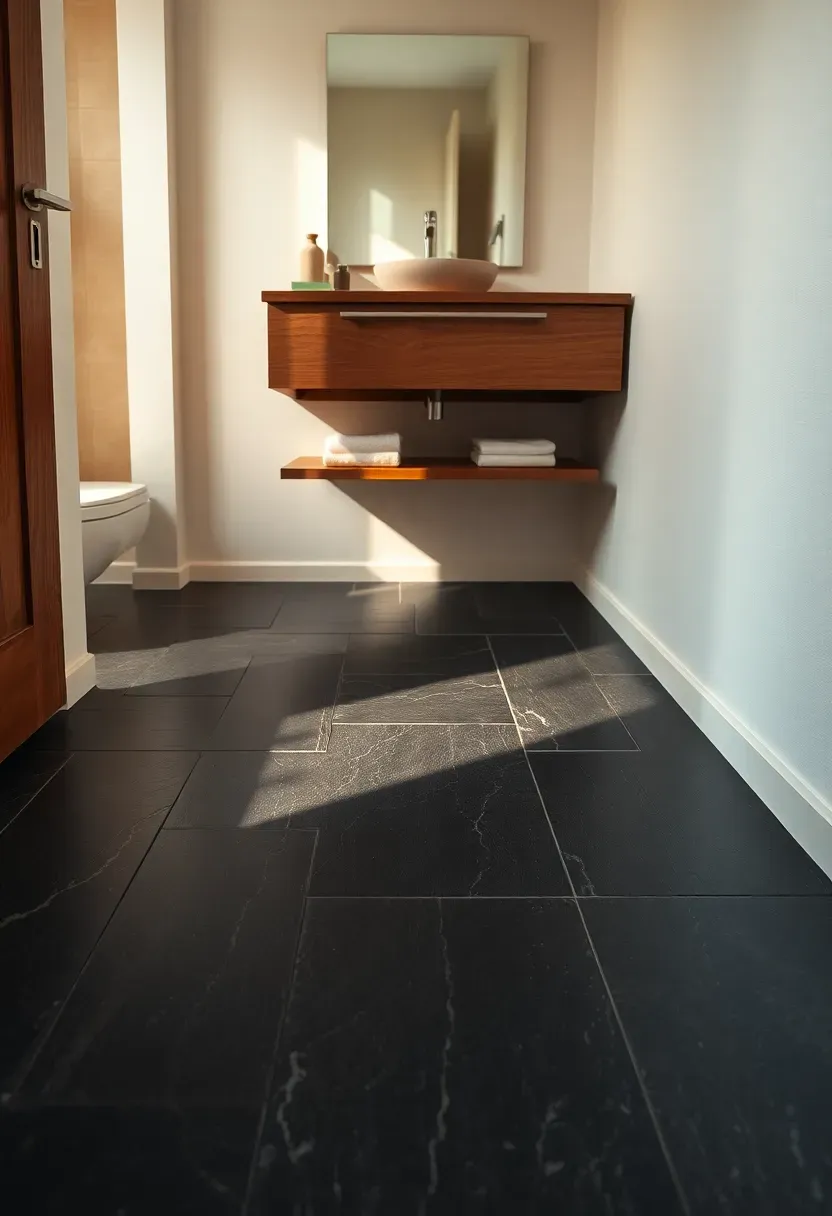
8. Heated Slate Tile
Why Heat Matters
Slate is genuinely cold underfoot — uncomfortably so in winter — but pair it with an electric radiant mat and the natural texture you wanted suddenly feels like a warm blanket. The thermal mass of slate holds heat for hours after the mat cycles off, so the floor stays cozy during the morning routine.
Installation Approach
Roll the heating mat onto the substrate before tiling. Embed the heating cables in the thinset layer, then set the slate on top. A floor sensor goes between two cable runs, connected to a smart thermostat outside the wet zone. The whole system adds roughly 1/4 inch to floor height.
Pros and Cons
Pros: spa-level comfort, dramatic natural texture, excellent slip resistance Cons: higher upfront cost (cables plus stone), professional electrical required, slight floor height increase
Recommended
Items for this idea
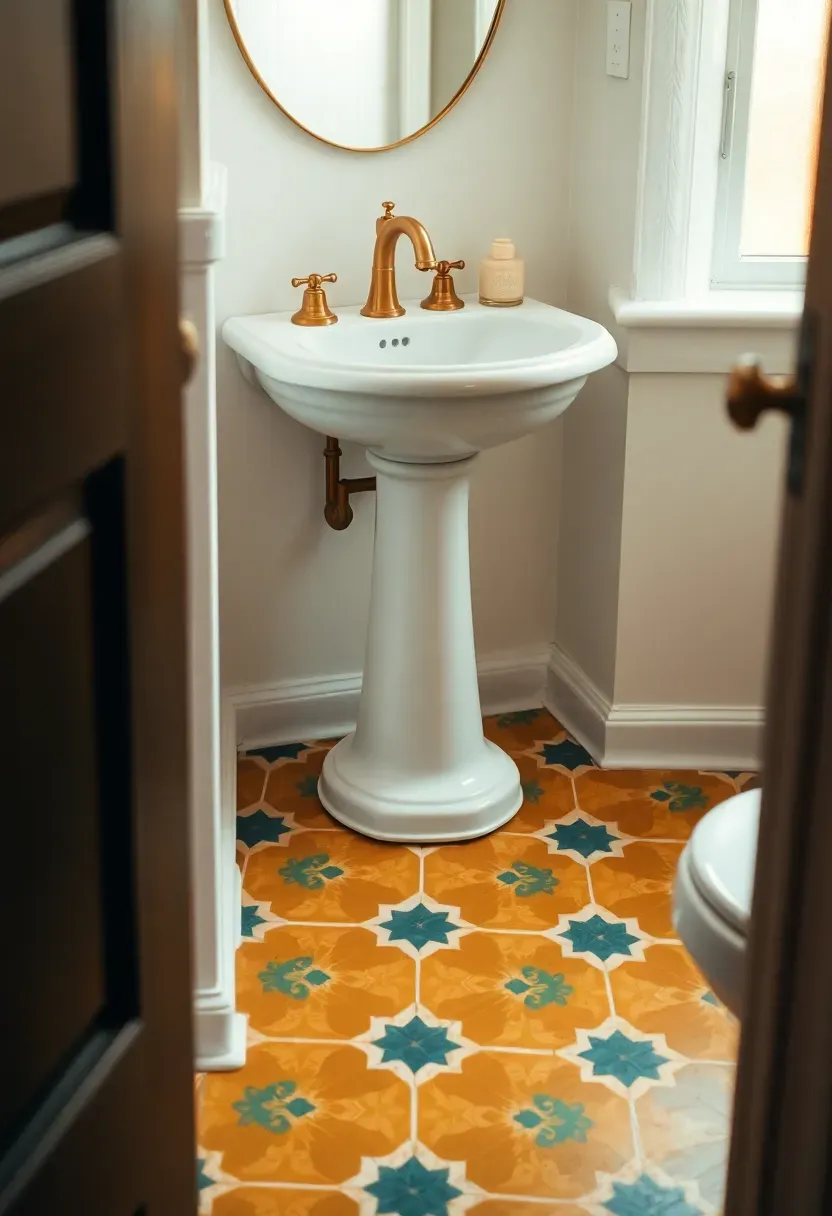
9. Moroccan Cement Tile Pattern
Hand-poured cement tiles from Morocco or Vietnam carry a depth of color that no printed porcelain can reproduce. The pigment runs through the full 5/8-inch thickness, so chips and wear actually look better over time. Patterns range from quiet two-color geometrics to riotous multi-color florals; pick one shade darker than you think you want, because the saturation softens after sealing.
Tips
- Cement tiles arrive unsealed; apply a penetrating sealer before grouting to protect the porous surface
- Use a thin grout joint (1/16 inch) so the pattern reads continuously
- Keep wall finishes simple — solid-color paint or unglazed zellige works best

10. Subway Tile on the Floor
Putting subway tile on the floor — usually 3 by 6 or 4 by 8 inches — reads as a quiet rebellion against the obvious. A vertical stack bond layout feels modern; a traditional running bond reads classic. Glazed porcelain subway costs about half what you'd pay for trendy formats, so this idea also stretches a renovation budget.
Tips
- Use a porcelain rated for floors (PEI 4 or 5), not a wall-only ceramic
- Light grey grout reads cleanest with white subway
- Layout a few rows dry first to confirm the cut sizes at walls before committing
Recommended
Items for this idea
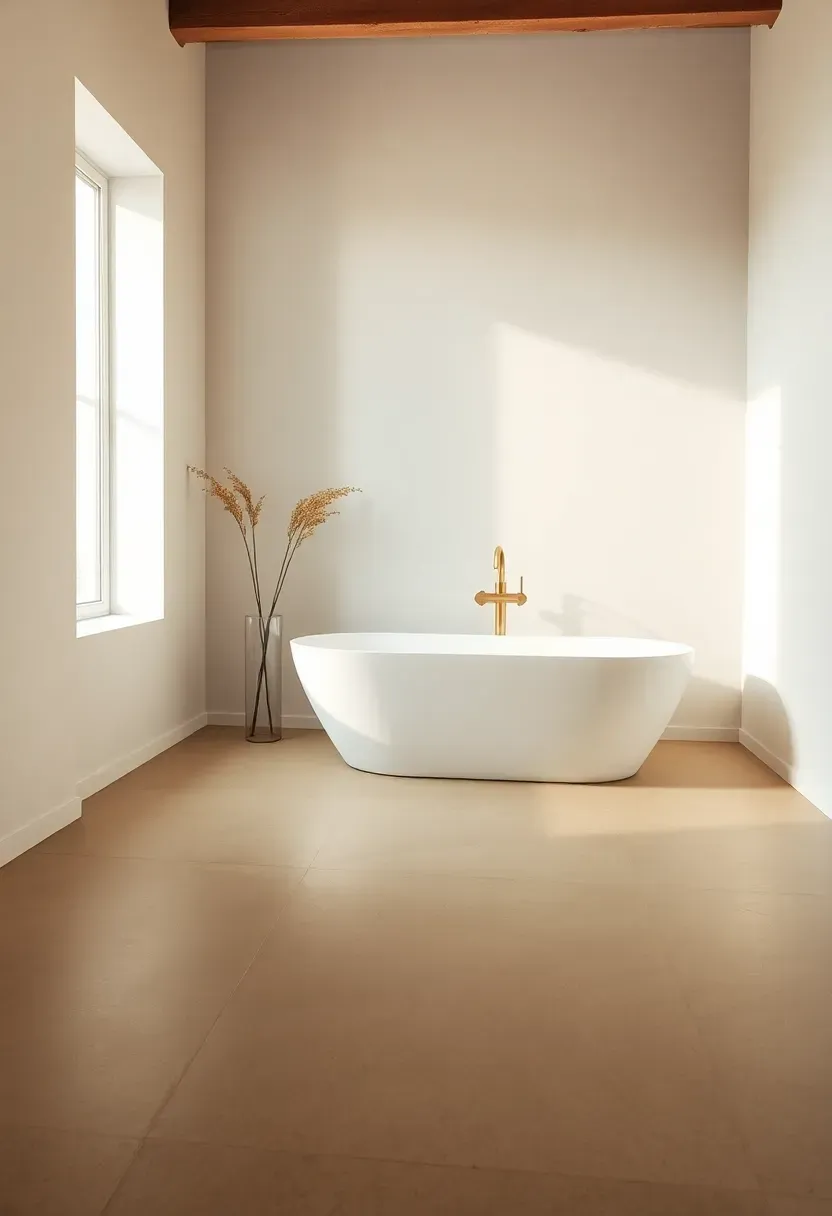
11. Concrete Microcement Floor
Why It Works
Microcement creates a continuous waterproof surface with zero grout lines — the closest thing to a poured concrete floor you can install in an existing bathroom. The 2-3 mm coating bonds to almost any substrate, including old tile, which makes it ideal for renovations where you don't want to demo down to the subfloor.
Installation Approach
A primer coat goes down first, followed by a base coat with embedded fiberglass mesh, then two to three pigmented finish coats. Each layer needs sanding between applications. Total installation runs three to five days for a typical bathroom, including cure time before sealing.
Pros and Cons
Pros: no grout lines, custom color match, installs over existing tile Cons: requires experienced installer, hairline cracks possible at structural movement points, sealer reapplication every 5 years
12. Vinyl Plank for Renters
Click-lock luxury vinyl plank floats over the existing floor without adhesive, which makes it the single most renter-friendly bathroom upgrade available. Modern LVP carries a wear layer of 12 to 30 mil — the thicker the better in a wet room — and the realistic embossed grain looks remarkably close to real wood. A standard bathroom takes one weekend to install with basic tools.
Tips
- Choose 100 percent waterproof rigid core LVP (SPC), not water-resistant WPC
- Leave a 1/4-inch expansion gap at all walls, hidden under quarter round
- Caulk the perimeter at the toilet base and tub for true water resistance
Recommended
Items for this idea
13. Honed Travertine Tiles
Travertine has more visual depth than any porcelain imitation can achieve — the natural pitting and color variation across each tile reads as authentic stone the second you walk in. A honed (matte) finish hides minor scratches better than polished and provides better grip when wet. Filled travertine fills the natural holes with epoxy at the factory; unfilled lets the holes remain for a more rustic look.
Tips
- Always seal travertine before grouting, then again after grout cures
- Avoid acidic cleaners — pH-neutral stone cleaner only
- Pair with brushed brass or aged bronze fixtures rather than chrome
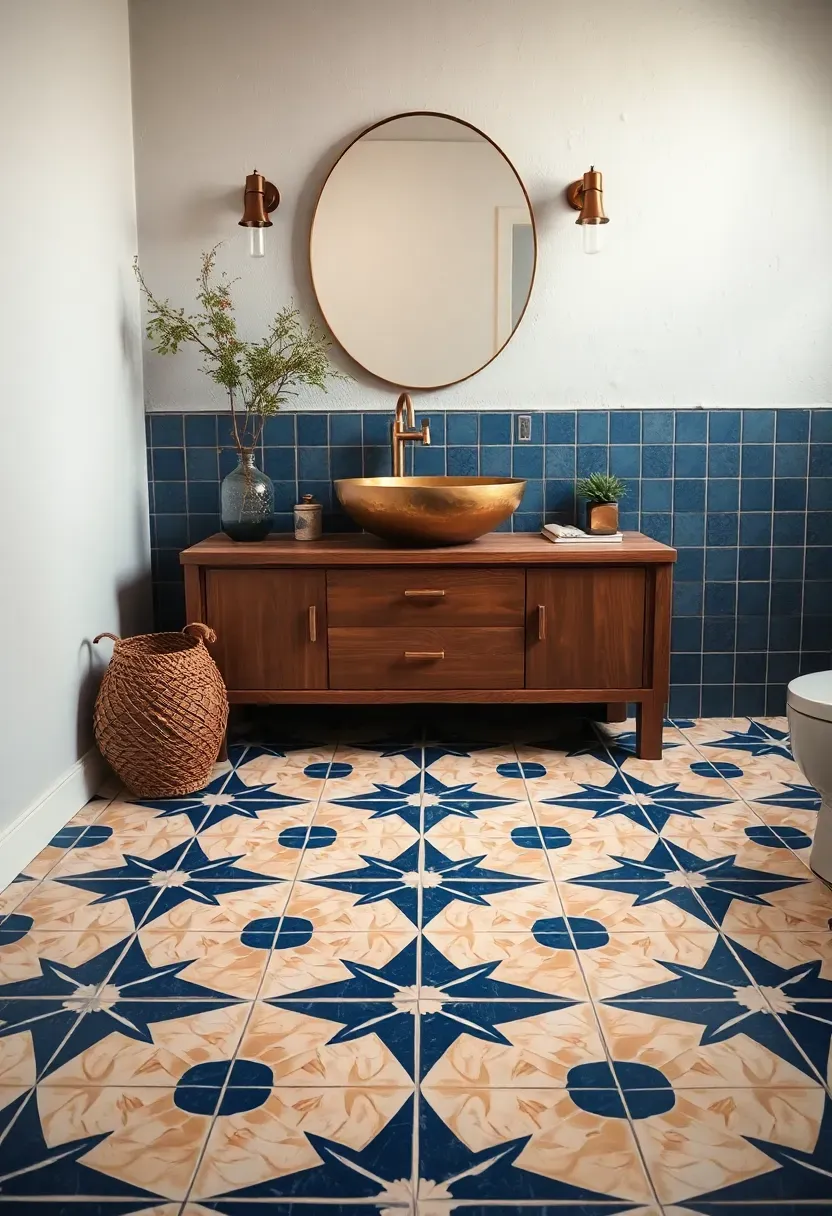
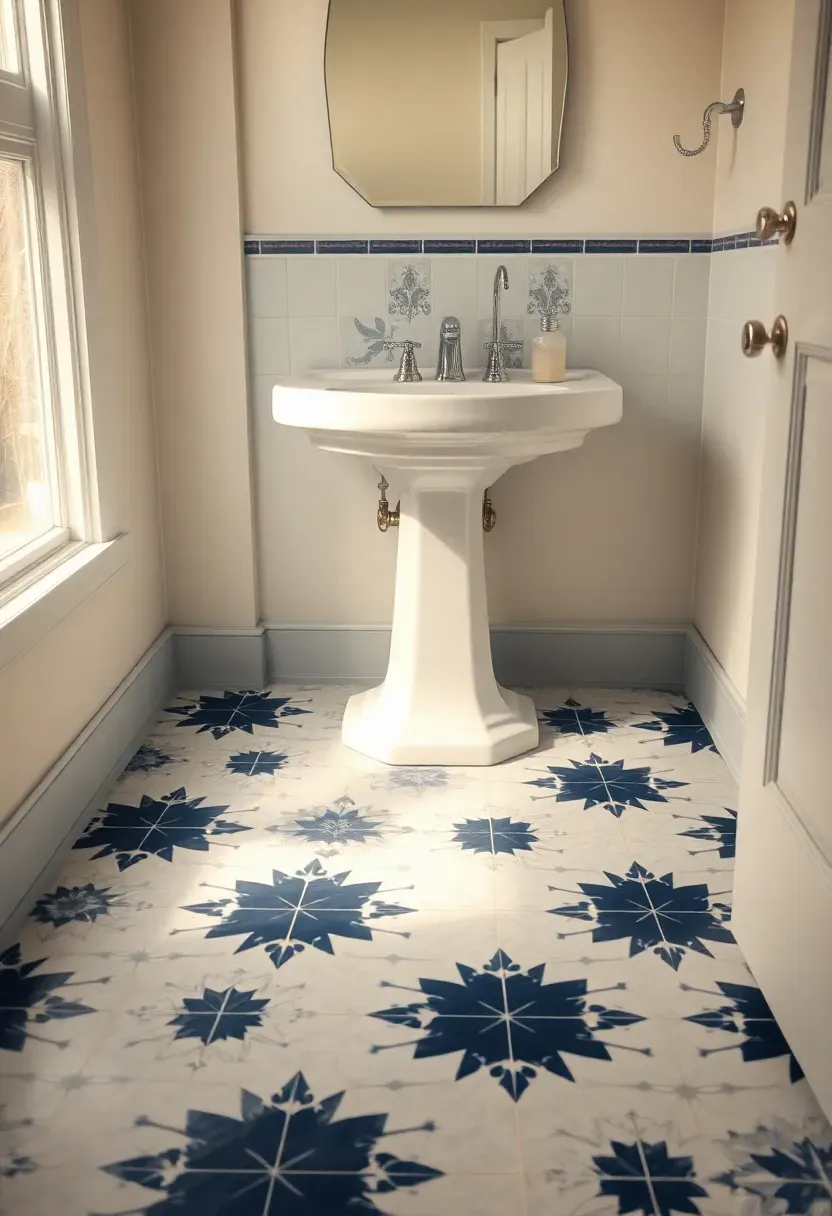
14. Bold Geometric Encaustic
The Core Idea
A high-contrast encaustic pattern in a small bathroom turns the floor into a piece of art you walk on. Encaustic tiles are typically 8 by 8 inches with hand-poured pigments; the patterns range from minimalist three-color stars to dense Victorian florals.
Modern Interpretation
Designers in the last few years have leaned into oversaturated palettes — terracotta with deep teal, mustard with charcoal, blush with forest green. The pattern carries the entire room, which means walls and fixtures should stay quiet to avoid visual chaos.
How to Apply at Home
- Order 15 percent extra to allow for pattern matching at edges
- Use a contrasting grout color to define the tile shape, or matching grout to let the pattern flow
- Limit bold encaustic to bathrooms under 50 square feet — bigger rooms can feel overwhelming
Recommended
Items for this idea
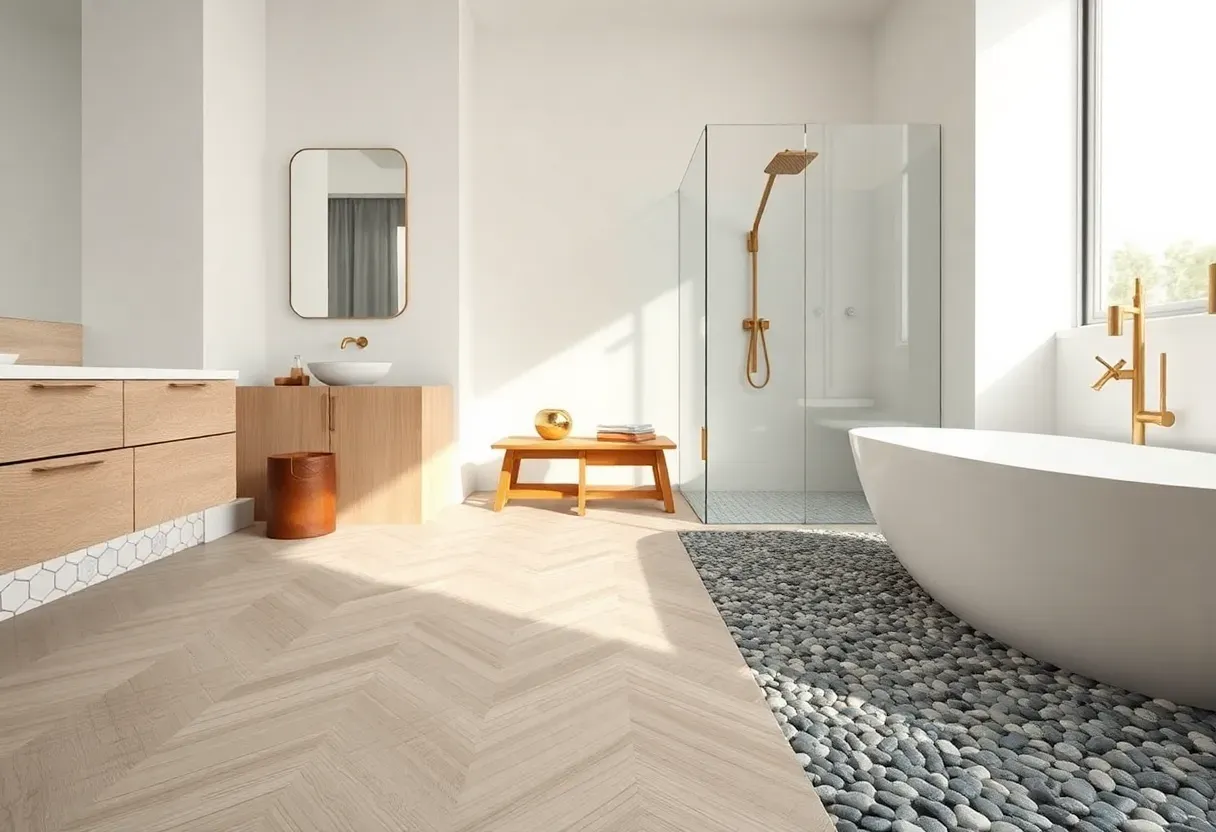
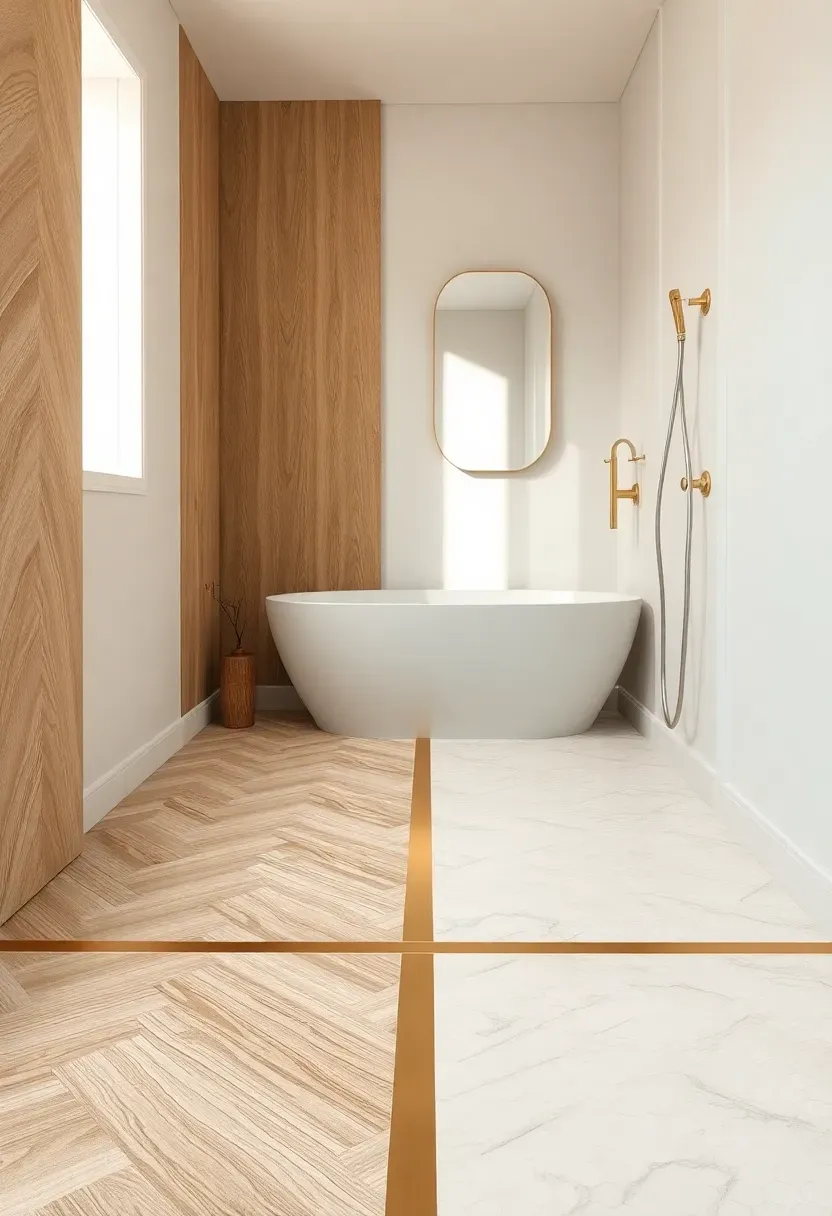
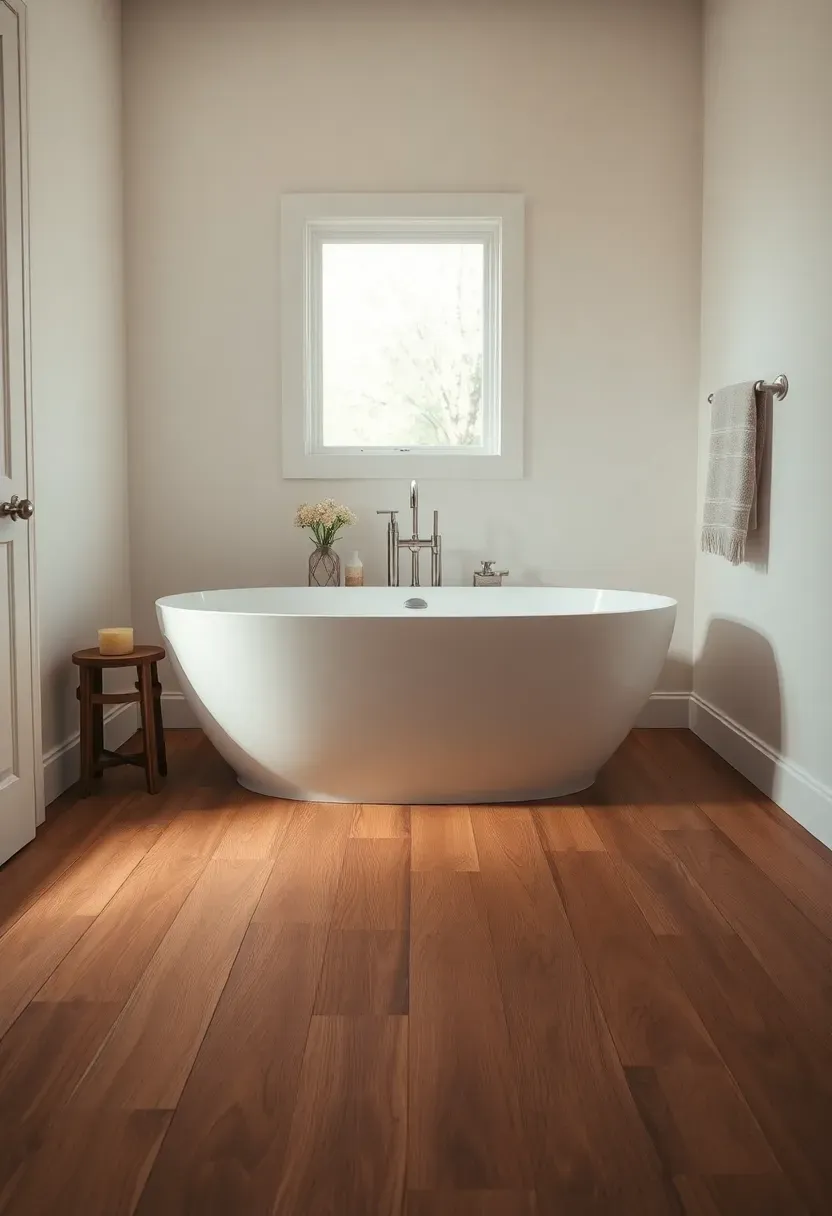
15. Wood and Tile Transition Border
Splitting the bathroom floor between two materials — wood-look in the dry zone, tile in the wet zone — is both practical and visually clever. The transition typically runs along the line where the vanity ends and the shower or tub begins. A brass or matte black T-bar finishes the joint and reads as an intentional design element rather than a builder's compromise.
Tips
- Plan the transition during framing so flooring heights align (LVP is thinner than tile by 1/4 inch)
- Use a Schluter strip in brushed brass for a modern transition profile
- Match the grout color to the wood-look tone to soften the visual seam
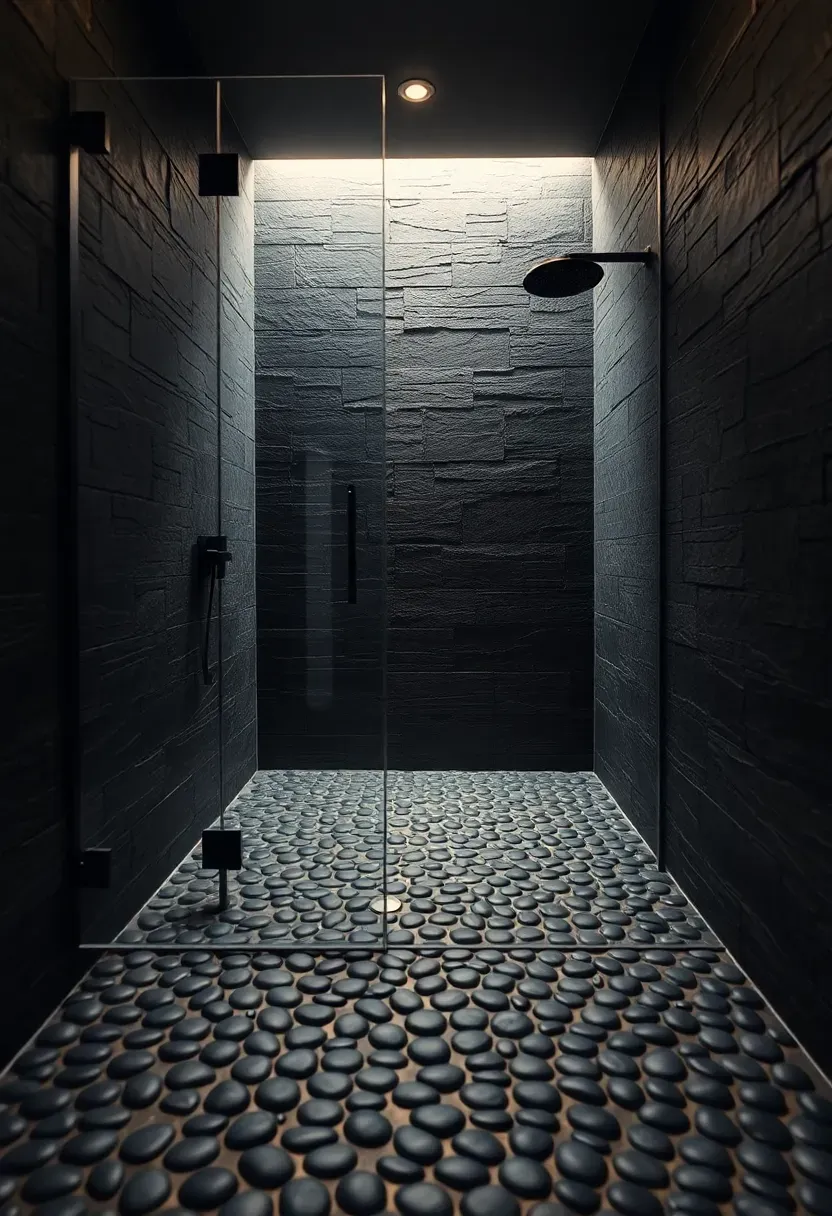
16. Matte Black Pebble Mosaic
A black pebble shower floor reads dramatically different from the standard tan-grey-cream pebble mix. The dark stones absorb light and create a deep, almost cave-like floor that reads luxurious in a contemporary bathroom. Black basalt or charcoal granite pebbles work better than dyed stones because the color is consistent through the material rather than a surface treatment.
Tips
- Pair with light walls to avoid the bathroom feeling too dark
- Use a charcoal grout that disappears into the stones
- Black pebbles show soap scum more visibly than light — clean weekly
Recommended
Items for this idea
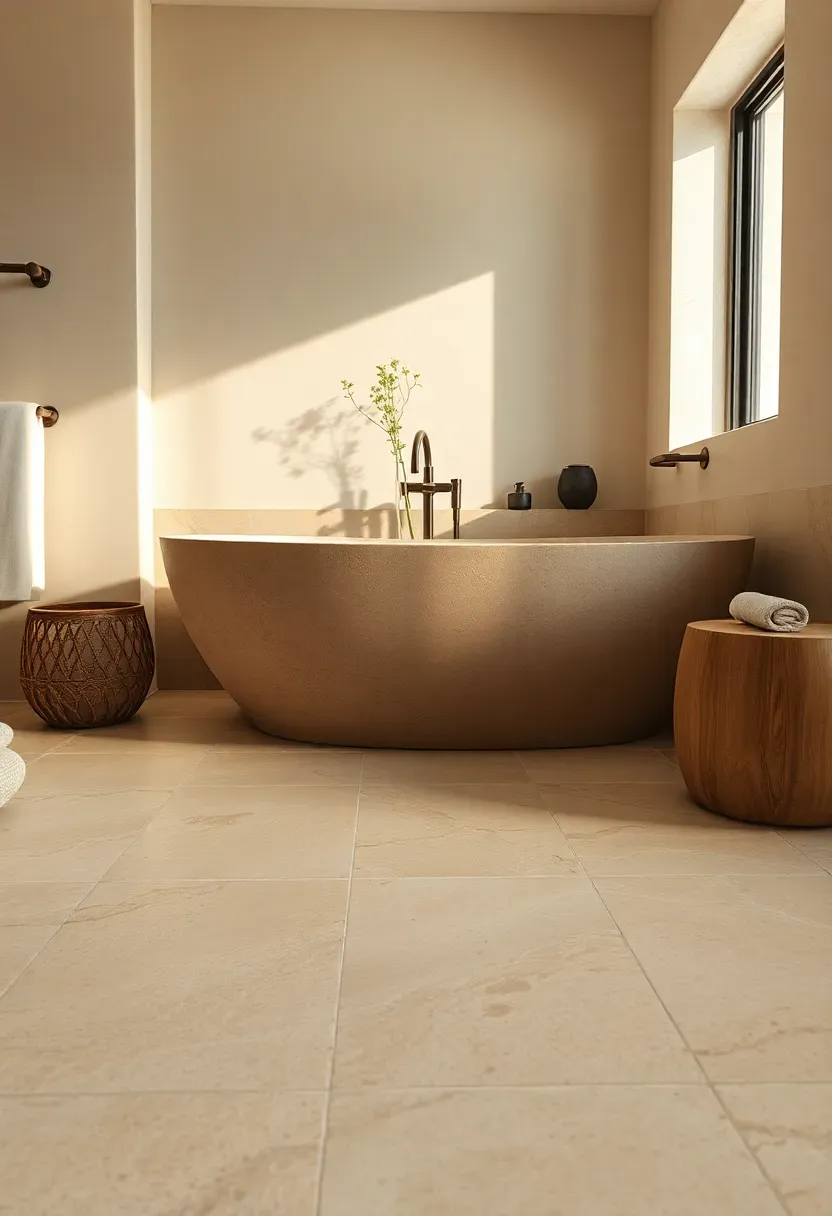
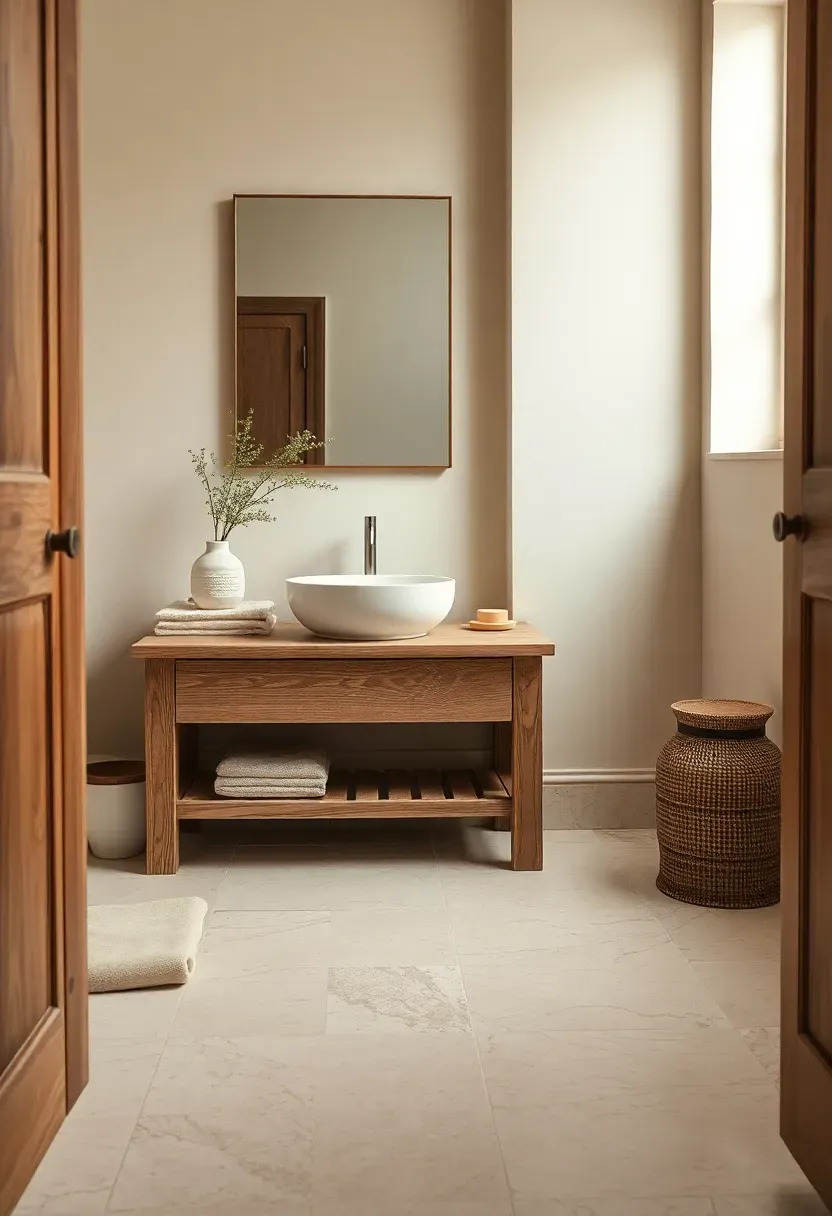
17. Limestone Tumbled Tiles
Tumbled limestone has the same softened edges and worn surface you'd find on flooring inside a 200-year-old French farmhouse. The natural variation across tiles ranges from pale ivory to warm honey, and the matte finish hides every scuff and smudge that polished stone would amplify. Limestone is softer than granite or marble — about a 3 on the Mohs scale — so it does require more attentive sealing.
Tips
- Apply a penetrating sealer plus a topical surface sealer for double protection
- Use a sanded grout in a tone that matches the lightest stone variation
- Avoid harsh chemical cleaners; pH-neutral stone soap and warm water only
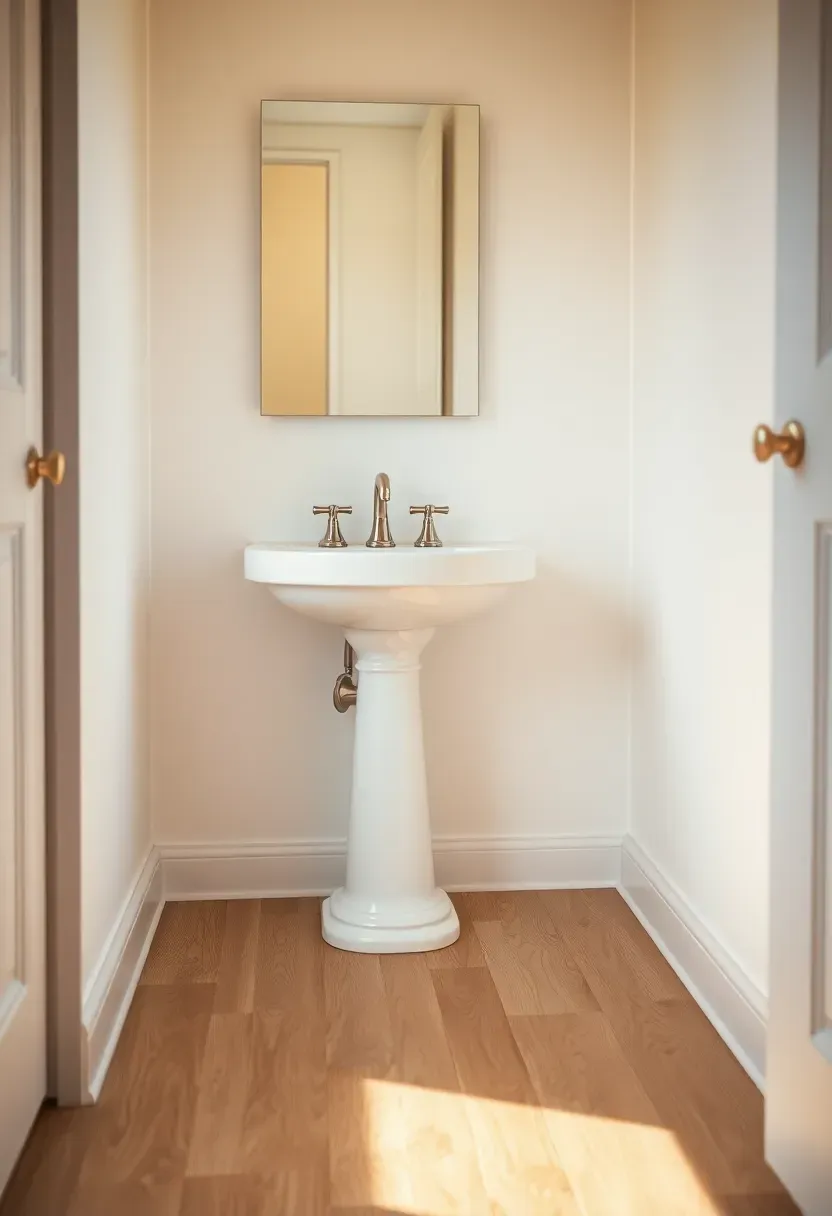
18. Faux Wood Porcelain Planks
Why Consider Faux Wood
Real hardwood in a bathroom is a maintenance gamble. Porcelain planks printed with high-resolution wood grain give you the look you want with full waterproofing and zero refinishing ever. Modern wood-look porcelain is virtually indistinguishable from real wood at standing height — the texture even matches the printed grain.
Installation Approach
Faux wood planks install identically to standard tile. The main difference is matching the random grain pattern across the floor: most manufacturers offer 6 to 8 different print variations per box, so you mix tiles from multiple boxes to avoid visible repeats.
Pros and Cons
Pros: waterproof, scratch-resistant, looks like real wood Cons: colder underfoot than real wood (heated mat solves this), requires careful pattern mixing, harder than real wood for installation cuts
Recommended
Items for this idea
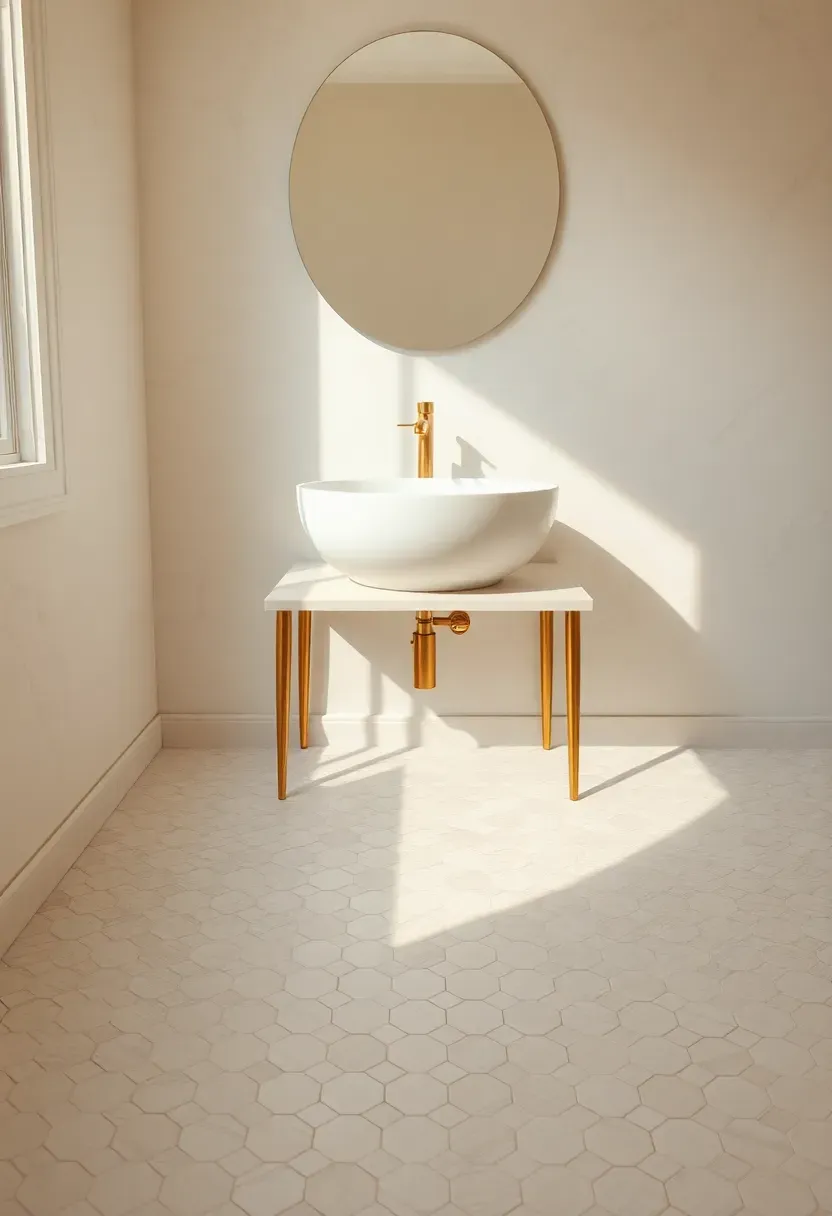
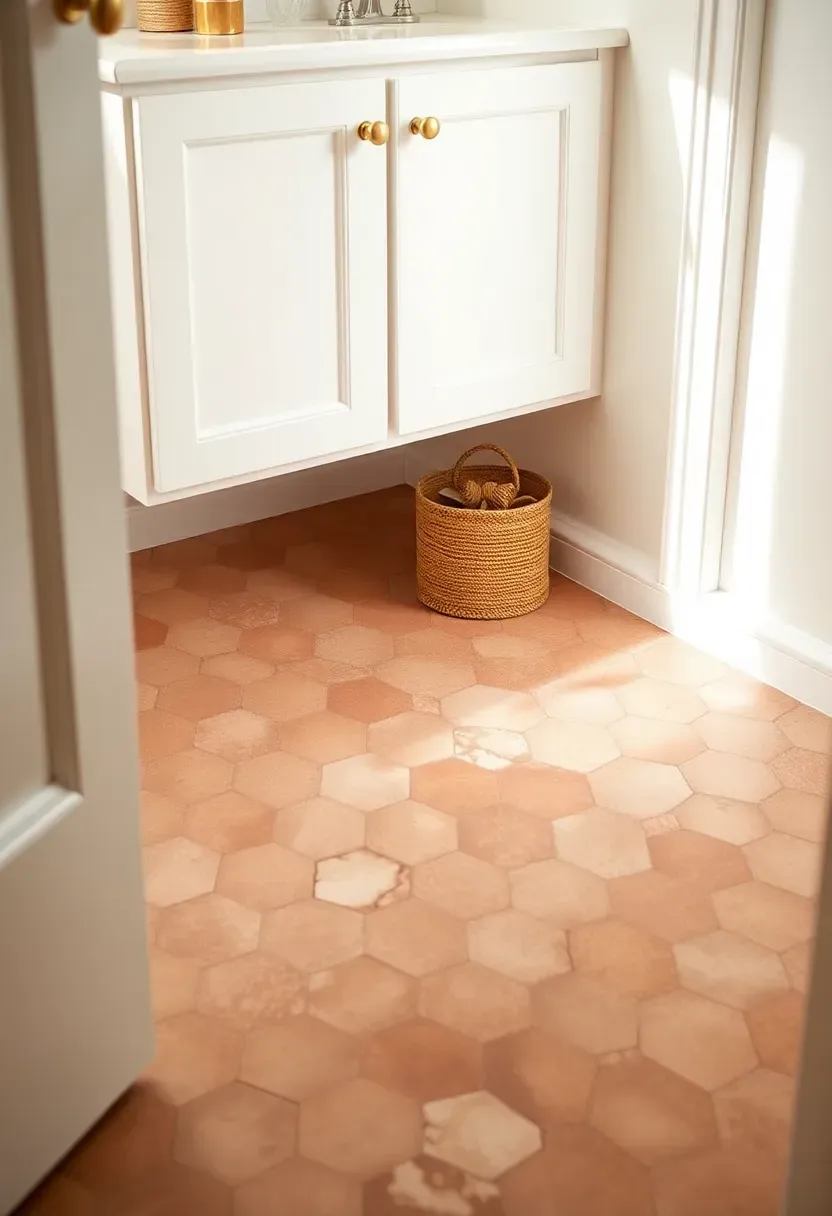
19. Pink Terracotta Hex Tile
Terracotta in a pale pink — sometimes called "rose" or "Saintes" terracotta — gives a bathroom unexpected warmth without veering into shabby chic. Hexagonal terracotta tiles measure 6 to 8 inches across and carry a soft handmade variation in tone that printed tiles can never replicate. The natural clay needs sealing, but it patinas beautifully over years rather than degrading.
Tips
- Seal twice with a breathable penetrating sealer designed for terracotta
- Use a sand-colored grout to keep the warmth consistent
- Pair with cream walls and brass fixtures rather than chrome
20. Patterned Vinyl Sheet
Sheet vinyl gets unfairly dismissed because of memories of 1980s linoleum, but modern patterned vinyl prints geometric and tile-look designs at a quality that rivals printed porcelain. A sheet floor has zero seams, which means zero water infiltration points and the easiest cleaning of any floor option. For a bathroom under 60 square feet, a single piece of 12-foot-wide vinyl covers the entire room.
Tips
- Order a sample first; printed patterns vary in scale and you want to see it in your space
- Use a felt-backed vinyl rather than fiberglass for better cushioning
- Acclimate the roll for 24 hours flat in the room before installing

Recommended
Items for this idea
21. Granite Slab Flooring
Granite is the toughest natural stone you can put on a bathroom floor — about a 7 on the Mohs scale, which means it shrugs off scratches that would mark marble or limestone. Large-format granite slabs (24 by 24 or 24 by 48) read modern; tumbled or honed granite reads more traditional. The cost per square foot runs higher than porcelain but lower than premium marble.
Tips
- A leather (matte) finish provides better grip than polished granite when wet
- Granite needs sealing every 2-3 years, less often than other natural stone
- Use a slightly sanded grout with grey tones to complement most granite colors
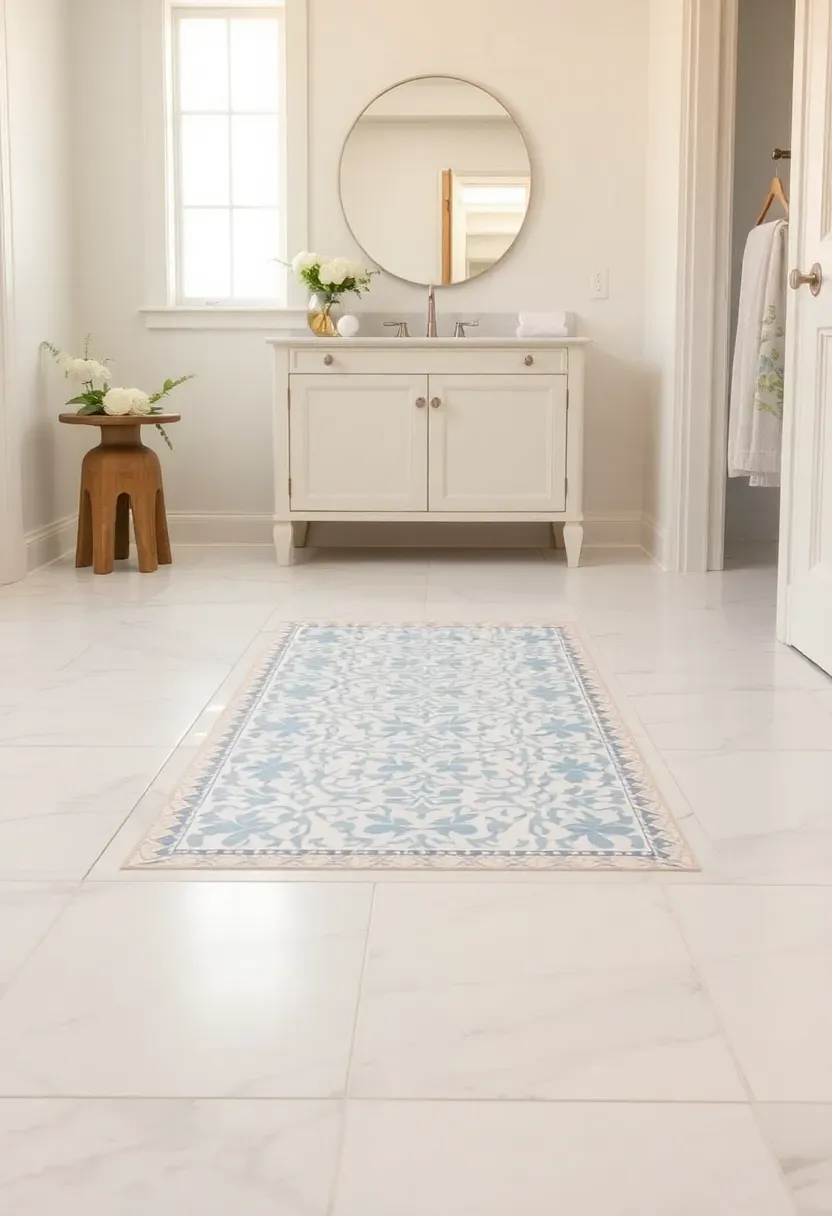
22. Mixed Material Mosaic Inlay
A custom inlay treats the bathroom floor like a tailored rug. The field is one material — say, large white marble — and the center carries a different material in a defined rectangle, creating a "rug" of patterned encaustic or contrasting mosaic. The technique works best in larger bathrooms where the inlay has room to breathe.
Tips
- Plan the inlay around the tub or vanity placement so it reads centered
- Use a continuous grout color across both materials to unify the look
- Confirm tile thicknesses match before installing — a 1/8-inch difference creates a tripping hazard
Recommended
Items for this idea
23. Underfloor Heating with Tile
Heated floors used to mean expensive hydronic systems with circulating hot water. Modern electric radiant mats run roughly seven to ten dollars per square foot for materials and add the kind of comfort that actually changes how you use your bathroom in winter. Smart thermostats with floor sensors keep operating costs reasonable — most owners report 30-50 dollars per year in extra electricity.
Tips for Getting It Right
- Run the heating mat under the entire floor except below the toilet flange and vanity footprint
- Pair with a smart thermostat that learns your morning routine
- Choose tile thinner than 3/8 inch for fastest heat response
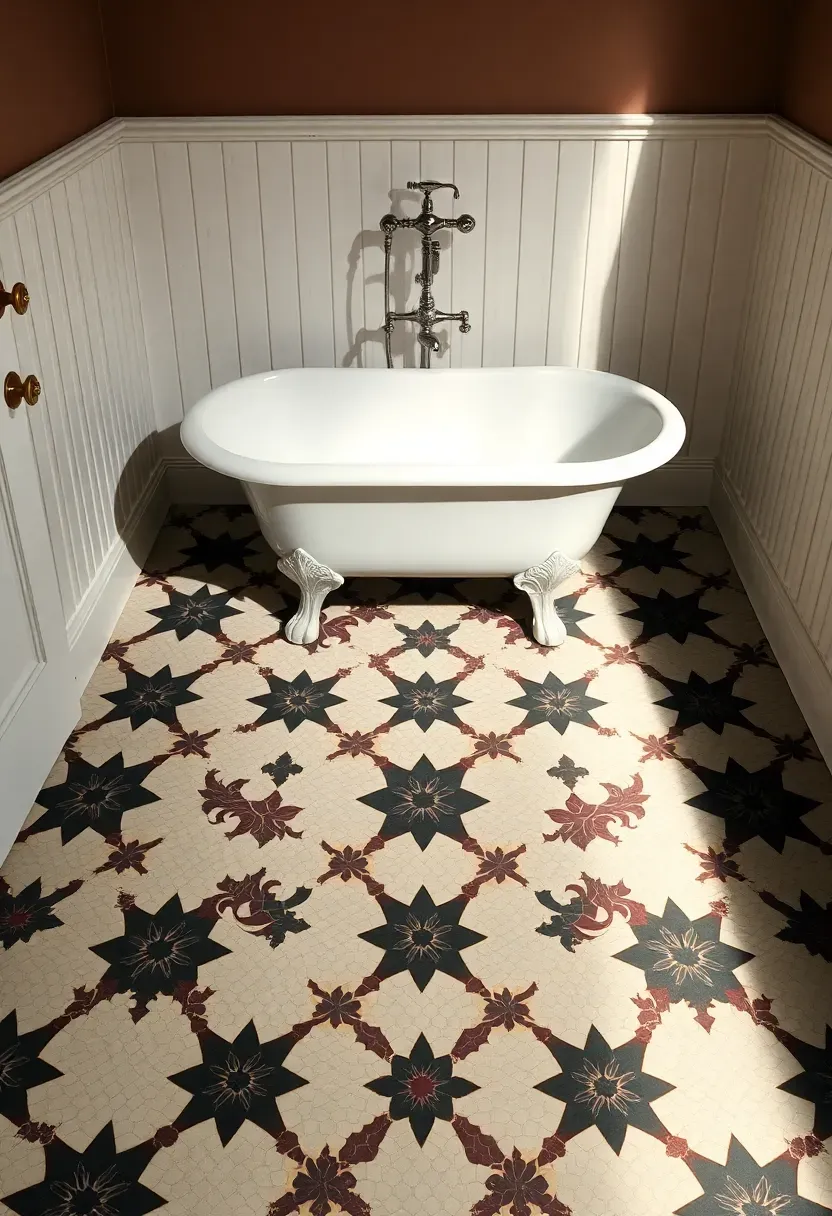
24. Vintage Victorian Tile Pattern
Victorian floor tile patterns originated in 19th-century English public buildings and migrated into private bathrooms through the late Victorian era. The patterns combine small unglazed porcelain tesserae — squares, triangles, octagons — into formal symmetrical designs. Original Victorian floors still survive in 150-year-old houses, which tells you everything about their durability.
Tips
- Order from a heritage tile maker that specializes in Victorian patterns for authentic proportions
- Plan the pattern around the room dimensions so the border lands cleanly at walls
- Use historically accurate grout — typically a warm grey rather than pure white
Recommended
Items for this idea
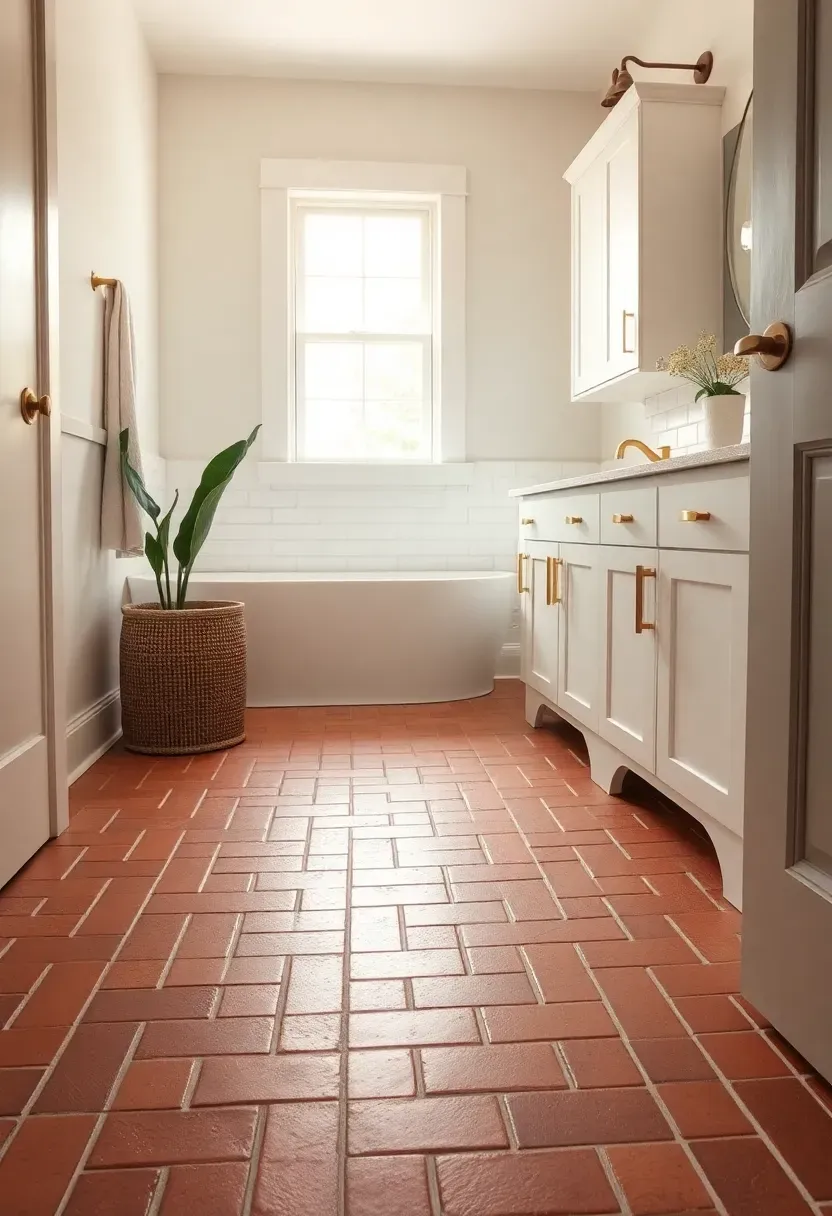
25. Brick-Look Tile Floor
Brick-look porcelain captures the warmth of an old farmhouse floor without the porosity issues real brick brings to a wet space. The tiles measure roughly 4 by 8 inches and carry color variation across the surface — some redder, some darker, some almost pink. A 30-degree offset pattern reads more authentic than a perfect running bond because real brick floors are never that precise.
Tips
- Pick a porcelain with multiple face variations to avoid repeating patterns
- A buff or sand grout matches the warm tones better than grey
- Pair with shaker vanity styles and unglazed wall tile for a coherent look
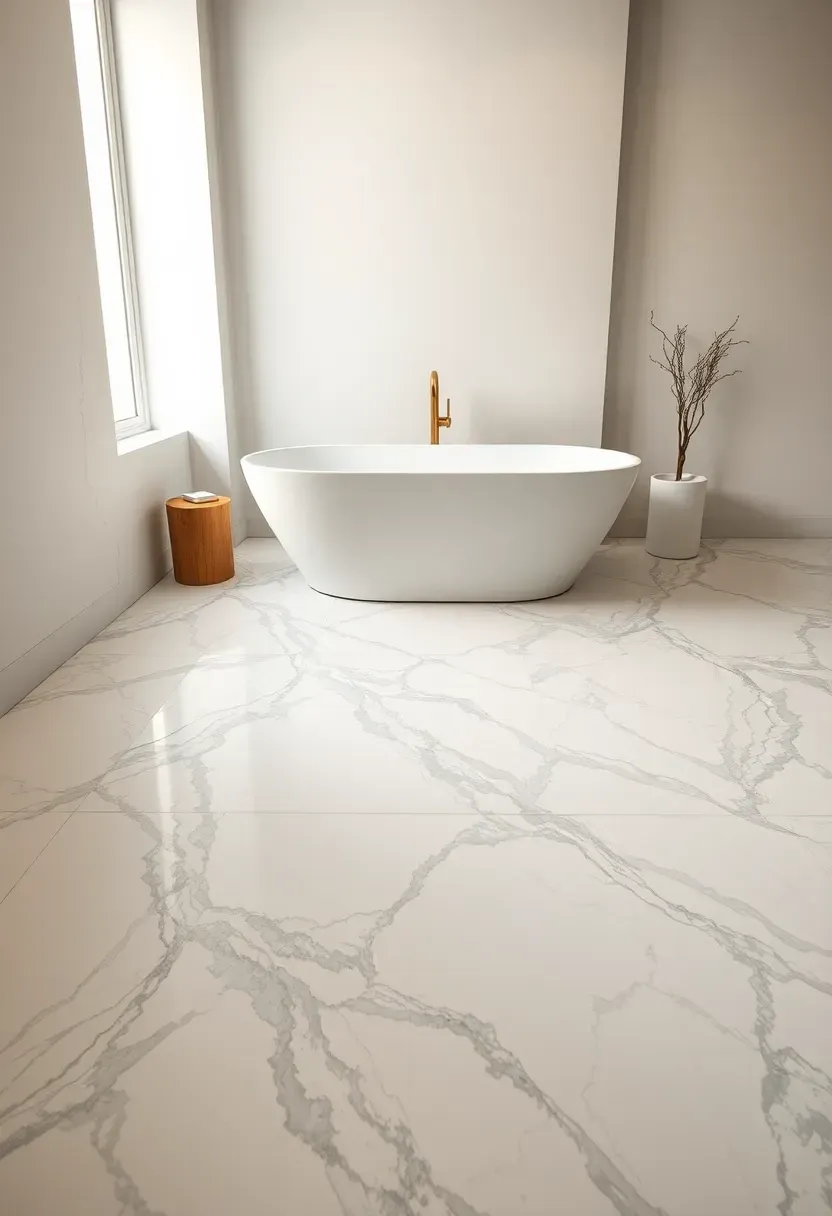
26. Oversized Marble Veined Tiles
A 48-by-48 marble tile with bold grey veining gives a bathroom the look of slab marble at a fraction of the cost. The dramatic veins act as natural wayfinding across the floor, and matched-vein layouts (where tiles align so the vein flows continuously) deliver the most luxe look. Calacatta and Statuario marbles offer the most striking vein patterns.
Tips
- Order tiles all from the same lot and ask the supplier to match veins before shipping
- Use a grout that matches the marble background (typically warm white or cream)
- Honed finish hides scratches better than polished in high-traffic bathrooms

Recommended
Items for this idea
27. Cork Flooring for Bathrooms
Cork in a bathroom sounds wrong until you stand on it. The material is naturally water-resistant, antimicrobial, and warm underfoot — about ten degrees warmer than tile at the same room temperature. Modern cork bathroom flooring uses a sealed surface and click-lock planks similar to LVP, with a polyurethane top coat that handles splashes for a decade or more.
Tips
- Choose cork specifically rated for bathroom use (not generic cork floor)
- Reseal the perimeter and around the toilet annually with cork-specific sealer
- Place a quick-dry bath mat in front of the tub to protect the seams from prolonged wetness
Quick FAQ
Which bathroom floor material lasts longest? Porcelain tile and granite both deliver 50-plus years of service when installed correctly. Porcelain wins on price and design flexibility; granite wins on raw durability against impacts and scratches. Both outlast the rest of the bathroom by a wide margin.
Are heated bathroom floors worth the cost? For most homeowners in cold climates, yes. Electric radiant systems run 30-50 dollars per year in operating cost and pay back in daily comfort during the winter months. The installation cost adds roughly seven to ten dollars per square foot to a tile project.
What's the best bathroom floor for renters? Rigid-core luxury vinyl plank with a click-lock system. It floats over the existing floor without adhesive, installs in a weekend, and can be lifted and reused at the next apartment. Pick a 100 percent waterproof SPC core with a 20-mil or thicker wear layer.
Can you put real wood floors in a bathroom? Technically yes, but it's a constant maintenance battle. Engineered hardwood handles humidity better than solid wood, but any prolonged water contact still causes warping. Wood-look porcelain or LVP gives you the same visual without the risk.
How do I make a bathroom floor less slippery? Choose tiles with a DCOF rating of 0.42 or higher (this is printed on the tile spec sheet). Smaller tiles with more grout lines also provide better grip than large slabs. For existing slick floors, a clear anti-slip coating can be applied to add traction without changing the appearance.
The right bathroom floor balances how the surface looks dry, how it feels wet, and how much maintenance you're willing to do over the next decade. Pick the idea that matches your tolerance for upkeep — porcelain and vinyl for low-effort, marble and travertine for the look that pays back the work. Whatever you choose, lay it well once and you'll forget it's there for years.
Pinterest cover for 27 Bathroom Floor Ideas That Actually Last
About the author
OBCD
CGI visualization and interior design content. We create detailed 3D renders and curate practical design ideas for every room in your home.