29 Bathroom Accent Wall Ideas
Bathrooms tend to play it safe. White subway tile, beige paint, maybe a framed mirror and call it done. But the one wall behind your vanity or tub is the perfect place to take a risk without committing the whole room. An accent wall in a bathroom works differently than in a living room or bedroom because moisture, splashing water, and humidity narrow your material choices. That constraint is actually helpful — it forces you to think about what actually holds up rather than chasing every trend on social media. These 29 ideas cover materials from natural stone to peel-and-stick options, with honest notes about cost and maintenance.
Here are 29 bathroom accent wall approaches organized by material type — starting with tile and stone, moving through wood and paint, then into wallpaper, panel systems, and some unexpected picks.
Table of Contents
- Zellige Tile
- Large-Format Porcelain Slab
- Penny Round Mosaic
- Stacked Natural Stone Ledger
- Herringbone Marble Tile
- Handmade Ceramic Tile
- Terrazzo Tile Wall
- Fish Scale Tile
- Vertical Subway Tile Stack
- Hexagonal Tile Pattern
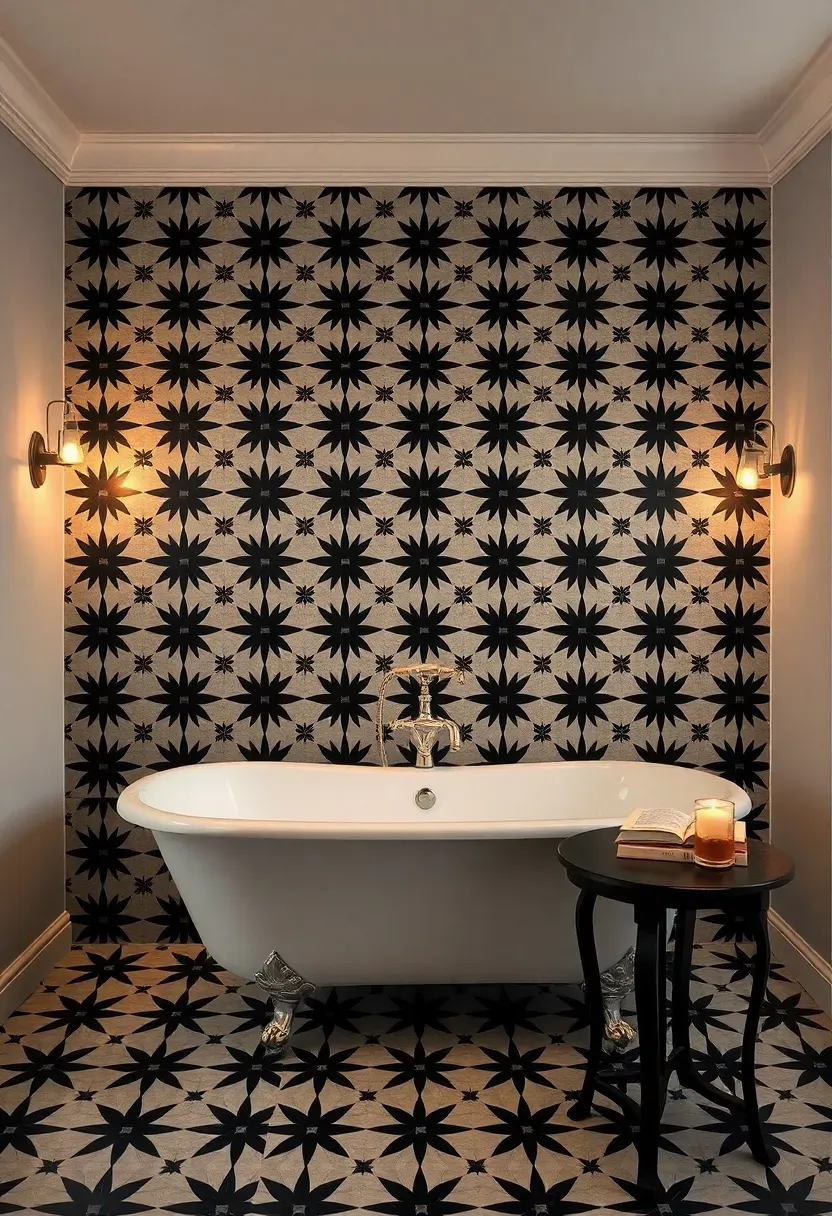
- Cement Tile with Bold Pattern
- Reclaimed Wood Planks
- Vertical Wood Slat Screen
- Teak Shower Wall
- Limewash Paint Finish
- Color-Block Painted Wall
- Ombre Paint Gradient
- Moisture-Resistant Wallpaper
- Botanical Print Wallpaper
- Grasscloth Texture Wall
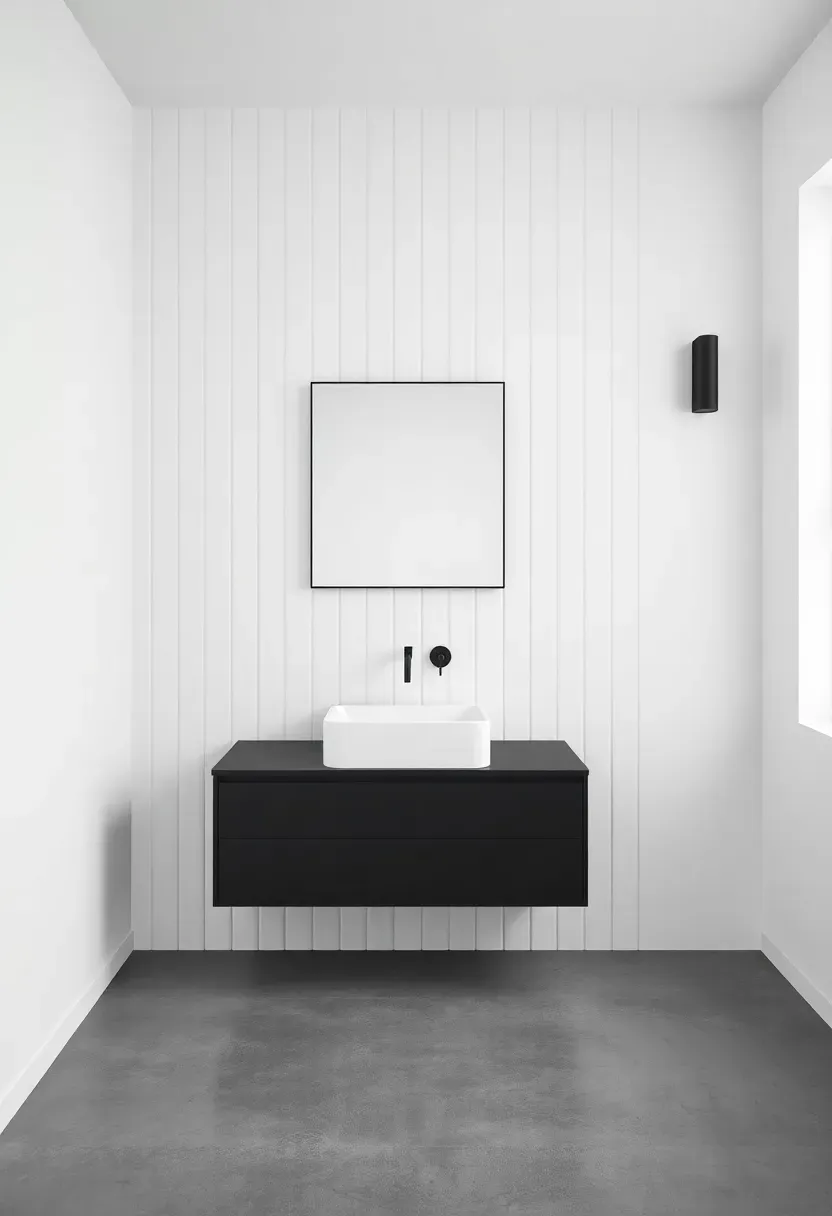
- 3D Fluted Panel
- Concrete Microcement Finish
- Mirror Wall Panel
- Black Steel-Frame Glass Partition
- Venetian Plaster
- Brick Veneer Wall
- Shou Sugi Ban (Charred Wood)
- Living Moss Wall
- Painted Arch Mural
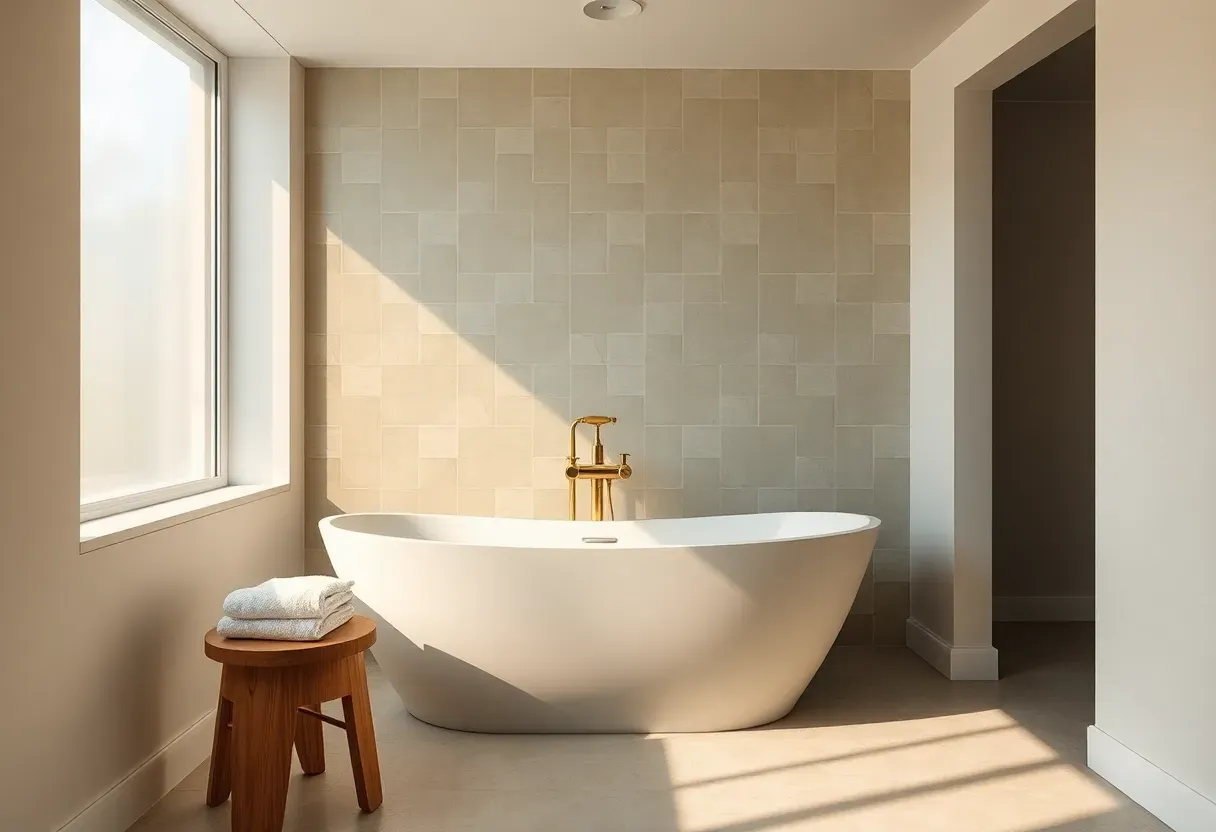
1. Zellige Tile
Zellige is a Moroccan glazed terracotta tile with an uneven, hand-cut surface that catches light at different angles throughout the day. No two tiles are identical, which gives bathroom walls a texture that machine-made ceramics cannot replicate. The imperfections are the point. Standard zellige tiles run 4x4 inches, though 2x6 rectangles have become more available. Expect to pay $15 to $30 per square foot for authentic Moroccan-made zellige, with domestic alternatives around $10 to $18. The irregular edges mean wider grout lines (1/8 inch minimum), and the porous clay body needs sealing in wet areas.
Tips
- Apply a penetrating sealer before grouting and a topcoat sealer after — the clay absorbs grout stain fast
- Use unsanded grout in a color close to the tile so the wide joints feel intentional rather than sloppy
- Stick to the wall behind the vanity or above the tub rather than inside a shower — zellige maintenance inside a wet zone is demanding
We picked a few things that go well with this idea: Art3d 102-Piece Peel Stick Subway Tile (★4.4), Vieshful Peel Stick Marble Wall Tile (20pcs) (★4.1) and STICKGOO Peel Stick Subway Tile (10-Sheet) (★4.4). As an Amazon Associate we earn from qualifying purchases.
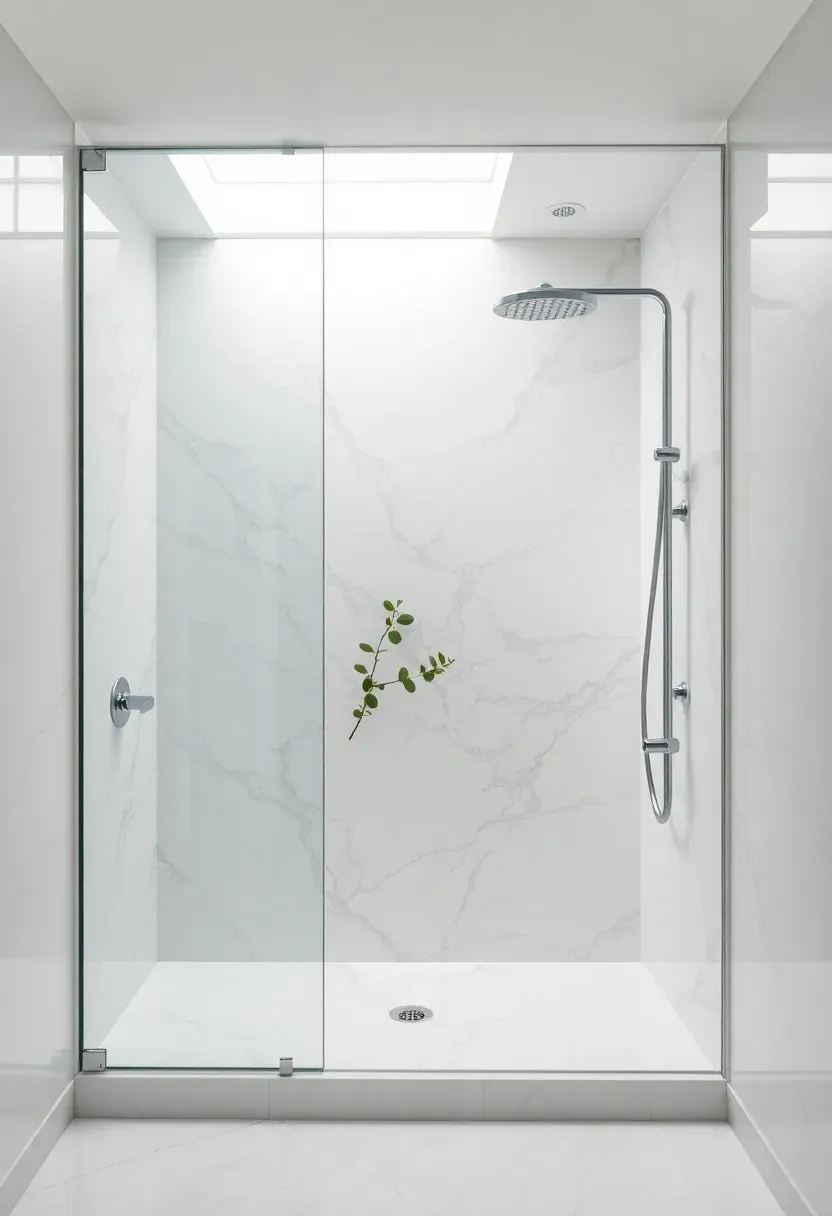
2. Large-Format Porcelain Slab
The appeal
Porcelain slabs — usually 60x120 inches or larger — give you the veined look of natural marble without the sealing and etching problems. One slab can cover most bathroom accent walls with zero grout lines, which makes the surface easier to clean and visually quieter than a grid of smaller tiles.
Installation reality
These slabs weigh 150 to 200 pounds each and require two installers, suction cup lifters, and a perfectly flat substrate. Professional installation runs $25 to $50 per square foot on top of material costs ($15 to $40 per square foot). Not a DIY project. But the result — a seamless marble-look wall that shrugs off water — is hard to beat in bathrooms where you want drama with low maintenance.
Choose porcelain slabs if
- You want marble aesthetics without worrying about acid etching from bathroom cleaners
- Minimizing grout lines matters to you
- Budget allows professional installation
We picked a few things that go well with this idea: NeatiEase Wood Slat Wall Panels (4-Piece) (★4.7), TONOR Walnut Wood Slat Panels (4-Pack) (★4.5) and Art3d 3D Fluted Wood Slat Panels (6-Pack) (★4.6). As an Amazon Associate we earn from qualifying purchases.
3. Penny Round Mosaic
Small circular tiles on mesh backing create a textured, almost fabric-like surface on a bathroom wall. The high grout-to-tile ratio means lots of visual texture even in a single color. Penny rounds work particularly well in small bathrooms because the small scale does not overwhelm tight spaces. Matte finishes in earthy tones (sage, terracotta, charcoal) feel current without being trendy. Budget around $8 to $15 per square foot for porcelain penny rounds. The biggest installation headache is keeping the sheets aligned — the circles shift easily on the mesh before the thinset sets.
Tips
- Press each sheet with a grout float immediately after placing to embed tiles evenly
- Epoxy grout resists mildew better than cement grout in bathroom settings
- Run the mosaic floor-to-ceiling on one wall for maximum impact in powder rooms
We picked a few things that go well with this idea: EPODEX Venetian Plaster Kit (53sqft), Goldblatt Venetian Plaster Trowel Set (3-Piece) (★4.9) and Drywall Patch Repair Tool Kit (All-in-1) (★4.6). As an Amazon Associate we earn from qualifying purchases.
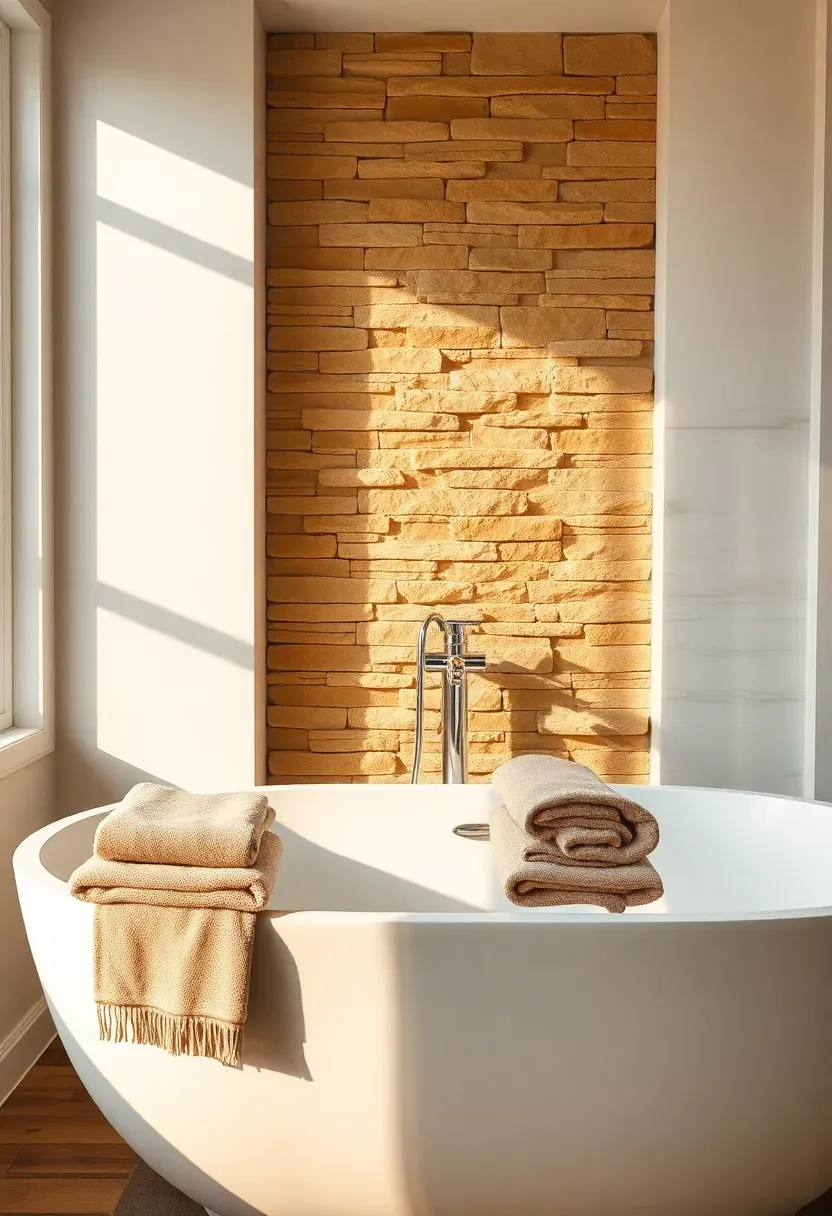
4. Stacked Natural Stone Ledger
Why stone works in bathrooms
Real stone brings a weight and presence that tile imitates but never quite matches. The irregular face of stacked ledger stone catches shadows from vanity lighting and creates depth on what would otherwise be a flat wall. Bathrooms benefit from this because the rooms are small enough that you notice surface texture up close.
Practical considerations
Stone ledger panels ($8 to $18 per square foot) attach to cement board with modified thinset. The rough surface traps moisture, so this works best on walls that do not get directly sprayed — behind the tub or opposite the shower. Seal with a breathable stone sealer and run your bathroom exhaust fan consistently. Weight matters: at 12 to 15 pounds per square foot, you need solid backing.
Pros and cons
- Genuine material depth that porcelain lookalikes lack
- Installation is heavier-duty than tile — not ideal for renters
- Dust collects on ledges; plan to wipe down monthly
Recommended
Items for this idea
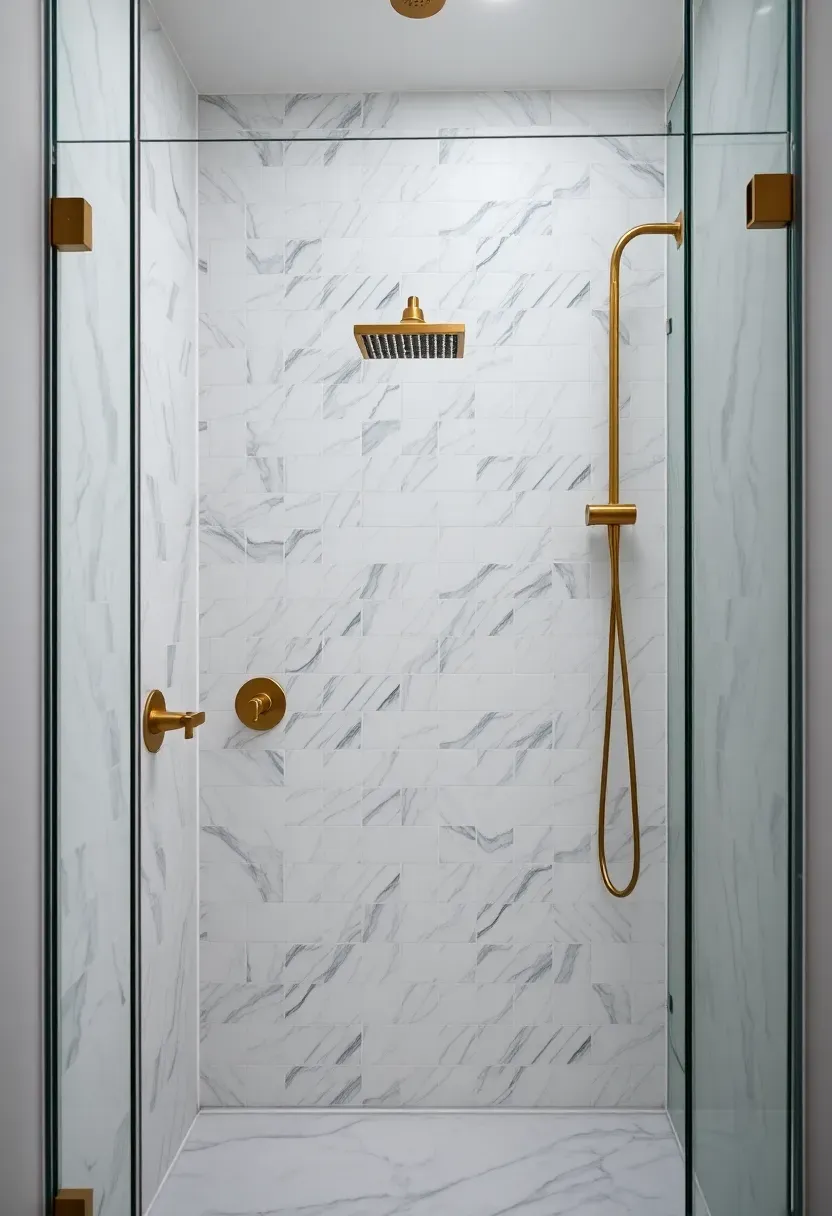
5. Herringbone Marble Tile
The herringbone pattern makes marble feel less formal and more dynamic than a standard grid layout. Each piece is a small rectangle (typically 1x3 or 2x4 inches) set at 45-degree angles, creating a zigzag that draws the eye upward. Carrara and Calacatta are the classic choices, but Emperador dark marble or even gray Bardiglio create a moodier version. Real marble needs sealing every 6 to 12 months in a bathroom, and acidic cleaners will etch the surface. For the look without the maintenance, porcelain tiles printed to mimic marble herringbone cost half as much and handle water without worry.
Tips
- Lay out the pattern dry on the floor first — herringbone is unforgiving if your starting line is off
- Book-match veining across adjacent tiles for a cohesive look
- Use marble only on walls, not shower floors, where standing water accelerates staining
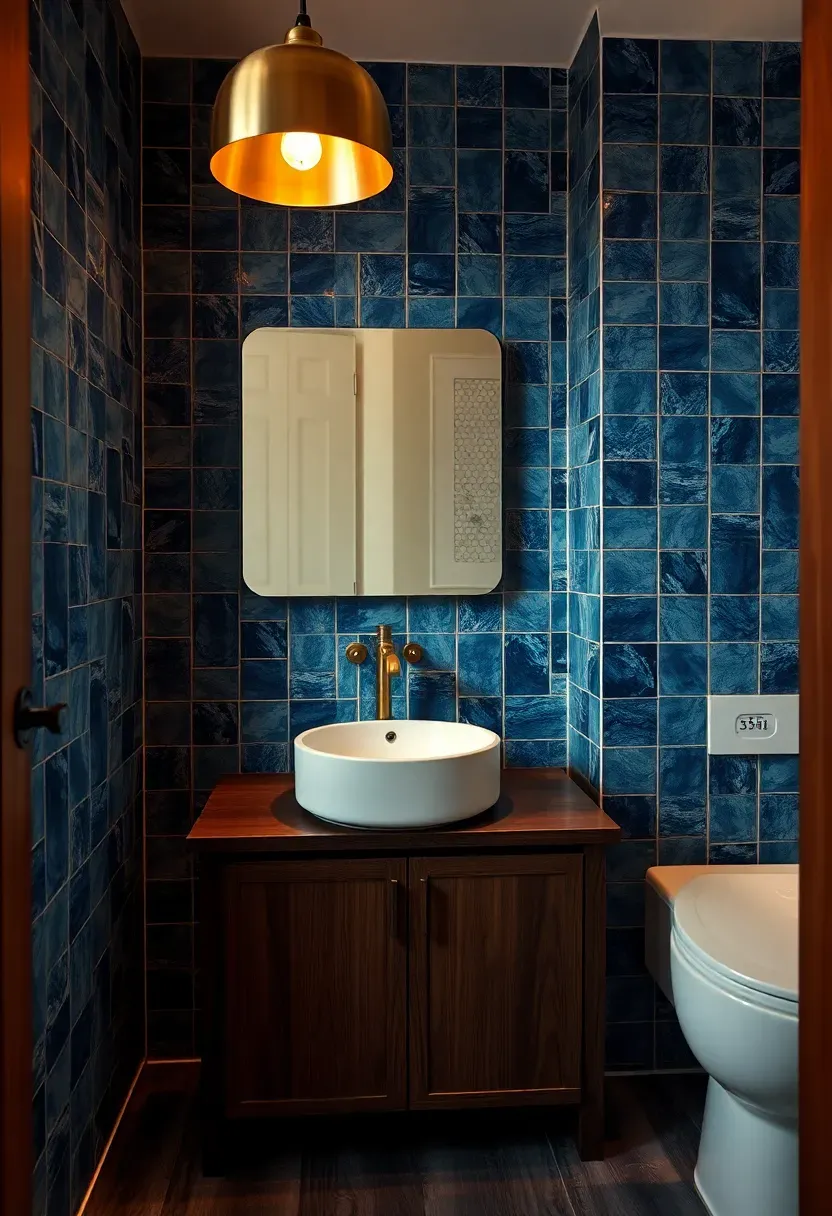
6. Handmade Ceramic Tile
Factory tiles are precise. Handmade ceramics are not, and that is their advantage. Each tile has slight variations in color, thickness, and glaze — some glossy, some matte, some with visible brush marks or kiln spots. This creates a wall that reads as crafted rather than installed. Small-batch producers offer colors you will not find at big-box stores: deep ocean blues, mossy greens, burnt sienna, dusty rose. Prices range from $18 to $45 per square foot depending on the maker. The irregular thickness means you will need more thinset and patience during installation, but the finished wall has a quality that flat, uniform tile cannot touch.
Tips
- Order 15% overage instead of the usual 10% — handmade tiles have higher breakage rates
- Mix tiles from multiple boxes during installation to distribute color variation evenly
- Pair with simple grout colors (white or light gray) to let the glaze variation do the talking
Recommended
Items for this idea
7. Terrazzo Tile Wall
Terrazzo started as Italian flooring in the 15th century — marble chips set in a cement binder, ground smooth. The wall tile version uses the same visual language but in lighter, thinner panels that work vertically. Modern terrazzo tiles come with chips in specific color palettes: rose quartz and sage on white, black and gold on gray, blue and cream on ivory. The random chip distribution means no two tiles look alike, but they share enough color DNA to read as unified. At $12 to $25 per square foot, terrazzo tiles cost more than basic ceramic but deliver a surface that feels genuinely different. They handle humidity fine and clean with a damp cloth.
Tips
- Large-format terrazzo tiles (24x24 or bigger) show the pattern better than small mosaic sizes
- Avoid overly busy chip patterns in small bathrooms — two or three chip colors maximum
- Terrazzo pairs well with simple brass or matte black fixtures that do not compete visually
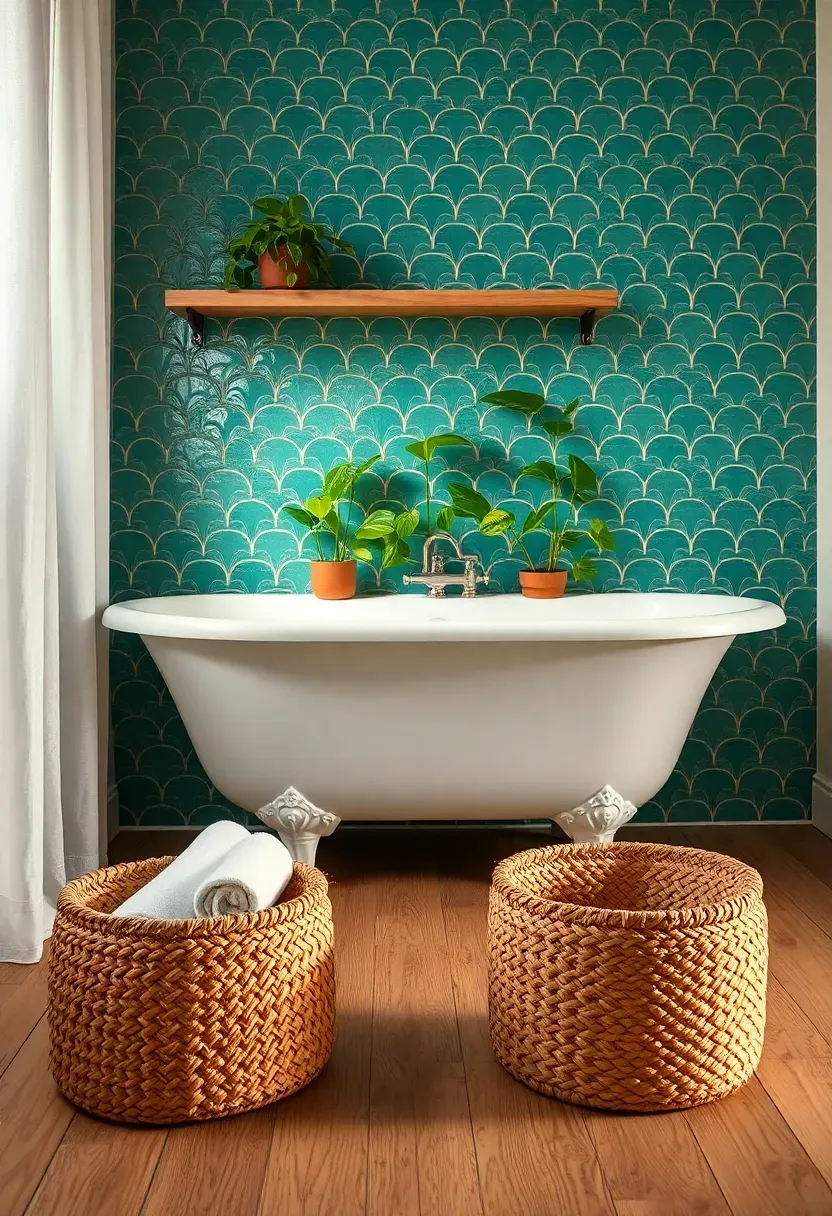
8. Fish Scale Tile
How to install
Fish scale (or fan-shaped) tiles interlock in rows where each tile nests into the curve of the one below. Start from the bottom center of your wall and work outward. Snap a vertical center line and a level horizontal line to keep rows aligned. Use tile spacers between each piece — 1/16 inch works for most fish scale tiles. The curved edges make cutting border tiles tricky; a wet saw with a diamond blade handles the curves, but expect to waste a few on practice cuts.
Step 1: Prepare your substrate
Cement board screwed to studs, taped and thinset at the seams. Flat is critical — any bump shows through these small tiles.
Step 2: Set the first row
Apply thinset with a 1/4-inch V-notch trowel. Press each tile and wiggle slightly to collapse the thinset ridges. Check level every four to five tiles.
Step 3: Build the pattern upward
Each new row offsets by half a tile width. The interlocking curve creates the scalloped look. Work in sections of three to four rows before the thinset skins over.
Watch out
- Do not rush the grout — wait 24 hours minimum for thinset to cure in humid bathroom conditions
- Glossy glazes show grout haze more than matte; buff carefully with a damp sponge
Recommended
Items for this idea
9. Vertical Subway Tile Stack
Subway tile gets dismissed as boring, but orientation changes everything. Stacking standard 3x6 tiles vertically instead of in the traditional horizontal brick pattern creates clean, modern lines that draw the eye upward — useful in bathrooms with standard 8-foot ceilings. The vertical stack bond layout exposes more continuous grout lines, so grout color becomes a real design decision. Dark grout on white tile makes the grid graphic and bold. Matching grout lets the tiles blend into a quieter texture. Cost is the biggest advantage here: basic white ceramic subway tile runs $2 to $4 per square foot. The vertical layout does require more precision because misaligned grout lines are immediately visible.
Tips
- Use a laser level for vertical grout lines — eyeballing vertical stack bond shows every error
- Consider 4x12 or 4x16 elongated subway tiles for a more contemporary proportion
- Matte finishes hide water spots better than glossy in splash-prone areas
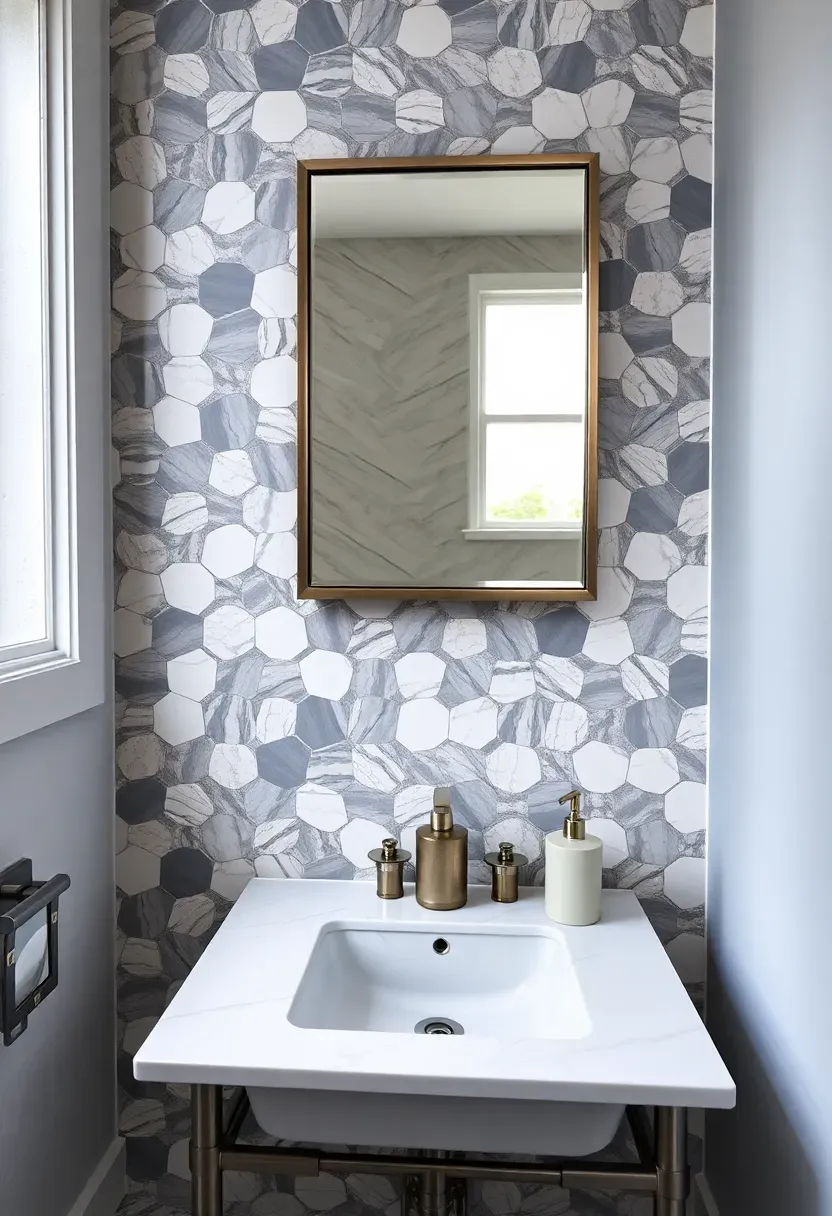
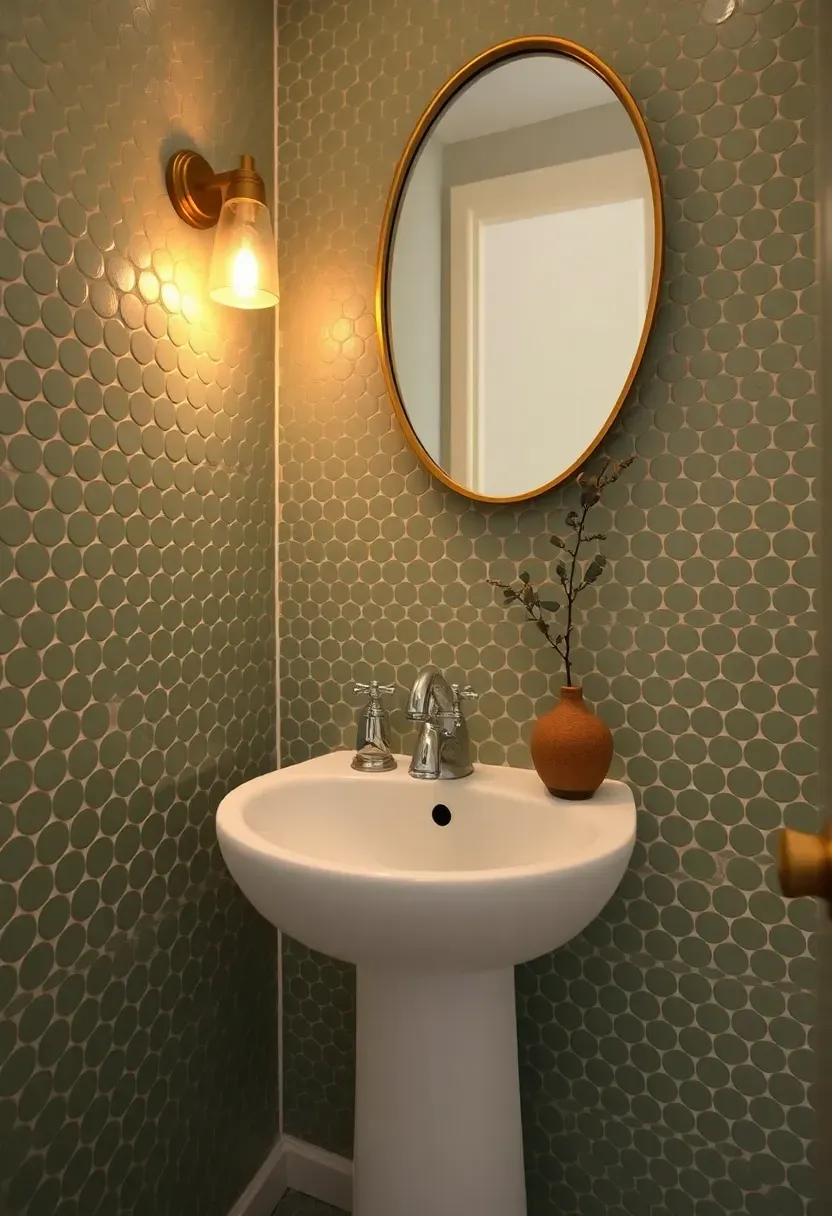
10. Hexagonal Tile Pattern
Hexagonal tiles — typically 2 to 4 inches across — create a honeycomb pattern that feels organic compared to rectangular grids. Mixing two or three shades within the same color family (light gray, medium gray, white) adds depth without creating visual chaos. Marble hexagons have natural veining that varies piece to piece, giving the wall movement. Porcelain versions offer the same geometry at lower cost and zero maintenance. The hexagonal shape means more grout lines per square foot, which increases installation time by roughly 20% compared to standard formats. Small hex tiles on mesh backing speed things up significantly.
Tips
- Randomize shade placement during layout — avoid clustering same-tone tiles
- Hex tiles look best floor-to-ceiling rather than stopped at a midpoint
- In showers, the extra grout lines mean extra sealing attention; use epoxy grout for wet zones
Recommended
Items for this idea
11. Cement Tile with Bold Pattern
The case for cement tile
Cement tiles are not fired — they are pressed under hydraulic force, which gives them a matte, chalky surface completely different from glazed ceramic. The patterns are made by pouring pigmented cement into molds, so colors run through the full thickness of the tile rather than sitting on a surface glaze. This means they age gracefully: chips reveal the same color underneath rather than exposing a white clay body.
What to know before buying
Cement tile is porous. In a bathroom, you must seal it before installation, after grouting, and then annually. Prices run $10 to $25 per square foot for stock patterns, more for custom. Weight is comparable to natural stone. The patterns themselves — Moroccan stars, geometric grids, floral encaustics — deliver a level of visual density that works best on a single wall so it does not overwhelm a small bathroom.
Choose cement tile if
- You want an old-world, artisanal look that gets better with age
- Pattern and color matter more than low maintenance
- Your accent wall stays dry (behind the vanity, not inside the shower)
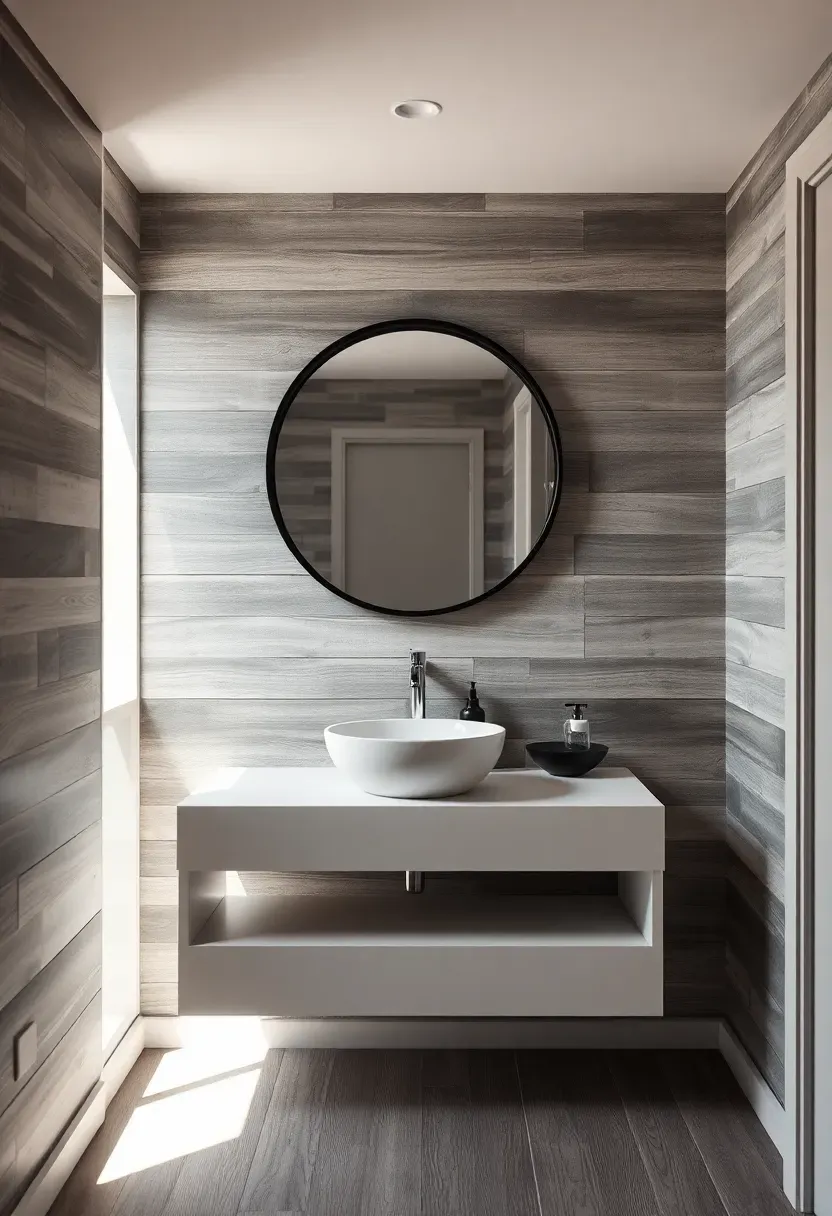
12. Reclaimed Wood Planks
Wood in a bathroom sounds risky, and it is — if you do it wrong. The key is keeping reclaimed planks on a wall that never gets directly wet, sealing them properly, and running your exhaust fan. Behind the vanity mirror or on the wall opposite the shower both work. Reclaimed wood adds warmth that tile and stone cannot match, and the patina of old barn wood or warehouse flooring tells a visual story that new materials lack. Kiln-dried reclaimed planks ($8 to $14 per square foot) are safer for bathrooms because the heat treatment stabilizes moisture content and kills anything living in the wood.
Tips
- Mount on furring strips with a 1/4-inch air gap behind for ventilation
- Apply marine-grade polyurethane (satin finish looks most natural) for moisture protection
- Avoid placing directly behind a toilet or next to a tub where splashing is constant

Recommended
Items for this idea
13. Vertical Wood Slat Screen
Vertical wood slats mounted with even spacing create a rhythm of light and shadow on a bathroom wall. The gaps between slats (typically 1 to 2 inches) let the wall color behind show through, adding a layered look. Oak, walnut, and cedar are common choices. Cedar has natural moisture resistance that gives it an edge in humid rooms. Slat walls work especially well when you mount LED strip lighting behind them — the light bleeds through the gaps and creates a soft glow that doubles as night lighting. Pre-made slat panels ($15 to $30 per square foot) simplify installation versus cutting and spacing individual boards.
Tips
- Seal all six sides of each slat before mounting, not just the visible face
- Use stainless steel or coated screws — regular steel will rust and streak the wood
- Keep slats at least 4 inches away from any direct water source
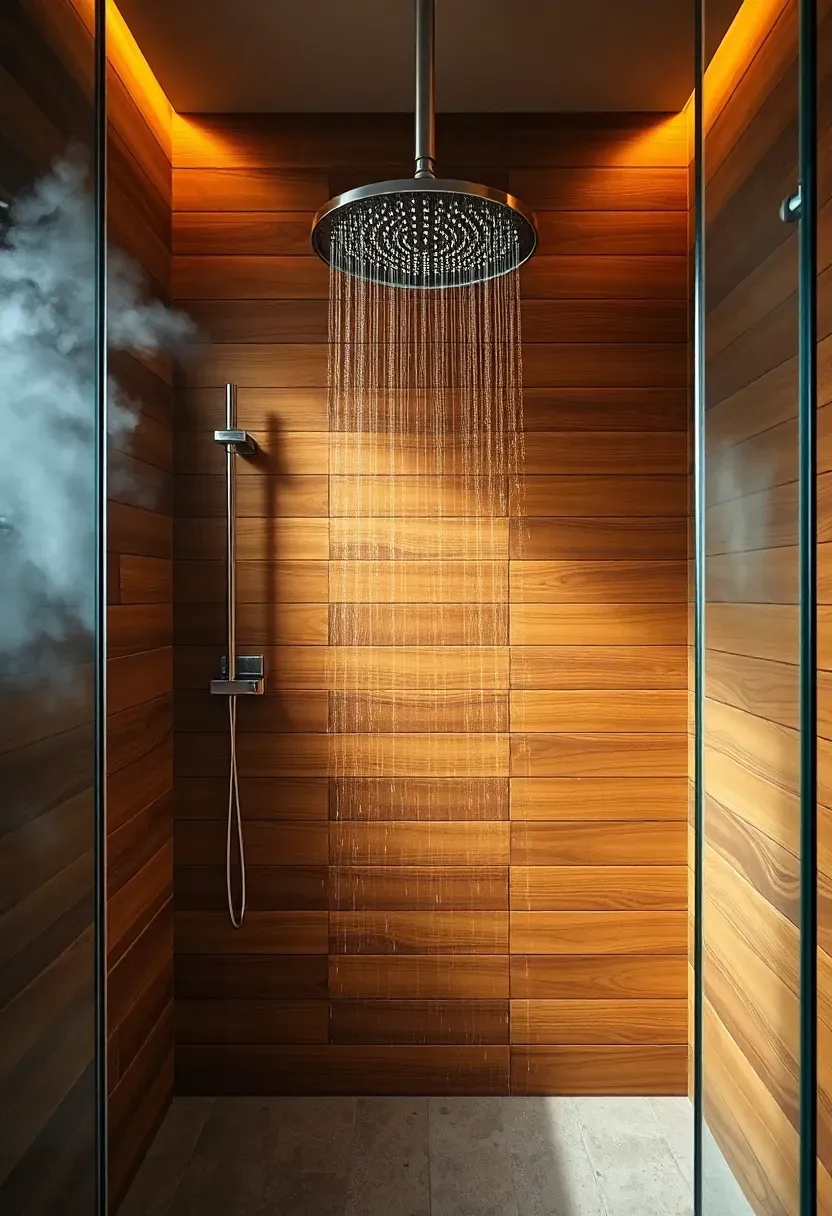
14. Teak Shower Wall
Teak is one of the few woods that can actually handle direct water contact long-term. Its natural oils make it resistant to rot, warping, and mildew — which is why it has been used in boat building for centuries. A teak accent wall inside a shower brings spa-resort warmth to a space dominated by cold tile and glass. Marine-grade teak planks run $25 to $50 per square foot, making this a premium choice. The wood develops a silver-gray patina over time unless you oil it periodically to maintain the golden-brown color. Either look works; it is a matter of preference.
Tips
- Use marine-grade stainless steel fasteners exclusively — no exceptions
- Leave 1/8-inch gaps between planks for water drainage and wood expansion
- Apply teak oil every 3 to 4 months if you want to maintain the warm honey color
Recommended
Items for this idea
15. Limewash Paint Finish
Limewash creates a chalky, cloud-like finish with subtle color variation across the surface. It is made from slaked lime and natural pigments, so the color sits in the plaster rather than on top of it like regular paint. Each brushstroke leaves visible movement, building up a mottled, lived-in look that flat latex paint cannot achieve. Application goes directly onto porous surfaces (raw plaster, unpainted drywall, or brick); it will not adhere to previously painted or sealed walls without a special primer. In bathrooms, limewash works on walls outside the splash zone. Colors deepen slightly when wet and return to their dry shade, which adds character to the shifting light in a bathroom throughout the day.
Tips
- Apply in thin, overlapping crosshatch strokes — do not roll it on
- Two coats minimum; three coats for richer color depth
- Seal with a breathable wax topcoat in bathrooms to protect against moisture absorption
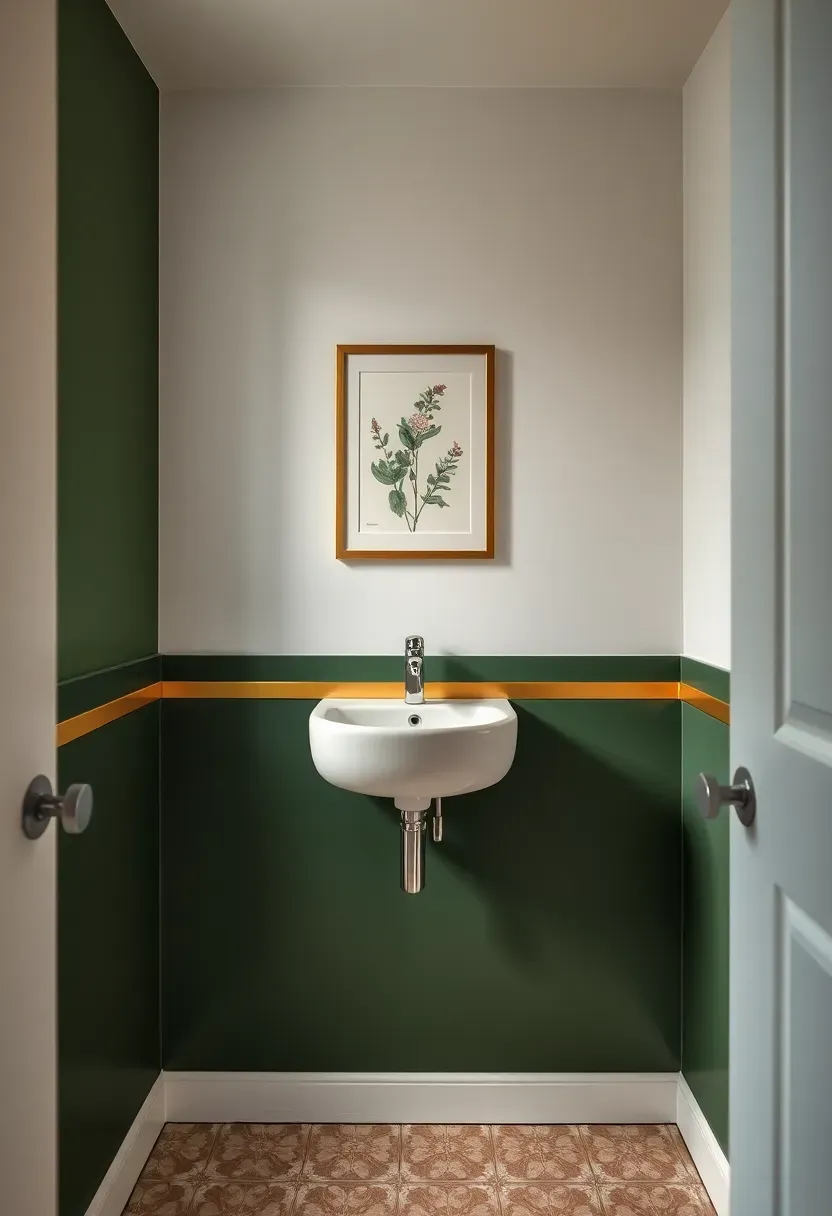
16. Color-Block Painted Wall
Color blocking splits a wall into two or more fields of contrasting color, usually with a hard horizontal line. The most common bathroom version divides the wall at chair-rail height (about 36 inches) with a darker color below and lighter above. This is practical in bathrooms: the darker lower section hides water marks and fingerprints while the lighter upper section keeps the room feeling open. A thin brass or chrome trim strip at the color break adds a polished detail. Total cost is just paint and tape — under $50 for most accent walls. The technique works on any wall surface that takes paint.
Tips
- Use high-quality painter's tape and burnish the edge with a putty knife before painting
- Semi-gloss or satin finish on the lower section resists moisture better than flat
- Pick colors at least four shades apart on the same paint strip for readable contrast
Recommended
Items for this idea
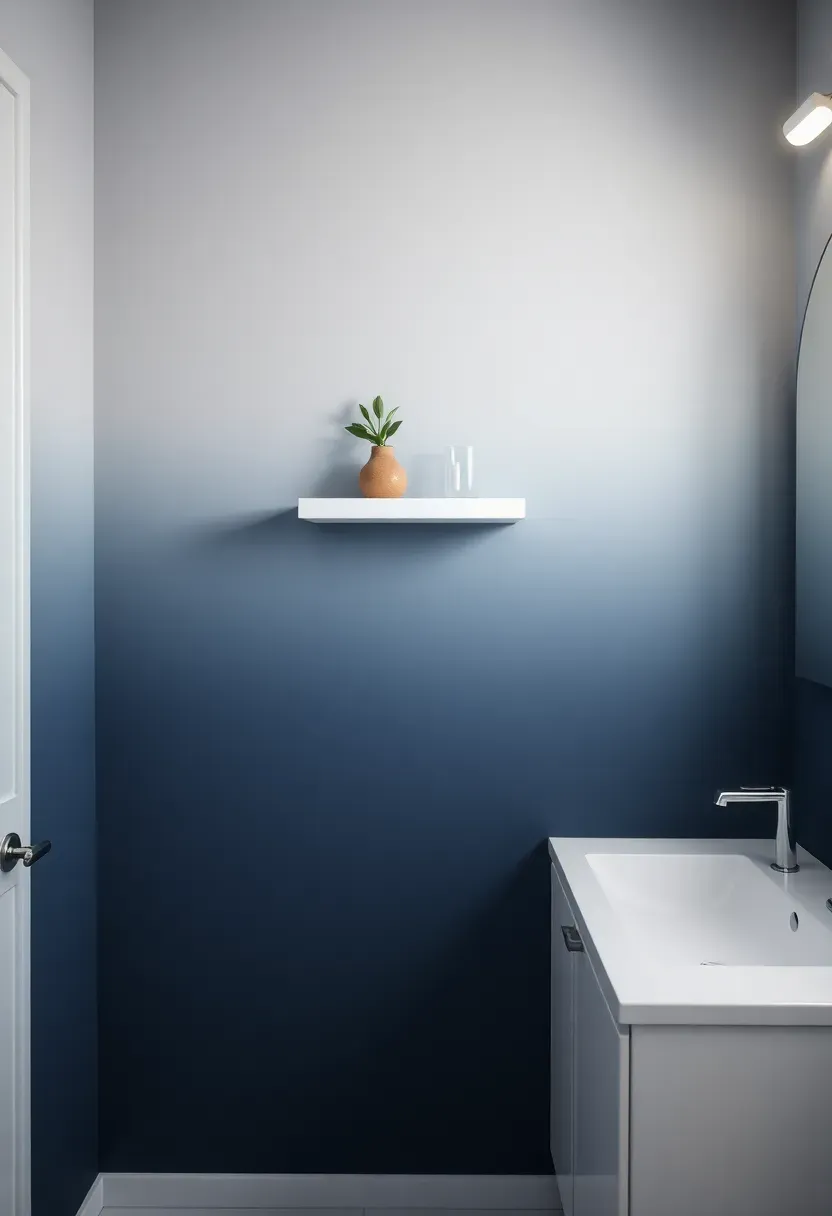
17. Ombre Paint Gradient
How to achieve the gradient
An ombre wall fades one color into another — usually dark at the bottom to light at the top, or saturated to desaturated. The technique requires working quickly before the paint dries, blending the transition zone with a wide dry brush while both colors are still wet.
Step 1: Paint the base
Roll your darker color on the lower third and your lighter color on the upper third. Leave the middle third unpainted.
Step 2: Blend the middle
Mix the two colors in a separate container for a midtone. Roll it into the center section, overlapping the edges of both the dark and light zones by about 6 inches.
Step 3: Feather the transitions
Use a clean, dry 6-inch brush in long horizontal strokes to blur the boundaries. Work fast — you have about 15 minutes before the paint tacks up.
Watch out
- Practice on cardboard first; the blending window is shorter in warm, dry bathrooms
- Flat or matte paint blends more forgivably than satin or semi-gloss
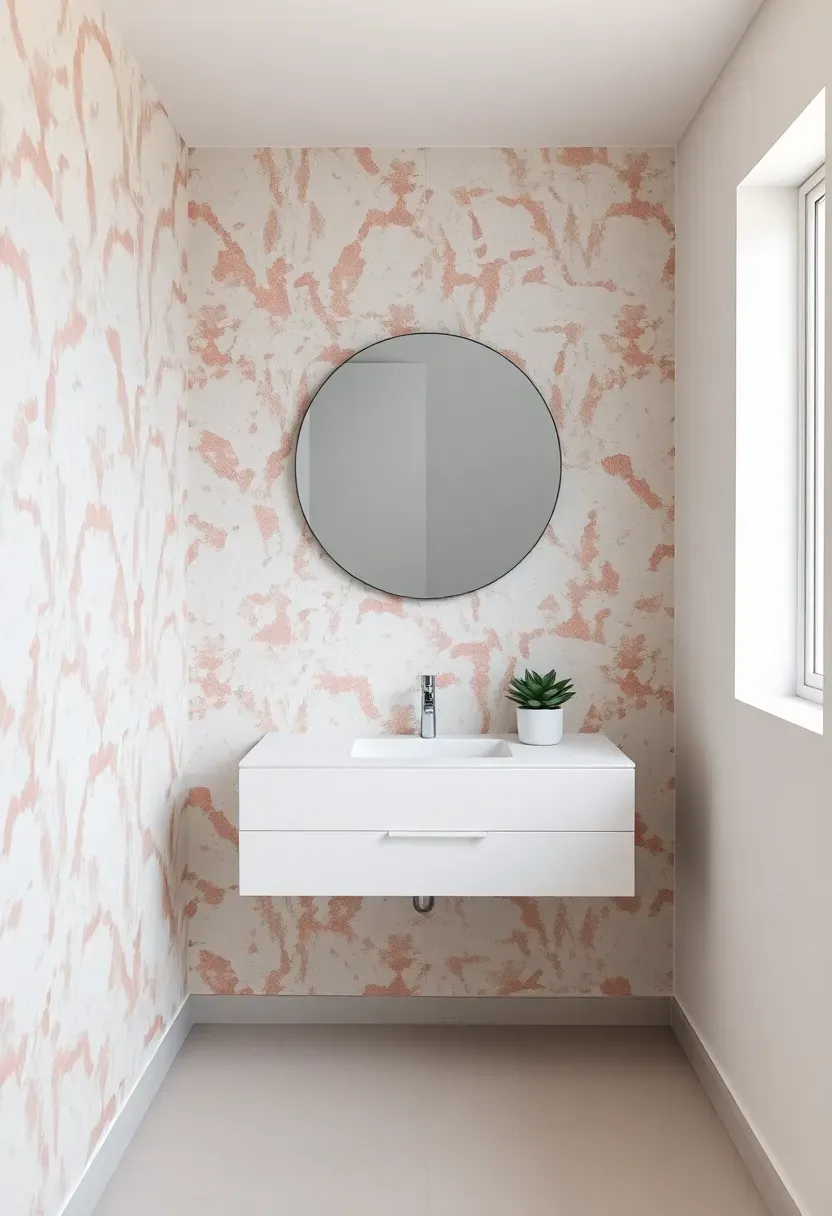
18. Moisture-Resistant Wallpaper
Not all wallpaper belongs in bathrooms, but vinyl-coated and solid vinyl wallpapers are designed for high-humidity environments. They resist peeling, and you can wipe them clean with a damp cloth. The adhesive matters as much as the paper — use a mold-inhibiting paste, not standard wallpaper adhesive. Modern bathroom wallpapers come in patterns that range from subtle linen textures to bold abstract prints. Peel-and-stick options make this renter-friendly, though they are less durable long-term than paste-applied vinyl. Keep wallpaper on walls that do not get directly sprayed: opposite the shower, behind the vanity, or in powder rooms where humidity is intermittent.
Tips
- Prime walls with an oil-based primer before hanging to create a moisture barrier
- Overlap seams toward the light source so shadow lines at joins are less visible
- In full bathrooms (with shower or tub), run the exhaust fan for 20 minutes after bathing
Recommended
Items for this idea
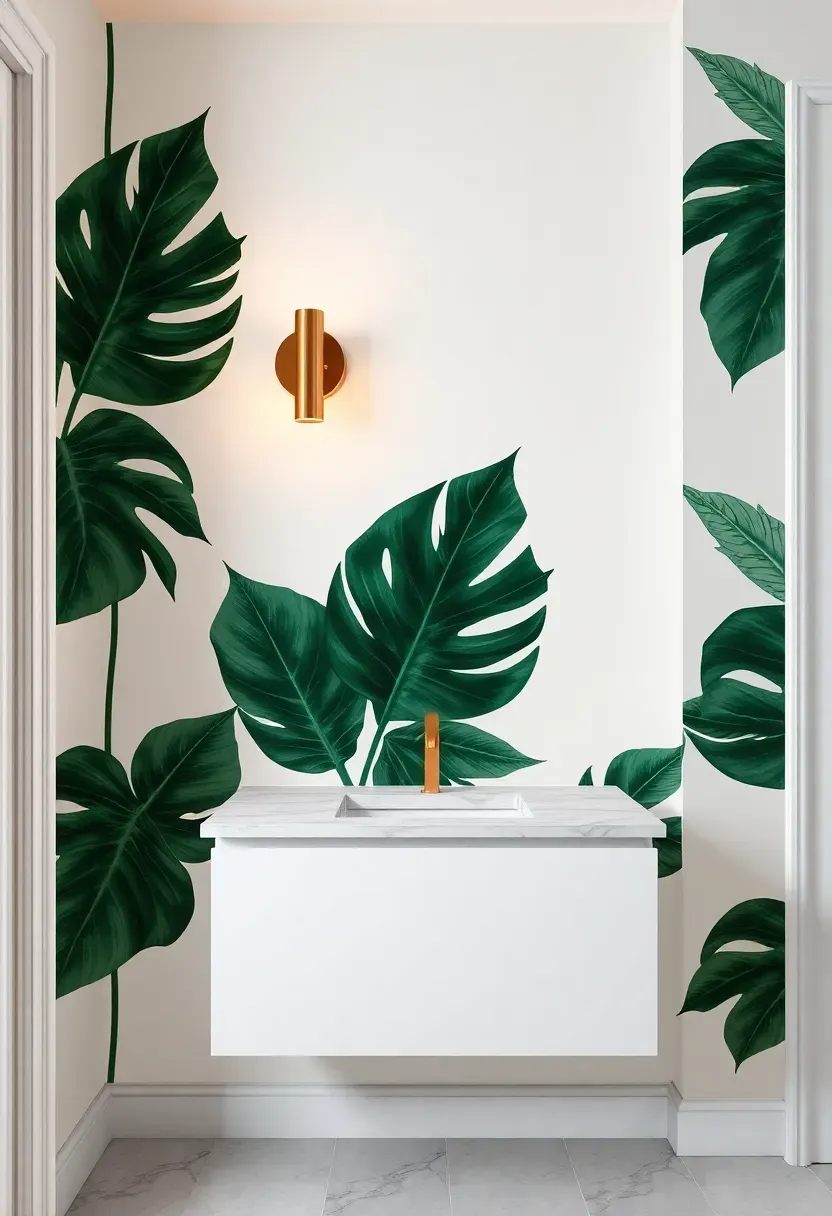
19. Botanical Print Wallpaper
Large-scale botanical prints — oversized palm fronds, banana leaves, trailing ferns — pair naturally with bathrooms because the humidity connection feels right. A single wall covered in leafy wallpaper can make a small bathroom feel like a garden conservatory. The scale of the print matters: go large. Small, repeating botanical patterns read as busy at close range, and bathrooms are all close range. Vinyl or vinyl-coated botanical prints run $40 to $120 per roll, with each roll covering roughly 28 square feet. Dark backgrounds (black, navy, deep green) with lighter botanical motifs create more drama than the reverse.
Tips
- Center the pattern on the focal wall so the largest leaves or fronds are symmetrically placed
- Match pattern repeats carefully at seams — botanical prints expose misalignment more than abstract patterns
- Pair with simple white or neutral fixtures to avoid visual competition
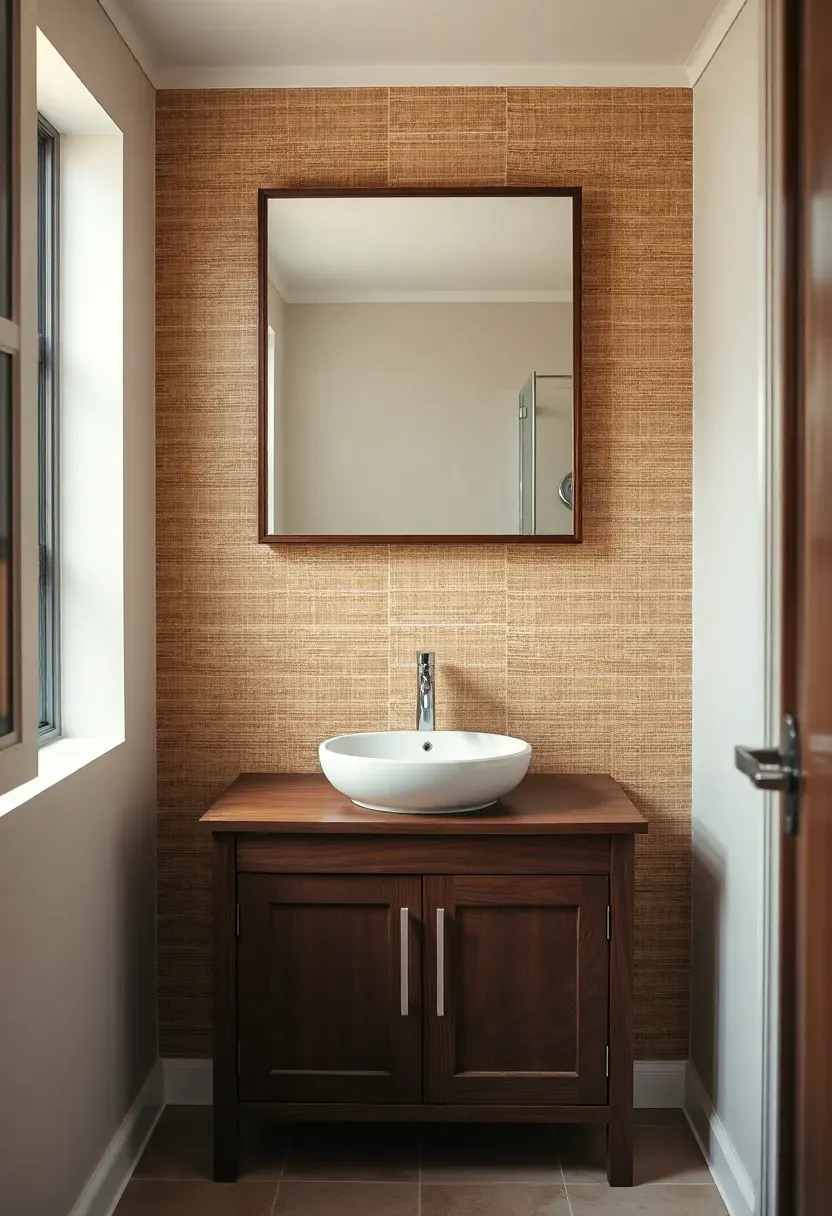
20. Grasscloth Texture Wall
Grasscloth wallpaper is woven from natural fibers — jute, sisal, seagrass, or arrowroot — laminated to a paper backing. The texture is visible and tactile, with horizontal striations that change appearance as light shifts across the surface. Grasscloth adds organic warmth without pattern, making it a good choice when you want texture but not visual complexity. The downside in bathrooms: natural grasscloth absorbs moisture and can develop mildew if ventilation is poor. Vinyl grasscloth imitations have improved significantly and handle humidity without the risks. Real grasscloth runs $50 to $150 per roll; vinyl versions cost $30 to $70.
Tips
- Never install real grasscloth inside a full bathroom with a shower — use vinyl grasscloth instead
- Powder rooms with intermittent humidity are the safest spot for natural grasscloth
- Hang with the weave direction consistent across all strips for a uniform look
Recommended
Items for this idea
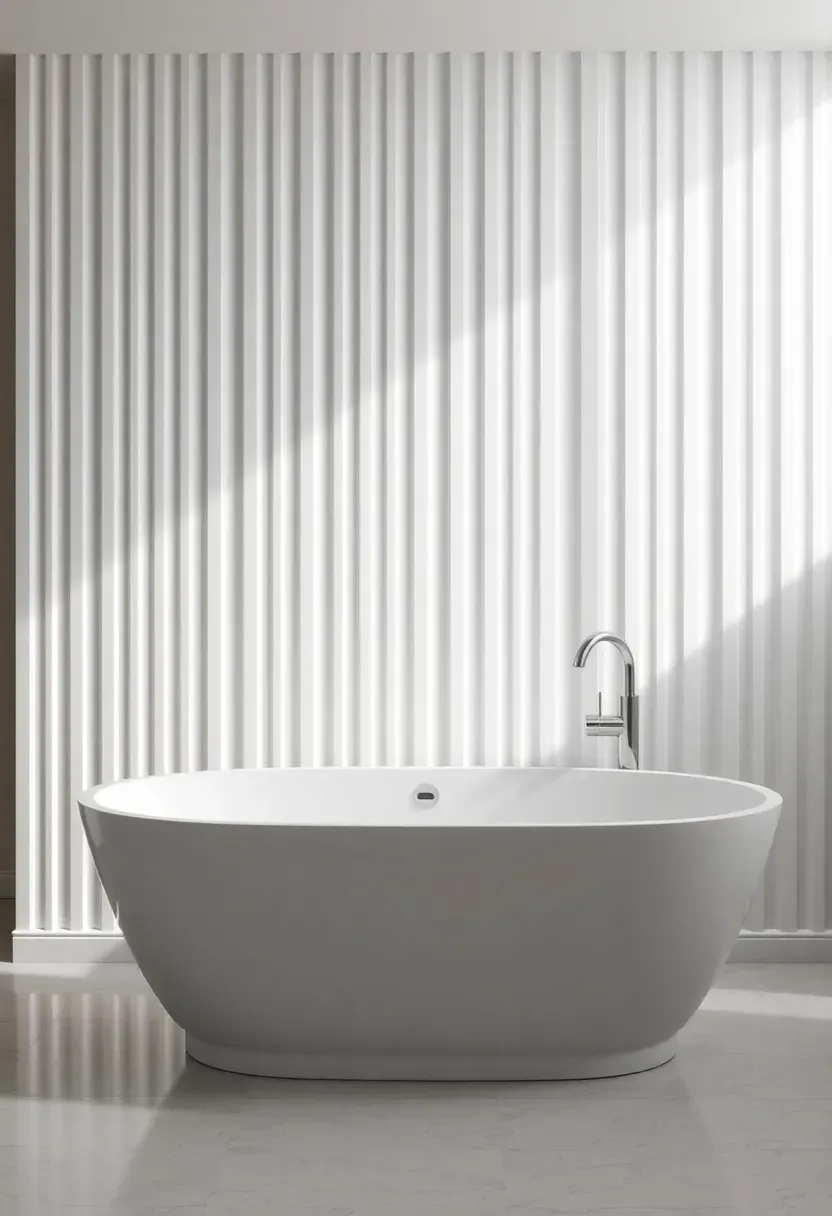
21. 3D Fluted Panel
Fluted panels have evenly spaced vertical grooves — like a stretched-out version of corrugated cardboard — that create shadow lines and tactile interest on a flat wall. MDF fluted panels are the most common and affordable option ($8 to $15 per square foot), but they need moisture-resistant primer and paint in bathrooms. Solid surface and composite panels handle humidity better but cost more. The vertical lines visually raise ceiling height and give the wall an architectural quality that flat drywall lacks. Fluted panels behind a freestanding tub or flanking a vanity mirror are probably the most popular application right now.
Tips
- Prime all sides and edges of MDF panels before installation — exposed MDF swells when it absorbs moisture
- Mount with construction adhesive plus brad nails into studs for a secure hold
- Paint in the same color as the surrounding walls for a subtle textural effect, or contrast for emphasis
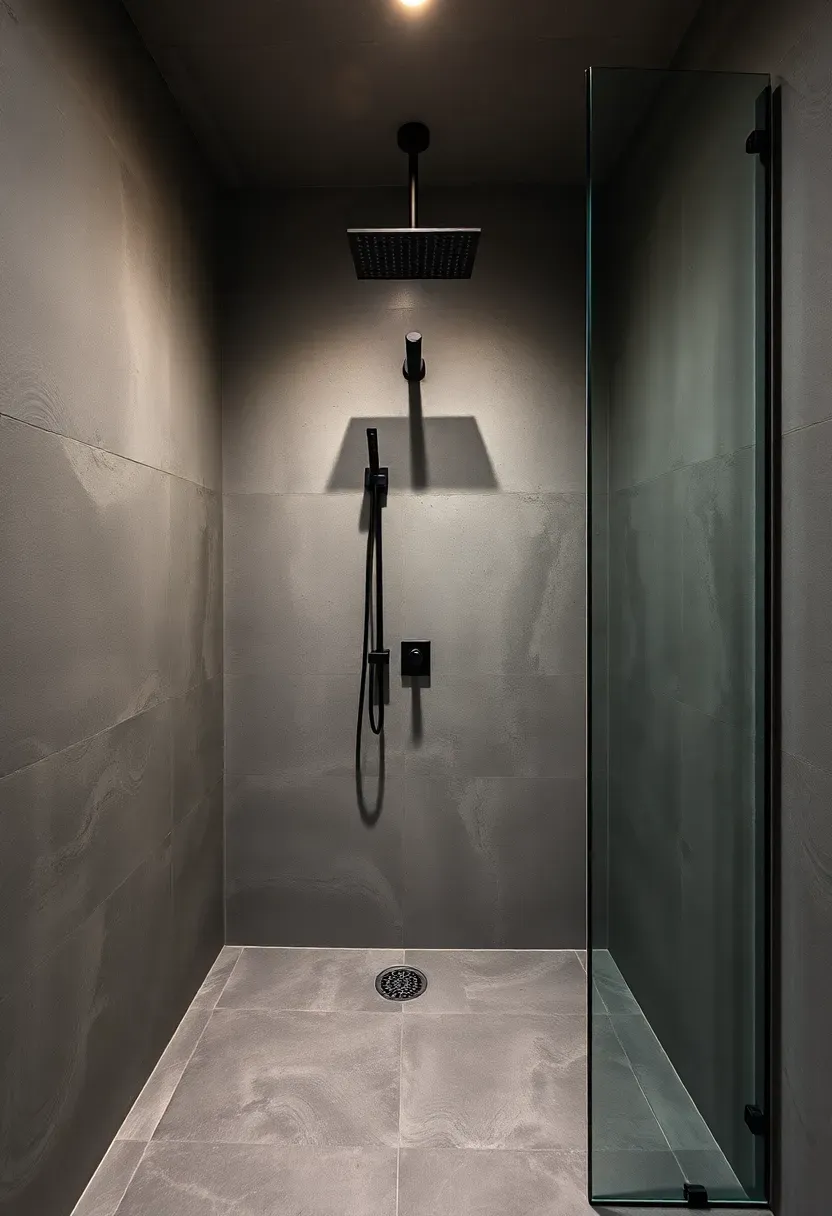
22. Concrete Microcement Finish
What it is
Microcement is a thin polymer-modified cement coating (2 to 3 millimeters thick) applied over existing surfaces — tile, drywall, concrete, even wood. It creates a seamless, poured-concrete look without demolition or the weight of actual concrete. The finish can be smooth and polished or left slightly textured, depending on how you trowel it.
Why it suits bathrooms
The seamless surface means no grout lines to clean or reseal. When properly sealed with a polyurethane topcoat, microcement is waterproof and can go inside showers, on floors, and on walls. Colors range from near-white to charcoal, with warm gray being the most requested. Material cost runs $5 to $12 per square foot, but professional application (recommended — the technique takes practice) adds $10 to $20.
Pros and cons
- Seamless, modern, industrial look without the weight
- Professional application is strongly recommended — DIY results vary widely
- Hairline cracking is possible if the substrate moves; flexible primers help prevent this
Recommended
Items for this idea
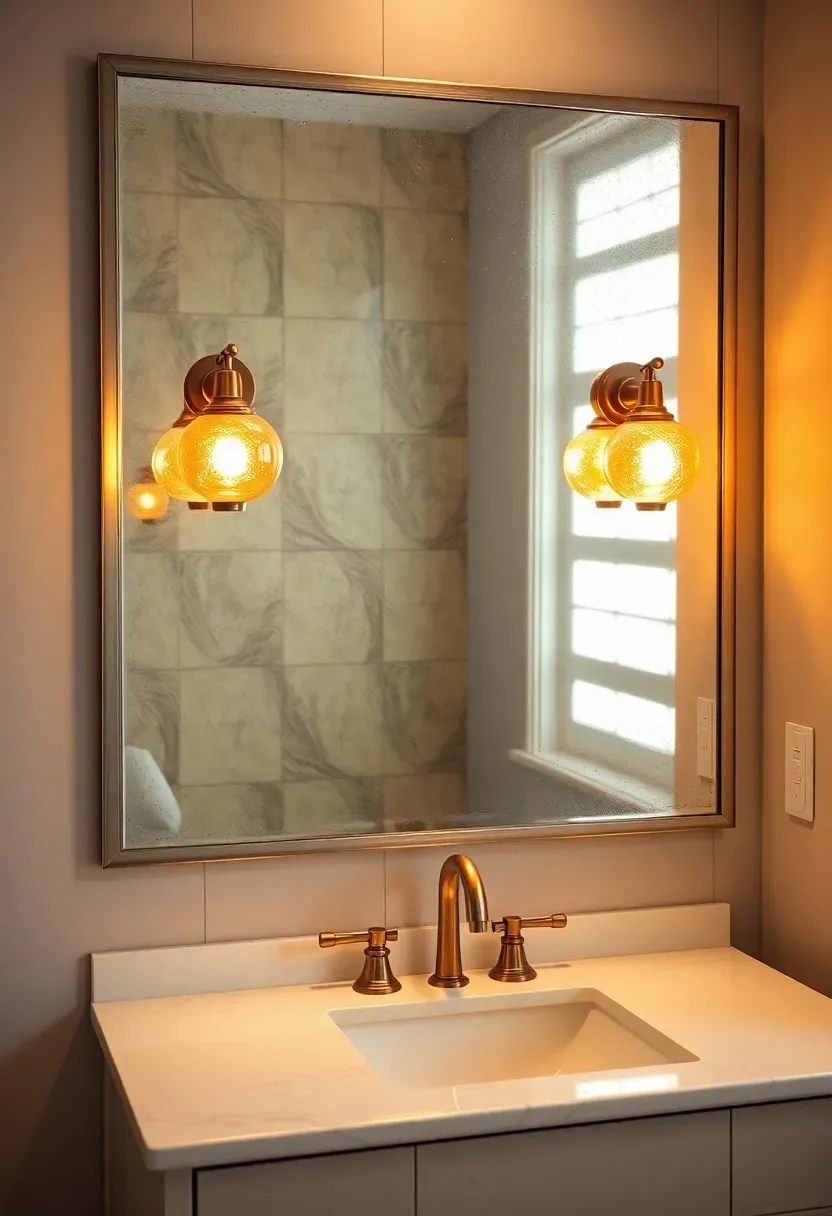
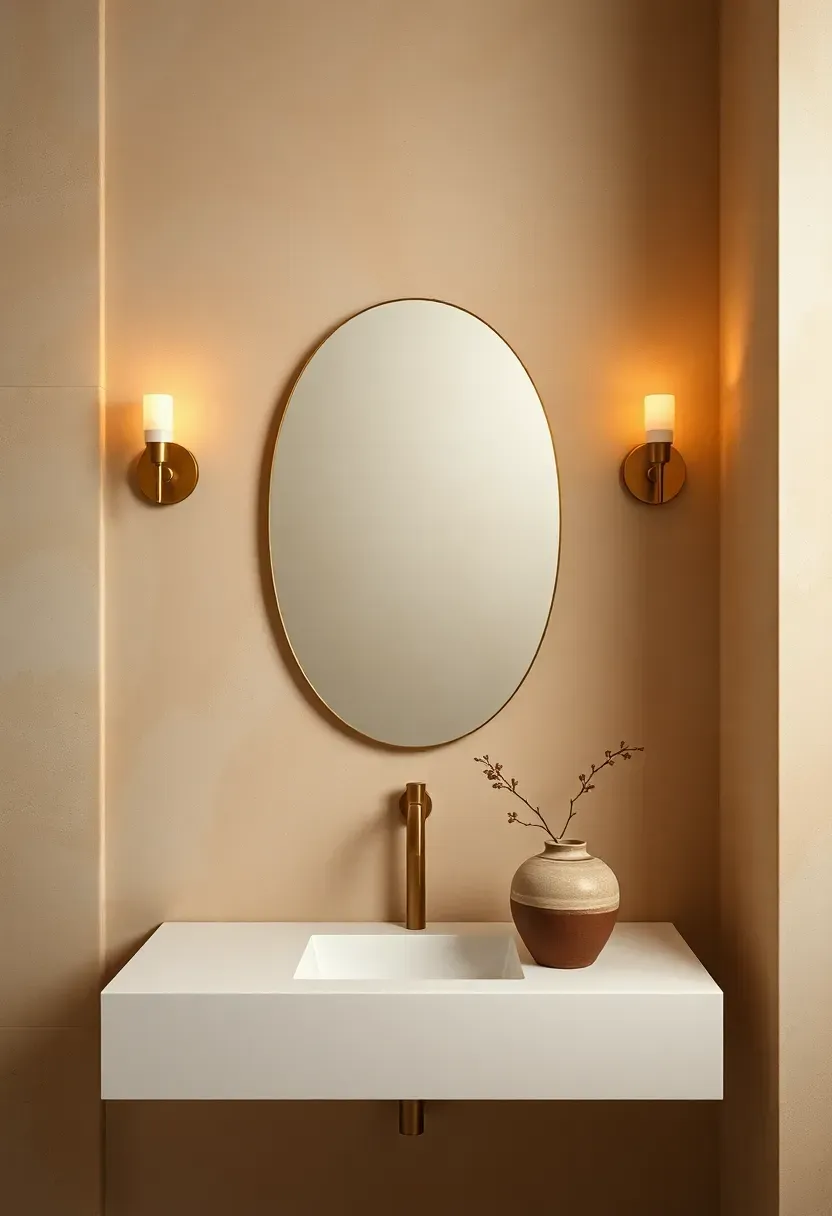
23. Mirror Wall Panel
A full or partial mirror wall behind the vanity amplifies light and makes small bathrooms feel twice their size. Antiqued mirror — with intentional clouding, foxing, or veining in the reflective surface — delivers the light-bouncing effect without the stark, gym-mirror look of clear glass. Antiqued mirror panels run $20 to $40 per square foot installed, compared to $8 to $15 for standard mirror. The panels mount with mirror adhesive or J-channel clips. In bathrooms without windows, a mirror accent wall is one of the most effective ways to fight the closed-in feeling that plagued every windowless bathroom you have ever been in.
Tips
- Use safety-backed mirror panels rated for wet environments
- Frameless mirror panels with minimal gaps create a more seamless look than framed segments
- Position opposite a window or light source for maximum reflected natural light
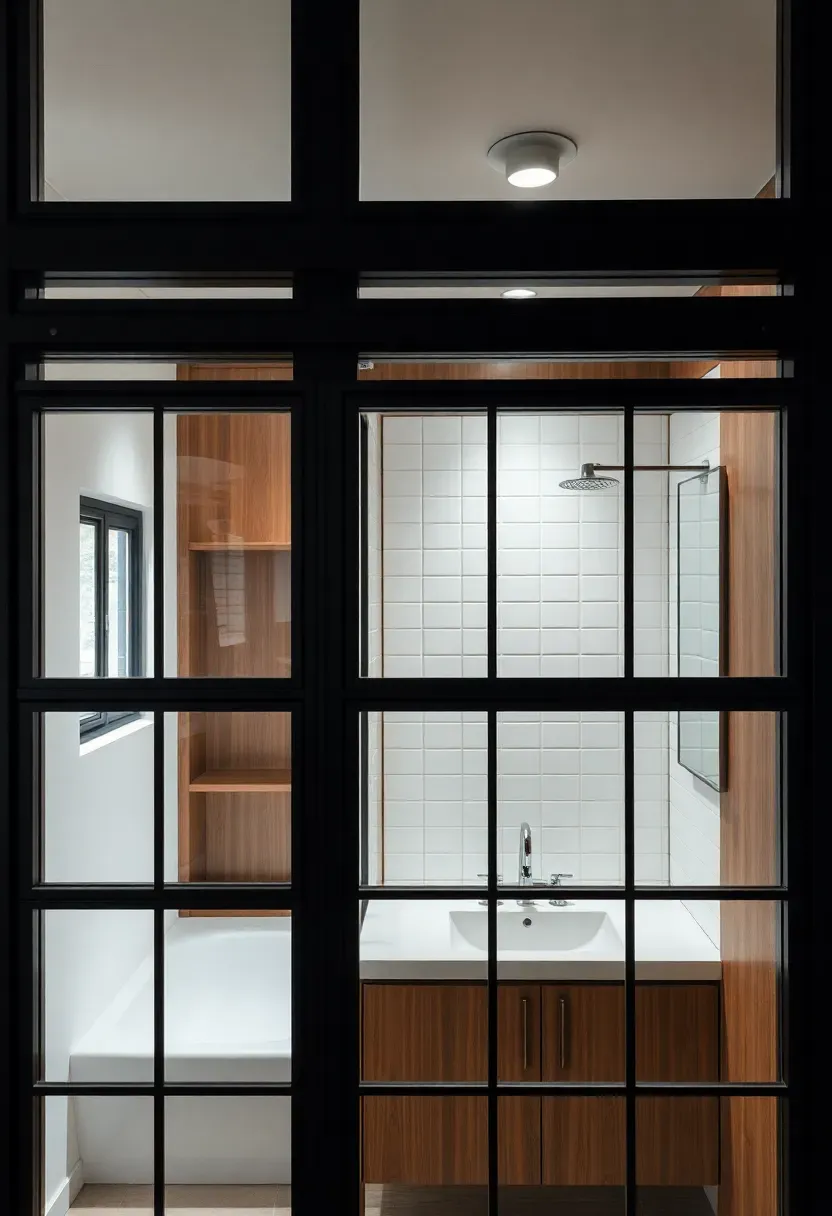
24. Black Steel-Frame Glass Partition
This is not a traditional accent wall — it is a wall made of steel-framed glass panels that divides the shower from the rest of the bathroom while staying visually open. The black steel grid gives an industrial-loft feel, and the glass lets light pass through both zones. Fixed panels (non-opening) are simpler and cheaper than hinged versions. Pre-fabricated steel-and-glass partition panels run $300 to $800 per panel depending on size. The look works best in bathrooms where you want spatial separation without the visual weight of a solid wall.
Tips
- Tempered glass is mandatory in bathroom wet zones — building codes require it
- Matte black powder-coated steel resists bathroom humidity better than painted steel
- Add a clear water-repellent coating to the glass to reduce water spot buildup
Recommended
Items for this idea
25. Venetian Plaster
Venetian plaster is built up in multiple thin layers of slaked lime and marble dust, troweled and burnished to create a polished surface with depth and movement. The finish can range from matte and chalky to highly glossy and almost stone-like, depending on how aggressively you burnish the final coat. The translucency of the layers creates color depth that paint simply cannot — light penetrates the surface and bounces back differently across the wall. In bathrooms, Venetian plaster needs a wax or sealer topcoat to handle humidity. Professional application runs $10 to $25 per square foot on top of materials.
Tips
- Apply at least three coats for proper depth — two coats looks thin and unfinished
- Burnish with a stainless steel trowel using firm pressure in random arcs
- Use beeswax sealer in bathrooms for both protection and a warm satin sheen

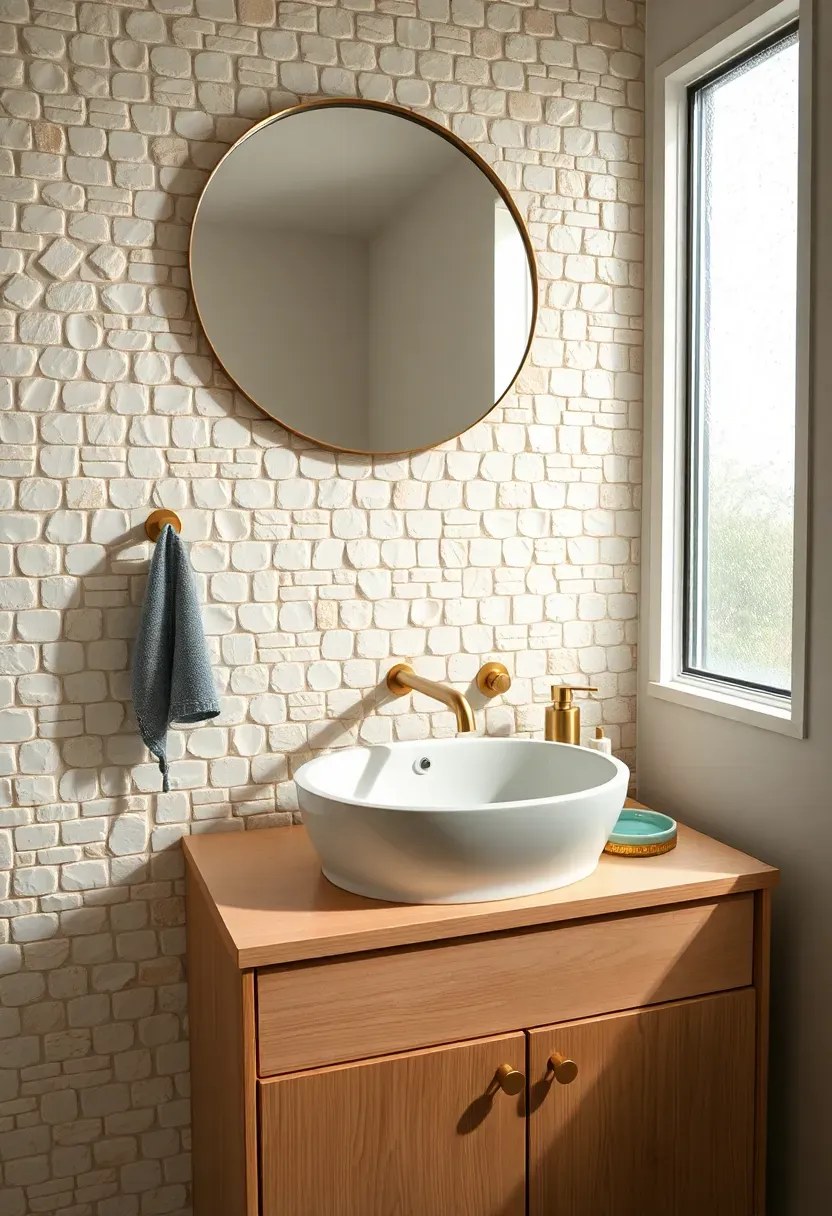
26. Brick Veneer Wall
Thin brick veneer (1/2 to 1 inch thick) gives you the look of a full brick wall at a fraction of the weight and depth. The veneer adheres to cement board or drywall with modified thinset, similar to tile installation. Real clay brick veneer has authentic color variation and texture that manufactured stone panels approximate but do not quite match. In bathrooms, brick's porous surface needs a penetrating masonry sealer to resist moisture absorption. The rough texture catches dust and soap residue, so plan for occasional scrubbing. White-washed brick veneer softens the industrial edge while keeping the texture.
Tips
- Seal with a breathable masonry sealer rather than a film-forming one — trapped moisture behind the sealer causes spalling
- White or light-gray mortar between bricks brightens the wall in darker bathrooms
- Keep brick veneer away from direct shower spray; opposite the shower or behind the vanity works best
Recommended
Items for this idea
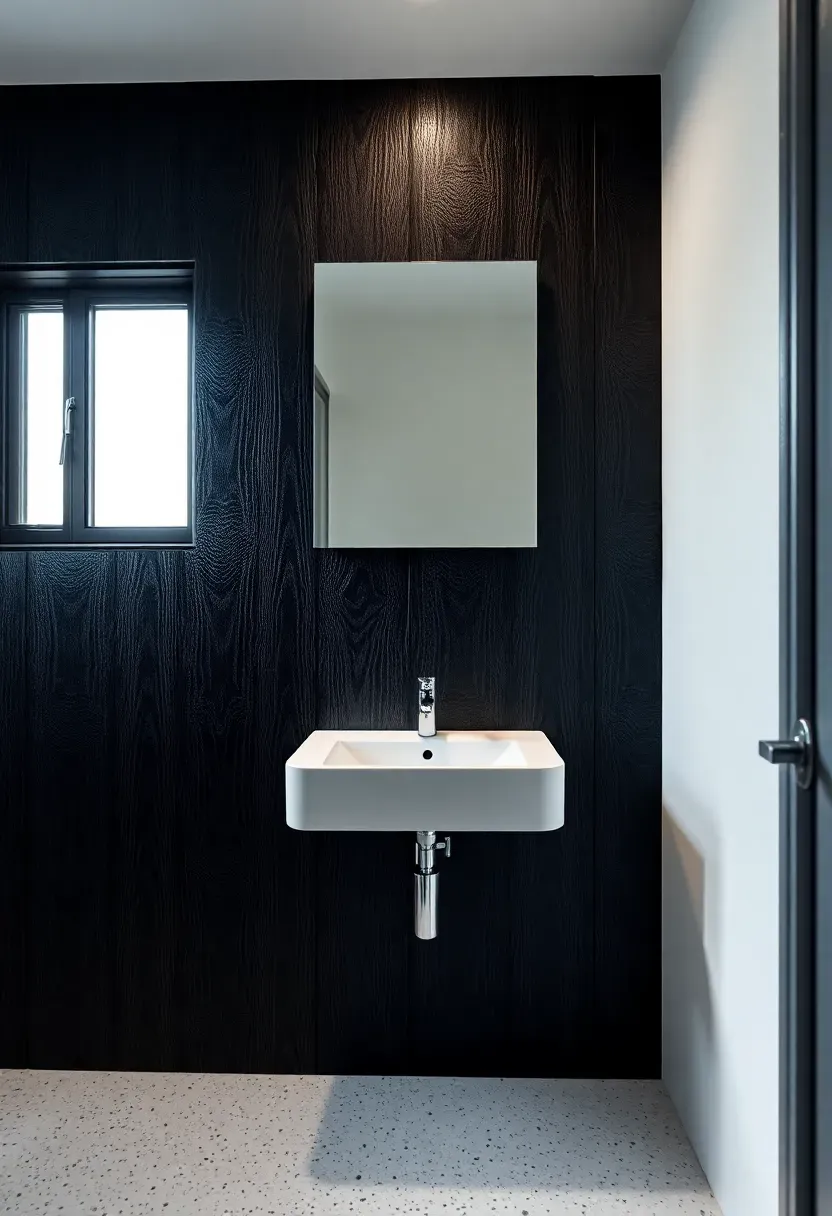
27. Shou Sugi Ban (Charred Wood)
Shou sugi ban is a Japanese technique where wood planks are charred with a torch, then brushed and sealed. The charring carbonizes the outer layer, creating a black, textured, alligator-skin surface that is naturally resistant to rot, insects, and moisture. The irony — fire-treated wood handling water better than untreated wood — makes this genuinely practical for bathrooms. Cedar and cypress are the traditional species. The deep black surface with visible wood grain underneath has a primal, elemental quality that photographs do not fully capture. Finished planks from specialty suppliers run $15 to $30 per square foot.
Tips
- Buy pre-charred planks rather than torching your own indoors — the process creates significant smoke
- Seal with a penetrating oil finish, not polyurethane, to maintain the matte charred texture
- The dark surface absorbs light; pair with bright white fixtures and adequate lighting
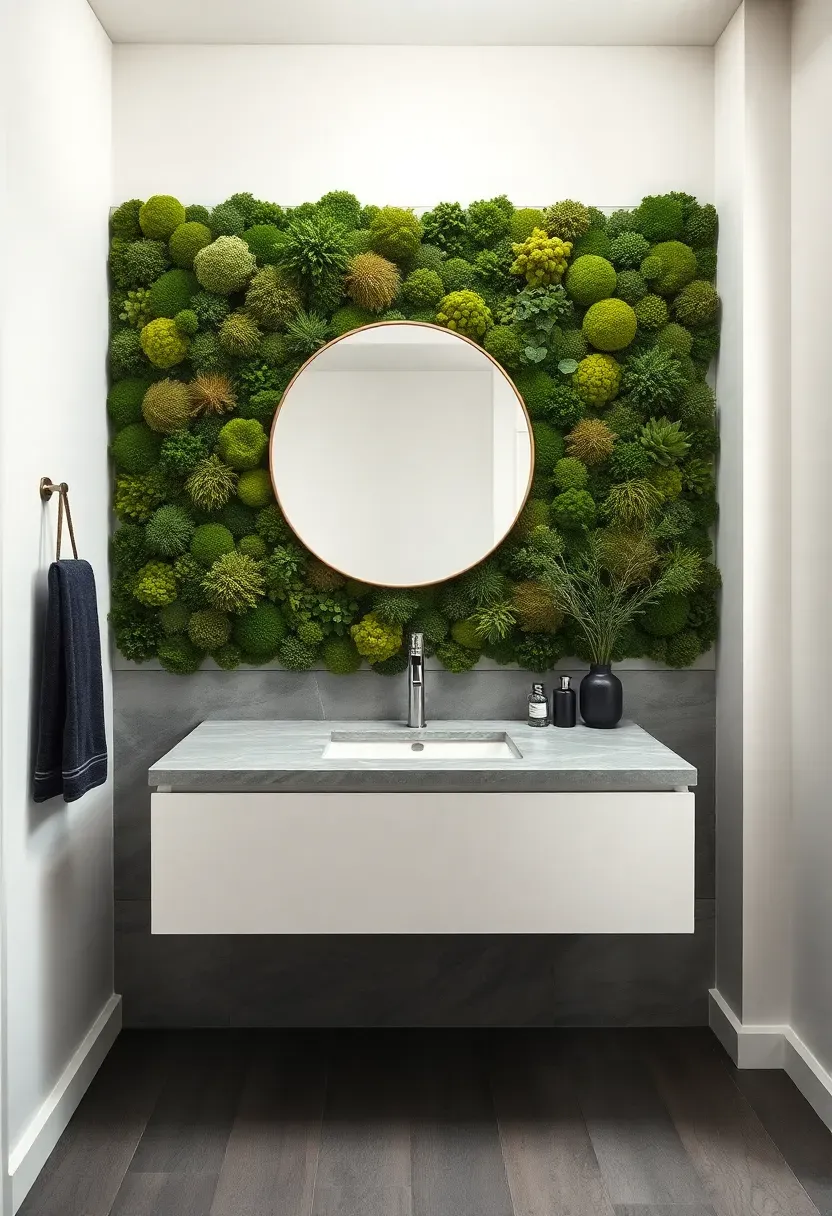
28. Living Moss Wall
Origins and modern use
Preserved moss walls started appearing in Scandinavian commercial spaces in the 2010s as a way to bring biophilic design indoors without the irrigation systems that living green walls require. The moss is harvested, then treated with glycerin to replace its moisture — keeping it soft and green indefinitely without water, soil, or sunlight.
How it works in a bathroom
Bathrooms are actually ideal for preserved moss because the ambient humidity keeps the moss supple. In very dry environments, preserved moss can become brittle; bathroom humidity solves this naturally. Panels come in flat sheet moss, cushion (bun) moss, or mixed styles. Expect to pay $30 to $60 per square foot for pre-made panels. They mount with construction adhesive or French cleats.
What to know
- No watering, no trimming, no sunlight needed — genuinely zero maintenance
- Avoid direct water contact; preserved moss should not get soaked
- The green color lasts 5 to 8 years before gradually fading
Recommended
Items for this idea
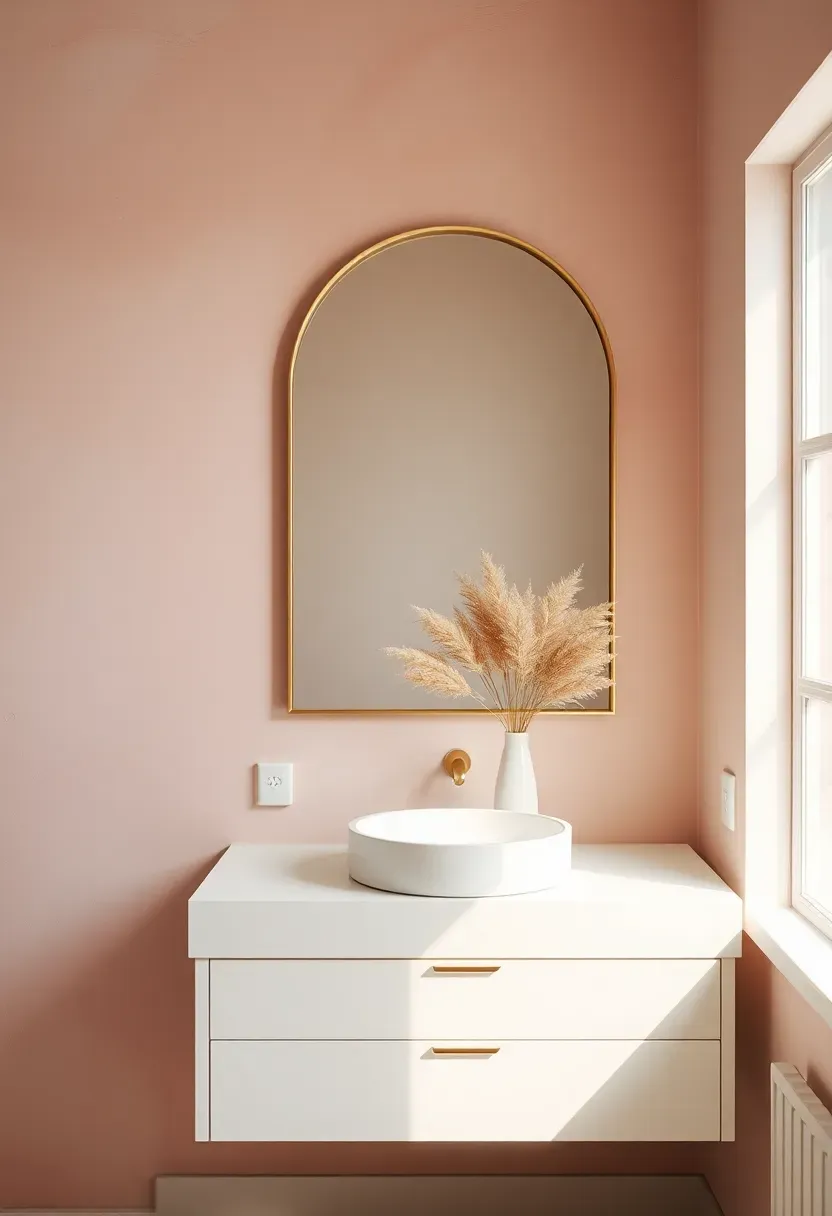
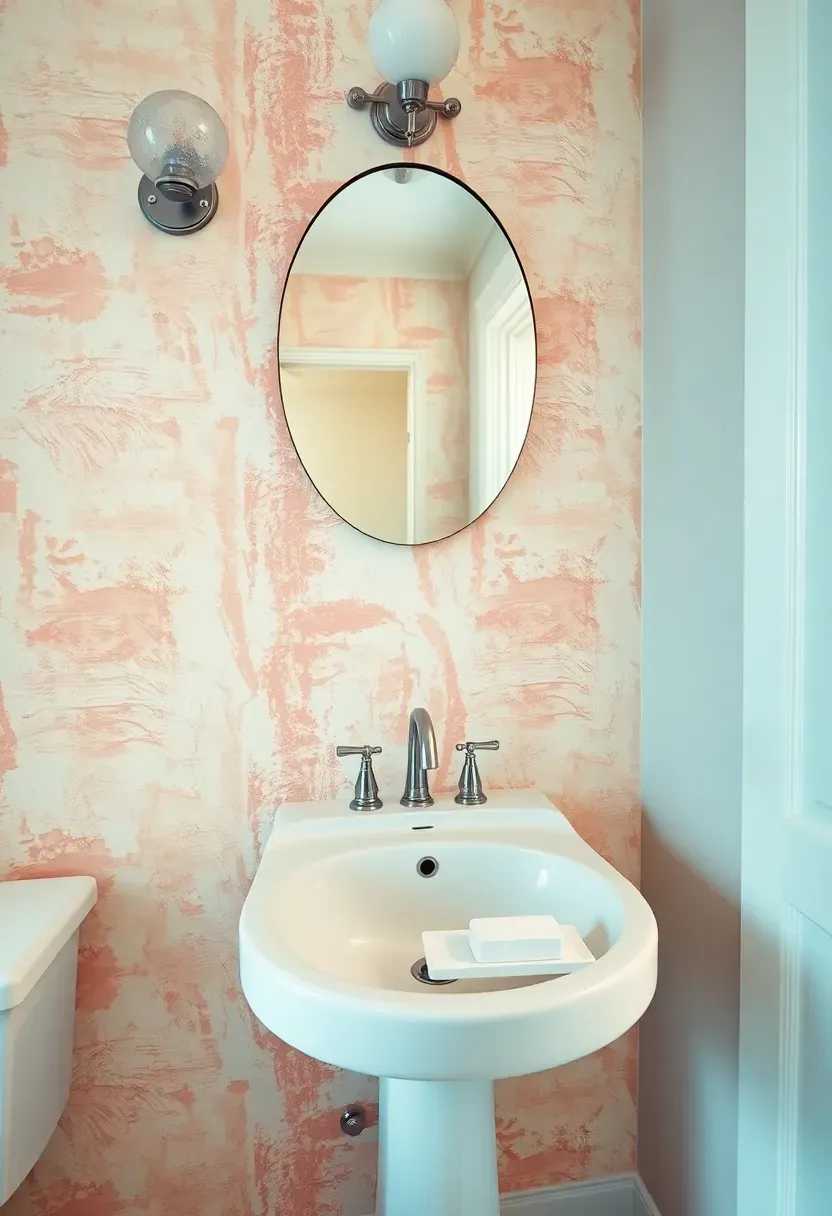
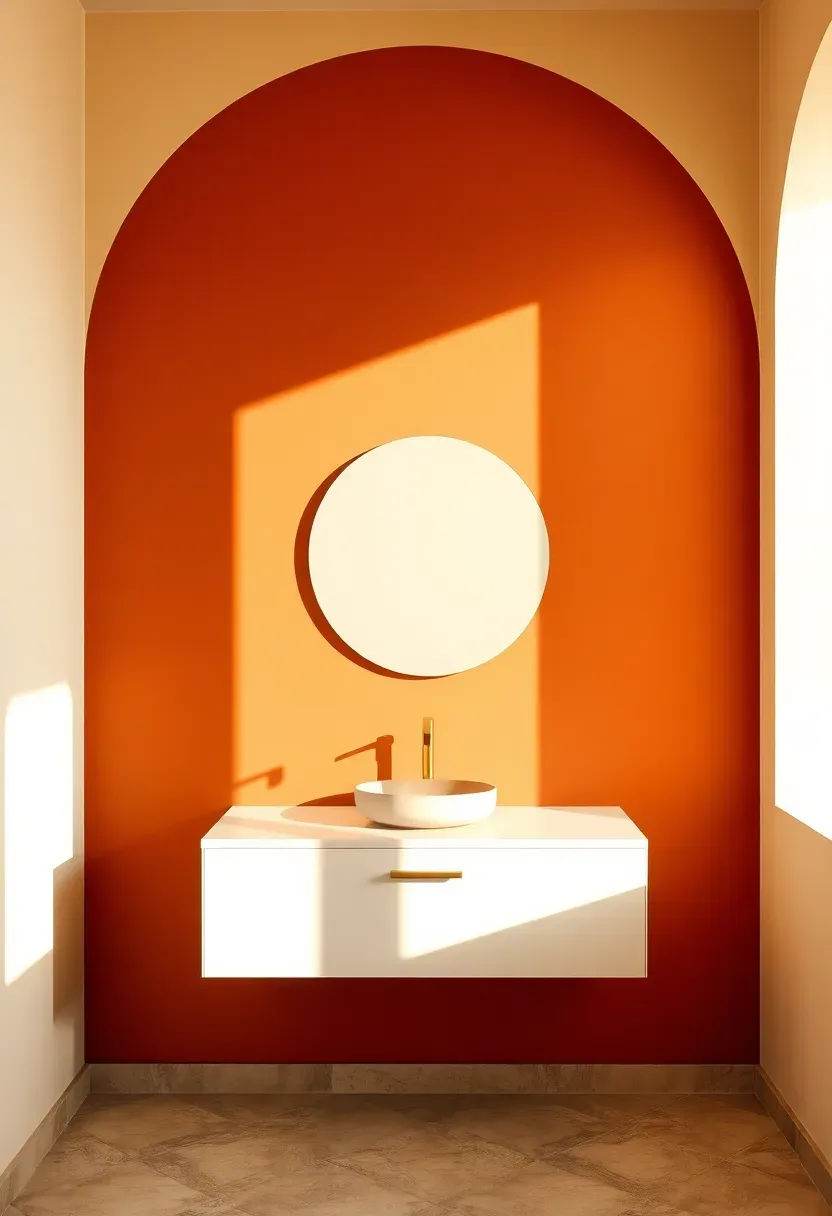
29. Painted Arch Mural
A painted arch is a simple trompe l'oeil effect: you tape and paint an arch shape on a flat wall, creating the illusion of an alcove or doorway. The curved shape softens the hard geometry of a typical bathroom and frames whatever sits in front of it — usually a vanity and mirror. The technique requires nothing more than a pencil, string (to draw the curve), painter's tape, and paint. Two contrasting colors — one for the arch, one for the surrounding wall — are all you need. Dusty terracotta, olive green, slate blue, or warm clay against a lighter neutral background are reliable choices. This is one of the most affordable accent wall options: a single quart of paint and an afternoon.
Tips
- Use a string-and-pencil compass anchored at the center point to draw a symmetrical arch
- Paint the arch color first, let it dry, then tape the edge and paint the background up to it
- Extend the arch from floor to above the mirror for full visual impact rather than floating it mid-wall
Quick FAQ
Does an accent wall make a small bathroom feel smaller? Not if you choose the right material and color. Light-colored tiles, mirrors, and glossy finishes actually expand the perception of space. Dark or heavily textured accent walls can close in a small room, so save those for bathrooms with more square footage or compensate with strong lighting.
Which bathroom wall should be the accent wall? The wall you see first when you open the door is the strongest candidate. In most bathrooms, that is the wall behind the vanity or the wall behind the tub. Avoid accent walls that are partially hidden behind a door swing — you lose the impact.
Can I use peel-and-stick tile for a bathroom accent wall? Yes, on walls that stay dry. Peel-and-stick products work well behind vanities and on walls opposite the shower. They are not rated for inside showers or directly above tubs where water regularly contacts the surface. The adhesive weakens with sustained moisture exposure.
How do I protect a wood accent wall from bathroom humidity? Seal all surfaces (front, back, edges) with marine-grade polyurethane or penetrating oil. Mount on furring strips to create an air gap behind the wood. And run your exhaust fan during and 20 minutes after every shower — this single habit does more than any sealant.
Are accent walls still in style for bathrooms? Accent walls are less about trend cycles and more about architecture. A well-executed material change on one wall creates a focal point the same way a fireplace does in a living room. The specific materials rotate in popularity, but the concept of a featured wall is not going anywhere.
A bathroom accent wall does not need to be complicated or expensive. Some of the best results here — the painted arch, the vertical subway stack, the color block — cost less than a nice dinner out. Others, like teak or porcelain slabs, are genuine investments. What matters more than the price tag is picking one wall and committing to it fully: floor to ceiling, edge to edge, with the rest of the room kept simple enough to let that wall breathe. Start with the wall you look at most and work from there.
Pinterest cover for 29 Bathroom Accent Wall Ideas
About the author
OBCD
CGI visualization and interior design content. We create detailed 3D renders and curate practical design ideas for every room in your home.