27 Bathroom Baseboard Ideas
Baseboards in bathrooms get overlooked until they start peeling, swelling, or growing mold along the bottom edge. The problem is that most builders install the same MDF baseboard they use everywhere else in the house, and MDF falls apart the moment moisture wicks into it. Bathrooms need baseboards that handle splashing water from the tub, condensation dripping down walls, and wet mop contact on a weekly basis. The material matters more here than in any other room. These 27 ideas cover everything from PVC and tile baseboards to solid wood, metal, and some less obvious approaches — with honest notes about cost, installation difficulty, and long-term durability.
Here are 27 bathroom baseboard options grouped by material type, starting with the most moisture-proof choices and working toward options that need more care in wet environments.
Table of Contents
- PVC Baseboard
- Ceramic Tile Baseboard
- Porcelain Tile Baseboard
- Bullnose Tile Trim
- Cove Base Tile
- Natural Stone Baseboard
- Marble Pencil Liner
- Solid PVC Crown-Profile Baseboard
- Vinyl Baseboard Wrap
- Rubber Cove Base
- Stainless Steel Channel Base
- Brass Kick Strip
- Aluminum L-Profile Base
- Solid Poplar Baseboard (Painted)
- Primed Finger-Joint Pine
- Cedar Baseboard
- White Oak Baseboard
- Recessed Reveal Base Detail
- Flush Drywall Base (No Baseboard)
- Microcement Cove Base
- Epoxy-Coated MDF
- Beadboard Baseboard Panel
- Penny Tile Baseboard Strip
- Terrazzo Base Trim
- Painted Baseboard with Waterproof Boot
- Quarter-Round Only Base
- Floating Vanity with No Baseboard Behind
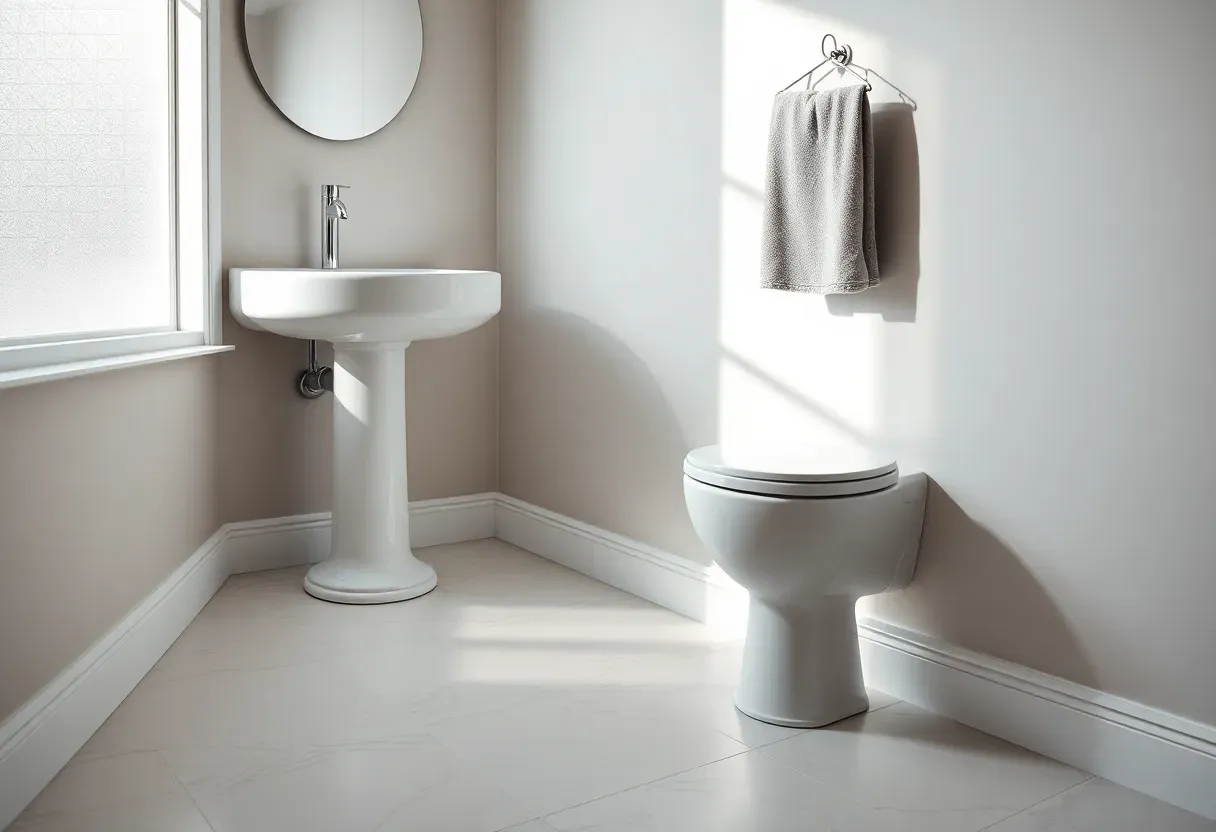
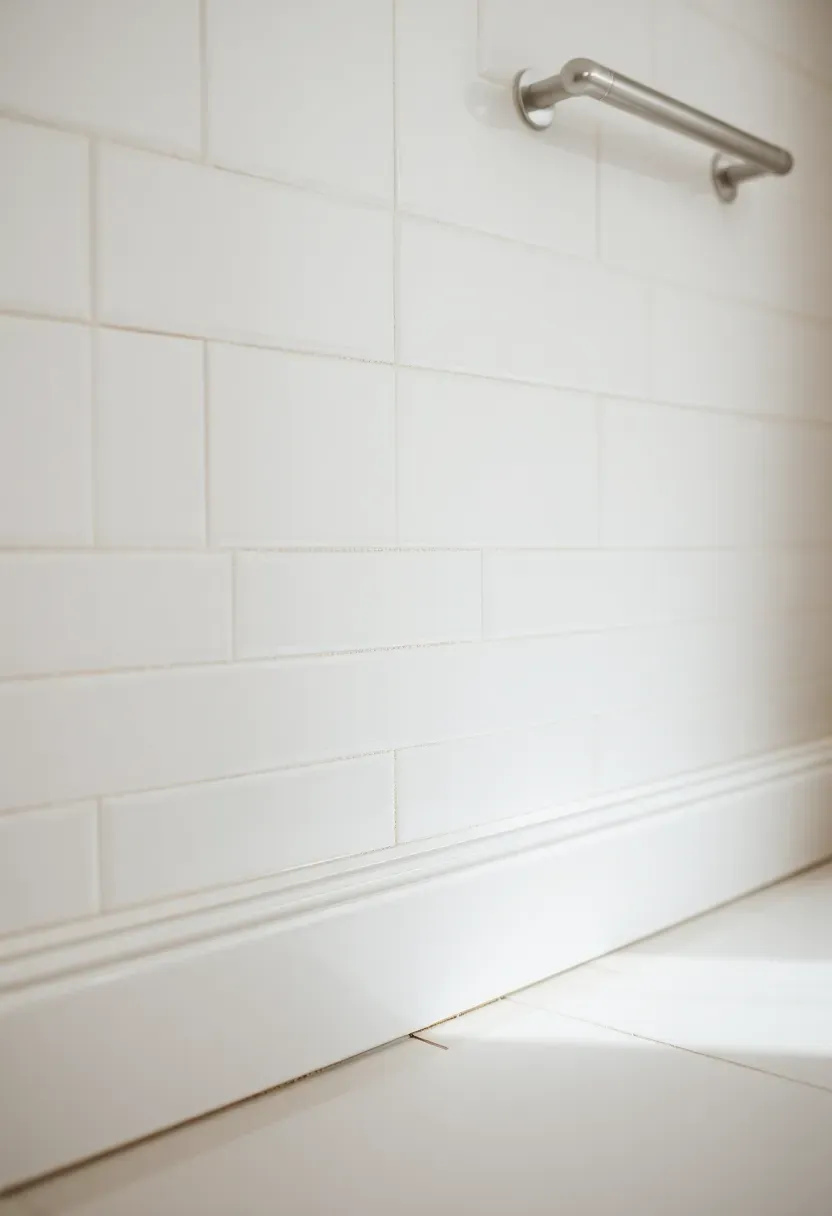
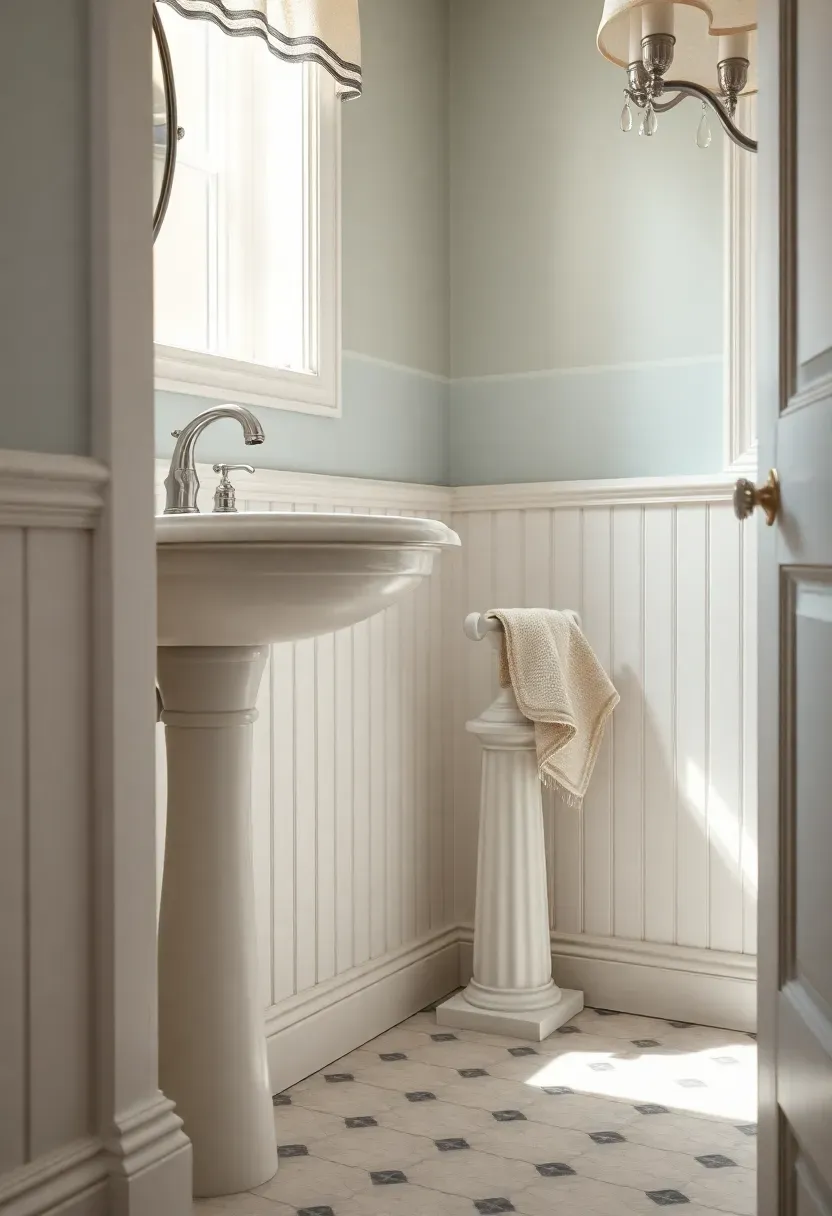
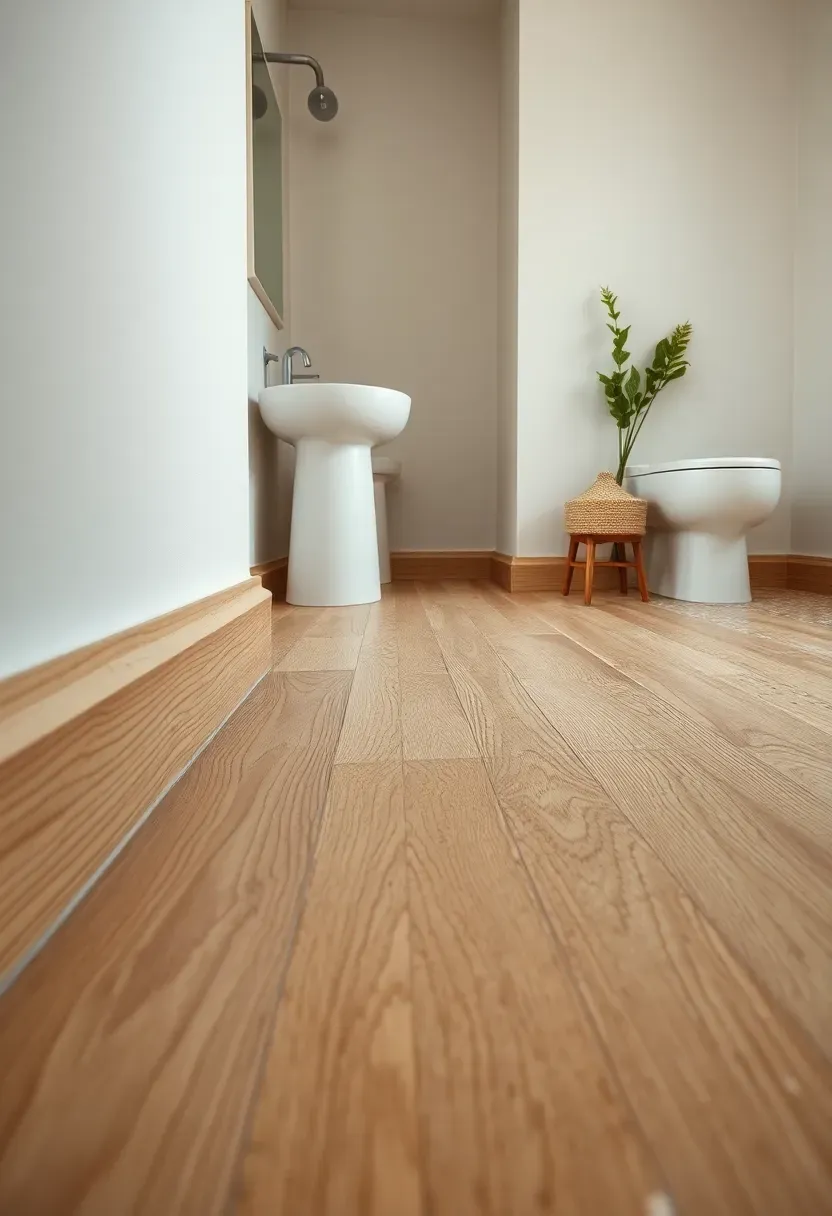
1. PVC Baseboard
PVC baseboard is the most practical choice for bathrooms where moisture is a constant. Unlike MDF or pine, solid PVC will not absorb water, swell, or rot — even if it sits in a puddle for days. It machines and paints like wood, accepts standard trim nails, and comes in profiles that mimic traditional colonial, craftsman, and modern flat-stock designs. Most PVC boards cost $1.50 to $3.50 per linear foot, which puts them in the same range as primed MDF while lasting dramatically longer in wet rooms. The material cuts cleanly with a miter saw and glues at joints with PVC cement for a seamless bond.
Tips
- Use paintable PVC adhesive caulk at the floor junction rather than silicone — it takes paint and stays flexible
- Sand lightly with 150-grit before priming to give paint something to grip on the slick surface
- For steam showers or rooms with floor drains, caulk both the top and bottom edges to fully seal the wall-floor junction
We picked a few things that go well with this idea: Peel and Stick PVC Baseboard Trim (20ft) (★4.4), Vinyl Cove Base Molding Trim (20ft) (★4.4) and Flexible Rubber Cove Base Trim (20ft) (★4.3). As an Amazon Associate we earn from qualifying purchases.
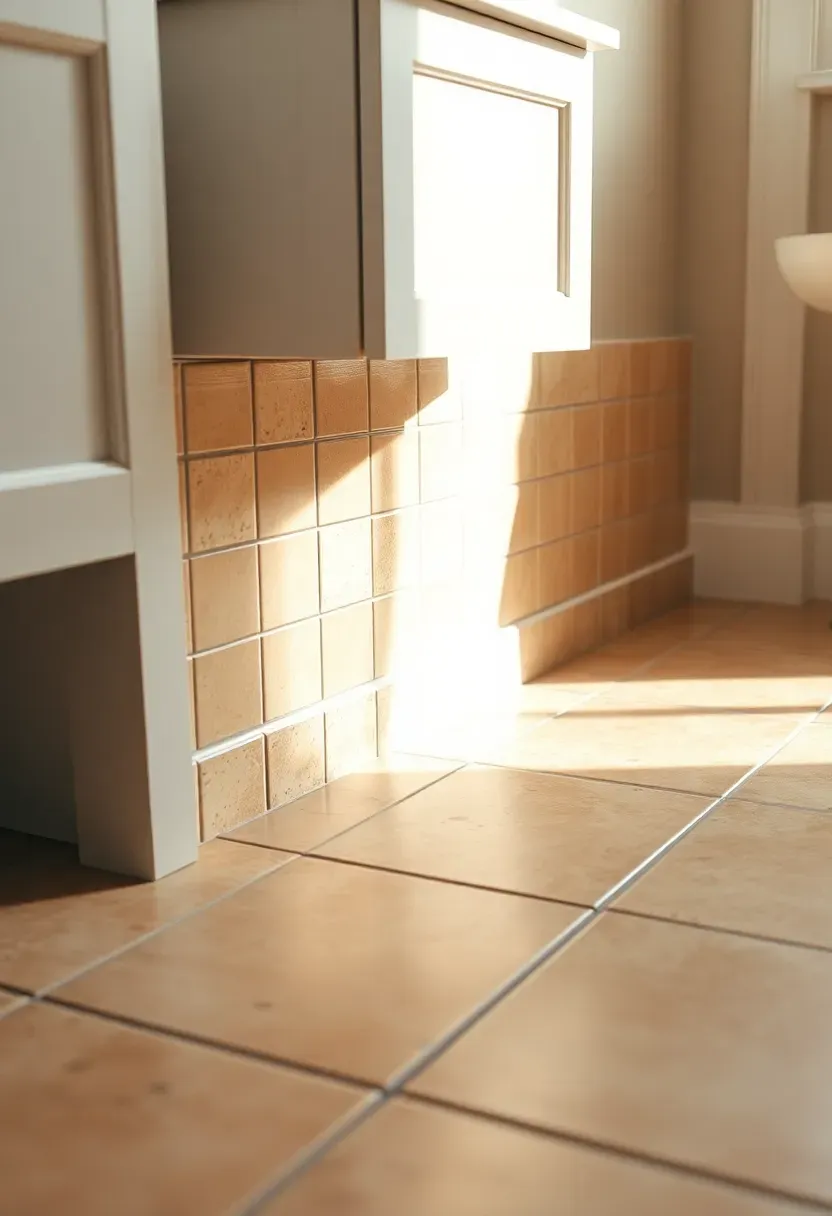
2. Ceramic Tile Baseboard
Why it works
Using the same ceramic tile from your floor as a baseboard creates a seamless transition that looks intentional rather than like an afterthought. You cut the tiles to 4- or 6-inch strips and thin-set them directly to the wall along the floor line. The grout line between the floor tile and the baseboard tile becomes almost invisible when you match grout colors. This approach is standard in European bathrooms and commercial settings, but underused in residential American builds.
Installation notes
- Cut tiles with a wet saw for clean edges — snap cutters leave rough tops that show at eye level
- Back-butter tiles and the wall surface for full coverage when mounting vertical pieces
- Seal grout with a penetrating sealer since the baseboard zone gets direct splash contact
We picked a few things that go well with this idea: Flex Caulk Waterproof Sealant Clear (6.6oz) (★4.4), Flex Caulk Waterproof Sealant White (9oz) (★4.4) and TOUSEA Self-Adhesive Waterproof Caulk Strip (★4.2). As an Amazon Associate we earn from qualifying purchases.
3. Porcelain Tile Baseboard
Porcelain is denser and less porous than standard ceramic, which gives it a real advantage at the floor line where standing water collects. A porcelain baseboard strip absorbs almost no moisture (under 0.5 percent by weight), meaning it will not crack from freeze-thaw cycles if your bathroom is in an unconditioned space like a pool house or detached guest bath. Cut the same large-format floor tile into 4-inch strips on a wet saw with a diamond blade. The look reads as a continuous surface from floor up, especially with rectified tiles that allow thin grout joints. Expect to add about $2 to $5 per linear foot in material costs beyond what you already paid for floor tile.
Tips
- Use a 1/16-inch spacer between the baseboard tile and floor tile for a tight joint
- Rectified (precision-cut) porcelain gives the cleanest baseboard edge at the top
- Match grout color exactly between floor and baseboard so the transition disappears
We picked a few things that go well with this idea: Peel and Stick Metal Tile Edge (10-Pack) (★4.3), Blulu Aluminum L-Shaped Tile Edge Trim (4-Pack) (★4.0) and Peel and Stick Metal Tile Edge Gold (10-Pack) (★4.3). As an Amazon Associate we earn from qualifying purchases.
4. Bullnose Tile Trim
The concept
Bullnose tiles have one factory-finished rounded edge, which gives you a smooth, professional-looking top edge on a tile baseboard without any exposed cut lines. Instead of cutting flat tiles where the raw edge shows at the top, bullnose pieces present a gently curved profile that transitions cleanly from the tile surface back to the wall. Most major tile manufacturers offer bullnose pieces that match their floor tile lines, though the selection has shrunk as more companies push metal edge trim instead.
Choosing the right piece
- Surface bullnose (one rounded long edge) works best for standard baseboard height of 3 to 4 inches
- If your floor tile does not have a matching bullnose, a Schluter Jolly metal edge strip gives a similar finished look
- Quarter-round bullnose creates a softer profile but collects dust in the curve
Recommended
Items for this idea
5. Cove Base Tile
Cove base tile has a concave curve at the bottom that bridges the gap between the floor and wall without a hard 90-degree angle. That curve does more than look clean — it eliminates the corner where water, hair, and grime collect in a standard flat baseboard installation. Commercial bathrooms and restaurant kitchens use cove base for exactly this reason. It is far easier to mop a curved junction than to dig a rag into a square corner. For residential bathrooms, cove base adds a finished, institutional-quality look that is surprisingly attractive when paired with the right wall treatment above.
Tips
- Match the cove base glaze to your floor tile for a monolithic look
- Inside and outside corner pieces are sold separately — order them when you order field tiles or you will wait weeks
- Set the cove base first, then tile the floor up to it, so the curve sits flush
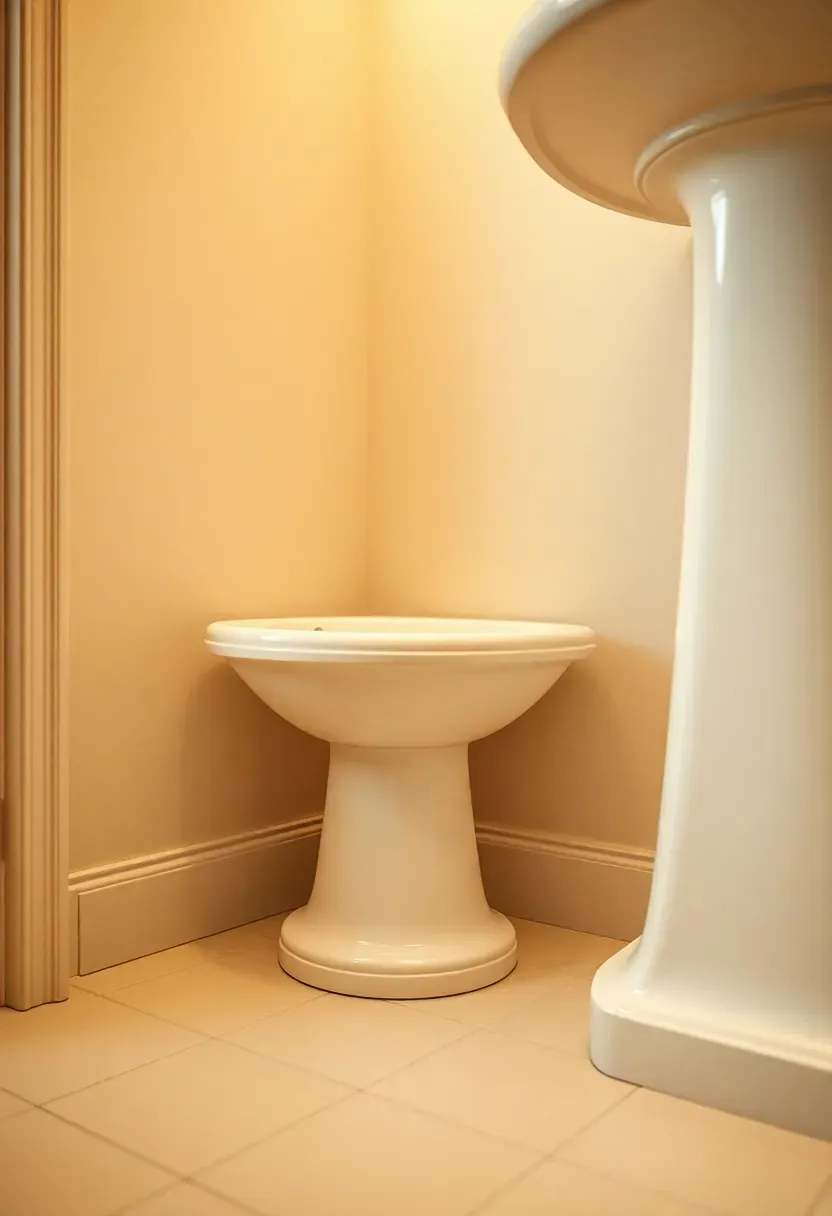
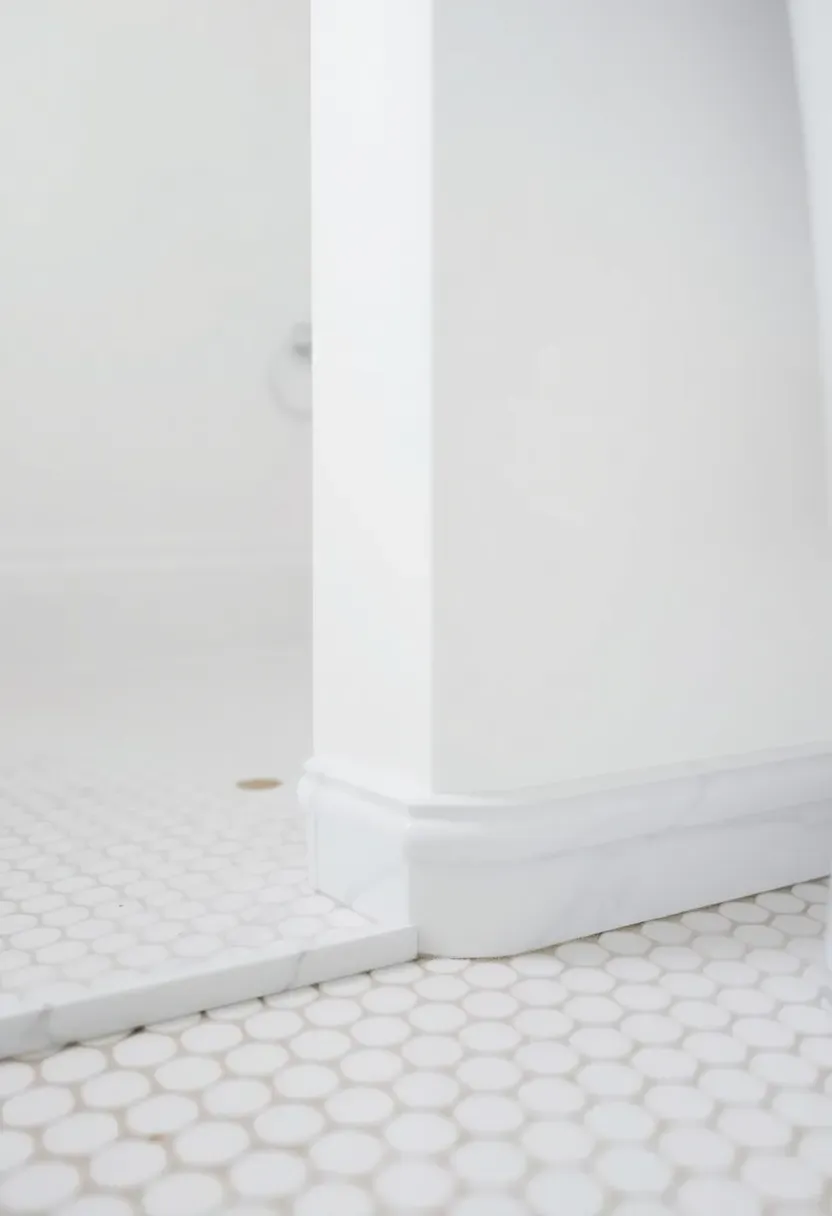
6. Natural Stone Baseboard
Natural stone baseboards — marble, travertine, limestone, slate — bring a weight and texture that no manufactured tile replicates. A 4-inch strip of honed marble along the base of a bathroom wall reads as architectural detail rather than simple trim. The cost is higher ($8 to $20 per linear foot depending on stone type), and the material needs sealing to resist water absorption and staining. But in a powder room or primary bath where you want the room to feel substantial, stone baseboards signal quality in a way that painted trim cannot.
Choose if
- You already have stone tile on the floor and want continuity up the wall
- The bathroom is a low-splash zone like a half bath where moisture exposure is minimal
- Budget allows for both material cost and annual resealing maintenance
Recommended
Items for this idea
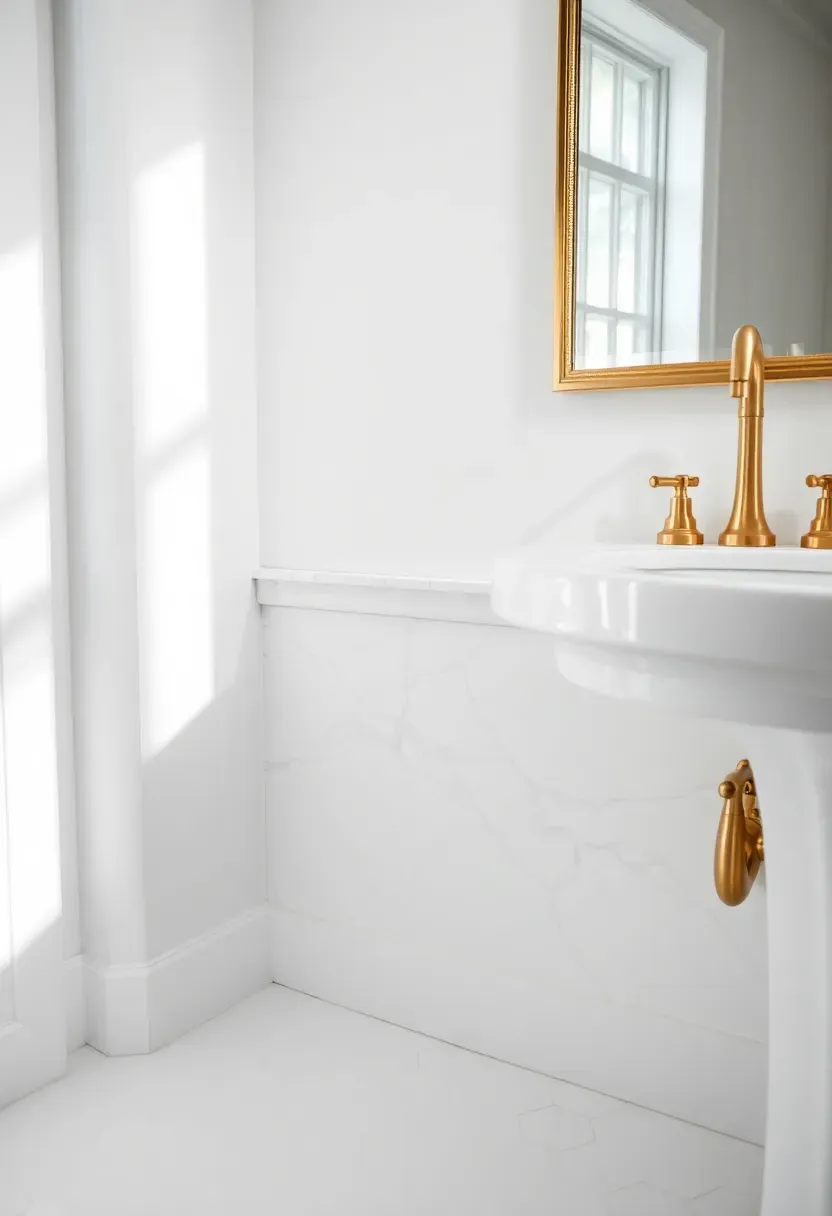
7. Marble Pencil Liner
A pencil liner is a narrow half-round molding, typically 1/2 inch to 3/4 inch wide, made from solid marble or other natural stone. Instead of a full baseboard, the pencil liner creates a subtle dividing line between floor and wall — more like jewelry for the room than a protective barrier. This works best in bathrooms where the wall finish (plaster, large-format tile, or paint) extends close to the floor and you just need something to define the boundary. Cost runs $4 to $12 per linear foot. The liner mounts with thin-set adhesive and requires only a single grout line above and below.
Tips
- Carrara and Thassos marble are the most common pencil liner materials and the easiest to source
- Miter inside corners at 45 degrees — butt joints look sloppy on a detail this small
- Seal before grouting to prevent staining from pigmented grout
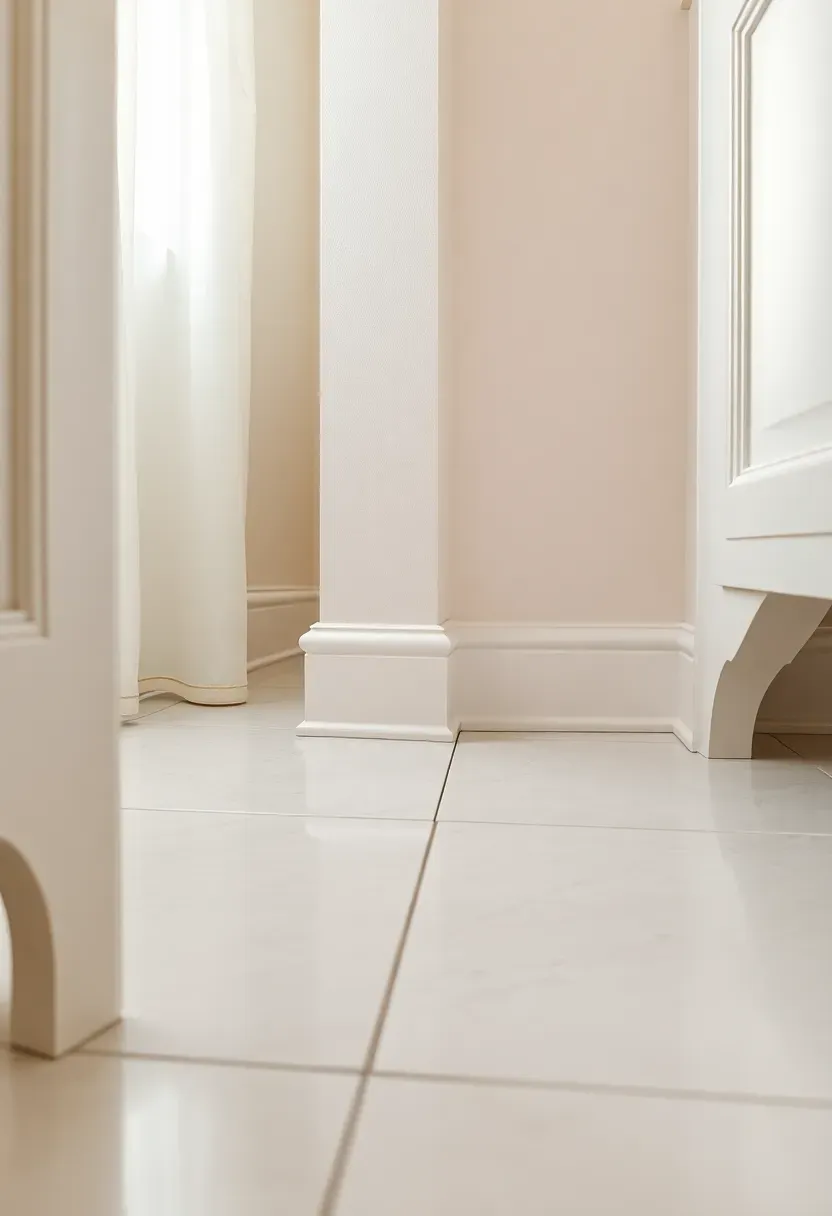
8. Solid PVC Crown-Profile Baseboard
Beyond flat stock
PVC baseboard does not have to mean a plain flat board. Manufacturers now mill PVC into ornate profiles — ogee, colonial, craftsman, and even crown-style designs — that replicate the look of traditional wood molding without any moisture risk. A 5-1/4-inch PVC baseboard with an ogee profile installed in a bathroom gives the same visual weight as stained oak trim, but you can splash water on it daily without consequence. Brands like Azek, Kleer, and Royal sell these in 16-foot lengths, which means fewer joints in a typical bathroom run.
What to know
- PVC expands slightly with heat — leave a 1/16-inch gap at inside corners and caulk over it
- Adhesive mounting (PL Premium or PVC-specific adhesive) holds better than nails alone on PVC
- These profiles cost about twice the price of flat PVC stock, but still less than rot-resistant hardwood
Recommended
Items for this idea
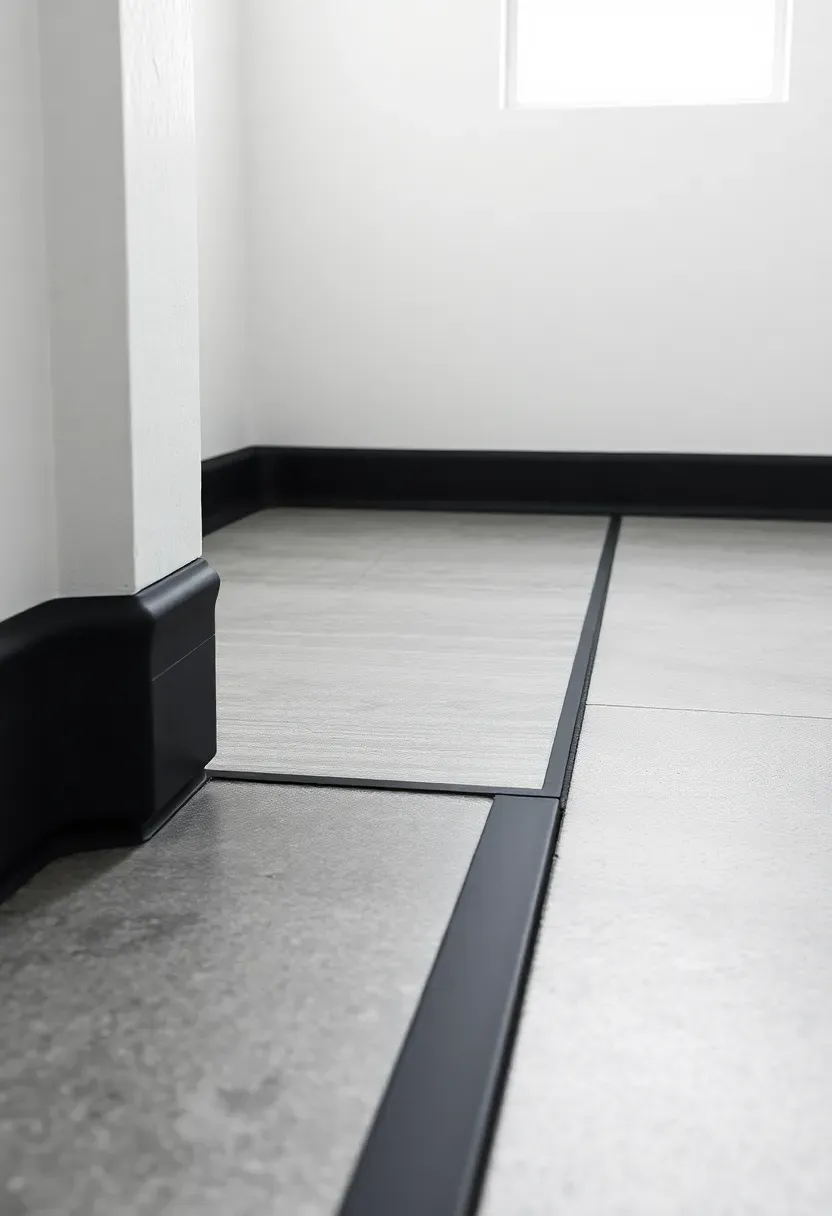
9. Vinyl Baseboard Wrap
Flexible vinyl baseboard (sometimes called wall base or coving strip) comes in rolls or 4-foot strips, bends around curves without cutting, and installs with contact adhesive in under an hour for a typical bathroom. It is the same material you see in hospitals, schools, and commercial restrooms — and that pedigree is the point. It handles water, chemicals, and heavy mopping without degradation. Heights range from 2.5 to 6 inches. Color options have expanded well beyond the beige-and-gray palette of the 1990s; you can now find matte black, white, navy, and even wood-grain textures.
Tips
- Warm the vinyl with a heat gun before bending around outside corners for a smooth wrap instead of a crease
- Use a J-roller to press the adhesive bond flat — finger pressure leaves bubbles
- Peel-and-stick versions exist but fail in high-humidity bathrooms; use contact cement instead
10. Rubber Cove Base
The practical case
Rubber cove base is a commercial-grade material that creates a curved, watertight seal between the floor and wall. It is made from recycled rubber or synthetic compounds that resist water, mildew, and most cleaning chemicals. The cove profile curves up from the floor into a flat surface against the wall, eliminating the gap where moisture collects. In a bathroom context, rubber cove base is almost maintenance-free and costs $1 to $3 per linear foot — less than most other moisture-proof options.
Potential downsides
- The look reads as commercial or industrial, which does not suit every design direction
- Color selection is limited compared to painted wood or tile options
- Adhesive failures happen if the wall surface is dusty or textured; clean and prime first
Recommended
Items for this idea
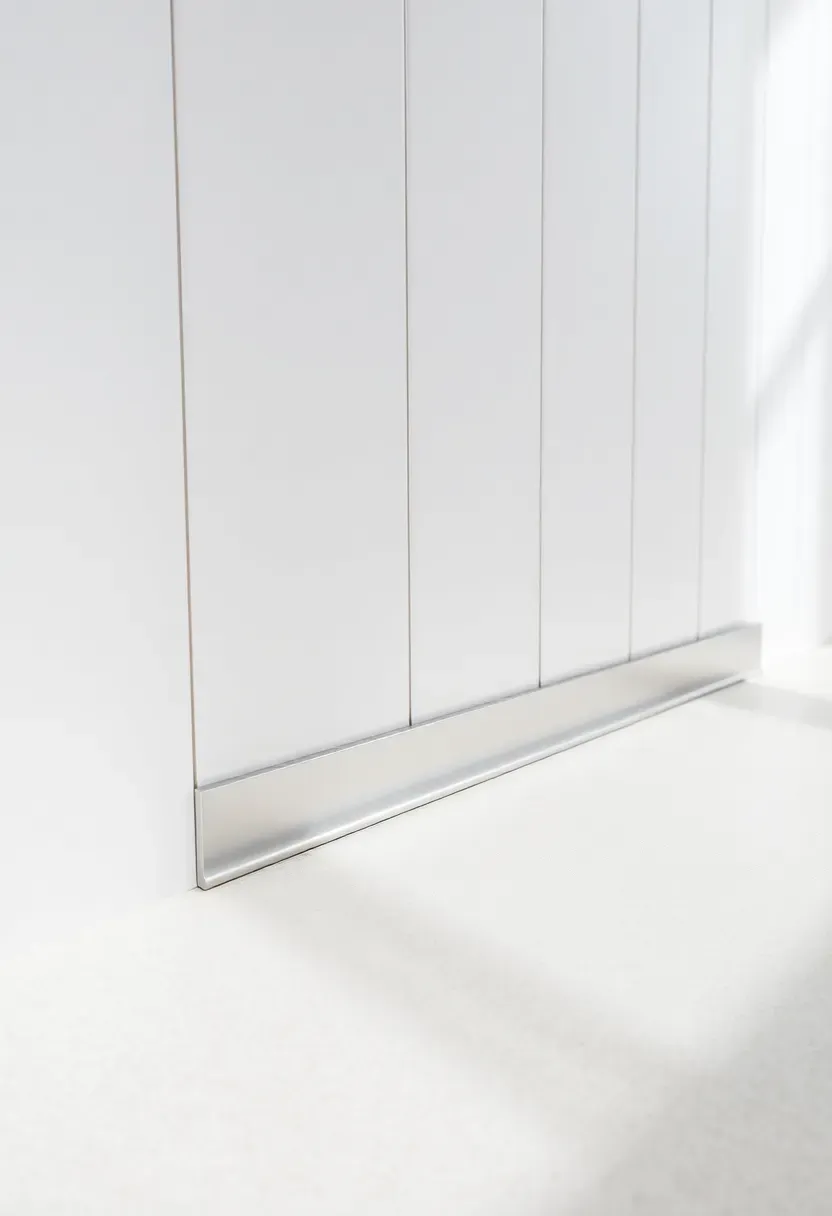
11. Stainless Steel Channel Base
A stainless steel channel base is a thin metal profile (typically 16 or 18 gauge) that sits along the floor-wall junction and creates a sharp, modern line. The channel is usually 2 to 3 inches tall and attaches with construction adhesive or concealed screws. This detail shows up in high-end restaurant bathrooms and hotel lobbies, and it translates well to a residential primary bath or powder room with contemporary finishes. The brushed or satin finish hides fingerprints and water spots better than polished stainless. Expect to pay $10 to $18 per linear foot for fabricated stainless channel.
Tips
- Order pre-mitered corners from a sheet metal shop — cutting stainless at home requires specialized tools
- Apply a thin bead of clear silicone behind the channel to prevent water from wicking behind it
- Pair with large-format floor tile and minimal wall trim for a cohesive modern look
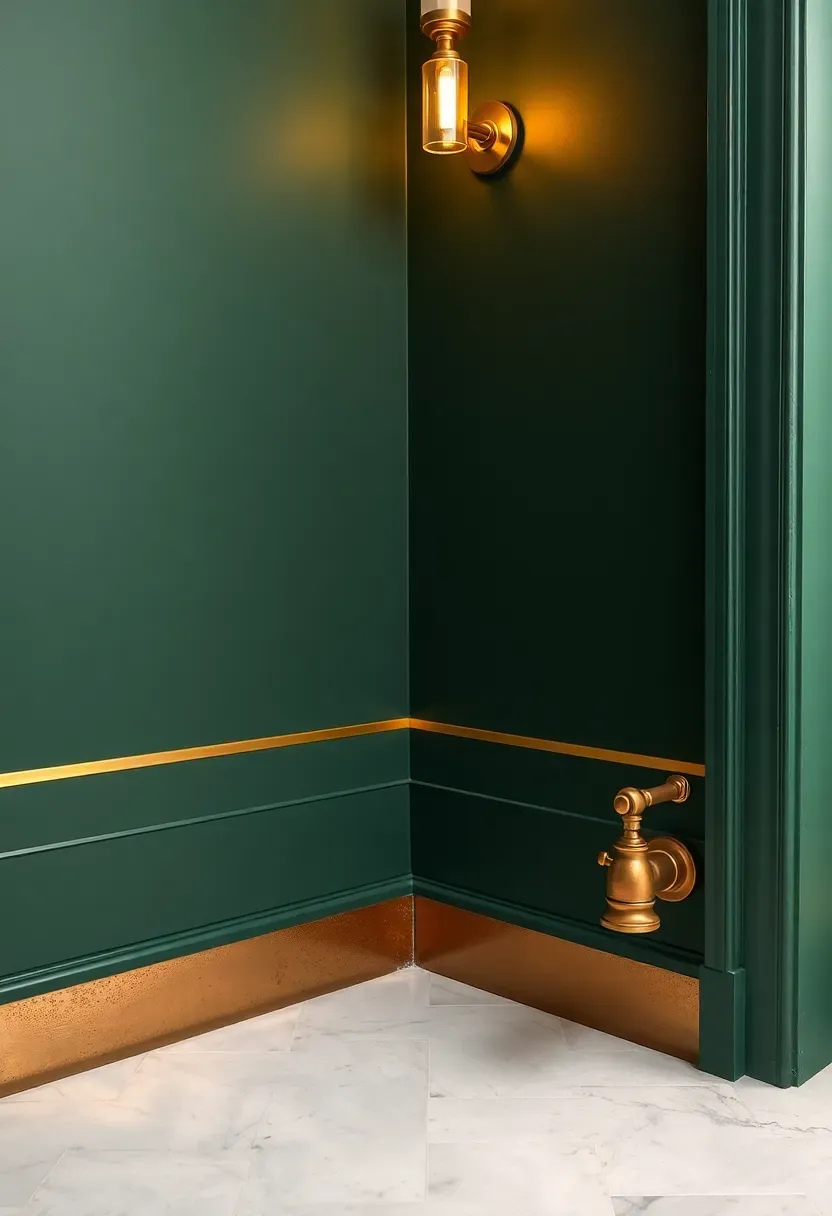
12. Brass Kick Strip
Brass baseboard trim (sometimes called a kick strip or toe plate) adds warmth that stainless steel cannot. Unlacquered brass starts bright and develops a living patina over months, which suits bathrooms where you want materials that age gracefully alongside stone and wood. Lacquered brass stays polished but eventually chips, so most designers prefer the unlacquered route. A brass strip typically runs 1.5 to 3 inches tall and mounts flush against the wall. Cost is higher than most options — $15 to $35 per linear foot — but you only need enough for the bathroom perimeter, which keeps the total reasonable in a small room.
Choose if
- Your bathroom already features brass faucets, towel bars, or cabinet hardware
- You want a detail that patinas and changes over time rather than staying static
- The room has dark or saturated wall colors that benefit from metallic contrast at the base
Recommended
Items for this idea
13. Aluminum L-Profile Base
An aluminum L-profile is the simplest metal baseboard option. It is a right-angle extrusion — one leg lies flat against the wall, the other sits on the floor — that creates a clean shadow line at the base of the wall. The profile is typically 3/4 to 1 inch tall and costs $3 to $8 per linear foot. Anodized finishes (silver, black, gold, bronze) resist corrosion in humid bathrooms. This is a common detail in European and Japanese residential bathrooms where baseboard is minimal and the focus stays on the wall and floor surfaces.
Tips
- Silicone adhesive works better than mechanical fasteners for a seamless face
- Cut with a non-ferrous metal blade on a miter saw for clean, burr-free joints
- Black anodized aluminum reads as a shadow line and almost disappears against dark grout
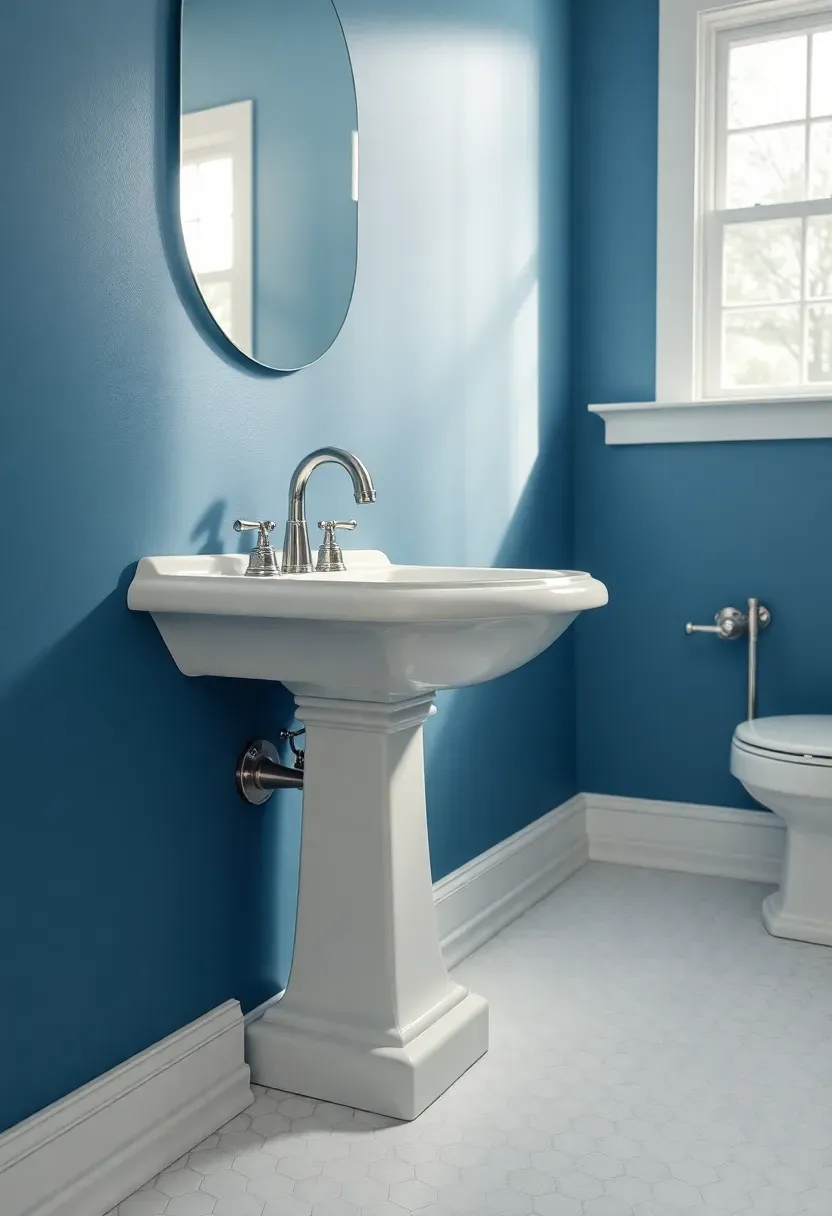
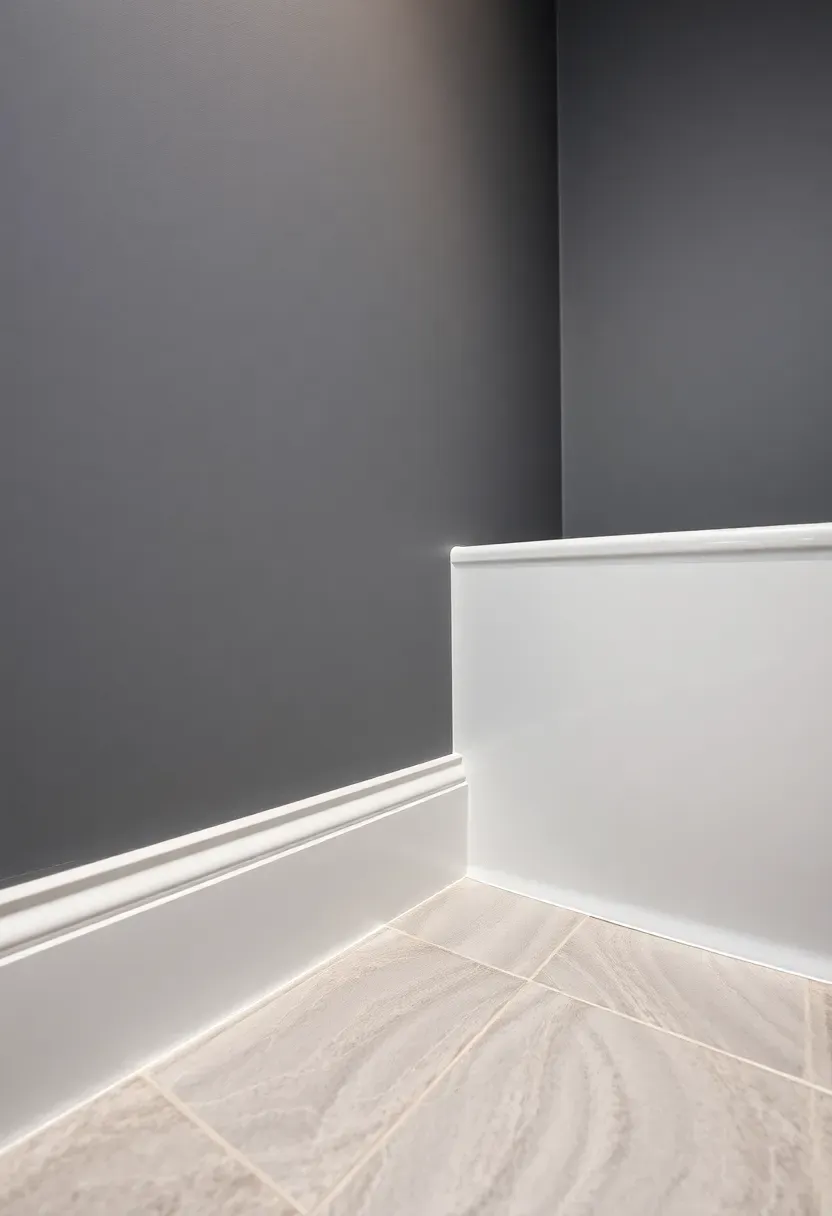
14. Solid Poplar Baseboard (Painted)
Poplar is a hardwood that takes paint well and resists moisture better than MDF, pine, or finger-joint stock. It does not swell or delaminate the way composite materials do when exposed to bathroom humidity. A poplar baseboard primed with a quality bonding primer and finished with two coats of semi-gloss latex paint creates a surface that sheds water and cleans easily. The wood itself is affordable ($1.50 to $3 per linear foot for 1x4 stock), machines cleanly, and accepts standard trim nails without splitting. For bathrooms where you want a traditional painted baseboard but need it to last, poplar is the right wood species.
Tips
- Prime all six sides (front, back, top, bottom, both ends) before installation to seal against moisture vapor
- Use semi-gloss or high-gloss paint — flat and eggshell finishes absorb moisture and stain
- Caulk the bottom edge with a flexible paintable caulk and repaint the caulk line annually

Recommended
Items for this idea
15. Primed Finger-Joint Pine
The budget option
Finger-joint pine baseboard is the least expensive option at most lumber yards — typically under $1 per linear foot for a 3-1/4-inch profile. The finger joints (small interlocking glue joints every 12 to 18 inches) create a longer board from shorter pine pieces. The issue in bathrooms is that these joints can swell and telegraph through paint when moisture gets in. However, if you seal it properly before installation, it performs adequately in a powder room or half bath where direct water contact is unlikely.
Make it last
- Seal every cut end with wood glue or end-grain sealer before installing
- Back-prime the wall side to prevent moisture migration from the drywall
- Avoid using in full bathrooms with tubs or showers — reserve for powder rooms and half baths only
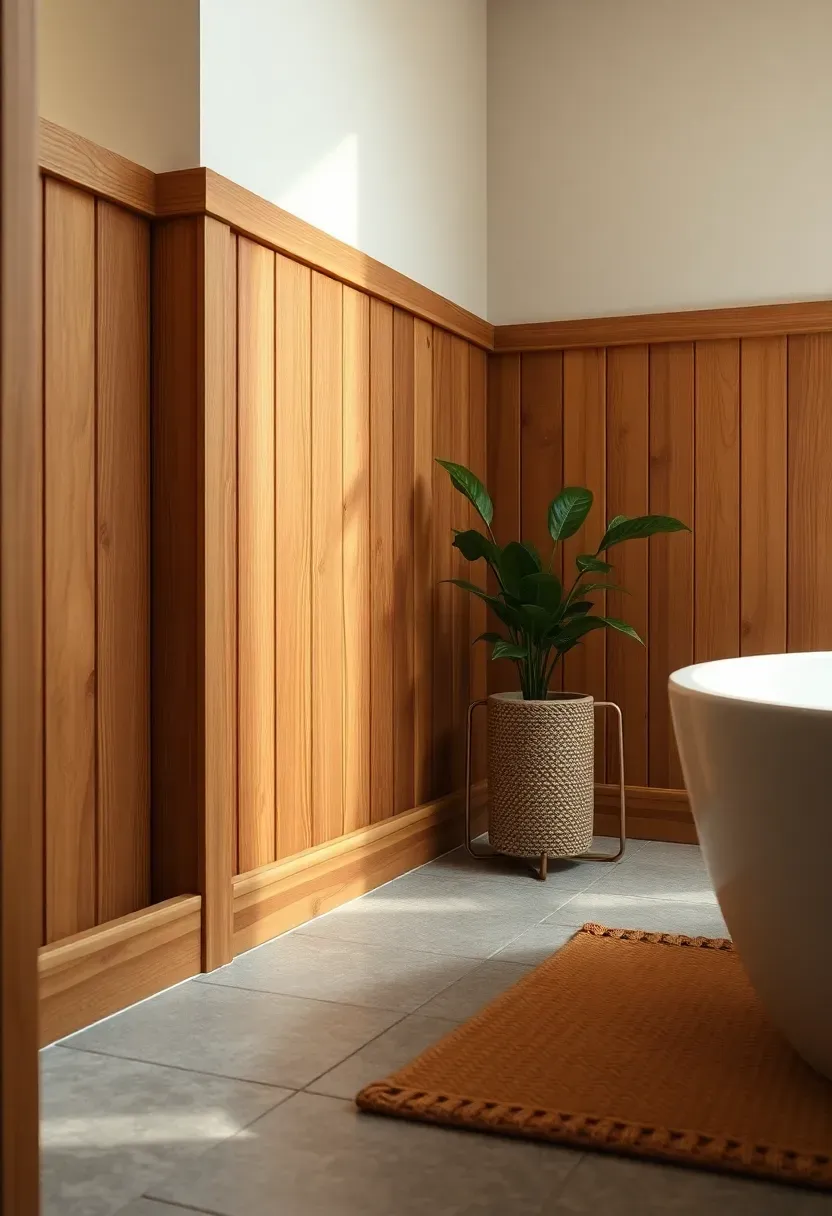
16. Cedar Baseboard
Cedar contains natural oils (thujaplicin and related compounds) that resist rot, mold, and insect damage without chemical treatment. A clear-finished or natural cedar baseboard brings a warm amber tone and a faint woody scent to a bathroom — especially noticeable right after a hot shower when the steam draws out the oils. Western red cedar is the standard species, available in 1x4 and 1x6 dimensions at most building supply stores. The cost runs $3 to $6 per linear foot, depending on grade. Clear (knot-free) grades look polished; knotty grades feel more rustic and cabin-like.
Tips
- Apply a marine-grade spar urethane or penetrating tung oil finish rather than film-forming polyurethane, which can peel in humid air
- Let the cedar acclimate in the bathroom for 48 hours before cutting and installing to minimize expansion gaps
- Pair with stone or matte tile floors — cedar against glossy porcelain creates a visual clash
Recommended
Items for this idea
17. White Oak Baseboard
White oak is one of the few hardwoods with closed-grain pores, which means it naturally resists water penetration far better than red oak, maple, or cherry. This is the same reason white oak is used for whiskey barrels and boat building. In a bathroom, a white oak baseboard with a penetrating oil finish (like Rubio Monocoat) provides genuine water resistance without a plastic-looking film coat. The grain pattern — especially in quarter-sawn boards — adds visual depth that painted baseboards cannot match. Expect to pay $4 to $8 per linear foot for clear-grade white oak.
Choose if
- You prefer the look of natural wood grain over painted trim
- The bathroom has a mid-century, Scandinavian, or Japanese design direction
- You are willing to re-oil the baseboard once a year as part of seasonal maintenance
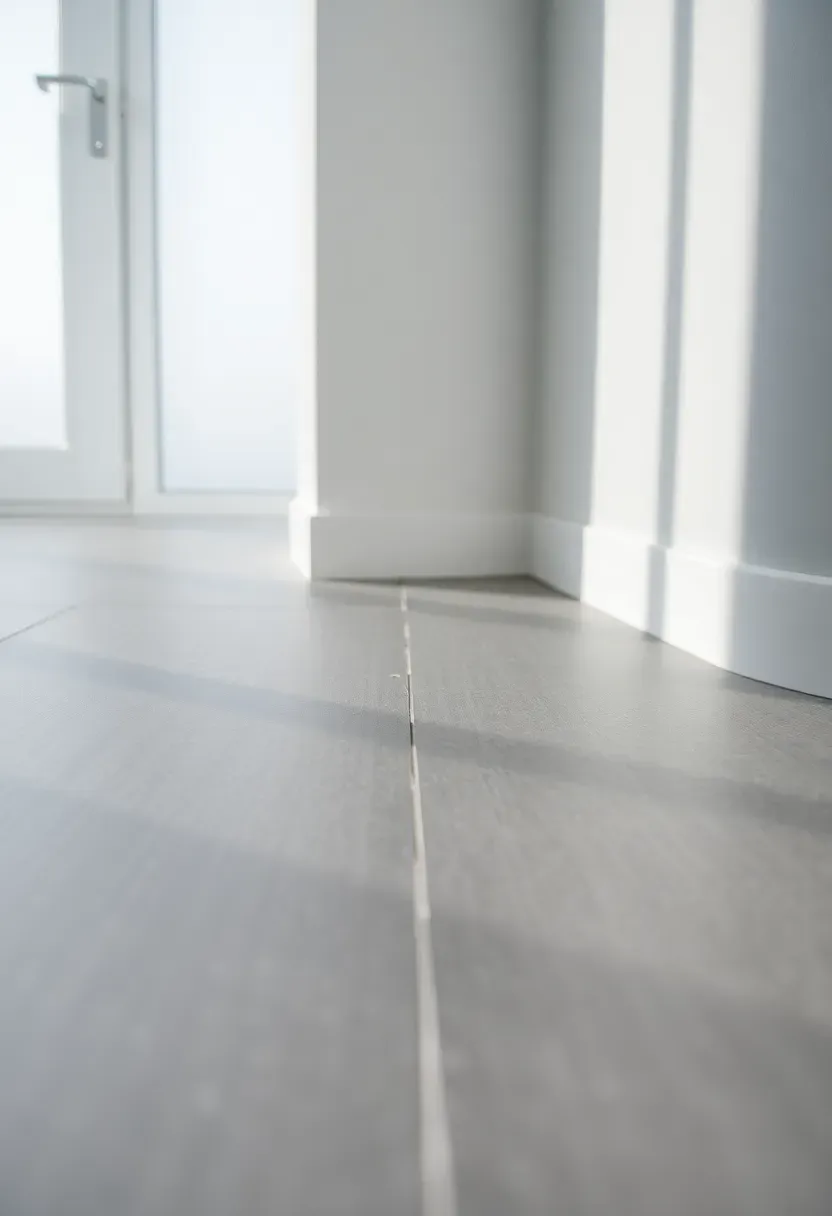
18. Recessed Reveal Base Detail
How it works
Instead of adding material to the wall-floor junction, a recessed reveal removes it. The drywall stops about half an inch above the finished floor, and a shadow gap (usually backed by a metal J-channel or shadow bead) creates a dark line at the base of the wall. The effect is that the wall appears to float above the floor. This detail requires planning during framing and drywall stages — you cannot easily retrofit it. Cost is mostly labor since the materials (J-channel and backing strip) are inexpensive.
What to know
- The reveal gap must be sealed with a flexible backer to prevent moisture from entering the wall cavity
- Cleaning the gap requires a vacuum crevice tool — mops cannot reach inside
- Works best with level concrete or large-format tile floors; irregular floor surfaces make the gap width inconsistent
Recommended
Items for this idea
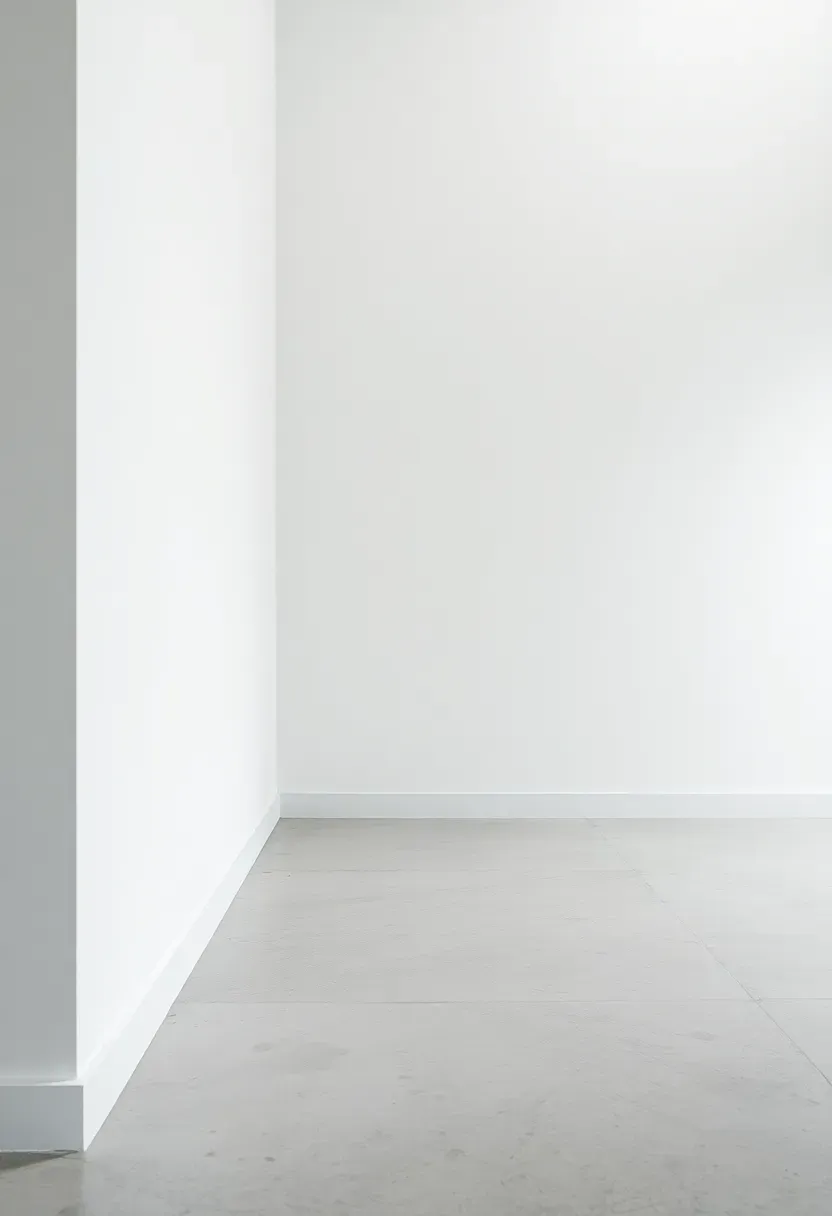
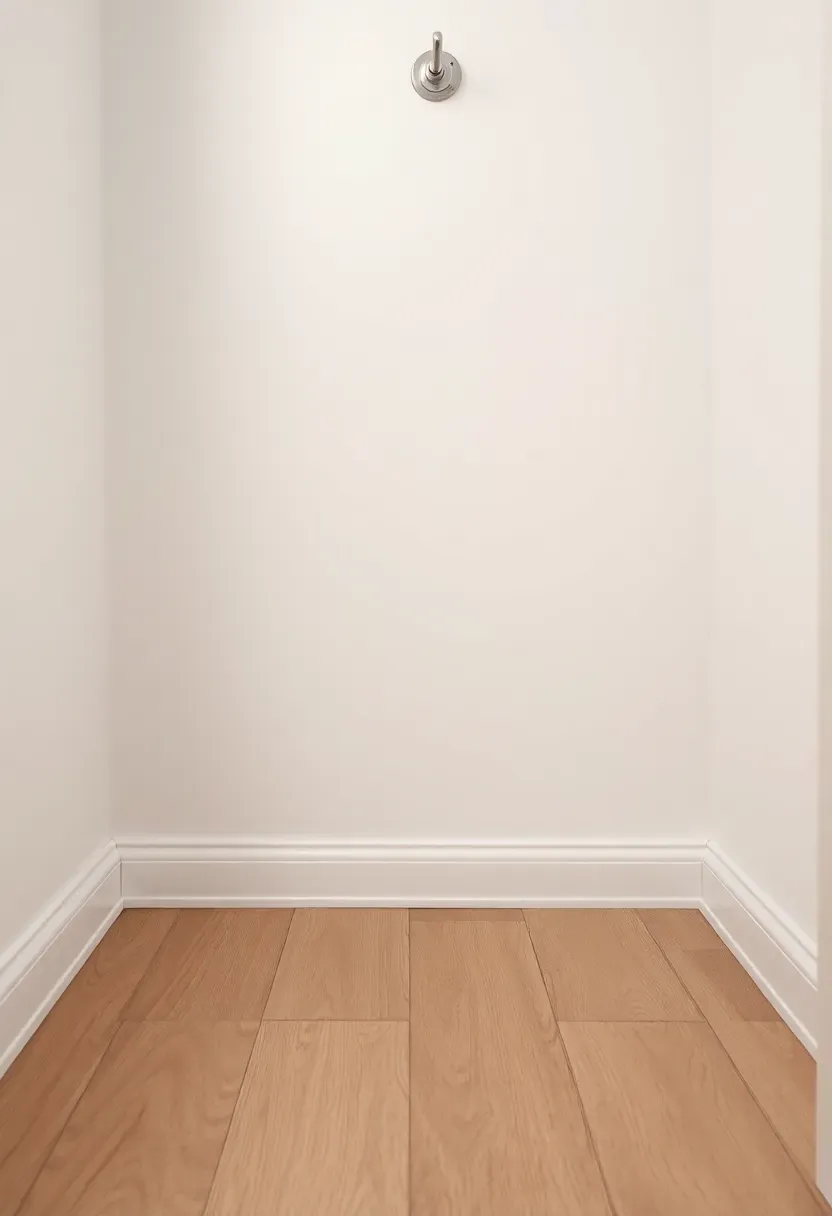
19. Flush Drywall Base (No Baseboard)
Skipping the baseboard entirely is a deliberate design choice that works when the wall finish is durable enough to handle floor-level contact. Venetian plaster, tadelakt, or tile-to-ceiling walls can terminate at the floor with just a bead of caulk. The result is a gallery-like minimalism that makes a small bathroom feel more spacious. The wall surface needs to be genuinely waterproof at the base — standard latex paint on drywall will fail within a year. Budget an extra $5 to $15 per linear foot for upgrading the bottom 6 inches of wall finish to a moisture-proof material.
Tips
- Use a color-matched flexible caulk at the floor-wall seam to absorb movement
- Tadelakt or microcement finishes handle this detail best because they are monolithic and waterproof
- This approach suits minimalist, Japanese, and contemporary design directions
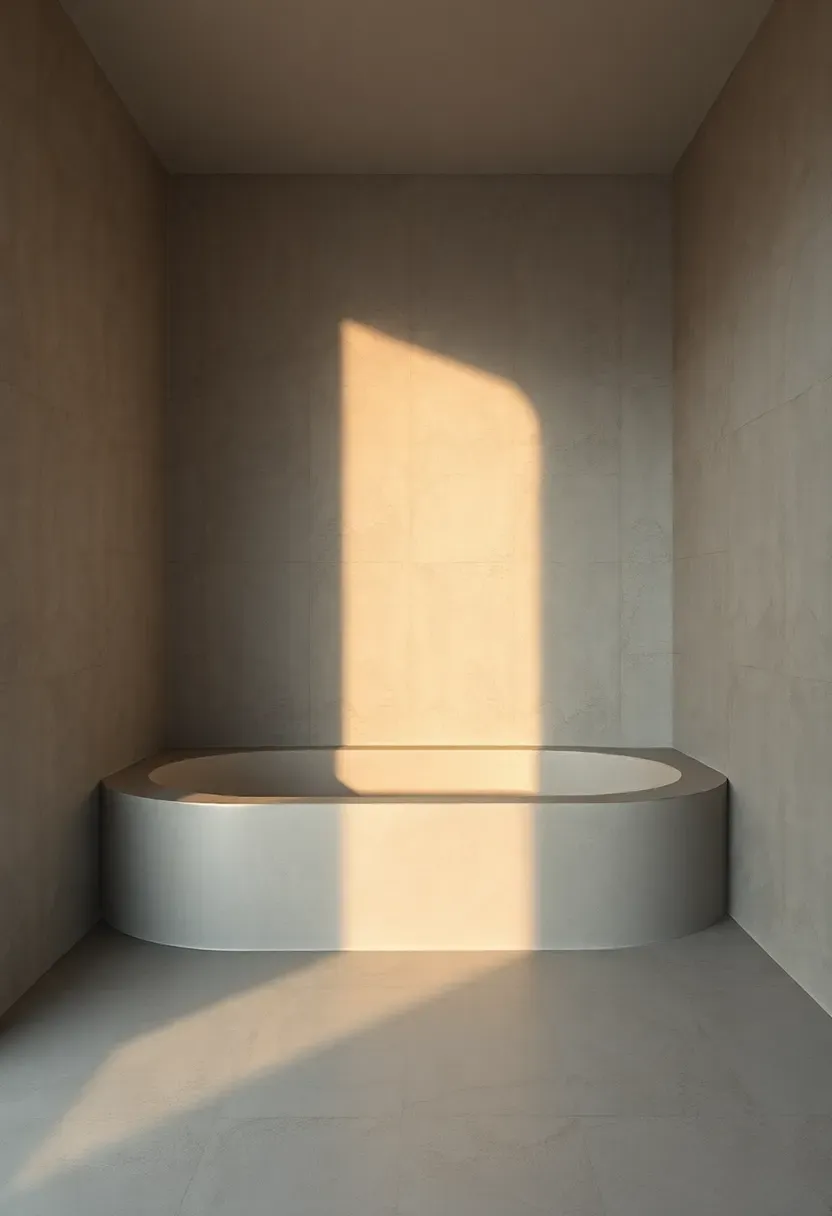
20. Microcement Cove Base
Microcement (also called micro-topping or micro-screed) is a thin polymer-modified cement coating that can be troweled over existing surfaces including the wall-floor junction. When shaped into a cove profile, it creates a seamless, waterproof curve that eliminates the joint between the wall and floor entirely. No grout lines, no caulk seams, no separate baseboard piece. The finish can be polished smooth or left with a light trowel texture. Cost for professional application runs $15 to $30 per linear foot, including surface prep and sealing. It is not a DIY-friendly material — the application technique requires experience.
What to know
- Microcement needs a flexible primer coat and two to three finish coats to avoid cracking
- Seal with a polyurethane or epoxy topcoat rated for wet areas
- The cove radius should be at least 1 inch to be cleanable — anything tighter traps moisture
Recommended
Items for this idea
21. Epoxy-Coated MDF
Making MDF survive
Standard MDF baseboard fails in bathrooms because the fiberboard core swells irreversibly when water penetrates the paint film. But a full encapsulation with two-part epoxy primer and epoxy paint creates a shell that prevents moisture from reaching the core. This is a workaround, not an ideal solution — if the epoxy coating gets chipped or cracked, water will find that weak point and the swelling starts. The advantage is cost: MDF baseboard runs under $1 per linear foot, and a quart of two-part epoxy primer covers a full bathroom.
Make it last
- Apply epoxy primer to all surfaces including cut ends and the back face before installation
- Fill nail holes with epoxy filler, not standard wood putty, which lets moisture through
- Inspect the baseboard annually and touch up any chips immediately
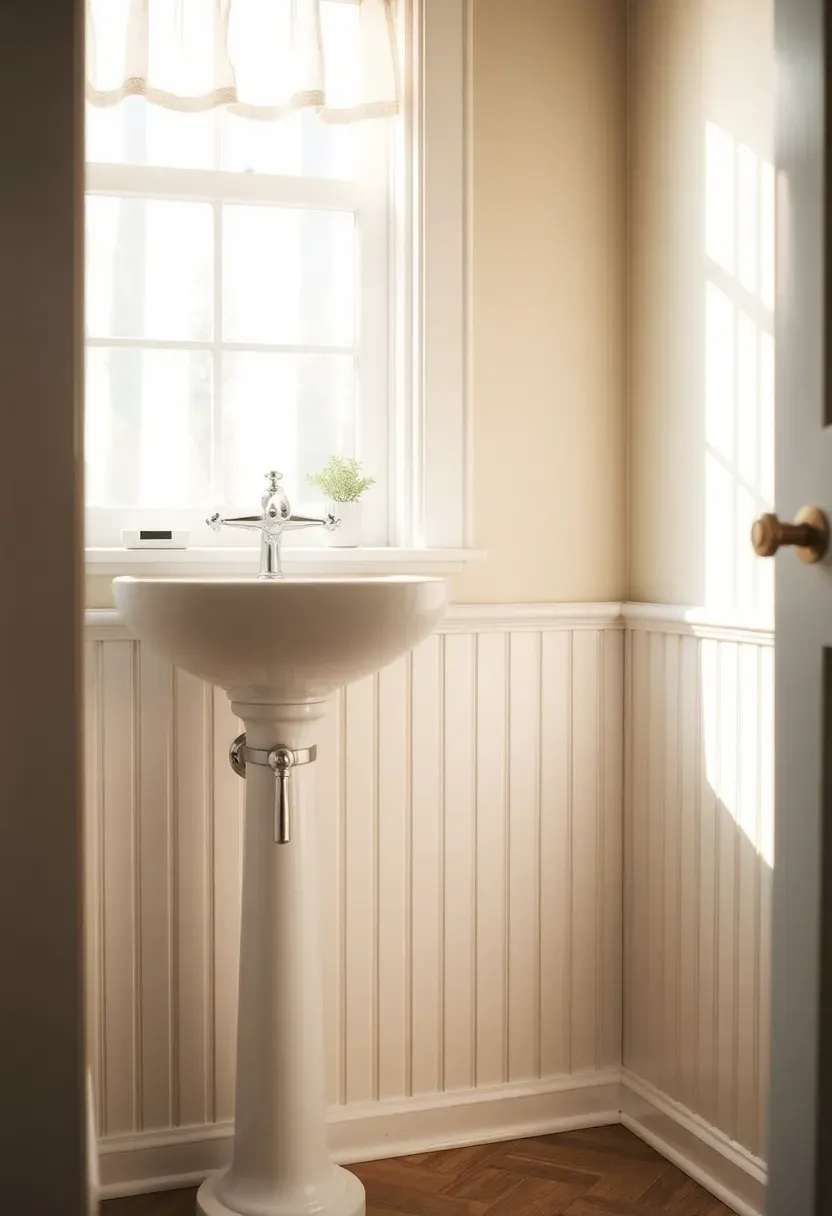
22. Beadboard Baseboard Panel
A beadboard panel used as a tall baseboard (8 to 12 inches) bridges the gap between a standard baseboard and full wainscoting. PVC beadboard panels are the right material for bathrooms — they mimic the look of traditional tongue-and-groove wood but handle moisture without any risk of swelling or rot. The vertical grooves add texture and shadow lines that a flat baseboard cannot provide. Mount the panel with PVC adhesive, then cap the top edge with a flat PVC rail to create a finished look. Total material cost runs $3 to $6 per linear foot.
Tips
- PVC beadboard panels from Azek or Versatex are the moisture-safe option; do not use MDF beadboard in wet rooms
- A 1x2 cap rail at the top gives a clean termination and hides any waviness in the drywall
- Paint with semi-gloss latex in the same color as the wall for a subtle texture, or a contrasting white for a traditional cottage look
Recommended
Items for this idea
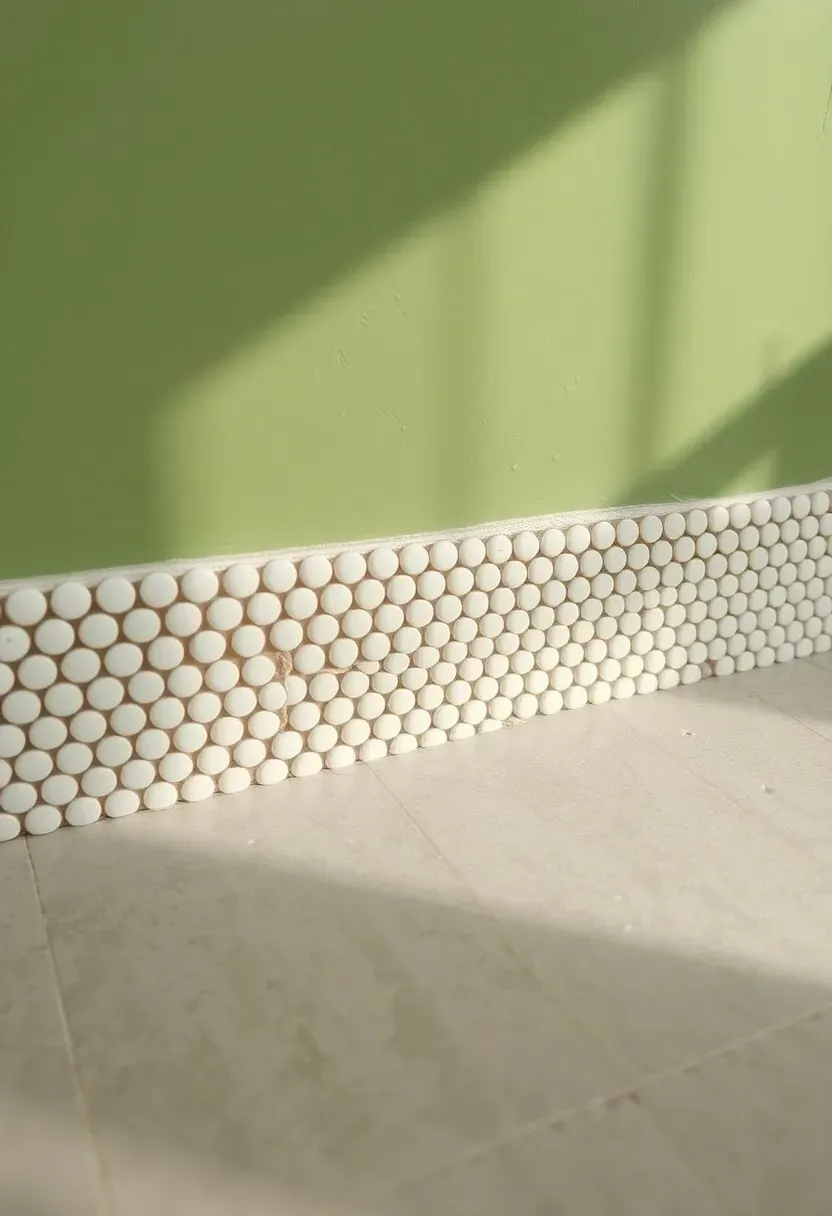
23. Penny Tile Baseboard Strip
A 4-inch strip of penny round mosaic tile used as a baseboard adds a playful, detailed texture that contrasts with larger floor tiles. The small circles (typically 3/4 inch diameter) create a pattern that reads differently at baseboard height than it does on a floor — more like a decorative band than a field of tile. Penny tile comes on mesh-backed sheets, so you cut them to your baseboard height and thin-set them in place. Grouting is the labor-intensive part since the small tiles create a lot of grout joints. Cost is $8 to $15 per linear foot including adhesive and grout.
Choose if
- Your bathroom has a retro, art deco, or eclectic design direction
- The floor tile is large-format and needs visual contrast at the base
- You want a baseboard that doubles as a decorative feature rather than just a protective strip
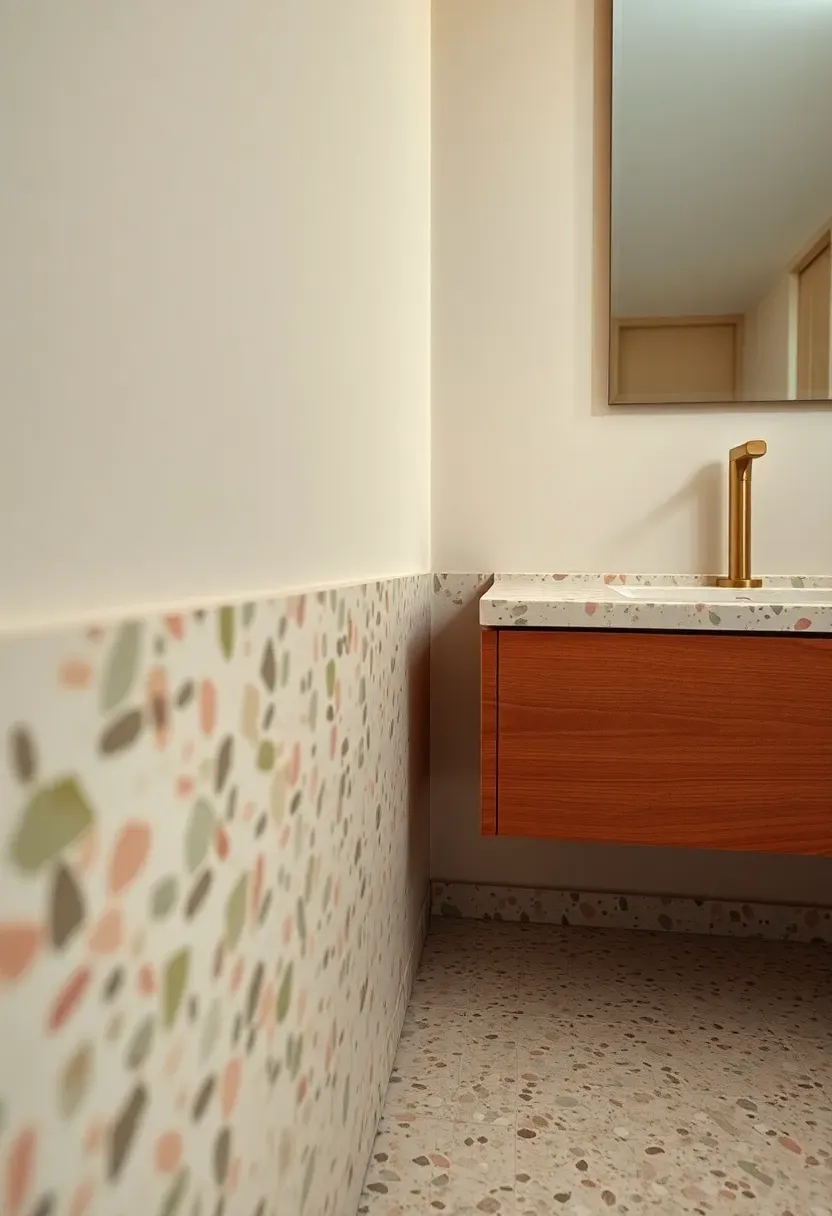
24. Terrazzo Base Trim
Terrazzo — a composite of marble, quartz, or glass chips set in a cement or resin binder — can be cut into baseboard strips that match a terrazzo floor. Pre-cast terrazzo baseboard pieces are available in standard 4- and 6-inch heights with a polished face and a square or beveled top edge. The material is extremely durable, waterproof when sealed, and the aggregate pattern makes scuffs and stains almost invisible. This is a premium option ($20 to $40 per linear foot for pre-cast pieces) that pairs naturally with mid-century modern and contemporary bathrooms.
Tips
- Order baseboard pieces from the same batch as the floor to guarantee aggregate color matching
- Thin-set adhesive rated for heavy tile or stone is the correct mounting method
- Seal the top edge and all joints with a penetrating stone sealer to prevent water entry
Recommended
Items for this idea
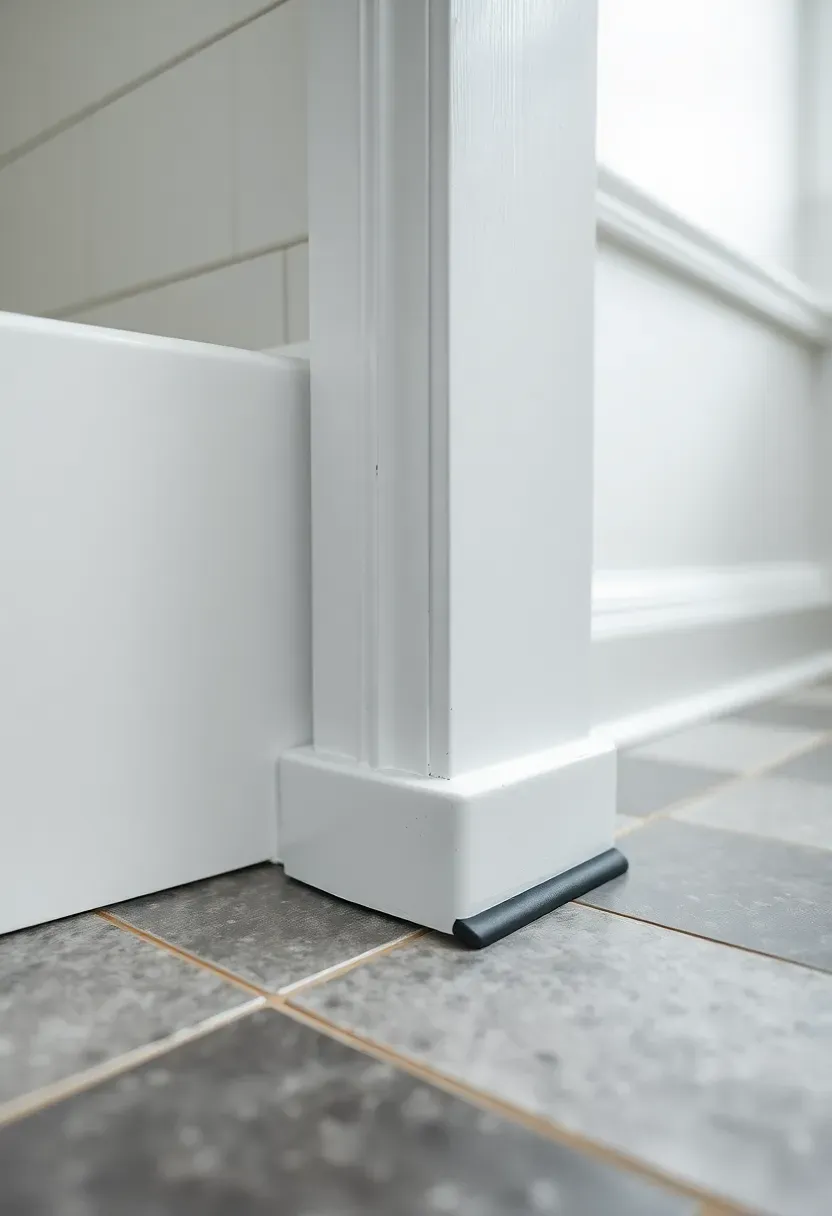
25. Painted Baseboard with Waterproof Boot
The hybrid approach
This method keeps a traditional painted wood baseboard but adds a waterproof barrier at the most vulnerable point — the bottom edge. A silicone or rubber "boot" (a small L-shaped strip) adheres to the bottom of the baseboard and tucks against the floor, creating a water-stop that prevents moisture from wicking up into the wood. Some manufacturers sell snap-on baseboard boots; you can also create one with a strip of peel-and-stick rubber membrane cut to width. The boot is nearly invisible once the baseboard is installed tight to the floor.
What to know
- The boot should extend at least 1/4 inch up the back face of the baseboard to catch splashes
- Silicone-based boots last longer than rubber in high-humidity environments
- This approach lets you use standard primed pine or poplar baseboard with added protection
26. Quarter-Round Only Base
Skipping the baseboard and using only a quarter-round (or shoe molding) at the floor-wall junction is a minimalist approach that works in small bathrooms where a full baseboard would feel heavy. The quarter-round — a 3/4-inch rounded profile — covers the expansion gap between the flooring and wall while adding almost no visual weight to the room. In a powder room or half bath under 40 square feet, this keeps the walls looking taller and the room feeling open. PVC quarter-round is the best choice for bathrooms; wood quarter-round needs paint on all surfaces to survive.
Tips
- Nail the quarter-round into the baseboard or wall plate, not into the flooring — the floor needs room to expand
- PVC quarter-round flexes around slight floor irregularities without gapping
- Paint the quarter-round the same color as the wall to make it nearly disappear
Recommended
Items for this idea
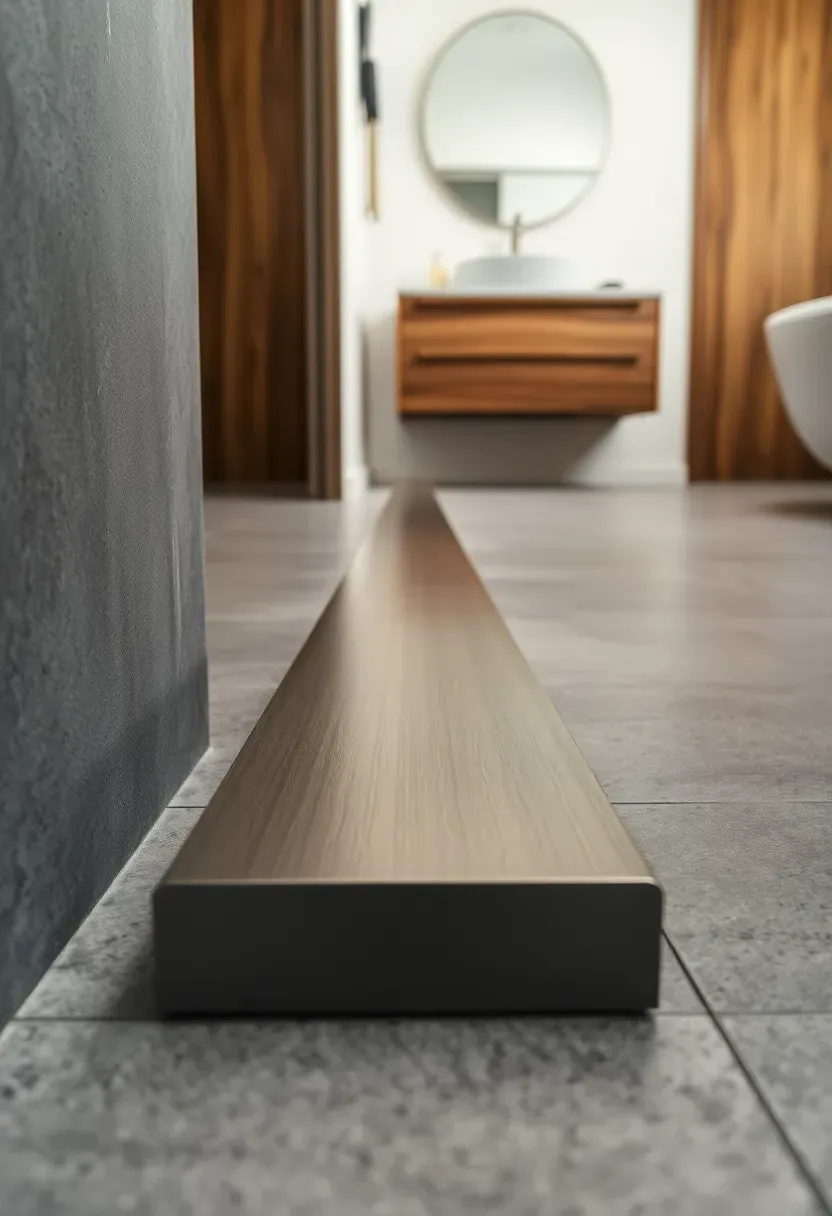
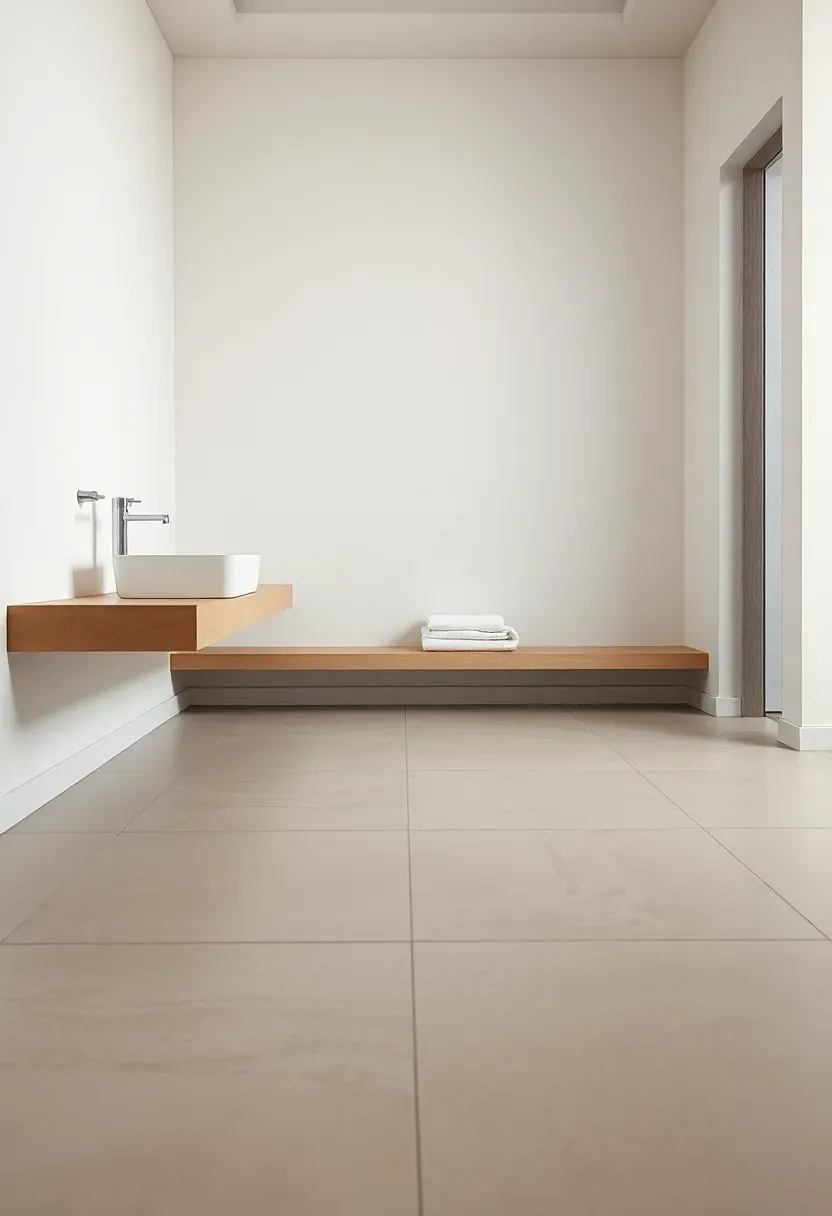
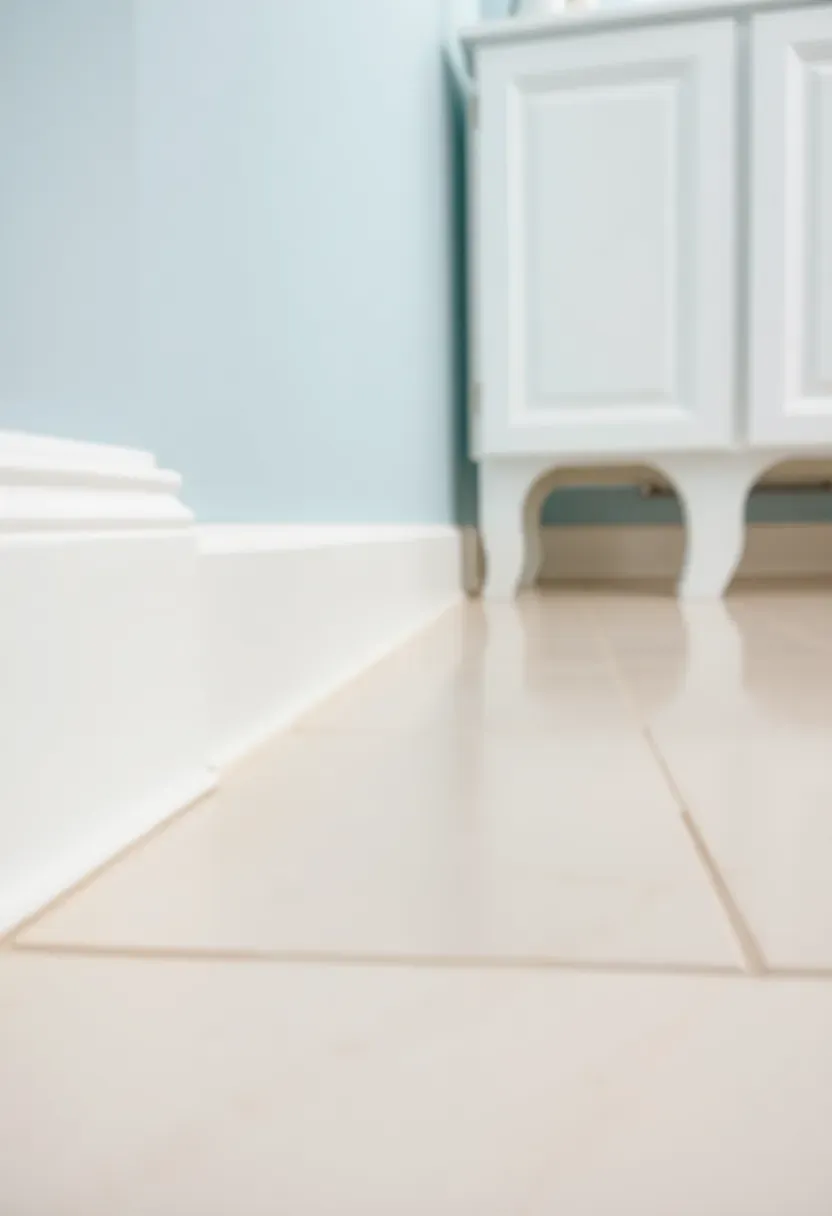
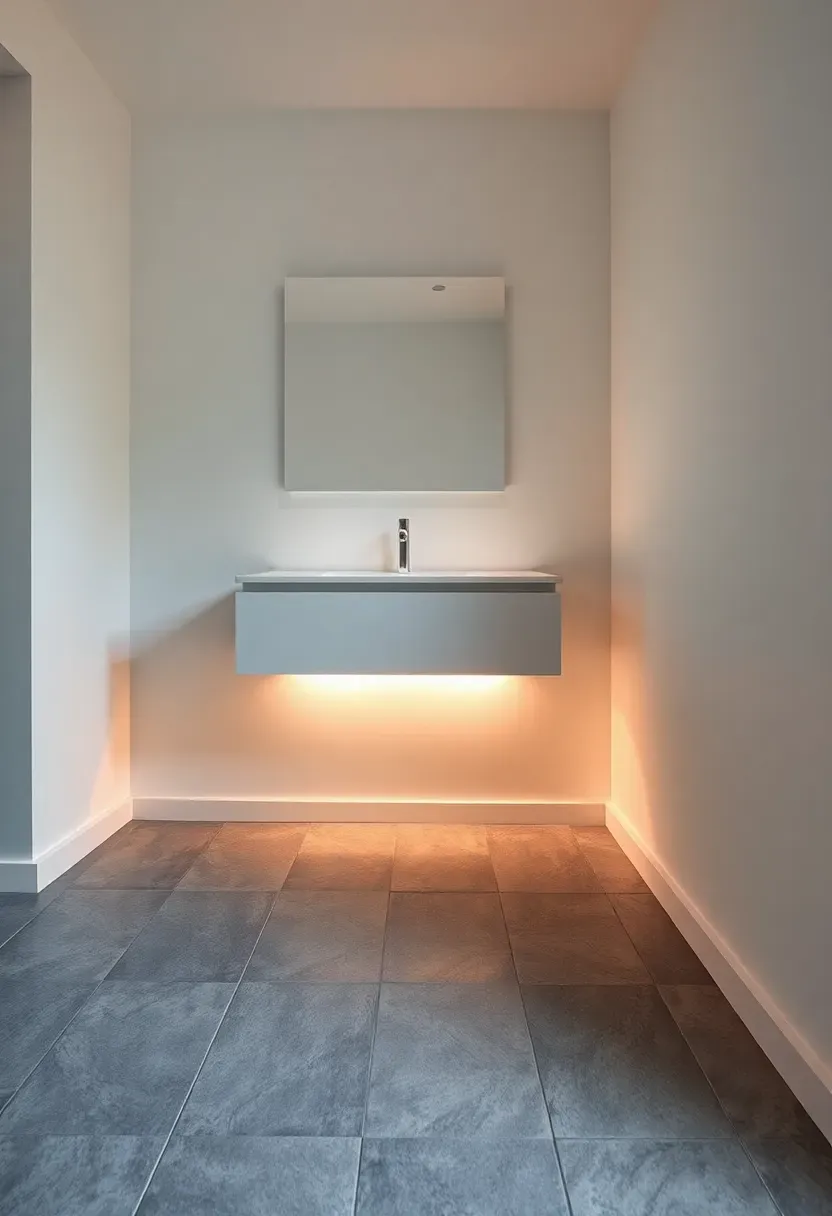
27. Floating Vanity with No Baseboard Behind
Rethinking the vanity wall
A wall-mounted floating vanity exposes the floor-wall junction beneath it, which means the baseboard needs to continue behind the vanity — or you can skip the baseboard on that wall entirely. When the floor tile runs uninterrupted under a floating vanity to the wall, and the wall finish is moisture-resistant (tile, plaster, or properly sealed paint), the result is a clean, open composition that makes the room feel larger. LED strip lighting under the vanity can highlight this detail and turn a practical choice into a design feature.
What to know
- The wall behind and below the vanity must be finished to the same standard as visible walls — no raw drywall
- Run the floor tile all the way to the wall with a caulked expansion joint at the perimeter
- If you do want baseboard on this wall, use a low-profile option (aluminum L-channel or cove tile) that will not interfere with under-vanity lighting
Quick FAQ
Does bathroom baseboard need to be waterproof? It does not need to be fully waterproof in every case, but it must handle periodic moisture contact. A powder room with no tub or shower puts minimal stress on baseboard material, so painted poplar or finger-joint pine works fine. A full bathroom with a shower or tub needs something genuinely moisture-resistant — PVC, tile, metal, or sealed stone.
Can I use regular MDF baseboard in a bathroom? You can, but it is a gamble. Standard MDF absorbs moisture through cut ends, nail holes, and any paint chip. Once the core swells, there is no reversing it. If you must use MDF, encapsulate it with epoxy primer on all surfaces, including the back face and cut ends. But PVC baseboard costs only slightly more and eliminates the risk entirely.
What is the best height for bathroom baseboard? Standard residential baseboard runs 3-1/4 to 5-1/4 inches tall. In bathrooms, 3-1/4 inches is the most common because it looks proportional in smaller rooms. Tile baseboards can go as low as 2 inches or as high as 6 inches depending on the tile size. There is no structural requirement — height is purely a design decision.
Should I caulk or grout the bottom of bathroom baseboard? For wood, PVC, or metal baseboards, use flexible caulk at the bottom — grout is too rigid and will crack as the building settles. For tile baseboards, use grout between the baseboard tile and floor tile (it matches the field grout), but use caulk at any change-of-plane junction where movement is expected.
How do I prevent baseboard mold in a bathroom? Mold grows where moisture sits against organic material. The most effective prevention is choosing an inorganic baseboard (PVC, tile, metal) that mold cannot feed on. If you use wood, prime all surfaces before installation, maintain the paint finish, and ensure the bathroom has adequate ventilation — an exhaust fan rated at 1 CFM per square foot of floor area, run for 20 minutes after every shower.
Bathroom baseboards sit at the intersection of function and finish. They protect your drywall from mop water and splashing, cover the expansion gap between your flooring and wall, and set the tone for how polished the room feels overall. Pick based on your bathroom type first — powder rooms can handle almost any material, while full bathrooms with tubs and showers need PVC, tile, stone, or metal to last. Then narrow by style. The 27 options here cover enough ground that you should find something that fits both your moisture conditions and your design preferences without compromise.
Pinterest cover for 27 Bathroom Baseboard Ideas
About the author
OBCD
CGI visualization and interior design content. We create detailed 3D renders and curate practical design ideas for every room in your home.