25 Bathroom Drawer Organization Ideas

Open any bathroom drawer and you will probably find a tangle of hair ties, half-used tubes, and at least one mystery product you forgot about. The fix is not buying fewer things — it is giving each item a predictable spot so your hand goes straight to it at 6 AM without looking. Drawer organizers do not need to be expensive, and most installs take under ten minutes. The real trick is matching the insert style to what you actually store: tall bottles need deep compartments, flat palettes need wide slots, and bobby pins need something with a lid or they migrate everywhere.
Below are 25 bathroom drawer organization ideas grouped by material, method, and the specific problem each one solves.
Table of Contents
- Bamboo Drawer Dividers
- Expandable Utensil Tray Insert
- Clear Acrylic Makeup Bins
- Velvet-Lined Jewelry Compartments
- Two-Tier Sliding Tray
- Silicone Heat Mat Section
- Magnetic Strip for Metal Tools
- Labeled Apothecary Jars
- Custom Foam Insert Cutouts
- Lazy Susan Turntable in a Deep Drawer
- Wire Mesh Baskets with Handles
- Spring-Loaded Divider Rails
- Woven Fabric Boxes
- Vertical Hair Tool Holster
- Spice Rack Insert Repurposed
- Pegboard Drawer Bottom
- Drawer-Within-a-Drawer Stacking
- Color-Coded Pouches
- Modular Honeycomb Dividers
- Under-Drawer Shelf Add-On
- Pull-Out Drawer Behind a False Panel
- Mason Jar Holder Rack
- Stackable Clear Bins with Lids
- Tension Rod Drawer Divider
- Full Custom Built-In Organizer
1. Bamboo Drawer Dividers
Bamboo works well in bathrooms because it resists moisture better than raw pine or MDF. Most bamboo organizer sets come with a mix of square and rectangular compartments sized for standard toiletries. The material is light enough to pull the whole tray out for cleaning, and it wipes down with a damp cloth. Look for sets that use interlocking joints rather than glue — they survive humidity cycles longer. One practical tip: measure your drawer interior before ordering. Advertised sizes include the outer frame, and a half-inch gap on each side means items shift around.
Tips
- Sand any rough bamboo edges with 220-grit paper to prevent snagging cloth items
- Apply a thin coat of mineral oil every six months to keep the bamboo from drying out
- Place heavier bottles toward the back of the drawer so the tray does not slide forward when opened

We picked a few things that go well with this idea: Best Choice 40in Tabletop Billiard Table (★4.6), GoSports 7-8ft Pool Table Wood Finish (★4.6) and GoSports Portable Billiards Table with Accessories (★4.3). As an Amazon Associate we earn from qualifying purchases.
2. Expandable Utensil Tray Insert
The Kitchen Hack That Works
Kitchen utensil organizers expand from about 10 to 18 inches, fitting most vanity drawers. They cost less than dedicated bathroom organizers and the slots happen to be perfect for toothbrushes, razors, combs, and tubes. The wider center section holds items like face wash bottles upright.
How to Set It Up
Extend the tray to fit snugly between the drawer walls. Place tall items in the back row and flat items up front. If the tray slides, stick a strip of shelf liner underneath. The friction keeps everything locked in place even if you yank the drawer open quickly.
Pros and Cons
- Pros: Cheap (under $12), widely available, adjustable width
- Cons: Slots may be too deep for small items like bobby pins, plastic versions can crack in heat
We picked a few things that go well with this idea: Arcade Classics Atari Centipede Cabinet (40 Games) (★4.2), Arcade1Up Mortal Kombat Deluxe Machine (14 Games) (★4.6) and Arcade Classics Atari Star Wars Cabinet (★4.2). As an Amazon Associate we earn from qualifying purchases.
3. Clear Acrylic Makeup Bins
Acrylic bins let you see contents without rummaging, which matters when you own fifteen lip products and need a specific shade in two minutes. The material is waterproof, cleans with glass cleaner, and does not absorb product spills the way porous materials do. Stack multiple heights within a single drawer to create zones: short bins in front for compacts and palettes, taller bins behind for foundation bottles. Avoid acrylic thinner than 2mm — it cracks under weight. Quality bins have polished edges and no visible seams.
Tips
- Group by product type rather than brand — you reach for categories, not labels
- Use a small acrylic riser at the back to angle items forward for visibility
- Clean bins monthly with isopropyl alcohol to remove makeup residue buildup
We picked a few things that go well with this idea: Leeleberd RGB LED Strip Lights (100ft) (★4.4), KSIPZE RGB LED Strip Lights (100ft) (★4.4) and RGB Color Changing LED Strip (200ft) (★4.2). As an Amazon Associate we earn from qualifying purchases.
4. Velvet-Lined Jewelry Compartments
Why Bathroom Jewelry Storage
Many people put on and remove jewelry at the bathroom mirror. A velvet-lined tray in the top vanity drawer keeps necklaces from tangling and earrings from rolling into crevices. The velvet surface grips items in place so they do not slide when the drawer moves.
Picking the Right Insert
Trays come in stackable layers. The top layer usually has ring rolls and earring slots, while the bottom layer holds bracelets and watches. Choose a tray depth that matches your drawer — too tall and it will not close. Dark colors hide tarnish marks better.
Pros and Cons
- Pros: Prevents scratches on fine metals, keeps pairs together, looks polished
- Cons: Velvet attracts lint and hair, not ideal for humid bathrooms without ventilation

Recommended
Items for this idea
5. Two-Tier Sliding Tray
A two-tier tray doubles your usable space inside a single drawer. The top tray slides forward or lifts out, revealing a second level underneath. This setup works best in deeper drawers (4 inches or more) where a single flat organizer wastes vertical space. Store daily items on top — toothpaste, deodorant, face moisturizer — and keep backups or less-used products below. Some models use ball-bearing slides, which feel smoother but cost more. Simpler versions rest on rails and slide by hand.
Tips
- Measure interior drawer height with the tray in place to make sure it clears the countertop underside
- Put heavier items on the bottom tier for stability
- Line the lower tier with removable shelf paper for easy cleaning

6. Silicone Heat Mat Section
Hot hair tools are awkward to store. You either wait for them to cool, drape them over the counter, or drop them into a drawer and hope for the best. A silicone heat mat lining one section of your drawer lets you put a curling iron or flat iron away immediately after use. These mats handle temperatures up to 450F and prevent scorching the drawer bottom. Cut the mat to fit your designated hot-tool zone, leaving surrounding compartments for heat-sensitive items.
Watch Out
- Do not place a hot tool directly against plastic organizer walls — silicone protects the base, but radiant heat still warms adjacent bins
- Wrap cords loosely to avoid kinking the internal wires
- Clean the mat regularly; product buildup on hot tools transfers and bakes onto the silicone
Recommended
Items for this idea
7. Magnetic Strip for Metal Tools
The Idea
Mount a magnetic strip on the inside of the drawer front panel (or directly on the drawer bottom). Small metal tools — tweezers, nail clippers, cuticle pushers, scissors — snap onto the strip and stay put. No more digging through a jumble of products to find tweezers.
Installation Steps
- Clean the surface with rubbing alcohol
- Peel the adhesive backing off the magnetic strip
- Press firmly and let it cure for 24 hours before loading tools
Watch Out
- Keep magnetic strips away from credit cards or hotel key cards stored in the same drawer
- Check that the magnet strength holds your heaviest tool — cheap strips lose grip on heavier items
8. Labeled Apothecary Jars
Glass jars with airtight lids keep cotton balls, Q-tips, bath salts, and hair ties contained and visible. Labels prevent the guessing game when jars look similar. Use waterproof vinyl labels or a label maker with laminated tape so humidity does not peel them off. Short, wide-mouth jars (8-12 oz) fit inside most drawers without tipping. The weight of glass also keeps them from sliding. If you want a cohesive look, buy a matching set of four to six jars and dedicate them to your most-used consumables.
Tips
- Round jars waste corner space — square jars pack more efficiently
- Refill jars from bulk packages stored elsewhere to keep drawer contents tidy
- Avoid metal lids in wet bathrooms; they rust where the seal meets the rim
Recommended
Items for this idea
9. Custom Foam Insert Cutouts
Why Foam
Foam inserts hold items in exactly one position. Every tool has its own shaped pocket, so the drawer looks the same every time you open it. This approach makes sense for expensive grooming tools, electric razors, or anything fragile you do not want rattling around.
How to Make One
Buy a sheet of medium-density foam (kaizen foam works well) that fits your drawer dimensions. Trace each item on the surface, then cut out the shapes with a sharp utility knife. Layer two sheets if your items are taller than one inch.
Pros and Cons
- Pros: No shifting, professional look, protects delicate items from impact
- Cons: Time-consuming to cut, must redo if you change your tool set, foam absorbs moisture if uncoated
10. Lazy Susan Turntable in a Deep Drawer
Deep drawers bury items at the back where you cannot reach them. A small turntable (10 to 12 inch diameter) solves this by spinning everything into view. Place it flat on the drawer bottom and arrange bottles in a circle. One rotation gives you access to every product. This works particularly well for skincare routines with multiple serums, toners, and creams that you use in a sequence. The turntable acts as a visual checklist.
Tips
- Choose a turntable with a non-slip surface so bottles stay upright during rotation
- Leave a one-inch gap between the turntable edge and drawer walls for clearance
- Use a shallow turntable (under 1.5 inches tall) to maximize remaining drawer height
Recommended
Items for this idea
11. Wire Mesh Baskets with Handles
Wire baskets ventilate, which prevents trapped moisture from growing mold under products. The handles let you lift a basket out and carry it — useful for travel prep or bathroom cleaning. Coat-finished wire (white or matte black) resists rust better than bare metal. Size the baskets so three or four fit side by side in one drawer without gaps. Assign each basket a category: first aid, travel-size extras, dental care, shaving supplies. When one category outgrows its basket, that is a signal to purge.
Tips
- Line basket bottoms with a thin silicone mat to prevent small items from falling through the mesh
- Label baskets on the front handle with clip-on tags
- Avoid stacking baskets inside a single drawer — it defeats the purpose of quick access

12. Spring-Loaded Divider Rails
The Problem
Fixed organizers never match your drawer layout perfectly. You end up with wasted strips of space along the edges, or compartments that are too wide for what you need.
The Solution
Spring-loaded dividers press against the drawer walls and hold themselves in place without adhesive or screws. You can reposition them any time your collection changes. Set them parallel to divide the drawer into lanes, or crosswise to create a grid. They come in heights from 2 to 4 inches.
Pros and Cons
- Pros: Infinitely adjustable, no installation damage, cheap to replace
- Cons: Can pop loose in very wide drawers, not strong enough for heavy items pushing against them
Recommended
Items for this idea
13. Woven Fabric Boxes
Fabric boxes add texture and warmth to a drawer that would otherwise feel clinical. Woven linen, cotton canvas, or jute boxes come in small sizes designed for drawers. They are soft, so they will not scratch the drawer interior, and they fold flat if you decide to stop using them. Some have reinforced walls with cardboard inserts to keep their shape. The downside is absorbency — fabric soaks up spills. Use them for dry items only: rolled washcloths, headbands, hair clips, individually wrapped soaps.
Tips
- Machine-wash fabric boxes monthly on a gentle cycle to prevent musty smells
- Choose boxes with stitched handles rather than glued — glue fails in humidity
- Dark linen hides stains better than white canvas

14. Vertical Hair Tool Holster
The Idea
Instead of laying hair tools flat (which wastes space and tangles cords), a holster stands them upright in individual cylinders. Think of it like a knife block inside your drawer. Each tool drops into its own slot, cord and all.
Steps to Set Up
- Measure your drawer depth to confirm tools will fit vertically
- Choose a holster with heat-resistant silicone-lined slots
- Place it in the back corner of the drawer where the ceiling above gives clearance
- Wrap each cord loosely around the tool handle before dropping it in
Watch Out
- Only works in drawers at least 6 inches deep
- Holsters with solid bottoms trap heat — look for ventilated bases

Recommended
Items for this idea
15. Spice Rack Insert Repurposed
Tiered spice rack inserts angle bottles at a slant so you can read labels without picking each one up. They work identically for skincare serums, essential oils, and travel-size products. The typical three-tier rack fits inside a standard 4-inch-deep drawer and holds 12 to 15 small bottles. Place it at the back of the drawer with flat storage in front. The stair-step profile uses vertical space that a flat organizer ignores.
Tips
- Non-slip shelf liner under the rack prevents it from sliding when you open the drawer fast
- Group bottles by routine step (cleanse, treat, moisturize) across the tiers
- Metal racks hold up better than plastic in bathroom humidity
16. Pegboard Drawer Bottom
Why Pegboard
A thin pegboard sheet cut to fit your drawer bottom lets you create compartments with movable pegs. It is the most flexible system possible — rearrange pegs in seconds to accommodate new products or seasonal changes.
How to Build It
Cut 1/8-inch pegboard to your drawer dimensions. Sand the edges smooth. Drop it into the drawer (no glue needed — the fit holds it). Insert short wooden dowels or plastic pegs to fence off zones. Tall pegs keep bottles upright; short pegs create divider walls.
Pros and Cons
- Pros: Completely customizable, inexpensive, no permanent modifications
- Cons: Pegboard absorbs moisture unless sealed, pegs can pop out if bumped hard

Recommended
Items for this idea
17. Drawer-Within-a-Drawer Stacking
Deep drawers benefit from horizontal stacking — shallow trays that pile two or three high within the same drawer. Each tray holds a different product category. The top tray lifts out entirely, giving access to the one below. Unlike the two-tier sliding system, stacking trays do not require rails, so they fit any drawer shape. Use the top layer for items you grab daily and reserve lower layers for weekly or occasional products like face masks, nail polish, and sample sachets.
Tips
- Keep tray heights under 2 inches each so two trays fit in a standard 5-inch drawer
- Label the edge of each tray so you know what is inside without lifting it
- Use trays of the same brand to ensure they stack flush
18. Color-Coded Pouches
Assign a color to each person or product category. Blue pouch for dental care, green for skincare, pink for makeup. Pouches zip shut, which keeps small items from escaping, and they travel easily — grab one when packing for a trip. Choose pouches made from nylon or PVC-coated fabric so they wipe clean after spills. Flat pouches lay better in drawers than puffy ones. If you share a bathroom, each person gets their own color, ending the "whose stuff is this" conversation.
Tips
- Clear-window pouches combine the color-coding benefit with at-a-glance visibility
- Hang a small hook inside the drawer to hold a pouch upright if space allows
- Replace pouches yearly — zippers corrode in humid environments

Recommended
Items for this idea
19. Modular Honeycomb Dividers
The Concept
Honeycomb dividers are interlocking plastic strips that snap together into a hexagonal grid. You cut them to size with scissors and arrange the pattern to match your drawer dimensions. The hexagonal cells hold round items (bottles, jars, rolled washcloths) more securely than square grids because the angled walls prevent rolling.
Setting It Up
- Count how many cells you need based on your item collection
- Snap strips together at the desired length
- Place the assembled grid inside the drawer and trim any overhanging edges
- Drop items into individual cells
Watch Out
- Hexagonal cells waste space for square or flat items — use a different organizer for palettes and phones
- Cheap versions flex too much and collapse under heavy bottles
20. Under-Drawer Shelf Add-On
The space below a drawer and above the cabinet floor is usually empty. An under-drawer shelf attaches to the underside of the drawer frame with screws or adhesive clips, creating a hidden flat surface. Use it for items you need but do not want visible: extra razor cartridges, a spare tube of toothpaste, feminine products, or medication packets. The shelf pulls out with the drawer above it, so access is easy. It works only if there is at least 3 inches of clearance below the drawer box.
Tips
- Weight limit on adhesive-mounted shelves is usually around 3 pounds — do not overload
- Paint the shelf to match the cabinet interior for a cleaner look
- Check that the shelf does not interfere with the drawer slides when fully extended

Recommended
Items for this idea
21. Pull-Out Drawer Behind a False Panel
The Problem
The panel below many bathroom sinks looks structural but is actually a decorative false front. Behind it sits 2 to 3 inches of usable space that goes completely wasted.
The Solution
Install a tip-out tray kit (about $15) behind that false panel. Two hinges and a small plastic tray convert dead space into storage for sponges, scrub brushes, toothbrushes, or small cleaning bottles. The tray tips outward when you press the panel top and closes flush when released.
Pros and Cons
- Pros: Uses otherwise wasted space, keeps items near the sink, invisible when closed
- Cons: Very shallow — only flat or small items fit, hinge quality varies by brand
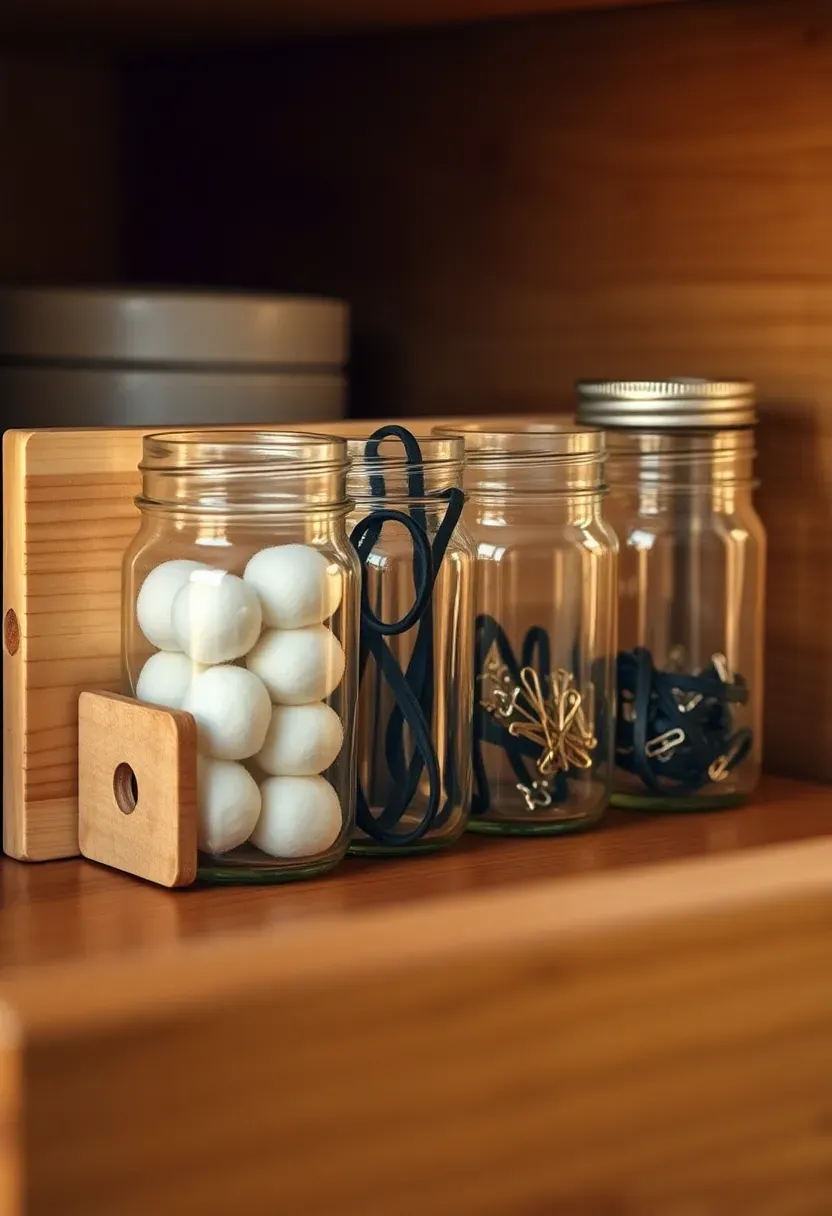
22. Mason Jar Holder Rack
A wooden or metal rack holds mason jars upright inside your drawer, turning them into visible, removable canisters. Short 4-ounce jars fit in shallow drawers and hold bobby pins, safety pins, hair ties, and cotton rounds. Wider 8-ounce jars handle cotton balls and individually wrapped items. The rack prevents jars from tipping when the drawer slides. You can build one from scrap wood in under an hour: cut a board to drawer width, drill holes sized to the jar mouths, and drop the jars through.
Tips
- Plastic mason-style jars are lighter and will not crack if the drawer slams
- Screw-top lids keep contents clean — snap-on lids pop off when jars jostle
- Paint or stain the rack to match your vanity finish
Recommended
Items for this idea
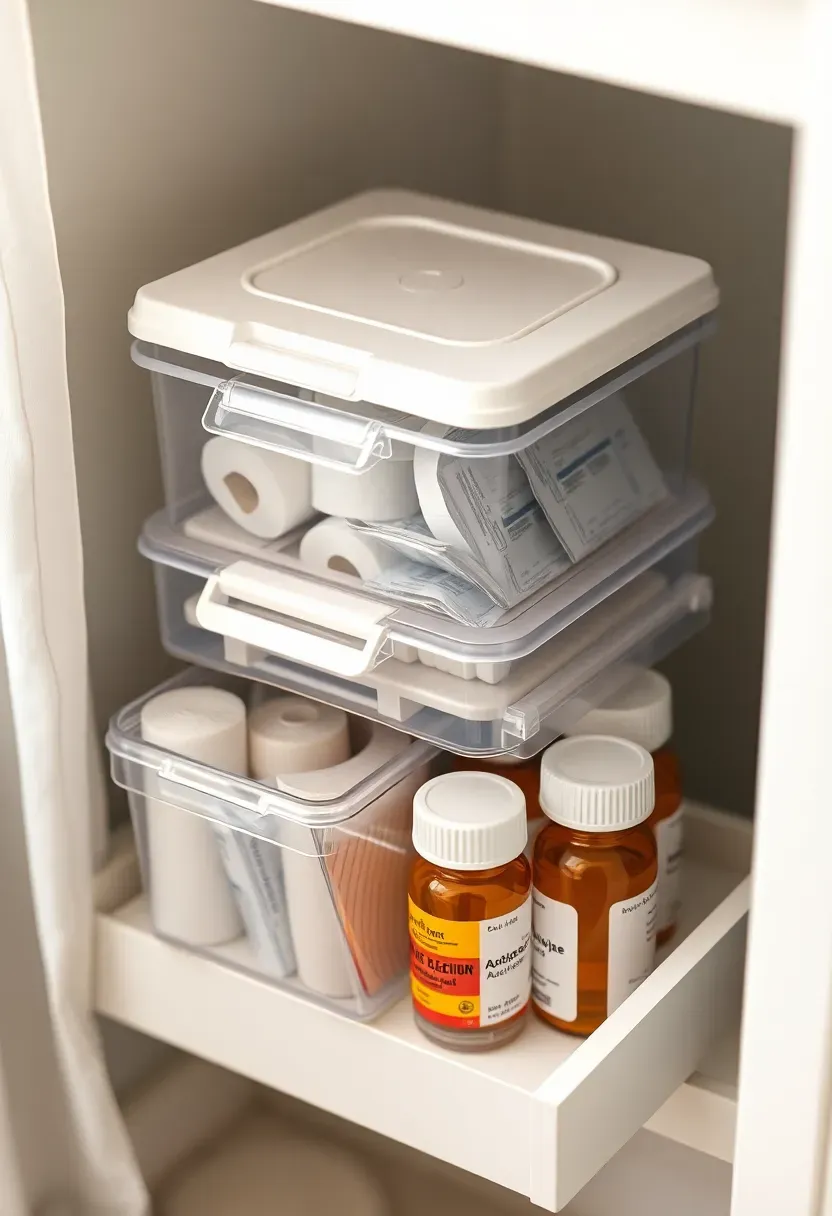
23. Stackable Clear Bins with Lids
Lidded bins protect contents from humidity, dust, and cross-contamination — important for first aid supplies, medications, and contact lens products. Clear walls let you scan contents without opening each bin. Stackable versions use nesting ridges on the lid and base to lock together, preventing the top bin from sliding off during drawer movement. Size them so two stacks fit side by side with a narrow channel between for easy gripping.
Tips
- Label the front face of each bin with removable adhesive labels for easy reorganization
- Keep medications in a separate, opaque bin if light sensitivity is a concern
- Replace lids when the snap mechanism loosens — a compromised seal lets in moisture
24. Tension Rod Drawer Divider
The Quick Fix
Small tension rods (the kind used for cafe curtains) wedge between drawer walls and create instant partitions. They install in seconds with no tools, adjust to any width, and remove without leaving marks. Use them to separate product groups or create lanes for bottles to stand in.
Steps to Install
- Measure the interior drawer width
- Buy tension rods slightly longer than that measurement
- Twist to extend, press into place across the drawer
- Arrange items between the rods
Watch Out
- Tension rods work better as lane dividers than as barriers — items can go over or under them
- Rubber tips leave marks on unfinished wood drawers over time

Recommended
Items for this idea
25. Full Custom Built-In Organizer
If off-the-shelf solutions never quite fit, a custom-built organizer solves every size and layout problem permanently. A woodworker or cabinetmaker routes compartments directly into a wood insert that fits your exact drawer dimensions. Every slot matches a specific item — your electric toothbrush, your partner's shaving kit, the kids' bath toys. The insert sits flush with the drawer top for a seamless look. Hardwood or marine-grade plywood stands up to bathroom conditions without warping. This is the most expensive option but also the most satisfying to use daily.
Tips
- Bring all items you plan to store to the cabinetmaker so they can template each compartment
- Request a clear polyurethane finish for moisture protection
- Build in one or two oversized empty compartments for future additions
Quick FAQ
Do bamboo organizers hold up in steamy bathrooms? Bamboo handles humidity better than most woods, but it still needs maintenance. Apply mineral oil twice a year and avoid submerging it. In very humid bathrooms without exhaust fans, consider acrylic or plastic instead.
Which drawer organizer works best for shared bathrooms? Color-coded pouches or separate baskets per person work well. Each person manages their own container, and the system scales easily when a guest moves in or kids grow up.
Can I organize a single shallow drawer to hold everything? One drawer rarely holds an entire household's bathroom inventory. Focus that drawer on daily-use items only — toothbrush, face wash, moisturizer, deodorant. Move backstock and occasional products to a linen closet or under-sink cabinet.
Are adhesive-mounted organizers safe for rental bathrooms? Most adhesive strips (like Command strips) remove cleanly from finished surfaces. Test on an inconspicuous spot first. Spring-loaded dividers and tension rods are the safest rental-friendly option since they leave zero marks.
How often should I reorganize bathroom drawers? Every three to four months is a good interval. Check expiration dates on medications and skincare, toss dried-out products, and adjust compartments for anything new you have added to your routine.
Bathroom drawer organization is less about buying the perfect product and more about matching the organizer type to your actual habits. A minimalist with five items needs a different setup than someone with a 20-step skincare routine. Start with the drawer you open most often, pick one method from this list, and give it a week. If you are still reaching for the right item on the first try, the system works. If not, swap it out — most of these ideas cost under $20 and install in minutes.
Pinterest cover for 25 Bathroom Drawer Organization Ideas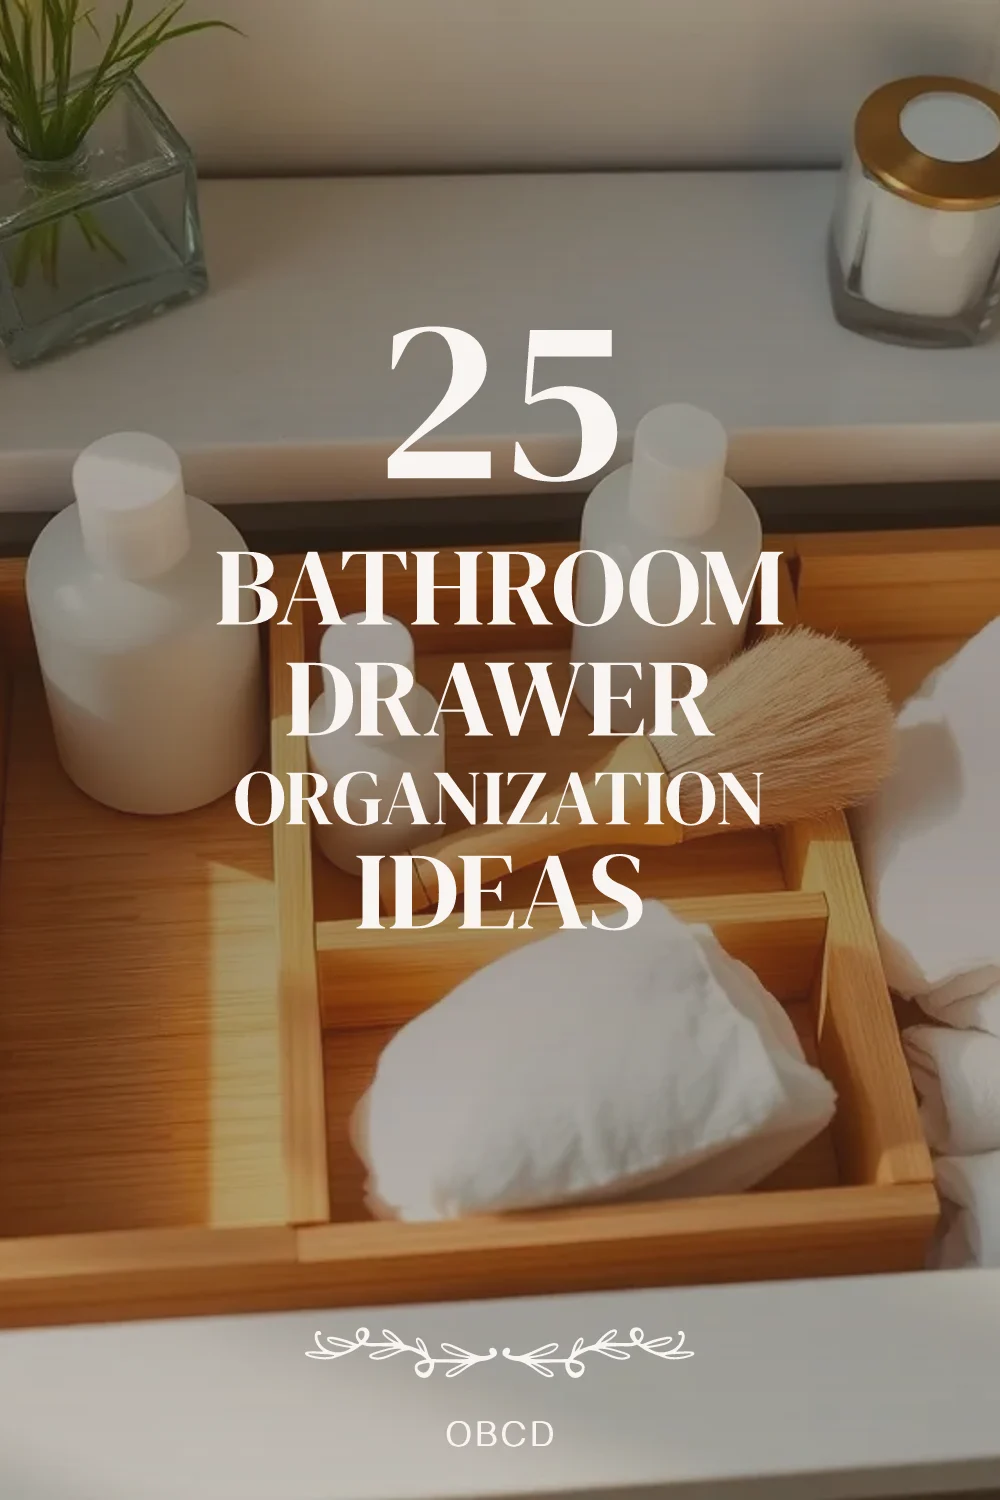
About the author
OBCD
CGI visualization and interior design content. We create detailed 3D renders and curate practical design ideas for every room in your home.