23 Bathroom Layout Ideas for Every Size and Shape
Most bathroom frustrations come down to layout, not decor. A gorgeous tile job means nothing if you bang your elbow on the towel bar every morning or the door hits the toilet when it swings open. Floor plan geometry dictates daily comfort far more than paint color or fixture finish ever will.
I spent years working around a bathroom where the vanity blocked half the natural light from the window. Moving it eighteen inches solved problems no amount of redecorating could touch. Layout is the foundation everything else sits on.
Here are 23 bathroom layout ideas organized by room size and configuration, from compact powder rooms to spacious primary suites. Each one addresses real spatial constraints with specific measurements and placement logic.
Table of Contents
- The Classic 5x8 Three-Fixture Layout
- Pocket Door Corner Vanity Plan
- Long Narrow Galley Bathroom
- Wet Room Open Layout
- L-Shaped Primary Suite
- Curbless Shower Accessible Layout
- Back-to-Back Plumbing Shared Wall
- Freestanding Tub Centerpiece Floor Plan
- Jack-and-Jill Connected Layout
- Under-Stairs Powder Room
- Double Vanity Parallel Layout
- Shower-Over-Tub Compact Plan
- Doorless Walk-In Shower Layout
- Separated Toilet Compartment
- Corner Shower Diagonal Entry
- Floating Vanity Open Floor Layout
- Three-Quarter Bath Efficient Plan
- Skylight Attic Bathroom Layout
- Dual Entry Ensuite Layout
- Linear Single-Wall Arrangement
- Bay Window Tub Alcove Layout
- Split Bathroom Two-Zone Design
- Compact Square 6x6 Layout
1. The Classic 5x8 Three-Fixture Layout
The 5x8-foot bathroom remains the most common size in American homes built after 1950. It fits a standard 60-inch tub along the short wall, a toilet beside it, and a vanity on the opposite side. Tight, but proven over decades. The key is keeping the door swing clear of all three fixtures — a 28-inch door works better than 30 here.
Tips
- Place the vanity directly across from the toilet to maximize elbow room at both stations
- Use a 24-inch vanity instead of 30 to gain six inches of walkway
- Mount the toilet paper holder on the vanity side wall within arm's reach of the toilet
We picked a few things that go well with this idea: Modern 24-Inch Floating Bathroom Vanity (Black) (★4.1), Modern 24-Inch Floating Bathroom Vanity (White) (★4.1) and IDEALHOUSE 30-Inch Floating Vanity with Ceramic Sink (★5.0). As an Amazon Associate we earn from qualifying purchases.
2. Pocket Door Corner Vanity Plan
The Core Issue
Standard hinged doors steal 7 to 9 square feet of usable floor space when they swing open. In bathrooms under 40 square feet, that loss is brutal.
The Solution
Replace the hinged door with a pocket door that slides into the wall cavity, then tuck a corner vanity into the space the door swing previously occupied. This recovers enough room for a comfortable standing area in front of the sink. Corner vanities with angled fronts typically measure 24 to 32 inches across the face and fit snugly into 90-degree wall junctions. Pair with a wall-mounted faucet to keep the small countertop completely clear.
Pros and Cons
Pros: Recovers dead space, no door clearance conflicts, creates more natural traffic flow Cons: Pocket door installation requires opening the wall, corner vanity storage capacity is limited
We picked a few things that go well with this idea: NearMoon 12-Inch Square Rainfall Showerhead (Matte Black) (★4.4), NearMoon 12-Inch Square Rainfall Showerhead (Chrome) (★4.4) and Voolan 12-Inch Stainless Steel Rainfall Showerhead (★4.5). As an Amazon Associate we earn from qualifying purchases.
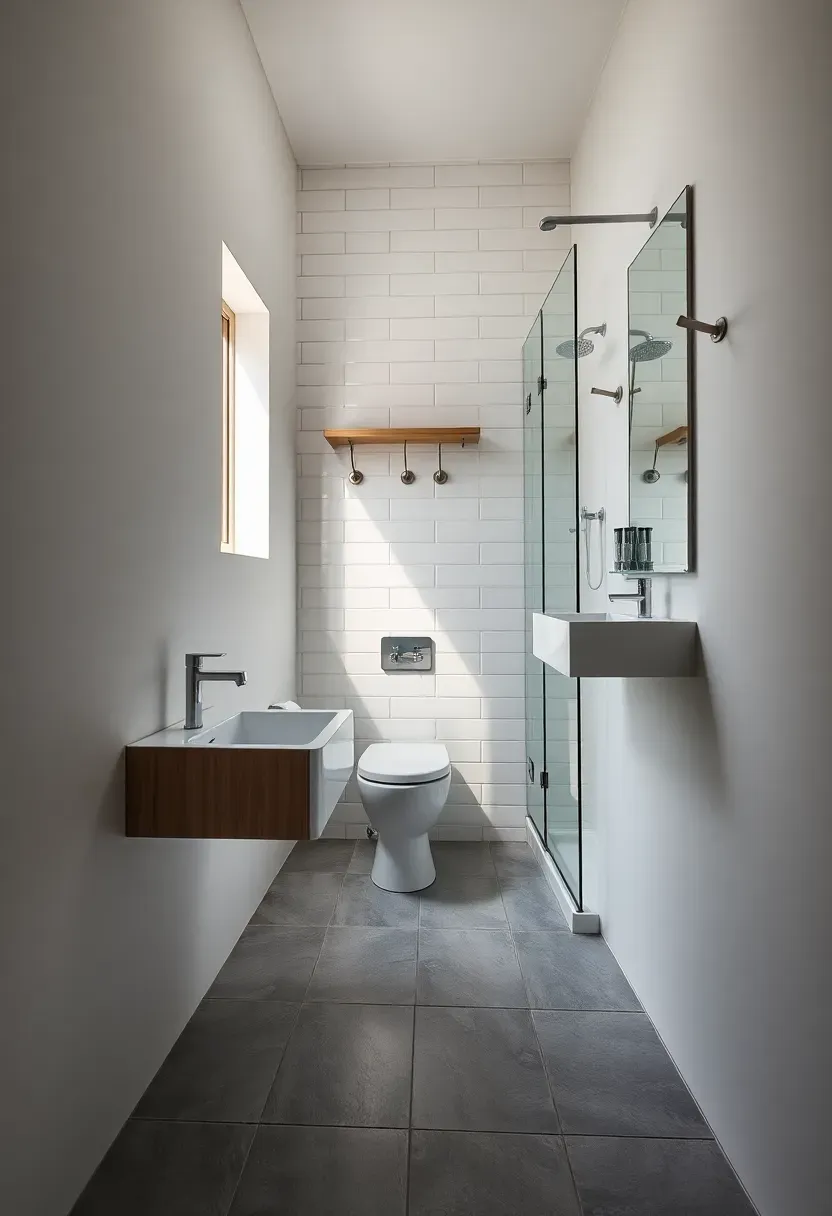
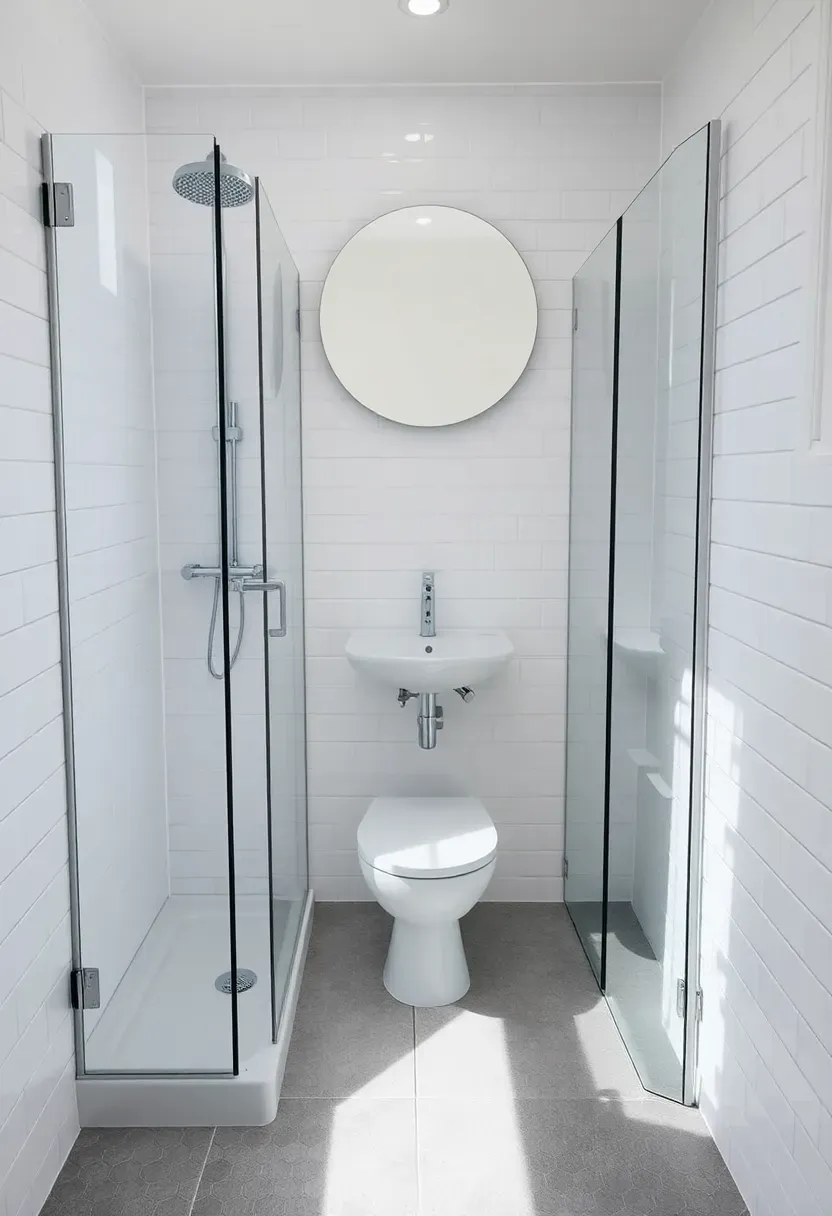
3. Long Narrow Galley Bathroom
Galley bathrooms — typically 4 to 5 feet wide and 10 or more feet long — appear frequently in row houses and railroad apartments. The temptation is to line everything along one wall, but a staggered arrangement works better.
How to Arrange It
Place the vanity near the entrance where you need it first in your morning routine. Position the toilet midway along the room on the opposite wall. Put the shower or tub at the far end where it benefits from any window. This zigzag path forces you to walk past each fixture naturally rather than creating a bottleneck at one end.
Watch Out
- Never place the toilet directly visible from the doorway — offset it behind a half wall or across from the vanity
- Use a sliding barn door or pocket door since a swinging door blocks the narrow corridor
- A linear drain at the shower entry helps contain water in doorless configurations
We picked a few things that go well with this idea: Amazon Basics 24-Inch ADA Grab Bar (★4.8), TAILI Suction Grab Bars (2-Pack) (★4.2) and Vive Textured Bathroom Safety Grab Bar (★4.6). As an Amazon Associate we earn from qualifying purchases.
4. Wet Room Open Layout
A wet room treats the entire bathroom floor as a shower zone. No curbs, no enclosures, no step-overs. The floor slopes gently toward a central or linear drain, and waterproof membrane covers every surface from floor to ceiling.
Step 1: Grade the Floor
The entire floor needs a consistent slope of about 1/4 inch per foot toward the drain. A skilled tile setter can achieve this with a mortar bed, or you can use pre-sloped foam panels as a substrate.
Step 2: Waterproof Everything
Apply a liquid membrane or sheet membrane to the entire floor and at least 6 feet up every wall. Overlap seams by 2 inches minimum. The toilet and vanity areas get the same treatment since water will reach them during showers.
Step 3: Zone with Glass
A single fixed glass panel (no door) between the shower head and the dry zone keeps most spray contained while maintaining the open visual flow. Position it 24 to 30 inches from the shower wall.
Recommended
Items for this idea
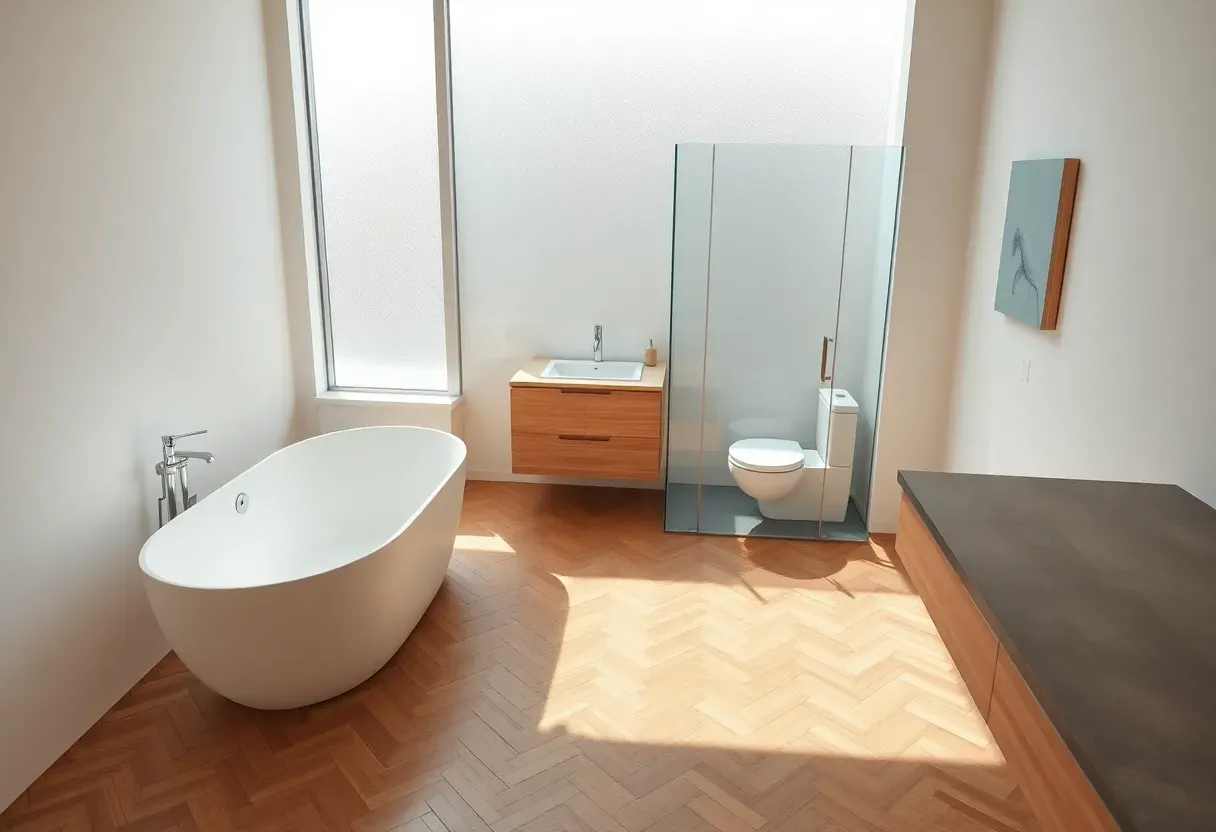
5. L-Shaped Primary Suite
When a bathroom wraps around a corner — common in primary suites where the builder carved space from an adjacent closet or bedroom — the L shape creates two natural zones. Use the longer leg for the shower and tub, and the shorter leg for the vanity and toilet. This separation adds privacy without walls.
Why It Beats a Rectangle
The bend in the layout acts as a visual barrier. Someone brushing their teeth at the vanity cannot see the toilet area, and vice versa. This implicit zoning feels deliberate rather than accidental and eliminates the need for a separate toilet compartment that would eat floor space.
Tips
- Place a recessed niche at the inside corner of the L for towel storage
- Run the same floor tile continuously through both legs to unify the space
- Position the vanity mirror to catch light from both directions if windows exist in each wing
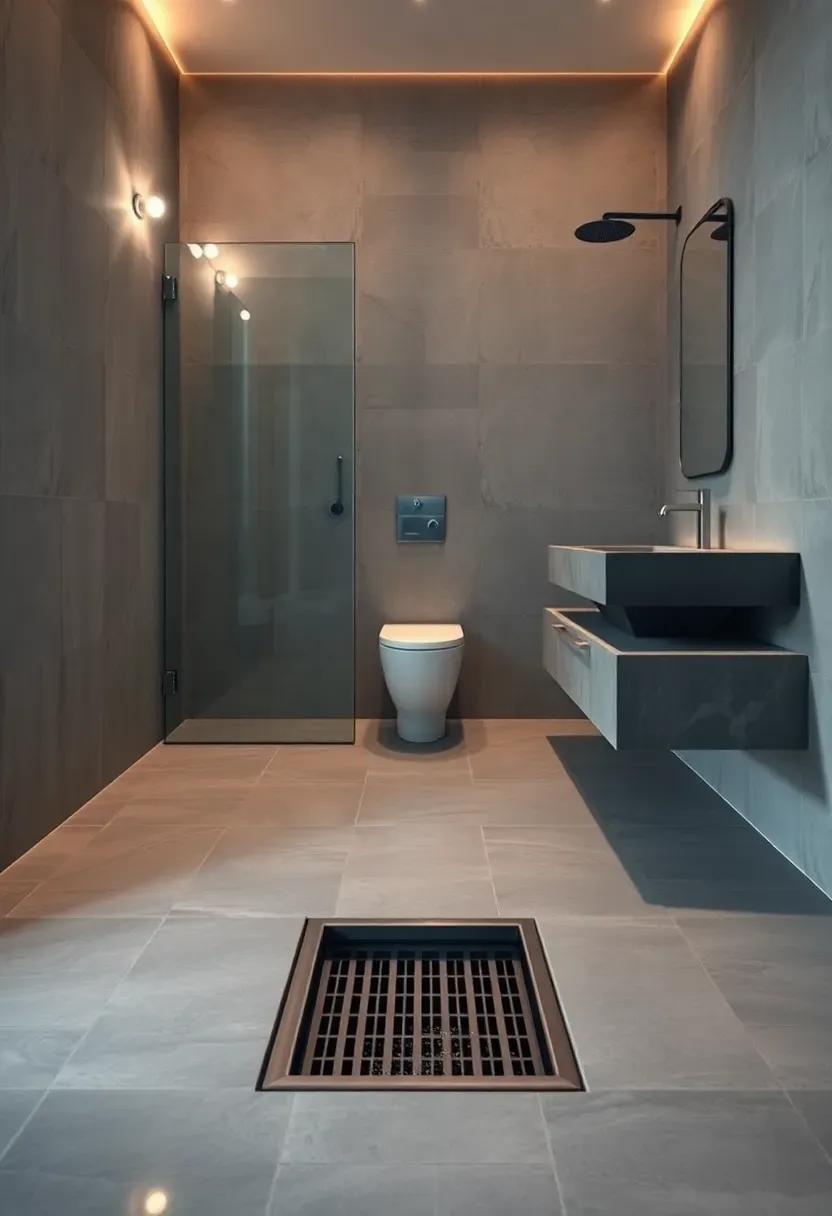
6. Curbless Shower Accessible Layout
Comparing: Traditional Shower vs Curbless Accessible Design
Accessibility layouts serve everyone, not just people with mobility challenges. A curbless shower with a 60-inch turning radius benefits parents bathing toddlers, anyone recovering from surgery, and aging-in-place planners.
Traditional Shower
Requires stepping over a 4 to 6 inch curb. Standard 36x36-inch footprint. Works for able-bodied adults but creates a trip hazard and blocks wheelchair or walker entry.
Curbless Accessible
Zero-threshold entry with the floor sloped to drain. Minimum 36-inch clear opening, ideally 42 inches. Blocking installed in all walls for future grab bar placement even if you do not install them now.
Choose Curbless If
You want a layout that works for decades without renovation, you have household members with any mobility consideration, or you simply prefer the clean aesthetic of barrier-free design.
Recommended
Items for this idea
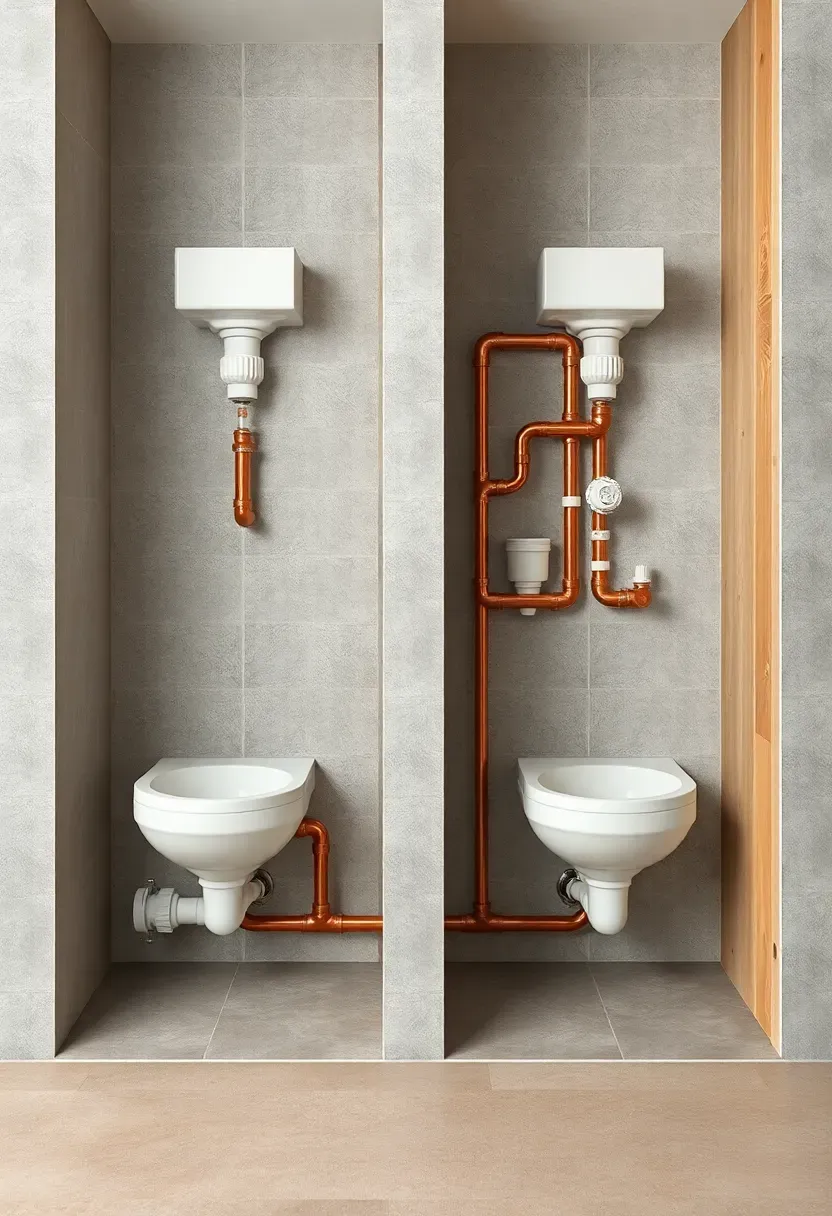
7. Back-to-Back Plumbing Shared Wall
Placing two bathrooms on opposite sides of the same wall cuts plumbing costs by 20 to 40 percent. Both rooms share supply lines, vent stacks, and drain runs through a single wet wall. This works for hall bath and ensuite combinations, or for adjacent kids' bathrooms.
Tips
- Align the toilets back-to-back for the simplest drain connection
- Use a 2x6 wet wall (not 2x4) to accommodate 3-inch drain pipes without notching studs
- Add sound insulation inside the shared wall — flushing sounds travel clearly through standard drywall
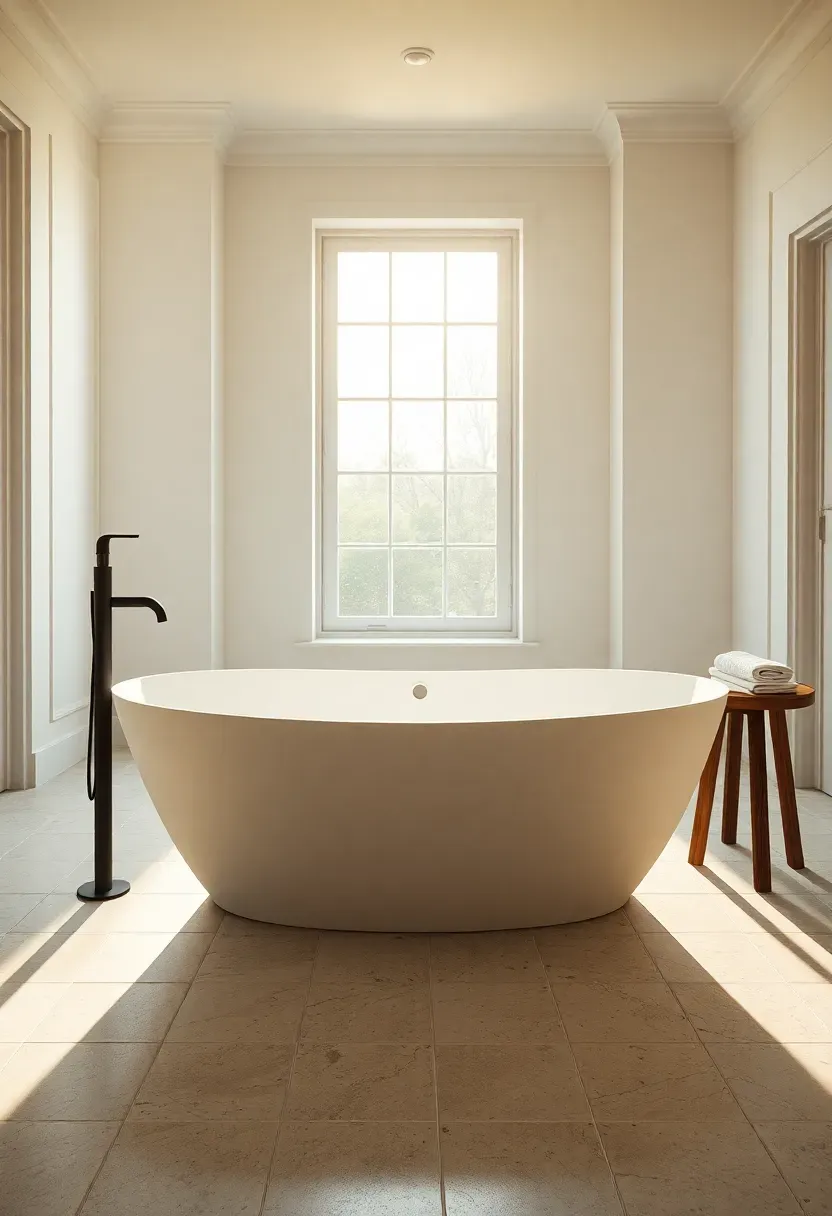
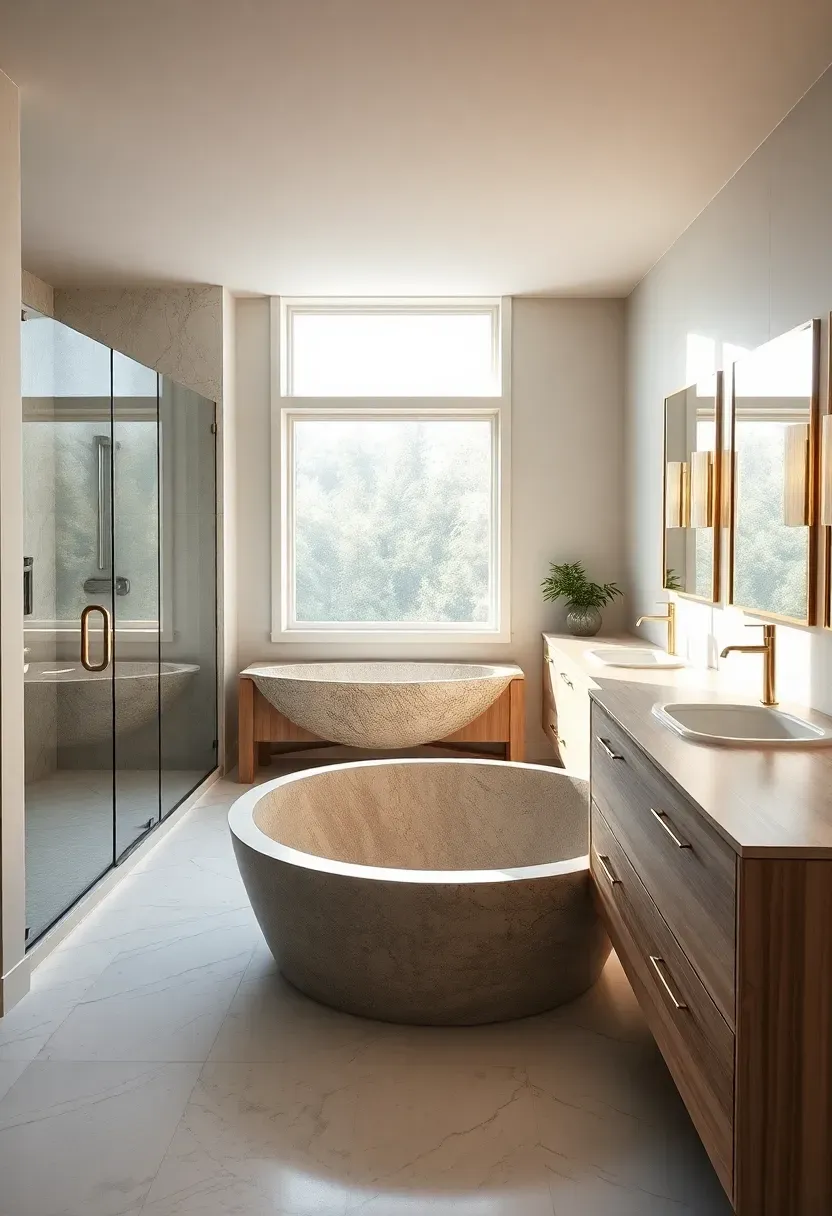
8. Freestanding Tub Centerpiece Floor Plan
Pulling a tub away from the wall and centering it in the room demands at least 70 square feet of bathroom space — anything smaller and the tub blocks circulation. But when you have the room, a freestanding tub creates an anchor point that organizes every other element around it.
Step 1: Set the Sight Line
Position the tub so it is the first thing you see from the bathroom entry. Align it with the doorway or a window for maximum visual impact.
Step 2: Route Floor Plumbing
Freestanding tubs need supply lines and a drain running through the floor, not the wall. Plan this before the slab pour or subfloor installation. Relocating floor plumbing after construction is expensive.
Step 3: Plan the Surround
Leave 18 inches minimum clearance on all sides of the tub. Place a small side table or built-in niche within arm's reach for soap and a towel. A floor-mounted tub filler on the long side keeps the approach clear.
Recommended
Items for this idea
9. Jack-and-Jill Connected Layout
Two bedrooms share one bathroom through separate lockable doors. The layout works best when each side gets its own sink while the shower and toilet sit in a central compartment with a privacy lock. Morning routines overlap less because two people can use their sinks simultaneously while the wet area stays private.
Why It Works
This layout saves the square footage of a second full bathroom while providing near-equivalent convenience. The critical detail is the lock system: each entry door must lock the other when the central compartment is in use.
Tips
- Install a double vanity with a visual divider (open shelf tower or medicine cabinet) between the two sinks
- Use a barn door or pocket door for the central compartment since swing doors conflict in tight spaces
- Add a vent fan rated for the combined square footage of both connected bedrooms
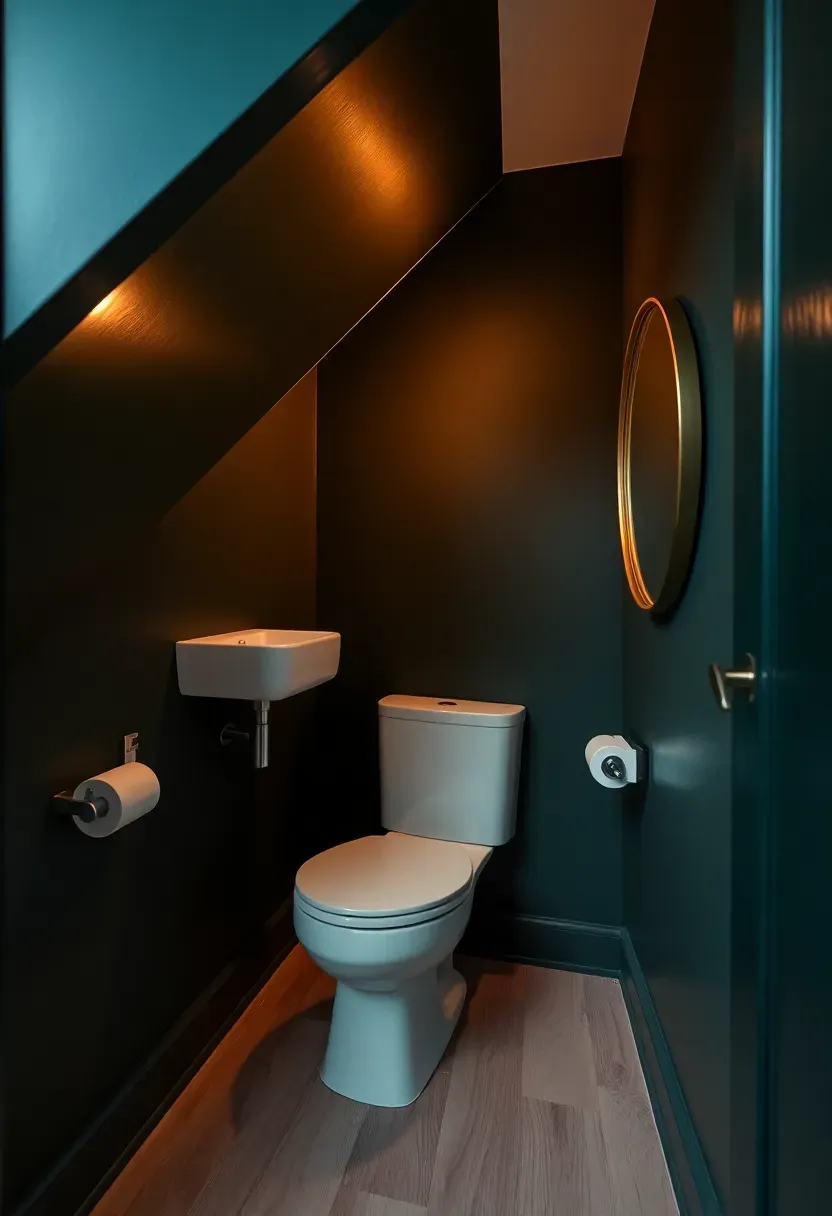
10. Under-Stairs Powder Room
The triangular void beneath a staircase often holds coats or cleaning supplies. Converting it to a powder room adds a half bath to a home without giving up any room footprint. You need about 30 inches of ceiling height at the toilet position and 36 inches at the sink.
Practical Considerations
- Place the toilet where the ceiling is lowest, since you sit there — standing height matters less
- Mount a wall-hung sink to keep the floor clear and visually expand the tight space
- An upflush toilet system works if the space sits below the main drain line
- Use a pocket door or outward-swinging door since there is no room for an inward swing
Recommended
Items for this idea
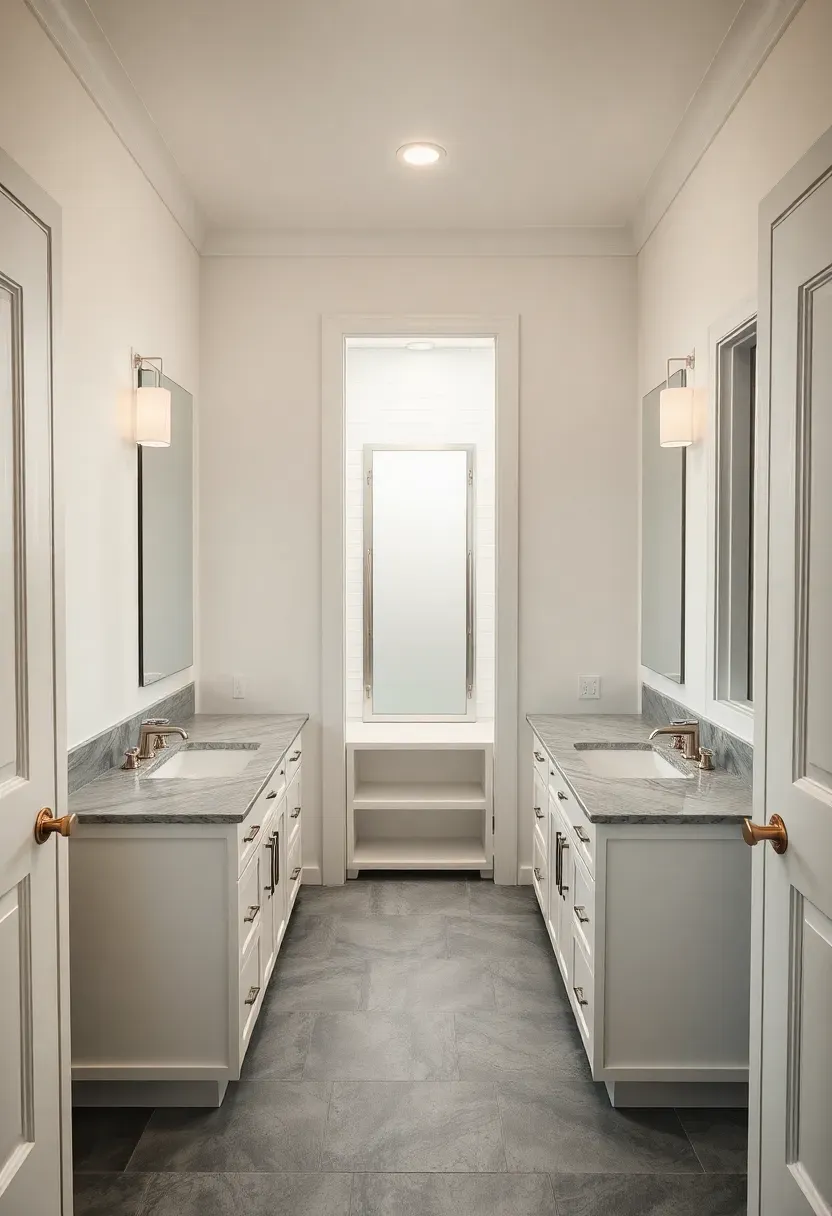
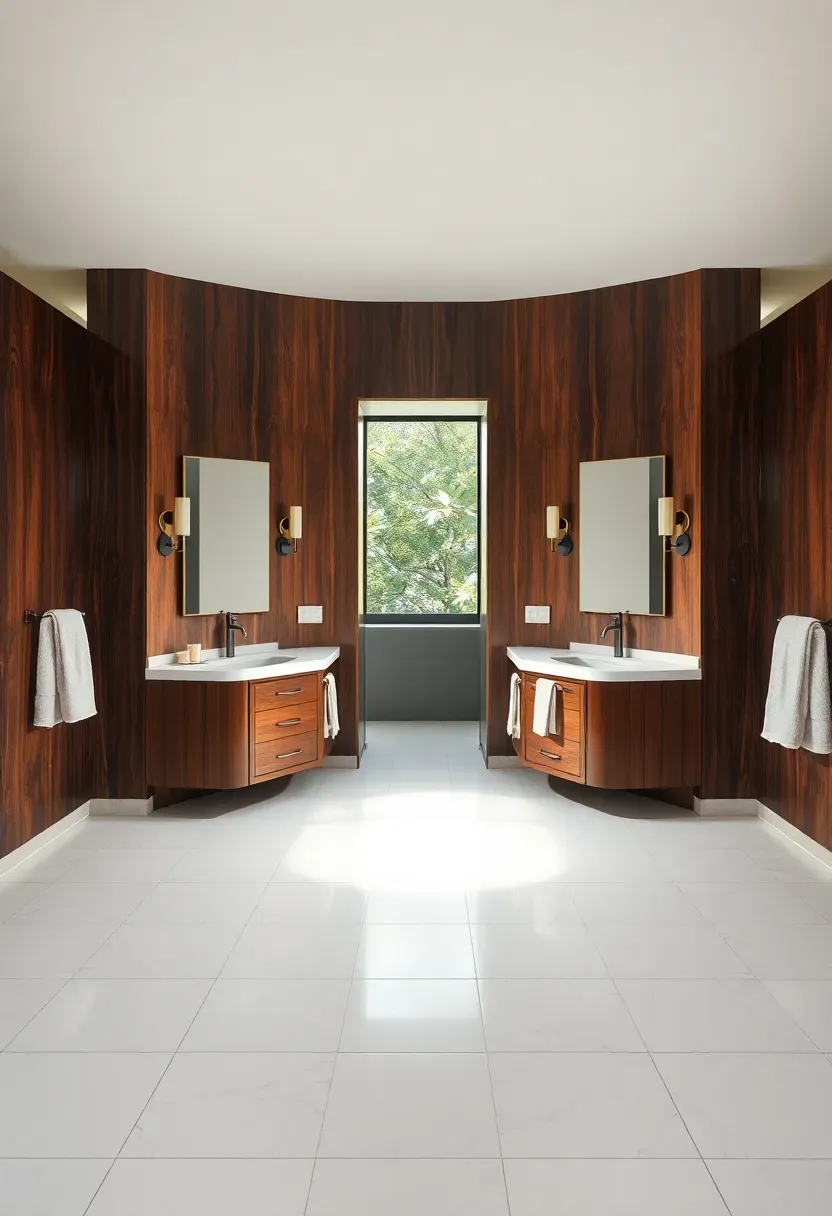
11. Double Vanity Parallel Layout
Comparing: Side-by-Side Double Vanity vs Face-to-Face Parallel Vanities
Most double vanities sit along one wall. But if your bathroom is wider than 8 feet, placing two separate vanities on opposite walls creates distinct his-and-hers stations with personal storage and mirror space.
Side-by-Side
Both sinks share one countertop and one mirror. Elbow bumping during morning rush. Shared storage beneath.
Face-to-Face
Each person gets their own vanity, mirror, outlets, and storage. Requires at least 42 inches between the two vanities for comfortable passage. More plumbing runs but significantly better daily function.
Choose Face-to-Face If
Your bathroom width exceeds 8 feet, two people consistently use the bathroom at the same time, or you want fully separate medicine cabinet and drawer storage.
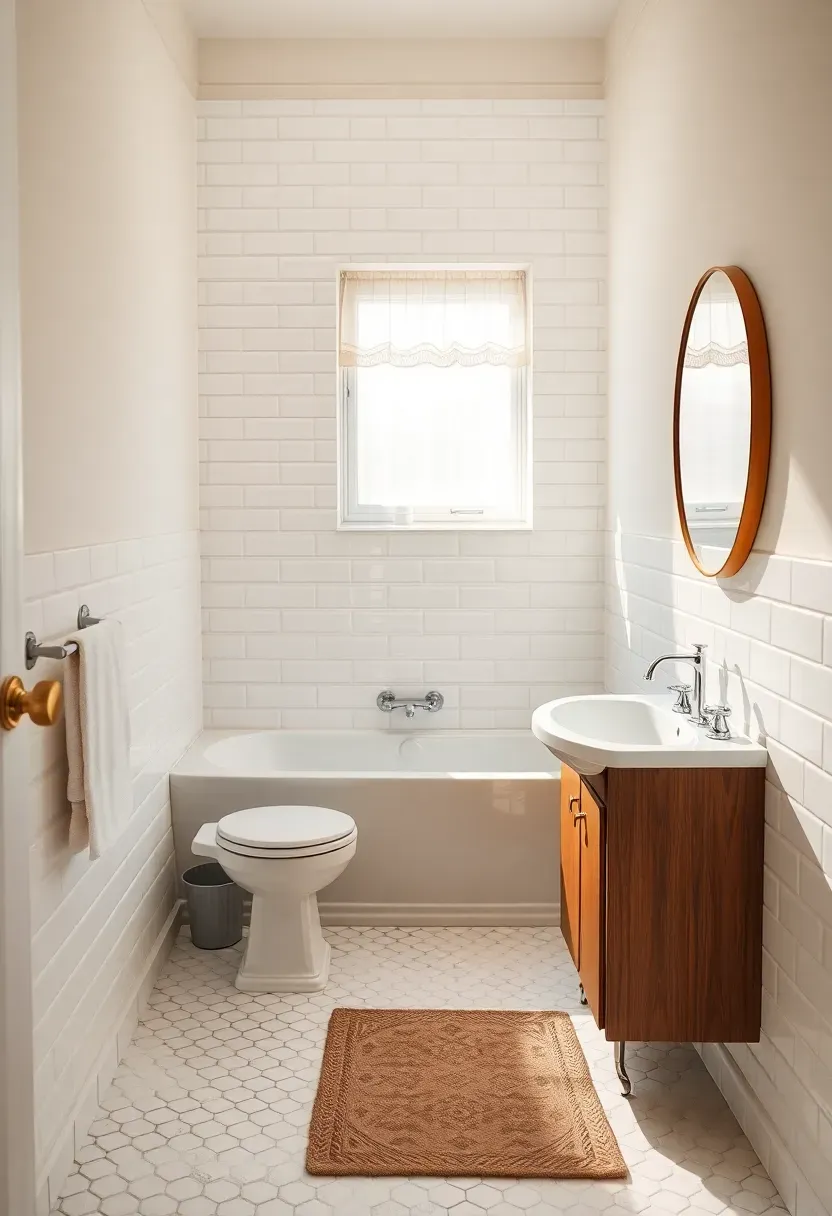
12. Shower-Over-Tub Compact Plan
Combining the shower and tub into one fixture is the most space-efficient layout for a full bathroom. A standard 60-inch alcove tub with a shower head above and a glass panel (replacing the shower curtain) fits in the same 5x8 footprint as a tub-only setup while adding full shower functionality.
Tips
- Use a fixed glass panel plus a short swinging section instead of a full glass door — it costs less and provides adequate splash protection
- Install the shower valve at 48 inches from the tub floor and the shower head at 78 inches for comfortable use
- Add a recessed niche on the back wall between studs for shampoo storage instead of a hanging caddy
Recommended
Items for this idea
13. Doorless Walk-In Shower Layout
Eliminating the shower door removes a maintenance headache (soap scum on glass) and a visual barrier. The trade-off: you need enough space and smart geometry to contain water without an enclosure.
How to Make It Work
The minimum comfortable size for a doorless walk-in is 36x60 inches with an entry path that turns at least once. An L-shaped entry wall or a snail-shell spiral forces water spray to hit a wall before it can escape the shower zone. Point the shower head away from the opening so the main water stream never aims toward the bathroom floor.
Watch Out
- Ambient temperature drops faster without an enclosure — add a ceiling-mounted heat lamp or radiant floor heating
- Frameless glass half-walls (42 inches tall) contain splash at the entry without blocking sight lines
- Slope the shower floor at 1/4 inch per foot toward a linear drain placed at the entry threshold
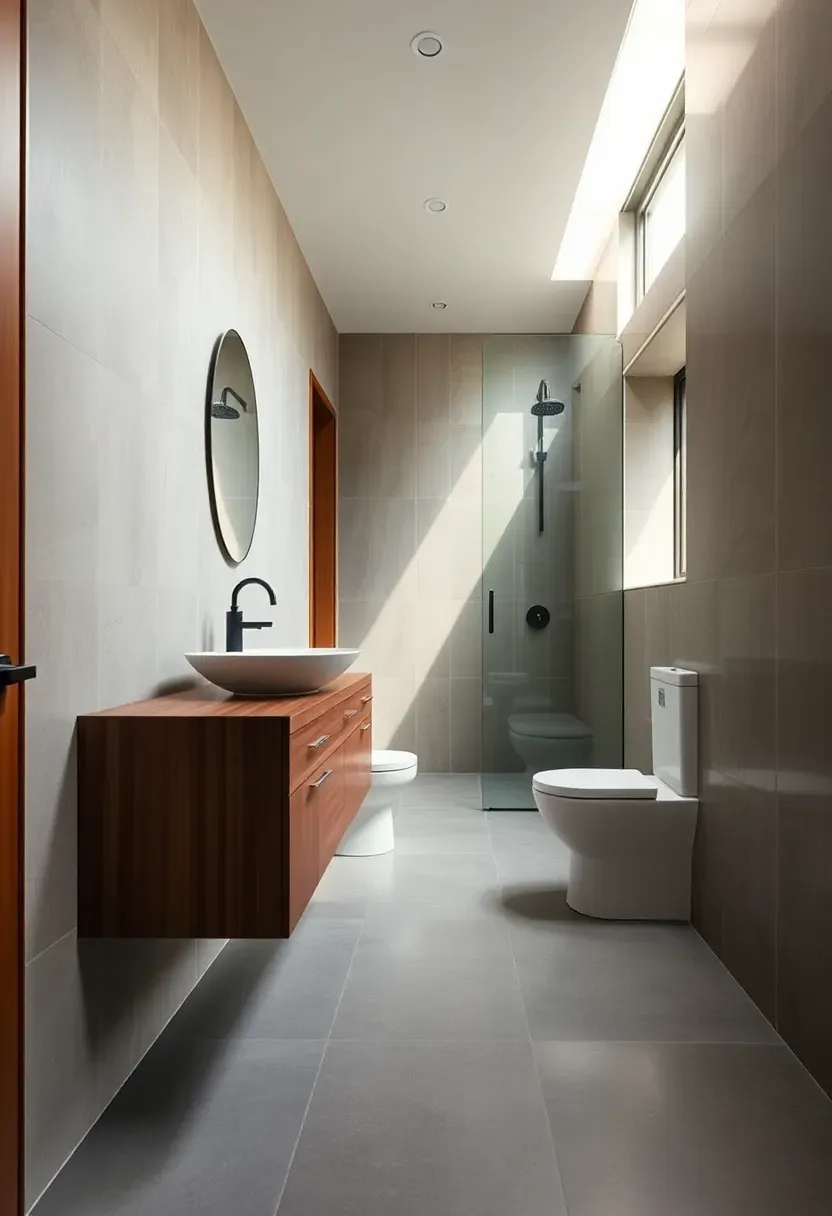
14. Separated Toilet Compartment
In many countries, the toilet sits in its own small room. This layout is gaining ground in American primary bathrooms because it allows one person to use the toilet in privacy while someone else showers or gets ready at the vanity.
The Core Issue
Open-plan bathrooms feel spacious but sacrifice toilet privacy, especially for couples.
The Solution
Build a 36x66-inch minimum compartment for the toilet, enclosed with a solid door or frosted glass. Position it at the far end of the bathroom, away from the entry, so it does not dominate the room visually. Include its own vent fan, a small shelf or magazine rack, and a toilet paper holder that does not require reaching across the space.
Pros and Cons
Pros: Full privacy for toilet use, bathroom remains available for other functions, better odor containment with dedicated ventilation Cons: Adds walls and a door (cost and space), can feel claustrophobic if undersized
Recommended
Items for this idea
15. Corner Shower Diagonal Entry
A neo-angle shower fits into a corner with an angled glass front panel that cuts across the 90-degree junction. This diagonal entry provides a wider opening than a standard square corner shower while using the same floor footprint, typically 36x36 or 38x38 inches.
Why It Works
The angled entry faces the room's center rather than a wall, making the shower feel more integrated with the bathroom and easier to access. The triangular footprint leaves adjacent wall space free for a toilet or vanity that would conflict with a standard rectangular shower door swing.
Tips
- Choose a 38-inch base over 36 — those two extra inches make a noticeable difference inside
- Use clear glass to maintain sight lines and prevent the corner from feeling boxed in
- Install the shower valve on the back wall so you can reach in and start the water without stepping into the cold stream
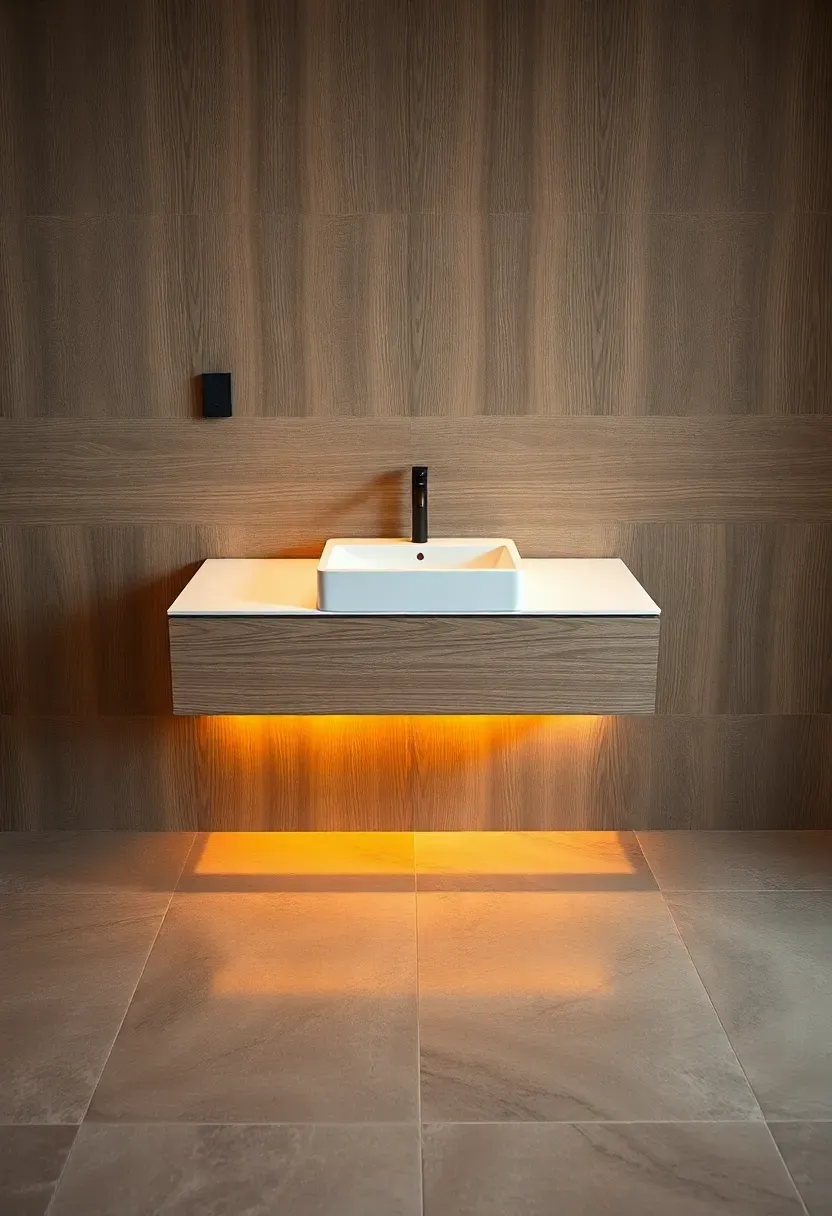
16. Floating Vanity Open Floor Layout
Wall-mounted vanities expose the floor beneath them, and that visible floor plane makes any bathroom look larger than it is. This optical trick works especially well when the floor tile runs continuously under the vanity without interruption.
Step 1: Reinforce the Wall
Floating vanities transfer all weight to the wall. Install a 2x10 or steel French cleat into the studs at your desired height, typically 30 to 34 inches from the floor to the countertop surface.
Step 2: Run Plumbing Inside the Wall
Unlike freestanding vanities that hide plumbing in the cabinet, floating vanities look best with the drain and supply lines entering through the wall rather than the floor. Plan this during rough-in.
Step 3: Light the Floor Below
Add a strip of warm LED lighting under the vanity to emphasize the floating effect at night. It doubles as a night light for midnight bathroom trips.
Recommended
Items for this idea
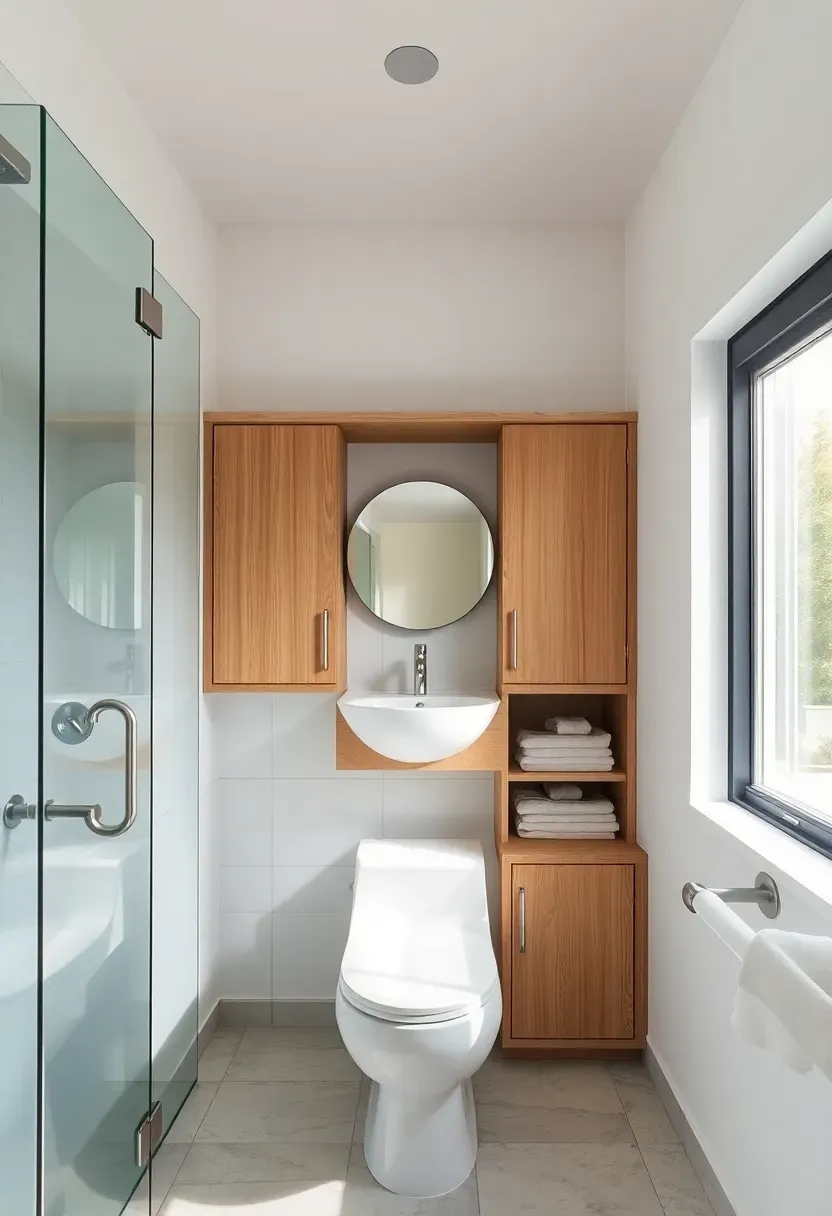
17. Three-Quarter Bath Efficient Plan
A three-quarter bath includes a sink, toilet, and shower — no tub. For households that rarely take baths, this layout reclaims the 15 square feet a tub would occupy and redistributes it to a larger shower, more storage, or wider walkways. In resale terms, a three-quarter bath counts as a full bathroom in most MLS listings as long as it has a shower.
Tips
- Use the freed space for a 42x42-inch shower instead of the standard 36x36 — the comfort difference is significant
- Add a built-in linen closet where the tub alcove would have been
- If you might want a tub later, rough in the drain and supply lines now and cap them behind the wall
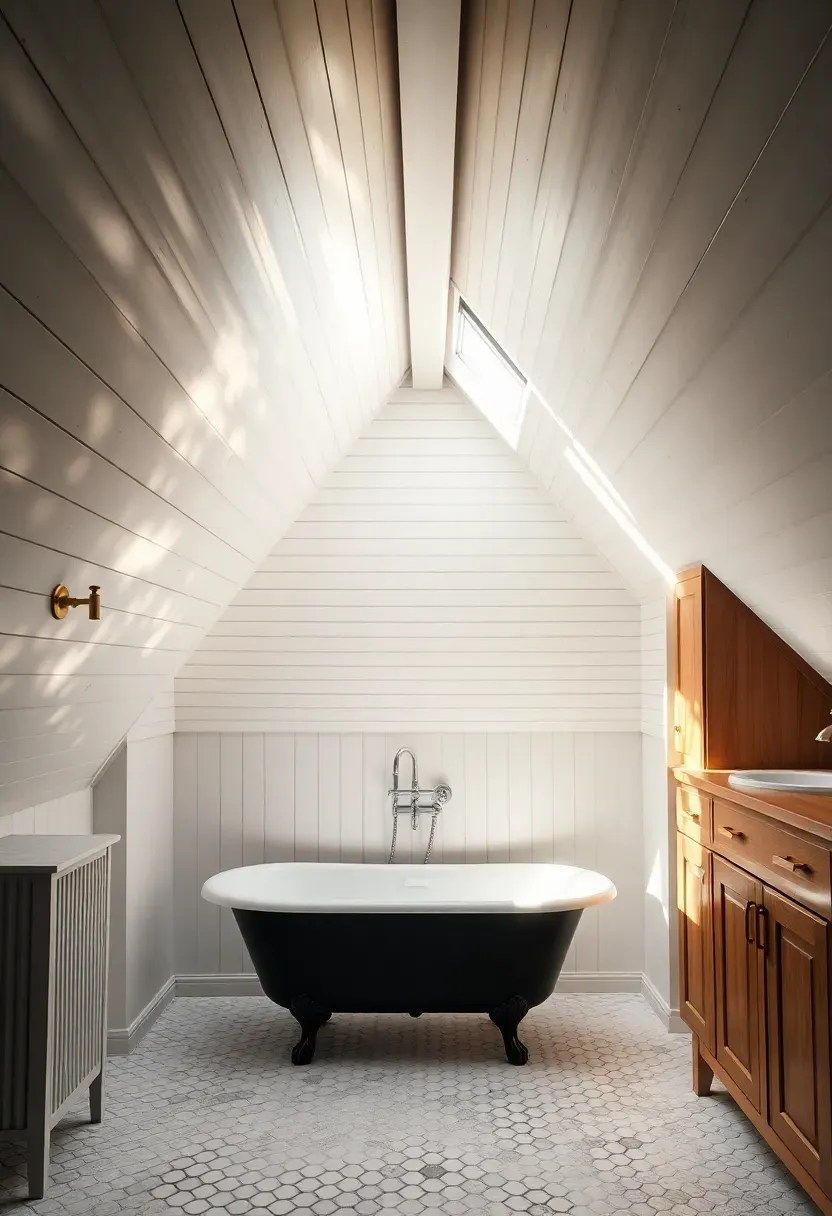
18. Skylight Attic Bathroom Layout
Attic bathrooms contend with sloped ceilings that limit where you can stand upright. The layout strategy is simple: place fixtures that require standing (vanity, shower) under the highest part of the ceiling, and fixtures where you sit or recline (toilet, tub) under the lower slopes.
How to Arrange It
Position the vanity and shower along the center ridge line where headroom peaks. Tuck the toilet under a side slope where you need only 60 inches of clearance above the seat. A skylight directly over the tub makes the low-ceiling zone feel open and brings natural light into what would otherwise feel like a cave. Knee walls along the eaves provide built-in storage behind cabinet doors.
Watch Out
- Verify that the floor joists can support the concentrated weight of a filled bathtub — attic framing is often lighter than main-floor construction
- Waterproof around the skylight aggressively; roof-bathroom intersections are leak-prone
- An exhaust fan vented through the roof is essential to prevent moisture from damaging attic insulation
Recommended
Items for this idea
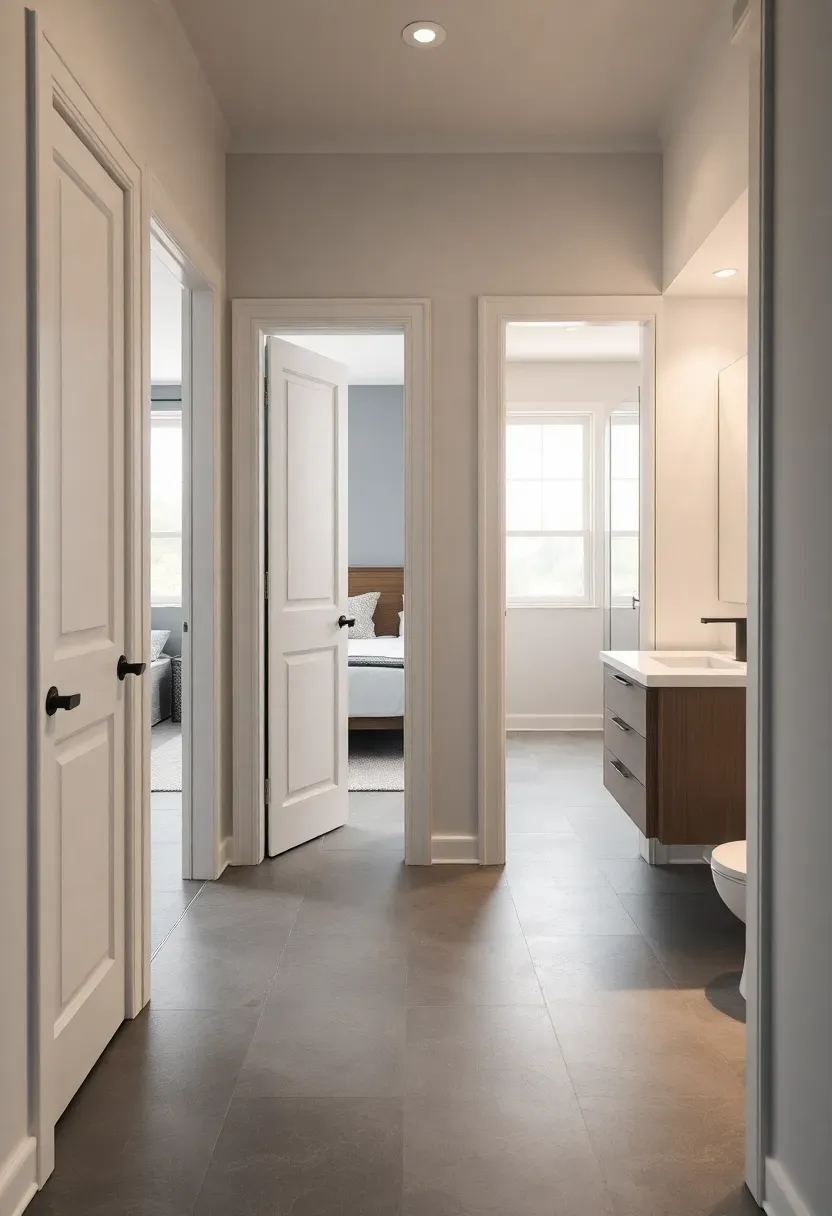
19. Dual Entry Ensuite Layout
Some ensuite bathrooms serve double duty — accessible from the primary bedroom and from the hallway for guests. This layout works when you cannot justify two separate bathrooms but need both private and public access.
The Core Issue
A single-entry ensuite forces guests to walk through the bedroom. Awkward for everyone.
The Solution
Add a second door from the hallway. Arrange the layout so the vanity and mirror face the hallway entry (guests see the presentable side), while the shower and toilet sit closer to the bedroom entry (private morning routine). A toggle lock system ensures both doors lock simultaneously from inside, preventing surprises from either direction.
Pros and Cons
Pros: Eliminates the need for a separate guest powder room, flexible access, maximizes bathroom utility Cons: Two doors reduce wall space for storage and mirrors, requires careful lock coordination
20. Linear Single-Wall Arrangement
When a bathroom is extremely narrow — under 4.5 feet wide — the only option may be aligning all fixtures along one wall. This single-wall layout appears in converted closets, basement additions, and efficiency apartments. The sequence matters: vanity nearest the door, then toilet, then shower at the far end.
Why This Order
You use the vanity most frequently and briefly, so it belongs closest to the entry for quick access. The toilet sits in the middle zone with some privacy from the doorway. The shower anchors the far end where plumbing connections can stack vertically and splash containment is easiest.
Tips
- Use a wall-hung toilet to maintain the continuous floor line and make cleaning easier
- A curbless shower at the far end eliminates the visual break of a shower pan edge
- Mount all storage (medicine cabinet, shelves, hooks) on the opposite wall to keep the fixture wall clean
Recommended
Items for this idea
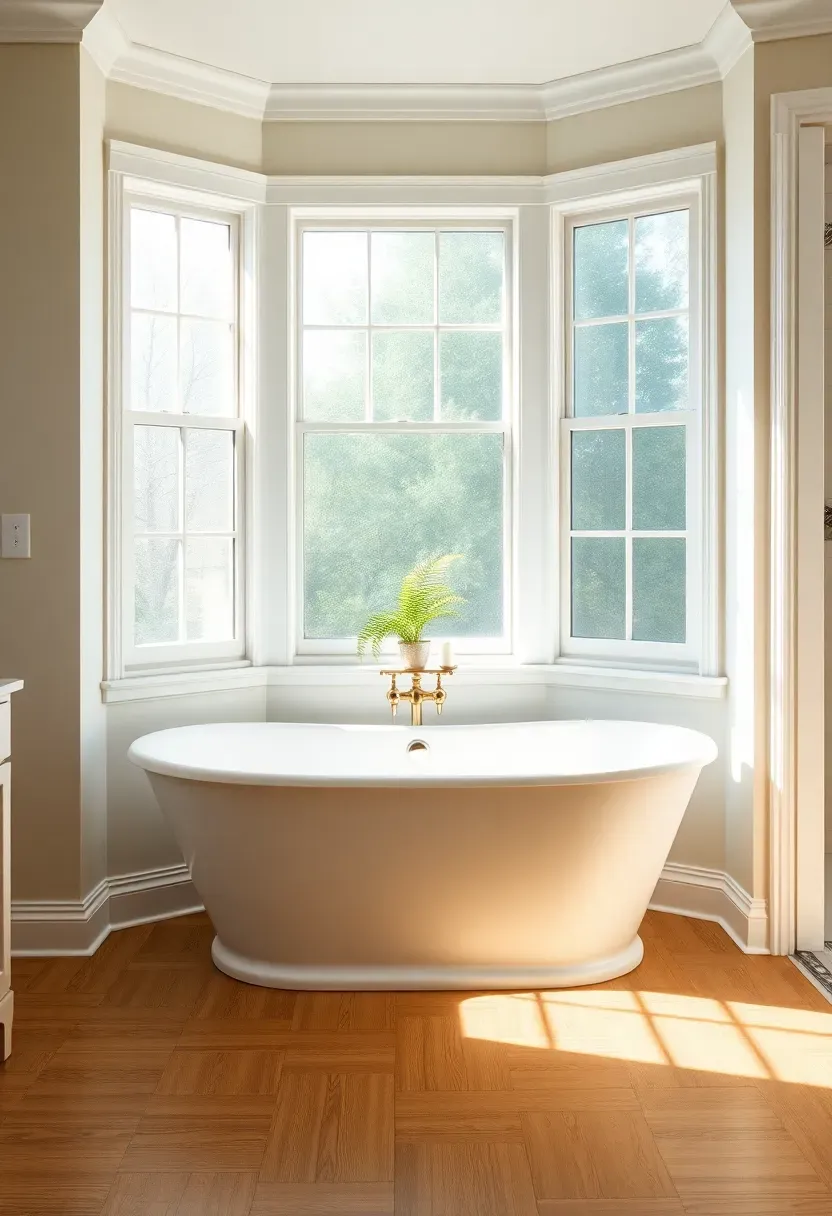
21. Bay Window Tub Alcove Layout
A bay window creates a natural alcove that might as well have been designed for a freestanding tub. The three-sided window surround floods the bathing area with light from multiple angles and provides a shelf ledge for candles or plants. Center the tub in the alcove and let the rest of the bathroom arrange itself around this anchor.
Why It Works
The alcove physically separates the tub from the working part of the bathroom. You step into a distinct zone when you approach the window, and that spatial shift signals relaxation. The window sill serves as built-in storage without any additional construction.
Tips
- Use frosted or textured glass in the lower panes for privacy while keeping the upper panes clear for sky views
- Ensure the window framing is waterproof — condensation from hot baths will reach the sill daily
- A tub filler mounted from the floor keeps the window wall free of plumbing hardware
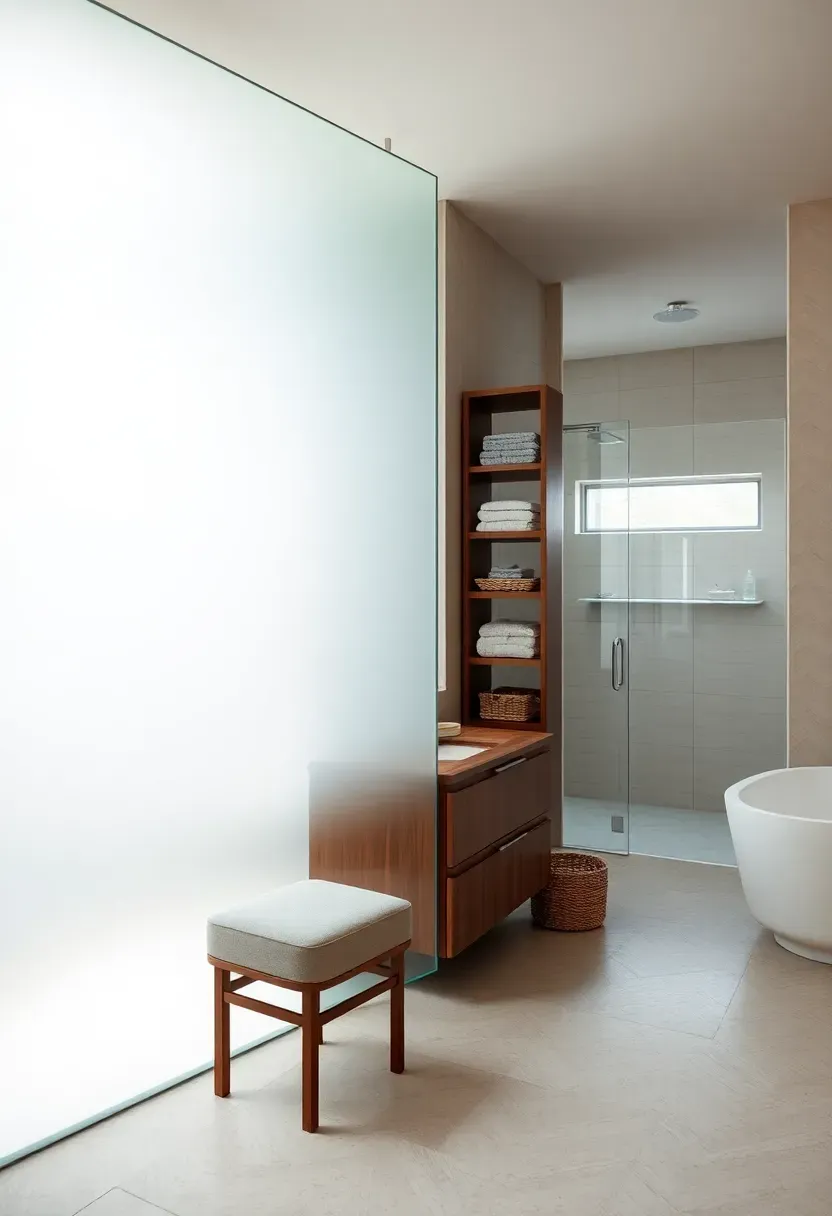
22. Split Bathroom Two-Zone Design
Comparing: Open Plan vs Two-Zone Split
A two-zone bathroom divides the room into a dry zone (vanity, storage, dressing area) and a wet zone (shower, tub, toilet) separated by a partial wall or glass partition.
Open Plan
Everything in one undivided space. Feels larger but moisture reaches all surfaces. Towels stay damp. Makeup mirrors fog.
Two-Zone Split
The partition blocks most humidity from reaching the dry zone. Towels dry faster. Electronics (hair dryer, electric shaver) stay away from water. The dry side can use materials that would not survive constant moisture exposure — wood shelving, fabric storage baskets, upholstered seating.
Choose Two-Zone If
Your bathroom exceeds 80 square feet, you want to use moisture-sensitive materials in part of the room, or you prefer visual variety between two distinct areas.
Recommended
Items for this idea
23. Compact Square 6x6 Layout
A 36-square-foot bathroom feels cramped only if the layout fights the geometry. In a square room, every wall is the same length, which actually simplifies fixture placement compared to awkward rectangles. Place the shower in one corner (32x32-inch neo-angle), the toilet on the adjacent wall, and a corner or wall-mount sink on the wall opposite the door.
Tips
- A corner shower and corner sink in diagonal corners maximize the central floor area
- Use a 24-inch round mirror instead of a wide rectangular one — it fits the proportions and avoids overwhelming the small wall
- Install the door to swing outward or use a pocket door so no floor space is lost to the door arc
- A recessed medicine cabinet adds storage without projecting into the tight room
Quick FAQ
Does bathroom layout affect home resale value? Absolutely. Buyers consistently rank bathroom functionality above aesthetics in surveys. A well-planned layout with adequate fixture spacing and logical flow signals quality construction, while cramped or awkward arrangements raise red flags during inspections.
What is the minimum size for a full bathroom? Building codes typically require 35 to 40 square feet for a full bath with tub, toilet, and sink. A 5x8-foot (40 sq ft) room is the standard minimum that comfortably fits all three fixtures with code-compliant clearances around each one.
Can I change my bathroom layout without moving plumbing? Sometimes. Swapping the positions of the vanity and toilet along the same wall is usually feasible. Moving fixtures to different walls means rerouting drain lines through the floor, which adds significant cost — especially on slab foundations where concrete must be cut.
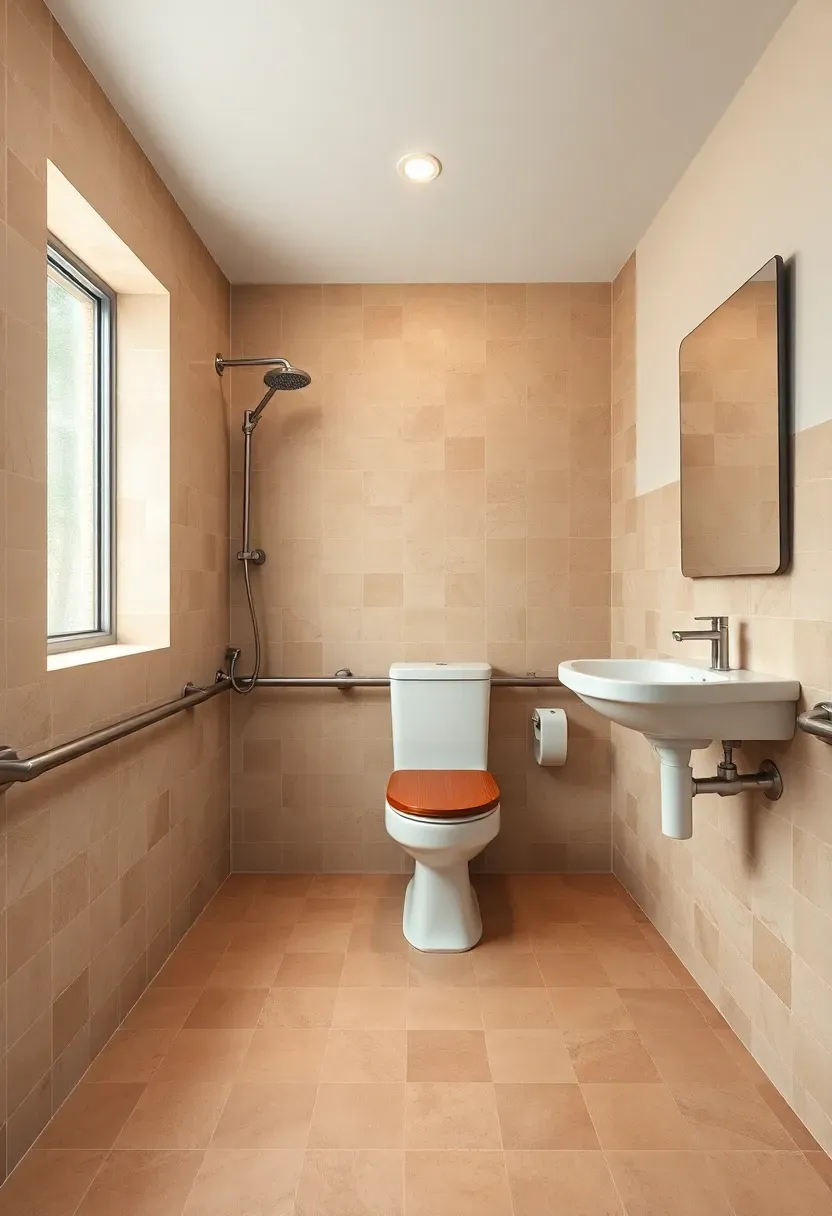
Which bathroom layout works best for aging in place? A curbless shower with a 60-inch turning radius, grab bar blocking in all walls, and a comfort-height toilet (17 to 19 inches) forms the foundation. Wide doorways (minimum 34 inches) and lever-handle faucets round out an accessible layout.
Should the toilet be visible from the bathroom doorway? Ideally not. Positioning the toilet out of the direct sight line from the door — behind a half wall, inside a compartment, or offset on a perpendicular wall — improves both the look and feel of the room.
Bathroom layout is one of those things you either get right during construction or live with for years. Before committing to any arrangement, tape the fixture footprints on the actual floor with painter's tape and walk through your morning routine. Stand at the vanity. Sit on the imaginary toilet. Step into the shower zone. That ten-minute exercise reveals more than any floor plan drawing. The right layout turns a bathroom from a room you tolerate into one that actually works with your daily life.
Pinterest cover for 23 Bathroom Layout Ideas for Every Size and Shape
About the author
OBCD
CGI visualization and interior design content. We create detailed 3D renders and curate practical design ideas for every room in your home.