27 Backyard BBQ Ideas for Better Grilling
I spent three summers cooking on a wobbly portable grill parked on bare grass before I finally built a proper BBQ area. The difference was not just aesthetic — food actually tasted better when I stopped chasing my cutting board across an uneven folding table. A dedicated grilling zone changes how you cook, how you host, and how often you actually use your backyard. These 27 ideas range from weekend projects you can finish with a truck bed of materials to more involved builds that anchor an entire outdoor living space.
Below you will find setups organized by type — from basic grill stations to full outdoor kitchens with bars and dining areas.
Table of Contents
- Built-In Stone Grill Station
- Portable Grill Cart Setup
- Pergola-Covered Cooking Zone
- Concrete Block Grill Surround
- U-Shaped Outdoor Kitchen
- Brick BBQ Pit with Chimney
- Reclaimed Wood Prep Counter
- Gravel Pad Grill Area
- Bar-Height Grill Counter
- Smoker and Grill Combo Corner
- Flagstone Patio BBQ Setup
- Steel Frame Grill Shelter
- Side Yard Narrow BBQ Station
- Rustic Fire Pit Grill
- Corrugated Metal Grill Backsplash
- Pallet Wood BBQ Bar
- Covered Outdoor Kitchen Island
- Japanese-Style Yakitori Grill Corner
- Tiered Hillside Grill Deck
- Pizza Oven and Grill Pairing
- Pool-Adjacent BBQ Station
- Fold-Down Wall-Mounted Prep Table
- Corten Steel Grill Surround
- Garden-Integrated Cooking Area
- Garage-Adjacent Grill Station
- Shaded Canopy BBQ Lounge
- Budget Cinder Block BBQ Island
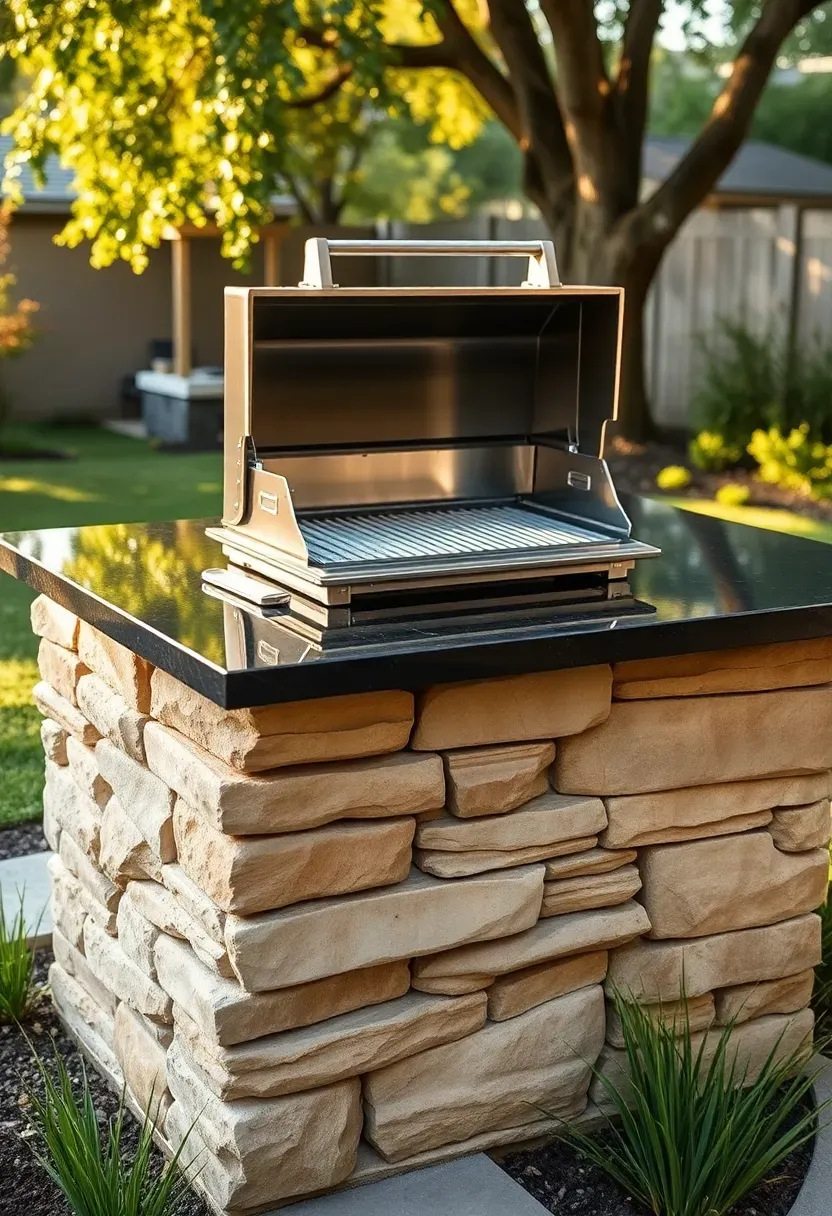
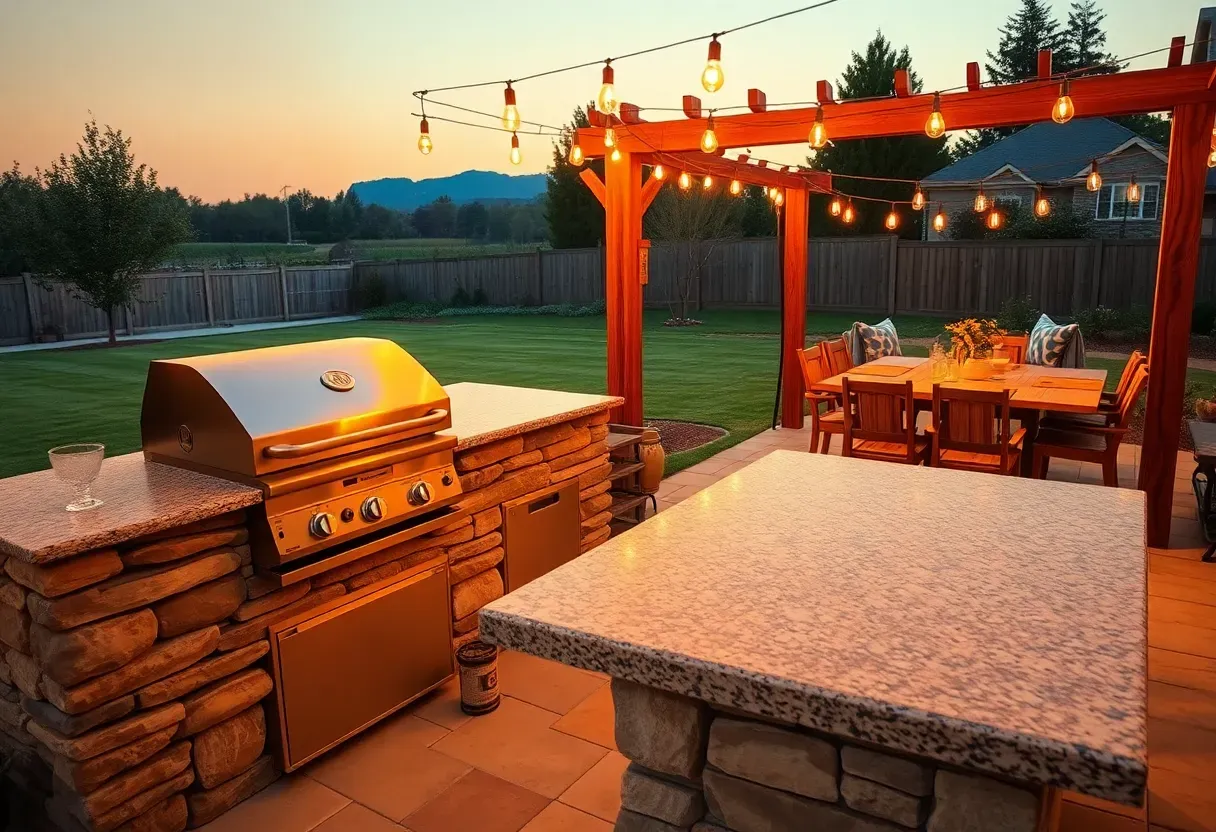
1. Built-In Stone Grill Station
A built-in stone station gives your grill a permanent home that looks like it belongs in the yard rather than just sitting on it. Natural stone or manufactured stone veneer over a cinder block frame creates a solid base with counter space on both sides. Plan for at least thirty inches of prep surface on each side of the grill opening. A granite or concrete countertop handles heat and weather without flinching. Run a gas line from the house for a cleaner setup than hauling propane tanks back and forth.
Material Choices
- Stacked limestone gives a natural look but costs more per square foot than manufactured veneer
- Concrete countertops can be poured in place and stained to match any stone color
- Stainless steel grill inserts rated for built-in use have better ventilation than freestanding models retrofitted into enclosures
We picked a few things that go well with this idea: Cuisinart Deluxe 20-Piece Grill Tool Set (★4.6), Alpha Grillers BBQ Tool Set (4-Piece) (★4.8) and Kaluns Stainless Steel BBQ Set with Case (★4.7). As an Amazon Associate we earn from qualifying purchases.
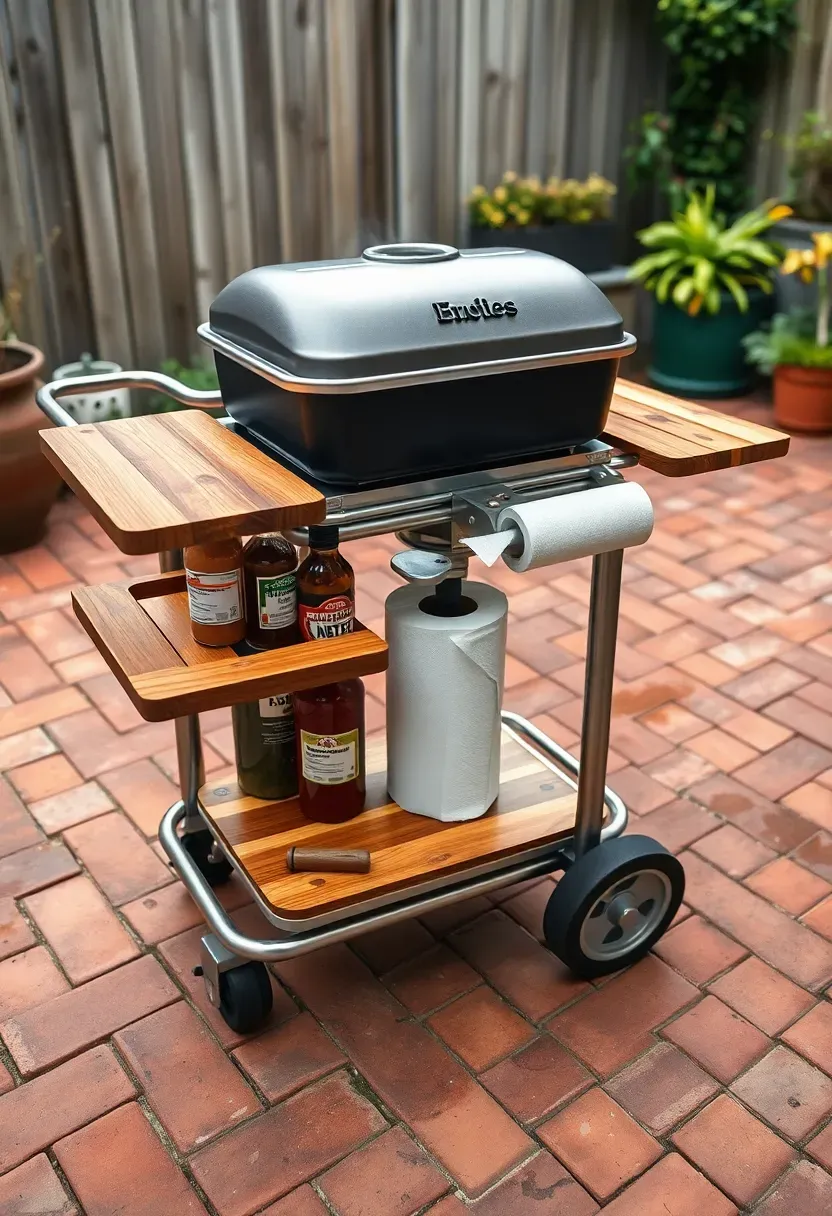
2. Portable Grill Cart Setup
The Case for Staying Mobile
Not everyone wants or can have a permanent grill station. Renters, people with small yards, and anyone who likes rearranging their outdoor layout will get more use from a well-organized cart. The key is treating it like a real workstation instead of just a grill with wheels.
Building a Better Cart
Start with a stainless steel cart that has a lower shelf and at least one side table. Add a magnetic strip for tools, a hook rail for tongs and spatulas, and a small cutting board that fits the side shelf exactly. Bolt a paper towel holder to the frame. Keep a bus tub underneath for dirty dishes. The whole setup rolls against the garage wall when you are done — no permanent footprint, no landlord issues.
We picked a few things that go well with this idea: addlon 50FT LED Edison String Lights (★4.6), addlon 48FT Vintage Edison Patio Lights (★4.5) and Brightech Ambience Pro Outdoor String Lights (★4.6). As an Amazon Associate we earn from qualifying purchases.
3. Pergola-Covered Cooking Zone
Grilling in direct sun at two in the afternoon in July is miserable. A pergola over your cooking area blocks enough sunlight to keep the cook comfortable while still allowing smoke to escape upward through the open slat structure. Cedar or pressure-treated pine beams spaced at twelve-inch intervals provide roughly forty percent shade coverage. Add retractable shade cloth panels on the sun-facing side for afternoons when the angle is low and direct.
Tips
- Keep the pergola ceiling at least eight feet high to allow heat and smoke to dissipate safely
- Mount string lights on the underside of the beams for evening grilling sessions
- Avoid fully enclosed roofing over a grill — trapped smoke and heat creates a safety hazard
We picked a few things that go well with this idea: EDOSTORY Wood Fired Outdoor Pizza Oven (★4.2), BIG HORN 3-in-1 Portable Pizza Oven (★4.4) and COSTWAY Wood Fired Patio Pizza Oven (★4.1). As an Amazon Associate we earn from qualifying purchases.
4. Concrete Block Grill Surround
This is the fastest path to a built-in look. Standard eight-inch concrete blocks stacked three courses high create a U-shaped surround that holds your existing grill and adds counter space on both sides. Cap it with concrete pavers or a poured concrete top. Total materials cost sits around one hundred fifty to two hundred dollars for a basic setup. You can finish this in a single Saturday morning with one other person and no specialized tools beyond a level and a rubber mallet.
Tips
- Use construction adhesive between courses instead of mortar for easier disassembly if you move
- Tile the top surface with outdoor-rated porcelain for a cleaner prep area
- Leave the back open for ventilation and easy access to propane connections
Recommended
Items for this idea
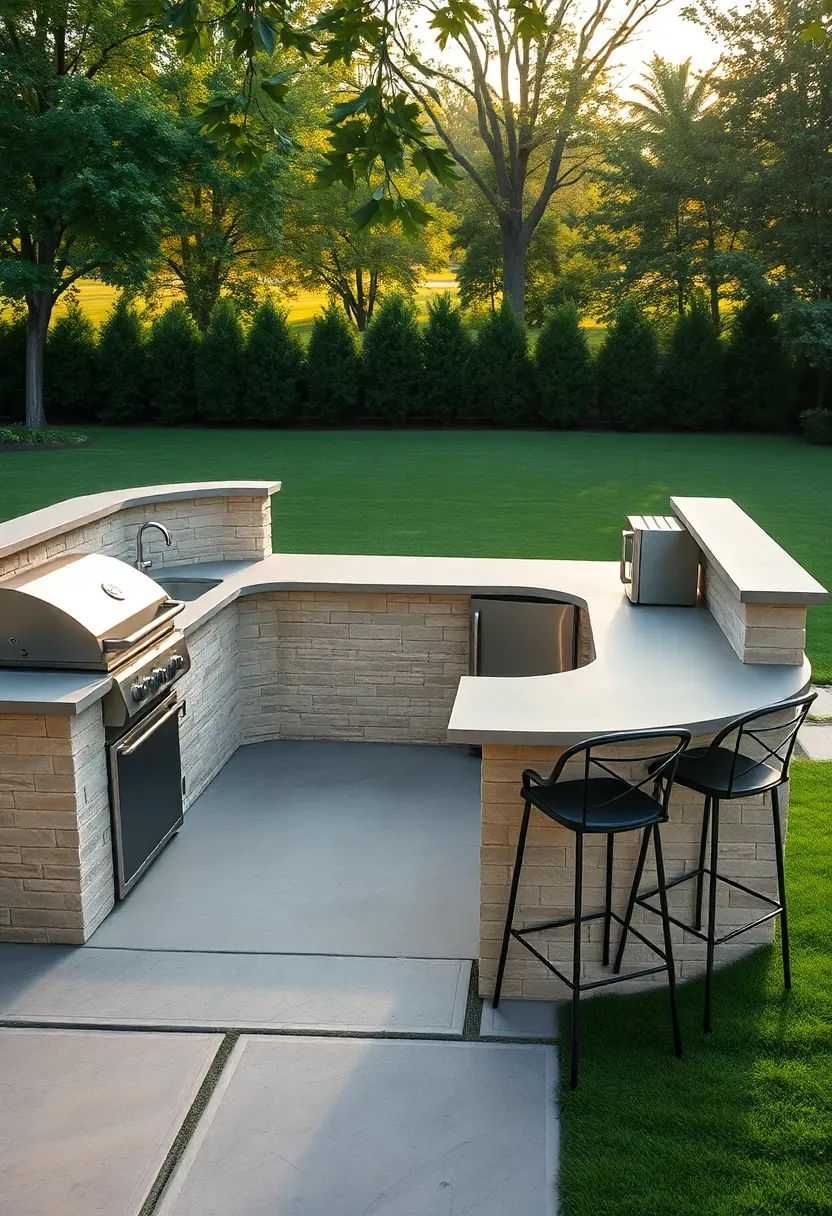
5. U-Shaped Outdoor Kitchen
Why U-Shape Works
A U-shape puts everything within a pivot — grill on one arm, sink and prep on the other, serving counter across the back. You stop walking back and forth across the patio carrying raw chicken on a plate. The enclosed footprint also naturally separates the cooking zone from the dining and lounging areas, which guests appreciate when grease is popping.
What to Include
At minimum: a built-in grill, a sink with running water (a garden hose connection works if plumbing is not feasible), and a small refrigerator for keeping meat cold. A twelve-foot by eight-foot footprint fits the U-shape comfortably with thirty-six-inch-deep counters. Bar stools along the exterior face turn the back counter into a serving bar where people gather while you cook.
Choose If
- You grill more than twice a week during warm months
- You host groups of eight or more regularly
- Your budget allows two to five thousand dollars for the build
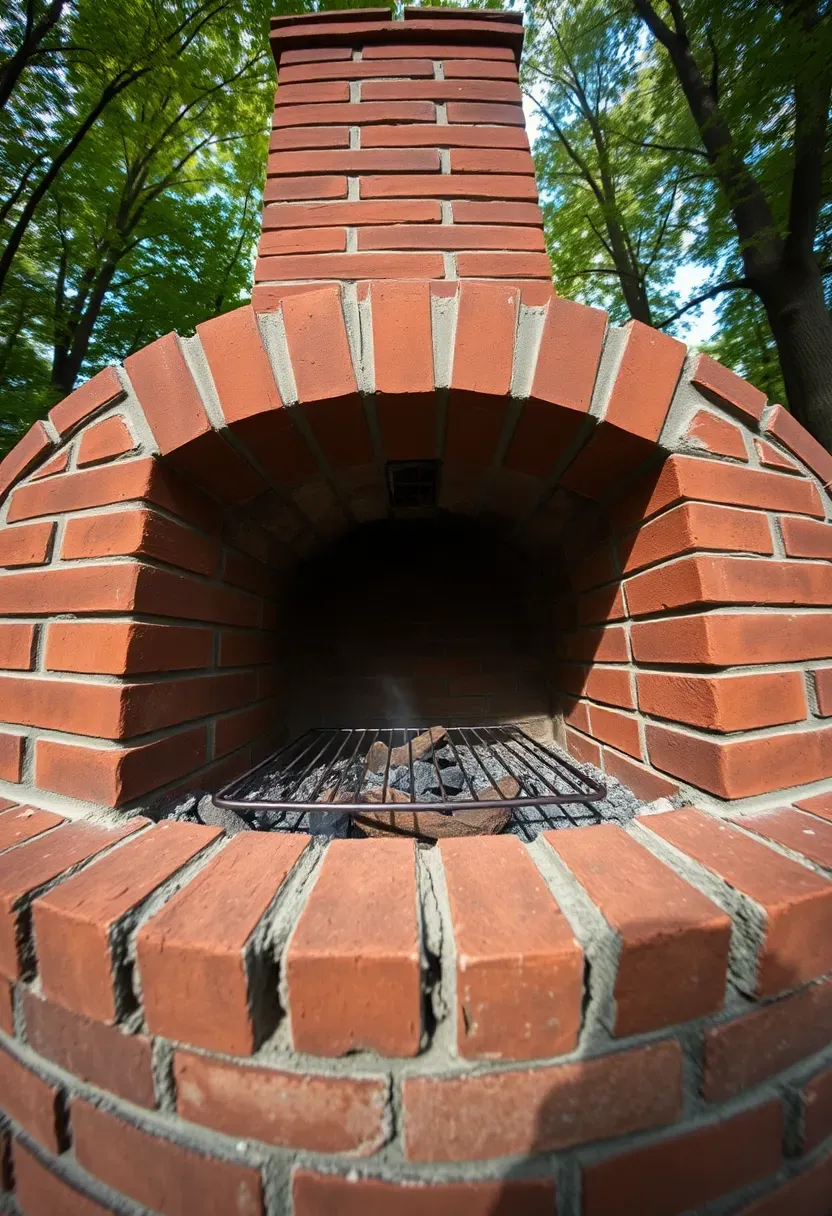
6. Brick BBQ Pit with Chimney
There is a reason old-school brick pits still show up in serious barbecue country. The thermal mass of brick absorbs and radiates heat evenly, and a proper chimney draws smoke up and away from the cook. Building one requires basic masonry skills — firebrick for the firebox interior, standard brick for the exterior shell, and refractory mortar rated for high temperatures. The chimney does not need to be tall; four feet above the grate opening handles draft well enough for most setups.
Tips
- Line the firebox floor with firebrick set in sand so individual bricks can be replaced when they crack
- Install a removable steel grate at two heights — low for searing, high for slow cooking
- Build an ash cleanout door at the base to simplify maintenance between cooks
Recommended
Items for this idea
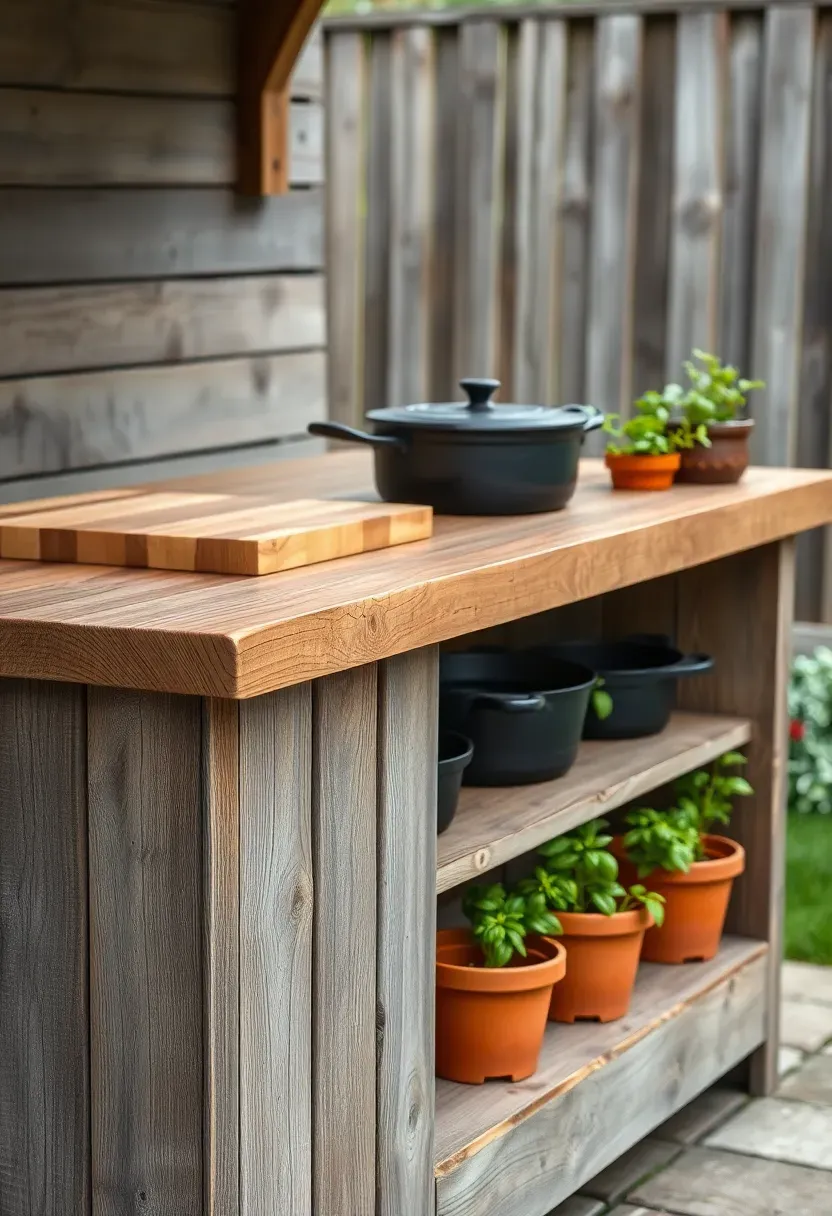
7. Reclaimed Wood Prep Counter
The Problem
Every grill needs a landing zone for plates, rubs, sauces, and resting meat. Most people use a folding table that wobbles, blows over in wind, and looks temporary. A dedicated prep counter built from reclaimed wood solves all three problems and adds character that new lumber cannot match.
The Build
Use two-inch-thick reclaimed barn wood planks for the top surface, sanded smooth and sealed with food-safe mineral oil and beeswax. Build the frame from pressure-treated 4x4 legs and 2x4 crossbraces. Keep the height at thirty-six inches to match standard kitchen counter height — your muscle memory from indoor cooking transfers directly. Add a lower shelf twelve inches off the ground for storing cast iron and sheet pans between uses.
Watch Out
- Reclaimed wood may contain hidden nails — run a metal detector over each board before cutting
- Seal the end grain especially well to prevent moisture wicking that leads to splitting
- Position the counter within arm's reach of the grill but far enough that the wood does not scorch
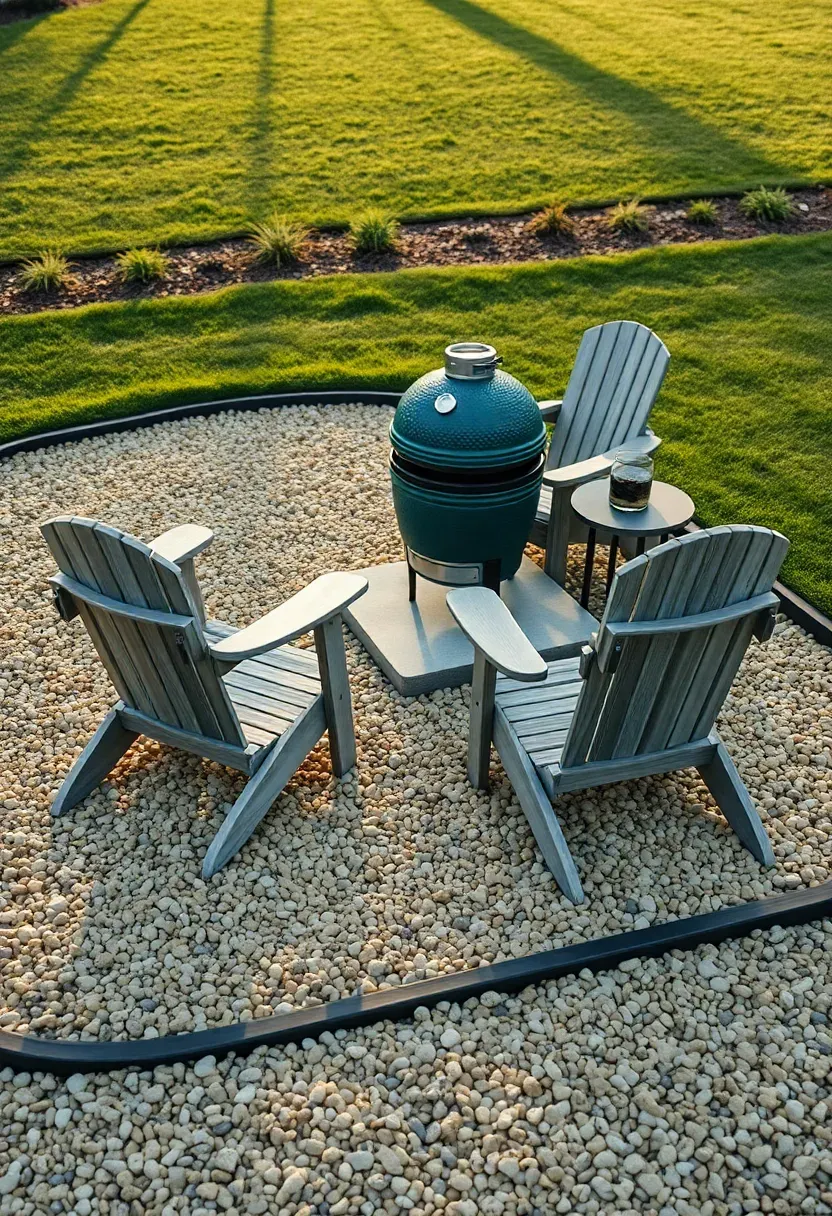
8. Gravel Pad Grill Area
A four-inch layer of pea gravel over compacted base and landscape fabric creates a level, well-drained surface for your grill in about three hours. Define the area with steel landscape edging bent into a rectangle or organic shape. Size it large enough to fit the grill plus four feet of clearance on all sides — a ten-by-twelve-foot pad handles most setups comfortably. Gravel drains instantly after rain so you never deal with puddles around your cooking area, and any grease drips disappear into the stone instead of staining concrete.
Tips
- Place a concrete paver or flagstone slab directly under the grill for extra stability on the loose surface
- Choose angular gravel over round pea gravel if you want a firmer walking surface
- Refresh the gravel annually by raking and topping off low spots with a fresh bag or two
Recommended
Items for this idea
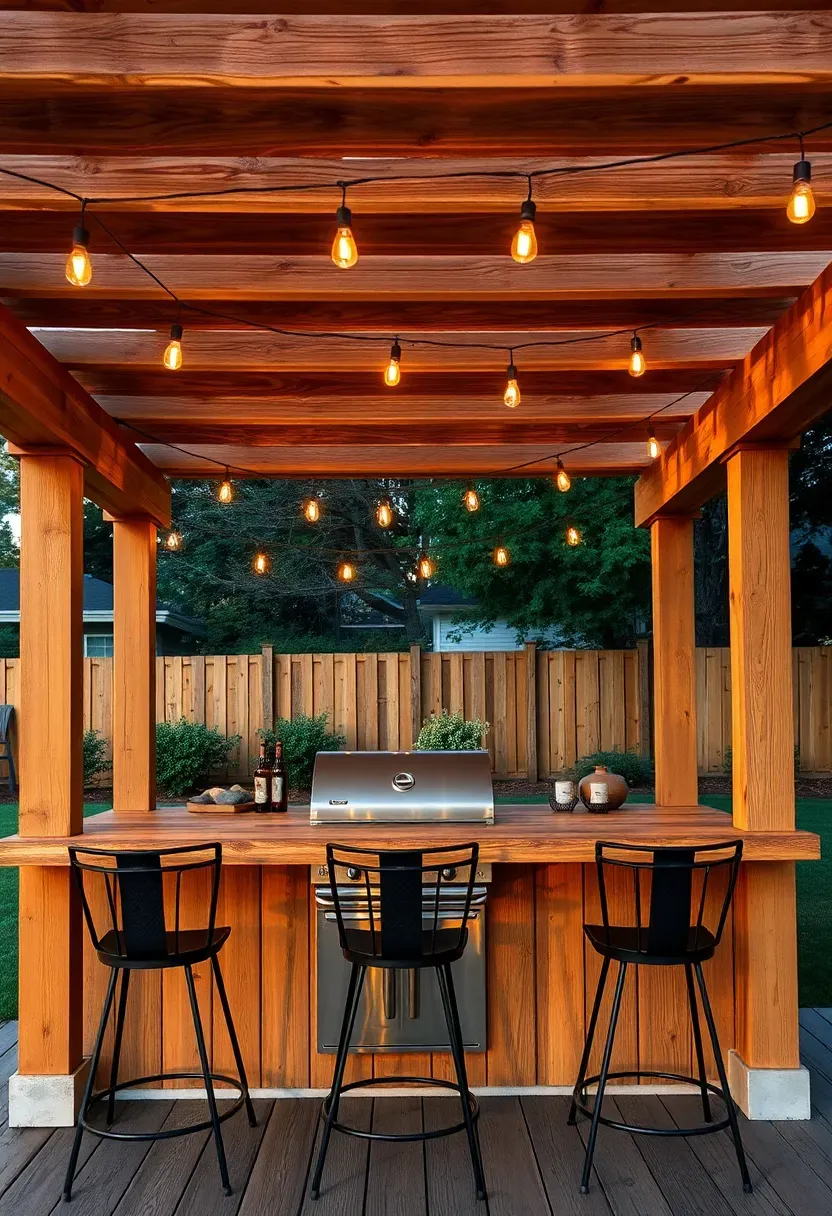
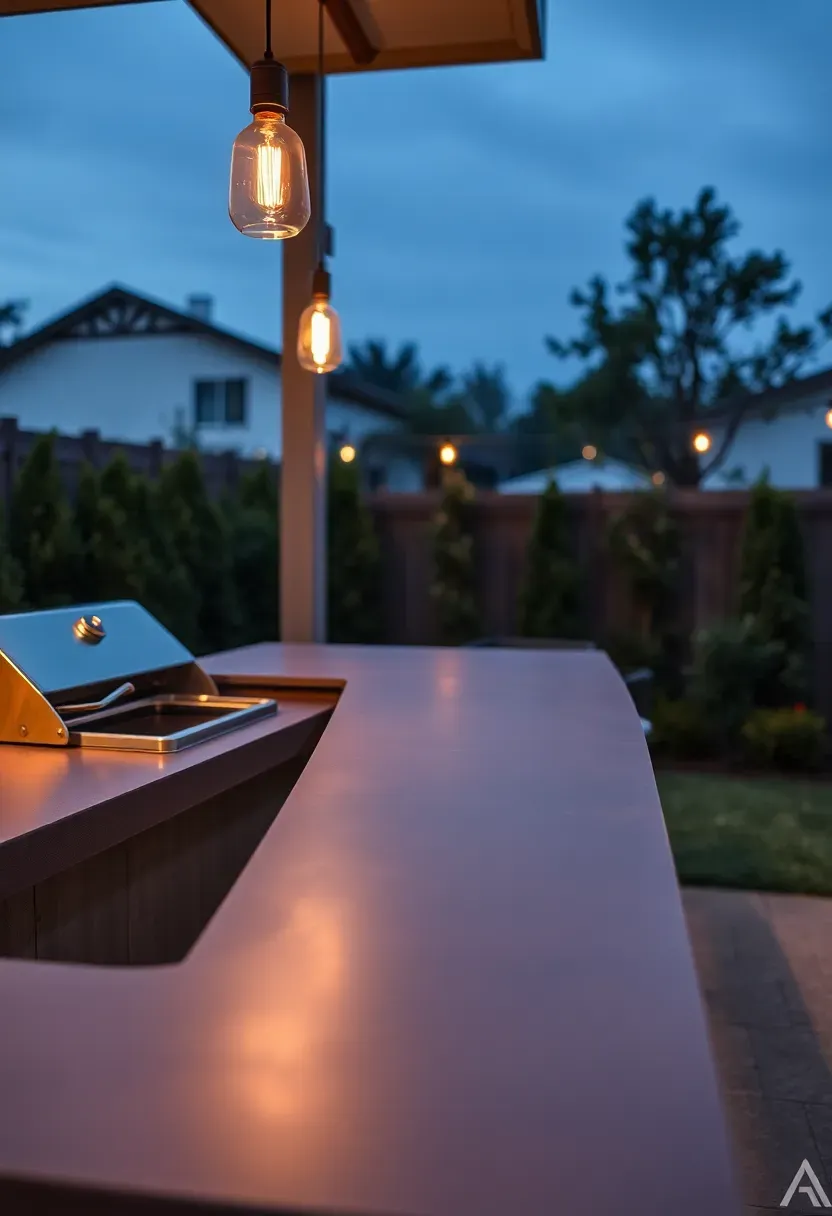
9. Bar-Height Grill Counter
Step 1: Set the Height
Build the counter at forty-two inches — standard bar height — instead of the typical thirty-six-inch kitchen counter. This single change shifts the dynamic from "watching someone cook" to "hanging out at a bar while food happens." Guests sit on stools on the far side, drinks in hand, while the cook works the grill at one end of the same counter.
Step 2: Plan the Layout
Run the counter in a straight line, eight to twelve feet long. Grill insert at one end, open counter in the middle for plating, and a slightly wider section at the far end for drinks and appetizers. A six-inch overhang on the seating side gives knees clearance.
Step 3: Choose Materials
Polished concrete tops handle heat and look sharp. Powder-coated steel bar stools resist weather. Skip upholstered outdoor seats at the bar — they absorb grease splatter and smell like burgers by August.
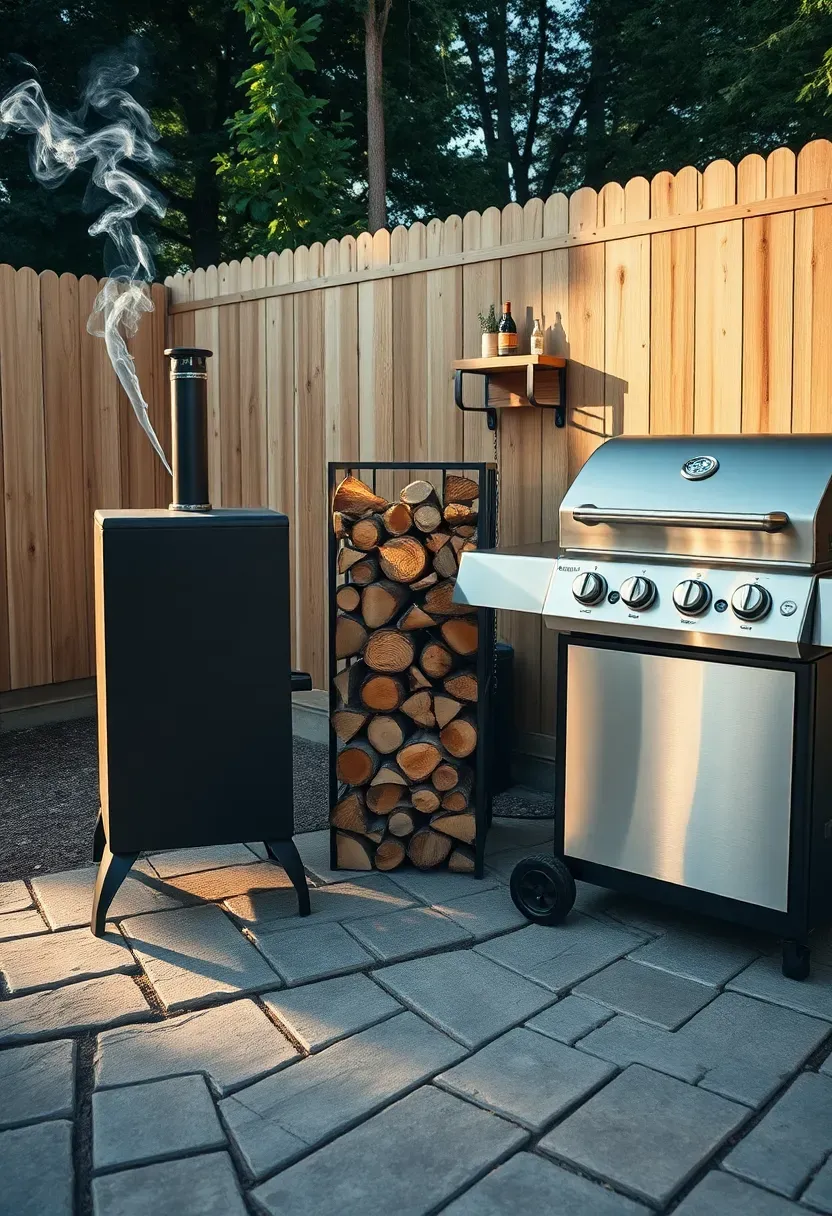
10. Smoker and Grill Combo Corner
Dedicating a corner of the yard to both a smoker and a grill gives you range — quick burgers on a Tuesday and a twelve-hour brisket on a Saturday from the same spot. Position the smoker downwind of your seating area (check prevailing wind direction before you pour any concrete). Place the grill adjacent with a shared prep surface between them. A firewood rack and a spice shelf mounted on a nearby fence post keep supplies within reach without cluttering the cooking surface.
Tips
- Allow at least three feet of clearance between the smoker exhaust and any overhead structure
- A dedicated 20-amp outlet nearby powers an electric smoker or pellet grill if you go that route
- Flagstone pavers underneath handle grease and ash better than wood decking
Recommended
Items for this idea
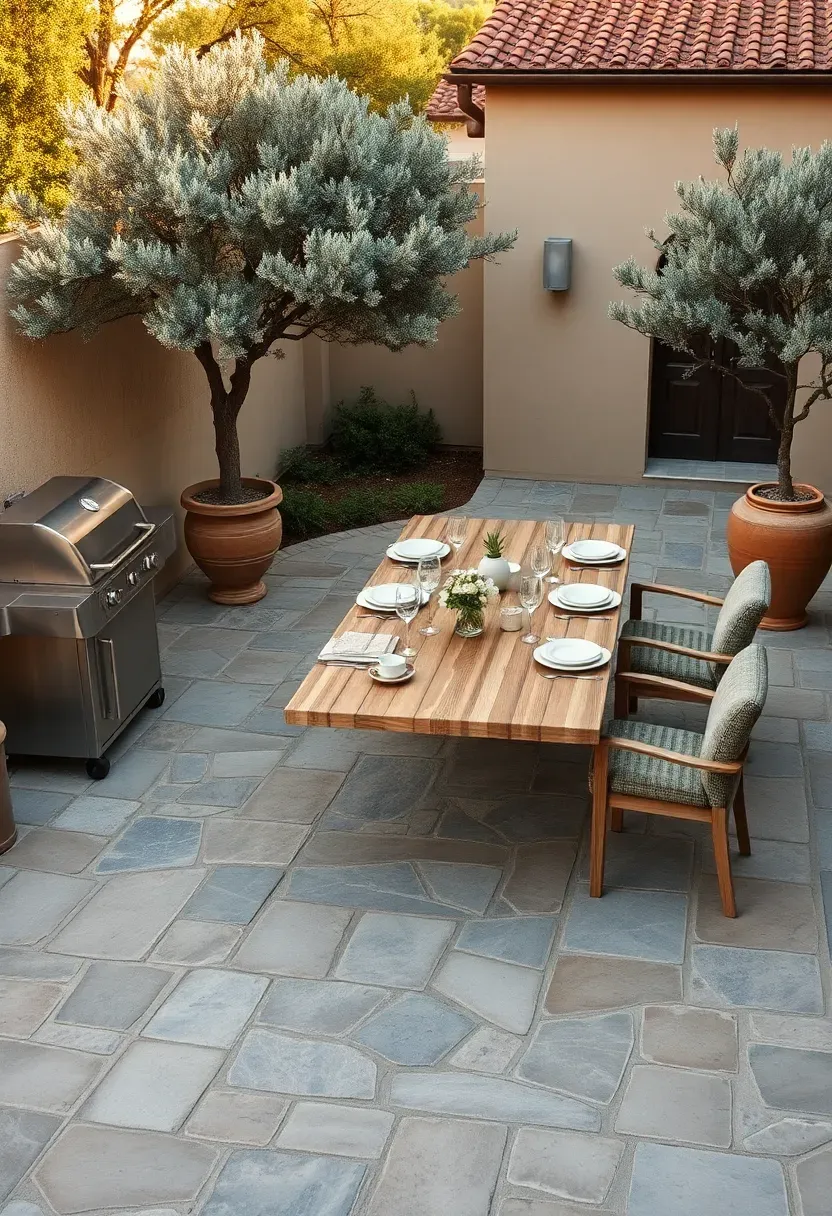
11. Flagstone Patio BBQ Setup
Flagstone gives you an irregular, natural surface that makes even a basic grill setup look established and intentional. Dry-laid flagstone over a compacted gravel base avoids the need for mortar or concrete footings — each stone is fitted by hand and leveled with stone dust. Define three zones within the patio: a cooking area near the house for utility access, a dining area centered around a table, and a transition space between them where people stand with plates and drinks.
Tips
- Choose flagstone at least two inches thick for foot traffic areas — thinner pieces crack under weight
- Fill joints with polymeric sand to prevent weed growth and keep stones from shifting
- Set the grill on a dedicated slab of bluestone or granite within the flagstone field for heat protection
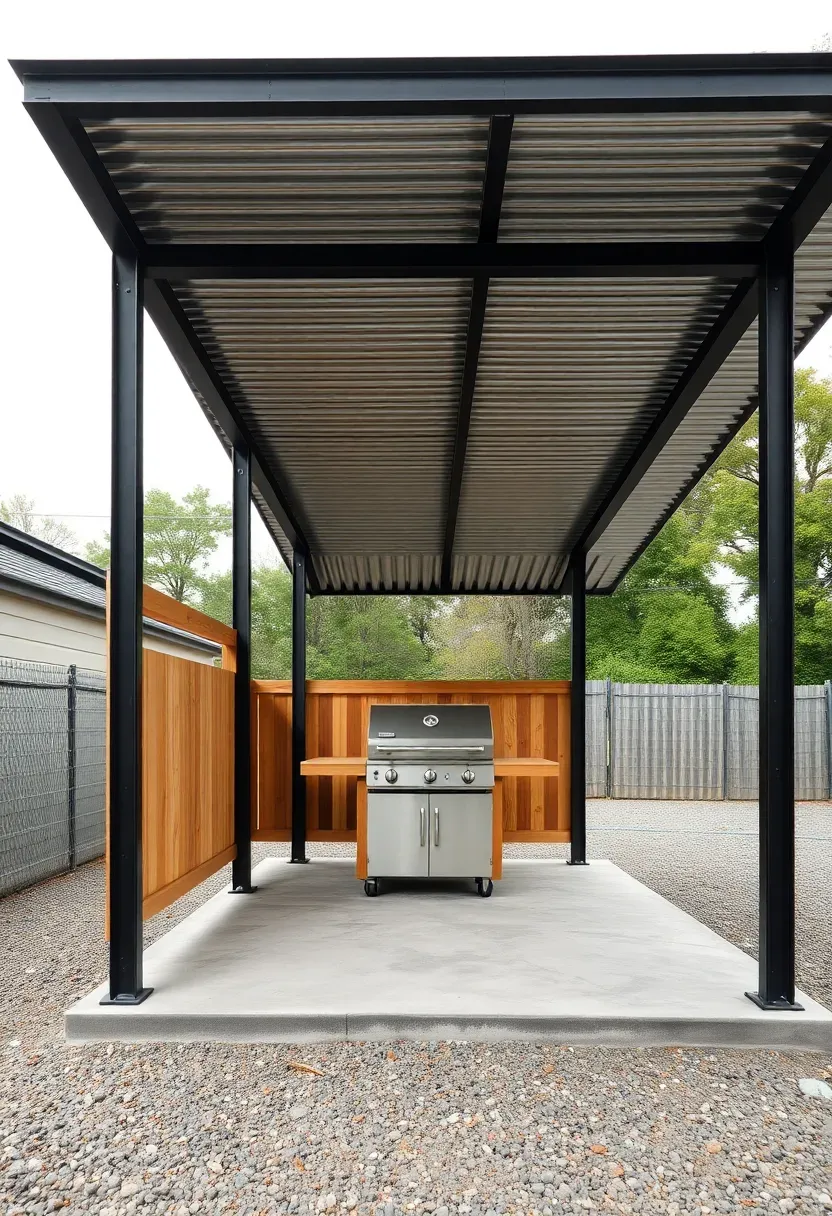
12. Steel Frame Grill Shelter
Origins of the Idea
Commercial food trucks and roadside BBQ stands use steel frame shelters because they are fireproof, open enough for ventilation, and stand up to years of smoke and grease. Scaling that concept down for a residential backyard gives you a dedicated rain-or-shine cooking structure that no pergola can match for weather protection.
Modern Residential Version
A four-post steel frame (two-inch square tubing) with a corrugated metal roof pitched at a slight angle sheds rain while allowing smoke to escape from the open sides. Weld or bolt the frame together, set the posts in concrete footings, and add the roof panels with self-tapping screws. Paint everything with high-temperature rated black paint. The industrial look works particularly well in yards with concrete, gravel, or modern landscaping.
Apply at Home
- Total material cost for a ten-by-eight-foot shelter runs around five hundred to eight hundred dollars in steel and roofing
- Add a concrete slab floor for easy cleanup — slope it slightly for drainage
- Hang a few S-hooks from the roof frame for utensils and a shop light for evening cooking
Recommended
Items for this idea
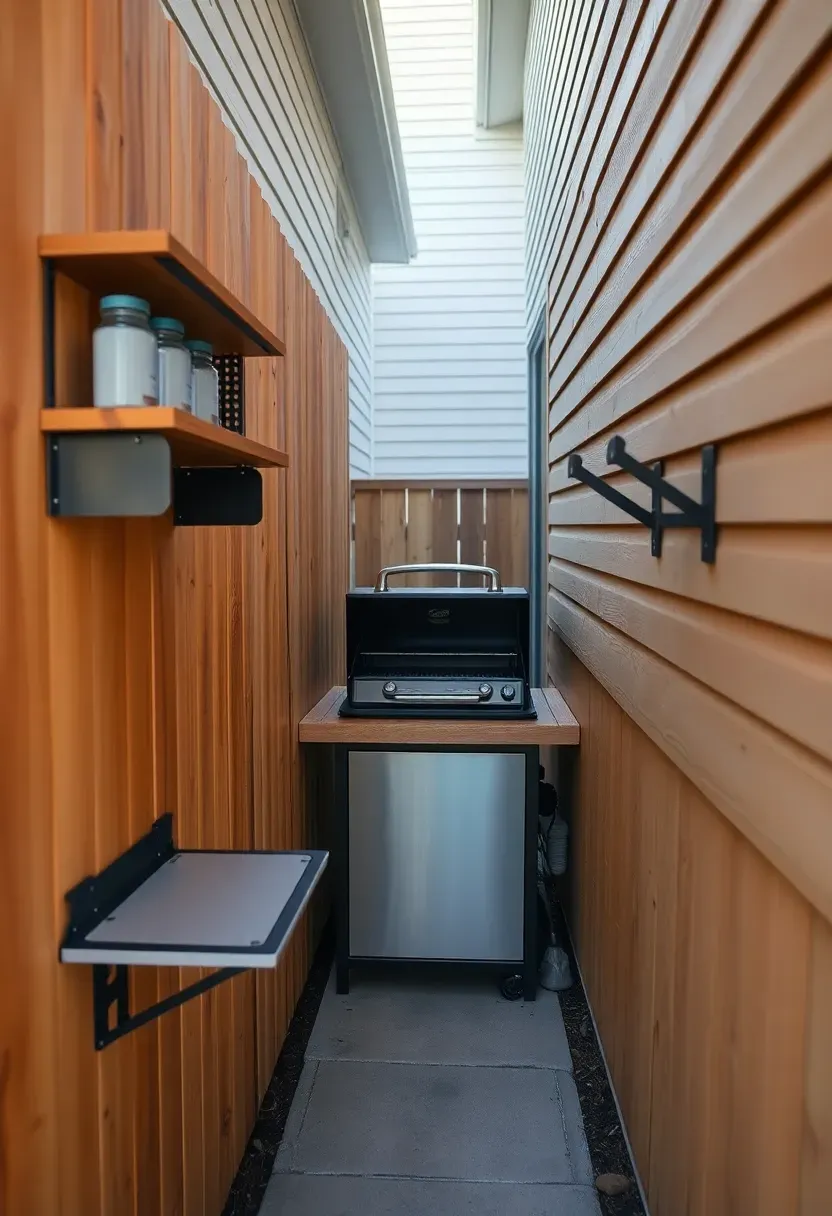
13. Side Yard Narrow BBQ Station
That four-foot-wide strip between your house and the fence is not dead space — it is a surprisingly good spot for a grill station. Smoke drifts away from the house (and neighbors) more easily in a side yard due to the natural wind tunnel effect between buildings. Build a narrow counter against the fence, twenty-four inches deep instead of the standard thirty-six, and mount fold-down shelves on the house wall for additional prep surface when you need it. A wall-mounted magnetic knife strip and a pegboard for tools keep everything accessible without taking up counter space.
Tips
- Install a heat shield on the fence behind the grill — a sheet of cement board works well
- Ensure at least thirty-six inches of clearance in front of the counter for safe movement
- Run a weatherproof electrical outlet on the house wall for a pellet grill or electric accessories
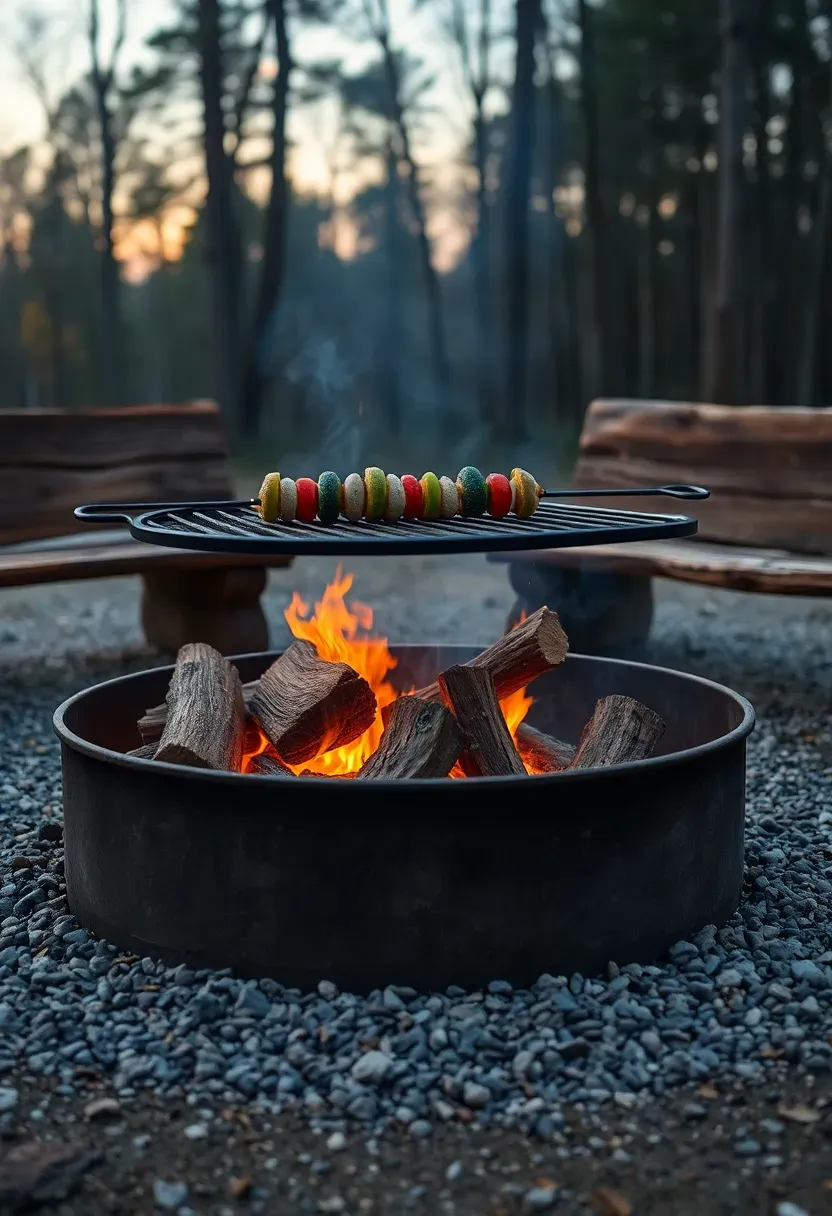
14. Rustic Fire Pit Grill
Before gas grills existed, people cooked over open fire. A fire pit with a swing-arm grill grate brings that back in a controlled way. Set a steel fire ring thirty-six inches in diameter into a gravel base. Mount a pivot post on one side with a swinging arm that holds a cast iron grate — this lets you swing the food away from the flames to check it or add fuel without reaching over the fire. Hardwood like oak, hickory, or fruitwood provides both cooking heat and smoke flavor that charcoal cannot replicate.
Tips
- Keep a bucket of sand nearby for flare-up control instead of water, which creates steam and ash spray
- Season the cast iron grate with vegetable oil after each use to prevent rust
- Build up a coal bed for thirty minutes before cooking — open flames are for ambiance, coals are for food
Recommended
Items for this idea
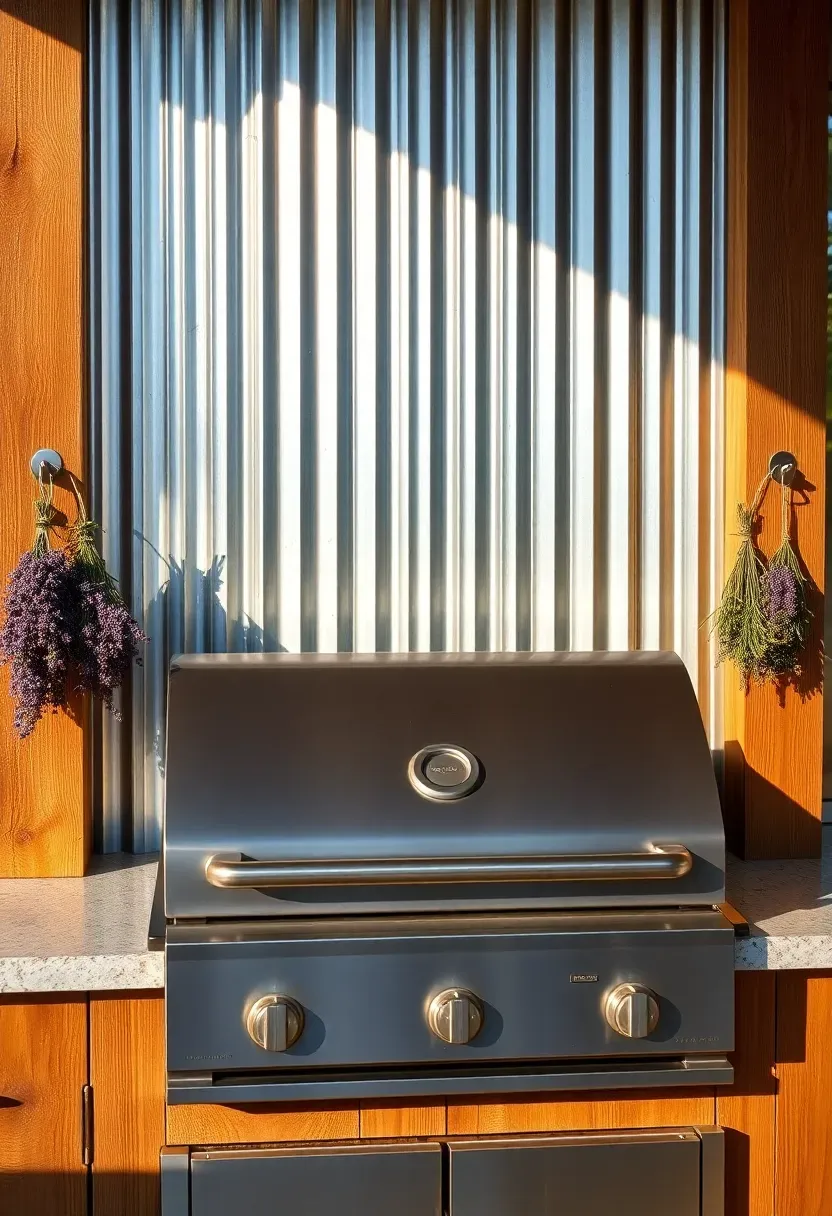
15. Corrugated Metal Grill Backsplash
The Problem
Grease splatter from a grill hits whatever surface sits behind it. A wooden fence gets stained. A house wall gets damaged. Nothing behind the grill means you are cleaning the siding every weekend.
The Solution
Mount a sheet of corrugated galvanized steel on a simple wood frame behind your grill. It catches splatter, wipes clean with a damp rag, reflects heat forward, and adds a farmhouse-industrial look that pairs well with both rustic and modern setups. A four-by-six-foot panel covers most grill widths with room to spare. The corrugation adds rigidity so the panel does not flex or bow.
Pros and Cons
- Pro: costs under forty dollars for the panel and mounting hardware
- Pro: completely fireproof and weather resistant
- Con: galvanized steel can look too industrial if your yard leans heavily toward natural materials
- Con: the shiny surface dulls to a matte gray within a year of outdoor exposure
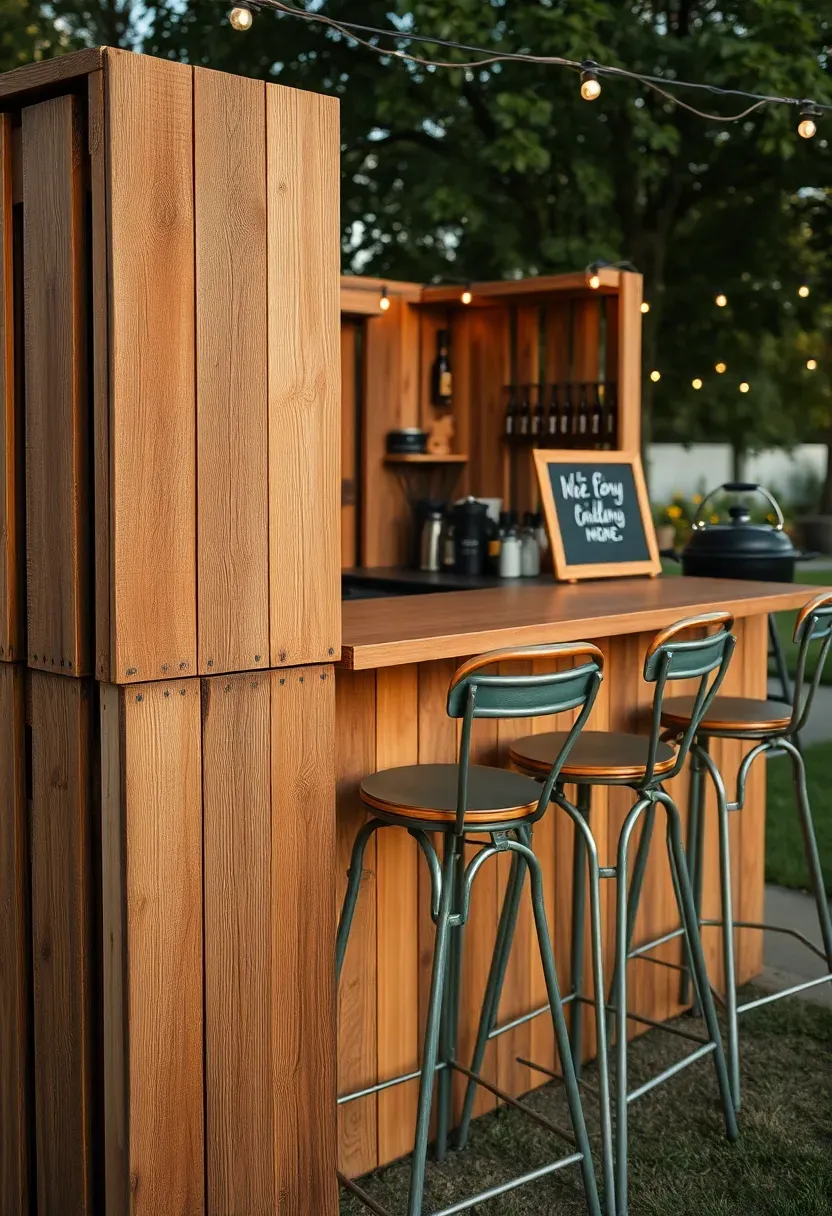
16. Pallet Wood BBQ Bar
Step 1: Source the Pallets
Find four to six heat-treated pallets (look for the HT stamp — avoid chemically treated ones marked MB). Grocery warehouses and building material suppliers often give them away. Sand each pallet thoroughly and remove any protruding nails or staples.
Step 2: Build the Frame
Stand two pallets upright as the front face. Screw them to a 2x4 frame for structural support. Add a plywood top sealed with polyurethane as the bar surface. The natural gaps in the pallet slats work as display shelving on the front — tuck rolled napkins, candles, or condiment bottles into the openings.
Step 3: Add the Details
Mount a chalkboard on one end for your menu. Hang bottle openers from the side. Set bar stools at the front. Park your grill at the end where the cook can serve plates directly across the counter.
Watch Out
- Pallet wood splinters easily — sand with 120 grit first, then finish with 220
- Seal all surfaces with exterior polyurethane or spar varnish to prevent water damage
- The structure is not load-bearing — do not lean on it or stack heavy coolers on top
Recommended
Items for this idea
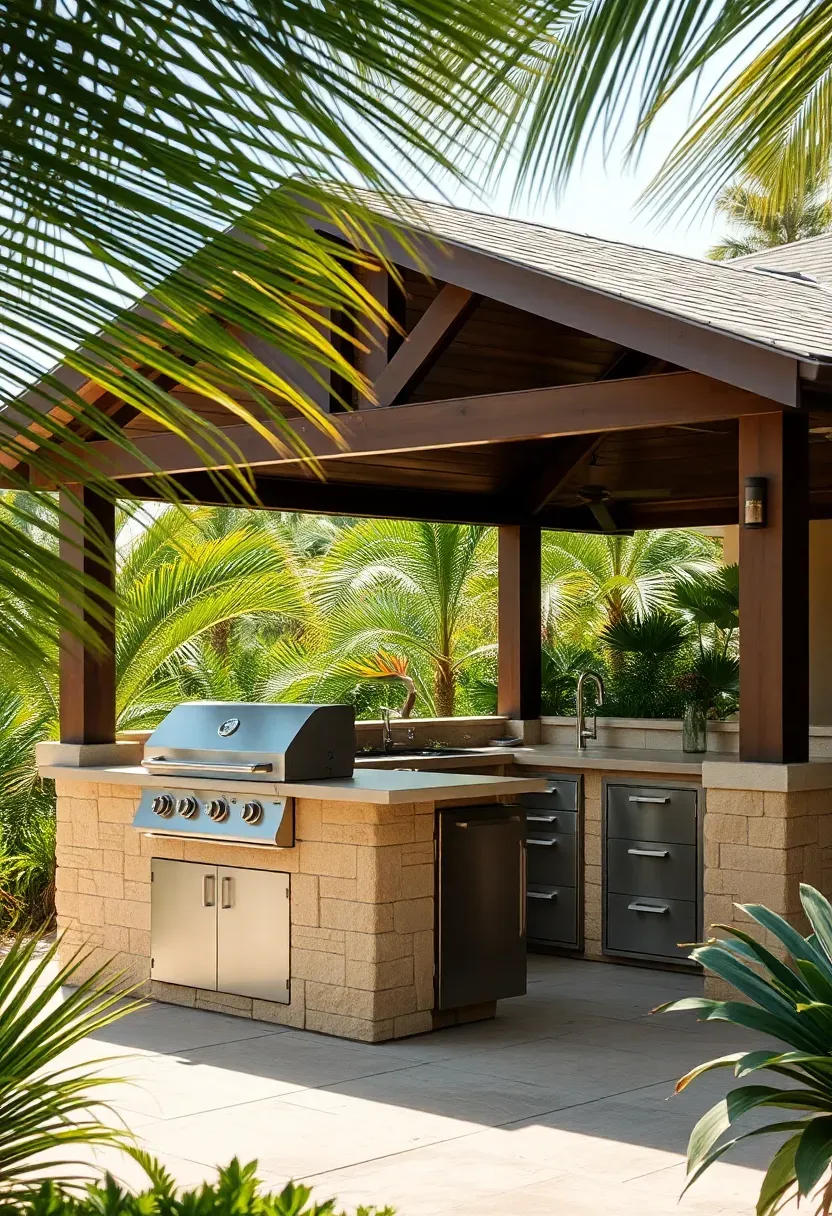
17. Covered Outdoor Kitchen Island
This is the full commitment. A freestanding island with a grill, sink, refrigerator, and storage drawers under a dedicated roof structure creates an outdoor kitchen that works as well as your indoor one. Frame the island with steel studs (wood rots in outdoor island enclosures), clad it with stone or stucco, and top it with granite or quartz. The roof above can be a hip-style structure on four posts or an extension of an existing patio cover.
Tips
- Budget fifteen hundred to five thousand dollars depending on materials and whether you DIY the framing
- Run water, gas, and electrical lines before closing up the island walls — retrofitting is expensive
- Include at least two twenty-amp dedicated circuits for the fridge and any countertop appliances
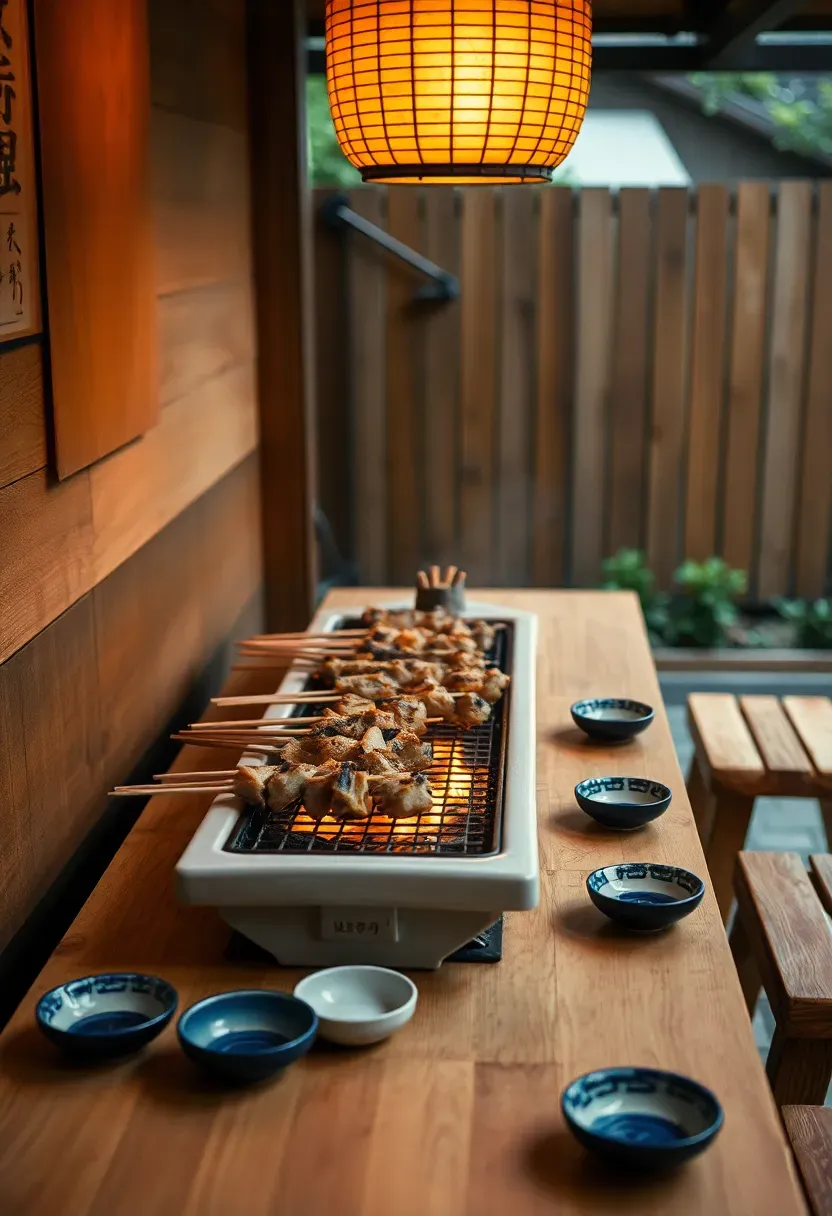
18. Japanese-Style Yakitori Grill Corner
Origins
Yakitori grilling goes back centuries in Japan — small pieces of chicken skewered on bamboo and cooked over bincho-tan charcoal on a narrow trough grill called a konro. The beauty of it is the intimacy. You cook four or five skewers at a time, turning them constantly, and serve each batch directly to the people sitting across from you.
Modern Backyard Version
A konro grill (available from Japanese kitchenware importers for about eighty to two hundred dollars) sits on any heat-resistant surface. Build or buy a narrow wooden table, twenty inches wide and four feet long, with the konro recessed into the center. Guests sit on low stools on both sides. Add small ceramic dishes for dipping sauces and a bamboo skewer holder. The whole setup occupies less than twenty square feet and becomes a conversation piece that no Weber kettle can match.
Apply at Home
- Bincho-tan charcoal burns hotter and cleaner than standard briquettes — find it at Asian grocery stores or online
- Practice on chicken thighs before attempting more delicate items like chicken skin or quail eggs
- Keep a spray bottle of water nearby to control flare-ups from dripping fat
Recommended
Items for this idea
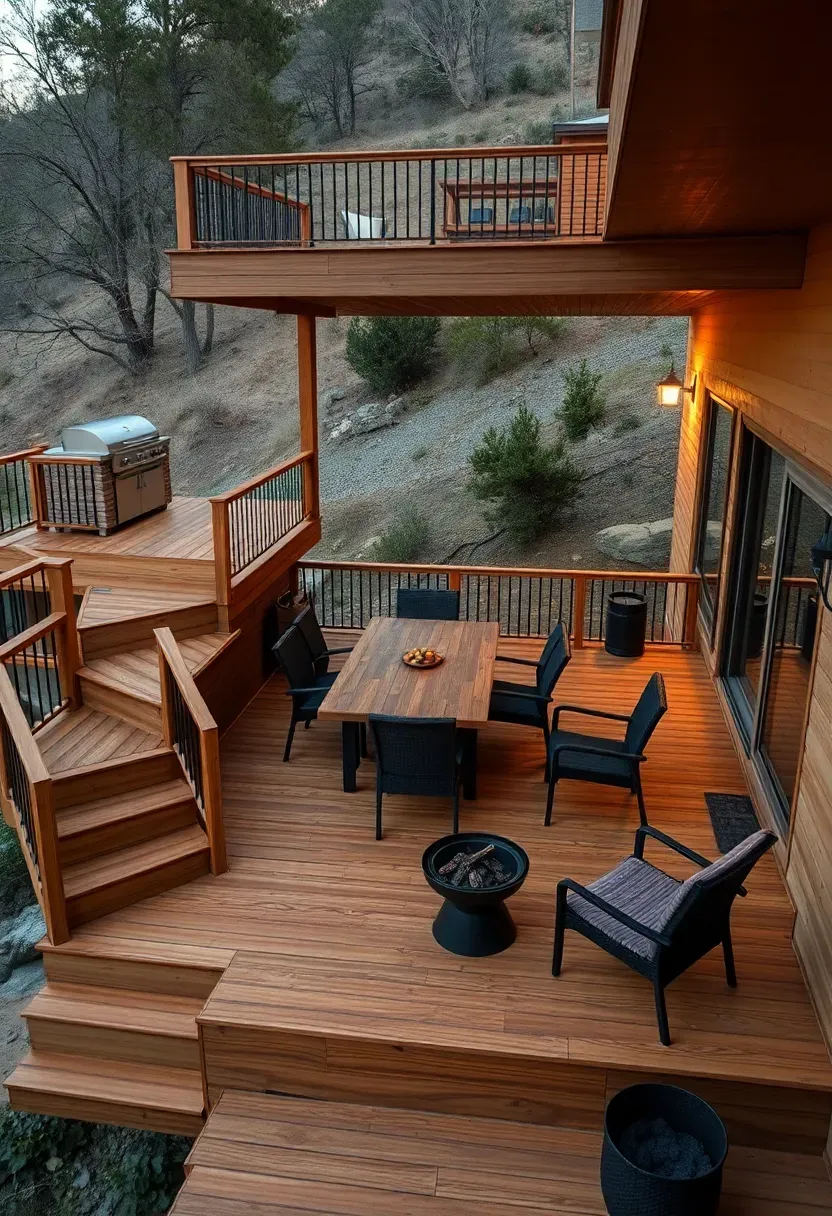
19. Tiered Hillside Grill Deck
A sloped yard is not a problem — it is an opportunity for a multi-level deck that gives your BBQ area built-in separation between cooking, dining, and lounging. Place the grill station on the highest tier (heat and smoke rise away from seated guests below). The middle level holds the dining table. The lowest tier works for lounge chairs or a fire pit. Steps between levels create natural traffic flow and prevent the crowding that happens when everything sits on one flat surface.
Tips
- Each tier needs its own footings and ledger board — do not shortcut the structural engineering on a hillside build
- Run gas and electrical to the top tier during construction, not after
- Add railing with built-in planter boxes on the exposed sides for a finished look that does double duty
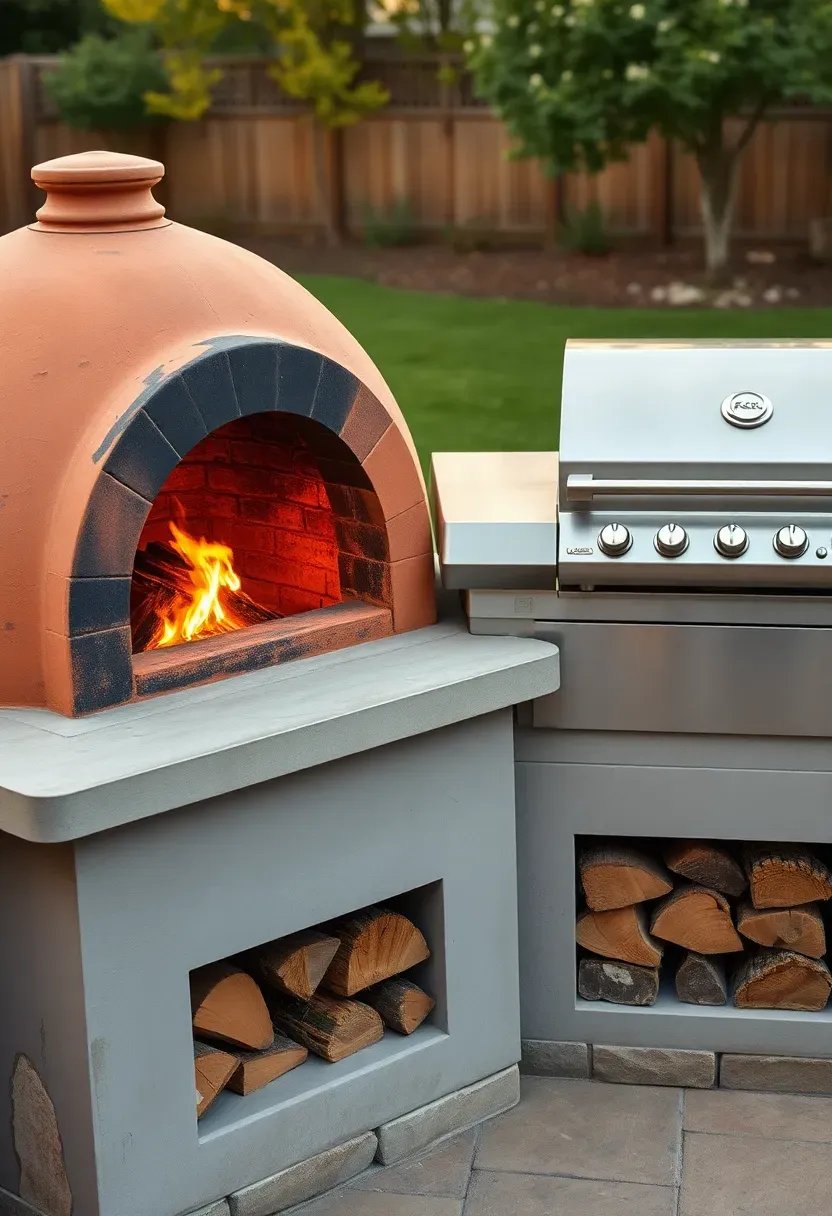
20. Pizza Oven and Grill Pairing
Pizza Oven vs. Grill: Why Not Both?
A gas or charcoal grill handles proteins and vegetables. A wood-fired pizza oven does flatbreads, roasted whole chickens, and bread. Together on a shared counter, they cover virtually any outdoor cooking scenario. The pizza oven also doubles as a heat source on cool evenings — open the door and it radiates warmth across the patio like a fireplace.
How to Pair Them
Place the pizza oven on one end of an L-shaped or straight counter, grill on the other. Store firewood in a rack built into the counter base below the oven. Keep at least twenty-four inches of clear counter space between them for plating and assembly. A prefabricated pizza oven kit runs eight hundred to two thousand dollars depending on size; pair it with your existing grill and you have a dual-fuel outdoor kitchen.
Choose If
- You love cooking for groups and want variety beyond grilled meat
- Weekend cooking sessions are an event, not just dinner prep
- Your budget allows for the oven investment (it pays off in pizza alone within a year)
Recommended
Items for this idea
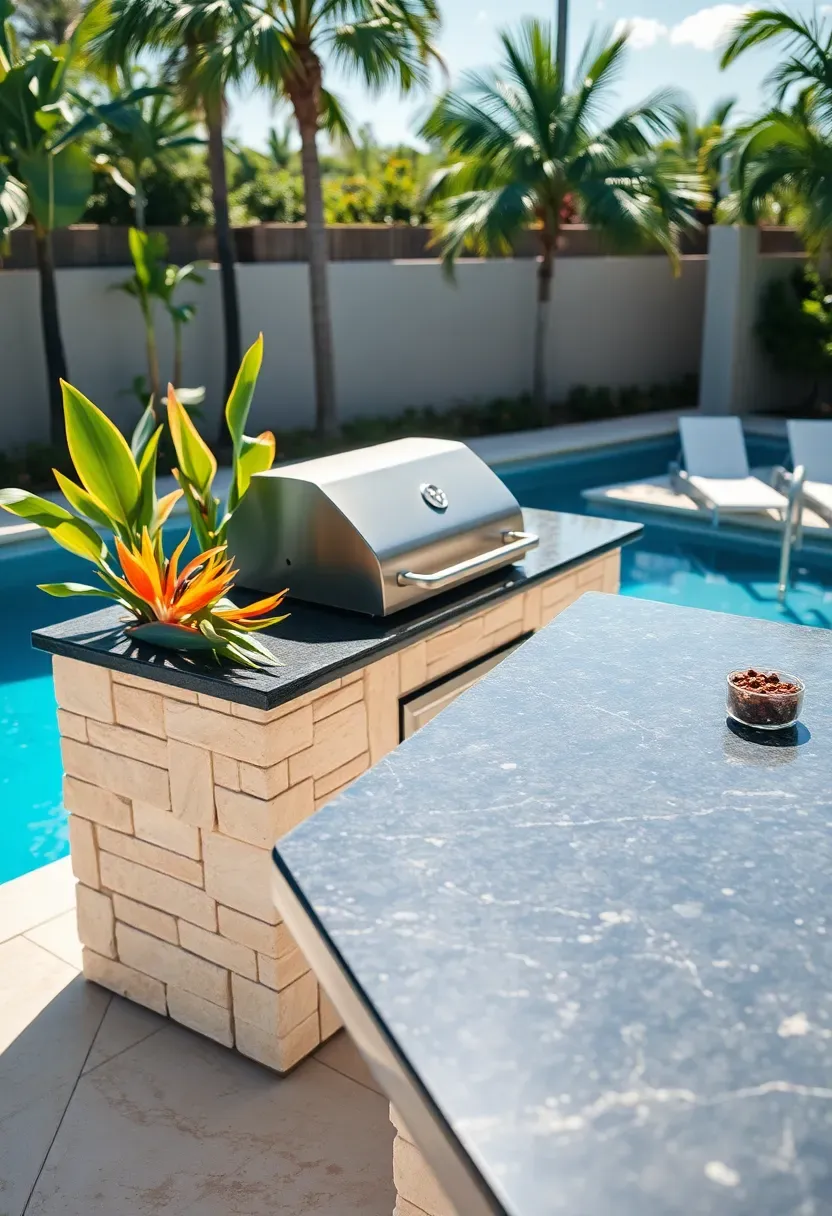
21. Pool-Adjacent BBQ Station
Grilling near the pool means food shows up hot and fast instead of getting cold on the walk from a distant patio. Position the grill station on the pool deck or immediately adjacent, with the cooking side facing away from the pool to keep grease and smoke off the water. A wet bar counter between the grill and the pool edge serves double duty — plates go out toward the pool, dirty dishes come back to the grill side.
Tips
- Use non-slip pavers around the grill area since bare wet feet will inevitably wander over
- Install a handwash station or at minimum a cooler with clean water near the grill
- Keep a clear twelve-foot buffer between the grill and any pool chemical storage
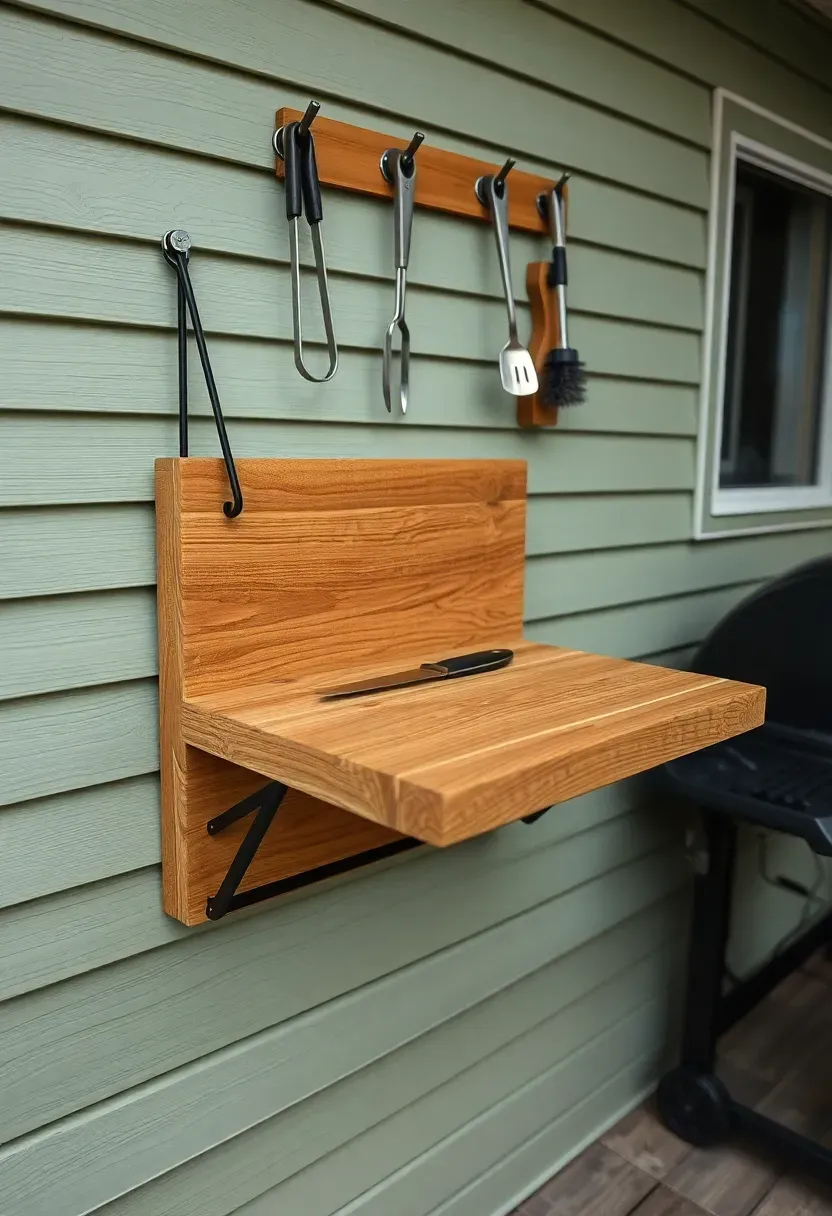
22. Fold-Down Wall-Mounted Prep Table
The Problem
Small patios and balconies cannot spare the floor space for a permanent prep counter. But grilling without a surface to work on means juggling plates on your lap or running inside for every step.
The Solution
A fold-down table mounted on the exterior house wall or a sturdy fence gives you a full prep surface when the grill is on and disappears flat against the wall when you are done. Build it from exterior-grade plywood or a solid wood slab with piano hinges at the wall and a folding leg or chain support underneath. A twenty-four-by-thirty-six-inch surface handles cutting boards, plates, and seasoning without feeling cramped.
Pros and Cons
- Pro: zero floor space when folded — no furniture to move around or cover in winter
- Pro: mounts at your preferred height since you choose the bracket position
- Con: weight capacity limited to about forty pounds on most designs
- Con: requires drilling into the wall, which may not suit renters
Recommended
Items for this idea
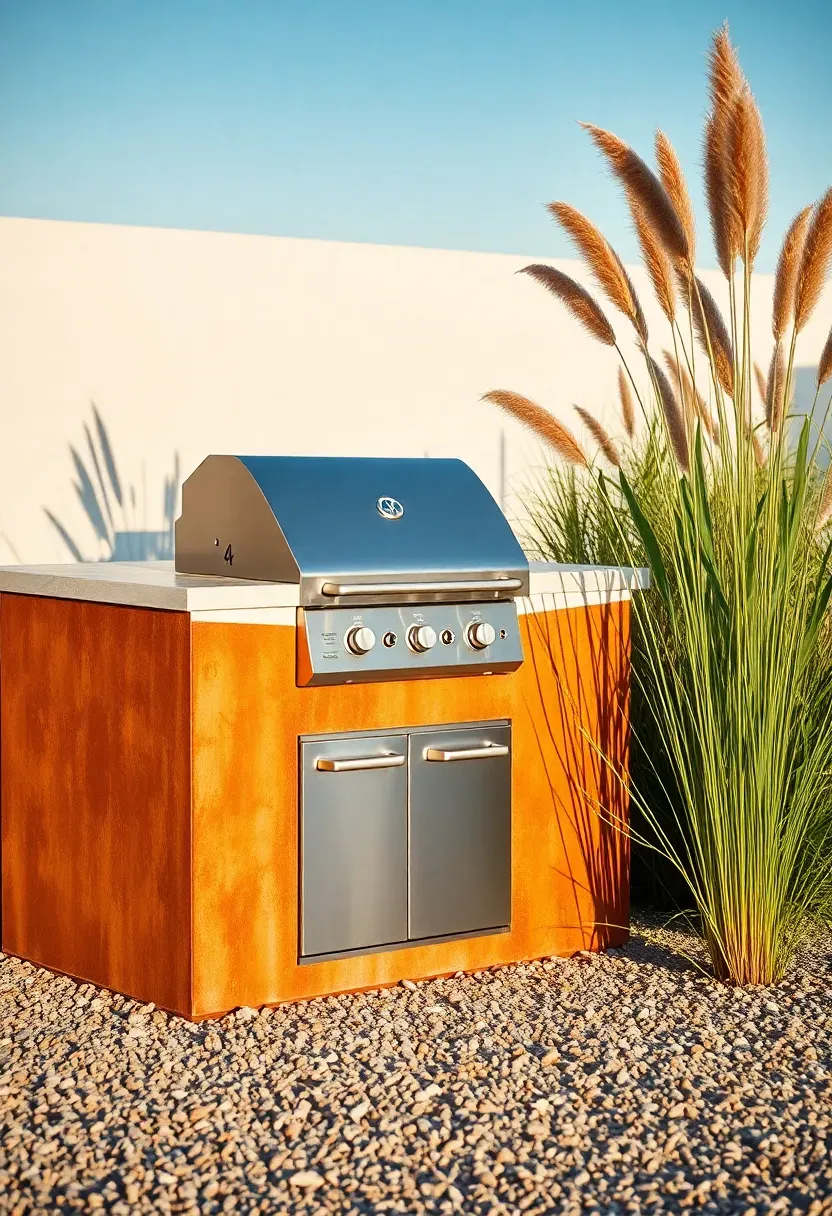
23. Corten Steel Grill Surround
Corten steel develops a stable rust patina that protects the underlying metal and looks intentionally weathered from day one. Use corten panels as the cladding for a grill island frame instead of stone or stucco. The warm orange-brown tone pairs well with concrete countertops, gravel groundcover, and native plantings. Each panel weathers differently based on its exposure to rain and sun, so no two installations look alike. The material is fireproof, maintenance-free after the patina stabilizes, and costs about the same as mid-range stone veneer.
Tips
- Order pre-weathered panels if you want the patina look immediately — fresh corten takes six months to develop fully
- Keep corten away from concrete footings during the initial rusting phase as rust runoff stains permanently
- Seal the top edge where the countertop meets the corten to prevent water pooling inside the island cavity
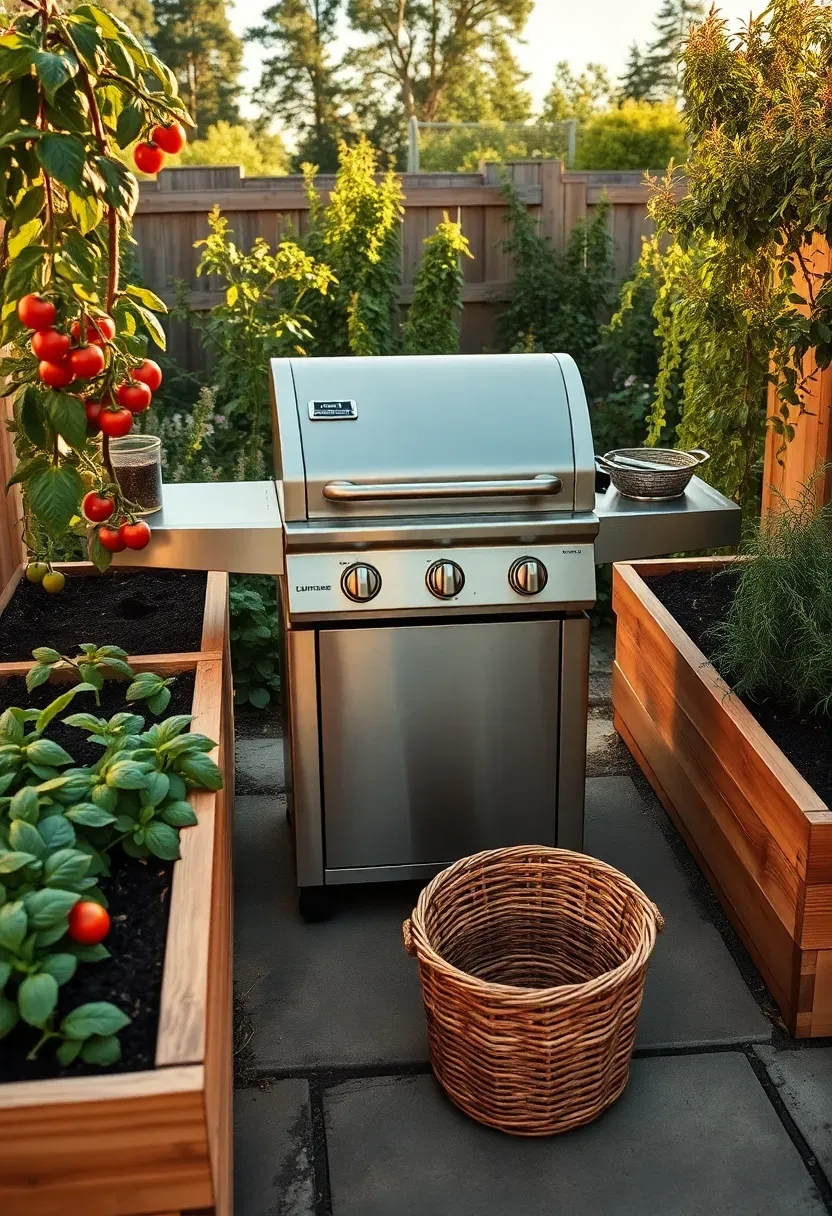
24. Garden-Integrated Cooking Area
Step 1: Position the Grill Near the Garden
Place your cooking area adjacent to or surrounded by raised garden beds. Growing tomatoes, peppers, onions, and herbs within arm's reach of the grill changes how you cook outdoors. You pick a handful of basil, slice a tomato that was on the vine thirty seconds ago, and grill it right there. The flavor difference between a just-picked pepper and one that sat in a store for a week is not subtle.
Step 2: Plan the Beds
Build raised beds at eighteen to twenty-four inches high so you do not have to bend down while managing the grill. Use cedar or galvanized steel planters. Plant the bed closest to the grill with your most-used herbs — rosemary, thyme, oregano, cilantro. Dedicate another bed to grilling vegetables: zucchini, corn, bell peppers, jalapeños.
Step 3: Connect the Zones
A gravel or stepping stone path between the beds and the grill keeps your feet clean and prevents trampling the planting area. Mount a small tool caddy on the end of one raised bed for tongs, a spray bottle, and a knife.
Recommended
Items for this idea
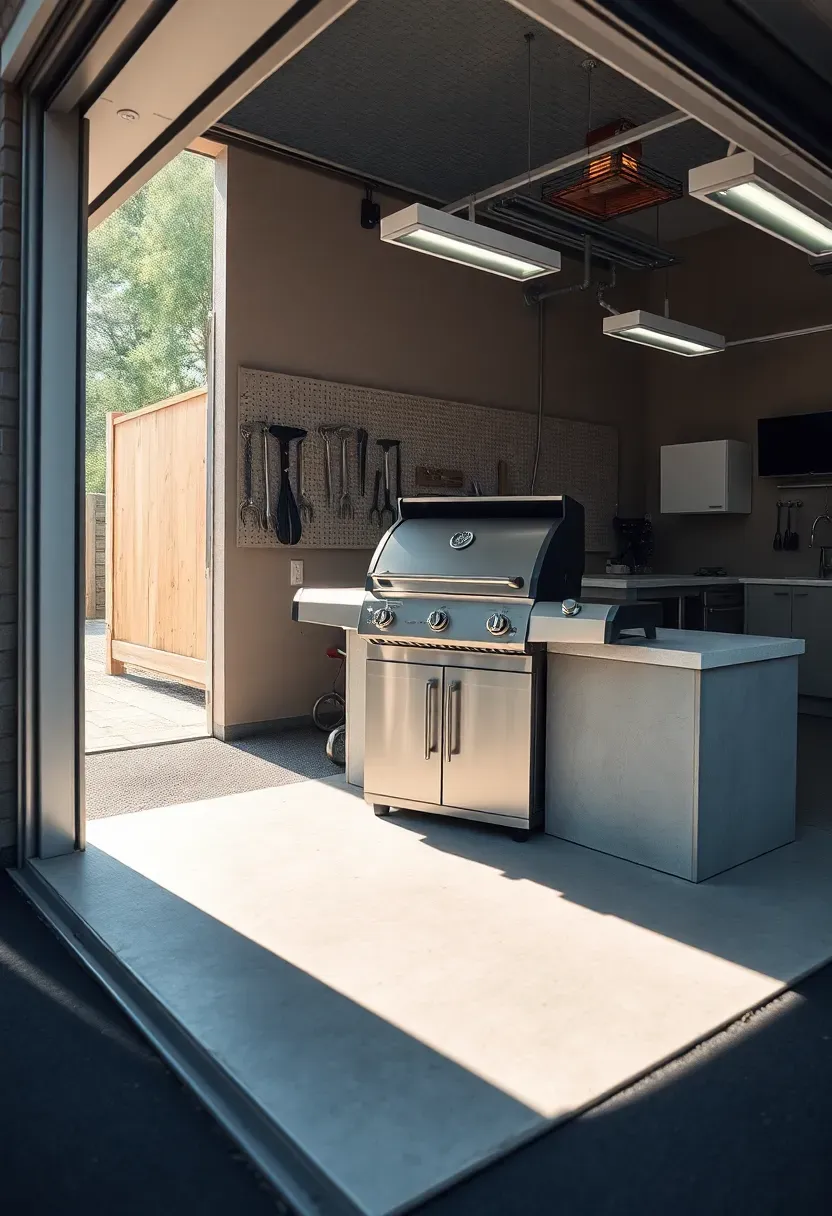
25. Garage-Adjacent Grill Station
Building your grill station right next to the open garage gives you access to electricity, storage, a utility sink (if your garage has one), and shelter from rain without constructing a separate outdoor structure. Pour a small concrete pad extending from the garage apron. Set the grill and counter on the pad, facing the yard. Use the garage interior wall for a pegboard tool organizer, spice rack, and paper towel holder. You get the convenience of an indoor kitchen with the ventilation of outdoor cooking.
Tips
- Never grill inside the garage — always position the grill on the exterior pad with at least ten feet of clearance from the garage opening
- A retractable awning mounted above the garage door extends rain protection over the cooking area
- Install a carbon monoxide detector inside the garage as an added safety measure when grilling nearby
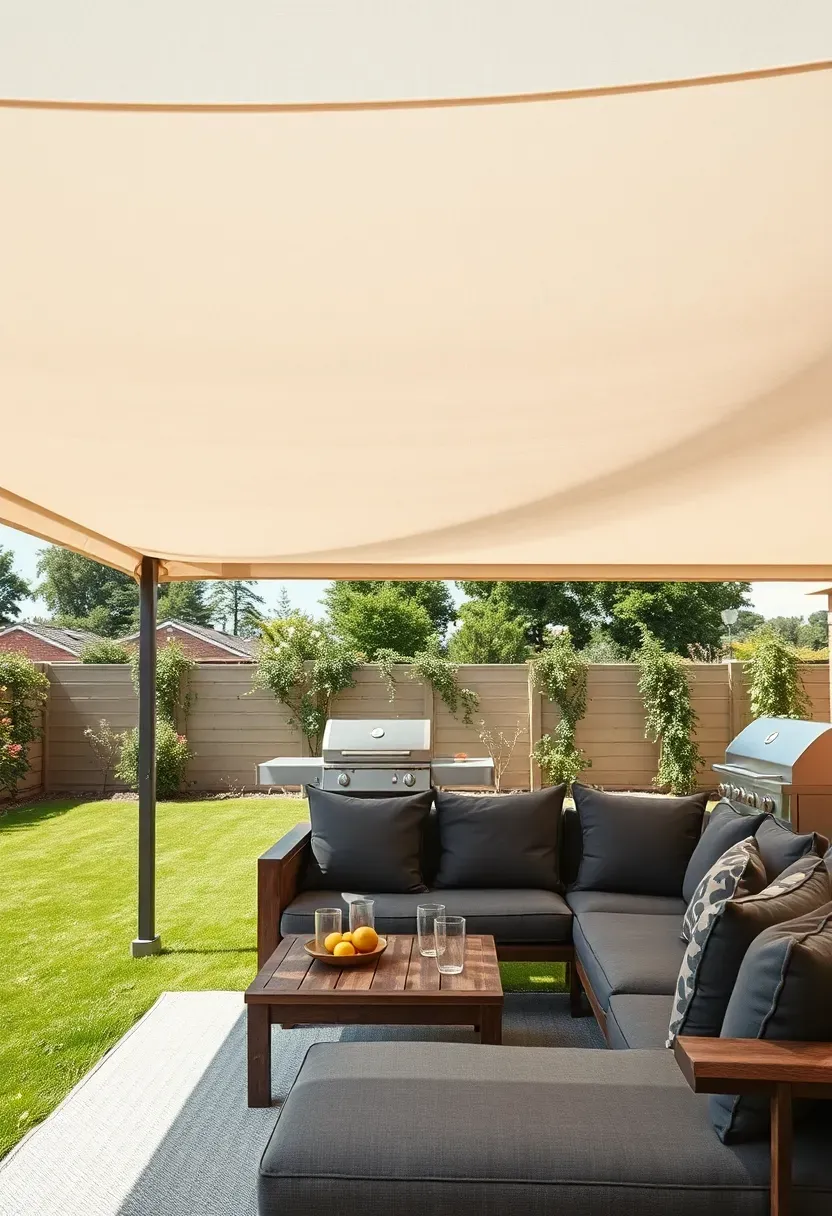
26. Shaded Canopy BBQ Lounge
The Idea
Combine a large shade canopy (twelve by sixteen feet minimum) with comfortable seating and a grill station at one end. This turns the BBQ area into a place where people stay for hours rather than grabbing a plate and retreating inside. The canopy handles sun and light rain, the seating keeps everyone comfortable, and the grill keeps food coming.
Making It Work
Use a heavy-duty canopy frame rated for semi-permanent outdoor installation — not a pop-up tent that collapses in wind. Anchor the posts with weighted bases or concrete footings. Place an outdoor sectional or deep-seat lounge chairs under the canopy with a low table in the center. Position the grill just outside the canopy edge on the downwind side so smoke drifts away from seated guests. Add a side table next to the grill as a pass-through for plates.
Recommended
Items for this idea
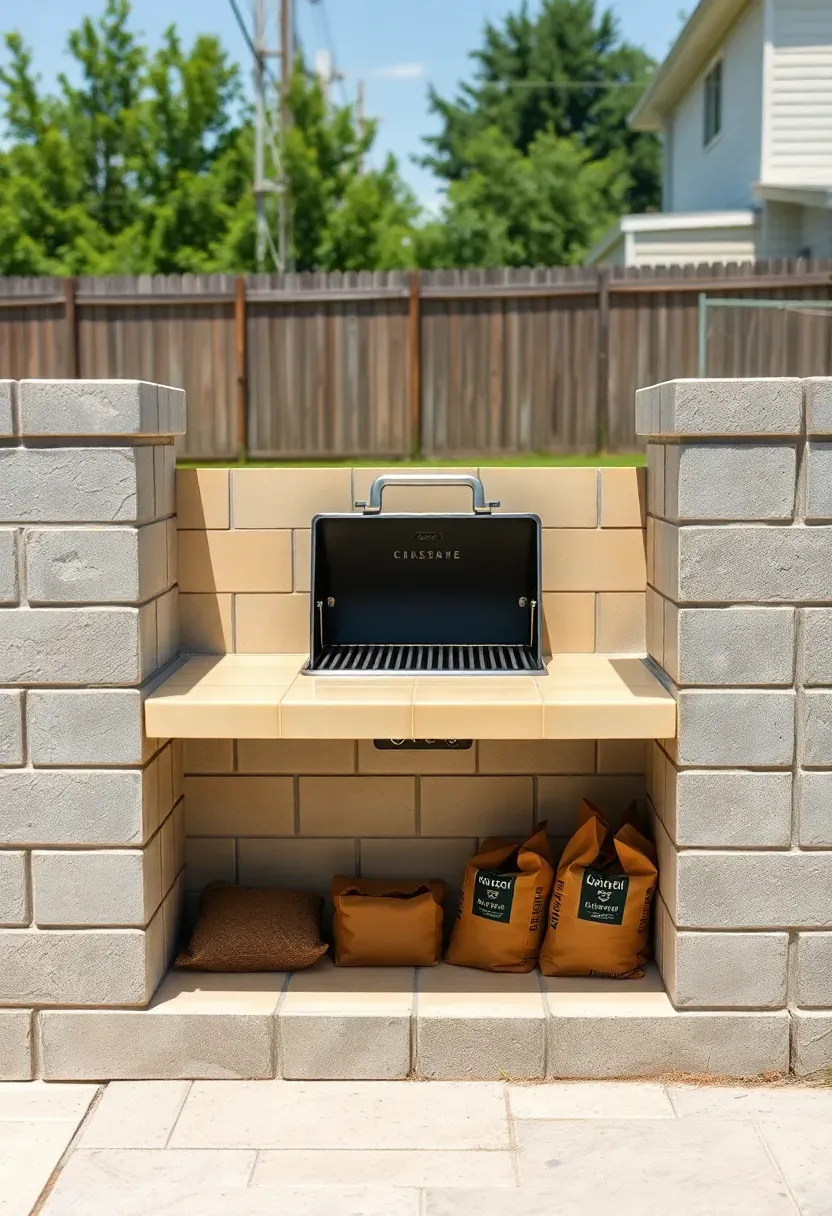
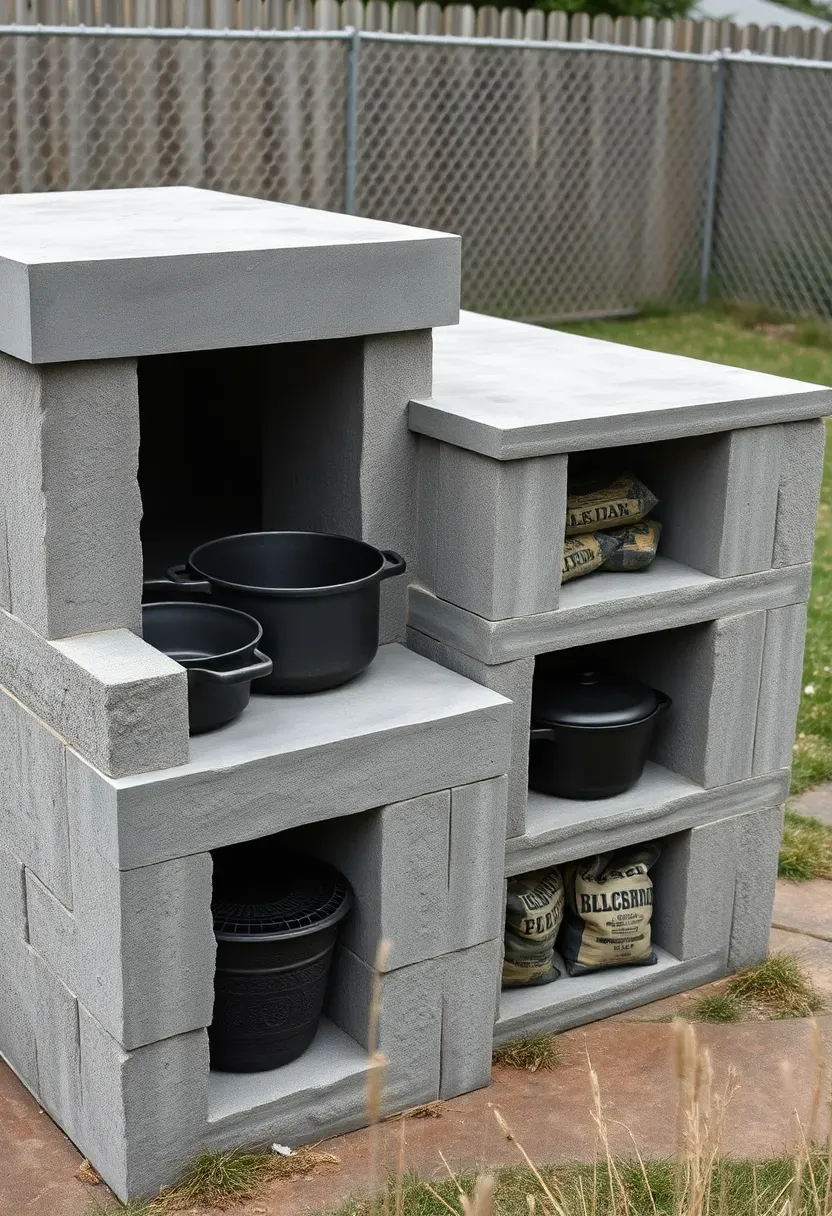
27. Budget Cinder Block BBQ Island
Forty standard cinder blocks, a bag of construction adhesive, and a few concrete pavers for the top. That is the entire materials list for a functional BBQ island that costs under two hundred dollars. Stack the blocks in a U or L shape, three courses high, with the grill opening sized to your existing grill or a drop-in charcoal pan. Use the open cavities in the blocks as storage — slide in wire baskets or just stack charcoal bags and tools directly into the holes. Cap the top with concrete pavers or a poured slab. It looks rough in a good way, and you built it yourself for the price of a single restaurant dinner.
Tips
- Dry-stack first (no adhesive) to test the fit around your grill before committing
- Level the ground pad carefully — cinder blocks amplify any unevenness in the base
- Paint the exterior with masonry primer and exterior latex if you want a cleaner look
Quick FAQ
Do I need a permit to build a backyard BBQ area? Most municipalities allow freestanding grills and simple outdoor counters without a permit. Once you add gas lines, electrical work, or a roofed structure, permits are typically required. Check your local building department before starting anything involving utilities or structures over a certain square footage.
What is the safest distance between a grill and a house? The National Fire Protection Association recommends at least ten feet between any grill and the house, garage, or deck railing. Some local fire codes are stricter. Keep this clearance in mind when planning your layout — it often determines where the grill station can go more than aesthetics does.
Can I build a BBQ station on a wood deck? Yes, with precautions. Place a fireproof grill mat or a concrete paver pad under the grill. Keep a fire extinguisher within reach. Avoid building permanent structures with open flames directly on wood decking without a non-combustible base layer. Composite decking is more heat-sensitive than pressure-treated wood, so check the manufacturer's guidelines.
Which grill type works best for a built-in station? Gas grills designed specifically for built-in installation have proper ventilation, insulated jackets, and side-access panels. Do not retrofit a freestanding grill into an enclosure — the trapped heat can damage the grill and create a fire risk. Built-in rated models from Weber, Blaze, and Bull start around six hundred dollars.
How much does an outdoor BBQ kitchen cost? A basic DIY cinder block setup runs under two hundred dollars. A mid-range built-in station with stone veneer and a gas grill costs two to four thousand. A full outdoor kitchen with sink, fridge, and roofing runs five to fifteen thousand depending on materials and whether you hire a contractor or build it yourself.
The best backyard BBQ area is the one that makes you cook outside more often. If that means a two-hundred-dollar cinder block island and a bag of charcoal, perfect. If it means a full outdoor kitchen with a pizza oven and a wet bar, also perfect. Start with the setup that fits this weekend's budget and this week's ambition. You can always add a second grill, extend the counter, or pour a bigger pad next season. The yard is patient — it will wait for you to catch up.
Pinterest cover for 27 Backyard BBQ Ideas for Better Grilling
About the author
OBCD
CGI visualization and interior design content. We create detailed 3D renders and curate practical design ideas for every room in your home.