23 Backyard Renovation Ideas
Two years ago my backyard was a rectangle of compacted clay with a rusted chain-link fence and a single sad maple. I started with the patio — a 12x14-foot area of interlocking concrete pavers that cost about $2,800 in materials. That one weekend project changed how we used the space completely. We ate outside more, the kids played out there longer, and neighbors started stopping by. One upgrade led to another, and within a year the yard felt like an entirely different property. The ideas below come from that experience and from dozens of yards I have helped friends plan since.
Each of these 23 backyard renovation ideas targets a specific zone or function, so you can tackle them individually or combine several into a larger project.
Table of Contents
- Paver Patio Expansion
- Cedar Pergola with Rafters
- Sunken Fire Pit Lounge
- Outdoor Kitchen Island
- Retaining Wall Terraces
- Privacy Fence Makeover
- Gravel and Stepping Stone Pathway
- Built-in Concrete Bench
- Raised Planter Beds
- String Light Canopy
- Deck Resurfacing with Composite
- Water Feature with Recirculating Pump
- Shade Sail Setup
- Turf-to-Meadow Conversion
- Outdoor Shower Station
- Hot Tub Pad with Screening
- Sport Court on a Budget
- Drainage Swale Garden
- Fence-Mounted Planters
- Outdoor Movie Wall
- Dry-Stack Stone Border
- Solar Path Lighting
- Covered Dining Pavilion
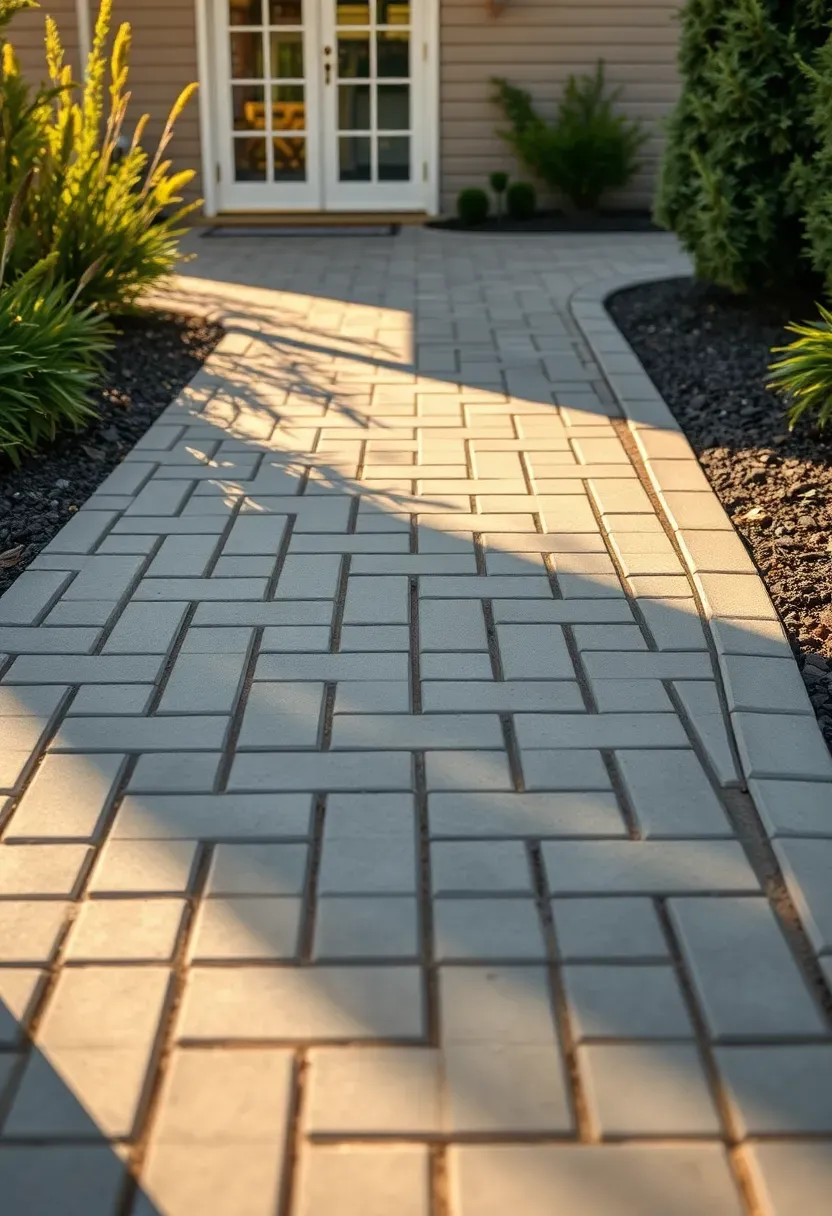
1. Paver Patio Expansion
A paver patio is usually the first renovation that makes a real difference. You can lay polymeric sand-jointed pavers over a compacted gravel base in a weekend if the area is under 200 square feet. Herringbone patterns lock together better under foot traffic than running bond. Budget $4 to $8 per square foot for standard concrete pavers, or $10 to $15 for natural stone. The most common mistake is skipping the edge restraint — without it, pavers migrate outward within a season and gaps open up along the perimeter.
What to get right
- Excavate 7 to 8 inches deep: 4 inches of crushed gravel base, 1 inch of leveling sand, then pavers
- Slope the surface 1/4 inch per foot away from the house for drainage
- Seal pavers with a water-based sealer after one month to lock sand joints and resist staining
We picked a few things that go well with this idea: 100ft LED Outdoor Patio String Lights (★4.3), Svater 105ft Commercial Grade Patio Lights (★4.6) and 100ft Dimmable LED Patio Lights with Remote (★4.9). As an Amazon Associate we earn from qualifying purchases.
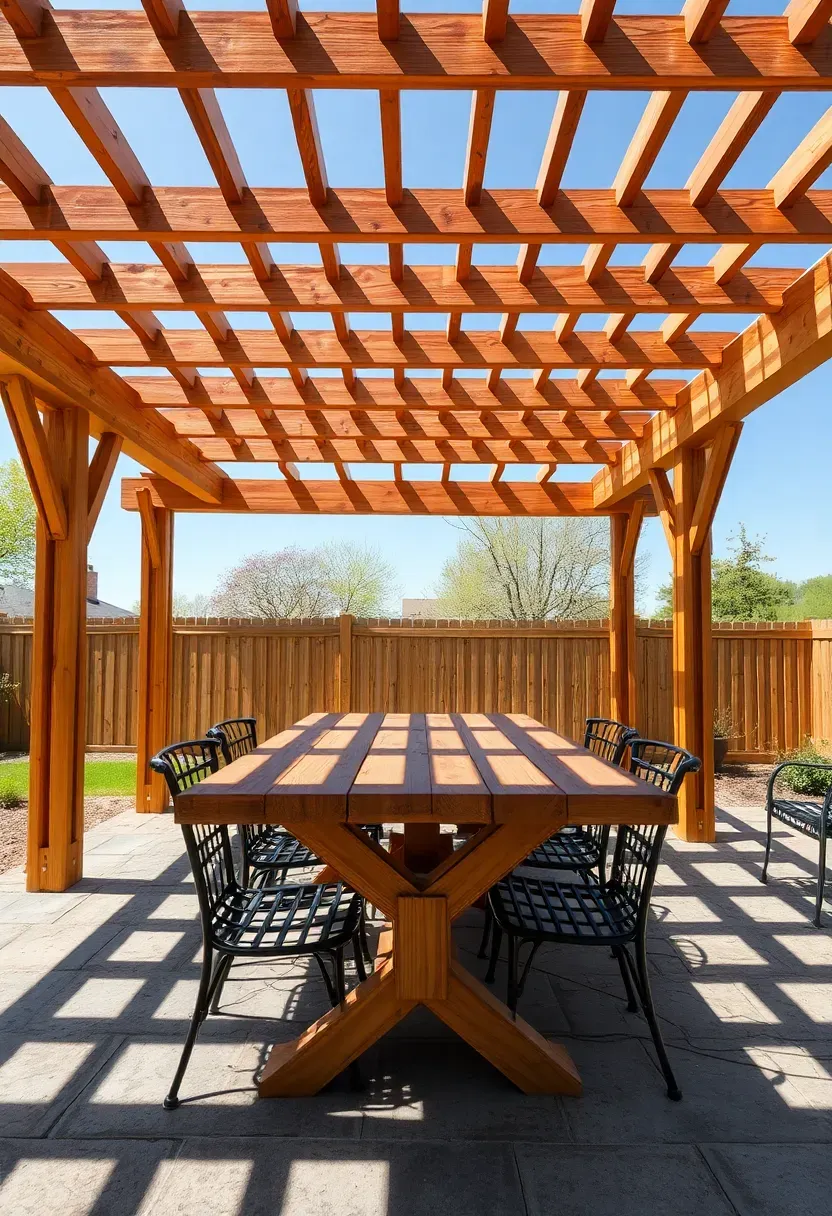
2. Cedar Pergola with Rafters
Why cedar works
Western red cedar resists rot and insects without pressure treatment, and it weathers to a silver-gray patina if you skip the stain. A basic 10x12-foot pergola uses 6x6 posts, 2x8 beams, and 2x6 rafters spaced 16 inches apart. Material cost runs $1,200 to $1,800 depending on lumber grade.
How to build it
Set posts in concrete footings that extend below frost line — 36 inches in most northern climates. Use Simpson Strong-Tie post bases to keep the wood off the concrete surface. Notch the beams to sit over the posts rather than bolting them to the face, which looks cleaner and distributes weight better.
Choose this if
- You want partial shade without blocking all sky view
- Your yard needs a vertical anchor point to define a dining or lounge zone
- You plan to train climbing plants like wisteria or grape along the top later
We picked a few things that go well with this idea: Infinite Cedar Raised Garden Bed (4x8) (★5.0), BlueWish Elevated Cedar Garden Bed (72in) (★5.0) and Best Choice Elevated Wood Planter Box (★4.5). As an Amazon Associate we earn from qualifying purchases.
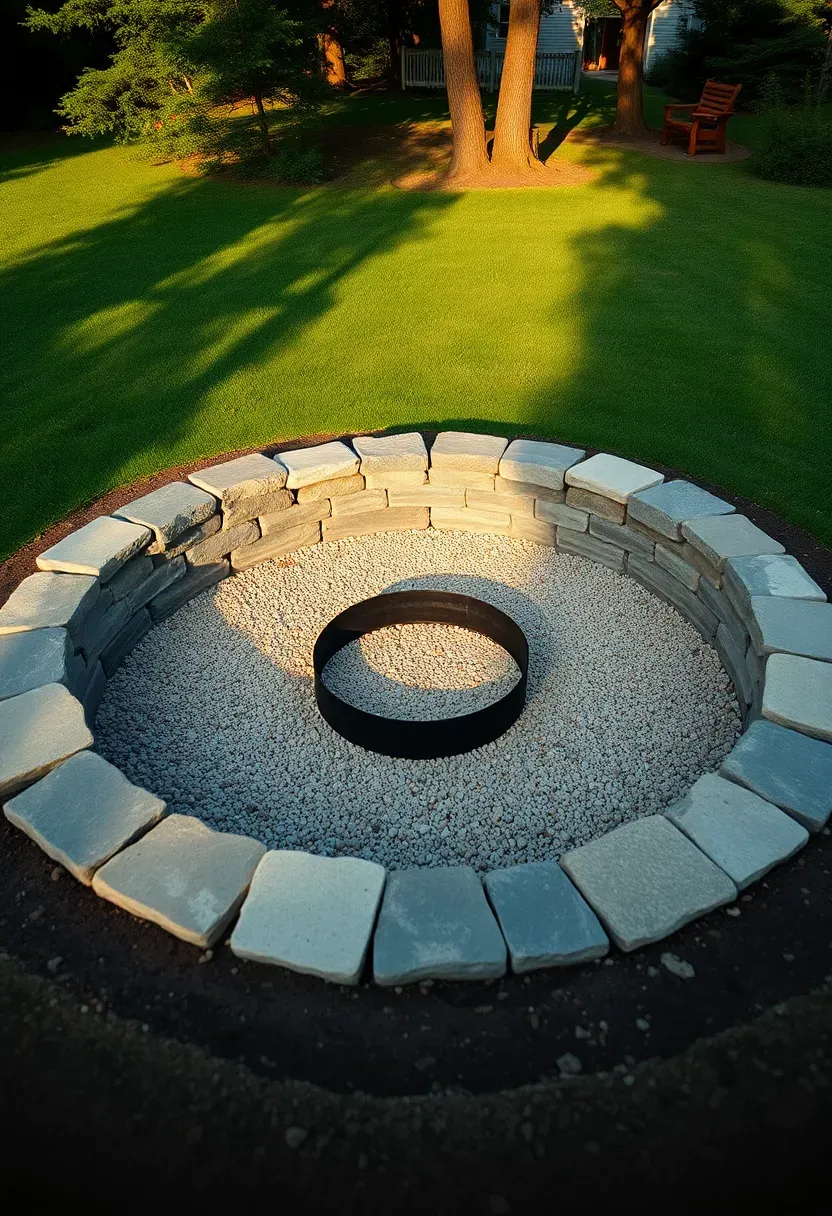
3. Sunken Fire Pit Lounge
Digging the fire pit area 12 to 18 inches below grade creates a natural gathering bowl that blocks wind and feels more enclosed than a raised pit on a flat patio. Line the excavation walls with dry-stacked fieldstone or concrete retaining wall blocks. A 5-foot-diameter pit with a 3-foot ring of seating around it needs about 150 square feet total. Fill the floor with compacted pea gravel for drainage and heat resistance. Use a steel fire ring insert inside the stone wall to protect the masonry from direct flame contact — these run $50 to $120 and last for years.
Tips
- Check local fire codes for setback distance from structures (usually 10 to 25 feet)
- Run a gas line for a propane burner insert if you want instant ignition without storing firewood
- Add a steel spark screen cover for safety when kids or pets are nearby
We picked a few things that go well with this idea: Hykolity 31in Fire Pit with Grill (★4.7), Gas One 22in Steel Outdoor Fire Pit (★4.4) and 36in 3-in-1 Fire Pit with Grills (★4.4). As an Amazon Associate we earn from qualifying purchases.
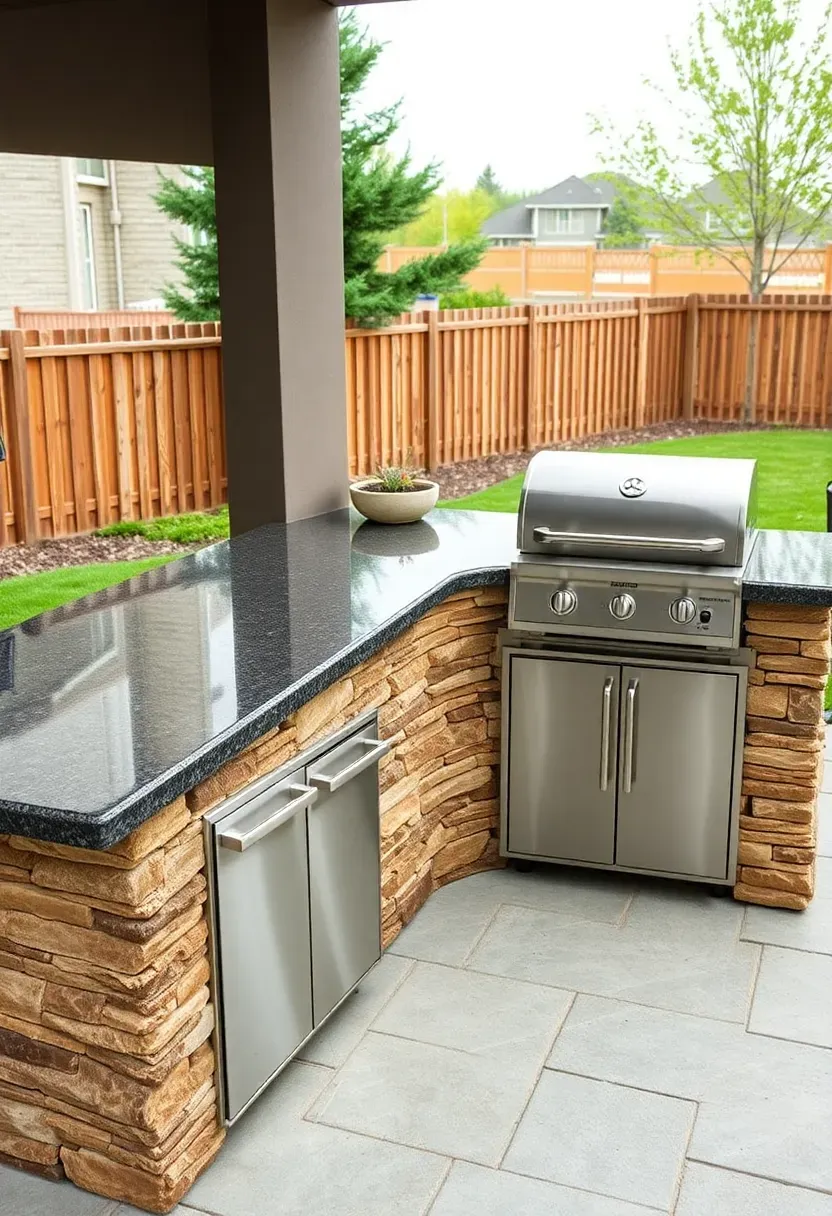
4. Outdoor Kitchen Island
The problem with standalone grills
A freestanding grill on a patio gives you cooking heat but no prep surface, no storage, and no counter for plating. You end up running back inside for every utensil and cutting board.
The solution
Build an L-shaped or straight kitchen island using concrete block framed in stone veneer or stucco. A basic 8-foot island with a 30-inch grill cutout, granite counter, and two access doors runs $3,500 to $6,000 for materials. Run a natural gas line to avoid swapping propane tanks. Add a small bar sink with a garden hose hookup for rinsing hands and vegetables.
Pros and cons
- Pro: Keeps the cook in the conversation instead of isolated at a grill cart
- Pro: Granite and stone surfaces handle heat, rain, and sun without degrading
- Con: Requires a concrete footer or compacted paver base — not something you set on bare grass
Recommended
Items for this idea
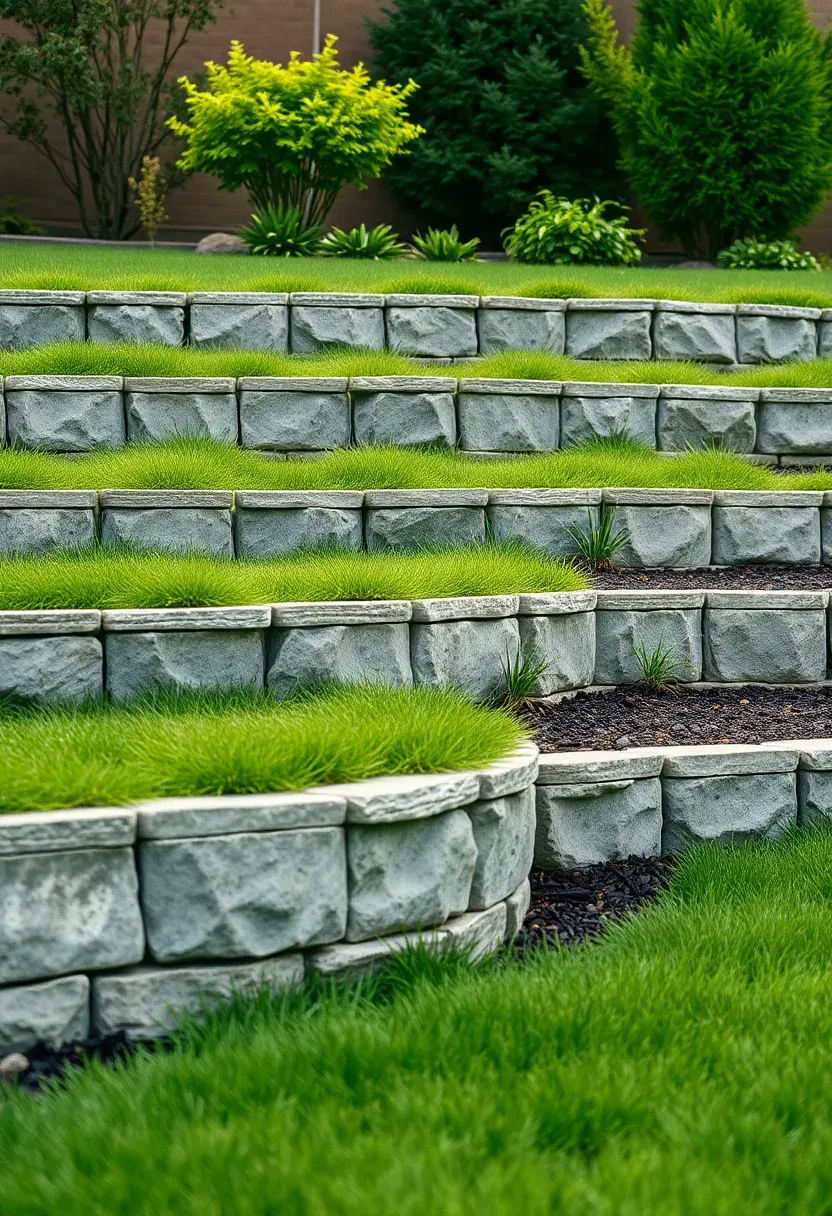
5. Retaining Wall Terraces
If your yard slopes more than about 3 feet across its length, terracing with retaining walls creates usable flat zones. Each terrace becomes its own room — one for dining, one for planting, one for play. Segmental retaining wall blocks from brands like Versa-Lok or Allan Block interlock without mortar and can handle walls up to 4 feet tall without engineering. Beyond 4 feet you need a geogrid-reinforced design signed off by an engineer. Cost is roughly $15 to $25 per face foot of wall including base preparation.
Tips
- Backfill with clean crushed stone, not native soil — clay behind a wall creates hydrostatic pressure that causes failure
- Install a perforated drain pipe at the base of each wall, routed to daylight
- Plant trailing ground covers along wall tops to soften the hardscape over time
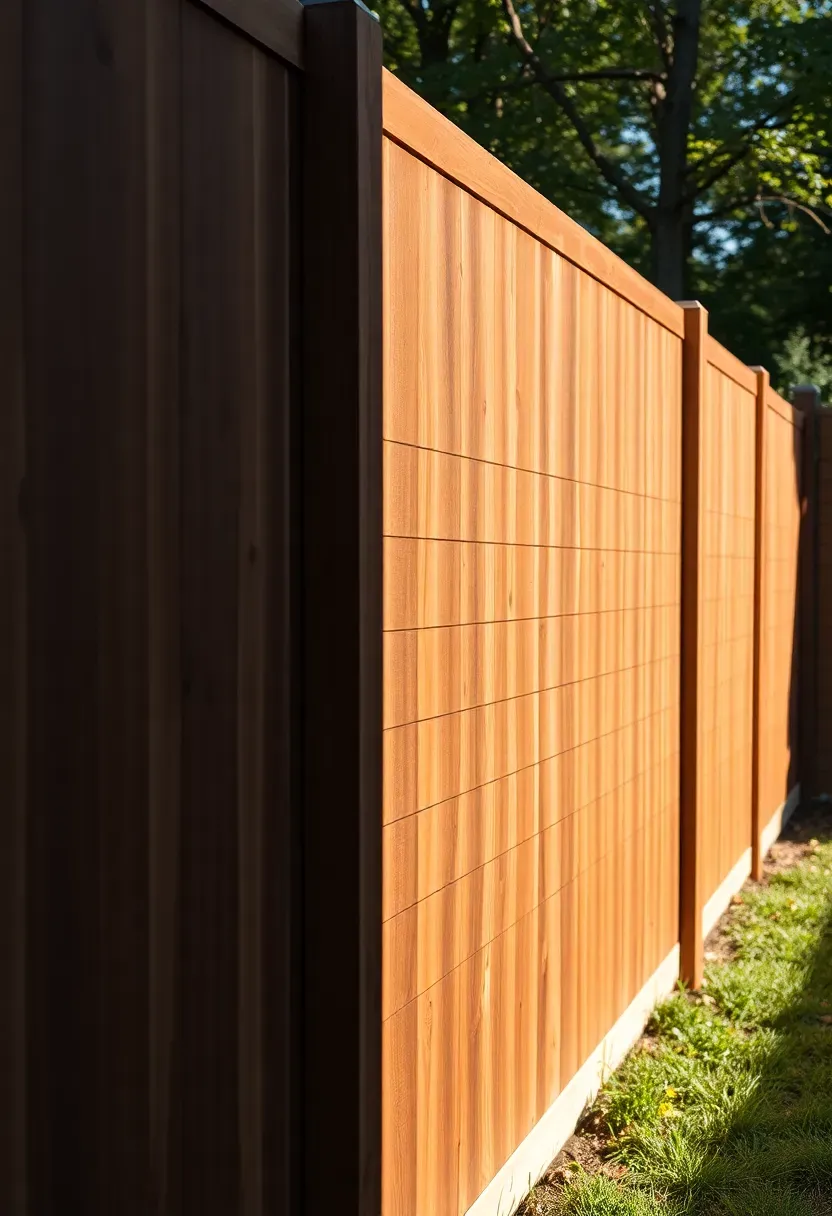
6. Privacy Fence Makeover
Replacing a worn chain-link or picket fence with a 6-foot horizontal cedar fence changes the feel of a backyard more than almost any other single project. Horizontal boards spaced with 1/4-inch gaps give a modern look while still allowing airflow. Use 4x4 posts set 6 feet on center in concrete, with 2x4 horizontal rails behind the boards. Apply a semi-transparent stain before installation — it is far easier to coat boards flat on sawhorses than up on the fence. Material cost for a 100-linear-foot run is approximately $2,500 to $3,500 depending on board width and stain choice.
Steps
- Pull old fence and posts, fill holes with compacted gravel
- Set new posts plumb in concrete, let cure 48 hours
- Attach 1x6 cedar boards horizontally with stainless steel screws to prevent rust staining
Watch out
- Confirm property lines before building — a survey costs $300 to $500 but avoids neighbor disputes
- Check if your HOA or city requires permits for fences over 4 feet
Recommended
Items for this idea
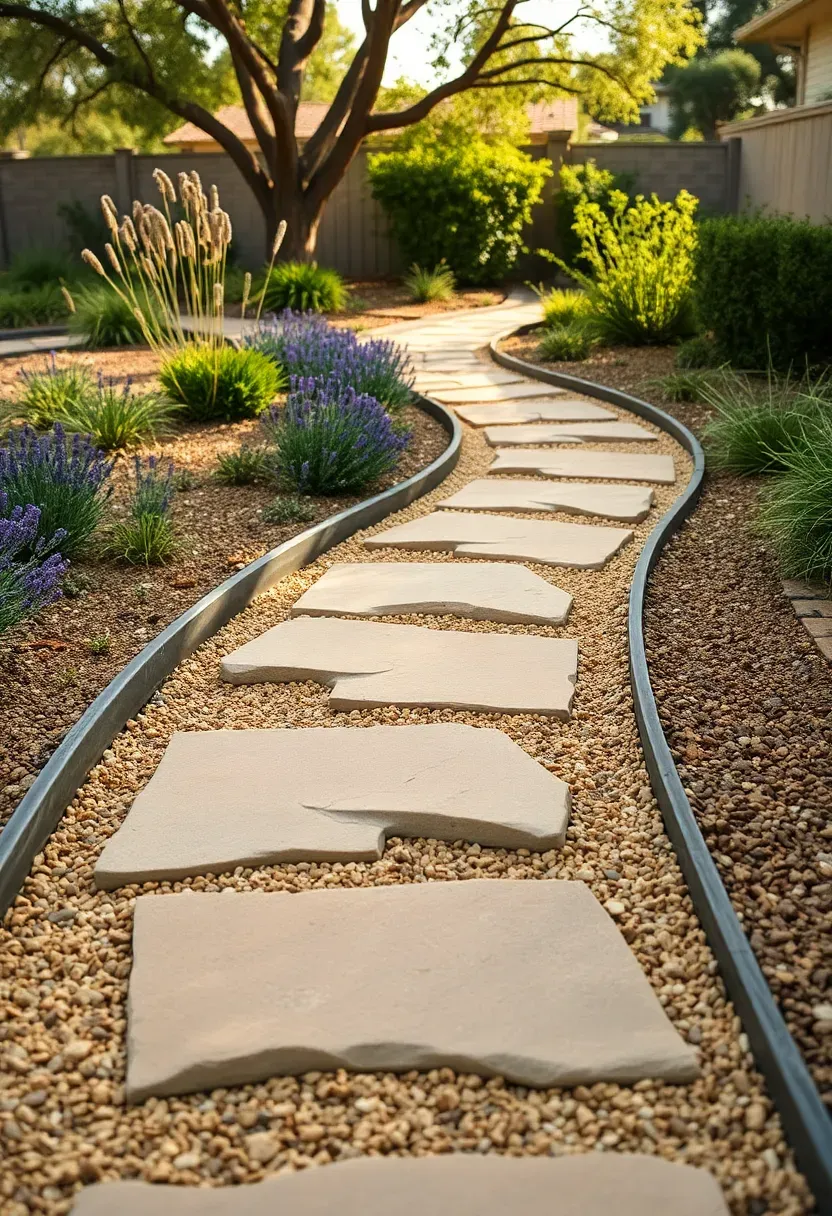
7. Gravel and Stepping Stone Pathway
A pathway does two things at once: it protects your lawn or garden beds from foot traffic, and it guides visitors through the yard in a deliberate sequence. Decomposed granite (DG) compacts into a firm surface that drains well, and setting irregular flagstone slabs into it at stride-length intervals gives a natural, unhurried feel. A 3-foot-wide path costs about $3 to $6 per linear foot for DG and stone combined. Pin the edges with steel landscape edging to keep gravel from migrating into adjacent beds.
Tips
- Space stepping stones at 24 to 26 inches center-to-center for a comfortable adult stride
- Set stones 1/2 inch above the gravel surface so they read as distinct rather than buried
- Avoid white gravel — it glares in sun and shows every leaf and twig
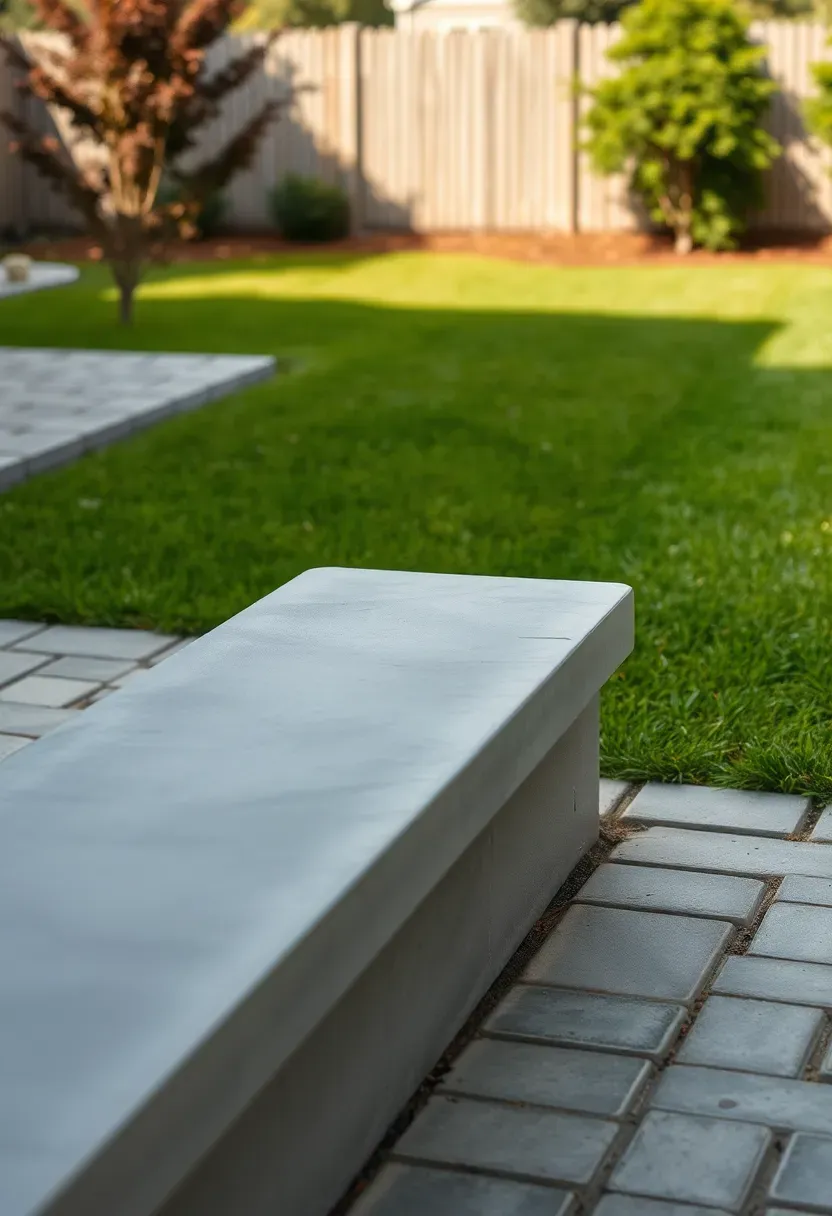
8. Built-in Concrete Bench
Why concrete instead of wood
Wood benches need re-staining every year or two, and even cedar eventually cracks and grays. A poured concrete bench is permanent. It gains character rather than deteriorating. You can form one in a weekend using 2x4 lumber forms, standard 4000-PSI concrete mix, and rebar reinforcement.
How to do it
Build a three-sided box form, line it with polyethylene sheeting for a smooth release, place two lengths of #4 rebar along the span, and pour. For a bench that is 8 feet long, 18 inches deep, and 4 inches thick, you need about 4 bags of 80-pound mix. Strip the form after 48 hours and cure under plastic for a week. Total material cost: under $80.
Choose this if
- You want seating that never needs maintenance
- Your patio design favors a minimal, architectural look
- You plan to add cushions seasonally but want the seat usable bare year-round
Recommended
Items for this idea
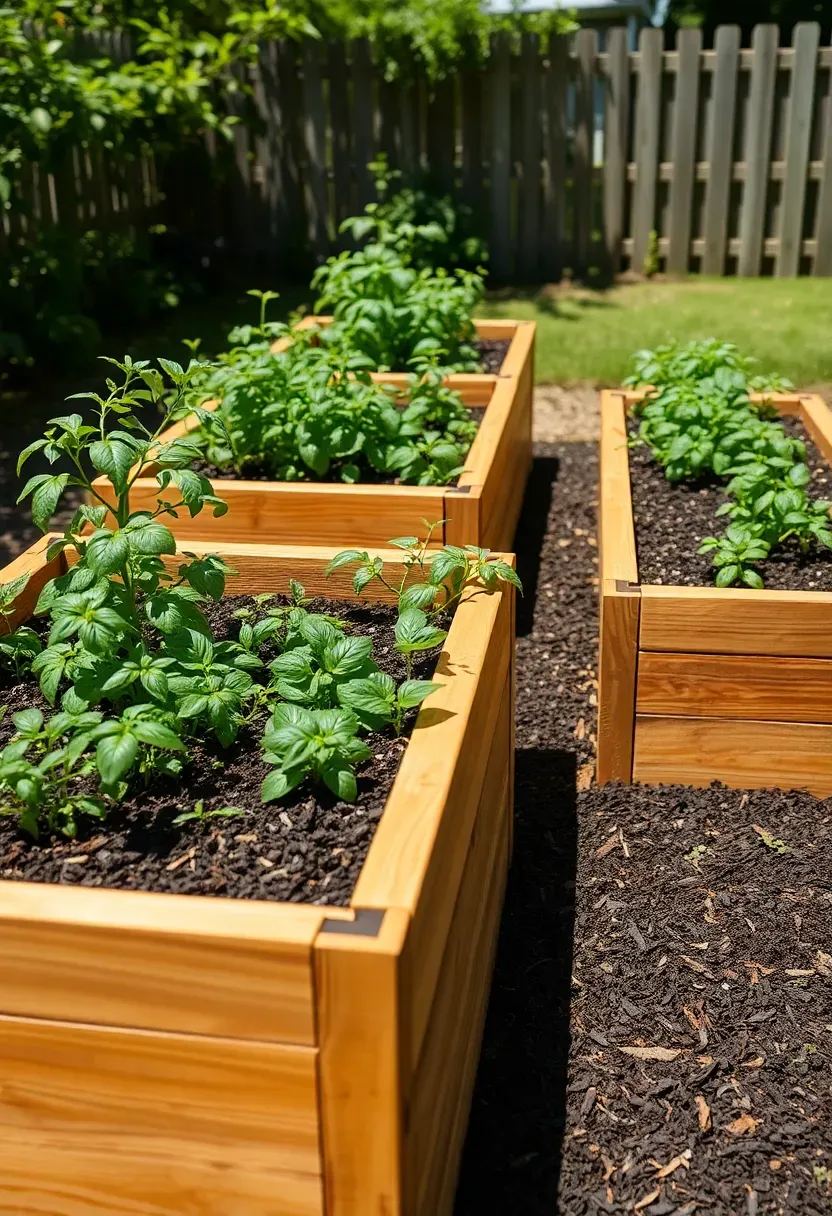
9. Raised Planter Beds
Raised beds solve drainage problems, keep soil warm earlier in spring, and let you control what is in the growing mix rather than fighting your native clay or sand. Build 4x8-foot frames from 2x10 cedar boards — cedar is naturally rot-resistant and avoids the chemical leaching concern of pressure-treated lumber near food plants. Fill with a 60/30/10 blend of topsoil, compost, and perlite. Elevating the soil 10 to 12 inches also reduces bending, which matters if you garden regularly. Each bed costs about $120 to $180 in lumber and hardware, plus $50 to $80 for soil fill.
Tips
- Orient beds north-south so both sides receive equal sunlight through the day
- Line the bottom with hardware cloth to keep burrowing pests out
- Space beds 30 inches apart for comfortable access with a wheelbarrow
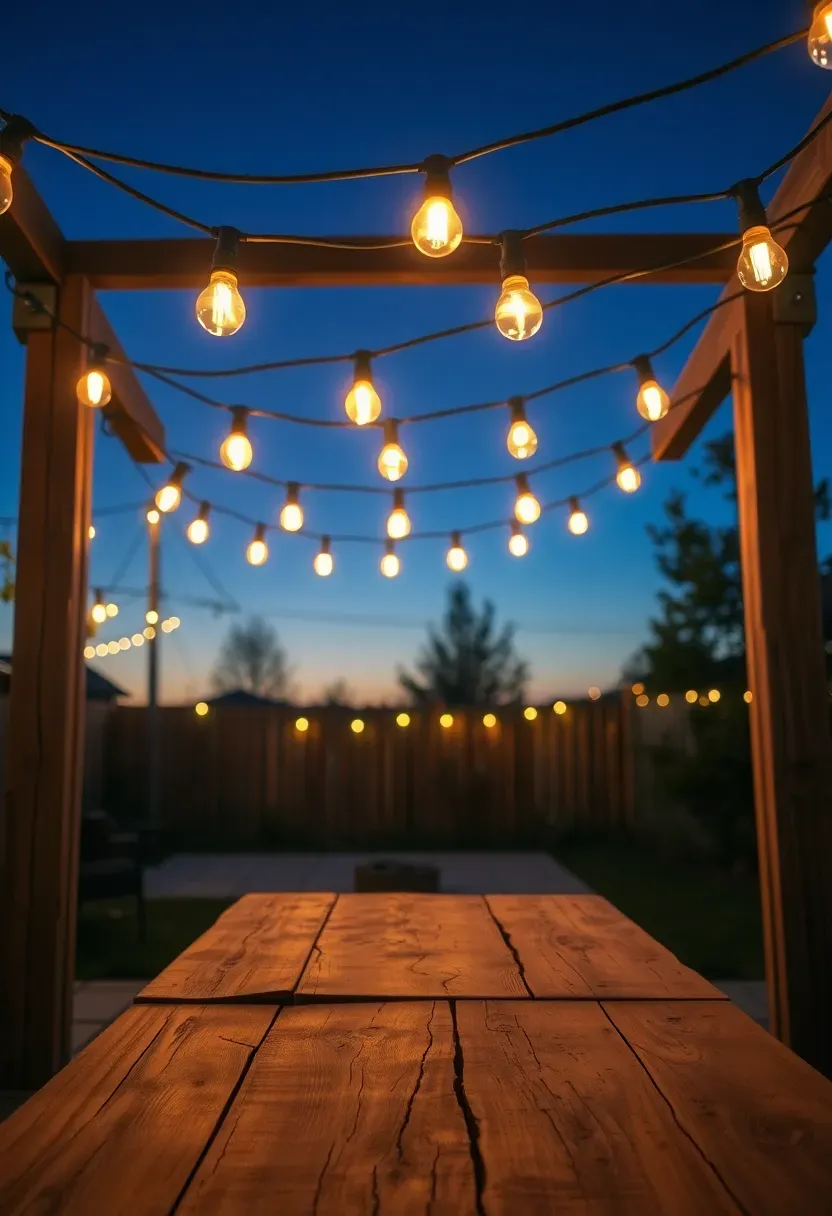
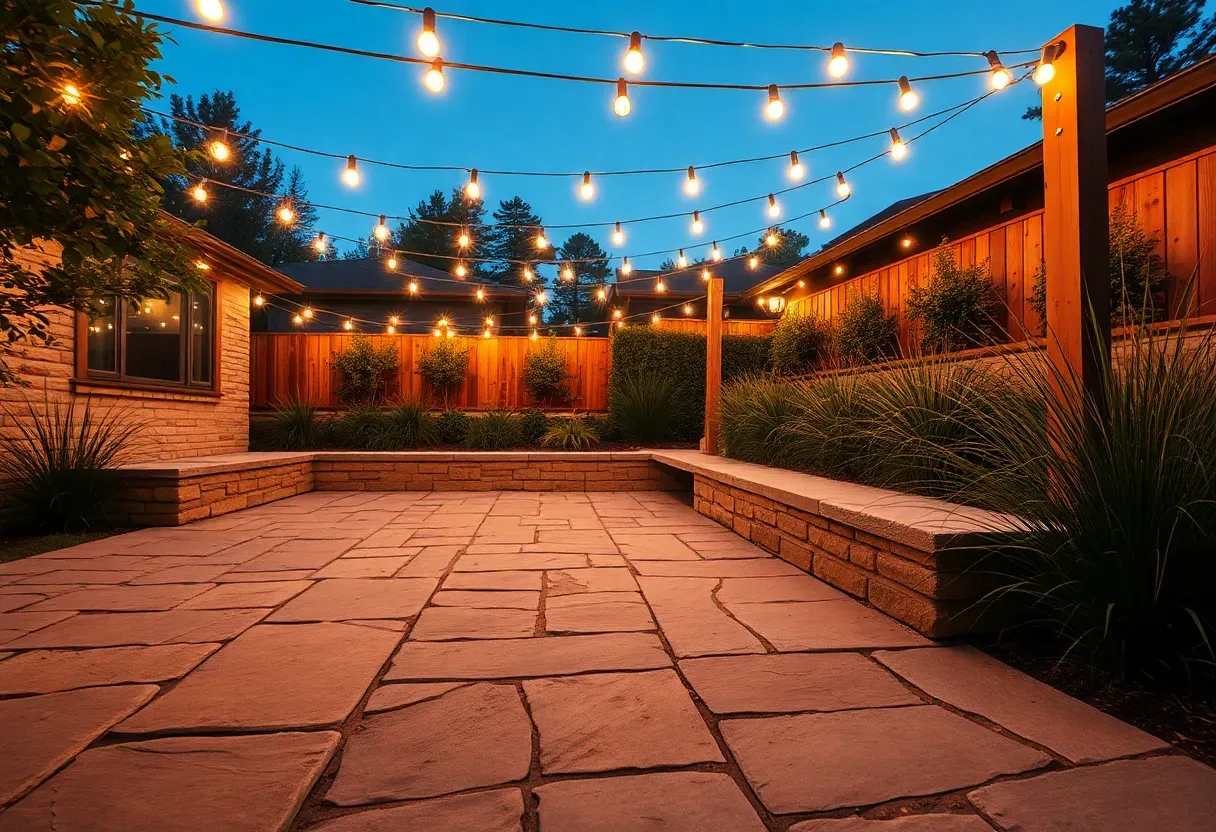
10. String Light Canopy
This is the highest-impact, lowest-cost backyard renovation I know. Commercial-grade string lights with shatterproof LED bulbs strung between 4x4 wood posts or existing structures completely change the mood of an outdoor space after dark. Run 14-gauge outdoor-rated cable in parallel lines spaced 3 to 4 feet apart, anchored with screw-in hooks at each end. A 20x20-foot canopy uses about 200 feet of lights and costs $80 to $150 total.
Steps
- Set two or more 10-foot 4x4 posts in concrete with eye bolts at the top
- Run galvanized guide wire between posts, then drape light strings along the wire
- Connect to a weatherproof outlet with a photocell timer so lights turn on at dusk automatically
Watch out
- Do not use indoor-rated extension cords outside — they degrade in UV and moisture
- Keep the lowest point of the string at least 8 feet above ground for head clearance
Recommended
Items for this idea
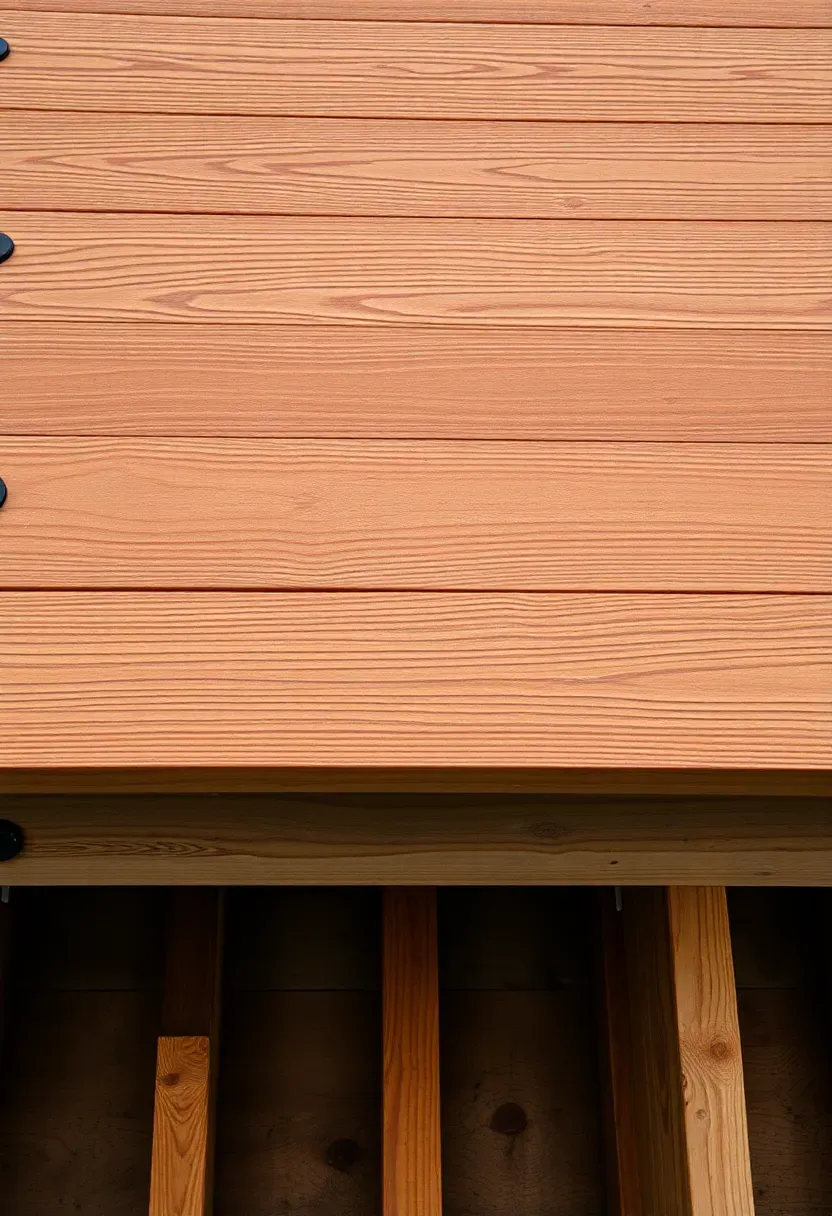
11. Deck Resurfacing with Composite
If your deck framing is still solid but the surface boards are splintering, warping, or fading, you can tear off the old decking and lay composite boards on the existing joists. Composite costs more upfront — $4 to $8 per linear foot for mid-range brands like Trex Select or TimberTech Edge — but you skip sanding, staining, and sealing forever. Hidden clip fasteners create a clean look without exposed screw heads. Most 12x16-foot decks can be resurfaced in two days by two people.
Tips
- Check joist spacing: most composite boards require 16-inch on-center or closer for residential spans
- Leave 1/8-inch gap between board ends for expansion — composite moves more than wood with temperature changes
- Replace any joist that shows soft spots, darkened wood, or insect damage before laying new surface

12. Water Feature with Recirculating Pump
The appeal
Moving water adds a sound layer that masks street noise and neighbor conversations. Even a modest pondless waterfall — where water disappears into a gravel-filled reservoir and recirculates — creates enough ambient sound to make a backyard feel private.
How to build it
Dig a 3x3-foot basin, line it with EPDM rubber liner, and fill with washed river rock. Set a submersible 1,200-GPH pump in the basin, run the tubing up to a natural stone spillway, and let gravity do the rest. Total materials run $250 to $500 depending on stone choice. The pump draws about 100 watts — comparable to a light bulb.
Watch out
- Add a check valve on the tubing to prevent backflow draining the basin when the pump shuts off
- Top off the basin every week in hot weather — evaporation pulls about 2 inches per week in summer
Recommended
Items for this idea
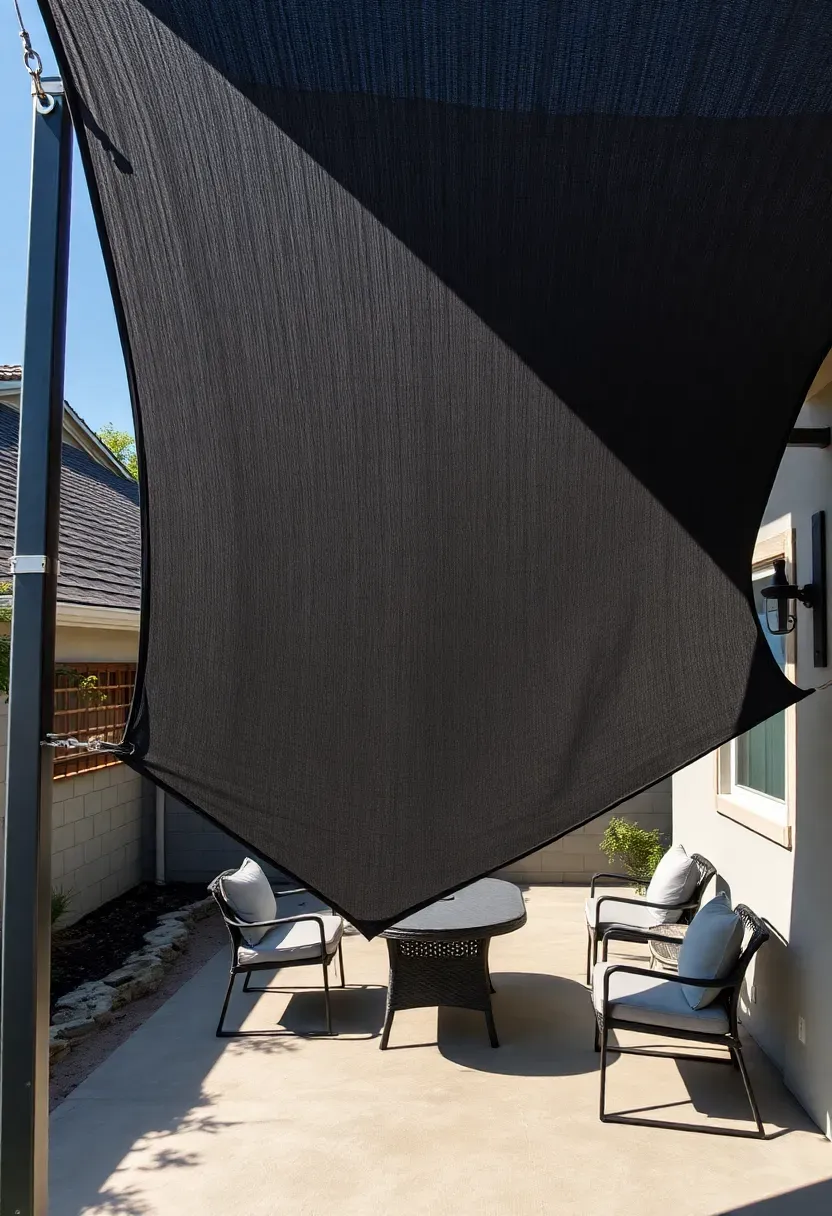
13. Shade Sail Setup
Shade sails cost a fraction of a pergola and install in an afternoon. A 12x12-foot triangular sail in commercial-grade HDPE fabric blocks 85 to 95 percent of UV while letting air move through. Mount points can be house wall brackets, steel posts set in concrete, or existing tree trunks (use lag bolts with tree-safe washers). Tension is the key — a saggy sail looks sloppy and collects rain. Use turnbuckles at each corner to pull the fabric taut after installation. Budget $80 to $200 for the sail and $50 to $100 for hardware.
Tips
- Angle one corner lower than the others so rainwater runs off rather than pooling in the center
- Remove sails before heavy wind events — they act like parachutes and can rip mounting hardware out
- Layer two overlapping sails at different angles for larger coverage and visual interest
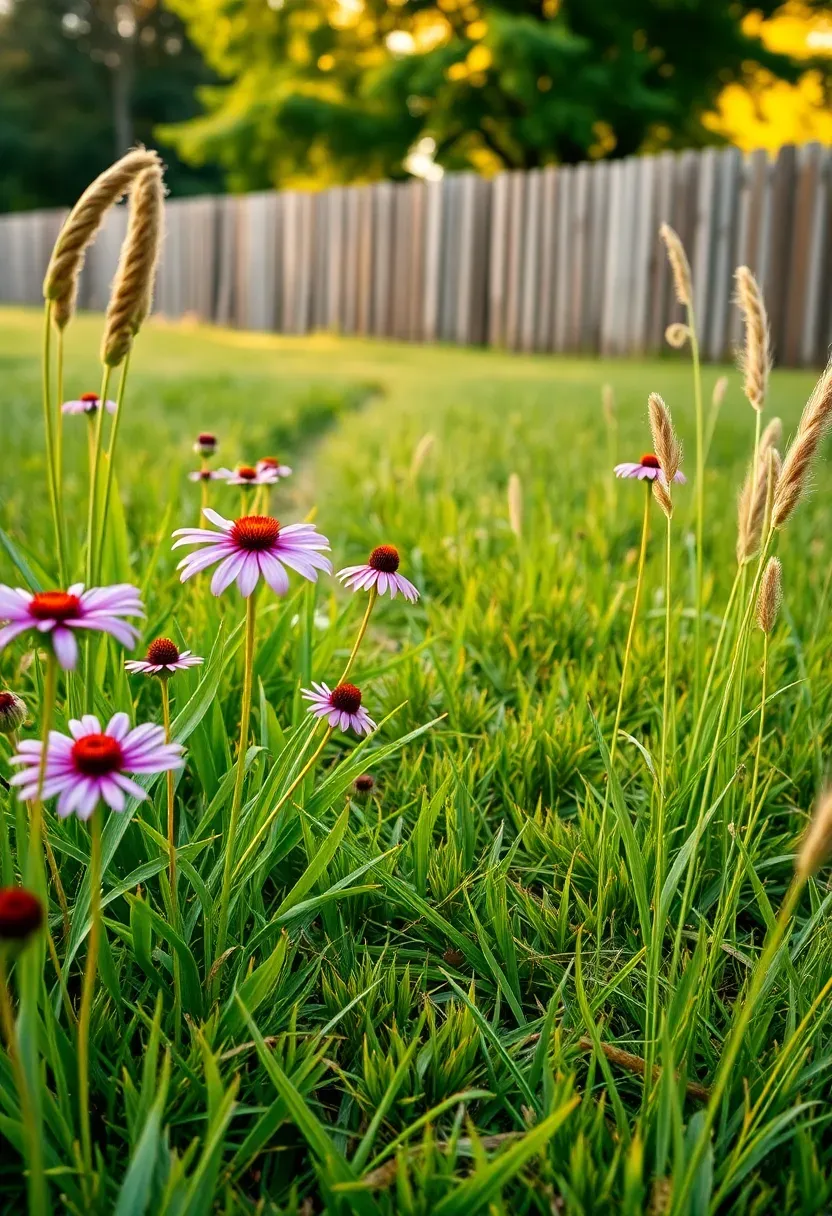
14. Turf-to-Meadow Conversion
The problem with lawns
Maintaining turf grass costs the average homeowner 40 to 60 hours and $500 to $800 per year in mowing, watering, fertilizing, and weed treatment. And a monoculture lawn supports almost no pollinators or beneficial insects.
The solution
Sheet-mulch the existing lawn with cardboard and 4 inches of wood chip mulch in fall, then direct-seed a regional wildflower and native grass mix the following spring. Within two seasons you get a meadow that needs mowing only once or twice a year. Seed mixes from Prairie Moon Nursery or Ernst Seeds cost $40 to $80 per 1,000 square feet.
Pros and cons
- Pro: Dramatic reduction in maintenance time and water use
- Pro: Attracts butterflies, bees, and ground-nesting birds
- Con: Looks messy during the first establishment year — neighbors may complain
Recommended
Items for this idea
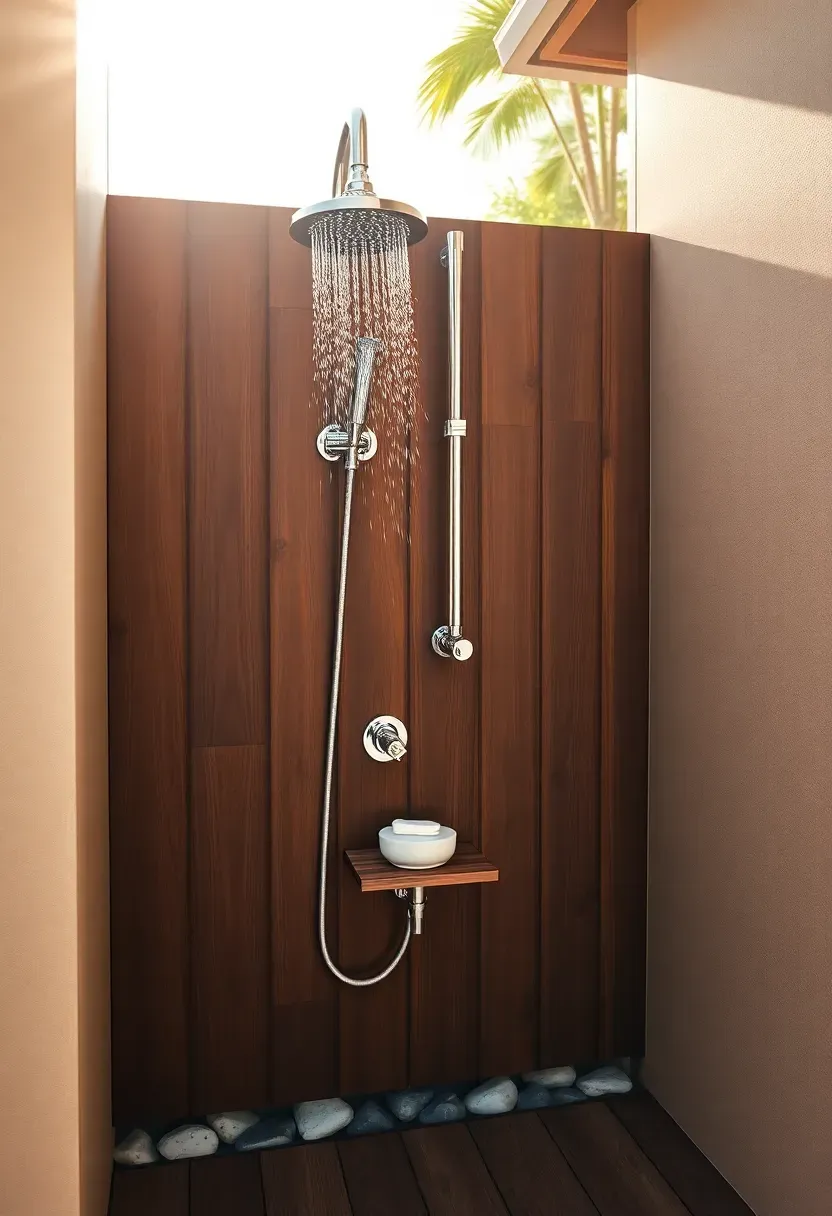
15. Outdoor Shower Station
An outdoor shower near a pool, hot tub, or garden makes rinsing off fast and keeps dirt out of the house. A simple setup uses a standard frost-proof hose bib, a diverter valve, and a wall-mounted showerhead on a 7-foot riser. Mount it on a cedar or IPE privacy screen for a finished look. Drainage goes into a dry well — a 3-foot-deep hole filled with crushed stone — rather than plumbed into the sewer. Total cost including lumber and plumbing fittings runs $200 to $450.
Tips
- Use a hot/cold mixing valve if you want warm water — run a hot water line from the nearest interior wall
- Lay teak deck tiles or smooth river stones at the base for barefoot comfort
- Add a towel hook and small shelf for soap within arm's reach
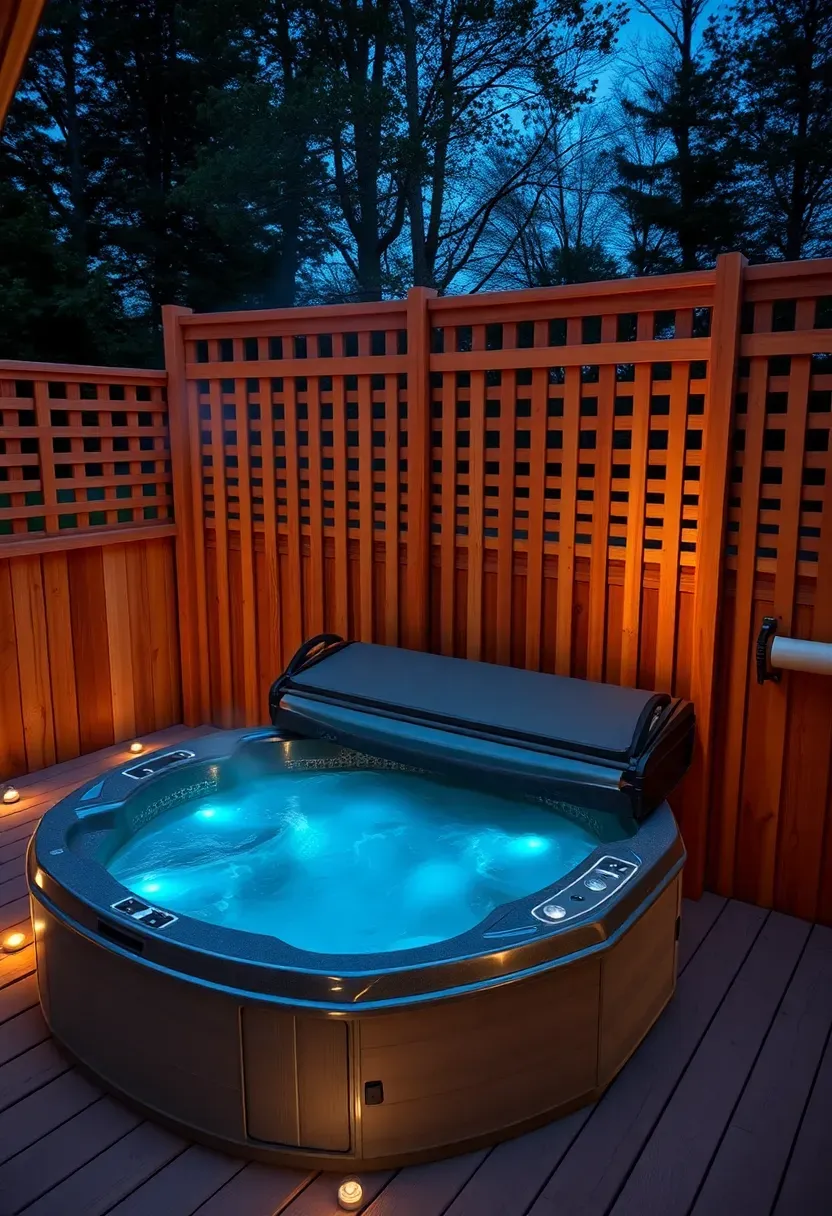
16. Hot Tub Pad with Screening
Dropping a hot tub directly on a lawn sinks and tilts within months. You need a level pad — either a 4-inch reinforced concrete slab or a compacted gravel base topped with concrete pavers. Size the pad 2 feet wider than the tub on all sides for access and a step. Surround two or three sides with a lattice or horizontal-slat privacy screen at 5 to 6 feet tall. This blocks sightlines without creating a wind tunnel. Run a dedicated 50-amp GFCI electrical circuit for a 240-volt tub — this is not optional and must be done by a licensed electrician.
Tips
- Grade the pad away from the tub so splashed water drains to the yard, not under the tub
- Hinge one screen panel for equipment access on the plumbing side
- Plant evergreen shrubs outside the screen for year-round visual softening
Recommended
Items for this idea
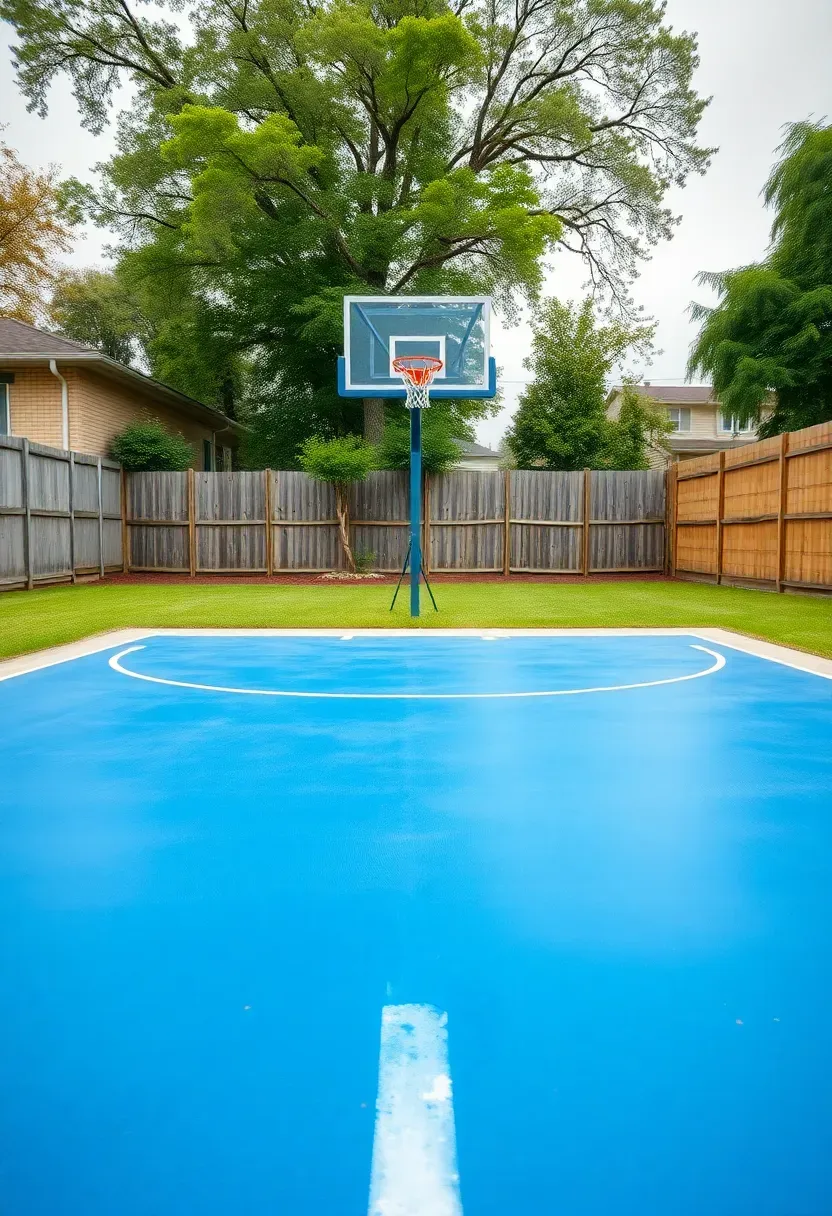
17. Sport Court on a Budget
You do not need a full-size regulation court to play pickleball, basketball, or four-square in your backyard. A 20x30-foot concrete slab — poured 4 inches thick with fiber-mesh reinforcement — gives you enough space for a half-court setup. Paint lines with acrylic sport court paint ($60 per gallon, two coats). Mount a wall-anchored or pole-mounted basketball hoop at the end. Total project cost: $2,000 to $4,500 for the slab, paint, and hoop depending on site prep.
Steps
- Excavate and compact 4 inches of crushed gravel base with a 1% slope for drainage
- Form and pour 4-inch slab with control joints every 8 to 10 feet
- Let cure 28 days, then clean, prime, and paint court lines with a stencil kit
Watch out
- Noise carries — place the court away from bedroom windows and neighboring houses if possible
- Add a ball-stop net along open sides to keep balls out of garden beds and the street
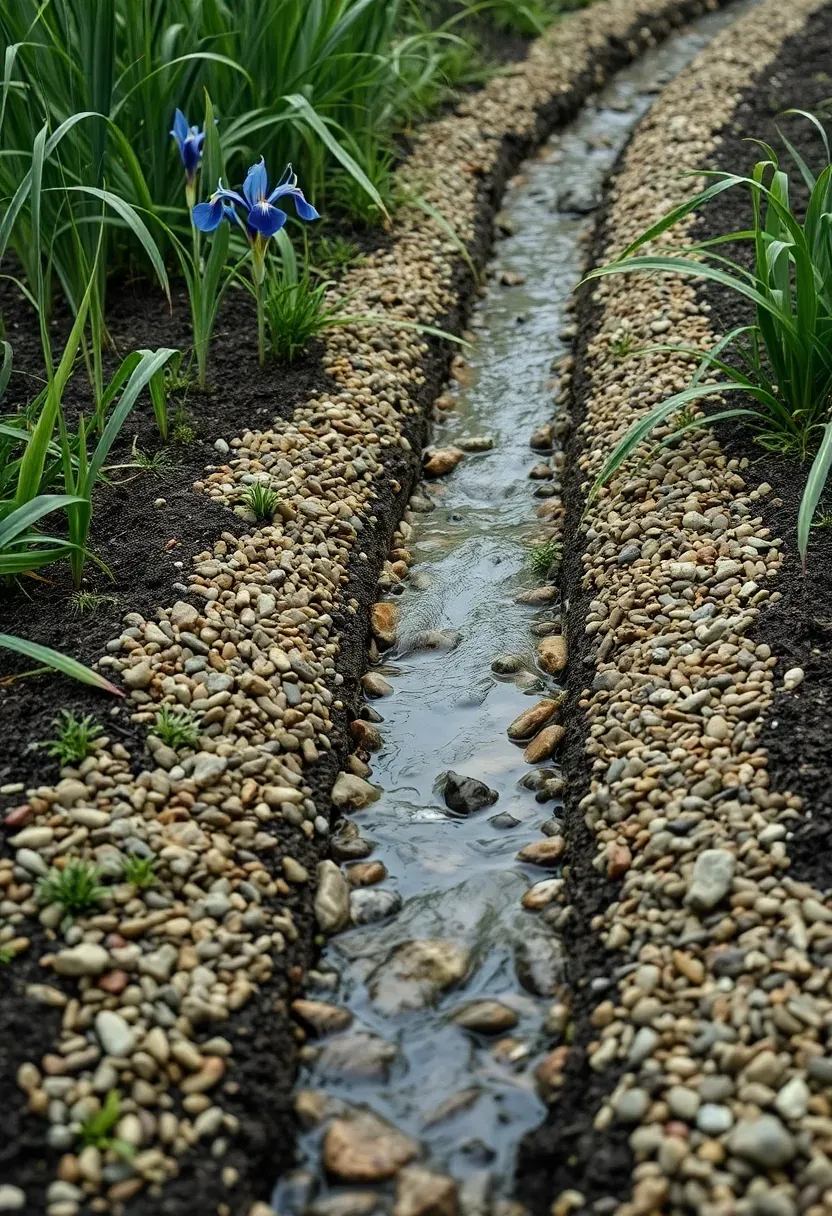
18. Drainage Swale Garden
Standing water after rain is one of the most common backyard problems, and a planted drainage swale fixes it while looking intentional. Dig a shallow channel — 6 to 12 inches deep and 2 to 3 feet wide — along the natural low point of your yard. Line the bottom with 3 inches of washed gravel and plant the sides with moisture-tolerant species like switchgrass, blue flag iris, and sedge. Water flows along the swale during rain, slows down in the gravel, and percolates into the soil rather than pooling.
Tips
- Direct the swale toward a rain garden basin or the street — never toward your foundation
- Slope the channel at 1 to 2 percent grade for slow, controlled flow
- Avoid lining with plastic — the goal is infiltration, not channeling water to a single discharge point
Recommended
Items for this idea
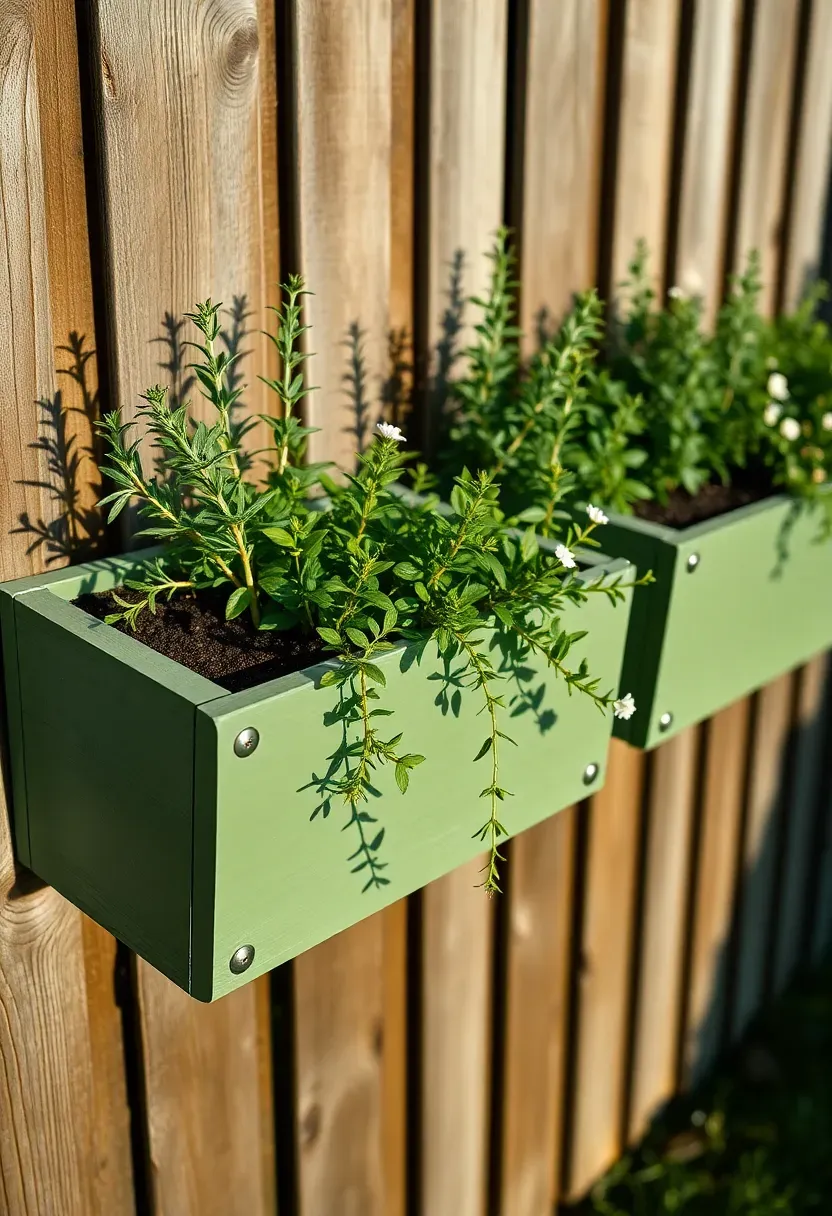
19. Fence-Mounted Planters
Vertical growing space along your fence line is free square footage that most people ignore. Cedar or composite planter boxes mounted with deck screws directly to fence boards add greenery at eye level, which makes a small yard feel fuller. Build boxes 6 inches deep and 24 to 30 inches long from 1x6 cedar — that is enough volume for herbs, lettuces, strawberries, or trailing flowers. Drill drainage holes in the bottom and line with landscape fabric to hold soil.
Tips
- Attach boxes to the inside of the fence so they do not extend into a neighbor's yard
- Limit weight to what the fence can handle — a 30-inch box full of wet soil weighs roughly 25 to 30 pounds
- Group herbs near the kitchen door for easy harvest while cooking
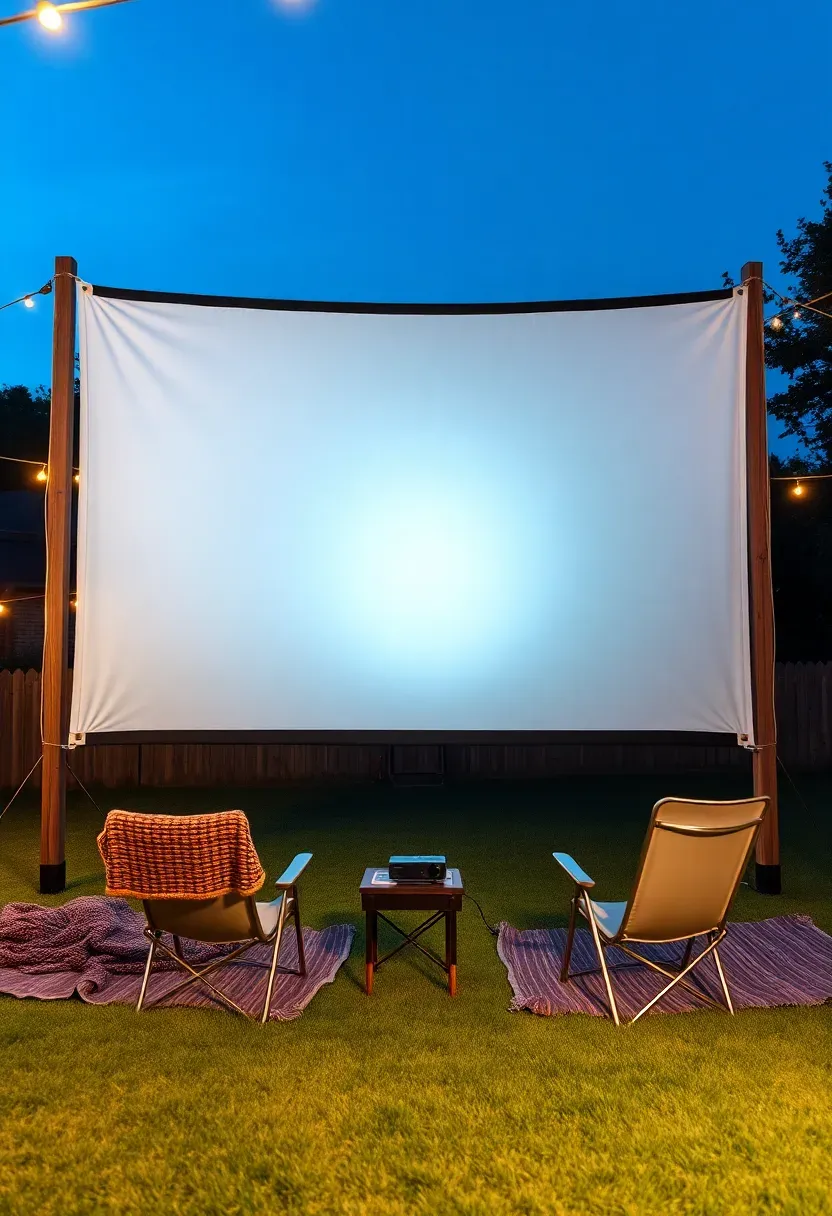
20. Outdoor Movie Wall
The simple version
Hang a 120-inch white blackout fabric screen between two posts or from a pergola beam. Pair it with a $150 to $300 portable projector (1080p is plenty for outdoor use) and a Bluetooth speaker. That is the entire setup. Total cost: $250 to $500.
Making it better
Build a permanent frame from 2x3 lumber wrapped in white spandex — this creates a drum-tight surface that does not ripple in wind. Mount the projector under a roof overhang or pergola to keep it dry. Run a dedicated outdoor outlet behind the screen location for clean cable management.
Choose this if
- You host gatherings regularly and want a low-cost entertainment feature
- Your backyard has a dark corner away from streetlights — projectors need darkness to look good
- You want something kids and adults both actually use rather than a decorative feature that sits idle
Recommended
Items for this idea
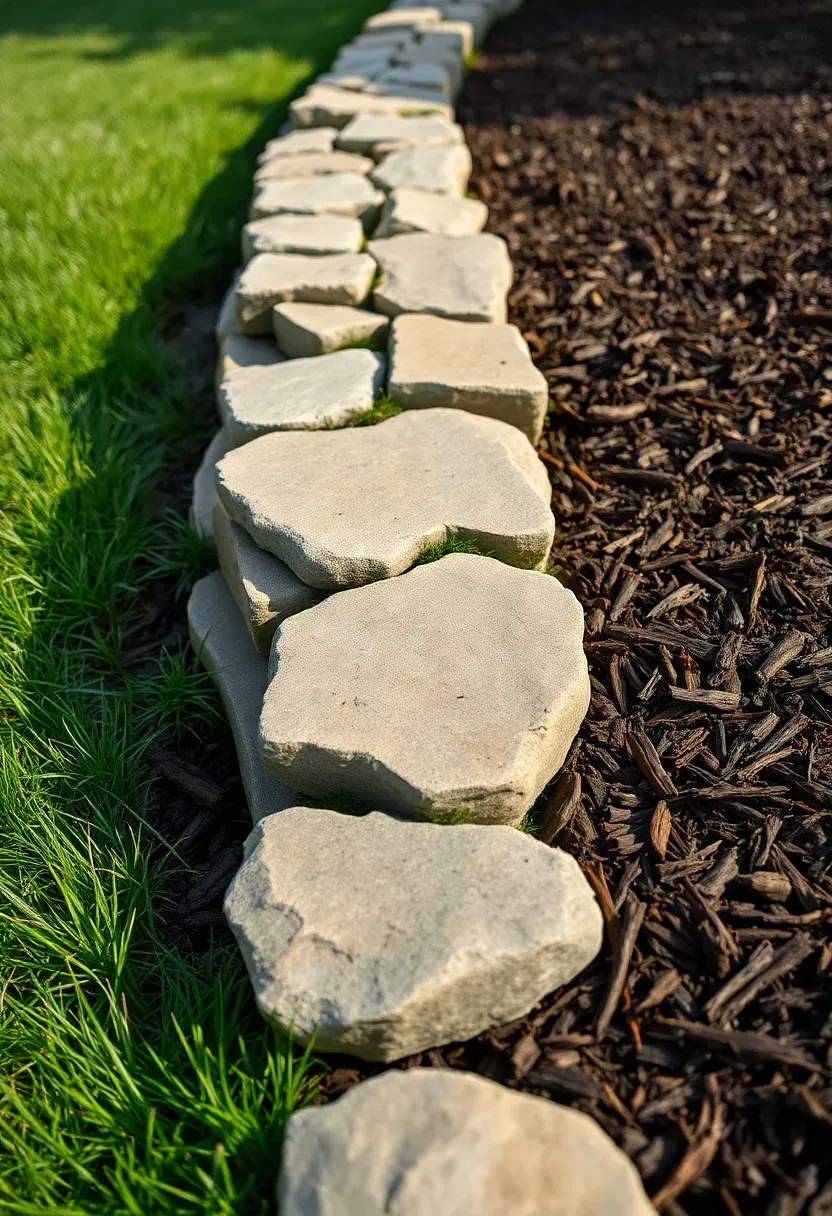
21. Dry-Stack Stone Border
Dry-stacked stone edging between lawn and garden beds is the oldest landscaping technique for a reason — it requires no mortar, adjusts to settling ground, and looks better with age as moss and lichen colonize the surface. Use locally sourced fieldstone or flat quarry stone in irregular shapes. Stack two to three courses high (8 to 12 inches total) and batter the wall slightly inward for stability. A 50-linear-foot border uses about 1 to 1.5 tons of stone, which runs $150 to $300 from a local quarry or landscape supply yard.
Tips
- Place the largest, flattest stones on the bottom course for a stable foundation
- Offset vertical joints between courses — same stacking rule as brickwork
- Fill gaps between stones with soil and tuck in creeping thyme or stonecrop for a planted look
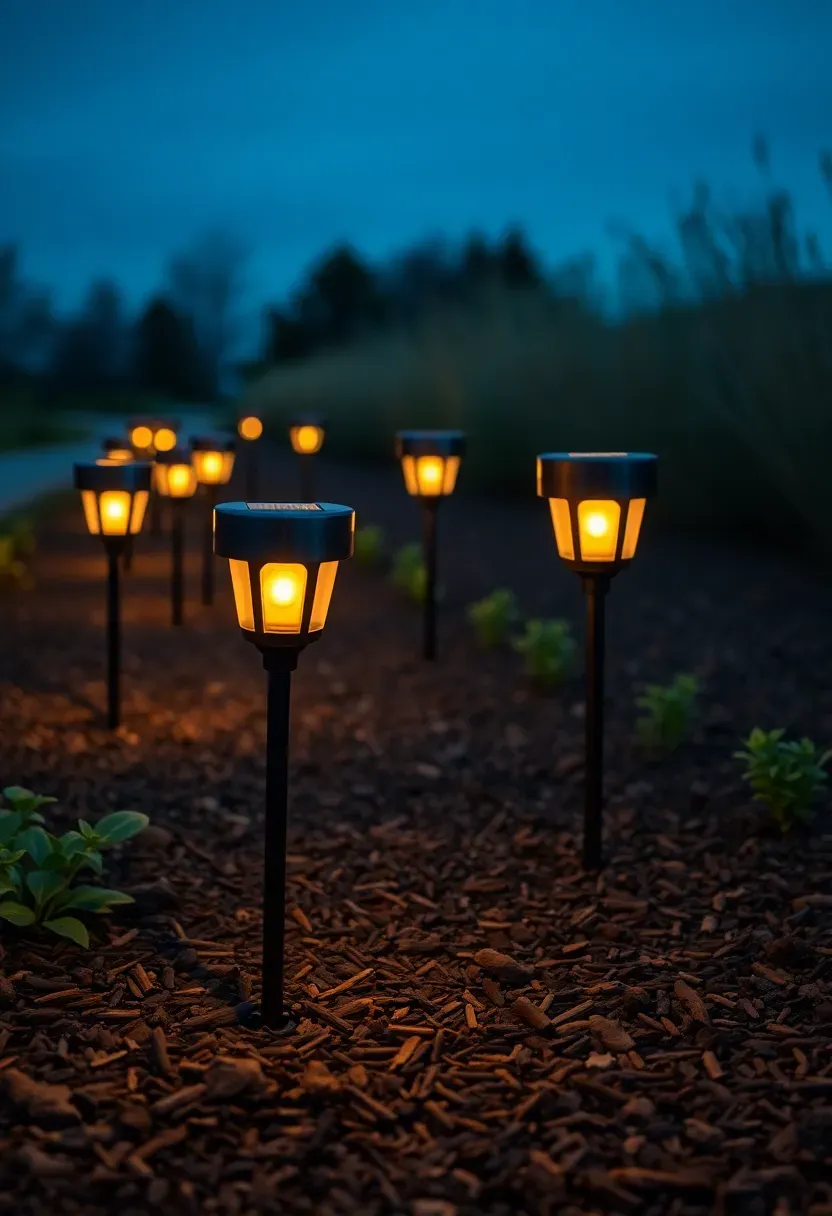
22. Solar Path Lighting
Solar path lights have improved dramatically in the past five years. Current models with lithium-ion batteries and warm-white LEDs (2700K to 3000K) run 8 to 10 hours on a full charge and actually produce enough light to see where you are walking. Place them 6 to 8 feet apart along pathways, drive edges, or bed borders. Stake-mount versions require zero wiring — push them into the ground and they work the same evening. A set of 10 quality solar path lights costs $40 to $90.
Tips
- Position solar panels where they receive at least 6 hours of direct sun — shaded units barely charge
- Choose fixtures with a warm color temperature; cool white (5000K+) looks harsh and institutional outdoors
- Replace rechargeable batteries every 2 to 3 years when run time drops noticeably
Recommended
Items for this idea
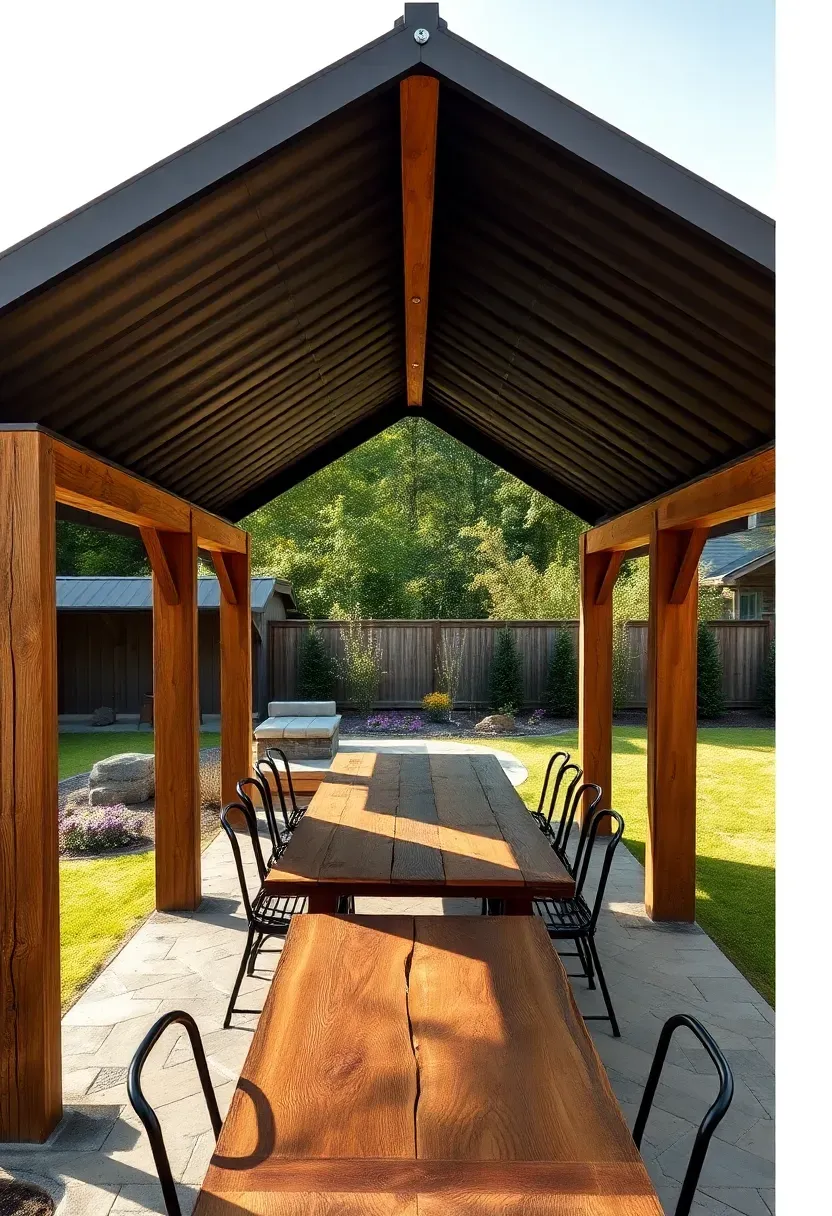
23. Covered Dining Pavilion
A pavilion is a pergola with a real roof — and that roof is what makes it usable in rain, intense sun, and even light snow. Build with 6x6 posts, 2x10 ridge beam, and 2x6 rafters covered with standing-seam metal roofing panels. A 12x16-foot pavilion shelters a table that seats eight comfortably. Budget $3,000 to $6,000 for materials depending on roofing choice and lumber species. Unlike a pergola, a roofed pavilion usually requires a building permit because it is classified as a permanent structure.
Steps
- Pour concrete pier footings at each post location, sized per local code
- Frame the roof with a simple gable or single-slope pitch of at least 3:12 for water runoff
- Install metal roofing panels with rubber-gasketed screws and flash all edges to prevent leaks
Watch out
- Check setback requirements — most jurisdictions require 5 to 10 feet from property lines for roofed structures
- Plan for electrical rough-in during framing if you want a ceiling fan or pendant light later
Quick FAQ
How much does a full backyard renovation cost? Costs vary wildly based on scope. A basic refresh — new patio, fresh fence, and lighting — typically runs $5,000 to $12,000 in materials for a DIY approach. Hiring contractors for grading, concrete, and electrical pushes a mid-range renovation to $20,000 to $50,000. Start with the highest-impact project first and phase the rest over time.
Which backyard renovation adds the most home value? Hardscaping — patios, retaining walls, and outdoor kitchens — consistently returns more at resale than soft landscaping. A well-built patio and outdoor kitchen can recoup 50 to 70 percent of cost, while plantings and lawn upgrades return less because buyers perceive them as maintenance obligations.
Can I renovate my backyard myself? Most of these projects are DIY-friendly if you have basic tools and a free weekend. Exceptions include electrical work for hot tubs and outdoor kitchens (hire a licensed electrician), retaining walls over 4 feet (need engineering), and any project requiring a building permit — pulling permits yourself is fine, but inspections require the work to meet code.
When is the best time of year to start a backyard renovation? Early spring or late fall in most climates. Concrete and mortar need temperatures above 40 degrees F to cure properly, and planting is best done when roots have time to establish before summer heat. Avoid starting major earthwork during your area's rainy season — moving wet soil compacts it and ruins drainage.
Do I need permits for backyard renovation projects? Fences over 4 feet, roofed structures, electrical circuits, and retaining walls above a certain height (usually 4 feet) typically require permits. Patios at grade, raised beds, and lighting generally do not. Call your local building department before starting — it takes five minutes and can save you from a code violation.
A backyard renovation does not have to happen all at once. Pick the project that will change how you use your yard the most — for many people that is a patio or a fire pit — and do it well. Live with it for a month. You will quickly see what the yard needs next. The 23 ideas above cover enough ground that you can keep improving the space for years without repeating yourself or running out of meaningful upgrades.
Pinterest cover for 23 Backyard Renovation Ideas
About the author
OBCD
CGI visualization and interior design content. We create detailed 3D renders and curate practical design ideas for every room in your home.