17 Backyard Floor Ideas for Every Budget
Last spring I ripped out a cracked concrete slab that had been slowly heaving for five years. Underneath was decent compacted soil, and I suddenly had options. Brick pavers? Gravel? Wood deck? Stained concrete? The choice of backyard flooring shapes everything — how furniture sits, how water drains, how hot the surface gets on bare feet in August. After testing four different materials across my own yard and helping neighbors with theirs, I put together these 17 backyard floor ideas. They range from a Saturday afternoon gravel pour to a full contractor-grade paver installation.
Here you will find everything from budget-friendly loose materials to premium hardscape surfaces, grouped so you can compare cost, durability, and installation difficulty side by side.
Table of Contents
- Pea Gravel Patio
- Stamped Concrete
- Brick Paver Herringbone
- Decomposed Granite
- Porcelain Outdoor Tiles
- Reclaimed Wood Deck
- Flagstone with Ground Cover
- Poured Concrete with Saw-Cut Joints
- Composite Deck Boards
- Interlocking Rubber Pavers
- Travertine Pavers
- Artificial Turf
- River Rock Mosaic
- Cobblestone
- Stenciled Concrete
- Cedar Deck Tiles
- Mixed Material Zoning
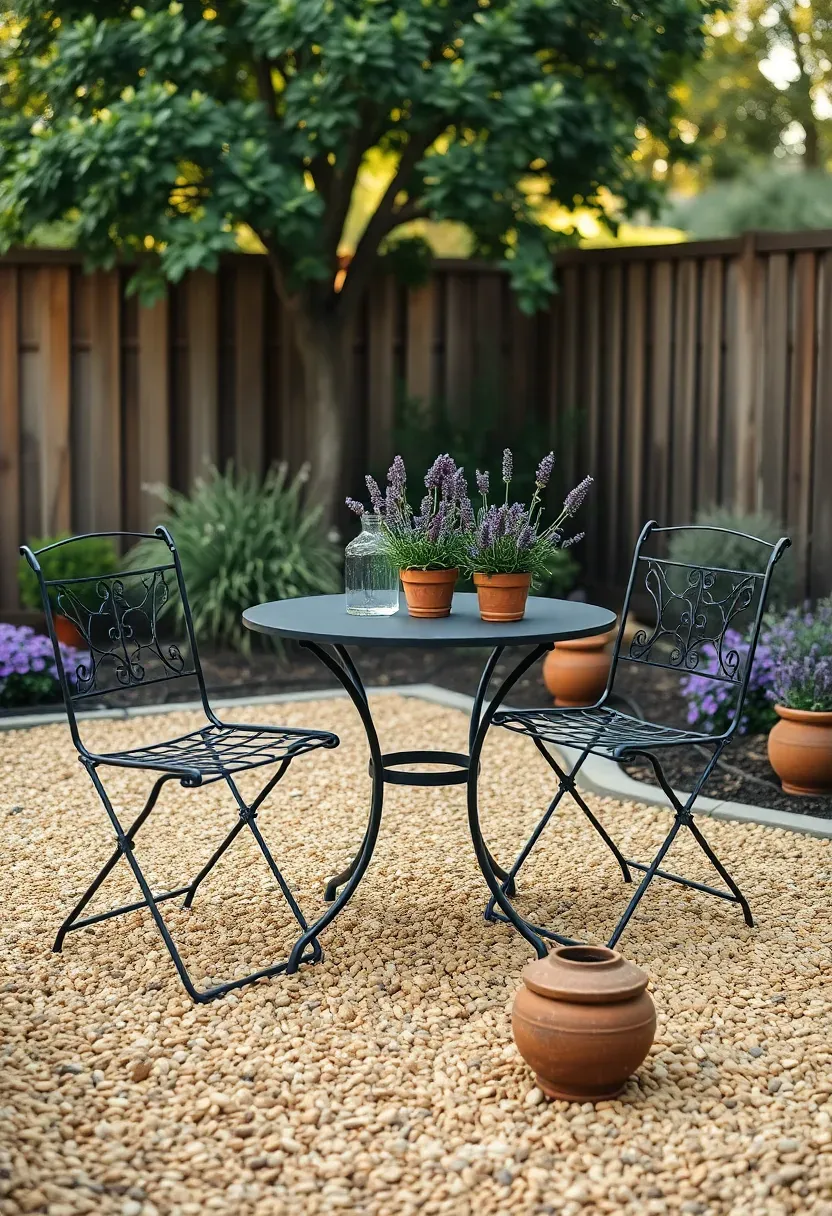
1. Pea Gravel Patio
Pea gravel is the fastest way to get a usable patio surface. You can cover a 10x12 area in a single afternoon for under $300 in materials. The small rounded stones — typically 3/8 inch — pack loosely enough for drainage but tightly enough to walk on comfortably in flat shoes. The biggest knock on gravel is migration: stones drift into garden beds and lawn edges unless you install proper borders. Steel landscape edging works best because it holds a clean line year after year without the bowing that plastic edging develops over time.
Tips
- Lay 3-4 inches of gravel over compacted base for a stable surface
- Use angular pea gravel rather than smooth river rock — it locks together better underfoot
- Add stepping stones through high-traffic paths to reduce gravel displacement
We picked a few things that go well with this idea: 3rd Street Inn Slate Stone Tiles (18-Pack) (★4.5), VEVOR Decorative Stepping Stones (8-Pack) (★3.8) and jxgzyy Interlocking Marble Patio Tiles (4-Pack) (★4.8). As an Amazon Associate we earn from qualifying purchases.
2. Stamped Concrete
Why it works
Stamped concrete gives you the appearance of natural stone, brick, or even wood at roughly half the installed cost. A skilled contractor presses patterns into freshly poured concrete and applies color hardener and release agents to create depth and texture.
The tradeoff
The surface looks great for the first 3-5 years, but sealer needs reapplication every 2-3 years. Without it, the color fades and the stamps lose definition. Cracks can also develop if the base wasn't compacted properly or if your soil has significant clay content. Repairs are harder to hide than with individual pavers since matching the stamp pattern and color exactly is nearly impossible.
Pros and cons
- Pro: Covers large areas seamlessly with no weed joints
- Pro: Wide range of patterns from ashlar slate to cobblestone
- Con: Resealing is mandatory maintenance, not optional
We picked a few things that go well with this idea: Plastic Interlocking Deck Tiles (36-Pack) (★4.4), PrimeZone Solid Acacia Wood Deck Tiles (54-Pack) (★4.5) and EchoDeck Interlocking Patio Tiles (44-Pack) (★4.4). As an Amazon Associate we earn from qualifying purchases.
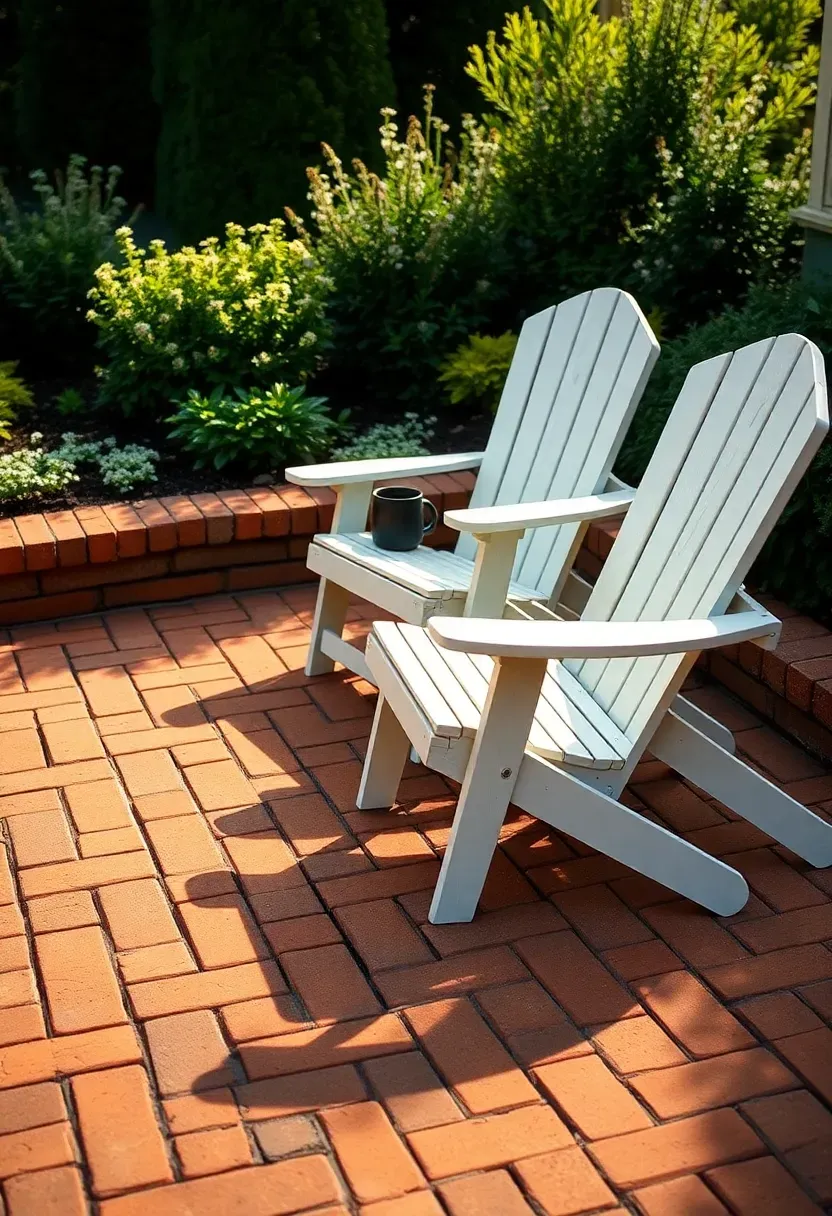
3. Brick Paver Herringbone
Brick pavers in a herringbone pattern create one of the most structurally sound patio surfaces you can build. The interlocking 45-degree or 90-degree angles distribute weight across neighboring bricks, which means less shifting under heavy furniture or foot traffic. Clay brick pavers run about $4-8 per square foot for materials alone, and they develop a subtle patina over the years that concrete pavers never quite match. The color goes all the way through, so chips and scratches blend in rather than revealing a gray core underneath.
Tips
- Set pavers on a 1-inch sand bed over 4 inches of compacted crushed stone base
- Use polymeric sand between joints — it hardens when wet and prevents weed growth
- Herringbone at 45 degrees looks more dynamic than 90-degree herringbone in rectangular spaces
We picked a few things that go well with this idea: Grey Pea Gravel Landscape Rocks (40 lbs) (★4.5), All Purpose Pea Gravel (50 lbs) (★4.2) and Gravel Company Smooth Pea Gravel (40 lbs). As an Amazon Associate we earn from qualifying purchases.
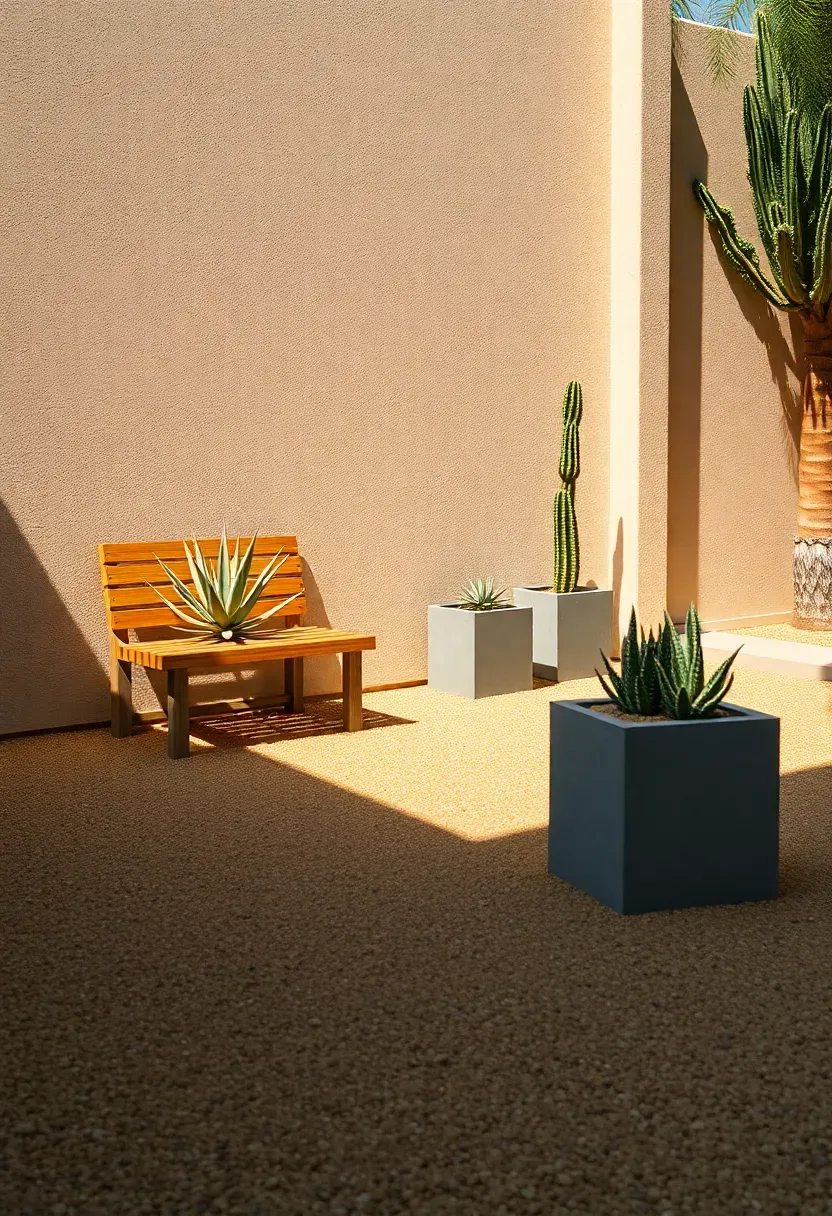
4. Decomposed Granite
Step 1: Prepare the area
Excavate 4 inches of soil and compact the subgrade with a plate compactor. Install steel or aluminum edging around the perimeter to contain the material.
Step 2: Add and compact layers
Spread decomposed granite in 2-inch lifts, wetting each layer and compacting it before adding the next. Two lifts get you to the right 3-4 inch depth.
Step 3: Finish and maintain
The surface should feel firm, almost like packed earth. Add a stabilizing binder if you want an even harder finish — products like Stabilizer Solutions lock the particles together while keeping the natural look.
Watch out
- DG gets muddy in heavy rain without adequate drainage grading
- It tracks into the house on shoe soles more than any other material
- Refresh with a thin new layer every 2-3 years as it compacts down
Recommended
Items for this idea
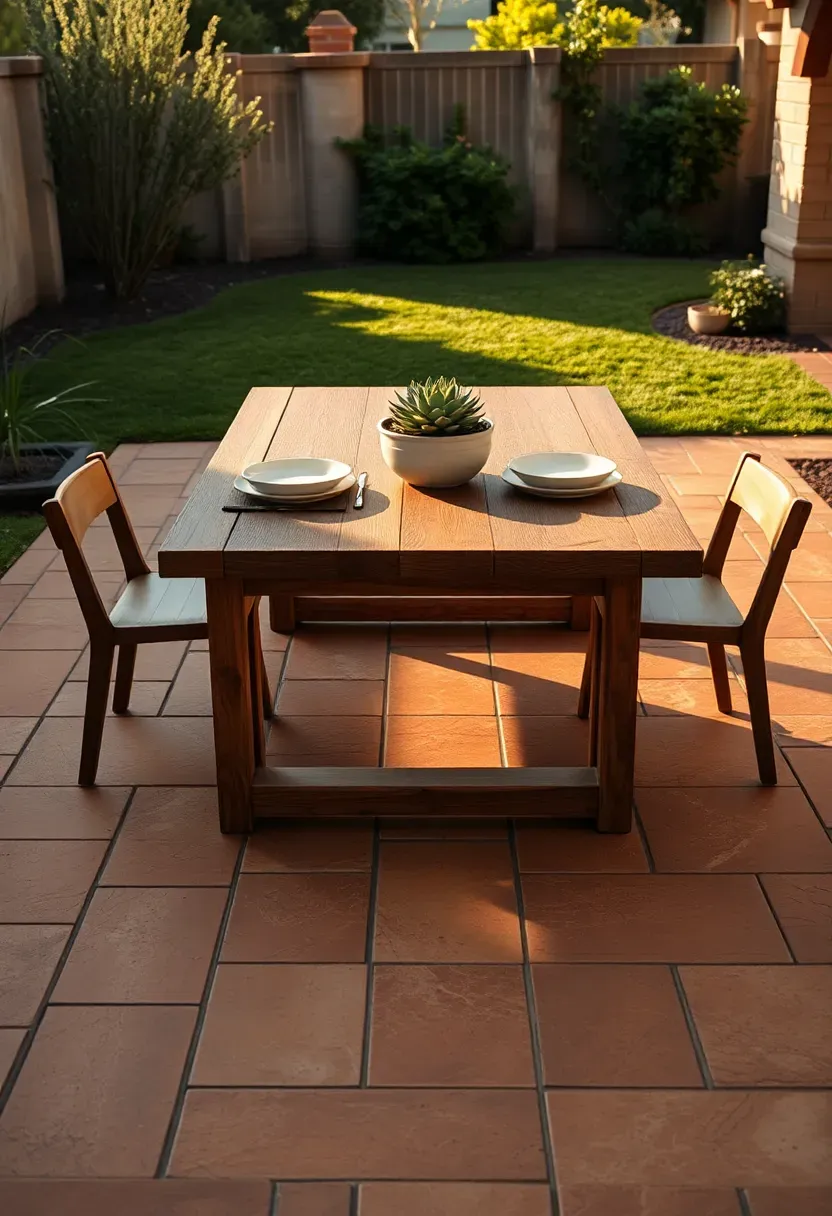
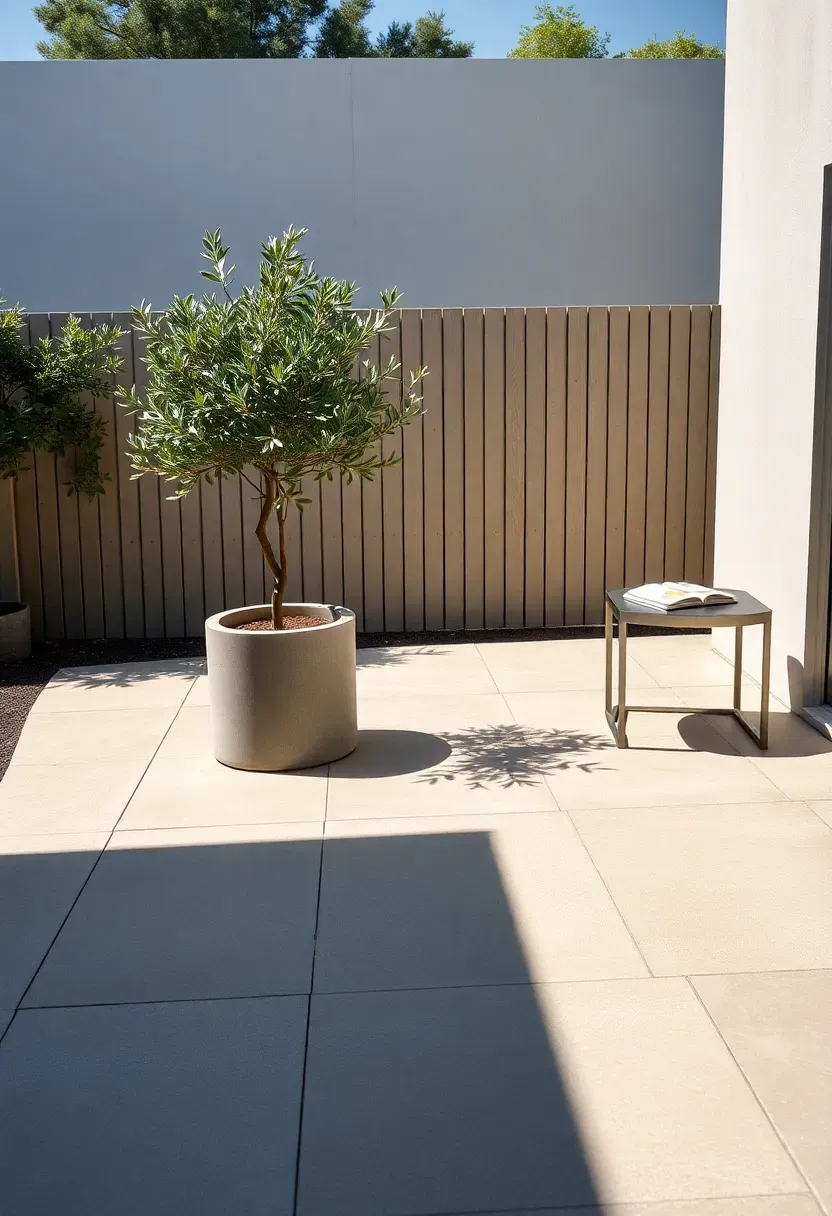
5. Porcelain Outdoor Tiles
Outdoor-rated porcelain tiles (20mm thick, not the 10mm interior version) handle freeze-thaw cycles, UV exposure, and heavy foot traffic without cracking or fading. They come in formats that mimic wood planks, natural stone, and concrete. Installation requires a level concrete slab or pedestal system — you cannot lay these directly on gravel or sand. The pedestal method creates a raised surface with airflow underneath, which helps drainage and allows access to utilities beneath the patio. Expect to pay $6-12 per square foot for quality outdoor porcelain before installation.
Tips
- Verify tiles have an R11 or higher slip rating for wet conditions
- Pedestal systems allow slope correction on uneven slabs
- Wood-look porcelain gives the warmth of timber without any sealing or staining
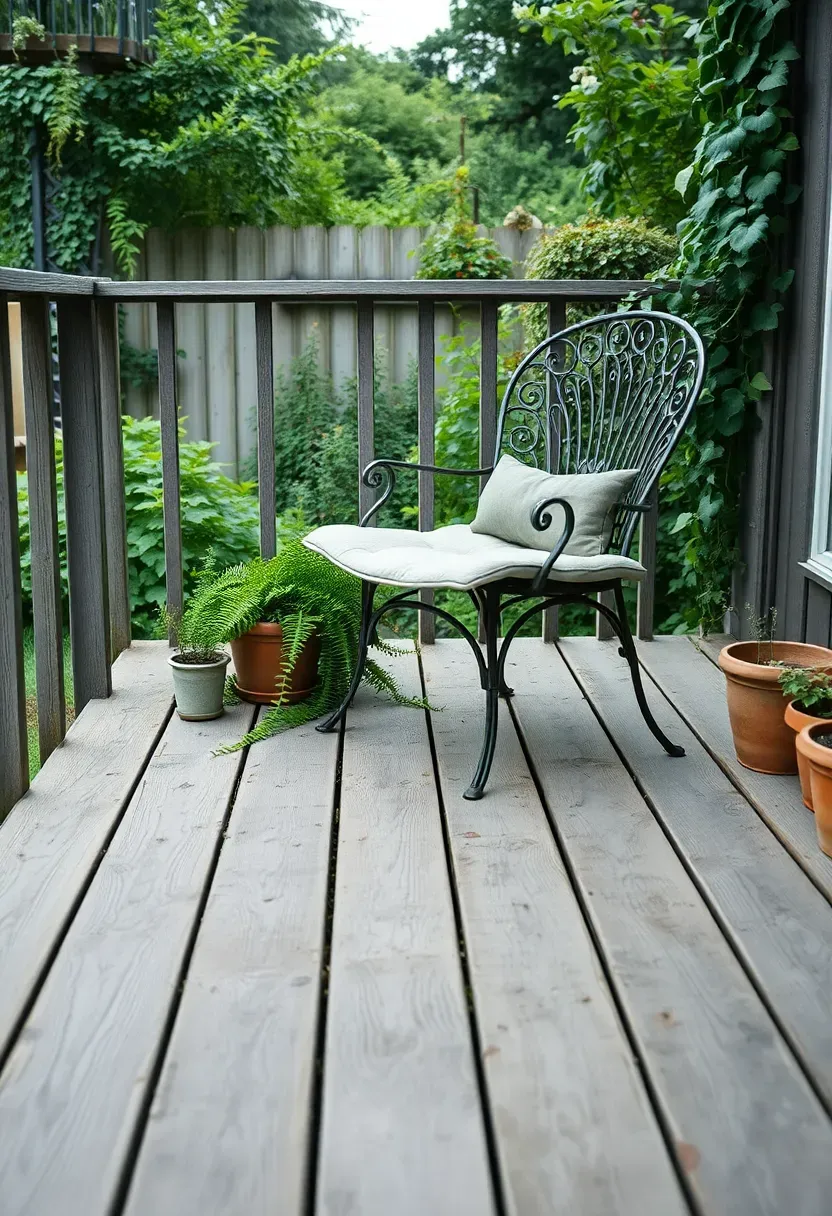
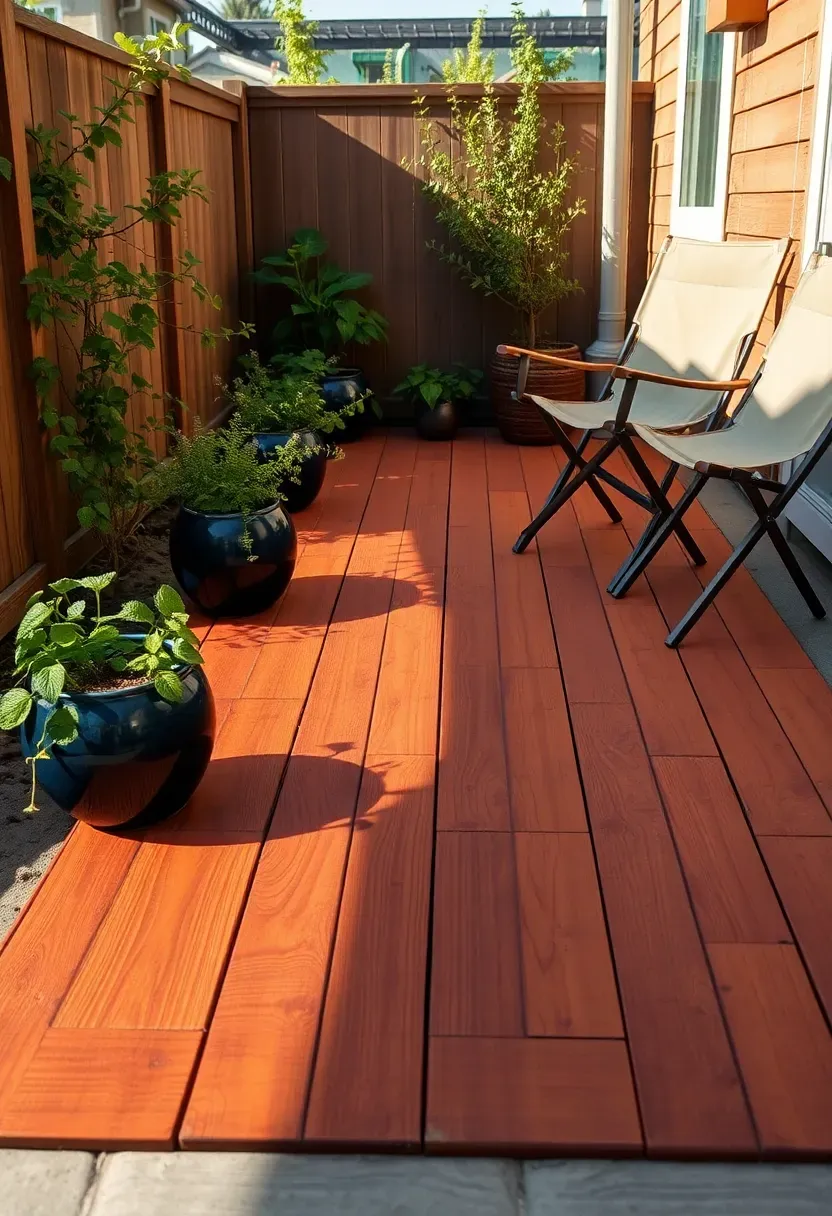
6. Reclaimed Wood Deck
Reclaimed lumber from old barns, warehouses, and demolition sites makes for backyard decks with genuine character that new wood cannot replicate. The grain patterns, nail holes, and color variation tell a story. Douglas fir, heart pine, and old-growth redwood are the most common salvaged species, and all three are denser than their modern counterparts because the trees grew slower. Budget roughly $8-15 per board foot depending on species and condition. Every board needs inspection for structural soundness — skip anything with active rot, insect damage, or deep checks that compromise more than a third of the cross-section.
Tips
- Mill each board to uniform thickness before installation for a level walking surface
- Use stainless steel screws — the tannins in aged wood corrode standard zinc fasteners fast
- Apply a penetrating oil finish rather than a film-forming sealer to preserve the aged look
Recommended
Items for this idea
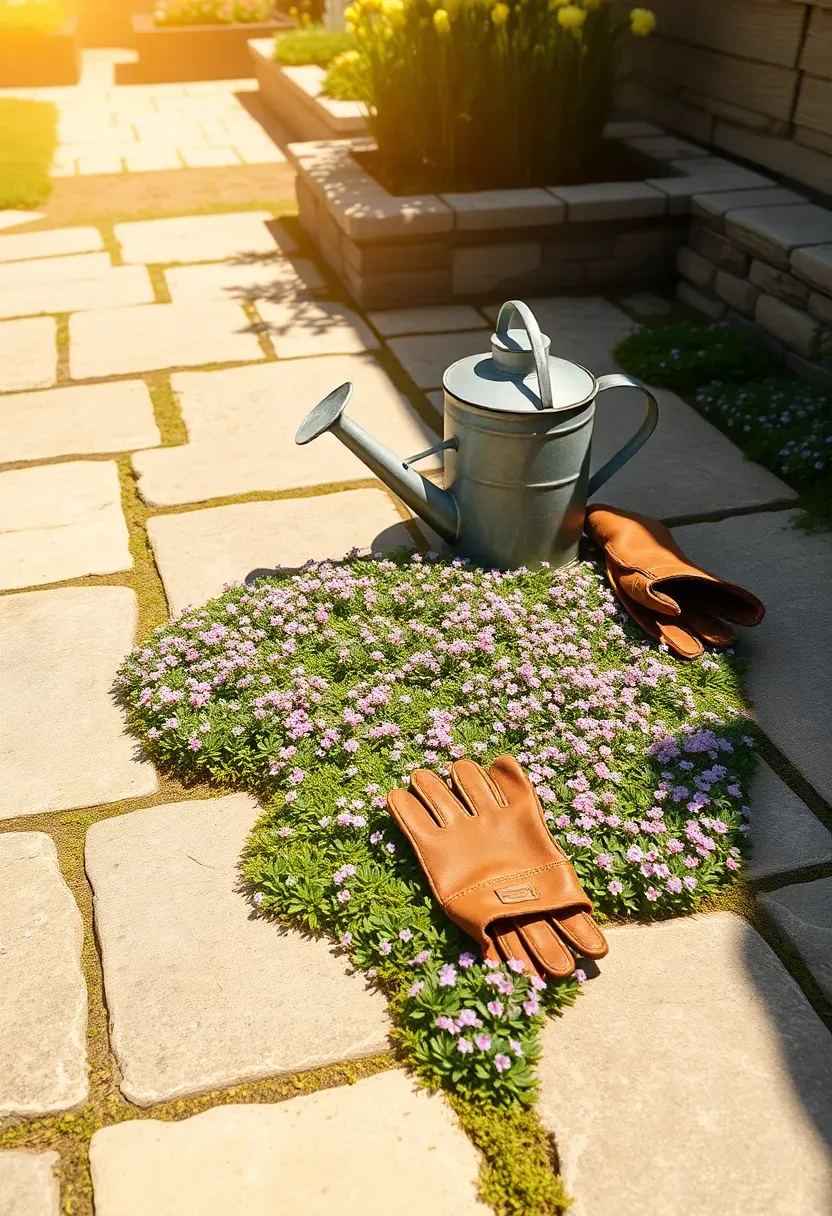
7. Flagstone with Ground Cover
Flagstone set with gaps of 1-2 inches between stones, filled with creeping thyme, Irish moss, or Corsican mint instead of mortar or polymeric sand. The ground cover softens the look, releases fragrance when stepped on, and handles light foot traffic. This works best in zones 5-9 where these low-growing plants can establish before winter. The planting gaps need at least 2 inches of quality soil mix to give roots somewhere to go. Irregular flagstone shapes create more natural gap patterns than cut stone, which makes the ground cover placement feel organic rather than forced.
Tips
- Creeping thyme tolerates the most foot traffic of common ground cover options
- Water newly planted ground cover daily for the first two weeks to establish roots
- Avoid using herbicides near planted joints — pull weeds by hand until ground cover fills in
8. Poured Concrete with Saw-Cut Joints
Why consider plain concrete
Poured concrete is the workhorse of backyard flooring. It costs $6-10 per square foot installed, lasts decades, and accepts almost any furniture or structure on top of it. The key to making it look intentional rather than industrial is the control joint pattern. Saw-cut joints at 8-10 foot intervals create a grid that controls where cracks form — because concrete will crack, and you want it happening along your lines rather than randomly across the surface.
Making it look good
A broom finish provides grip. An exposed aggregate finish adds texture and visual interest by revealing the stone within the mix. Integral color — pigment mixed into the wet concrete — gives warm tones without surface-level dye that wears off. These three choices together produce a backyard floor that looks considered, not like a warehouse parking pad.
Pros and cons
- Pro: Extremely durable with minimal maintenance beyond occasional power washing
- Pro: Flat, smooth surface works well for outdoor dining tables and rolling grills
- Con: Removal is expensive and labor-intensive if you change your mind later
Recommended
Items for this idea
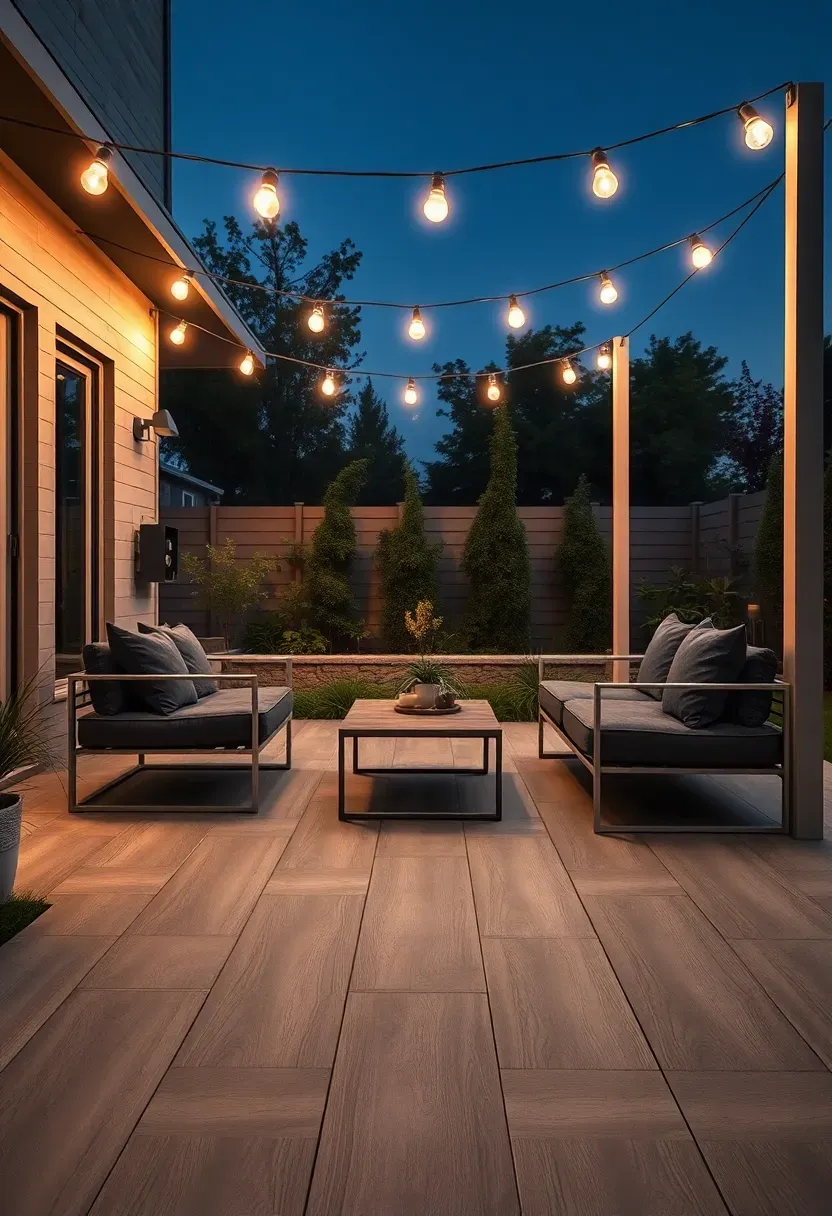
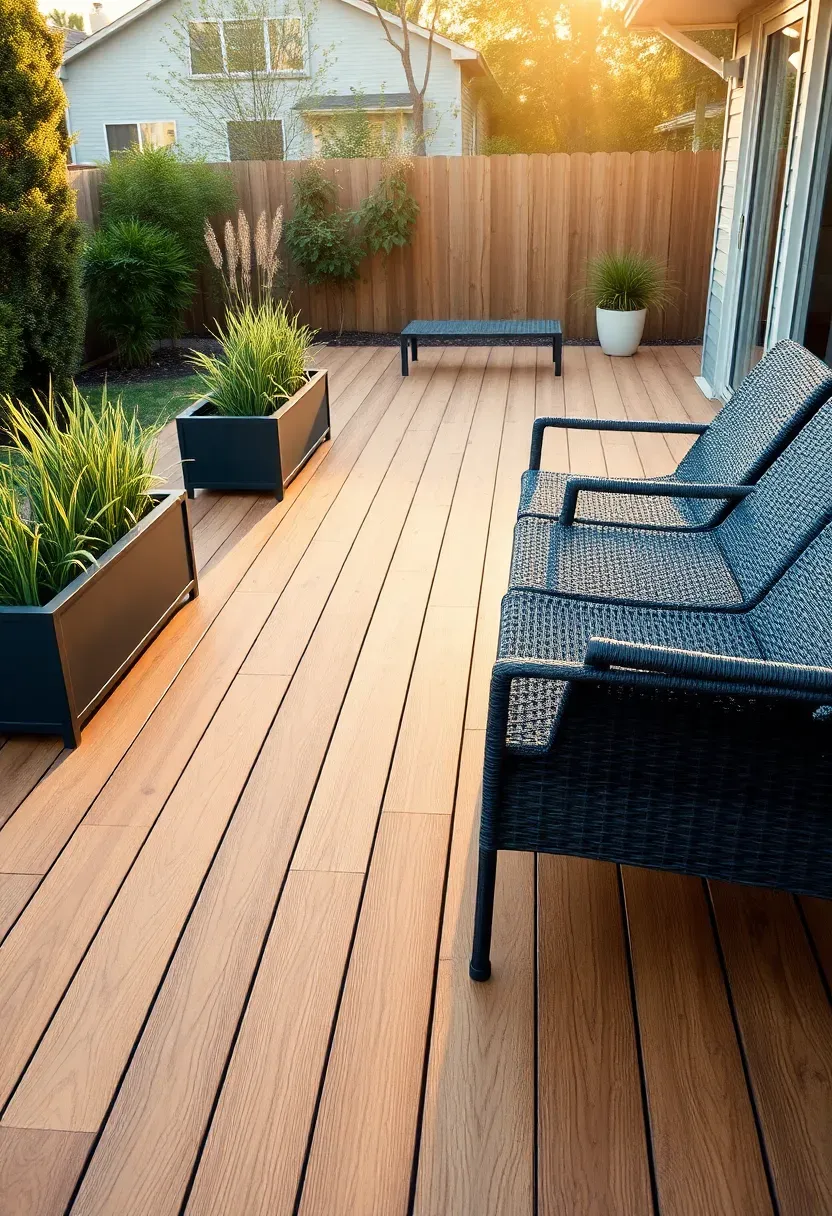
9. Composite Deck Boards
Composite decking (a blend of wood fibers and plastic polymers) eliminates the annual sanding-and-staining cycle that real wood demands. Brands like Trex, TimberTech, and Fiberon offer boards that resist fading, staining, and mold. The material costs more upfront — $5-12 per linear foot versus $2-4 for pressure-treated pine — but the 25-year warranty and near-zero maintenance close that gap over time. The surface can get hot in direct sun, noticeably more than natural wood, so light colors perform better in southern exposures. Some newer capped composites include cooling technology that reduces surface heat by up to 35%.
Tips
- Hidden fastener systems give a clean, screw-free surface appearance
- Leave 1/8-inch gaps between boards for thermal expansion
- Choose boards with a realistic wood grain texture — flat, smooth composites look plasticky
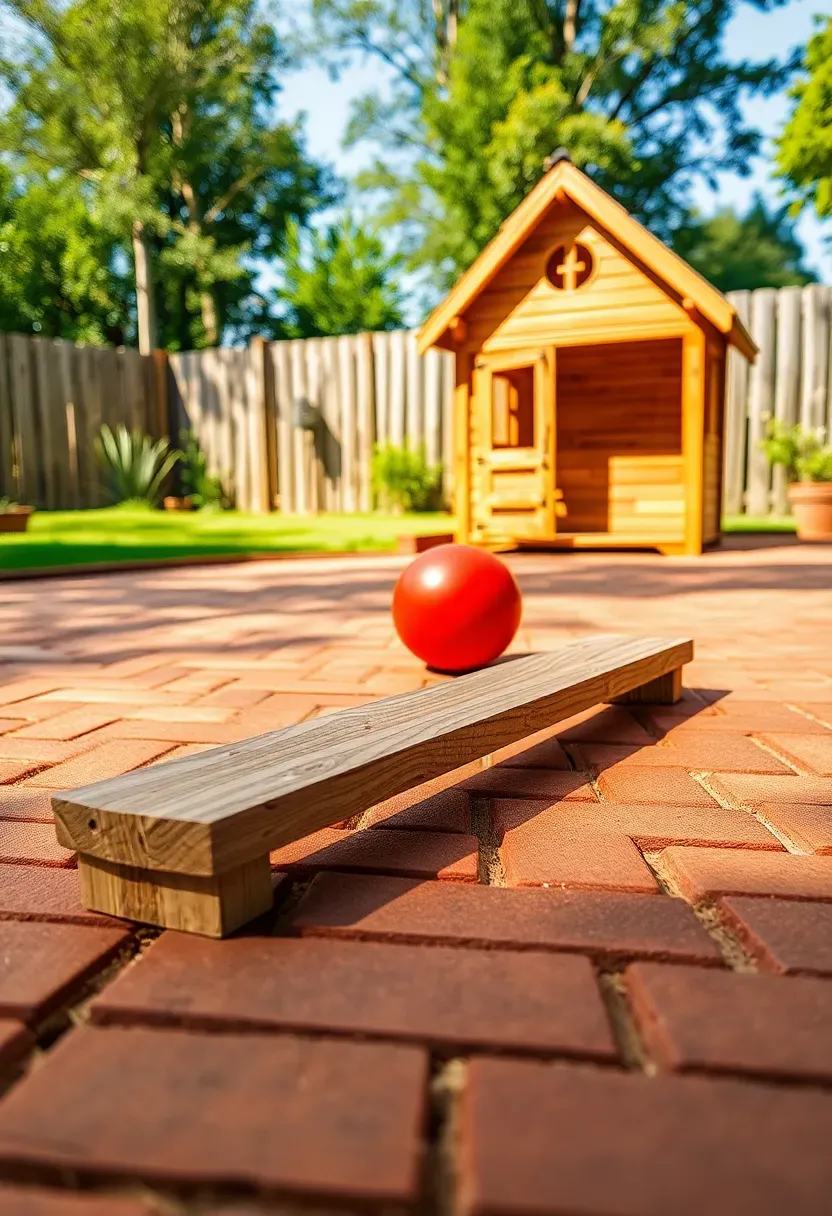
10. Interlocking Rubber Pavers
Rubber pavers made from recycled tires are the safest backyard flooring for play areas. They absorb impact, drain quickly through built-in channels, and interlock without adhesive on any flat surface. A 2-inch-thick rubber paver provides fall protection for drops up to 4 feet, which covers most swing sets and playhouses. They come in earth tones and brick patterns that look better than you would expect from recycled rubber. Cost runs about $4-8 per square foot, and installation is genuinely DIY-friendly — lay them on compacted gravel or an existing concrete slab.
Tips
- Pin corners and edges with landscape spikes to prevent shifting on gravel bases
- Rubber retains heat — place under shade structures in hot climates
- Power wash annually with mild detergent to prevent algae buildup on textured surfaces

Recommended
Items for this idea
11. Travertine Pavers
Travertine stays cool underfoot, which is why you see it around pools across the Mediterranean and the American Southwest. The natural pitting and color variation — cream, walnut, gold, silver — gives each paver a distinct look. Tumbled travertine has softened edges that create a casual, aged appearance. Honed travertine is smoother and more formal. French pattern layouts, which mix four different paver sizes in a repeating random arrangement, hide the seams between pavers and create visual movement across the surface. Budget $8-15 per square foot for materials, slightly more than concrete pavers but less than most natural cut stone.
Tips
- Seal travertine annually to prevent staining from food, drinks, and leaf tannins
- Use a non-sanded grout or polymeric sand between joints, never Portland cement mortar outdoors
- Avoid acidic cleaners — they etch the calcium carbonate surface permanently
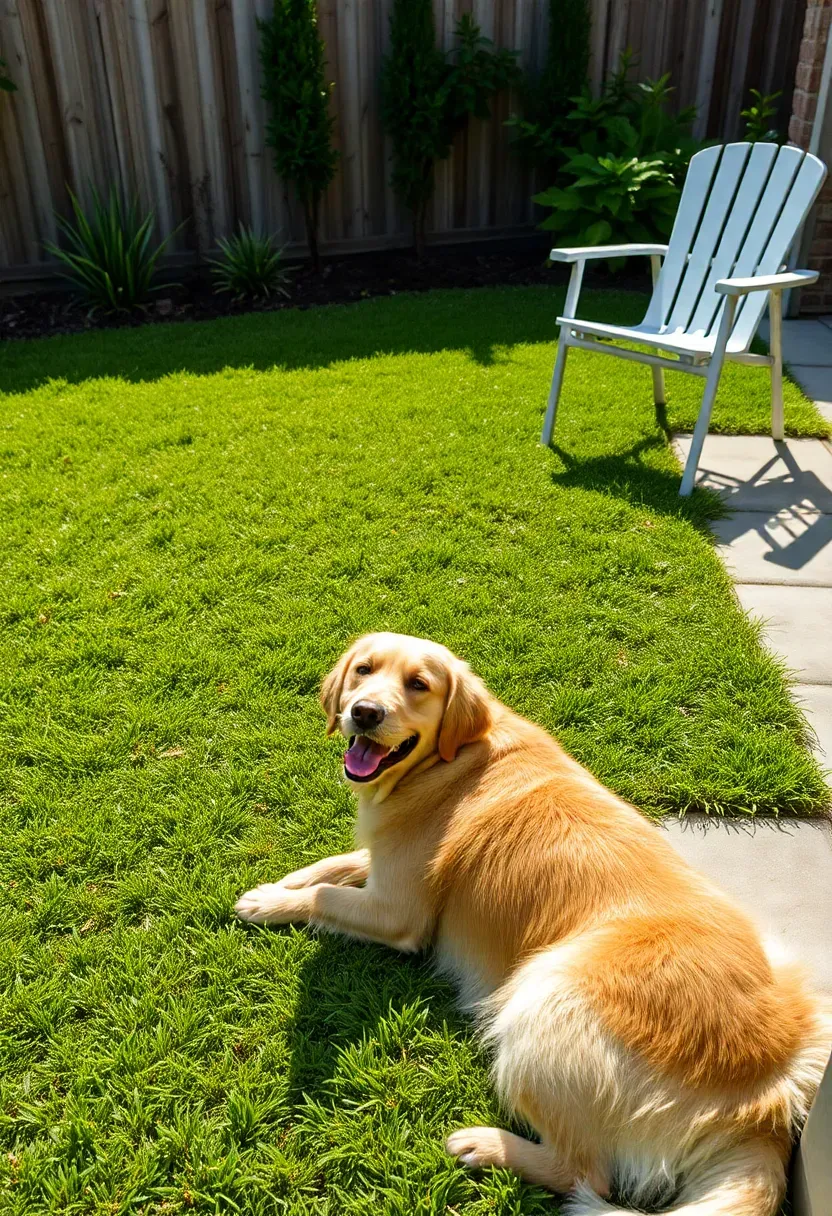
12. Artificial Turf
Is it right for your yard?
Artificial turf makes sense in specific situations: drought-prone climates where water restrictions limit real lawn maintenance, shaded areas where grass refuses to grow, or high-traffic zones that turn into mud pits during rainy seasons. Modern turf uses varied blade heights and mixed green tones that look convincing from a few feet away.
What to know before committing
Quality turf with proper installation (base prep, infill, drainage layer) costs $8-14 per square foot. Cheap turf installed without adequate base work looks terrible within two years — seams separate, blades flatten permanently, and drainage fails. The infill material matters too: silica sand is standard, but cork or coconut fiber infills run cooler and feel more natural.
Choose turf if
- Your water bill for lawn irrigation exceeds $100/month during summer
- You need a pet-friendly surface that drains and cleans easily
- The area gets less than 4 hours of direct sunlight (where real grass struggles)
Recommended
Items for this idea
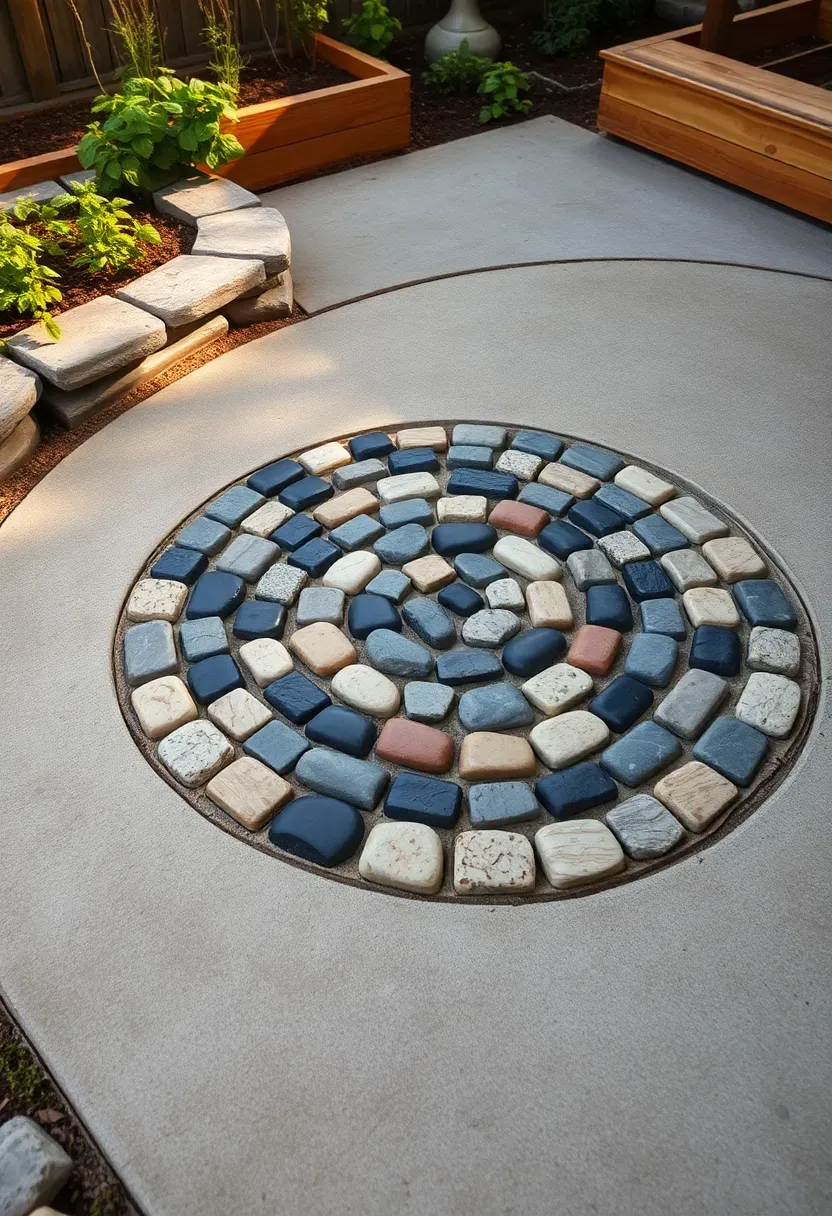
13. River Rock Mosaic
River rock mosaic floors take patience but produce results that no manufactured material can match. Select flat-sided river stones in 1-3 inch sizes, sort them by color, and set them on edge in a bed of wet mortar. Traditional patterns include spirals, waves, medallions, and fan shapes. A 4x4-foot section takes roughly 6-8 hours of careful placement. This is not a full-patio treatment for most people — it works best as a focal accent at an entry point, beneath a water feature, or as a decorative border around a plainer patio surface.
Tips
- Set stones on edge, not flat — edge-set stones lock together and resist popping out
- Use a consistent joint width (roughly 1/4 inch) for a professional-looking finish
- Seal the finished mosaic with a penetrating stone sealer to prevent mortar staining
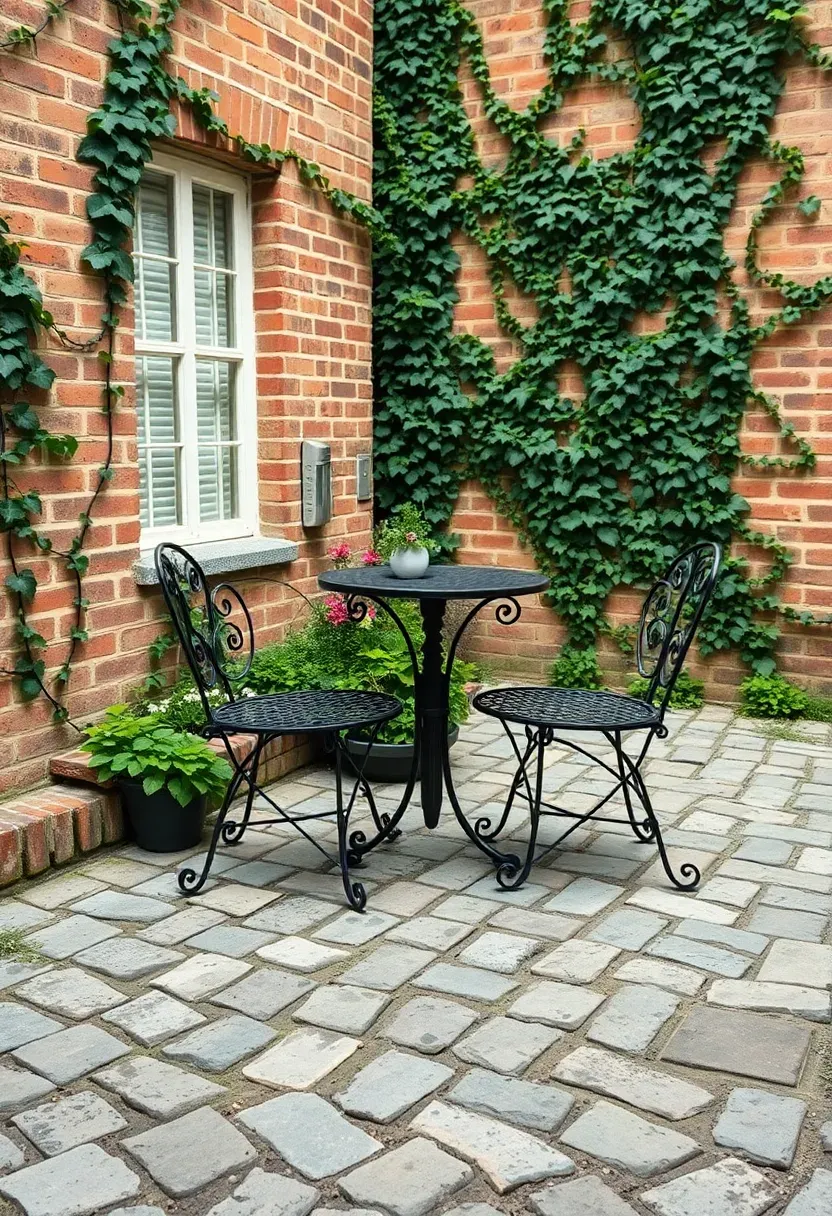
14. Cobblestone
Origins
Cobblestone paving dates back to Roman road construction — small, roughly hewn granite or basalt blocks set in sand and gravel. The material survived centuries of cart wheels and horse hooves, which says something about its durability.
Modern use
Today, cobblestone works in backyards as a high-character alternative to uniform concrete pavers. Reclaimed cobblestones from decommissioned European streets are available through specialty suppliers at $12-25 per square foot. New-cut granite cobbles cost less ($6-12) but lack the rounded wear and patina. Fan patterns and running bond layouts both suit backyard scales. The irregular surface drains well naturally but creates an uneven walking surface — not ideal as a primary dining patio but excellent for pathways and accent areas.
How to use at home
- Border a smoother patio surface with a cobblestone apron for contrast
- Create a cobblestone circle as a fire pit base — the material handles heat without cracking
- Mix cobblestone with brick for a layered, historically inspired look
Recommended
Items for this idea
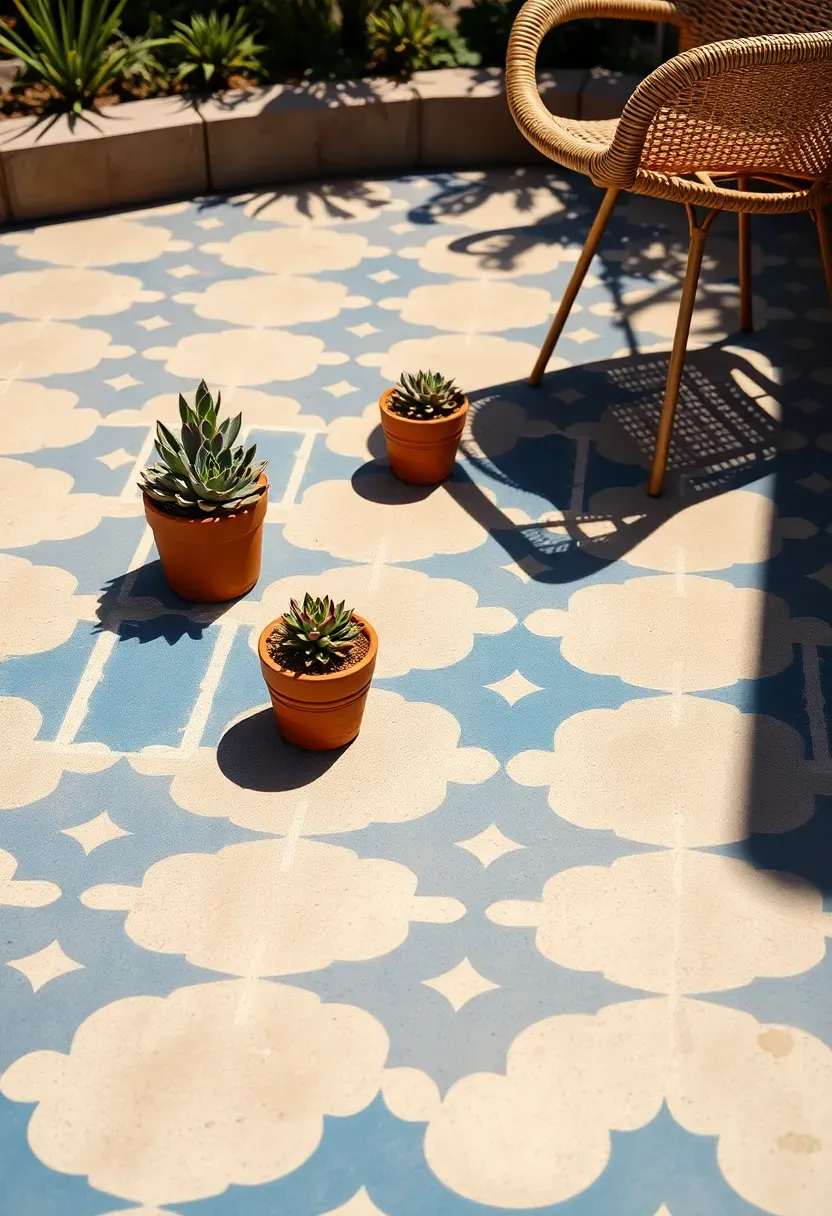
15. Stenciled Concrete
Stenciled concrete is the budget-conscious answer to decorative outdoor flooring. You apply large reusable stencils to an existing or new concrete slab and roll on concrete overlay or masonry paint to create patterns — Moroccan tiles, geometric grids, faux brick, even faux wood grain. The entire process costs $2-4 per square foot in materials if you do it yourself. The catch: durability depends entirely on surface prep and sealer quality. Acid-etch or grind the concrete first so the coating bonds mechanically, not just chemically. Then apply 2-3 coats of exterior concrete sealer rated for foot traffic.
Tips
- Practice your stencil alignment on cardboard before committing to concrete
- Work in sections, overlapping the stencil pattern carefully to avoid misalignment
- Recoat every 2-3 years in high-traffic areas to keep the pattern sharp
16. Cedar Deck Tiles
Step 1: Assess your existing surface
Cedar deck tiles snap together and sit on top of existing concrete, compacted gravel, or even a level dirt surface. Each tile (typically 12x12 or 12x24 inches) has an interlocking plastic grid base that lifts the wood slightly, allowing water to drain underneath.
Step 2: Lay the grid
Start in one corner and work outward. Tiles click together without tools, screws, or adhesive. Cut border tiles with a circular saw. The entire installation for a 10x10 area takes about 2 hours.
Step 3: Maintain
Cedar naturally resists rot and insects, but it will gray over time without oil treatment. Apply cedar oil once a year if you want to preserve the warm reddish tone. Otherwise, let it silver — the gray patina is attractive in its own right and structurally harmless.
Watch out
- Tiles can shift on gravel surfaces in high-wind areas — consider perimeter anchoring
- Not suitable for areas with standing water — the plastic base will trap debris if submerged
- Quality varies wildly between brands — look for tiles using western red cedar, not eastern white

Recommended
Items for this idea
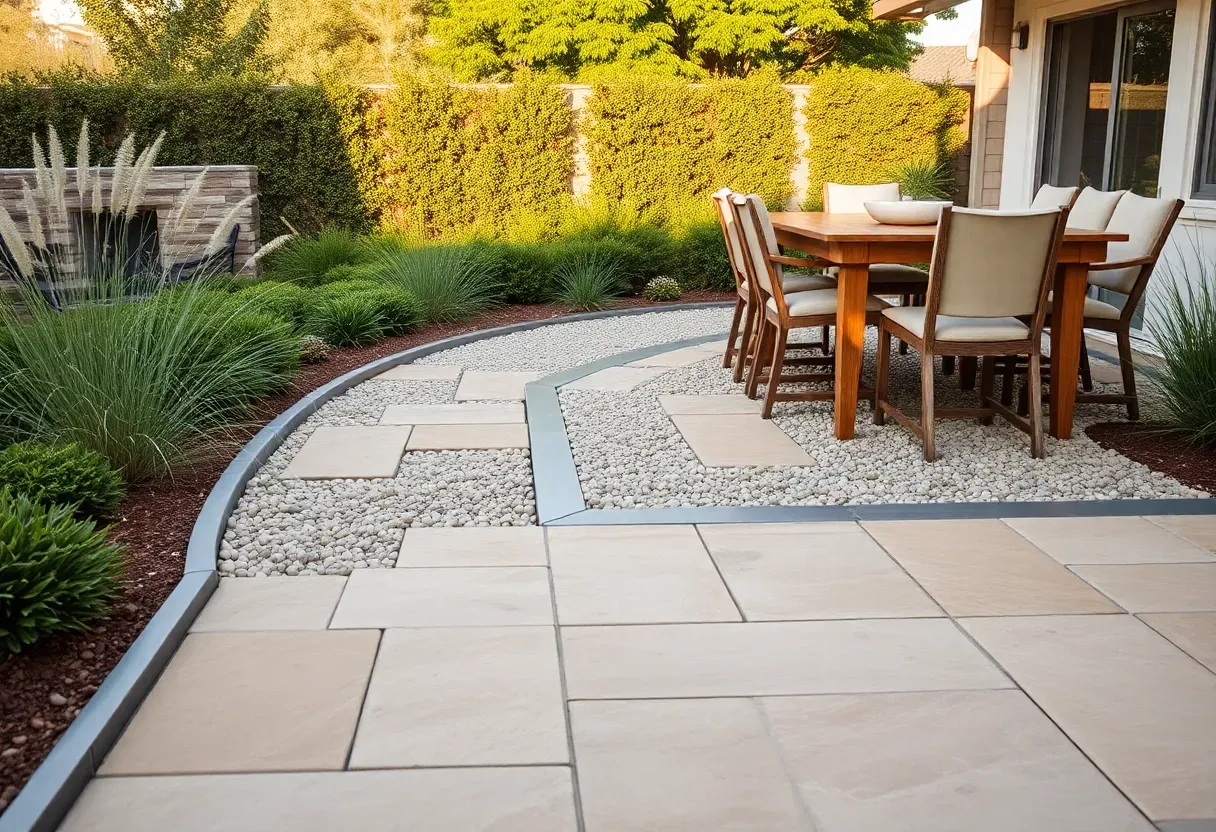
17. Mixed Material Zoning
The most interesting backyard floors combine two or three materials to define separate use zones. A concrete or paver pad for the dining table. A gravel transition path. A wood deck section for lounging. The material changes signal function without walls or physical barriers. The key is managing the transitions — where gravel meets pavers, install a flush steel edge. Where deck meets concrete, use a trim board or stone cap that covers the gap cleanly. Mixing materials also lets you put your budget where it matters most: spend on travertine around the seating area and use affordable gravel for pathways.
Tips
- Limit yourself to three materials maximum — more than that looks chaotic
- Keep one material as the dominant surface (60% or more of total area) for visual cohesion
- Use color temperature as a guide: warm materials (wood, brick, travertine) group together naturally
Quick FAQ
How much does it cost to redo a backyard floor? Budget anywhere from $2 per square foot for basic gravel to $20+ for natural stone with professional installation. A typical 200-square-foot patio ranges from $400 for DIY gravel to $4,000 for installed travertine. Labor usually doubles the material cost.
Which backyard flooring material lasts the longest? Natural stone (flagstone, travertine, granite cobblestone) and properly poured concrete both last 30-50 years with basic maintenance. Composite decking warranties extend to 25 years. Gravel and DG need periodic replenishment but the base lasts indefinitely.
Can I install backyard flooring over existing concrete? Yes, several options work directly over concrete: porcelain tiles on pedestals, cedar deck tiles, rubber pavers, stenciled coatings, and thin stone veneer. The existing slab needs to be structurally sound and reasonably level, but you can skip demolition in most cases.
What is the coolest backyard flooring for bare feet? Travertine stays noticeably cooler than concrete or composite in direct sun due to its porous structure. Natural grass and light-colored gravel are also foot-friendly in heat. Dark-colored materials — charcoal pavers, dark composite, black rubber — absorb the most heat and should be placed in shaded areas.
Does backyard flooring need a permit? In most jurisdictions, ground-level patios and gravel installations do not require permits. Raised decks above 30 inches, structures attached to the house, and any work involving drainage changes typically do. Check with your local building department before starting — permit requirements vary significantly by municipality.
Pick one material and start small. A 6x8-foot test section costs little, takes a weekend, and teaches you whether that surface works for your yard, your climate, and your daily habits before you commit to covering the entire backyard. The best backyard floor is the one that matches how you actually use the space — not the one that looks best in a photo.
Pinterest cover for 17 Backyard Floor Ideas for Every Budget
About the author
OBCD
CGI visualization and interior design content. We create detailed 3D renders and curate practical design ideas for every room in your home.