19 Backyard Firepit Ideas That Look Great All Year
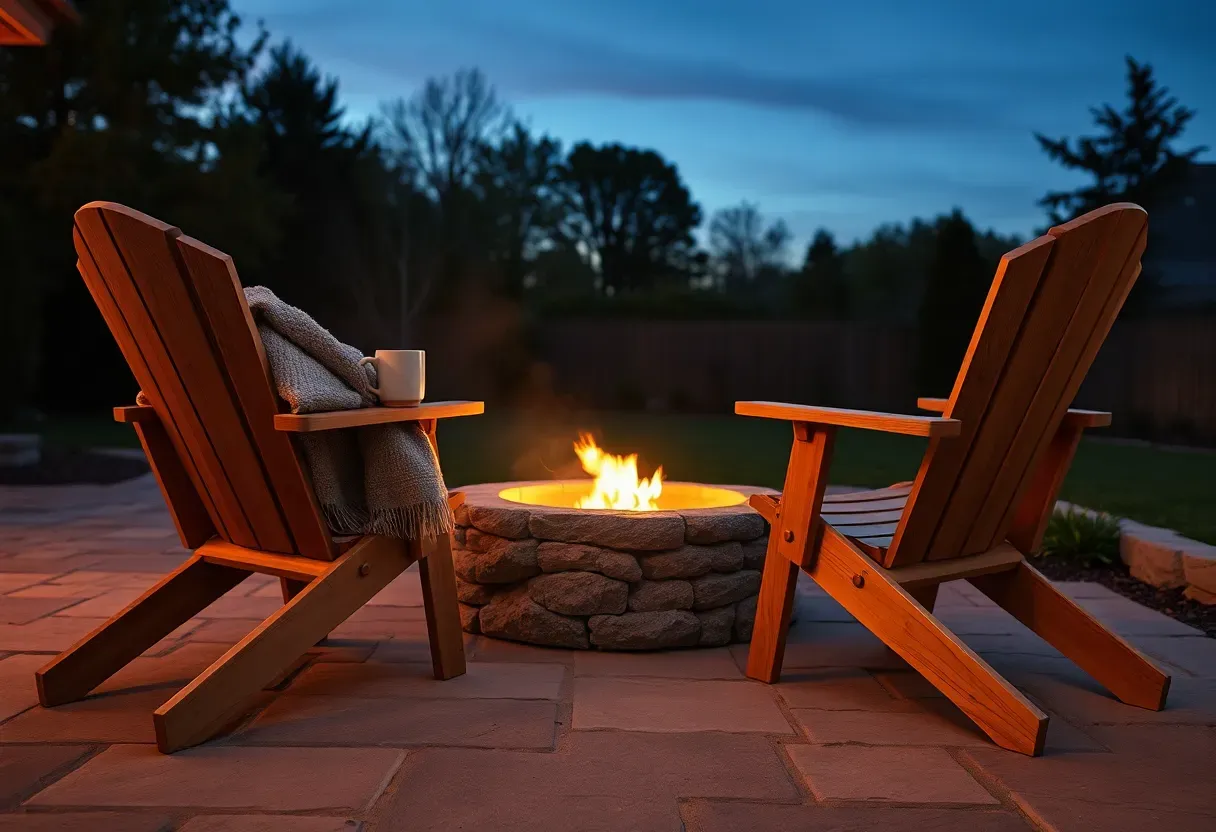
Most firepits get used for about three months, then sit ignored until the next cookout season. That is a waste. The right firepit design works in January when you want to sit outside with a blanket and coffee just as well as it does during a July barbecue. I have spent the past few years testing different setups in my own yard and photographing dozens of others, and the ones that get used year-round share a few traits: comfortable seating within arm's reach, wind protection built into the layout, and materials that age well instead of crumbling after two winters.
Here are 19 backyard firepit ideas organized by style, material, and function so you can match one to your actual yard rather than some imaginary version of it.
Table of Contents
- Dry-Stacked Bluestone Fire Ring
- Corten Steel Bowl on a Gravel Terrace
- Conversation Pit with Recessed Firepit
- Tabletop Gas Firepit for Small Patios
- Fieldstone Firepit with Curved Sitting Wall
- Concrete Trough Fire Feature
- Cast Iron Cauldron on a Flagstone Pad
- Double-Ring Firepit with Gravel Moat
- Fire Table with Built-In Drink Rail
- Stacked Railroad Tie Firepit Surround
- Hillside Terraced Firepit
- Propane Firepit with Glass Wind Guard
- Brick Herringbone Firepit Patio
- Asymmetric Boulder Firepit Circle
- Minimalist Black Steel Fire Column
- Firepit with Overhead Pergola and String Lights
- Recycled Washing Machine Drum Firepit
- Firepit Dining Table Combo
- Sunken Round Firepit with Grass Steps
1. Dry-Stacked Bluestone Fire Ring
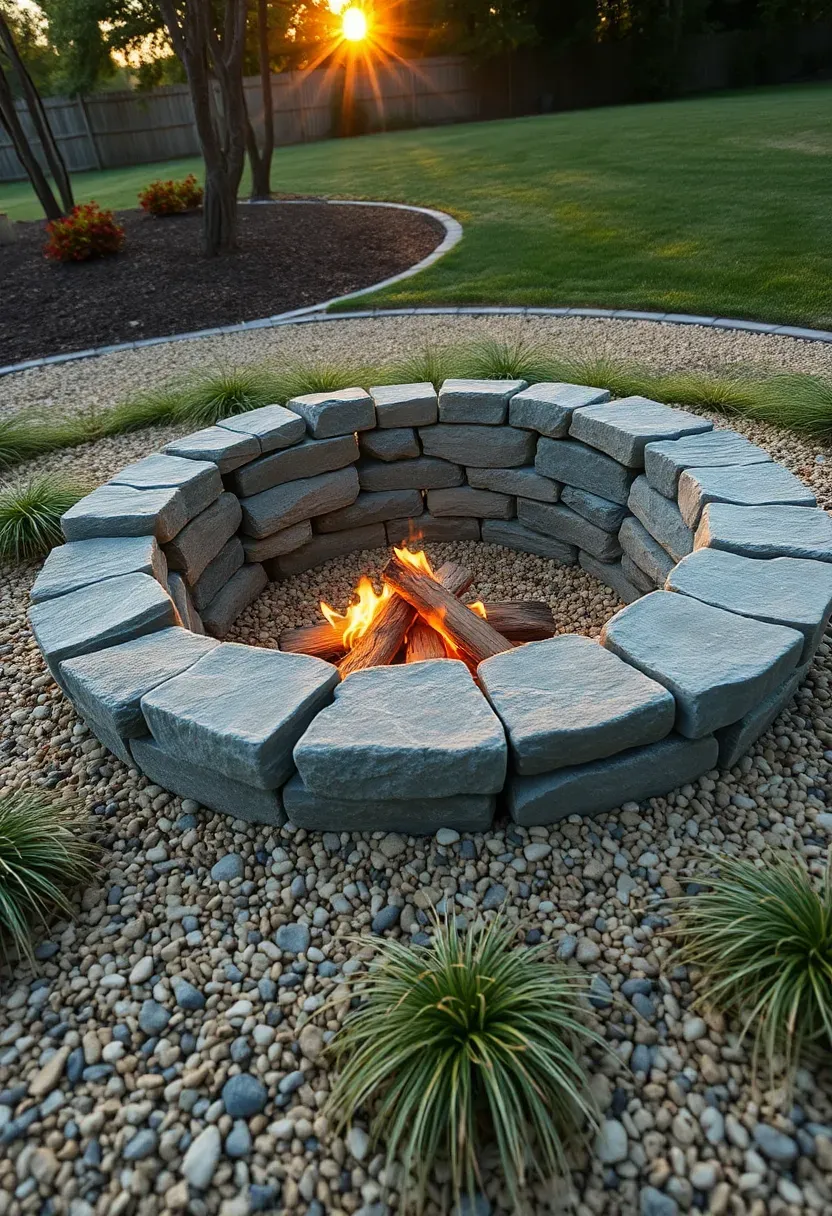
Bluestone splits naturally into flat, stackable pieces that hold up to heat without cracking or spalling the way cheap pavers do. A dry-stacked ring — no mortar needed — goes up in about two hours and costs around $150-200 in stone from a local quarry or landscape supply yard. The irregular edges give each ring a slightly different character, which beats the cookie-cutter look of prefab kits. Set it on a compacted gravel base at least 4 inches deep, and keep the inner diameter around 36 inches for a fire that is big enough to feel but small enough to cook over. Bluestone develops a dark patina from smoke over time that actually improves its appearance.
Tips
- Source bluestone locally to cut shipping costs — it is heavy and expensive to freight
- Stack pieces with a slight inward lean so the wall gets more stable as it rises
- Line the interior bottom with fire brick for longevity if you plan to burn hardwood regularly
We picked a few things that go well with this idea: Hykolity 31" Fire Pit with Grill (★4.7), OutVue 36" Fire Pit with Grills (★4.4) and Devoko 32" Outdoor Metal Fire Pit (★4.5). As an Amazon Associate we earn from qualifying purchases.
2. Corten Steel Bowl on a Gravel Terrace
Why Corten?
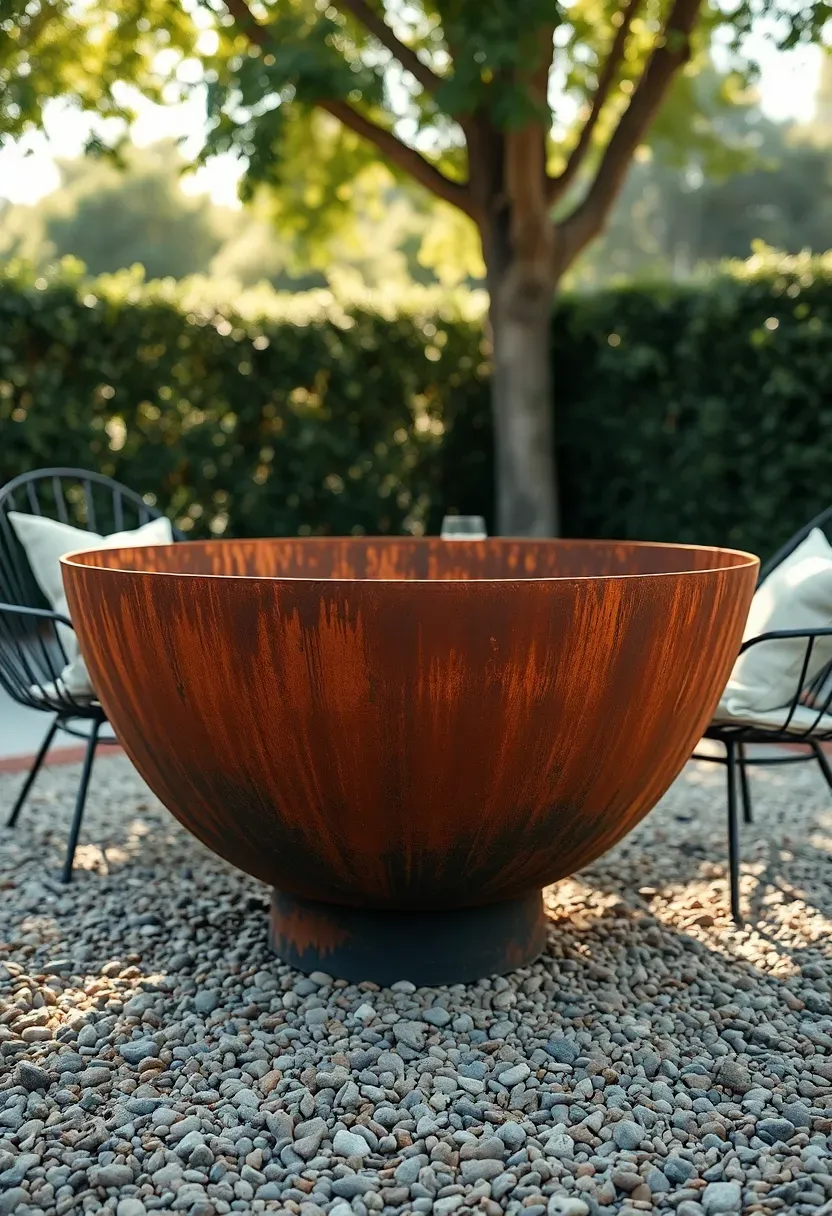
Corten (weathering steel) develops a stable rust layer that protects the metal underneath from further corrosion. Unlike painted steel bowls that peel and flake, a Corten bowl looks better every year. The warm orange-brown patina matches nearly any landscape palette — desert, woodland, coastal, suburban.
The right base
Decomposed granite or angular pea gravel makes the best terrace material under a Corten bowl. Both drain fast, resist heat damage, and won't blow around in wind. Spread it 3 inches deep over compacted soil and landscape fabric in a 10-12 foot circle.
What to watch
Corten weeps rust stains during its first year of patina development. Keep it off light-colored concrete or natural stone until the patina stabilizes, usually 6-12 months after first exposure to rain.

We picked a few things that go well with this idea: Walsunny 43" Propane Fire Pit Table (★4.4), Ciays 42" Gas Fire Pit Table (60K BTU) (★4.6) and ComaZoo 60" Oval Concrete Fire Pit Set (★4.5). As an Amazon Associate we earn from qualifying purchases.
3. Conversation Pit with Recessed Firepit
This idea borrows from 1970s sunken living rooms and moves the concept outdoors. Excavate a circular or rectangular area about 18-24 inches below grade, pour a concrete slab at the bottom, and build bench-height seating walls around the perimeter. Place a gas or wood-burning firepit insert in the center. The recessed design blocks wind naturally, keeps flames below eye level for unobstructed sightlines, and creates an enclosed feeling that makes groups of four feel intimate and groups of twelve feel manageable. It costs more than above-ground options — budget $1,500-3,000 for a concrete version — but it becomes a permanent landscape feature that adds real property value.
Tips
- Install a French drain under the slab to prevent water pooling after rain
- Cap the seating walls with smooth stone or sealed wood for comfortable sitting
- Add low-voltage step lights into the bench risers for safe navigation at night
We picked a few things that go well with this idea: VOZUJI 100ft Outdoor Patio String Lights (★4.5), VOZUJI 50ft Shatterproof Patio Lights (★4.6) and 100ft LED Edison Bulb Patio Lights (★4.3). As an Amazon Associate we earn from qualifying purchases.
4. Tabletop Gas Firepit for Small Patios
The problem
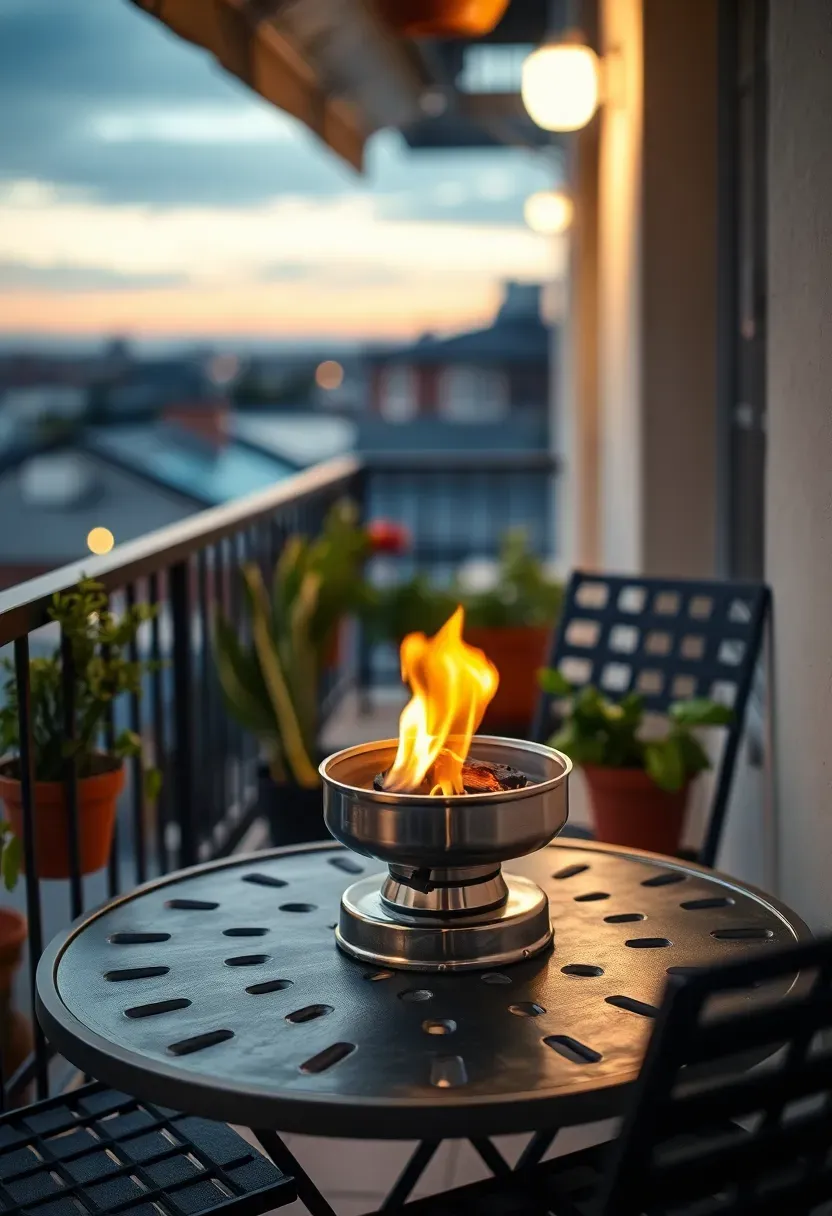
You want a fire feature but your outdoor space is a 6x8 foot apartment patio, a narrow townhouse deck, or a small condo courtyard. Full-size firepits need 10+ feet of clearance from structures, which rules them out.
The solution
Tabletop propane firepits run on small 1-pound camping canisters, produce a 10-12 inch flame, and sit safely on any heat-resistant surface. They generate enough warmth for two people sitting close and enough ambiance for a quiet evening outside. Most cost $50-150 and weigh under 15 pounds, so you can store them inside when not in use.
Pros and cons
- Pro: No permits, no installation, no smoke, instant on/off
- Con: Limited heat output, small flame, fuel canisters add up if used daily
- Bottom line: Perfect as a mood piece, not enough to warm a group on a cold night
Recommended
Items for this idea
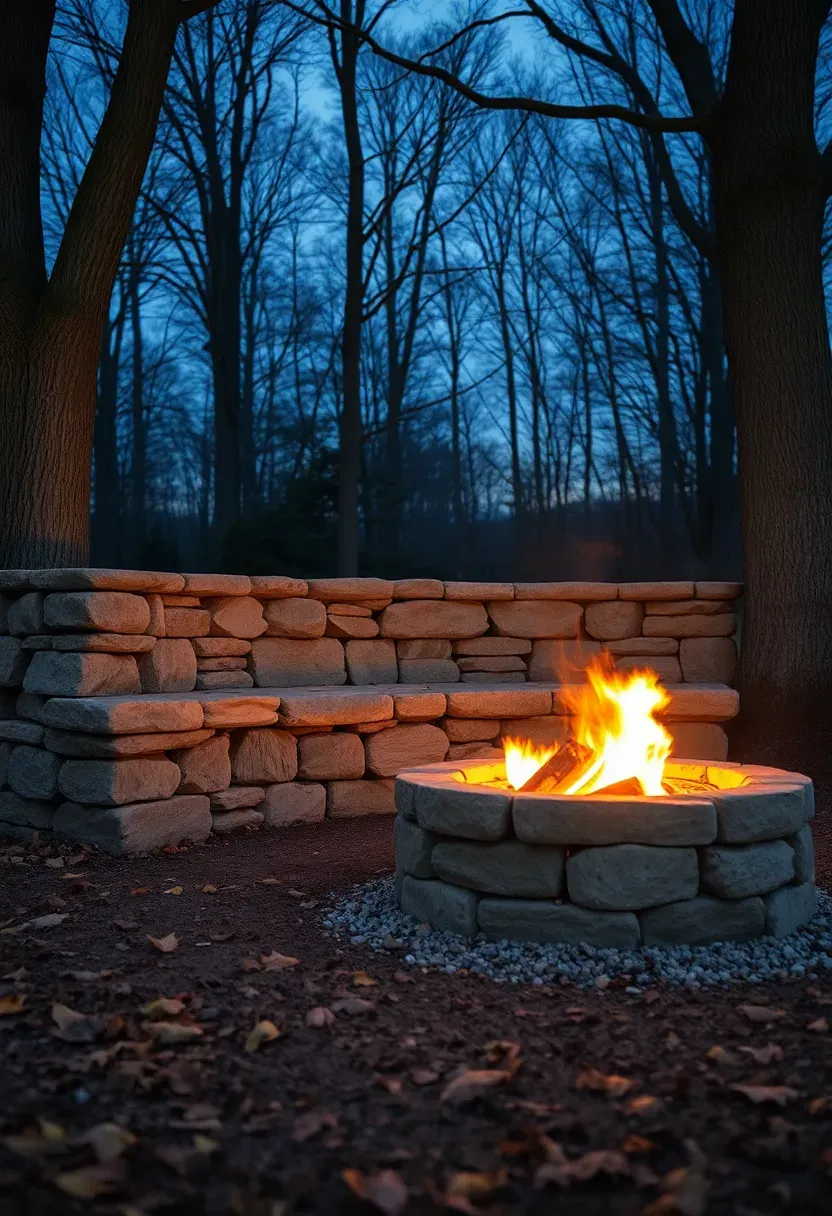
5. Fieldstone Firepit with Curved Sitting Wall
Fieldstone collected from your own property or bought from a local quarry costs a fraction of cut stone and carries a rough, organic quality that suits wooded lots and rural properties. Build the firepit ring 40-44 inches in diameter from the rounder, denser stones and use flatter pieces to construct a curved sitting wall 18 inches high and 16 inches deep at a comfortable distance (about 5-6 feet) from the flames. Backfill behind the wall with compacted gravel for stability. The wall does double duty: it defines the space, provides permanent seating that never needs moving or storing, and acts as a windbreak. Fill the area between the pit and wall with crushed granite or bark mulch.
Tips
- Sort fieldstones by shape before building — flat bottoms for the wall, round ones for the ring
- Dry-stack without mortar so water can drain freely through joints
- Plant low creeping ground cover (thyme, sedum) in gaps along the wall top for a lived-in look
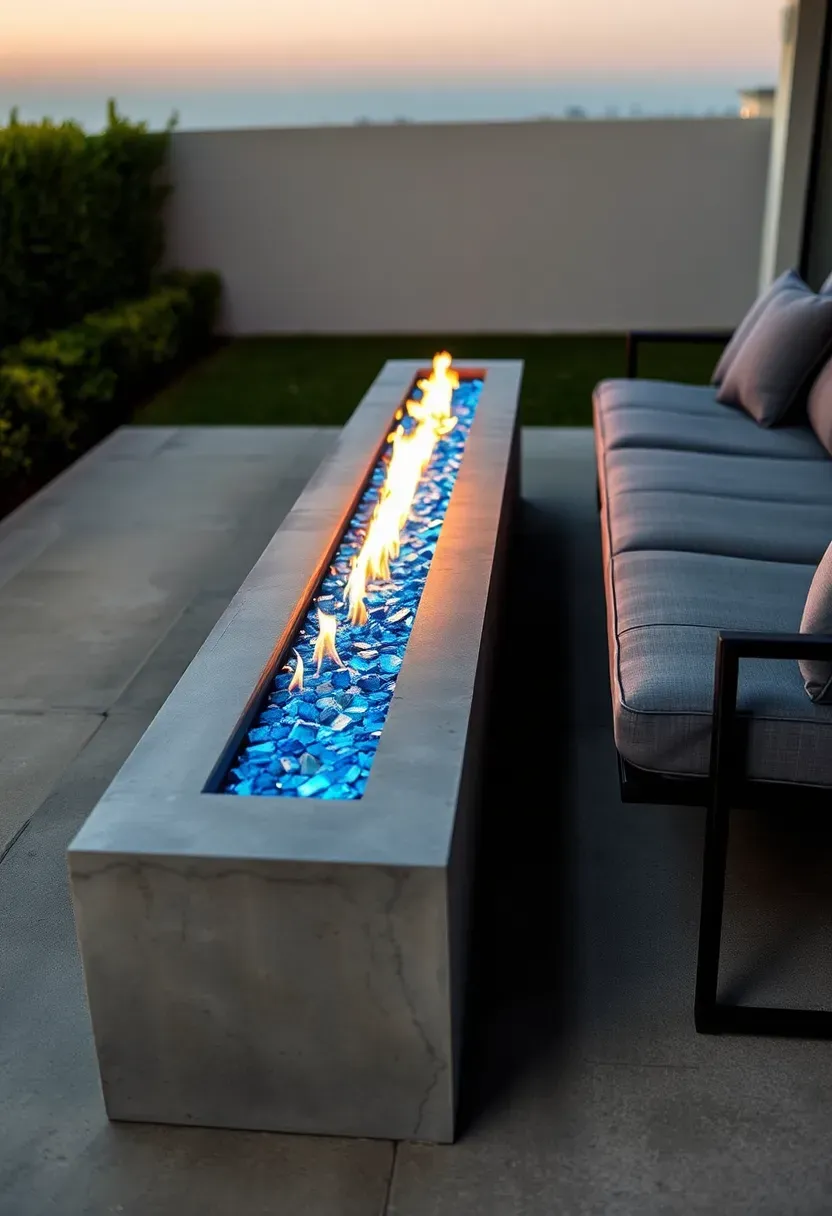
6. Concrete Trough Fire Feature
Linear fire features suit modern homes better than round pits because they echo the horizontal lines of contemporary architecture. A poured concrete trough — typically 48-72 inches long, 14 inches wide, and 12 inches tall — filled with fire glass and a gas burner bar creates a dramatic focal point that also functions as a visual divider between seating areas. You can pour the trough yourself using melamine-coated forms, or order a prefab GFRC (glass fiber reinforced concrete) unit. The linear shape works especially well along one edge of a rectangular patio, giving everyone seated on both long sides equal access to the warmth.
Where it fits best
- Modern ranch homes with flat rooflines and clean hardscape
- Rooftop decks where a round pit would feel out of place
- Pool areas where the trough can double as a visual barrier near the water's edge
Recommended
Items for this idea
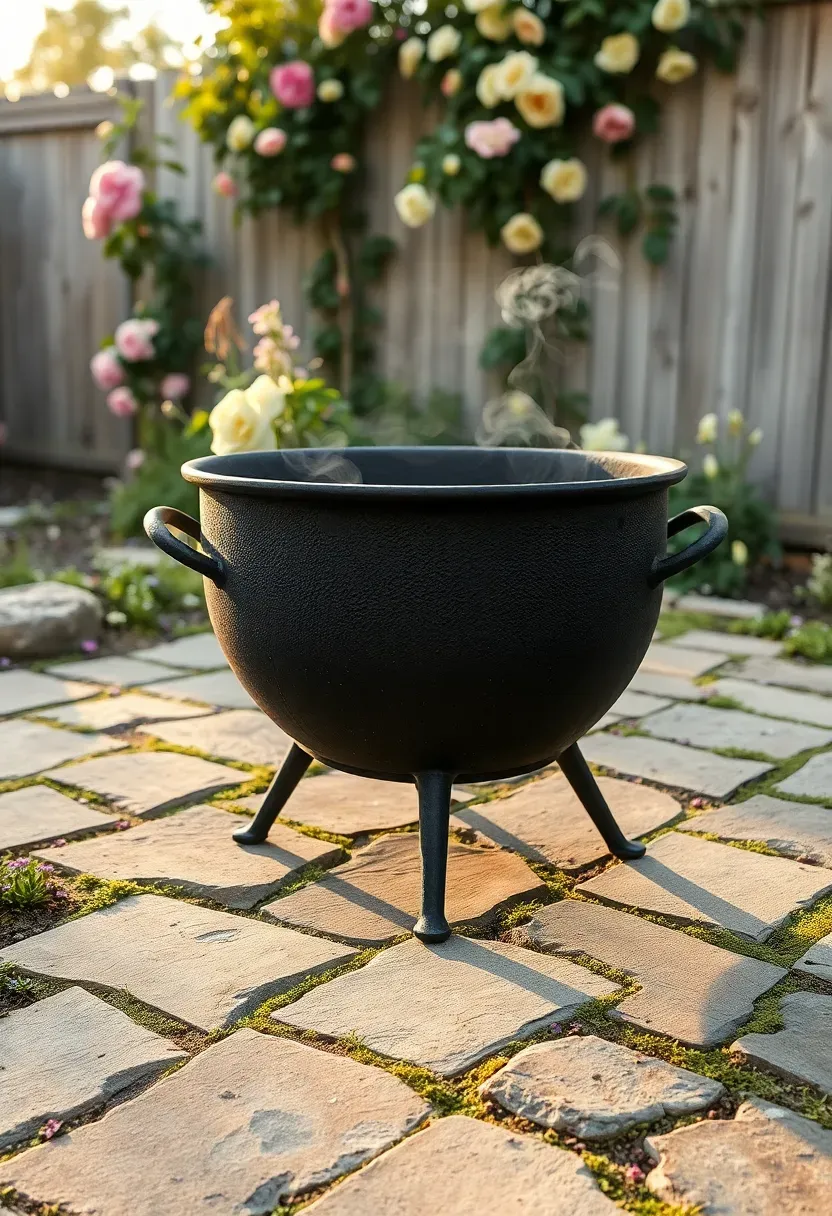
7. Cast Iron Cauldron on a Flagstone Pad
Step 1: Build the base
Lay irregular flagstone in a 6-8 foot circle on a sand bed. Let the gaps stay wide (1-2 inches) and fill them with polymeric sand or plant creeping thyme for a cottage garden look.
Step 2: Place the cauldron
A 30-inch cast iron cauldron with a tripod stand sets directly on the flagstone. Cast iron holds heat long after the fire dies, which extends warmth on cool evenings. These run $100-200 from garden supply or fireplace specialty shops.
Step 3: Accessorize
Hang a cooking grate from the tripod for campfire-style grilling. Add a spark screen lid for windy nights. Place three or four mismatched vintage chairs around the flagstone pad.
Watch out
Cast iron is heavy — a 30-inch cauldron weighs 50-80 pounds. Choose your location before filling it with wood, because you will not want to move it often.

8. Double-Ring Firepit with Gravel Moat
The double-ring design adds a visual and functional buffer between the fire and the surrounding yard. Build a standard stacked stone or block fire ring (36 inches inner diameter), then install a second ring of steel landscape edging at about 60 inches in diameter. Fill the space between the two rings with a different material than whatever surrounds the outer ring — crushed white marble between the rings with pea gravel outside, or river rock between the rings with bark mulch outside. The moat acts as a spark catch, keeps seating at a safe distance, and adds a deliberate, finished quality to what might otherwise look like a basic ring of rocks in the middle of a lawn.
Tips
- Use a different colored gravel inside the moat for clear visual separation
- Keep the moat at least 10-12 inches wide so it reads as intentional, not accidental
- Add solar path lights at four points around the outer ring for nighttime definition
Recommended
Items for this idea
9. Fire Table with Built-In Drink Rail
A firepit you can set your drink on is a firepit that gets used every weekend. Fire tables combine a gas burner in the center with a wide flat rim — typically 6-8 inches — that serves as a ledge for glasses, plates, and phones. You can buy prefab versions from $400-800, or build your own from a metal fire ring insert and a concrete or wood-topped frame. The rail keeps drinks close without the risk of knocking them into the fire. It also gives people something to lean on, which subtly encourages them to stay longer. Place it where you would normally put a coffee table between outdoor sofas and chairs.
Tips
- Cedar and ipe hold up to outdoor weather; avoid pine unless you seal it thoroughly
- Route a propane line underneath for a built-in tank compartment
- Attach a metal heat shield under the drink rail where it meets the fire ring
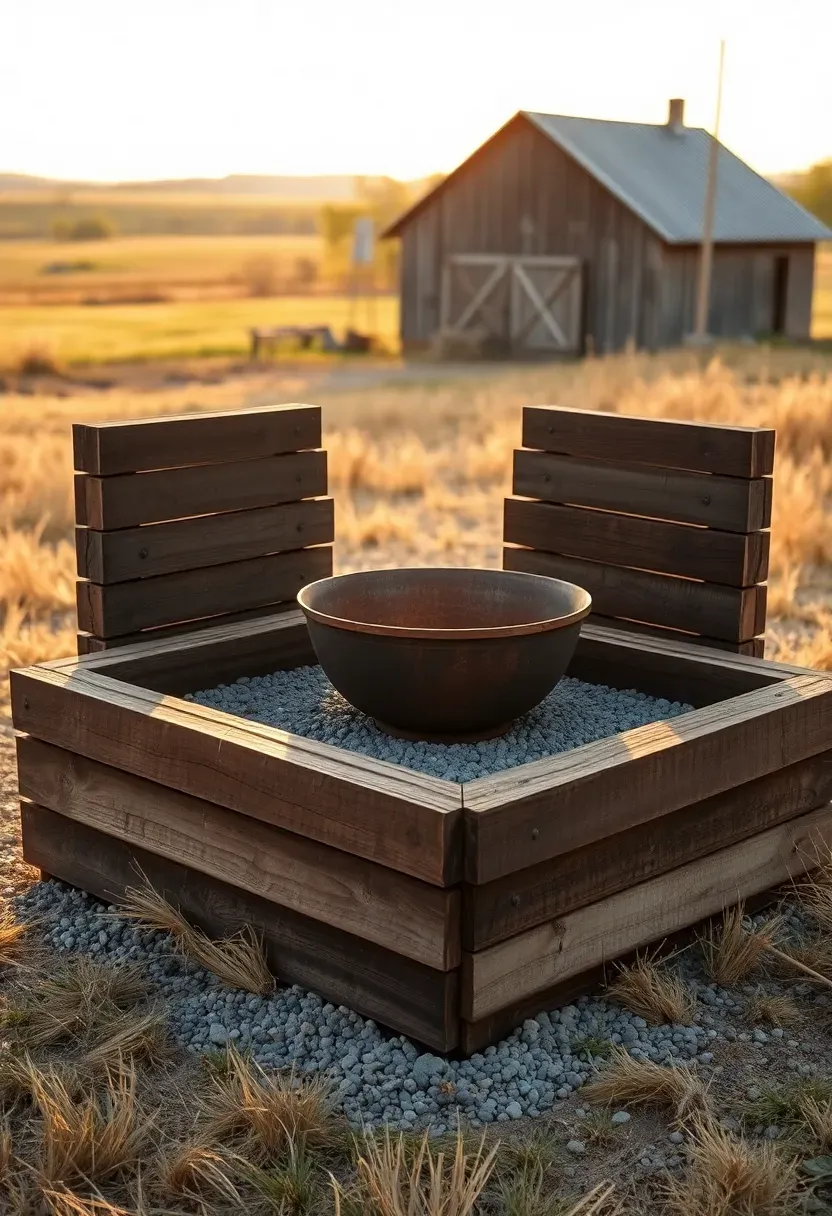
10. Stacked Railroad Tie Firepit Surround
The appeal
Used railroad ties have a rough, heavy, dark-stained character that fits rural properties, farmsteads, and rustic cabin yards. They cost $10-25 each from salvage yards and can be stacked two or three high to form a square or rectangular seating surround.
How to build it
Lay the first course of ties directly on compacted gravel in a square pattern, stagger the second course like brickwork for stability, and pin layers together with 12-inch rebar driven through pre-drilled holes. Place a metal fire ring or bowl inside the square rather than burning directly against the wood.
Safety note
Keep a metal fire ring or bowl between flames and the ties — railroad ties are treated with creosote, which is flammable. A contained fire with a spark screen is safe; direct contact between flames and treated wood is not. Some people prefer untreated landscape timbers as a safer alternative.
Recommended
Items for this idea
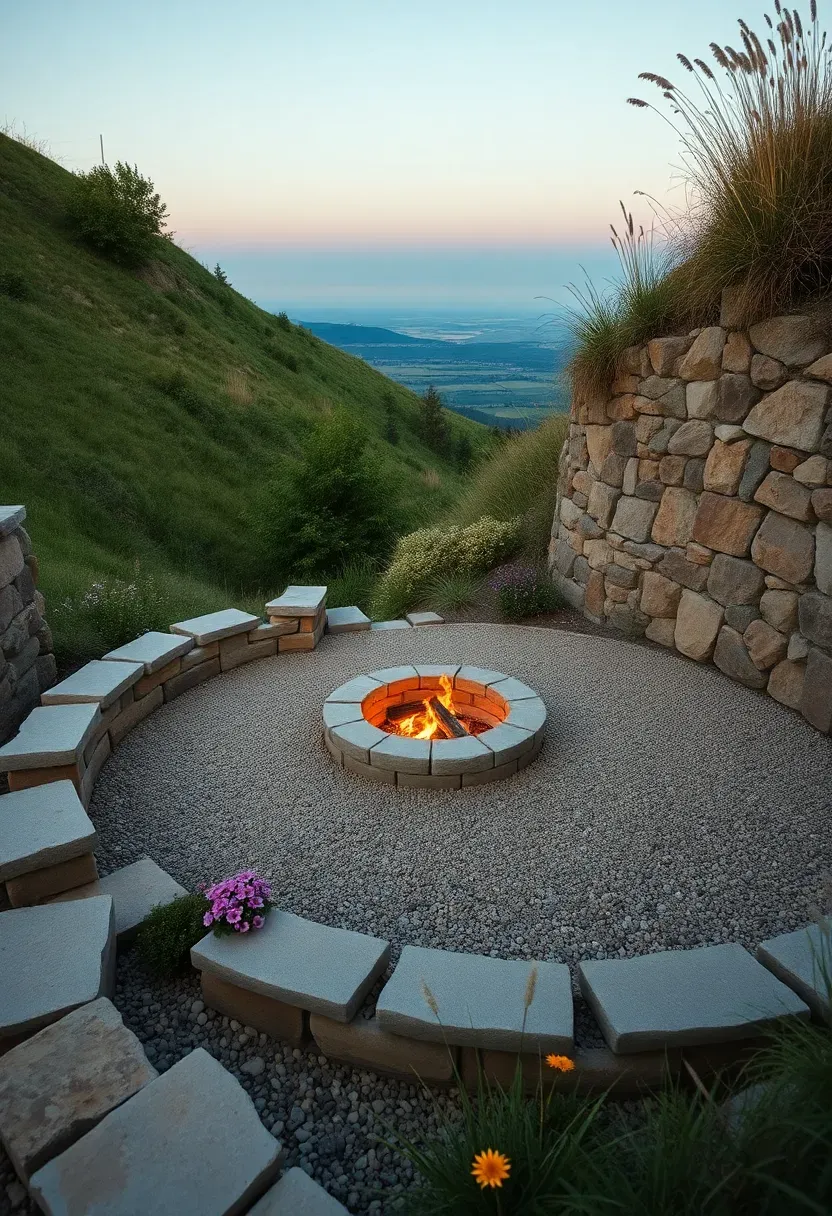
11. Hillside Terraced Firepit
A sloped yard that feels unusable for anything becomes the best firepit spot on the property with some earthwork. Cut a level platform into the hillside — at least 12 feet in diameter — and build a retaining wall on the downhill side from stacked stone, timber, or concrete block. The uphill cut face becomes a natural backdrop and windbreak. Place the firepit toward the downhill edge so the retained earth behind you blocks prevailing winds. Plant the exposed slope with native grasses or groundcover to prevent erosion. The result feels like a private amphitheater carved into the landscape.
Tips
- Compact the cut face and install drainage behind the retaining wall to prevent hydrostatic pressure
- Angle the platform slightly toward the downhill side for water runoff
- Use the excavated soil to level low spots elsewhere in the yard
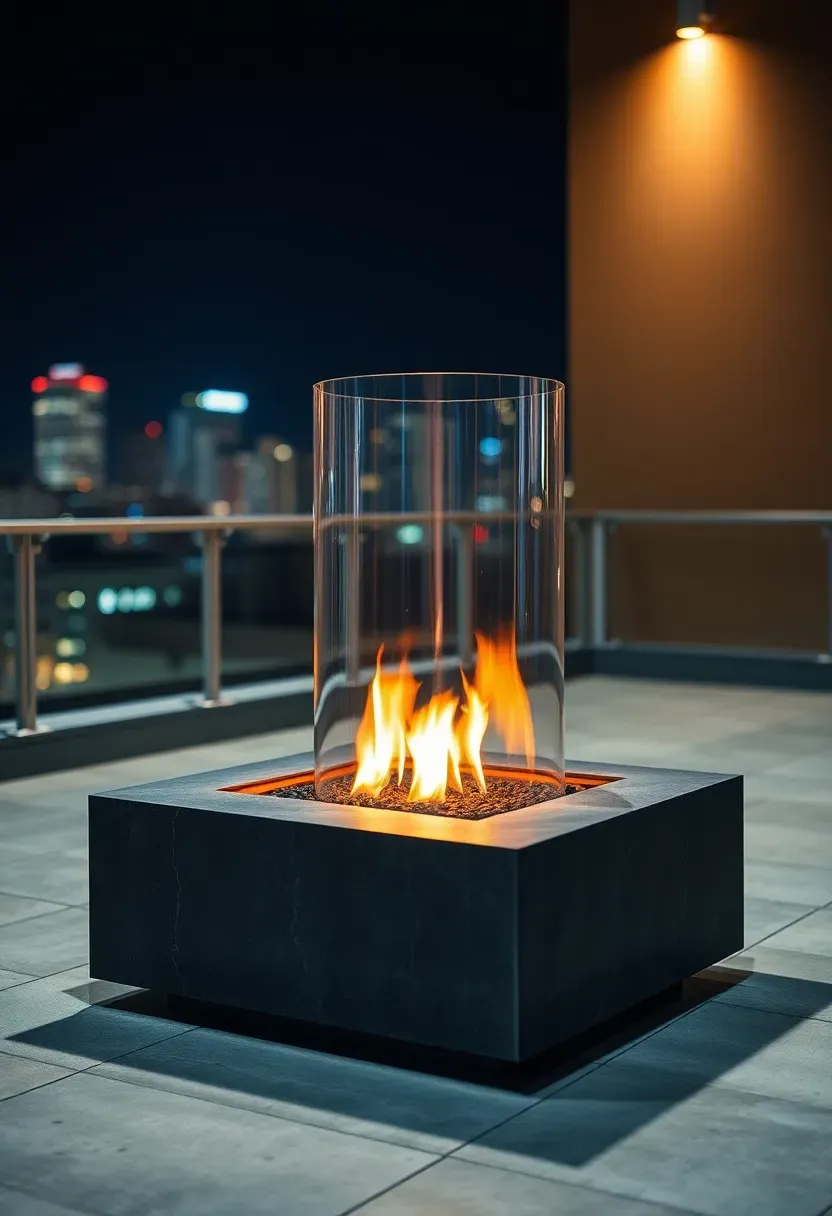
12. Propane Firepit with Glass Wind Guard
The problem
Gas firepits produce a clean, adjustable flame, but a moderate breeze pushes that flame sideways, wastes fuel, and reduces the heat you actually feel. This is especially frustrating on elevated decks, rooftops, or open yards with no tree cover.
The solution
A tempered glass wind guard — a clear cylinder or rectangular panel set around the burner — blocks wind from reaching the flame while keeping the fire fully visible from all angles. Guards cost $40-120 depending on size and attach to the fire ring or sit freely around it.
Choose if
- You live in a windy area or on a hill
- Your firepit sits on an exposed deck or rooftop
- You want the flame to stay tall and centered without constant adjustment
Recommended
Items for this idea
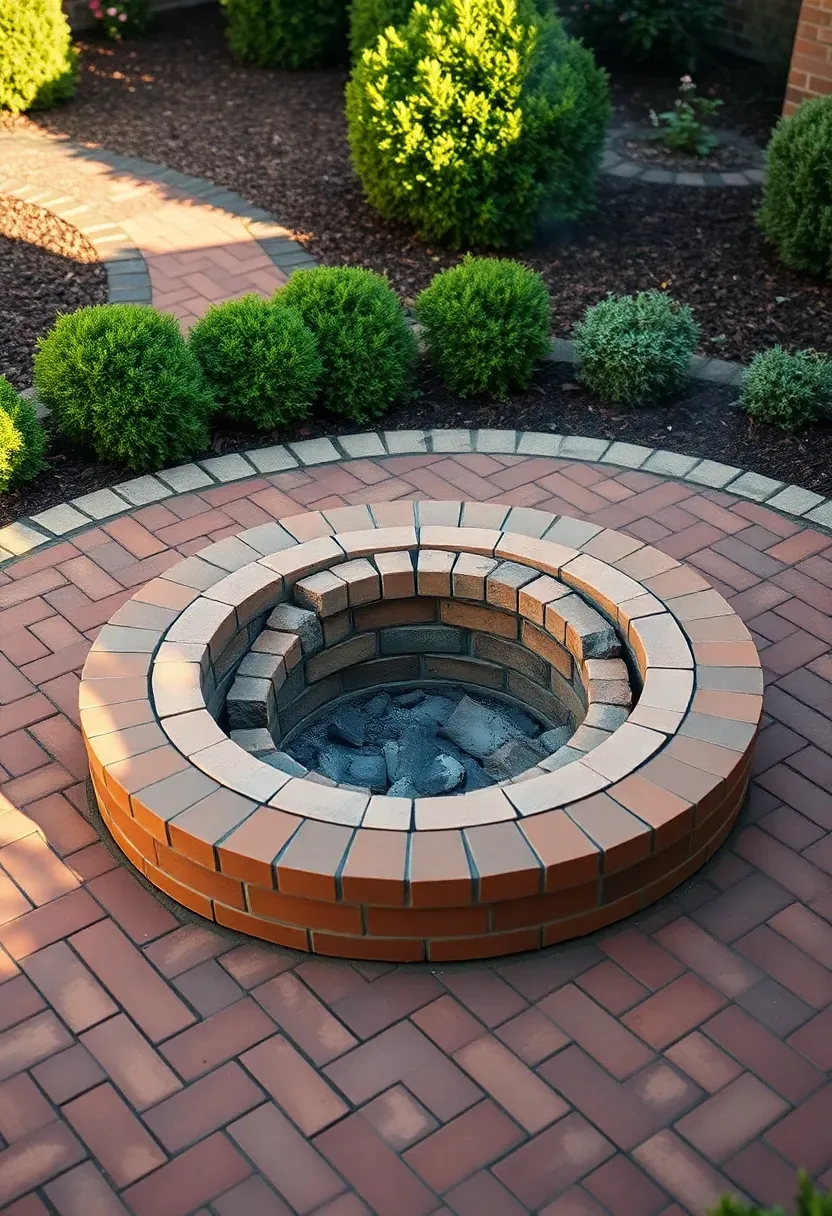
13. Brick Herringbone Firepit Patio
There is a reason herringbone patterns have survived for centuries — the interlocking 45-degree angles distribute weight evenly, resist shifting, and look more interesting than running bond without being fussy. Build a 12x12 or 14x14 foot herringbone patio using standard clay bricks on a compacted sand and gravel base, then construct a round fire ring in the center from fire-rated brick or firebrick. The warm red tones of brick suit colonial, farmhouse, and English cottage styles particularly well. Over time, moss fills the joints and the whole surface develops the weathered patina of a much older garden. This is a weekend-plus project for experienced DIYers, or about $2,000-3,500 installed by a mason.
Tips
- Use a string line and center stake to maintain a true circle for the fire ring
- Lay the herringbone pattern from the center outward — it is easier to cut edge pieces than fit the middle
- Leave a 2-inch gap between the firebrick ring and the patio bricks for thermal expansion

14. Asymmetric Boulder Firepit Circle
Perfectly round, evenly spaced arrangements look designed. Sometimes you want a firepit that looks like it has always been there, as if someone cleared a few trees and found it. Place 5-7 large boulders (18-30 inches) at irregular intervals around a ground-level fire ring. Vary the distance — some close enough to lean against, others farther back with room for a chair between them. Partially bury the boulders 4-6 inches into the ground so they feel rooted, not dropped. This approach costs the price of the boulders ($50-150 each delivered) plus a few hours with a shovel and a strong back. It works best in naturalistic yards with existing trees, meadow grass, or woodland edges.
Tips
- Ask the quarry to select boulders with at least one flat face for comfortable sitting
- Partially bury them at slightly different angles for a natural, geologic look
- Avoid placing any boulder directly downwind of the fire's prevailing smoke direction
Recommended
Items for this idea
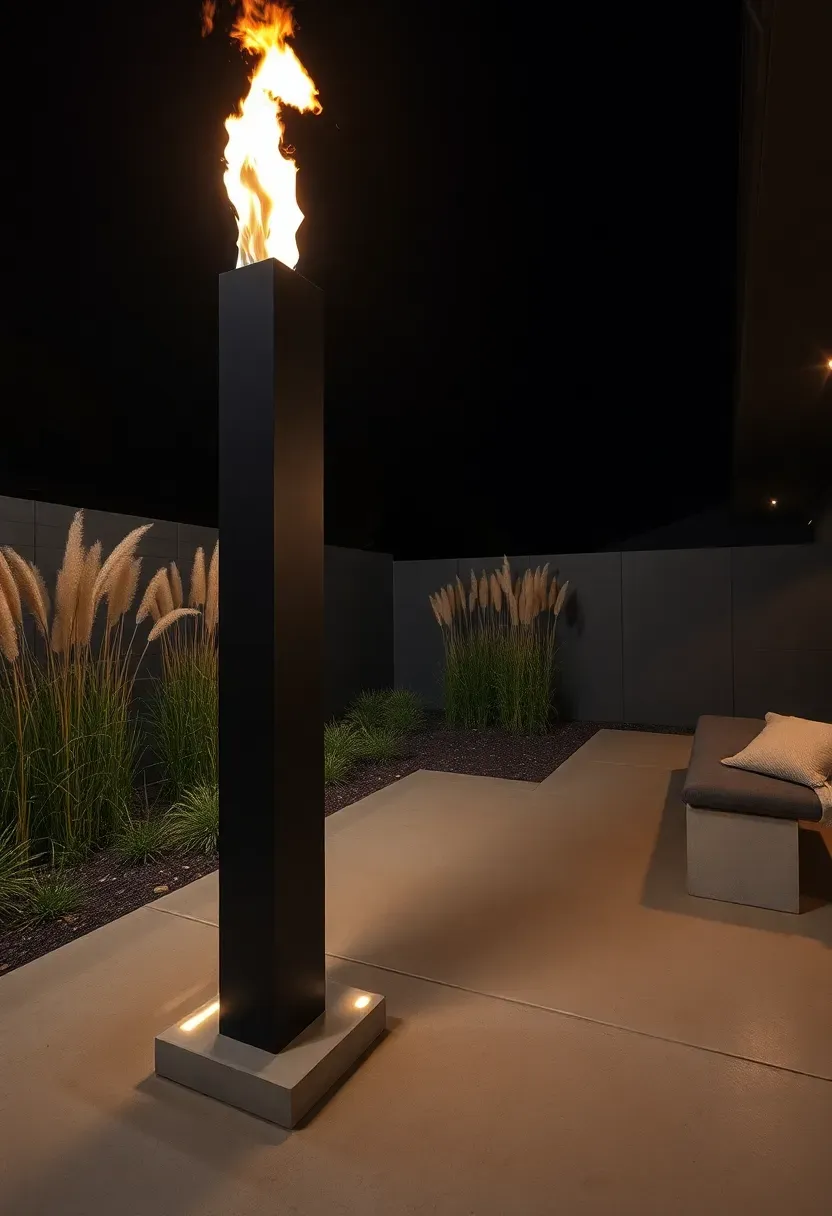
15. Minimalist Black Steel Fire Column
For yards where architecture matters more than rusticity, a vertical fire column makes a statement that a squat fire bowl cannot. These are typically 36-48 inches tall, 12-16 inches wide, and run on natural gas or propane piped from below. The flame rises from the top, visible at standing height rather than requiring everyone to sit down. Powder-coated matte black steel complements modern, industrial, and Scandinavian-inspired outdoor spaces. Place it near a seating area as an accent, or use two columns flanking a pathway or entrance for a dramatic approach. They generate moderate heat in a tight radius — enough for two people standing close, not enough to warm a group of eight.
Where it fits best
- Minimalist concrete or porcelain tile patios
- Courtyard gardens with clean lines and structured planting
- Entrance areas where a ground-level pit would be a tripping hazard
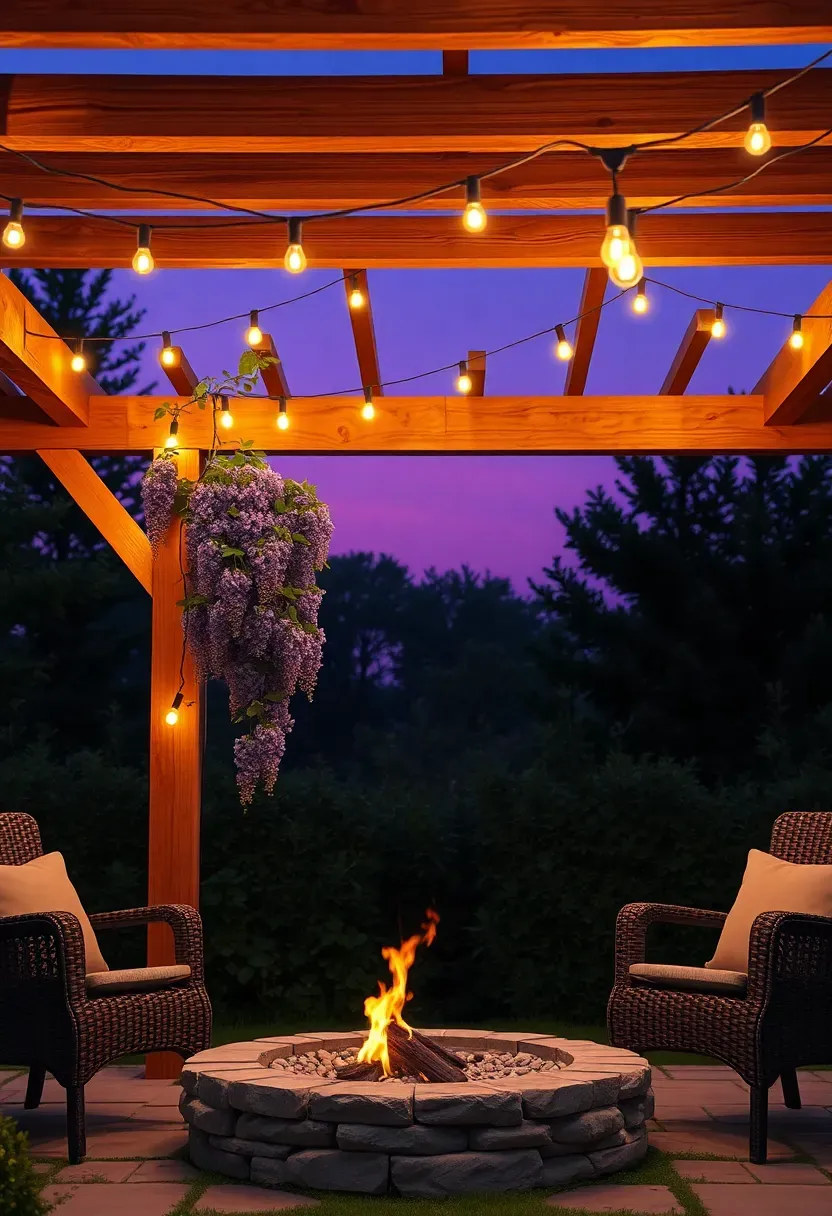
16. Firepit with Overhead Pergola and String Lights
Step 1: Build or install the pergola
A 12x12 foot cedar or pressure-treated pergola provides the frame. Set the posts at least 24 inches deep in concrete footings. Keep the crossbeams at 9-10 feet high — tall enough to dissipate rising heat and smoke safely.
Step 2: Place the firepit
Center a gas firepit (not wood-burning — sparks and overhead structures do not mix) under the pergola. Gas burns clean and the heat dissipates before reaching the wood above, but maintain at least 8 feet of vertical clearance between flame and any wood surface.
Step 3: Add lighting and greenery
Drape commercial-grade string lights in a zigzag pattern across the rafters. Train a climbing plant — wisteria, jasmine, or grape vine — up one or two posts for seasonal greenery and partial shade.
Watch out
Never burn wood in a firepit under a pergola. Use gas only, and confirm your local code allows overhead structures above fire features.
Recommended
Items for this idea
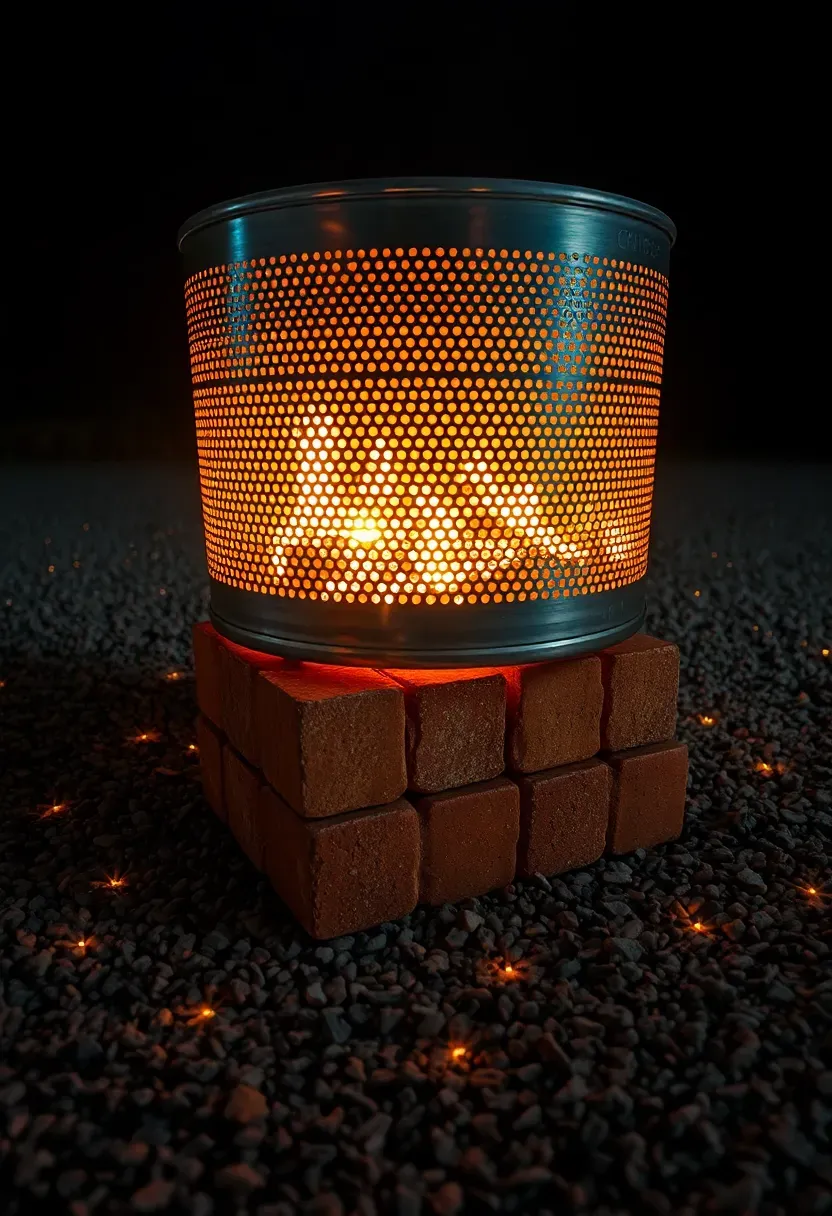
17. Recycled Washing Machine Drum Firepit
This is the best sub-$20 firepit you can build. Old front-load washing machine drums are perforated stainless steel cylinders designed to survive thousands of high-heat, high-spin cycles. Pull one from a broken machine (check appliance recyclers or curbside finds), set it on a bed of sand or gravel, and you have a firepit with built-in airflow through every hole in the drum wall. At night, the perforations glow with individual points of firelight that create a pattern on the surrounding ground. It is not elegant in a country-club way, but it has a honest industrial charm that works in casual, creative, or workshop-style backyards.
Tips
- Remove the plastic seal ring and any rubber gaskets before the first fire
- Set the drum on three bricks or a metal stand for better airflow underneath
- Spray the exterior with high-temperature flat black paint if you want a more finished look
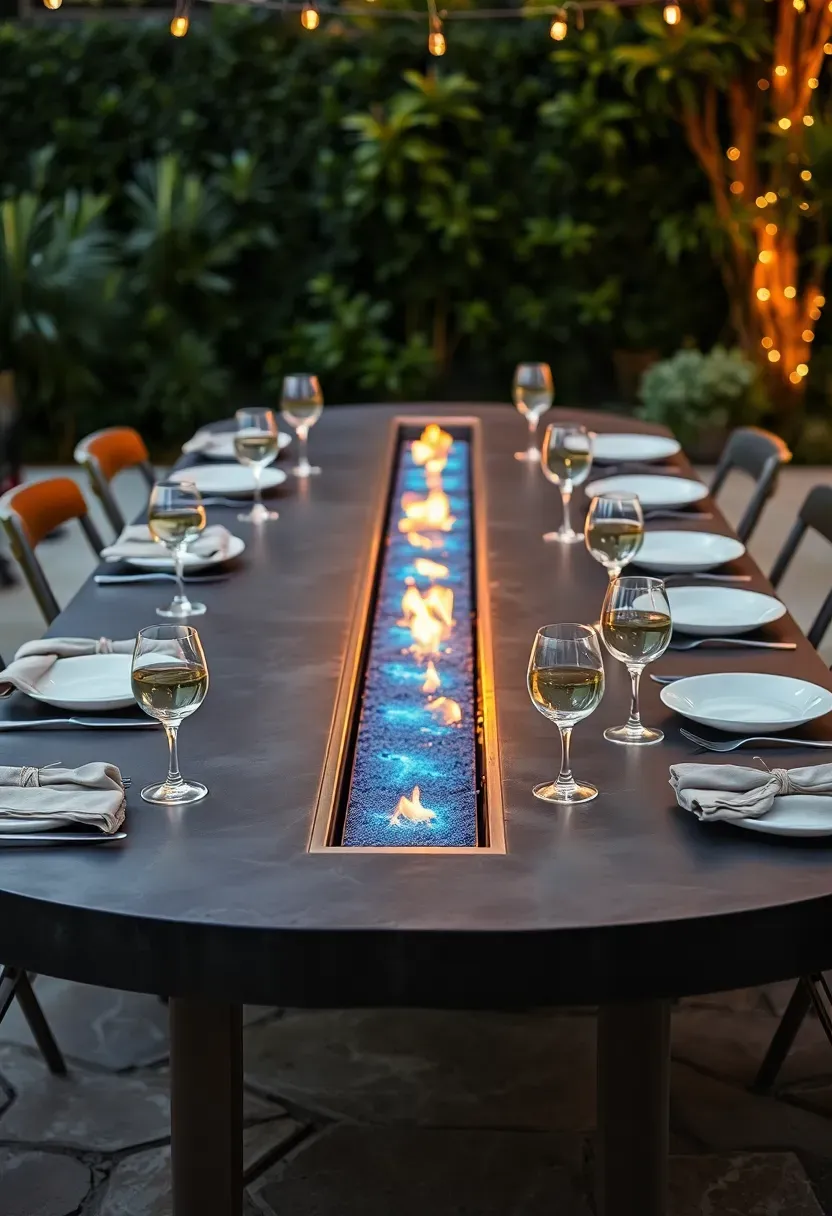
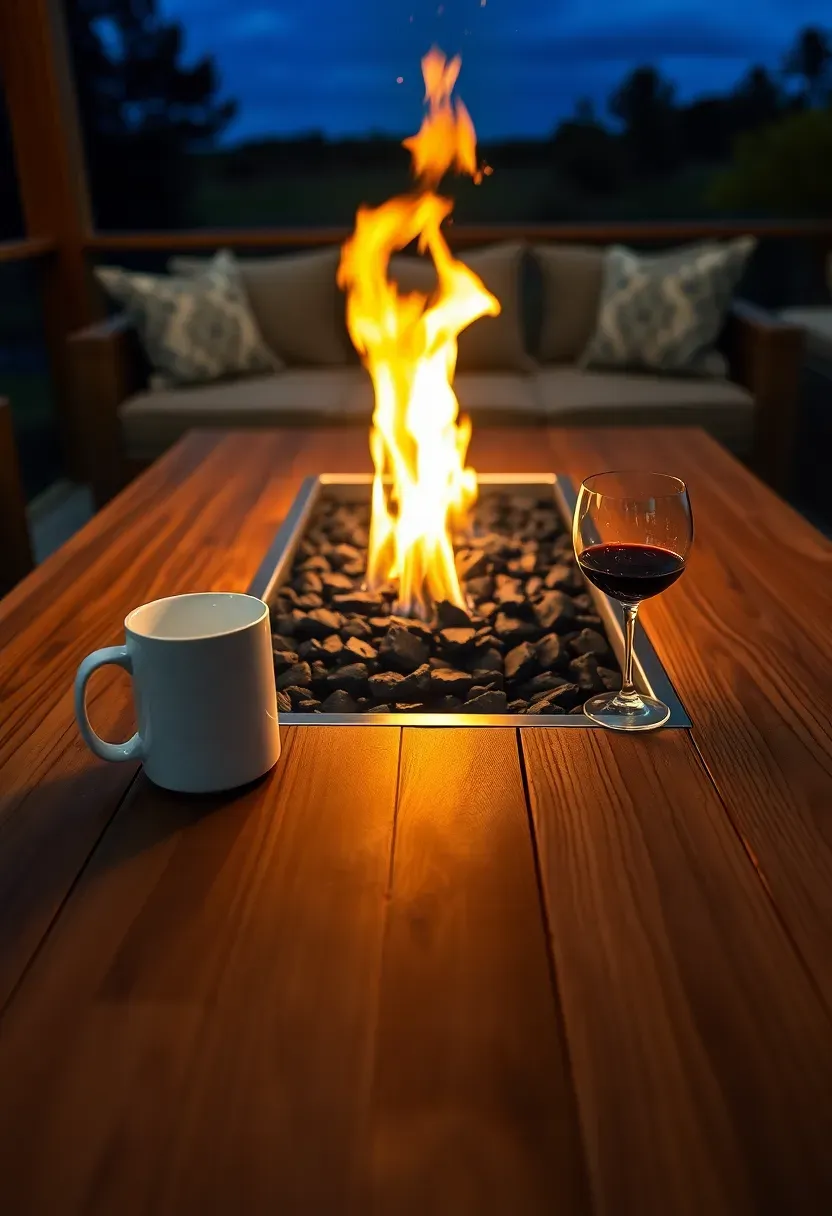
18. Firepit Dining Table Combo
Why combine them?
A separate firepit and dining table forces you to choose between eating and sitting by the fire, or requires enough yard space for both. A dining table with a gas fire trough down the center solves this by putting the flame where the centerpiece would normally go. You eat with warmth and light within arm's reach.
What to look for
Tables with a narrow (8-10 inch wide) linear burner down the center, heat-resistant surfaces (concrete, stone, or ceramic tile), and wide enough side sections (at least 14 inches) for a plate and glass. They seat 6-8 depending on length.
Recommendation
This works best for people who use their outdoor space primarily for meals rather than lounging. If you host dinners outside more than campfire hangs, this is the better investment. Budget $800-2,000 for a quality prefab version.
Recommended
Items for this idea
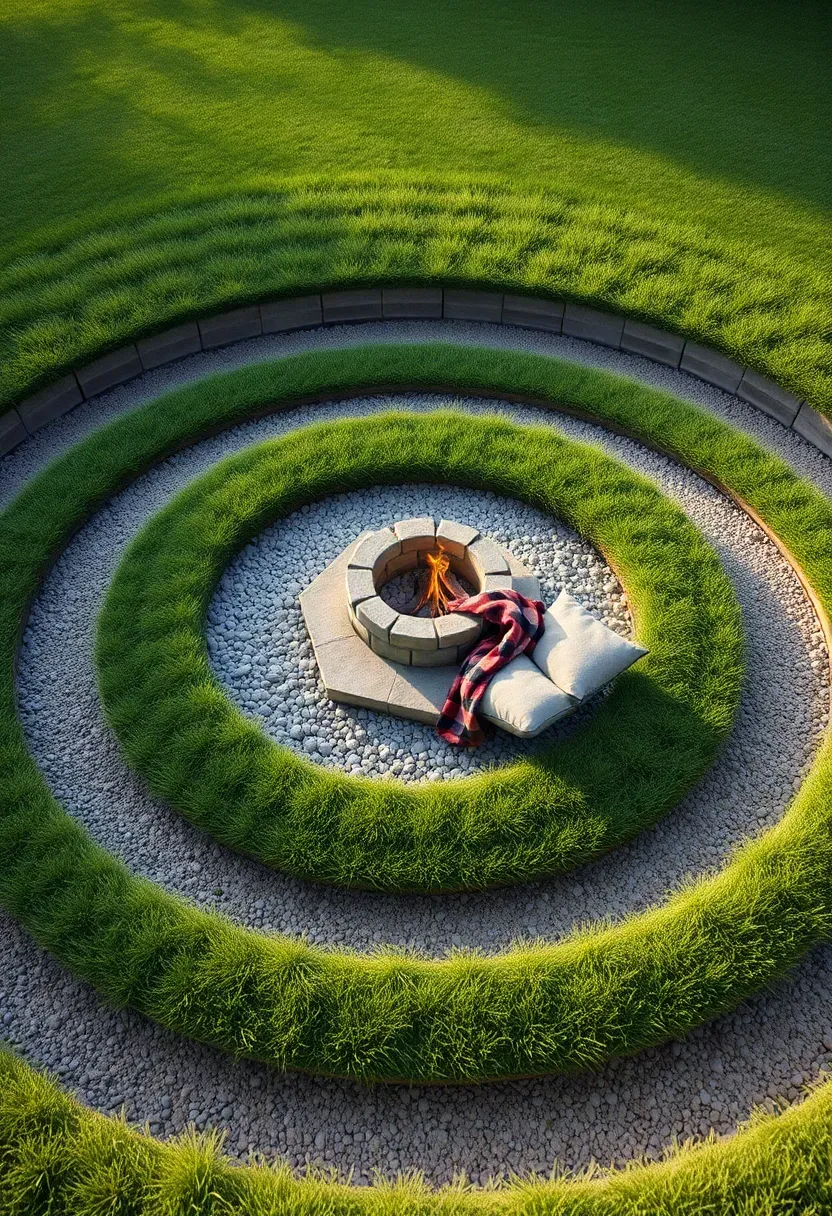
19. Sunken Round Firepit with Grass Steps
Instead of hard surfaces all the way down, this version uses turf-covered tiers as seating steps. Excavate a circular bowl shape with 2-3 concentric step-downs, each about 12 inches deep and 24 inches wide. Compact the soil on each terrace, add 2 inches of topsoil, and seed or sod with a durable grass variety (bermuda or tall fescue work well). The firepit sits at the lowest level on a gravel pad. From above, the whole thing looks like a natural depression in the lawn. Guests sit on the grass steps with blankets and cushions. The soft seating surface is more comfortable than stone for long evenings, and during the day when the firepit is cold, the sunken lawn becomes a casual amphitheater for kids, reading, or afternoon naps.
Tips
- Choose a grass variety that tolerates foot traffic and partial shade from seated bodies
- Install a 4-inch drain pipe at the lowest point connected to a dry well or daylight outlet
- Mow the steps with a push mower on the highest setting to keep grass thick and cushiony
Quick FAQ
How much does it cost to build a backyard firepit from scratch? A basic DIY firepit using stacked stone or concrete blocks runs $75-200 in materials. Mid-range builds with a paver patio and sitting wall land around $500-1,500. Professional installations with gas lines, custom stonework, and built-in seating start at $2,000 and can reach $5,000+.
Is a wood-burning or gas firepit better for year-round use? Gas wins for convenience in cold months — instant ignition, no smoke, and a clean shut-off mean you will actually use it on a random Tuesday in February. Wood-burning pits offer more heat output and that campfire atmosphere, but the effort of building and tending a fire limits how often most people bother.
Do firepits damage the grass or patio underneath? Wood-burning pits will kill grass in a 2-3 foot radius from heat alone. Always place them on gravel, stone, or a concrete pad. Gas firepits produce less ground-level heat but still benefit from a non-combustible base. On wood decks, use a certified deck protector pad.
Can I use a firepit during a burn ban? Most burn bans exempt gas and propane firepits since they produce no sparks or embers. Wood-burning pits are typically restricted. Check your county fire authority for specific rules — the distinction matters, and fines for violations range from $100 to $1,000+.
What is the safest seating distance from a firepit? Keep chairs and benches 4-5 feet from the edge of the fire ring for comfort and safety. At that distance you feel warmth on your face and hands without scorching. Move back to 6-7 feet if you have small children who might lunge forward.
The best firepit is the one that actually gets used, which means it needs to match how you live outside — not how a catalog says you should. If you eat outdoors, look at the dining table combo or the drink rail fire table. If your yard slopes, use the hill instead of fighting it. If your budget is $20 and a free afternoon, grab a washing machine drum. Stop overthinking it. Pick one, build it this weekend, and see what happens when you light it up after dark. People will show up.
Pinterest cover for 19 Backyard Firepit Ideas That Look Great All Year
About the author
OBCD
CGI visualization and interior design content. We create detailed 3D renders and curate practical design ideas for every room in your home.