19 Backyard Gazebo Ideas
We bought our house partly because of the big backyard, then spent three years ignoring most of it. The grass was mowed, sure, but nobody sat out there. The turning point was a 10-by-12 cedar gazebo I built over two weekends with lumber from the local yard. Suddenly we had a place to eat dinner outside, somewhere the kids did homework on warm evenings, a spot that felt like an actual room rather than just lawn. A gazebo gives a yard a center of gravity. These 19 ideas cover materials, shapes, and sizes for yards of all kinds — from compact suburban lots to sprawling rural properties.
Below you will find gazebo designs grouped by material, function, and budget, with honest notes on what each option actually requires to build and maintain.
Table of Contents
- Classic Cedar Gazebo
- Steel Frame Hardtop Gazebo
- Screened Dining Gazebo
- Pop-Up Canopy Gazebo
- Rustic Log Gazebo
- Vinyl Pergola-Gazebo Hybrid
- Japanese-Inspired Tea Gazebo
- Poolside Cabana Gazebo
- Corner Lot Privacy Gazebo
- Stone Pillar Gazebo
- Grapevine Gazebo
- Hot Tub Gazebo Enclosure
- Fire Pit Gazebo
- Cottage Garden Gazebo
- Modern Flat-Roof Gazebo
- Octagonal Victorian Gazebo
- Budget Pallet Gazebo
- Hillside Elevated Gazebo
- Solar-Powered Evening Gazebo
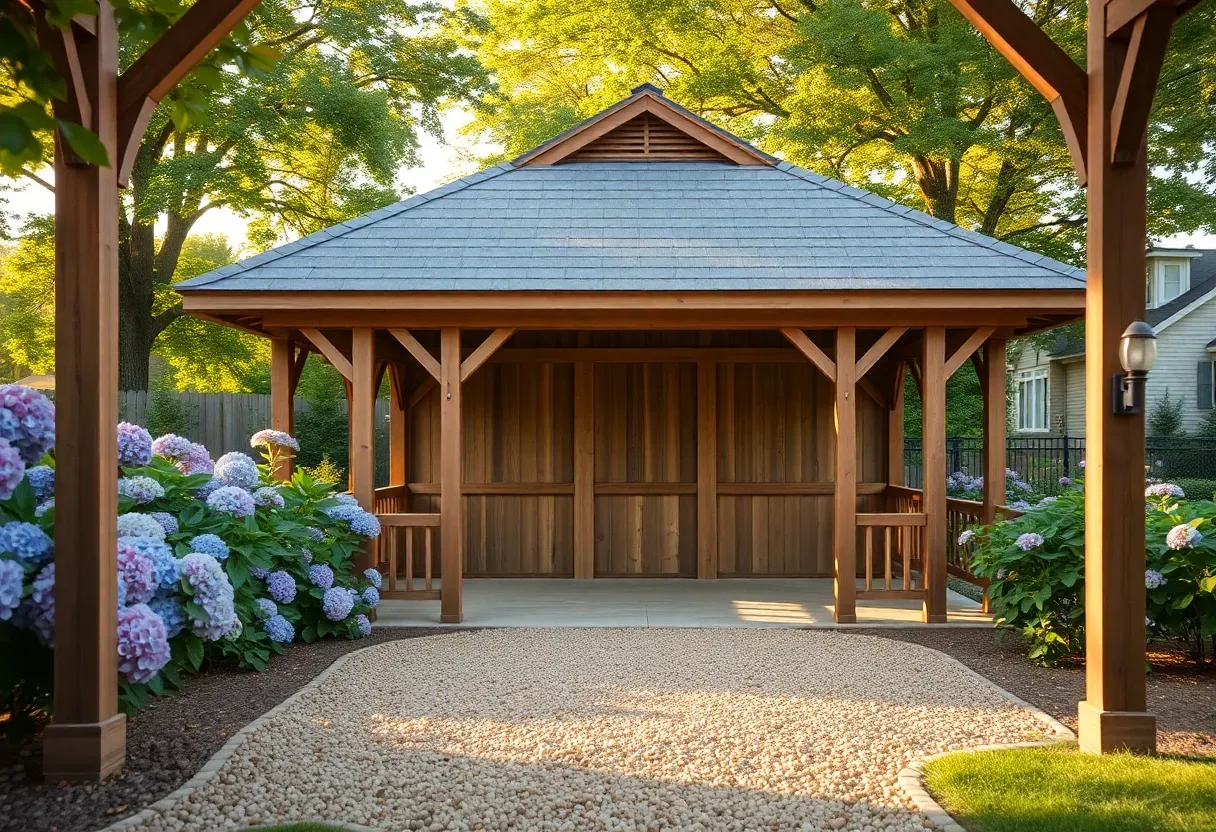
1. Classic Cedar Gazebo
Cedar remains the default gazebo lumber for good reason. It resists rot naturally without chemical treatment, weathers to a silver-grey that most people find attractive, and smells great during construction. A standard 10-foot octagonal cedar gazebo costs between $3,000 and $6,000 in materials if you build it yourself, or $8,000 to $14,000 installed by a contractor. The octagonal shape distributes wind load evenly, which matters if you live somewhere with storms. Plan on staining or sealing every two to three years if you want to preserve the original honey color rather than letting it go grey.
Tips
- Use hot-dipped galvanized or stainless steel fasteners — regular screws will leave black streaks on cedar
- Set posts on concrete piers rather than burying them directly in soil
- Add a cupola at the peak for ventilation and visual interest
We picked a few things that go well with this idea: Aoxun 10x12 Hardtop Gazebo with Netting (★4.3), Aluminum Frame 10x12 Hardtop Gazebo (★4.3) and Aoxun 10x12 Metal Pavilion with Curtains (★4.3). As an Amazon Associate we earn from qualifying purchases.
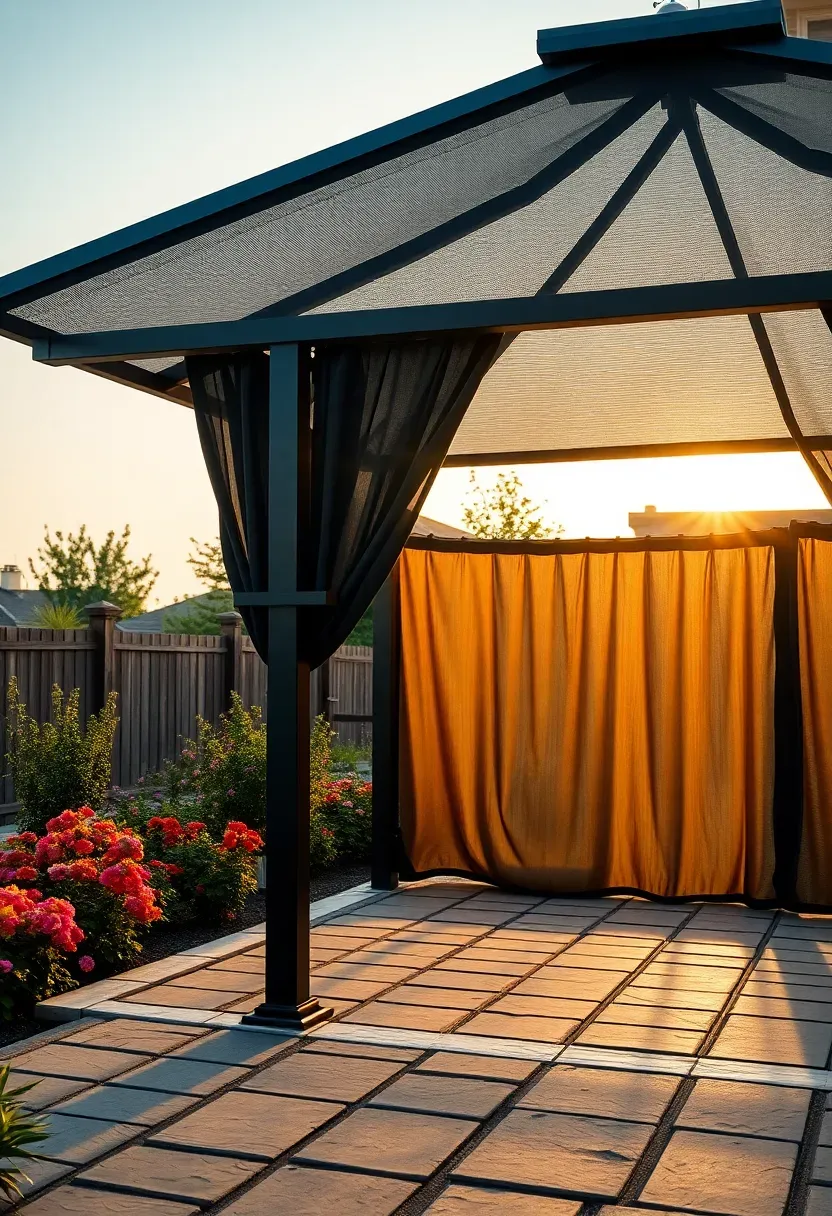
2. Steel Frame Hardtop Gazebo
The problem with soft-top gazebos
Fabric canopies fade, tear in wind, collect mildew, and need replacement every few seasons. You end up spending more over five years than a hardtop costs upfront.
Why steel and polycarbonate work better
Hardtop gazebos use powder-coated steel or aluminum frames with polycarbonate or galvanized steel roof panels. They handle snow loads up to 2,200 pounds on higher-end models. Assembly takes a full day with two people. Prices range from $1,200 for a basic 10x10 to $4,500 for a 12x16 with curtains and netting included. The roof sheds rain cleanly and blocks UV without the sagging you get from fabric.
Pros and cons
- Pro: Virtually no maintenance after installation
- Pro: Most ship with integrated mosquito netting and privacy curtains
- Con: They look industrial if the surrounding landscaping is too sparse — plant around the base
We picked a few things that go well with this idea: Addlon 54FT Solar String Lights with Remote (★4.4), Addlon 102FT Solar String Lights (30 Bulbs) (★4.4) and Addlon 54FT Solar Patio Lights (3 Modes) (★4.3). As an Amazon Associate we earn from qualifying purchases.
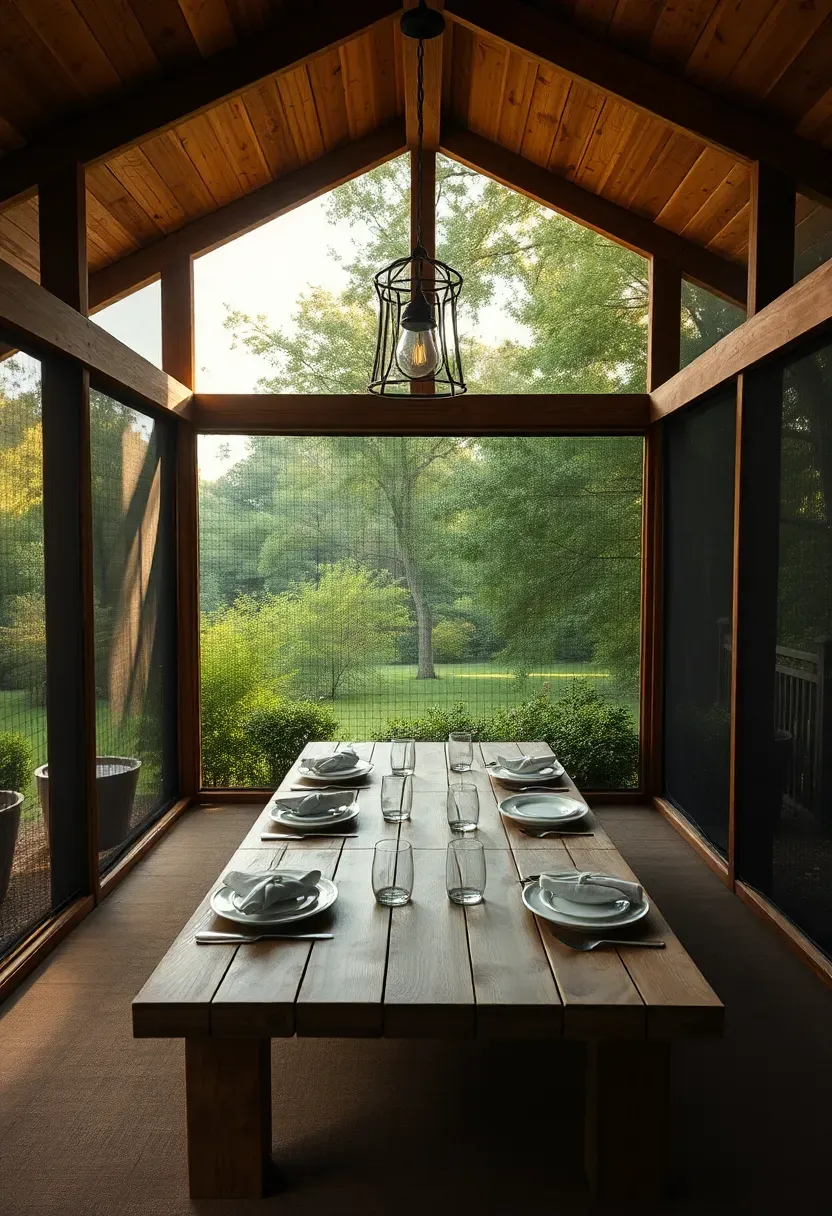
3. Screened Dining Gazebo
If mosquitoes run you off the patio every July, a screened gazebo solves the problem permanently. The key measurement is interior clearance: you need at least 11 by 13 feet inside to fit a six-person dining table with chairs that can push back comfortably. Ceiling height matters too — anything under 8 feet feels cramped once a hanging light fixture takes up a few inches. Fiberglass screening is cheaper but tears easily; upgrade to pet-resistant polyester mesh if you have dogs. A screen door with a magnetic closure strip keeps the entrance sealed without fumbling with latches while carrying plates.
Tips
- Install a ceiling fan rated for damp locations to move air on still nights
- Use a dark screen color — it is easier to see through than bright white mesh
- Run an outdoor-rated electrical line underground to the gazebo before finishing the floor
We picked a few things that go well with this idea: Universal 10x10 Gazebo Mosquito Netting (★4.3), Outdoor Waterproof Mesh Privacy Curtains (2-Pack) (★4.3) and Cedar Gazebo Privacy Curtains with Netting (★5.0). As an Amazon Associate we earn from qualifying purchases.
4. Pop-Up Canopy Gazebo
How to set one up properly
Start by choosing a 10x10 or 10x20 size depending on your gathering. Extend the legs fully before raising the canopy to avoid bending the joints. Stake each corner with 10-inch spiral stakes in grass or use 25-pound weight bags on concrete. Attach sidewalls on the windward side first to create a wind break without catching gusts from the open end.
Step 1: Pick the right weight class
Commercial-grade frames use 40mm hexagonal steel legs. Residential versions use 30mm square tubes that bend in moderate wind. Spend the extra $80 on the heavier frame.
Step 2: Anchor it seriously
A 10x10 canopy generates over 200 pounds of lift in a 20 mph gust. Sandbags, water weights, or screw-in ground anchors are not optional.
Step 3: Know when to take it down
If the forecast calls for winds over 30 mph, collapse it. No canopy is designed to stay up indefinitely.
Watch out
- Never leave a pop-up canopy unattended in changing weather — they become projectiles
- Dry the canopy fully before storing to prevent mold
Recommended
Items for this idea
5. Rustic Log Gazebo
There is a particular kind of backyard where milled lumber looks wrong — wooded lots with mature oaks, properties that back up to fields, cabins. A log gazebo built from peeled round timbers fits those settings the way a cedar-shake roof fits a Craftsman house. Source logs locally from tree services clearing storm damage. Eastern red cedar and black locust are the most rot-resistant species available in most of the eastern US. A six-post log gazebo with a simple rafter roof costs roughly $2,000 in materials if you mill nothing and just debark and notch the logs yourself. It will look rough and intentional rather than sloppy if you keep the dimensions consistent.
Tips
- Debark logs within two weeks of cutting, before beetles move in
- Apply a borate preservative to end grain where moisture enters fastest
- Leave 18 inches of clearance between the lowest log and soil grade
6. Vinyl Pergola-Gazebo Hybrid
Vinyl vs. wood
Vinyl never needs paint or stain. It will not rot, split, or attract termites. It does expand and contract with temperature, so joints must allow movement. The trade-off: it looks like vinyl. No amount of wood-grain embossing fully mimics real timber up close. From 20 feet away, though, most guests cannot tell the difference.
When to choose vinyl
Pick vinyl if you genuinely will not maintain a wood structure. Honest self-assessment matters here. If your deck already has peeling stain, vinyl is the better call.
Choose wood if
You care about tactile warmth, plan to apply a colored stain that makes it a design feature, or want to hang heavy items from the frame. Vinyl posts flex under lateral loads that wood handles without issue.
Recommendation
For most suburban backyards where the gazebo sits 30-plus feet from the house, vinyl gives you the silhouette you want without the upkeep calendar.
Recommended
Items for this idea
7. Japanese-Inspired Tea Gazebo
Japanese garden structures follow a principle called wabi-sabi — beauty in imperfection and impermanence. A tea gazebo (azumaya) is small by Western standards, usually 6 by 8 feet, with a low platform floor you step up onto after removing shoes. The roof curves gently upward at the eaves. Materials are deliberately modest: unfinished hinoki cypress, bamboo accents, a packed-earth or gravel surround. The point is not to impress visitors but to frame a quiet moment. Position it facing a garden view or water feature rather than the house. Keep plantings asymmetrical — one Japanese maple on one side, low moss on the other, nothing centered.
Tips
- Use a compacted gravel pad rather than concrete to match the natural aesthetic
- Source shoji-style screen panels from Japanese woodworking suppliers online
- Plant black bamboo on one side for privacy and movement in the breeze
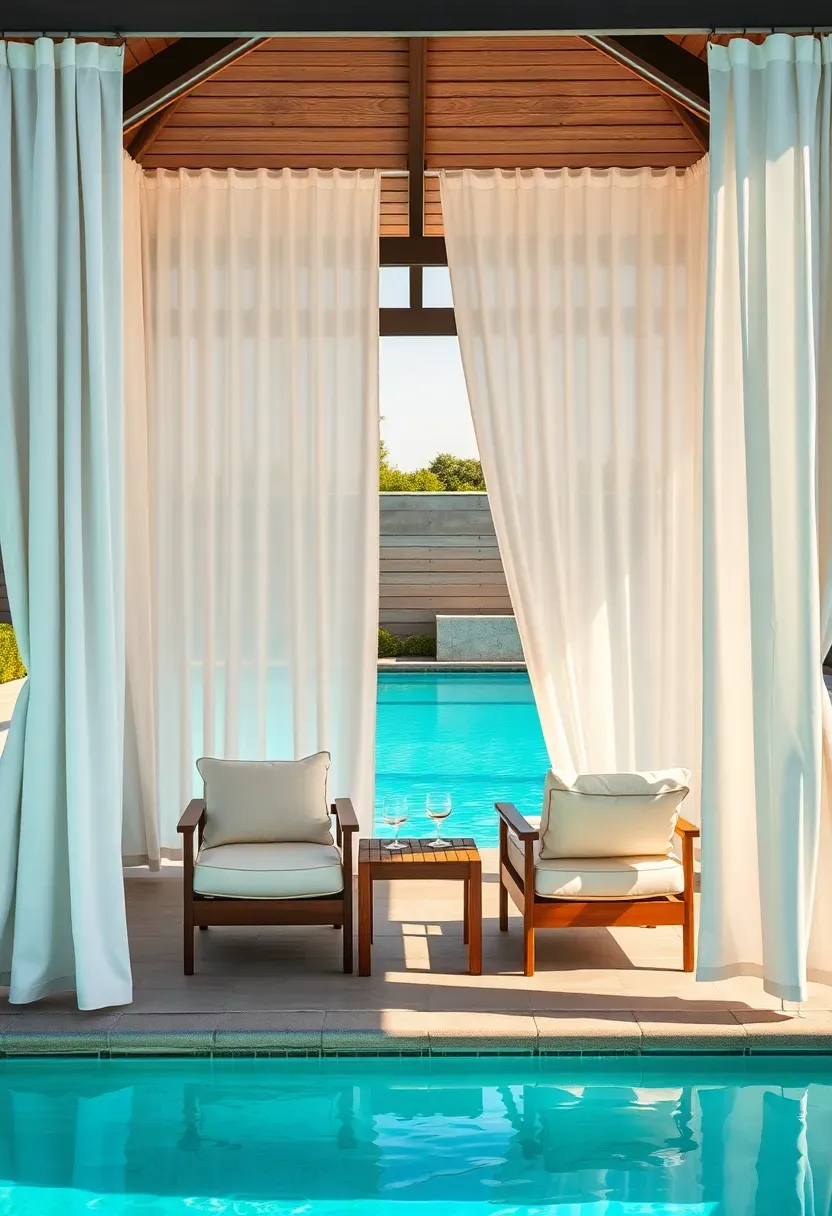
8. Poolside Cabana Gazebo
The problem
Pool areas get full sun for hours and offer no shade for breaks between swimming. Sunscreen reapplication only goes so far when you are outside all afternoon.
The solution
A cabana-style gazebo placed within 15 feet of the pool edge provides shade, a dry spot for towels and phones, and a visual anchor for the pool area. Build it with aluminum or pressure-treated lumber rated for ground contact since poolside structures deal with constant splash exposure and chlorine drift. Dimensions of 8 by 10 feet fit two lounge chairs comfortably. Add outdoor curtains on rings for flexible privacy. Use a concrete pad with a slight crown so water sheds outward rather than pooling under the cabana.
Pros and cons
- Pro: Extends usable pool time by hours on hot days
- Pro: Creates a defined lounging area that keeps towels and bags off the deck
- Con: Proximity to water means hardware corrodes faster — inspect fasteners yearly
Recommended
Items for this idea
9. Corner Lot Privacy Gazebo
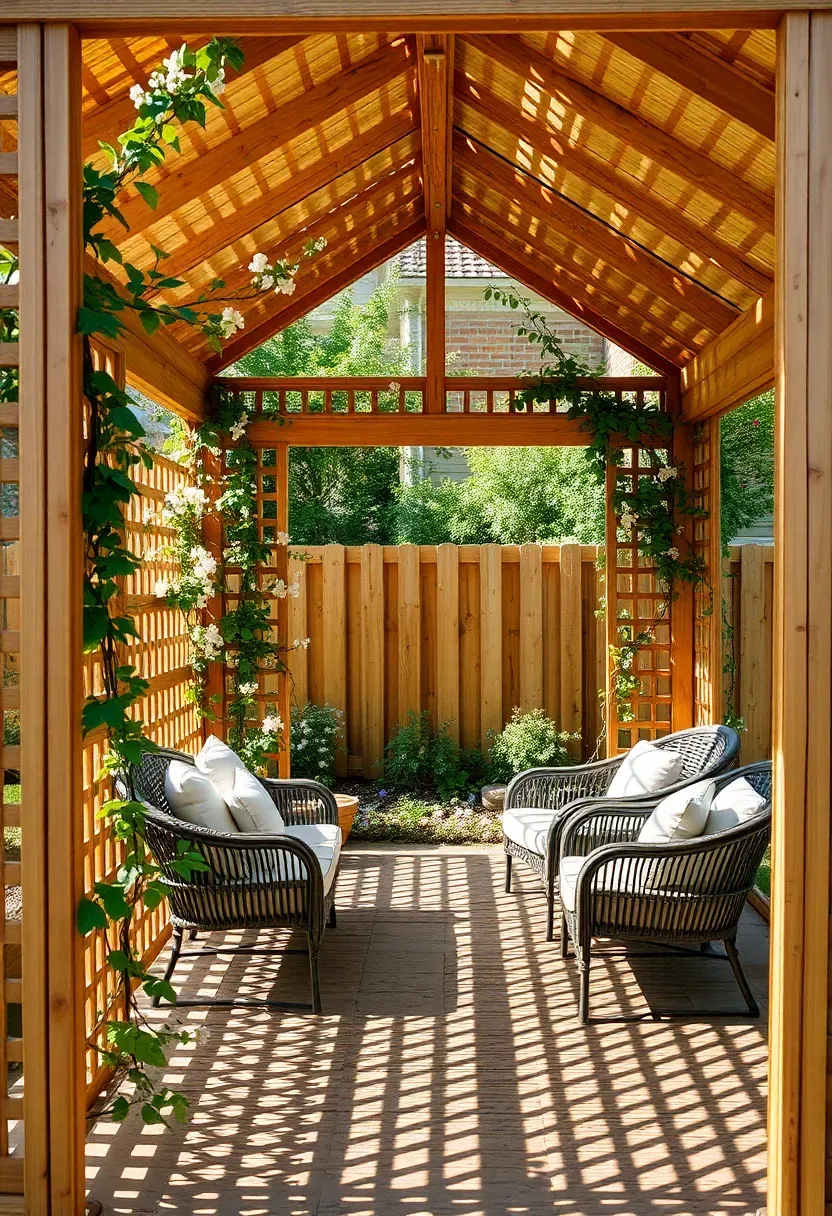
Corner lots give you more yard but less seclusion. Two street-facing sides mean neighbors, pedestrians, and headlights at night. A gazebo with solid or lattice walls on the exposed sides works as a privacy screen and an outdoor room simultaneously. Position it in the corner closest to the intersection where sight lines converge. Build two walls at full height (7 to 8 feet) with lattice panels that allow airflow while blocking direct views. Leave the yard-facing sides open. Plant fast-growing vines — star jasmine, clematis, or trumpet vine — on the lattice for a living wall that thickens each season and softens the structure visually.
Tips
- Check your local setback requirements before building within 10 feet of a property line
- Orient the open sides toward your house so you face your own yard when sitting inside
- Add outdoor roller shades on the lattice sides for complete blackout on movie nights
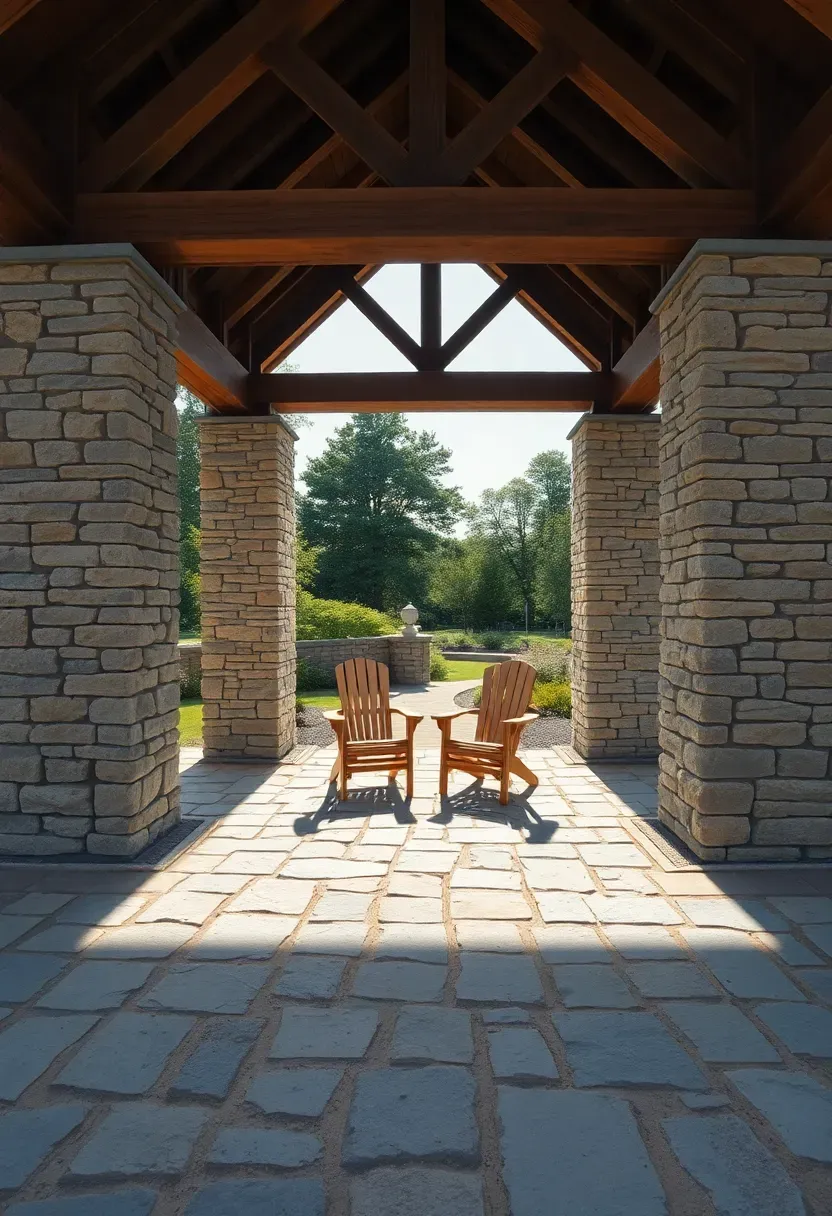
10. Stone Pillar Gazebo
Origins
Stone columns in garden architecture go back to Greek stoas and Roman peristyles — open-air covered walkways that provided shade in public spaces. The idea migrated into English country gardens by the 18th century and reached American estates during the Gilded Age.
Modern application
Today, a stone pillar gazebo reads as permanent and substantial in a way no wood or metal structure can match. The pillars are typically built from stacked fieldstone, river rock, or cut limestone with a steel reinforcement core and mortar joints. The roof sits on a wood or steel beam structure that bears on the stone columns. Total cost runs $12,000 to $25,000 depending on stone selection and local mason rates.
How to apply at home
You do not need four massive columns. Even two stone pillars flanking the entrance of a wood-frame gazebo adds weight and permanence. Source stone locally to match existing hardscaping. A flagstone floor ties the whole composition together.
Recommended
Items for this idea
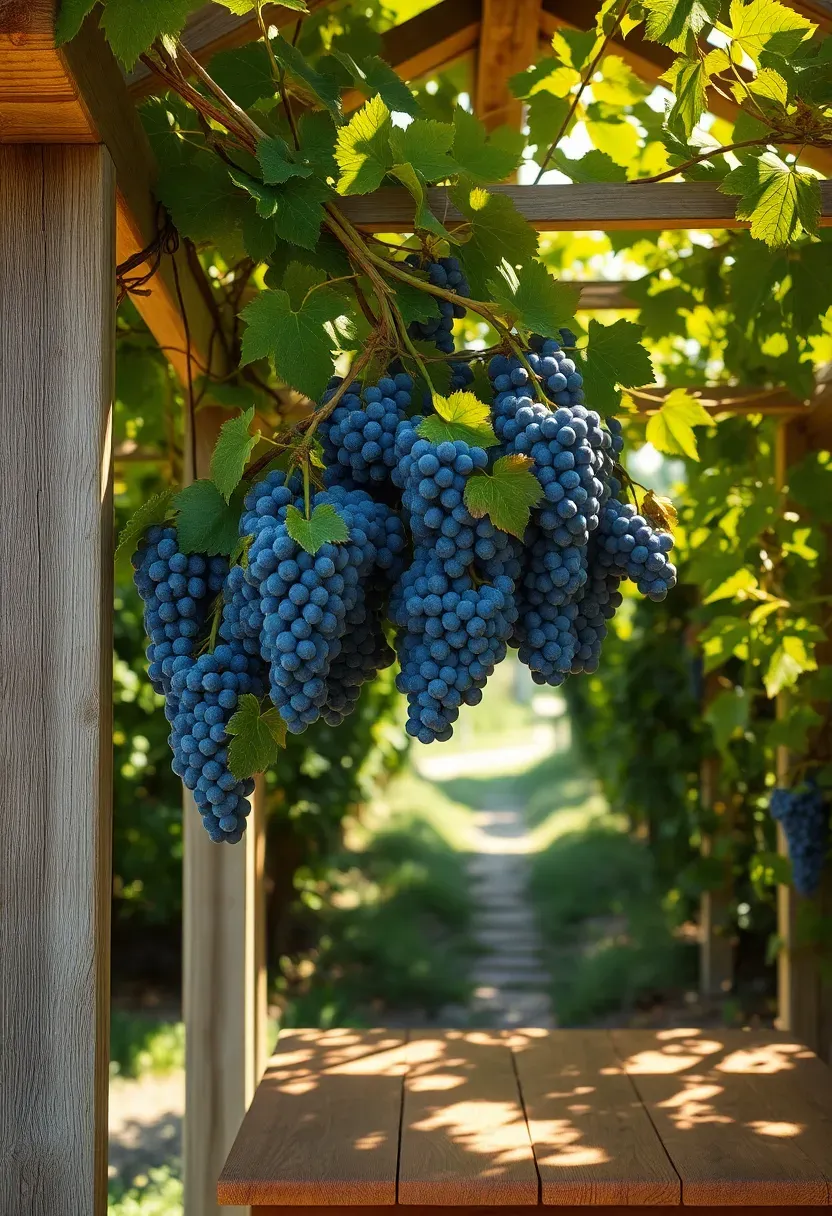
11. Grapevine Gazebo
Build the structure and let the plants do the rest. A grapevine gazebo starts as a basic post-and-beam frame — four 6x6 posts, double 2x8 beams, and a grid of 2x4 rafters spaced 16 inches apart. Plant one grapevine at the base of each post. In two growing seasons, the vines will cover the roof completely, providing dense shade and actual fruit. Concord grapes are the hardiest and fastest for northern climates. Muscadine varieties work better in the South. The vines need annual pruning in late winter — cut back to the main cordons (horizontal branches) and leave four to six buds per spur. Without pruning, the canopy becomes a tangled mess that produces less fruit and more mildew.
Tips
- Install heavy-gauge wire between rafters to give tendrils something to grip
- Apply dormant oil spray in early spring before bud break to control scale insects
- Harvest grapes in late August through September before wasps discover them
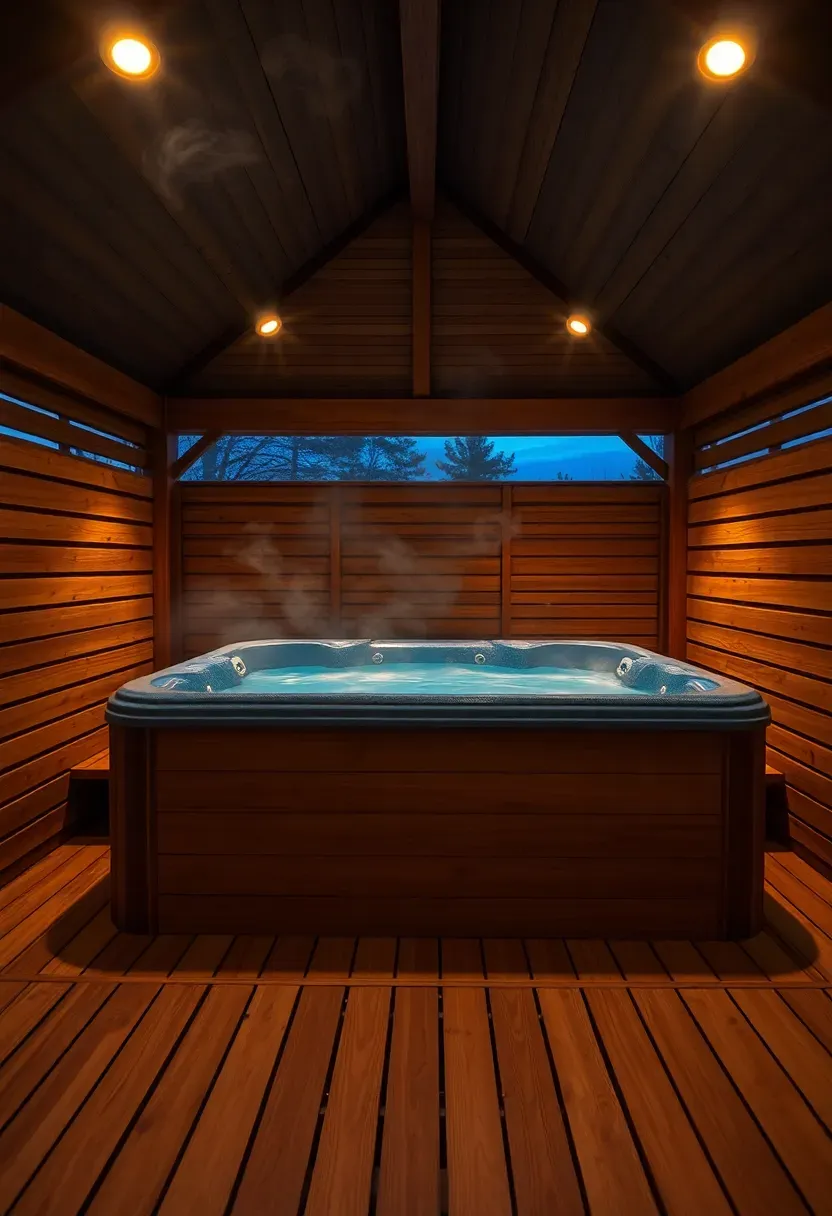
12. Hot Tub Gazebo Enclosure
Why enclose your hot tub
An uncovered hot tub loses heat fast, collects debris, and offers no privacy. A gazebo enclosure fixes all three problems while adding a structure that justifies the investment.
How to build it
Size the gazebo 3 feet wider and longer than the hot tub on all sides to allow walk-around access and a changing bench. The floor needs to support the filled weight of the tub (typically 3,000 to 4,000 pounds for a six-person model) so pour a 4-inch reinforced concrete pad. Vent the roof peak to release steam that would otherwise cause condensation and dripping. Use cedar or redwood for the frame — both handle humidity far better than pine or fir.
Watch out
- Confirm electrical capacity before building — most hot tubs need a dedicated 50-amp circuit
- Leave one wall removable or hinged for future tub replacement
Recommended
Items for this idea
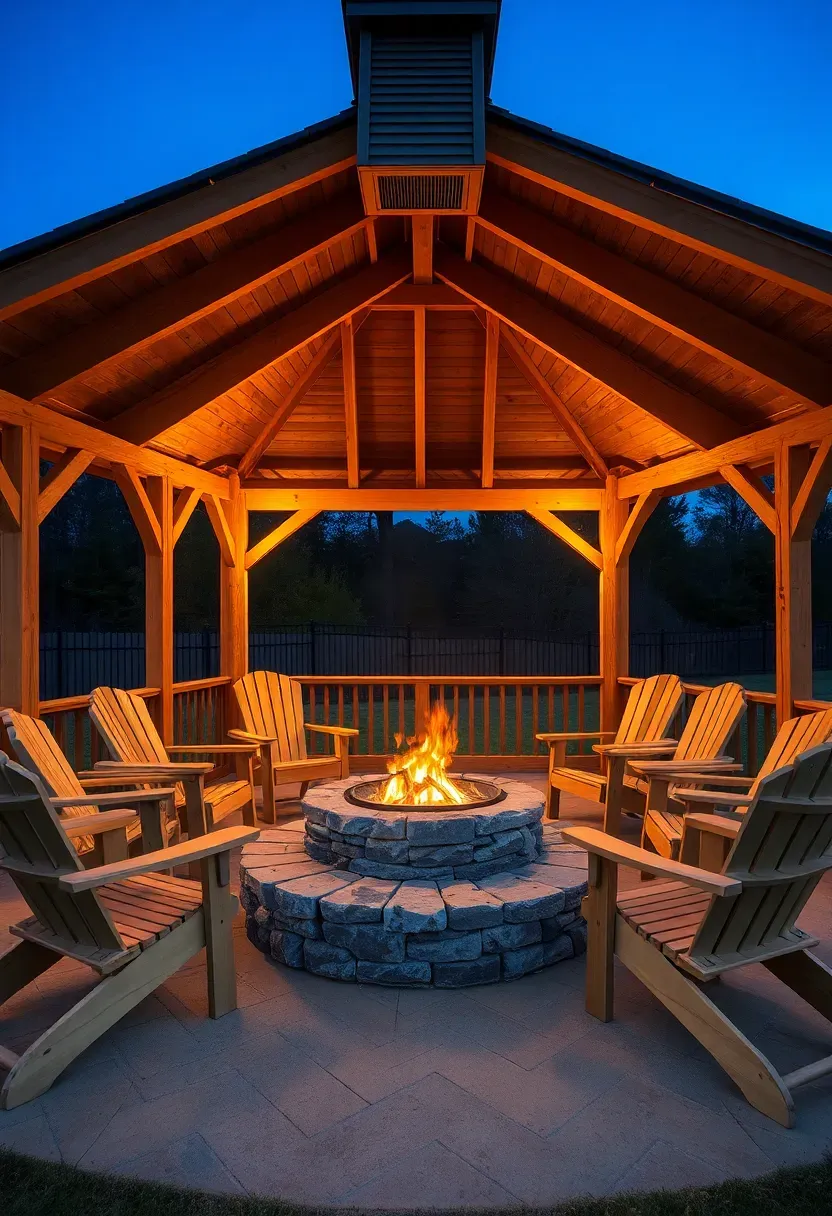
13. Fire Pit Gazebo
Combining fire and an overhead structure sounds risky, and it is if done carelessly. The critical detail is a chimney opening or vented cupola directly above the fire pit. Without it, smoke pools under the roof and carbon monoxide becomes a real hazard. Build the opening at least 4 feet in diameter and line the roof edges around it with metal flashing rated for high heat. The fire pit itself should sit on a non-combustible base — poured concrete, stone, or a steel fire ring on a gravel pad. Keep a minimum of 10 feet between the fire and any structural post. A propane or natural gas fire pit is safer under a gazebo than wood-burning because you control the flame height and eliminate sparks.
Tips
- Install a carbon monoxide detector at seated head height inside the gazebo
- Use tempered glass wind guards around gas fire pits to contain the flame
- Choose chairs with metal frames rather than resin, which can warp near heat
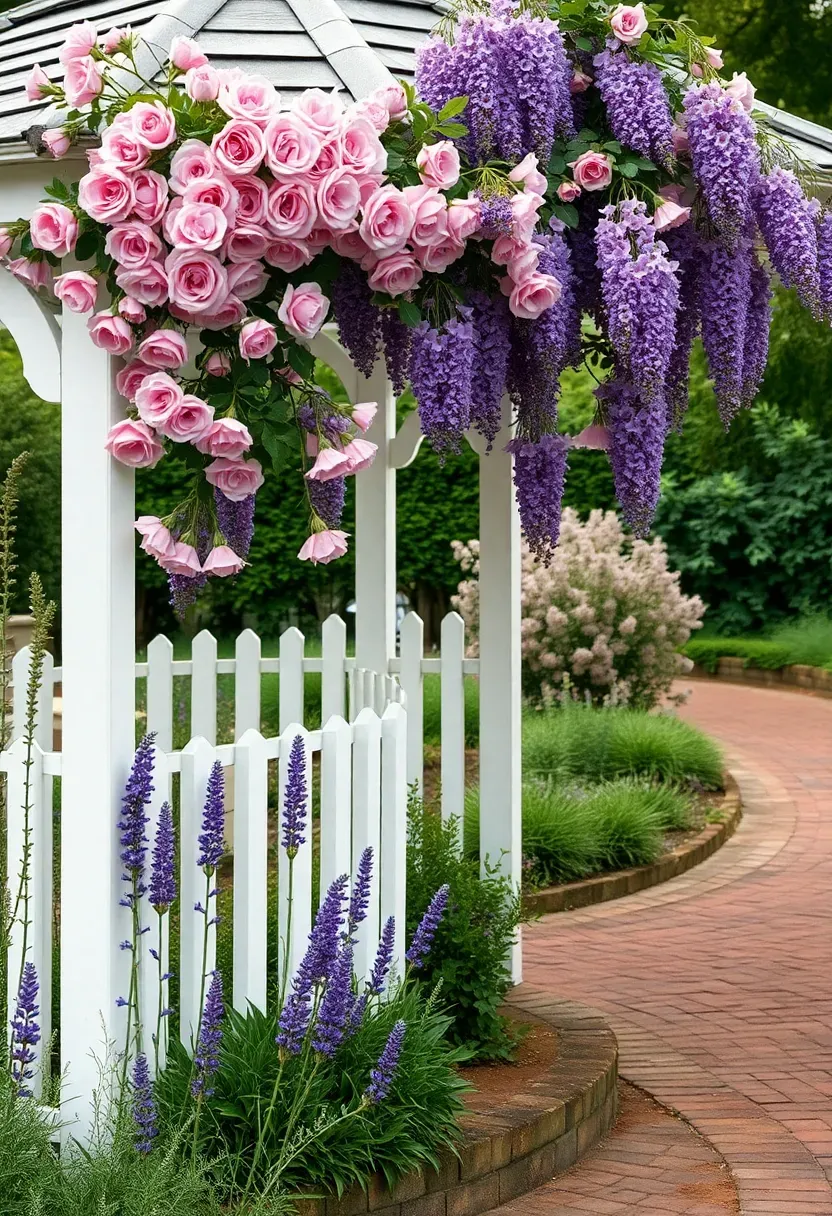
14. Cottage Garden Gazebo
A cottage garden gazebo leans into abundance rather than minimalism. Paint it white or soft sage green. Add a picket-style railing at 30 inches high. Plant climbing roses (New Dawn is practically indestructible) on two sides and let wisteria take a third. Edge the path leading to it with lavender, catmint, and foxglove for height layering. Inside, a small round bistro table and two chairs are enough — this is not a space for large gatherings but for morning coffee with a book. The charm comes from the slightly overgrown, slightly imperfect look where flowers spill over railings and bees work the blooms two feet from your teacup.
Tips
- Prune climbing roses after the first flush in June to encourage a second bloom in September
- Use a copper fungicide spray on roses in early spring to prevent black spot
- Set the gazebo back from the main garden path so arriving at it feels like a discovery
Recommended
Items for this idea
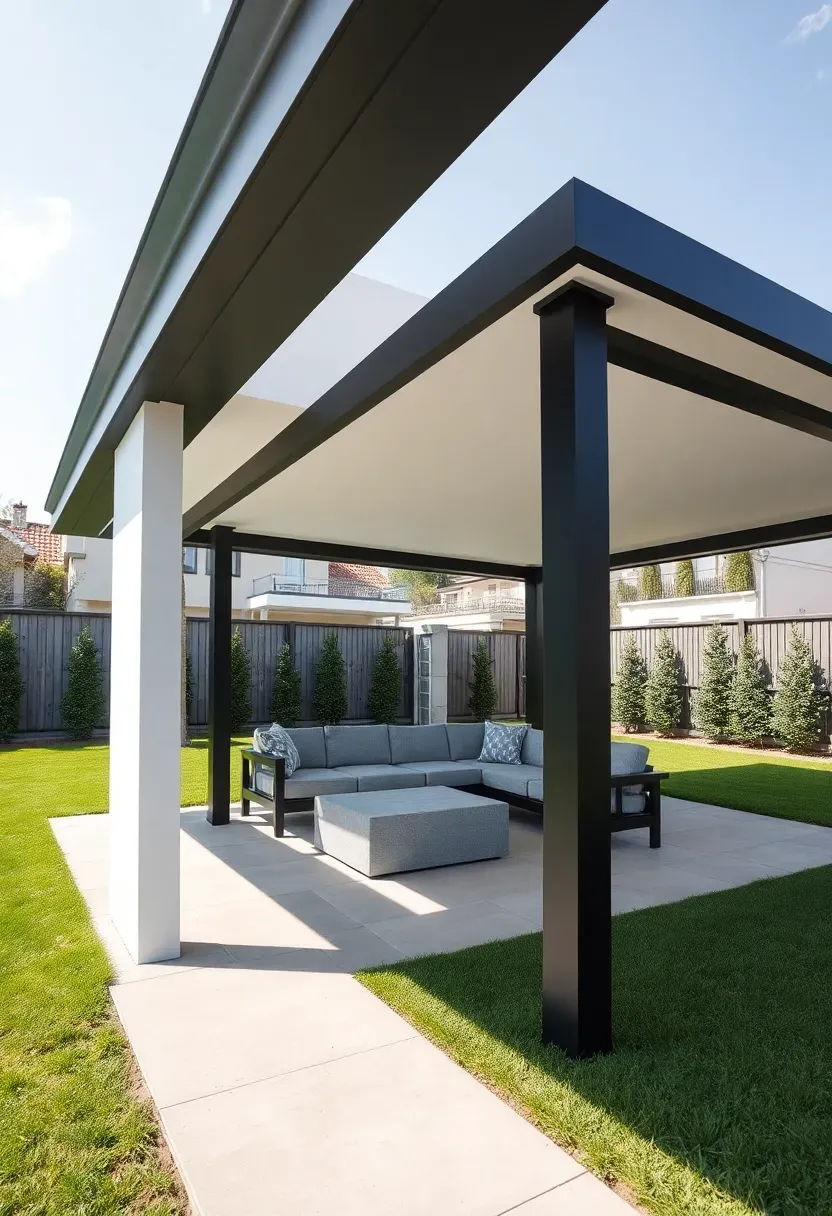
15. Modern Flat-Roof Gazebo
Flat roof vs. pitched roof
Pitched roofs shed water and snow naturally. Flat roofs collect both unless built with a slight slope (1/4 inch per foot minimum). The advantage of flat is visual — it reads as contemporary, disappears into a modern landscape, and allows for a green roof or rooftop planter if structurally supported.
Material choices
Steel posts with aluminum or composite roof panels are the standard combination. Powder-coat the steel in matte black, charcoal, or dark bronze. Avoid white frames in modern designs — they read as commercial tent rather than architectural.
Choose a flat roof if
Your house has contemporary architecture, your landscape uses geometric hardscaping, or you want the gazebo to recede visually rather than become a focal point.
Recommendation
A 12x14 flat-roof gazebo with 4-inch square steel posts and a 2-inch composite roof panel costs around $5,000 to $8,000 installed. Add integrated LED strip lighting under the roof edge for a clean nighttime look.
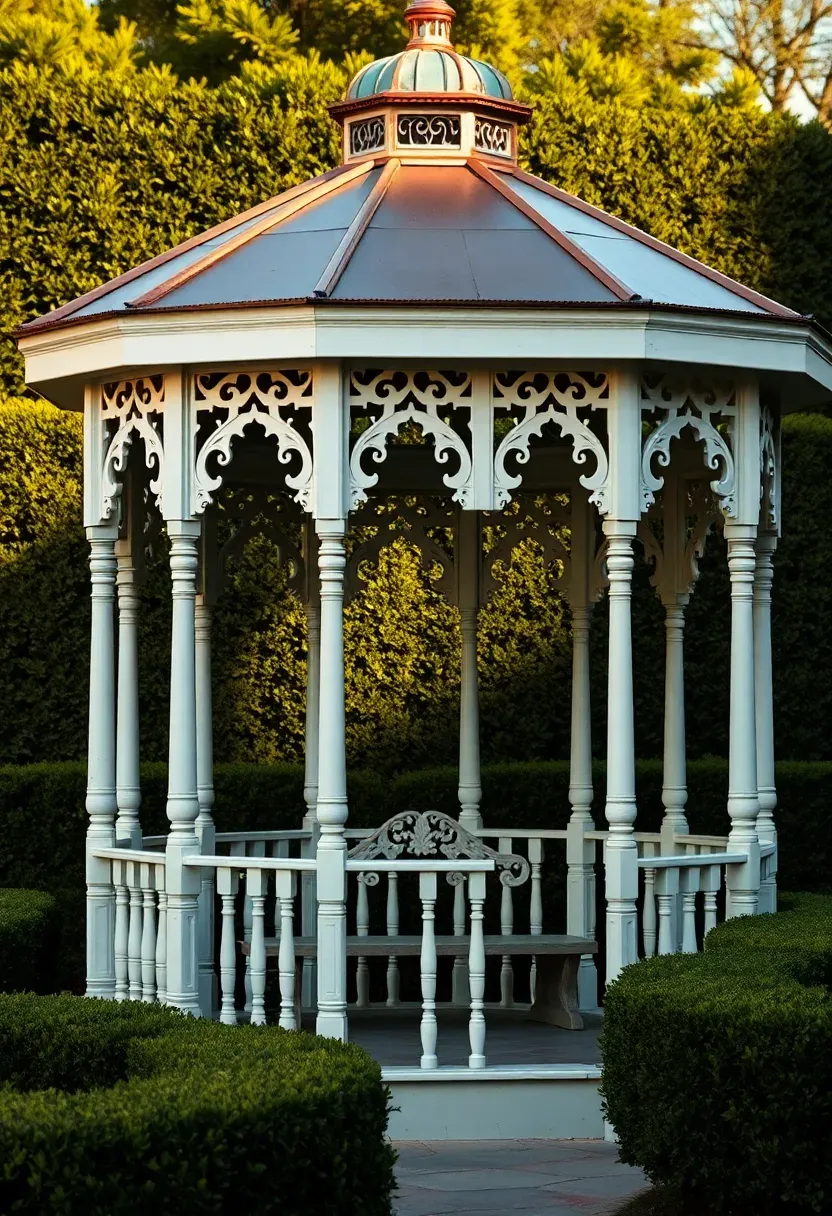
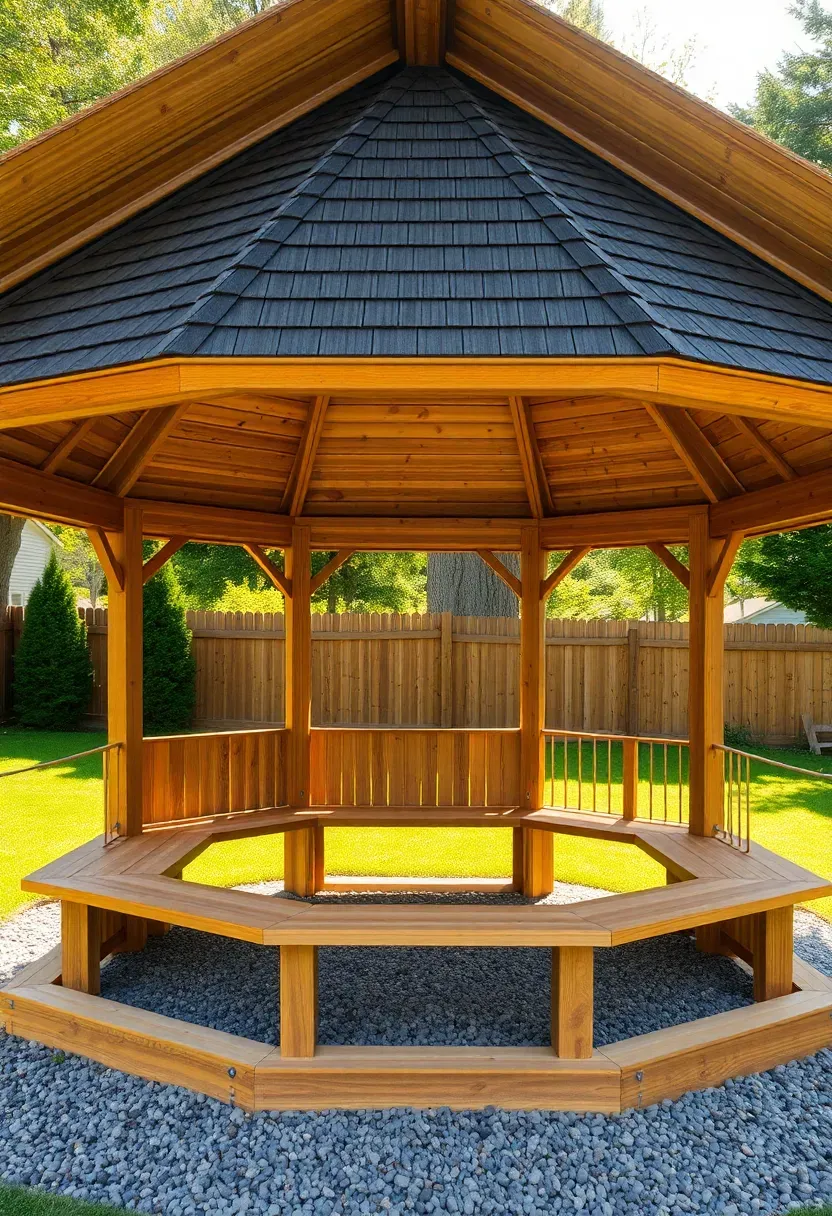
16. Octagonal Victorian Gazebo
The eight-sided gazebo reached peak popularity in the 1880s and 1890s when pattern books published by architects like A.J. Bicknell spread ornamental designs to carpenters across the country. The geometry is more than decorative: eight equal sides create a nearly circular interior that encourages conversation because everyone faces the center. Building one requires compound miter cuts at 22.5 degrees for every railing joint and roof rafter — this is not a beginner project. Buy a pre-cut kit from a gazebo manufacturer if your woodworking skills are moderate. Kits run $4,000 to $12,000 depending on size and trim detail. Finishing touches include a turned finial at the peak, scroll-cut brackets at the post-beam connections, and a copper cap on the cupola.
Tips
- Prime and paint all trim pieces before assembly — it is far easier on sawhorses than overhead
- Use PVC trim boards for gingerbread details if you want the look without the maintenance
- Set the gazebo on a raised platform (12 to 18 inches) with steps to emphasize its formality
Recommended
Items for this idea
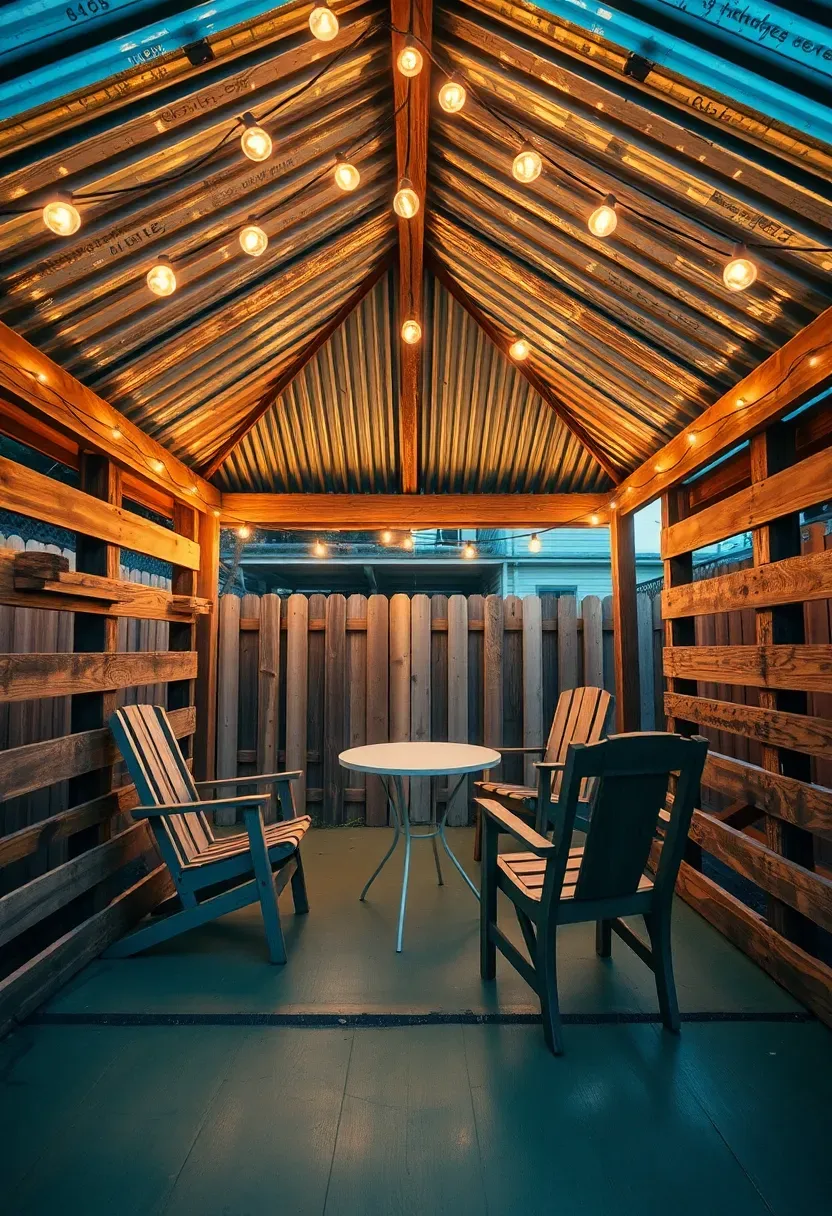
17. Budget Pallet Gazebo
How to build a gazebo for under $300
Pallets are free from warehouses and shipping yards. You need 12 to 16 standard 48x40-inch pallets, a box of 3-inch deck screws, and roofing material. That is it.
Step 1: Build the floor platform
Lay four pallets in a square, level them with shims, and screw them together. Top with 1/2-inch plywood screwed down every 8 inches.
Step 2: Raise the walls
Stand pallets vertically on three sides. Bolt them to the floor platform and to each other at the corners using 3/8-inch carriage bolts. Leave the fourth side open as the entrance.
Step 3: Frame the roof
Cut 2x4s for a simple gable frame. Screw corrugated metal panels or polycarbonate sheets over the frame. Overlap panels by one corrugation to prevent leaks.
Watch out
- Heat-treated (HT-stamped) pallets are safe; methyl-bromide-treated (MB-stamped) pallets are toxic — check the stamps
- Sand all surfaces aggressively to remove splinters before anyone uses it barefoot
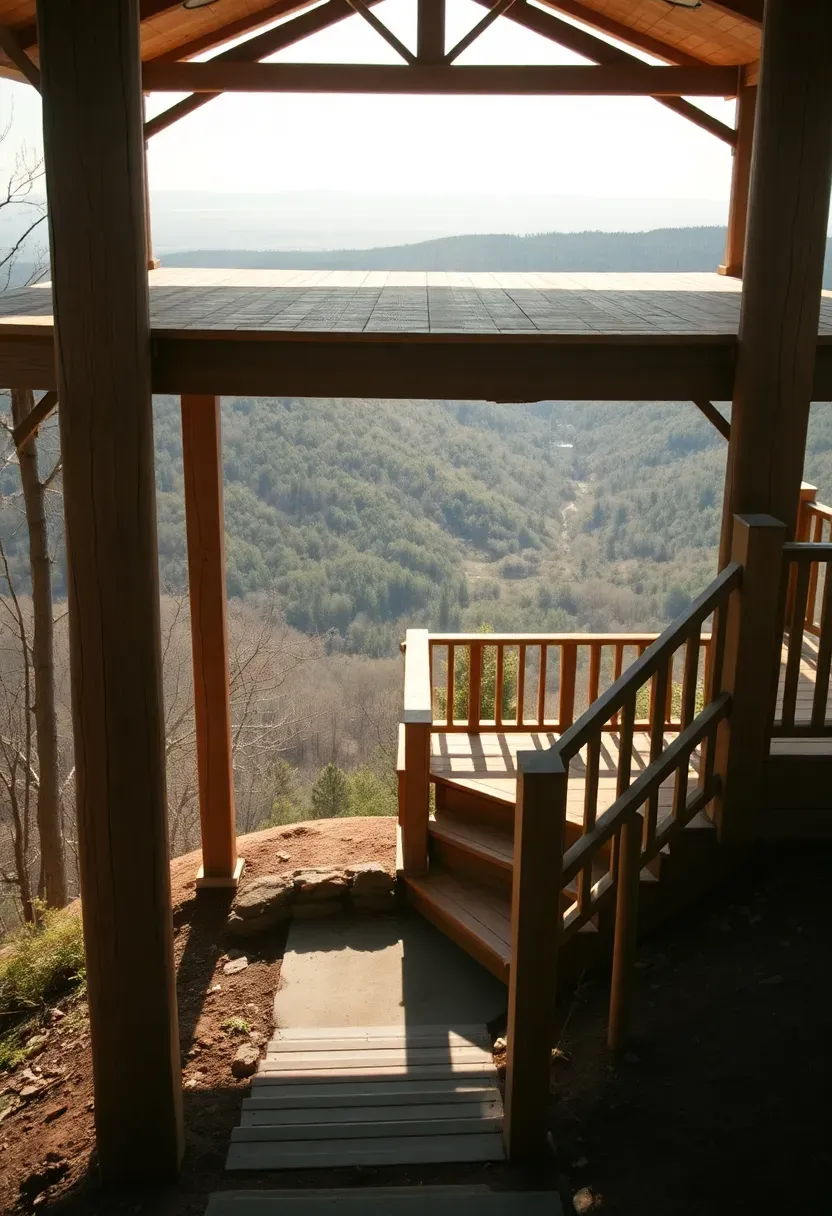
18. Hillside Elevated Gazebo
Sloped yards discourage most people from building anything. But a hillside is actually an advantage for a gazebo because elevation gives you a vantage point. The structure sits on posts of varying height — short on the uphill side, tall on the downhill side — with a level deck platform on top. This is essentially deck construction with a roof. The downhill posts may need to be 8 to 12 feet tall, which requires 6x6 posts at minimum and cross-bracing between them. Add a wraparound railing and stairs descending the slope. The payoff is a gazebo that feels like a treehouse, with views over the canopy of lower-growing trees and shrubs. Drainage matters on slopes: direct runoff away from the post footings with a French drain or swale uphill of the structure.
Tips
- Hire a structural engineer for posts taller than 10 feet to calculate wind and lateral loads
- Use ground-screw foundations instead of concrete piers on slopes to minimize excavation
- Plant native ground cover on the exposed slope below the gazebo to prevent erosion
Recommended
Items for this idea
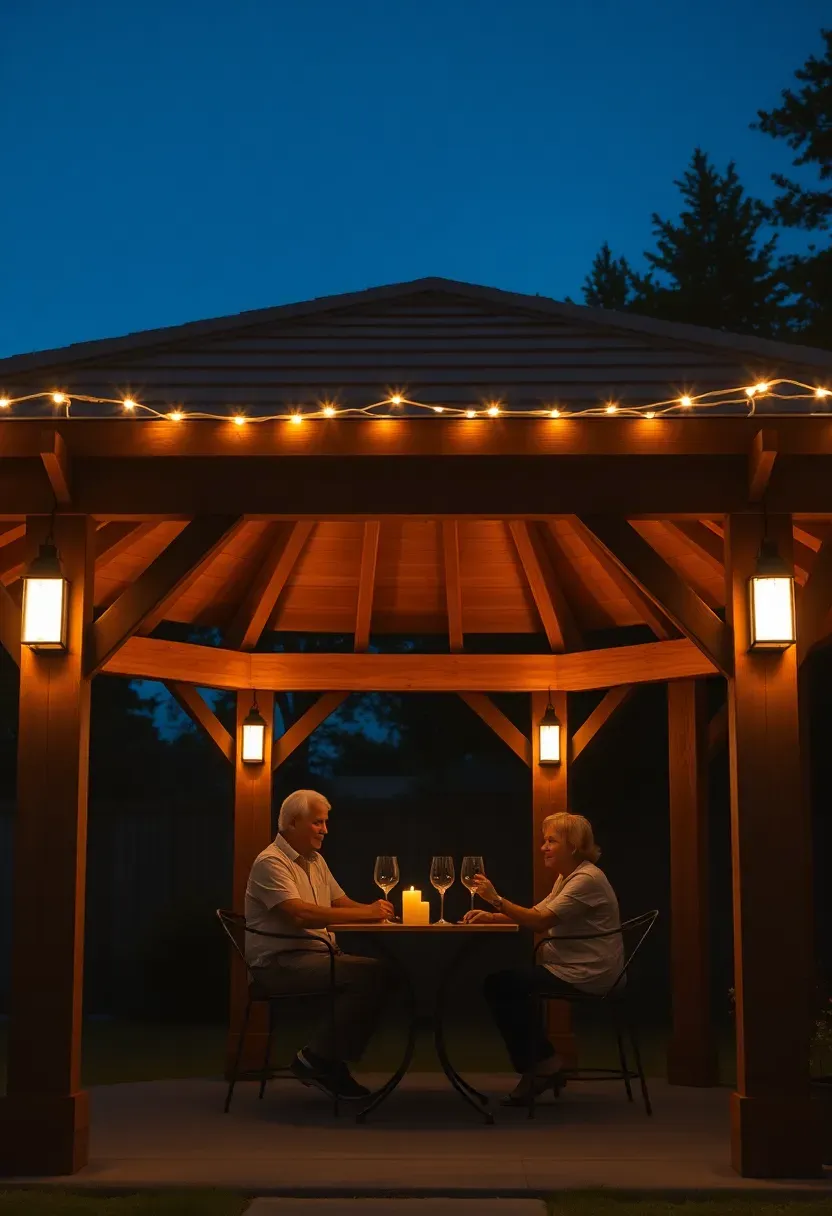
19. Solar-Powered Evening Gazebo
The problem
Running electrical wiring to a freestanding gazebo means trenching, conduit, permits, and an electrician. For a structure 50 feet from the house, that easily costs $1,500 to $3,000 just for the power connection.
The solution
Solar eliminates the wire run entirely. Mount a 100-watt solar panel on the south-facing roof slope. Connect it to a 12V lithium battery stored in a weatherproof box under a bench. Run 12V LED strip lights along the roof beams and wire solar post-cap lights to each column. A fully charged 50Ah battery powers about 500 lumens of LED light for 12 hours — more than enough for an evening. Add a USB charging port so phones stay alive during long dinners outside.
Pros and cons
- Pro: No trenching, no permits, no electrician — total solar kit costs $200 to $400
- Pro: Works completely off-grid, even during power outages
- Con: Output drops noticeably in cloudy winter weeks — supplement with candles or battery lanterns
Quick FAQ
How much does a backyard gazebo cost to build? Costs range widely. A DIY pallet gazebo runs under $300. A basic cedar kit costs $3,000 to $6,000 in materials. A contractor-built stone or hardwood gazebo with electrical can reach $15,000 to $25,000. The biggest variable is whether you hire labor or do it yourself — labor typically doubles the materials cost.
Do I need a permit for a backyard gazebo? Most municipalities require a building permit for any permanent structure over 100 to 120 square feet. Some have height restrictions in setback zones. Call your local building department before pouring footings — the permit usually costs $50 to $200 and takes one to three weeks.
Which gazebo shape works best for small yards? Rectangular gazebos use space more efficiently because they tuck against fence lines and property edges. An 8x10 rectangle fits in most suburban backyards without dominating the lawn. Octagonal gazebos need more clearance around them to look right and work better in larger, open areas.
Can I build a gazebo on an existing patio? Yes, if the patio slab is at least 4 inches thick and in good condition. Anchor posts to the concrete using heavy-duty post base brackets with expansion bolts. Avoid drilling into a slab that already shows cracking — the vibration and new holes will accelerate the damage.
What is the most durable gazebo roofing material? Standing-seam metal roofing lasts 40 to 60 years with virtually no maintenance. Architectural asphalt shingles cost less and last 20 to 30 years. Polycarbonate panels are lighter and let filtered light through but yellow after 10 to 15 years of UV exposure.
A gazebo does not need to be expensive or complicated to change how you use your yard. Even the simplest version — four posts, a roof, and a flat floor — creates a destination that pulls you outdoors on evenings when you would otherwise stay on the couch. Start with a size and material that matches your budget, build it in a spot where you will actually see it from inside the house, and let the landscaping fill in around it over time. The yard stops being background and starts being a place.
Pinterest cover for 19 Backyard Gazebo Ideas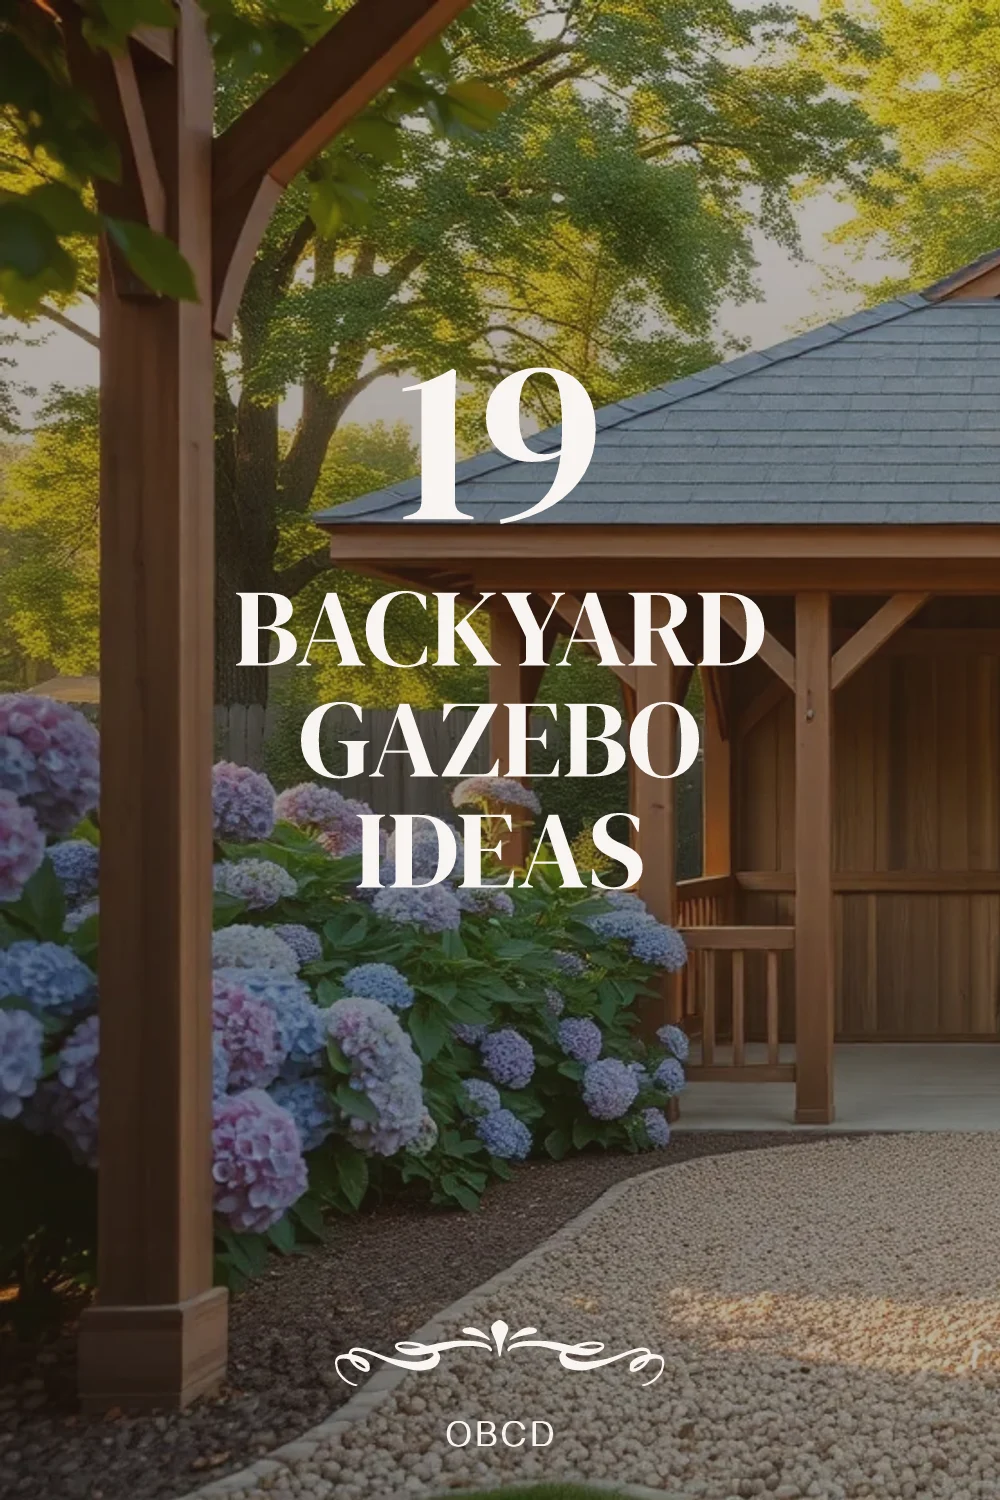
About the author
OBCD
CGI visualization and interior design content. We create detailed 3D renders and curate practical design ideas for every room in your home.