21 Backyard Gym Ideas for Outdoor Workouts
I stopped renewing my gym membership three years ago after realizing I was driving twenty minutes each way to do exercises I could do in my own yard. The initial setup was embarrassing — a yoga mat on grass that slid around and a pair of rusted dumbbells from a garage sale. But over time I figured out what actually works outdoors: the right flooring surface, weather protection for equipment, and enough variety to keep showing up. The cost of a decent backyard gym sits somewhere between two months and eight months of a commercial membership, and you never have to wait for a squat rack again.
Below are 21 backyard gym ideas ranging from minimal no-equipment zones to full open-air weight rooms with roofing and storage.
Table of Contents
- Rubber Mat Platform on Gravel Base
- Pergola Weight Room
- Bodyweight Calisthenics Station
- Shipping Container Gym
- Garage Door Open-Air Gym
- Yoga and Stretching Deck
- Climbing Wall on Fence
- Battle Rope and Sled Lane
- Tire Flip and Strongman Corner
- Pool Deck Fitness Area
- Shade Sail Gym Zone
- Freestanding Pull-Up Rig
- Resistance Band Wall Anchor Station
- Boxing and Heavy Bag Setup
- Kettlebell Pad on Decomposed Granite
- Adjustable Dumbbell Bench Station
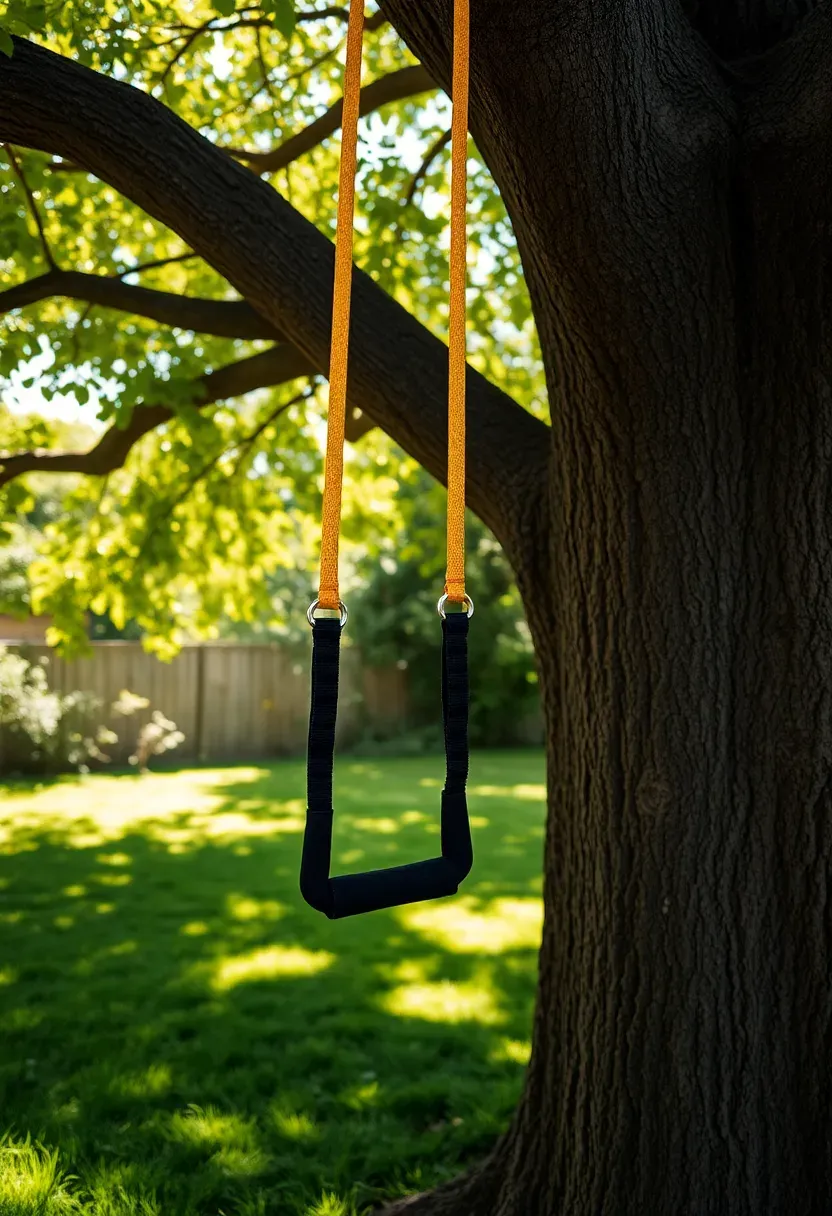
- Suspension Trainer Tree Setup
- Olympic Lifting Platform
- CrossFit-Style Box Jump Area
- Backyard Rower and Bike Shelter
- Full Open-Air Gym Under a Lean-To Roof
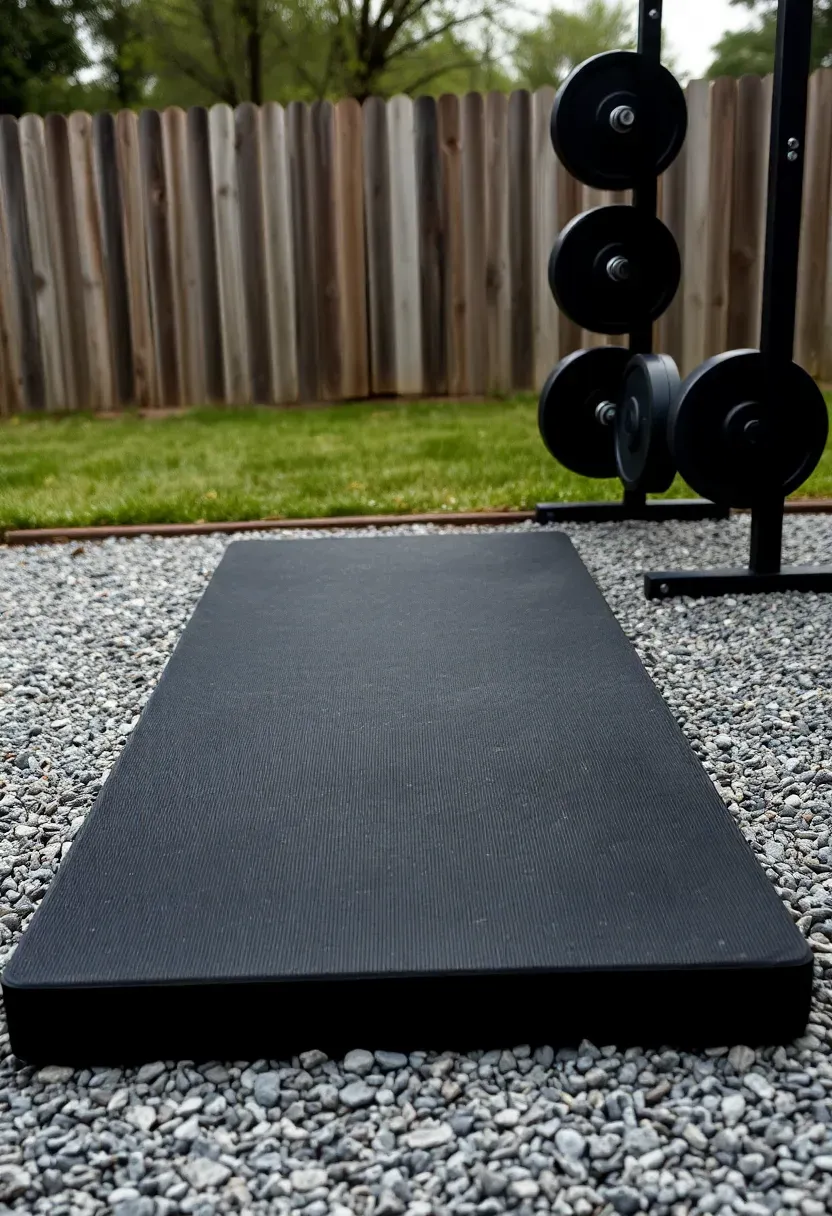
1. Rubber Mat Platform on Gravel Base
Getting the floor right is the single most important decision for an outdoor gym. Grass sounds nice until you try to deadlift on it — the bar sinks, your footing shifts, and everything feels unstable. A gravel base topped with interlocking rubber stall mats (the kind sold at farm supply stores for about forty-five dollars per 4x6 mat) gives you a level, draining surface that handles heavy drops. Dig down four inches, fill with compacted three-quarter-inch crushed stone, and lay the mats directly on top. No concrete needed.
Material Notes
- Horse stall mats from Tractor Supply are 3/4-inch thick and weigh about 100 pounds each
- Seam the mats tightly so barbells do not catch on edges during deadlifts
- Slope the gravel slightly away from the house for drainage after rain
We picked a few things that go well with this idea: Mohawk Heavy Duty Rubber Stall Mat (2x3) (★4.5), Mohawk Heavy Duty Rubber Stall Mat (3x4) (★4.5) and Flooring Inc Tough Rubber Roll (1/4 Thick) (★4.4). As an Amazon Associate we earn from qualifying purchases.
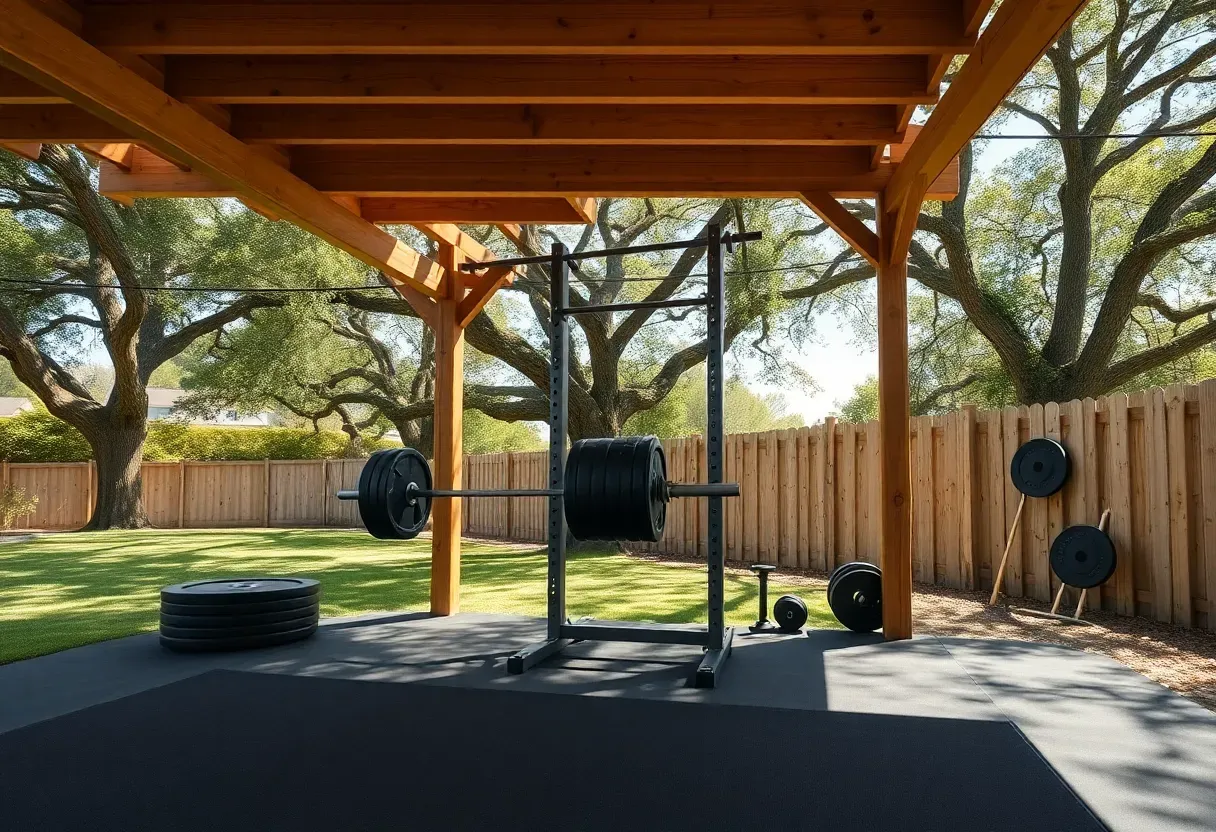
2. Pergola Weight Room
Why Cover Your Equipment
Rain and UV light destroy gym equipment faster than actual use does. Vinyl-coated cable stacks corrode, rubber grips crack, and chrome bars develop surface rust within a single season if left exposed. A pergola with a polycarbonate roof panel solves this without the permit hassle of a full structure in most jurisdictions — check your local code, but freestanding pergolas under a certain square footage often skip the permit process.
What This Gets You
Pros: Shaded lifting area that stays dry, open sides keep airflow, can mount a pull-up bar directly to the crossbeam, looks good year-round Cons: Still exposed to wind-driven rain from the sides, polycarbonate panels yellow over 5-8 years and need replacing, crossbeam height limits overhead press unless you plan for at least 10-foot clearance
We picked a few things that go well with this idea: YYJO Foldable Pull-Up Bar Power Tower (350 LBS) (★4.5), Bongkim Portable Pull-Up Tower Station (330 LBS) (★4.4) and RELIFE Power Tower Pull-Up Dip Station (★4.4). As an Amazon Associate we earn from qualifying purchases.
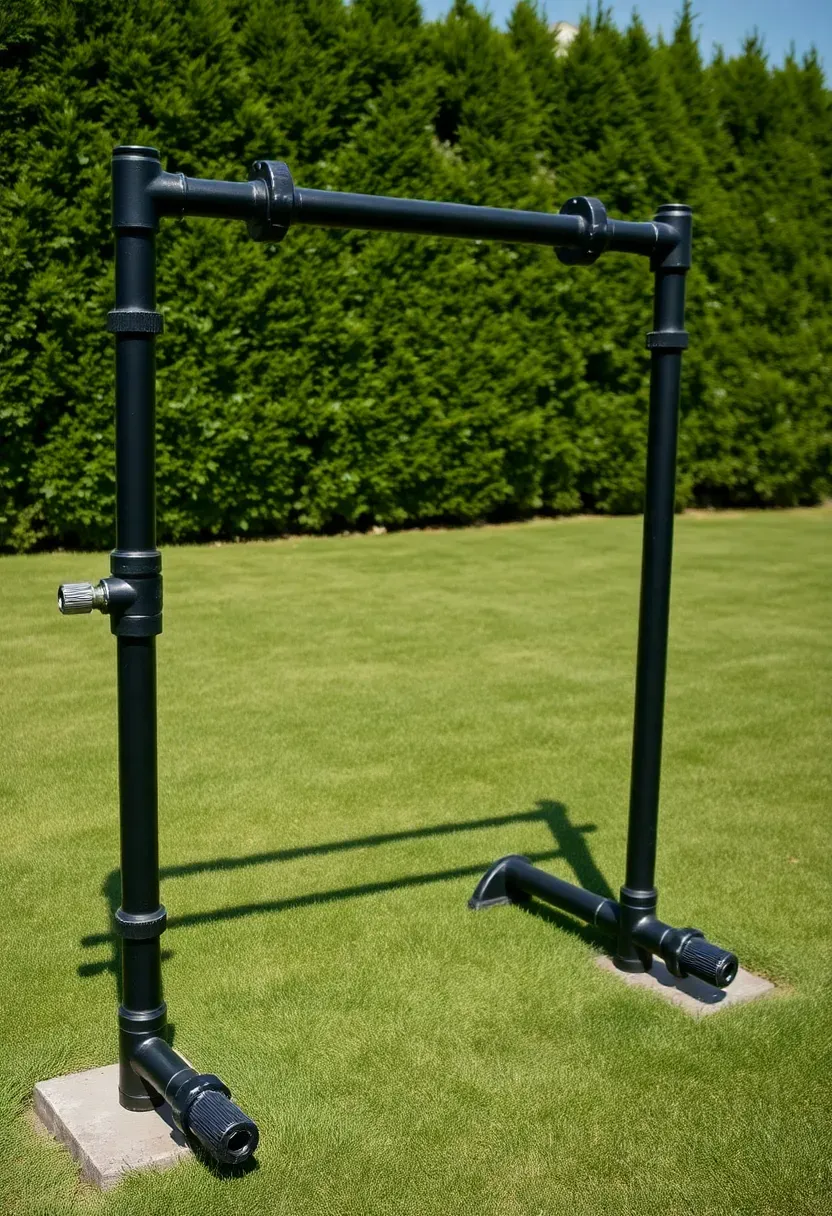
3. Bodyweight Calisthenics Station
You can build a complete calisthenics station from black iron pipe and floor flanges for under three hundred dollars. The setup needs four main components: a pull-up bar at roughly seven and a half feet, a set of parallel bars at waist height for dips, a low bar around knee height for rows, and a flat area for handstand practice. Sink two 4x6 posts three feet into concrete footings, bolt the crossbar between them, and run the parallel bars off the same posts. Add gymnastic rings on straps for an extra twenty-five dollars and you have more exercise variety than most commercial gyms offer.
Programming Ideas
- Alternate push days (dips, push-ups, handstand holds) with pull days (pull-ups, rows, ring curls)
- Hang a resistance band from the pull-up bar for assisted reps while building strength
- Use chalk in dry weather to prevent slipping on the pipe surface
We picked a few things that go well with this idea: CAP Barbell Cast Iron Kettlebell Set (★4.6), Unipack Powder Coated Kettlebell Weight Set (★4.7) and Amazon Basics Cast Iron Kettlebell (★4.8). As an Amazon Associate we earn from qualifying purchases.
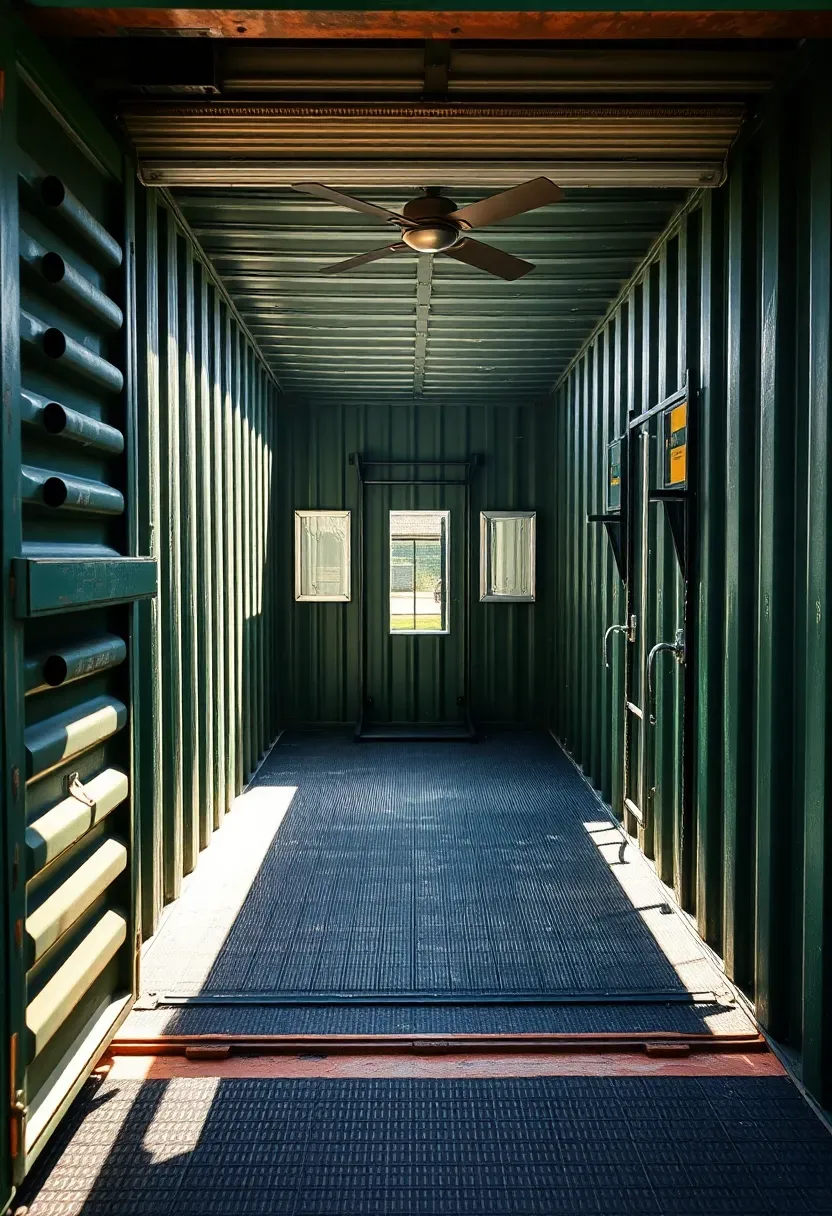
4. Shipping Container Gym
The Idea
A 20-foot shipping container gives you 160 square feet of enclosed, lockable gym space. Used containers run eight hundred to two thousand dollars depending on condition and location. You cut in a window, add a roll-up garage door on one end, insulate the ceiling with rigid foam, and you have a weatherproof box that keeps equipment secure.
How to Set It Up
- Have the container delivered onto a level gravel pad or concrete footings at the corners
- Grind and paint the interior walls with rust-inhibiting primer, then a light color to reduce the cave feeling
- Install rubber flooring over the corrugated steel floor — use 3/4-inch mats with plywood underlayment for a truly flat surface
- Mount a fan or two for ventilation since these boxes get hot fast in direct sun
Watch Out For
- Containers need a setback from property lines — zoning varies by municipality
- Without insulation, interior temperatures can exceed 130 degrees Fahrenheit in summer sun
- The corrugated walls make mounting mirrors and TV brackets annoying without furring strips
Recommended
Items for this idea
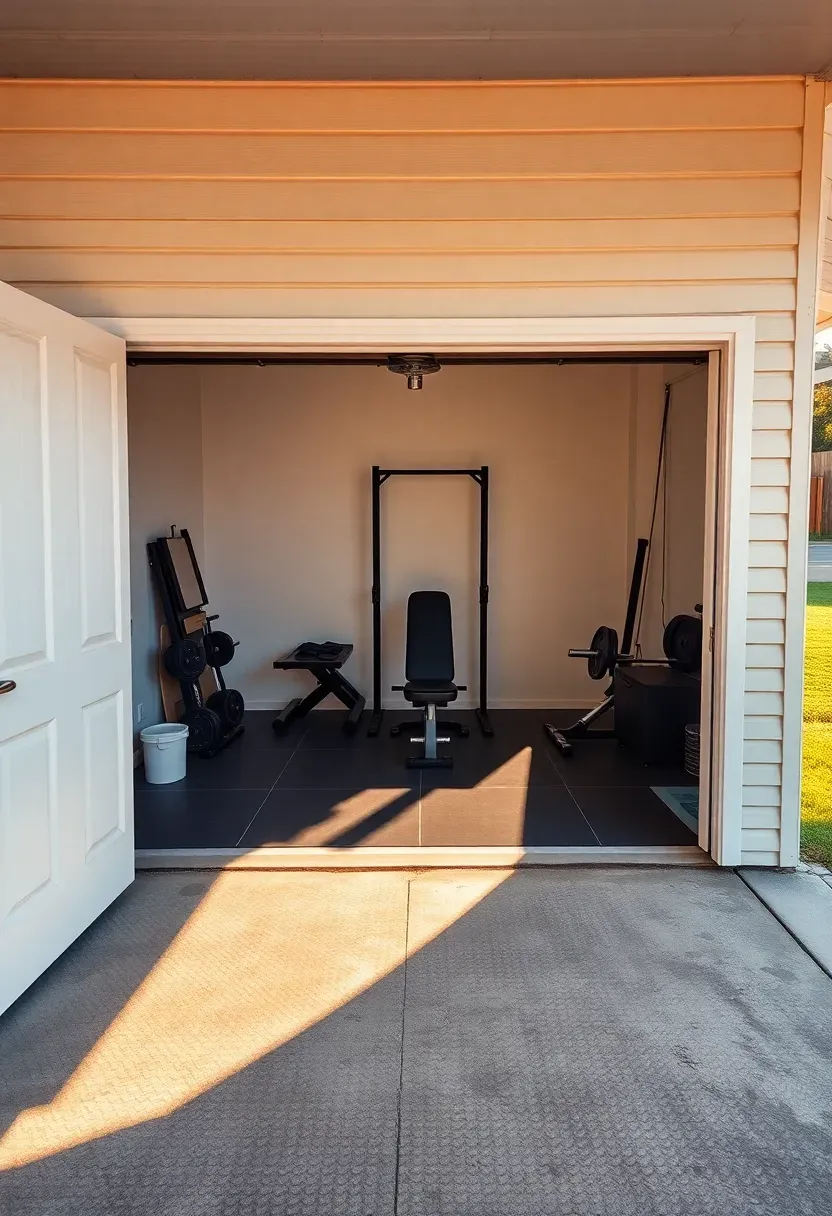
5. Garage Door Open-Air Gym
This is the cheapest backyard gym idea because you already own the space. Roll the garage door up, push the car out, and you have a covered, flat concrete floor with power outlets and lighting. The key upgrade that makes it feel intentional rather than sad: buy a set of interlocking foam or rubber tiles to lay over the concrete (protects both the floor and dropped weights), mount a pull-up bar in the door header, and add a wall-mounted fold-down rack so everything stows flat when the car comes back. Some people keep the equipment on a rolling cart that slides to the back wall in sixty seconds.
Tips
- A box fan in the doorway creates solid cross-ventilation on still days
- Hang a curtain rod with an outdoor fabric panel for afternoon sun glare
- Use a dehumidifier if you live in a humid climate to protect stored barbells
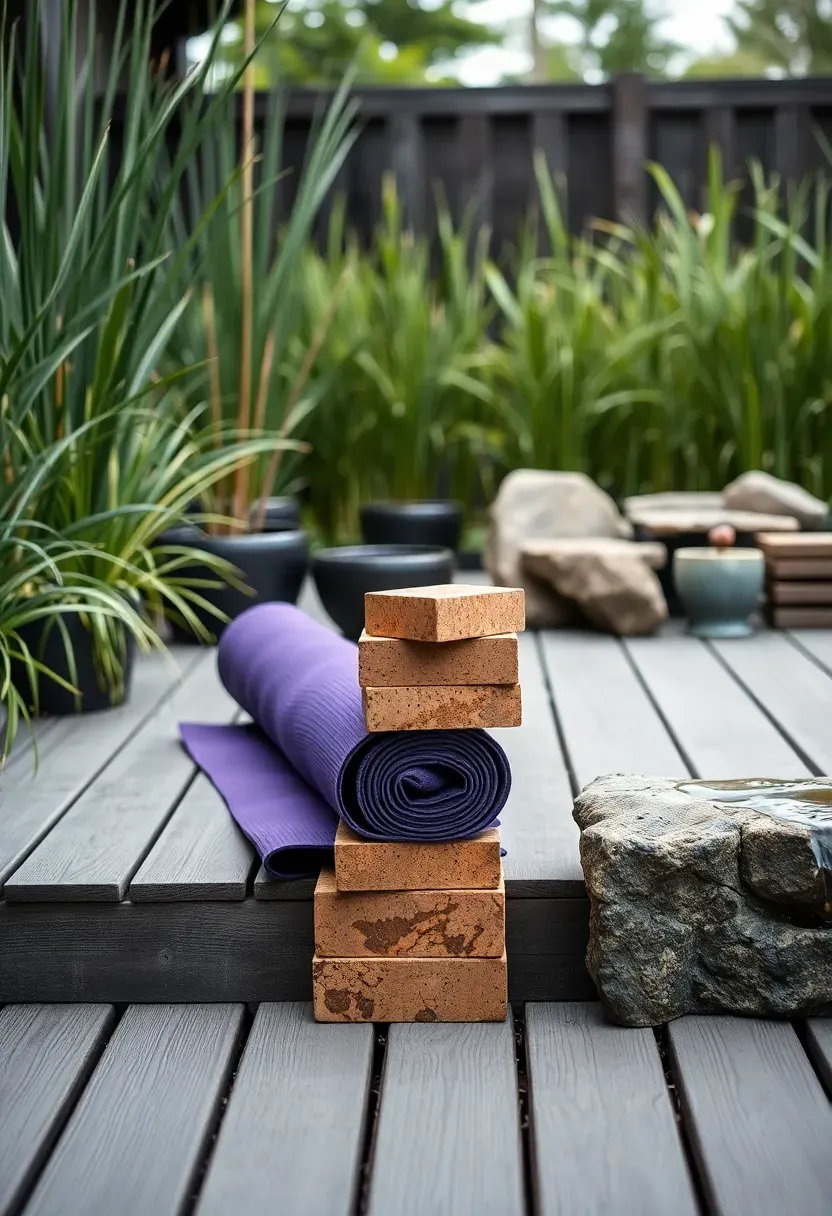
6. Yoga and Stretching Deck
Why Dedicate Space to Recovery
Most people who build backyard gyms focus on the heavy equipment and forget that stretching and mobility work need their own zone. Doing yoga on rubber mats designed for deadlifts is uncomfortable — the texture is harsh on bare skin and the smell of recycled rubber is not what you want during a breathing exercise.
The Solution
Build a small 8x10 composite deck specifically for flexibility work. Composite decking stays cooler than wood in direct sun, does not splinter, and cleans with a hose. Surround it with tall ornamental grasses or bamboo in planters for wind screening and visual privacy. The total material cost for a low-to-ground floating deck this size runs four hundred to seven hundred dollars.
Choose This If
- You practice yoga or pilates regularly and want a dedicated surface
- You need a cool-down area separate from the weight zone
- You want a dual-purpose space that works for meditation or reading when not training
Recommended
Items for this idea
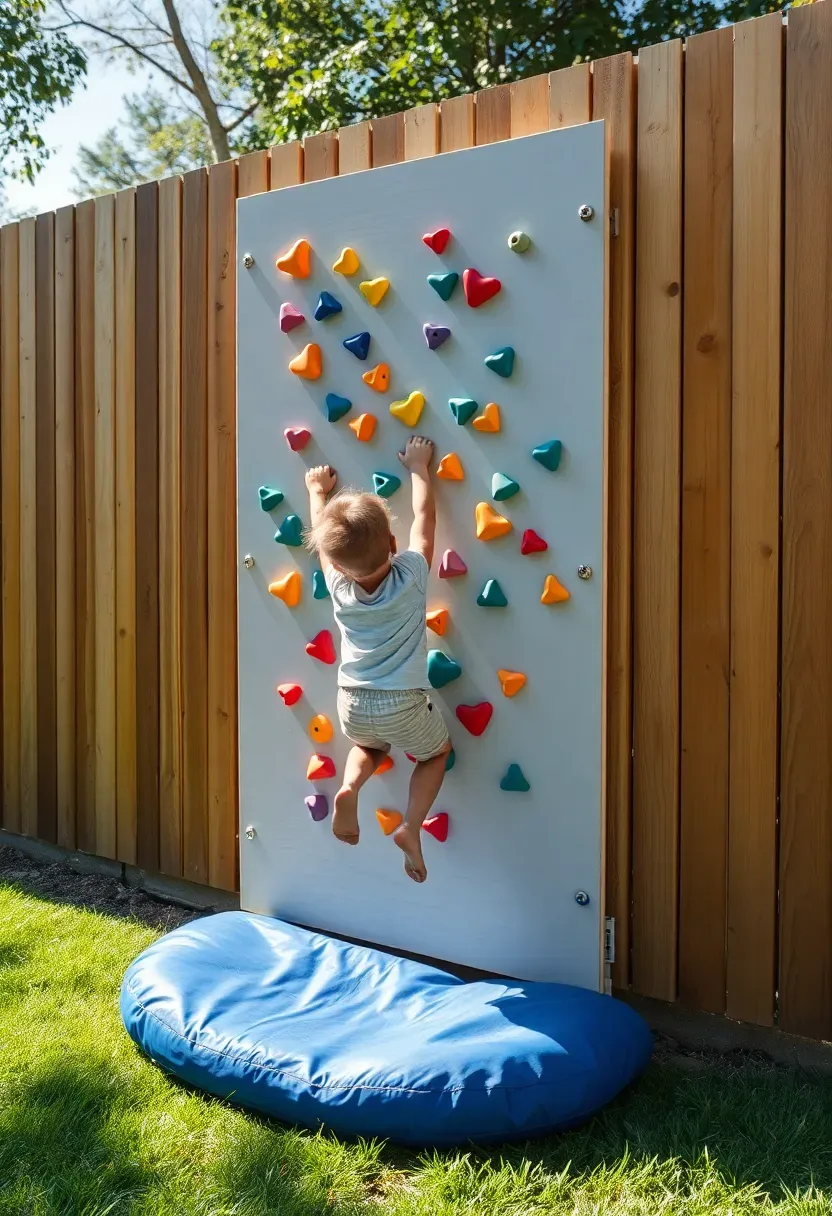
7. Climbing Wall on Fence
A privacy fence is already a vertical surface doing nothing. Bolt a sheet of 3/4-inch exterior plywood to the fence posts (not the pickets — they will rip out), screw in T-nut inserts on an 8-inch grid, and attach climbing holds. A basic set of 25 holds costs forty to sixty dollars online. Place a crash pad or stack of old mattresses below. This works for kids and adults. The limiting factor is fence height — most privacy fences top out at six feet, which is fine for traversing sideways but short for vertical climbing. If you want more height, extend two posts upward and add a panel above the fence line.
Tips
- Seal the plywood with exterior primer and paint to prevent delamination
- Rotate hold positions every few months to create new route problems
- Add a small overhang angle at the top for an extra challenge
8. Battle Rope and Sled Lane
What You Need
A straight run of 40 to 50 feet along the side of your yard. Lay a strip of artificial turf (the short-pile, dense kind used for putting greens, not the tall fluffy stuff) and anchor a heavy post or eyebolt at one end for the battle ropes. The same lane doubles as a sled push track. A basic weight sled costs sixty to one hundred dollars, and you load it with standard plates.
How to Build It
- Clear and level a 4-foot-wide strip along the fence line
- Lay landscape fabric, then a thin layer of compacted decomposed granite
- Roll out the artificial turf on top — use landscape staples every two feet along the edges
- Sink a 6x6 post two feet deep at the far end and attach a heavy-duty eyebolt for the rope anchor
Watch Out For
- Sleds wear through cheap turf fast — buy commercial-grade with a minimum face weight of 50 ounces per square yard
- Battle ropes fray at the anchor point, so wrap that section with electrical tape or buy a rope with a reinforced center loop
Recommended
Items for this idea
9. Tire Flip and Strongman Corner
Tractor tires are free. Seriously — call any tire shop that services farm or construction equipment and they will be thrilled to have you haul one away because they pay to dispose of them. A 400-pound tractor tire is a gym in itself: flip it, jump on it, hit it with a sledgehammer, drag it with a chain. Pair it with a couple of sandbags (buy the woven polypropylene kind and fill them yourself with play sand at about four dollars per fifty-pound bag) and you have a strongman corner that costs almost nothing. The only downside is noise — tire flips at 6 AM will not make you popular with neighbors.
Tips
- Place the tire on a patch of bare dirt or mulch to absorb impact and reduce sound
- Wear gloves — tractor tire treads collect wire fragments from the steel belts
- A 200-pound tire is enough for most people starting out; 400-plus is genuinely heavy
10. Pool Deck Fitness Area
If you already have a pool, you have a large flat concrete surface and a built-in recovery tool. Carve out a section of the deck — even a 6x8 corner — for a small dumbbell rack, a flat bench, and a hook strip for resistance bands. The concrete is already there and already level. After lifting, you jump in the pool. Cold water immersion is not just trendy; it genuinely reduces inflammation and muscle soreness after hard sessions. The practical issue is corrosion: chlorine-rich air accelerates rust on steel equipment, so wipe down barbells and dumbbell handles with a light coat of 3-in-1 oil weekly, or invest in stainless steel or rubber-coated gear.
Tips
- Store equipment in a deck box when not in use to limit chlorine exposure
- A rubber mat section prevents weights from cracking pool coping
- Keep the workout area on the side opposite the pool entry steps for safety
Recommended
Items for this idea
11. Shade Sail Gym Zone
The Problem
Working out in direct sun past about 10 AM in summer is genuinely dangerous. Heat exhaustion, sunburn, and the motivation-killing effect of being baked while trying to exercise. You need shade, but a permanent roof structure means permits and cost.
The Solution
A triangular shade sail mounted between three anchor points — two fence posts and one house-mounted bracket, or three freestanding steel poles — blocks 90 to 95 percent of UV and drops the felt temperature underneath by 10 to 15 degrees. A quality 16-foot sail in HDPE fabric runs seventy to one hundred twenty dollars. Pair it with a rubber mat platform underneath and you have a shaded gym zone that goes up in an afternoon and comes down for winter storage.
Pros and Cons
Pros: Cheap, removable, available in colors that look intentional, blocks most rain in light showers Cons: Flaps and pulls in high wind (take it down before storms), does not block wind-driven rain, collects water in the center if not tensioned properly — add a center post or angle it to prevent pooling
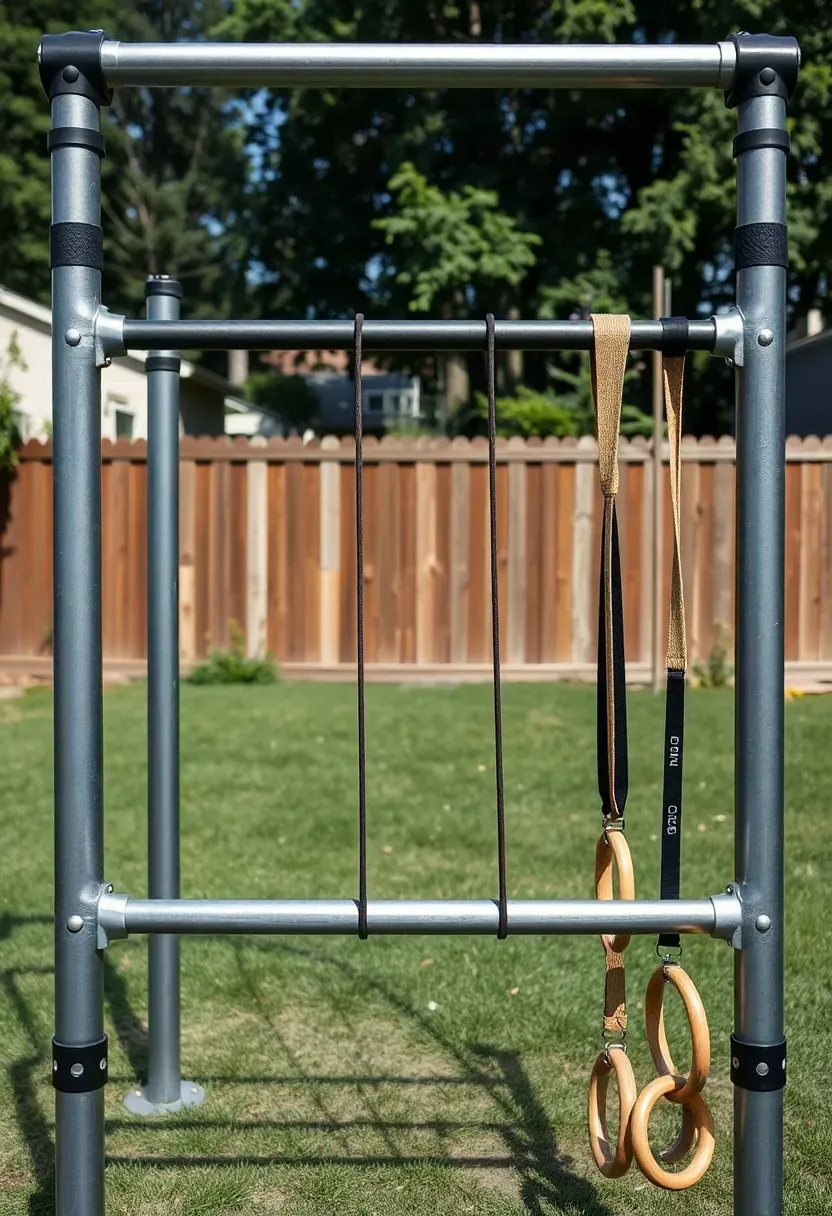
12. Freestanding Pull-Up Rig
A freestanding pull-up rig takes up about a 4x4 foot footprint and opens up dozens of exercises. Commercial outdoor models from Rogue or Titan cost three hundred to six hundred dollars and arrive mostly assembled. The DIY route uses 2-inch schedule 40 steel pipe welded or bolted into an A-frame shape with Kee Klamp fittings. Either way, anchor the base to concrete footings or heavy sandbag weights — nobody wants the rig tipping during a kipping pull-up. Add a pair of dip handles on the sides and you have covered the two most effective upper-body movements without needing a wall or ceiling to mount to.
Grip Options
- Standard overhand at shoulder width for general back development
- Wide grip for lat emphasis
- Neutral grip (palms facing each other) using mounted handles — easier on the shoulders

Recommended
Items for this idea
13. Resistance Band Wall Anchor Station
Why Bands Outdoors
Resistance bands weigh nothing, cost ten to forty dollars per set, and replicate almost every cable machine movement. The missing piece is a solid anchor point. Indoors people use door-frame anchors, but outside you can mount heavy-duty eyebolts directly into a concrete or masonry wall at three different heights: ankle, chest, and overhead.
Setup Steps
- Drill into mortar joints (not the brick face) using a masonry bit and insert sleeve anchors rated for at least 200 pounds of pull-out force
- Thread a heavy eyebolt with a carabiner clip into each anchor — three anchors spaced vertically give you low, mid, and high cable angles
- Clip the resistance band loop to the carabiner at the height you need
- Stand on a rubber mat for grip and joint cushioning
Watch Out For
- Bands degrade in UV light — store them in a bag or bucket between sessions
- Check bands for small tears before each use; a snapped band under tension can cause real injury
- Latex-free bands last longer outdoors than standard latex versions
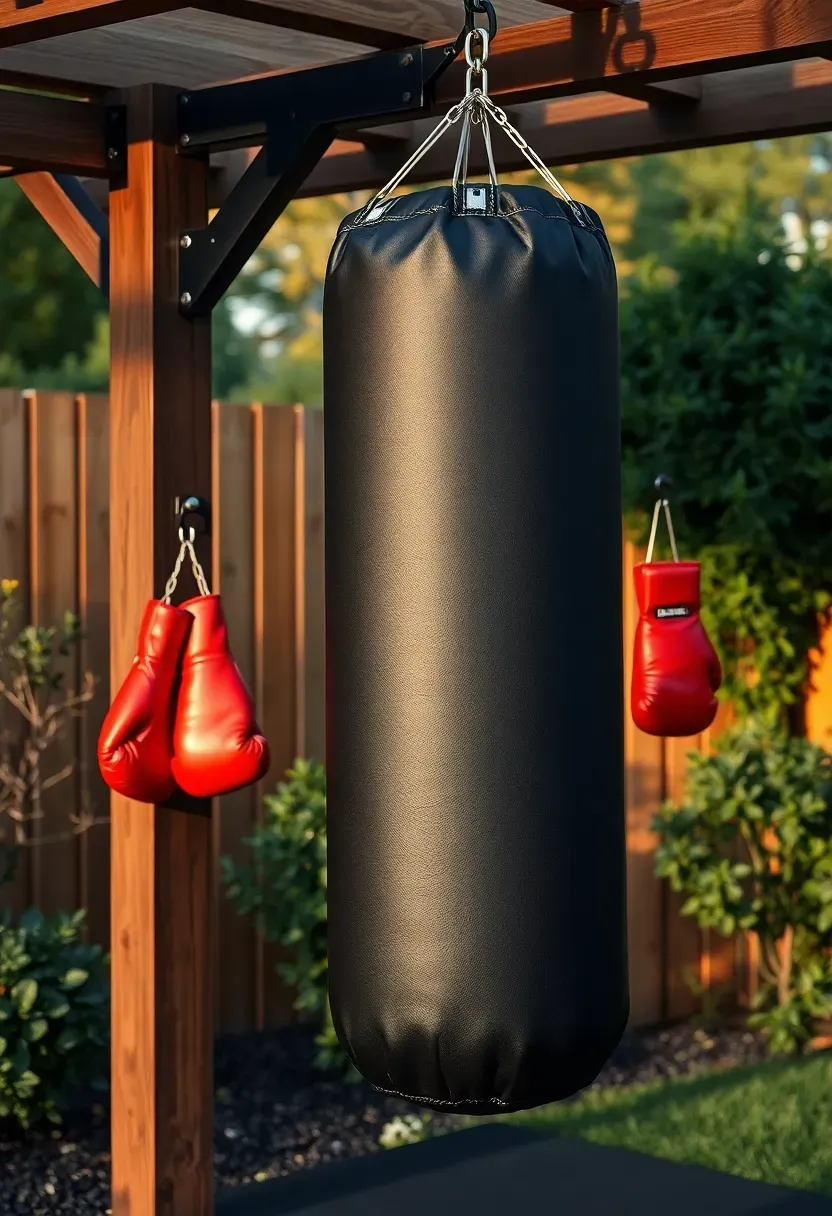
14. Boxing and Heavy Bag Setup
Hanging a heavy bag outdoors requires one thing most backyard structures lack: a mount point rated for dynamic load. A 70-pound bag generates over 300 pounds of force when hit hard, and that force swings and cycles. Do not hang it from a pergola beam unless you have verified the beam and its connections can handle it — a 4x8 beam bolted with through-bolts to 6x6 posts will work, a decorative 2x6 pergola rafter will not. The alternative is a freestanding heavy bag stand, which costs one hundred to two hundred dollars and needs no mounting at all. Place a 6x6 rubber mat underneath to catch sweat and protect the ground surface.
Tips
- Filled bags left in rain get waterlogged and heavy — cover with a tarp or bring indoors
- Wrap the hanging chain with a pool noodle or pipe insulation to reduce noise
- Speed bags require a wall-mounted platform, which works well on an exterior garage wall
Recommended
Items for this idea
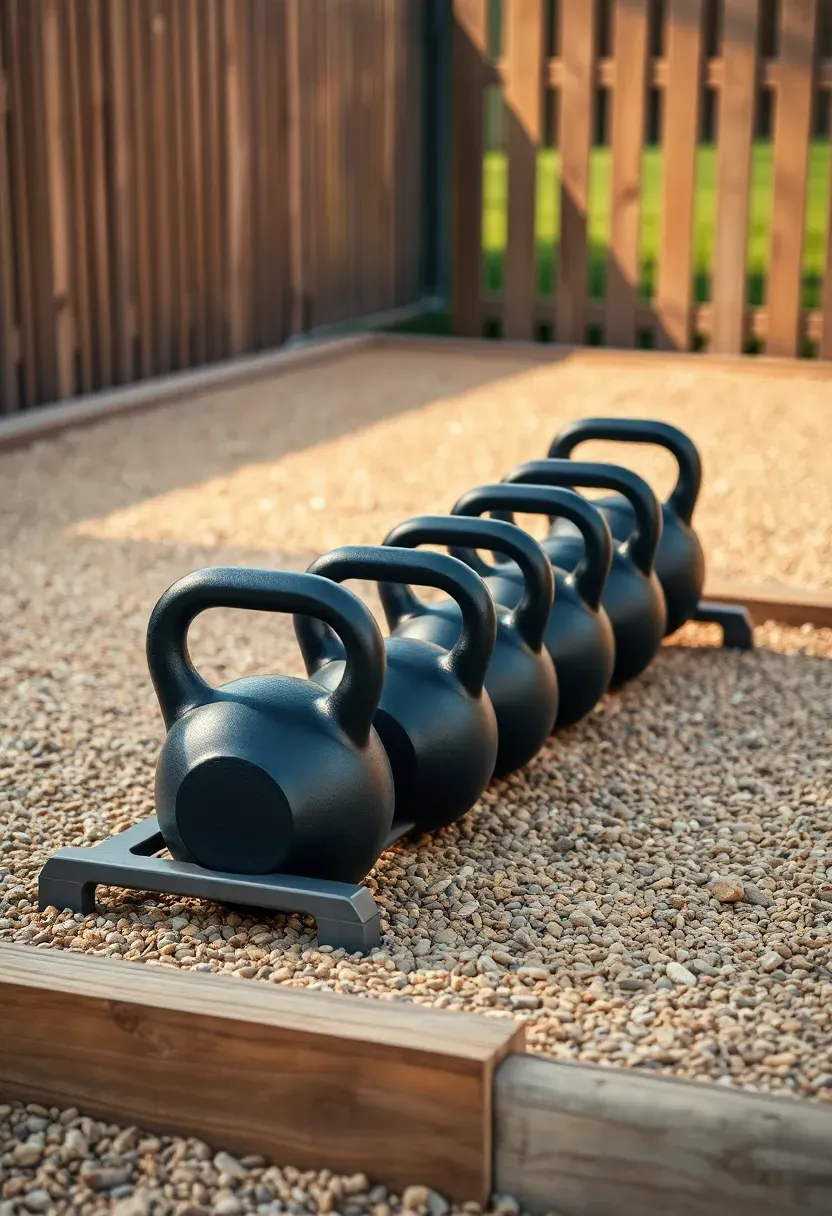
15. Kettlebell Pad on Decomposed Granite
Kettlebells and decomposed granite are a natural pairing. DG compacts into a firm, slightly forgiving surface that drains well and costs about forty dollars per ton (enough to fill a 10x10 area three inches deep). Frame the area with landscape timbers, fill with DG, compact it with a hand tamper or plate compactor, and you are done. Kettlebell swings, Turkish get-ups, goblet squats, and carries all work perfectly on this surface. The slight give of DG is easier on joints than concrete but firm enough that you are not sinking. If you drop a kettlebell on DG, it thuds rather than bouncing — safer and quieter.
Tips
- Wet the DG and re-compact it once a month to maintain a solid surface
- A 4-inch border of landscape timbers keeps the gravel from migrating into the lawn
- Start with three kettlebells: a light one for pressing, a medium for swings, a heavy for deadlifts
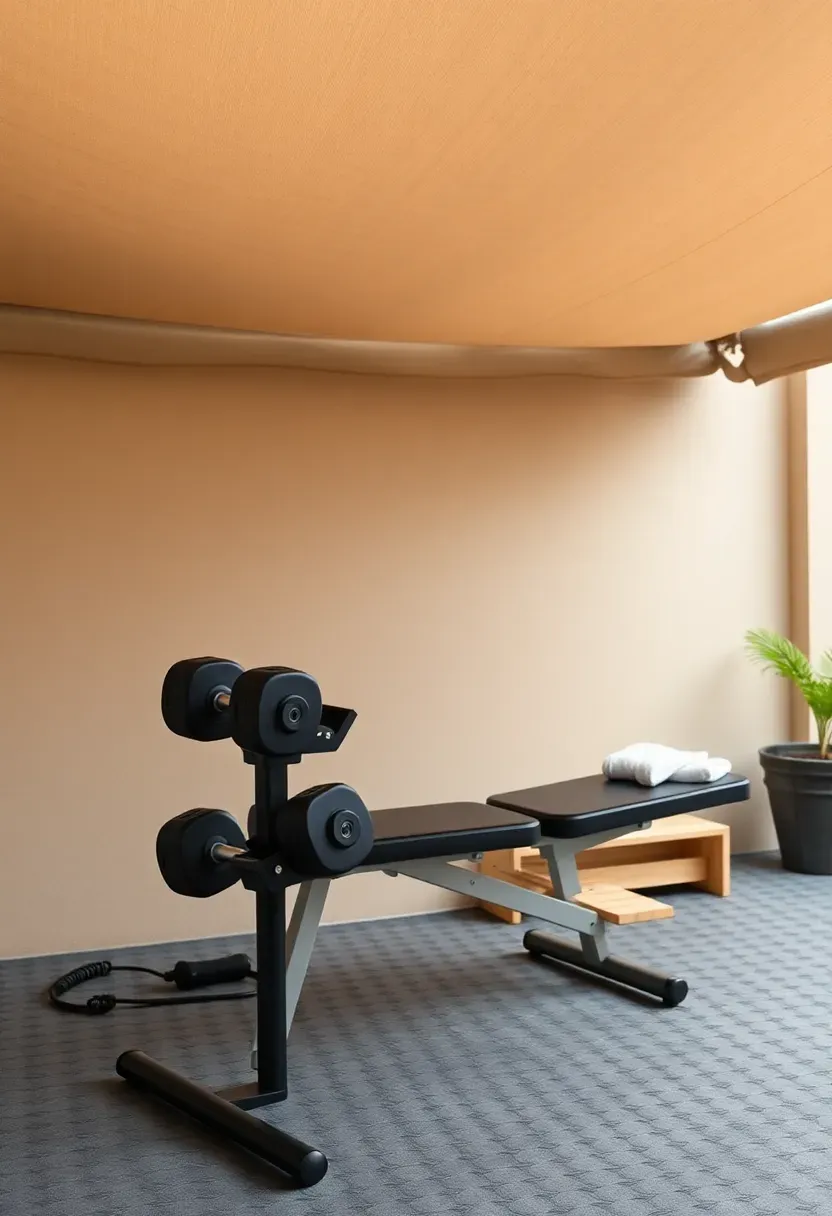
16. Adjustable Dumbbell Bench Station
The Case for Adjustable Dumbbells
A full rack of fixed dumbbells from 5 to 50 pounds costs over a thousand dollars and takes up a lot of space. A single pair of adjustable dumbbells like Bowflex 552s or PowerBlocks replaces fifteen pairs and sits on a small stand. Combined with an adjustable flat-to-incline bench, you can do chest presses, rows, shoulder presses, curls, lunges, and more — essentially a complete program from a 3x5 foot footprint.
Outdoor Considerations
The dial or pin mechanisms in adjustable dumbbells are more vulnerable to dust and moisture than solid fixed dumbbells. Store them in a waterproof deck box or under a covered patio between sessions. Never leave them in rain. Wipe the adjustment mechanisms with a dry cloth after sweaty workouts to prevent corrosion. If budget allows, selectorized plate-loaded handles (like Ironmaster Quick-Locks) have fewer moving parts and tolerate outdoor conditions better.
Recommended
Items for this idea
17. Suspension Trainer Tree Setup
A TRX or similar suspension trainer weighs under two pounds, costs thirty to eighty dollars, and turns any sturdy overhead anchor into a full gym. A mature hardwood tree branch (at least 6 inches in diameter, alive and healthy) is the most scenic anchor point you will find. Throw the strap over the branch, clip the carabiner, and you have rows, push-ups, squats, hamstring curls, pikes, and dozens of other movements available. The instability of the straps recruits stabilizer muscles that fixed machines ignore entirely.
Tips
- Wrap the branch with a towel or strap protector to prevent bark damage
- Test the branch with your full weight plus a bounce before training
- Pair with a set of gymnastic rings (fifteen dollars) for dips and muscle-ups
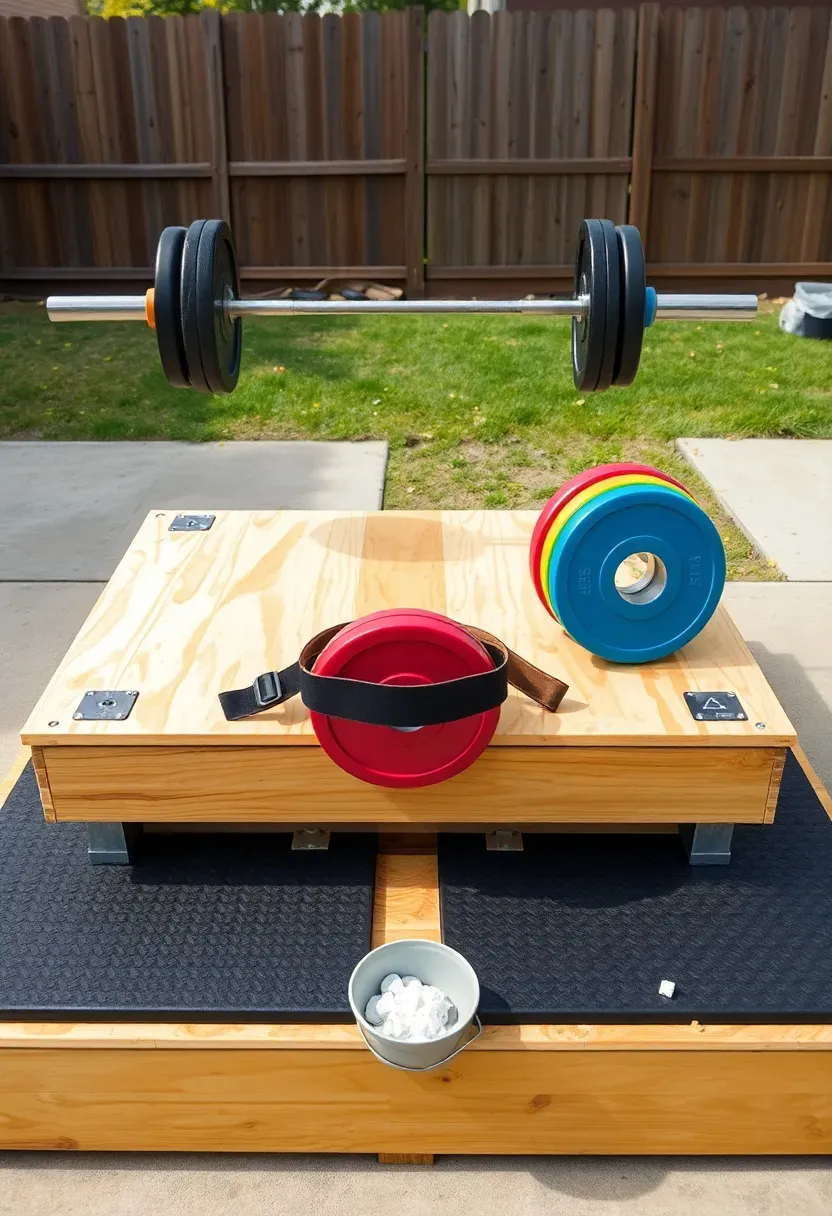
18. Olympic Lifting Platform
If you do cleans, snatches, or jerks, you need a platform that can absorb dropped barbells loaded with bumper plates. Build a standard 8x8 platform: two layers of 3/4-inch plywood as the base, with rubber horse stall mats on the left and right thirds and a center strip of finished hardwood or extra plywood where you stand. Outdoors, use pressure-treated plywood for the bottom layer and seal the hardwood center with polyurethane. Set the whole platform on a concrete pad or very well-compacted gravel. Without a solid sub-base, the platform will shift and settle unevenly within weeks.
Build Tips
- Screw the plywood layers together with 1-5/8 inch wood screws every 12 inches
- Leave a 1/4-inch gap around the perimeter so the platform can expand and contract with temperature changes
- Bumper plates are mandatory for outdoor use — cast iron plates crack concrete and destroy grass
Recommended
Items for this idea
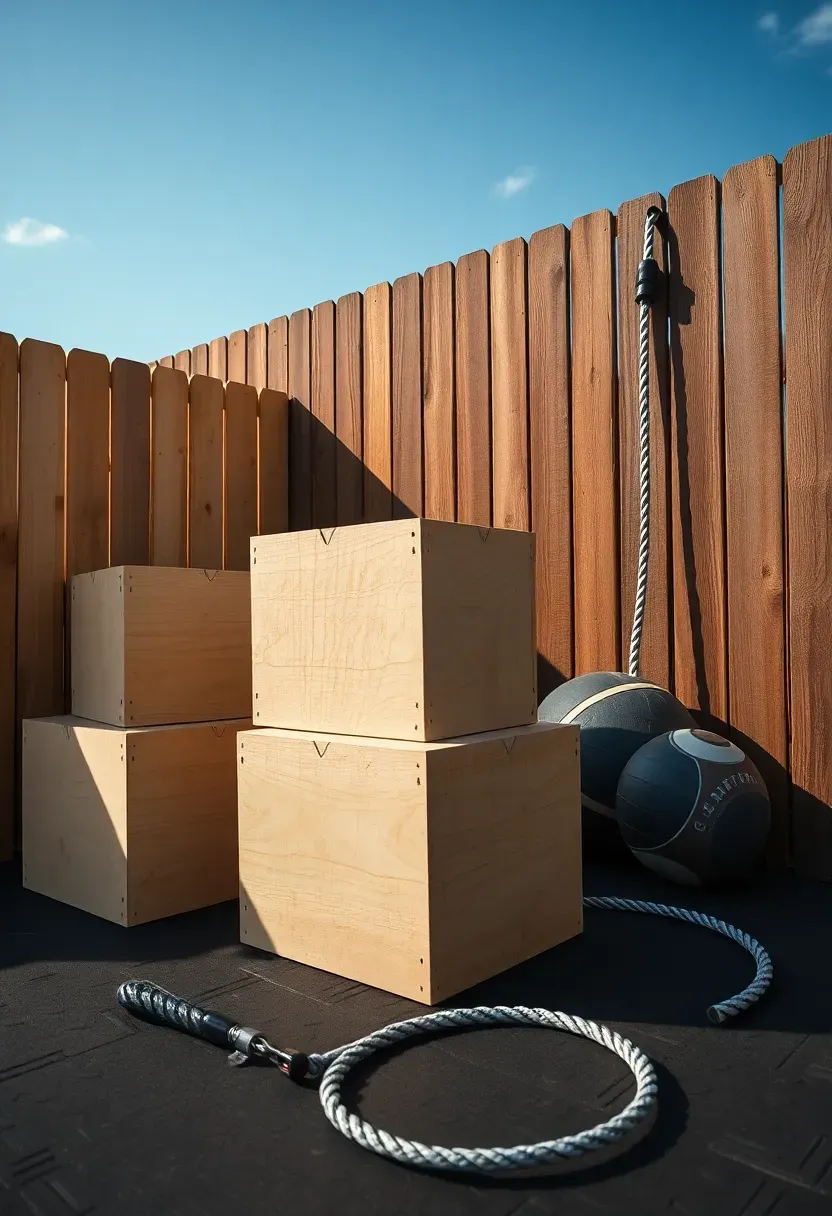
19. CrossFit-Style Box Jump Area
What You Need
Three plywood boxes at 20, 24, and 30 inches. You can build all three from two sheets of 3/4-inch plywood for about sixty dollars. The 3-in-1 design (where each face of the box gives a different height) is the most efficient. Add a couple of wall balls (slam-proof medicine balls), a jump rope, and a pull-up bar and you can run most CrossFit WODs from your backyard.
How to Build the Boxes
- Cut panels for each box using the 3-in-1 template (widely available free online)
- Glue and screw with exterior wood glue and 2-inch deck screws
- Sand all edges aggressively — shin scrapes on sharp plywood corners during missed jumps are brutal
- Seal with exterior polyurethane or paint with non-slip deck paint on the top surfaces
Watch Out For
- On hot days, the plywood surface gets slippery with sweat — apply grip tape or non-slip paint
- Place boxes on flat ground only; a wobbling box during jump training is a torn Achilles waiting to happen
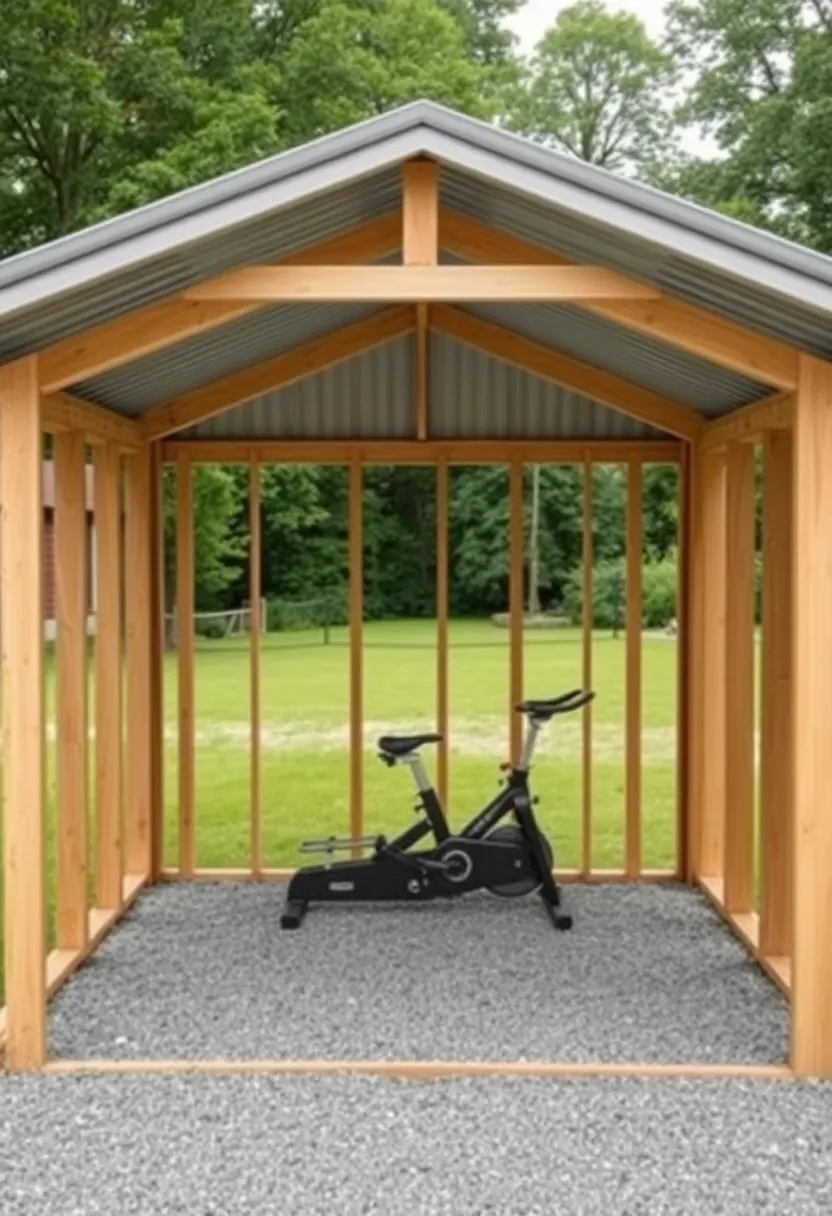
20. Backyard Rower and Bike Shelter
Cardio machines and outdoor weather are enemies. The electronics in a Concept2 rower or a Peloton bike are not designed for humidity, dust, or temperature swings. But these are exactly the machines people want to use outside because rowing and cycling in fresh air is genuinely more enjoyable than staring at a basement wall. The solution is a small three-sided shelter — essentially a lean-to roof with a back wall and two short side walls — just big enough for one or two machines. Frame it with pressure-treated 2x4s, sheathe with plywood or corrugated metal, and add a roof panel. Total footprint is about 5x10 feet.
Tips
- Face the open side away from prevailing wind direction
- Run an outdoor-rated extension cord for the bike's power supply
- Cover machines with fitted covers even inside the shelter during extended non-use
Recommended
Items for this idea
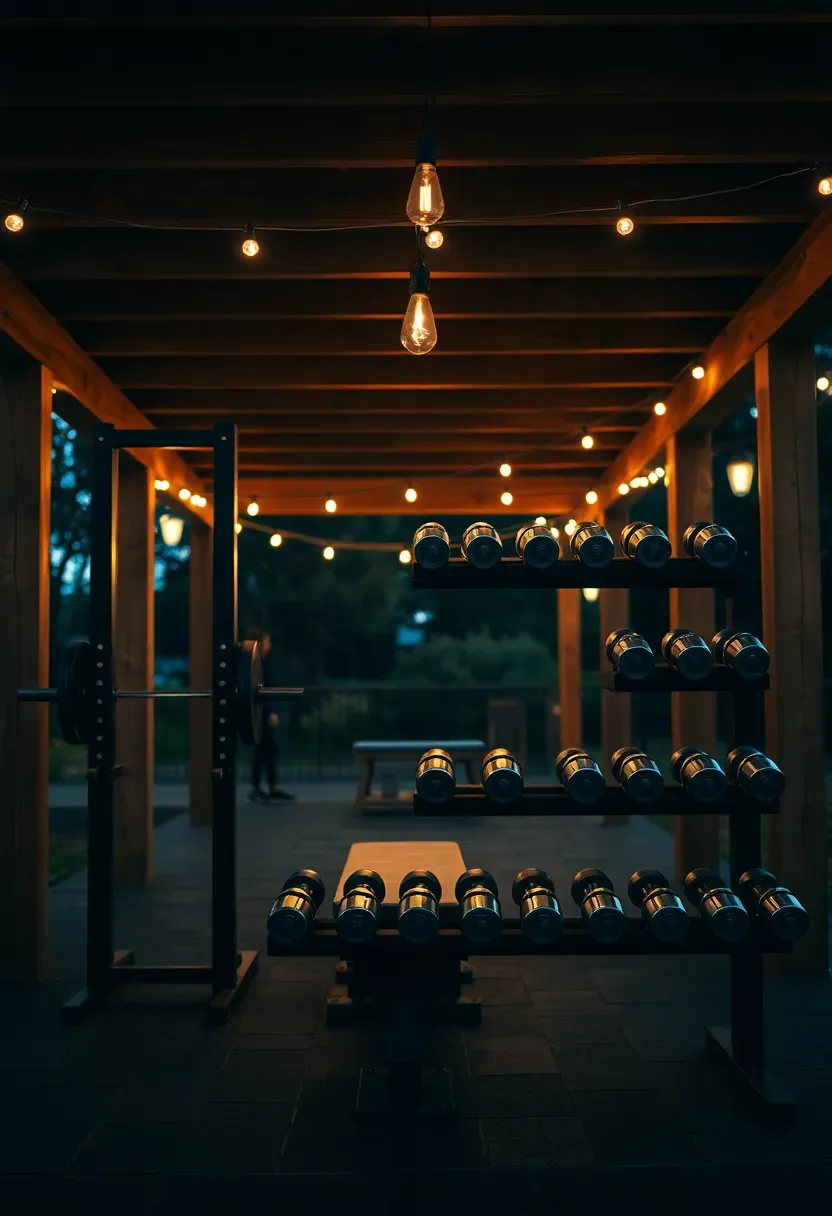
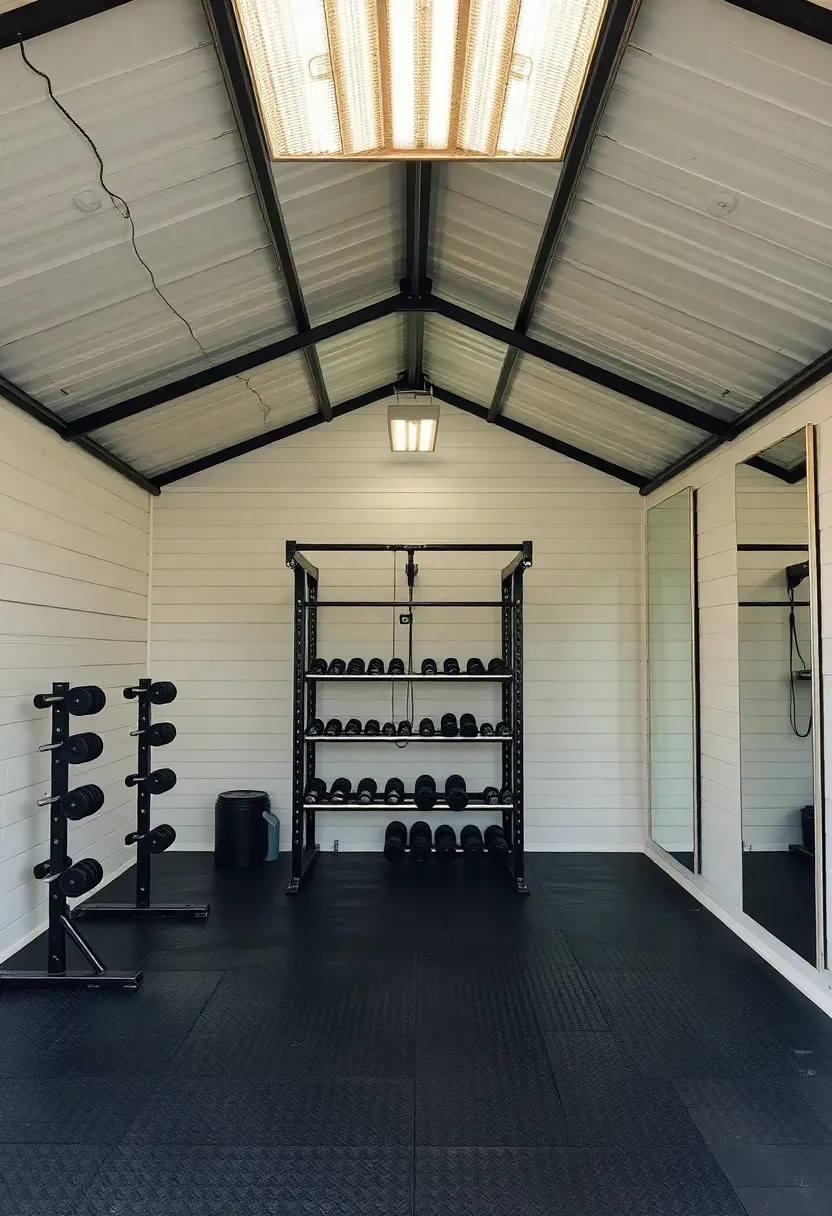
21. Full Open-Air Gym Under a Lean-To Roof
This is the end-game backyard gym. A lean-to structure attached to the back of your house or garage, open on one or two sides, with a roof that keeps everything dry. Size it at a minimum of 12x16 feet for a squat rack, a bench, a dumbbell rack, and room to move. Pour a concrete slab (or use an existing patio), install rubber flooring, and mount mirrors on the back wall. Add electrical for lighting and a fan. The cost ranges from two to five thousand dollars depending on how much you DIY versus hire out. This is a permanent structure that likely requires a building permit, so check before you pour concrete.
Planning Checklist
- Verify setback requirements from your property line before building
- Match the roof pitch and material to your existing house for visual cohesion
- Install a GFCI outlet for any powered equipment
- Consider running a water line for a small utility sink — washing chalk and sweat off hands matters more than you think
Quick FAQ
How much does it cost to build a backyard gym? Anywhere from under a hundred dollars for a basic bodyweight setup with a pull-up bar and rubber mat to five thousand or more for a fully covered structure with a squat rack and flooring. Most people land around five hundred to fifteen hundred dollars for a solid intermediate setup with free weights, a bench, and weather protection.
Will outdoor gym equipment rust? Yes, eventually. Chrome bars rust fastest, followed by bare steel. Stainless steel and powder-coated or rubber-coated equipment holds up best. Wipe equipment down after use, store under cover when possible, and apply a light oil (3-in-1 or WD-40) to barbell shafts monthly.
Do I need a permit to build a backyard gym? It depends on what you are building. Freestanding equipment on your existing patio needs no permit. A new concrete slab, a roofed structure, or a shipping container almost always requires one. Call your local building department before starting — the conversation takes five minutes and can save you a teardown order later.
Can I use backyard gym equipment in winter? Cold weather actually makes outdoor lifting more comfortable once you warm up — no overheating. The real issue is frozen metal bars (wear gloves or use fat grips), icy surfaces (keep your platform clear and dry), and shorter daylight (add LED shop lights to your setup). Many people train outdoors year-round in climates that drop below freezing.
What flooring works best for an outdoor gym? Horse stall mats on compacted gravel is the gold standard for price and performance. They are cheap, nearly indestructible, drain well, and absorb dropped weights. Concrete works too but cracks under repeated heavy drops. Avoid interlocking foam tiles outdoors — they absorb water, grow mold, and compress under heavy loads.
A backyard gym does not need to look like a commercial fitness center to work like one. Start with the floor surface and one piece of equipment you will actually use three times a week. Add from there as your training evolves. The best home gym is the one that gets you outside and moving consistently — not the one with the most equipment collecting dust under a tarp.
Pinterest cover for 21 Backyard Gym Ideas for Outdoor Workouts
About the author
OBCD
CGI visualization and interior design content. We create detailed 3D renders and curate practical design ideas for every room in your home.