19 Backyard Grill Ideas for Outdoor Cooking
My neighbor grills on a rusty charcoal kettle balanced on two paving stones, and honestly, his pulled pork is better than most restaurant versions. Equipment matters less than people think — but your setup, layout, and comfort while cooking? Those make a real difference in how often you actually fire things up. A dedicated grill area does not need to cost thousands. Some of the best ones I have seen started with leftover pavers and a Saturday afternoon. Here are 19 ideas that cover the full range from bare-bones to built-out.
Each idea focuses on a different approach to backyard grilling — materials, layout, shelter, and workflow.
Table of Contents
- Freestanding Grill on a Paver Pad
- L-Shaped Grill Counter
- Kamado Grill Nesting Station
- Charcoal Grill with Windscreen Wall
- Grill Gazebo with Built-In Venting
- Rolling Stainless Steel Grill Cart
- Sunken Grill Pit
- Dual-Fuel Grill Island
- Fence-Mounted Fold-Out Grill Shelf
- Rustic Stone Grill Alcove
- Deck-Integrated Grill Station
- Argentine-Style Open Grill
- Shed-Roofed Grill Lean-To
- Modular Concrete Block Grill Bar
- Trailer-Style Mobile Grill Unit
- Under-Pergola Grill Setup
- Corner Lot Grill Nook
- Reclaimed Brick Grill Surround
- Minimalist Steel Frame Grill Table
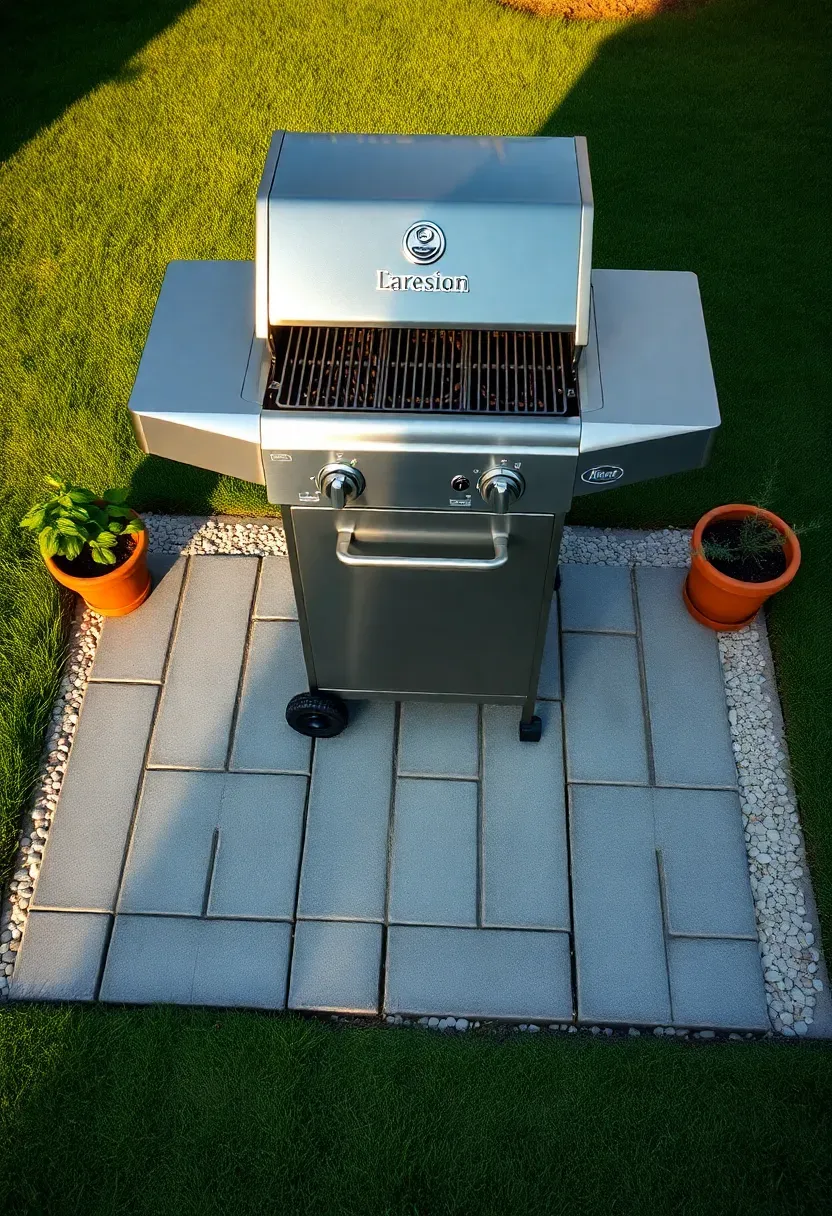
1. Freestanding Grill on a Paver Pad
The simplest grill upgrade is giving your grill a proper floor. A four-by-six-foot paver pad levels the surface, keeps the grill from sinking into grass, and creates a visual boundary that makes the cooking area feel intentional. Lay landscape fabric first, add two inches of compacted gravel, then set concrete or natural stone pavers on top. The whole project takes about three hours and costs under a hundred dollars if you use standard concrete pavers from a home center.
Tips
- Extend the pad eighteen inches beyond the grill on all sides for safe footing
- Use polymeric sand between joints to prevent weed growth and keep pavers locked
- Add a single row of border pavers in a contrasting color to frame the pad visually

We picked a few things that go well with this idea: Alpha Grillers BBQ Tools Set (★4.8), Yoehka 34-Piece BBQ Grill Tools Kit (★4.8) and Kaluns Stainless Steel BBQ Tool Set (★4.7). As an Amazon Associate we earn from qualifying purchases.
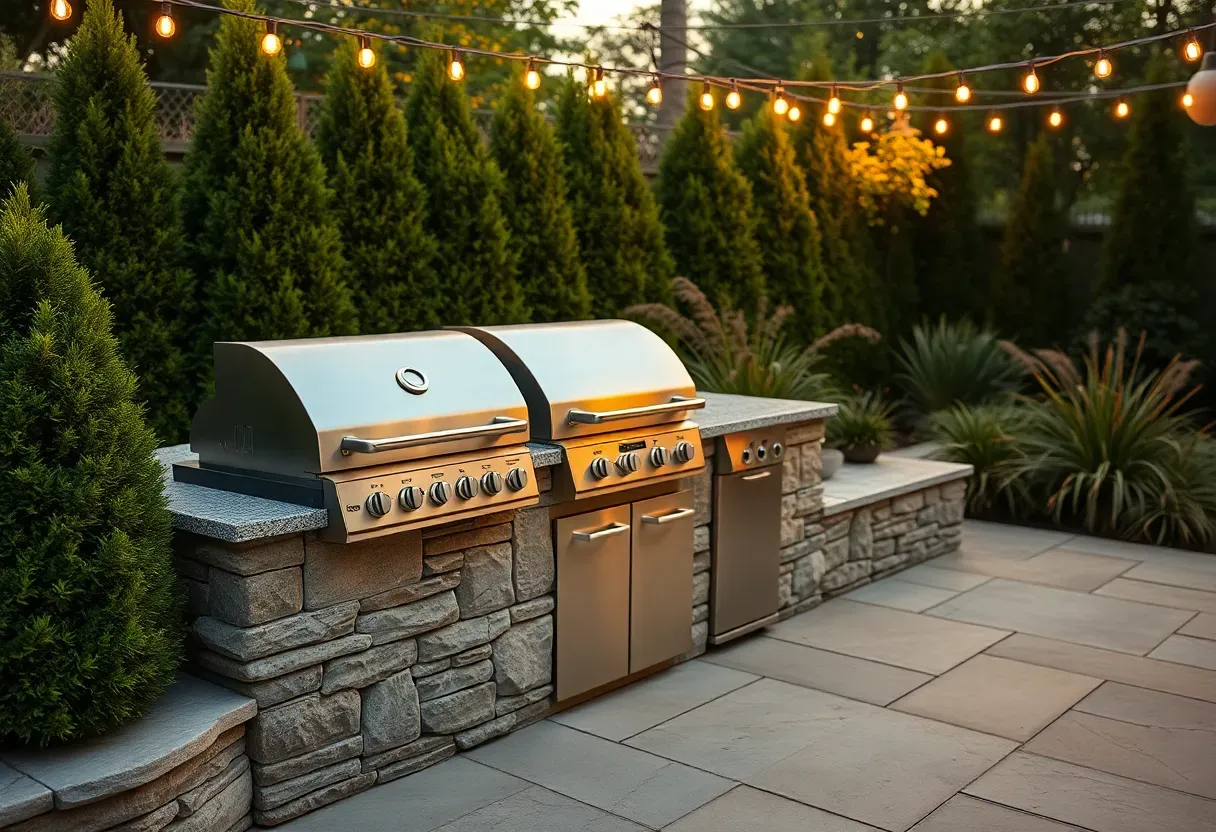
2. L-Shaped Grill Counter
Why L-Shape Beats a Straight Run
A straight counter gives you prep space on one side of the grill. An L-shape gives you prep on one arm and serving on the other, with the corner acting as a natural staging area for plates and condiments. The cook stays in one spot while guests approach from the serving side without crowding the hot zone.
Building It Right
Frame with steel studs or cinder block, face with stone veneer or stucco, and cap with granite, concrete, or quartzite. Each arm should measure at least five feet to be useful. Position the grill two-thirds of the way along one arm so you have more counter on the dominant-hand side. Route a gas line through the base and install a shutoff valve inside the cabinet space below the countertop for quick access.
Choose If
- You host dinner parties where guests linger near the cook
- Your patio has a corner or wall that naturally forms one arm of the L
- You want separation between raw prep and finished food areas
We picked a few things that go well with this idea: UBeesize Large Fireproof Grill Mat (65x48) (★4.2), Double-Sided Under Grill Deck Mat (48x30) (★4.4) and Silicone Fireproof Under Grill Mat (48x30) (★4.6). As an Amazon Associate we earn from qualifying purchases.
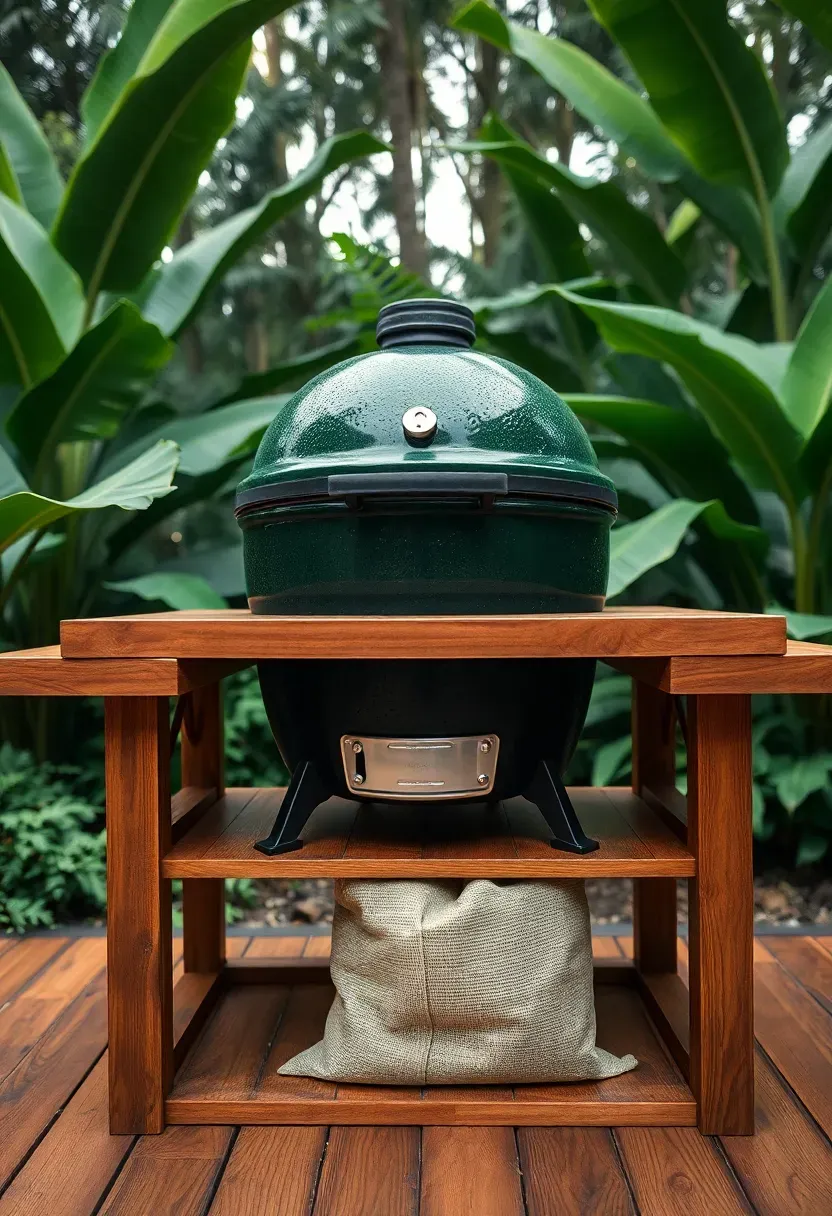
3. Kamado Grill Nesting Station
Kamado-style ceramic grills are heavy, round, and awkward to pair with standard rectangular tables. A custom nesting station solves this. Build a table with a circular cutout that lets the kamado sit flush with the surrounding work surface. Use moisture-resistant hardwood like teak, ipe, or white oak for the tabletop. The lower shelf stores charcoal bags and fire starters out of the rain. A stainless steel ash catcher mounted underneath the table opening catches debris during cleanout and slides out like a drawer.
Tips
- Cut the opening one inch larger than the grill diameter for heat expansion clearance
- Reinforce the table frame — a large kamado weighs over 150 pounds empty
- Seal the wood with marine-grade spar varnish every spring to handle rain and grill splatter
We picked a few things that go well with this idea: Keter Unity XL Outdoor Prep Table (★4.4), GasOne Stainless Steel Rolling Grill Cart (★4.8) and Foldable Stainless Steel Grill Prep Table (★4.3). As an Amazon Associate we earn from qualifying purchases.
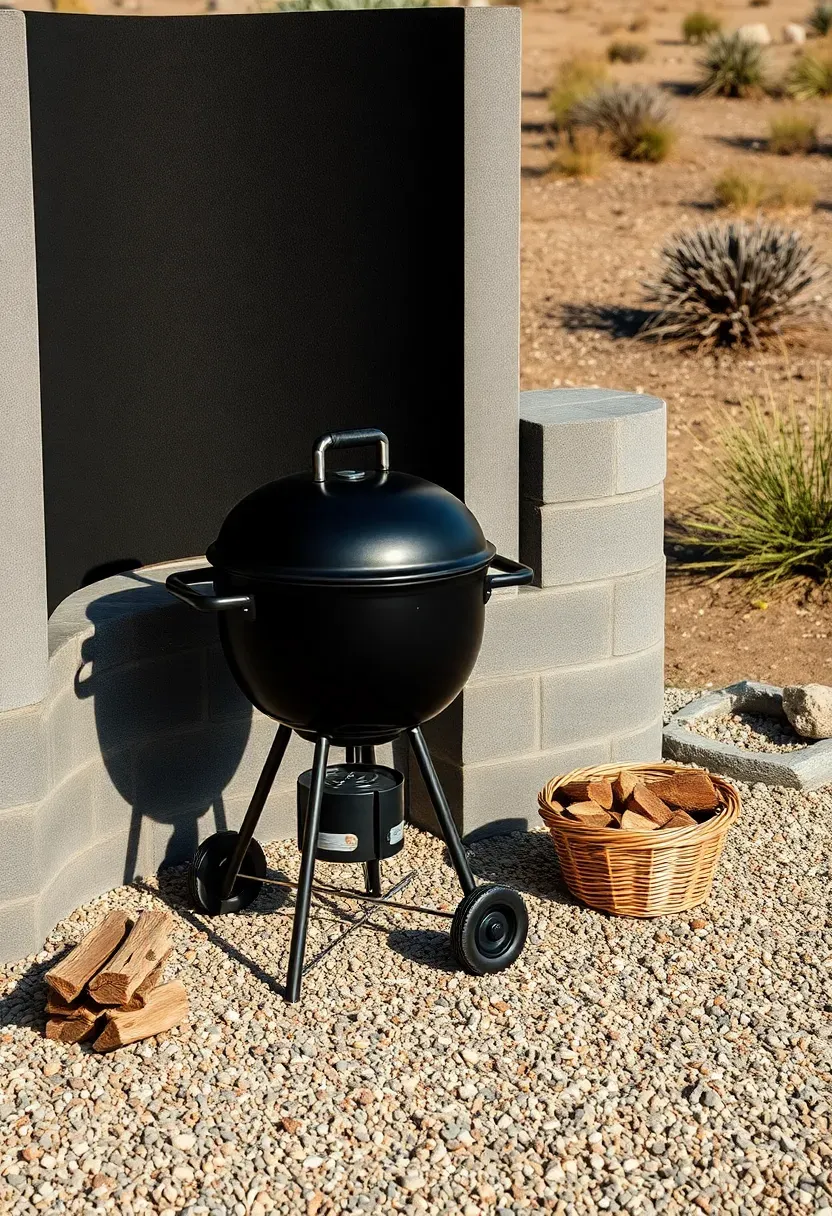
4. Charcoal Grill with Windscreen Wall
The Problem
Wind kills charcoal grilling. It blows ash onto food, creates hot spots on one side of the grate, and makes temperature control nearly impossible. If your yard faces open land or sits on a hill, you already know this frustration.
The Fix
Build a curved or L-shaped windscreen wall three feet high using cinder block, brick, or stacked stone. Position it on the prevailing wind side of your grill — check which direction your grass lies flat after a storm and block that side. The wall does not need mortar for a dry-stacked version; gravity and three courses of interlocking block handle moderate wind. Line the interior face with firebrick if the grill sits close enough to radiate heat onto the wall.
Pros and Cons
- Pro: charcoal burns more evenly, food cooks predictably
- Pro: doubles as a visual screen and defines the grill zone
- Con: a permanent wall limits grill repositioning
- Con: dry-stacked versions may shift in high winds or freeze-thaw cycles
Recommended
Items for this idea
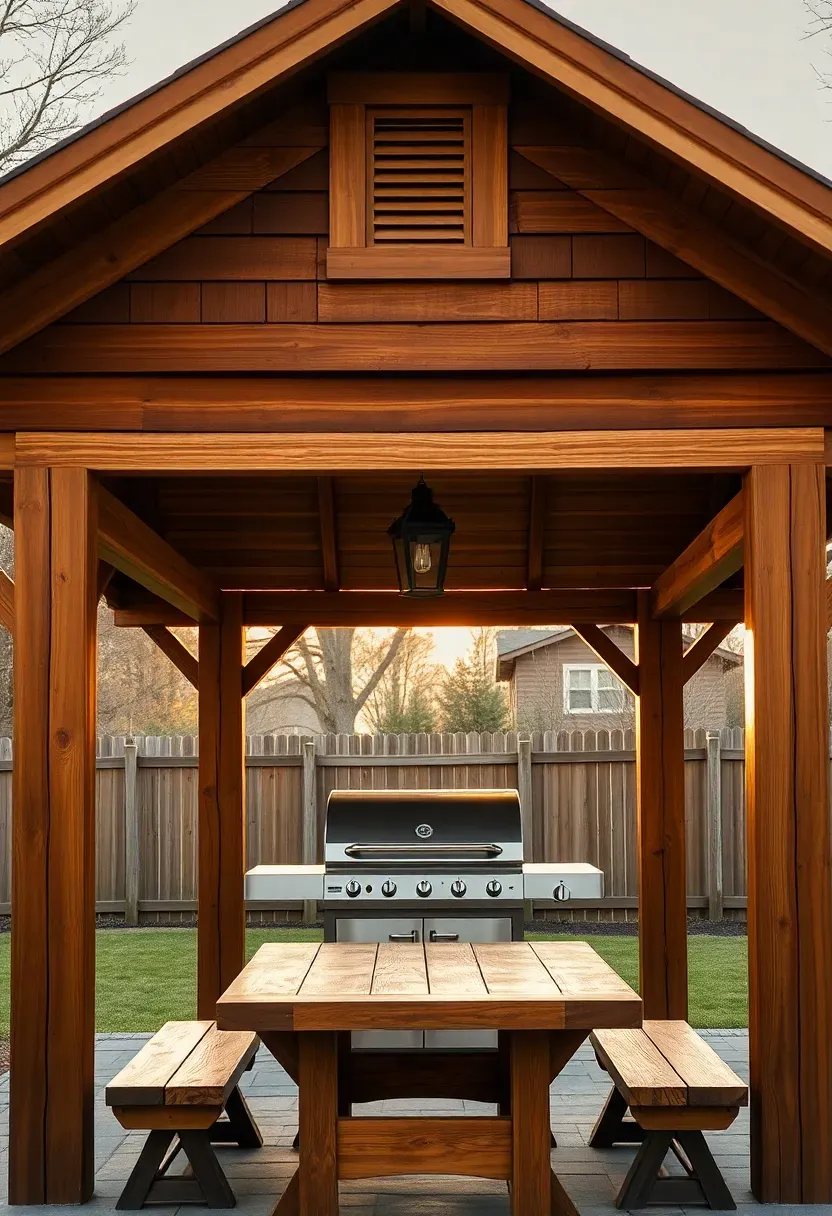
5. Grill Gazebo with Built-In Venting
A standard gazebo traps smoke. A grill-specific gazebo solves this with a cupola or ridge vent at the peak that acts as a chimney, pulling heat and smoke upward and out. Look for models with a double-tiered roof — the gap between tiers provides continuous airflow without mechanical ventilation. Steel-frame versions with powder-coated finishes hold up better than wood near constant heat and grease vapor. Mount a pendant light inside for evening visibility over the cooking surface.
Tips
- Minimum eight-foot ceiling height keeps the cook comfortable and reduces fire risk
- Anchor the frame to concrete footings — gazebos catch wind like a sail
- Hang a grease-rated fire extinguisher from one of the support posts within arm's reach
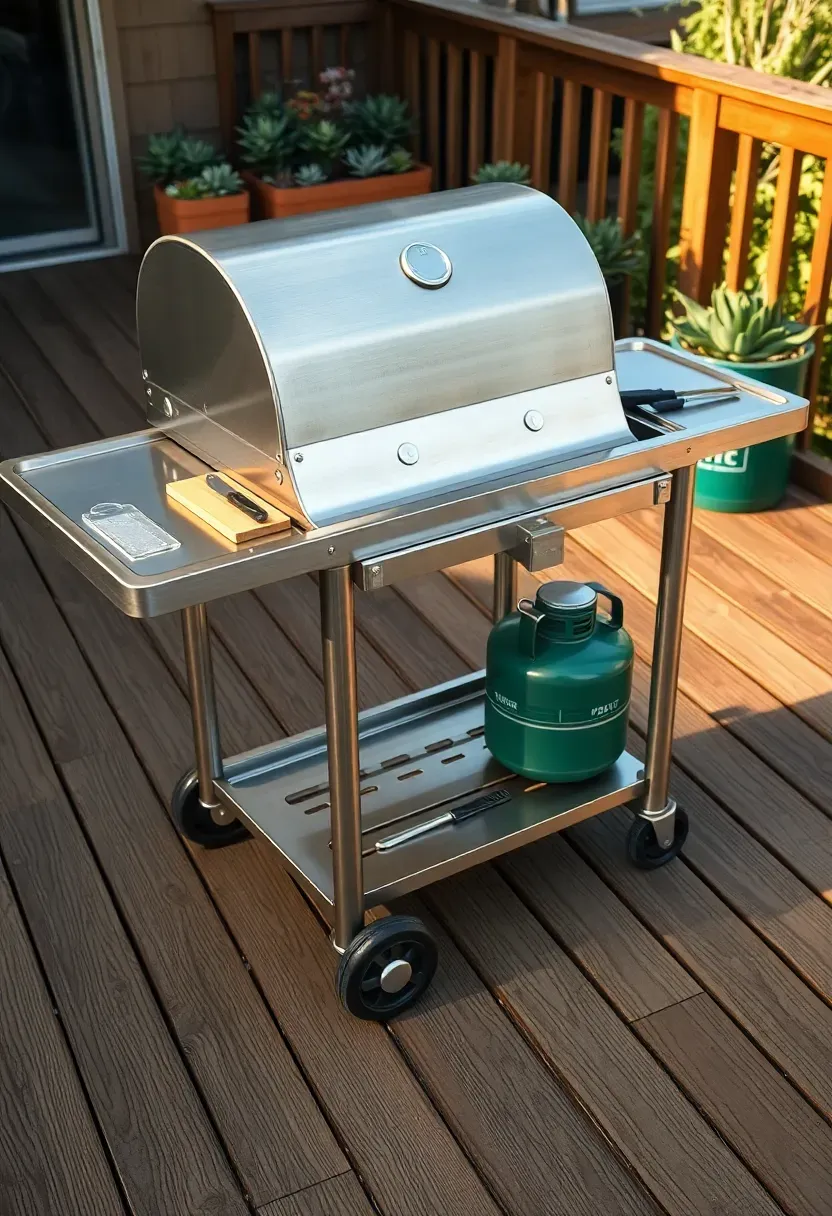
6. Rolling Stainless Steel Grill Cart
Step 1: Pick the Right Cart Frame
Start with a commercial-grade stainless steel cart — not the flimsy stamped-metal versions sold at big box stores. Restaurant supply stores sell prep carts with welded joints and locking casters for similar prices but far better durability.
Step 2: Customize the Layout
Bolt a magnetic knife strip along one side rail. Add S-hooks on the end rail for tongs, spatula, and a meat thermometer lanyard. Mount a paper towel holder vertically on a leg. Attach a small shelf bracket below the main surface for a cutting board that slides in and out.
Step 3: Set Up a Parking Spot
Designate a spot against the house or garage wall where the cart lives when not in use. Install two eye bolts in the wall with a bungee cord to secure the cart in storms. Roll it out when you grill, roll it back when you finish.
Watch Out
- Lock all four casters before lighting the grill — carts roll on sloped decks
- Keep the propane tank on the lower shelf, never on the cooking surface
- Wipe down stainless steel with mineral oil monthly to prevent surface corrosion
Recommended
Items for this idea
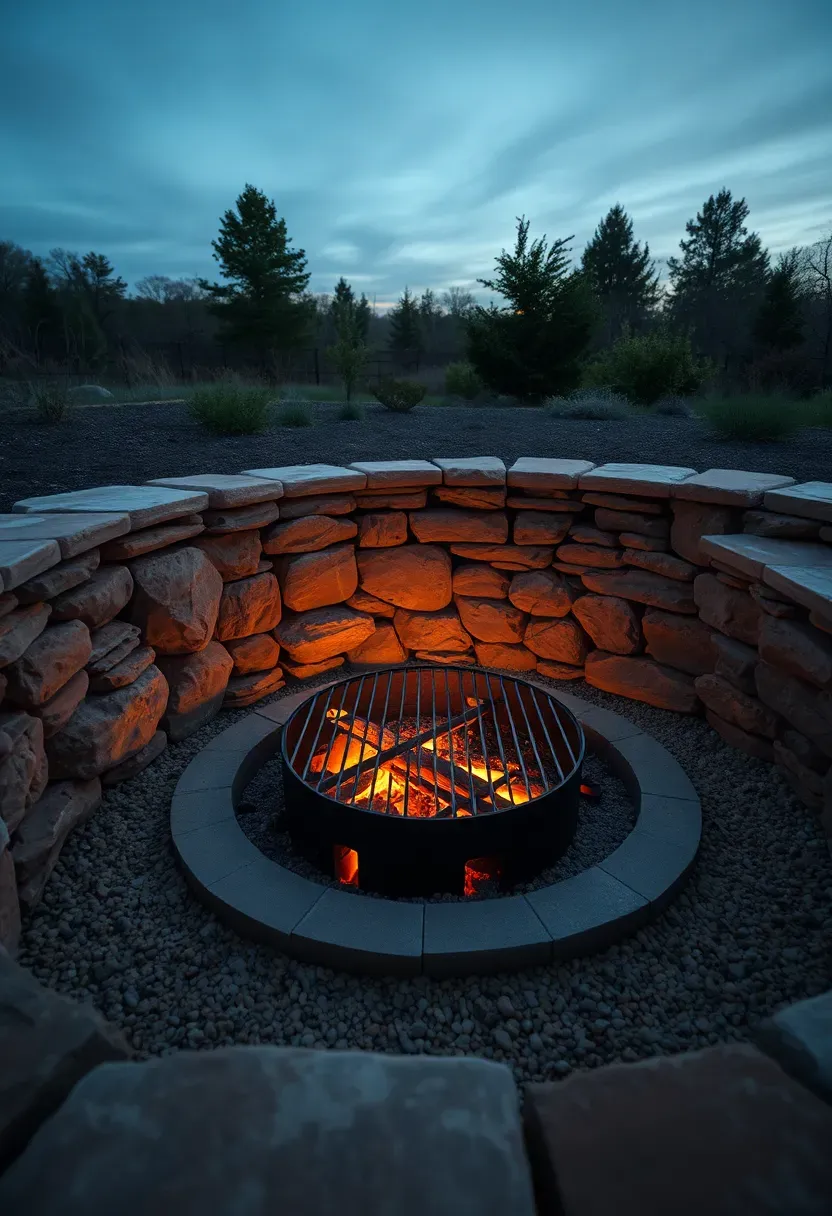
7. Sunken Grill Pit
Dig down instead of building up. A sunken grill pit sits eighteen to twenty-four inches below grade, with stone or block retaining walls and a steel grate that rests at ground level or slightly above. The recessed design shields the fire from wind naturally, holds heat exceptionally well, and creates a gathering focal point where people sit on the raised edges or built-in benches. Line the bottom with four inches of gravel for drainage — standing water in a fire pit corrodes steel grates and cracks masonry in freezing climates.
Tips
- Check local building codes — some municipalities classify sunken pits differently than above-grade fire features
- Install a removable grate so you can switch between grilling and open fire pit mode
- Build a simple plywood cover for when the pit is not in use to keep leaves and animals out
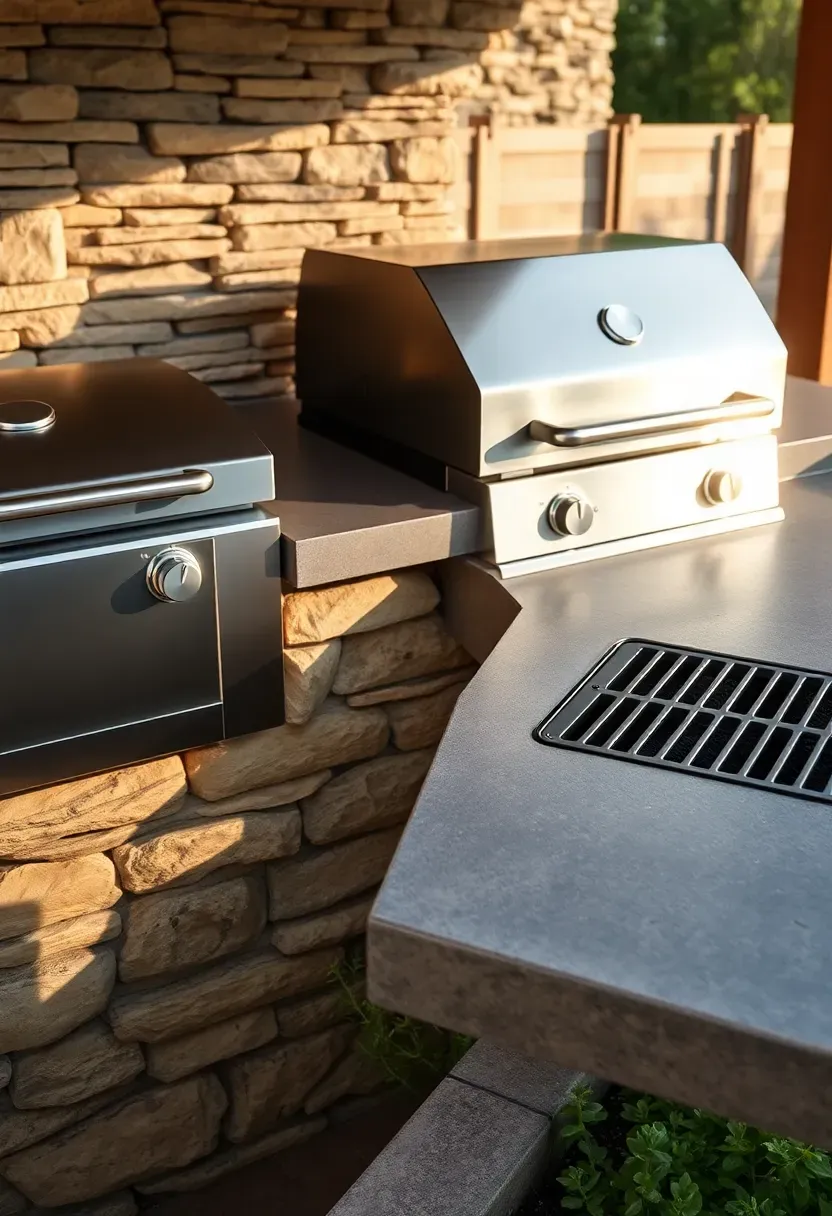
8. Dual-Fuel Grill Island
Gas vs. Charcoal: Why Not Both?
Gas is convenient for weeknight burgers — turn a knob and you are cooking in five minutes. Charcoal gives you the smoke flavor and searing heat that gas struggles to match. A dual-fuel island accommodates both. Set a gas grill insert on one end and a charcoal drawer or drop-in on the other, separated by at least three feet of counter space.
Layout Details
Build the island eight to ten feet long with the gas grill on the left (near the gas line) and the charcoal section on the right (near open air for ash disposal). Include a small stainless steel sink between them for hand washing between raw and cooked food. The counter depth should be at least thirty inches to provide useful prep space in front of each grill.
Choose If
- You grill weeknights (gas) and do weekend low-and-slow cooks (charcoal)
- Your household has competing opinions about fuel type
- You have at least a ten-foot linear run available along your patio edge
Recommended
Items for this idea
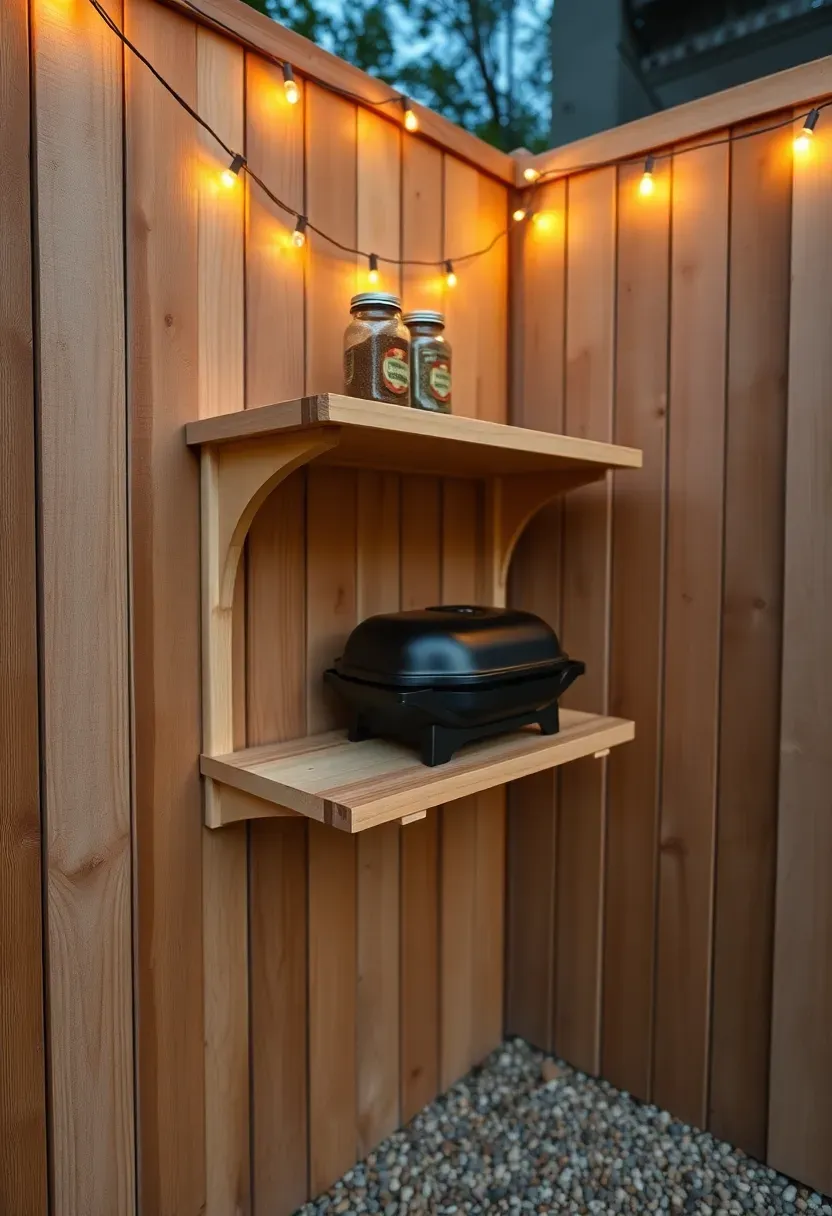
9. Fence-Mounted Fold-Out Grill Shelf
Small yards demand creative solutions. A hinged shelf mounted to a privacy fence folds flat against the fence when not in use and flips up to create a stable platform for a small portable grill, tabletop hibachi, or electric grill. Build it from pressure-treated two-by-sixes with a piano hinge along the bottom edge and a folding leg brace or chain support. The shelf should extend no more than twenty-four inches from the fence to avoid tipping. Keep a heat shield — a piece of cement board — between the grill and the fence surface.
Tips
- Check that your fence posts can support the weight — reinforce with lag bolts into the post if needed
- Add a narrow spice shelf above the main shelf using a single one-by-four plank
- Position at least three feet from any gate opening so the shelf does not block foot traffic
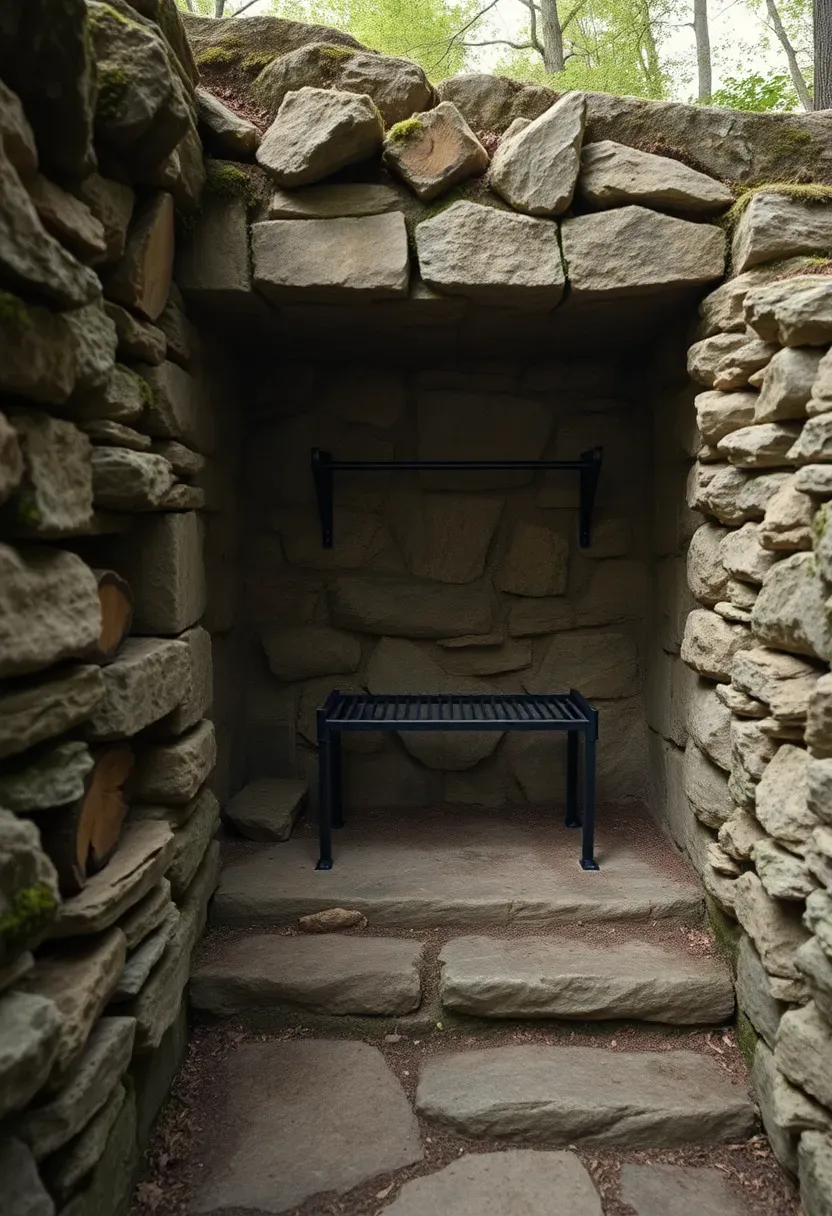
10. Rustic Stone Grill Alcove
If your yard has a slope or retaining wall, carve a grill alcove directly into it. Natural fieldstone walls create a three-sided shelter that blocks wind, retains heat, and looks like it has been there for decades. Set a steel grill grate on iron brackets mortared into the side walls at two heights — one for direct grilling and one twelve inches higher for indirect cooking. Build a firewood niche into one of the side walls so split logs stay dry and within arm's reach during cooks.
Tips
- Use firebrick for the back wall surface behind the grate — regular stone can crack from direct heat exposure
- Slope the alcove floor slightly forward so rainwater drains out instead of pooling
- Install a simple steel lintel across the top if you want to add a stone arch for a finished look
Recommended
Items for this idea
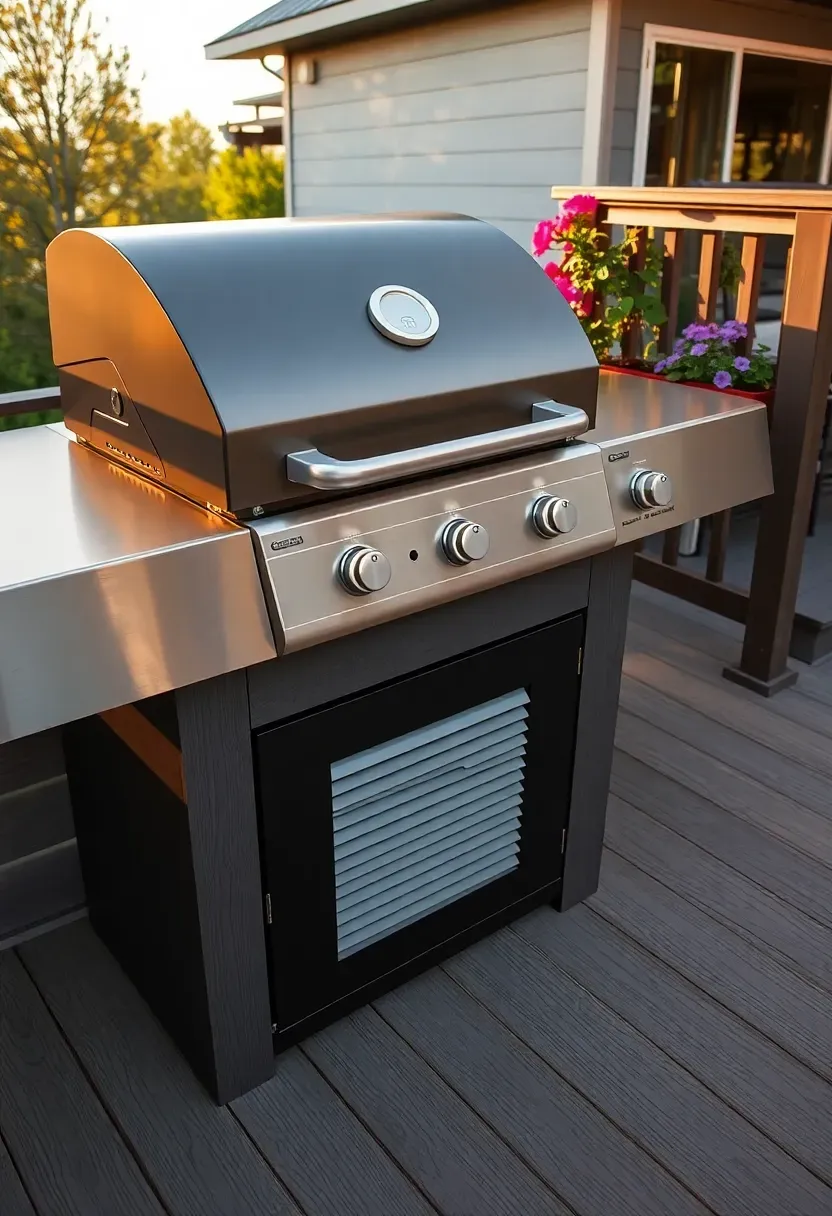
11. Deck-Integrated Grill Station
The Problem
Freestanding grills on wooden decks create burn marks, grease stains, and fire anxiety. They look temporary no matter how expensive the grill.
The Solution
Frame a grill bay into the deck structure itself. Cut an opening in the deck surface, install a steel or cement board fire box liner, and drop in a built-in grill insert rated for zero-clearance installation. Surround the opening with composite decking trim that matches the rest of the deck. Below the grill, build an enclosed cabinet for propane storage with a vented door panel.
Pros and Cons
- Pro: clean built-in appearance that increases deck value
- Pro: no grease dripping onto deck boards — the liner catches everything
- Con: requires structural modification to the deck frame
- Con: moving the grill later means patching a hole in your deck
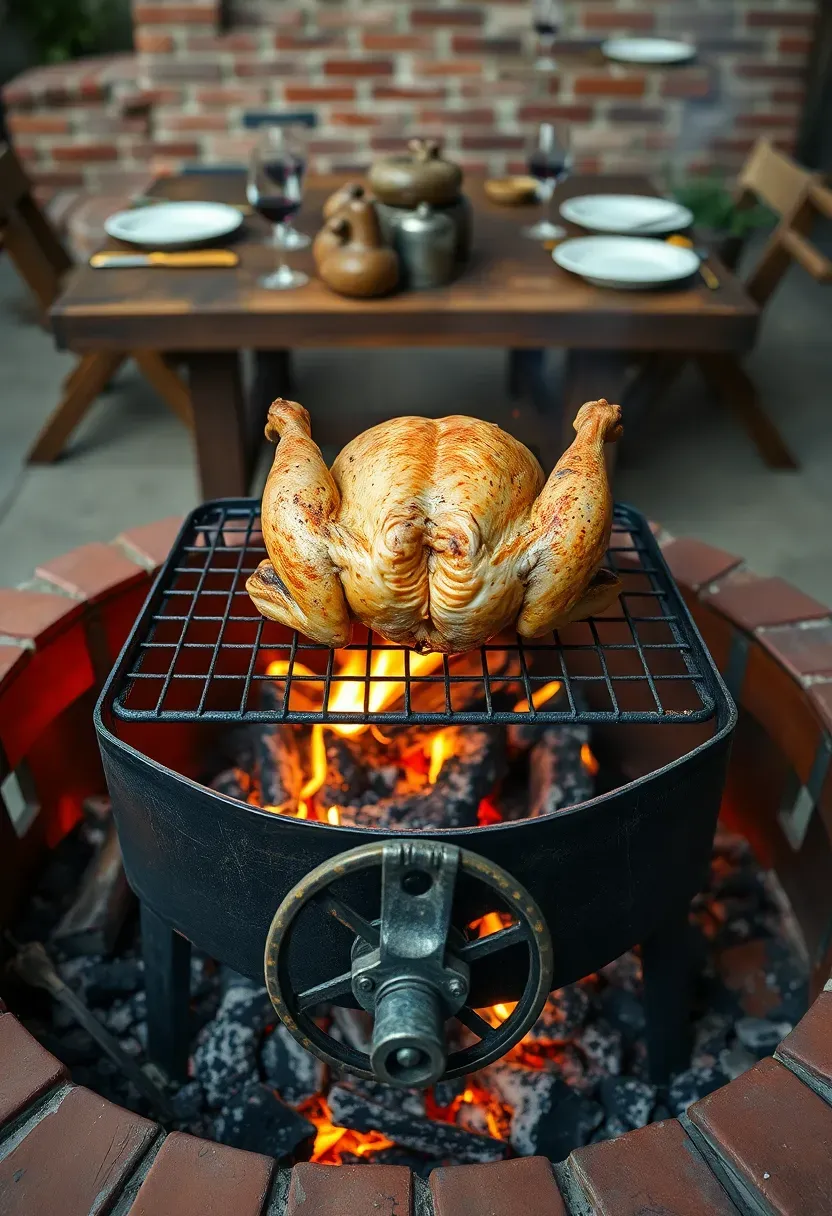
12. Argentine-Style Open Grill
Argentine asado grills use a V-shaped fire tray with a hand-crank mechanism that raises and lowers the grate above live coals. This gives you continuous heat control without touching the grate — crank it down to sear, raise it up for gentle cooking. You can buy prefabricated Argentine grill inserts from specialty suppliers or weld one from heavy-gauge steel if you have the skills. The fire tray sits inside a simple brick or stone surround at waist height. No gas line, no ignition system, no moving parts besides the crank.
Tips
- Use hardwood lump charcoal or split hardwood logs — briquettes do not produce enough radiant heat for this style
- The crank mechanism should raise the grate at least eighteen inches above the coals for low-temperature cooking
- Season the steel grate with high-smoke-point oil before first use and after every deep cleaning
Recommended
Items for this idea
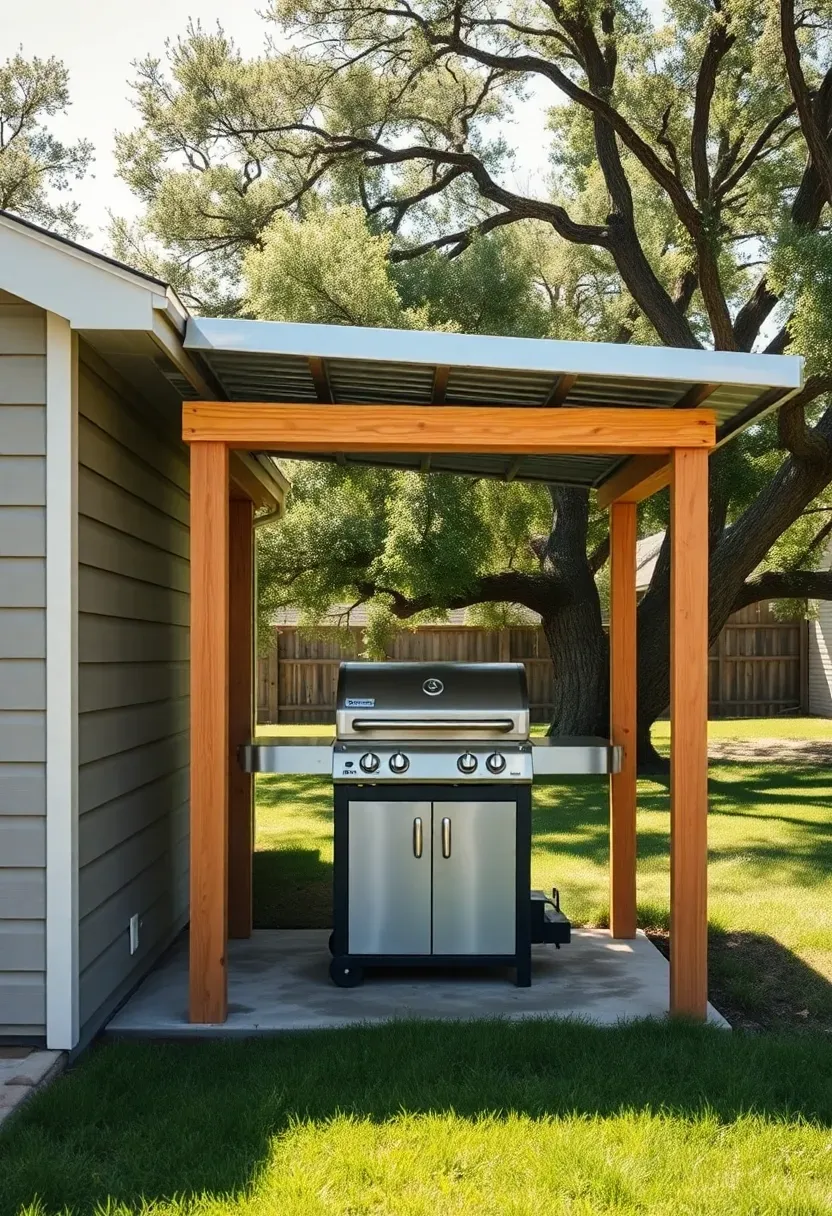
13. Shed-Roofed Grill Lean-To
A lean-to is the cheapest permanent shelter you can build over a grill. One sloped roof plane, three support posts on the open side, and the house or garage wall as the back support. Frame it with pressure-treated four-by-fours and sheet the roof with corrugated metal or polycarbonate panels. The open front and sides let smoke escape freely while the roof keeps rain off the cook and the grill. Size it six feet wide by four feet deep — enough room for the grill plus one person working comfortably.
Tips
- Pitch the roof away from the house so rainwater runs toward the yard
- Leave at least twelve inches between the roof edge and the top of the grill for smoke clearance
- Bolt the ledger board to the house wall with lag screws into studs — do not rely on siding alone
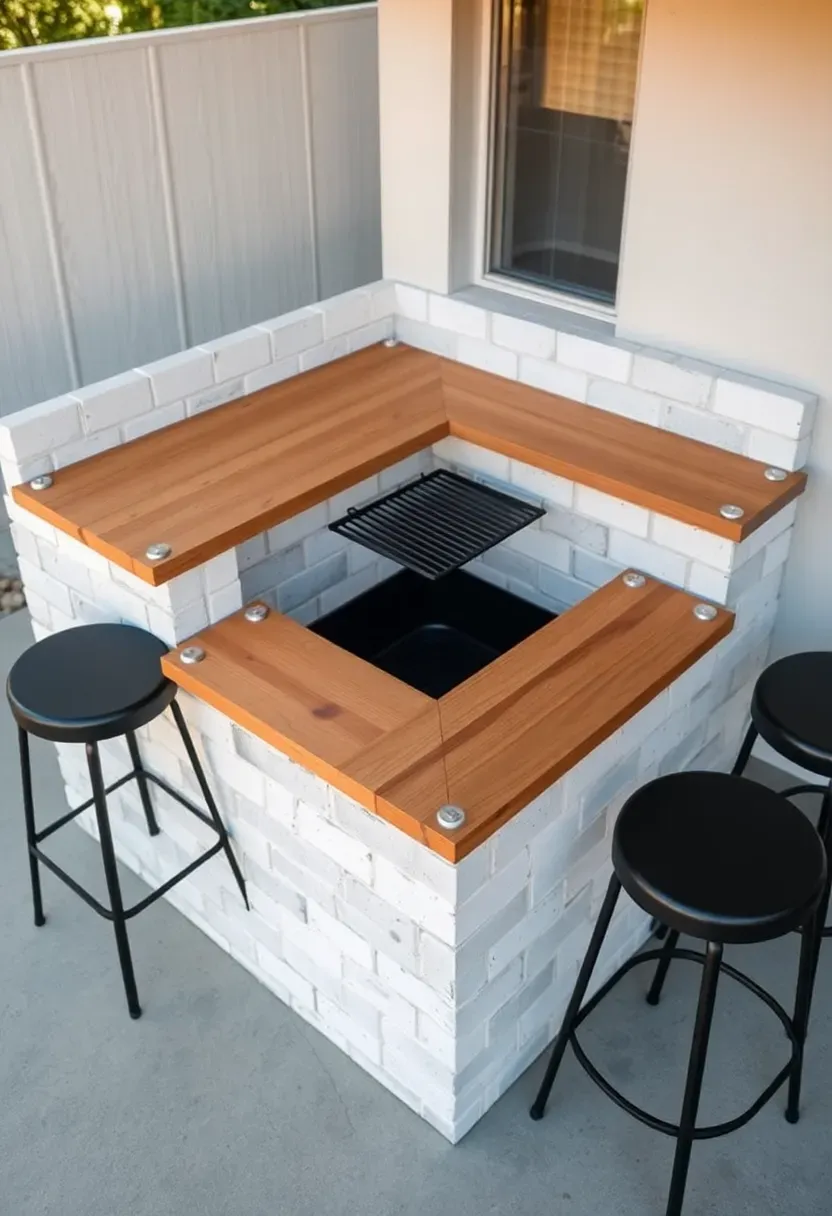
14. Modular Concrete Block Grill Bar
Step 1: Stack the Base
Dry-stack standard 8x8x16 concrete blocks in a U-shape, three courses high. No mortar needed — construction adhesive between courses keeps things solid. This gives you a thirty-two-inch counter height that matches standard kitchen ergonomics.
Step 2: Add the Surface
Lay two-inch-thick butcher block planks or treated lumber across the top. For a more durable option, pour a thin concrete countertop in place using a simple plywood form. Seal with food-safe concrete sealer.
Step 3: Set Up the Grill and Seating
Drop a portable grill into the center opening or set it on top. Add three or four bar stools along the outside face. The cook works from inside the U while guests sit across the counter with drinks and plates — everyone faces each other.
Watch Out
- Paint or stucco the block exterior for a finished look — raw cinder block reads as unfinished construction
- Level the ground beneath the base carefully — three courses of block amplify any unevenness
- Anchor the bottom course to the patio with concrete adhesive if you live in a high-wind area
Recommended
Items for this idea
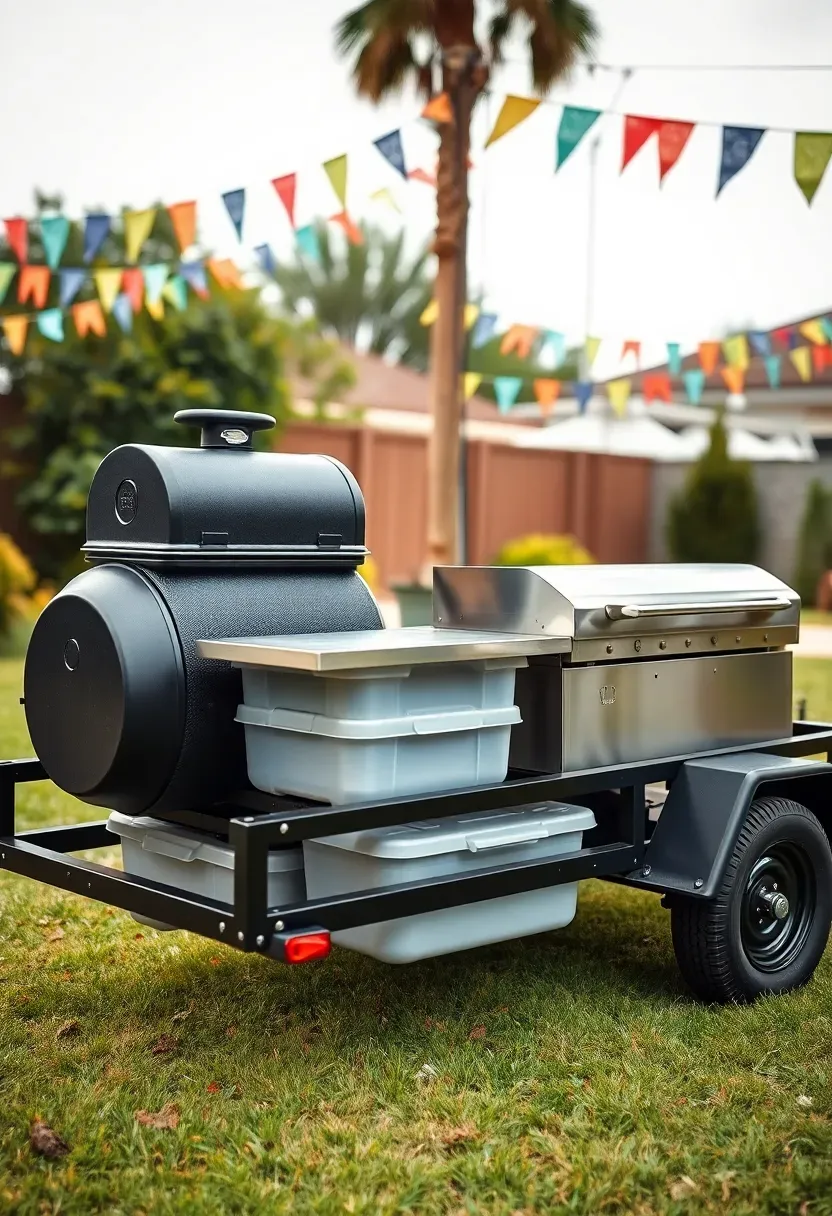
15. Trailer-Style Mobile Grill Unit
For people who host at different locations — tailgates, family reunions, block parties — a trailer-mounted grill setup puts your entire cooking station on wheels. Start with a small utility trailer (four by six feet is enough) and weld or bolt a grill, smoker, and prep table to the deck. Add a tongue-mounted toolbox for utensils, rubs, and fuel. The trailer stays in your driveway between events and hitches to any vehicle with a standard two-inch receiver.
Tips
- Secure the propane tank with a chain and bracket rated for road vibration
- Install trailer lights and a license plate bracket if your state requires registration for small trailers
- Add a fold-down side shelf that extends the prep area when parked but stows flat for towing
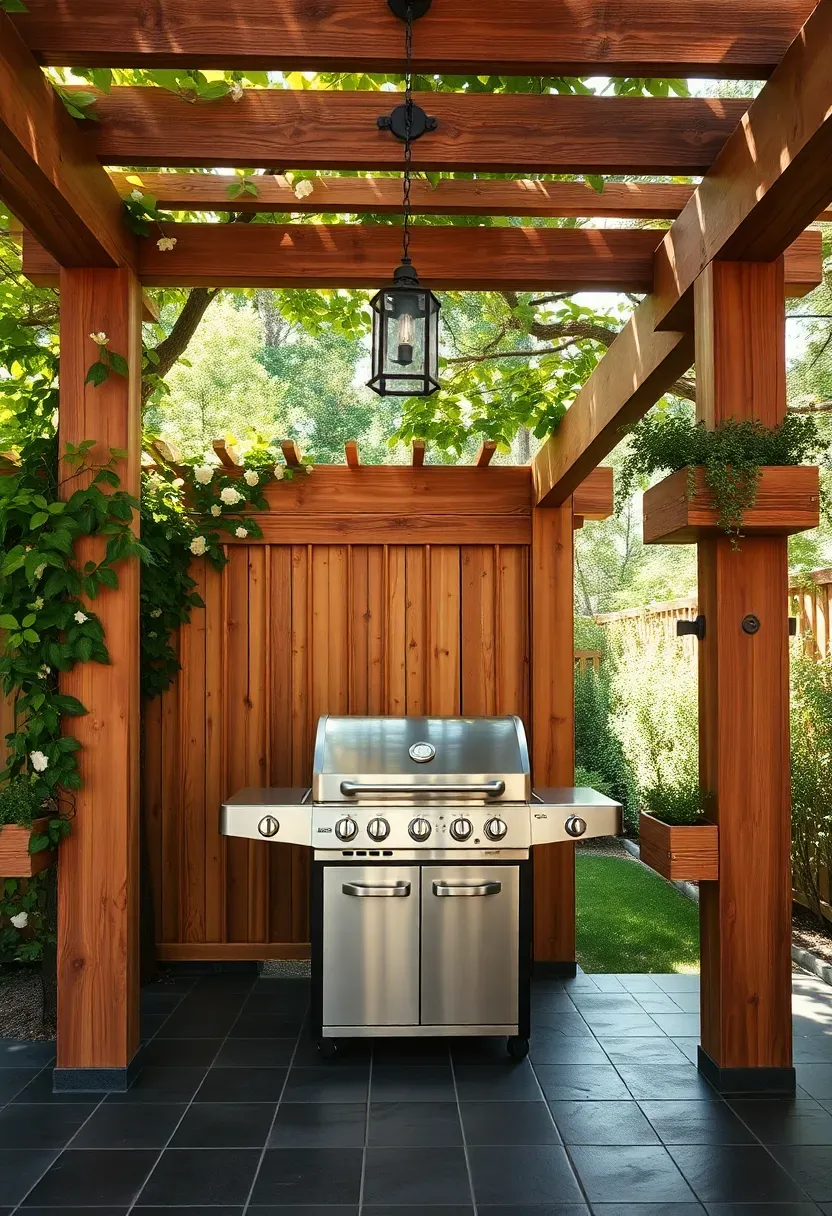
16. Under-Pergola Grill Setup
A pergola gives you partial shade and a sense of enclosure without trapping smoke the way a solid roof does. The open-slat design lets heat rise freely while filtering harsh midday sun. Position your grill under the center of the pergola with at least three feet of clearance on each side. Train climbing plants — jasmine, wisteria, or grape vine — on one or two sides for natural screening. Avoid covering more than sixty percent of the top with vines or shade cloth, or smoke will linger at cook height.
Tips
- Use cedar or redwood for natural rot resistance near moisture and heat
- Mount hooks on the pergola posts for grilling tools, lanterns, and a small speaker
- Install a drip irrigation line along the top beam to water climbing plants without a hose
Recommended
Items for this idea
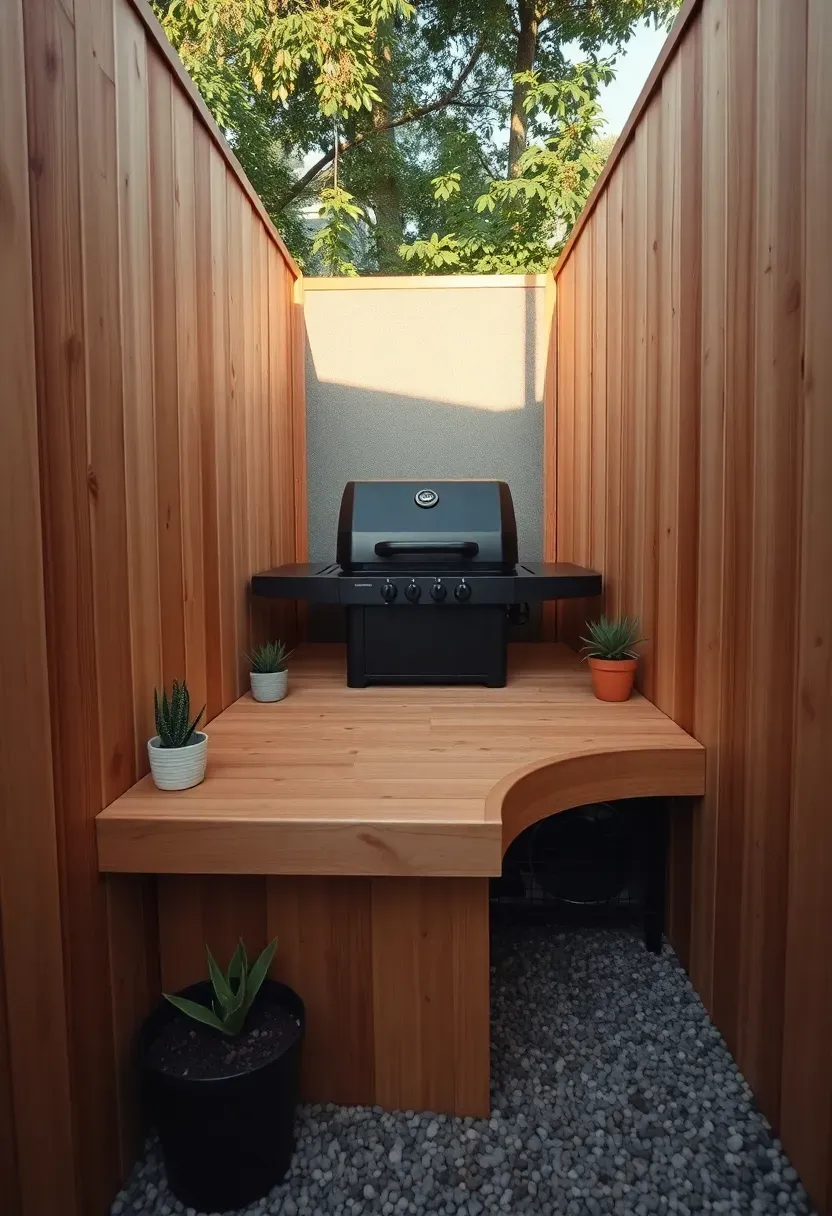
17. Corner Lot Grill Nook
Dead corners where two fences meet often go unused. Reclaim that space by tucking a compact grill into the angle with a small countertop running along each fence line. The two walls provide natural wind protection and create a cozy enclosed feel. Build a narrow counter — eighteen inches deep is enough — along each fence using brackets and treated lumber. The grill sits in the corner where the two counters meet. Keep a heat-resistant cement board panel against the fence behind the grill to protect the wood from heat damage.
Tips
- Use the fence tops as mounting points for string lights to define the nook at night
- Keep a minimum six-inch gap between the grill body and the fence for airflow
- Add a small shelf underneath each counter for storing grill accessories and cleaning supplies
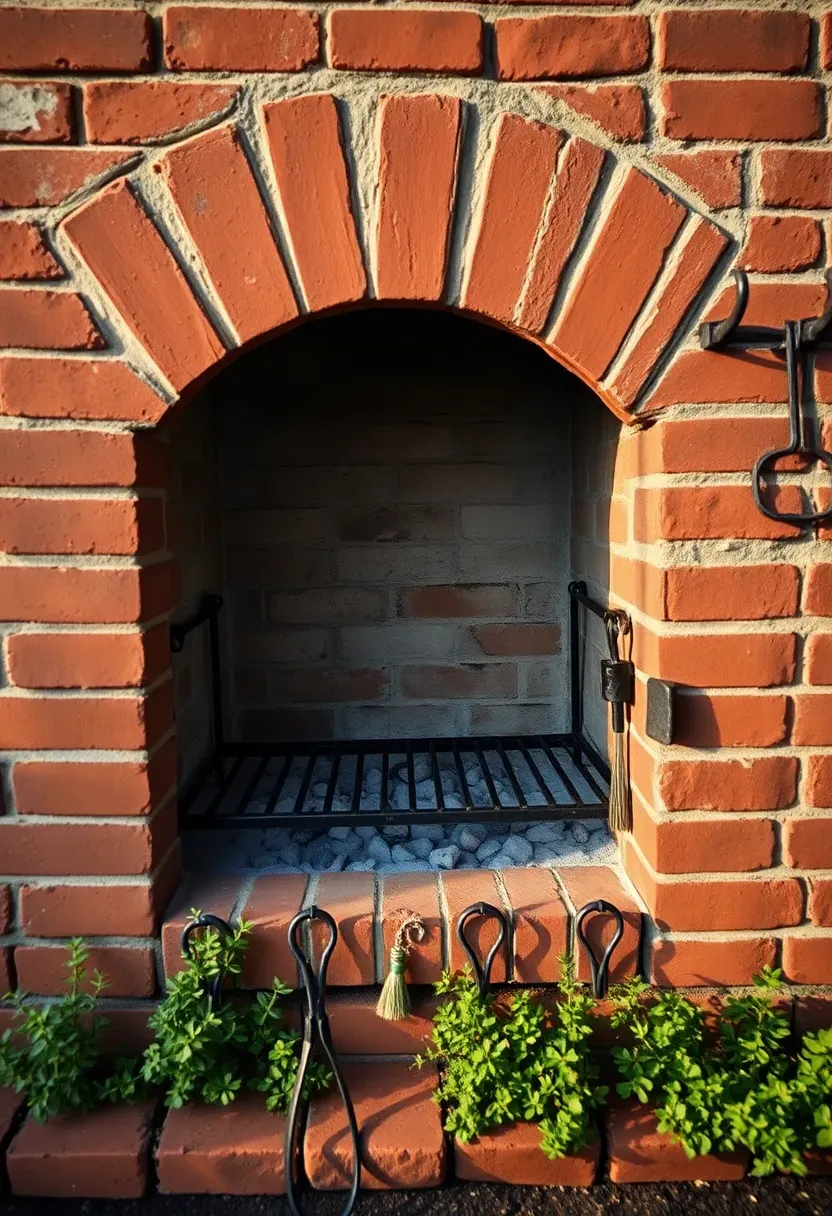
18. Reclaimed Brick Grill Surround
Origins
Brick grilling structures trace back to colonial-era outdoor hearths, where cooking happened outside during summer months to keep the house cool. The thick brick walls absorbed heat from the fire and radiated it evenly across the cooking surface — a principle that still works perfectly today.
Modern Version
Source reclaimed brick from demolition salvage yards — old chimney bricks work especially well because they have already survived decades of heat cycling. Build a three-sided surround with an arched or flat lintel opening. The interior dimensions should fit your grill with two inches of clearance on each side. Leave open mortar joints at the base for air intake, which feeds the charcoal and helps with temperature regulation.
Apply at Home
- Reclaimed brick costs roughly half what new brick does and has more character
- Mix brick colors and textures intentionally rather than trying to match — the variation is the point
- Plant low herbs like thyme and oregano at the base of the surround where reflected heat keeps soil warm and encourages growth
Recommended
Items for this idea
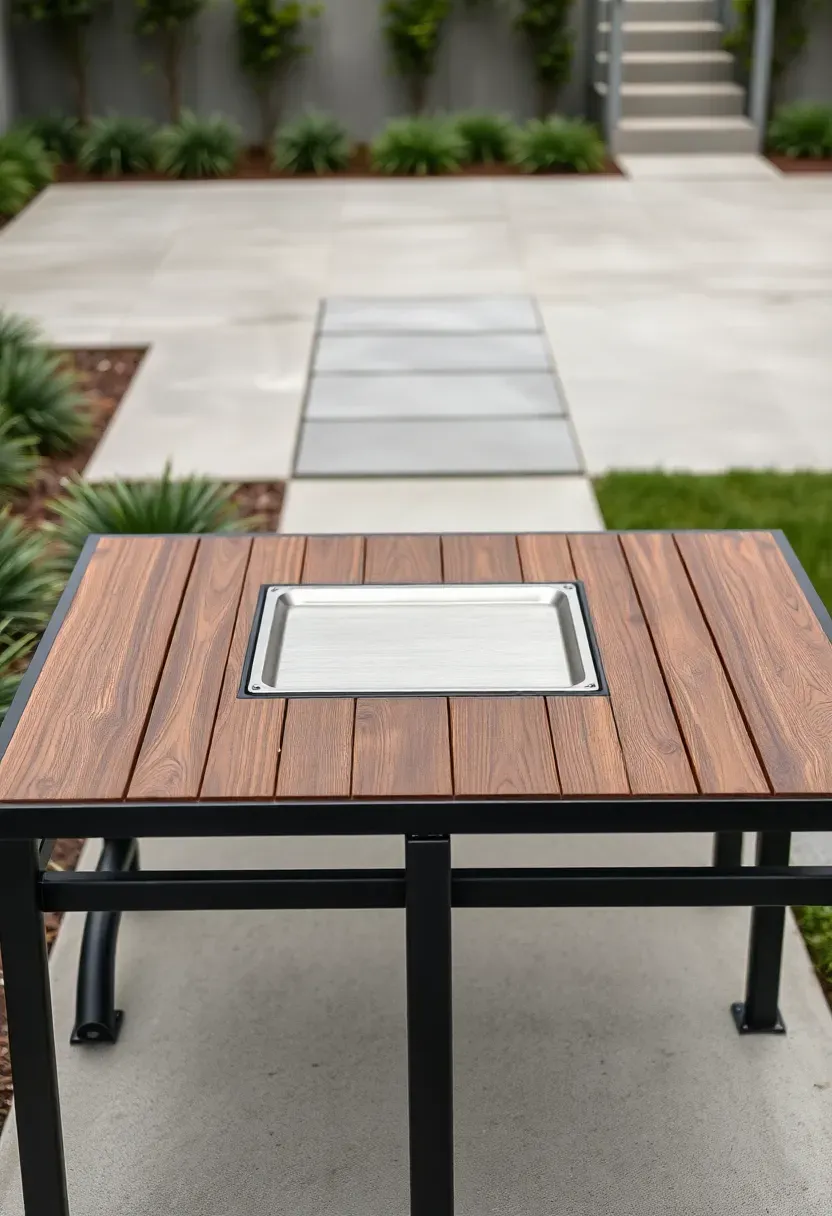
19. Minimalist Steel Frame Grill Table
A welded steel frame with clean lines and a matte black powder coat finish gives you a grill table that looks like modern furniture rather than backyard equipment. Use one-and-a-half-inch square steel tubing for the frame, with a cutout in the center for a drop-in grill. Fill the remaining surface with hardwood slats — ipe or thermally modified ash — spaced a quarter inch apart for drainage. The result is a piece that works as a prep table, serving surface, and grill station simultaneously. When the grill is not in use, drop in a matching wood insert to convert it to a regular outdoor table.
Tips
- Have the frame professionally powder coated for a finish that resists rust, heat, and UV fading
- Use stainless steel hardware throughout — standard zinc-plated bolts corrode within one season outdoors
- Weld leveling feet into the bottom of each leg to compensate for uneven patio surfaces
Quick FAQ
Do I need a permit to build a permanent grill station? It depends on your municipality. Most areas allow freestanding structures under a certain height (usually six feet) and footprint (typically under 120 square feet) without a permit. Anything with a gas line, electrical, or plumbing almost always requires one. Call your local building department before pouring concrete.
Which grill fuel is best for backyard cooking? Gas heats fast and cleans up easily. Charcoal delivers better sear marks and smoky flavor. Wood pellet grills split the difference with set-it-and-forget-it temperature control and real wood smoke. Pick based on how much time you want to spend tending the fire versus eating.
How far should a grill be from the house? The general guideline is ten feet from any structure, including fences, overhangs, and vinyl siding. Built-in installations with proper fire-rated materials and clearances can be closer, but check your local fire code and your homeowner's insurance policy before reducing that distance.
Can I grill on a wooden deck safely? Yes, with precautions. Use a grill mat rated for high temperatures underneath, keep a fire extinguisher nearby, and never leave a lit grill unattended. Built-in deck installations should use zero-clearance-rated grill inserts with fire box liners to protect the deck framing.
What is the most budget-friendly backyard grill setup? A paver pad with a portable charcoal kettle grill. The pavers cost under fifty dollars, and a quality 22-inch kettle grill runs around one hundred to one hundred fifty dollars. Add a small side table from a thrift store and you have a complete cooking station for under two hundred dollars total.
The right grill setup matches how you actually cook, not how a catalog says you should. Start with the simplest version that gets you outside and cooking more often — a flat surface under the grill and a table within reach. Build from there as your habits and budget allow. The best backyard grill area is the one that gets used every week, not the one that looks impressive in a photo but sits cold all summer.
Pinterest cover for 19 Backyard Grill Ideas for Outdoor Cooking
About the author
OBCD
CGI visualization and interior design content. We create detailed 3D renders and curate practical design ideas for every room in your home.