17 Backyard Lights Ideas
Last summer I spent four evenings outside without turning on a single light. The yard was pitch black by 8:30, the grill was somewhere to my left, and I tripped over a garden hose twice. That was enough. I started testing different backyard lights — cheap solar stakes from the hardware store, string lights from a restaurant supply company, a few low-voltage LED fixtures wired into the deck. Some worked immediately. Others died within a month. The 17 ideas below represent what actually holds up after months of rain, sun, and wind. Prices range from $15 for solar stakes to $800 for a professionally wired system.
Below you will find backyard lighting grouped by type: string and overhead lights, path and ground-level options, accent and decorative fixtures, and smart or solar-powered setups.
Table of Contents
- Bistro String Lights on Posts
- Solar Path Stakes
- LED Deck Rail Strips
- Hanging Lantern Tree
- Low-Voltage Spotlight on Trees
- Mason Jar Fairy Lights
- Recessed Step Lights
- Copper Post Cap Lights
- Solar Floating Pool Orbs
- Ground-Level Well Lights
- Pergola Curtain Lights
- Portable LED Lanterns
- Motion-Sensor Floodlight
- Fire Pit with Built-in LED Ring
- Smart Color-Changing Bulbs
- Rope Light Garden Border
- Candlelit Hurricane Lanterns
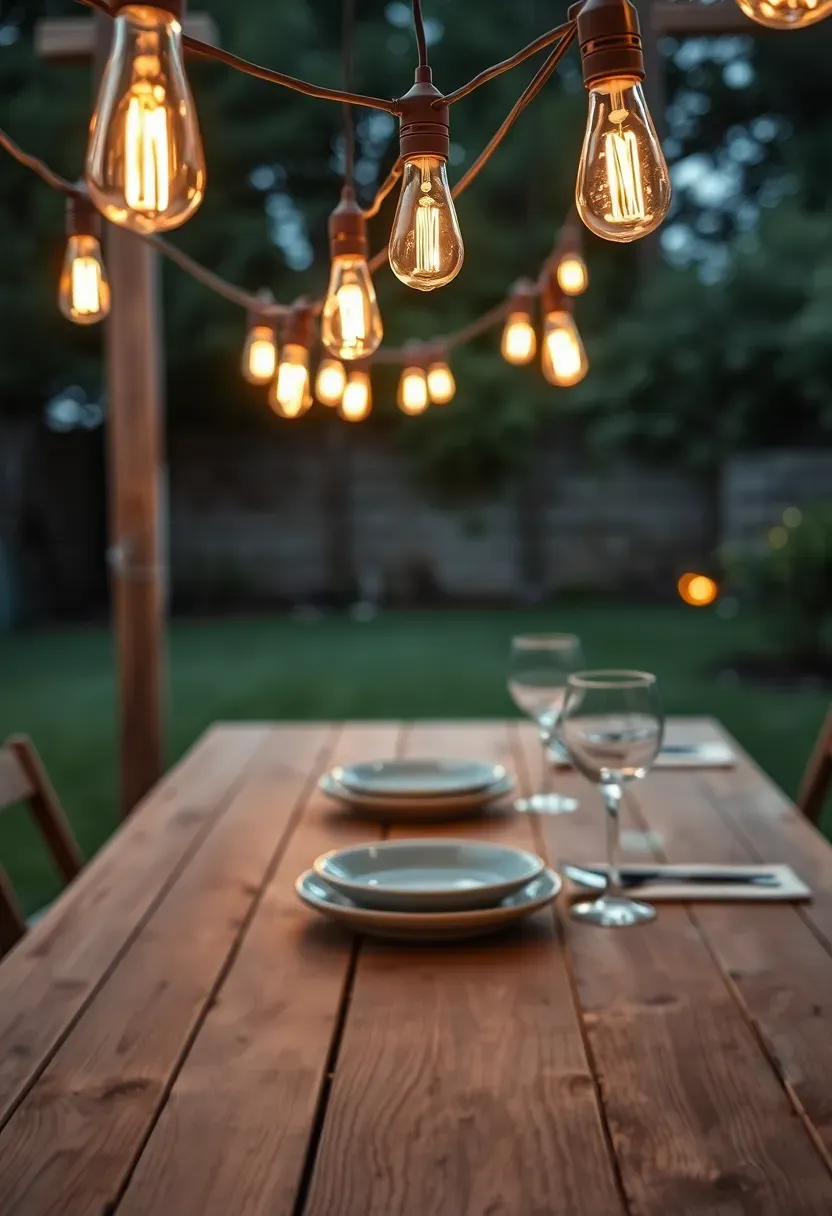
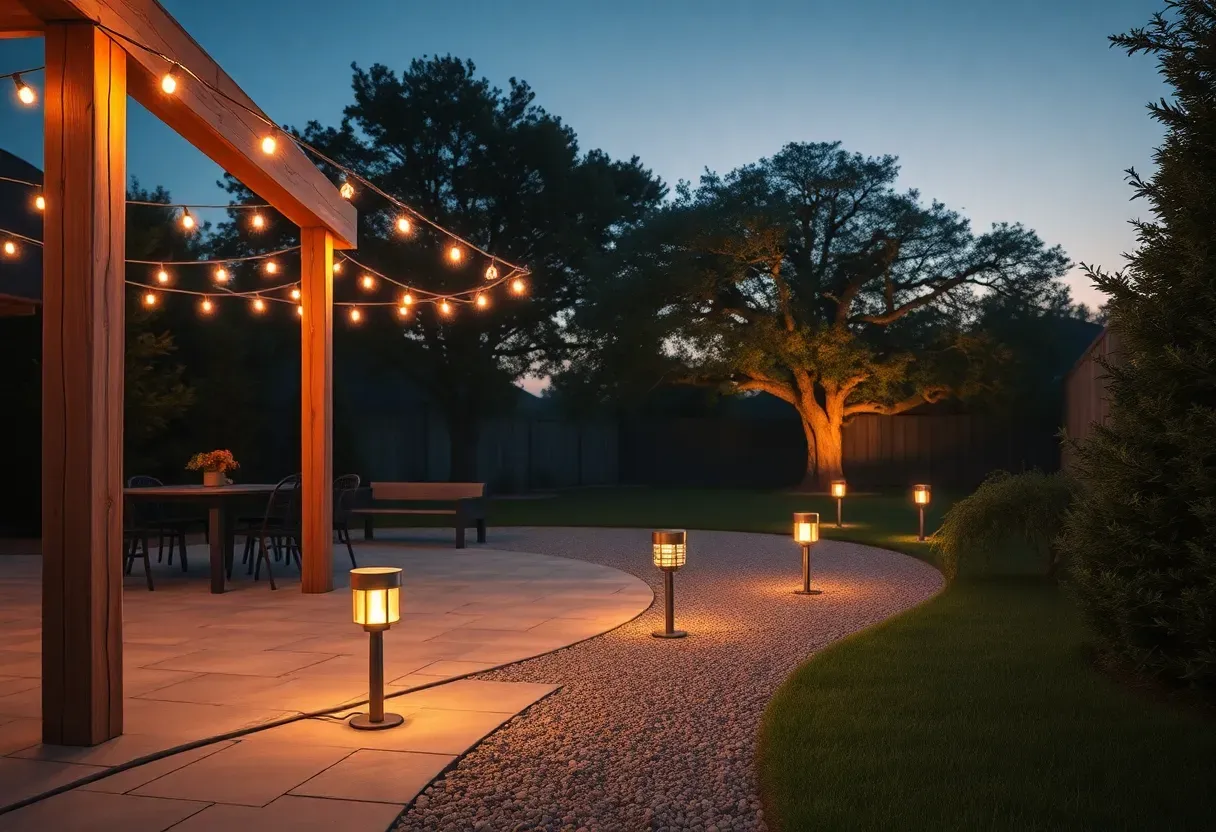
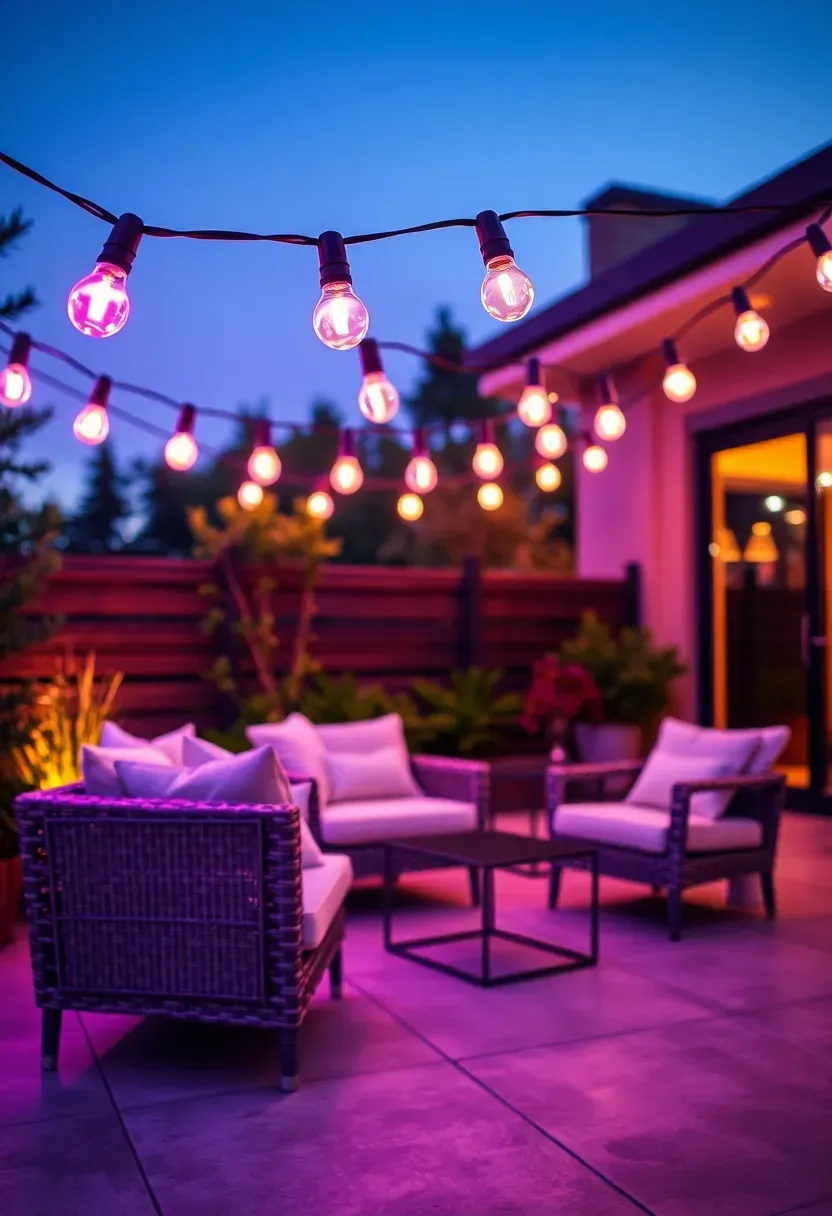
1. Bistro String Lights on Posts
Bistro lights — the ones with exposed filament bulbs spaced 12 inches apart — are the single fastest way to make a backyard feel like somewhere you want to be after dark. Run them between two 4x4 treated posts set in concrete, or attach them to existing structures like a fence top and the house fascia. Commercial-grade strings with S14 bulbs handle wind and rain better than the thinner cafe-light versions. The warm 2200K glow sits right between candlelight and standard incandescent, which flatters food and faces without washing everything amber. Budget about $40-$60 for a 48-foot string with LED bulbs. They draw so little power you can leave them on all evening for pennies.
Tips
- Use 14-gauge guide wire between posts first, then hang the light string from it with zip ties to prevent sagging
- Stagger heights by mounting one end 2 feet higher than the other for a gentle drape rather than a flat line
- Replace any cracked bulbs immediately — moisture enters the socket and corrodes the contacts within days
We picked a few things that go well with this idea: Svater Commercial Outdoor String Lights (105FT) (★4.6), Outdoor LED Patio String Lights (100FT) (★4.3) and addlon LED Outdoor String Lights (48FT) (★4.5). As an Amazon Associate we earn from qualifying purchases.
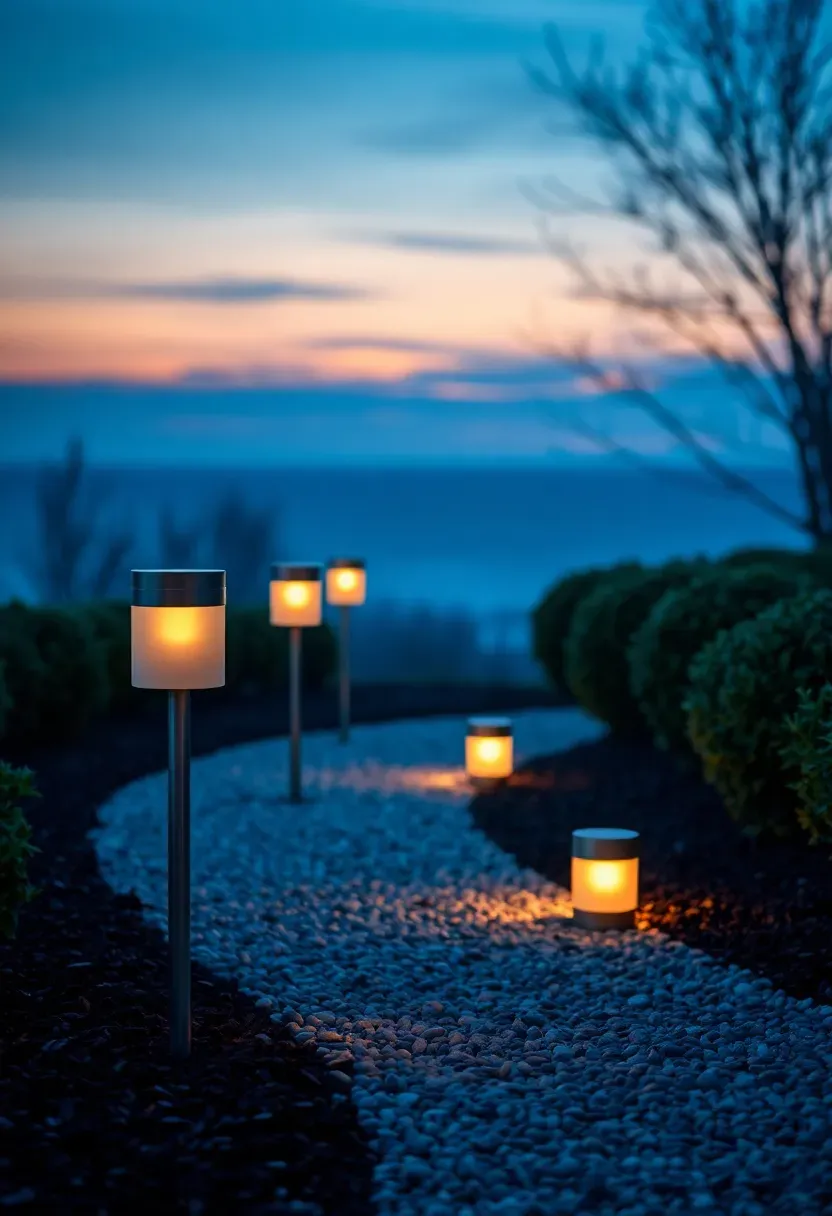
2. Solar Path Stakes
The issue
Wiring low-voltage path lights along a walkway means burying cable, installing a transformer, and dealing with connections that corrode underground. For a 30-foot path, you are looking at $200+ in materials and a full day of trenching.
The fix
Solar path stakes eliminate all of that. Each unit has its own panel, battery, and LED. Push the stake into the ground next to the path edge and walk away. Modern versions with lithium iron phosphate batteries hold charge for 8-12 hours — enough for the entire night even in December. The key is buying units with a separate small solar panel on a 3-foot wire rather than an integrated top panel. Separate panels can sit in full sun while the light stays under tree canopy where you actually need it.
Pros and cons
- Pro: Zero wiring, zero electricity cost, and installation takes 30 seconds per light
- Pro: Repositioning is instant — just pull and replant whenever you change the garden layout
- Con: Output dims noticeably after 6 hours on cloudy-day charge, and cheap models yellow within one season
We picked a few things that go well with this idea: Mancra Solar Pathway Lights (8-Pack) (★4.5), GIGALUMI Solar Garden Lights (6-Pack) (★4.3) and Greluna Solar Pathway Lights (12-Pack) (★4.3). As an Amazon Associate we earn from qualifying purchases.
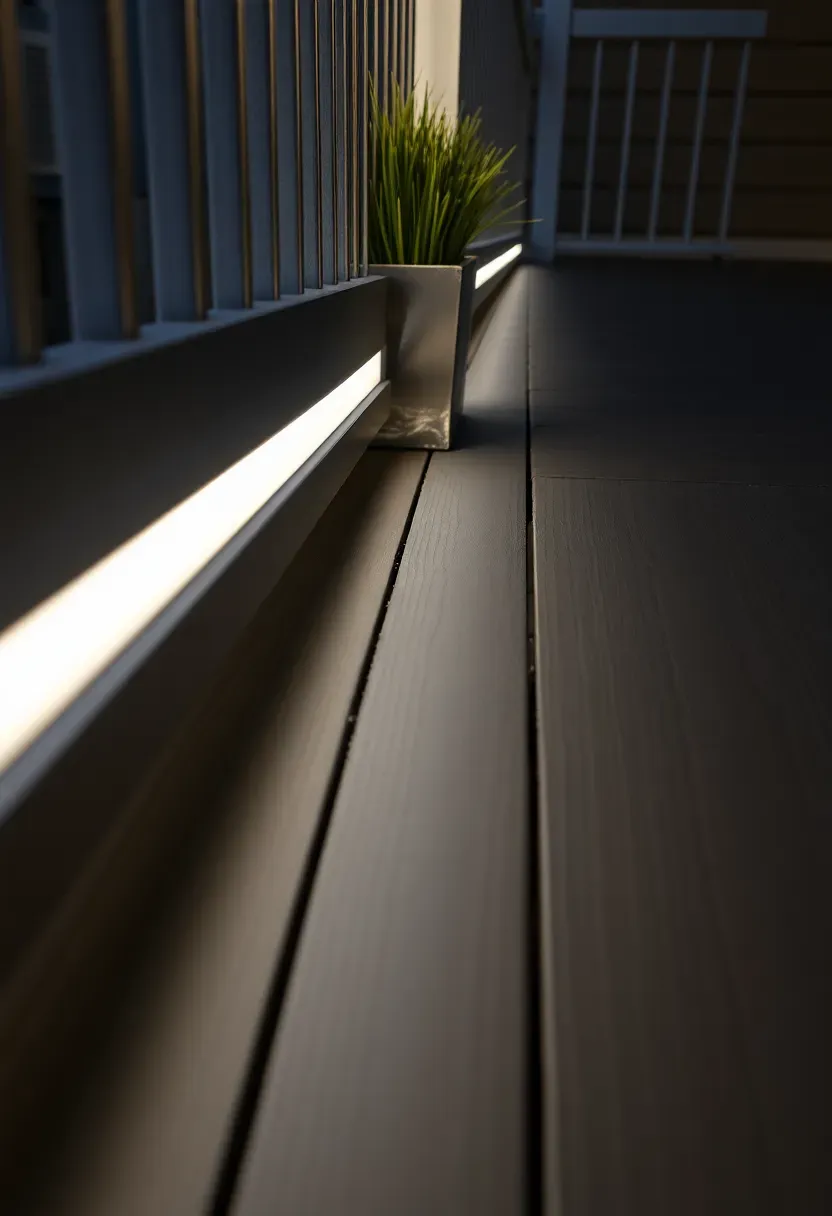
3. LED Deck Rail Strips
Step 1: Measure and plan
Measure the total length of railing you want to light. LED strip lights sell in 16.4-foot (5-meter) reels. Most decks need 2-3 reels. Stick with IP65-rated strips — anything lower and humidity will kill them within a season.
Step 2: Mount the channel
Aluminum U-channel with a frosted diffuser cover hides the individual LED dots and spreads the light into a smooth wash. Screw the channel to the underside of the top rail using stainless steel screws every 12 inches.
Step 3: Connect power
Run 18-gauge low-voltage wire from the strips down a post leg to a weatherproof transformer plugged into an outdoor GFCI outlet. Add a photocell sensor so they turn on automatically at dusk.
Watch out
- Strips with adhesive backing peel off in heat — always use the aluminum channel with mechanical clips
- Cut strips only at the marked solder points (every 3 LEDs) or you will short an entire section
We picked a few things that go well with this idea: EZORKAS Rechargeable LED Lanterns (2-Pack) (★4.8), XTAUTO Collapsible Solar LED Lantern (4-Pack) (★4.5) and Lighting EVER 1000LM Rechargeable Lantern (★4.6). As an Amazon Associate we earn from qualifying purchases.
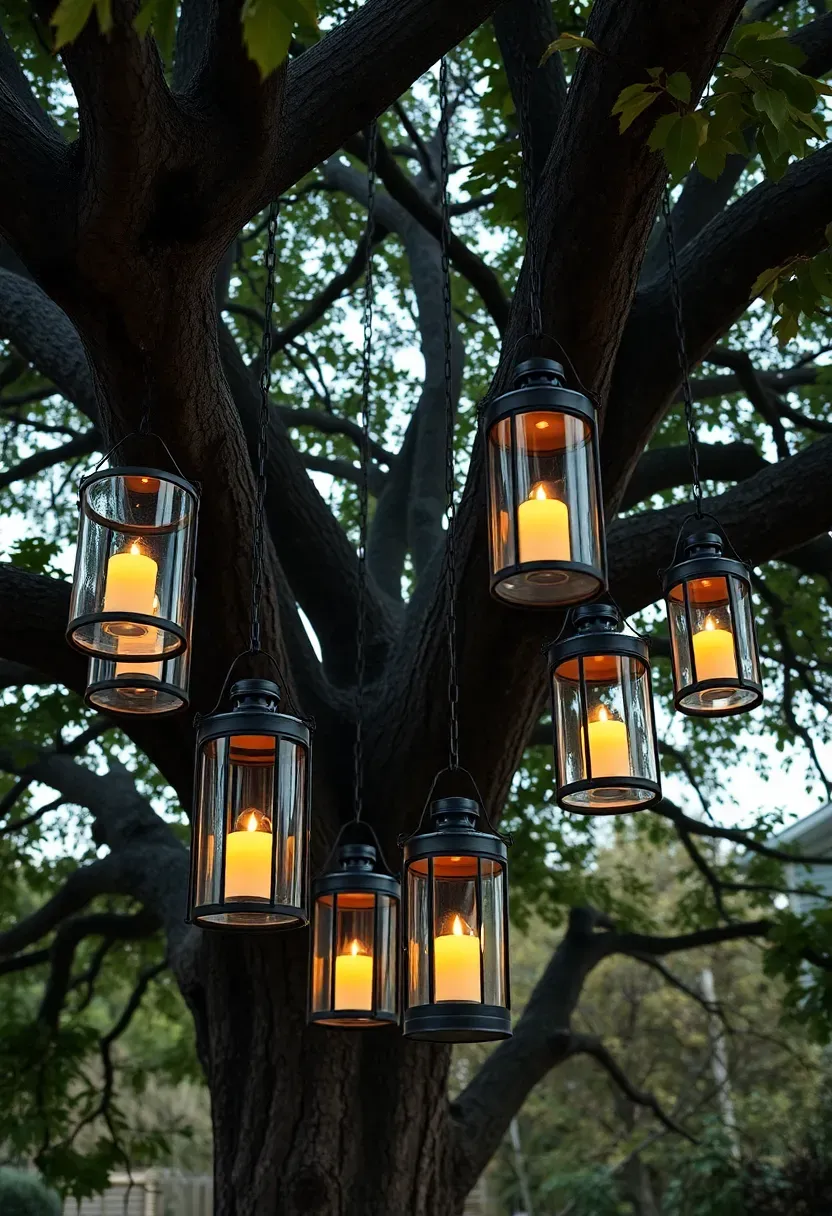
4. Hanging Lantern Tree
Pick a tree with a canopy spread of at least 15 feet and branches thick enough to hold weight — 3 inches diameter minimum. Hang 5-8 lanterns at different heights using galvanized S-hooks and chain. Mix lantern sizes: a couple of large 14-inch hurricane styles, several medium 8-inch metal-frame versions, and a few small votive holders. Use LED flameless candles rather than real flame because wind will blow out wax candles every ten minutes and dripping wax damages bark. Battery-operated flickering LEDs look convincing from 4 feet away and last 200+ hours per set of batteries. The layered light creates pockets of glow and shadow that overhead fixtures cannot replicate.
Tips
- Wrap chains with felt or rubber where they contact branches to prevent bark damage during wind sway
- Hang the lowest lantern no lower than 6.5 feet to avoid head clearance problems
- Rechargeable LED candles pay for themselves in three months versus disposable batteries
Recommended
Items for this idea
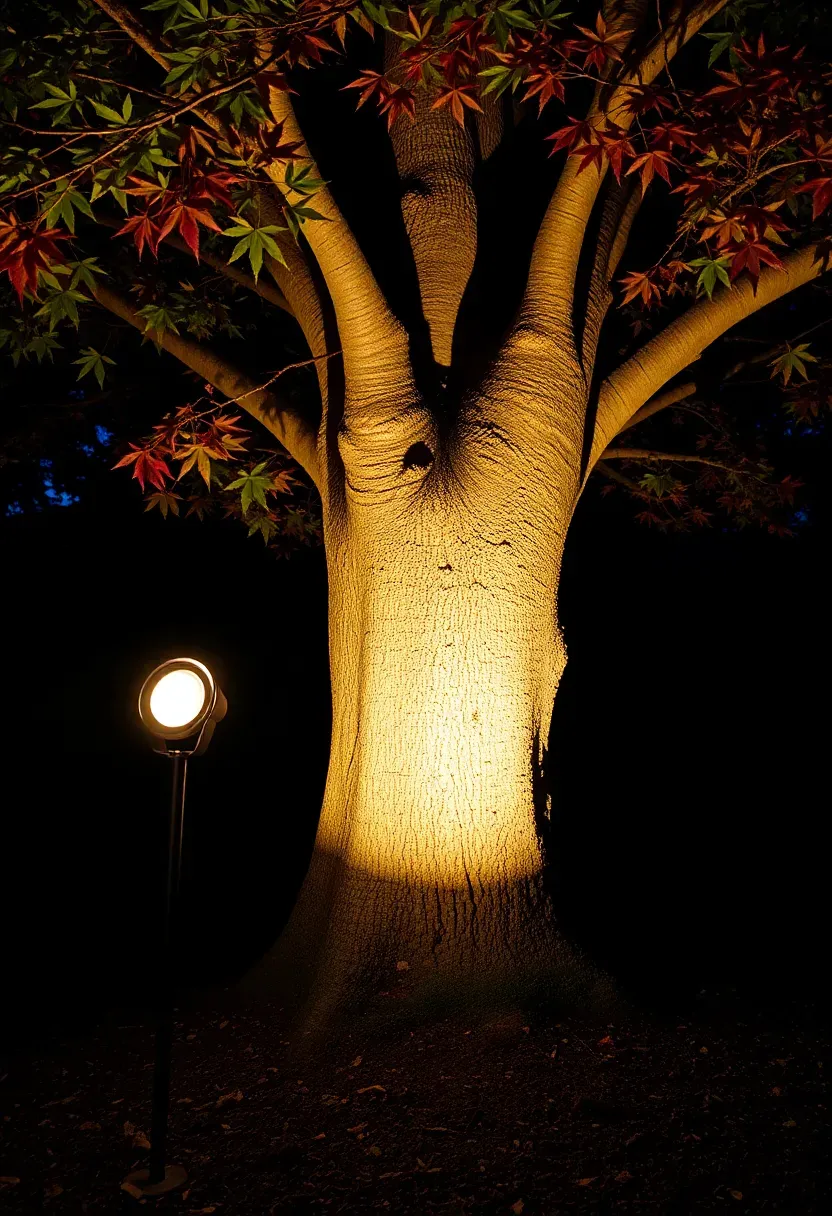
5. Low-Voltage Spotlight on Trees
Uplighting vs. downlighting
Uplighting a tree from the ground creates drama — shadows shift across the canopy and the trunk becomes a sculptural element. Downlighting (called moonlighting) places fixtures high in the branches pointing down, mimicking filtered moonlight on the ground below. Both use the same MR16 or PAR36 LED lamps. Uplighting is easier to install since you just spike the fixture into the soil. Moonlighting requires climbing and mounting hardware but produces a more natural effect.
How many fixtures per tree
A single spotlight creates harsh one-directional light with a black shadow on the opposite side. Two fixtures placed 120 degrees apart fill in shadows and reveal the tree's full shape. Three is ideal for specimen trees over 30 feet, but two handles most backyard situations.
Choose if
- You want a low-key, natural glow on the ground: go with moonlighting placed 15-20 feet up
- You want your tree to stand out as a visual anchor from across the yard: choose uplighting with a 15-degree narrow beam
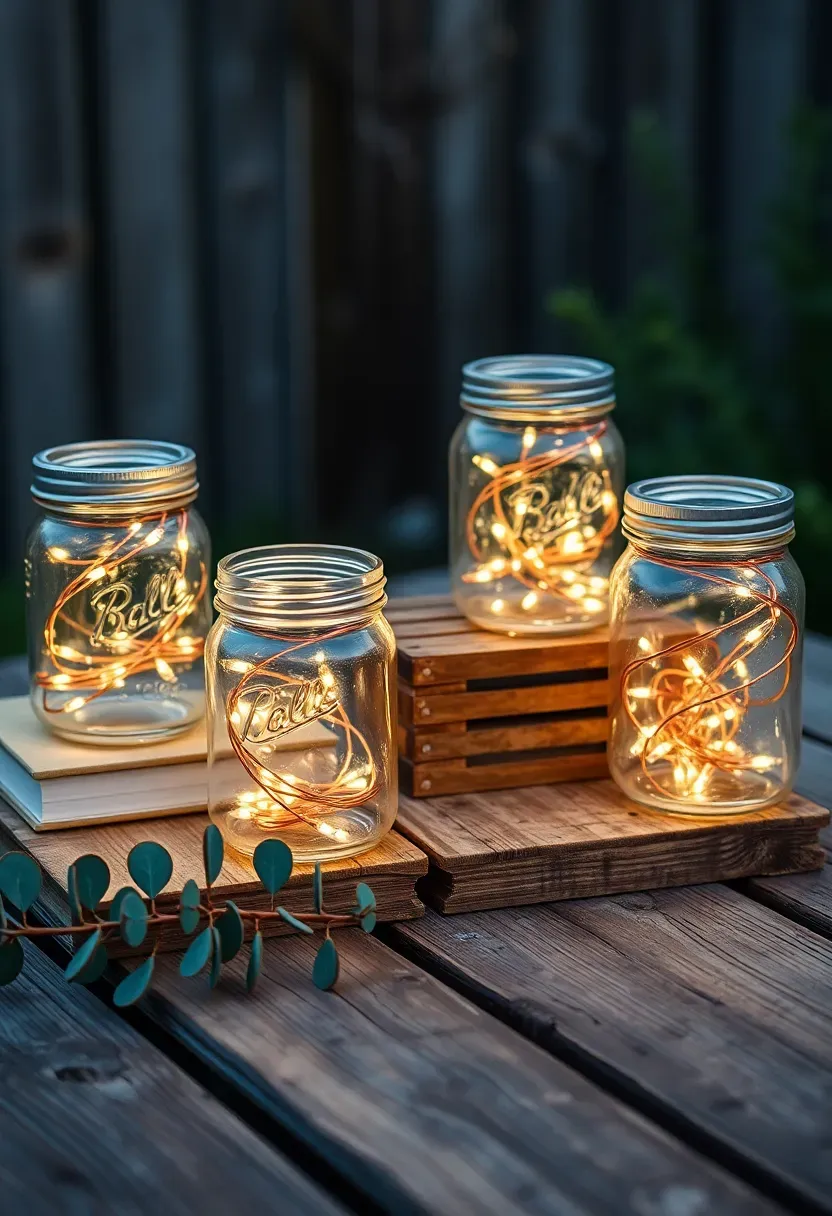
6. Mason Jar Fairy Lights
This one costs almost nothing and takes fifteen minutes. Buy a pack of copper wire fairy lights — the ones with 20-30 micro LEDs on a thin bendable wire, battery pack included. Coil the wire loosely inside a quart mason jar. That is it. The glass amplifies and scatters the light, and the copper wire itself adds a warm metallic reflection. Group three to five jars at different heights on an outdoor table, shelf, or stair step. They work as centerpieces for outdoor dinners or accent lights along a pathway edge. Each set runs on two CR2032 batteries that last about 72 hours of continuous use, or switch to solar-topped mason jar lids that charge during the day and glow all evening.
Tips
- Frosted jars diffuse light more evenly — spray the inside with glass frosting spray from a craft store
- Tint the jars by adding a few drops of food coloring to Mod Podge and coating the inside for colored glow
- Secure lids with a rubber gasket if placing jars where they might tip — water inside kills the battery pack fast
Recommended
Items for this idea
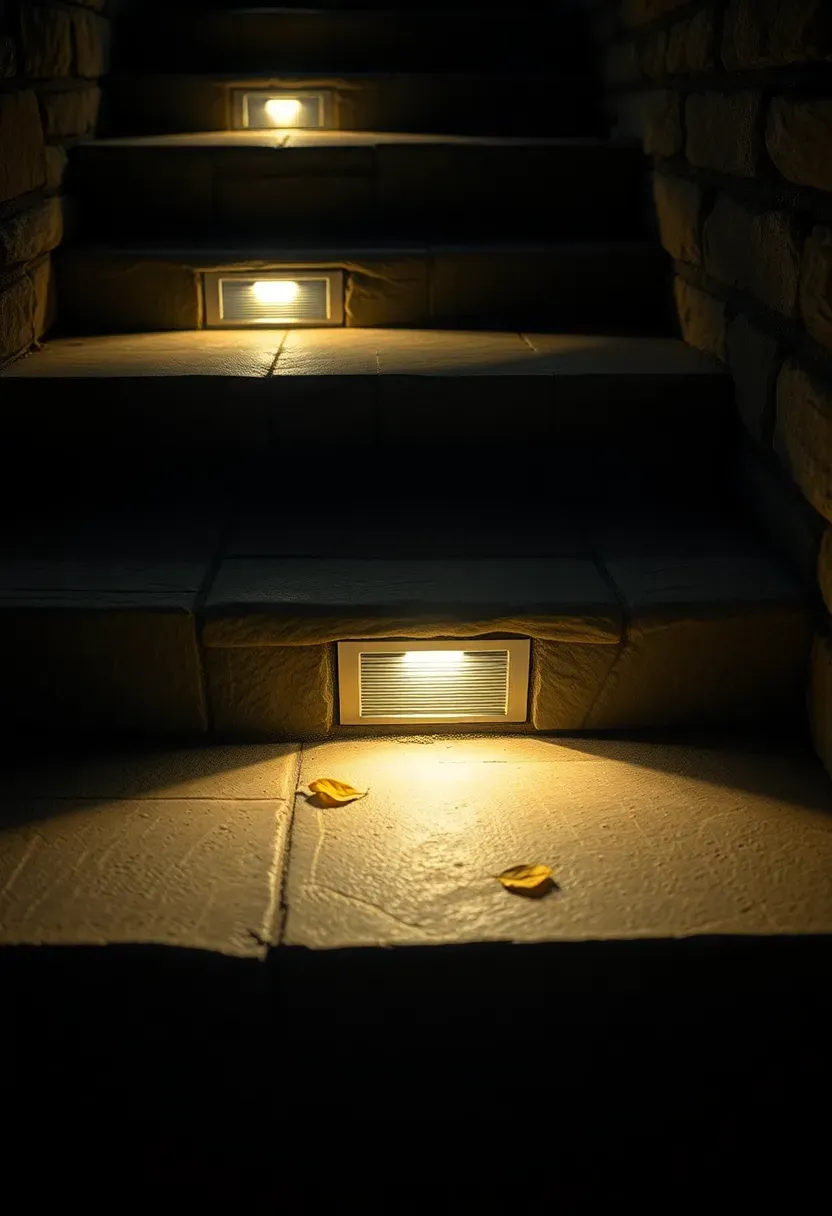
7. Recessed Step Lights
Falls on outdoor stairs cause roughly 200,000 emergency room visits per year in the US. Recessed step lights solve that problem while looking clean enough to disappear during the day. They mount flush into the riser face of each step, casting a small wash of light down across the tread below. Low-voltage LED versions draw 1-2 watts each and connect in a daisy chain to a single transformer. Stainless steel or bronze faceplates resist corrosion. Install them on every other step for adequate coverage, or on every step for a more luxurious look. The fixtures require cutting a rectangular hole in the riser, which is straightforward with wood or composite but needs a masonry bit for stone.
Tips
- Position lights 4 inches from one side rather than dead center — centered lights create a symmetrical runway look that feels institutional
- Choose fixtures with a louver or shield that directs light downward only, preventing glare when viewed from below
- Wire them on the same circuit as path lights so everything activates together at dusk

8. Copper Post Cap Lights
Why copper
Copper develops a natural patina over 6-18 months that shifts from bright penny orange to chocolate brown and eventually to verdigris green. That patina is actually a protective layer — copper post caps outlast painted aluminum by decades. The warm tone of the metal complements wood fencing, stone columns, and brick pillars without clashing.
Solar vs. wired
Solar post caps contain a small panel on the top face and a rechargeable battery inside. They produce about 15-20 lumens, which is enough for a gentle marker light but will not illuminate a walkway on its own. Wired versions hit 50-100 lumens and give consistent brightness regardless of weather. If your posts already carry low-voltage wiring for other fixtures, wired caps make sense. Otherwise, solar is the simpler choice for purely decorative glow.
Recommendation
Go with solar copper caps on perimeter fence posts where you want ambience, and wired caps on posts flanking entryways or gates where you need functional visibility.
Recommended
Items for this idea
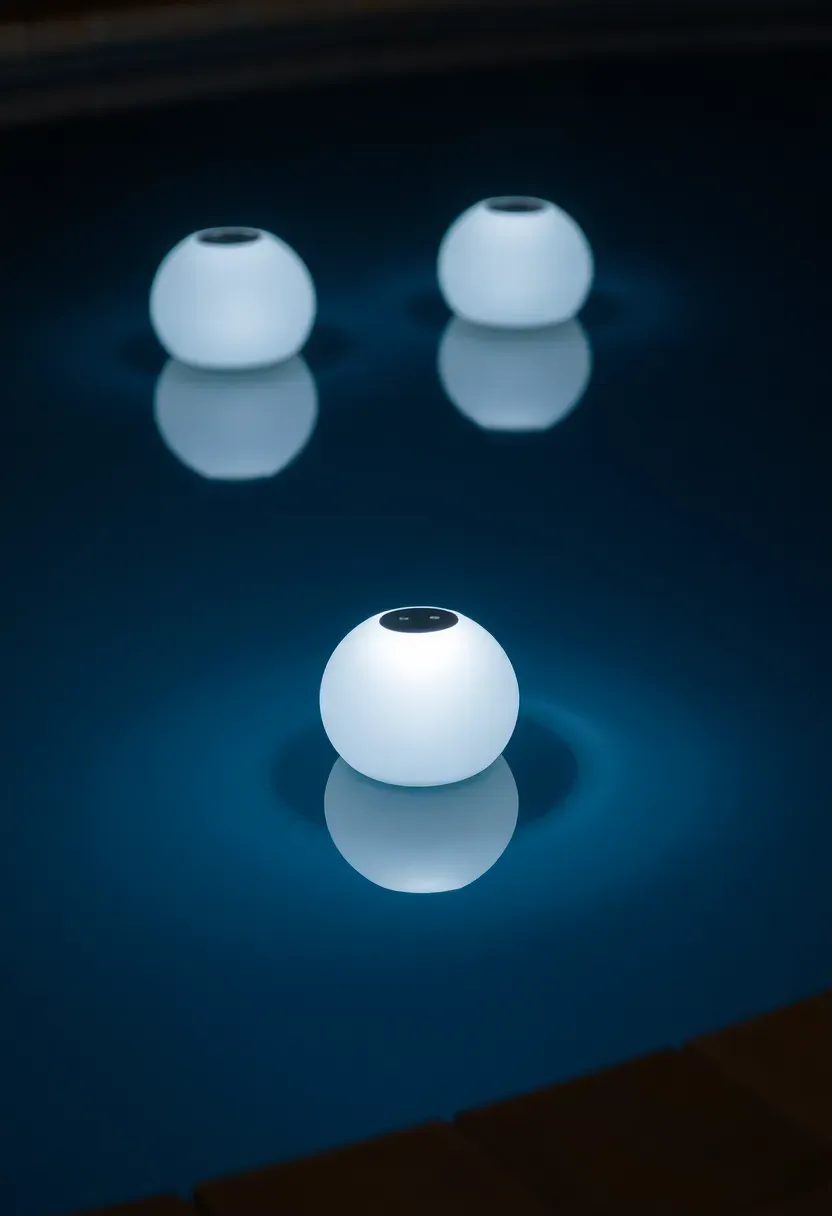
9. Solar Floating Pool Orbs
Floating orbs turn a pool or pond into a light source itself. The water amplifies the glow and creates moving reflections on surrounding surfaces whenever a breeze ruffles the surface. Most orbs are 8-12 inches in diameter, made from durable polyethylene, and contain a solar panel on top with a rechargeable battery inside. Better models offer multiple color modes — steady white, color cycling, or single-color lock. They charge in 6-8 hours of direct sun and run for 8-10 hours. The biggest complaint with cheap versions is they drift to one corner and cluster together. Fix that by tethering each orb to a small fishing weight on 4 feet of monofilament so they stay distributed across the surface.
Tips
- Bring orbs inside during pool chemical shock treatments — concentrated chlorine clouds the plastic over time
- Clean the solar panel monthly with a damp cloth to prevent film buildup from pool chemicals
- For ponds, choose orbs rated IP68 (fully submersible) rather than IP67 (splash resistant only)
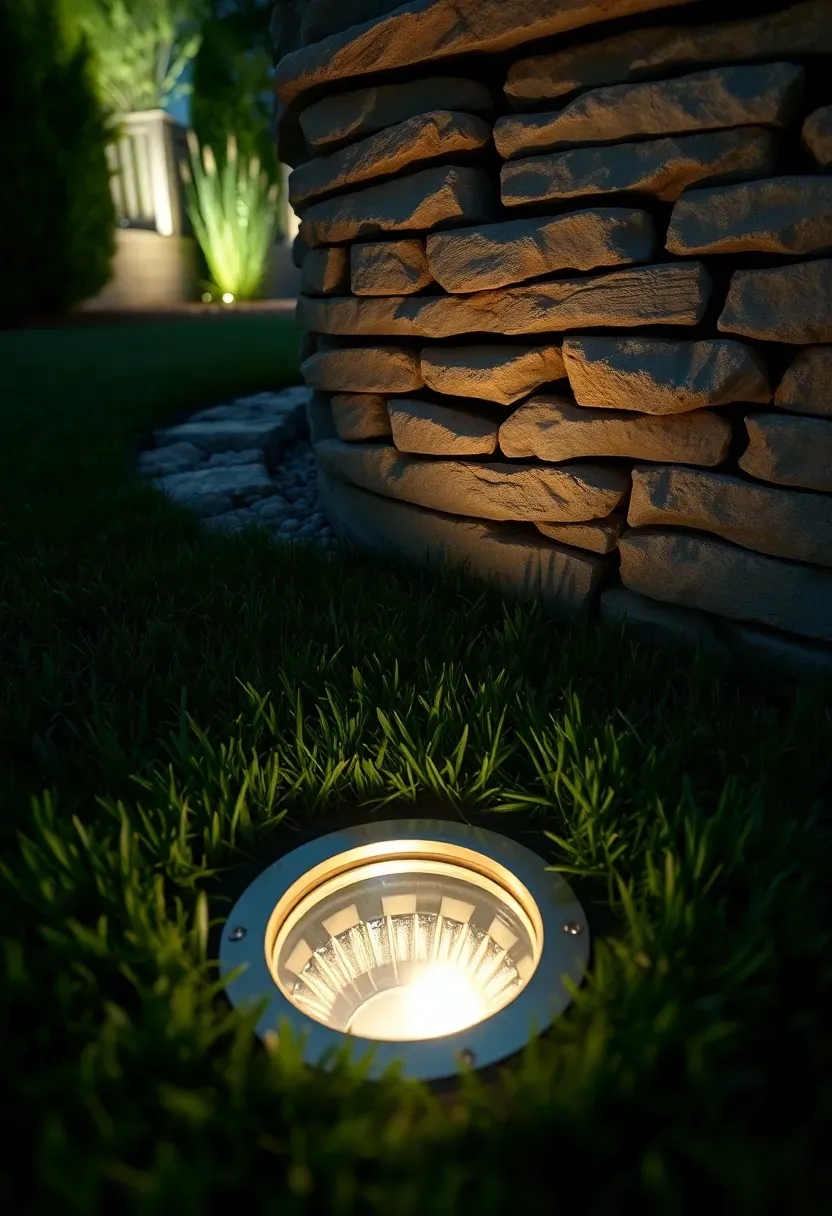
10. Ground-Level Well Lights
Well lights sit flush with the ground surface — the entire fixture is buried with only a lens visible at grade level. They work for uplighting walls, fences, garden sculptures, and low plantings. The beam spreads depending on the lens: narrow spots (15 degrees) for tall walls, medium floods (35 degrees) for tree trunks, and wide floods (60 degrees) for broad surfaces. Brass or composite housings resist corrosion better than cast aluminum in ground contact. Installation means digging a hole slightly larger than the fixture, setting it in gravel for drainage, and running low-voltage cable through flexible conduit. Water pooling inside the housing is the main failure point, so proper drainage underneath is not optional.
Tips
- Install a gravel bed 4 inches deep below each housing so rainwater drains away from the lamp compartment
- Use fixtures with removable lamp trays for easy bulb replacement without digging up the entire unit
- Mark locations with landscape flags before mowing season — running over a flush-mount light is an expensive mistake
Recommended
Items for this idea
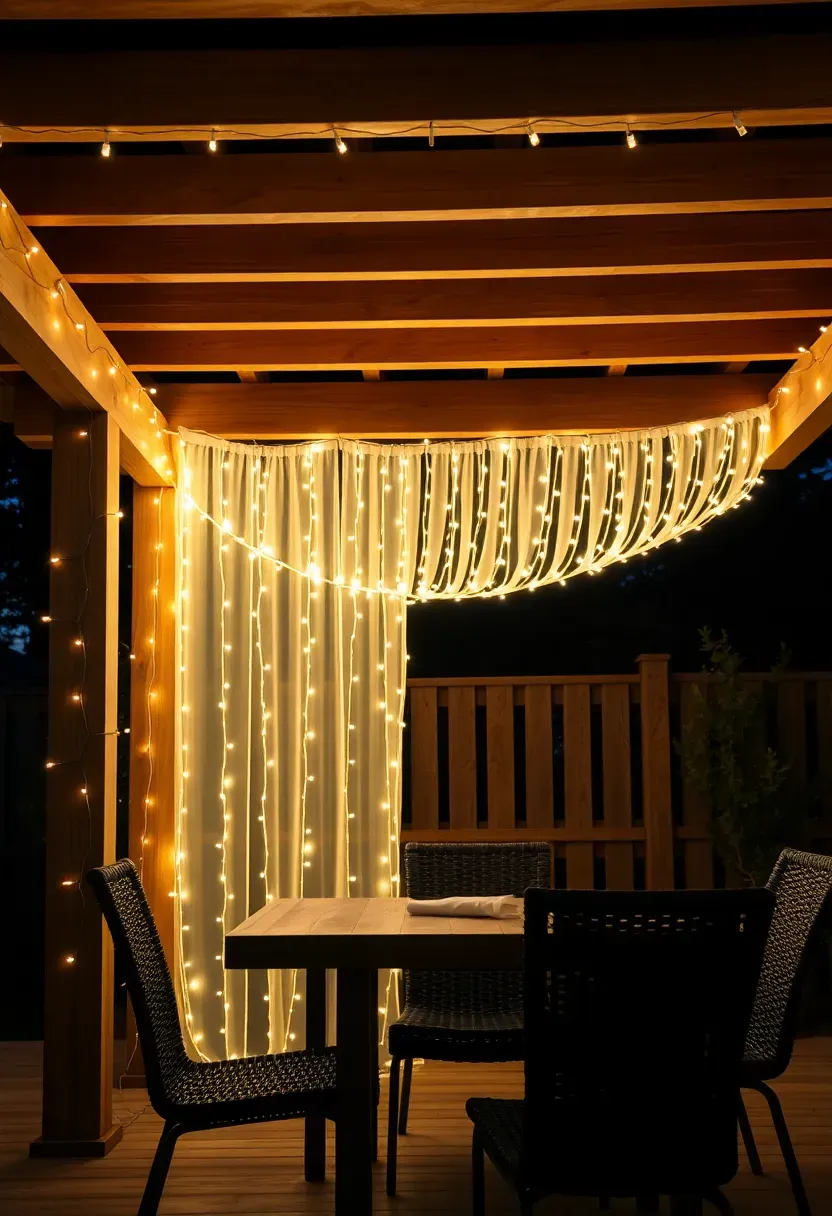
11. Pergola Curtain Lights
The issue
A pergola provides structure and shade but feels like an empty frame after sunset. Standard string lights across the top leave the sides dark and the space underneath uneven.
The fix
Curtain lights — vertical strands that drop from a horizontal header wire — fill the volume under a pergola with an even, layered glow. Buy a curtain light panel sized to your pergola's rafter-to-rafter span. Panels come in standard sizes from 3x6 feet to 10x10 feet. Attach the header wire to the rafters and let the vertical strands hang freely or zip-tie them to the posts at the bottom to prevent tangling in wind. The effect is a glowing room outdoors without walls. Pair with sheer outdoor curtains on two sides for a soft, diffused look that makes the pergola feel enclosed without blocking airflow.
Pros and cons
- Pro: Creates a defined outdoor room with light alone — no construction needed
- Pro: Draws only 12-18 watts for a 10x10 panel, roughly the same as a single standard bulb
- Con: Vertical strands tangle in strong wind if not secured at the bottom anchor point
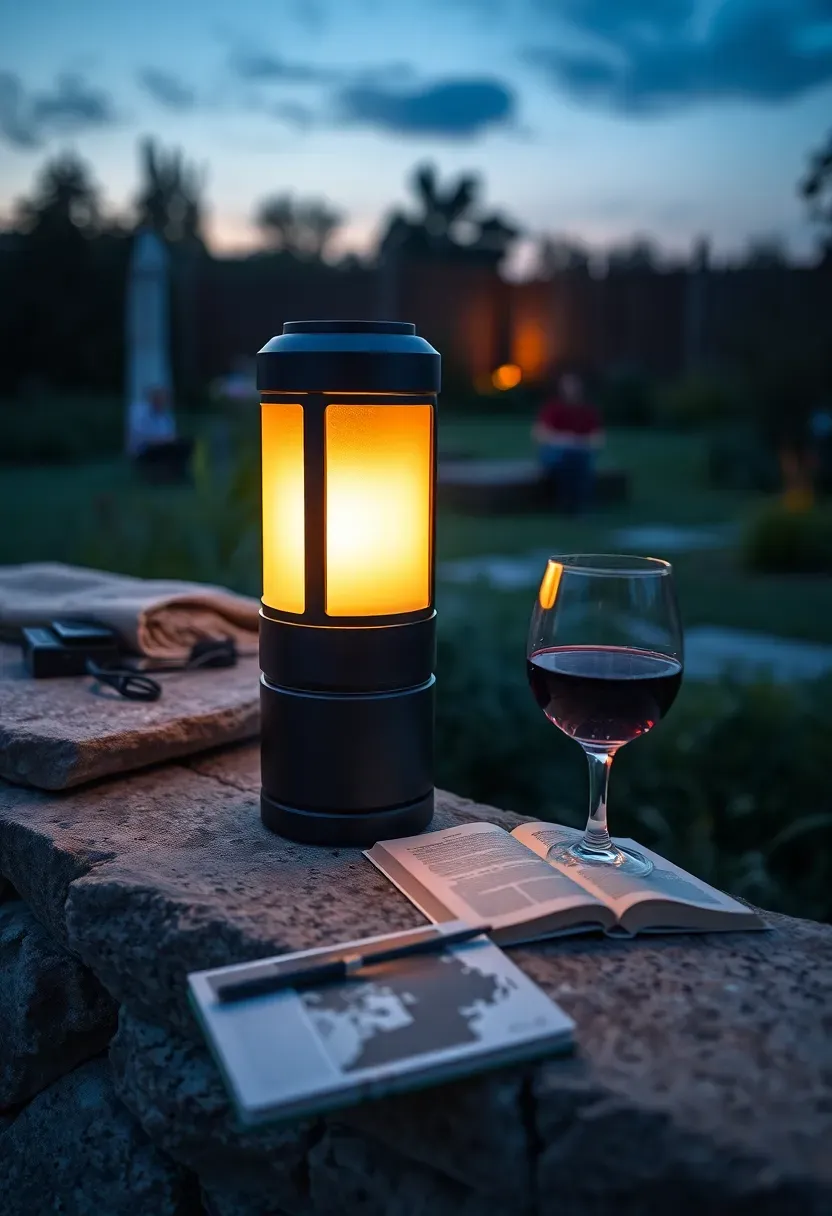
12. Portable LED Lanterns
Rechargeable LED lanterns go wherever you need light without extension cords or stakes. Bring one to the fire pit, set another on the patio table, hang a third from a shepherd's hook by the grill. Good units put out 200-400 lumens on the warm setting and last 8-20 hours per charge depending on brightness level. Look for lanterns with a USB-C charging port and a dimmer rather than fixed brightness steps — dimmers let you match the mood rather than choosing between "too bright" and "too dim." Weather ratings vary widely. IP54 handles light rain. IP65 handles downpours. Metal housings in brass or matte black outlast plastic by years and look better doing it. Price range is $25-$80 each.
Tips
- Buy at least three in matching style so the yard has consistent visual language rather than a garage-sale look
- Charge during the day using a small solar panel on the patio table — most USB-C lanterns accept solar input
- Avoid lanterns with cool white (5000K+) as the only option — they cast a sterile, commercial light that kills the relaxed feeling

Recommended
Items for this idea
13. Motion-Sensor Floodlight
Security vs. ambience
Motion-activated lights serve a practical purpose — they deter intruders and prevent trips — but they also kill the mood if they blast 3000 lumens across your dinner table every time a cat walks by. The solution is zoning. Mount the floodlight to cover the perimeter and entry points, not the seating area. Modern units with adjustable detection zones let you aim the sensor at the gate and side yard while ignoring the patio.
What to look for
Dual-head fixtures let you aim each lamp independently. Look for adjustable sensitivity (so raccoons do not trigger it), adjustable duration (15 seconds to 5 minutes), and a dusk-to-dawn mode that keeps a low 10% glow on all night and ramps to full brightness on detection. LED floods rated 1500-2000 lumens at 3000K provide clear visibility without the harsh interrogation-room look of 5000K lights.
Choose if
- You need security coverage for dark yard edges: go with a dual-head 2000-lumen model with a 180-degree sensor
- You want subtle safety lighting for walkways: choose a lower-output 800-lumen fixture with a narrow 90-degree detection zone
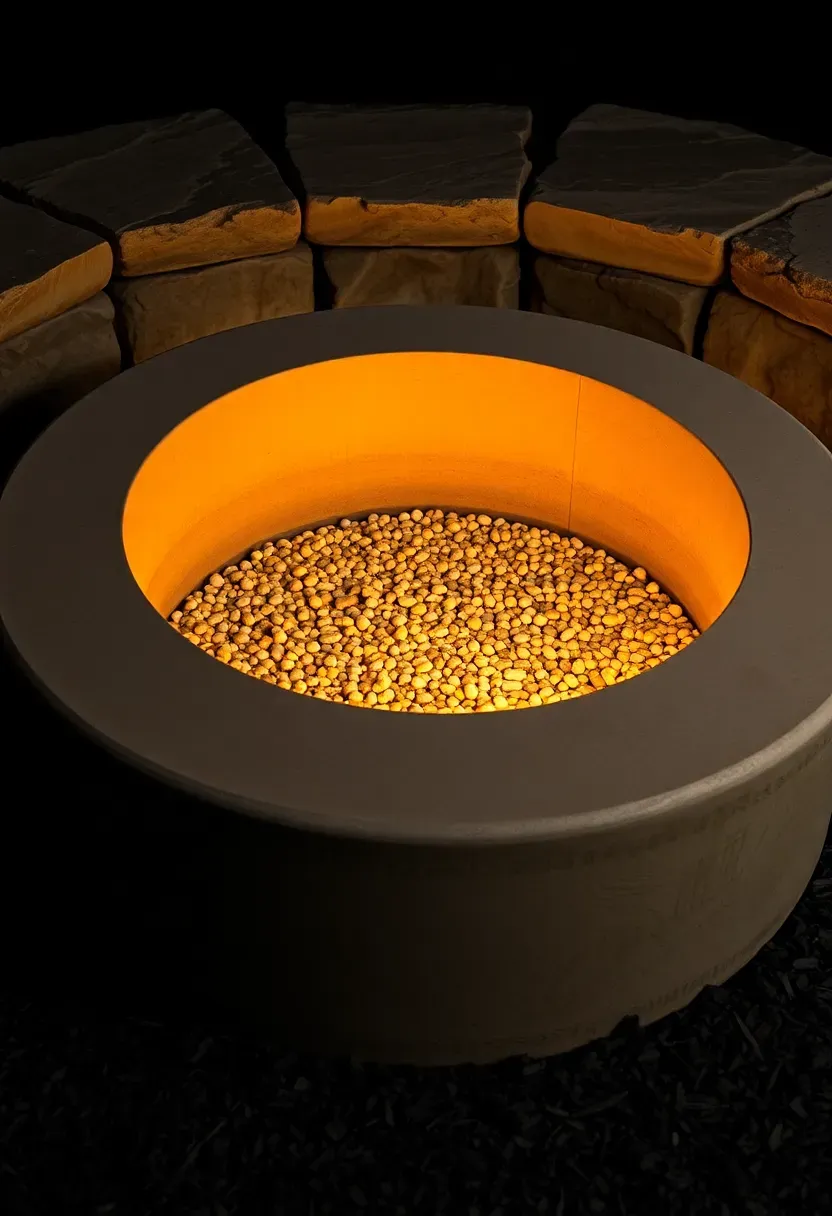
14. Fire Pit with Built-in LED Ring
A fire pit is already a gathering point. Adding an LED ring around the interior rim or recessed into the seating wall means the area stays lit even when the fire is out. The ring provides enough ambient light for conversation and safe navigation without overpowering the fire when it is burning. Install a flexible LED strip rated for high heat (silicone-jacketed, rated to 300 degrees F) inside an aluminum channel mounted to the inner wall of the fire pit surround. Place it below the seating surface level so the light source itself stays hidden — you see the glow on the ground and paver surface, not the strip. Wire it into the same low-voltage system as your other landscape lights.
Tips
- Use amber or warm white (2200K) LEDs to match firelight — cool white next to flames looks wrong
- Seal all connections with marine-grade heat shrink tubing, not electrical tape, which melts near the fire
- Add a separate switch for the LED ring so you can run it independently of the main landscape circuit
Recommended
Items for this idea
15. Smart Color-Changing Bulbs
Smart bulbs in outdoor fixtures connect to Wi-Fi or Bluetooth and give you control over color, brightness, and scheduling from your phone. The practical use is not party-trick rainbow mode — it is setting a warm 2200K white for dinner, switching to a dim amber for late-night conversation, and scheduling everything to turn off at midnight. Brands like Philips Hue Outdoor, LIFX, and Govee make weather-rated smart bulbs that fit standard E26 sockets. The Hue system requires a bridge hub ($50) but offers the most reliable automation and integration with voice assistants. LIFX bulbs connect directly to Wi-Fi with no hub needed but can strain routers when you add more than 15 devices.
Tips
- Set up scenes rather than adjusting individual bulbs — "Dinner," "Cleanup," and "Wind Down" cover most evenings
- Use the scheduling feature to dim from 100% to 30% over the course of the evening so the transition feels natural
- Pair with a physical outdoor dimmer switch as backup — app-dependent systems fail when Wi-Fi drops
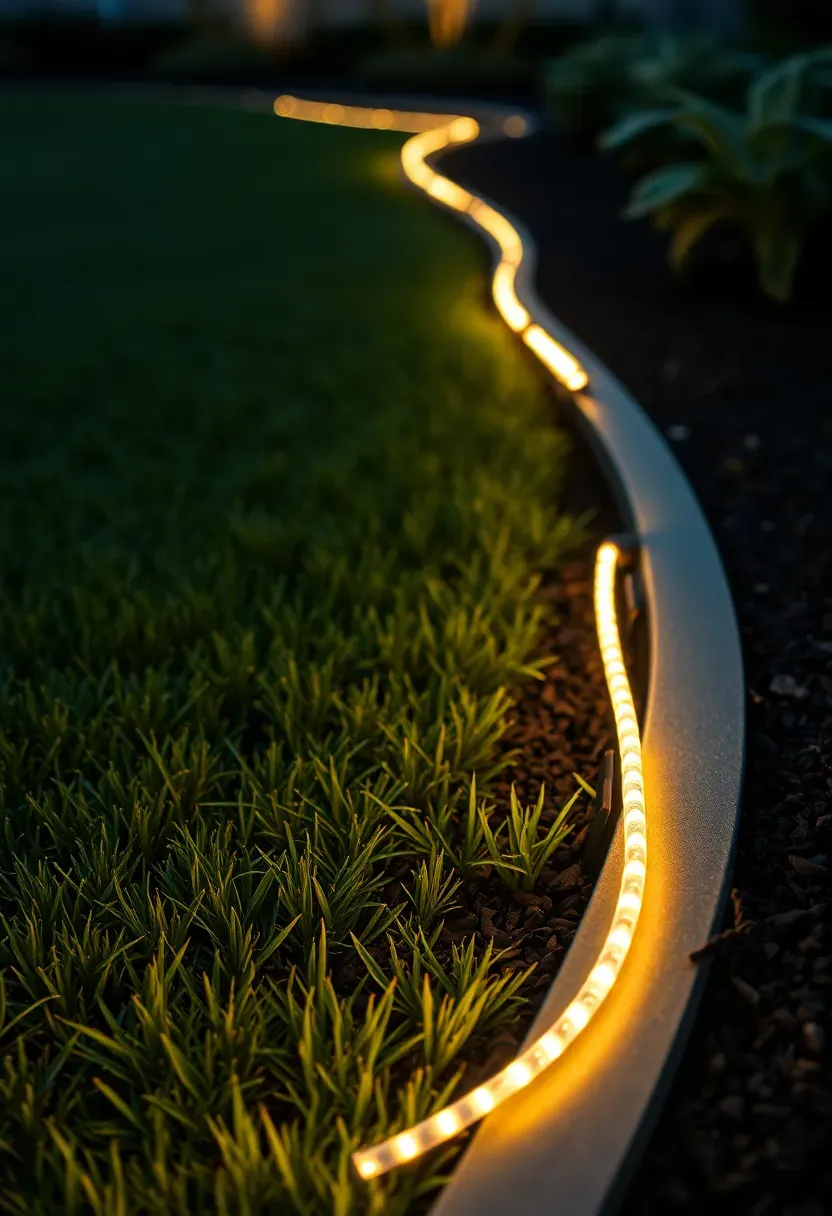
16. Rope Light Garden Border
Step 1: Plan the layout
Lay the unlit rope along your garden bed edge during the day to confirm the path and measure the total length. Rope lights sell in 18-foot, 24-foot, and 50-foot spools. Buy 10% longer than you measure to account for curves.
Step 2: Install mounting clips
Snap the rope into plastic mounting clips screwed into wood edging, or use landscape stakes for in-ground mounting along a bed border. Space clips every 12 inches on curves and every 24 inches on straight runs.
Step 3: Connect and test
Most LED rope lights plug directly into a standard outdoor outlet. Add an outdoor-rated timer or photocell to automate on/off. For runs longer than 50 feet, use a heavier gauge extension or a second power feed at the midpoint to prevent voltage drop and dimming at the far end.
Watch out
- Cheap rope lights use PVC tubing that yellows and cracks after one summer of UV exposure — look for silicone-jacketed versions rated for outdoor use
- Do not bury rope lights under mulch — heat builds up and accelerates deterioration
Recommended
Items for this idea
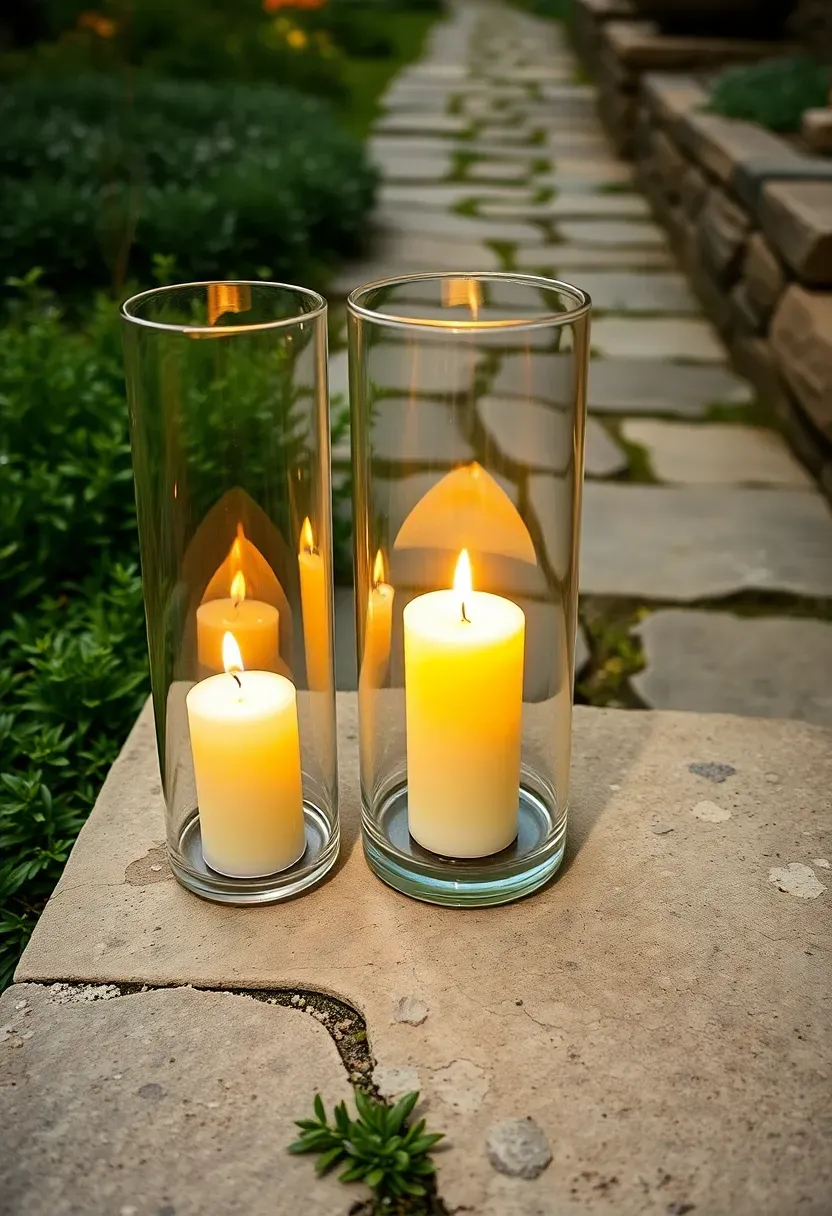
17. Candlelit Hurricane Lanterns
No battery, no wire, no solar panel. Hurricane lanterns with pillar candles produce the best-quality light of anything on this list — a warm, flickering glow that no LED truly replicates yet. The glass cylinder protects the flame from wind down to about 15 mph. Use 3-inch diameter pillar candles that burn 60-80 hours each. Place lanterns on steps, low walls, or flat stones along a path. The heat from the candle rises straight up through the open top, so surfaces below and beside the lantern stay cool. Group three to five lanterns in odd numbers at varying heights for the most natural look. Total cost for five brass hurricane lanterns and a case of pillar candles runs about $80-$120.
Tips
- Set lanterns on a fireproof surface — stone, brick, or a ceramic tile — never directly on a wood deck
- Trim wicks to 1/4 inch before each use to prevent smoking and soot buildup on the glass
- Place citronella pillar candles in the lanterns during mosquito season for dual-purpose lighting
Quick FAQ
Do solar backyard lights actually work in cloudy climates? Modern solar path lights with lithium iron phosphate batteries perform reasonably well in overcast areas like the Pacific Northwest. They charge to about 60-70% on cloudy days, giving 5-6 hours of light instead of the full 10-12. Position panels where they get the most sky exposure, even if direct sun is rare. Avoid placing them under tree canopy.
How many lumens do I need for a backyard patio? For ambient dining and conversation, 100-200 lumens total across the patio works well. That is roughly what two 48-foot bistro light strings produce. Walkways need 50-100 lumens per 10 linear feet. Security lighting along perimeters typically runs 1500-2000 lumens per fixture.
Can I mix warm and cool white lights in the same yard? You can, but it looks intentional only if the temperatures are assigned by zone. Use warm white (2200-2700K) in seating and dining areas, and reserve cool white (4000-5000K) for security floodlights and utility areas like trash can pads or the side gate. Mixing them within the same visual field creates a confused, mismatched atmosphere.
What gauge wire do I need for low-voltage landscape lighting? For runs under 100 feet with fewer than 10 fixtures, 16-gauge cable handles the load. For longer runs or more fixtures, step up to 12-gauge to prevent voltage drop that causes distant lights to dim. Always use direct-burial-rated cable, not indoor lamp cord.
Are LED string lights worth the extra cost over incandescent? LED string lights use about 80% less electricity and last 25,000-50,000 hours versus 1,000-2,000 for incandescent. They run cool, which matters on a wood pergola or near fabric. The upfront cost is 2-3x higher, but they pay for themselves in one season of nightly use through lower energy bills and zero bulb replacements.
Backyard lighting does not require a master plan or an electrician on speed dial. Start with one zone — the patio table, the walkway to the gate, the tree you look at most from the kitchen window. Get that right, then expand outward. The best-lit yards I have seen were built up over two or three seasons, adding a fixture here and a string there until the whole space felt complete without any single purchase breaking the budget. A $40 string of bistro lights changes a yard more than most $400 purchases ever will.
Pinterest cover for 17 Backyard Lights Ideas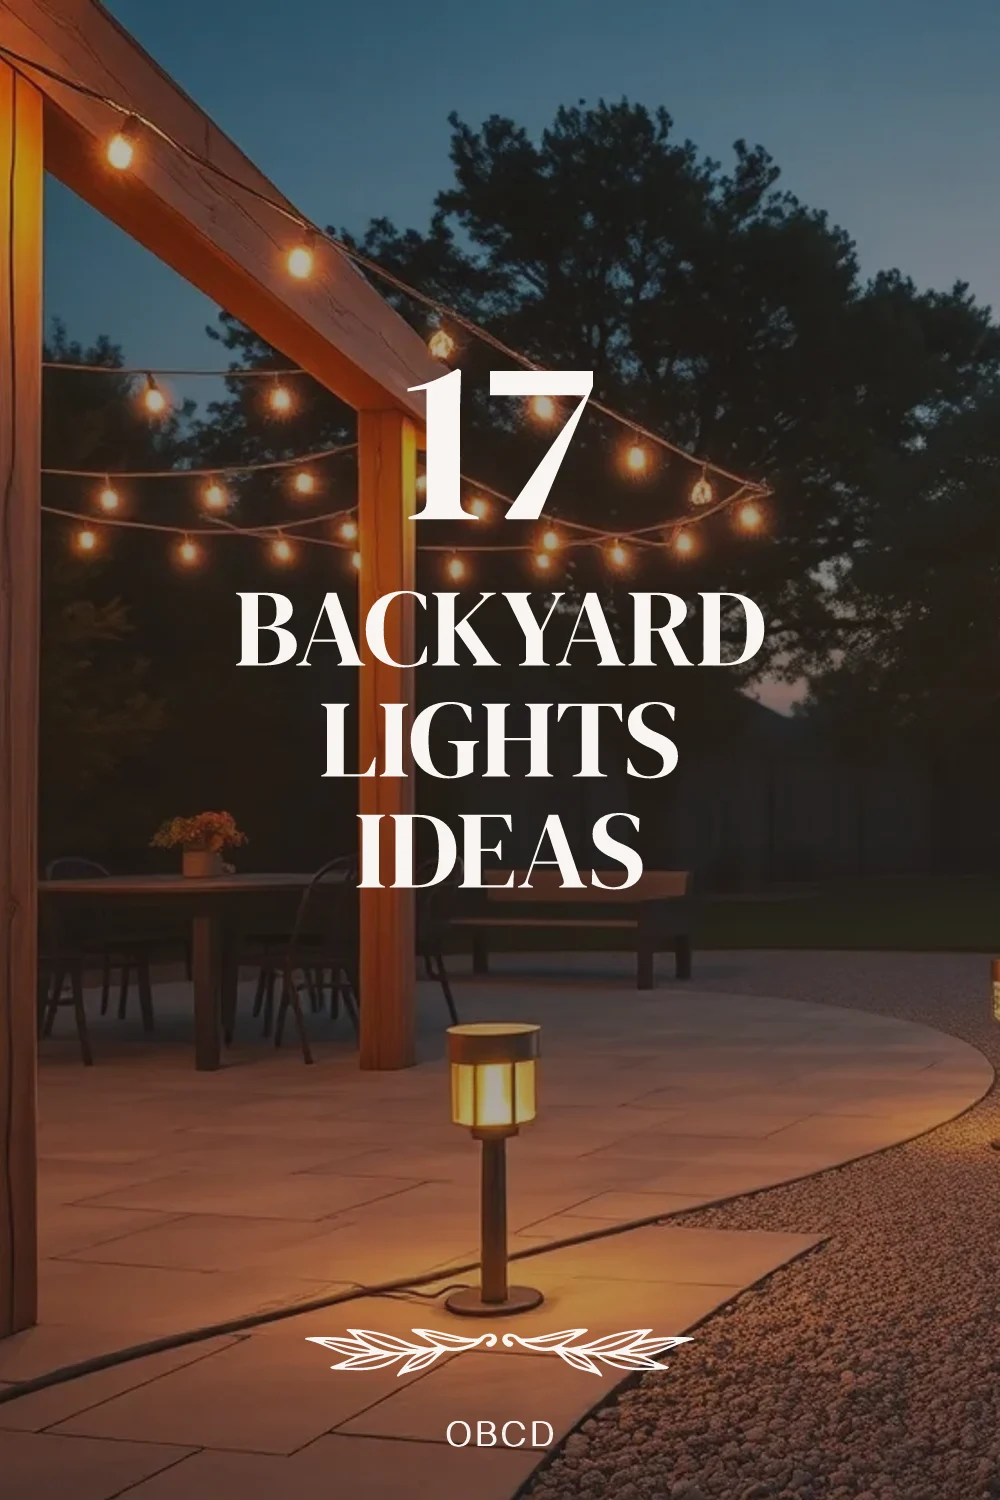
About the author
OBCD
CGI visualization and interior design content. We create detailed 3D renders and curate practical design ideas for every room in your home.