19 Backyard Play Area Ideas for All Ages
We moved into a house with a flat, empty backyard in 2019. Within six months, our two kids had worn a dirt path between the back door and a single sad swing hanging from a tree branch. The grass was dead in a 15-foot radius. That bare patch became the starting point for an actual play area — one with proper surfacing, a few structures, and enough variety that our kids (and honestly, their parents) still use it years later. The ideas below focus on dedicated play zones rather than scattered toys. Each one addresses surfacing, safety clearances, and how the space holds up over seasons.
Here are 19 play area concepts organized from ground-level basics through climbing structures, sport zones, and multi-age layouts.
Table of Contents
- Rubber Mulch Safety Surface
- Poured-in-Place Rubber Pad
- Natural Log Climbing Course
- Swing Set with Fall Zone Planning
- Sunken Trampoline
- Climbing Wall Panel on a Retaining Wall
- Sand Play Pit with Drainage Layer
- Bike and Scooter Loop Track
- Ninja Warrior Course Posts
- Half-Court Basketball Pad
- Slack Line and Balance Zone
- Shade Sail Over Play Equipment
- Gaga Ball Pit
- Multi-Level Playhouse Platform
- Turf Mound Slide Hill
- Backyard Zip Line Run
- Toddler Zone with Fence Partition
- Rock Scramble Bouldering Area
- All-Ages Game Lawn
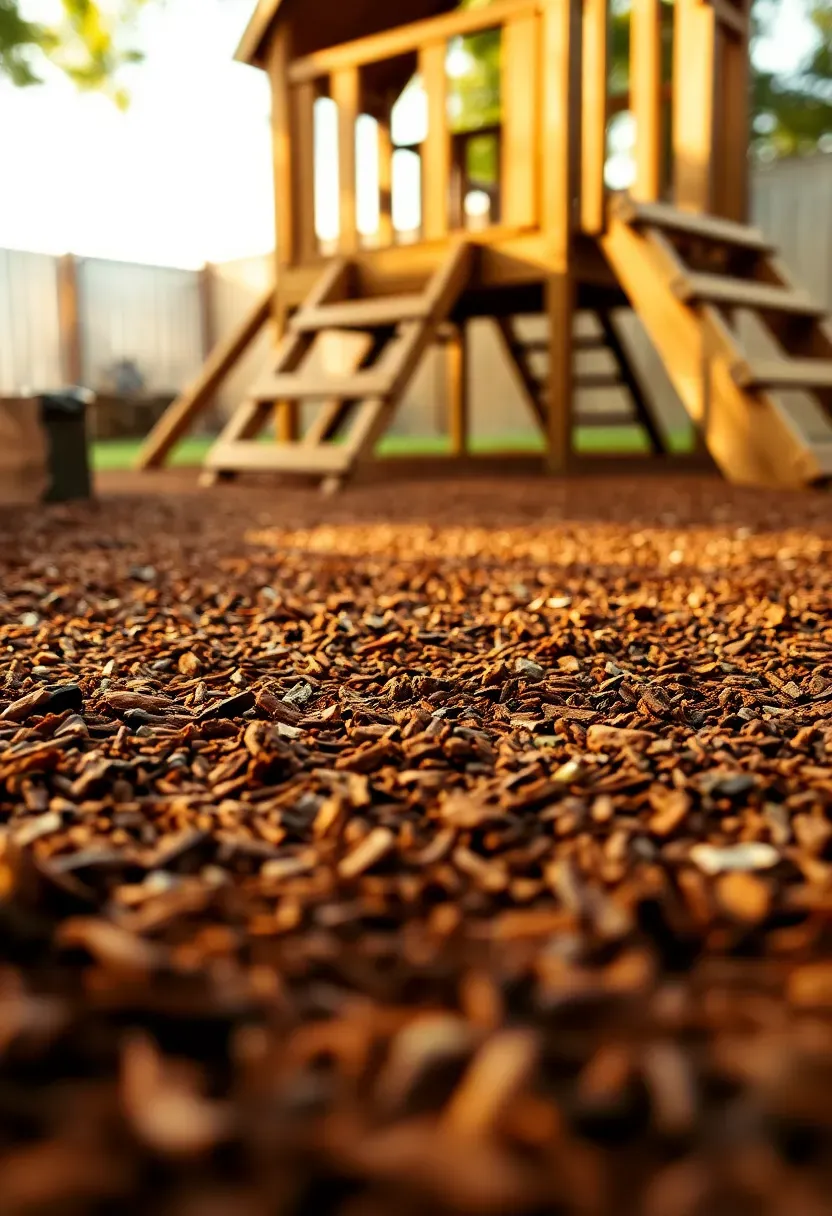
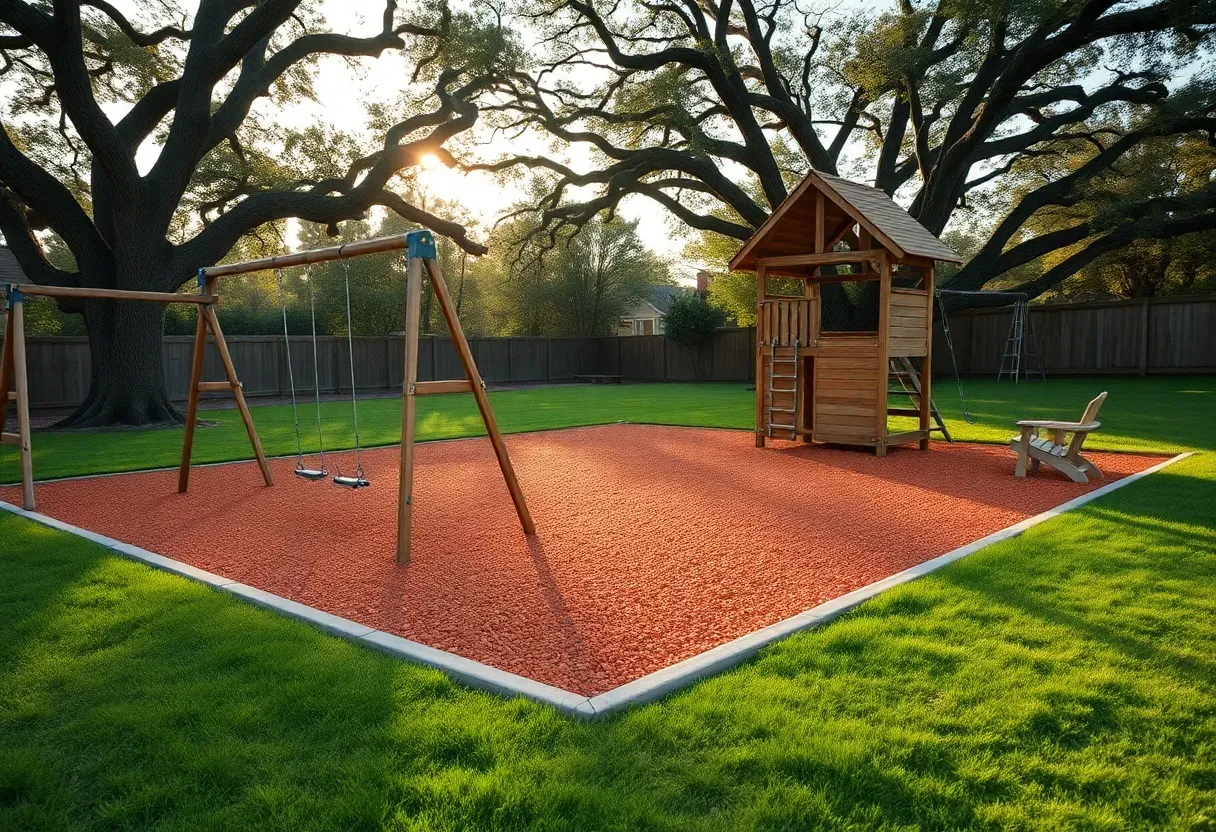
1. Rubber Mulch Safety Surface
Before picking any play equipment, solve the ground first. Rubber mulch — made from shredded recycled tires — absorbs falls from up to 10 feet when laid 6 inches deep. It does not decompose, does not attract termites, and drains faster than wood chips. The material costs roughly $8-12 per square foot installed, which adds up on larger areas but pays off in reduced maintenance over five or more years compared to pea gravel or wood fiber.
What to Know
- Buy IPEMA-certified rubber mulch; uncertified products may contain steel wire fragments.
- Install weed barrier fabric underneath and border with 6x6 landscape timbers to prevent migration.
- Darker colors (brown, black) absorb heat — surface temperature can reach 140°F in direct Texas sun. Go lighter in hot climates.
We picked a few things that go well with this idea: KidKraft Appleton Wooden Swing Set (★4.3), Sportspower Arcadia Metal Swing Set (★4.4) and Backyard Discovery Buckley Hill Cedar Swing Set (★4.3). As an Amazon Associate we earn from qualifying purchases.
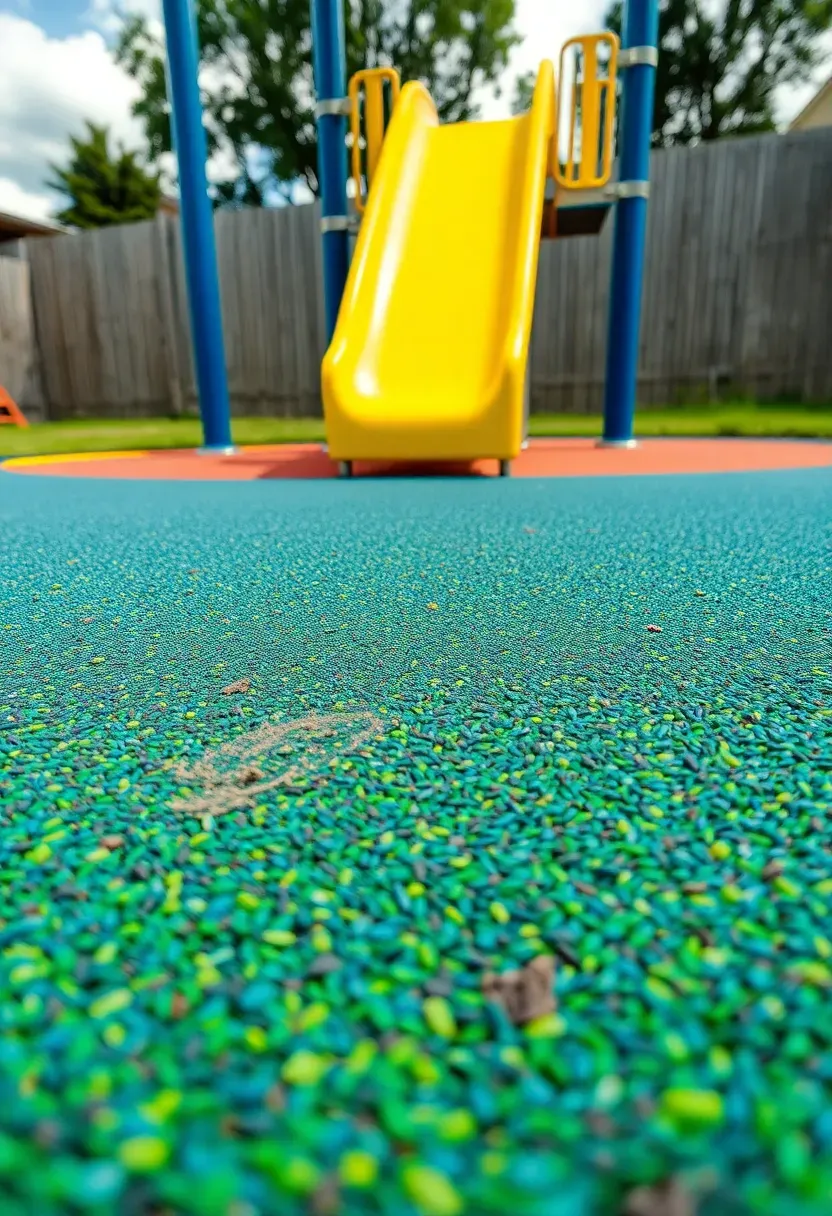
2. Poured-in-Place Rubber Pad
Why Consider It
Loose-fill surfaces shift, scatter, and need periodic raking. Poured-in-place rubber is a two-layer system — a base of recycled rubber granules topped with a colored EPDM wear layer — that creates a seamless, wheelchair-accessible surface.
The Tradeoff
Cost. Professional installation runs $12-18 per square foot, roughly double rubber mulch. But there is zero ongoing material replacement, no raking after rain, and no risk of kids throwing handfuls at each other.
Best For
- Families with children using wheelchairs or walkers
- Yards where mulch migration into garden beds is a problem
- Homeowners who want a finished, permanent look under play structures
We picked a few things that go well with this idea: Ninja Warrior 50ft Slackline Kit (10 Accessories) (★4.5), Hyponix 60ft Ninja Course (13 Obstacles) (★4.5) and AOBOTE Ninja Course 52ft (9 Accessories) (★4.5). As an Amazon Associate we earn from qualifying purchases.
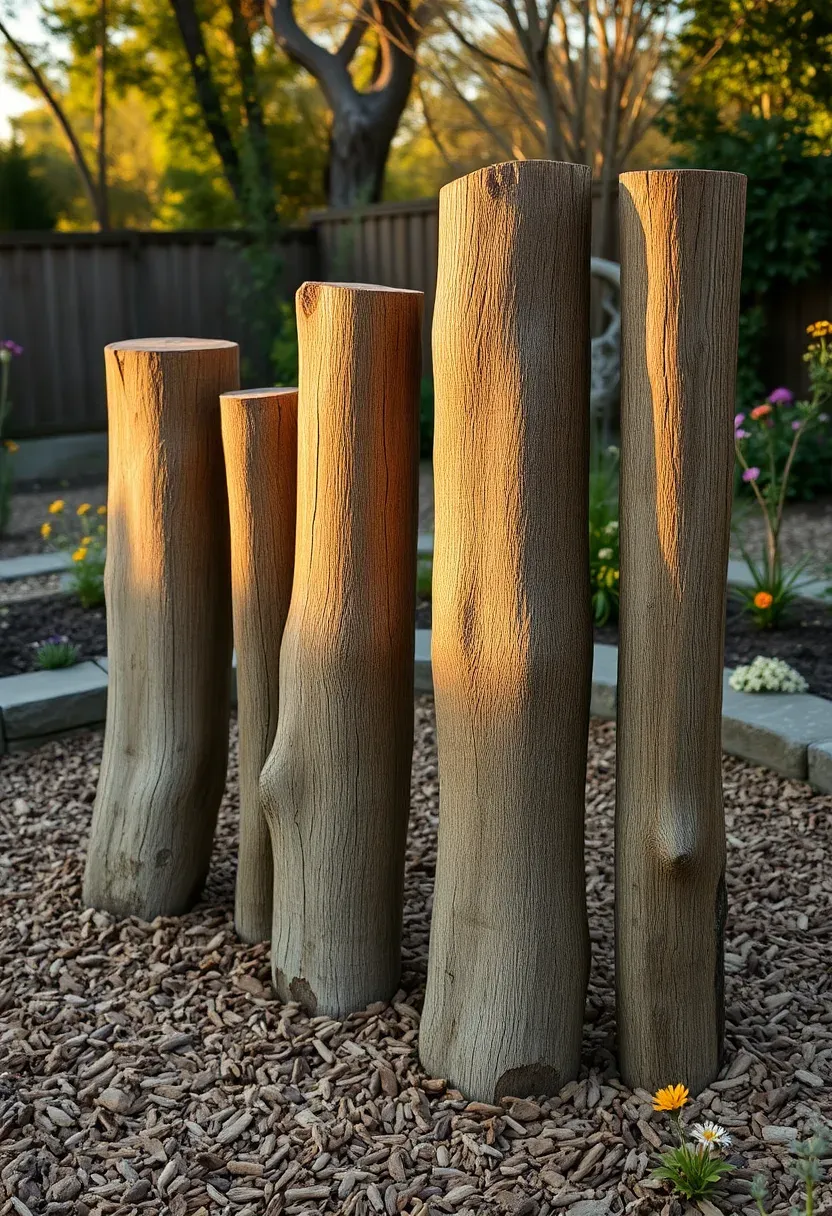
3. Natural Log Climbing Course
Skip the catalog play equipment and source logs from a local tree service. Most will deliver hardwood sections for free or cheap after a removal job. Cedar, oak, and locust hold up outdoors without treatment. Set them vertically at varying heights (18 inches to 4 feet for under-10s) in post holes with 24 inches buried and tamped gravel at the base. Space them 18-24 inches apart so kids can step, leap, and balance between them.
Tips
- Debark all logs — loose bark hides insects and creates slip hazards when wet.
- Arrange in a curved path rather than a straight line to encourage different movement patterns.
- Surround the course with 6 inches of wood fiber mulch extending 6 feet beyond the outermost log.
We picked a few things that go well with this idea: LOVE STORY Triangle Shade Sail (12ft) (★4.5), Shade&Beyond Triangle Shade Sail (16ft) (★4.5) and SUNNY GUARD Triangle Shade Sail (16ft) (★4.6). As an Amazon Associate we earn from qualifying purchases.
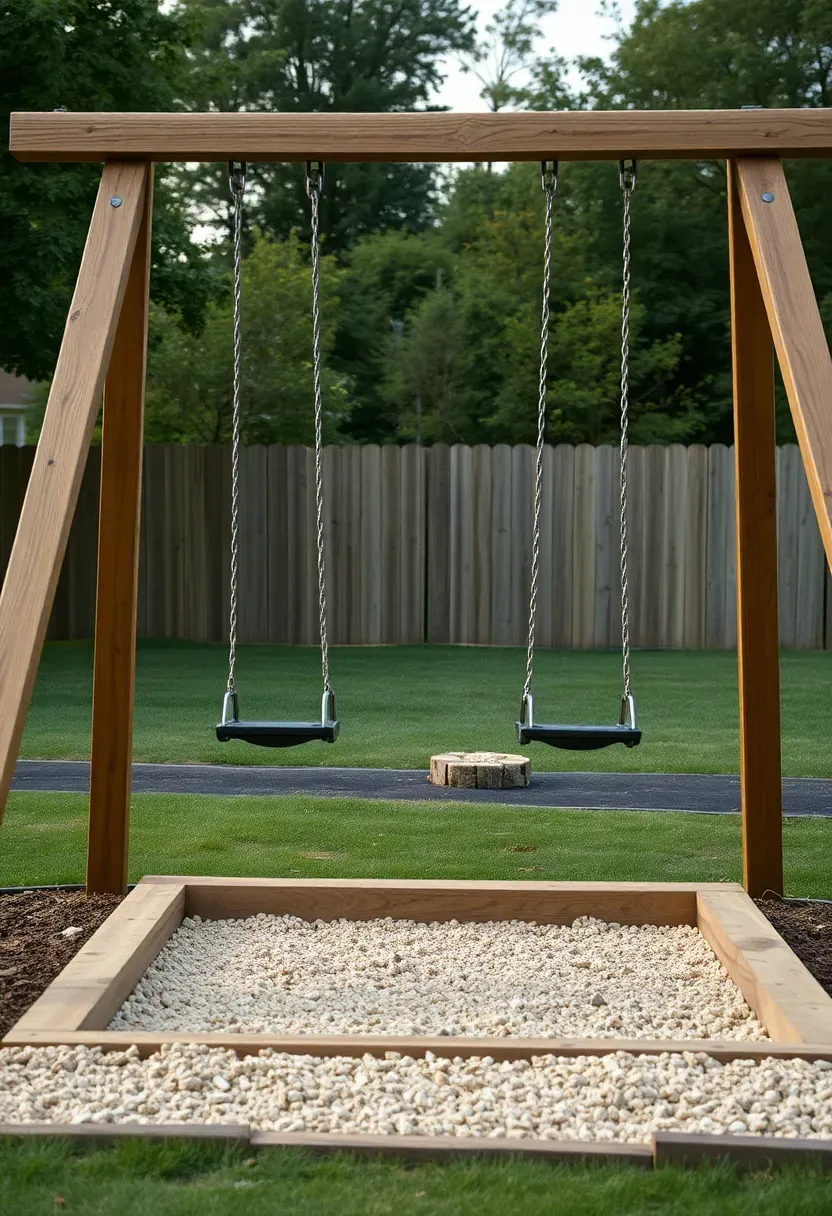
4. Swing Set with Fall Zone Planning
Most backyard swing sets are installed with about half the clearance they actually need. The CPSC recommends a fall zone extending 6 feet in every direction from the swing structure, plus an additional zone in front and behind equal to twice the height of the pivot point. For a standard 8-foot-tall swing set, that means you need a cleared and surfaced area roughly 24 feet deep by 20 feet wide. Measure before you buy.
Steps
- Mark the full zone with spray paint before any assembly. If the zone overlaps a fence, patio, or tree trunk, shift the location or choose a shorter set.
- Level the ground within the zone — a 2% grade maximum prevents puddles without creating a slope hazard.
- Anchor the legs with concrete footings or auger-style ground anchors, not the flimsy plastic stakes that come in the box.
Watch Out
- Swings with rigid seats (wood, plastic) cause more impact injuries than belt-style rubber seats.
- S-hooks on chains must be fully closed; check them every spring after freeze-thaw cycles.
Recommended
Items for this idea
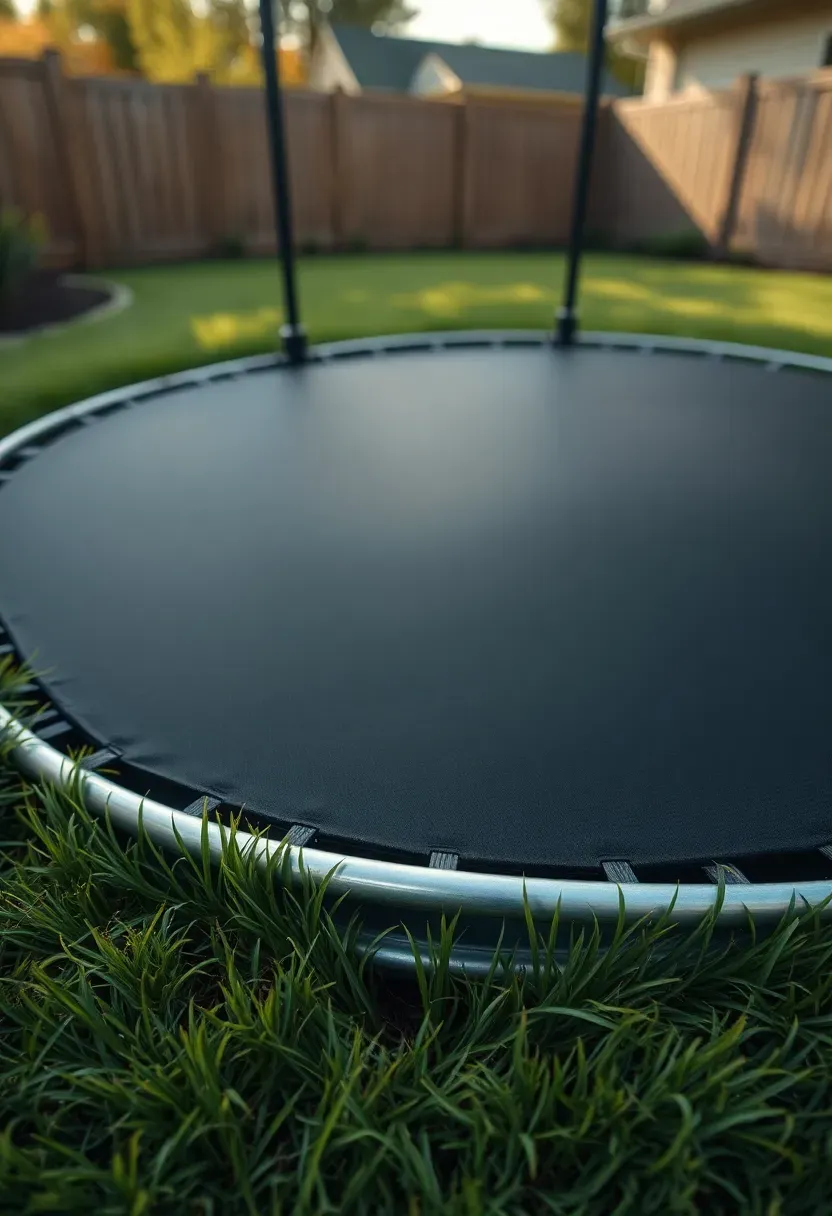
5. Sunken Trampoline
An in-ground trampoline sits flush with the lawn surface, eliminating the fall-from-height risk that makes above-ground models nerve-wracking. You dig a bowl-shaped hole matching the trampoline diameter (usually 12 or 14 feet), add a retaining wall ring, and set the frame at ground level. The visual impact is minimal — it looks like a flat circle in the grass rather than a towering steel cage.
Tips
- Dig the hole 6-8 inches deeper than needed and install a drainage sump at the bottom; water pooling under the mat causes rust and mildew.
- Leave a 2-inch gap between the mat edge and the ground to allow air flow on each bounce.
- Install a low safety net flush with the ground if small children will use it unsupervised.
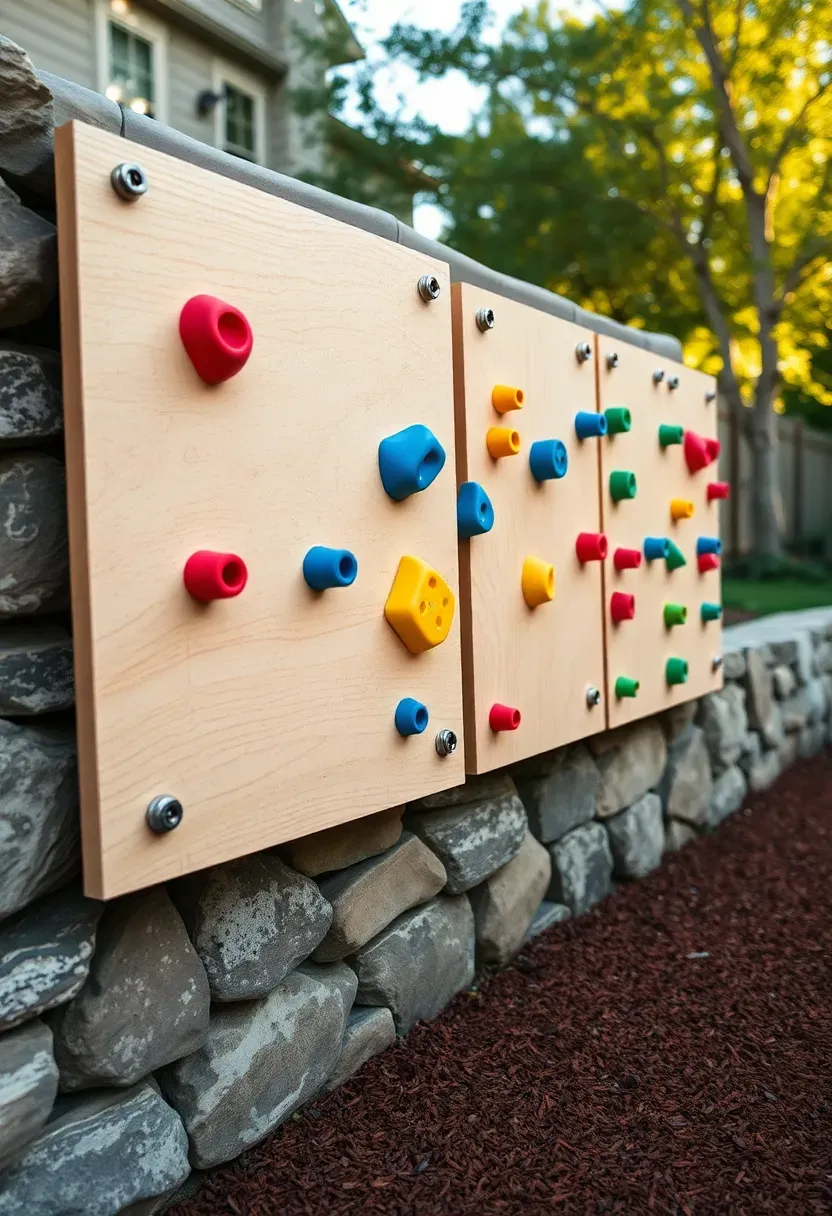
6. Climbing Wall Panel on a Retaining Wall
If your yard has a retaining wall between 4 and 8 feet tall, you already own a climbing structure. Mount 3/4-inch plywood panels (exterior grade, sealed) directly to the wall face with lag bolts, then attach commercial climbing holds in a pattern that routes kids horizontally rather than vertically. Traversing walls are safer because the climber is never more than a few feet off the ground, and they build grip strength and problem-solving the same way vertical walls do.
Tips
- Set holds using T-nuts from behind the plywood so they can be rearranged as kids progress.
- Keep the bottom of the lowest holds 12 inches off the ground to avoid toe-stubs during regular yard use.
- Lay 6 inches of rubber mulch or pea gravel at the base extending out 4 feet from the wall.

Recommended
Items for this idea
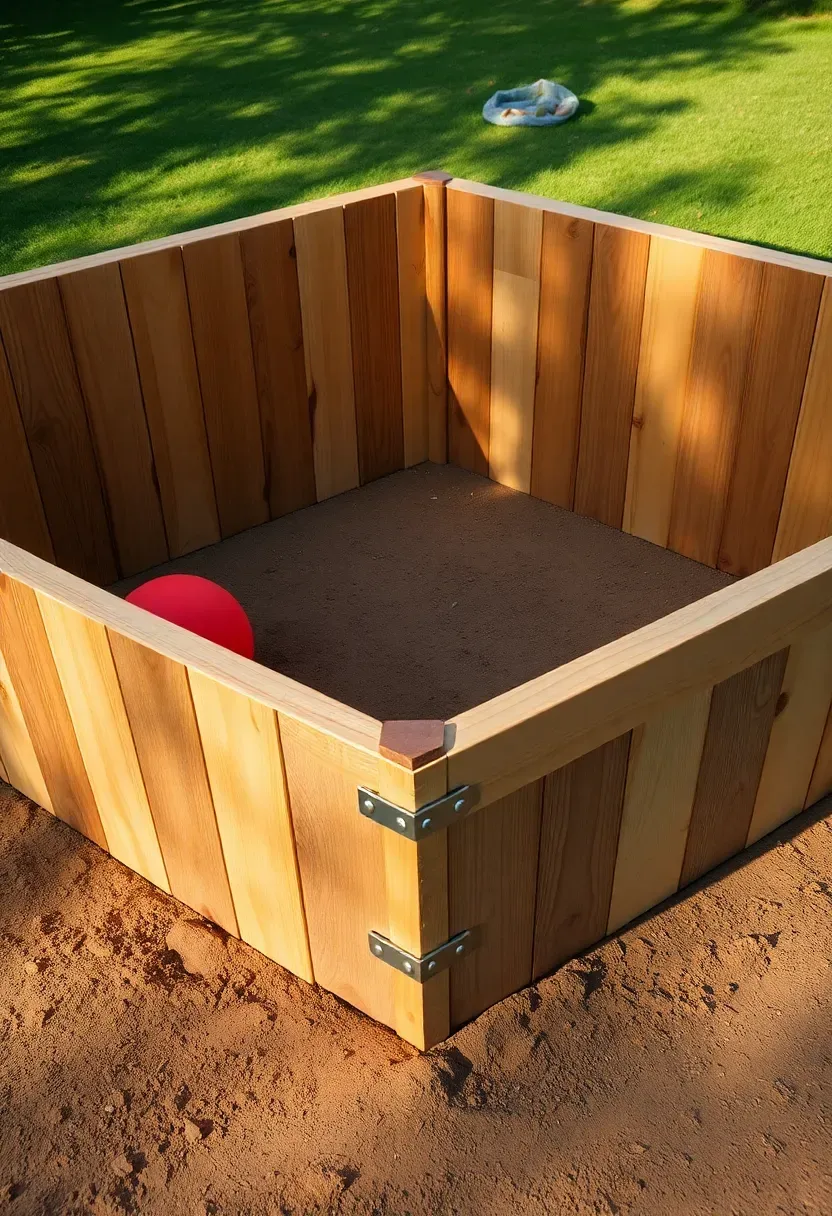
7. Sand Play Pit with Drainage Layer
A sandbox without drainage becomes a mosquito pond after every rainstorm. Build yours on a slope or add a 4-inch gravel layer beneath landscape fabric before adding sand. Frame it with composite decking boards (they will not rot or splinter like railroad ties) and build the frame 14-16 inches tall so you can fill with 10 inches of play sand and still have sides kids can sit on.
What Works and What Doesn't
Works: A roll-up mesh cover that lets rain through but keeps cats and debris out. Perforated PVC pipe buried in the gravel layer to channel water away.
Doesn't work: Solid tarps. They collect rain on top, sag, and dump the whole puddle into the sandbox when removed. They also trap moisture beneath, creating a perfect environment for mold in warm climates.
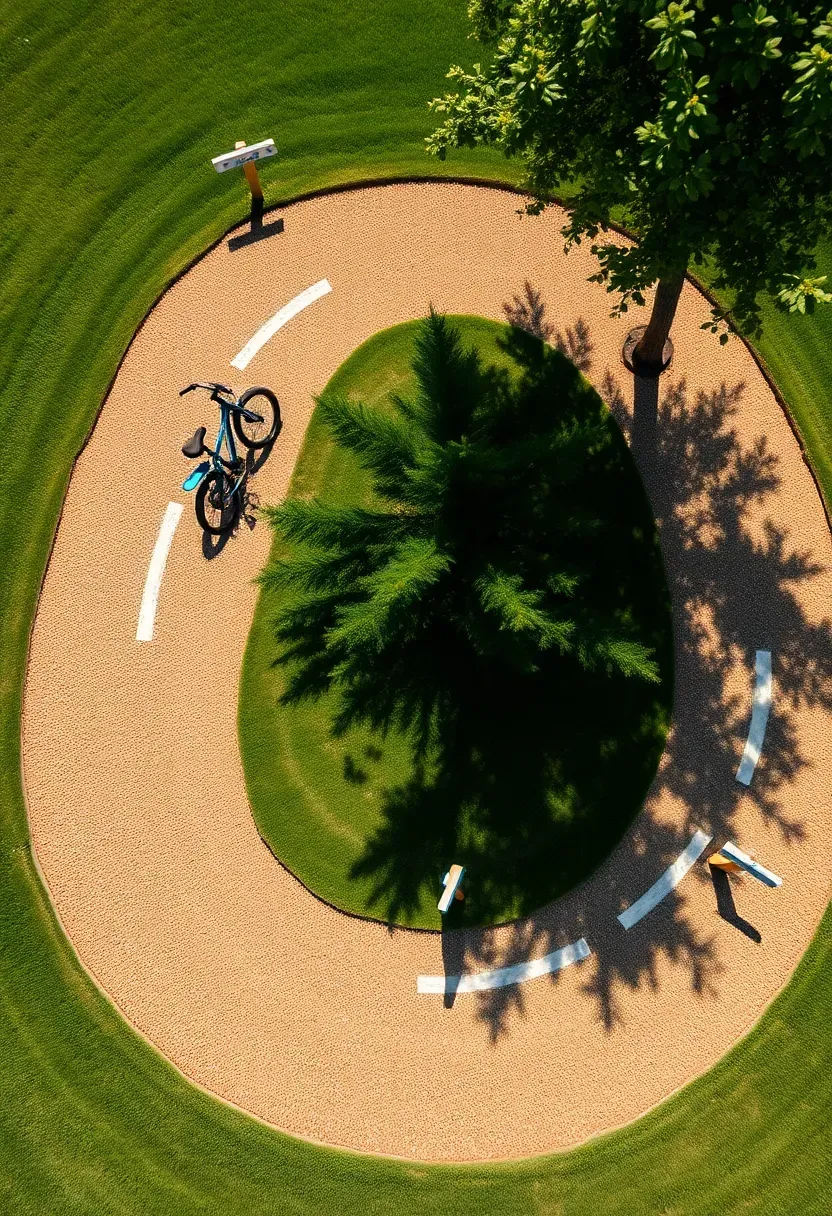
8. Bike and Scooter Loop Track
The Layout
A continuous loop between 60 and 100 feet long, 4-5 feet wide, with gentle curves and no sharp turns. Compacted decomposed granite (DG) is the easiest surface — it packs firm, drains well, and costs about $1.50 per square foot. Concrete is permanent but five times the price. Avoid asphalt in residential backyards; it requires professional equipment and heats up significantly.
How to Build
- Plan the route using a garden hose laid on the ground. Walk it with a bike to confirm turning radius works.
- Excavate 4 inches deep along the path and compact the subgrade.
- Fill with 3 inches of DG, wet it, and compact with a plate tamper in two passes.
Bonus
- Paint lane lines and traffic signs for pretend play — a can of field marking paint costs $6 and lasts a full season.
Recommended
Items for this idea
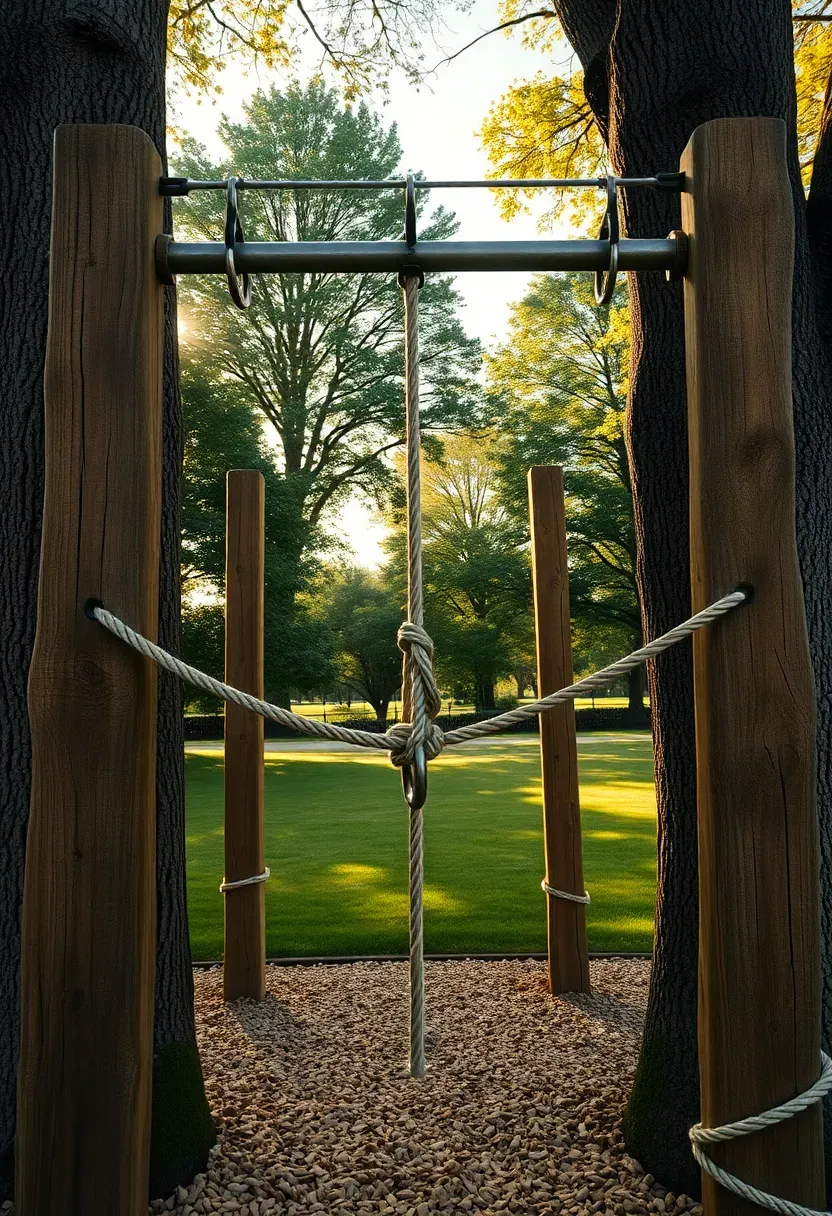
9. Ninja Warrior Course Posts
Set 6x6 pressure-treated posts at 8-foot intervals in a line. Between them, hang monkey bar rungs, cargo net sections, gymnastic rings, and rope ladders using galvanized hardware. The post height (8-10 feet above ground with 3 feet buried) gives enough clearance for most hanging obstacles. Total materials for a four-station course typically run $300-500 if you source hardware from a marine supply store rather than a specialty play equipment retailer.
Tips
- Rate every hanging element for at least 300 pounds — adults will use this.
- Space the ground-level fall zone 6 feet from each side of the obstacle line.
- Add a peg board at one station for upper body training that works for both kids and parents.
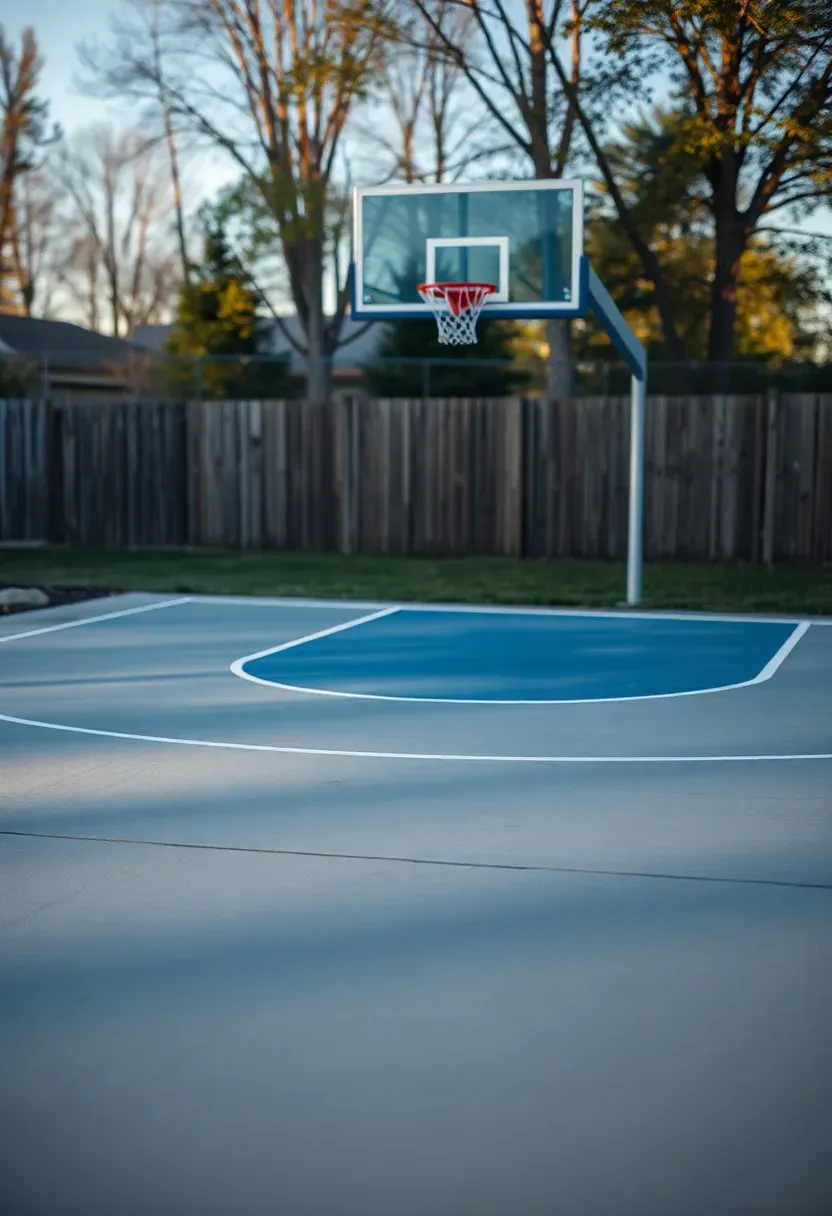
10. Half-Court Basketball Pad
A regulation half-court is 47 by 50 feet — bigger than most backyards can handle. A functional half-court for home use needs roughly 30 by 30 feet of flat, hard surface with 3-5 feet of buffer on each side. A 4-inch concrete slab with fiber mesh reinforcement and a broom finish (for traction) is the standard approach. Pair it with an in-ground adjustable hoop rather than a portable one; portable bases wobble and tip in wind.
Choose This If
- You have at least 1,200 square feet of relatively flat yard to dedicate
- Your family includes anyone over age 8 who plays basketball, pickleball, or four-square
- You want a surface that doubles for roller skating, chalk art, or parking extra cars during gatherings
Skip This If
- Your property has heavy clay soil that shifts seasonally — the slab will crack without deep footings
- You need quiet; basketball bouncing carries through open windows
Recommended
Items for this idea
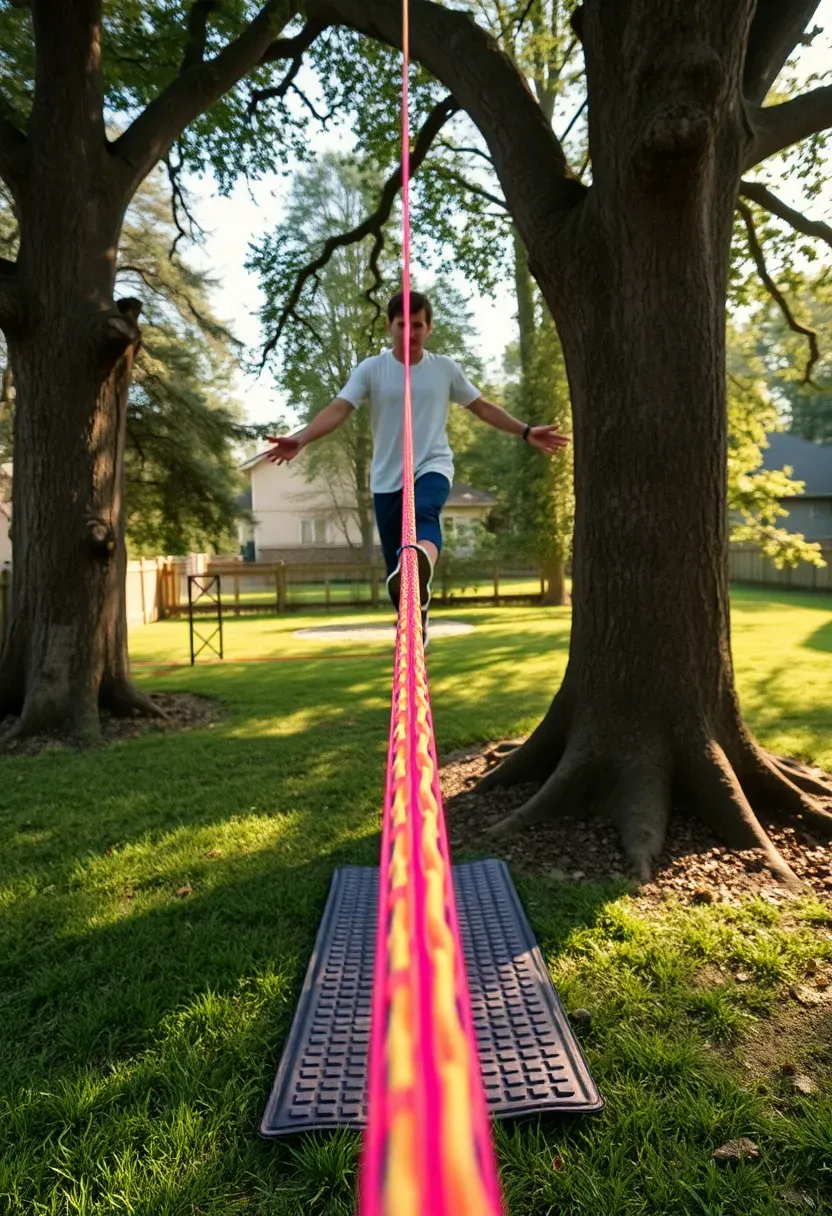
11. Slack Line and Balance Zone
A slackline costs about $30, takes ten minutes to set up between two trees, and builds core balance better than any piece of gym equipment. For a permanent installation in a play area, use 6x6 posts set in concrete (if you lack trees) and mount the line at knee height for beginners. Underneath, lay interlocking foam mats or a thick layer of mulch — grass alone gets destroyed within a week from repeated falls.
Steps
- Select anchor points 30-50 feet apart. Trees need to be at least 12 inches in diameter; smaller trees flex too much.
- Wrap tree protectors around the bark before attaching the ratchet. Bare webbing cuts through bark over time.
- Set starting height at 12 inches above the surface. Once kids can walk the full length, raise it in 4-inch increments.
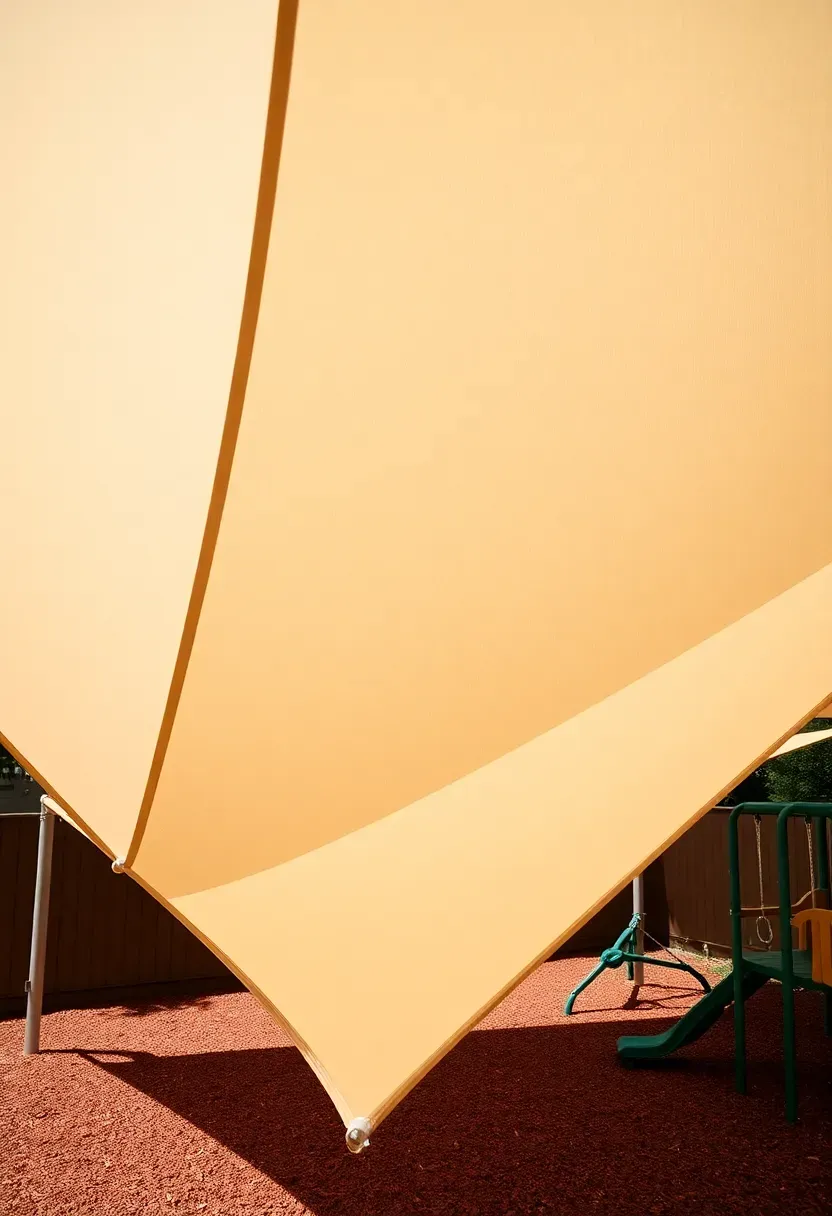
12. Shade Sail Over Play Equipment
Unshaded metal slides reach 160°F in summer. Unshaded rubber surfaces are not much better. A shade sail blocks 90-95% of UV radiation and drops the surface temperature underneath by 20-30 degrees. Mount 16-foot triangular sails on galvanized steel posts (4-inch diameter, set 3 feet in concrete) at a 20-25 degree angle for proper rain runoff.
Tips
- Use stainless steel turnbuckles at each corner so you can tension the fabric without climbing the posts.
- Take sails down before winter storms; wind and snow loads tear even commercial-grade HDPE fabric.
- Overlap two sails at different angles for better coverage than a single large one.
Recommended
Items for this idea
13. Gaga Ball Pit
Gaga is a dodgeball variant played in an octagonal pit. Kids hit a foam ball with open hands trying to strike opponents below the knees. The pit itself is simple: eight panels of 2x10 or 2x12 lumber connected with corner brackets, forming an octagon roughly 15-20 feet across. No floor needed — compacted dirt or short grass works fine. The game is fast, inclusive (eliminated players re-enter each round), and requires zero equipment beyond a soft ball.
Tips
- Bevel the top edge of each board or cap it with a rounded pool noodle section to prevent scrapes.
- Attach panels with carriage bolts rather than screws so the pit can be disassembled for lawn mowing.
- Use 24-inch-tall walls for kids under 10; 30-inch for mixed-age groups.
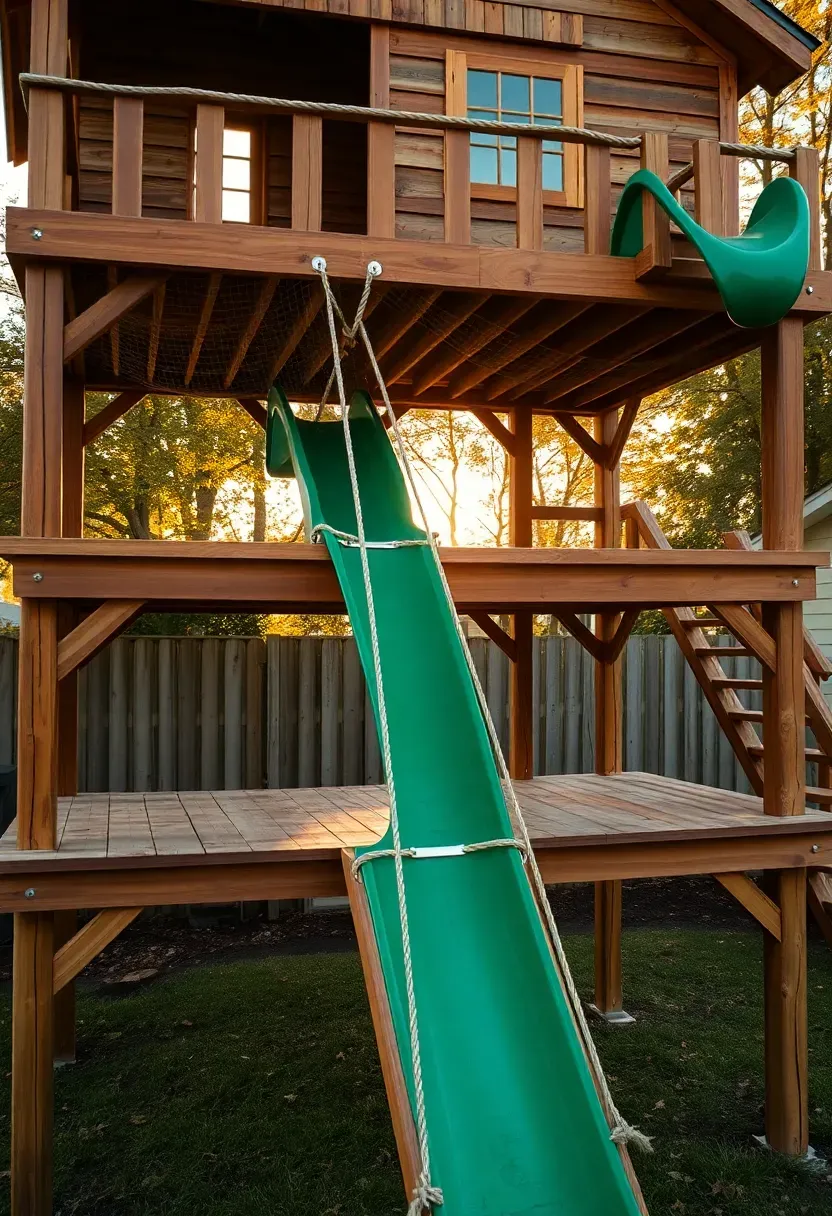
14. Multi-Level Playhouse Platform
Why It Works
Kids use vertical space differently than adults expect. A playhouse with two or three connected platforms at 2, 4, and 6 feet creates distinct zones — a ground-level reading nook, a mid-level lookout, and a top deck for imaginative play — without occupying more footprint than a single structure. Connect levels with ladders, cargo nets, or ramps rather than stairs to add physical challenge.
Build Notes
Frame with 4x4 posts on concrete piers. Use 5/4 composite decking for platforms (no splinters, no rot). Railings on any platform over 30 inches should have balusters spaced under 3.5 inches — the same as residential deck code. A tube slide from the top platform adds a fast exit route and costs $150-250 for a residential-grade section.
Watch Out
- Check local building codes. Structures over 120 square feet or 10 feet tall often require a permit.
- Anchor the entire structure against lateral forces — kids jumping in groups create significant sway.
Recommended
Items for this idea
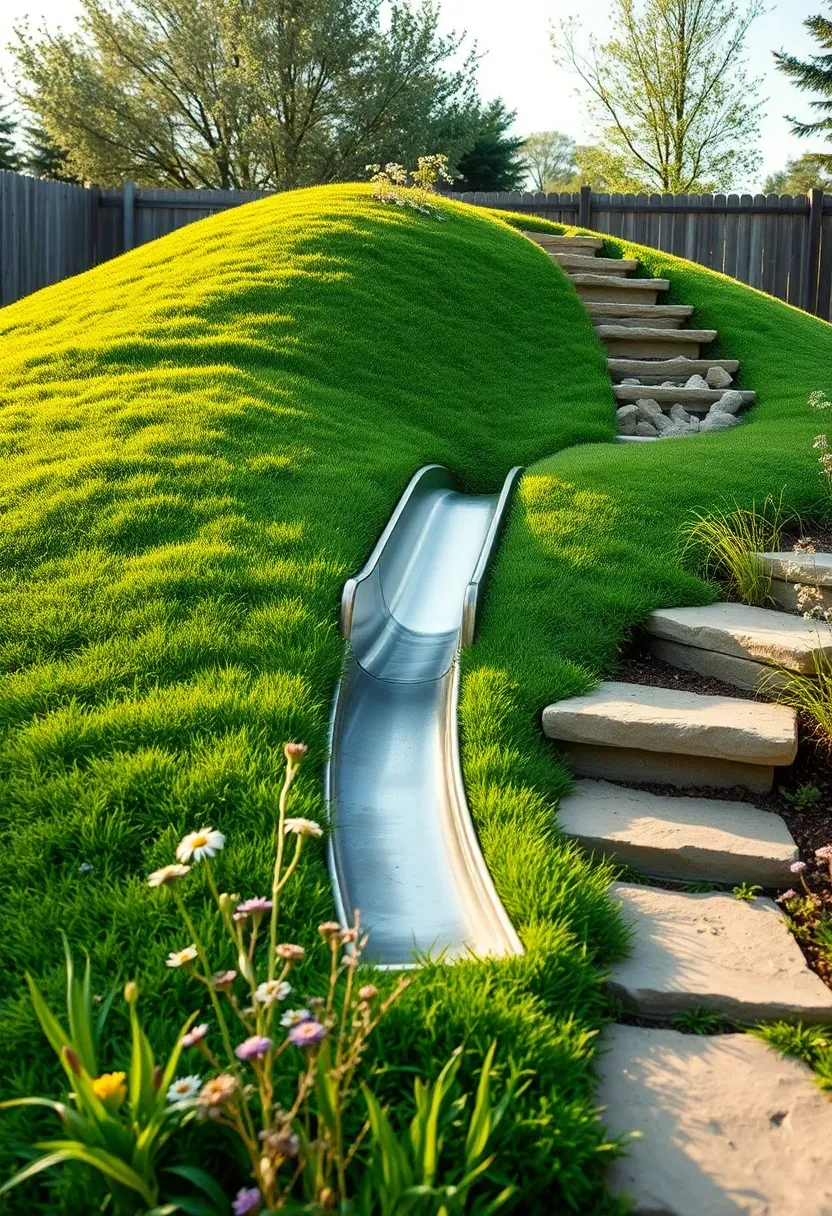
15. Turf Mound Slide Hill
Build a landscaped hill and embed a slide into it. The mound itself can be constructed from clean fill dirt (often available free from construction sites), shaped with a front slope of 30-35 degrees, and covered with sod. A stainless steel or polyethylene slide channel runs down the steeper face. Stone steps or carved footholds on the back provide the climb. The finished result looks like a natural landscape feature rather than playground equipment, which matters if your HOA has opinions about backyard aesthetics.
Tips
- Compact the fill in 6-inch lifts to prevent settling and slides developing bumps.
- Install erosion control fabric on all slopes before sodding — rain will wash bare dirt into the slide channel.
- Crown the top of the mound slightly so water runs off rather than pooling at the slide entry.
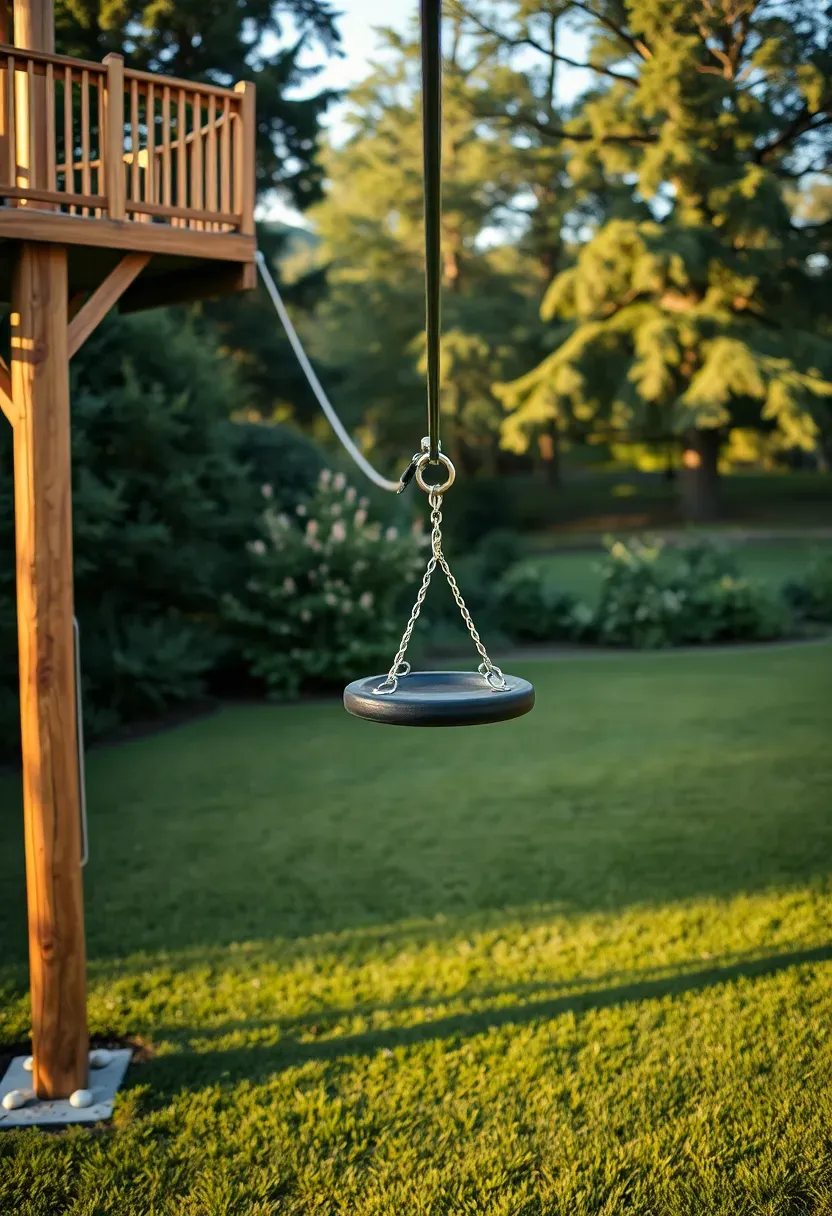
16. Backyard Zip Line Run
A residential zip line needs two things most people underestimate: length and slope. The cable should span at least 75 feet for a satisfying ride, and the launch point needs to sit 6-8 feet higher than the terminus. Use 3/8-inch galvanized aircraft cable rated for at least 1,000 pounds, a trolley with sealed bearings, and a bungee brake at the landing end. Mount the high end to a structural beam (not a tree limb — they break unpredictably under dynamic loads) and the low end to a buried deadman anchor.
Watch Out
- Maintain at least 6 feet of ground clearance at the rider's lowest point along the entire run.
- Test the brake system with a weighted bag before any person rides.
- Check cable tension and trolley bearings every three months; cable stretch is normal in the first year.

Recommended
Items for this idea
17. Toddler Zone with Fence Partition
When you have both toddlers and older kids, the play area needs a boundary. A 3-foot decorative fence with a self-closing gate creates a protected zone where 1-3 year olds can explore without wandering into the swing path or basketball court. Inside this zone, keep equipment low — nothing over 3 feet tall — and use artificial turf or interlocking foam tiles as the surface. Include a water table, a low slide, and a few sensory bins. The fence does not need to be fortress-grade; it just needs to slow a toddler down enough for a parent to intervene.
Tips
- Install the gate latch at adult height so toddlers cannot operate it independently.
- Place the toddler zone within direct sightline of the patio or deck seating area.
- Choose a location with partial natural shade; toddlers overheat faster than older children.
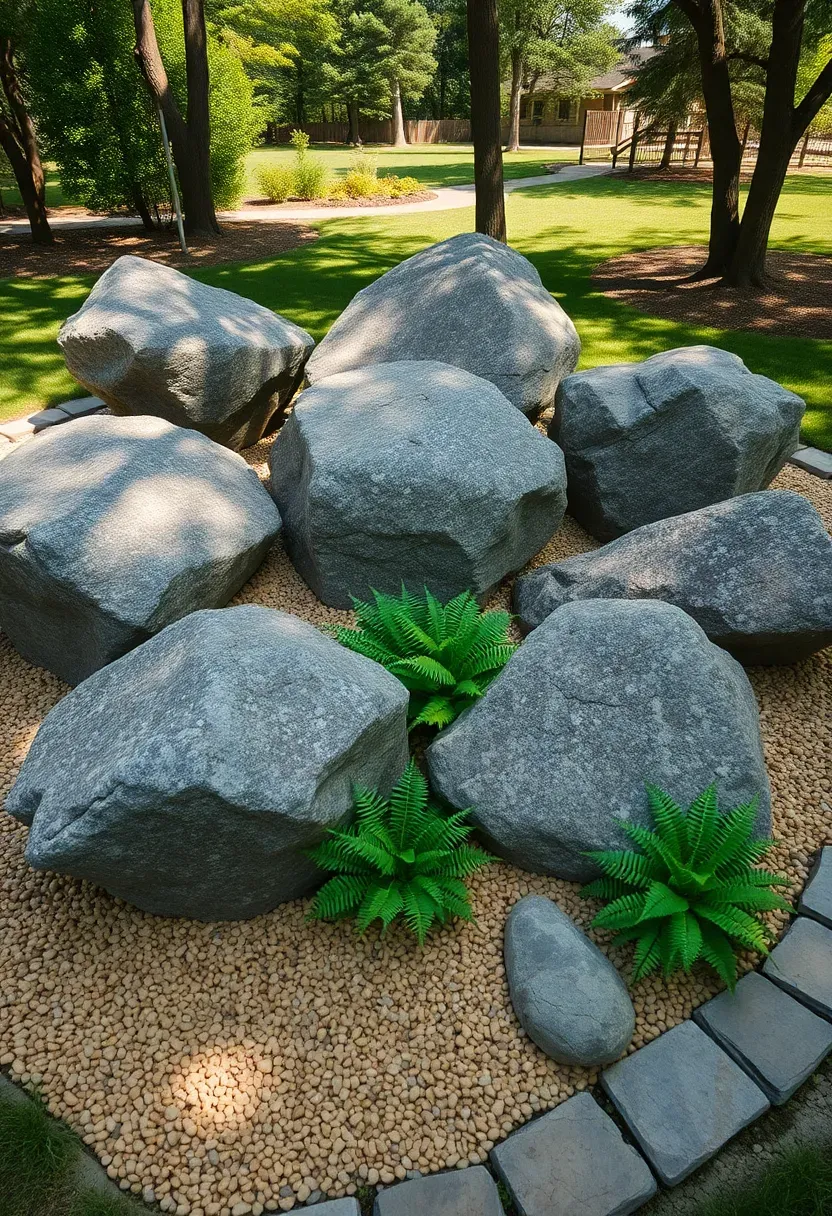
18. Rock Scramble Bouldering Area
Origins
Playground bouldering traces back to adventure playgrounds in post-war Denmark, where kids played on rubble and construction debris. Modern versions use sourced natural boulders — typically granite, basalt, or sandstone — arranged in clusters that invite climbing, scrambling, and jumping between surfaces.
How to Set It Up
Source boulders from a landscape supply yard. Select pieces with flat tops and rough texture (avoid polished or rounded river rock — too slippery). Arrange 5-8 boulders in a cluster with the tallest no more than 4 feet, set them partially buried for stability, and fill gaps with pea gravel. Plant shade-tolerant ferns or ornamental grasses between stones for a naturalistic look.
Making It Your Own
- Carve shallow foot cups into softer sandstone boulders to create hand and footholds.
- Position the tallest boulder so it faces a soft landing zone of mulch or rubber surfacing, not another rock.
Recommended
Items for this idea
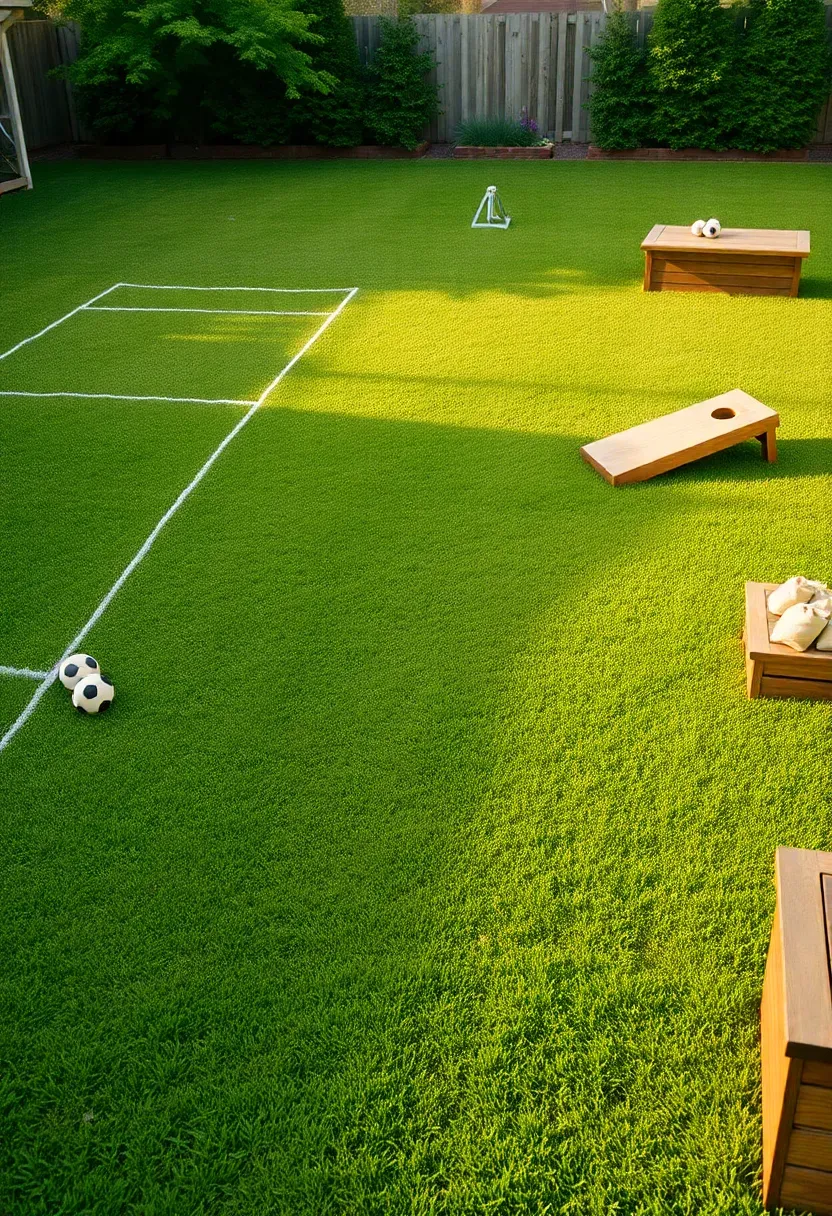
19. All-Ages Game Lawn
Not every play area needs structures. A flat, well-maintained grass rectangle — 30 by 60 feet minimum — handles bocce, croquet, badminton, cornhole, spikeball, and a dozen other games that work for ages 5 through 75. The key investment is the turf itself: overseed with a durable grass blend (tall fescue and Kentucky bluegrass in cool climates; Bermuda or zoysia in warm ones), maintain a mowing height of 2.5-3 inches, and aerate twice per year to prevent compaction from foot traffic.
Tips
- Install flush-mount ground sleeves at standard bocce and badminton court positions so you can drop in posts without digging each time.
- Store equipment in a weatherproof deck box at the lawn edge rather than hauling it from the garage.
- Add a single low-voltage floodlight on a timer for evening play during summer months.
Quick FAQ
How much does it cost to build a backyard play area? Budget play areas using mulch surfacing and DIY equipment start around $500-1,000. Mid-range setups with a swing set, surfacing, and shade run $3,000-6,000. Custom builds with poured rubber, multiple structures, and sport courts can exceed $15,000.
What is the safest surface for a backyard play area? Poured-in-place rubber meets the highest safety standards for fall attenuation, but it is expensive. Rubber mulch and engineered wood fiber are effective and affordable alternatives when installed at the correct depth (6 inches minimum for equipment up to 7 feet).
Do I need a permit for backyard play equipment? Most jurisdictions do not require permits for freestanding residential play structures under 10 feet tall and 120 square feet. Permanent structures with footings, electrical connections, or exceeding those dimensions typically need a building permit. Check your local code before pouring concrete.
Can adults use backyard play structures? Yes, if you build for it. Rate all hardware for 300+ pounds, use 4x4 or 6x6 posts rather than 2x4 framing, and choose commercial-grade components where possible. Ninja courses, slacklines, zip lines, and sport courts are inherently multi-age.
How do I keep a play area looking good in winter? Remove shade sails and fabric covers before freeze season. Rake and redistribute loose-fill surfaces in early spring. Oil or seal any exposed wood in late fall. Store portable equipment indoors. Permanent structures like poured rubber pads and concrete courts need minimal winter maintenance beyond debris removal.
Building a backyard play area is less about buying the right equipment and more about planning the right zones. Start with surfacing — it is the least exciting part and the most important for safety. Add one or two anchor structures that match your kids' current ages, then leave open space for activities that will change year to year. The best play areas grow with your family rather than becoming a fixed installation that gathers moss after two seasons.
Pinterest cover for 19 Backyard Play Area Ideas for All Ages
About the author
OBCD
CGI visualization and interior design content. We create detailed 3D renders and curate practical design ideas for every room in your home.