25 Backyard Landscaping Ideas on a Budget
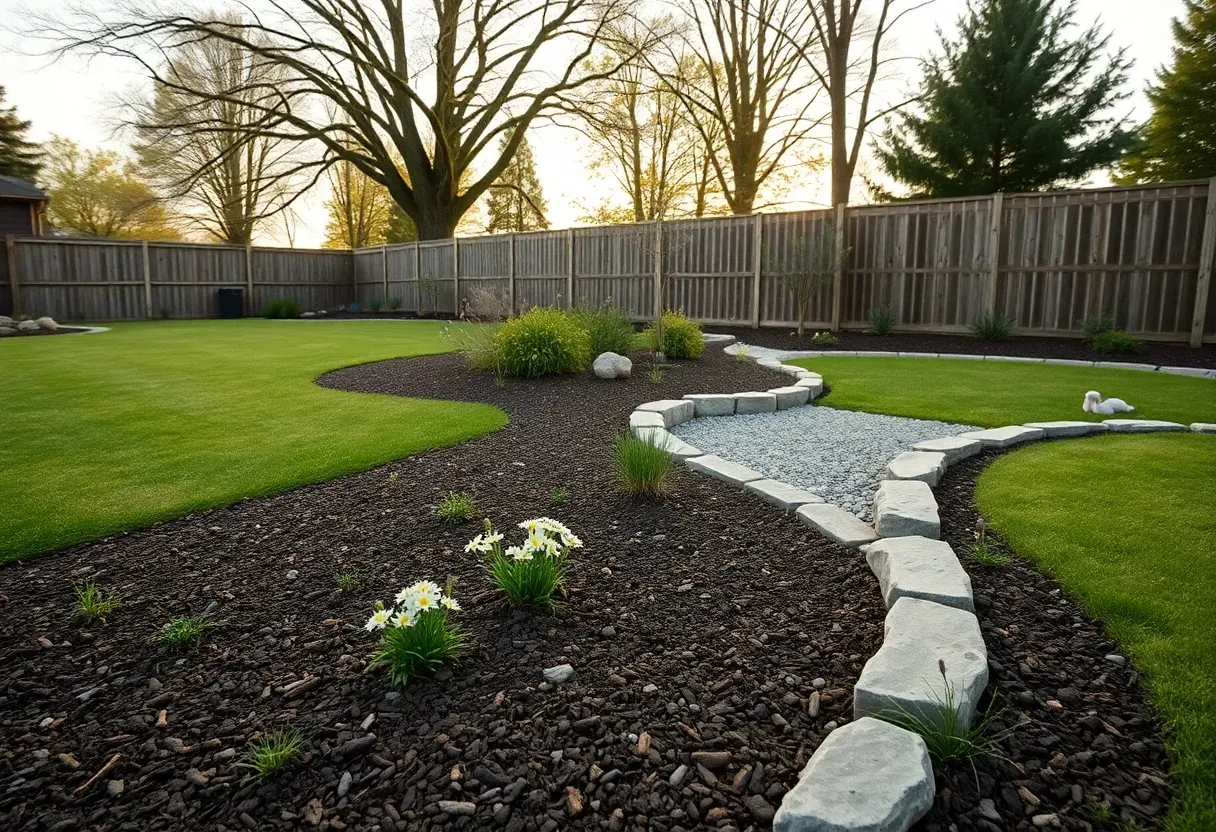
Last spring I ripped out a 400-square-foot section of dying grass and replaced it with mulch, three clumps of ornamental grass, and a curved gravel path. Total cost was under $160. The yard looked like it had been professionally designed, but the real trick was understanding which landscaping moves give you the most visual impact per dollar. Expensive hardscaping and exotic plants are not the answer. Mulch, native species, smart edging, and repetition of a few key plants — that is how you build a yard that looks intentional without draining your savings account. Here are 25 backyard landscaping ideas that keep costs low and results high.
Each idea below is organized from ground-level basics like mulch and gravel up to planting strategies, borders, and finishing details.
Table of Contents
- Mulch Bed Refresh
- Native Wildflower Meadow
- Pea Gravel Walkway
- Landscape Fabric Weed Barrier
- DIY Brick Border Edging
- Ornamental Grass Clusters
- Ground Cover Instead of Grass
- River Rock Dry Creek Bed
- Railroad Tie Retaining Wall
- Seed-Grown Perennial Border
- Flagstone Stepping Stones
- Transplant Division Garden
- Pine Straw Mulch Beds
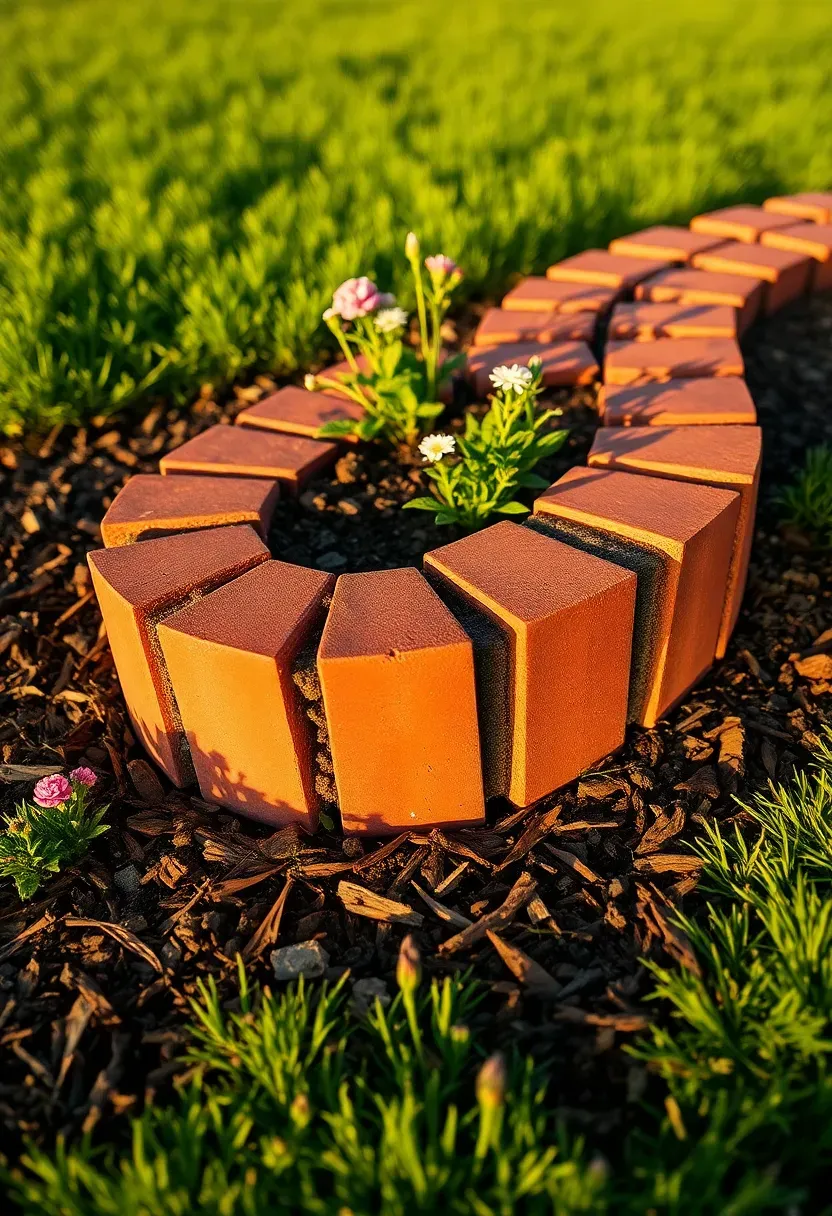
- Concrete Curb Edging
- Layered Shrub Foundation Planting
- Decomposed Granite Patio Area
- Tree Ring Flower Beds
- Clover Lawn Replacement
- Stone Slab Garden Steps
- Vertical Fence Planting
- Moss Garden in Shaded Areas
- Recycled Concrete Rubble Wall
- Raised Mound Berm
- Solar Path Lighting Along Beds
- Seasonal Bulb Layering
1. Mulch Bed Refresh
Nothing changes the look of a yard faster than fresh mulch. A 2-3 inch layer of hardwood or cedar mulch over existing beds costs roughly $30-$45 per cubic yard, and one yard covers about 100 square feet at proper depth. Beyond appearances, mulch retains soil moisture, suppresses weeds, and insulates plant roots from temperature swings. The color fades over a season, so plan on a top-up layer each spring — but that annual refresh is actually the cheapest recurring landscaping investment you can make.
Tips
- Buy mulch in bulk from a landscape supply yard rather than bagged from a hardware store — you will pay about half the price per volume.
- Keep mulch 3 inches away from tree trunks and plant stems to prevent rot and pest problems.
- Double-shredded hardwood knits together better than chunk bark and stays put on slopes during rain.
2. Native Wildflower Meadow
Why Native Beats Exotic
Native wildflowers cost a fraction of nursery perennials because you grow them from seed — a $12 packet covers 200 square feet. More importantly, they already know how to handle your local soil, rainfall, and pests without intervention. Black-eyed susans, coneflowers, and blanket flowers thrive in poor soil that would kill a hybrid tea rose.
How to Start One
Pick a sunny spot with at least 6 hours of direct light. Scalp the existing grass as short as possible, rake to expose bare soil, scatter seed in early fall or late spring, and press it into the soil surface with a lawn roller or your feet. Do not cover the seed — most wildflowers need light to germinate. Water lightly for two weeks, then leave it alone.
Pros and Cons
Pros: Extremely cheap; attracts pollinators; virtually no maintenance after establishment; reseeds itself each year.
Cons: Looks messy during the first year while plants establish; neighbors may mistake it for neglect; some HOAs restrict meadow plantings in front yards.
Recommended
Items for this idea
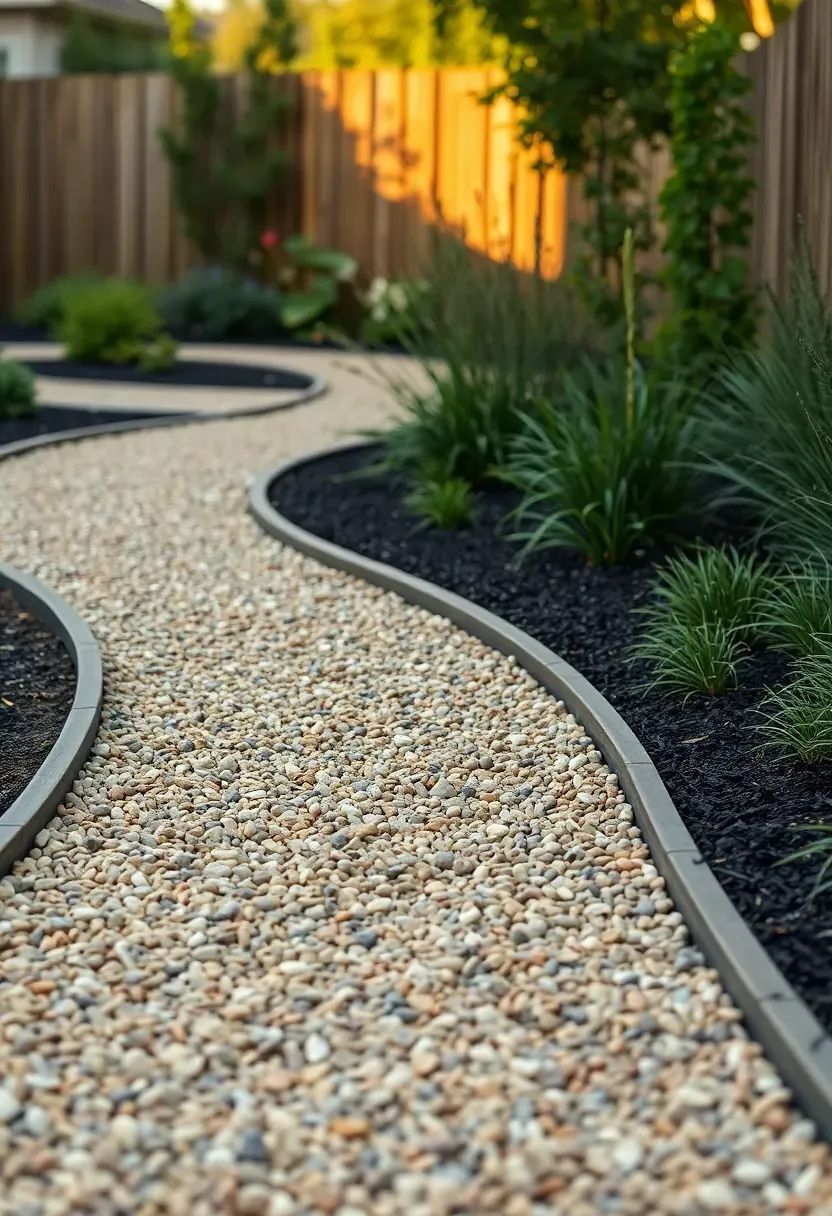
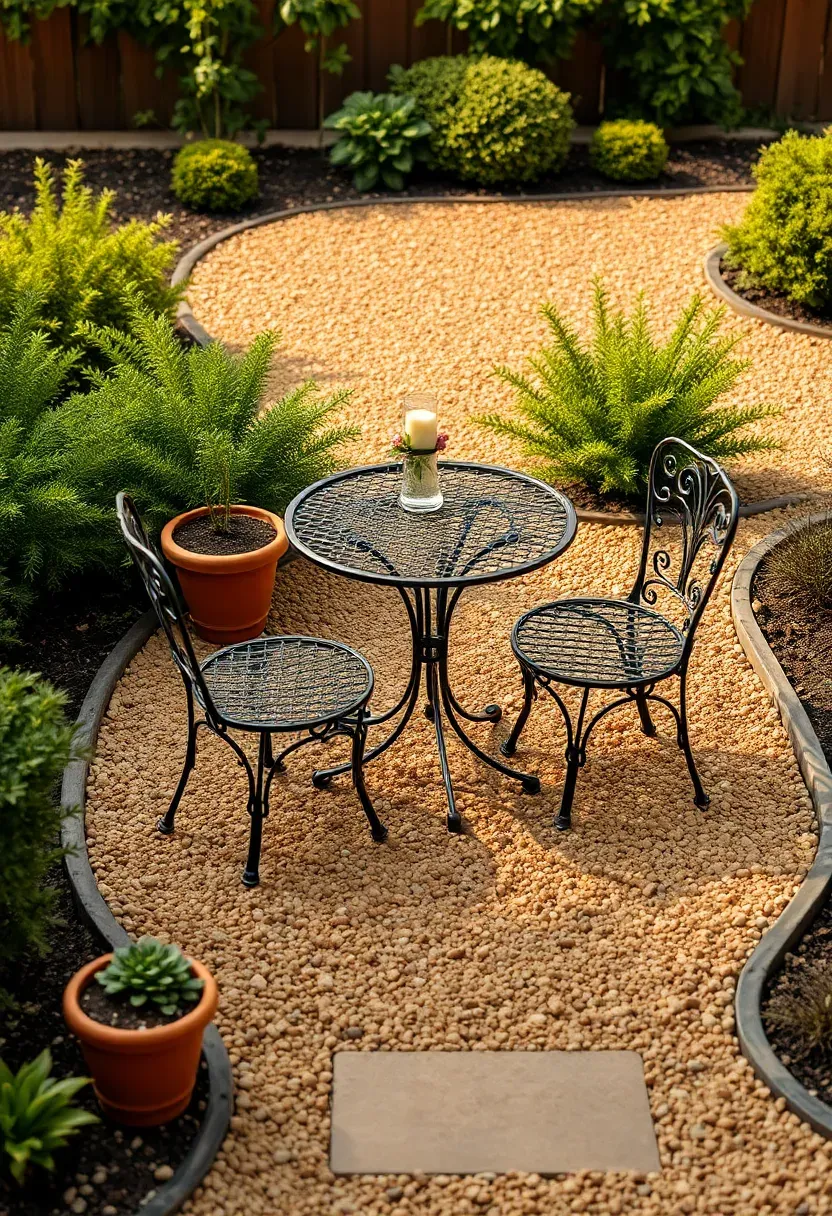
3. Pea Gravel Walkway
A gravel path through your yard gives it structure for almost nothing. Pea gravel runs $35-$60 per ton, and a 3-foot wide path needs about a ton for every 30 linear feet at 3-inch depth. The key to a path that stays neat is proper edging — steel landscape edging at $2-$3 per foot keeps the stone from migrating into your beds. Lay landscape fabric underneath, pour the gravel, and rake it level. The slight crunch underfoot gives a yard a deliberate, almost park-like quality that concrete paths lack.
Tips
- Use 3/8-inch stone rather than 3/4-inch — smaller pea gravel packs tighter and feels more stable to walk on.
- Compact the first layer with a hand tamper before adding the final inch of loose stone.
- Add a slight crown to the center of the path so rainwater sheds to the sides instead of pooling.
4. Landscape Fabric Weed Barrier
The Problem
Weeds are the number one reason budget landscaping falls apart. You spend a weekend building a clean bed, and within six weeks grass and dandelions push through. Hand-pulling becomes a chore that eventually gets abandoned, and the bed looks worse than before you started.
The Solution
Commercial-grade landscape fabric (not the thin stuff from dollar stores) blocks weed growth while allowing water and air to reach the soil. Lay it over prepared ground before adding mulch, gravel, or stone. Cut X-shaped slits where you want to plant, fold the flaps under, and mulch over the top. A 3-foot by 100-foot roll of professional-grade fabric costs $15-$25, covers a large bed, and lasts 5-10 years before degrading.
Watch Out
- Cheap woven fabric tears easily and degrades in one season — spend the extra few dollars on spunbond polypropylene.
- Fabric works under mulch and gravel but should not be used under soil in raised beds, where it blocks root growth.
Recommended
Items for this idea
5. DIY Brick Border Edging
Reclaimed bricks from demolition sites, Craigslist, or your own old patio make excellent garden edging at zero to minimal cost. Even new bricks run only $0.50-$1.00 each at home centers. Dig a shallow trench along your bed edge, set bricks at a 45-degree angle (the classic sawtooth pattern), or lay them flat end-to-end for a cleaner look. Pack soil against the outside to hold them in place. Brick edging defines beds sharply, keeps mulch from spilling onto the lawn, and adds a traditional character that plastic edging cannot match.
Tips
- Soak reclaimed bricks in water for an hour before setting — dry bricks pull moisture from the surrounding soil and shift as it shrinks.
- For curved beds, use half-bricks in tight radius sections to avoid wide gaps between full-length bricks.
- Level the trench bottom with a half-inch of sand for easier height adjustment.
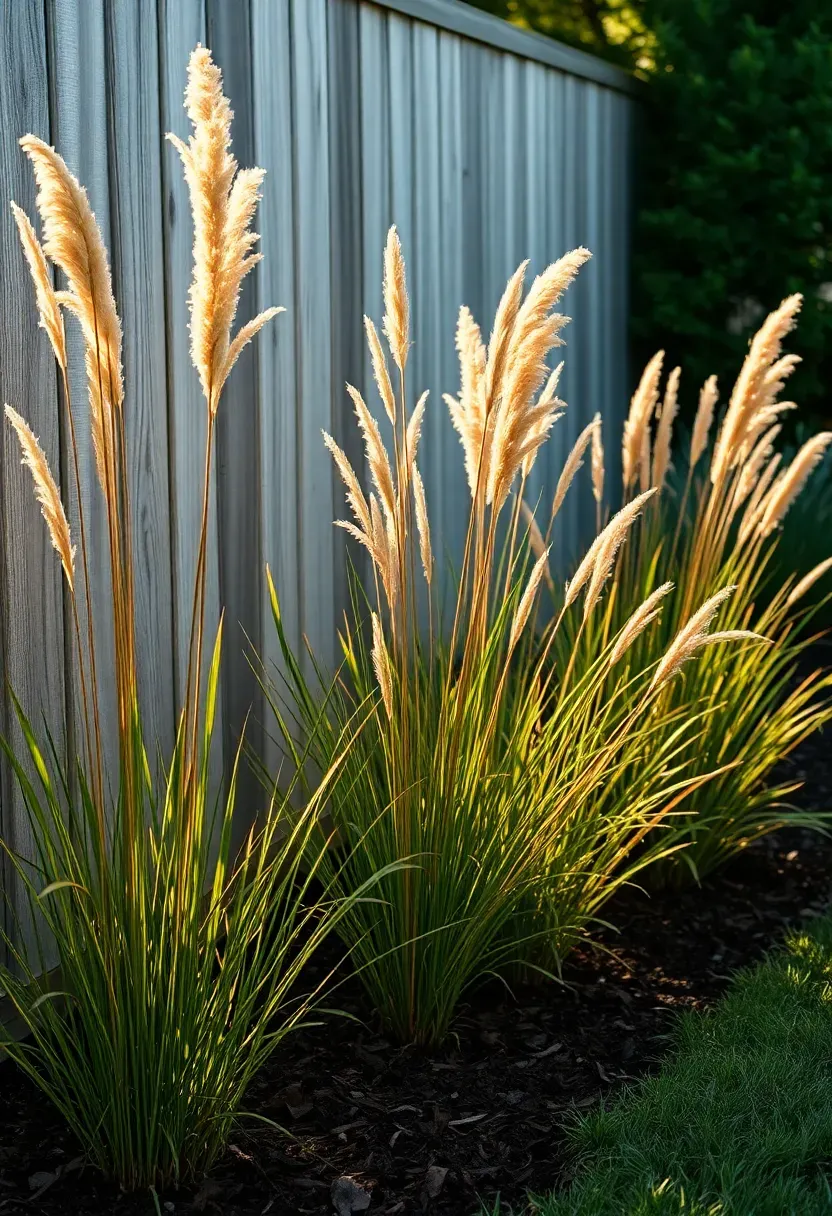
6. Ornamental Grass Clusters
Ornamental grasses are the best value plant in budget landscaping. A single $8 gallon-pot of maiden grass or Karl Foerster feather reed grass grows to 5-6 feet tall and 3-4 feet wide within two seasons. Plant three in a row and you have a living screen. The movement they add when wind catches the foliage is something no hardscape feature can replicate. They need almost no water once established, tolerate poor soil, and the dried seed heads provide winter interest when everything else in the yard has gone dormant.
Tips
- Space ornamental grasses at two-thirds of their mature width — they will fill the gaps by the second growing season.
- Cut them back to 6 inches in late February before new growth starts; do not prune in fall or you lose winter texture.
- Divide established clumps every 3-4 years and replant the divisions elsewhere — free plants from your existing stock.
Recommended
Items for this idea
7. Ground Cover Instead of Grass
Lawn Problems
Maintaining a traditional lawn costs $200-$400 per year in fertilizer, weed killer, and water — and that is before you factor in the time spent mowing weekly. If a section of your yard gets too much shade, too much foot traffic, or drains poorly, the grass will always struggle there no matter how much you spend.
The Alternative
Replace problem lawn areas with ground cover plants that spread on their own. Creeping thyme, white clover, sedum, or ajuga fill in within one growing season from 4-inch pots spaced 8-12 inches apart. Many tolerate light foot traffic and never need mowing. A flat of 18 ground cover plants runs $25-$40 at most nurseries and covers roughly 50 square feet once established.
Choose If
- Your yard has shaded patches where grass refuses to thicken
- You want to reduce mowing area without installing hardscape
- You are in a drought-prone area and need to cut irrigation costs
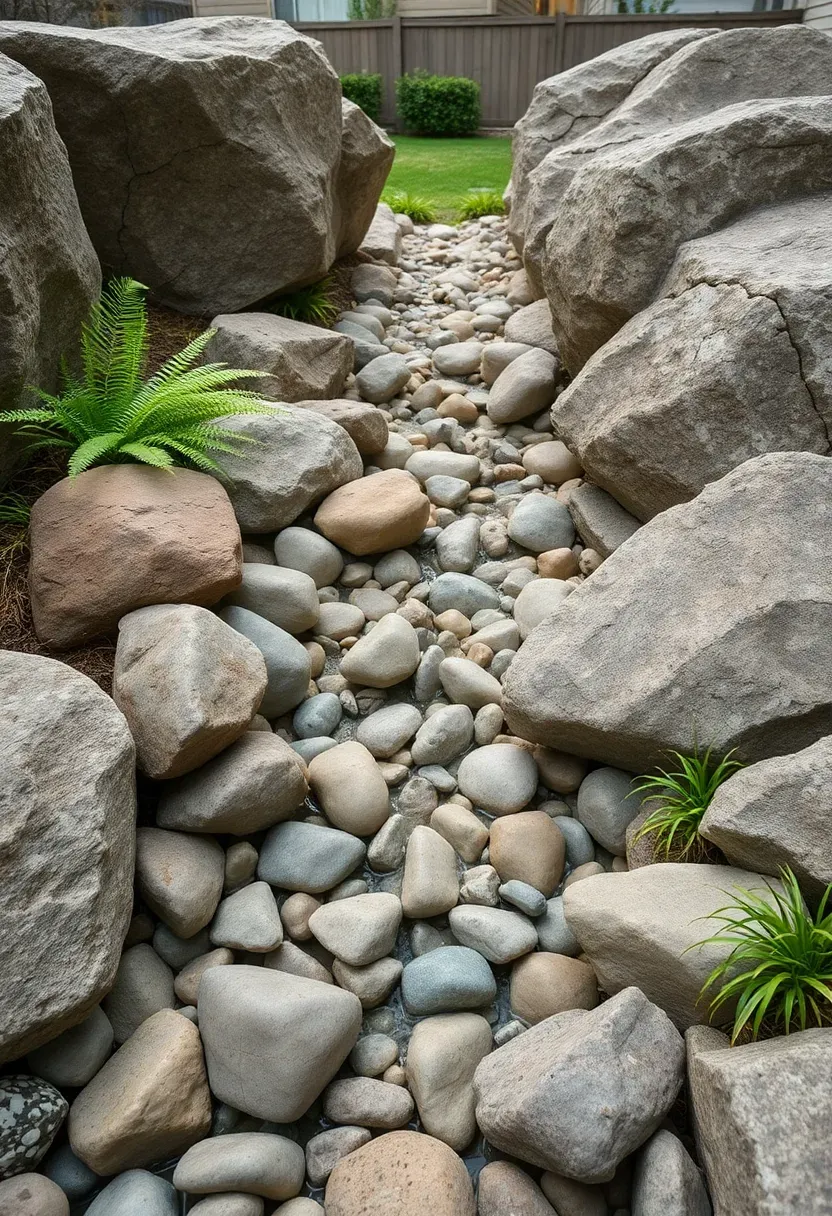
8. River Rock Dry Creek Bed
A dry creek bed solves drainage problems and looks like a natural landscape feature. Dig a shallow trench (6-8 inches deep, 2-3 feet wide) along the path where water runs during rain. Line it with landscape fabric, then fill with river rocks ranging from 2-inch stones in the center to larger 6-8 inch boulders along the edges. The size variation mimics a real streambed. Cost is $50-$100 per ton of river rock depending on your region, and most backyard dry creeks need 1-2 tons. During dry weather it reads as a design element; during storms it channels water away from your foundation.
Tips
- Follow the natural low points in your yard — the water already knows the best route.
- Tuck a few native ferns or sedge grasses between the larger boulders at the edges for a realistic look.
- Grade the trench at a minimum 1% slope (1 inch drop per 8 feet of length) to keep water moving.
Recommended
Items for this idea
9. Railroad Tie Retaining Wall
Used railroad ties cost $10-$20 each and stack into a serviceable retaining wall for slopes up to 3 feet high. They are heavy enough (around 200 pounds each) to resist soil pressure without elaborate engineering. Lay the first course in a trench, drill through with a long bit, and pin to the ground with 2-foot rebar stakes. Stagger each subsequent course like bricks. A 20-foot retaining wall two ties high runs about $120-$200 in materials. The dark, rough-hewn look works well in rustic and cottage-style yards.
Tips
- Only use ties in areas away from vegetable gardens — the creosote treatment contains chemicals you do not want near edible plants.
- Drill drainage holes or leave 1-inch gaps between ties every 4 feet to prevent water buildup behind the wall.
- Wear gloves when handling — creosote stains skin and clothing permanently.
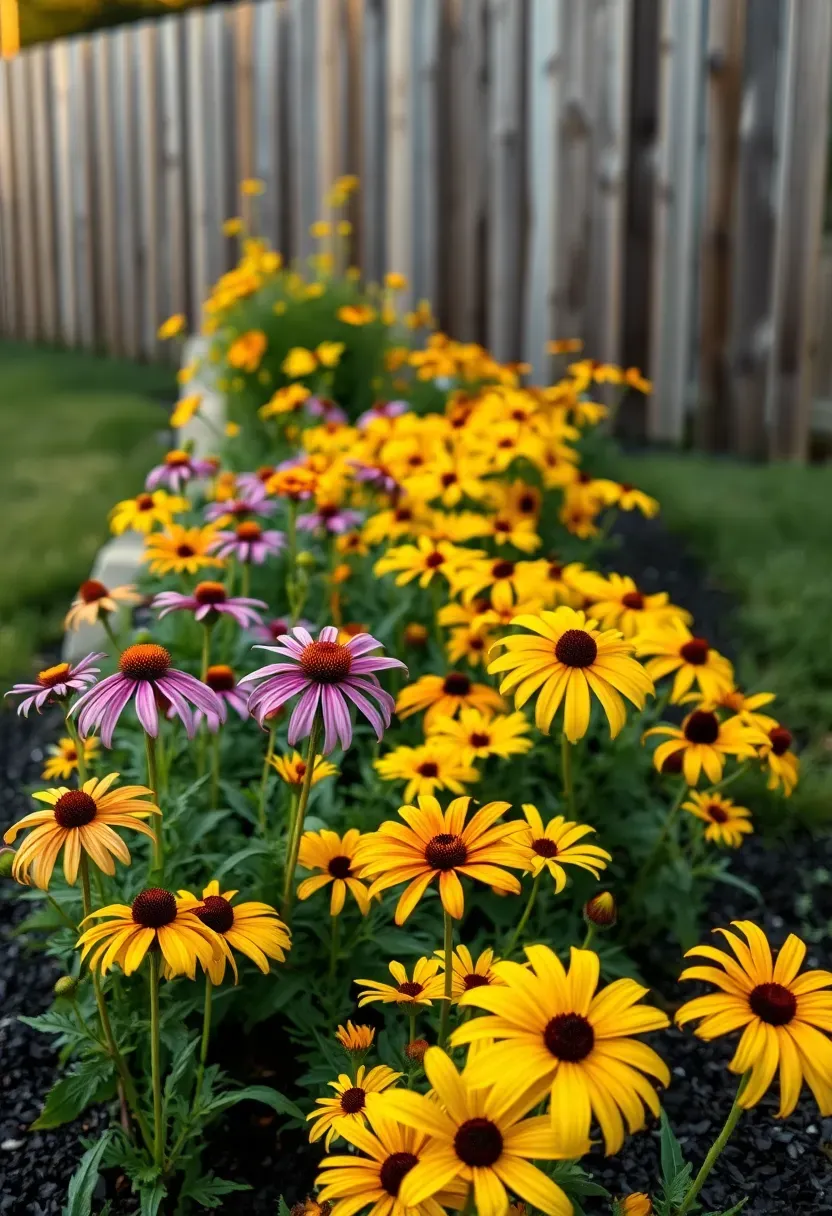
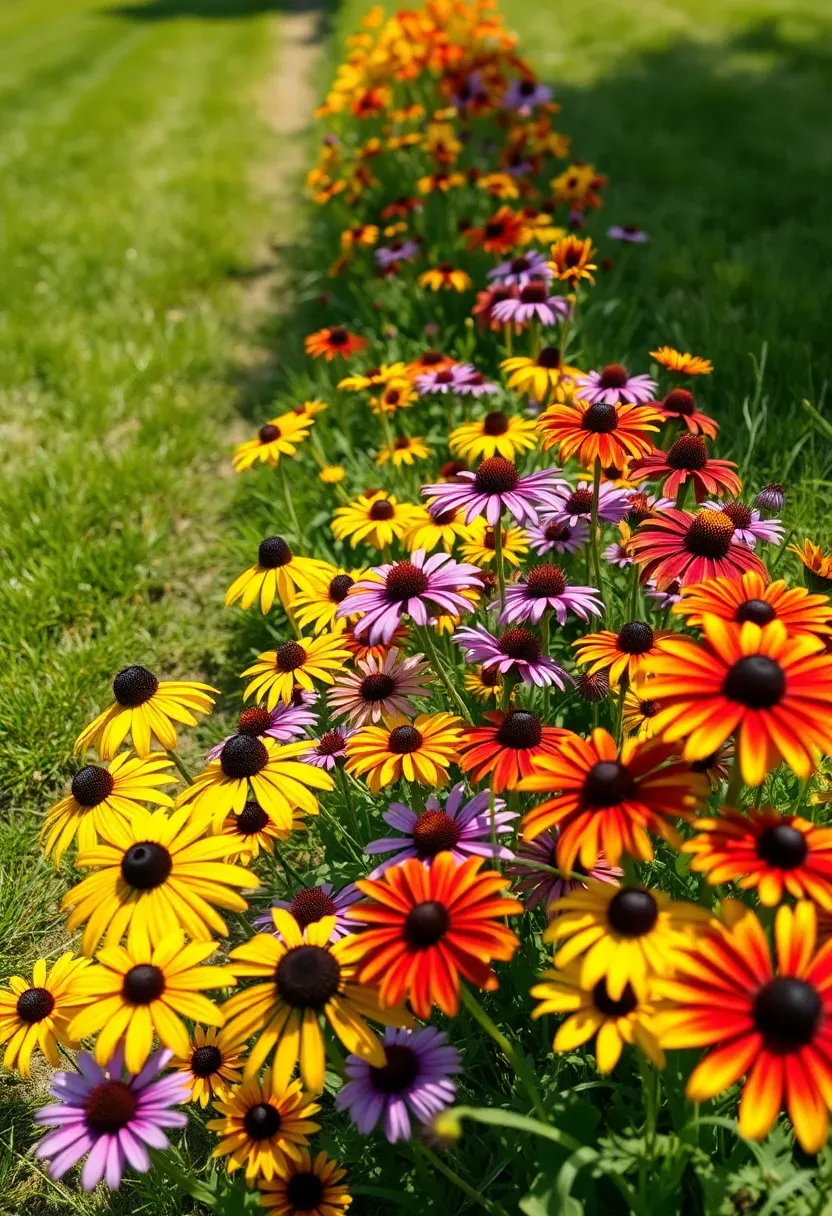
10. Seed-Grown Perennial Border
Growing perennials from seed instead of buying nursery plants saves 80-90% of the cost. A packet of coneflower seed ($3-$5) produces 50+ plants. The trade-off is time — most seed-grown perennials bloom in their second year rather than the first. Start seeds indoors in late winter using recycled containers and basic potting mix, transplant after last frost, and by the following summer you will have a border that would have cost $300+ at retail nursery prices. Black-eyed susans, shasta daisies, daylilies from seed, and yarrow all germinate reliably for beginners.
Tips
- Start with species that self-sow aggressively — coneflowers and black-eyed susans drop seed and expand the border every year for free.
- Plant in odd-numbered groups (3s and 5s) for a natural rather than regimented look.
- Deadhead the first year's growth to direct energy into root development rather than seed production.
Recommended
Items for this idea
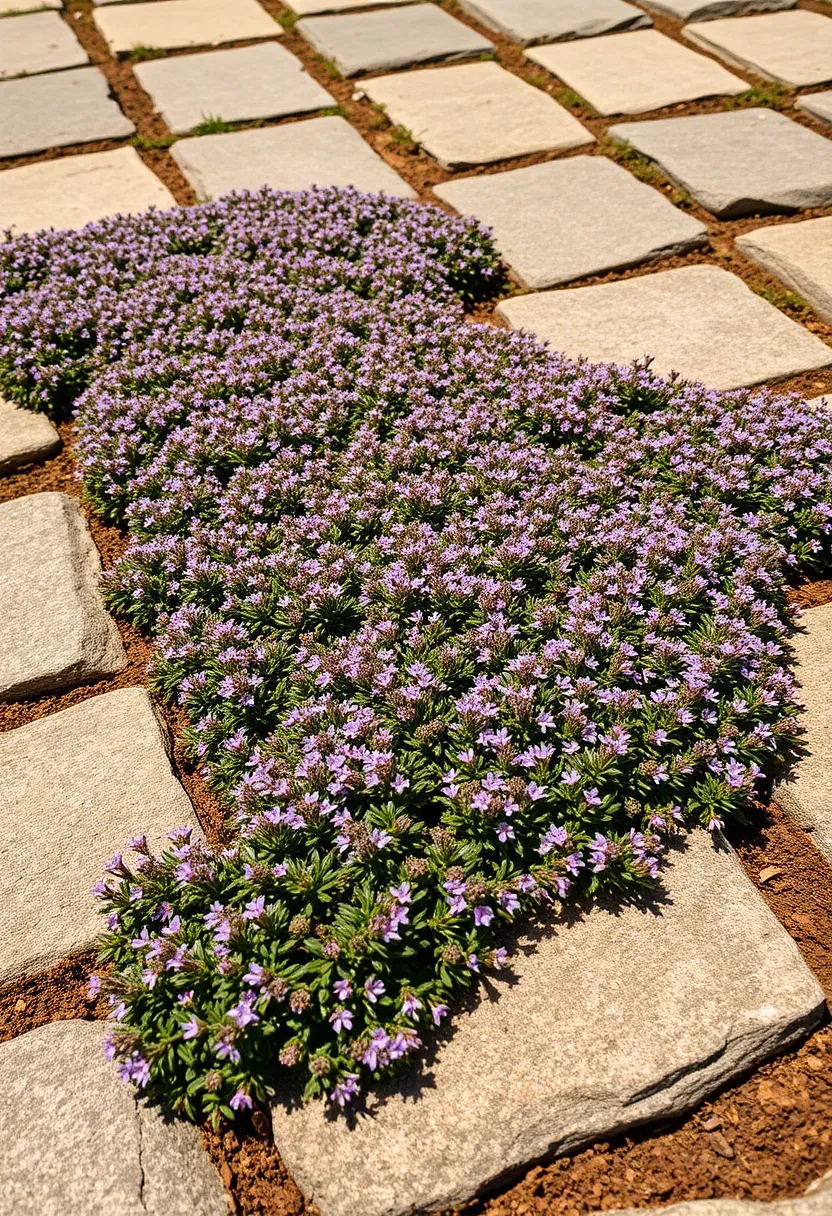
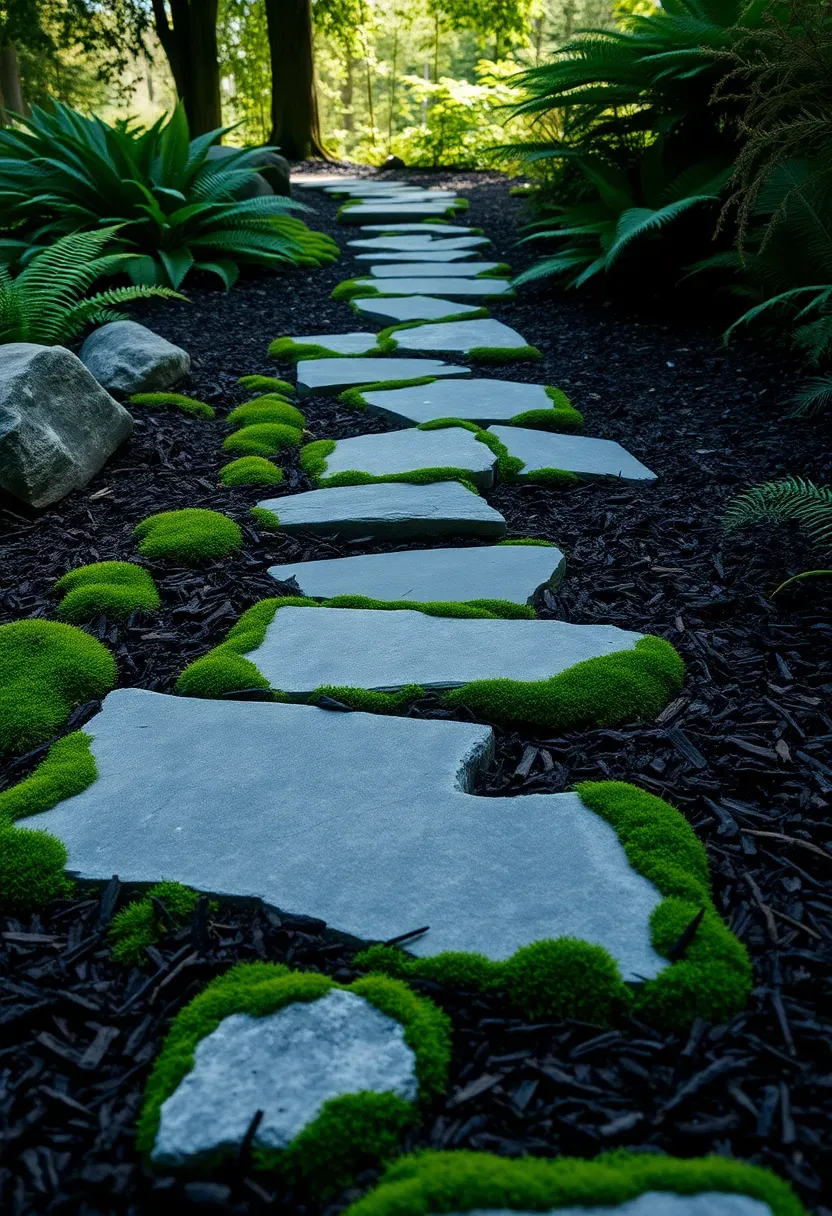
11. Flagstone Stepping Stones
Individual flagstone pieces set into mulch or ground cover create a casual path that fits any backyard style. Buy irregular-shaped seconds or remnants from a stone yard at $2-$5 per piece — much cheaper than full pallets of uniform flagstone. Set each stone on a compacted sand base so it sits level with the surrounding surface. Space them at a comfortable walking stride (about 24 inches center to center). The result is a path that looks like it has been there for decades, especially once moss or thyme fills in around the edges.
Tips
- Choose stones at least 16 inches across — anything smaller feels unstable underfoot.
- Excavate the depth of each stone plus 1 inch of sand so the surface sits flush with the ground.
- Vary the shape and size slightly from stone to stone for a more organic appearance.
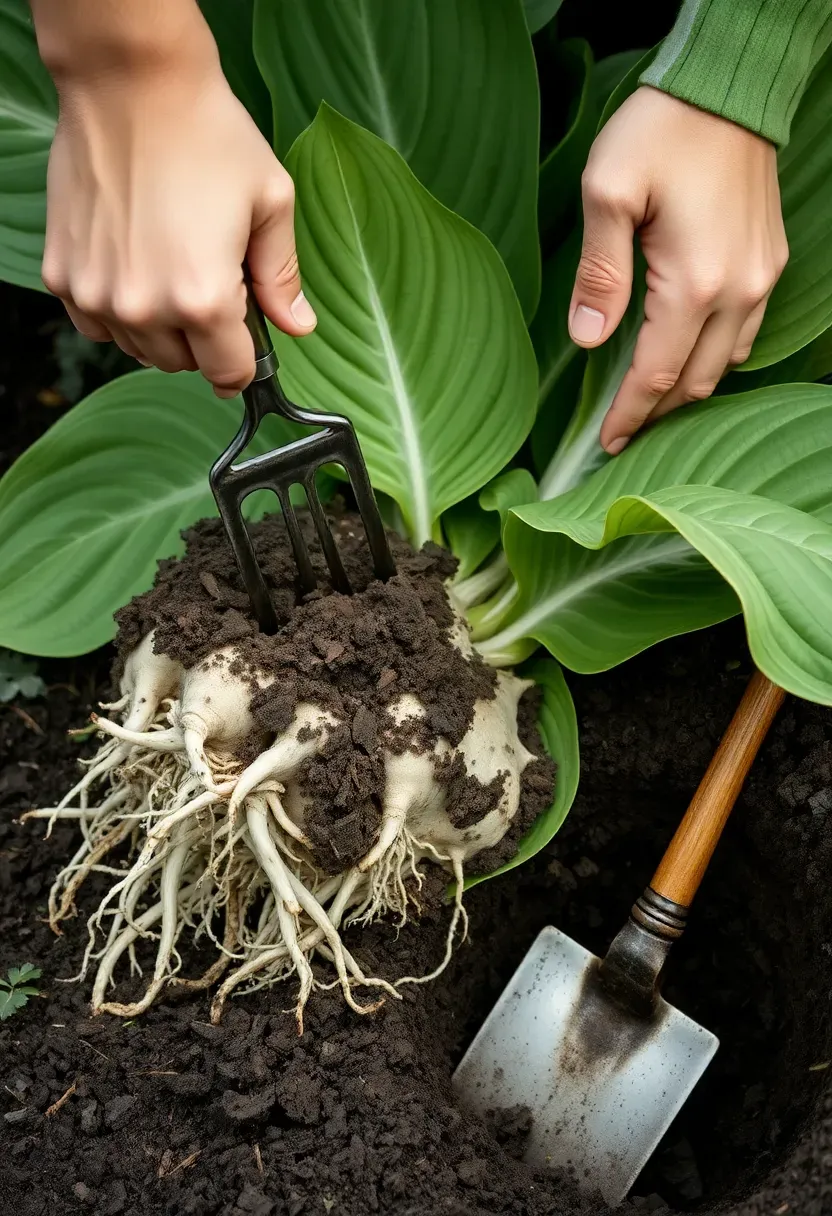
12. Transplant Division Garden
How It Works
Most established perennials — hostas, daylilies, irises, ornamental grasses, sedum — can be dug up, split into sections, and replanted. Each division becomes a fully independent plant. If you have even one mature hosta, you can turn it into six plants in 15 minutes with a garden fork and a sharp spade.
Where to Get Free Plants
Ask neighbors and local gardening groups. Gardeners divide plants every 3-4 years to keep them healthy, and the extra divisions usually end up in the compost. Facebook gardening groups, Nextdoor plant swaps, and local garden club sales are gold mines for free or nearly free perennial divisions.
Steps
- Dig the entire root ball out of the ground in early spring or fall.
- Shake off excess soil so you can see the root structure.
- Split into sections with at least 3-4 growing points each using a sharp spade or garden fork.
- Replant immediately at the same depth and water thoroughly.
Recommended
Items for this idea
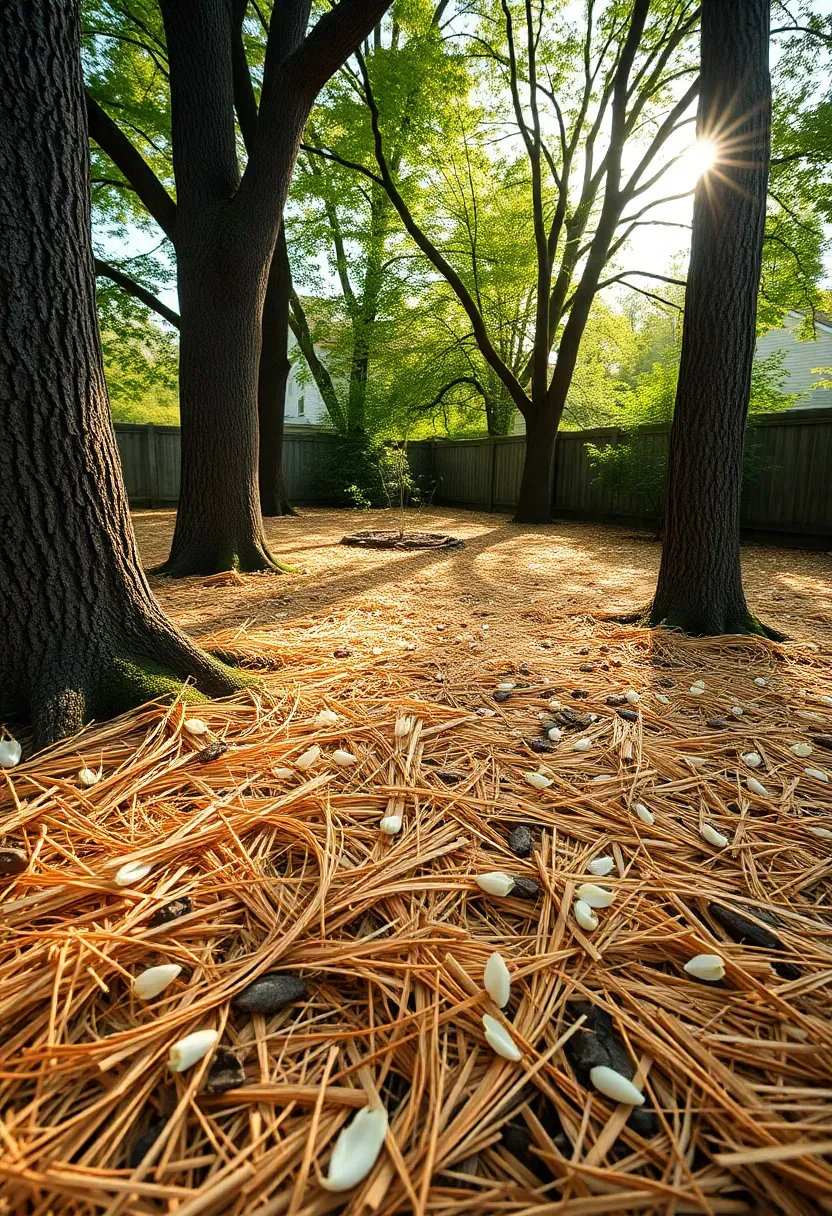
13. Pine Straw Mulch Beds
Pine straw (also called pine needle mulch) is cheaper than hardwood mulch in the southeastern US, running $3-$6 per bale that covers about 30 square feet at 3-inch depth. It knits together and stays in place on slopes better than bark mulch, makes the soil slightly acidic over time (good for azaleas, blueberries, and hydrangeas), and gives beds a soft, woodland floor appearance. The downside is it decomposes faster than hardwood mulch and needs refreshing twice per year instead of once.
Tips
- Fluff pine straw as you spread it rather than laying bales flat — compressed straw creates a mat that sheds water instead of letting it through.
- Layer it 3-4 inches deep; it compacts significantly within the first month.
- Avoid pine straw in windy, open areas — it is lightweight enough to blow around before it settles.
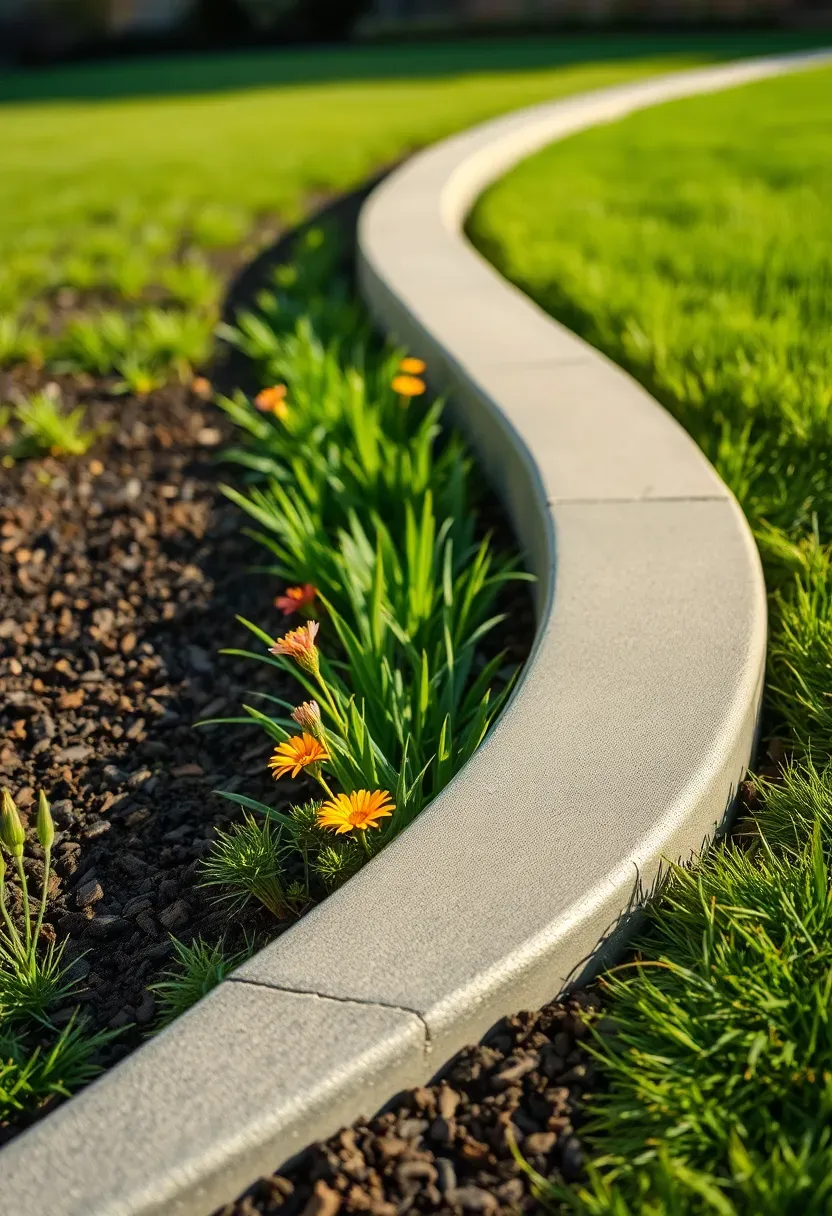
14. Concrete Curb Edging
DIY vs. Professional
Professional landscape curbing costs $5-$10 per linear foot installed. The DIY version using a concrete mold form costs about $1-$2 per foot in bagged concrete mix. The difference is labor intensity — mixing and pouring concrete by hand is genuinely hard work, and you need dry weather for 48 hours after pouring. For a 50-foot border, the savings ($150-$400) can justify the effort.
Building It
Dig a trench 4 inches deep and 6 inches wide. Form the sides with flexible hardboard or buy a reusable concrete mold. Mix bagged concrete to a thick consistency, pack it into the form, and smooth the top with a trowel. Remove forms after 24 hours. The finished curb creates a permanent, mower-friendly edge that never shifts, rots, or needs replacement. Paint it to match your house trim or leave it natural gray.
Pros and Cons
Pros: Permanent installation; clean lines; mower wheels ride along the top edge so you never need to hand-trim.
Cons: Cannot be moved if you redesign beds; cracks in freeze-thaw climates if not reinforced with fiber mesh; labor-intensive for long runs.
Recommended
Items for this idea
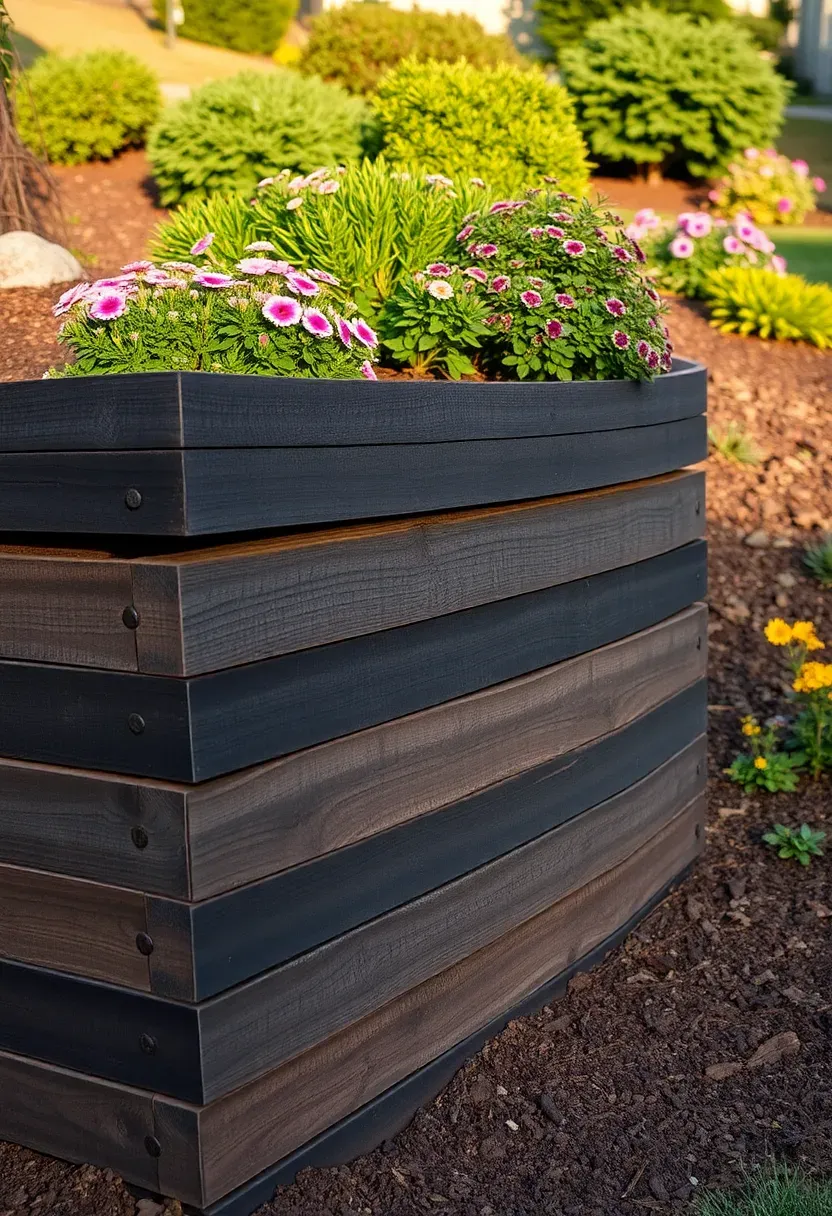
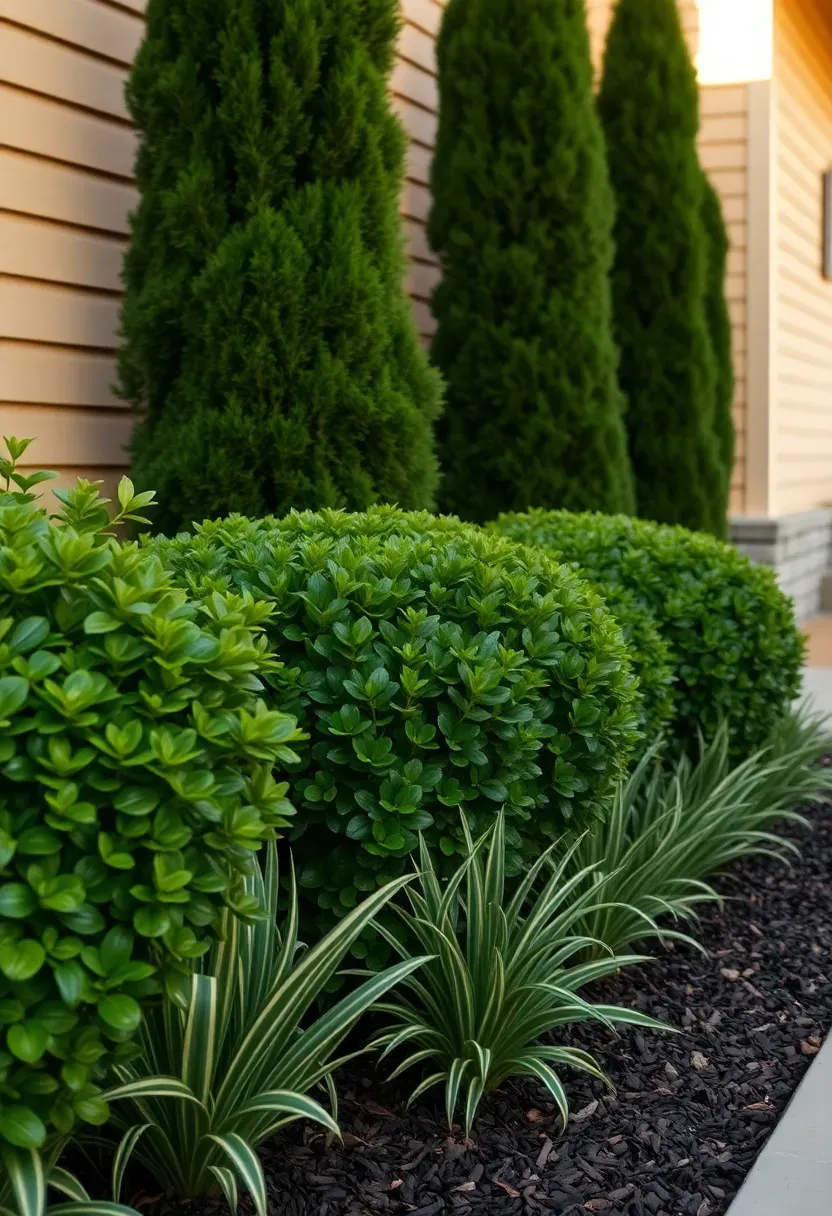
15. Layered Shrub Foundation Planting
Foundation planting is the landscaping that runs along the base of your house, and layering it properly is what separates a yard that looks finished from one that looks bare. The formula: tall plants in back (arborvitae, holly), medium plants in the middle (boxwood, spirea), and low edging plants in front (liriope, daylilies). Buy small container sizes — 1-gallon shrubs cost $6-$12 each versus $40-$80 for 5-gallon specimens, and they catch up in size within 2-3 seasons. A full foundation bed for one side of a house runs $80-$150 using small stock.
Tips
- Space shrubs at 75% of their mature spread — tight enough to fill in without crowding.
- Mulch the entire bed 3 inches deep after planting to conserve moisture and suppress weeds while plants establish.
- Water deeply once per week for the first summer rather than lightly every day — deep watering encourages deep root growth.
16. Decomposed Granite Patio Area
Decomposed granite (DG) compacts into a firm, stable surface that works as an alternative to concrete for outdoor seating areas. It costs $40-$60 per ton, and a 10x10-foot patio needs roughly 1.5 tons at 3-inch depth. Unlike pea gravel, DG packs down almost solid when tamped and wetted, so furniture sits without wobbling. The warm tan or gold color blends naturally with planted areas. Edge the patio with steel edging or timber borders to keep the material contained, and plan on compacting it with a plate compactor (rent one for $60/day) for the best surface.
Tips
- Choose stabilized DG (mixed with a binding agent) for areas with heavy use — it resists erosion and does not track onto shoes as much.
- Lay over compacted base gravel for proper drainage in clay-soil regions.
- Avoid DG in areas where you will drag heavy furniture frequently — chair legs gouge the surface.
Recommended
Items for this idea
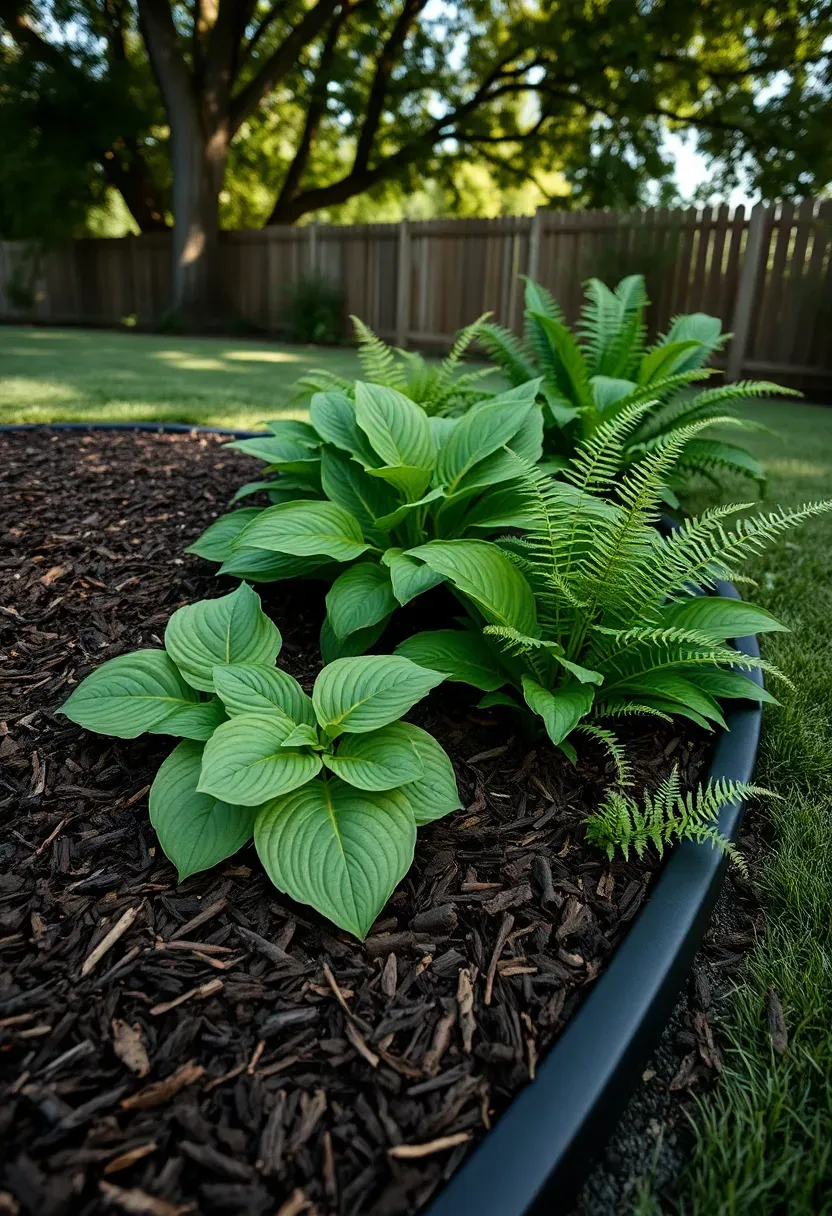
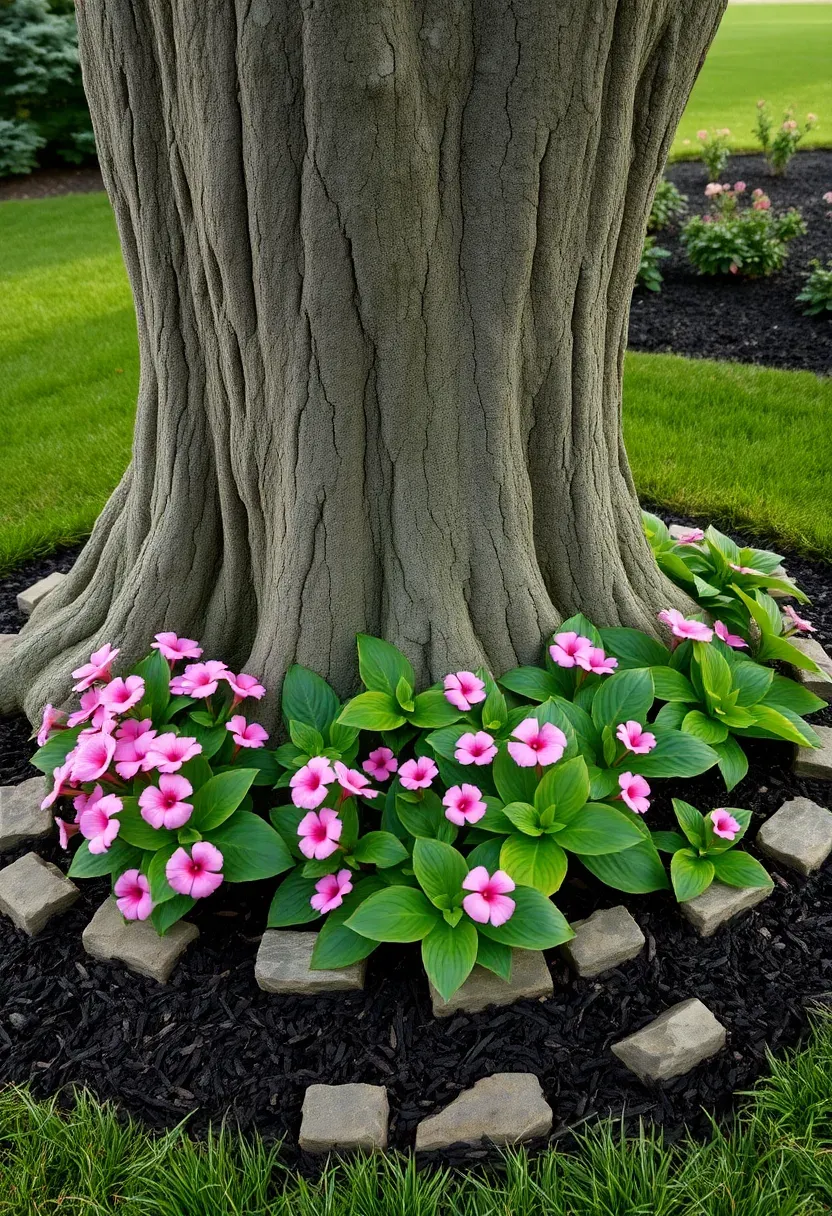
17. Tree Ring Flower Beds
Building a planting bed around an existing tree gives you garden space without sacrificing lawn area and makes mature trees look intentional rather than plopped in the middle of grass. Edge a circle 3-6 feet out from the trunk with brick, stone, or metal edging. Fill with 2-3 inches of mulch and plant shade-tolerant species like hostas, ferns, impatiens, or coral bells. The tree canopy provides built-in irrigation reduction since shade slows evaporation, so these beds need less water than sun-exposed areas.
Tips
- Do not pile soil or mulch against the tree trunk — keep the root flare exposed to prevent bark rot.
- Avoid cutting large roots when installing edging; route the border around them.
- Choose shallow-rooted plants that will not compete aggressively with the tree for water and nutrients.
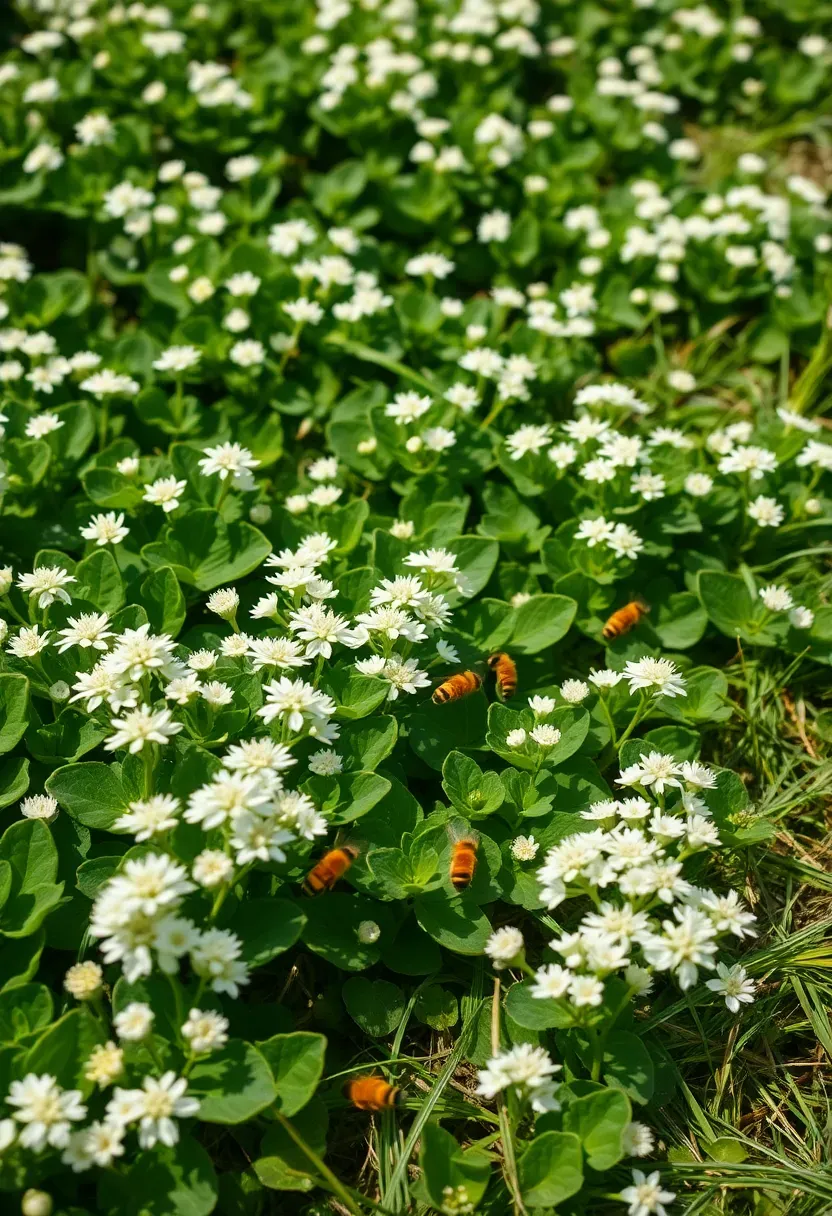
18. Clover Lawn Replacement
White clover (Trifolium repens) was actually a standard lawn component until the 1950s, when broadleaf herbicides killed it along with weeds and the chemical companies rebranded it as a weed itself. It fixes nitrogen from the air into the soil, which means it fertilizes itself and any grass growing alongside it. A 1-pound bag of clover seed costs $8-$12 and covers 1,000 square feet. It stays green through drought, tolerates foot traffic, rarely needs mowing (maxes out at 6-8 inches), and feeds pollinators with small white flowers from May through October.
Tips
- Overseed into existing thin lawn by mowing low, scattering seed, and watering daily for two weeks.
- Mix clover with a low-growing fescue for a more traditional lawn look that still gets the nitrogen-fixing benefit.
- Avoid applying any broadleaf herbicide or your clover will die — if dandelions bother you, pull them by hand.
Recommended
Items for this idea
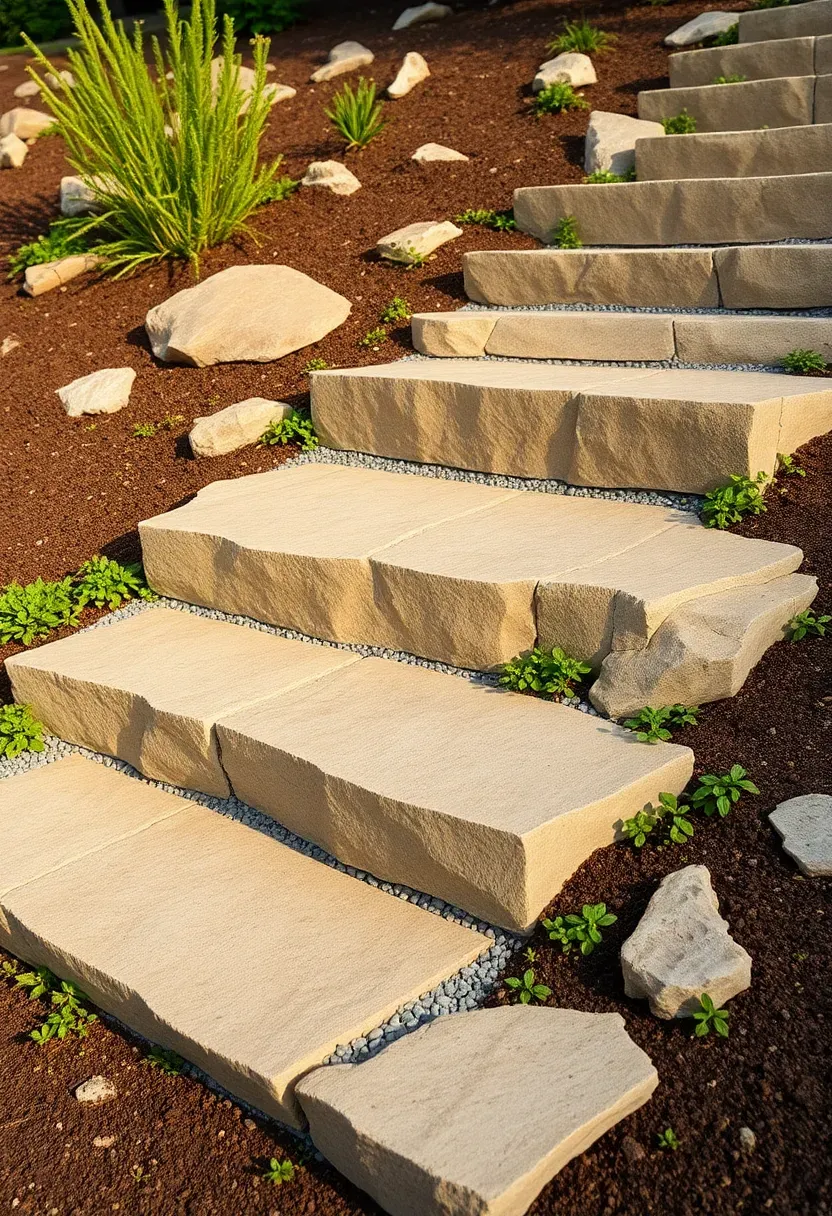
19. Stone Slab Garden Steps
Sloped yards need steps, and stone slabs are cheaper than poured concrete when you buy fieldstone seconds or irregular pieces. Source flat stones 3-4 inches thick and at least 18 inches deep (front to back) from a local quarry or stone yard at $1-$3 per square foot for seconds. Set each slab on a compacted gravel base with a slight forward pitch (1/4 inch per foot) to shed water. The irregular edges and natural color variation give you steps that look like they grew out of the hillside rather than something bolted on as an afterthought.
Tips
- Excavate each step platform 2 inches deeper than the stone thickness and fill with compacted gravel for a stable base.
- Overlap each upper step over the one below by 1 inch to prevent water from running between the joint.
- Keep riser height between 5 and 7 inches for comfortable climbing; anything taller feels like a scramble.
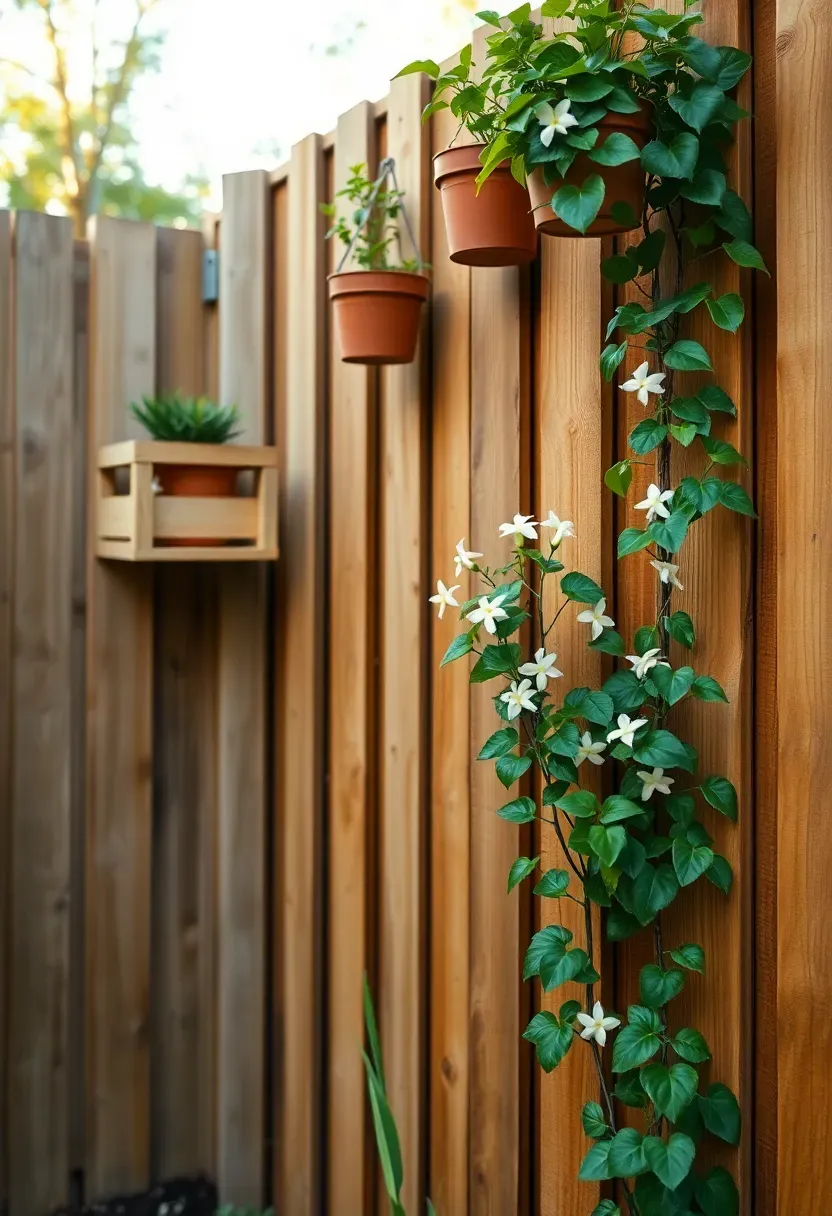
20. Vertical Fence Planting
The Problem
Small backyards run out of ground-level planting space fast. You fill the beds, and the fence still looks like a bare wall of wood or vinyl towering over everything. The yard feels enclosed rather than green.
The Solution
Use the fence as a vertical planting surface. Mount cedar planter boxes at staggered heights, hang small pots from hooks screwed into the top rail, and plant a climbing vine (jasmine, clematis, or honeysuckle) at the base every 6-8 feet. Within one season the fence disappears behind foliage. Total cost for a 30-foot fence section: $40-$70 for lumber, hooks, soil, and a few starter plants.
Watch Out
- Weight adds up fast — mount brackets into fence posts, not panels, to prevent sagging.
- Climbing vines can damage wood fences over time; use wire trellises mounted 2 inches off the fence surface to keep vines from gripping the boards directly.
Recommended
Items for this idea
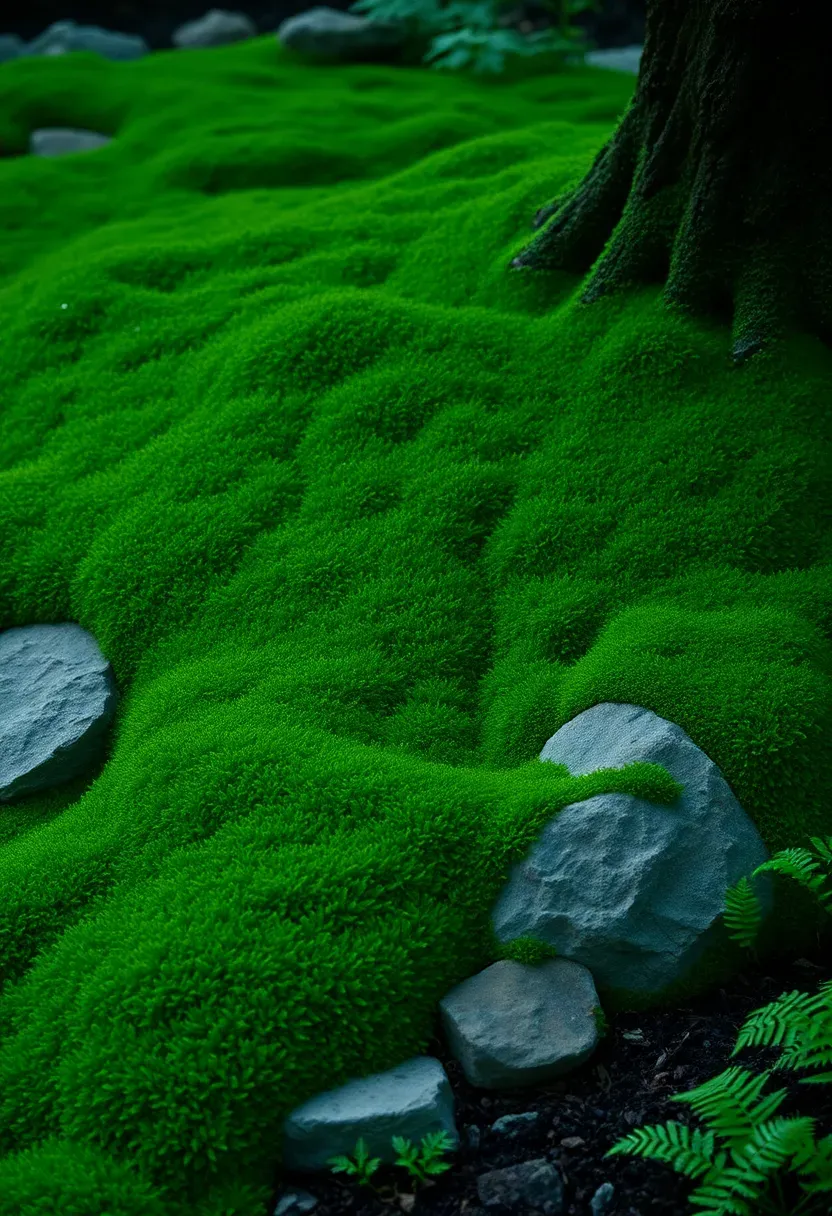
21. Moss Garden in Shaded Areas
That perpetually damp, shady corner where nothing grows well is actually the perfect spot for a moss garden. Moss needs no mowing, no fertilizer, and no supplemental watering in shaded areas that stay naturally moist. Harvest moss from your own property or buy live moss sheets for $5-$8 per square foot. Press them firmly onto cleared, compacted soil and mist daily for two weeks while they attach. The result is a velvety green surface that looks centuries old and thrives in exactly the conditions that kill grass. Moss gardens work especially well around tree bases, between stepping stones, and along north-facing walls.
Tips
- Remove all grass and leaf debris before laying moss — it needs direct soil contact to attach its rhizoids.
- Buttermilk slurry (blend moss scraps with buttermilk and paint it on surfaces) works for colonizing stone walls and concrete.
- Acidic soil (pH 5.0-5.5) is ideal; test your soil and amend with sulfur if it is too alkaline.
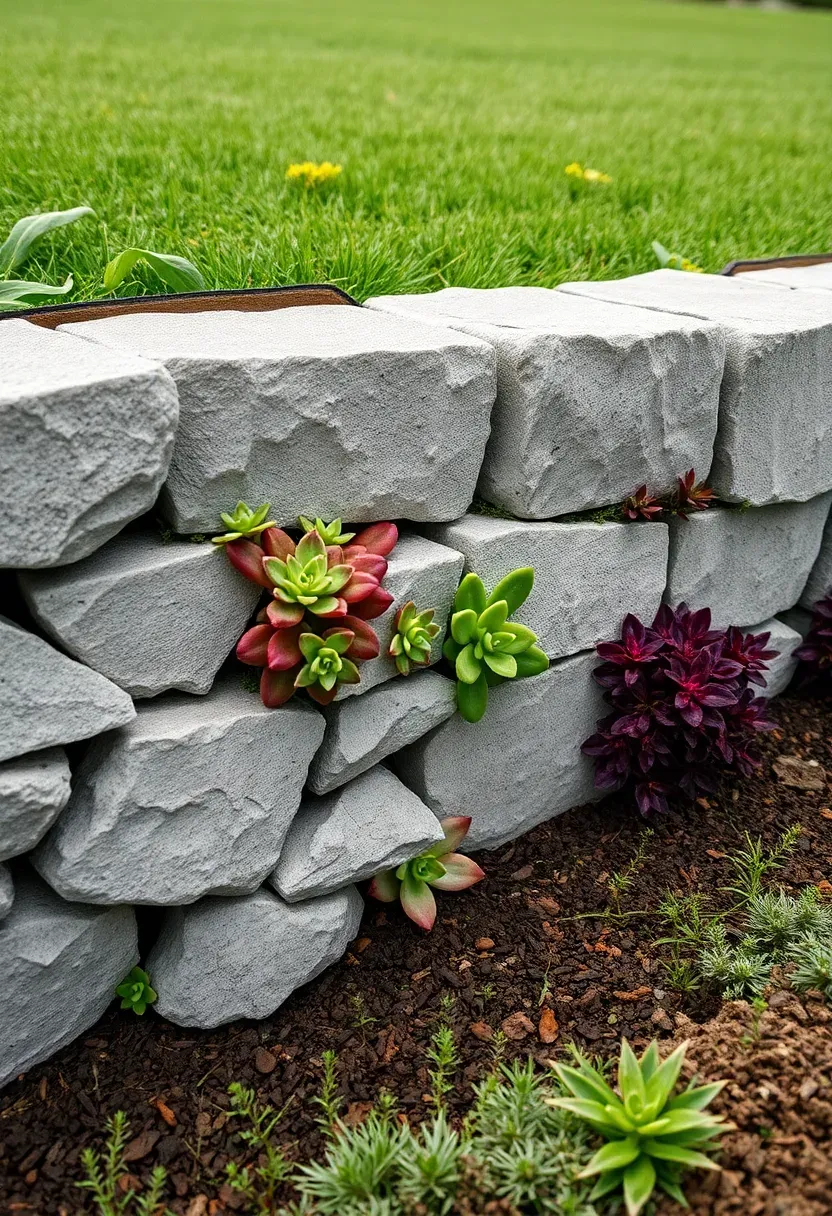
22. Recycled Concrete Rubble Wall
Broken concrete from old sidewalks and patios — called urbanite in landscaping circles — stacks into attractive garden walls that cost nothing if you source the material from demolition projects or municipal waste programs. The jagged edges and exposed aggregate look surprisingly similar to natural stacked stone when arranged with the flat faces outward. Build dry-stacked walls up to 2 feet tall without mortar by selecting flat pieces and fitting them together like a puzzle. Tuck small soil pockets between stones and plant creeping thyme or sedum in the gaps for a living wall effect.
Tips
- Wear safety glasses when breaking concrete into manageable pieces — fragments fly unpredictably.
- Sort pieces by thickness before building so each course stays roughly level.
- Lean the wall face slightly backward (about 1 inch of setback per foot of height) for stability.
Recommended
Items for this idea
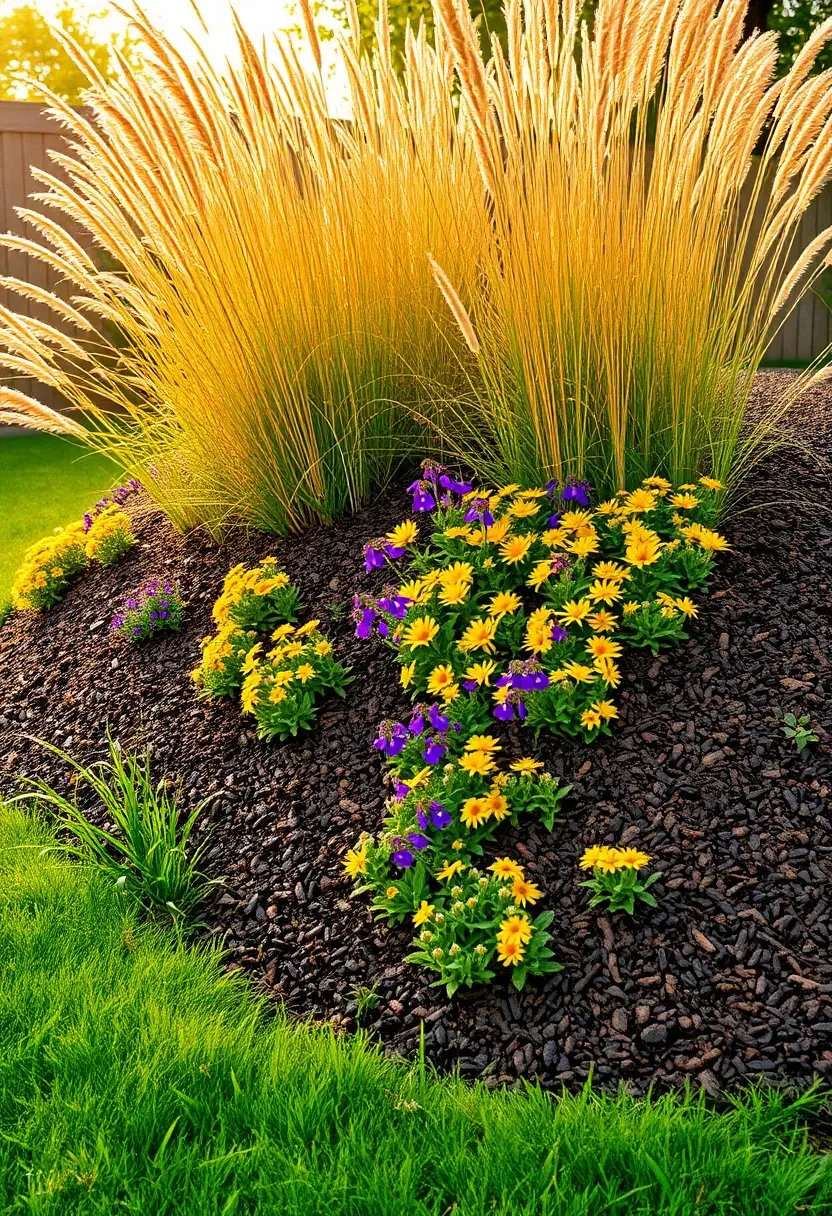
23. Raised Mound Berm
A berm is a raised mound of soil that adds dimension to flat yards, creates privacy screening when planted with tall species, and improves drainage in low-lying areas. Build one for free using excavated soil from other projects or buy fill dirt at $10-$25 per cubic yard delivered. Shape the mound with a gradual slope (no steeper than 4:1 ratio — 4 feet of run for every 1 foot of rise) so it looks natural. A 15-foot-long berm, 5 feet wide and 18 inches tall, uses about 2 cubic yards of soil. Plant it with ornamental grasses and perennials for a feature that adds vertical interest to an otherwise flat landscape.
Tips
- Build the core with compacted fill dirt and add 4-6 inches of topsoil over the surface for planting.
- Compact the soil in stages as you build up — uncompacted berms settle 20-30% within the first year and lose their shape.
- Mulch the entire surface immediately after planting to prevent erosion before roots establish.
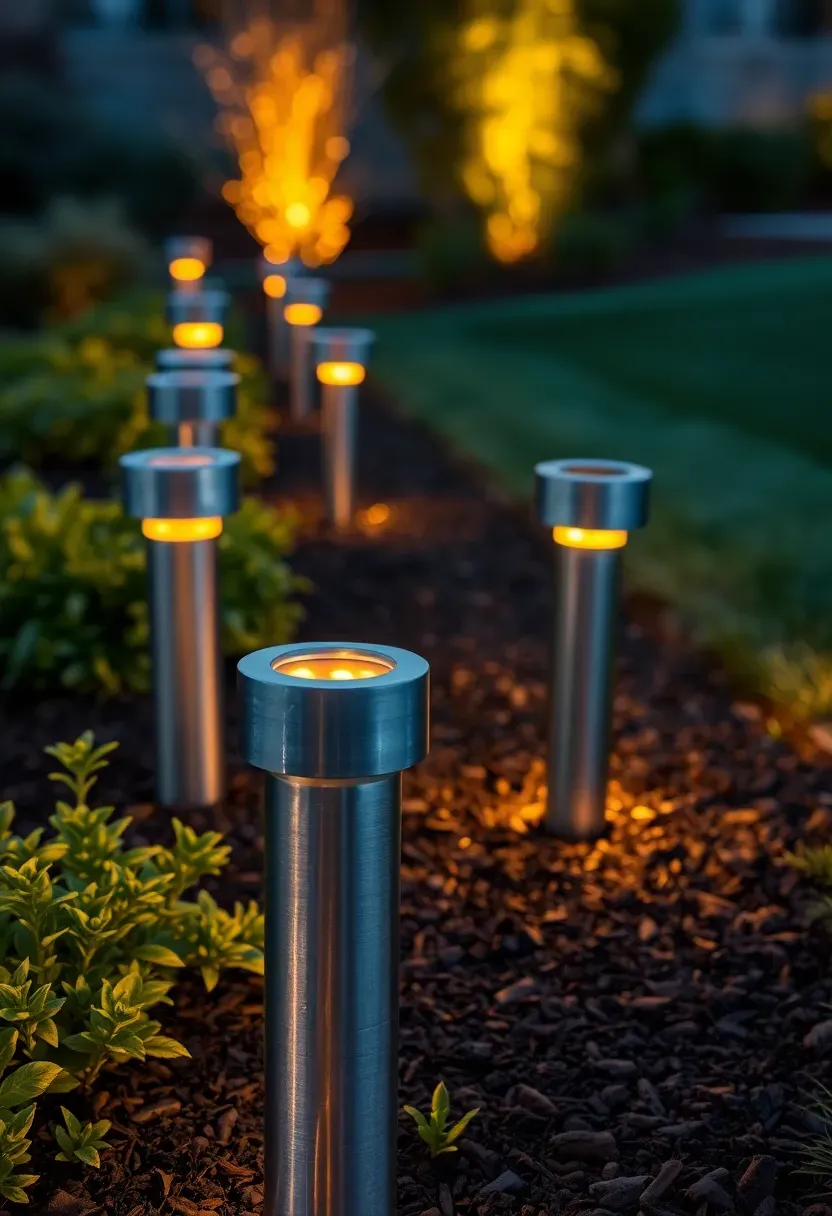
24. Solar Path Lighting Along Beds
Solar path lights have improved dramatically in the last five years. The current generation uses brighter LEDs, lasts 8-12 hours on a full charge, and does not require any wiring. Buy a 10-pack of stainless steel solar stakes for $20-$35 and press them into the soil along your bed edges every 6-8 feet. The amber glow at dusk defines your landscaping work after dark and creates a sense of intentionality that separates a finished yard from one that is still in progress. Place them on the south side of paths where they get maximum sun exposure during the day.
Tips
- Clean the solar panels every few weeks with a damp cloth — dust buildup reduces charging efficiency by 30-40%.
- Position lights where they will not be hit by mower wheels or string trimmer line.
- Replace rechargeable batteries every 2 years rather than buying new lights — most models use standard AA NiMH cells.
Recommended
Items for this idea
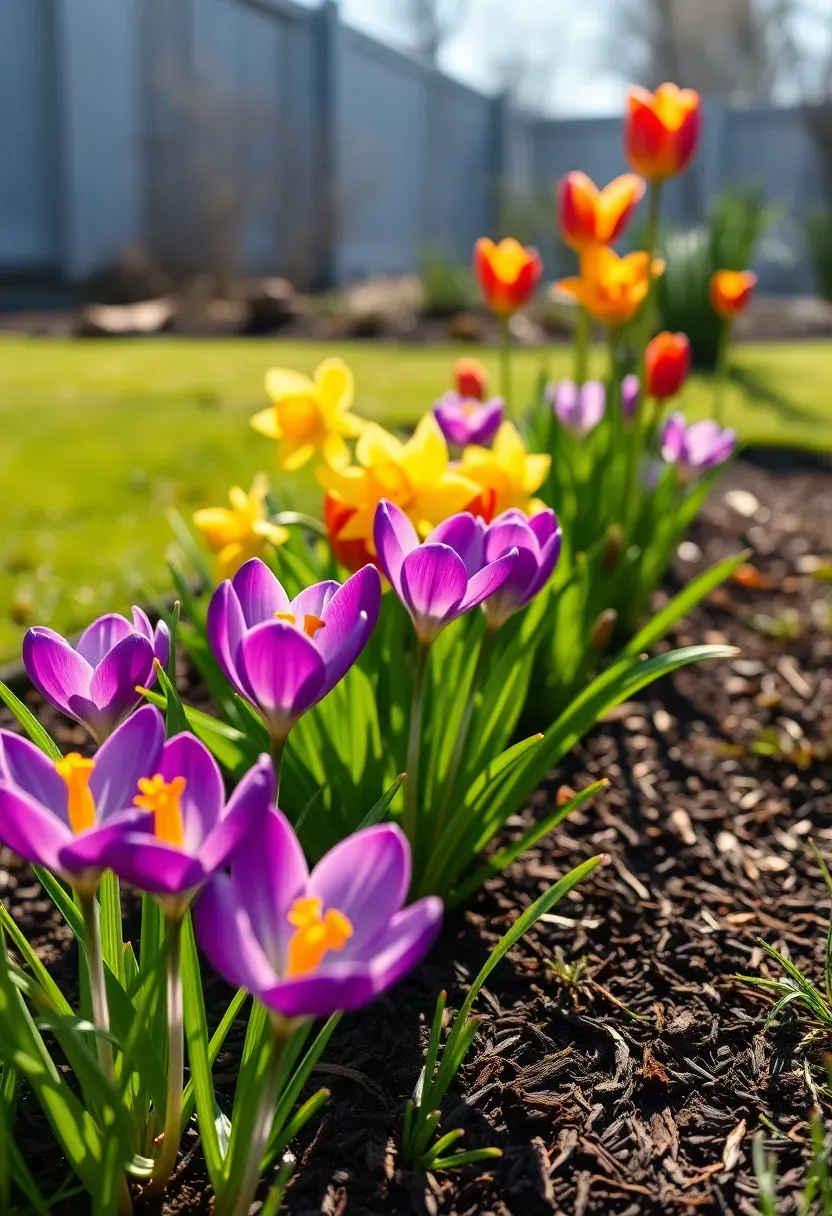
25. Seasonal Bulb Layering
Bulb layering (also called lasagna planting) stacks different bulb types at different depths in the same bed so they bloom in sequence over 8-10 weeks. Plant tulips deepest (8 inches), daffodils in the middle (6 inches), and crocuses near the surface (3 inches). As each layer finishes blooming, the next one comes up through it. A single 4x4-foot bed packed with 50-60 mixed bulbs costs $30-$45 and produces a display from late February through mid-May that looks like it belongs in a botanical garden. After blooming, the foliage dies back and perennials fill the space for summer.
Tips
- Buy bulbs in bulk from online suppliers in September — prices drop 40-60% compared to retail garden center packaging.
- Avoid watering bulb beds in summer while they are dormant; excess moisture causes rot.
- Mark bulb locations with small stakes so you do not accidentally dig them up when planting annuals later.
Quick FAQ
Is it cheaper to landscape yourself or hire someone? DIY landscaping costs 50-75% less than hiring a professional crew, mainly because you eliminate labor charges, which represent about 60% of most landscaping quotes. The materials are the same price either way. Where professionals earn their fee is in grading, drainage, and large tree installation — jobs that require equipment most homeowners do not own.
Which backyard landscaping project gives the most impact per dollar? Fresh mulch in all existing beds. It takes a single weekend, costs $100-$200 for an average backyard, and instantly makes everything look maintained and intentional. If your beds already have mulch, the next best investment is edging — clean borders between lawn and beds make the entire yard look sharper.
Can I landscape over an existing lawn without removing the grass? Yes, using the sheet mulching method. Lay overlapping sections of cardboard directly over the grass, wet it thoroughly, and cover with 4-6 inches of mulch or compost. The cardboard smothers the grass over 2-3 months while decomposing into the soil. Plant through slits in the cardboard once it starts breaking down. This avoids the back-breaking work of stripping sod.
Do I need a plan before starting, or can I just begin? Sketch a rough layout on paper first, even if it takes only 10 minutes. Marking bed boundaries, path routes, and plant locations before you dig prevents the most common budget-landscaping mistake: buying materials or plants you end up not using because they do not fit the space.
When is the best time to start backyard landscaping? Early fall is ideal for most planting work because roots establish during cool weather before winter dormancy. Spring is second best. Hardscaping — paths, walls, edging — can happen any time the ground is not frozen. Avoid starting major planting projects in midsummer heat, when new plants need constant watering to survive transplant shock.
Budget backyard landscaping works best when you pick 3-4 projects from this list and do them well rather than attempting all 25 at once. Start with the basics — mulch your beds, define your edges, and add one focal planting area. Those three moves alone will make your yard look like you spent thousands. Then add a project each season as time and budget allow. The yard that looks effortlessly put together is never actually built in a weekend; it is the result of a few smart choices repeated over a couple of years.
Pinterest cover for 25 Backyard Landscaping Ideas on a Budget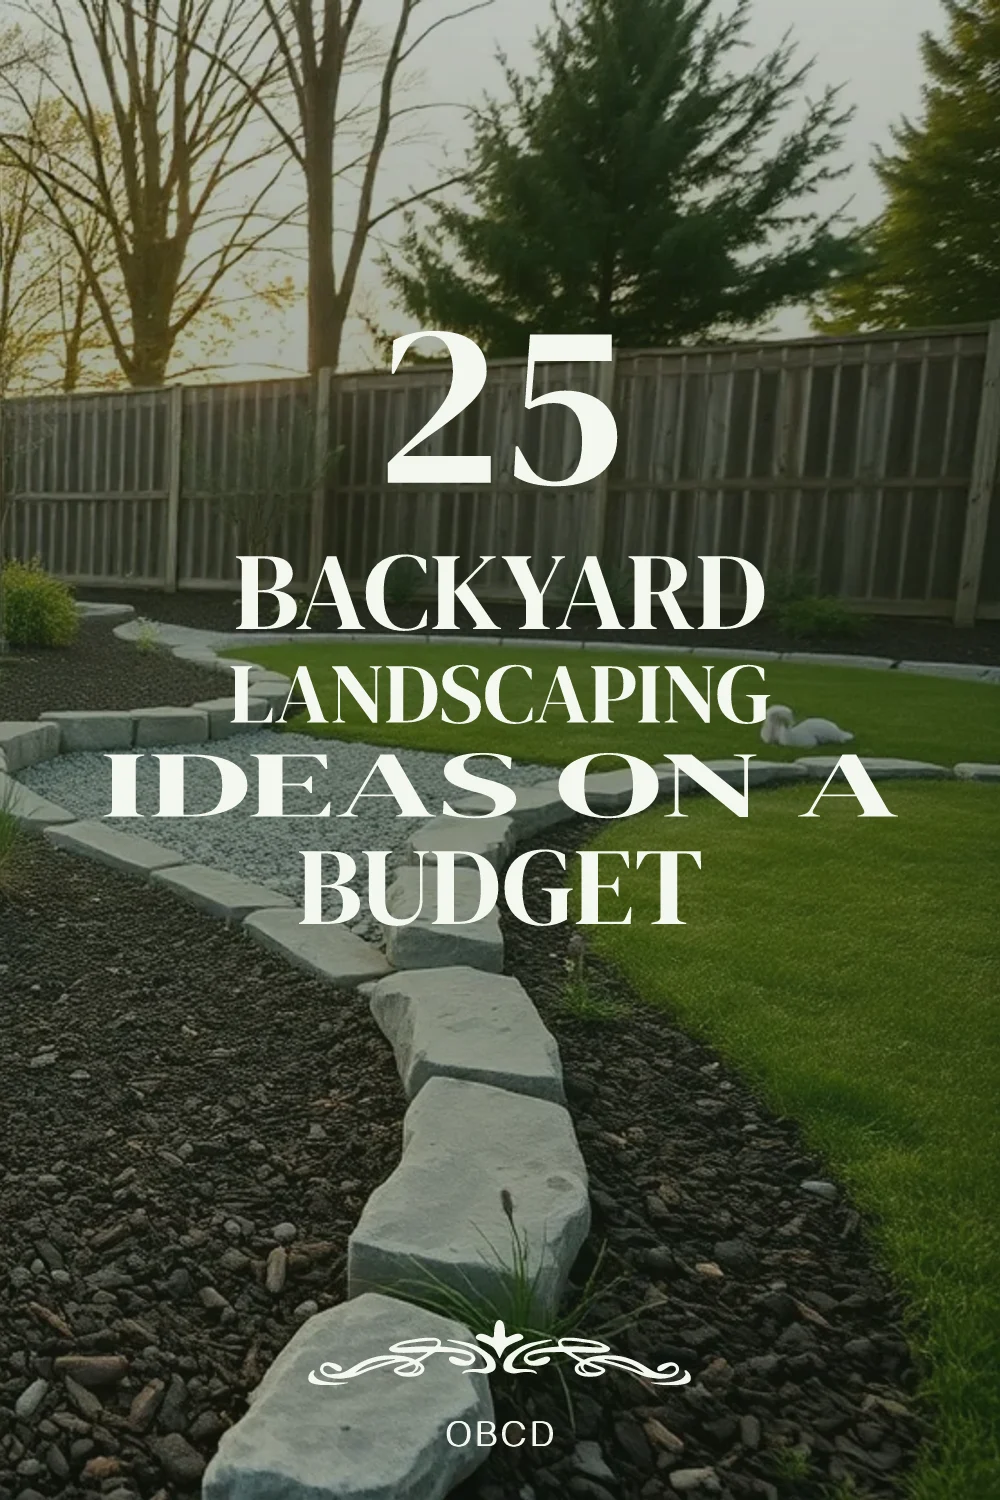
About the author
OBCD
CGI visualization and interior design content. We create detailed 3D renders and curate practical design ideas for every room in your home.