27 Backyard Kitchen Ideas for Cooking Outside

Last summer I cooked dinner outside every night for six straight weeks. Not because I had some luxury outdoor kitchen — I started with a portable grill on a folding table. But that stretch of cooking in the open air changed how I thought about the whole backyard. By August, I had built a permanent countertop with a plumbed sink, and my indoor kitchen barely got used until October. The point is, you do not need a $40,000 installation to enjoy cooking outside. You need a setup that matches how you actually cook and how often you will realistically use it.
These 27 backyard kitchen ideas range from bare-bones grill carts to fully plumbed cooking stations with pizza ovens and refrigeration.
Table of Contents
- Built-In Gas Grill Island
- Portable Grill Station with Cart
- L-Shaped Outdoor Kitchen
- Brick Pizza Oven Setup
- Concrete Block Cooking Counter
- Pergola-Covered Kitchen
- Kamado Grill Station
- Stainless Steel Linear Kitchen
- Rustic Stone Grill Surround
- Budget Pallet Wood Bar Kitchen
- U-Shaped Outdoor Kitchen
- Compact Balcony Cooking Nook
- Smoker Pit with Prep Counter
- Modern Concrete Slab Kitchen
- Pool-Adjacent Wet Bar Kitchen
- Japanese Hibachi Grill Table
- Farmhouse-Style Outdoor Kitchen
- Modular Cabinet Kitchen
- Wood-Fired Grill and Rotisserie
- Bar-Height Island Kitchen
- Tile Mosaic Cooking Counter
- Covered Pavilion Kitchen
- Side-Yard Galley Kitchen
- Fire Table Dining Kitchen
- Corten Steel Outdoor Kitchen
- Recycled Brick Summer Kitchen
- Full Outdoor Chef's Kitchen

1. Built-In Gas Grill Island
A grill island is the backbone of most backyard kitchens. The standard setup uses a steel frame clad in stone or stucco, with a drop-in gas grill, a few feet of counter on each side, and cabinet storage below. Most islands run 6 to 10 feet long and cost between $3,000 and $8,000 depending on the finish material. The key decision is countertop height — 36 inches matches indoor kitchen standard, but 38 inches feels better when you are standing for long grilling sessions.
Tips
- Size your cutout precisely to the grill manufacturer's specs before pouring any concrete or setting stone.
- Include at least 18 inches of counter on the grill's dominant-hand side for plating.
- Run a gas line with a dedicated shutoff valve rather than relying on tank exchanges.
We picked a few things that go well with this idea: Spire 5-Burner Built-In Gas Grill (30") (★4.4), Brand-Man 6-Burner Built-In Grill (40") (★4.5) and Stainless Steel Outdoor Grill Cart (35") (★4.3). As an Amazon Associate we earn from qualifying purchases.
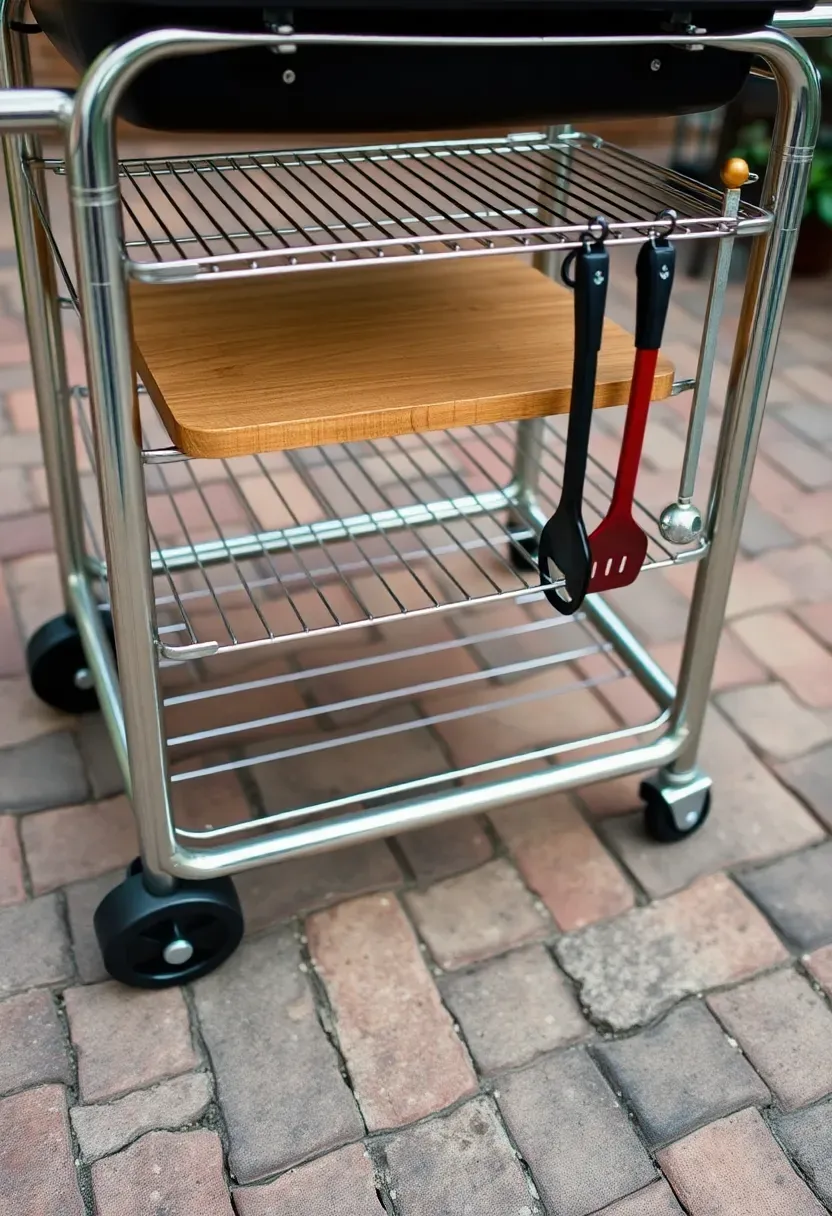
2. Portable Grill Station with Cart
Why Start Portable
Not everyone wants to commit to a permanent installation, and that is a perfectly reasonable position. A well-chosen grill cart gives you 80% of the functionality at 10% of the cost. You can roll it into the garage during winter, reposition it for wind direction, and upgrade incrementally over time.
Picking the Right Cart
Look for carts with at least two shelves, locking casters, and a towel bar. The best ones use powder-coated steel frames that resist rust for three to five seasons. Avoid carts with thin stamped-metal shelves — they warp after a single summer of holding hot pans. Budget $150 to $400 for a cart that will last.
Watch Out
- Plastic wheels crack on textured pavers; get rubber or pneumatic casters instead.
We picked a few things that go well with this idea: Pizza Peel and Accessories Set (7-Piece) (★4.6), Big Horn 12" Multi-Fuel Pizza Oven (★4.4) and Pizza Oven Accessories Tool Kit (7-Piece) (★4.6). As an Amazon Associate we earn from qualifying purchases.
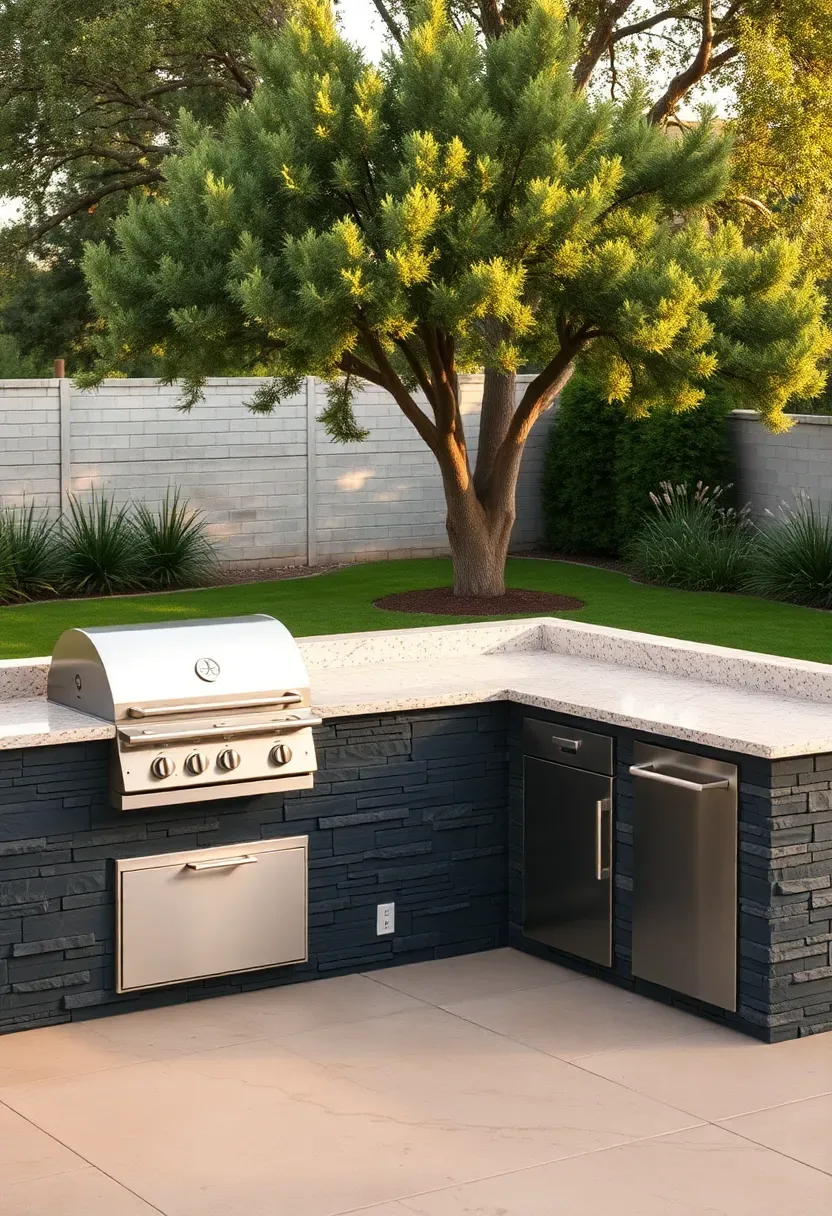
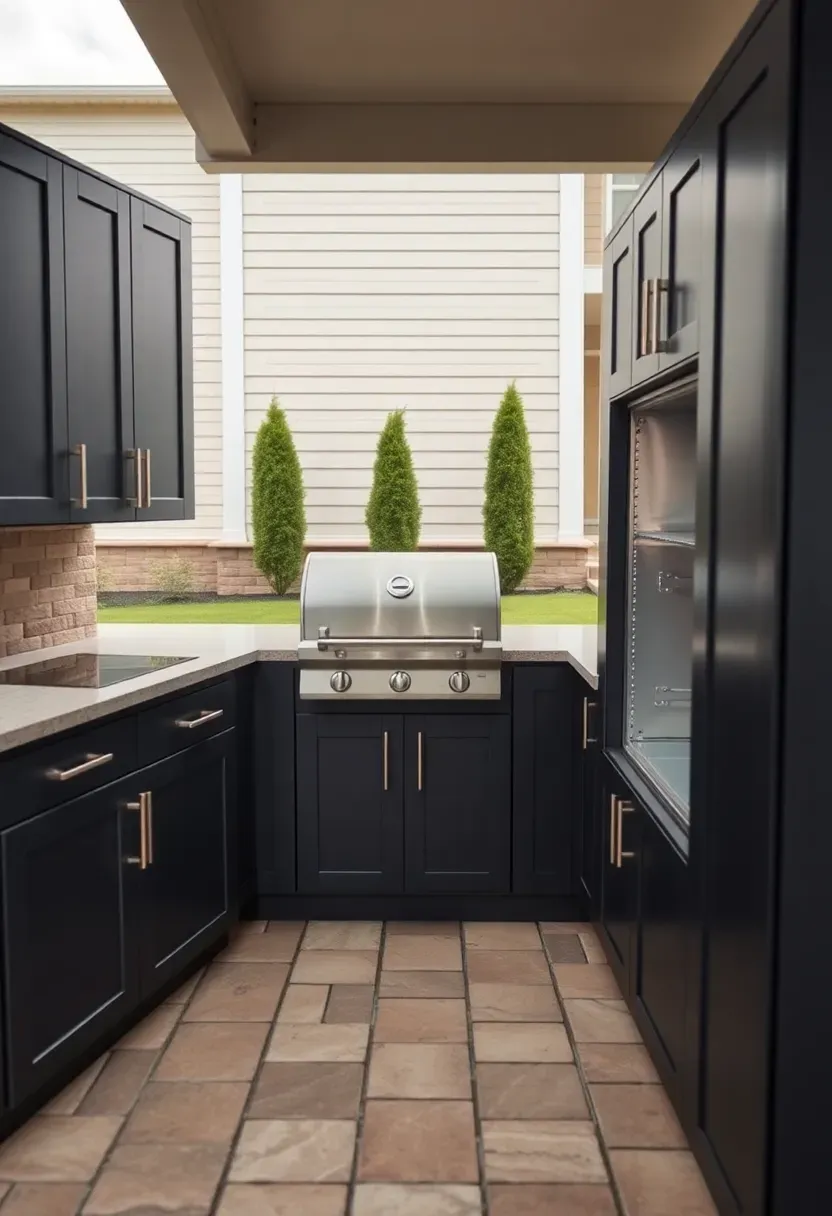
3. L-Shaped Outdoor Kitchen
The L-shape is probably the most practical layout for backyards that can dedicate a corner to cooking. One arm holds the grill and hot-side prep, the other handles cold storage and a sink. The corner itself becomes dead space unless you plan for it — a lazy susan cabinet, a built-in trash pullout, or a beverage cooler all fit well there. Expect 12 to 16 linear feet of counter total, which gives two people enough room to prep and cook without bumping elbows.
Tips
- Put the grill on the arm closest to prevailing wind so smoke blows away from the dining area.
- Slope countertops 1/8 inch per foot toward the outer edge for rain drainage.
- Tile the backsplash area behind the grill — grease splatter will happen and you want a wipeable surface.
We picked a few things that go well with this idea: VEVOR Stainless Steel Outdoor Kitchen Drawers (★4.2), VEVOR Stainless Steel BBQ Access Door (24") (★4.6) and VEVOR Triple-Drawer Outdoor Kitchen Cabinet (★4.2). As an Amazon Associate we earn from qualifying purchases.
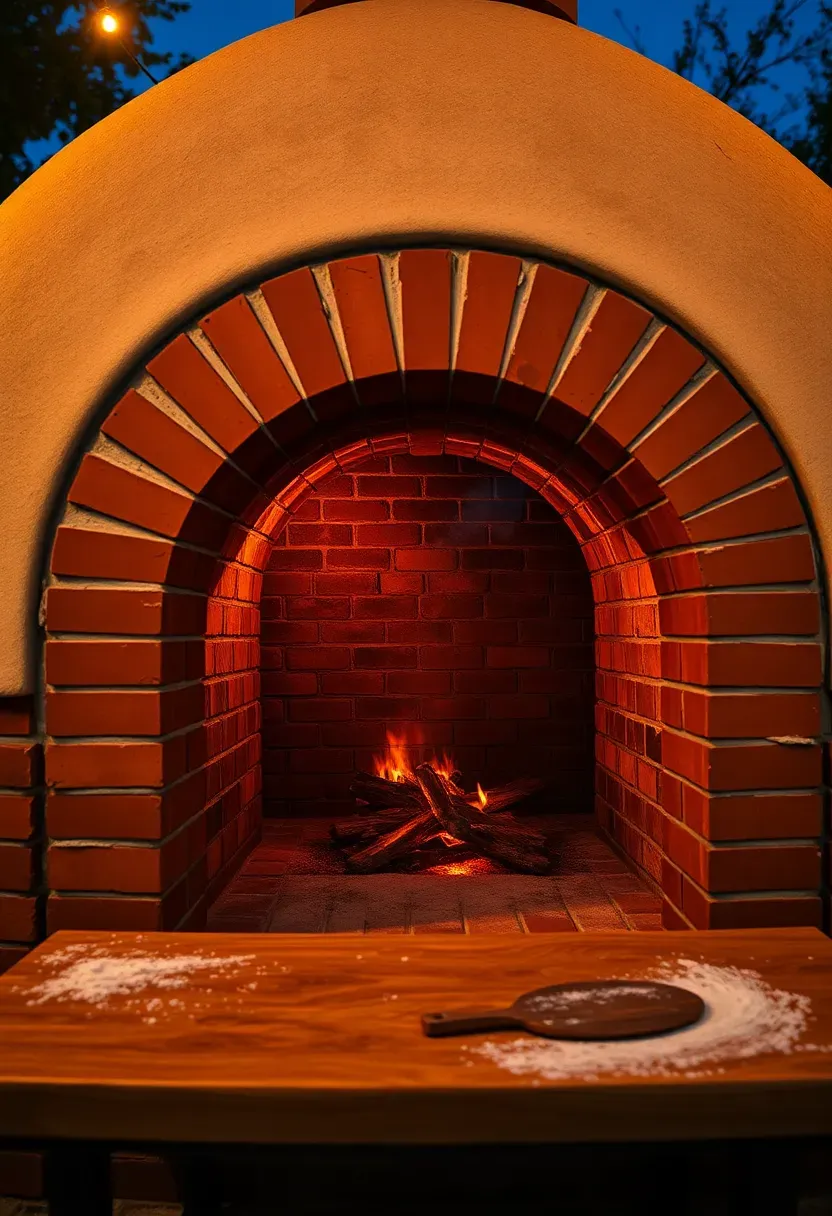
4. Brick Pizza Oven Setup
Origins of the Backyard Pizza Oven
The Neapolitan-style dome oven traces back to 18th-century Naples, but the backyard version took off in the US around 2010 when kit manufacturers started selling pre-cast refractory components. Before that, building one required a skilled mason and two weeks of curing time.
Modern Backyard Versions
Today you can buy a complete kit for $1,500 to $4,000 that assembles in a weekend. The oven dome is made from castable refractory cement rated to 2,000°F, surrounded by ceramic fiber insulation and a stucco or stone shell. Most reach pizza-cooking temperature (750-900°F) in 45 minutes to an hour with hardwood fuel.
Apply at Home
- Place the oven on a reinforced concrete pad rated for at least 3,000 PSI — these ovens weigh 1,500 to 3,000 pounds.
- Keep a 3-foot clearance from any combustible structure including wood fences and pergola rafters.
- Cook bread and roasts after pizza when the oven temperature drops to 400-500°F — you get two meals from one firing.
Recommended
Items for this idea
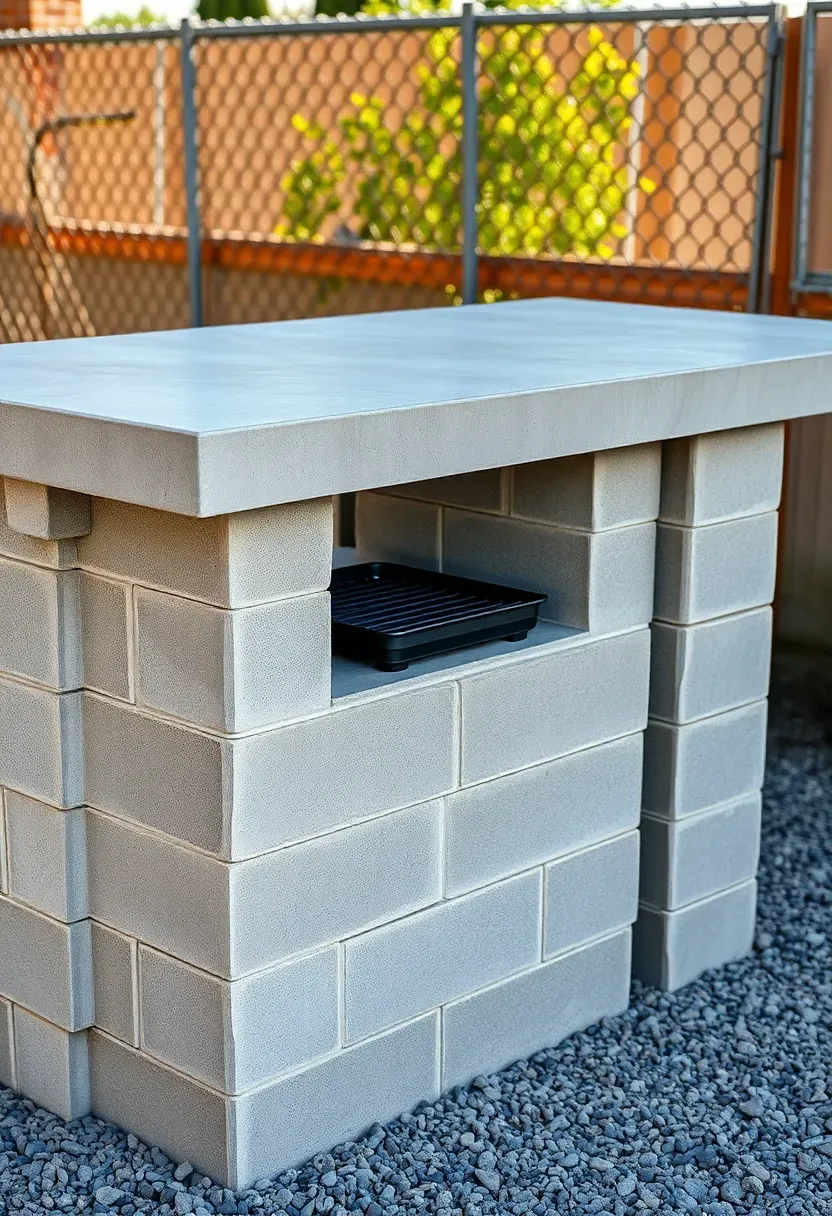
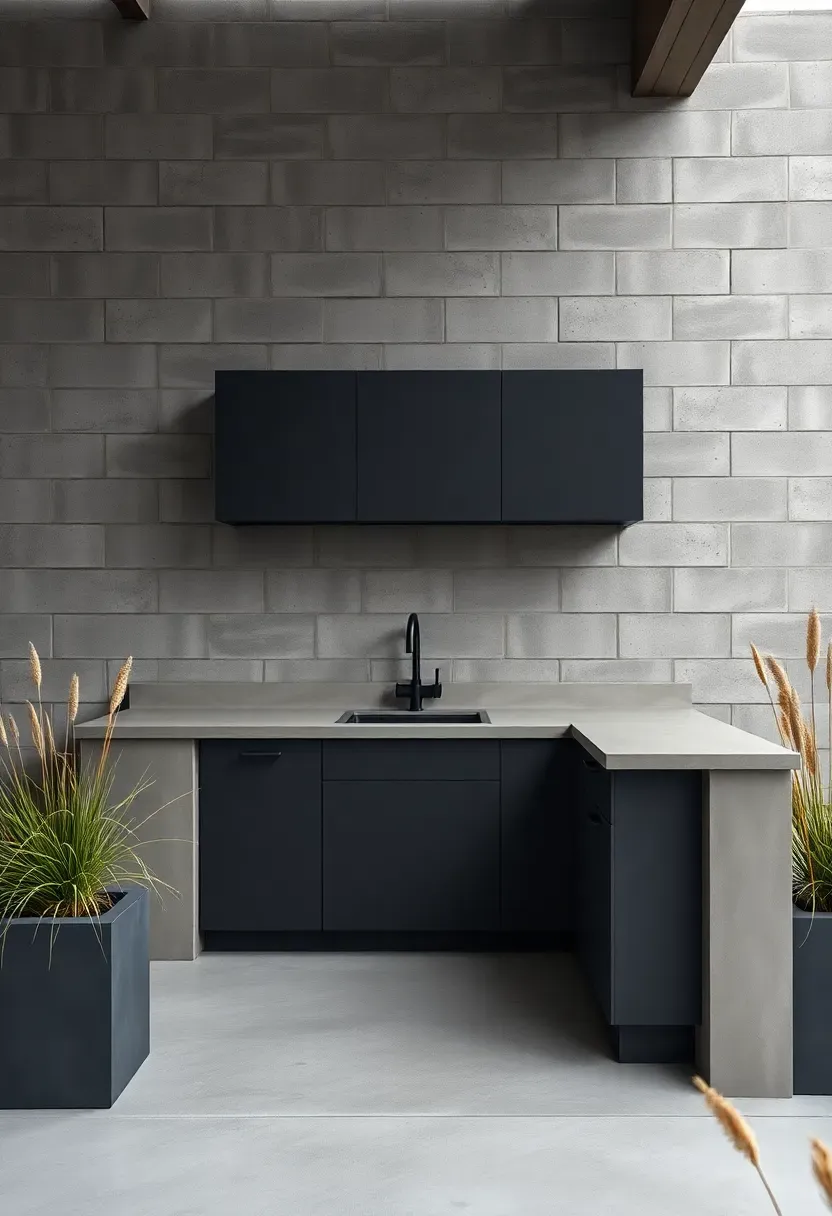
5. Concrete Block Cooking Counter
This is the most cost-effective permanent backyard kitchen you can build yourself. Standard 8x8x16 CMU blocks stacked three courses high, with rebar and mortar, give you a solid base for a poured or precast concrete countertop. Total material cost runs $400 to $900 for a 6-foot counter. The finish is utilitarian — industrial, really — but you can apply a stucco coat or glue stone veneer panels over the blocks if you want a polished look later.
Tips
- Fill all block cores with concrete and rebar for structural integrity, not just the corner columns.
- Use a concrete countertop mix with fiber reinforcement rather than standard ready-mix — it resists cracking from thermal cycling.
- Seal the countertop with a food-safe penetrating sealer every spring.
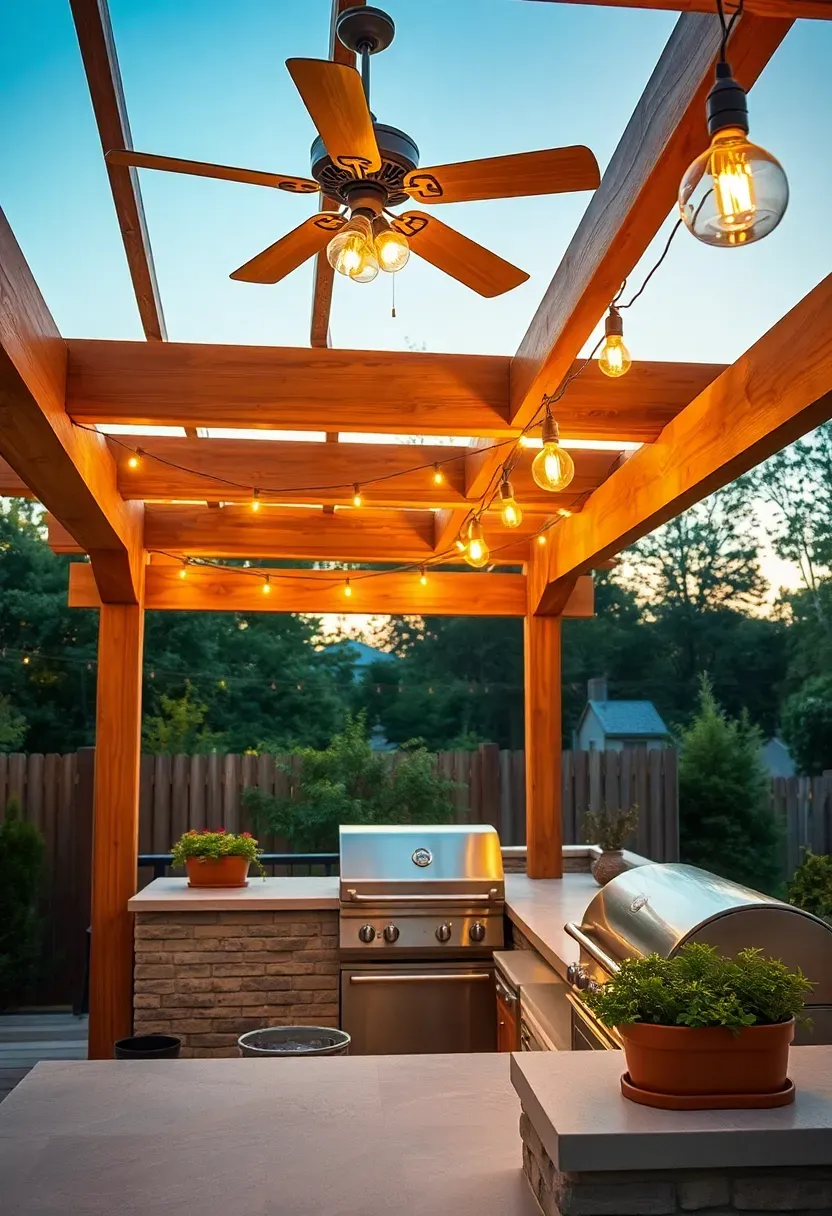
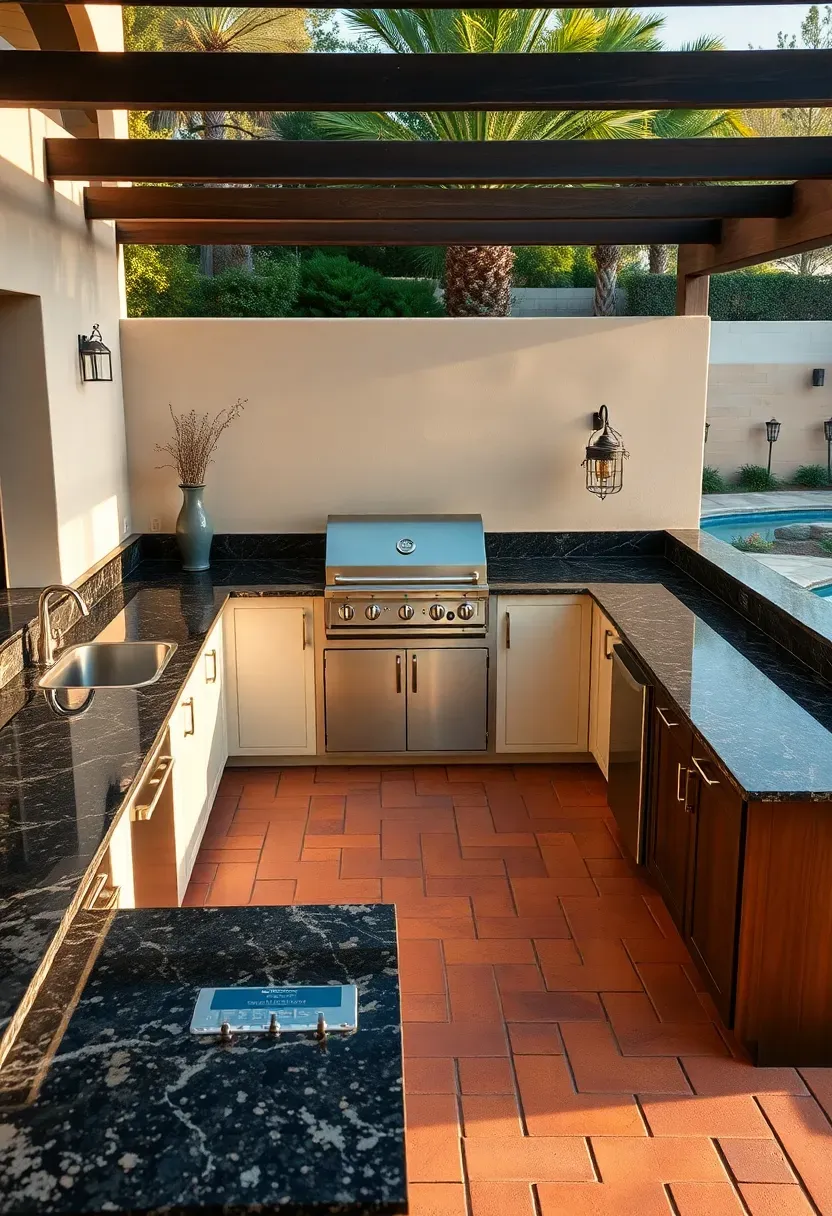
6. Pergola-Covered Kitchen
The Problem with Open-Air Cooking
Cooking in direct sun during July is miserable. There is no way around it. Beyond personal comfort, UV exposure degrades stainless steel finishes faster and warps plastic components on appliances. Food safety is another factor — your cutting board hits unsafe temperatures quickly under direct sun.
The Solution
A pergola with rafters spaced 6 to 12 inches apart cuts direct sun by 50 to 70 percent while maintaining airflow. Adding a ceiling fan makes the shaded zone feel 8 to 10 degrees cooler. For rain protection, install clear polycarbonate panels between rafters — they shed water while keeping the open-air feel.
Pros and Cons
- Pro: Extends cooking season by keeping the cook comfortable in peak summer.
- Pro: Provides mounting points for lights, fans, and even a misting system.
- Con: Adds $2,000 to $6,000 to the project depending on material and span.
- Con: Requires permitting in most jurisdictions since it is a permanent structure.
Recommended
Items for this idea
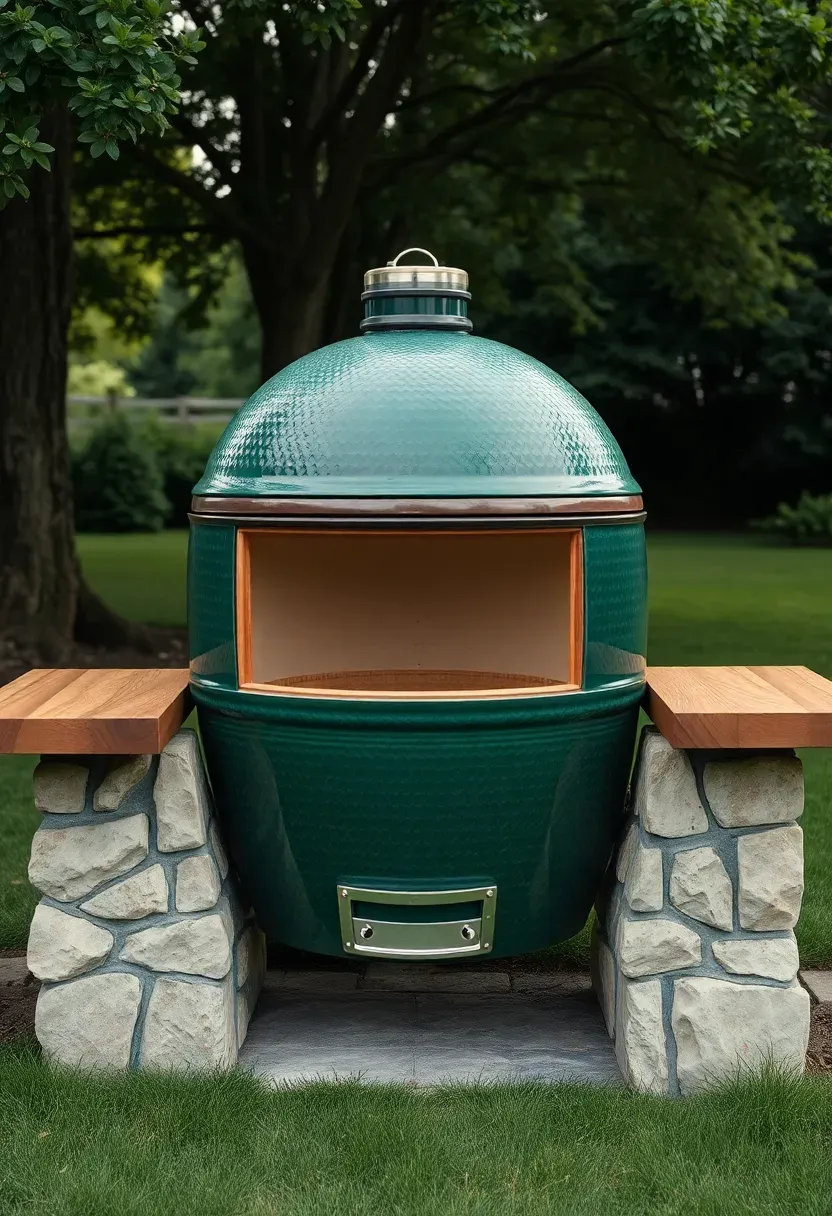
7. Kamado Grill Station
Kamado-style ceramic cookers (Big Green Egg, Kamado Joe, Primo) are incredibly versatile — they grill, smoke, bake, and roast. The thick ceramic walls retain heat for 12-plus hour cooks on a single load of charcoal. Building a dedicated station around your kamado means you get counter space for prep and a stable platform that keeps the heavy cooker at a comfortable working height. Most station builds use a steel or wood frame with a stone countertop and a cutout sized to the kamado's base ring.
Tips
- Build the frame to hold at least 250 pounds — a large kamado weighs 150-200 pounds before adding charcoal and food.
- Leave 4 inches of clearance around the ceramic body so the shell can expand with heat without cracking the surround.
- Position the station out of foot traffic paths since the exterior gets hot enough to burn skin during long cooks.
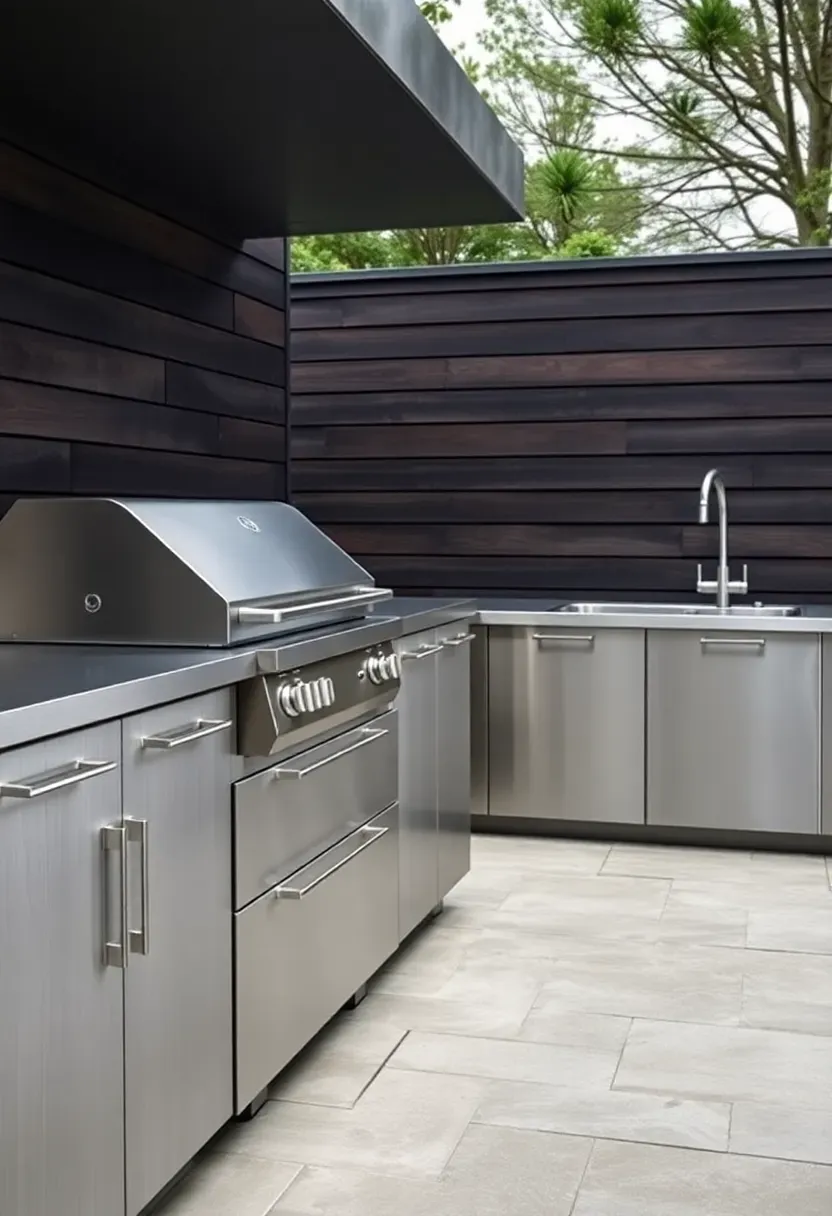
8. Stainless Steel Linear Kitchen
Stainless vs. Masonry: How They Compare
A linear stainless steel kitchen uses prefabricated cabinet modules that bolt together on a level pad. Installation takes hours instead of the days required for masonry construction. The trade-off is aesthetics — stainless looks commercial rather than residential, and it shows fingerprints and water spots constantly.
Choose Stainless If
- You want to install fast and potentially relocate the kitchen later.
- Your climate gets heavy rain and you need cabinets that will not absorb moisture.
- You prefer a modern, clean-lined look over rustic warmth.
Choose Masonry If
- You want a permanent structure that adds property value.
- You prefer the look of stone, brick, or stucco.
Recommendation
For most homeowners, a hybrid approach works best: stainless steel cabinets and appliances set into a masonry island with a stone countertop. You get the durability of stainless where it counts and the warmth of natural materials where people see them.
Recommended
Items for this idea
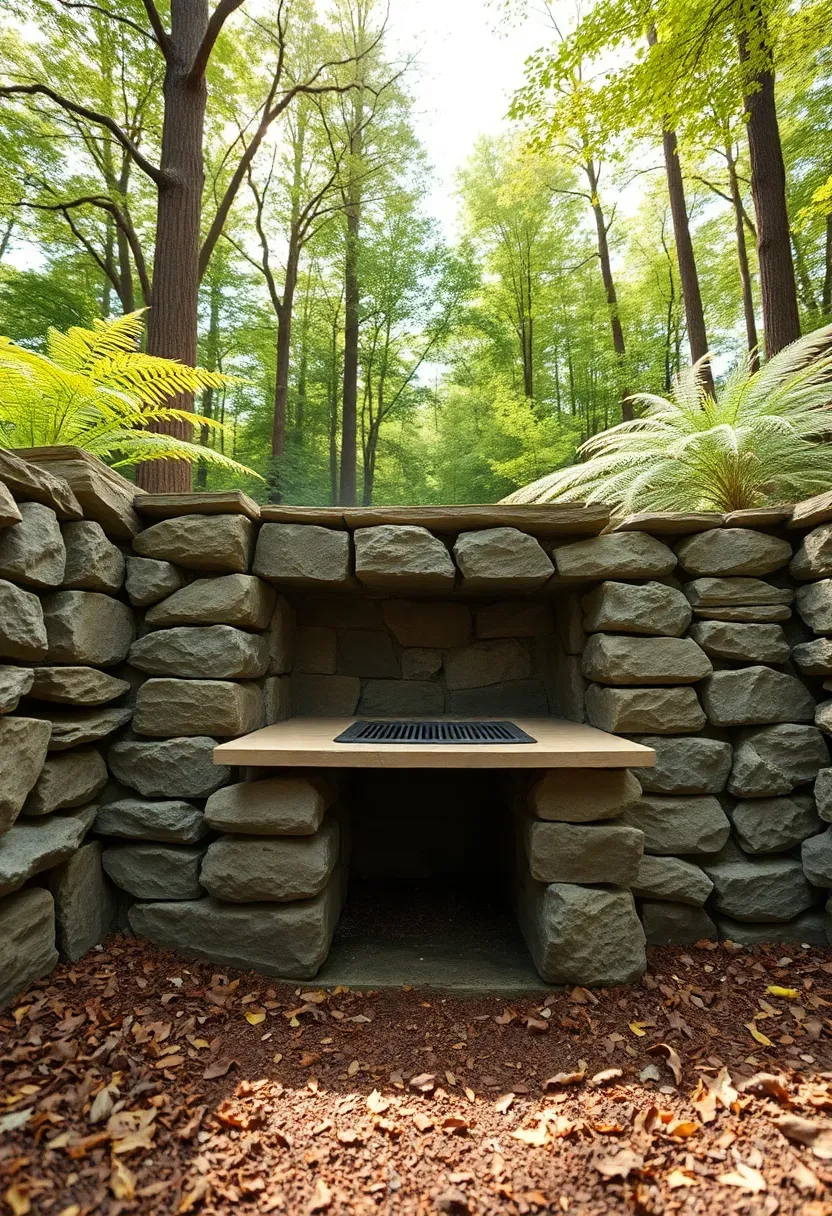
9. Rustic Stone Grill Surround
Fieldstone or river rock stacked dry or with mortar around a grill cutout gives you a backyard kitchen that looks like it grew out of the landscape. This works especially well in wooded lots or properties with existing stone retaining walls. The irregular stone faces hide imperfect masonry work, which makes this a forgiving project for first-time builders. Material cost depends heavily on local stone availability — $2 to $8 per square foot if you source from a local quarry, double that for delivered pallets.
Tips
- Lay the flattest stones on the countertop surface and save irregular shapes for the vertical faces.
- Use a steel lintel across the grill opening rather than trying to span it with stone.
- Mortar joints should be recessed 1/2 inch from the stone face for a natural shadow line.
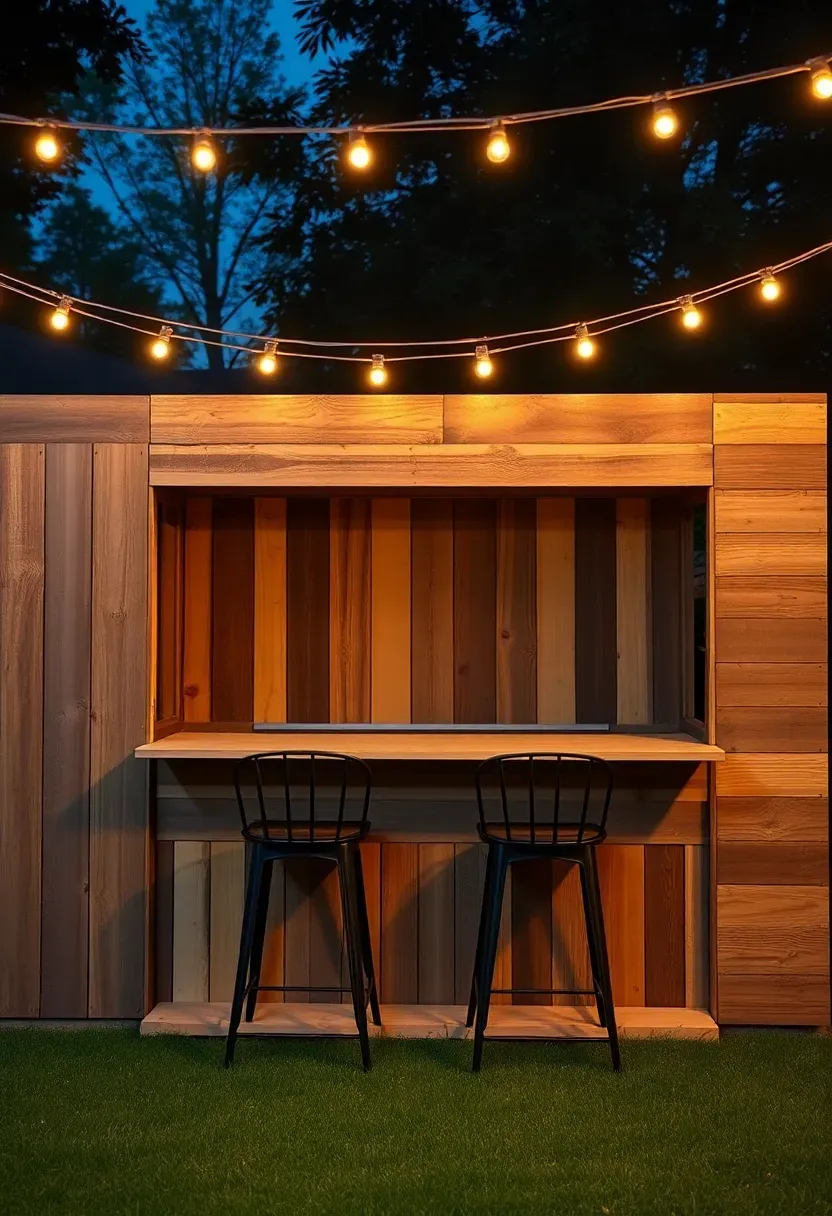
10. Budget Pallet Wood Bar Kitchen
How to Build a Pallet Kitchen
Pallet wood kitchens are the weekend project that keeps showing up on Pinterest for a reason: the raw material is often free. Here is how to make one that actually lasts more than one season.
Step 1: Source and prep pallets. Get heat-treated pallets (stamped HT, not MB). Pull all nails, sand rough faces with 60-grit, then 120-grit. You need 6 to 8 pallets for a 5-foot bar.
Step 2: Build the frame. Use 2x4 pressure-treated lumber for the structural skeleton. The pallets are cladding, not structure — do not rely on them for load bearing.
Step 3: Attach pallet boards. Screw pallet boards to the frame with 1.5-inch exterior screws. Alternate board widths for visual interest.
Step 4: Seal everything. Two coats of exterior polyurethane or spar varnish. Without this, the wood will rot within two seasons.
Watch Out
- Pallet wood splits easily when screwing near edges — pre-drill every hole.
Recommended
Items for this idea
11. U-Shaped Outdoor Kitchen
The U-shape gives you the most counter space and the best workflow of any layout. The cook stands in the center with everything within a step or two — grill behind, sink to one side, prep surface to the other. This layout requires a footprint of at least 10x10 feet, ideally 12x14. It is the most expensive configuration because you are building three connected counter runs, but it pays off if you cook outside frequently or entertain large groups.
Tips
- Keep the opening of the U facing your dining area so the cook stays part of the conversation.
- Install task lighting under any overhead structure — the U-shape creates shadows in the center at night.
- Use different counter heights if possible: 36 inches for prep, 42 inches for the bar-seating side.
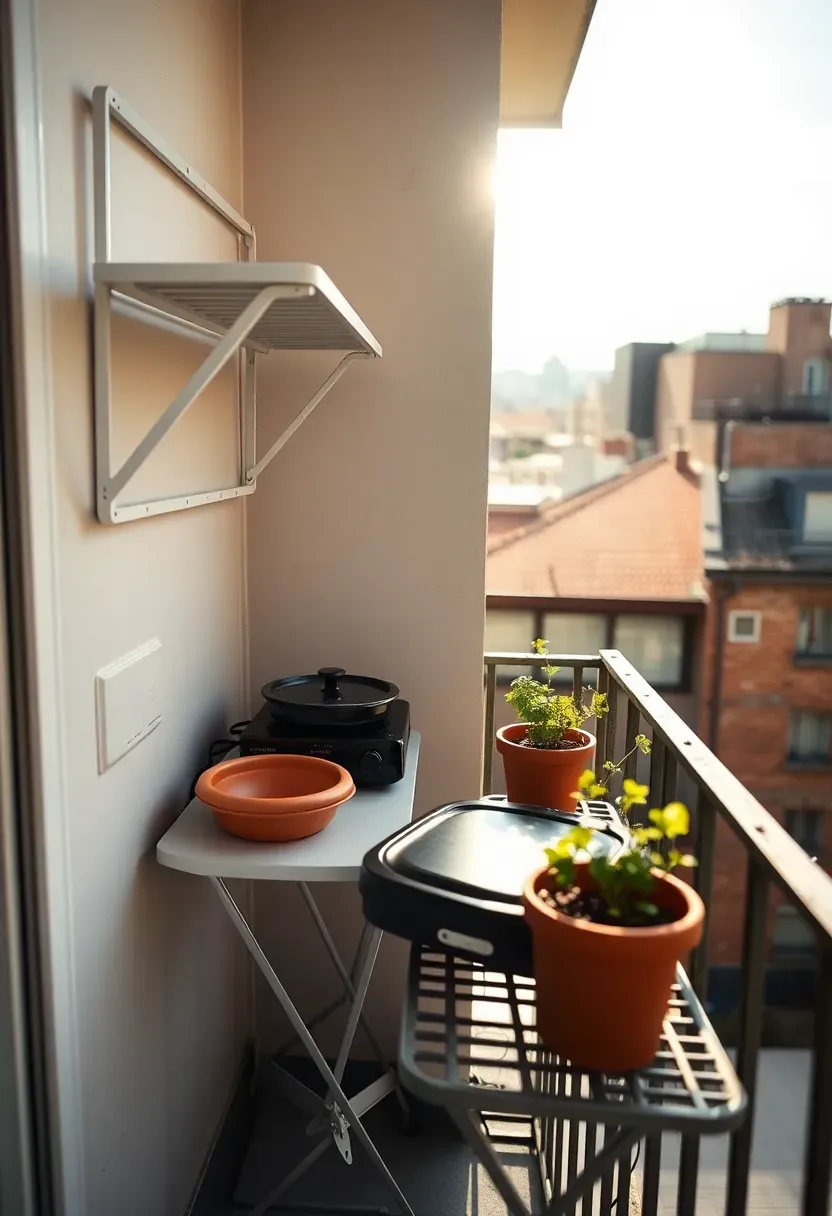
12. Compact Balcony Cooking Nook
Not every backyard kitchen needs a backyard. Apartment dwellers and condo owners can set up a functional cooking station on a balcony as small as 4x6 feet. The key is vertical storage and a tabletop electric or gas grill — check your building's rules first, since many prohibit open-flame grills on balconies above the ground floor. A wall-mounted folding shelf gives you prep space that disappears when you need the balcony for other uses.
Tips
- Use an electric griddle or infrared grill if your building bans charcoal and propane.
- Mount a magnetic knife strip and spice rack on the wall to keep counter space clear.
- Choose a grill with a built-in grease management system to avoid drips on neighbors below.
Recommended
Items for this idea
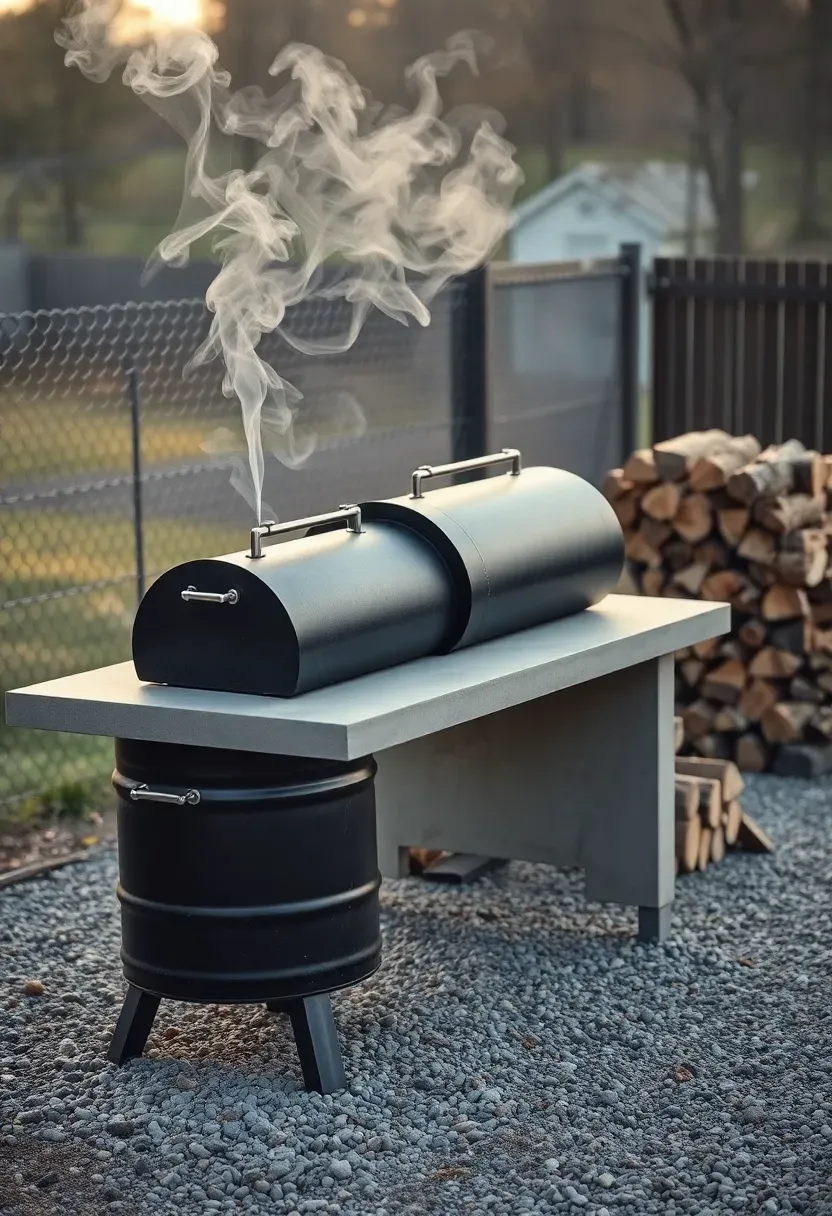
13. Smoker Pit with Prep Counter
Dedicated smoker setups need more space and airflow than standard grill stations. An offset smoker produces heavy smoke for the first two hours of a cook, so position it downwind from your seating area and at least 10 feet from the house. Building a permanent prep counter next to the smoker gives you a surface for rubs, injections, wrapping, and resting meat. Concrete or granite countertops work best here since they handle the heat and grease without damage.
Tips
- Pour a 4-inch concrete pad under the smoker — settling ground will throw off the firebox-to-cook-chamber airflow.
- Install a hose bib within 10 feet for cleanup.
- Add a weatherproof electrical outlet for thermometer probes and a fan if you use a powered draft system.
14. Modern Concrete Slab Kitchen
Poured-in-place concrete countertops give you complete control over shape, edge profile, and color. The minimalist look pairs well with clean-lined outdoor furniture and modern landscaping. A standard 2-inch-thick concrete countertop with fiber reinforcement costs $65 to $100 per square foot installed, including the form work. You can add integral color, exposed aggregate, or embedded objects like glass chips during the pour.
Tips
- Vibrate the concrete thoroughly during the pour to eliminate air pockets that become pinholes on the surface.
- Cure for at least 7 days under plastic sheeting before applying sealer.
- Plan sink and grill cutouts with foam inserts in the form before pouring — cutting concrete after curing is messy and risks cracking.
Recommended
Items for this idea
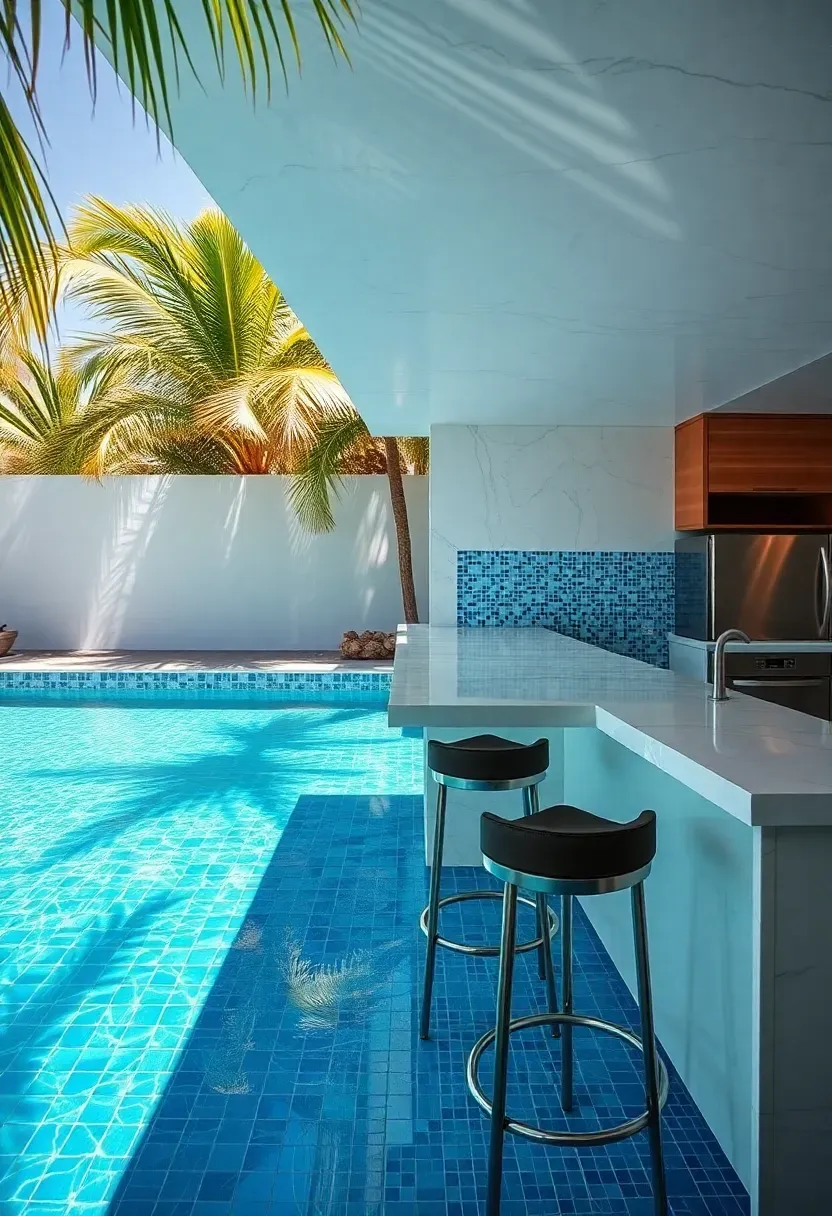
15. Pool-Adjacent Wet Bar Kitchen
If your pool is the center of backyard activity, putting a kitchen next to it makes logistical sense. A wet bar with a sink, mini fridge, and blender station keeps the pool crowd fed and hydrated without tracking water through the house. Position the counter so swimmers can sit on the pool-side stools — a swim-up bar works if your pool deck is at the right height, typically 42 inches above the pool floor at that point.
Tips
- Use slip-resistant material on the kitchen floor — wet feet on smooth tile is a liability issue.
- Install a GFCI-protected electrical panel for all outlets within 20 feet of the pool.
- Choose marine-grade stainless steel for anything that will get splashed regularly.
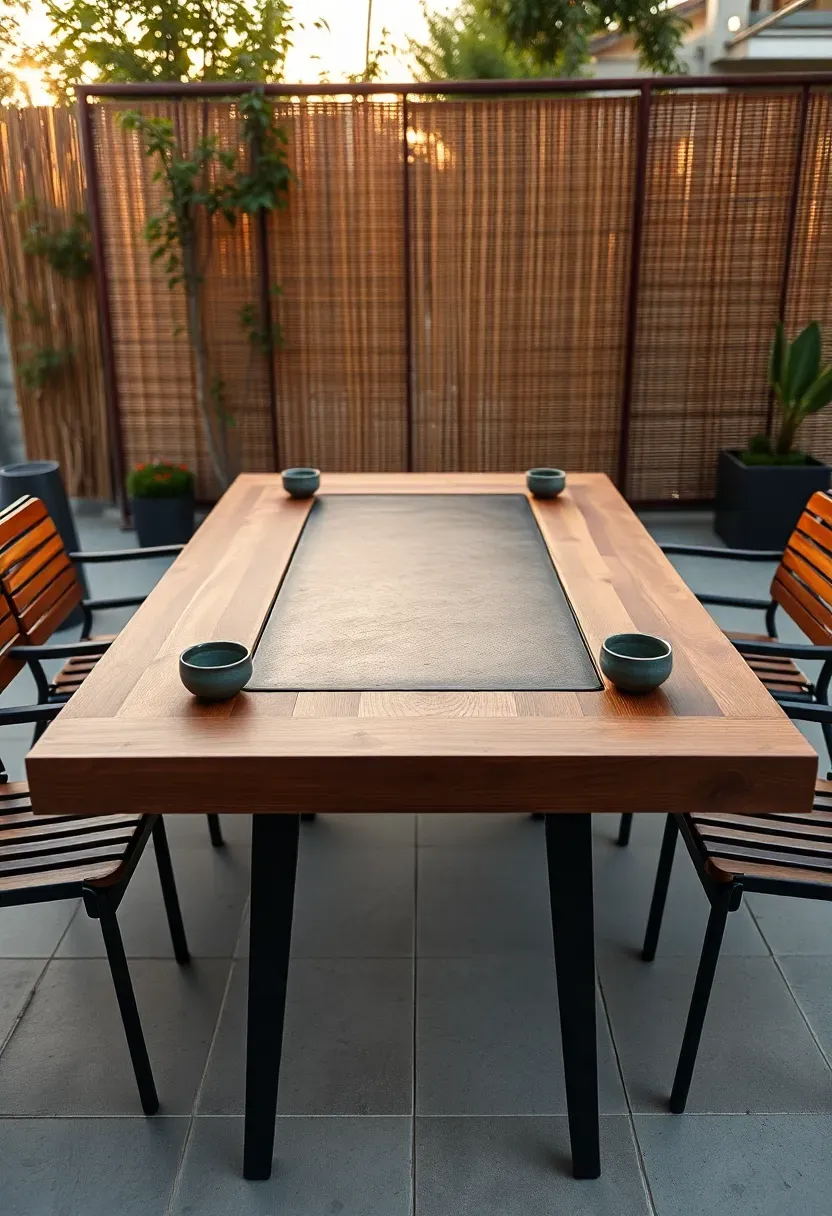
16. Japanese Hibachi Grill Table
Origins
The teppanyaki-style flat grill table became popular in American restaurants through the Benihana chain in the 1960s, though the backyard version draws more from the traditional Japanese shichirin — a small charcoal grill designed for tabletop use. The concept of cooking at the table where you eat collapses the kitchen-dining divide entirely.
Modern Backyard Versions
Today's backyard hibachi tables use a built-in propane or natural gas burner under a thick steel plate, set into a weather-resistant dining table. Guests sit around the grill and the cook works in the center. Tables run $800 to $3,000 for pre-built units, or you can fabricate one by welding a 1/4-inch steel plate into a hardwood or concrete table frame.
Apply at Home
- Use A36 carbon steel for the cooking plate — it seasons like cast iron and develops better nonstick properties over time than stainless.
- Build a grease channel around the plate perimeter that drains into a removable catch cup.
- Seat no more than 6 people around a 30x48-inch plate so everyone can reach the food.
Recommended
Items for this idea
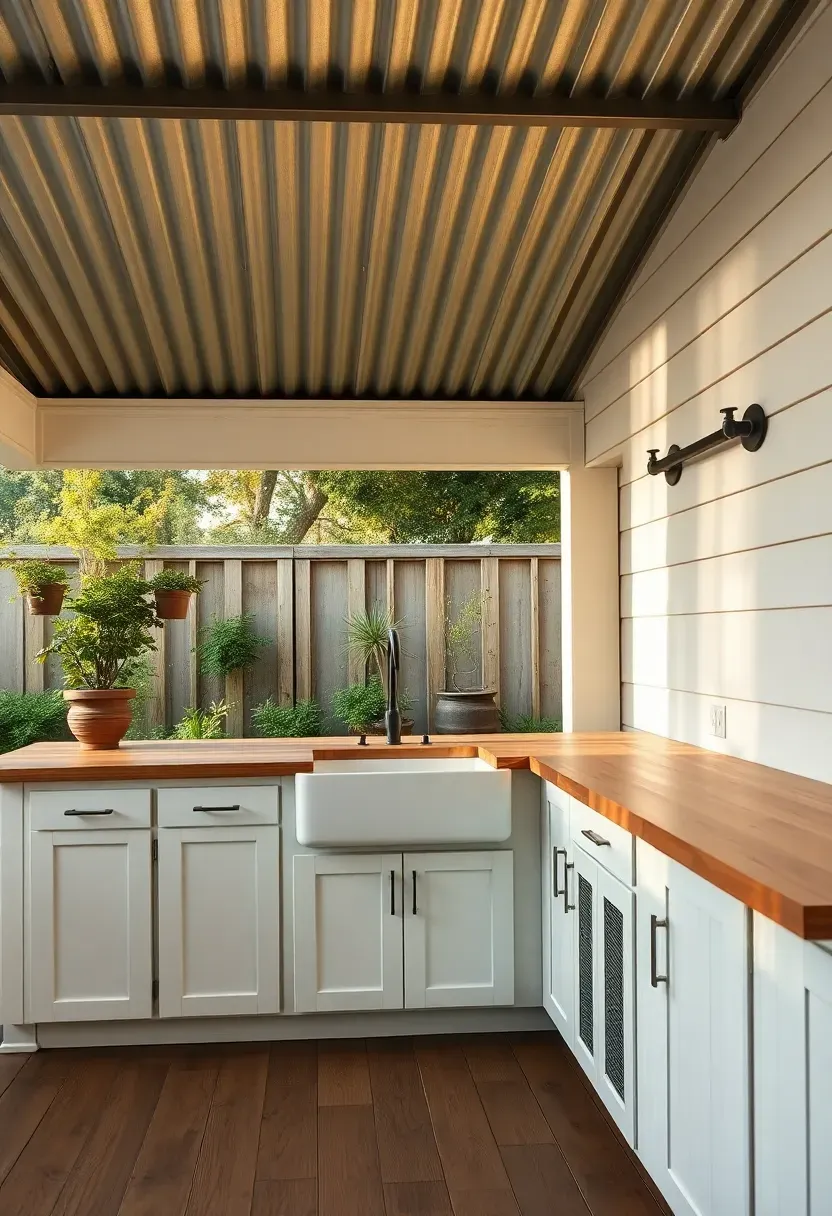
17. Farmhouse-Style Outdoor Kitchen
The farmhouse aesthetic translates well to outdoor kitchens when you use the right materials. Shiplap or board-and-batten cladding on the cabinet bases, a thick butcher block or reclaimed wood countertop, and a corrugated metal roof overhead give the space that lived-in agricultural character. The trick is using exterior-rated versions of traditionally interior materials — marine-grade plywood under the shiplap, sealed butcher block, and galvalume rather than bare steel for the roofing.
Tips
- Apply exterior-grade paint or stain to all wood surfaces and refresh annually.
- Mount a farmhouse-style apron sink in the counter for maximum visual impact.
- Use black iron pipe for shelving brackets and towel bars to reinforce the rustic theme.
18. Modular Cabinet Kitchen
Why Modular Makes Sense
Modular outdoor kitchen systems from brands like Challenger, Newage, and Trex let you configure a kitchen from pre-engineered cabinet boxes. Each module arrives assembled — you just level, connect, and bolt them together. The advantage over custom masonry is flexibility: you can start with a grill cabinet and a door-drawer combo, then add a refrigerator module and a sink module next year.
Picking Components
Most systems offer base cabinets in 24, 30, and 36-inch widths. Doors come in stainless steel, powder-coated aluminum, or composite panels. Budget $400 to $900 per module, plus countertop, which is usually sold separately as a cut-to-fit granite or quartz slab.
Watch Out
- Module alignment gets tricky on uneven ground — pour a level concrete pad before delivery.
Recommended
Items for this idea
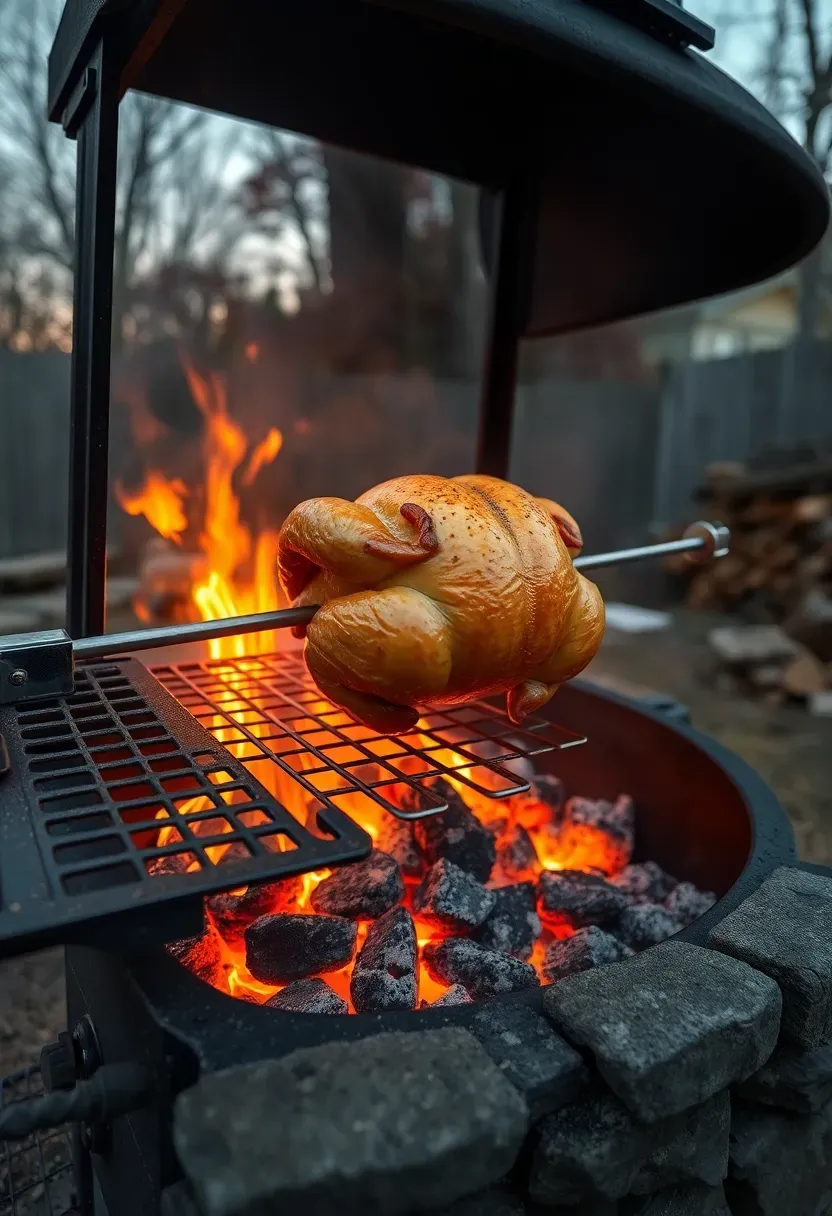
19. Wood-Fired Grill and Rotisserie
There is a specific flavor you only get from cooking over actual wood — not charcoal, not gas, but split hardwood logs burning down to coals. A dedicated wood-fired grill with an adjustable grate height and an optional rotisserie attachment gives you that flavor along with the ability to sear, roast, and slow-cook. Argentine-style grills with a crank wheel for raising and lowering the grate are the gold standard here, running $1,200 to $5,000 for the grill alone.
Tips
- Use only seasoned hardwood (oak, hickory, cherry, mesquite) — softwoods create creosote buildup and off-flavors.
- Build a firewood storage rack within arm's reach of the grill but outside the heat zone.
- Install a wind break on the prevailing wind side to maintain consistent coal temperature.
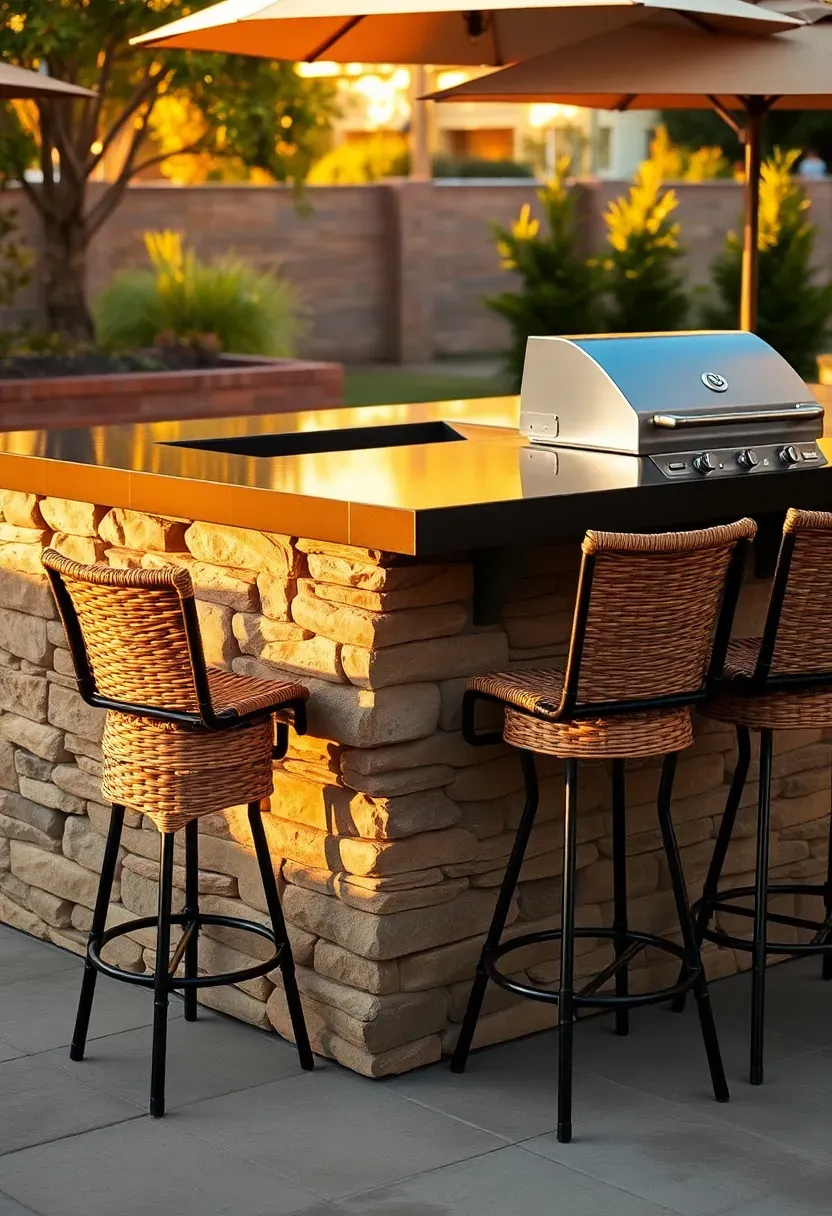
20. Bar-Height Island Kitchen
A split-level island solves the problem of combining cooking and socializing in one structure. The grill side sits at standard 36-inch counter height for comfortable cooking, while the opposite side rises to 42 inches with an overhang for bar stools. Guests face the cook, drinks stay at a natural height for standing or sitting, and the raised bar top hides the messy cooking side from view.
Tips
- Extend the bar overhang at least 12 inches to give seated guests knee room.
- Use a different countertop material or color for each level to visually separate the zones.
- Run electrical through the island base for a blender outlet and USB charging on the bar side.
Recommended
Items for this idea
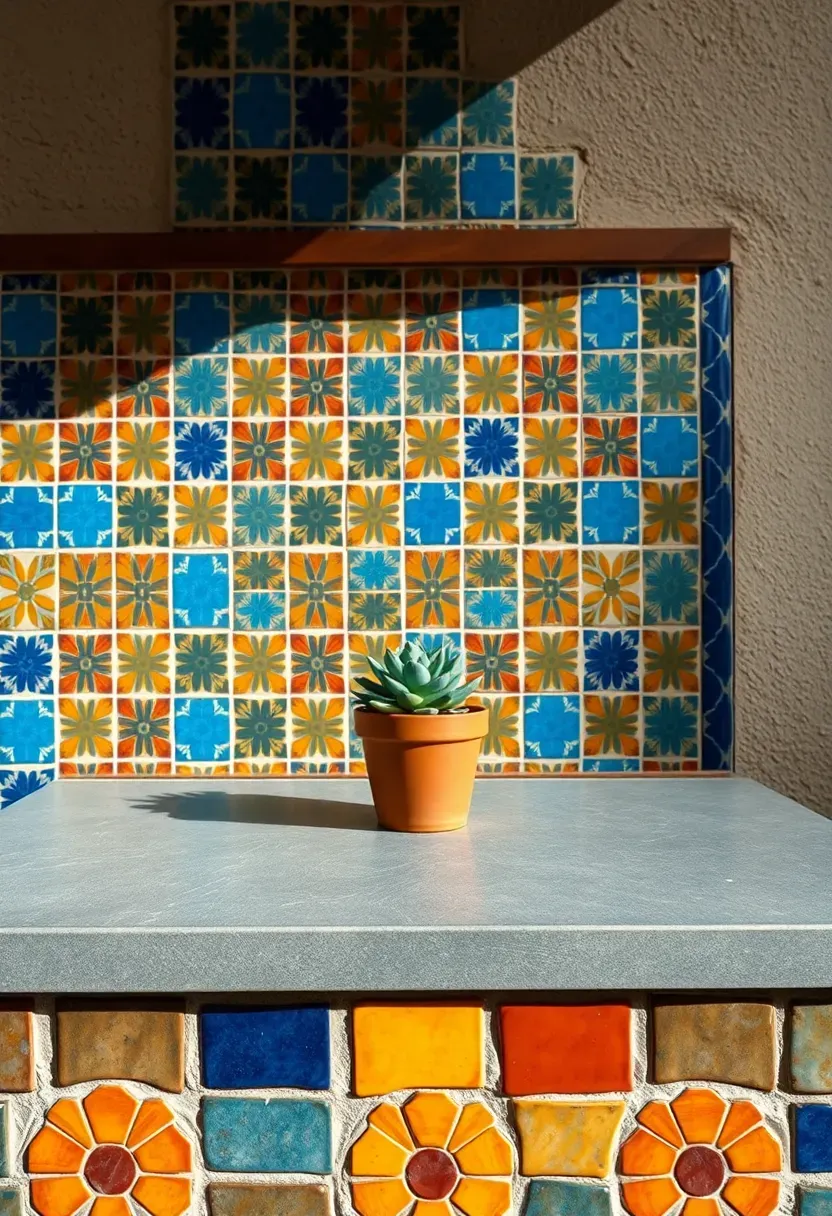
21. Tile Mosaic Cooking Counter
Hand-laid tile on the vertical faces of a kitchen island or counter gives you a custom look that no prefabricated system can match. Mexican Talavera tiles, Moroccan zellige, or Portuguese azulejo patterns all work in outdoor settings as long as you use frost-rated tiles and a flexible thinset rated for exterior use. The tile is decorative cladding over a structural CMU or concrete block base — it adds color and personality without affecting the structural integrity.
Tips
- Set tiles on a scratch coat of modified thinset over metal lath for the strongest bond.
- Use sanded grout in a contrasting color to define the pattern.
- Seal the grout annually with a silicone-based sealer to prevent water absorption and freeze-thaw cracking.
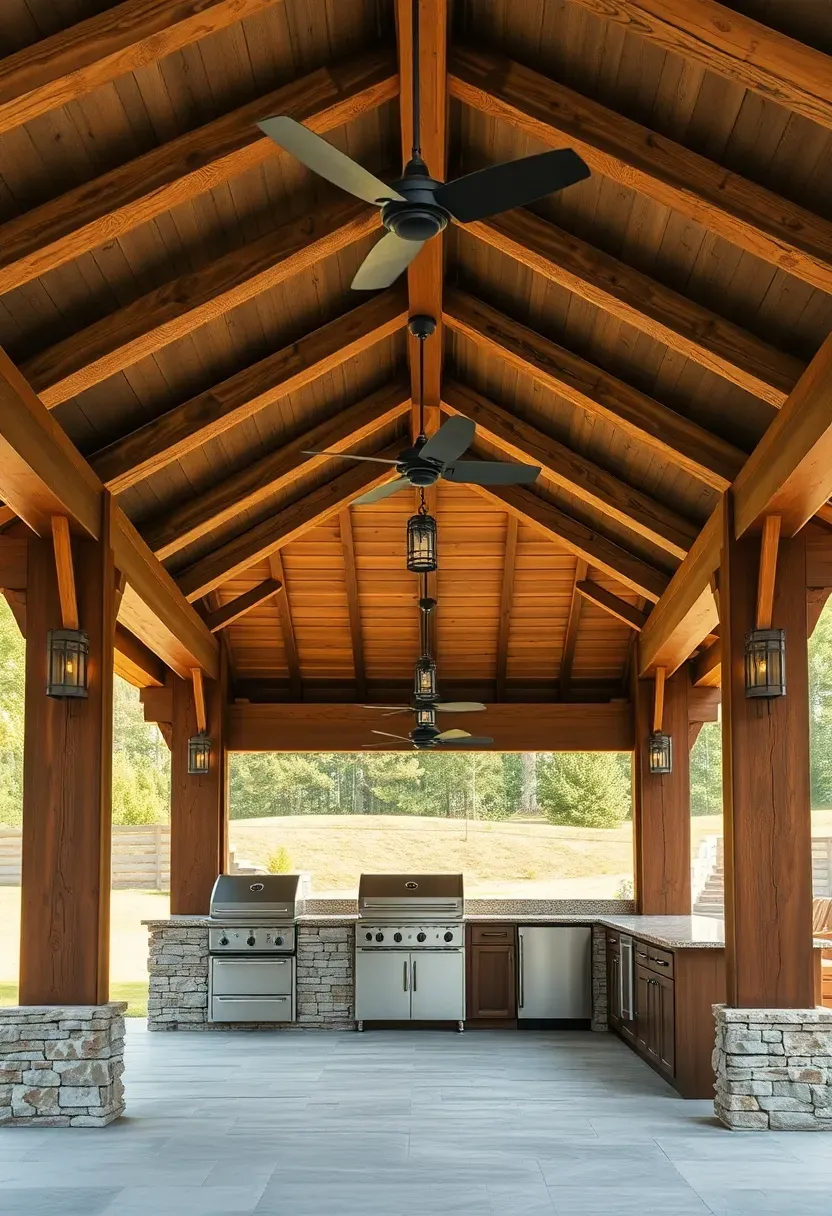
22. Covered Pavilion Kitchen
A pavilion is a pergola's bigger, more committed sibling. Where a pergola provides partial shade, a pavilion has a full roof — shingles, metal panels, or thatch — supported by heavy timber or masonry columns. This means rain protection, which opens up the possibility of installing appliances, countertops, and even cabinetry that would not survive unprotected exposure. Budget $8,000 to $25,000 for the pavilion structure alone, before kitchen equipment.
Tips
- Match the pavilion roof material and pitch to your house roof for visual continuity from the street.
- Include at least two ceiling fans for air circulation — a covered space without moving air gets humid fast.
- Wire the pavilion during construction for lights, outlets, and a future TV mount even if you do not plan to use them immediately.
Recommended
Items for this idea
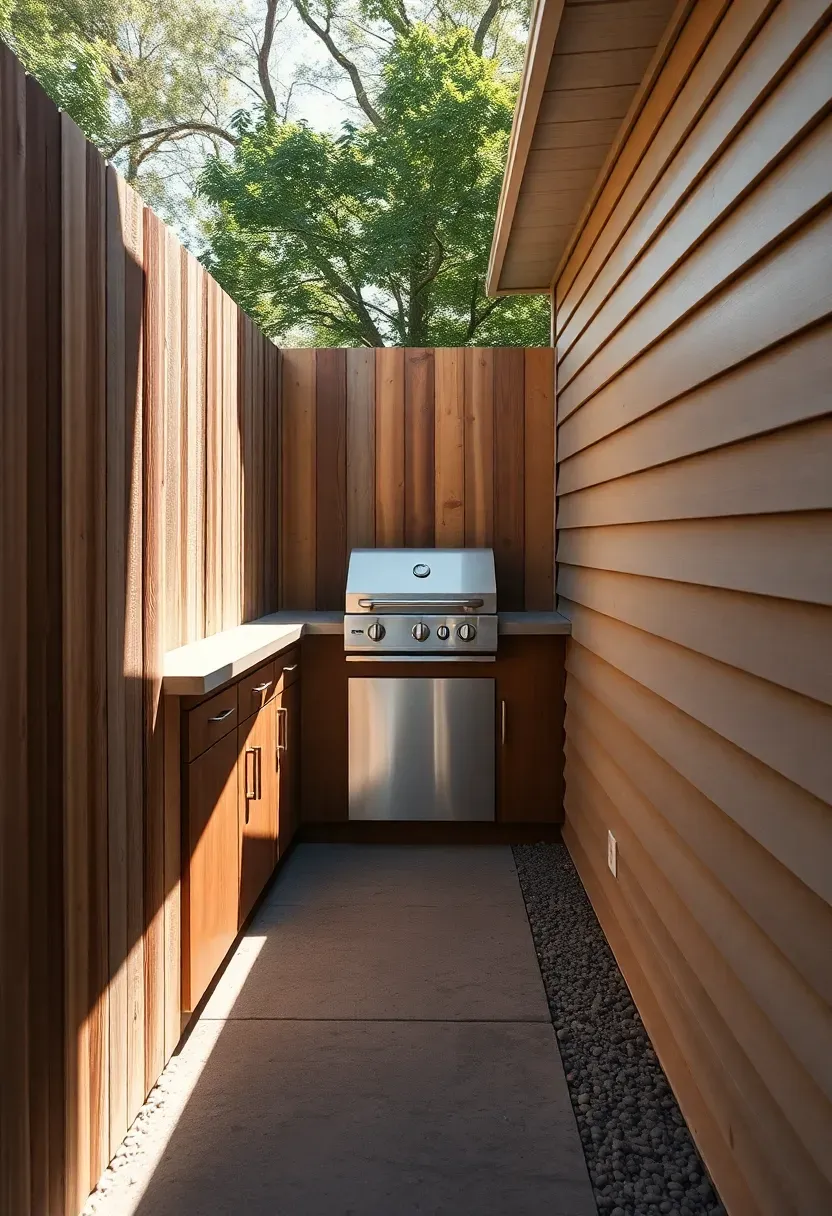
23. Side-Yard Galley Kitchen
Side yards are some of the most underused space on a residential lot. A galley layout — counter on one side, clear walkway on the other — turns a 4-to-6-foot-wide passage between house and fence into a functional cooking lane. This works particularly well for homes where the backyard is too small or too occupied by a pool or play equipment to accommodate a kitchen. Run the counter along the fence side with the grill centered and a pass-through window to the dining area.
Tips
- Install drainage along the base of the counter since side yards often channel roof runoff.
- Use downlights mounted under eaves rather than tall fixtures that would block the narrow space.
- Keep the walkway side at least 36 inches clear for safe passage while the grill is in use.
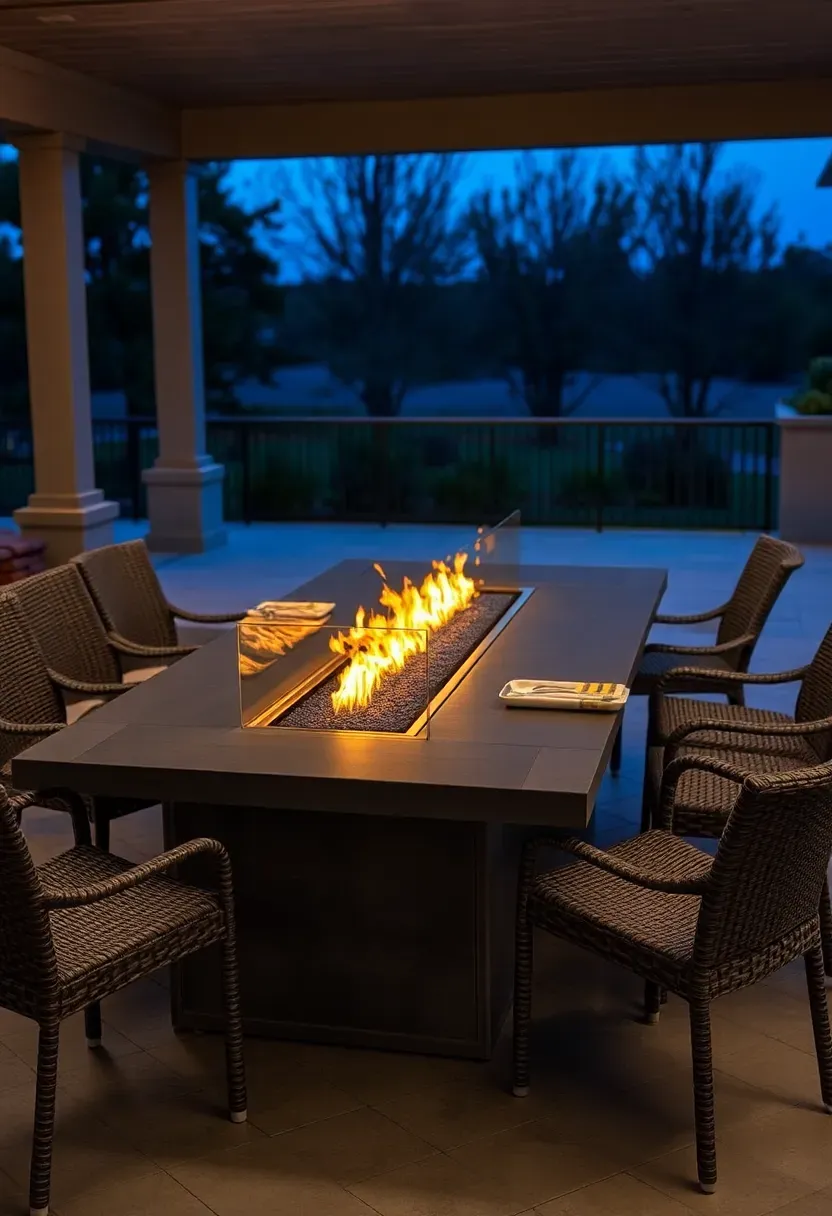
24. Fire Table Dining Kitchen
A fire table that doubles as a cooking surface blurs the line between kitchen and dining in a way that feels casual and social. Several manufacturers now sell fire pit tables with optional cooking grate inserts, griddle plates, or wok rings that drop into the burner opening. You get ambiance when you want it, cooking capability when you need it, and a dining table the rest of the time.
Tips
- Choose a table with a wind guard — open flames at table height are a napkin fire waiting to happen.
- Use a separate portable grill for heavy cooking and reserve the fire table for finishing, warming, and light cooking like grilled appetizers.
- Store the cooking grate insert when not in use to keep the table looking clean for non-cooking gatherings.
Recommended
Items for this idea
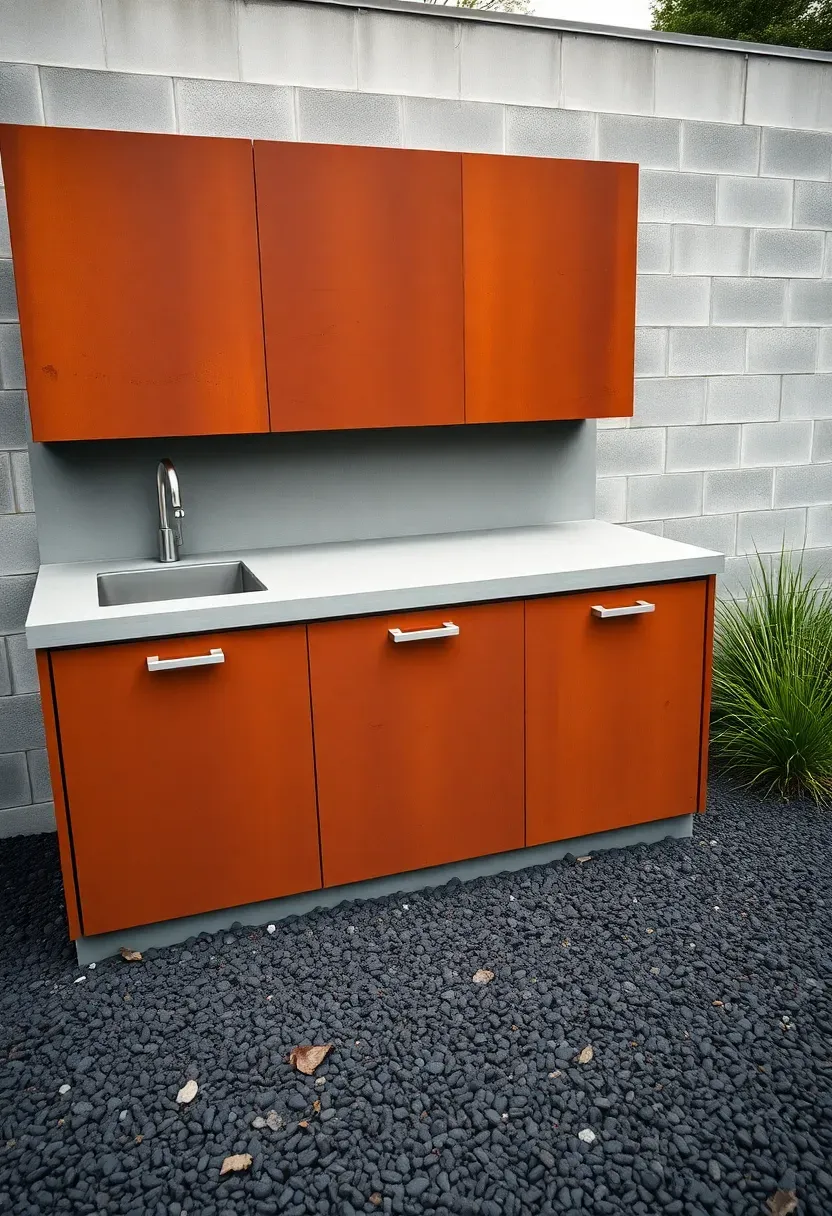
25. Corten Steel Outdoor Kitchen
Corten (weathering steel) develops a stable rust patina that protects the underlying metal from further corrosion. In an outdoor kitchen, Corten panels create a warm, industrial look that changes color over the first 6 to 18 months as the patina develops, then stabilizes. The steel is structural enough to serve as the cabinet face without additional framing in some configurations. Expect to pay $15 to $25 per square foot for raw Corten sheet, plus fabrication.
Tips
- Let the patina develop naturally — do not accelerate it with salt or vinegar, which creates uneven coloring.
- Keep Corten panels away from concrete and light-colored stone during the active rusting phase since rust runoff will stain permanently.
- Seal the interior faces of Corten cabinets with a clear coat to prevent rust transfer to stored items.
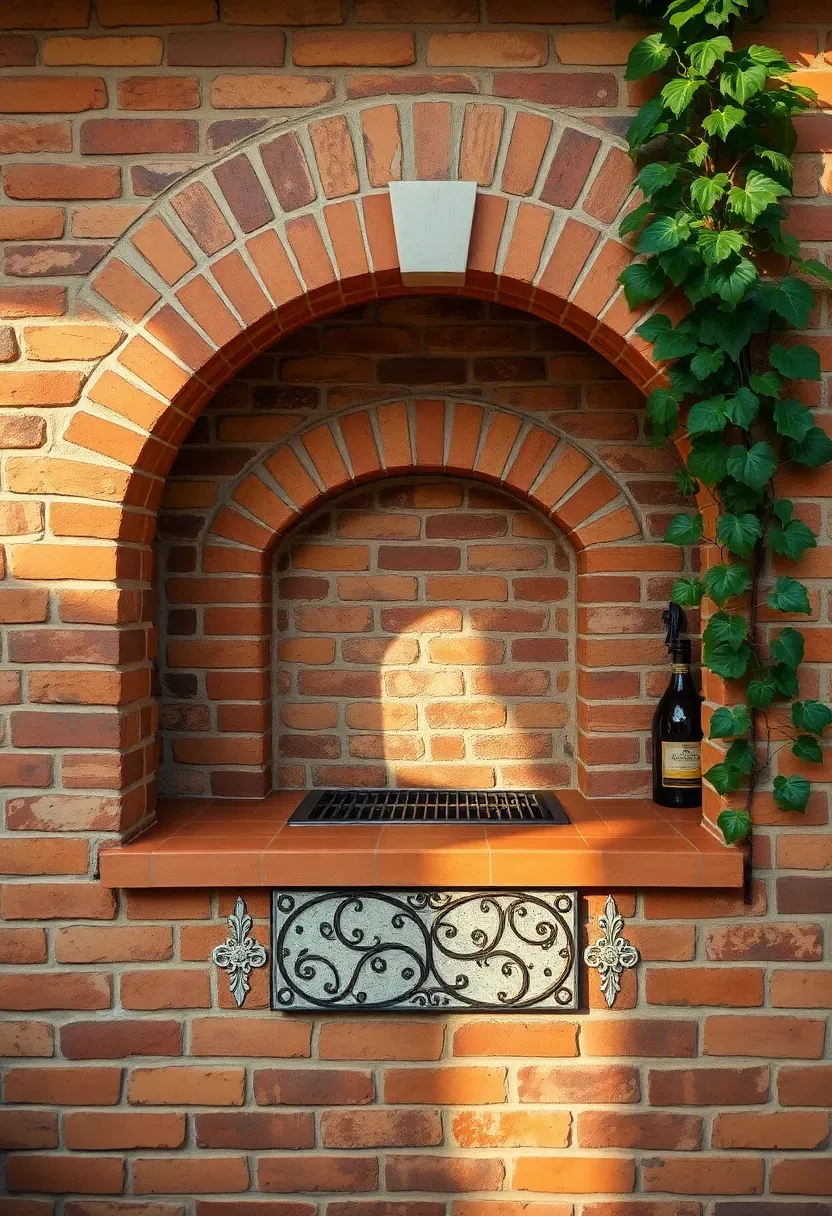
26. Recycled Brick Summer Kitchen
Reclaimed brick from demolished buildings has character that new brick cannot replicate — irregular edges, old mortar residue, color variation from decades of weathering. A summer kitchen built from recycled brick connects visually to older homes and established neighborhoods. Source brick locally from demolition contractors or architectural salvage yards, typically $0.40 to $1.00 per brick. You will need roughly 400 to 600 bricks for a basic 6-foot cooking counter with storage below.
Tips
- Clean reclaimed brick with a masonry chisel and wire brush rather than acid washing, which can weaken old brick.
- Test a sample brick for freeze-thaw resistance if you live in a cold climate — not all old brick was fired hard enough.
- Lay brick in a running bond pattern for structural strength; stack bond looks modern but is weaker without reinforcement.

Recommended
Items for this idea
27. Full Outdoor Chef's Kitchen
This is the endgame — a fully plumbed, fully wired outdoor kitchen with commercial-grade appliances, ventilation, and enough counter space to prep a dinner for thirty. We are talking a 48-inch gas range or grill, a commercial hood vent, double basin sink, dishwasher, full-size refrigerator, and 20-plus feet of counter. Budget $25,000 to $80,000 depending on appliance brands and finish materials. This only makes sense if you cook outside multiple times per week and entertain regularly.
Tips
- Hire a licensed plumber and electrician — commercial appliances need dedicated circuits and properly sized gas lines.
- Include a hand-washing sink separate from the food-prep sink if you plan to cater events.
- Install a grease trap on the drain line to prevent sewer issues from heavy outdoor cooking.
Quick FAQ
How much does a basic backyard kitchen cost? A simple grill station with a concrete block base and countertop runs $500 to $1,500 in materials if you do the labor yourself. Adding a sink with running water pushes costs to $2,000 to $4,000 due to plumbing. Prefab modular systems start around $3,000 for a basic two-cabinet setup.
What is the best countertop material for outdoor kitchens? Granite and concrete are the most durable options for weather exposure and heat resistance near grills. Both handle rain, UV, and temperature swings without cracking or staining when properly sealed. Tile works well too, but grout lines require annual maintenance.
Do I need a permit to build a backyard kitchen? Most jurisdictions require permits for permanent structures with gas lines, electrical connections, or plumbing. A portable grill on a cart rarely needs anything. Check your local building department before pouring any foundation — unpermitted work can create problems when you sell.
Can I build an outdoor kitchen on a wood deck? Yes, with proper fire protection. Use a non-combustible base under the grill (cement board or a steel plate), maintain manufacturer-specified clearances, and check that your deck's load capacity handles the added weight. A basic grill island weighs 800 to 1,500 pounds.
Which backyard kitchen layout works best for small yards? A linear (single-wall) layout against a fence or house wall takes up the least space while still giving you grill, prep, and storage. A 6-foot run is enough for a grill, 2 feet of counter, and a cabinet. The side-yard galley layout also works well for tight lots.
Building a backyard kitchen does not have to happen all at once. Start with what matches your cooking habits right now — even a cart and a decent grill — and add infrastructure as your outdoor cooking routine takes shape. The best backyard kitchens I have seen were built over two or three seasons, with each addition informed by how the owner actually used the previous setup. Pick one idea from this list, build it this spring, and see where it leads.
Pinterest cover for 27 Backyard Kitchen Ideas for Cooking Outside
About the author
OBCD
CGI visualization and interior design content. We create detailed 3D renders and curate practical design ideas for every room in your home.