17 Backyard Movie Night Ideas
We hosted our first backyard movie night three years ago with a bedsheet safety-pinned to the fence and a cheap projector balanced on a cooler. The image was washed out, the audio was tinny, and half the neighborhood could see our screen from the street. Since then I have tested every setup from $80 portable projectors to a permanent outdoor theater with buried speaker wire and a retractable screen. The biggest lesson: you do not need expensive gear. You need the right placement, decent sound, and comfortable seating. These 17 ideas cover every budget and yard size, from a simple blanket-and-laptop setup to a full backyard cinema.
Below you will find backyard movie night ideas organized by equipment, seating, atmosphere, and food — everything you need to plan a screening that people actually want to come back for.
Table of Contents
- Inflatable Movie Screen
- DIY PVC Frame Screen
- Projector on a Budget
- Bluetooth Speaker Bar Setup
- Pallet Seating Area
- Bean Bag Pit
- Layered Blanket Lawn
- Hay Bale Theater Rows
- Hanging Edison Bulb Walkway
- Tiki Torch Perimeter
- Fire Pit Intermission Zone
- Outdoor Popcorn Station
- Candy Bar Cart
- Mosquito Net Canopy
- Themed Movie Night Decor
- Drive-In Style Car Seats
- Projector and Screen Storage Shed

1. Inflatable Movie Screen
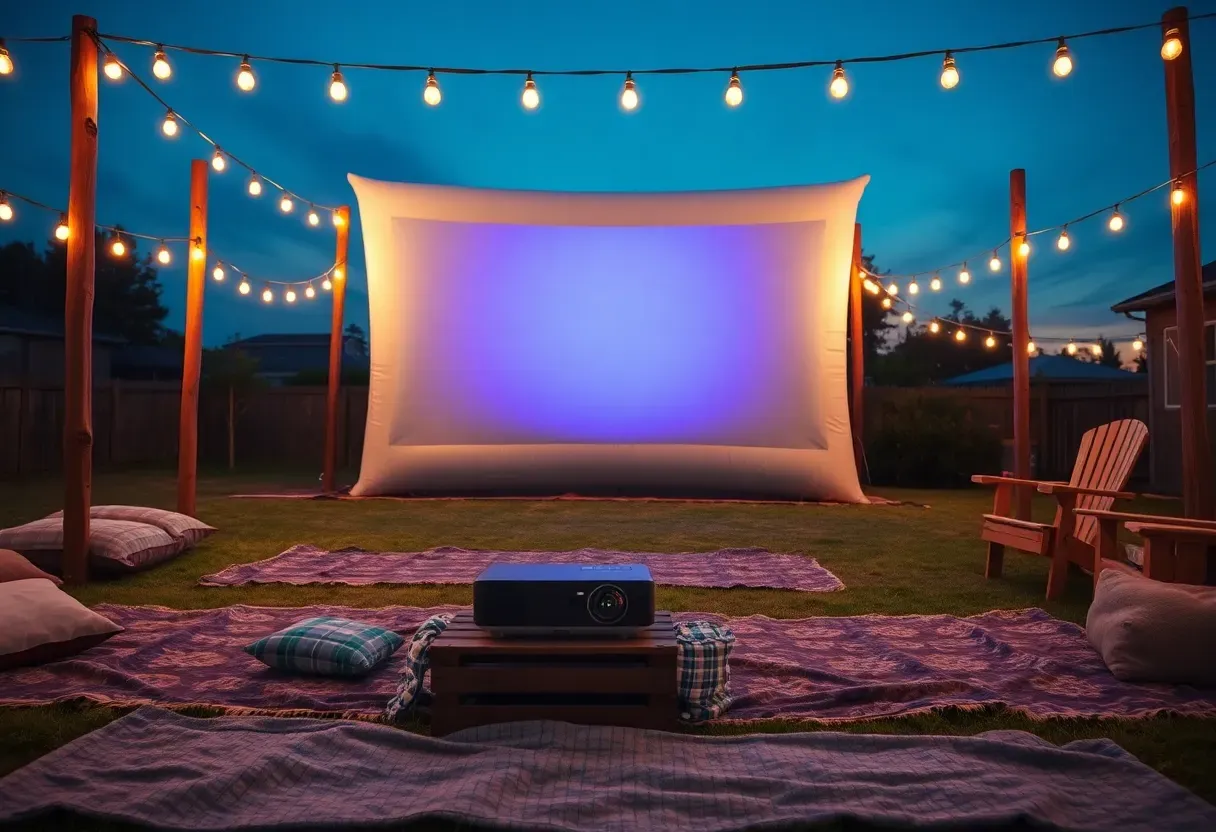
Inflatable screens are the fastest path to a backyard movie night that looks legit. Most models inflate in under three minutes with the included fan, and the wrinkle-free surface gives you a cleaner image than any sheet or tarp. A 14-foot diagonal screen — big enough for 20 people sitting on a lawn — runs about $90-$150. The frame is airtight, so once inflated you can disconnect the fan if the noise bothers you during quiet scenes. Stake it down with the included ground anchors because even a light breeze catches the surface like a sail. When the movie ends, deflate it, roll it into the carry bag, and stash it in the garage.
Tips
- Place the screen at least 3 feet from any fence or wall so wind passes behind it instead of catching the surface
- Black-backed screens reject ambient light better — worth the $20 premium over white-backed models
- Test inflation before guests arrive; a slow leak from a pinhole can deflate the screen mid-movie
We picked a few things that go well with this idea: 16ft Inflatable Outdoor Movie Screen (★4.6), 14ft Inflatable Projector Screen with Blower (★4.6) and 20ft Inflatable Outdoor Movie Screen (★4.6). As an Amazon Associate we earn from qualifying purchases.
2. DIY PVC Frame Screen
How to build one
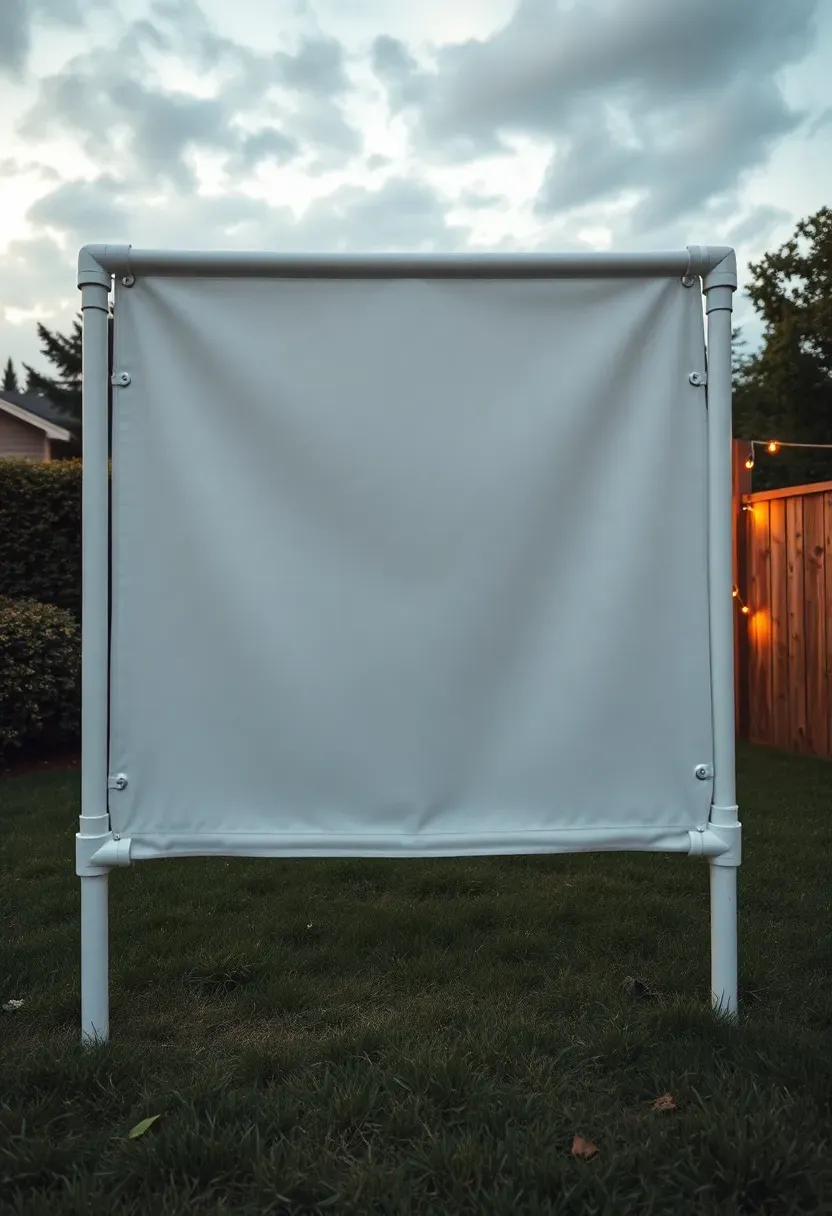
If you want a screen that stays up all weekend without a fan running, a PVC frame is the cheapest permanent option.
Step 1: Cut the frame
Buy 1-inch Schedule 40 PVC pipe and eight corner fittings. Cut four pieces for a rectangle — 10 feet wide by 6 feet tall works well for most projectors. Total pipe cost: about $18.
Step 2: Stretch the fabric
White blackout cloth from a fabric store ($4/yard) wraps around the frame and attaches with binder clips or PVC snap clamps. Pull it drum-tight. Wrinkles catch light unevenly and create distracting shadows.
Step 3: Anchor it
Slide the bottom horizontal pipe through two U-shaped rebar stakes hammered into the ground. This keeps the screen upright in wind without guy wires cluttering the lawn.
Watch out
PVC yellows after a full summer in direct sun. Store the frame in a shed between uses, or spray it with UV-resistant clear coat.
We picked a few things that go well with this idea: ZAZE 80x80 Waterproof Picnic Blanket (★4.6), Sapsisel 3-Layer Waterproof Outdoor Blanket (★4.4) and ZAZE Washable Waterproof Picnic Blanket (80x80) (★4.6). As an Amazon Associate we earn from qualifying purchases.
3. Projector on a Budget
The issue
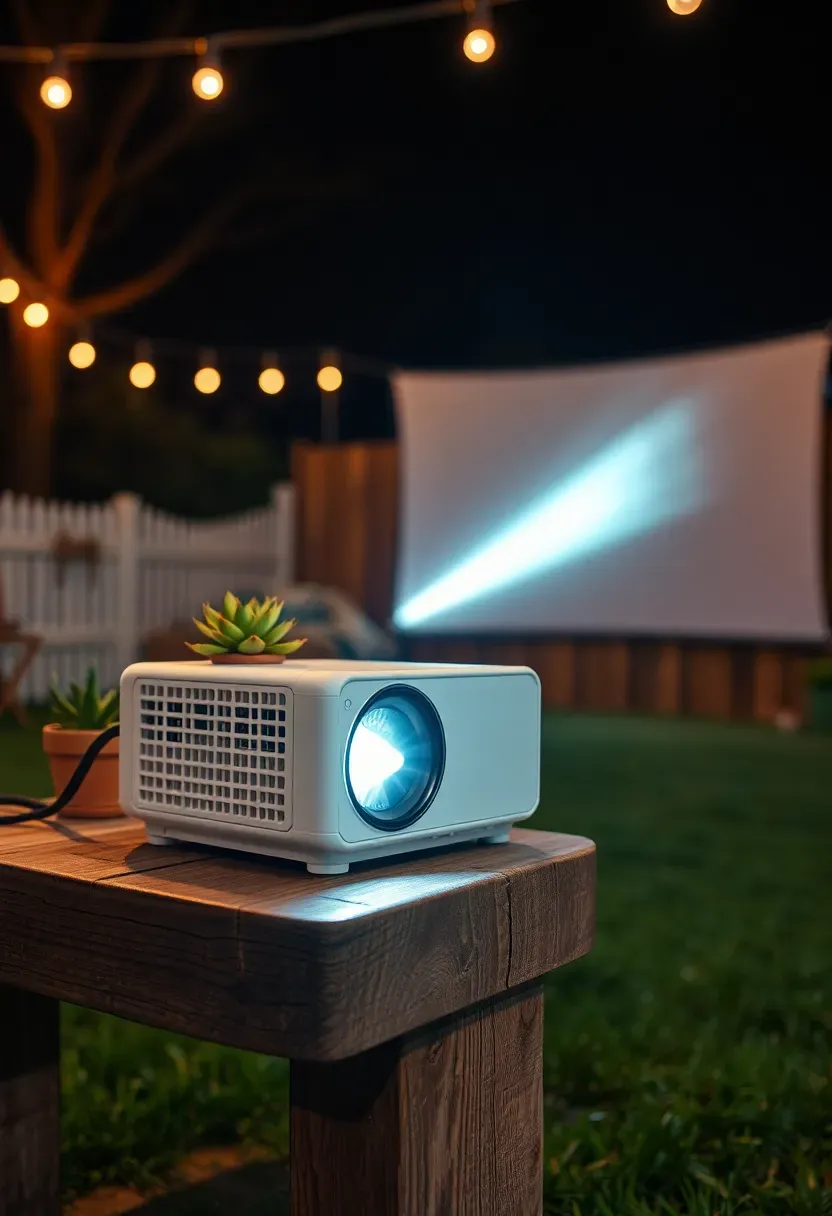
Full-size home theater projectors cost $500-$2,000 and weigh enough to need a permanent ceiling mount. Dragging one outside every Friday night gets old fast, and moisture is a real concern.
The fix
Mini LED projectors in the $120-$250 range now output 300-500 ANSI lumens — plenty for a dark backyard after sunset. Models with native 1080p resolution (not "supported 1080p," which means they downscale) produce sharp text and decent color. Look for one with built-in Android TV or Roku so you skip the laptop entirely. Battery-powered models last about 2.5 hours, which covers most films. The BenQ GV30 and XGIMI MoGo 2 are two that I have used personally and both survived a season of outdoor use without issues.
Pros and cons
- Pro: Weighs under 4 pounds, fits in a backpack, and sets up in 90 seconds
- Pro: Built-in speakers on newer models are surprisingly passable for casual viewing
- Con: Anything under 300 lumens is unwatchable unless your yard is pitch dark and the screen is under 80 inches
We picked a few things that go well with this idea: VEVOR 8oz Commercial Popcorn Machine (★4.4), West Bend Stir Crazy Popcorn Popper (4-Qt) (★4.5) and VEVOR 12oz Commercial Popcorn Machine (★4.4). As an Amazon Associate we earn from qualifying purchases.
4. Bluetooth Speaker Bar Setup
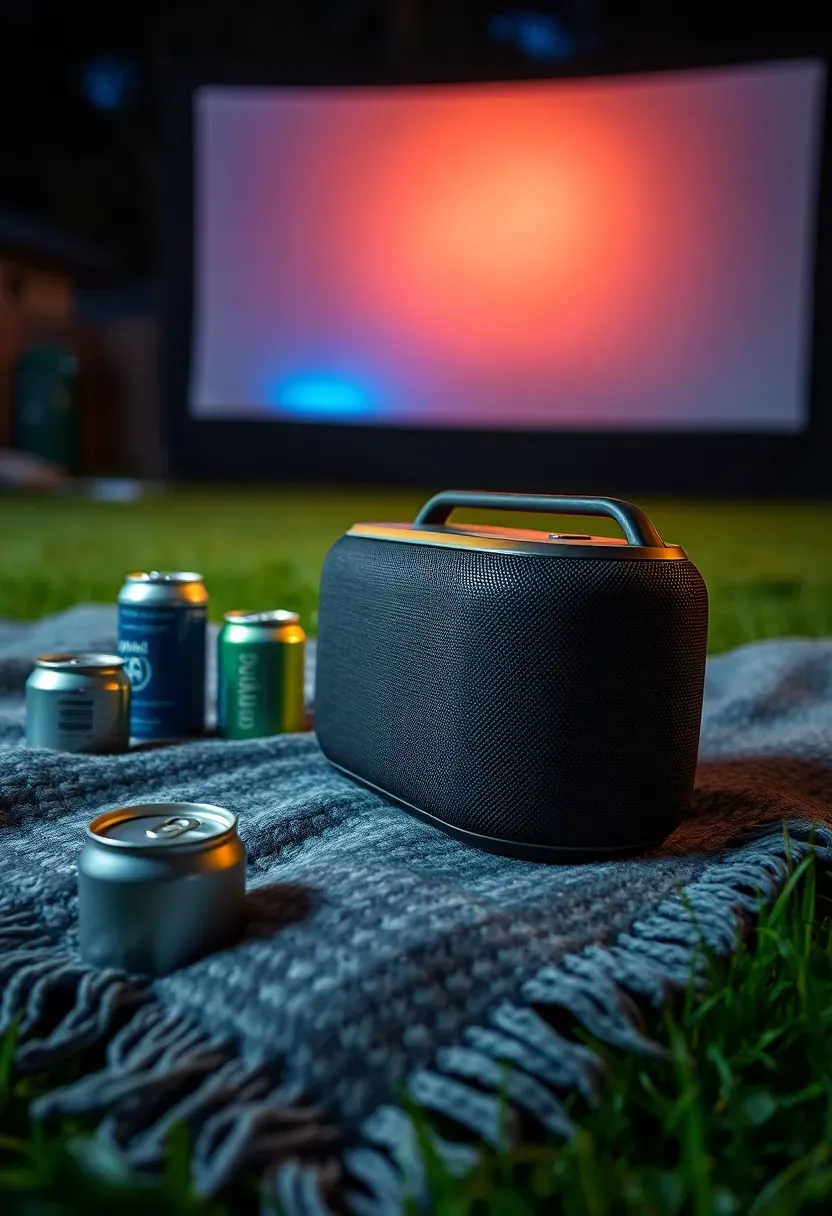
The projector's built-in speaker is fine for the first ten minutes, then someone asks "what did they say?" and you realize outdoor audio needs help. A Bluetooth soundbar placed on the ground in front of the screen, facing the audience, solves this immediately. The JBL Xtreme 3 or a similar cylindrical speaker with 360-degree output works for groups up to 15. For larger crowds, pair two speakers in stereo mode and separate them 8-10 feet apart. Place speakers at ear height of seated viewers — on a small stool or overturned crate — so dialogue carries without cranking the volume to levels that bother neighbors. A $35 Bluetooth transmitter plugged into the projector's headphone jack eliminates cable runs across the lawn.
Tips
- Start the movie at 40% volume and adjust after five minutes once everyone settles; initial reactions are always "louder"
- Keep the speaker behind the front row, not beside it, to avoid one side getting blasted
- Charge speakers fully beforehand — Bluetooth audio at high volume drains batteries 30% faster than music streaming
Recommended
Items for this idea
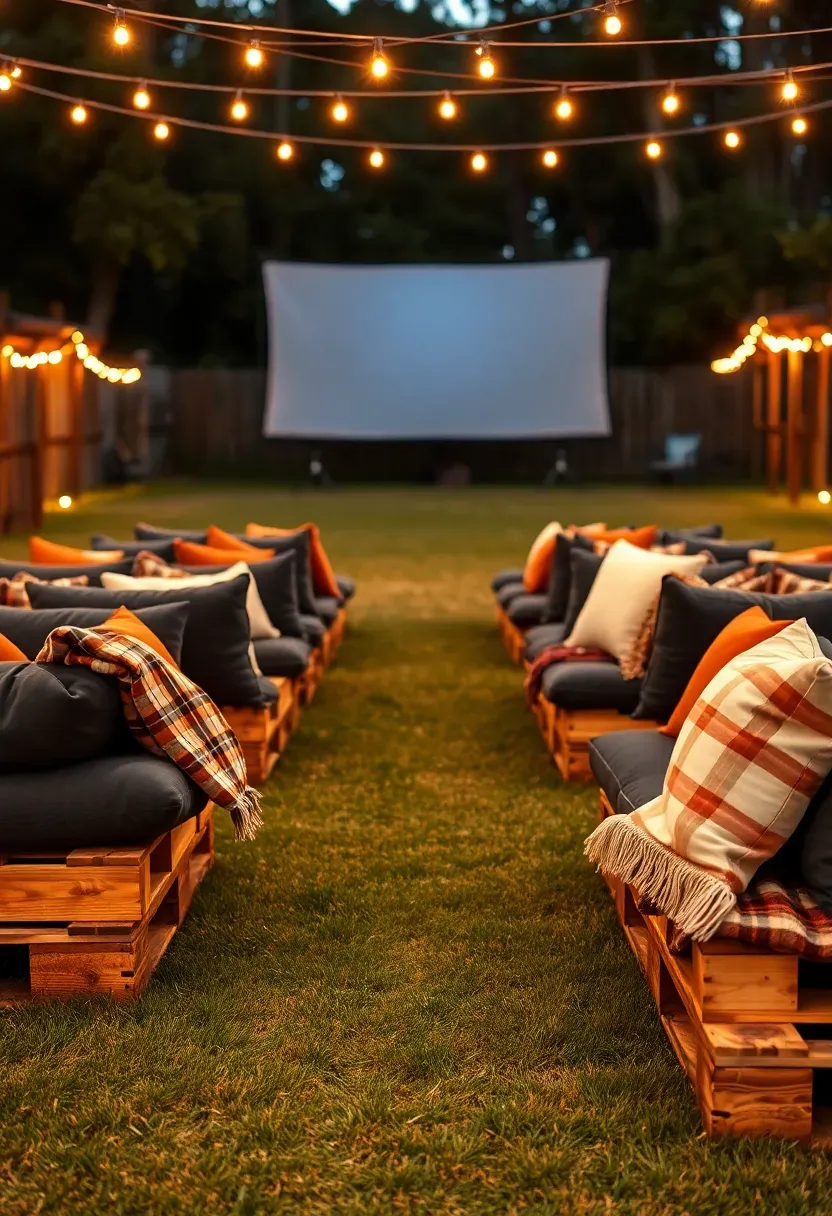
5. Pallet Seating Area
Free shipping pallets from local warehouses make surprisingly solid outdoor benches when sanded and stacked. Two pallets on top of each other give you a seat height of about 10 inches — low, but comfortable with a thick outdoor cushion on top. Arrange six to eight pallets in two staggered rows, theater-style, and you seat 12-16 people without buying a single chair. Sand every surface thoroughly (splinters ruin the mood faster than a bad movie), then coat with exterior polyurethane. The gaps between slats let rainwater drain, so you can leave them in the yard between screenings. Add a few throw pillows and blankets and the whole setup looks deliberate rather than scrappy.
Tips
- Heat-treated pallets stamped "HT" are safe for home use; avoid those marked "MB" (methyl bromide treated)
- Screw pallets together in pairs so they do not shift when people sit down or stand up
- Elevate the back row on a second layer of pallets so shorter viewers can see over the front row
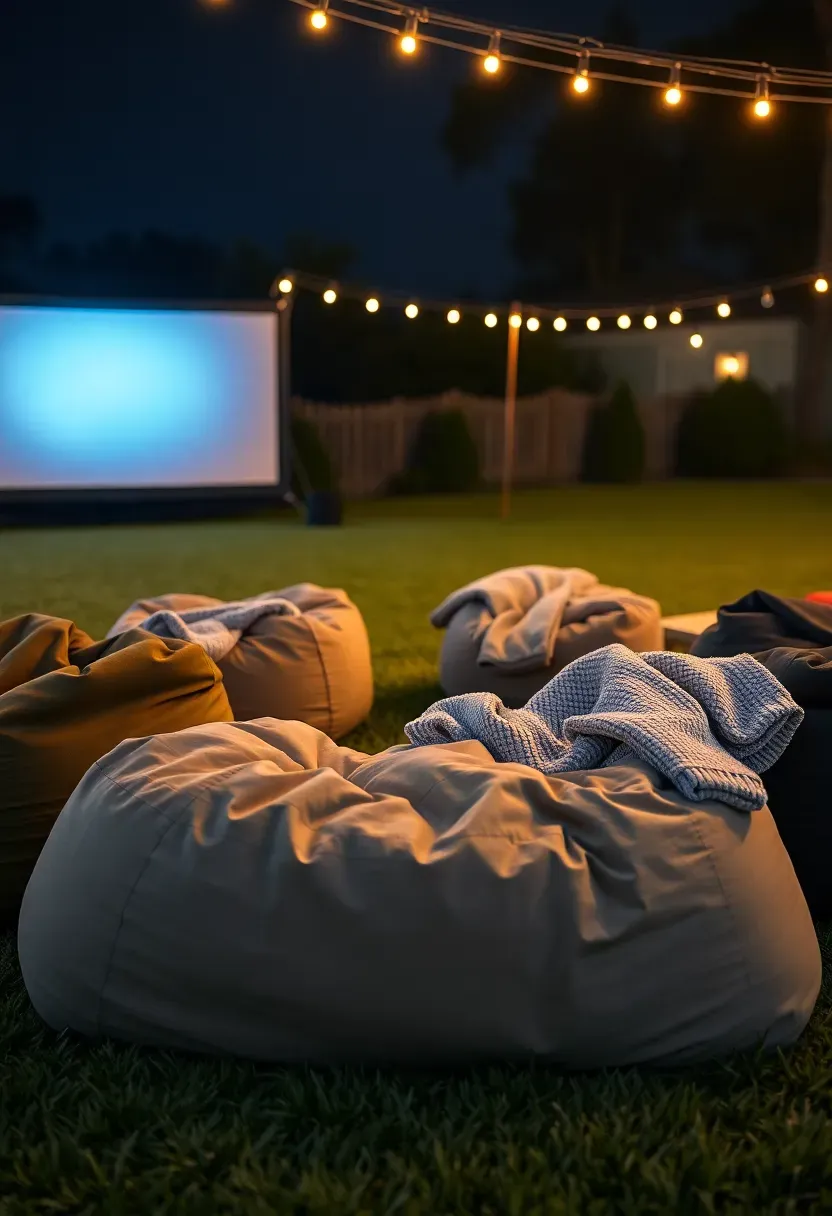
6. Bean Bag Pit
Bean bags beat chairs for movie nights because nobody sits upright during a movie anyway. Oversized outdoor bean bags (the kind filled with foam rather than polystyrene beads) hold their shape, resist moisture, and weigh enough to stay put in wind. A 5-foot bean bag fits two adults comfortably. Scatter six or seven across the lawn with about 2 feet of space between each so people can get up without stepping on someone. The Chill Sack and Big Joe brands make water-resistant covers that wipe clean after grass stains and spilled drinks. At $60-$100 each, a full set costs less than a single outdoor sofa.
Tips
- Store bean bags in a dry spot between uses — even water-resistant covers get musty after days of dew exposure
- Mix sizes: a few large ones for couples and several singles for people who want their own space
- Dark-colored covers hide stains better but absorb more heat; stick with medium tones like olive or slate
Recommended
Items for this idea
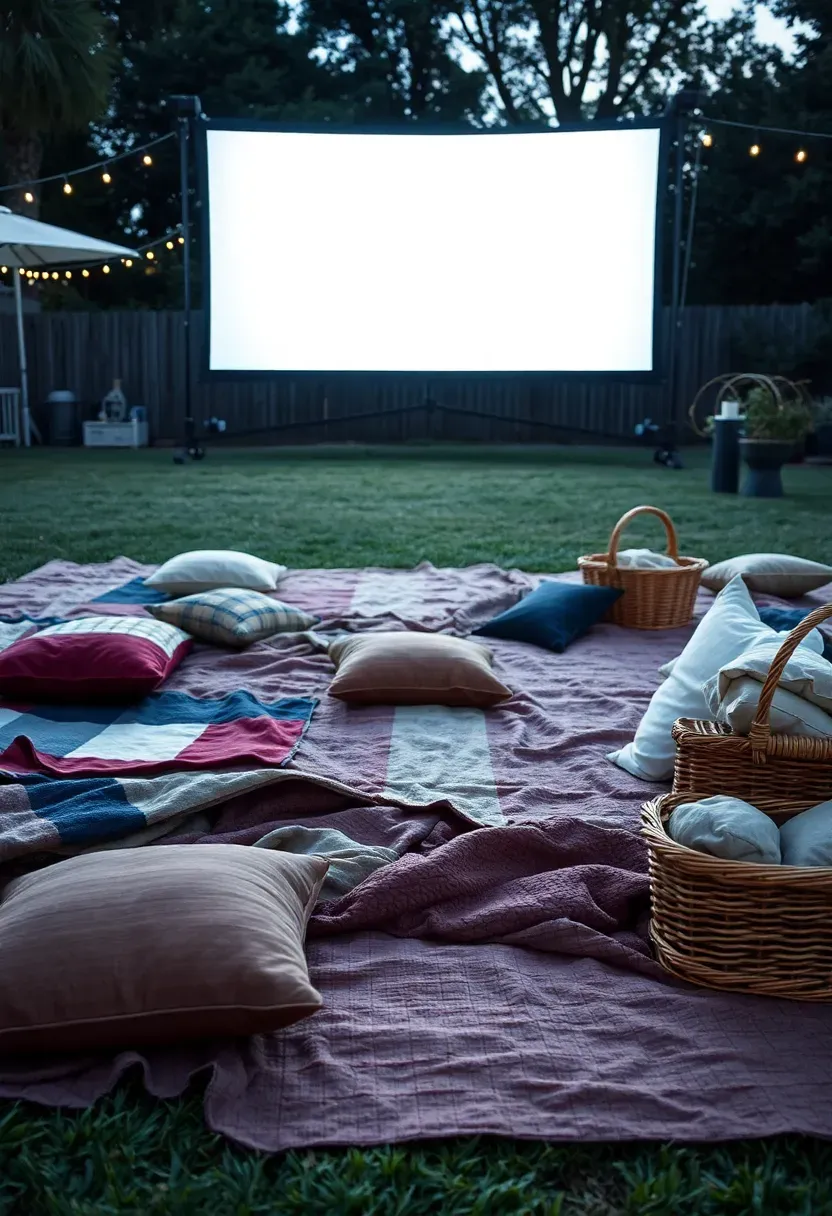
7. Layered Blanket Lawn
The simplest movie night seating requires zero furniture. Lay down a waterproof picnic blanket first (the kind with a nylon backing) to block ground moisture, then stack quilts and fleece throws on top. The waterproof layer matters — by 9 PM in most climates, grass is already damp with dew, and that moisture wicks through cotton in minutes. Spread blankets in a gentle arc rather than straight rows so everyone angles slightly toward the screen center. Budget pick: moving blankets from Harbor Freight ($8 each) are thick, washable, and you will not care if they get dirty. Pile extra pillows at the back for people who want to lean against something.
Tips
- Lay blankets 30 minutes before showtime so the ground underneath warms slightly and feels less cold through the fabric
- Keep a stack of extra fleece throws in a basket near the back — temperatures drop fast after sunset
- Avoid white or light-colored blankets near the screen; they reflect projector light and create glare
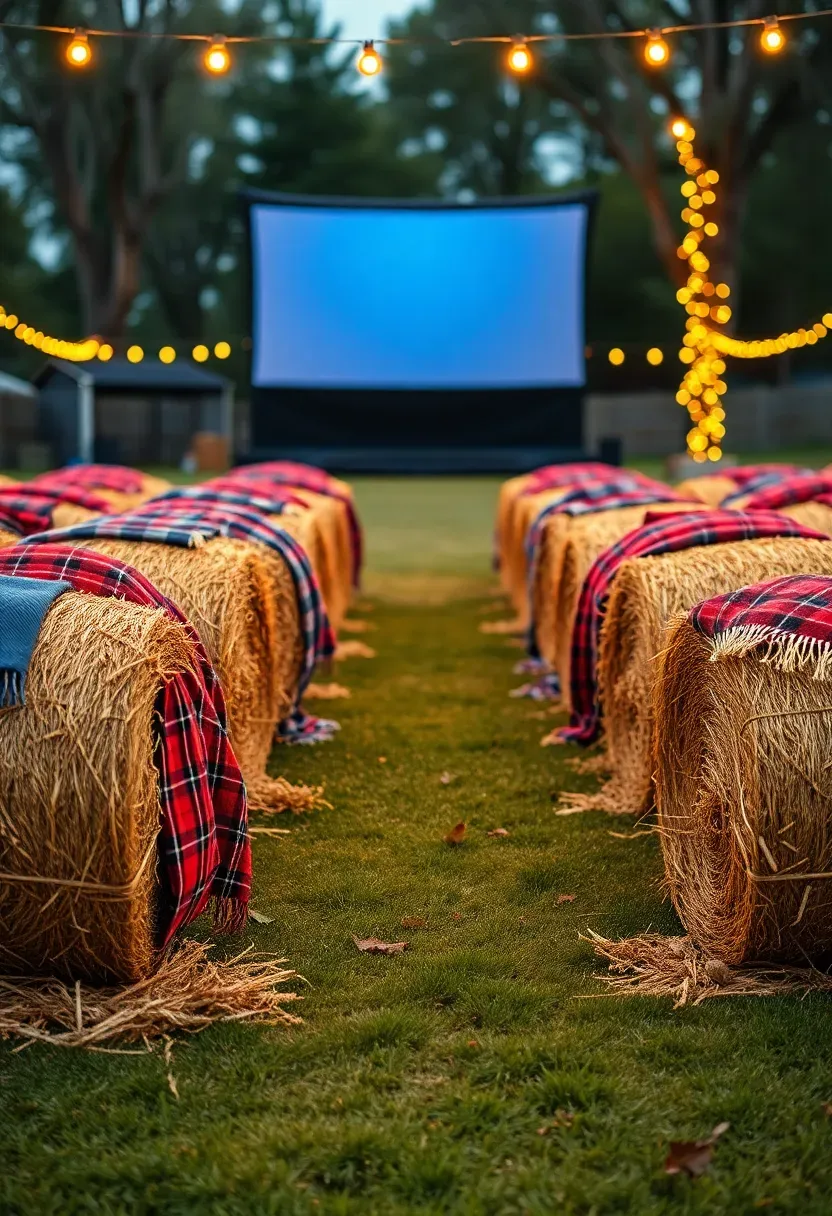
8. Hay Bale Theater Rows
Hay bales solve two problems at once: they provide elevated seating with natural back support, and they look incredible in photos. A standard rectangular bale measures about 36 by 18 by 14 inches — tall enough to sit on without cushions, though a folded blanket on top adds comfort. Arrange them in curved rows with the arcs facing the screen, spacing bales about 6 inches apart so people can squeeze through to their seats. Most feed stores sell bales for $5-$8 each. After the movie season ends, break them apart and use the straw as garden mulch. They smell good, they are completely disposable, and they give the whole setup a rural drive-in feel.
Tips
- Drape each bale with a blanket to prevent itchy straw from poking through clothes
- Keep bales dry — wet hay molds within 48 hours and produces an awful smell
- Position the back row on two stacked bales for tiered sightlines
Recommended
Items for this idea
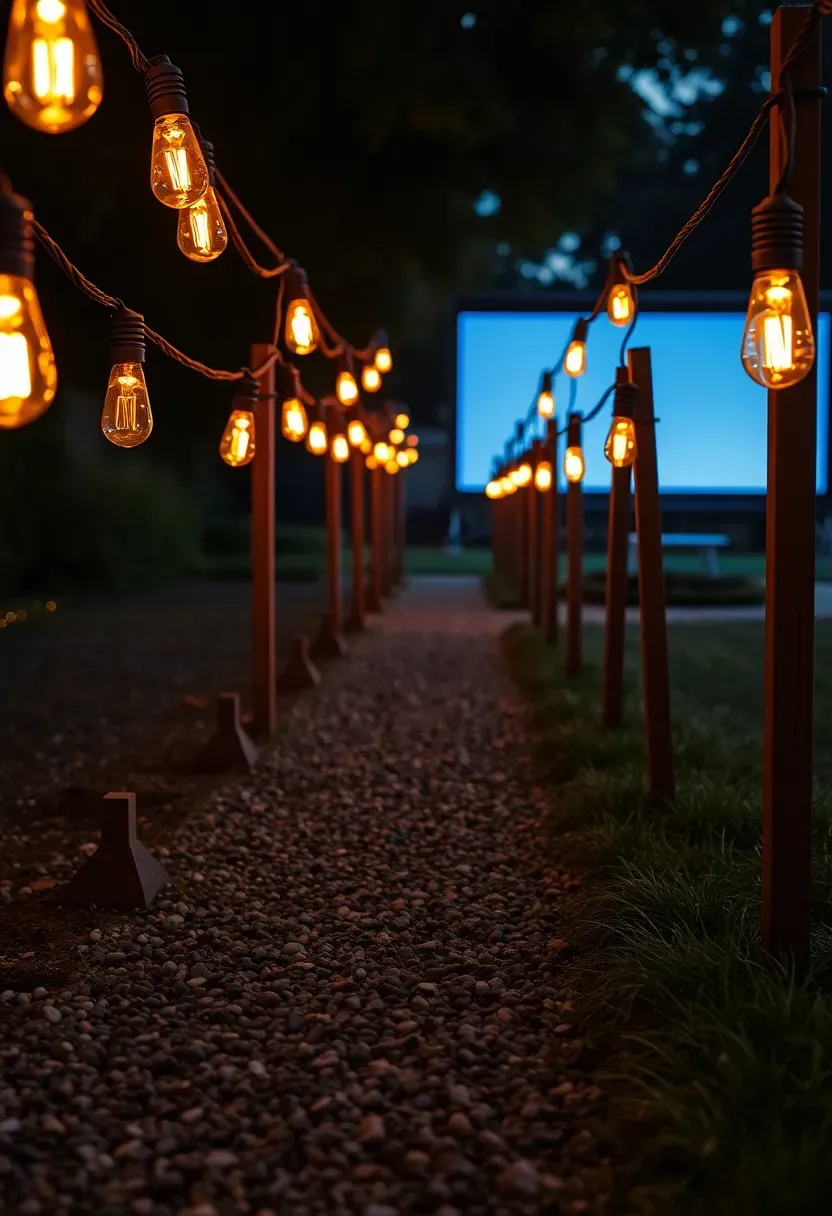
9. Hanging Edison Bulb Walkway
How to set the scene
A lit walkway from the house to the screening area sets the mood before anyone sees the screen. Edison bulbs on low posts create a warm corridor effect.
Step 1: Set the posts
Drive 3-foot wooden garden stakes into the ground every 6 feet along both sides of the path. You need them short — waist height at most — so the bulbs hang at knee level and do not compete with the projector.
Step 2: Run the lights
Drape a 25-foot strand of Edison bulbs between the stakes in a gentle zigzag. Use outdoor-rated clips to keep the wire close to the ground level of each stake.
Step 3: Dim them during the movie
Plug the strand into a $12 outdoor dimmer. During the walk to the seating area, full brightness. Once the movie starts, drop them to 20% — just enough glow to find your drink without washing out the screen.
Watch out
Make sure the cord path does not cross the main walking lane at ground level. Tape it down or route it behind the stakes to avoid tripping hazards in the dark.
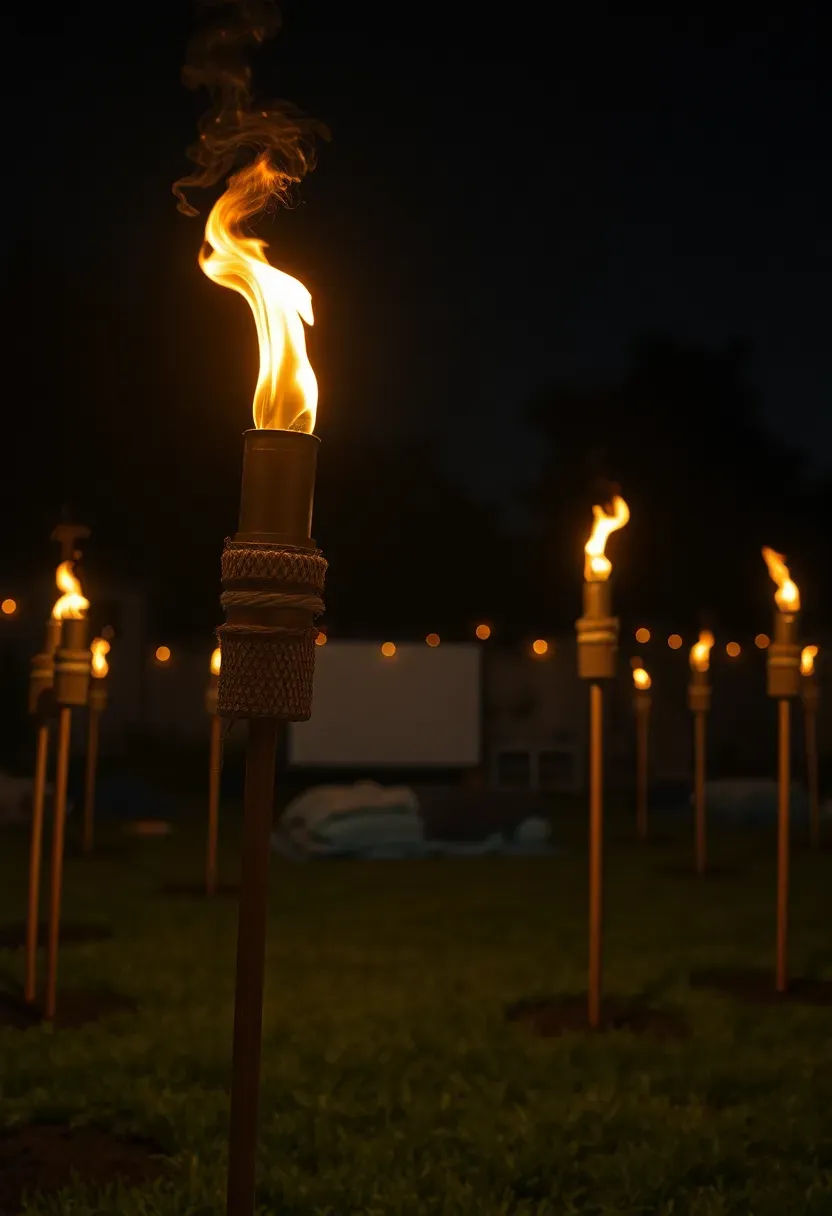
10. Tiki Torch Perimeter
Tiki torches define the edges of your movie area while keeping bugs at a distance. Citronella fuel does repel mosquitoes within a 5-foot radius per torch — not perfectly, but noticeably. Place torches every 8 feet around the perimeter of the seating zone, angled slightly outward so the flame sits away from anyone walking past. Standard bamboo torches from the garden center cost $3-$5 each and burn for about 5 hours on one fill of fuel. The flickering firelight also gives the whole area a campfire atmosphere that flat electric lights cannot replicate. For safety, push each stake at least 10 inches into the soil and keep torches 6 feet from any fabric — blankets, screen, canopy, or clothing hung on a chair.
Tips
- Fill torches and let wicks soak for 20 minutes before lighting for a clean, even burn
- Metal torches with a snuffer cap last for years; bamboo ones split after two seasons
- Place one torch near the snack table so people can see what they are grabbing without using a phone flashlight
Recommended
Items for this idea
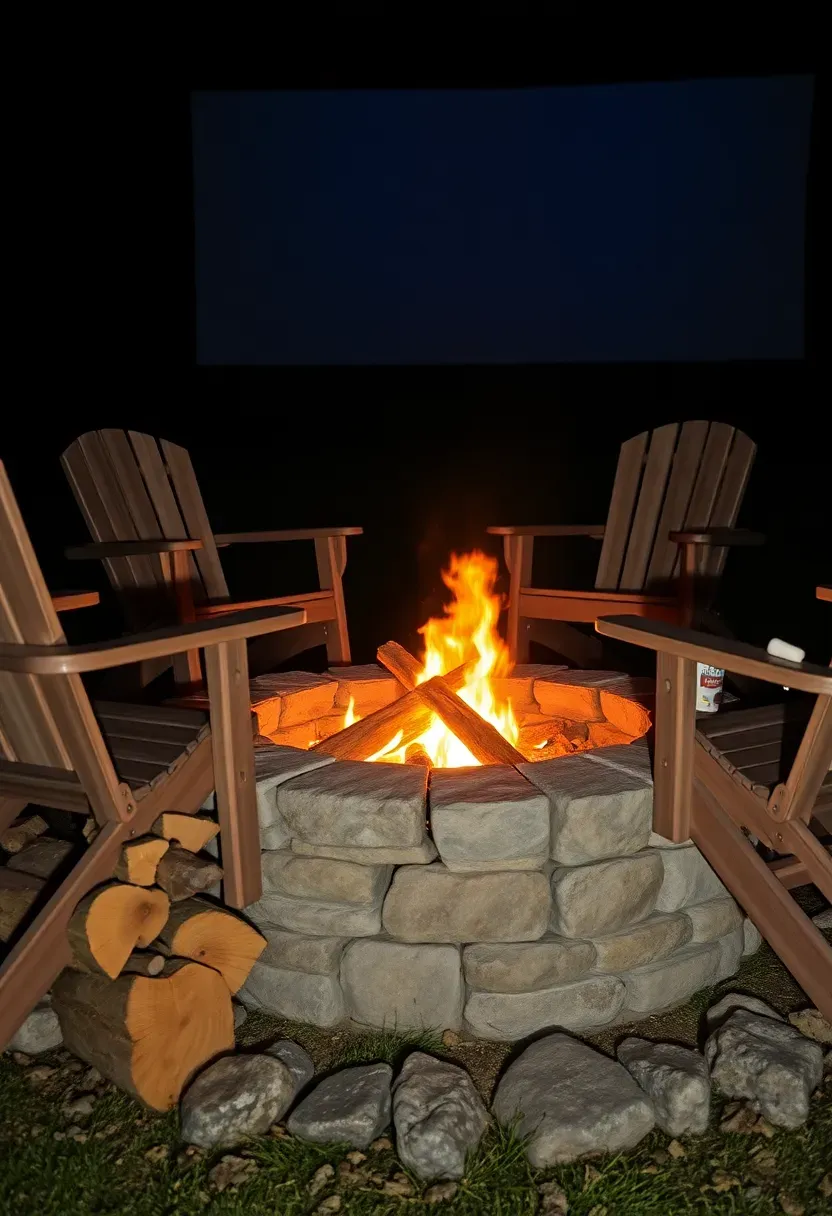
11. Fire Pit Intermission Zone
A fire pit positioned behind the main seating area gives people somewhere to go during halftime, bathroom breaks, or after the credits roll. It extends the evening — without a fire pit, everyone drifts inside once the movie ends. Place it at least 20 feet behind the last row of seating so the light does not reach the screen during the film. A simple steel bowl fire pit ($50-$80) works fine; you do not need a built-in stone ring for this purpose. Keep a small stack of firewood and a bag of marshmallows nearby. The transition from "movie is over" to "let's sit by the fire" happens naturally and adds an extra hour to the evening every time.
Tips
- Light the fire during the last 15 minutes of the movie so it is going strong when credits roll
- Position chairs in a circle, not a row, so the fire pit area feels separate from the theater
- Keep a bucket of sand or a garden hose within reach — standard fire safety, but easy to forget in the dark
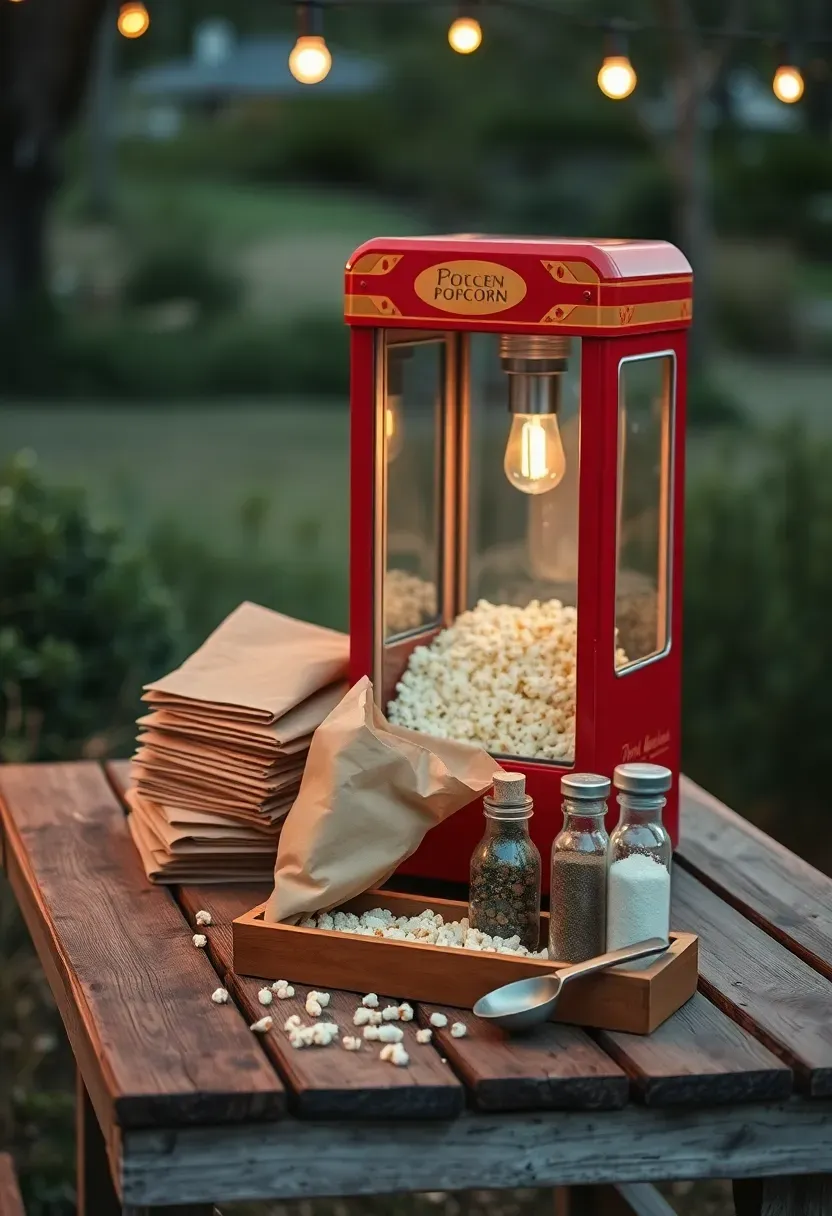
12. Outdoor Popcorn Station
Nothing says movie night like fresh popcorn, and a dedicated station turns it into an event. A countertop popcorn machine ($40-$70, the kind with the glass kettle) plugs into any outdoor outlet and pops a batch in under 4 minutes. Set it on a folding table near the entrance to the seating area with a stack of paper bags or bowls, plus a few seasoning options: nutritional yeast, everything bagel seasoning, truffle salt, ranch powder. The smell alone draws people outside faster than any invitation. For a simpler setup, skip the machine and use a large stockpot on a portable butane burner — it actually produces better popcorn with more even popping.
Tips
- Pop batches before the movie starts and keep them warm in a large paper bag; popcorn goes stale fast in open bowls
- Offer both salted butter and a dry seasoning option for guests who do not want greasy hands
- Line the table with kraft paper for instant cleanup — fold it up with the crumbs and toss it
Recommended
Items for this idea
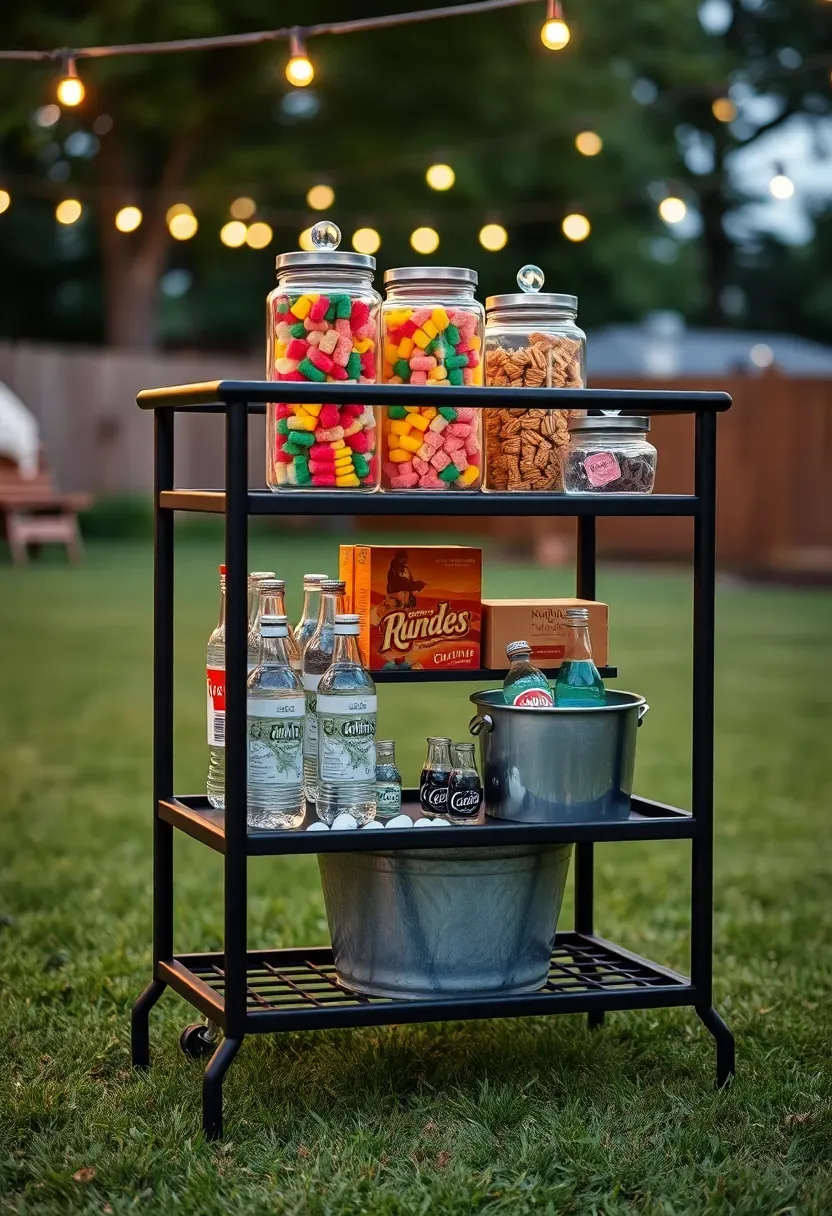
13. Candy Bar Cart
A rolling bar cart loaded with movie theater candy takes about 10 minutes to assemble and gets a reaction every time. Buy a mix of boxed candy (Milk Duds, Junior Mints, Sour Patch Kids — the same brands you find at the concession stand) and fill a few glass jars with bulk gummy bears and chocolate-covered raisins. Add a small ice bucket with bottled drinks on the lower shelf. The cart itself does not need to be expensive — a $30 utility cart from IKEA works perfectly. Roll it out before the screening and park it next to the seating area where people can grab snacks without blocking the screen. The whole spread costs about $25-$40 depending on how much candy you buy.
Tips
- Glass jars with lids keep bugs out of open candy — critical on warm summer nights
- Label jars with small chalkboard tags if you have guests with allergies
- Include a few non-candy options like trail mix or pretzels for people who prefer salty snacks
14. Mosquito Net Canopy
Why it matters
Mosquitoes peak at exactly the hours you want to be outside watching movies — dusk through midnight. Citronella candles and torches help but do not create a sealed barrier.
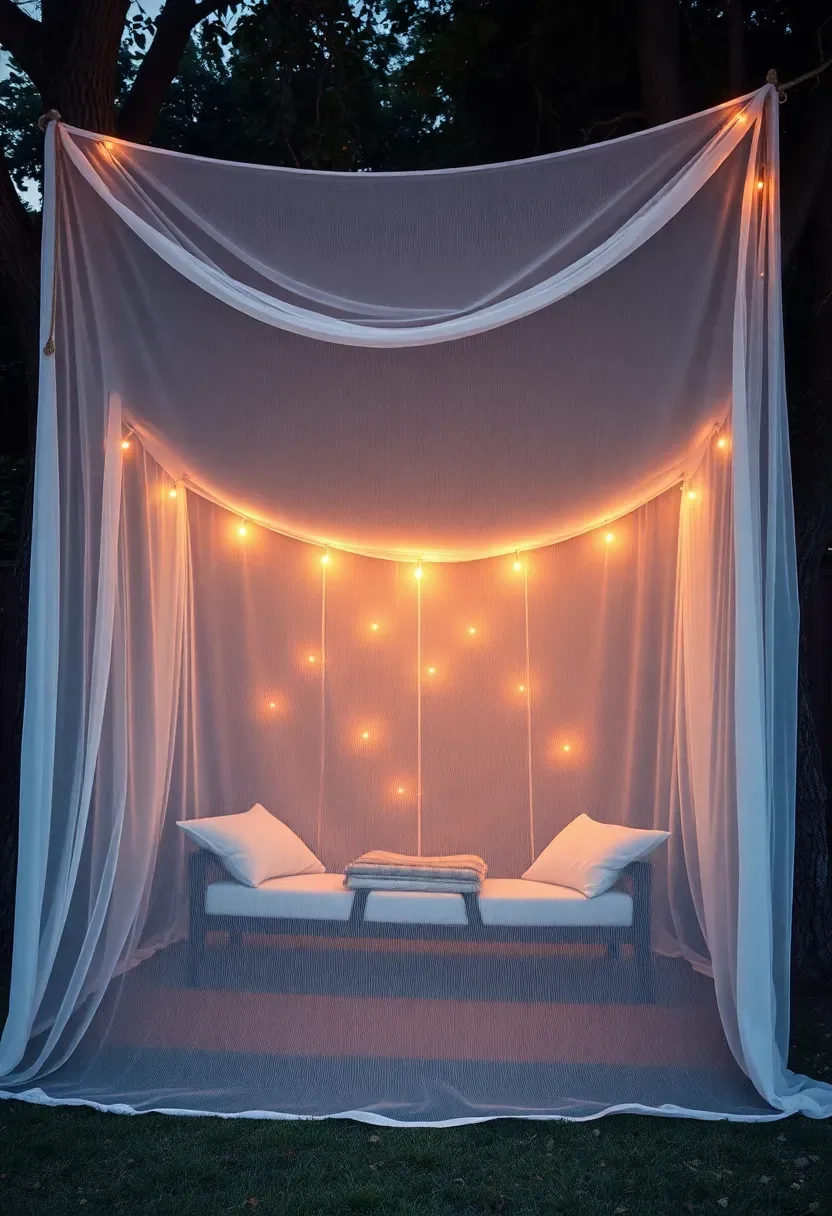
The solution
A large mosquito net canopy (12x12 or 16x16 feet) hung from a central pole or tree branch creates an enclosed viewing area. These nets weigh almost nothing, pack down to the size of a water bottle, and cost $20-$40. Drape the net over a rope strung between two trees or poles at about 8 feet high, and stake the bottom edges to the ground with landscape pins. The mesh is fine enough to block mosquitoes but open enough that air circulates freely. You can see the screen clearly through the netting — white mesh works better than green for minimal visual interference.
Choose this if
You live in a humid climate where mosquitoes are aggressive from June through September and sprays alone are not enough.
Recommended
Items for this idea
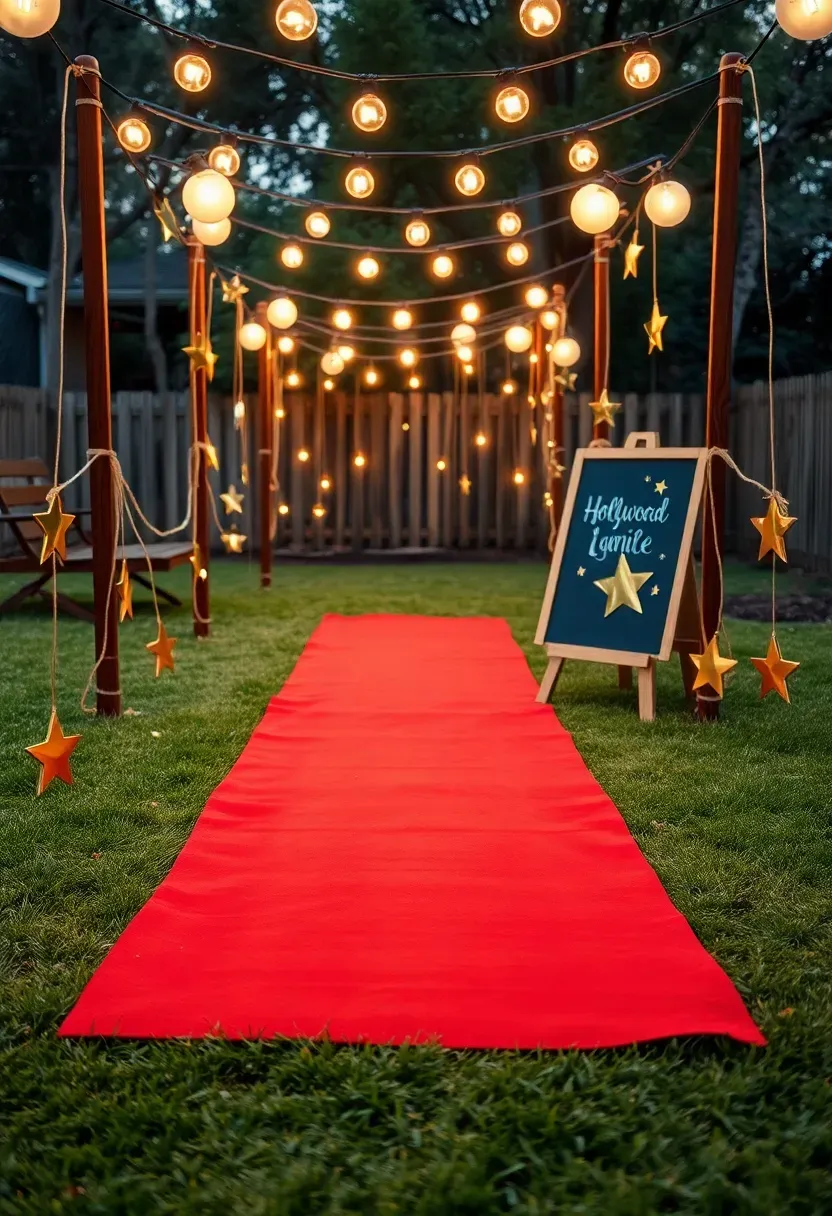
15. Themed Movie Night Decor
Matching the decor to the movie makes the night memorable rather than just another screening. A few targeted props go further than generic decorations. For a horror movie night, line the path with carved jack-o-lanterns and use red-gelled flashlights. For a sci-fi screening, tape glow sticks to tent stakes and scatter them across the lawn like a landing strip. Kids' movie nights work well with character cutouts printed at a copy shop and mounted on foam board. The key is restraint — pick three or four themed elements rather than decorating every surface. A themed ticket printed on cardstock and handed to each guest at the door costs almost nothing but makes the evening feel planned rather than thrown together.
Tips
- Set up a small photo area with a themed backdrop near the entrance — guests will share photos and promote your next night for free
- Match the snack menu to the theme: Italian food for a mobster film, fish and chips for a British comedy
- Reuse props across multiple themed nights by rotating genres monthly
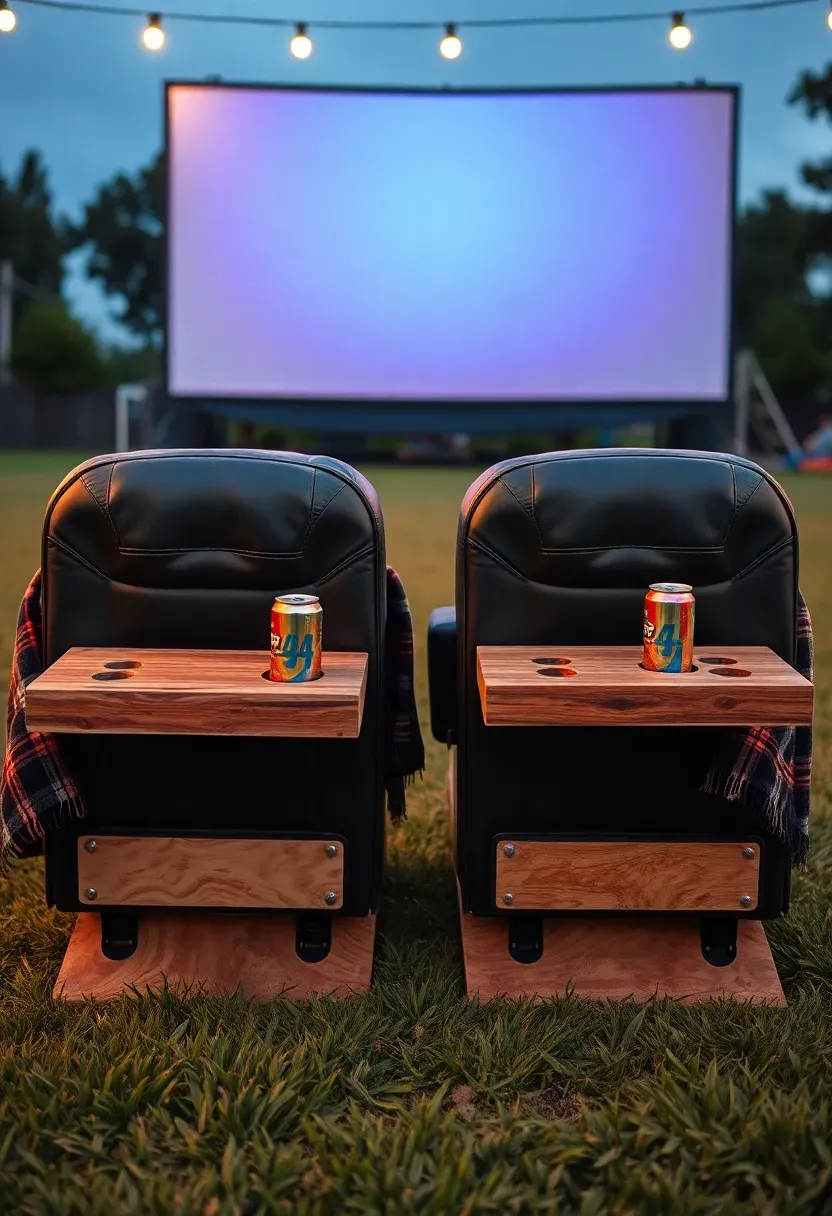
16. Drive-In Style Car Seats
This one takes more effort, but the payoff is worth it. Salvage bench seats from a junkyard (most charge $20-$50 per seat) and set them directly on the lawn facing the screen. They are already ergonomically shaped for sitting and watching something in front of you. A bench seat from a 1990s truck or van comfortably fits three adults. Bolt a scrap plywood base underneath so the seat sits level on uneven ground. Add a cup holder tray (a board with drilled holes) on each armrest. The drive-in aesthetic is immediately obvious to anyone who walks into the yard, and the seats are far more comfortable than folding chairs. Pair them with a small FM transmitter connected to the projector's audio output so guests can tune in on a portable radio — full drive-in experience.
Tips
- Clean salvaged seats thoroughly with upholstery cleaner and let them sun-dry for two days before use
- Cover seats with fitted sheets between movie nights to protect from dew and bird droppings
- Place the front seats lower (directly on grass) and rear seats on a plywood riser for sightlines
Recommended
Items for this idea
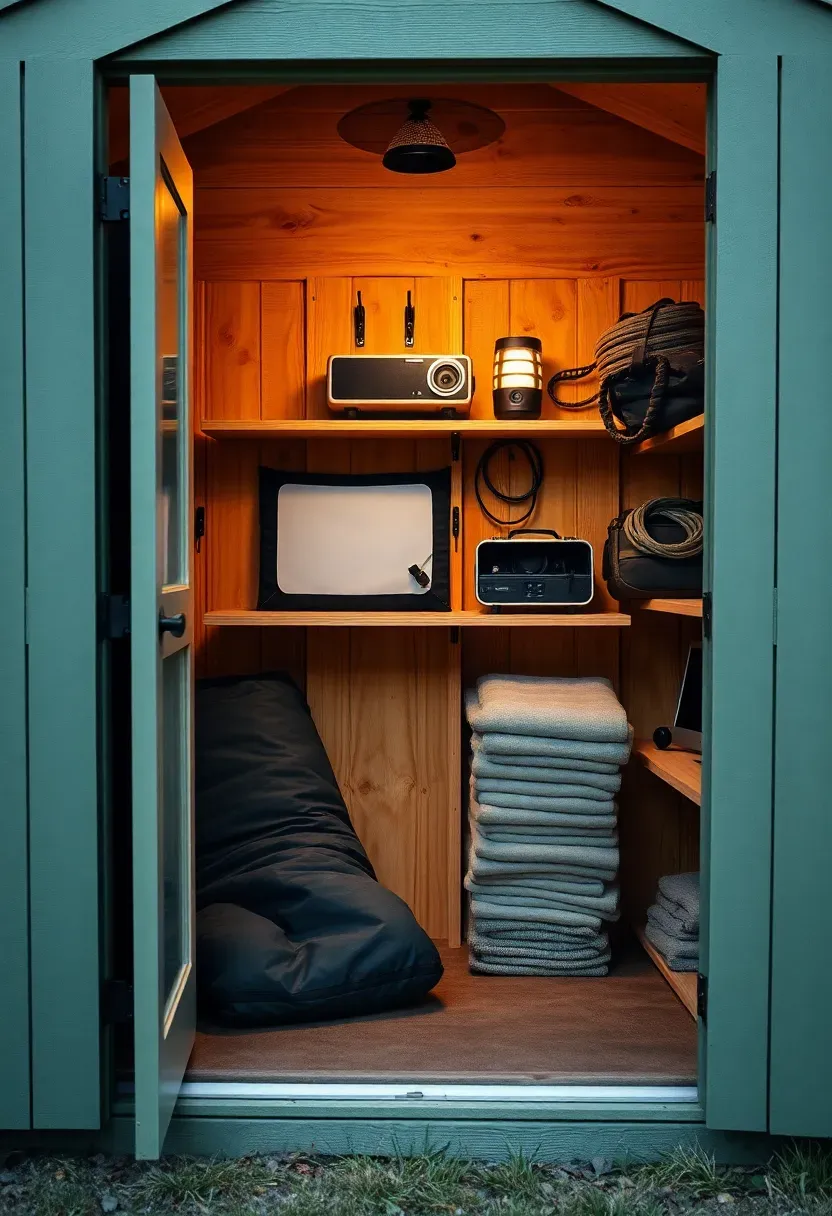
17. Projector and Screen Storage Shed
If you host movie nights regularly, a dedicated storage spot eliminates the 30-minute setup scramble. A 4x4-foot mini shed or large outdoor storage box keeps the projector, screen, extension cords, speakers, and blankets in one place — protected from weather and ready to grab. Mount hooks on the inside walls for cable organizers and a shelf for the projector case. A weatherproof power strip inside the shed means you can charge the projector and speakers between uses without bringing them inside. You can build a basic shed from fence boards for under $100, or repurpose a large deck box ($60-$80) that doubles as extra seating during the movie. Label each shelf so everything goes back in the same spot, and you cut setup time from 30 minutes to about 8.
Tips
- Add a silica gel dehumidifier packet inside to protect electronics from moisture between uses
- Keep a small toolkit in the shed: zip ties, gaffer tape, extra bulbs, a multi-tool, and spare batteries
- Mount a battery-operated motion light inside so you can find gear in the dark without fumbling with your phone
Quick FAQ
How many lumens does an outdoor projector need? For a dark backyard after sunset, 300-500 ANSI lumens works well for screens up to 100 inches. If your yard has street lights or a neighbor's porch light spilling in, aim for 700+ lumens. The key measurement is ANSI lumens, not the inflated "lumens" number some budget projectors advertise.
When should I start the movie? Wait until the sky is fully dark — typically 30-45 minutes after sunset depending on your latitude and time of year. Starting too early means a washed-out image for the first 20 minutes. Use the waiting time for snacks and socializing.
Can I use a white wall instead of a screen? Yes, if the wall is smooth, flat, and painted matte white. Textured stucco or brick creates visible shadows across the image. A satin or semi-gloss paint finish reflects light unevenly and creates a hotspot in the center. Flat white latex paint on a smooth surface works nearly as well as a dedicated screen.
Do I need to worry about noise complaints? Keep volume reasonable and end by 10 PM on weeknights. Sound carries farther outdoors than you expect — what sounds moderate from your seating area can be clearly audible three houses away. A pair of speakers aimed at the audience (rather than one loud speaker) lets you lower overall volume while keeping dialogue clear.
What is the best surface to set up on? Flat grass is ideal. Concrete patios work but get cold and hard without padding. Avoid gravel — it shifts under blankets and chairs. If your lawn slopes, position the screen at the low end and seat the audience on the incline for natural stadium-style sightlines.
Backyard movie nights are one of those rare projects where the result is better than the effort. Even the most basic setup — a portable projector, a white sheet, and a pile of blankets — creates an evening people talk about for weeks. Start simple, upgrade one piece at a time, and do not overthink the details. The movie does most of the work. Your job is just to make the seat comfortable, the sound audible, and the popcorn warm.
Pinterest cover for 17 Backyard Movie Night Ideas
About the author
OBCD
CGI visualization and interior design content. We create detailed 3D renders and curate practical design ideas for every room in your home.