23 Backyard Landscape Ideas
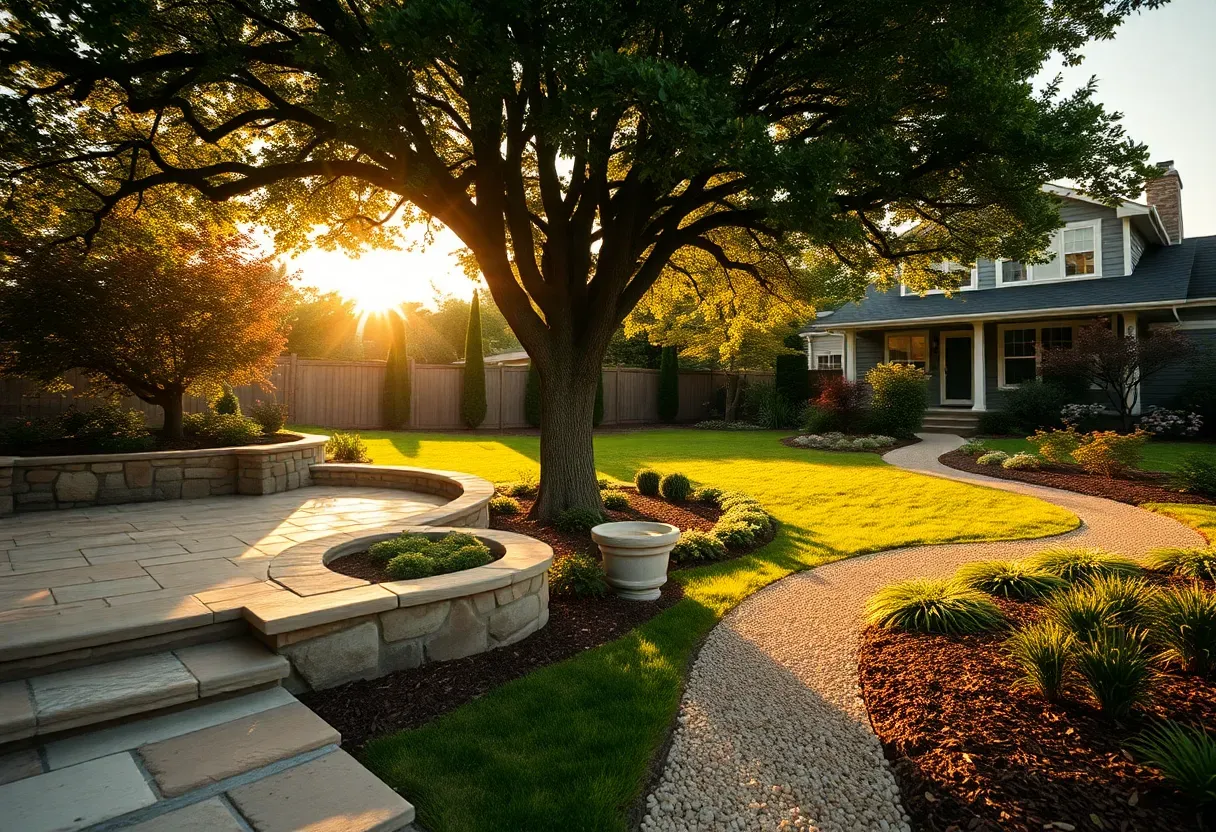
My neighbor spent $14,000 on a professional landscape plan two years ago. It looked incredible in the rendering — layered beds, a curved stone wall, specimen trees in all the right spots. Six months after installation, half the plants were dead because nobody accounted for the 4-hour afternoon shade from his garage. The plan was beautiful on paper but ignored the yard it was supposed to fit. Good backyard landscaping starts with watching your actual space: where water pools after rain, which corners get scorched by July sun, where the soil stays damp versus bone dry. The ideas below work across a wide range of yard sizes and climates, but each one asks you to observe your conditions first and design second.
Here are 23 approaches organized from ground-level plantings up through hardscape, vertical elements, and finishing details.
Table of Contents
- Layered Perennial Border
- Dry Creek Bed
- Native Meadow Patch
- Stone Retaining Wall Terrace
- Shade Garden Under Mature Trees
- Gravel Courtyard with Potted Plants
- Rain Garden
- Ornamental Grass Screen
- Flagstone Patio with Creeping Ground Cover
- Raised Planting Beds with Stone Walls
- Japanese-Inspired Gravel Garden
- Mixed Hedge Border
- Sloped Hillside Planting
- Edible Landscape Integration
- Boulder Grouping Focal Point
- Water Feature with Recirculating Fountain
- Pergola with Climbing Vines
- Low Stone Wall Seating
- Drought-Tolerant Xeriscape
- Wildflower Cutting Garden
- Sunken Conversation Area
- Evergreen Foundation Planting
- Landscape Lighting Plan
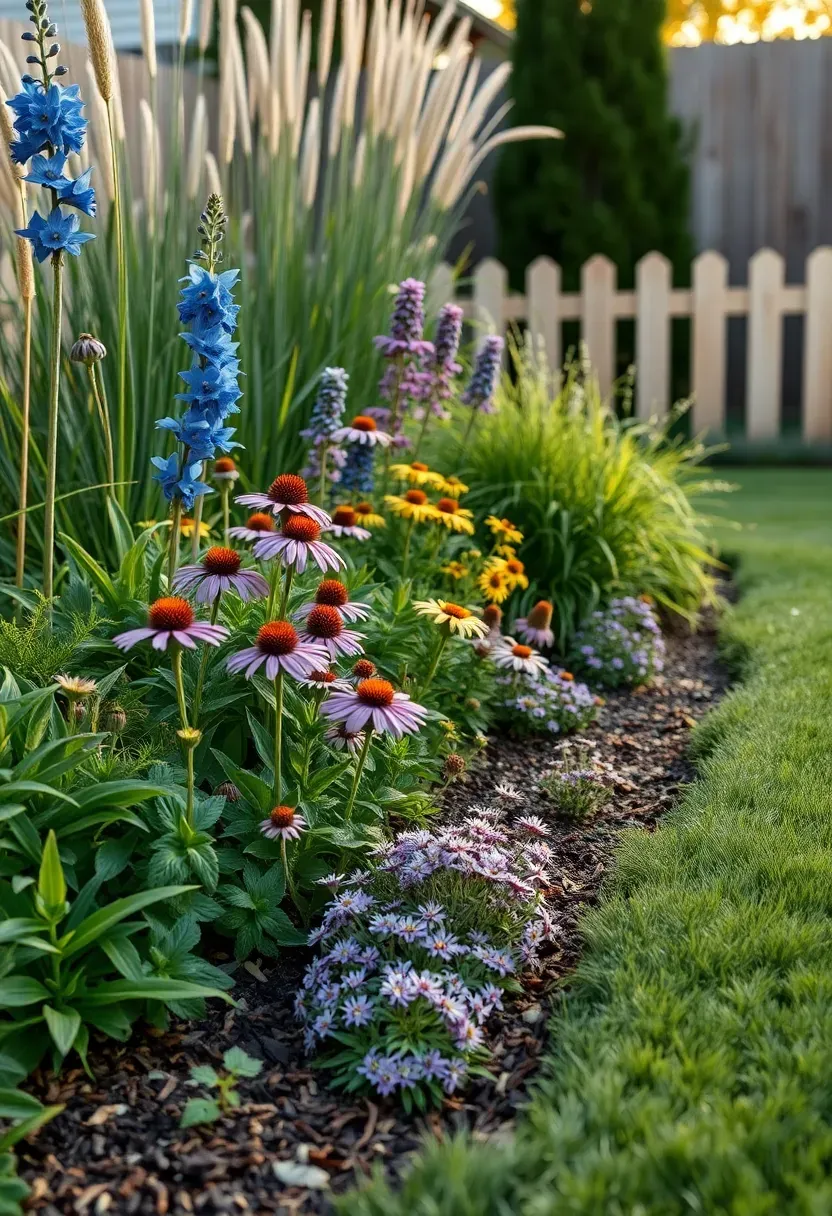
1. Layered Perennial Border
A perennial border arranged by height gives your yard depth without any permanent structures. Place tall plants (4-6 feet) like Joe Pye weed or ornamental grasses along the back, mid-height bloomers (2-3 feet) such as coneflower and black-eyed Susan through the middle, and low spreaders like catmint or sedum along the front edge. Plan for three seasons of bloom by mixing spring, summer, and fall flowering species in each row. A 30-foot border about 6 feet deep needs roughly 45-60 plants depending on spacing — figure $4-$8 per gallon pot at most nurseries.
Tips
- Group each variety in clusters of 3-5 plants rather than alternating singles; massed color reads better from a distance.
- Leave 18-inch gaps between the front row and your lawn edge for mower clearance.
- Cut everything to 4-6 inches in late February before new growth starts; the dead stalks provide winter habitat for beneficial insects.
We picked a few things that go well with this idea: Bloomingbulb Gracillimus Maiden Grass (3 Divisions) (★3.4), Red Fountain Grass Live Plants (2-Pack) and Pampas Grass Perennial with White Plumes (★4.0). As an Amazon Associate we earn from qualifying purchases.
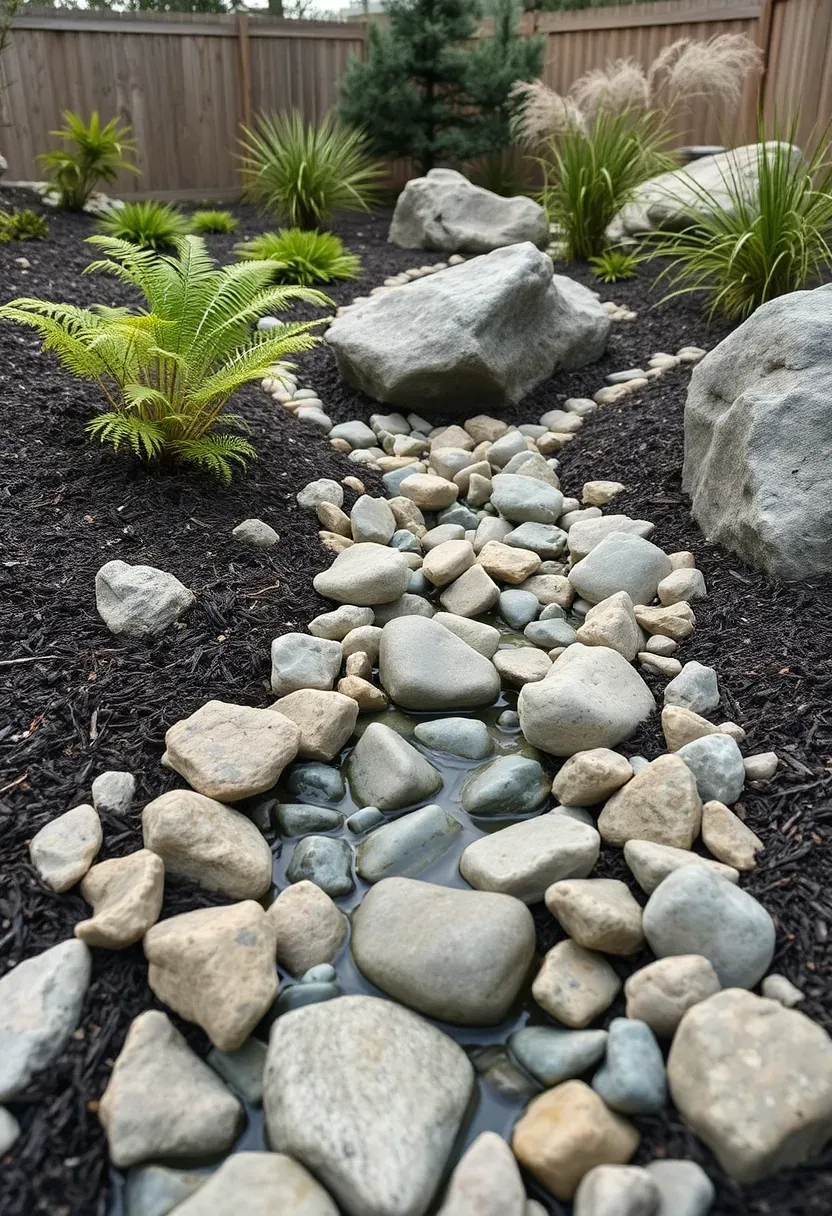
2. Dry Creek Bed
The Problem
Water pools in a low spot after every rain, drowning grass and creating a mud pit that takes days to dry out. French drains work but are invisible — you spend the money and effort with nothing to show visually.
The Solution
A dry creek bed channels runoff while looking like a deliberate landscape feature. Excavate a shallow trench (6-8 inches deep, 2-4 feet wide) along the natural drainage line, line it with landscape fabric, and fill with a mix of 4-6 inch river rock on the bottom and 2-3 inch rounded stone on top. Place a few larger boulders at bends for a natural appearance. Plant moisture-loving ferns, sedges, or blue flag iris along the banks. Total material cost for a 25-foot run is typically $200-$400 depending on local stone prices.
Pros and Cons
Pros: Solves drainage without buried pipe; zero maintenance once installed; looks good dry or wet; increases yard usability by eliminating soggy zones.
Cons: Requires correct slope calculation (1-2% grade minimum); leaf debris collects between rocks in fall; difficult to relocate once built.
We picked a few things that go well with this idea: Gardencoin Aluminum LED Path Lights (6-Pack) (★4.7), LEONLITE LED Landscape Path Lights (12-Pack) (★4.4) and SUNVIE Cast-Aluminum Landscape Path Lights (12-Pack) (★4.5). As an Amazon Associate we earn from qualifying purchases.
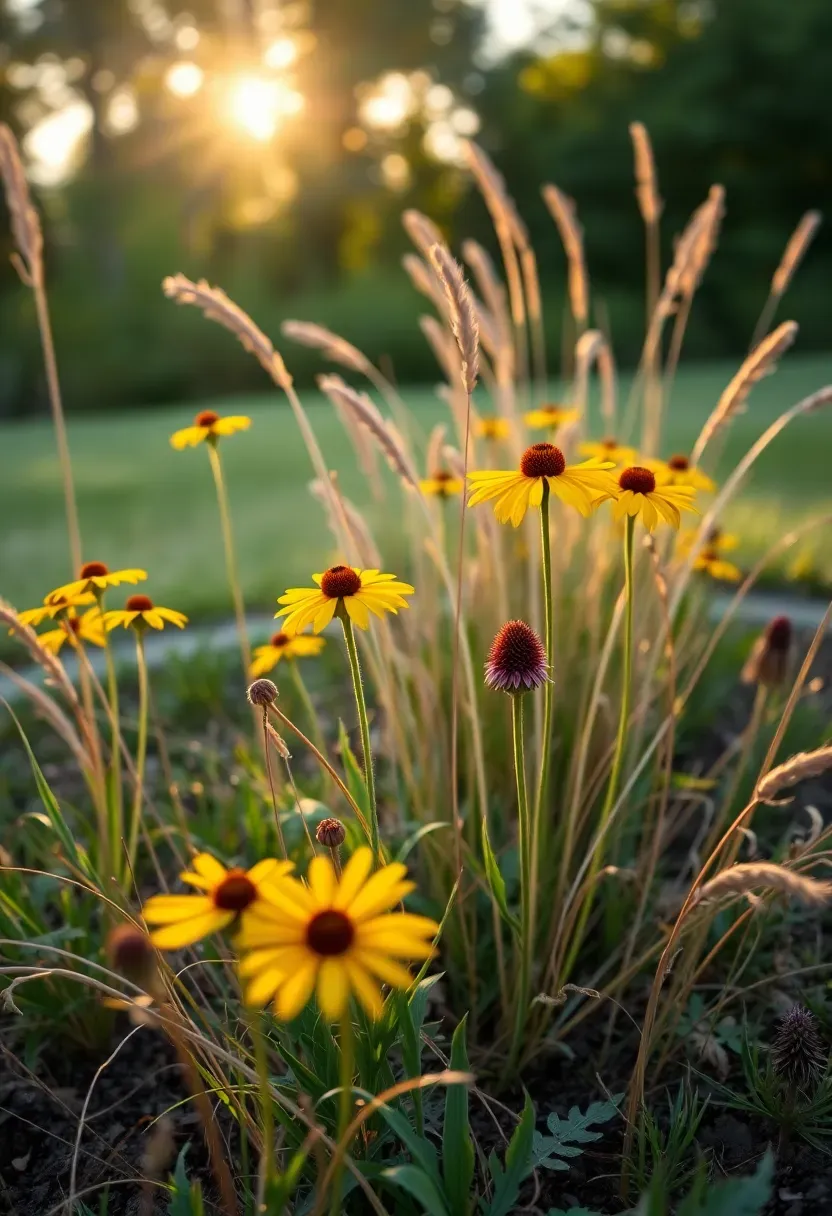
3. Native Meadow Patch
Converting a section of lawn to native meadow cuts mowing, supports pollinators, and adds seasonal texture that turf grass cannot match. Start with an area at least 10x10 feet — anything smaller reads as neglect rather than intention. Kill existing grass with a smother method (cardboard layers) or solarization (clear plastic for 6-8 weeks in summer). Seed with a regional native mix in fall for cold-climate zones or early spring in the South. Expect a weedy first year while perennials establish root systems. By year two, the meadow fills in and only needs one annual mowing in late winter.
Tips
- Define edges with a clean mowed strip at least 3 feet wide so the meadow reads as intentional, not abandoned.
- Buy seed mixes from regional native plant suppliers rather than big-box "wildflower" blends, which often contain non-native annuals that die after one season.
- Burn or mow to 6 inches every March to knock back woody invaders and recycle nutrients.
We picked a few things that go well with this idea: Galvanized Steel Landscape Edging (6-Pack, 20ft) (★4.5), Galvanized Steel Landscape Edging (10-Pack, 33ft) (★4.5) and Worth Garden Steel Landscape Edging (10-Pack, 33ft) (★4.6). As an Amazon Associate we earn from qualifying purchases.
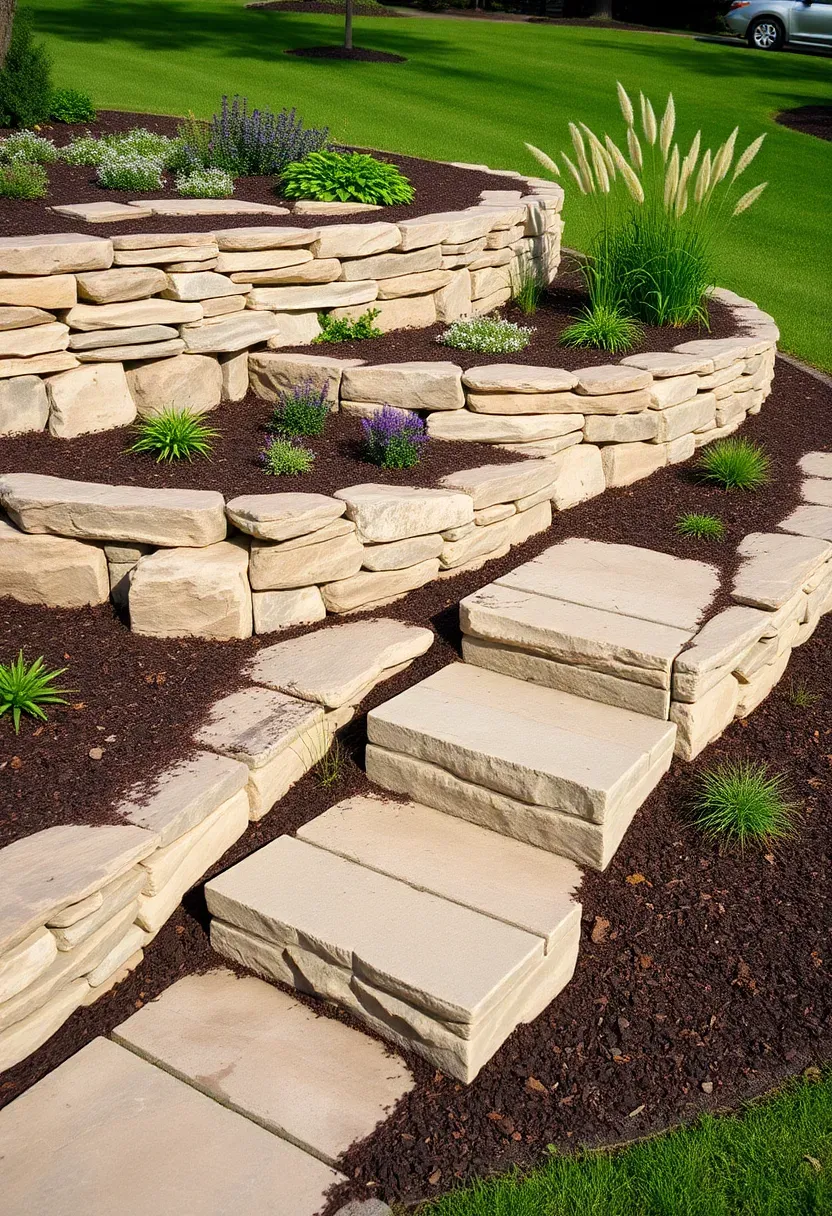
4. Stone Retaining Wall Terrace
How to Terrace a Slope
Gentle slopes (under 3:1 grade) are prime candidates for DIY terracing. Short walls — 2 feet or under — do not usually require engineering or permits in most jurisdictions.
Step 1: Measure and Mark
Drive stakes at the top and bottom of the slope. Run a string level between them to determine total elevation change. Divide by your desired wall height (18-24 inches works well) to get the number of tiers.
Step 2: Build the Base Wall
Dig a 6-inch trench at the base of the lowest tier. Fill with 4 inches of compacted gravel. Set the first course of wall block or natural stone, checking level every 4 feet. Stack remaining courses with a slight backward lean (about 1 inch per foot of wall height).
Step 3: Backfill and Plant
Fill behind each wall with gravel for the bottom third, then topsoil above. Plant each terrace level with species that match its sun exposure — the top tier gets more direct light than the lower one.
Watch Out
- Walls over 2 feet typically need a building permit and may require geogrid reinforcement depending on local codes.
- Always install perforated drain pipe behind the base course to prevent water pressure from pushing the wall outward.
Recommended
Items for this idea
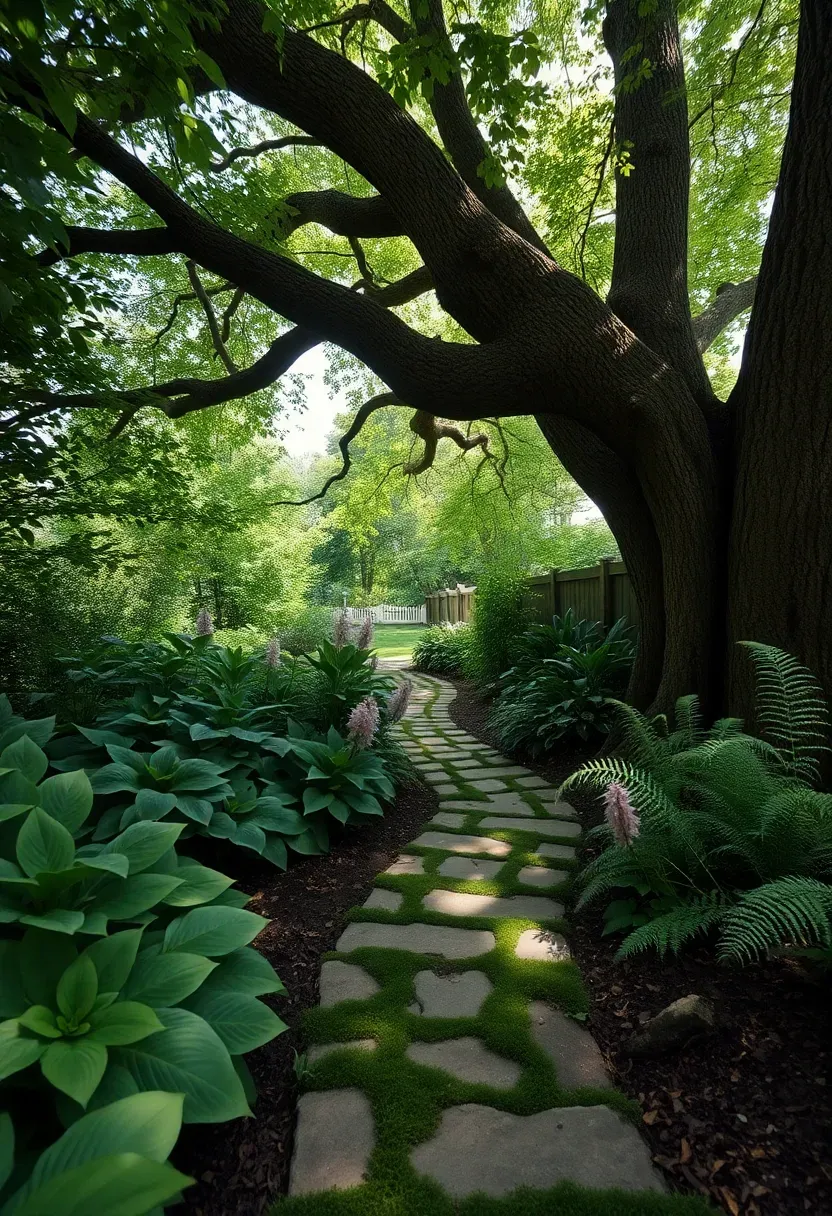
5. Shade Garden Under Mature Trees
The area beneath large deciduous trees is often bare dirt or patchy grass because turf cannot compete with root competition and filtered light. Rather than fighting it, lean into shade-tolerant species. Hostas, ferns, astilbe, heuchera, and brunnera thrive under canopy with as little as 2-3 hours of direct sun. Avoid digging deep holes near tree roots — instead, top-dress with 3-4 inches of quality compost and plant into that layer. Mulch with shredded hardwood bark to retain moisture and suppress weeds. The result is a lush understory that makes the tree look like it grew there on purpose rather than being surrounded by dead lawn.
Tips
- Do not pile soil or mulch against the tree trunk — keep a 6-inch gap around the base to prevent rot.
- Water shade gardens deeply once a week rather than lightly every day; tree roots absorb shallow moisture before perennials can reach it.
- Add spring-blooming bulbs (snowdrops, scilla, wood hyacinths) that flower before the tree canopy leafs out and blocks light.
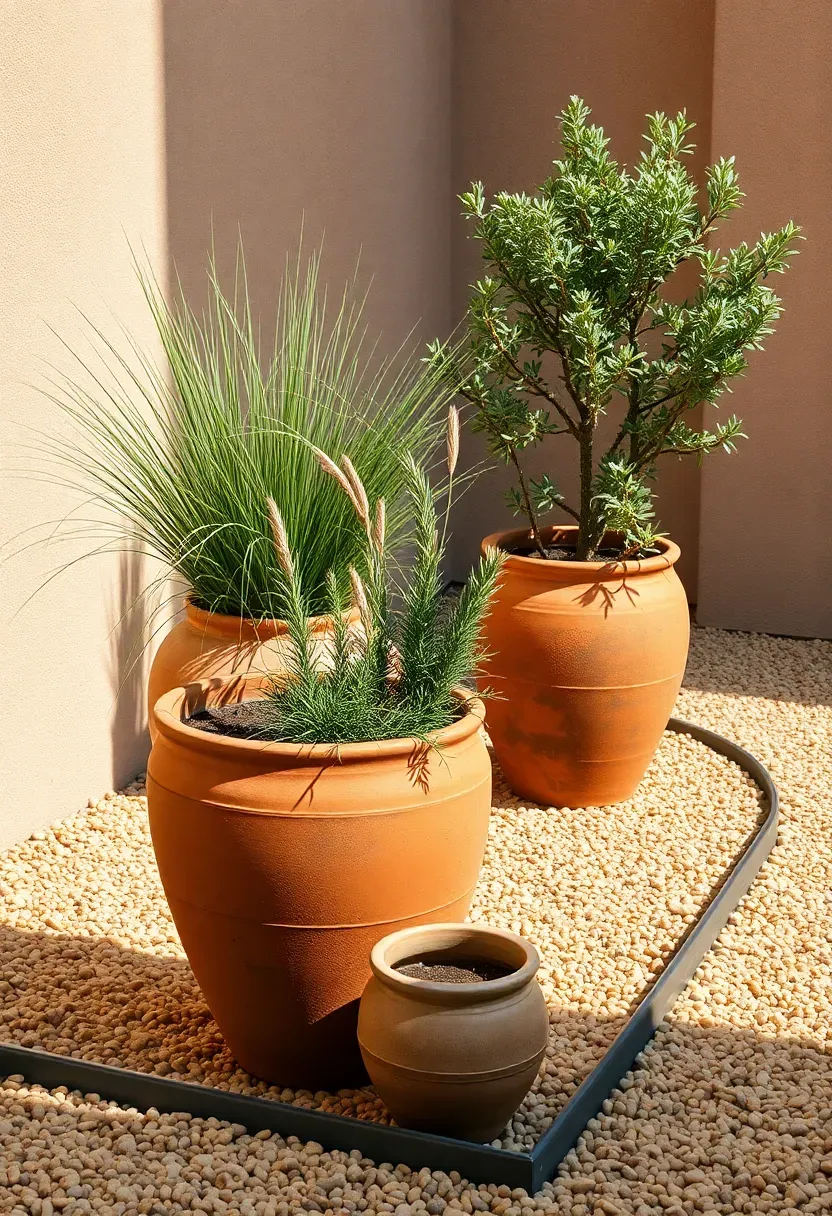
6. Gravel Courtyard with Potted Plants
A gravel courtyard eliminates the need for planting beds entirely — everything grows in containers you can rearrange, replace, or take with you when you move. This approach works especially well for renters, small yards, or anyone who wants a low-maintenance but green outdoor space. Lay 2-3 inches of 3/8-inch pea gravel or decomposed granite over landscape fabric within a defined border (steel edging, brick, or stone). Cluster terracotta pots, glazed ceramics, and galvanized planters in groups of odd numbers. Mix heights by using plant stands, overturned pots as risers, or tall architectural plants like agave or Italian cypress.
Tips
- Terracotta dries out fast in summer — line the inside with a plastic nursery pot to slow evaporation while keeping the look.
- Group pots near a water source to make daily summer watering practical rather than a chore that gets skipped.
- Add one oversized statement pot (24 inches or wider) as an anchor piece; too many small pots look scattered.
Recommended
Items for this idea
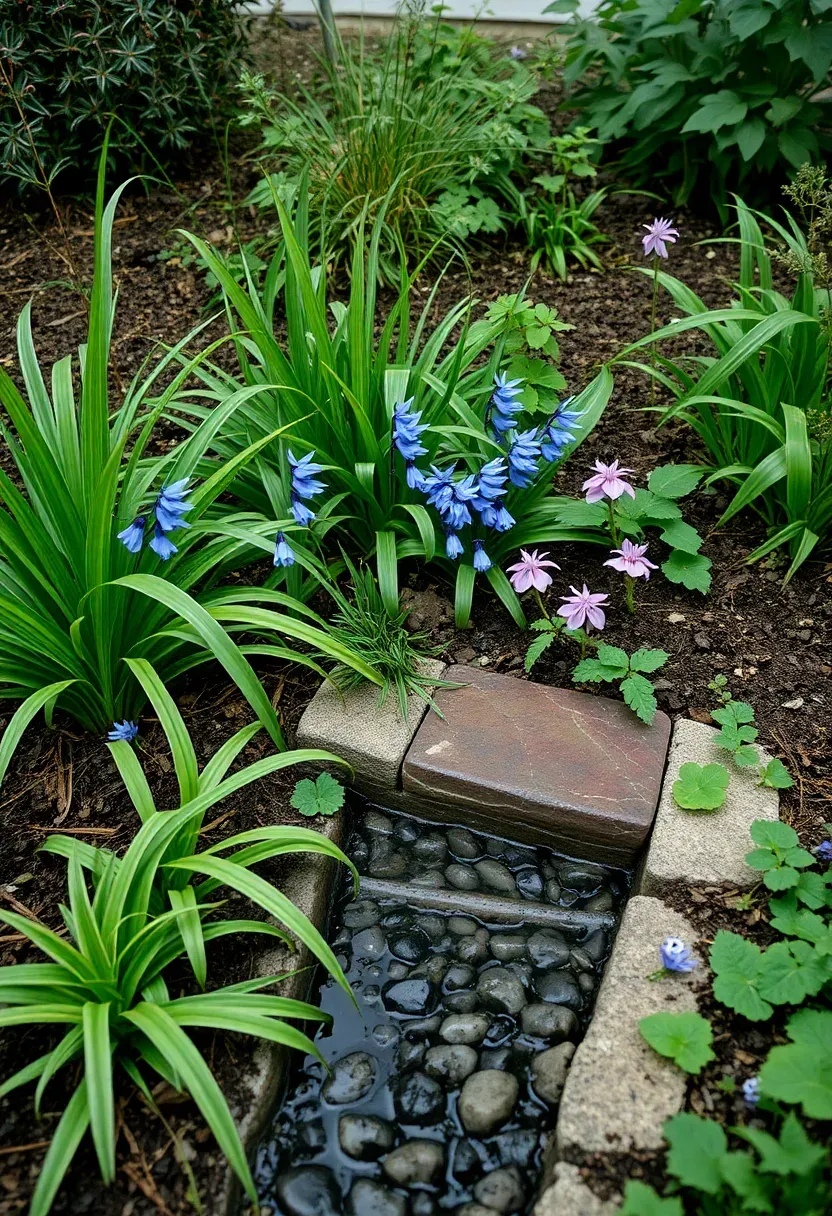
7. Rain Garden
Why Build One
A rain garden captures roof and surface runoff in a shallow planted depression, letting water infiltrate over 24-48 hours rather than running off into storm drains. A 150-square-foot rain garden can handle runoff from roughly 500 square feet of roof. Beyond stormwater management, rain gardens create a consistently moist growing zone perfect for plants that struggle in standard beds.
How to Build It
Choose a low spot at least 10 feet from your foundation. Dig an 8-12 inch deep basin with gently sloped sides. Amend the bottom with a 50/50 mix of compost and coarse sand to improve infiltration. Plant the deepest center zone with species that tolerate periodic standing water (blue flag iris, swamp milkweed, cardinal flower). Fill the mid-slope with adaptable plants like switchgrass and New England aster. Edge the rim with standard perennials that prefer average moisture.
Choose If
- Your yard has a visible runoff problem or standing water after storms.
- Local stormwater incentive programs exist — many municipalities offer rebates of $500-$2,000 for residential rain gardens.
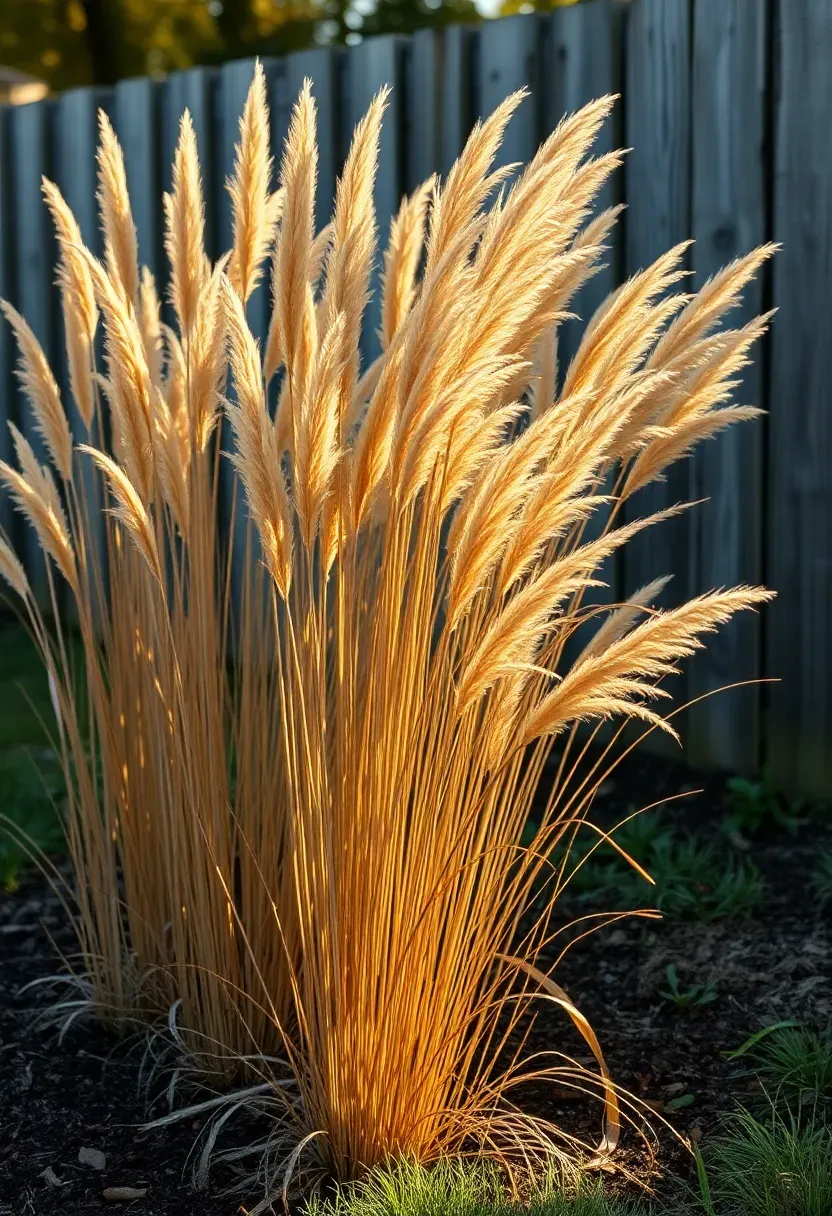
8. Ornamental Grass Screen
Ornamental grasses make effective privacy screens that move in the wind, change color through the seasons, and cost far less than fencing. Karl Foerster feather reed grass grows 5 feet tall and stays upright without flopping. Miscanthus varieties reach 6-8 feet by midsummer. Plant in a staggered double row with 3-foot spacing for a dense screen within two growing seasons. A 40-foot run needs about 26 plants — roughly $130-$200 in gallon pots. Unlike a fence, a grass screen does not require permits, does not rot, and gets better looking each year as clumps fill in.
Tips
- Choose clump-forming grasses (Panicum, Calamagrostis, Miscanthus sinensis) rather than spreading types (ribbon grass, running bamboo) that invade neighboring beds.
- Cut to 6 inches in late February before new shoots emerge; the dried winter form provides four months of off-season interest.
- Leave at least 2 feet between the planting and any property line so mature clumps do not encroach on a neighbor's side.

Recommended
Items for this idea
9. Flagstone Patio with Creeping Ground Cover
Flagstone vs. Standard Pavers
Flagstone patios look more organic than manufactured pavers because the stone shapes are irregular and the joint widths vary. When you fill those joints with creeping plants instead of sand or grout, the patio becomes partly green — softening the hardscape and reducing the heat-island effect that solid stone creates.
Best Ground Cover Options
Creeping thyme (Thymus serpyllum): Purple flowers in June, handles foot traffic well, releases fragrance when stepped on. Full sun required.
Elfin thyme: More compact than standard creeping thyme, stays under 1 inch tall. Better for tight joints.
Blue star creeper (Isotoma fluviatilis): Tiny blue flowers, spreads aggressively. Good for mild climates (zones 6-9).
Irish moss (Sagina subulata): Dense, bright green cushion. Prefers partial shade and consistent moisture.
Recommendation
Creeping thyme works in the widest range of conditions and tolerates the most foot traffic. Start with plugs spaced every 6 inches in joints at least 1.5 inches wide.
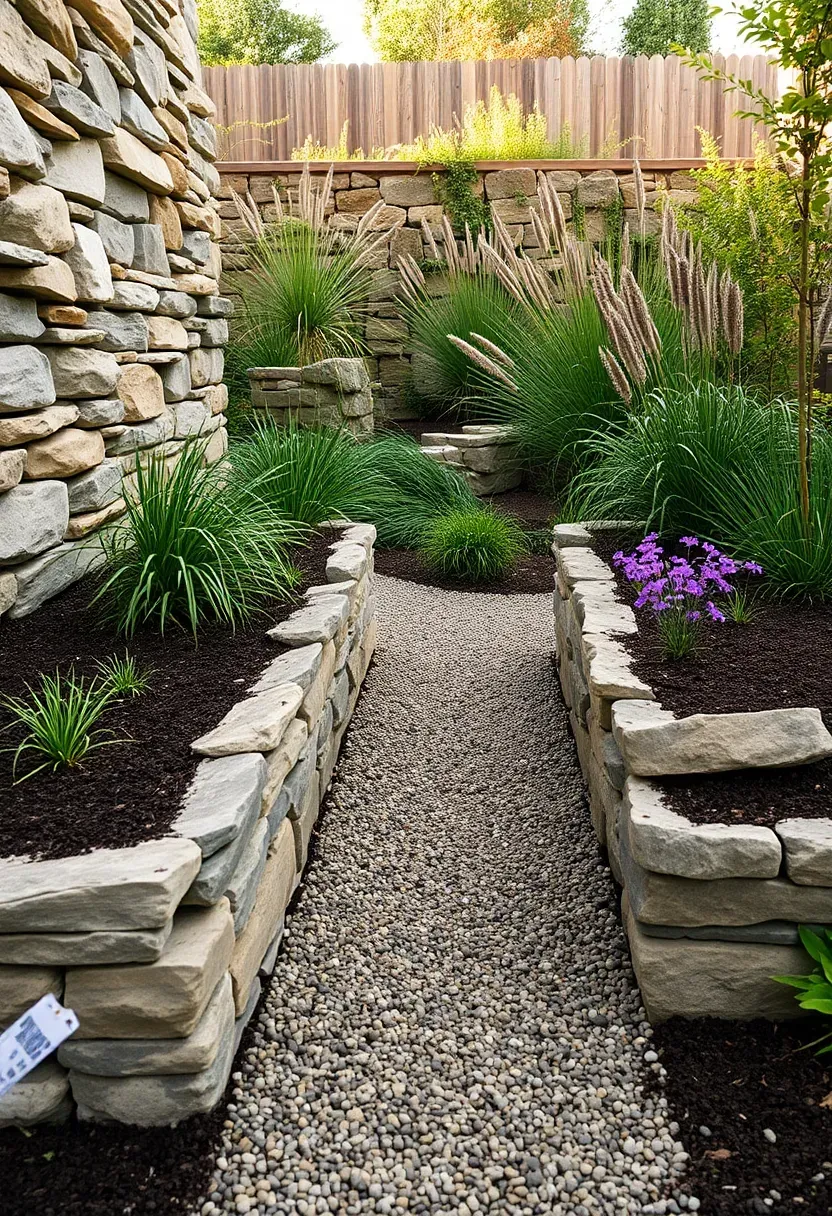
10. Raised Planting Beds with Stone Walls
Raised beds built with natural stone walls look permanent and add vertical structure to flat yards. Unlike timber raised beds that rot after 5-8 years, dry-stacked stone walls last indefinitely. Use locally sourced fieldstone or flat-faced wall stone stacked 18-24 inches high without mortar. Fill with a mix of 60% topsoil, 30% compost, and 10% perlite for excellent drainage. The elevated soil warms faster in spring (giving you a 2-3 week head start on planting), drains better than ground-level beds, and puts plants at a height where you can actually see them from across the yard.
Tips
- Batter the wall inward slightly (about 1 inch of lean per 12 inches of height) so gravity holds stones in place.
- Cap the top course with wide flat stones that double as casual seating edges.
- Line the interior with landscape fabric before filling to prevent soil from washing through stone gaps.
Recommended
Items for this idea
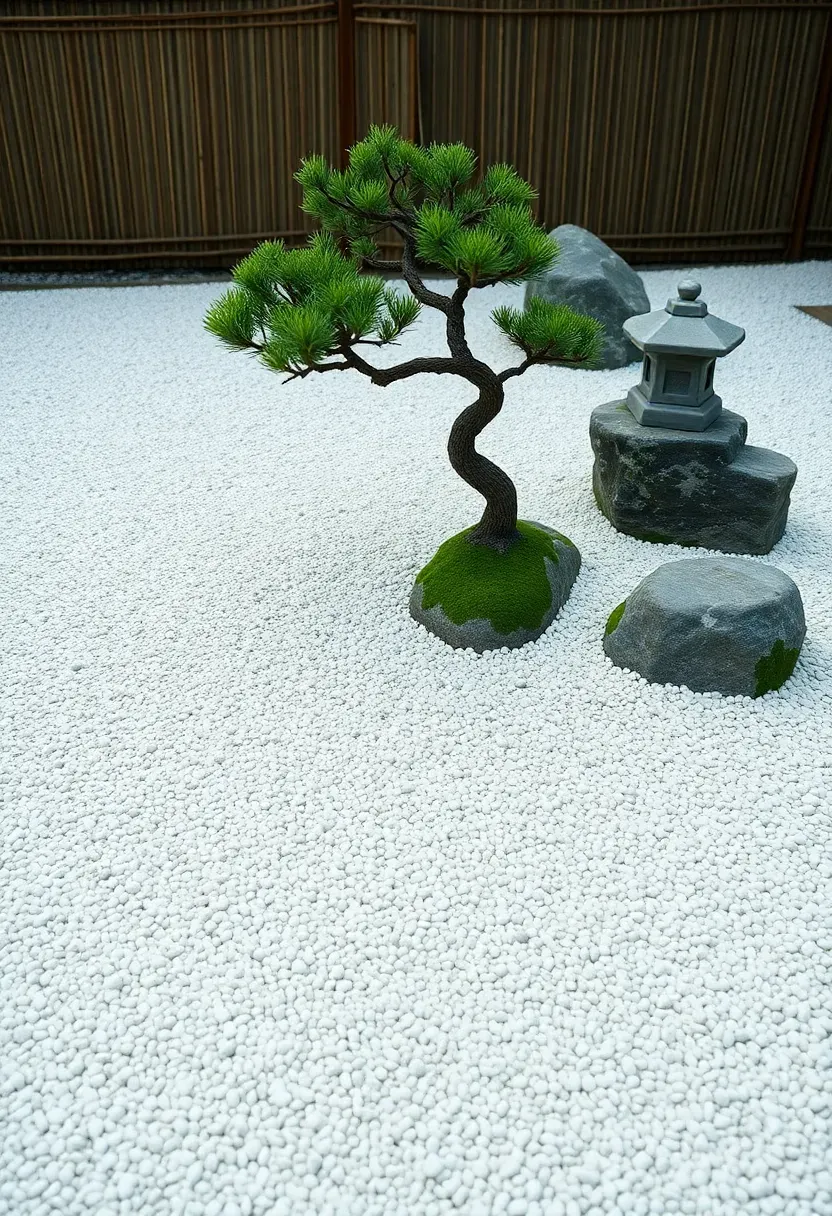
11. Japanese-Inspired Gravel Garden
Origins
Japanese dry gardens (karesansui) date back to the 14th century, originally designed for meditation in Zen temple courtyards. The raked gravel represents water; boulders suggest mountains or islands. The aesthetic relies on restraint — far fewer elements than a typical Western garden, each one placed with deliberate intention.
Modern Application
You do not need a monastery to borrow this approach. A 12x12-foot corner of your backyard can become a contemplative space with white decomposed granite, 3-5 carefully chosen boulders, a single specimen tree (Japanese maple, dwarf pine, or stewartia), and a border of low moss or mondo grass. Keep plant species to three or fewer. The visual calm comes from open space and negative area, not from filling every inch.
Apply at Home
- Rake patterns weekly using a standard garden rake with tines spaced 2 inches apart.
- Edge the gravel area cleanly with black steel edging sunk flush to the surface.
- Place boulders in odd-numbered groups (3 or 5) at off-center positions rather than centered or symmetrical.
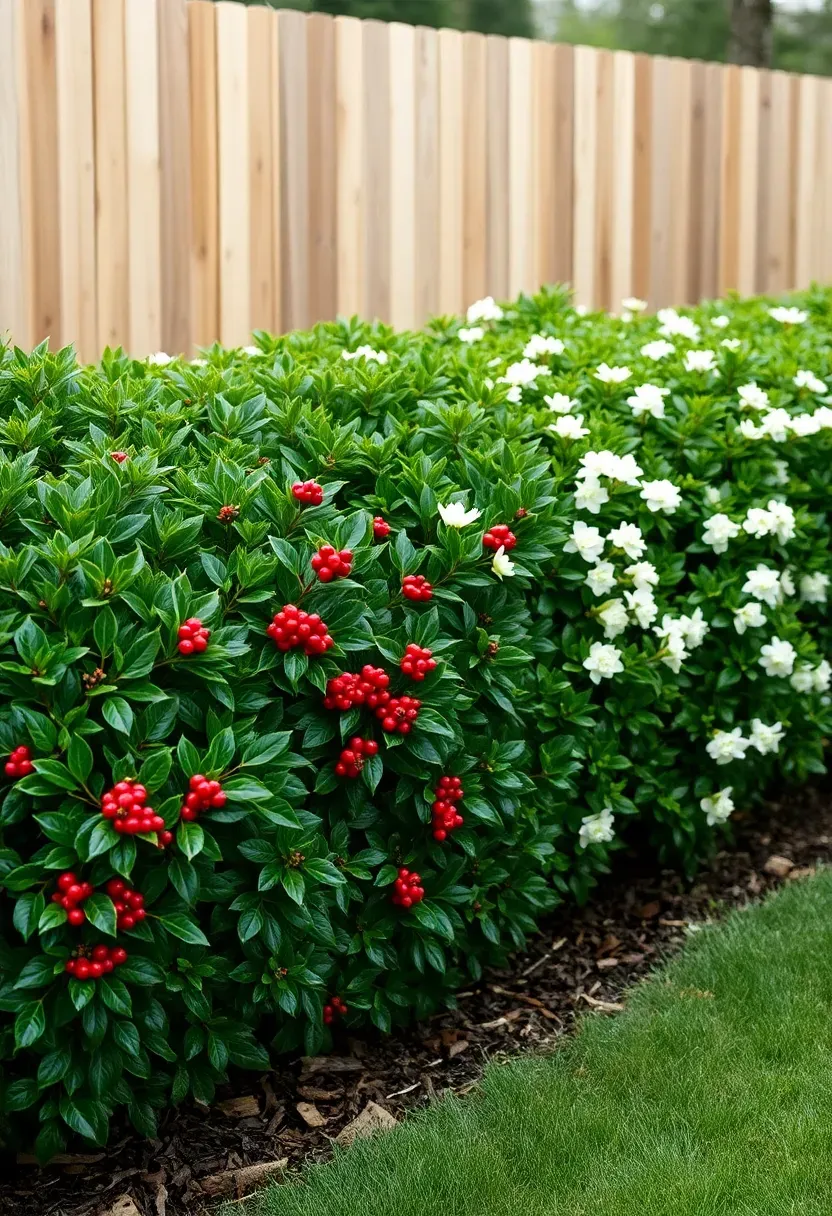
12. Mixed Hedge Border
A single-species hedge looks uniform but offers nothing when that one species has a bad year — a boxwood blight outbreak or a drought stress event leaves your entire border bare or brown. Mixed hedges blend 3-5 compatible species of similar growth rate and mature height, creating texture and reducing risk. Combine broadleaf evergreens (holly, boxwood, cherry laurel) with deciduous flowering shrubs (viburnum, ninebark, spirea) for year-round density with seasonal blooms and berry production woven through.
Tips
- Match growth rates closely — a fast-growing privet next to a slow boxwood creates an uneven wall within three years.
- Plant in a staggered double row rather than a single line for a fuller look and fewer visible gaps.
- Prune the fastest growers twice a year and the slowest ones once to maintain a roughly even top line.
Recommended
Items for this idea
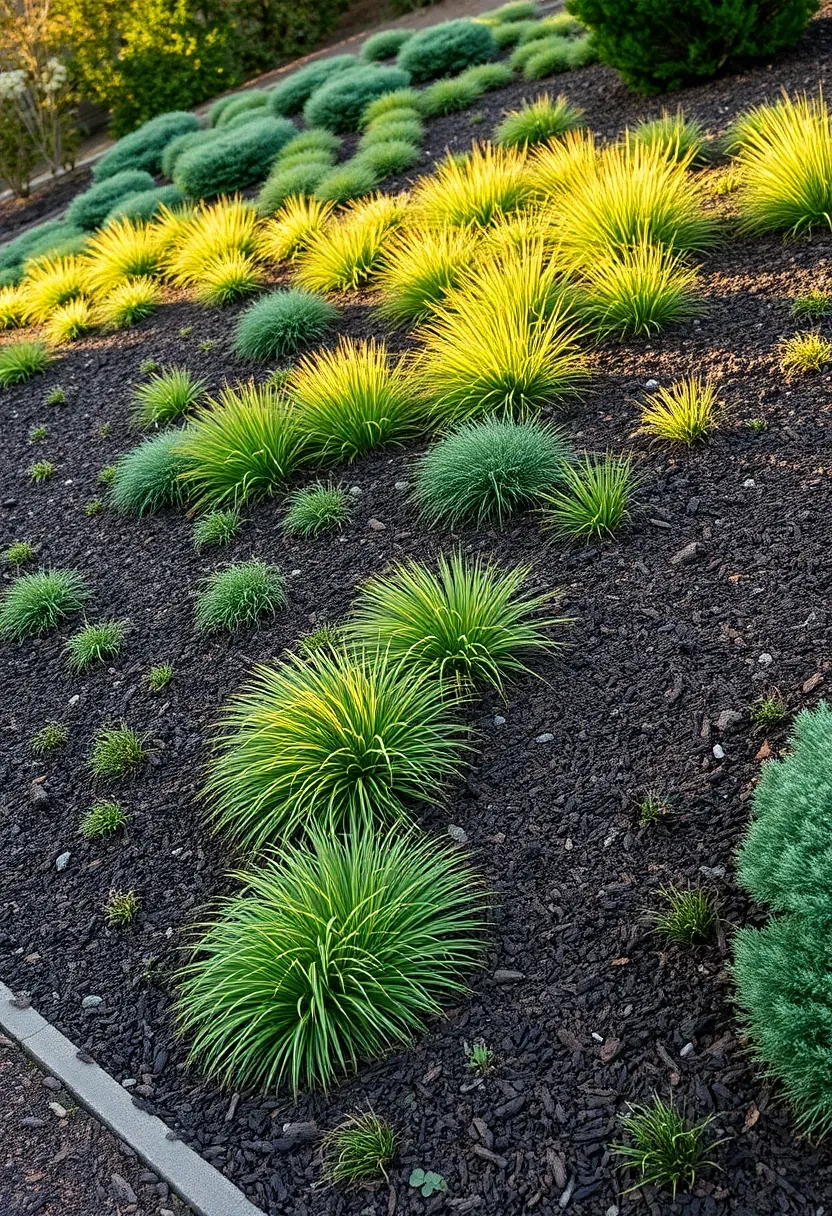
13. Sloped Hillside Planting
Slopes erode. That is the core problem with any backyard grade steeper than about 3:1. Mowing is dangerous, bare soil washes away, and most homeowners just let it go wild. The fix is dense planting with deep-rooted species that hold soil in place. Start from the bottom with groundcovers like creeping juniper, pachysandra, or vinca minor. Move upslope with deeper-rooted perennials and low shrubs — summersweet, inkberry holly, and Virginia sweetspire all root aggressively on slopes. Install coconut coir erosion blankets on any bare areas until plants establish.
Tips
- Plant in staggered rows across the slope (not up and down) to slow sheet flow between plants.
- Water newly planted slopes with drip irrigation rather than sprinklers — overhead water accelerates surface erosion before roots establish.
- Avoid tilling the slope before planting; disturbed soil erodes faster than undisturbed.
14. Edible Landscape Integration
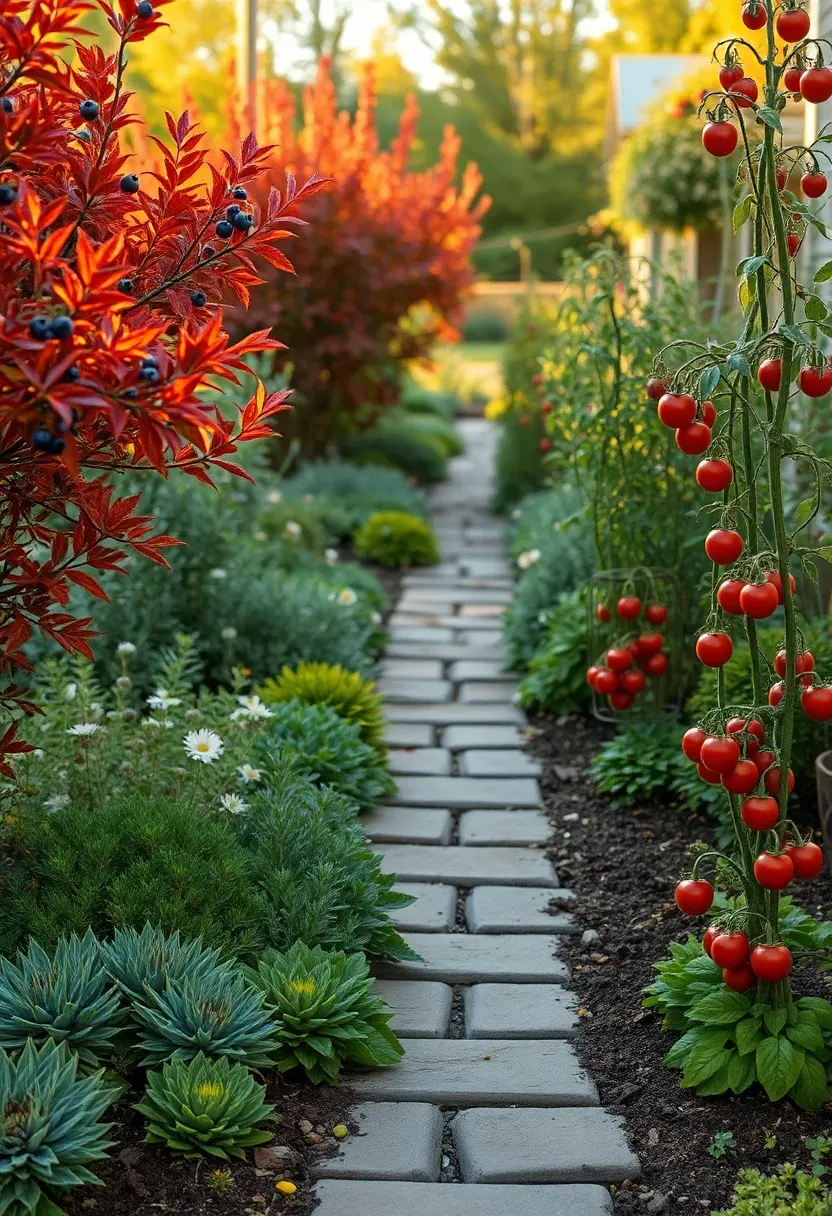
Food That Looks Good
Edible landscaping ditches the separate vegetable patch in favor of mixing food-producing plants into your ornamental beds. Blueberry bushes have excellent fall color and work as foundation shrubs. Rosemary and lavender serve as border plants while doubling as kitchen herbs. Dwarf apple or pear trees provide the same structural role as any ornamental specimen tree. Swiss chard and purple basil hold their own visually alongside coleus and heuchera.
How to Plan It
Replace one ornamental shrub with a fruiting equivalent: swap a burning bush for a blueberry, a privet for a currant. Thread herbs along path edges where their fragrance releases as you brush past. Tuck tomato cages behind taller ornamentals so the support structure disappears once plants fill in.
Choose If
- You want to reduce grocery trips without dedicating space to a traditional vegetable garden.
- Your HOA restricts visible vegetable gardens but does not regulate individual plant species.
Recommended
Items for this idea
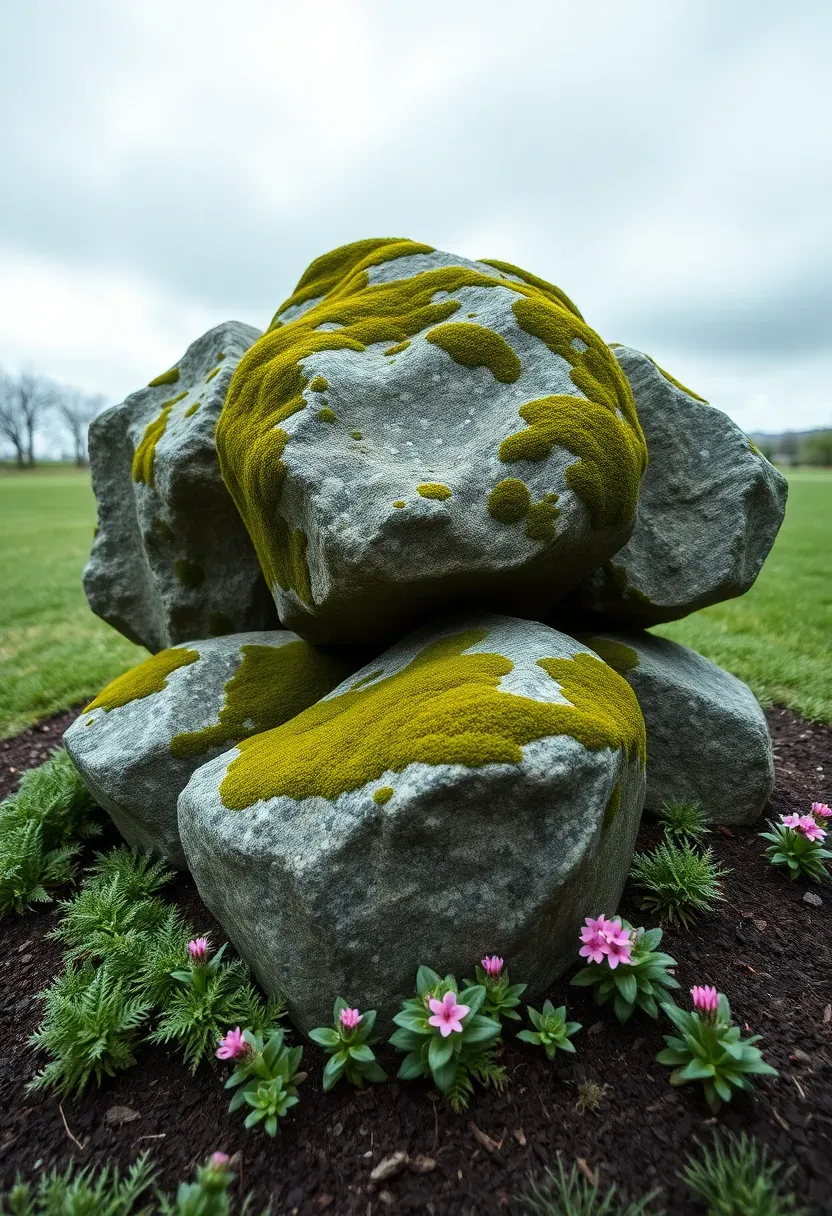
15. Boulder Grouping Focal Point
Three to five well-placed boulders do more for a backyard's visual weight than most plantings. Boulders work as anchors — they ground a landscape the way furniture grounds a room. Source them locally to match the geology of your area (granite in New England, sandstone in the Midwest, basalt in the Pacific Northwest). Bury each boulder one-third of its height for a natural look; sitting boulders on the surface looks like they were dropped there by a delivery truck. A 500-pound boulder costs $50-$150 delivered from a local quarry or landscape supply yard.
Tips
- Group boulders in odd numbers with irregular spacing rather than evenly spaced rows.
- Orient the widest face toward your primary viewpoint (kitchen window, patio seating).
- Plant low groundcover (moss, sedum, creeping phlox) around the base so the boulders appear to emerge from the landscape rather than sit on top of it.
16. Water Feature with Recirculating Fountain
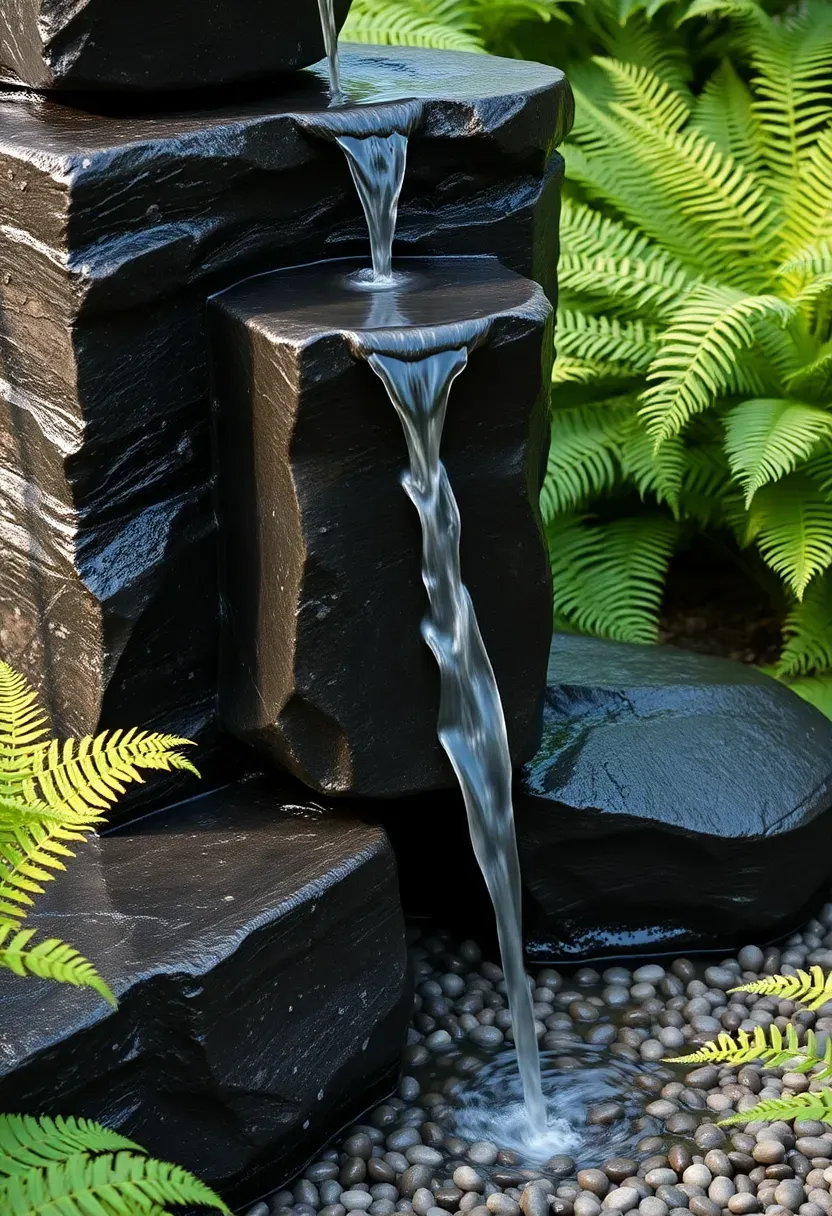
Why Add Water
Sound changes how a space feels more than almost any visual element. A small recirculating fountain produces enough white noise to mask street traffic, neighbor conversations, and air conditioner hum from 15-20 feet away. Water also draws birds, dragonflies, and butterflies — turning a quiet yard into something that feels alive.
Build Options
Disappearing fountain: Water bubbles up through a drilled basalt column or urn and drains into a hidden underground basin. No standing water, no drowning risk, minimal maintenance. Kit cost: $200-$500.
Stacked stone spillway: Flat stones arranged so water cascades down 2-3 levels into a small catch basin with a submersible pump. More visual drama, more splashing sound. DIY materials: $150-$300 plus pump ($80-$120).
Ceramic pot fountain: Drill a hole in a large glazed pot, feed a pump line through, and let water overflow the rim into a planted basin below. Quick weekend project. Under $150 total.
Recommendation
Disappearing fountains work for most backyards — they require the least maintenance and eliminate mosquito breeding concerns since no water surface is exposed.
Recommended
Items for this idea
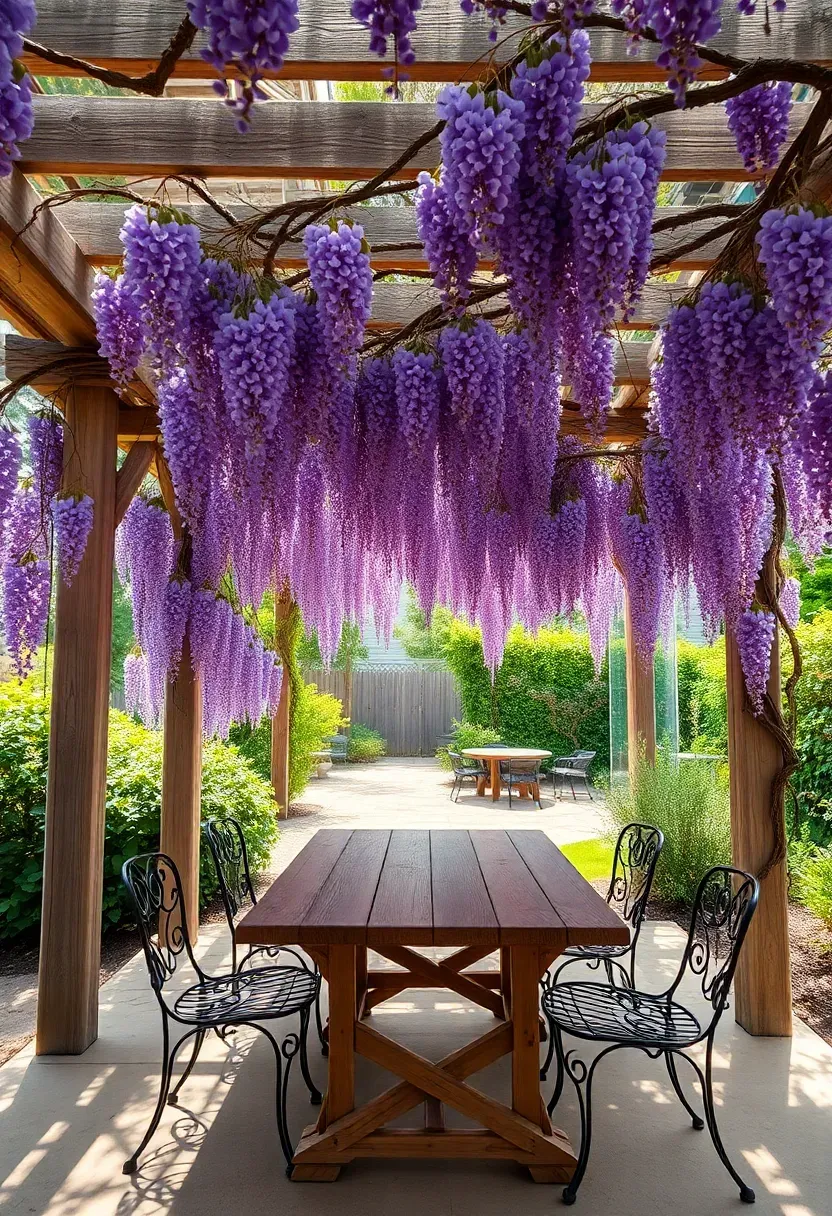
17. Pergola with Climbing Vines
A bare pergola is just a frame. A vine-covered pergola is a room. The right climbing plant transforms an open structure into filtered shade within 2-3 seasons. Wisteria produces the most dramatic effect — heavy purple racemes in spring and dense canopy all summer — but it grows aggressively and needs strong support. More manageable options include climbing hydrangea (shade tolerant, white lacecap blooms), trumpet vine (orange flowers that attract hummingbirds), and crossvine (semi-evergreen in mild climates). For food production, grape vines provide shade, fall color, and fruit on the same structure.
Tips
- Build pergola rafters from at least 2x8 lumber; heavy vines like wisteria can exceed 100 pounds per linear foot of beam and crush lightweight construction.
- Install stainless steel wire or heavy gauge hog wire between rafters to give young vines something to grip before they reach the wood.
- Prune vines aggressively in late winter so summer growth stays controlled — unpruned wisteria will pry apart roof joints within five years.
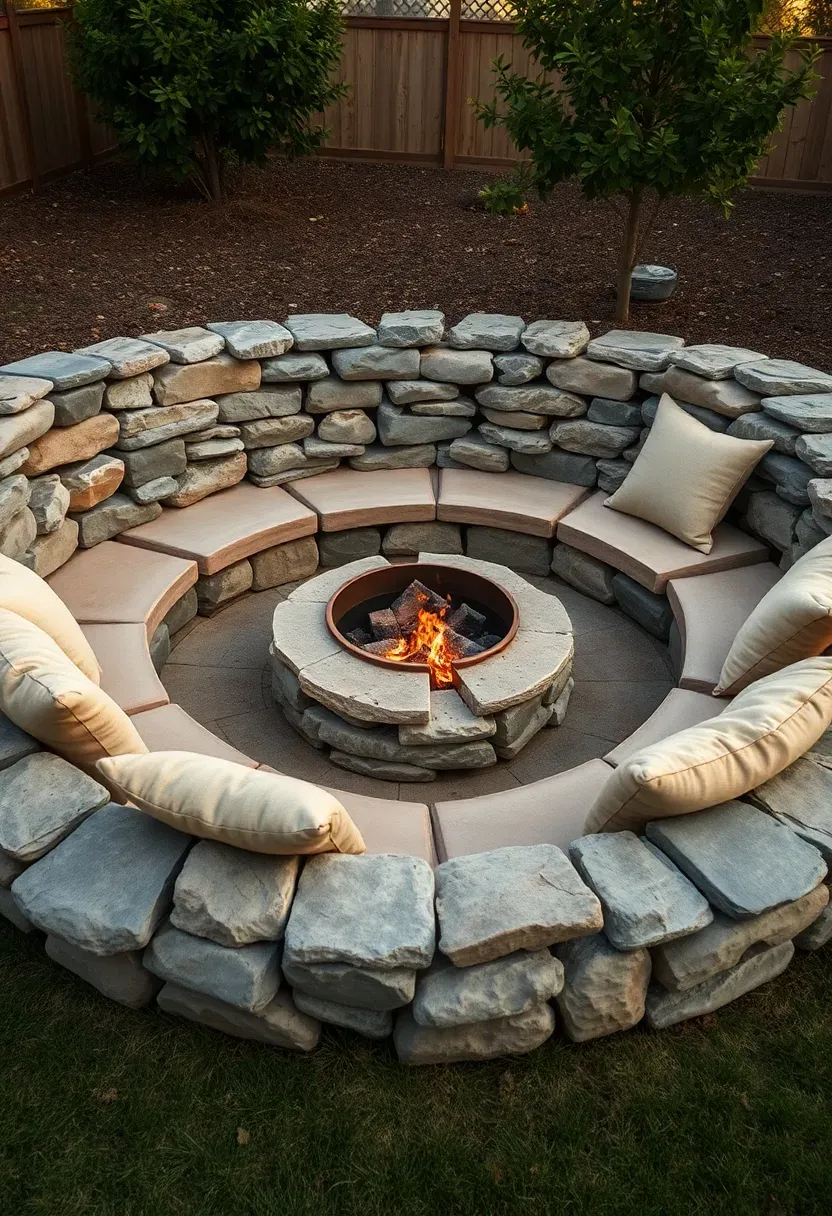
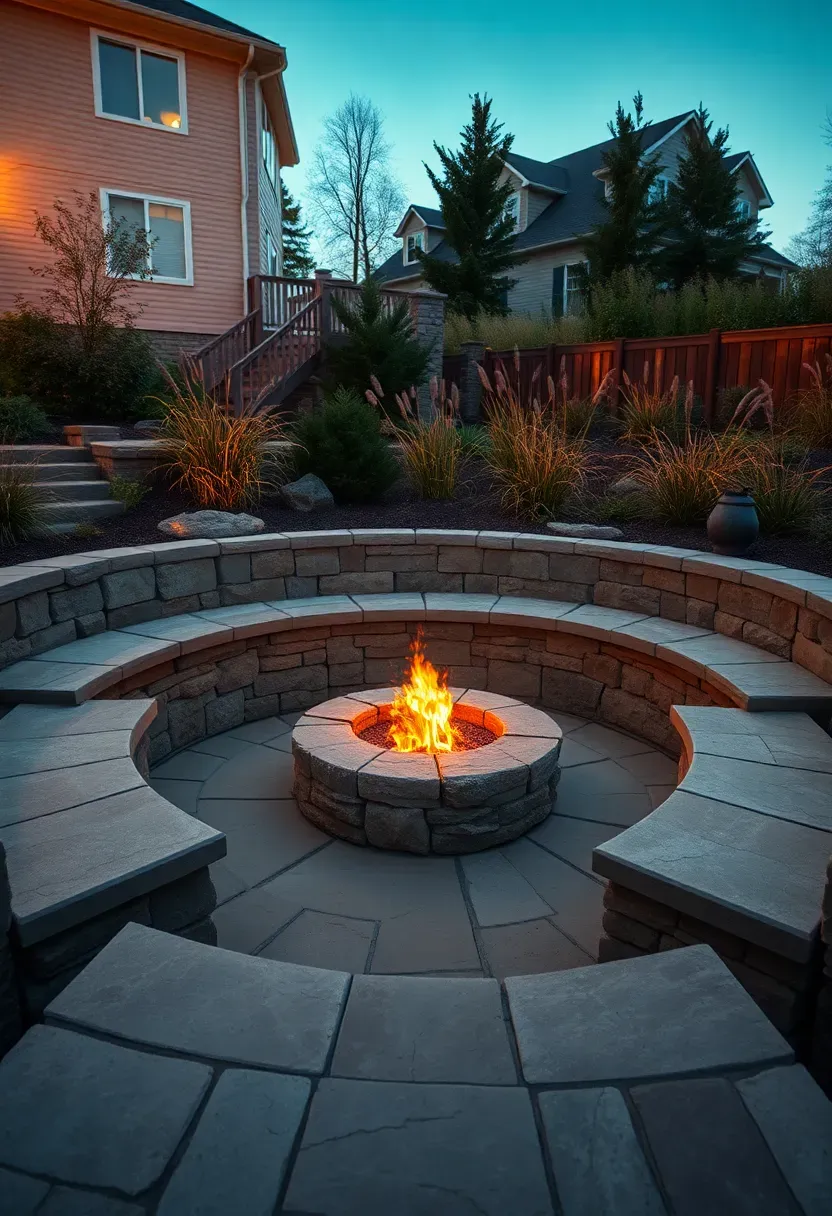
18. Low Stone Wall Seating
A 20-24 inch stone wall serves double duty as a planting bed edge and casual seating. This height matches a standard chair seat, so guests sit comfortably without cushions (though cushions help). Build with dry-stacked fieldstone or mortared cut stone depending on your aesthetic — dry-stack has a casual, organic feel while mortared walls look cleaner and more architectural. Cap the top course with wide, flat-faced stones at least 12 inches deep to create a comfortable perch. Position these walls around fire pits, along patio edges, or as retaining walls where grade changes naturally create the needed height.
Tips
- Smooth the cap stones with a diamond pad if they have rough edges where people will sit.
- Set a slight outward slope (1/4 inch per foot) on cap stones so rainwater drains off rather than pooling.
- Run landscape lighting along the wall base to define the seating edge after dark and prevent tripping.
Recommended
Items for this idea
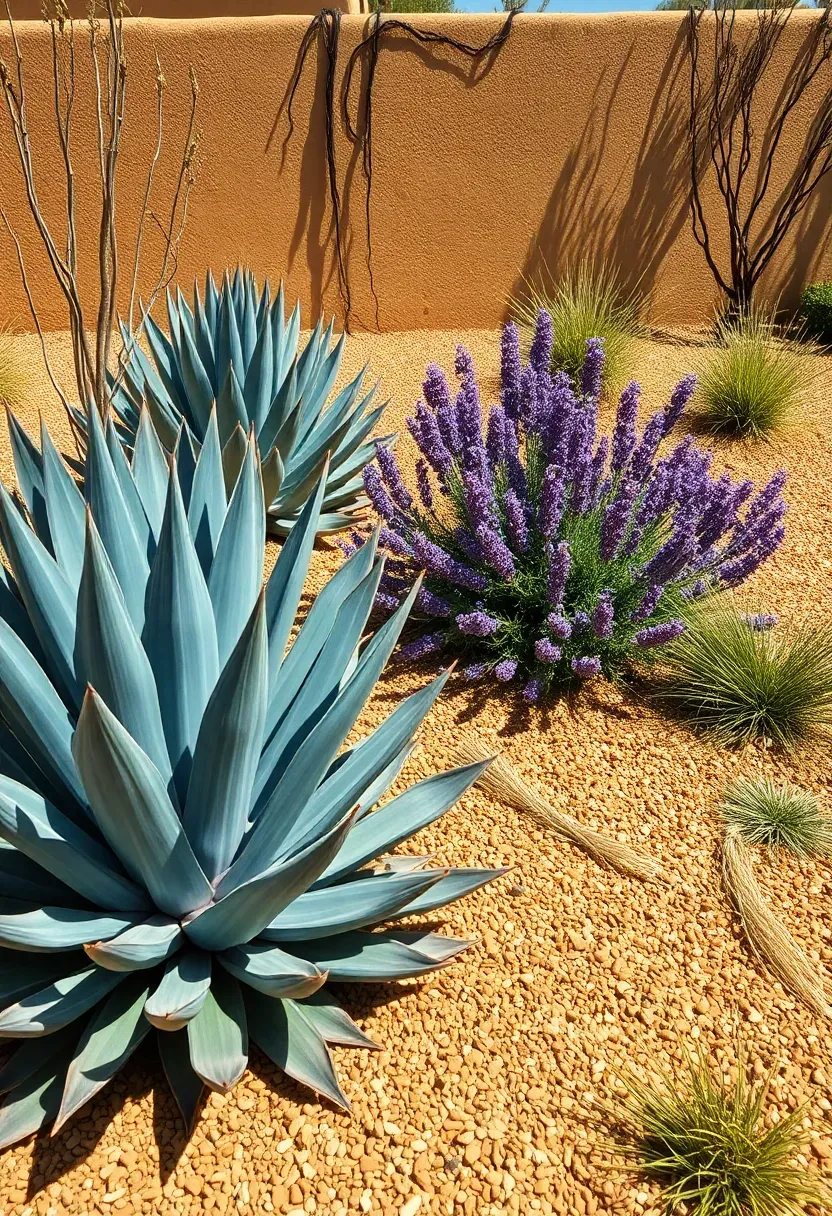
19. Drought-Tolerant Xeriscape
Xeriscaping is not just rocks and cactus — that is a common misconception. Done well, it is a full landscape that simply operates on rainfall alone after the establishment period. The key categories: structural plants (agave, yucca, large rosemary), flowering perennials (lavender, salvia, penstemon, echinacea), groundcovers (creeping thyme, sedum, silver carpet lamb's ear), and a few accent grasses (blue fescue, Mexican feather grass). Replace turf with decomposed granite or gravel mulch and group plants by water need so the rare supplemental irrigation goes only where it matters most.
Tips
- Mulch with gravel or decomposed granite, not wood chips — organic mulch retains moisture against stems and causes rot in drought-adapted plants.
- Water deeply once every 10-14 days during the first summer to establish roots, then reduce to monthly or stop entirely depending on rainfall.
- Place the most drought-tolerant species on slopes and exposed ridges where soil dries fastest.
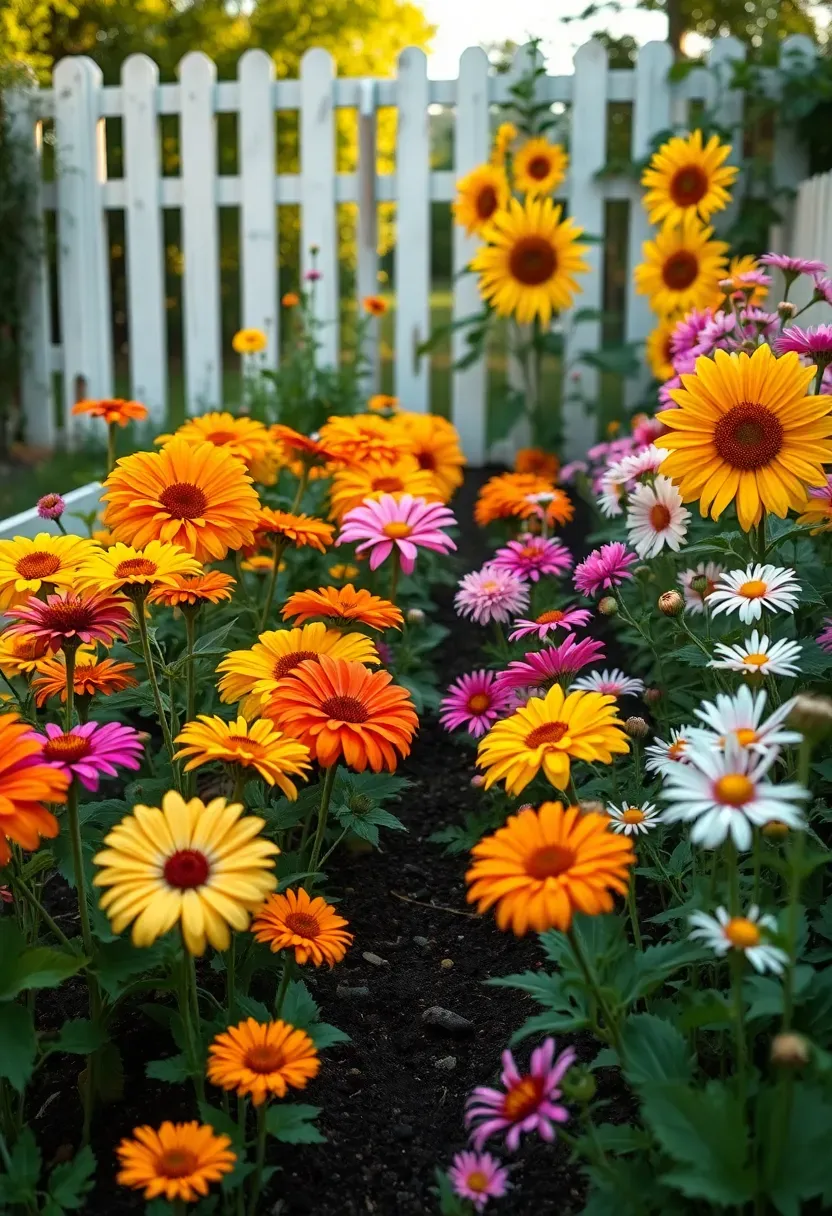
20. Wildflower Cutting Garden
A cutting garden gives you fresh flowers for the house from May through October without raiding your ornamental beds. Dedicate a 4x12-foot strip (or larger) in a sunny spot with decent soil. Plant in rows spaced 18 inches apart for easy picking and maintenance access. Focus on prolific bloomers: zinnias produce all summer and branch more aggressively the more you cut. Dahlias start in July and keep going until first frost. Cosmos and sunflowers fill vertical space. Snapdragons and stock add early-season variety. Annual cutting flowers from seed cost under $20 for a full garden — far cheaper than weekly bouquets from a florist.
Tips
- Harvest in early morning when stems are fully hydrated; afternoon-cut flowers wilt faster in the vase.
- Pinch zinnia and dahlia seedlings at the fourth leaf set to encourage branching and more bloom stems.
- Grow sweet peas on a trellis at the back of the cutting bed — they produce for 6-8 weeks and scent the entire garden.
Recommended
Items for this idea
21. Sunken Conversation Area
The Problem
Standard patio furniture groupings sit at ground level, exposed to wind and visually floating without any sense of enclosure. The space feels open but not intimate — fine for parties, less appealing for evening conversation with two or three people.
The Solution
Dig down 18-24 inches below the surrounding grade to create a sunken seating area. Line the perimeter with retaining walls (stone, poured concrete, or large timber) that double as backrests or extra seating. Pave the floor with flagstone, brick, or poured concrete. The surrounding landscape — now at or above shoulder height when seated — acts as natural walls. Add a fire pit at center and this becomes the most-used spot in the yard from spring through fall.
Pros and Cons
Pros: Wind protection from all sides; natural sense of enclosure; dramatic visual impact; cooler in summer because you are below the surface plane.
Cons: Requires significant excavation and soil removal; drainage must be planned carefully (lowest point in the yard floods first); not suitable for yards with high water tables.
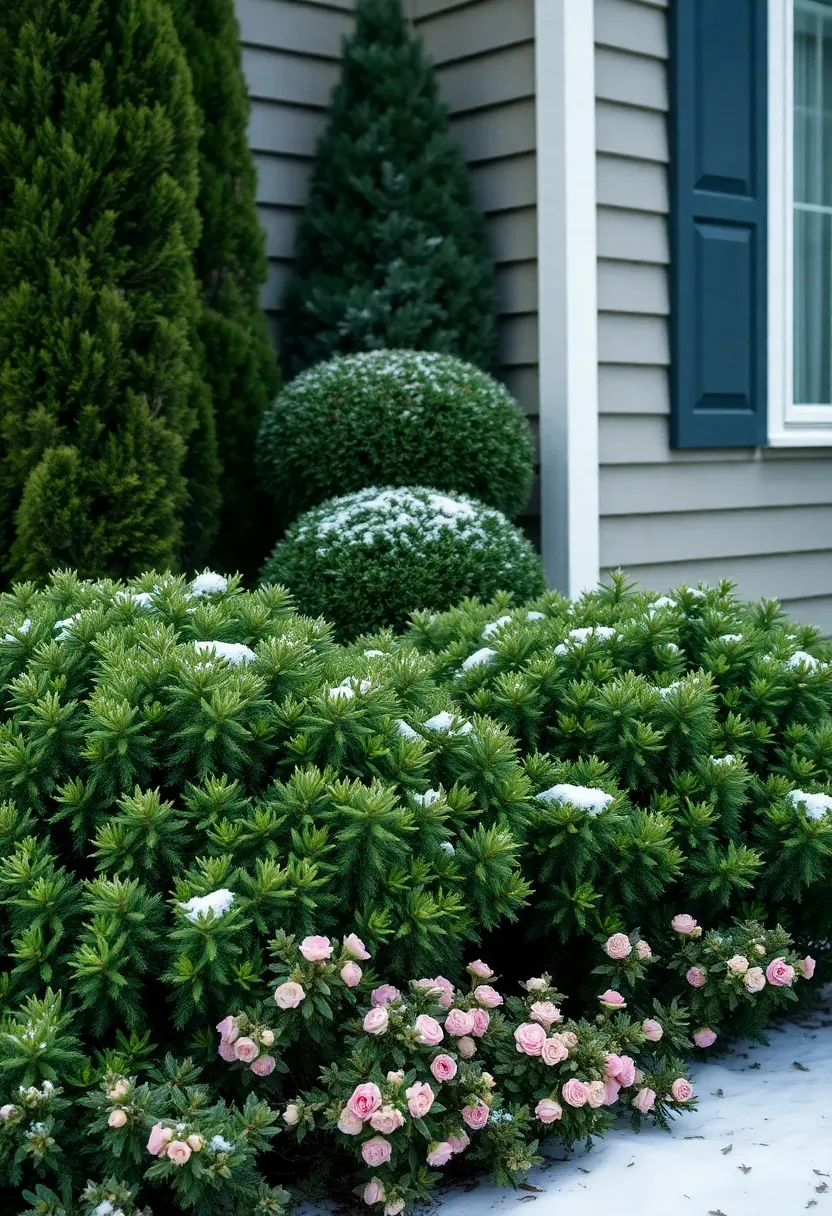
22. Evergreen Foundation Planting
Most backyards focus on the view away from the house, but the foundation line where your house meets the ground deserves attention too. A layered evergreen planting along the back wall gives your yard a finished backdrop in every season — including winter when deciduous plants are bare. Use columnar arborvitae or upright juniper for height at corners, globe boxwood or dwarf holly for middle structure, and spreading evergreens like creeping juniper or low yew along the front. The green wall frames everything else in the yard and hides the concrete foundation, utility meters, and dryer vents.
Tips
- Plant at least 3 feet from the foundation to allow air circulation and prevent moisture problems against the house wall.
- Mix broadleaf evergreens (holly, boxwood, rhododendron) with needled types (spruce, juniper, yew) for texture variety.
- Avoid planting tall evergreens in front of windows — choose species whose mature height stays below the sill line for each position.
Recommended
Items for this idea
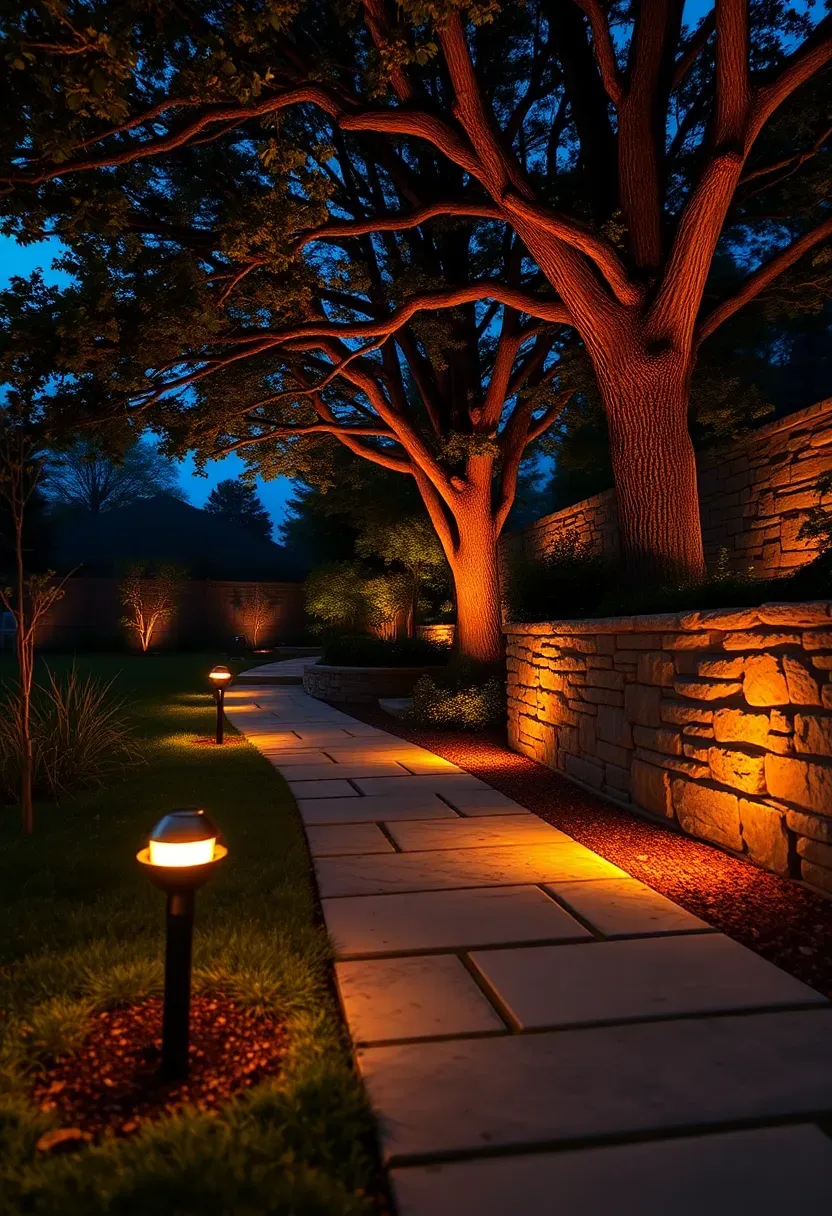
23. Landscape Lighting Plan
How to Light a Backyard
Landscape lighting extends your yard's usability by 4-5 hours per day and makes your daytime planting efforts visible after dark. The mistake most people make: floodlighting everything from one or two high-mounted fixtures. The goal is layered light at low levels, mimicking the way indoor lighting design works.
Step 1: Path Lights
Space 12-18 inch tall bollard or mushroom-style fixtures every 8-10 feet along walkways. Use warm white (2700K) LEDs drawing 2-3 watts each. This establishes safe footing and defines circulation routes.
Step 2: Uplights on Trees
Mount small LED spotlights at ground level aimed up into tree canopies. One or two fixtures per tree is enough. The light filtering through branches creates depth and vertical drama that path lights alone cannot achieve.
Step 3: Wash Lights on Walls and Features
Aim wide-beam fixtures at stone walls, water features, or specimen plantings from 3-4 feet away. The grazing light reveals texture that disappears during the day.
Watch Out
- Stick to 2700K color temperature throughout — mixing warm and cool white fixtures looks disjointed and cheap.
- Use a transformer with a timer and photocell so lights turn on at dusk and off at a set hour rather than running all night.
Quick FAQ
Do I need a professional landscape designer for these ideas? Most of the ideas above work as DIY projects with basic tools and moderate physical effort. Retaining walls over 2 feet, significant grading changes, and electrical work for lighting may warrant professional help. A landscape designer adds the most value when you are trying to integrate multiple ideas into a cohesive plan rather than tackling one element at a time.
Which backyard landscape idea gives the best return on investment? Foundation plantings and defined patio areas consistently rank highest in home value studies. The National Association of Realtors estimates well-executed landscape upgrades recover 100-200% of their cost at resale. A $3,000 patio and planting project can add $5,000-$6,000 in perceived home value.
How long before a new backyard landscape looks mature? Perennial borders fill in by year two. Shrub hedges take 3-4 years to close gaps. Trees need 5-8 years to provide meaningful shade. The most common mistake is spacing plants too closely for instant fullness — they crowd each other by year three and require removal.
Can I implement these ideas in phases over several years? Phased installation works well and spreads cost over time. Start with structural elements (grading, walls, patios) in year one, then add trees and major shrub plantings in year two, and fill with perennials, groundcovers, and finishing details in year three. This sequence ensures heavy equipment access for early phases before delicate plantings go in.
What is the lowest-maintenance backyard landscape approach? Combine a gravel courtyard (idea 6), drought-tolerant plantings (idea 19), and an ornamental grass screen (idea 8). This trio eliminates mowing entirely, requires minimal watering after establishment, and needs seasonal cleanup just once or twice per year.
Start with the idea that solves your biggest frustration — poor drainage, lack of privacy, dead lawn under shade trees, or simply a yard that looks bare. One well-executed project teaches you more about your soil, light, and personal taste than any amount of Pinterest browsing. Build from there. Each new element connects to the last, and within a few seasons the individual projects merge into a landscape that feels like it belongs to your specific piece of ground rather than a catalog photo.
Pinterest cover for 23 Backyard Landscape Ideas
About the author
OBCD
CGI visualization and interior design content. We create detailed 3D renders and curate practical design ideas for every room in your home.