25 Backyard Pavers Ideas
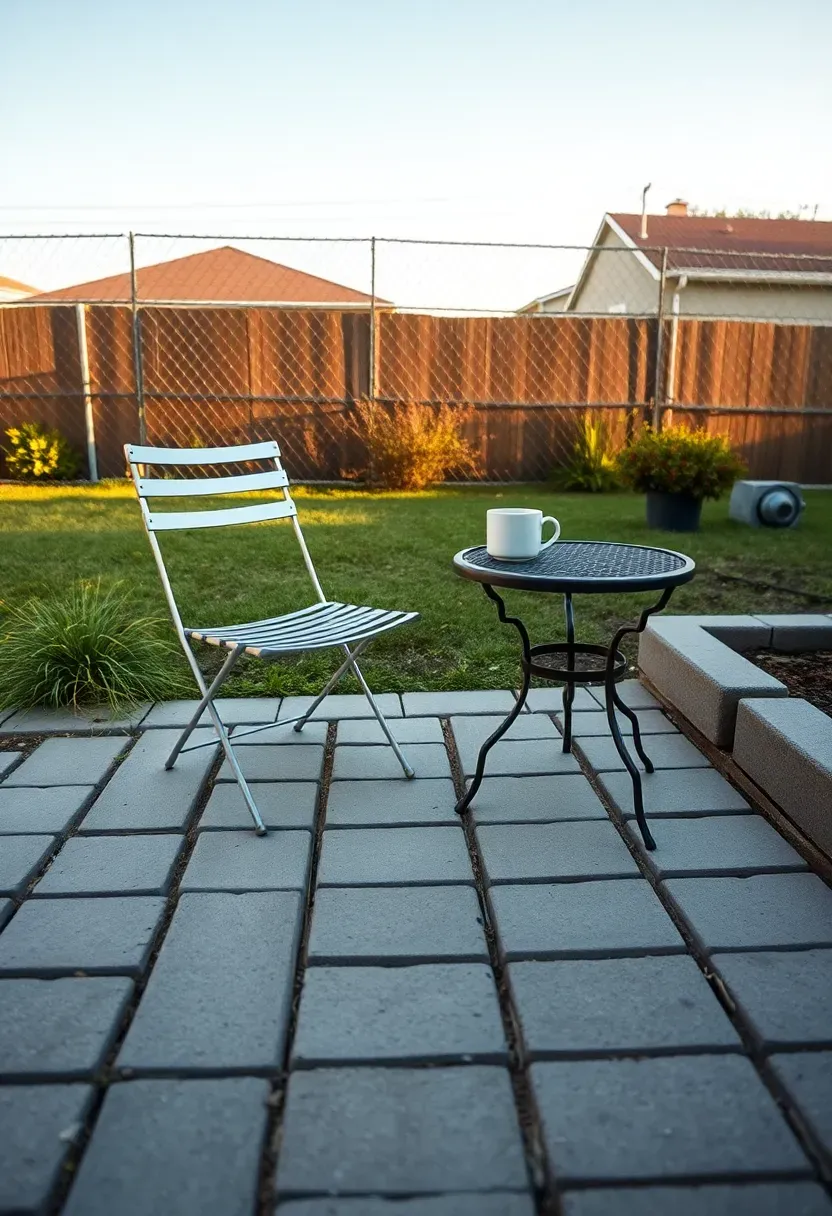
I ripped out a cracked concrete slab behind my house three summers ago and replaced it with interlocking pavers over a compacted gravel base. The whole project took four days and cost roughly $1,400 in materials for a 200-square-foot area. What surprised me most was how many layout and material options existed once I started researching — far beyond the basic brick rectangle I had pictured. Pavers let you build surfaces that drain properly, flex with freeze-thaw cycles instead of cracking, and can be pulled up individually if a section settles. They also happen to look better than poured concrete in almost every setting.
Here are 25 backyard pavers ideas organized by material, pattern, and application so you can find the right fit for your yard.
Table of Contents
- Classic Herringbone Brick
- Running Bond Concrete Pavers
- Flagstone with Gravel Joints
- Circular Patio Kit
- Basketweave Pattern
- Large-Format Porcelain Slabs
- Permeable Pavers for Drainage
- Mixed-Material Border Design
- Travertine Pool Deck
- Cobblestone Accent Strip
- Stacked Bond Modern Grid
- Fan Pattern Driveway Extension
- Stepping Stones in Gravel
- Charcoal and Gray Two-Tone Layout
- Curved Walkway with Soldier Course Edge
- Reclaimed Brick Patio
- Ashlar Random Pattern
- Paver Fire Pit Surround
- Narrow Side Yard Paver Path
- Bluestone Irregular Cut
- Geometric Diamond Inlay
- Paver-and-Pea-Gravel Hybrid
- Elevated Paver Deck on Pedestals
- Desert Landscape Pavers
- Budget Concrete Paver Basics
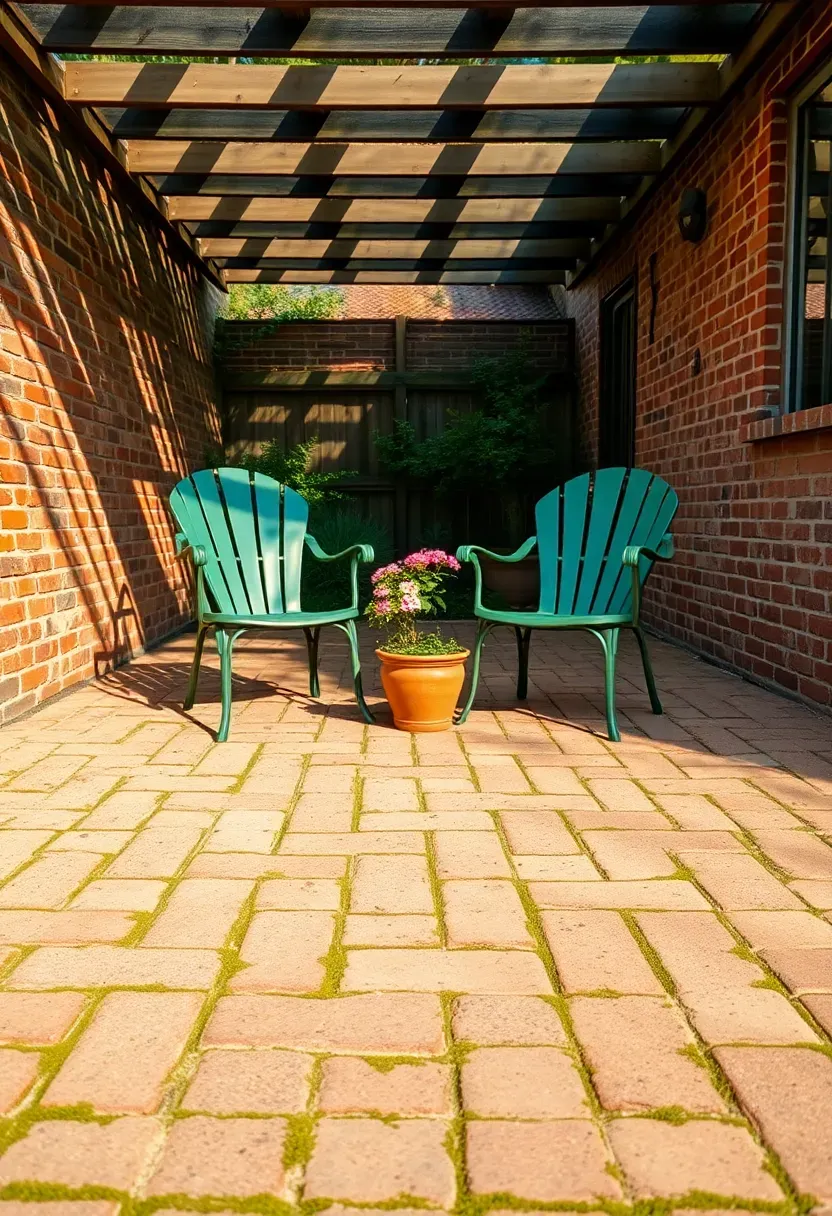
1. Classic Herringbone Brick
Herringbone is one of the oldest paver patterns and it earns its staying power. The 45-degree or 90-degree zigzag interlocks each brick against its neighbors, which distributes load sideways and resists shifting under foot traffic or furniture weight. Standard clay bricks in the 4x8-inch size fit this pattern without any cuts except at the borders. The warm red-to-rust color range ages well outdoors and picks up moss in shaded spots, which some people consider a bonus rather than a problem. Expect to pay $3 to $6 per square foot for the bricks alone.
Laying tips
- Compact your gravel base in 2-inch lifts — skipping this step causes settling within the first year
- Use a 90-degree herringbone if you want fewer edge cuts; 45-degree looks more dynamic but wastes more material
- Polymeric sand in the joints prevents ant hills and weed growth better than regular mason sand
We picked a few things that go well with this idea: Dominator Polymeric Sand Gray Beige (10 lb) (★4.2), Rhino Power Bond Polymeric Sand (10 lb) (★4.1) and Alliance Gator Maxx G2 Polymeric Sand (50 lb) (★4.5). As an Amazon Associate we earn from qualifying purchases.
2. Running Bond Concrete Pavers
Why this pattern works for beginners
Running bond is the same offset pattern you see in brick walls. Each row shifts half a paver length from the row below. It reads as orderly without looking fussy, and installation moves fast because you are repeating one simple offset across the entire surface.
What to watch for
Concrete pavers come in uniform dimensions, so the running bond stays tight and consistent. The main risk is a base that is not level — any dip shows more in a linear pattern than in a random layout. Tamp the bedding sand with a plate compactor before you start placing, and string a guide line every four rows to keep your courses from drifting.
Pros and cons
- Pro: fastest pattern to lay for a first-timer
- Pro: clean modern look that suits contemporary architecture
- Con: uniform grid can feel monotonous on large surfaces — consider a contrasting border to break it up
We picked a few things that go well with this idea: Galvanized Steel Landscape Edging (20ft, 6-Pack) (★4.5), VEVOR Steel Landscape Edging (6-Pack, 40x8 in) (★4.6) and Worth Garden Steel Lawn Edging (33ft, 10-Pack) (★4.6). As an Amazon Associate we earn from qualifying purchases.
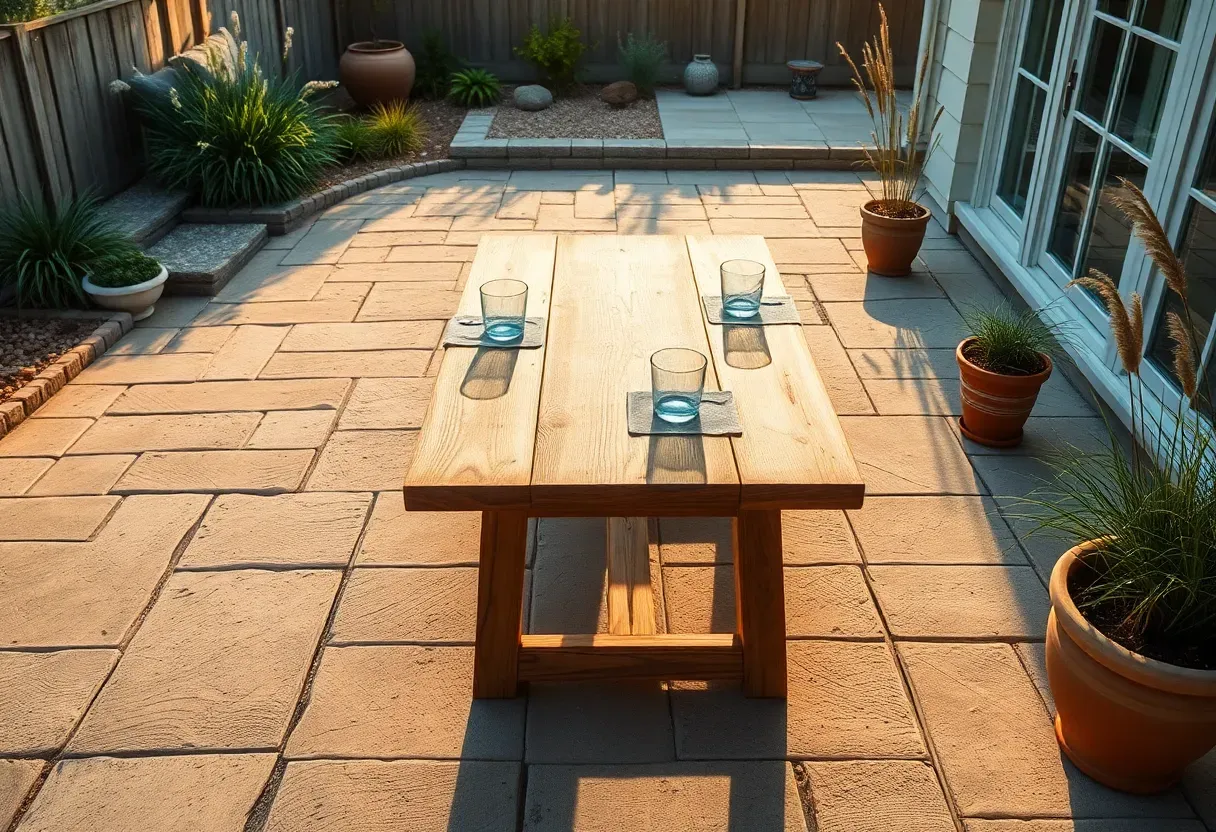
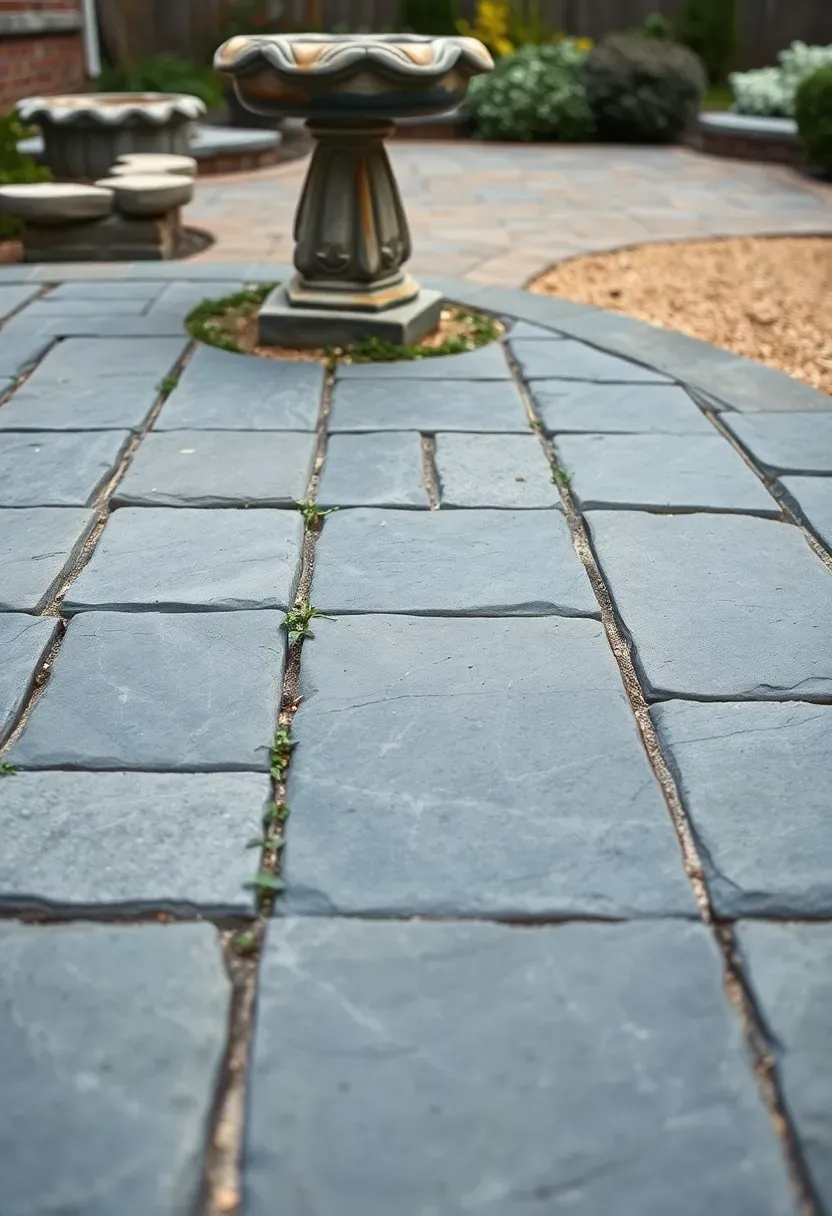
3. Flagstone with Gravel Joints
Flagstone creates an informal, organic look that suits cottage gardens and wooded lots. The irregular shapes mean no two installations look alike. Most suppliers sell flagstone by the ton, and you will need roughly 1 to 1.5 tons per 100 square feet depending on thickness. The gravel joints — typically 1 to 3 inches wide — let water drain straight through, which eliminates the need for grading toward a single drainage point.
Material choices
- Pennsylvania bluestone: dense, smooth, blue-gray tones
- Arizona flagstone: warm gold, rust, and tan — lighter weight but softer underfoot
- Local quarry stone: usually cheapest; color and hardness vary by region
We picked a few things that go well with this idea: SoulMate Smokeless Fire Pit Ring (40-Inch) (★4.4), Koutemie Fire Pit Ring Liner (40-Inch) (★4.6) and Uniflasy Propane Fire Pit Burner Kit (12-Inch) (★4.3). As an Amazon Associate we earn from qualifying purchases.
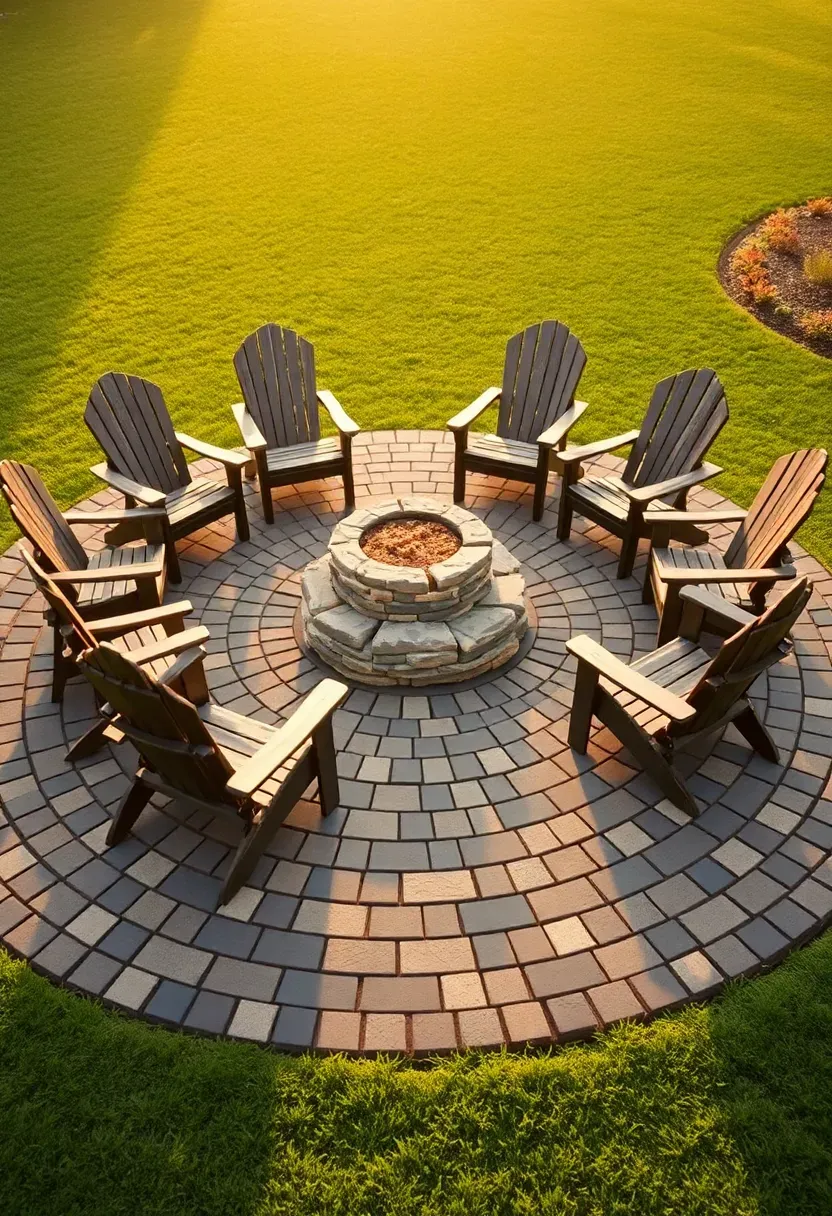
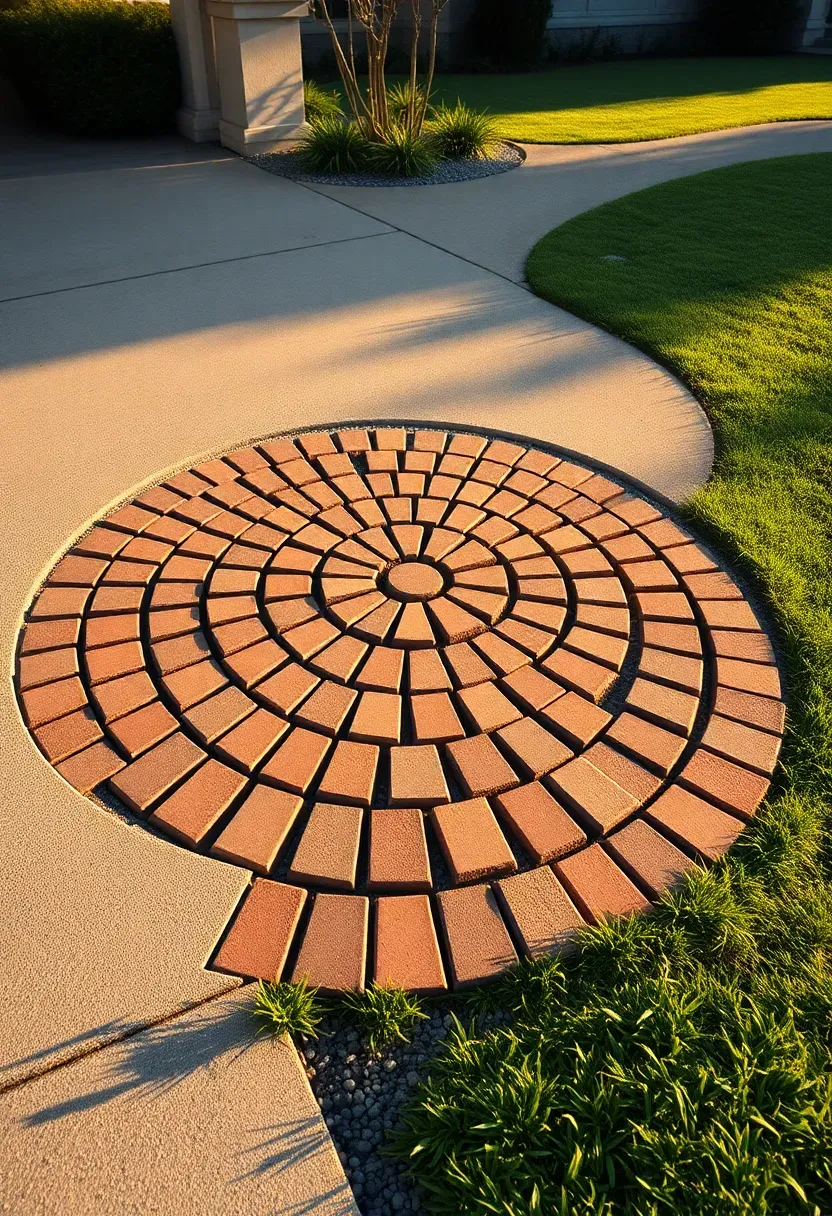
4. Circular Patio Kit
How to build a round patio without custom cuts
Big-box stores sell circular patio kits with pre-shaped pavers that nest together in concentric rings. A 12-foot-diameter kit covers about 113 square feet and typically costs $500 to $900. You stake a center point, spread your base, and work outward ring by ring.
Step 1: Mark and excavate
Tie a string to a center stake and scribe your circle. Dig 7 to 8 inches deep inside the line.
Step 2: Base and sand
Fill with 4 inches of compacted gravel, then 1 inch of leveling sand. Check grade with a long straightedge radiating from center to edge.
Step 3: Place rings
Start from the center ring and work out. Each ring's pieces are labeled or color-coded by the manufacturer. Tap each paver down with a rubber mallet.
Watch out
- The center can rise if you crown the sand layer — keep it flat or slightly concave so water drains outward
- Edge restraint is critical on curves; use flexible plastic edging pinned with 10-inch spikes
Recommended
Items for this idea
5. Basketweave Pattern
Basketweave alternates pairs of pavers at right angles — two horizontal, then two vertical. The result resembles woven fabric. It reads as traditional and works particularly well on smaller patios where a busy pattern would overwhelm the space. Because every pair meets at a clean right angle, the layout is forgiving if your cuts are not perfectly precise. This pattern dates back to Roman road construction, where interlocking orientations helped prevent lateral movement of individual stones under cart traffic.
Design tips
- Pair basketweave with a soldier-course border (single row of pavers set lengthwise) for a finished frame
- Two-color versions — alternating tan and charcoal pairs — add depth without extra complexity
- Best suited for areas under 300 square feet; on larger surfaces the pattern can feel repetitive
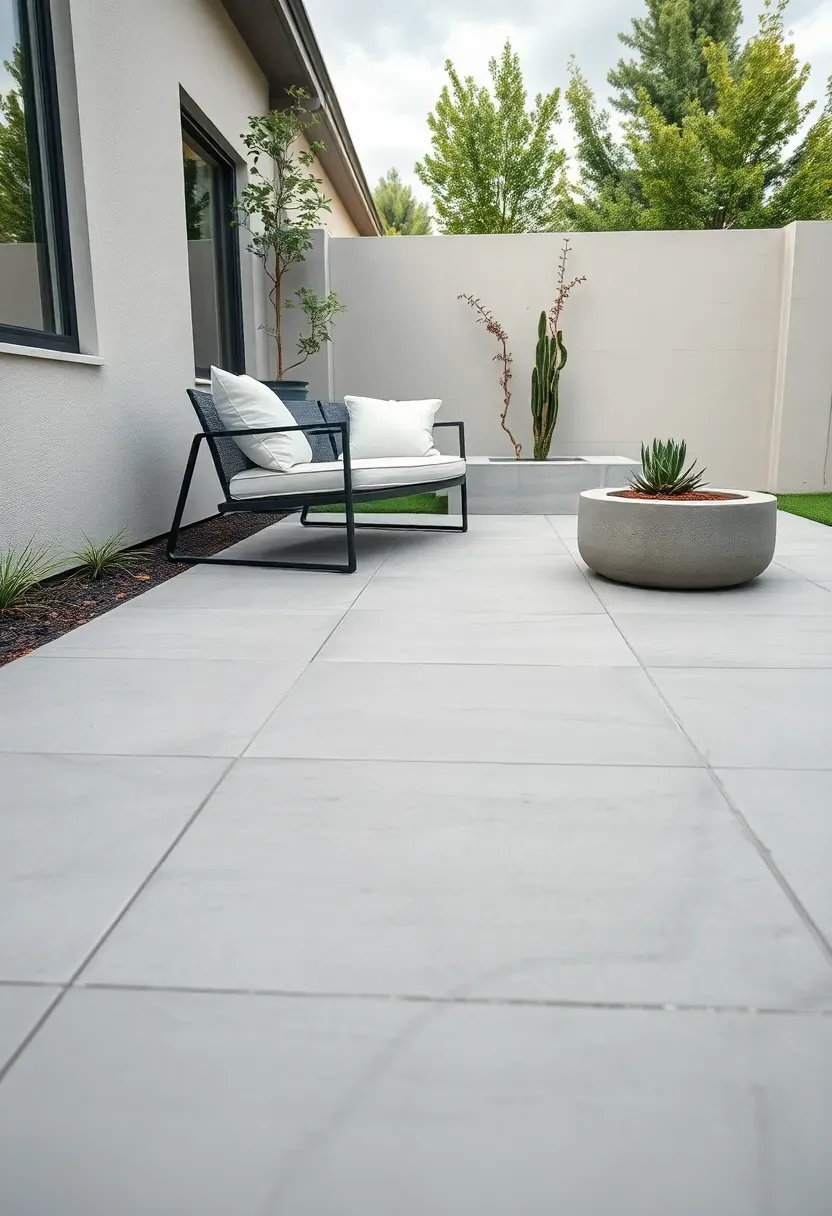
6. Large-Format Porcelain Slabs
Porcelain vs. concrete: what is the difference outdoors?
Porcelain pavers are fired at over 2,200 degrees Fahrenheit, which makes them nearly impervious to water absorption (less than 0.5%). Concrete pavers absorb 5% or more. That matters in cold climates where trapped moisture leads to spalling after freeze-thaw cycles.
The trade-off
Porcelain costs roughly $8 to $15 per square foot — two to three times what concrete pavers run. But you skip sealing entirely, staining is almost impossible to achieve, and the surface stays cooler underfoot in summer sun because it reflects more heat. Common sizes are 24x24 and 24x48 inches, which cover ground fast and create a clean, minimal joint grid.
Choose porcelain if
- You want a low-maintenance surface that looks the same in year ten as year one
- Your climate drops below freezing regularly
- You prefer a contemporary aesthetic with thin grout lines
Recommended
Items for this idea
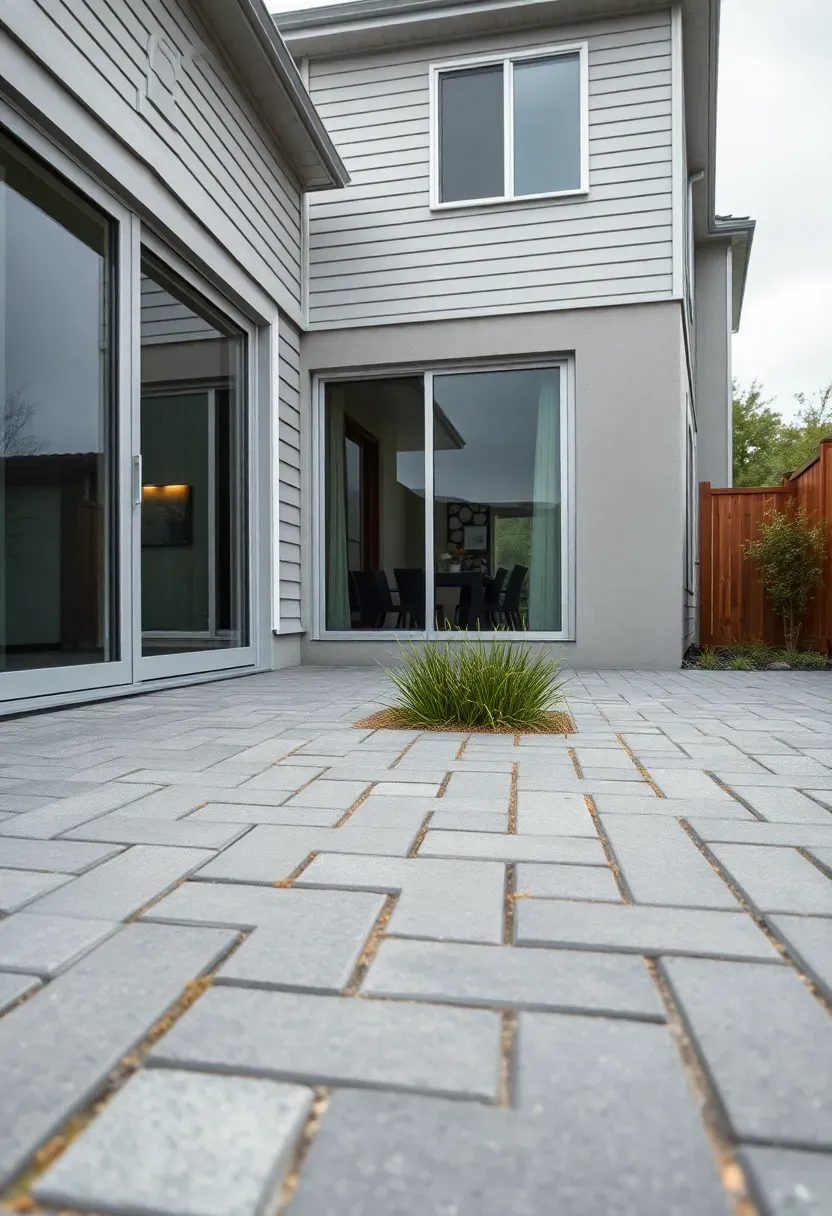
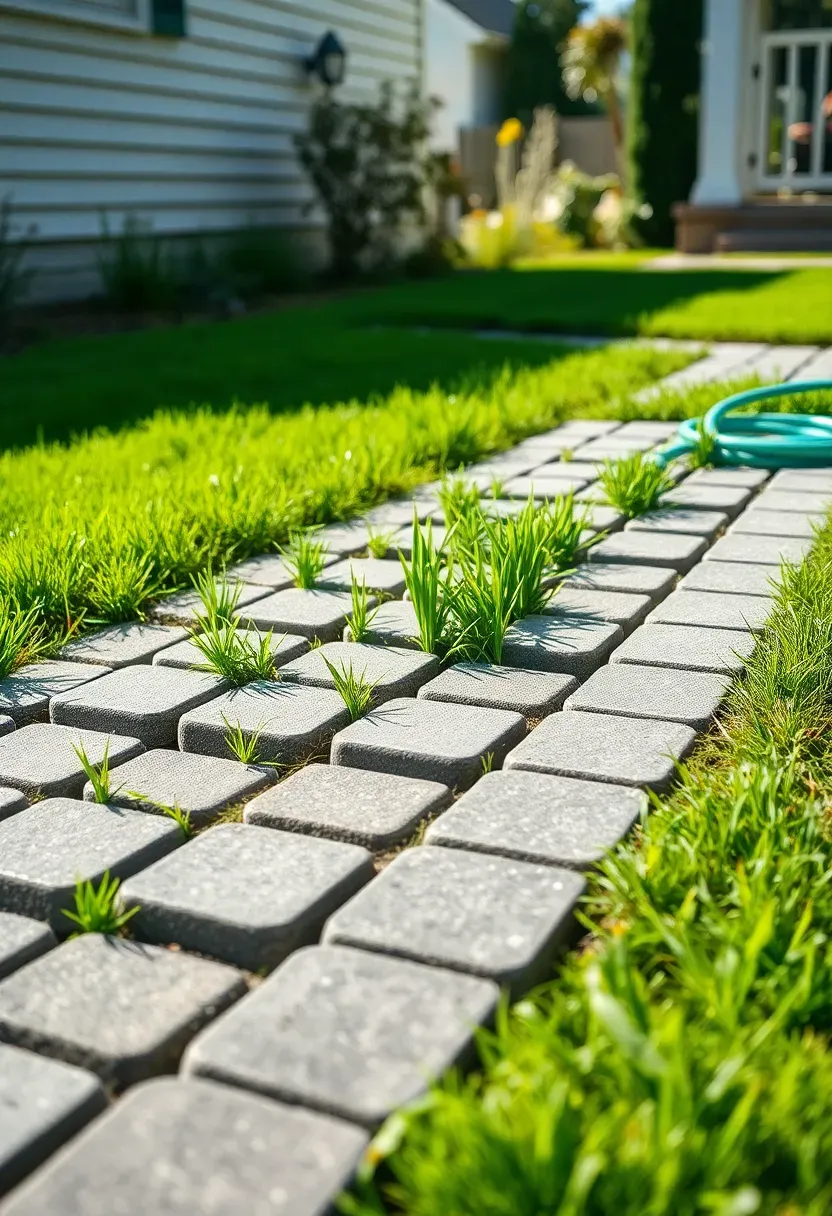
7. Permeable Pavers for Drainage
Permeable pavers have widened joints or built-in gaps that let rainwater pass through into a gravel reservoir below. Some municipalities now require permeable surfaces for new hardscape over a certain square footage — check your local code before committing to a standard paver layout. The open-graded base beneath permeable pavers is deeper than a traditional base, usually 12 to 18 inches of clean crushed stone with no fines, so excavation is more involved. The payoff is zero runoff from your patio during normal rain events and reduced load on storm drains.
Practical notes
- Fill joints with small aggregate (ASTM No. 8 or No. 9 stone), not sand — sand clogs the voids
- Vacuum or blow out joints annually to prevent silt accumulation
- Cost premium over standard pavers is 15% to 25%, mostly from the deeper base excavation
8. Mixed-Material Border Design
A contrasting border turns a plain paver field into something deliberate. The most common approach uses one material for the interior and a different color, size, or material type for a 6-to-12-inch perimeter strip. Dark charcoal borders around light gray pavers is a reliable combination. Brick borders around concrete pavers mix textures and scales. Natural stone edges around uniform pavers add an organic frame to a geometric center.
Tips
- Set the border first and work inward — this guarantees clean edges and avoids awkward filler cuts along the perimeter
- Use the same base depth for both materials to prevent differential settling
- A double-row soldier course border (two parallel rows of bricks set on edge) gives more visual weight than a single row
Recommended
Items for this idea
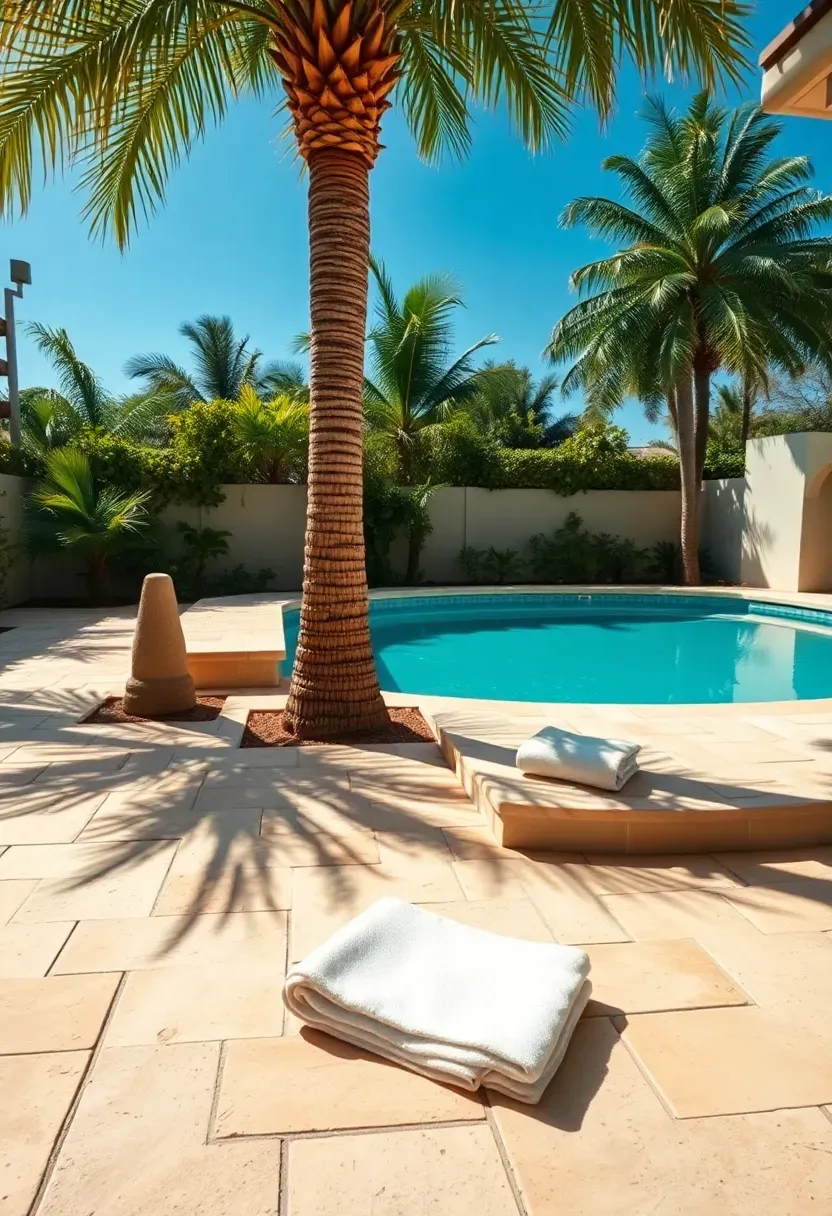
9. Travertine Pool Deck
Why pool builders favor travertine
Travertine stays cool underfoot even in direct sun because of its porous surface structure and lighter color range. It also has a naturally textured, tumbled finish that provides grip when wet — a genuine safety advantage over smooth concrete or glazed tile near a pool. French-pattern travertine (four different sizes in a repeating layout) is the standard pool-deck choice because the varied scale keeps large surfaces visually interesting.
The honest downsides
Travertine is calcium carbonate, which means acidic pool water splashes will etch the surface over time. Sealing annually with a penetrating sealer slows this but does not eliminate it. And travertine costs $6 to $12 per square foot before installation, making it one of the pricier paver options.
Best for
- Warm-climate yards where bare feet are the norm
- Pool areas where slip resistance matters more than cost
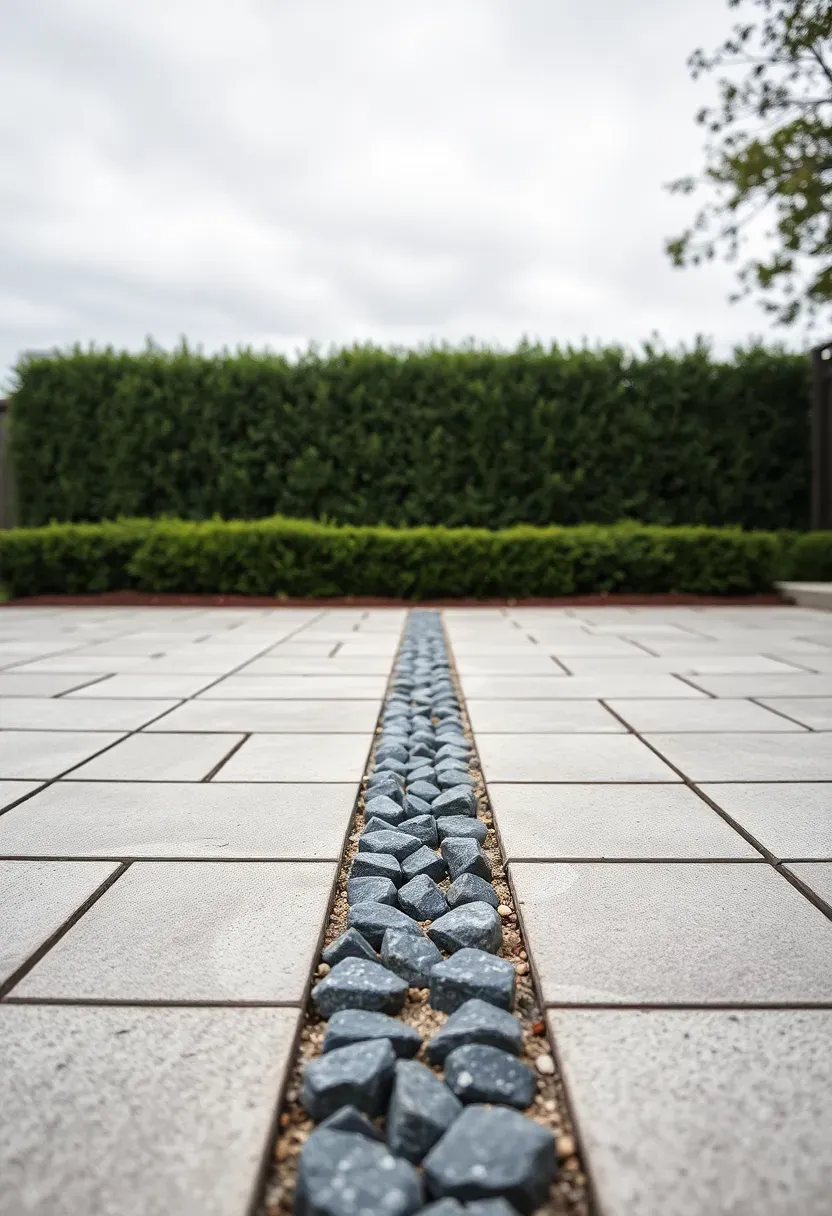
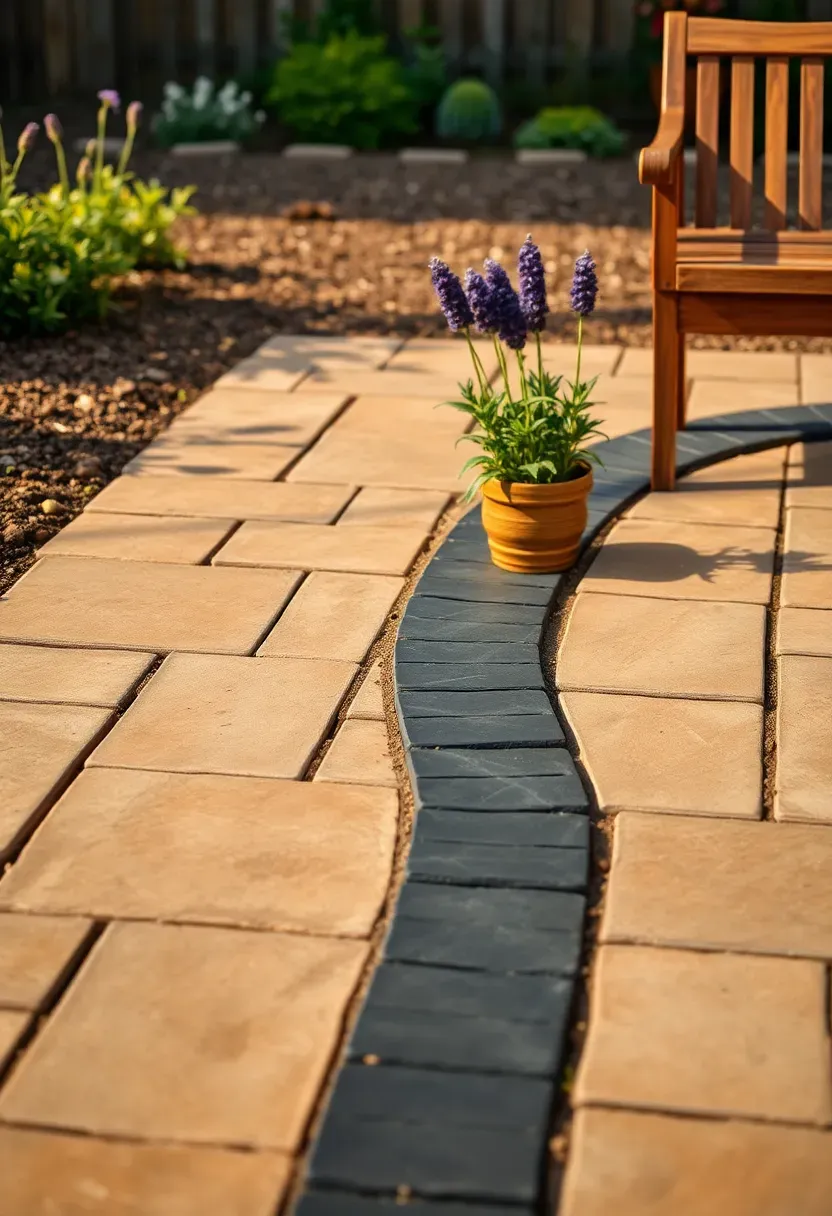
10. Cobblestone Accent Strip
A single row or band of cobblestones set into a field of larger pavers creates a visual break that divides zones without building a wall or planting a hedge. Use a cobblestone strip to separate the dining area from the lounging area, or to mark the transition from patio to walkway. Granite cobbles in the 4x4-inch size are the most durable option — they resist chipping and hold their color for decades. Tumbled concrete cobblestone imitations cost less and are easier to source but wear faster in freeze-thaw climates.
Layout ideas
- Straight band across the patio width at the natural division point
- Curved strip echoing a garden bed edge
- Cross-hatch grid creating a 4x4 or 6x6 foot panel pattern within the larger surface
Recommended
Items for this idea
11. Stacked Bond Modern Grid
What makes stacked bond different
Unlike running bond, stacked bond aligns every joint in both directions — creating a perfect grid. It looks intentionally modern, almost architectural. The trade-off is that any paver that sits even slightly higher or lower than its neighbors stands out immediately because the eye follows the unbroken joint lines.
Getting the base right
This pattern demands the most precise base preparation of any layout. After compacting gravel, screed your sand layer using two pipes as rails — the same technique tile setters use indoors. Pull a straight board across the pipes to create a dead-flat surface, then lift the pipes and fill the voids.
Where it works best
- Contemporary backyards with clean-line furniture and minimal landscaping
- Small courtyards where the grid reads as intentional rather than monotonous
- Pair with 24x24-inch pavers for maximum effect; smaller pavers create too many lines
12. Fan Pattern Driveway Extension
Fan pattern — also called European fan or cobblestone fan — arranges pavers in arcing rows that radiate from a center point. You see it on centuries-old European plazas, and it brings that same sense of permanence to a backyard when used as a driveway apron or transition zone between the drive and the patio. The pattern requires tapered or wedge-shaped pavers, which limits your material options to manufacturers that produce fan-specific sets. Installation takes longer than linear patterns because each arc must be set individually with consistent joint spacing.
Tips
- Start from the center point and work outward in half-circles
- Embed a contrasting paver at the center as a focal point
- Budget 20% extra material for the edge cuts where arcs meet straight borders
Recommended
Items for this idea
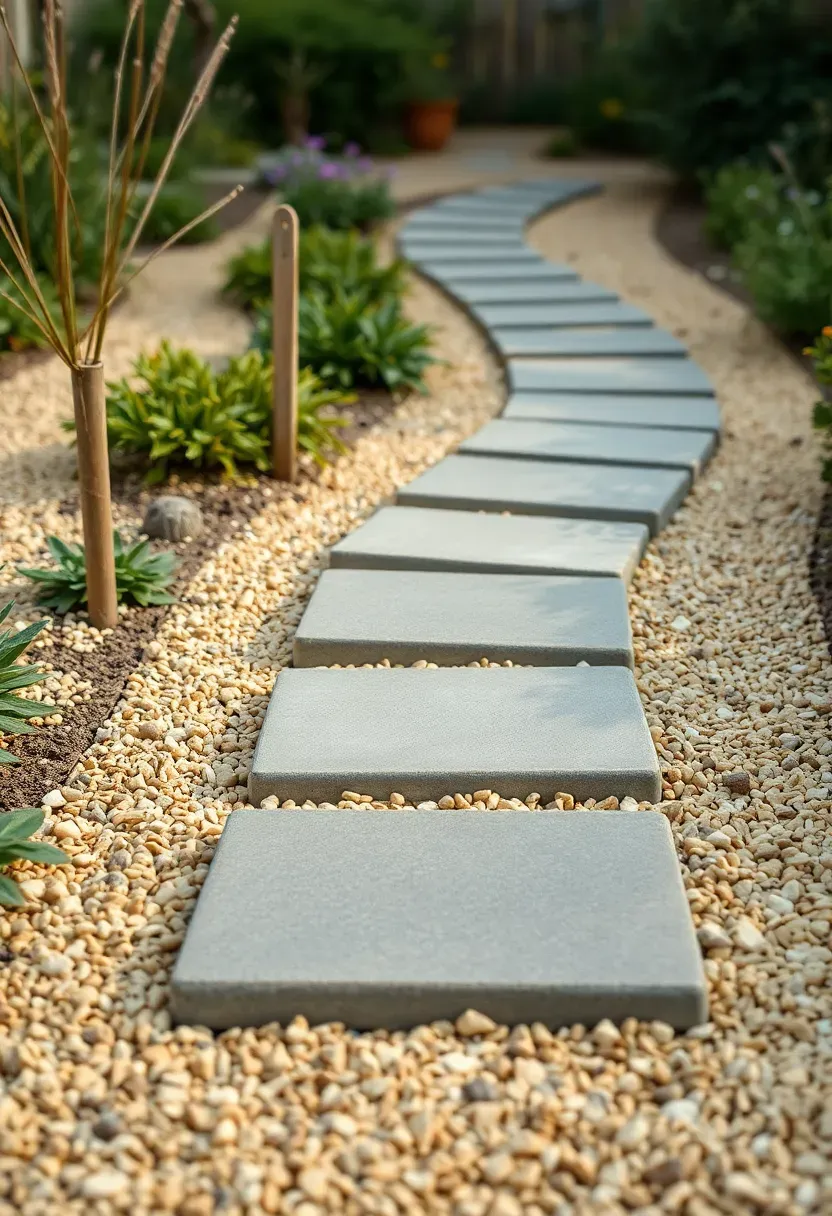
13. Stepping Stones in Gravel
The simplest paver project you can finish in a weekend
If you want the look of pavers without the full base-prep commitment, setting individual stepping stones in a gravel bed gets you there fast. Buy 16-inch or 18-inch square concrete pavers, spread 3 inches of compacted gravel in your path area, and place the stones 6 to 8 inches apart (roughly one stride for comfortable walking).
Step 1: Outline the path
Lay a garden hose along your desired route. Walk it a few times to confirm the curve feels natural, then mark the edges with landscape paint.
Step 2: Excavate and fill
Dig 4 inches deep within your marked edges. Line with landscape fabric, then fill with pea gravel or decomposed granite and rake level.
Step 3: Set stones
Place each paver, press it into the gravel until it sits flush with the surrounding surface. Check each one with a short level.
Watch out
- Spacing over 10 inches forces an unnatural stride and people will step off the stones
- Use angular gravel (crushed stone), not round pea gravel, if you want the bed to stay put — round stones migrate
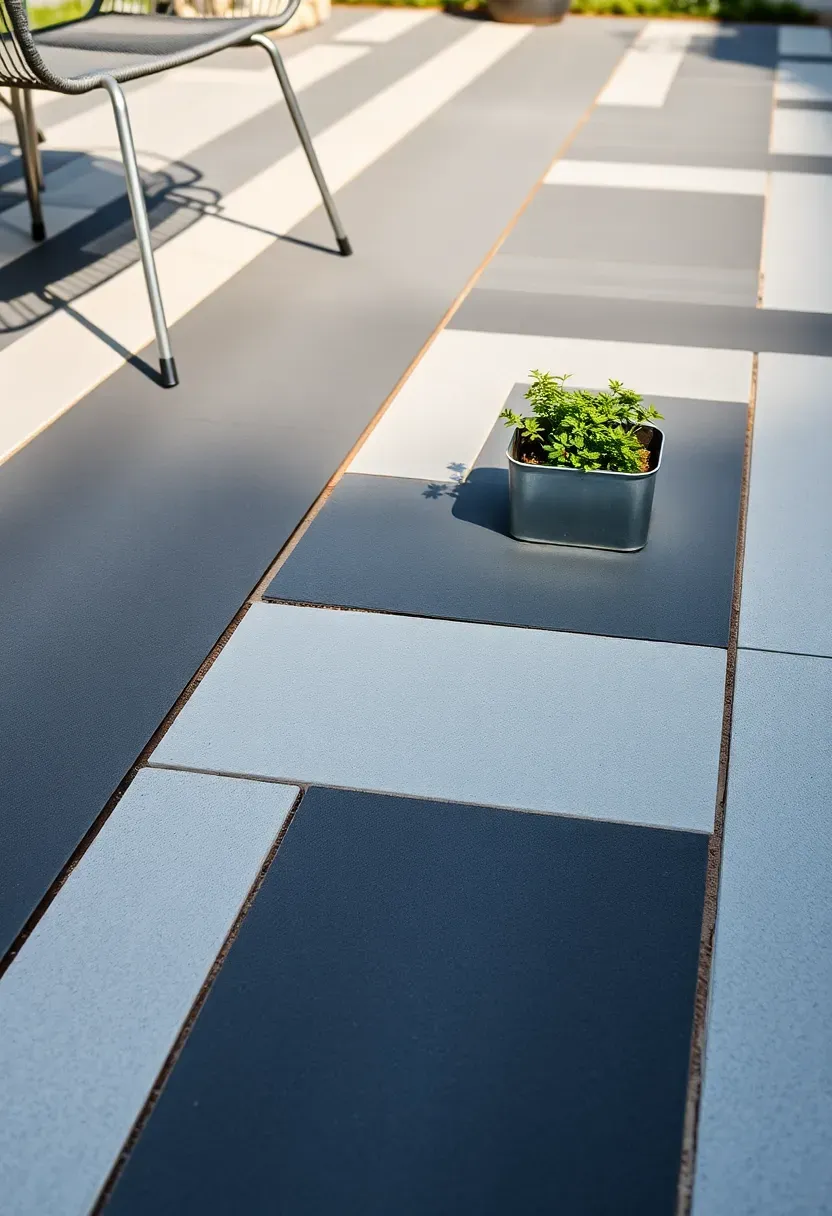
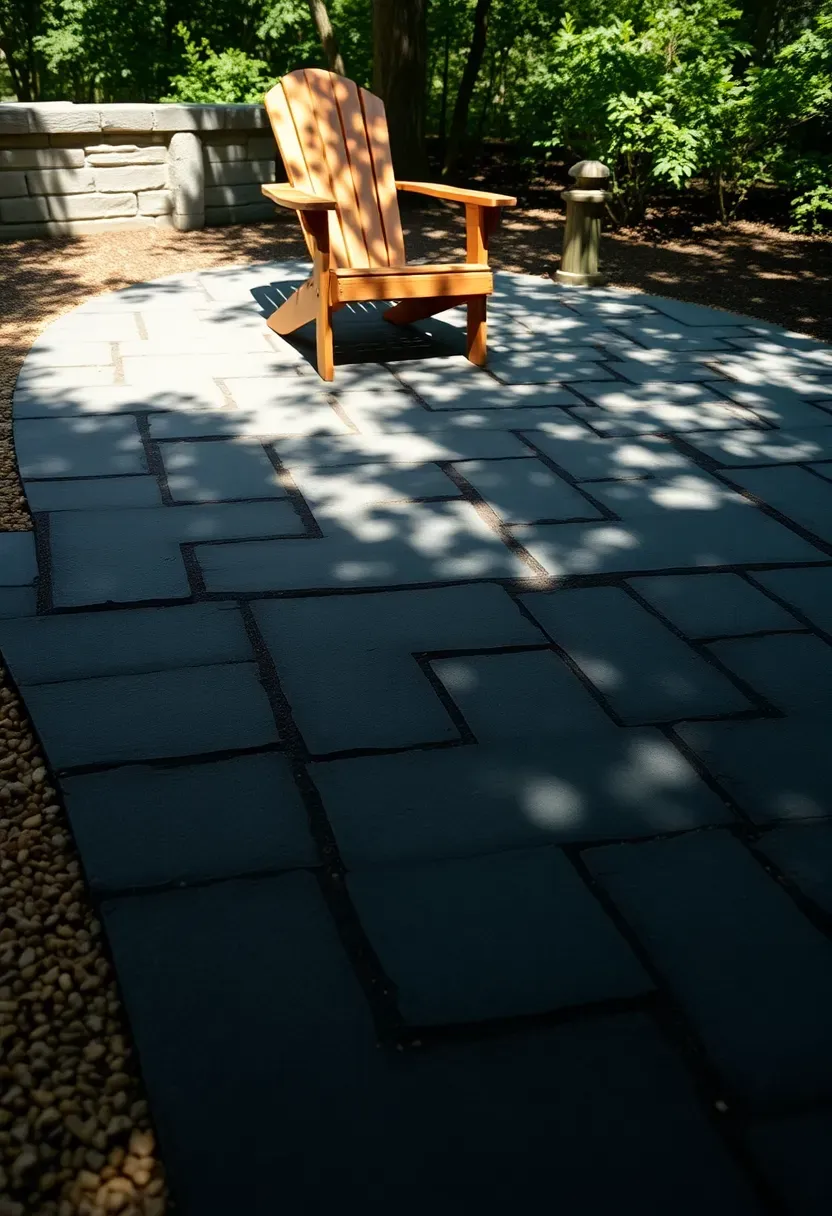
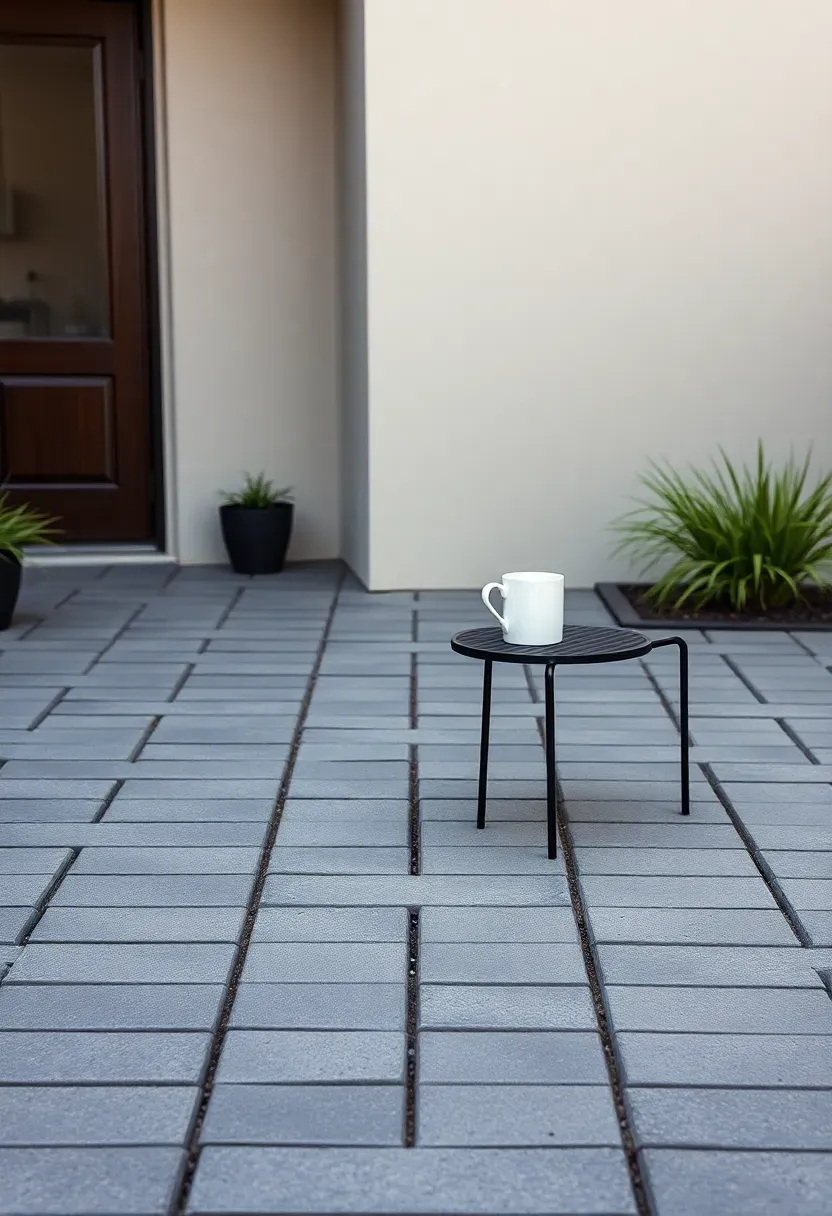
14. Charcoal and Gray Two-Tone Layout
Two colors of the same paver create visual interest without mixing materials. Charcoal and light gray is the most popular combination because the contrast is strong enough to read from a distance but not so stark that it fights with your plantings or furniture. You can run the two tones in alternating rows, alternating bands of three or four rows, or in a checkerboard on large square pavers.
Design choices
- Alternating single rows create a fine stripe that suits narrow spaces
- Wide bands (4 to 6 rows of one color, then 4 to 6 of the other) feel bolder and work on larger patios
- Random placement — mixing the two colors without a pattern — gives a natural, stone-like effect
Recommended
Items for this idea
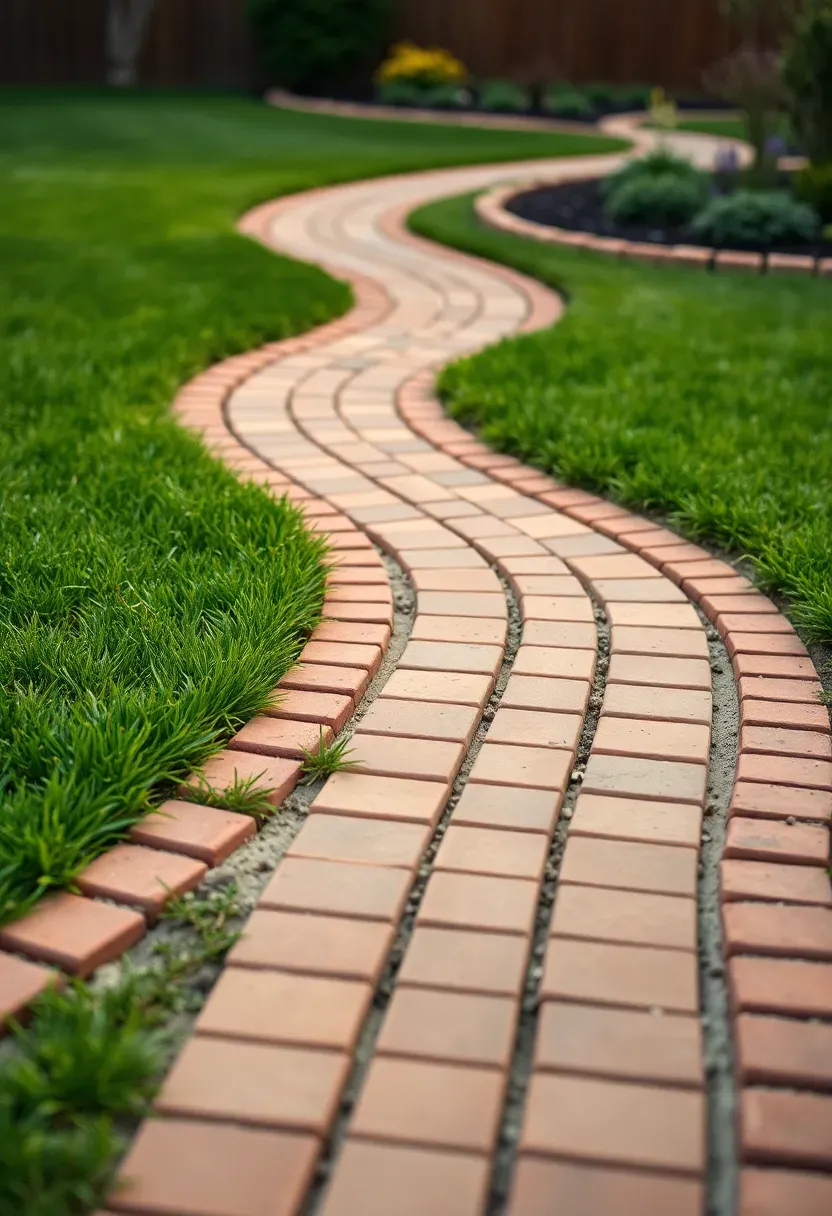
15. Curved Walkway with Soldier Course Edge
Why curves need a formal edge
Straight paver walkways hold their shape because the edge restraint runs in a straight line. Curves introduce lateral pressure at every point along the arc, so pavers on the outside of the bend want to spread outward. A soldier course — a row of pavers set on their long edge perpendicular to the path — acts as both a visual border and a structural buttress.
Building the curve
Use flexible plastic edging to define your curve first. Set the soldier course tight against it, then fill the interior with your field pavers. On tight curves, you will need to cut the inner pavers narrower — a wet saw with a diamond blade handles this cleanly.
Choose if
- Your yard has organic, flowing garden beds that would look odd with a straight path
- You want a walkway that feels intentional rather than just functional
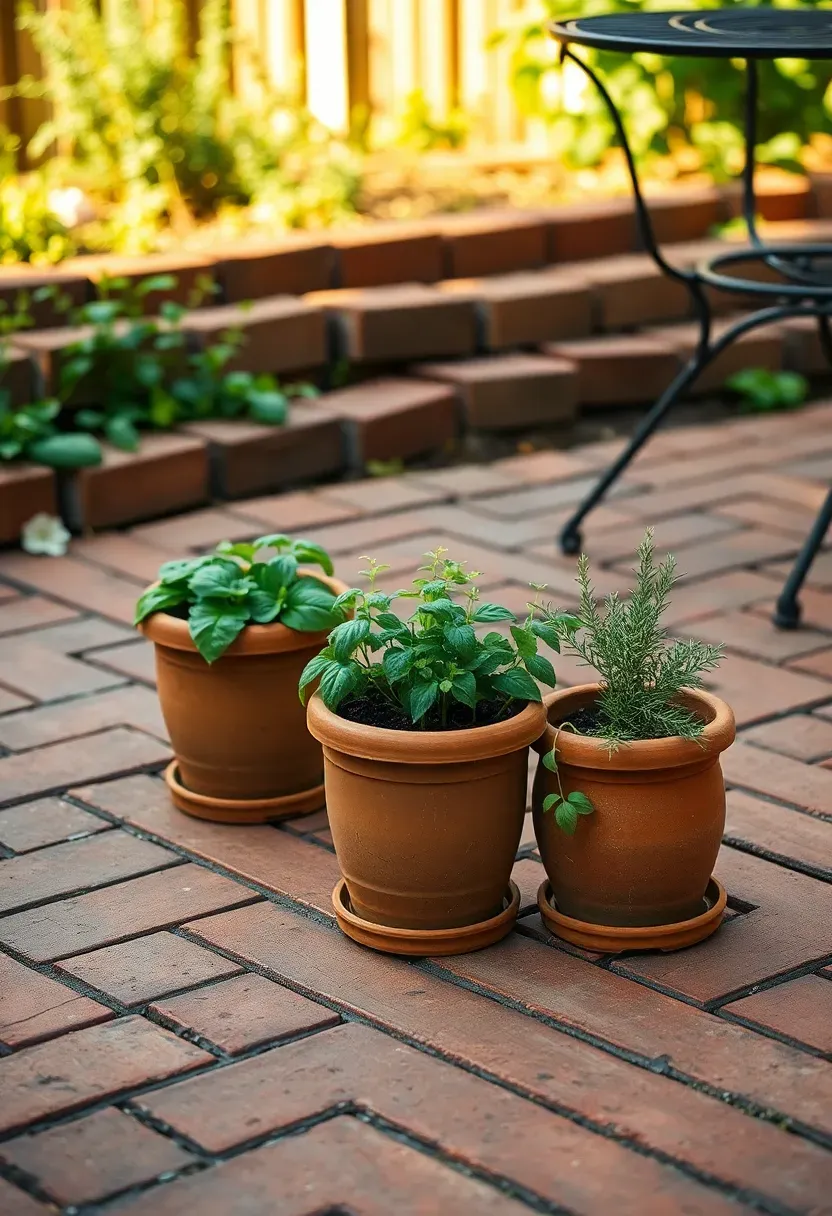
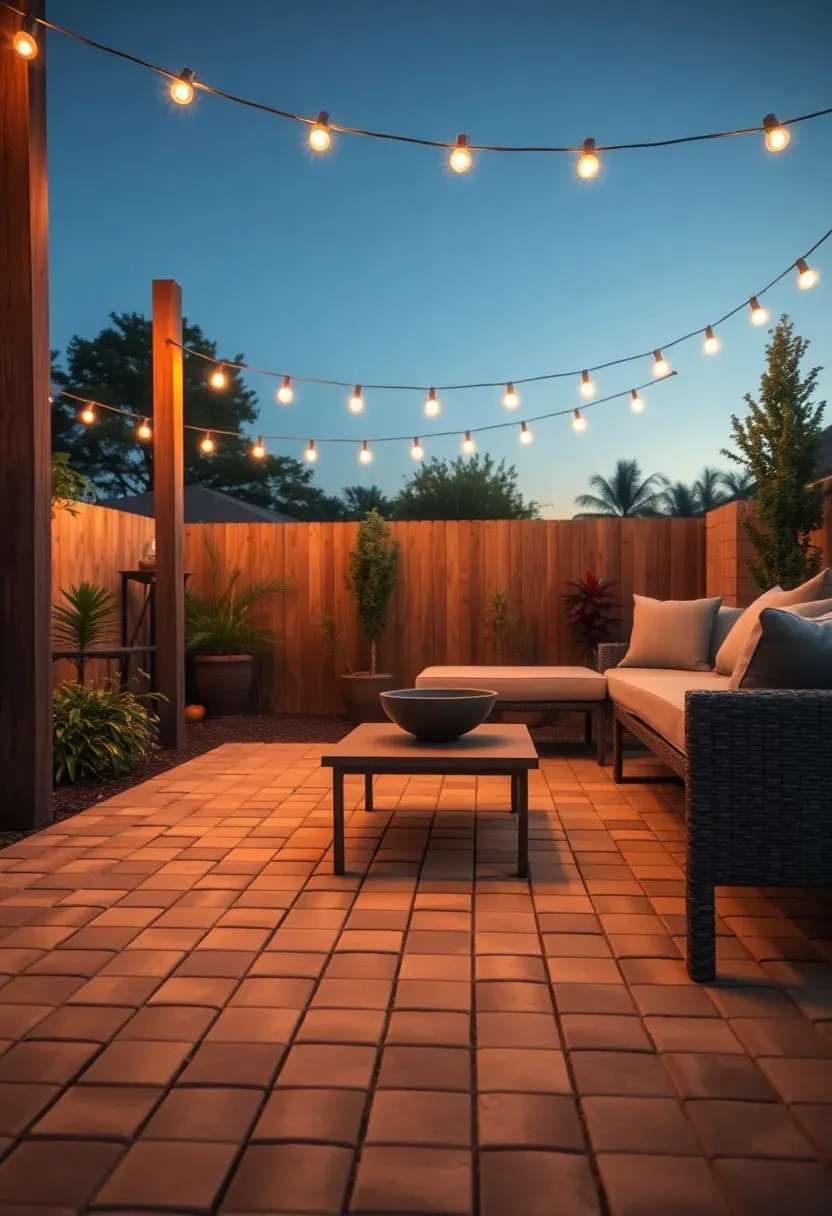
16. Reclaimed Brick Patio
Reclaimed bricks carry color variation, worn edges, and occasional mortar residue that new bricks cannot replicate. Architectural salvage yards sell them for $0.50 to $1.50 per brick depending on condition and region. A patio needs roughly 4.5 bricks per square foot in a standard pattern. The inconsistency in dimensions — old bricks vary by up to a quarter inch — actually helps because it creates wider, more irregular joints that suit a relaxed backyard aesthetic.
Practical considerations
- Sort reclaimed bricks by thickness before laying; group similar thicknesses together to reduce wobble
- Some old bricks are softer than modern pavers and will chip more easily — avoid using them where you drag heavy furniture
- Pair with wide sand or moss joints for a cottage-garden feel that hides dimensional inconsistency
Recommended
Items for this idea
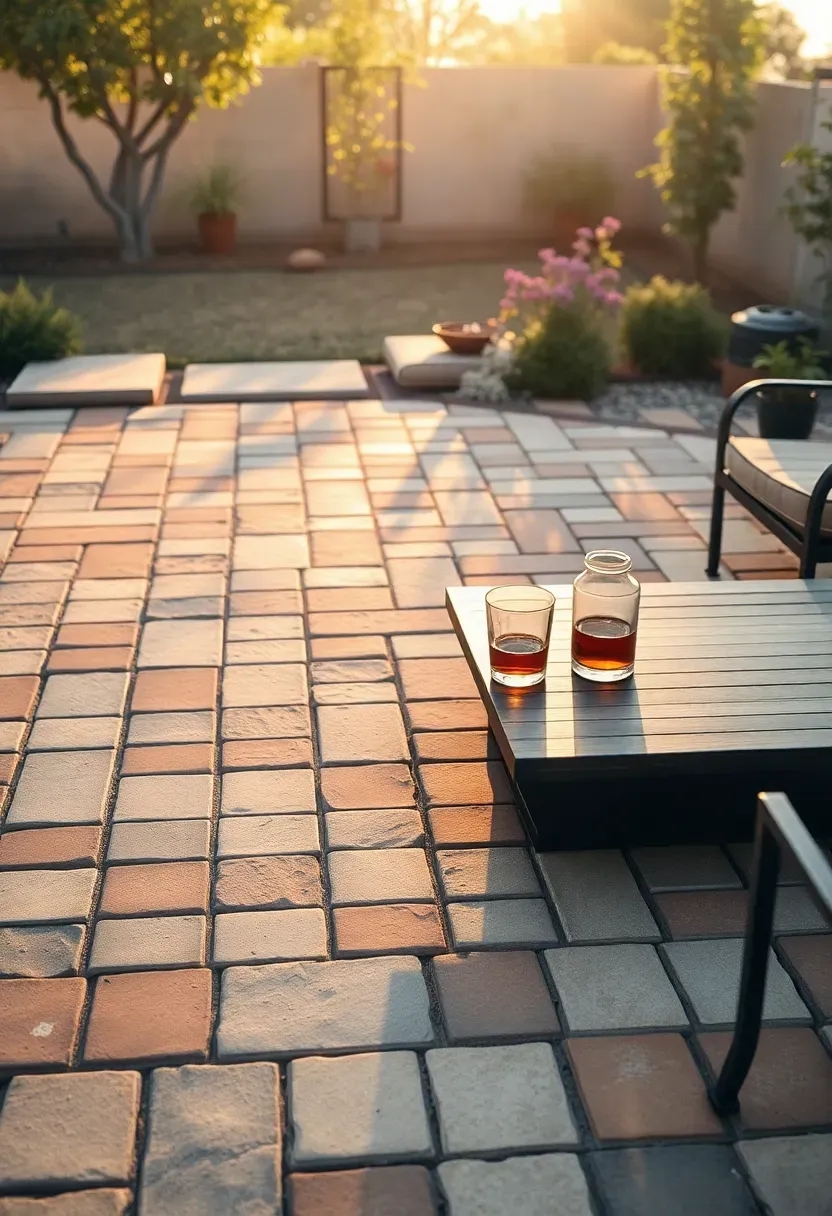
17. Ashlar Random Pattern
What is ashlar pattern?
Ashlar uses rectangular pavers in three or four different sizes laid in a repeating sequence that looks random but follows a set template. The manufacturer provides the laying pattern as a printed sheet — you just follow the map. The result looks like hand-cut stone at a fraction of the cost.
Why it works
Because the sizes vary, no long joint lines run across the surface. This hides any slight imperfections in your base and makes the patio feel more like natural stone. Ashlar patterns also let you buy one product line (same color, texture, and thickness) in multiple sizes rather than mixing different products that might not sit at the same height.
Best applications
- Backyard patios where you want a traditional look without the cost of real cut stone
- Large surfaces where a single paver size would look monotonous
- Pair with a single-size border for a clean perimeter
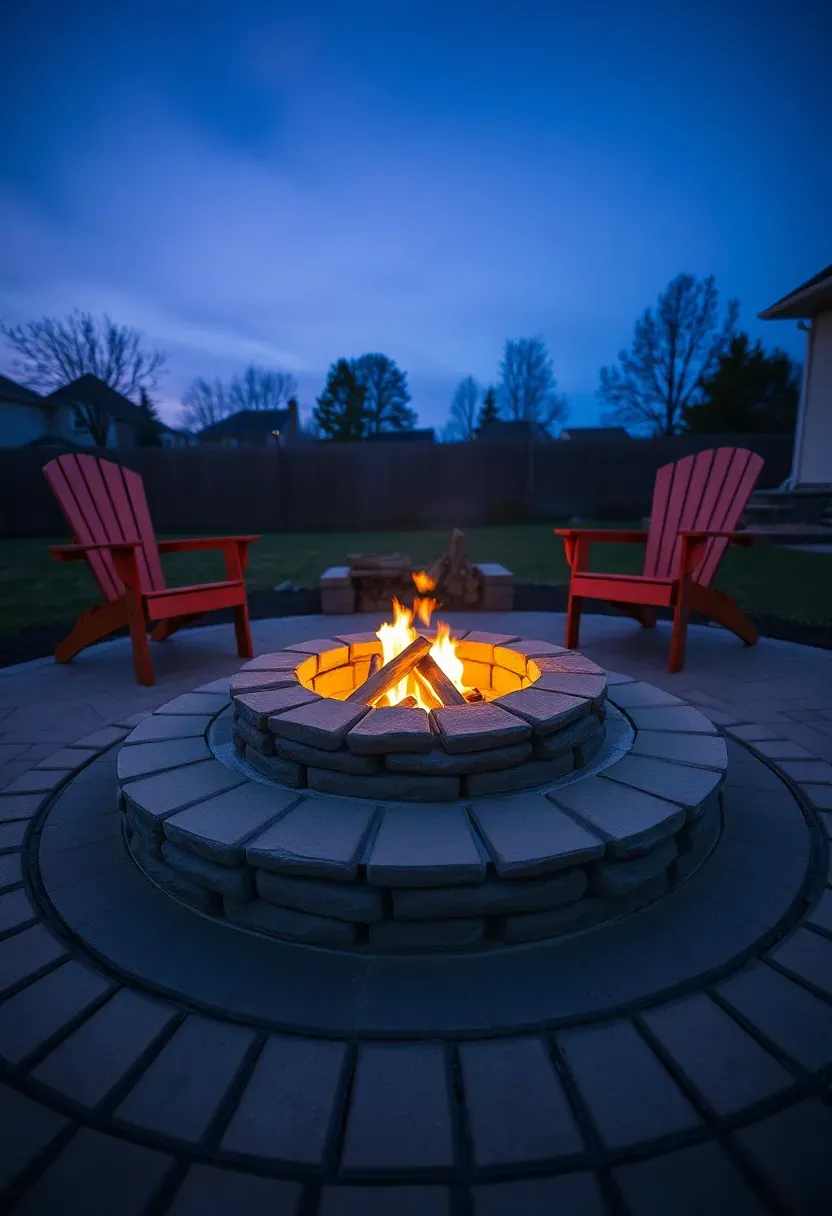
18. Paver Fire Pit Surround
A dedicated paver zone around a fire pit defines the seating area and protects adjacent grass from foot traffic and falling embers. Build the surround 4 to 6 feet wider than the fire pit on all sides — this gives chairs enough setback from the heat and creates a stable, level surface for Adirondack chairs or built-in benches. Use the same paver as your main patio for a seamless look, or switch to a contrasting material to frame the fire pit as a distinct zone.
Tips
- Keep combustible material (wood, composite decking) at least 10 feet from the fire pit opening
- Slope the paver surround 1/8 inch per foot away from the pit to drain rainwater
- A retaining lip of stacked pavers or wall block around the fire pit contains ash and directs smoke upward
Recommended
Items for this idea
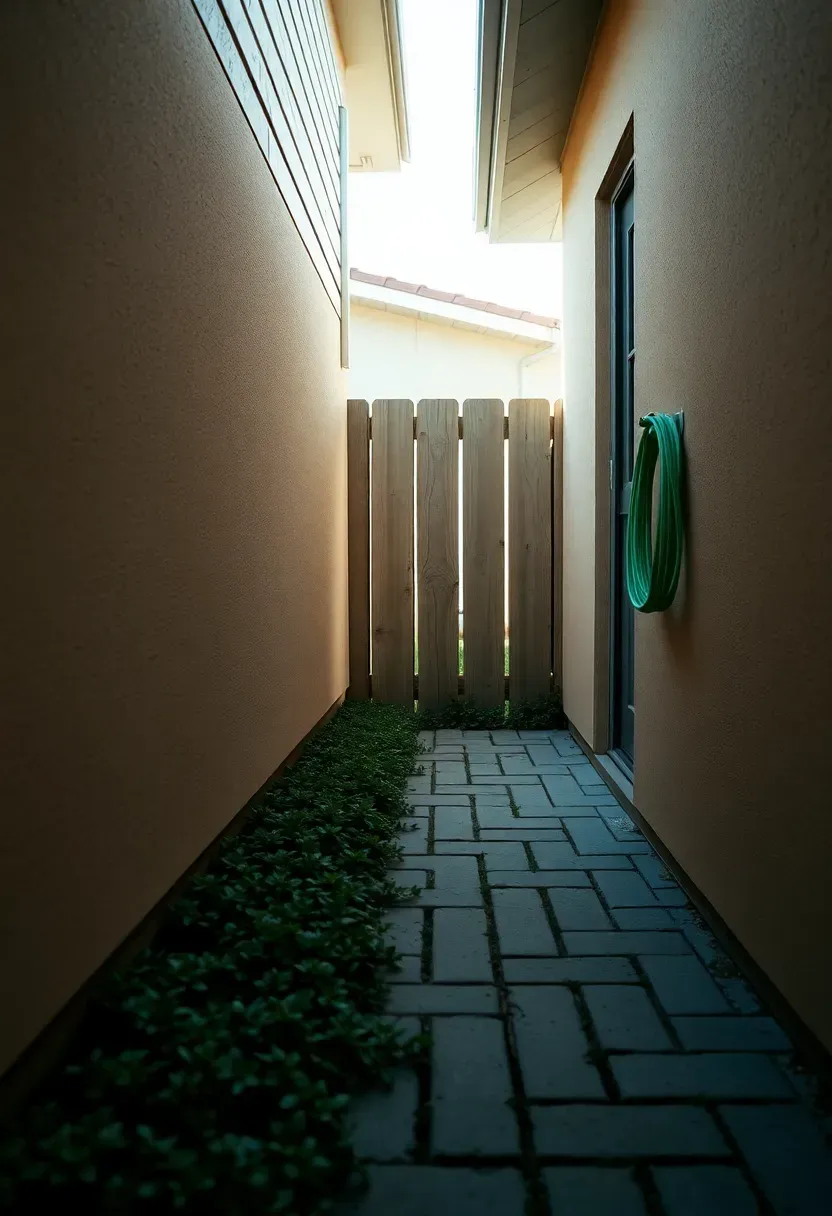
19. Narrow Side Yard Paver Path
The problem
Side yards are typically 3 to 5 feet wide, sloped toward the house, and ignored until you need to drag a trash can through mud to the curb.
The solution
A paver path 24 to 36 inches wide with a slight crown (higher in the center) directs water toward the fence side rather than the foundation. Use a single paver width in running bond so there are no lengthwise cuts. Compact the base thoroughly because side yards often have utility trenches that settle unevenly. Edge both sides with aluminum or steel landscape edging — plastic edging is too flexible for a narrow corridor where mower wheels or foot traffic push directly against it.
Pros
- Keeps mud off shoes and foundation
- Creates a clean utility corridor for trash cans, wheelbarrows, hose reels
Cons
- Requires careful grading to prevent water pooling against the house
- Limited width makes it hard to pass someone coming the other way
20. Bluestone Irregular Cut
Bluestone — technically a type of sandstone quarried mainly in Pennsylvania and New York — comes in irregular polygonal pieces that fit together like a puzzle. The blue-gray surface develops a slight silver patina over time. It is dense enough to resist most freeze-thaw damage without sealing, though shaded areas can get slippery when wet because the surface is naturally smooth.
Installation difference from standard pavers
- You dry-fit the pieces on the sand bed like a jigsaw, trimming edges with a masonry hammer as needed
- Joints run 1/2 to 2 inches wide depending on how much trimming you do
- Fill joints with polymeric sand or plant creeping thyme for a living-joint look

Recommended
Items for this idea
21. Geometric Diamond Inlay
How to add a focal point without changing your layout
A diamond or lozenge shape set into the center or a key area of your patio breaks up a uniform field without requiring a completely different pattern. You achieve it by rotating standard rectangular pavers 45 degrees within a defined border. The border pavers stay at 0 degrees, creating a frame. Fill the diamond with a contrasting color for maximum effect — dark within light, or warm within cool.
Step 1: Plan the geometry
Mark the diamond on your base before you start laying. Use string lines from corner to corner to define the rotated area.
Step 2: Lay the border first
Set the perimeter of the diamond in your field-paver color. This establishes the clean edge between the two orientations.
Step 3: Fill the center
Lay the rotated pavers inside the border. You will need to cut triangular pieces where the 45-degree pavers meet the straight border.
Watch out
- A diamond smaller than 4x4 feet looks lost; aim for at least 6x6 feet on a standard patio
- Keep the diamond aligned with a sight line from your most common viewing angle (the back door, typically)
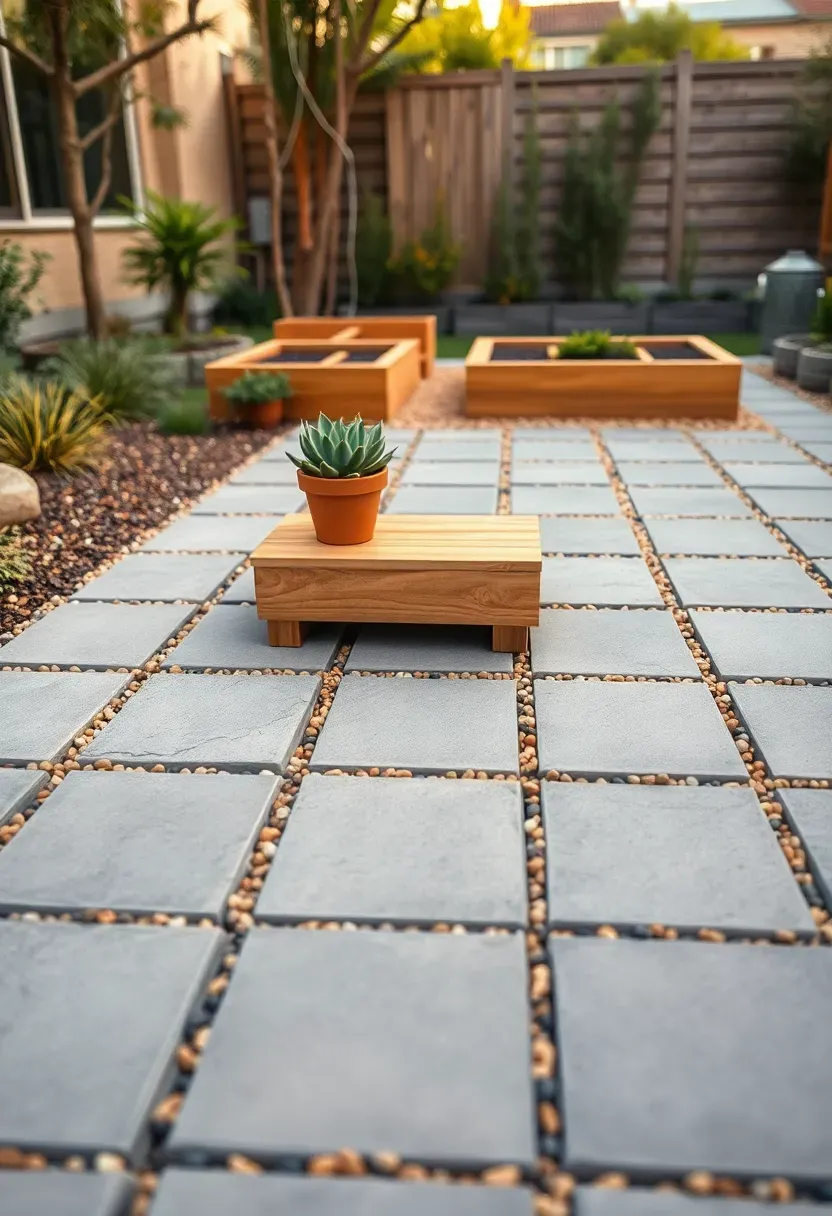
22. Paver-and-Pea-Gravel Hybrid
This approach spaces pavers 2 to 4 inches apart and fills the gaps with loose gravel. The effect sits somewhere between a fully paved patio and a gravel yard — structured enough for furniture but relaxed enough for a garden setting. It uses 30% to 40% fewer pavers than a tight-joint layout, which cuts material cost significantly. The gravel handles drainage naturally, and the wide joints soften the hardscape visually.
What to know
- Pea gravel migrates into lawn areas unless you install a flush edge restraint — aluminum landscape edging or a concrete mow strip works
- Furniture legs sink into gravel between pavers; place the legs directly on paver surfaces when positioning chairs and tables
- Annual top-off of gravel keeps the joints full and the look fresh
Recommended
Items for this idea
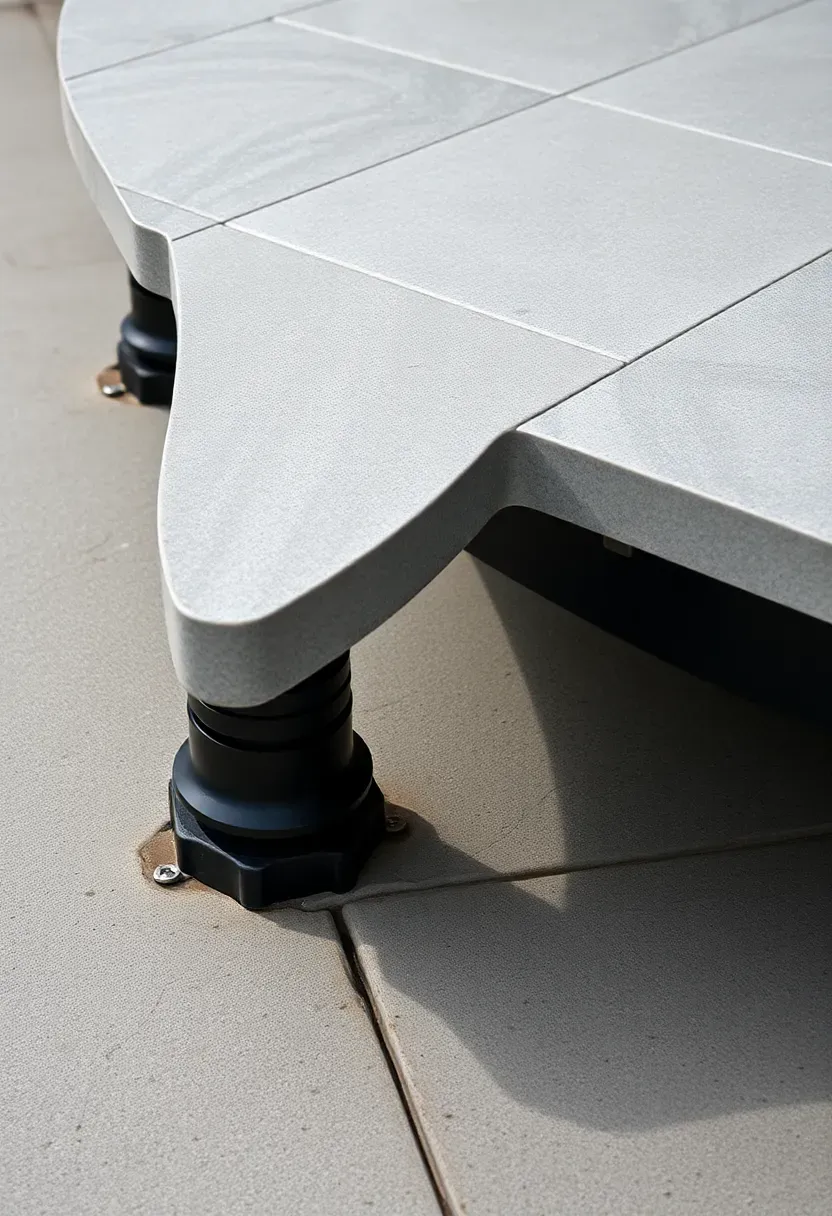
23. Elevated Paver Deck on Pedestals
A different approach to paver installation
Instead of excavating and building a gravel base, pedestal systems let you set porcelain or concrete pavers on adjustable plastic supports over an existing concrete slab, rooftop membrane, or even compacted gravel. Each pedestal adjusts independently, so you can level the surface without regrading the substrate. The gap beneath the pavers allows water to drain freely and air to circulate, which prevents moisture issues on rooftop installations.
Where it makes sense
Pedestal systems excel on rooftops, over waterproof membranes you do not want to penetrate, and on old concrete patios that are cracked but still structurally sound. They cost more per square foot ($4 to $8 just for the pedestals) but eliminate excavation labor entirely.
Limitations
- Not suitable for areas with heavy vehicle traffic
- Pavers can shift if not clipped together or if pedestals are spaced too far apart
- The 2-to-4-inch gap beneath collects leaves and debris that need occasional clearing
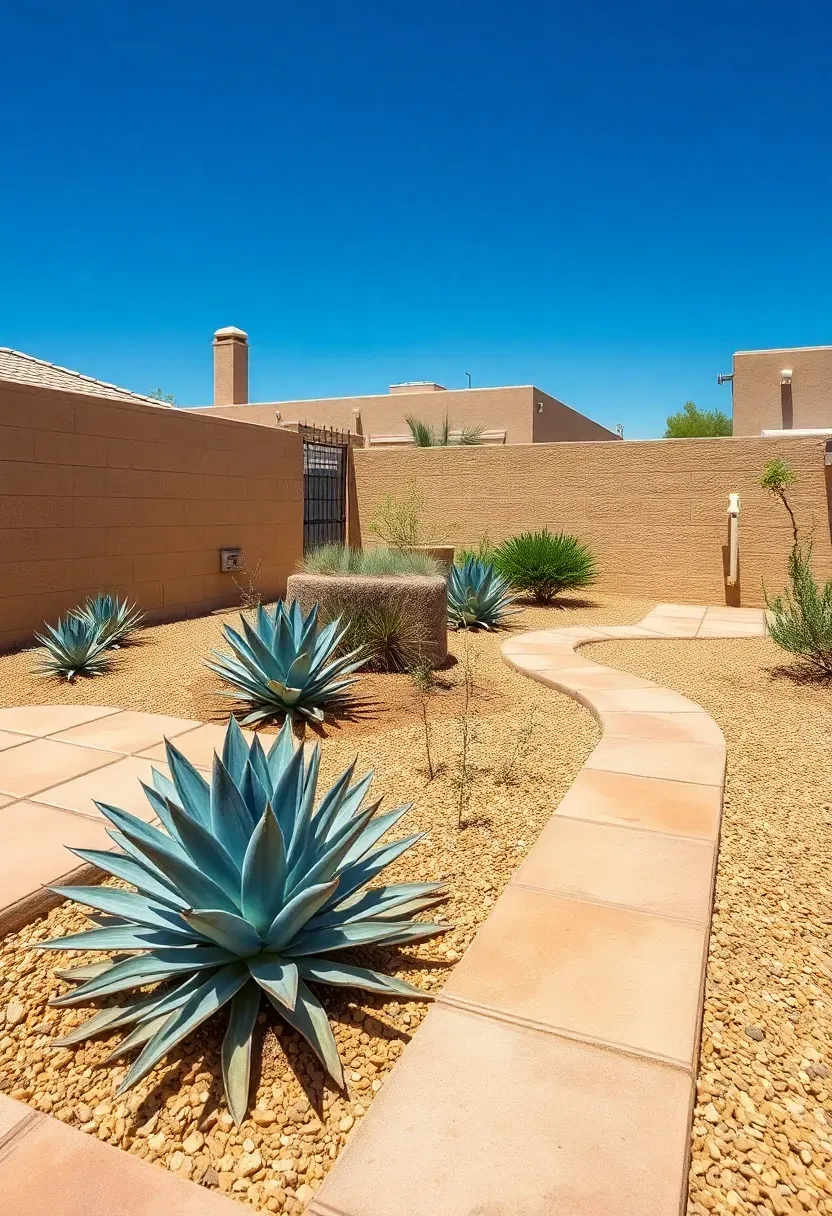
24. Desert Landscape Pavers
Origins and context
In arid climates from the American Southwest to Mediterranean coastlines, outdoor surfaces have always favored stone and masonry over organic materials. Wood rots under UV exposure and irrigation cycles; concrete cracks from extreme temperature swings. Pavers handle both conditions because individual units flex with thermal expansion rather than fighting it.
Modern application
Choose pavers in sand, buff, or terracotta tones that blend with the surrounding earth. Avoid dark colors — they absorb heat and make barefoot walking painful by midafternoon. Arrange them with wide joints filled with decomposed granite rather than polymeric sand, echoing the natural ground surface. Integrate planting pockets for agave, yucca, or trailing rosemary directly within the paver field.
Adapt at home
- Even in non-desert climates, the desert paver aesthetic works for low-water garden zones
- Replace traditional lawn-to-patio transitions with gravel-to-paver gradients for a cohesive look
- Use lighter-colored sealers if your chosen paver runs darker than you would like
Recommended
Items for this idea
25. Budget Concrete Paver Basics
Concrete pavers from home-improvement stores start at $0.50 per piece for 6x6 or 6x9-inch units — roughly $1.50 to $2.50 per square foot. At that price, you can pave a 150-square-foot patio for under $400 in materials, plus another $150 to $200 for gravel base, sand, and edge restraint. The pavers lack the color depth of premium products, but they hold up well structurally and you can always stain or seal them later for a richer finish.
Keeping costs down
- Rent a plate compactor ($50 to $80 per day) instead of buying one
- Buy pavers by the pallet — per-unit prices drop 15% to 20% compared to buying individual pieces
- Skip the polymeric sand for now; regular masonry sand works fine and costs a fraction of the price
Quick FAQ
How deep should I dig for a paver base? For pedestrian-only areas, excavate 7 to 8 inches total: 4 inches of compacted gravel, 1 inch of leveling sand, and the paver thickness (typically 2-3/8 inches). Driveways need 10 to 12 inches of gravel base because of vehicle weight.
Can I lay backyard pavers over existing concrete? Yes, if the concrete is structurally sound and drains properly. Apply a thin mortar bed or use pedestal supports. Cracked slabs that heave or settle need to be broken out first — laying pavers over an unstable slab just transfers the problem upward.
Do pavers increase home value? Real estate appraisers generally consider a well-built paver patio a feature that supports asking price, but the return depends on your market. In neighborhoods where outdoor living space is expected, a finished paver patio prevents your listing from looking incomplete. Budget $5 to $15 per square foot installed and expect to recover 50% to 70% at resale.
Which paver material lasts longest? Natural granite and porcelain lead for longevity — both resist UV fading, water absorption, and surface wear better than concrete or clay. Granite cobblestones in European city centers have survived centuries of cart and vehicle traffic. For residential use, porcelain and granite both last well beyond a homeowner's typical tenure.
Are pavers slippery when wet? It depends on the finish. Tumbled, textured, and shot-blasted surfaces provide good grip wet or dry. Polished or smooth-finished pavers (some porcelain, honed bluestone) can be slick — look for a manufacturer's wet slip rating (DCOF of 0.42 or higher) if the area gets rain or pool splash.
Pavers are one of the few backyard materials where doing the base prep right matters more than the product you pick. Spend your time and budget on excavation depth, gravel compaction, and proper edging. The pavers themselves — whether $2 concrete rectangles or $12 porcelain slabs — will perform well for years if they are sitting on a stable, well-drained foundation. Start with a small section, learn the rhythm of the work, and expand from there. Your knees will thank you for doing it in stages anyway.
Pinterest cover for 25 Backyard Pavers Ideas
About the author
OBCD
CGI visualization and interior design content. We create detailed 3D renders and curate practical design ideas for every room in your home.