17 Backyard Pavilion Ideas
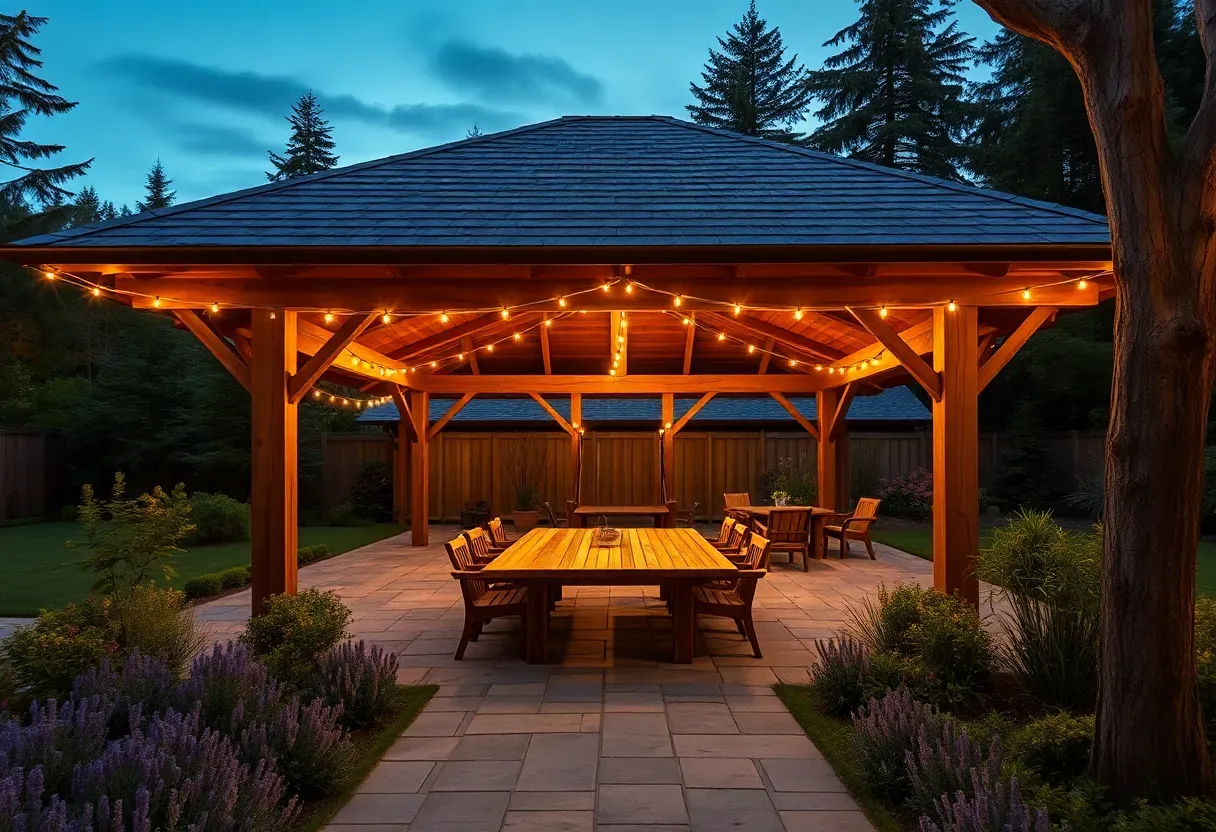
My parents had a flat canvas canopy over their back patio for about six years. Every spring the fabric sagged with rainwater, the poles rusted at the base, and the whole thing looked worse each season. When they finally replaced it with a proper cedar pavilion — posts set in concrete, actual rafters, a shingled roof — the difference was not just visual. The space went from something they tolerated to where they actually spent their evenings. A pavilion gives you permanent overhead cover without closing in the walls, which makes it more versatile than a gazebo and more substantial than a pergola. Here are 17 approaches worth looking at.
Each idea below covers a different material, shape, or function — from budget-friendly metal kits to custom timber frames built for serious entertaining.
Table of Contents
- Timber Frame Pavilion
- Metal Roof Pavilion
- Poolside Pavilion
- Pavilion with Outdoor Kitchen
- Gable Roof Pavilion
- Hip Roof Pavilion
- Pavilion with Fireplace
- Stone Column Pavilion
- Small Backyard Pavilion
- Rustic Log Pavilion
- Modern Flat Roof Pavilion
- Pavilion with Curtains
- Attached Pavilion
- Cedar Shake Pavilion
- Pavilion with Hot Tub
- DIY Pavilion Kit
- Pavilion with Outdoor Bar
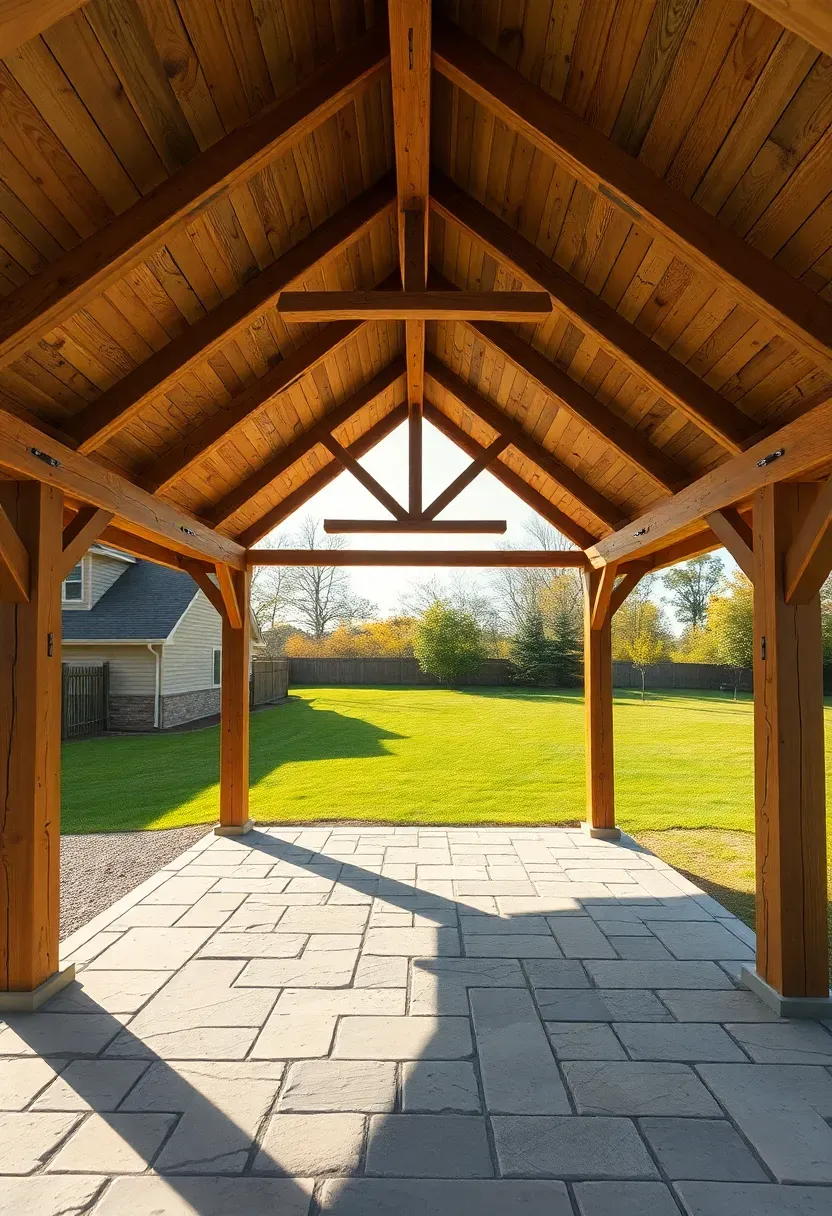
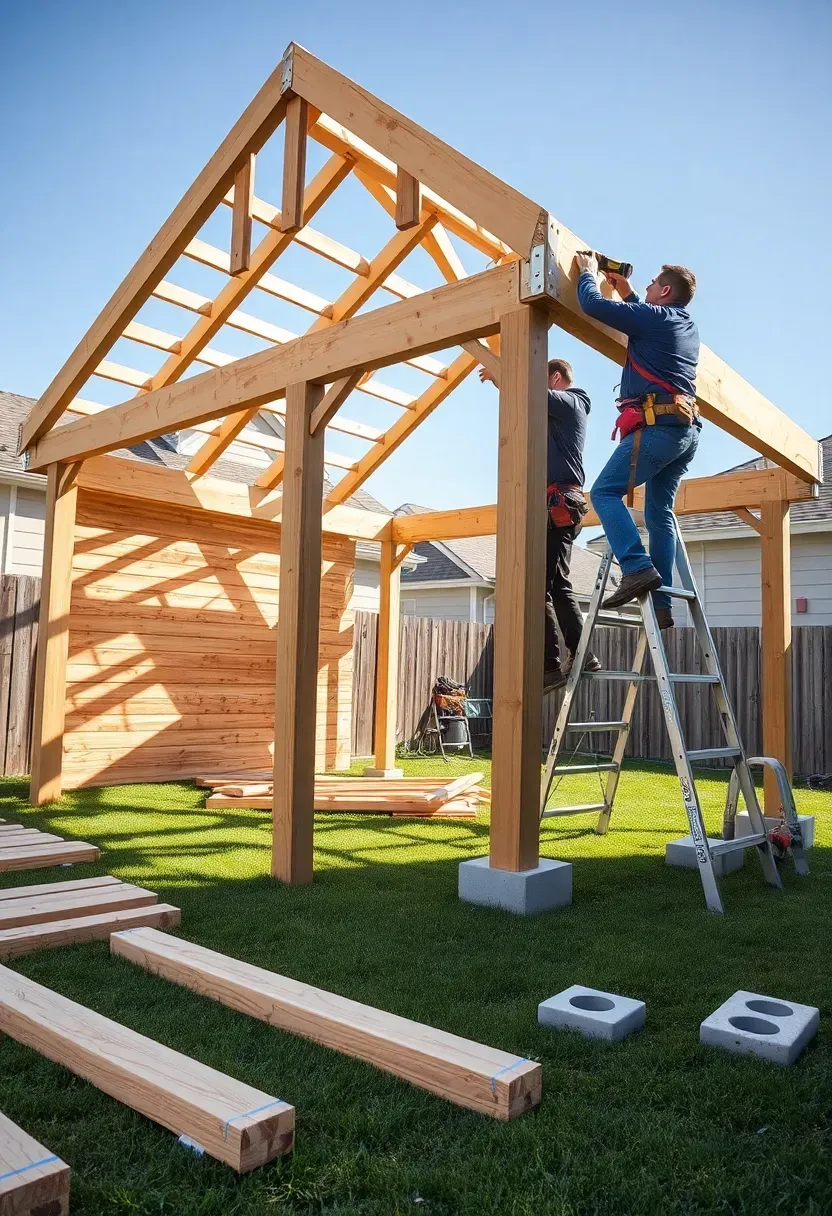
1. Timber Frame Pavilion
Timber framing uses large-section posts and beams joined with mortise-and-tenon joinery rather than metal brackets and screws. The result is a pavilion where the structure itself is the visual feature — no drywall or trim hiding the bones. Douglas fir and white oak are the two most common species for backyard pavilions. Douglas fir costs less and takes stain well. White oak resists rot naturally and weathers to a silver-gray if left unsealed. A 14x18-foot timber frame pavilion with a professional raise typically runs $12,000 to $22,000 depending on wood species and roof material. The joinery requires precision cutting, so most homeowners hire a timber frame shop to prefabricate the bents and then assemble on site in a single weekend.
Tips
- Specify kiln-dried timber to minimize post-installation shrinking and checking
- Set posts on concrete piers rather than burying them — even rot-resistant species degrade below grade
- Ask your fabricator about a king post truss for spans over 14 feet to avoid a center support column
We picked a few things that go well with this idea: Purple Leaf 12x24 Steel Double Roof Gazebo (★4.7), Purple Leaf 12x14 Hardtop Gazebo with Curtains (★4.7) and Backyard Discovery Beaumont Cedar Pergola Kit (14x12) (★4.5). As an Amazon Associate we earn from qualifying purchases.
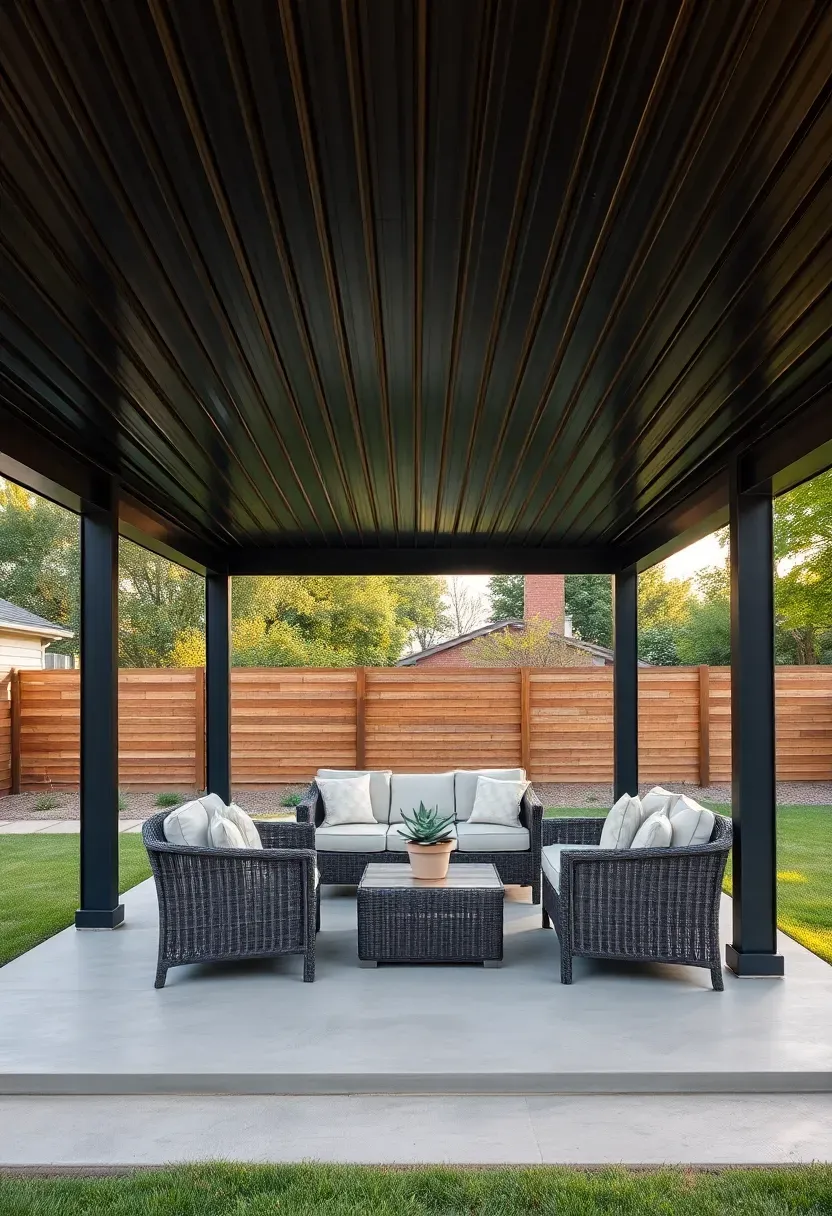
2. Metal Roof Pavilion
Why metal works for pavilions
Metal roofing sheds water faster than shingles, weighs less than tile, and handles hail better than either. On a pavilion where the underside of the roof is visible (no ceiling to hide behind), standing-seam panels give you clean lines with concealed fasteners. The ribs cast subtle shadow patterns that change through the day.
Modern take
Current options include matte-finish steel in charcoal, bronze, and forest green, plus aluminum panels that will not rust in coastal climates. Steel panels cost $4 to $8 per square foot installed. Aluminum runs about 20 percent more but weighs 60 percent less, which means your supporting structure can be lighter.
Apply at home
- Choose a panel profile with a 1.5-inch rib height for residential scale — taller ribs look industrial
- Add foam closure strips at eaves to keep wasps and birds from nesting under the panel corrugations
We picked a few things that go well with this idea: Brightever 100FT Outdoor String Lights (52 Bulbs) (★4.6), Brightown 50FT Waterproof Globe String Lights (★4.7) and 100FT LED Outdoor Patio String Lights (★4.3). As an Amazon Associate we earn from qualifying purchases.
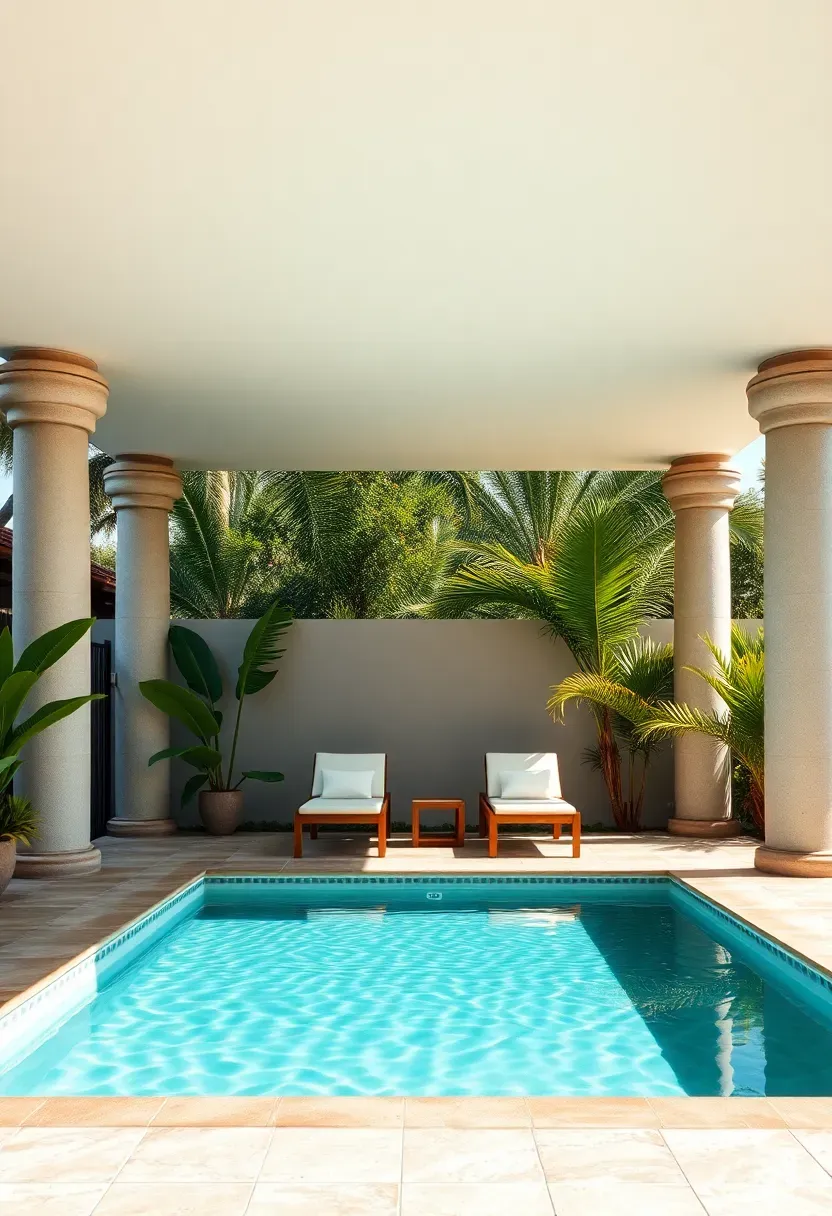
3. Poolside Pavilion
How to position it right
Place the pavilion on the side of the pool that gets afternoon shade naturally — west or southwest in most Northern Hemisphere yards. This keeps the shaded seating area cool during the hottest hours without blocking morning sun from warming the pool water.
Step 1: Set the distance
Keep posts at least 6 feet from the pool edge. This gives enough room for a walkway and prevents splash water from staining column bases over time.
Step 2: Choose your surface
Concrete pavers or natural stone around the pavilion base are better than wood decking near a pool. Chlorinated water warps and bleaches most wood species within two seasons.
Step 3: Plan drainage
Slope the pavilion pad away from the pool at a quarter-inch per foot minimum. You want rainwater running toward the yard, not into the pool.
Watch out
Pavilion columns near pools need stainless steel or hot-dip galvanized hardware. Standard zinc-plated bolts corrode fast in the chlorine-heavy air around a pool.
We picked a few things that go well with this idea: Fanbulous 52-Inch Waterproof Outdoor Ceiling Fan (★4.8), Addlon 20-Inch Waterproof Gazebo Ceiling Fan (★4.8) and LEDIARY 20-Inch Caged Outdoor Fan with Lights (★4.7). As an Amazon Associate we earn from qualifying purchases.
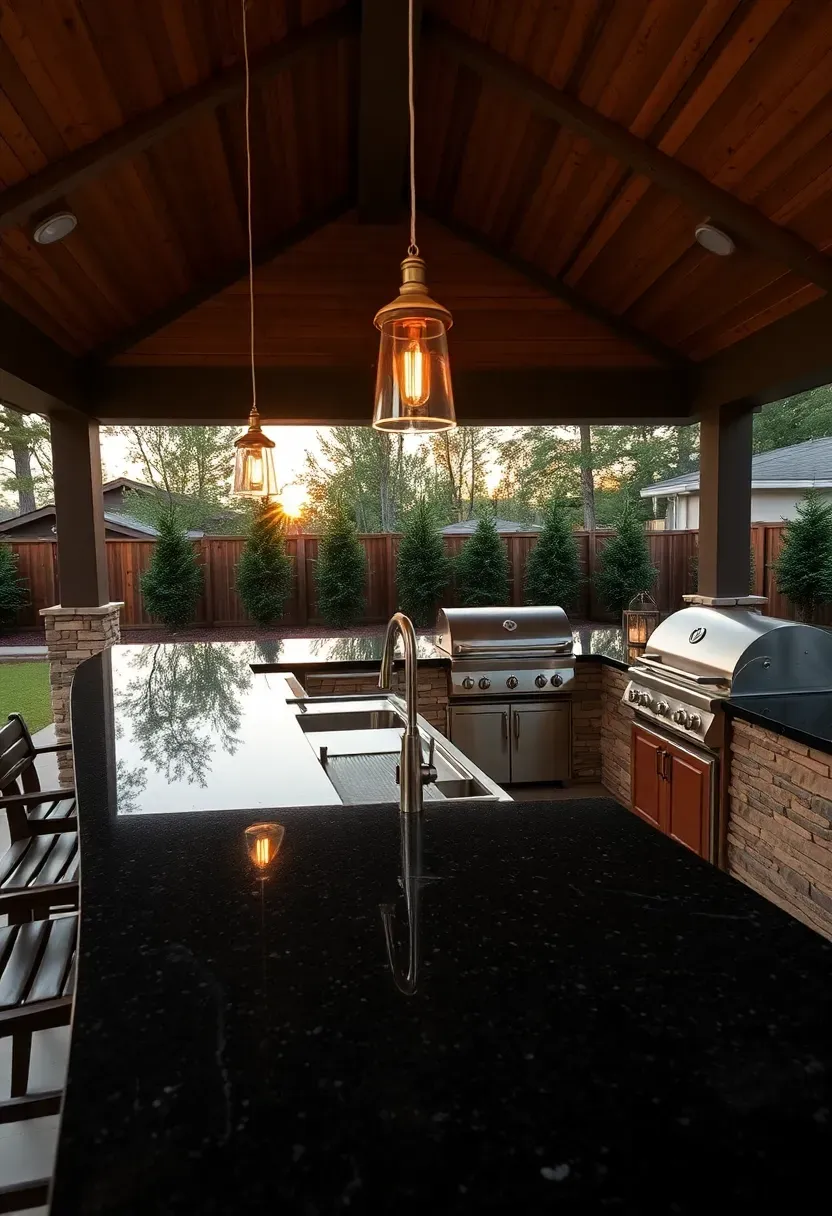
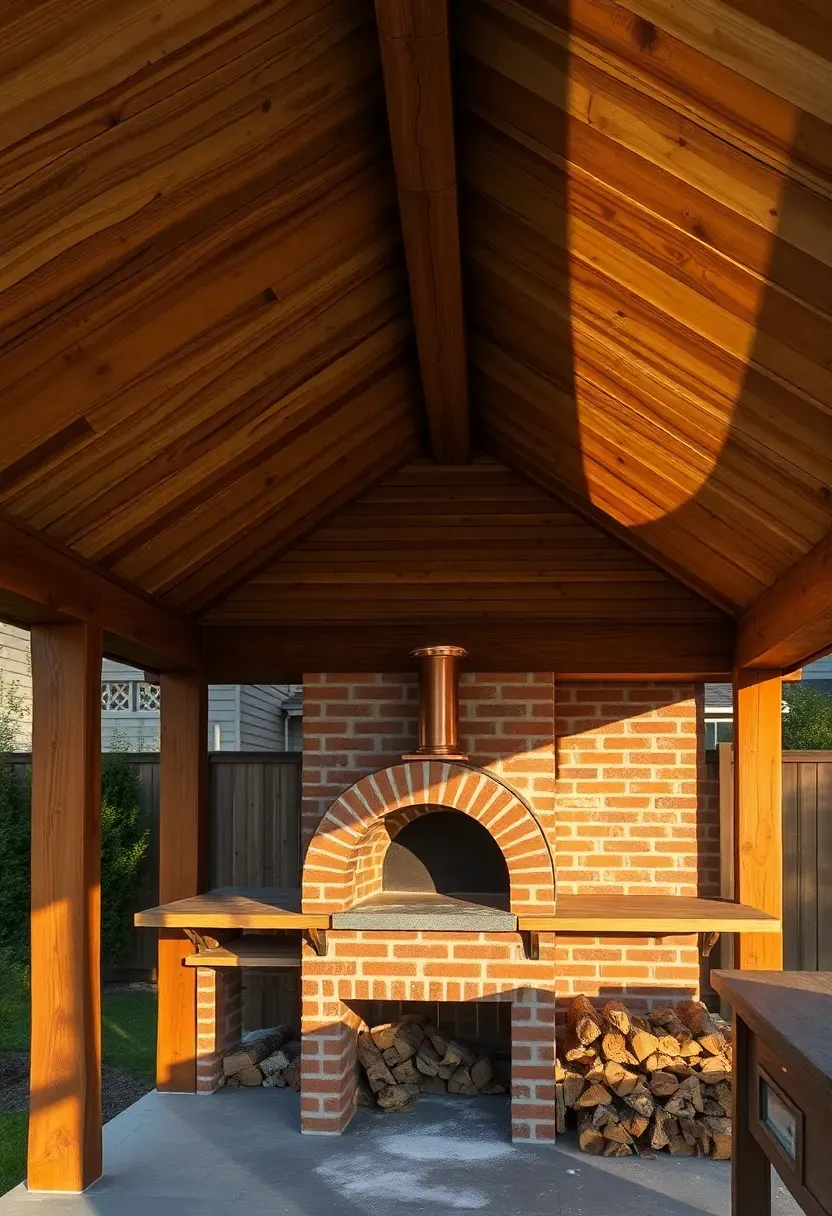
4. Pavilion with Outdoor Kitchen
The problem with cooking in the open
Rain cancels dinner plans. Direct sun heats up the cook. Wind scatters napkins and ash. An uncovered outdoor kitchen is basically a fair-weather appliance that sits unused half the year in most climates.
The solution
A pavilion over the kitchen area gives you a permanent roof without walls, so smoke and heat dissipate naturally while rain stays off the counters. The key detail most people miss: you need a vented ridge cap or cupola directly above the grill. Without it, smoke pools under the roof peak and stains the ceiling within a single season. A 16x20-foot pavilion accommodates a grill, prep counter, sink, and four bar stools comfortably. Run gas, water, and electrical lines underground before the slab is poured.
Pros and cons
- Pro: Cook year-round regardless of weather
- Pro: Keeps guests nearby without exposing them to direct heat
- Con: Grease and smoke residue build up on roof structure — plan for annual power washing
Recommended
Items for this idea
5. Gable Roof Pavilion
The gable is the simplest roof shape that actually works well at scale. Two sloped planes meet at a central ridge — no valleys, no hips, no complex framing geometry. This makes it the most cost-effective option for DIY builders and the easiest to waterproof since water only flows in two directions. A 6/12 pitch (26.5 degrees) gives you good rain shedding without making the structure feel towering. Steeper pitches — 8/12 or 10/12 — add interior volume and visual drama but require longer rafters and more roofing material. Gable pavilions look best when proportioned so the roof height from plate to ridge is roughly one-third of the overall height from ground to ridge. Wider spans may need a collar tie or king post to prevent rafter spread.
Tips
- Add a ridge vent even on an open pavilion — it reduces heat buildup under the roof by 15 to 20 degrees
- Use rafter tails that extend 18 inches past the beam line for rain protection and visual depth
- Brace the gable ends with diagonal wind bracing if your area sees gusts over 40 mph
6. Hip Roof Pavilion
A hip roof slopes on all four sides, which gives it better wind resistance than a gable because there are no flat vertical surfaces for gusts to catch. The tradeoff is more complex framing — you need jack rafters and hip rafters in addition to the common rafters, which adds 15 to 25 percent to carpentry costs compared to a gable of the same footprint. Visually, hip roofs feel lower and more grounded even at the same actual height. They work particularly well on square or near-square pavilion footprints (12x12, 14x16). On long rectangles, hip roofs start to look squat. One practical advantage people overlook: the overhang is consistent on all four sides, so you get equal rain protection no matter which direction a storm comes from.
Tips
- A 4/12 to 6/12 pitch balances aesthetics and material cost on a hip roof
- Install a cupola or ridge vent at the peak — hip roofs trap more heat than gables due to less vertical ventilation area
- Use hurricane clips at every rafter-to-beam connection for genuine wind resistance
Recommended
Items for this idea
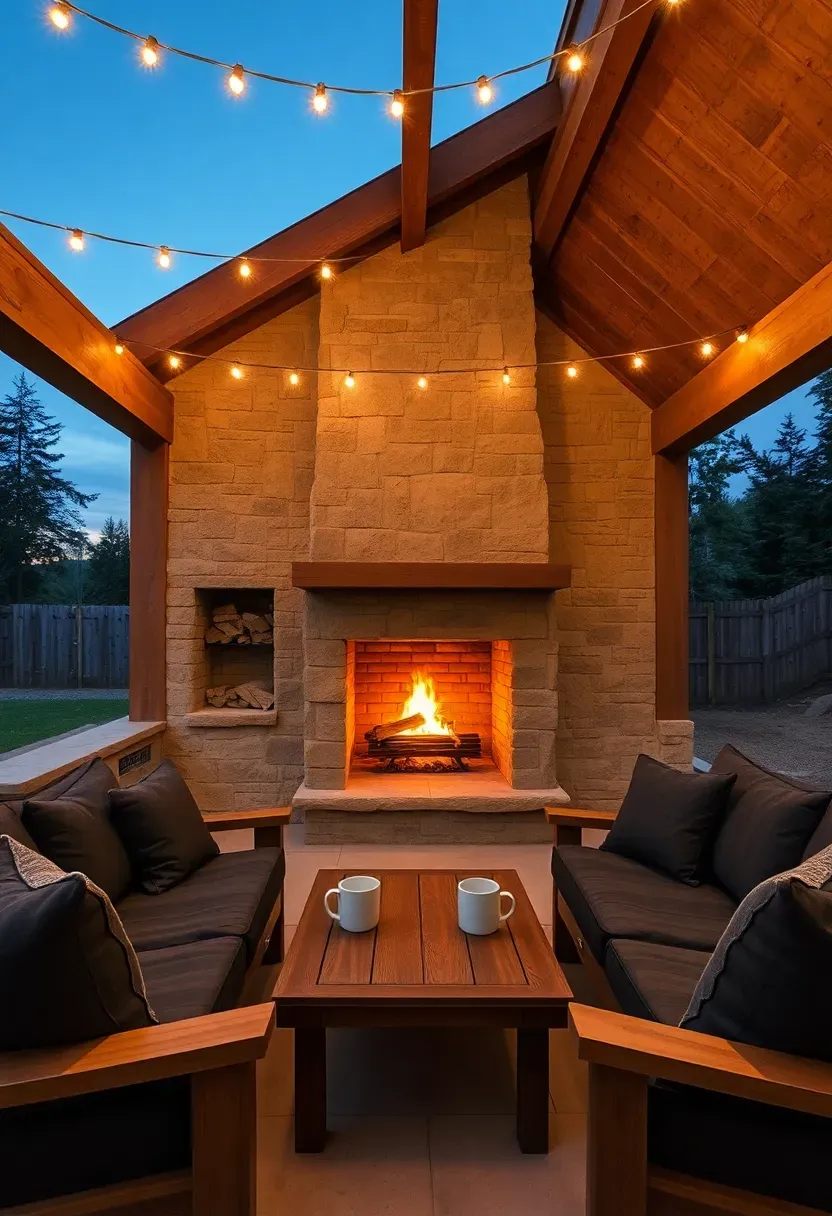
7. Pavilion with Fireplace
Why add a fireplace
A fireplace extends your pavilion's usable season by two to three months in cold climates. Once temperatures drop below 55 degrees, an open pavilion feels uncomfortable within 20 minutes. A fireplace with a proper firebox and chimney radiates enough warmth to keep a 200-square-foot seating area comfortable into the low 40s.
How to build it right
The fireplace needs its own footing — typically a 4-foot-deep concrete pad separate from the pavilion slab. This prevents settling from pulling on the pavilion frame. Build the firebox from firebrick rated to 2,000 degrees Fahrenheit. The chimney should extend at least 2 feet above the pavilion ridge to ensure proper draw. Without sufficient height, smoke rolls back under the roof.
Choose if
- You live in a climate with cool evenings from September through May
- You want a permanent focal point that anchors the space visually
- You are willing to invest $5,000 to $15,000 for the masonry work alone
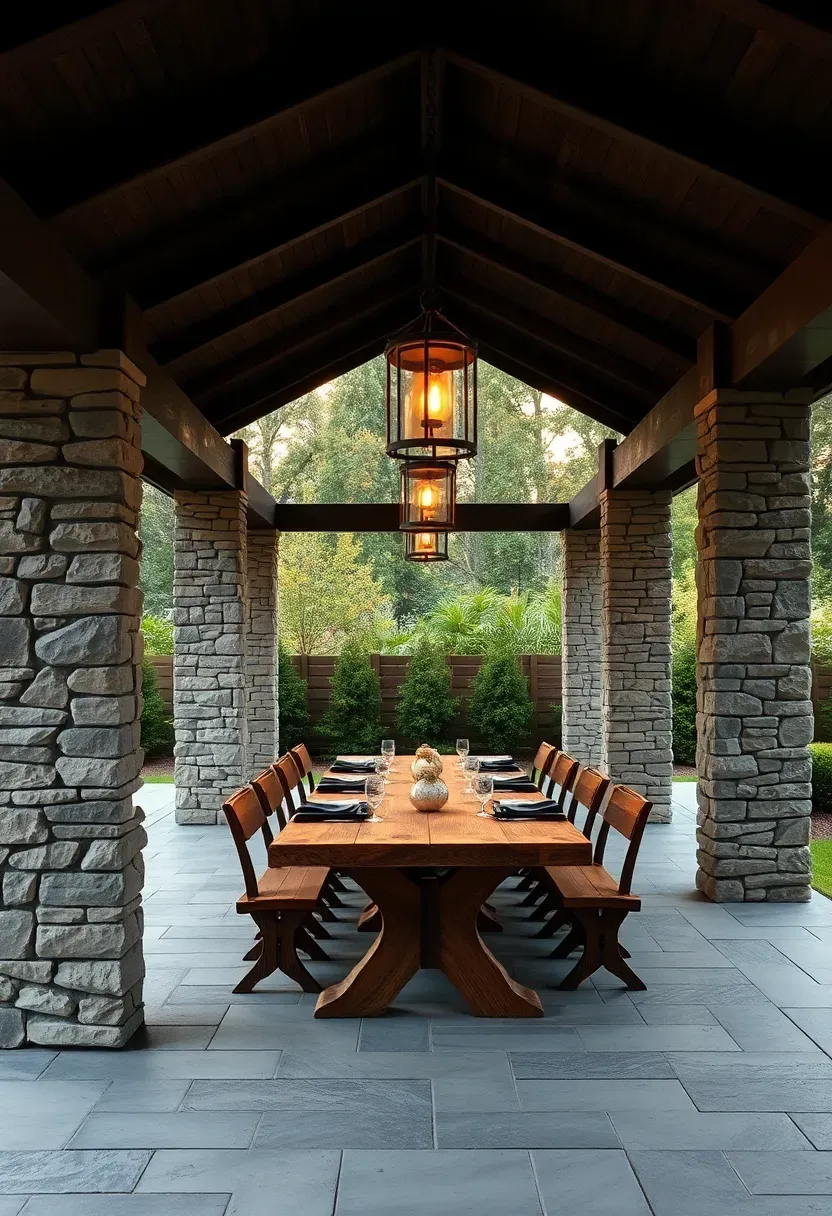
8. Stone Column Pavilion
Stone column wraps turn a standard post-and-beam pavilion into something that looks like it has been there for decades. The most common approach uses a structural wood or steel post as the core, then wraps it in a stone veneer — either natural stone (limestone, fieldstone, river rock) or manufactured stone veneer that weighs about a third as much. Full-thickness natural stone columns start at around $150 per linear foot of column height. Manufactured veneer runs $60 to $90 per linear foot. The base of each column needs a concrete footing that extends below the frost line, and the stone should start on a concrete ledge rather than sitting on grade-level soil where moisture wicks up and loosens mortar joints within a few freeze-thaw cycles.
Tips
- Match the stone species to your house foundation or landscape walls for visual continuity
- Use a through-wall flashing cap on top of each column before the beam rests on it — water trapped between stone and beam causes rot
- Keep column bases at least 4 inches above the surrounding grade to prevent splash erosion
Recommended
Items for this idea
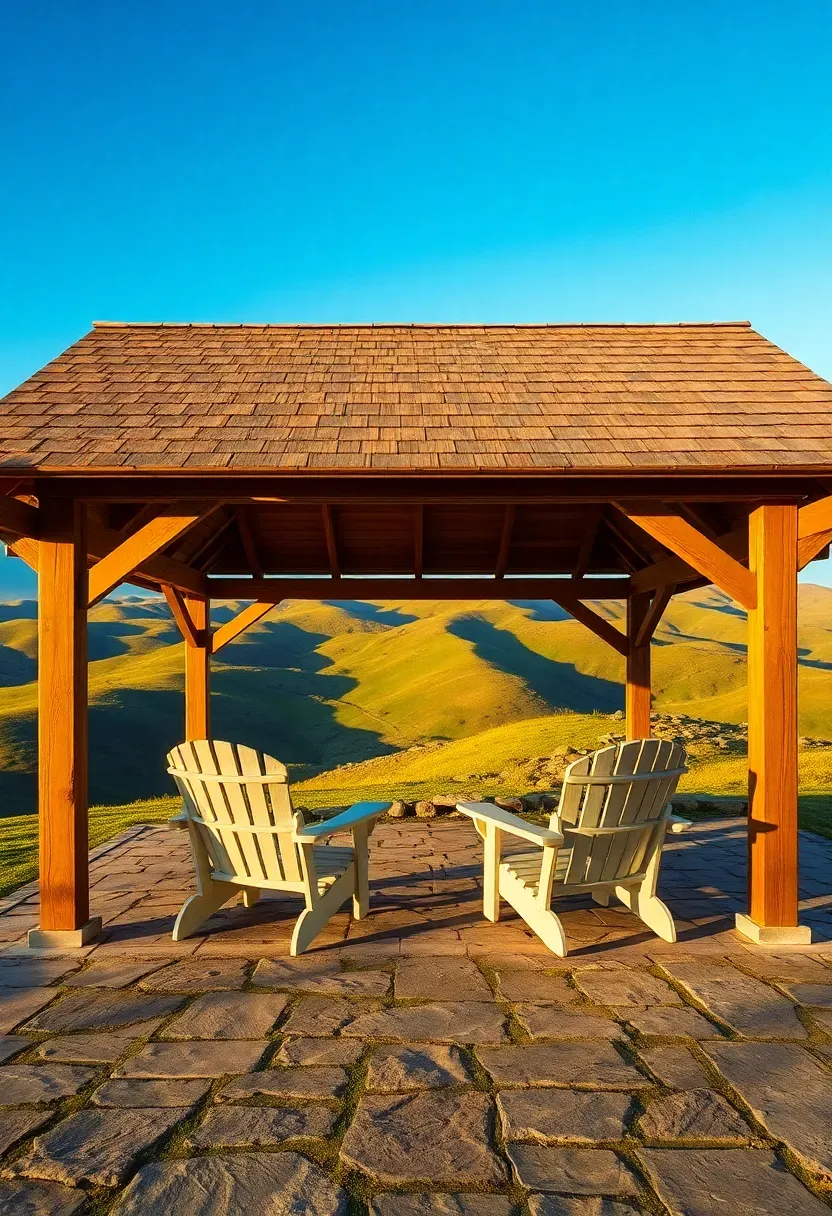
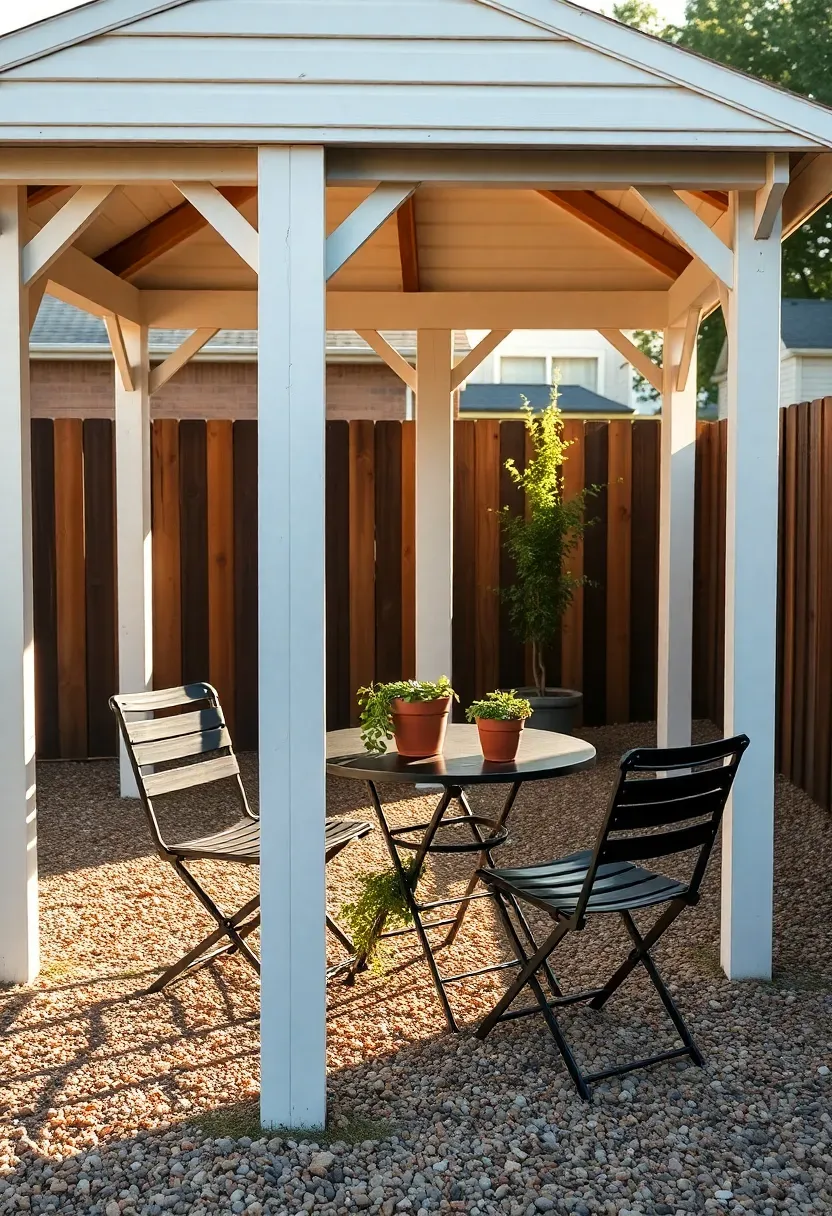
9. Small Backyard Pavilion
The issue with small yards
Most pavilion designs assume you have a quarter-acre lot or more. When your entire backyard is 20 by 30 feet, a standard 14x18 pavilion would swallow most of it and make the remaining space feel like a narrow walkway.
The fix
Scale down to a 10x10 or 8x12 footprint and keep the roof pitch moderate — a 5/12 gable avoids adding imposing height. Use 4x4 posts instead of 6x6 to reduce visual bulk. A compact pavilion works best positioned in a corner rather than centered, which leaves one larger open area in the yard instead of two cramped strips. Expect to spend $3,000 to $6,000 for a small custom-built pavilion or $1,500 to $2,800 for a prefab metal kit.
Pros and cons
- Pro: Provides shelter without dominating a small lot
- Pro: Lower cost and faster installation than full-size versions
- Con: Fits two to four people comfortably — not built for large gatherings
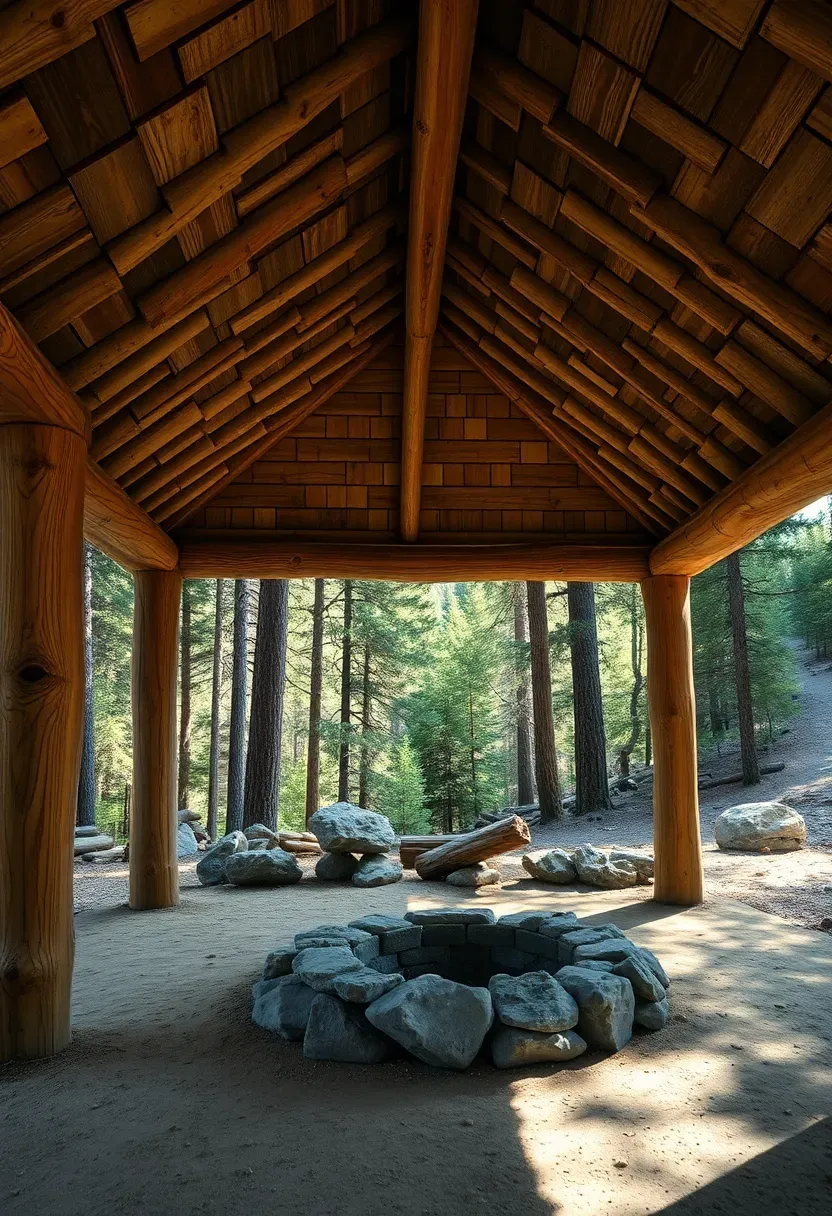
10. Rustic Log Pavilion
Peeled logs give a pavilion a look that manufactured lumber cannot replicate. The natural taper from butt to tip, the knots, the slight bow — these irregularities are the whole point. Eastern red cedar and lodgepole pine are the most popular species for log pavilion construction. Cedar resists insects and rot without chemical treatment. Lodgepole pine grows straight with minimal taper, which makes it easier to stack and join. Most log pavilions use a saddle-notch or round-notch connection at the corners, with the roof purlins set into notches cut into the top plate logs. The rustic aesthetic works best in wooded or rural settings — a peeled-log pavilion in a suburban subdivision with vinyl-sided houses looks out of context more often than not.
Tips
- Let logs season for six to twelve months before building to reduce cracking as they dry
- Apply a borate-based preservative before assembly for insect protection that does not alter the wood color
- Seal the end grain of each log with a wax-based end sealer to prevent checking
Recommended
Items for this idea
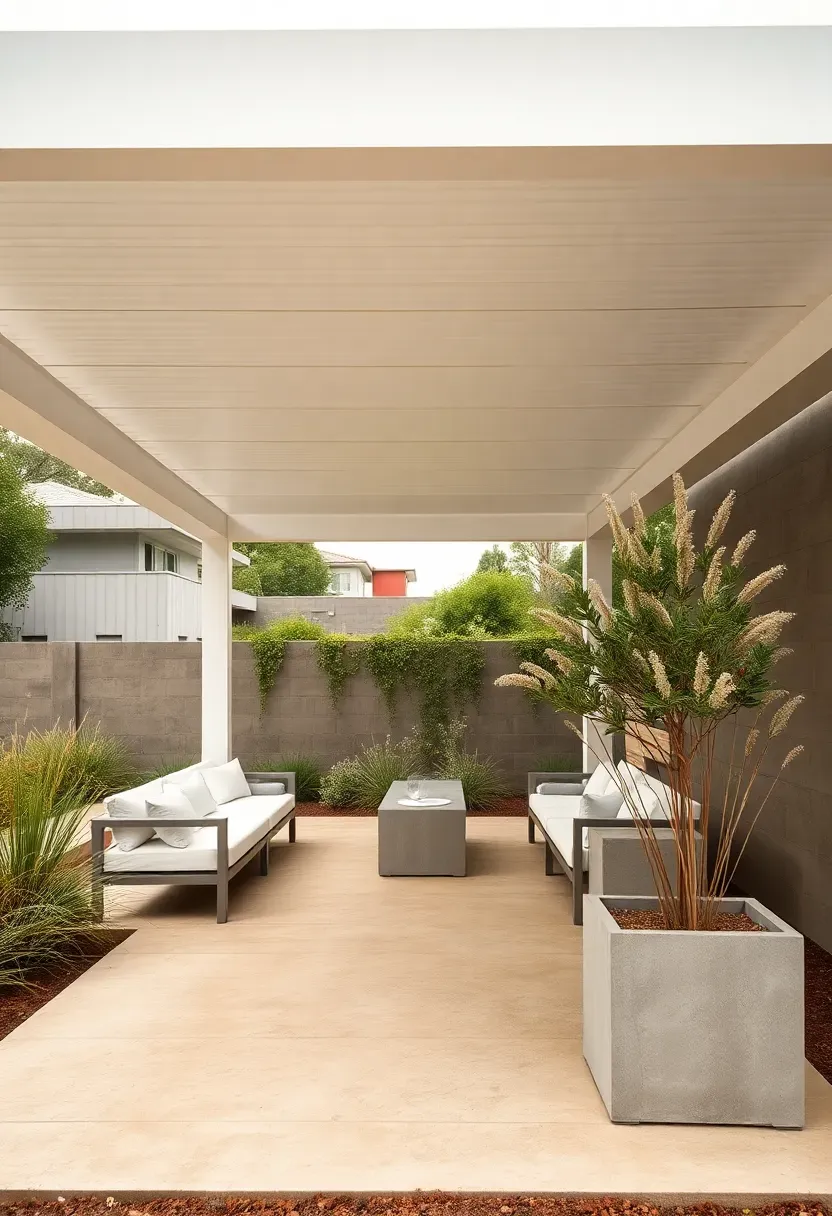
11. Modern Flat Roof Pavilion
Flat roof vs. pitched: an honest comparison
A flat roof on a pavilion gives you a contemporary look that pairs well with modern house architecture. But "flat" is misleading — the roof still needs a minimum slope of a quarter-inch per foot (1/4:12) to drain water. Without it, ponding occurs, the membrane sags, and you get leaks within the first year. True flat roofs use a built-up membrane (TPO, EPDM, or modified bitumen) rather than shingles, which cannot shed water at such low angles.
Making it work
Steel beam construction handles flat-roof spans better than wood because steel does not deflect under load the way lumber does over time. A 16-foot clear span with steel beams stays flat; the same span in 2x12 lumber will develop visible sag within three to five years. Expect to pay 30 to 50 percent more for a steel-frame flat-roof pavilion than a comparable wood-frame gable design.
Apply at home
- Integrate a gutter system into the low edge — without it, water sheets off and erodes the ground below
- Use a white or light-colored membrane to reduce heat absorption under the roof
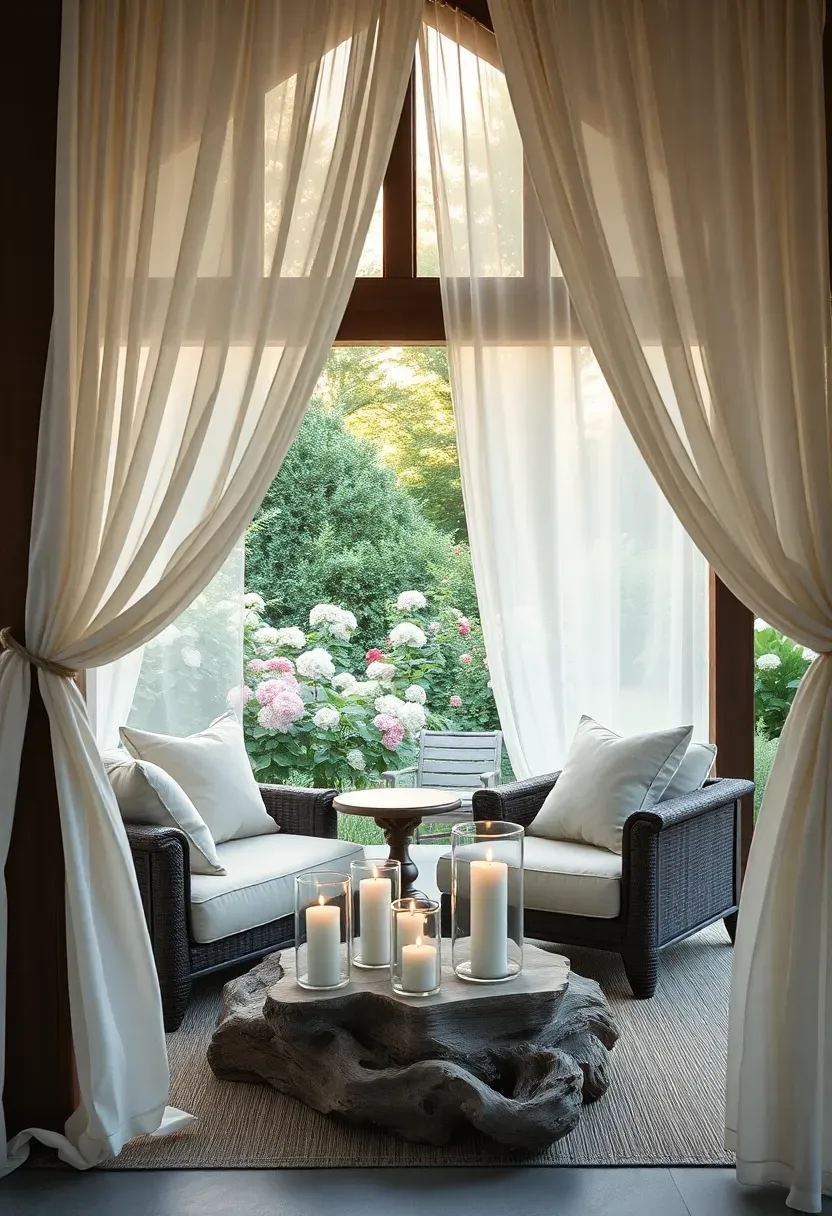
12. Pavilion with Curtains
Curtains turn an open pavilion into a semi-enclosed room when you need privacy, wind protection, or shade from low-angle sun. The practical version uses outdoor-rated fabric — Sunbrella or similar solution-dyed acrylic — hung from stainless steel curtain rods mounted to the underside of the beam. Avoid sheer indoor fabric outdoors; it mildews within weeks and tears in moderate wind. The rod-and-ring system lets you slide panels open on calm days and close them when the wind picks up or when you want to block the neighbor's view during dinner. Budget about $200 to $400 per panel for quality outdoor curtains in a standard 8-foot drop length. Weighted hems or tie-backs keep the fabric from billowing into the seating area.
Tips
- Mount rods 2 inches below the beam soffit so curtain rings slide freely without catching on hardware
- Use marine-grade stainless rings — standard chrome rings corrode and leave rust stains on fabric
- Wash curtains with mild soap and water twice a season to prevent mold from taking hold in the fibers
Recommended
Items for this idea
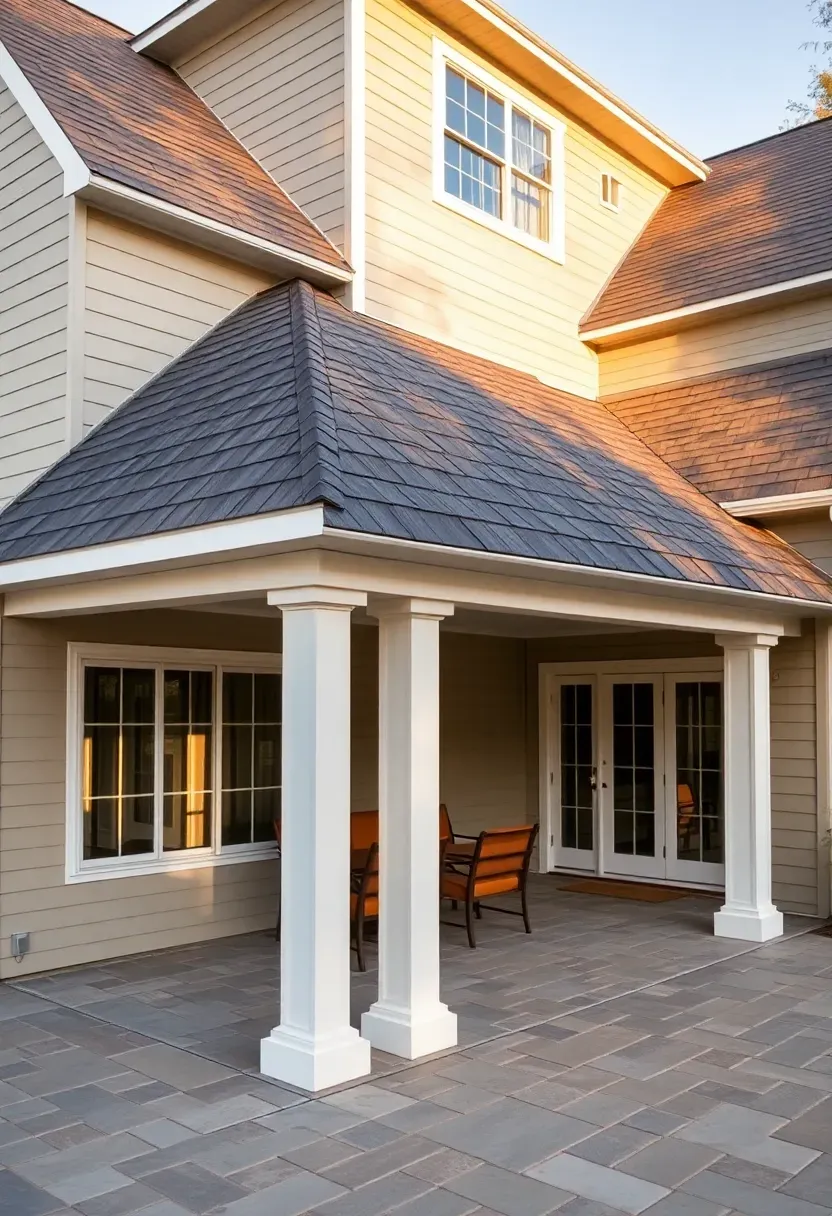
13. Attached Pavilion
How to connect it to your house
An attached pavilion shares one wall (or at least a ledger board) with the house, which reduces the number of posts needed and creates a seamless transition from indoors to covered outdoor space. The critical detail is the ledger connection. The ledger board bolts to the house rim joist or masonry wall using lag screws or through-bolts with proper flashing above it.
Step 1: Install the ledger
Attach a pressure-treated 2x8 or 2x10 ledger to the house using half-inch lag screws spaced every 16 inches. Install Z-flashing behind the siding and over the top edge of the ledger to direct water away from the house wall.
Step 2: Set the posts
The front posts carry the outer edge of the roof. Set them on concrete footings below the frost line and use adjustable post bases to keep wood off the concrete surface.
Step 3: Tie in the roof
Match the pavilion roof pitch and material to your existing house roof for a built-in look. A mismatched roof material or pitch angle makes the addition look like an afterthought.
Watch out
Check your local building code — attached structures almost always require a permit and may affect your property's setback calculations.
14. Cedar Shake Pavilion
Cedar shakes split from western red cedar blocks give a pavilion roof a layered, textured look that no other roofing material matches. Each shake is slightly different in thickness and grain pattern, which creates natural shadow lines across the roof surface. Hand-split shakes are thicker (3/4 to 1-1/4 inches) and more irregular than machine-cut shingles, giving a rougher, more rustic appearance. They also cost more — $6 to $10 per square foot installed versus $3 to $5 for cedar shingles. On a pavilion with visible rafter tails and no ceiling, the underside of the shake layer becomes part of the aesthetic, so use skip sheathing (spaced 1x4 boards) rather than solid plywood. The gaps between boards allow air circulation that helps the shakes dry faster after rain, extending their lifespan from 20 years to potentially 30 or more.
Tips
- Use only Grade 1 (Blue Label) shakes — lower grades have excess sapwood that rots faster
- Maintain a 3/8-inch gap between shakes for expansion — tight-butted shakes buckle when wet
- Apply a borate-based preservative every five years rather than film-forming sealers that trap moisture
Recommended
Items for this idea
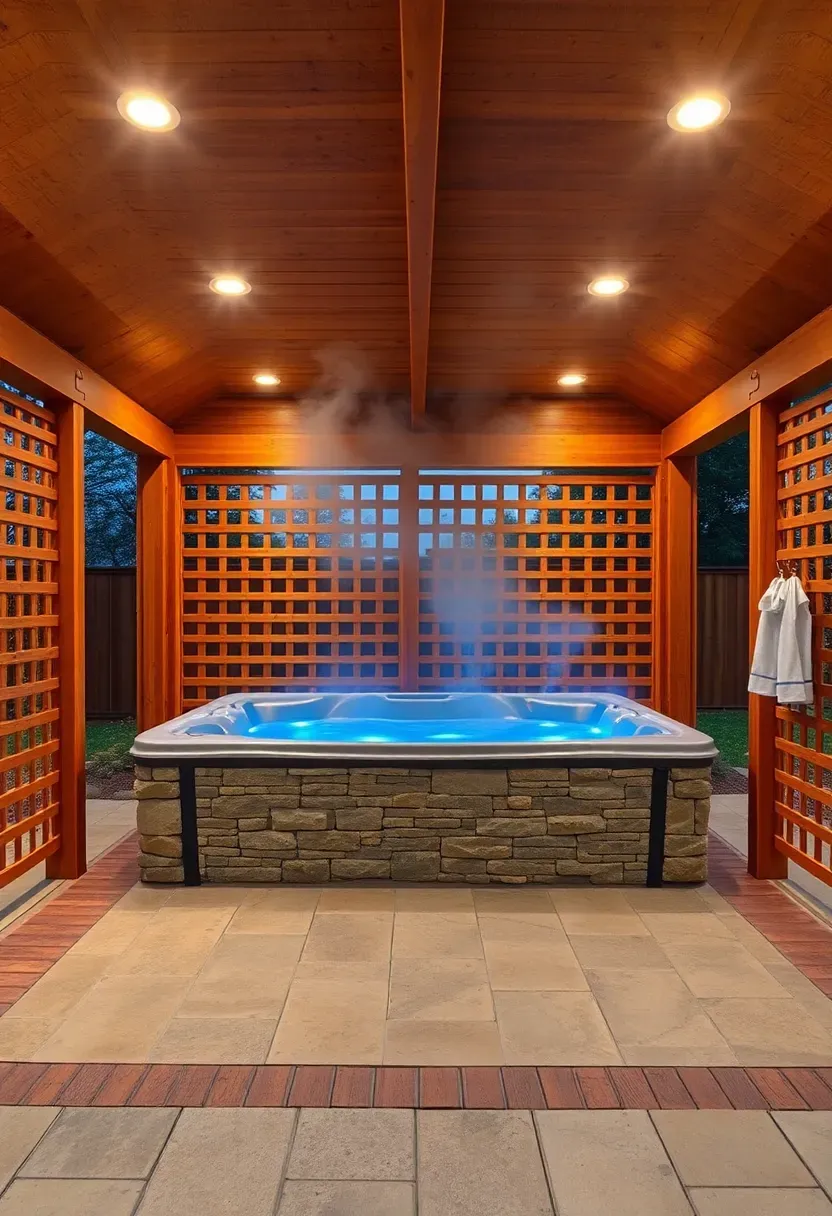
15. Pavilion with Hot Tub
Why cover a hot tub
A pavilion over a hot tub keeps debris out of the water (fewer filter cleanings), blocks direct sun that degrades chlorine faster, and provides privacy from neighboring properties. It also lets you use the tub during rain without getting pelted, which in practice means you actually use it year-round instead of just on perfect evenings.
Sizing it right
The pavilion footprint should extend at least 3 feet beyond the hot tub on all sides. For a standard 7x7-foot tub, that means an absolute minimum of 13x13. Going to 14x16 gives you room for a bench or towel rack alongside the tub. Ceiling height matters — keep it at least 8 feet to prevent condensation dripping back into the tub and onto you. Higher is better for ventilation. The moisture environment demands rot-resistant materials: cedar or redwood for the frame, stainless steel for all fasteners, and a roof material that handles condensation from below.
Choose if
- You want to use the hot tub regardless of weather or time of year
- Privacy from neighbors is a priority
- You are prepared to invest $4,000 to $10,000 beyond the cost of the tub itself
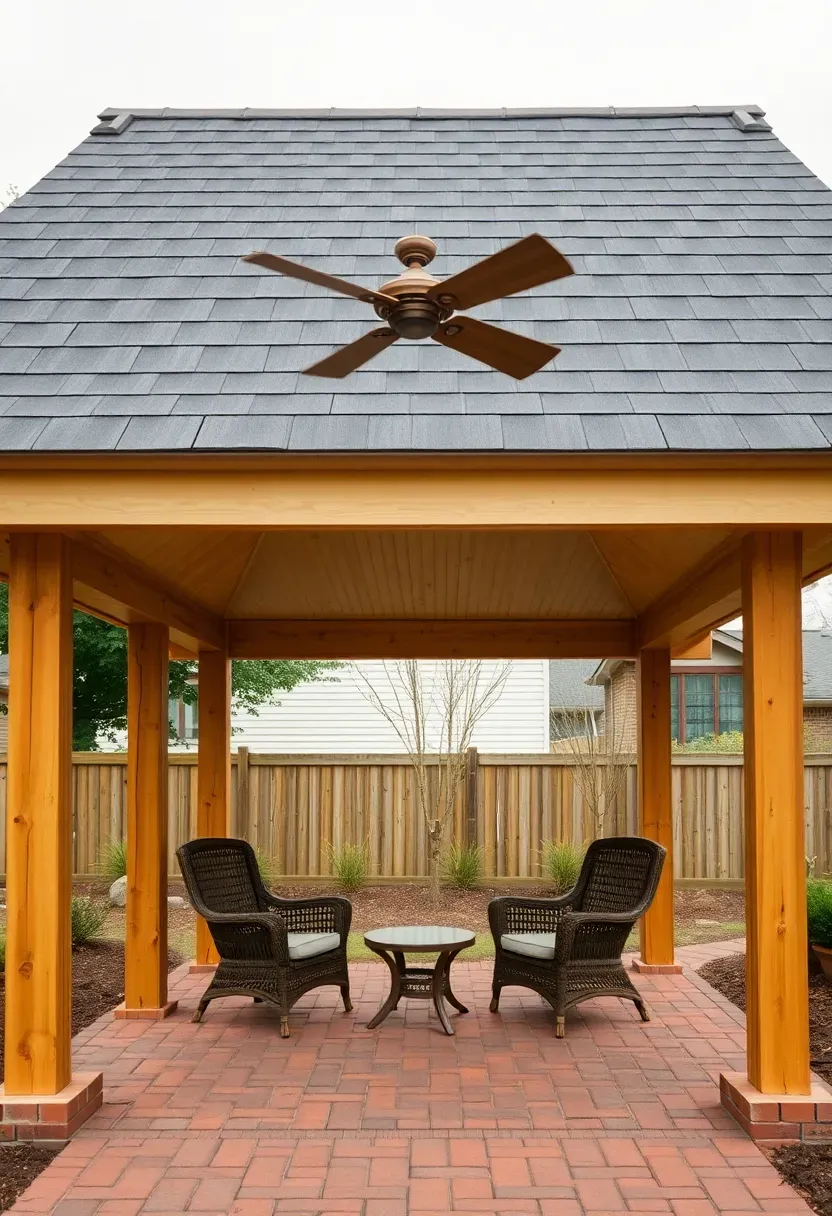
16. DIY Pavilion Kit
How to build it yourself
Pavilion kits come pre-cut and pre-drilled with all hardware included. You supply the foundation, a few basic tools, and a weekend. Most kits use pressure-treated pine or cedar and include pre-engineered metal brackets that replace traditional joinery — no mortise cutting, no complicated angled cuts.
Step 1: Prepare the site
Level the ground and pour or set concrete footings at the post locations specified in the kit plans. This step takes the most time — usually a full day for digging and a week for concrete to cure.
Step 2: Raise the posts and beams
With two people and a ladder, set the posts into the bracket hardware, then lift beams into position. Most kits use bolt-through connections at every joint. Tighten to the specified torque.
Step 3: Install the roof
Set rafters into the pre-welded rafter hangers, add the ridge board, then sheet with plywood and apply the shingles of your choice (not usually included in the kit). A 12x14 kit takes a competent DIYer about 20 to 30 hours total.
Watch out
Check whether your municipality requires a building permit for detached covered structures — many do for anything over 120 square feet of roof area.
Recommended
Items for this idea
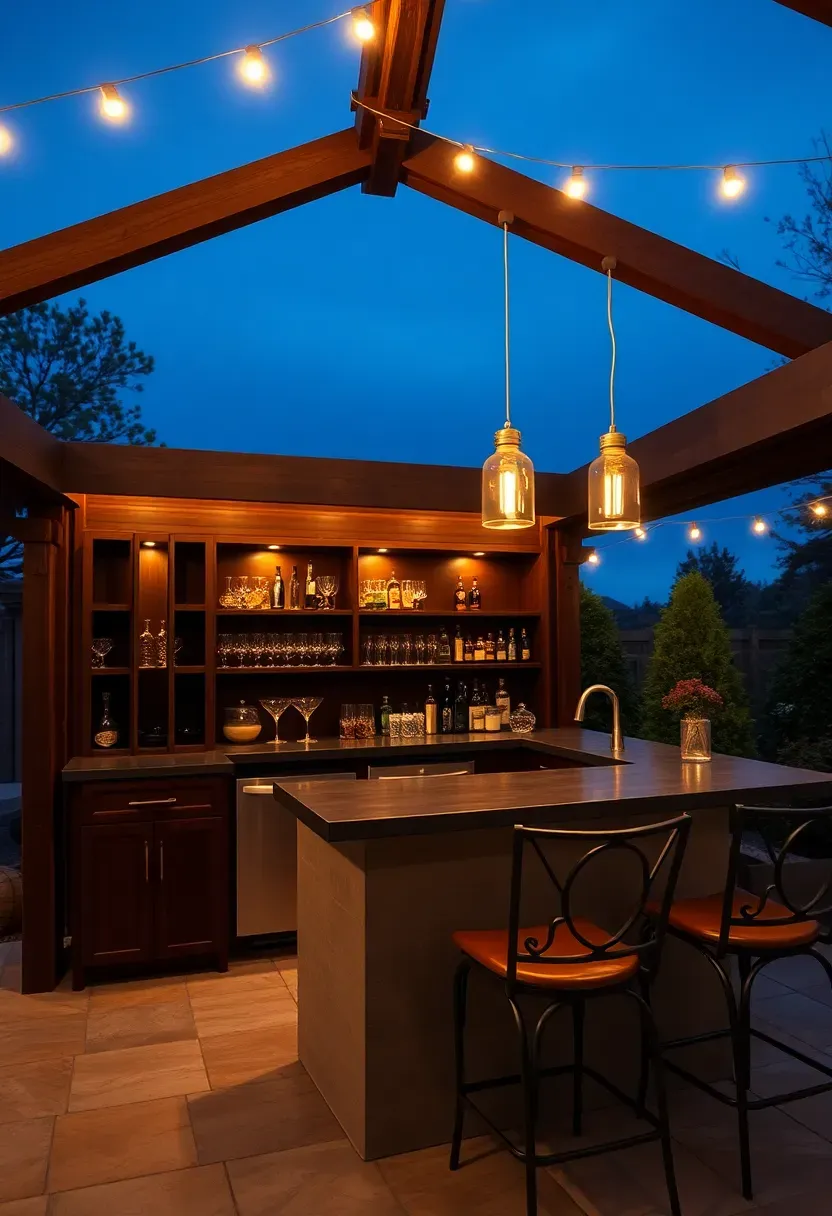
17. Pavilion with Outdoor Bar
The difference between a pavilion with a table and a pavilion with a bar is the counter height and the workflow it creates. A 42-inch-high bar counter puts standing guests at a comfortable leaning height and seated guests on 30-inch stools at the right ergonomic position. Build the bar frame from pressure-treated 2x4 studs with a plywood substrate, then finish with the counter material of your choice — granite, butcher block, concrete, or porcelain tile. L-shaped or U-shaped layouts give you a working side (with sink, mini fridge, and storage below) and a guest side. Run a dedicated 20-amp circuit for the refrigerator and any blender outlets. A GFCI-protected outlet is mandatory for outdoor wet locations. The bar works best positioned at one end of the pavilion rather than dead center, leaving the other end free for dining or lounge seating.
Tips
- Slope the bar top surface slightly toward the working side so spills drain away from guests
- Install a bar foot rail at 6 inches off the ground — it is a small detail that makes standing comfortable
- Use an under-counter ice maker rather than hauling bags from the kitchen
Quick FAQ
How much does a backyard pavilion cost? Budget $3,000 to $8,000 for a basic pressure-treated pine pavilion in the 12x14 range. Timber frame or stone column versions with premium roofing materials can reach $15,000 to $30,000 or more. The foundation, electrical, and any plumbing add to the base structure cost.
Do I need a permit to build a backyard pavilion? In most jurisdictions, yes. Detached covered structures over 120 square feet typically require a building permit and must meet setback requirements. Check with your local building department before pouring footings — unpermitted structures can trigger fines and complicate future home sales.
What is the difference between a pavilion and a gazebo? A pavilion is typically rectangular with an open-sided roof supported by posts — no built-in railing or floor. A gazebo is usually octagonal or hexagonal with a raised floor, perimeter railing, and sometimes screened walls. Pavilions cover larger areas and accommodate more flexible furniture arrangements.
Can I build a pavilion on a slope? Yes, but it requires stepped footings and posts of different heights to create a level roof plane. The uphill posts will be shorter than the downhill posts. Grade the area around the pavilion so water drains away from the footings, and consider a retaining wall on the uphill side if the slope exceeds 10 percent.
How long does a wood pavilion last? A well-built pavilion with pressure-treated or naturally rot-resistant lumber (cedar, redwood, white oak) and proper drainage lasts 25 to 40 years with periodic maintenance. Metal-roofed pavilions last even longer since the roof is typically the first component to fail on shingle-covered designs.
A pavilion is one of the few backyard projects where the money you spend directly translates into hours used. Unlike a garden bed that looks good from a distance or a fence that solves one problem, a pavilion becomes the default place people go when they step outside. Start with the roof style and material that fits your climate, get the footings right, and the rest is furniture and personal taste.
Pinterest cover for 17 Backyard Pavilion Ideas
About the author
OBCD
CGI visualization and interior design content. We create detailed 3D renders and curate practical design ideas for every room in your home.