21 Backyard Playground Ideas Kids Love
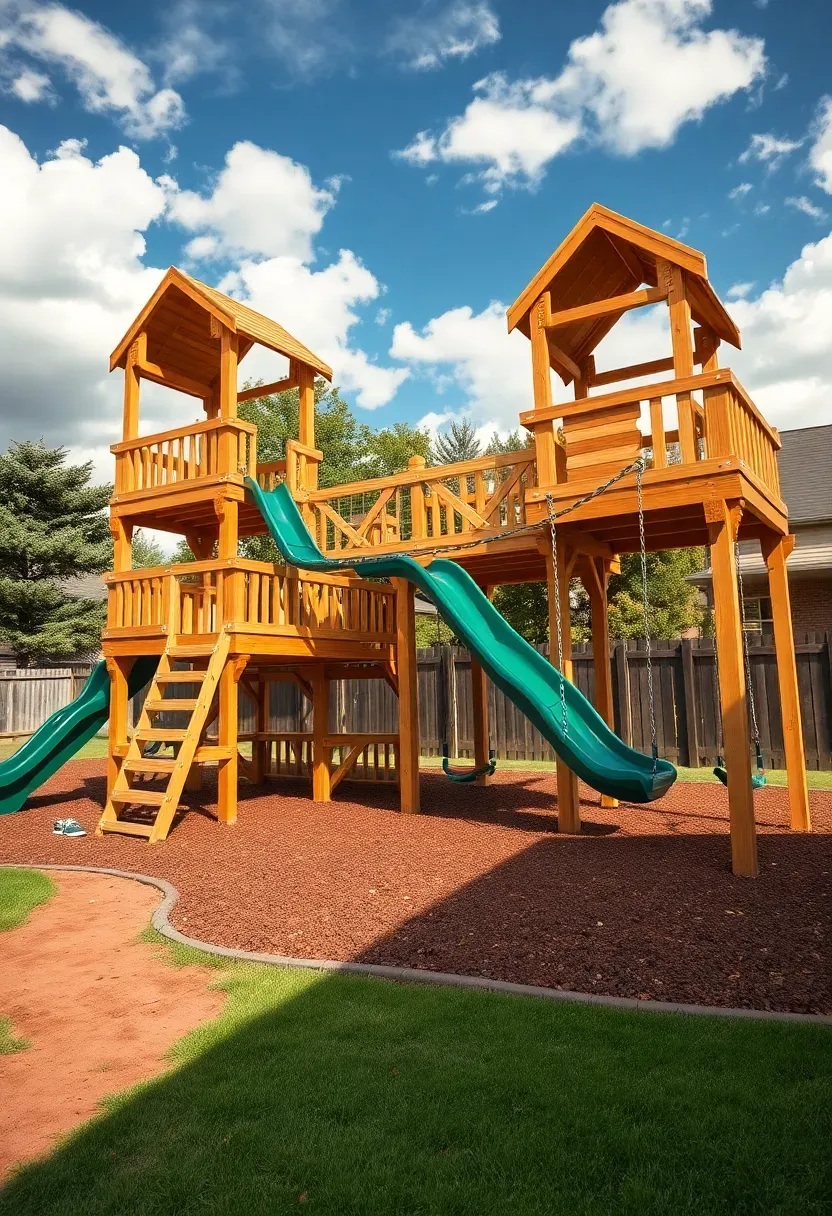
Our neighbors spent $8,000 on a prefab playground set from a big box store. It looked great for about a year. Then the plastic faded, the chains rusted, and their kids outgrew it. Meanwhile, we built ours piece by piece over two summers for roughly half that cost, and it still gets daily use because we kept adding to it. The difference was not money — it was planning for how kids actually play rather than how the thing looks in a catalog photo. These 21 playground ideas cover ground-level builds through overhead structures, with real measurements, material choices, and the kind of honest cost info that product listings leave out.
Below you will find playground concepts organized from foundation work and surfacing through climbing structures, swings, slides, and multi-feature builds.
Table of Contents
- Rubber Mulch Safety Surface
- A-Frame Wooden Swing Set
- Rock Climbing Wall Panel
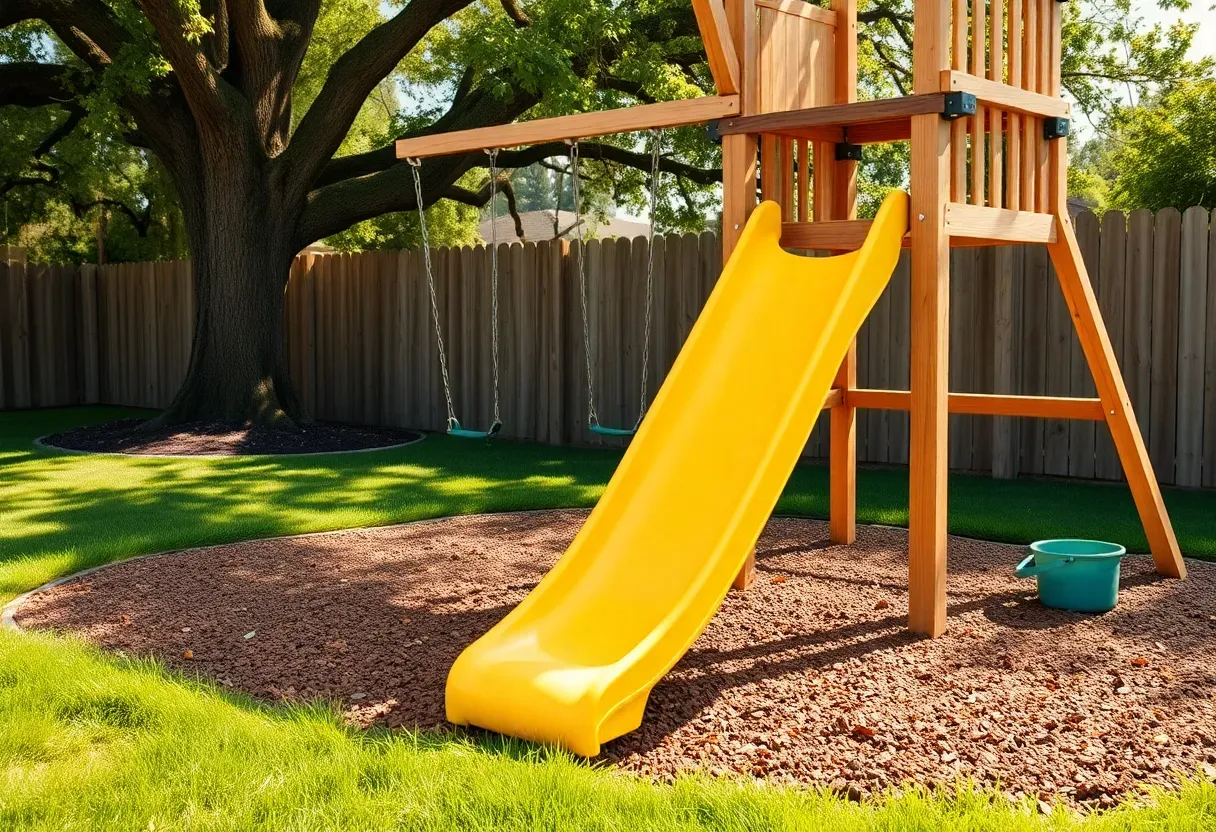
- Hillside Slide Built Into a Slope
- Rope and Net Climbing Tower
- Sandbox with Hinged Cover
- Balance Beam Course
- Monkey Bars and Overhead Ladder
- Tire Swing on a Single Post
- Playhouse with Second-Story Deck
- DIY Ninja Warrior Course
- Shade Sail Over the Play Zone
- Spiral Tube Slide from a Platform
- Cargo Net Climbing Bridge
- Seesaw with Adjustable Pivot
- Musical Instrument Wall
- Fireman Pole and Rope Drop
- Water Play Table Station
- Geodesic Climbing Dome
- Zipline Run Across the Yard
- Modular Playground System
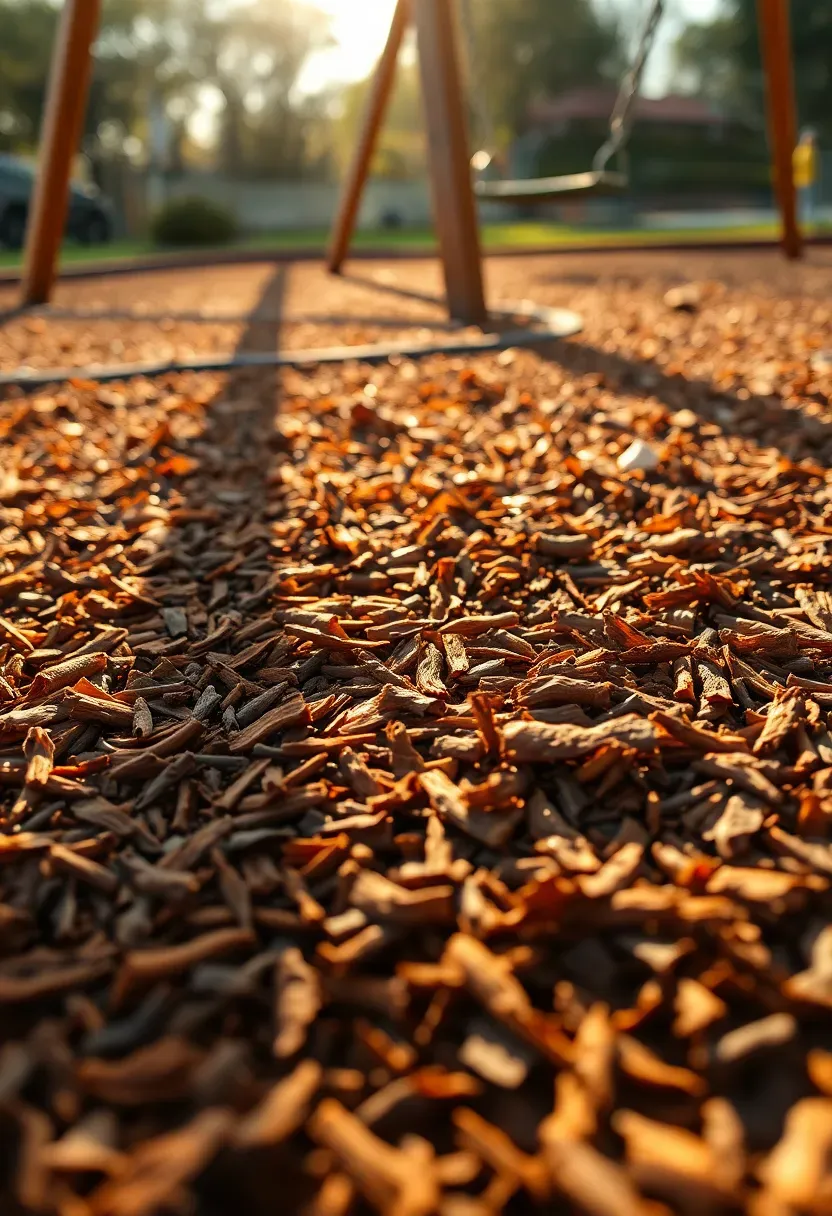
1. Rubber Mulch Safety Surface
Before you build a single structure, deal with what goes under it. Rubber mulch made from recycled tires absorbs impacts better than wood chips, pea gravel, or bare grass. A 6-inch layer meets ASTM F1292 standards for fall heights up to 10 feet, which covers nearly every residential playground element. It does not decompose, so you are not topping it off every spring like you would with wood mulch.
What to Know
- Budget $8-12 per square foot installed, or about $600-900 for a 10x10-foot zone.
- Use landscape timbers or composite boards to create a contained border — loose rubber migrates into lawn within one season without edging.
- Darker colors absorb heat; choose brown or green over black if your playground gets full afternoon sun.
We picked a few things that go well with this idea: Sportspower Arcadia Metal Swing Set (★4.4), Sportspower Park Ridge Swing Set (800 lbs) (★4.2) and Sportspower Taylor Galvanized Metal Swing Set (★4.4). As an Amazon Associate we earn from qualifying purchases.
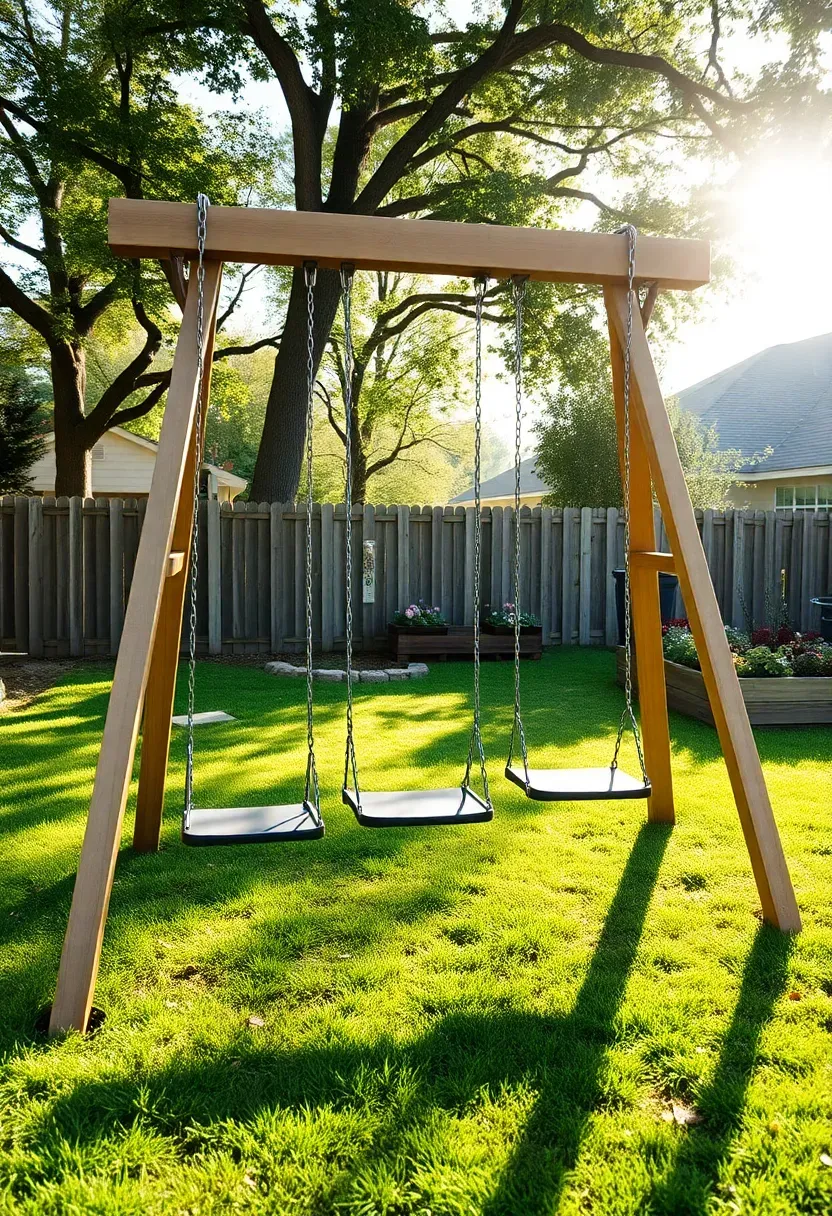
2. A-Frame Wooden Swing Set
Why It Works
The A-frame design is the most structurally sound swing configuration for residential use. Two angled legs on each side create a wide base that resists the lateral forces generated by swinging — forces that tip narrow single-post designs over time. A 4x6 pressure-treated top beam spanning 12 feet supports three swing positions comfortably with proper bracket spacing.
Build Notes
Use galvanized steel A-frame brackets rather than trying to cut compound angles on the legs. Sink the base legs 18 inches into concrete footings or use ground anchors rated for swing sets. Space swing hangers at least 20 inches apart and 30 inches from the frame edge so kids do not clip the legs mid-swing. Total materials cost runs $350-500 depending on lumber prices in your region.
We picked a few things that go well with this idea: Playsafer Rubber Mulch Nuggets (40 lbs, Black) (★4.5), Playsafer Rubber Mulch Nuggets (40 lbs, Brown) (★4.5) and Eco-Wise Wire-Free Rubber Mulch (20 lbs) (★5.0). As an Amazon Associate we earn from qualifying purchases.
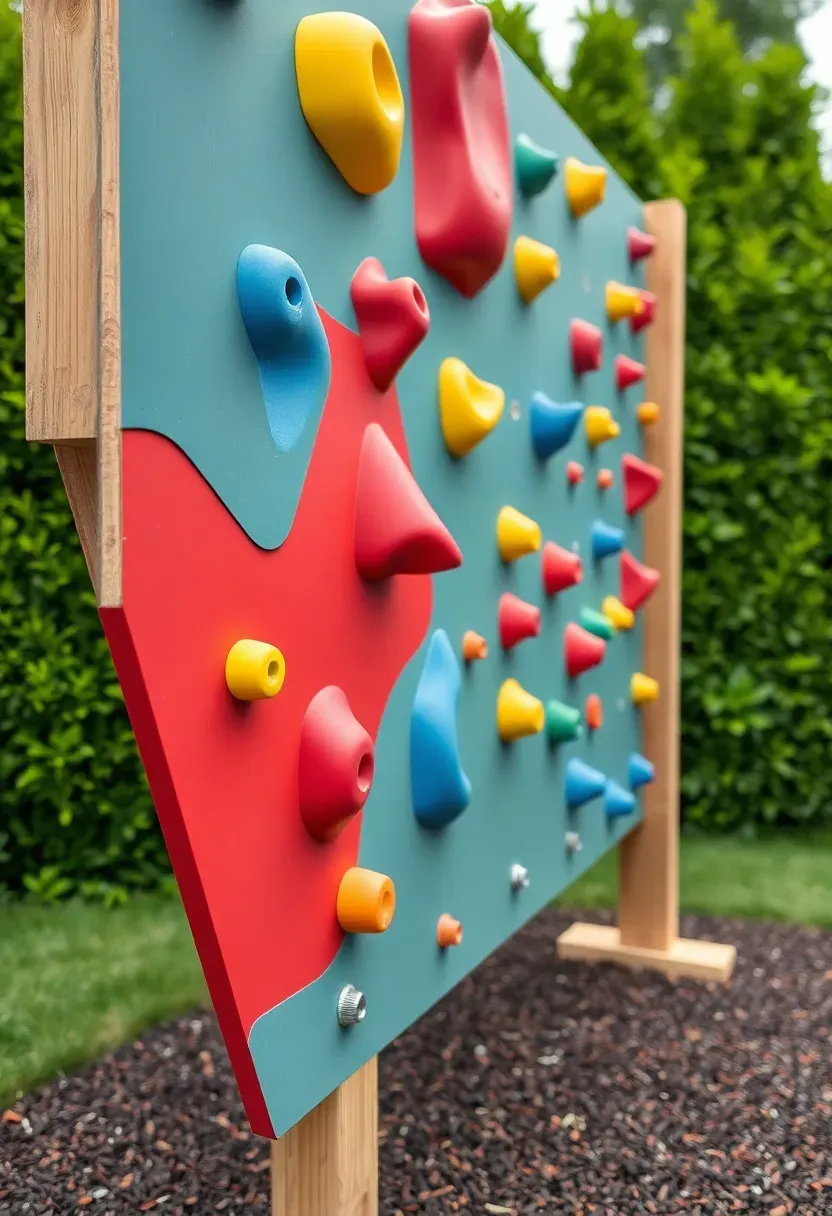
3. Rock Climbing Wall Panel
A 4x8-foot sheet of 3/4-inch exterior plywood, a bag of T-nut hardware, and 30 climbing holds is all you need. Mount the panel against an existing fence, a retaining wall, or build a freestanding frame with 4x4 posts. Angling the wall back 10-15 degrees from vertical makes it accessible for kids under six while still challenging for older ones. The real advantage over a purchased climbing structure: you can rearrange holds every few months to create new routes, which keeps the wall interesting long after the initial excitement fades.
Tips
- Use T-nuts inserted from the back of the plywood — bolt-through holds strip out of wood within a season of heavy use.
- Start with jugs (large, easy-grip holds) at the bottom and progress to crimps and slopers higher up.
- Place a crash pad or 8-inch rubber mulch zone extending 6 feet from the wall base.
We picked a few things that go well with this idea: Gardenature 10FT Climbing Dome with Hammock (★4.8), VEVOR 10FT Climbing Dome with Swing (★4.5) and Gardenature 6FT Climbing Dome (440 lbs) (★4.6). As an Amazon Associate we earn from qualifying purchases.
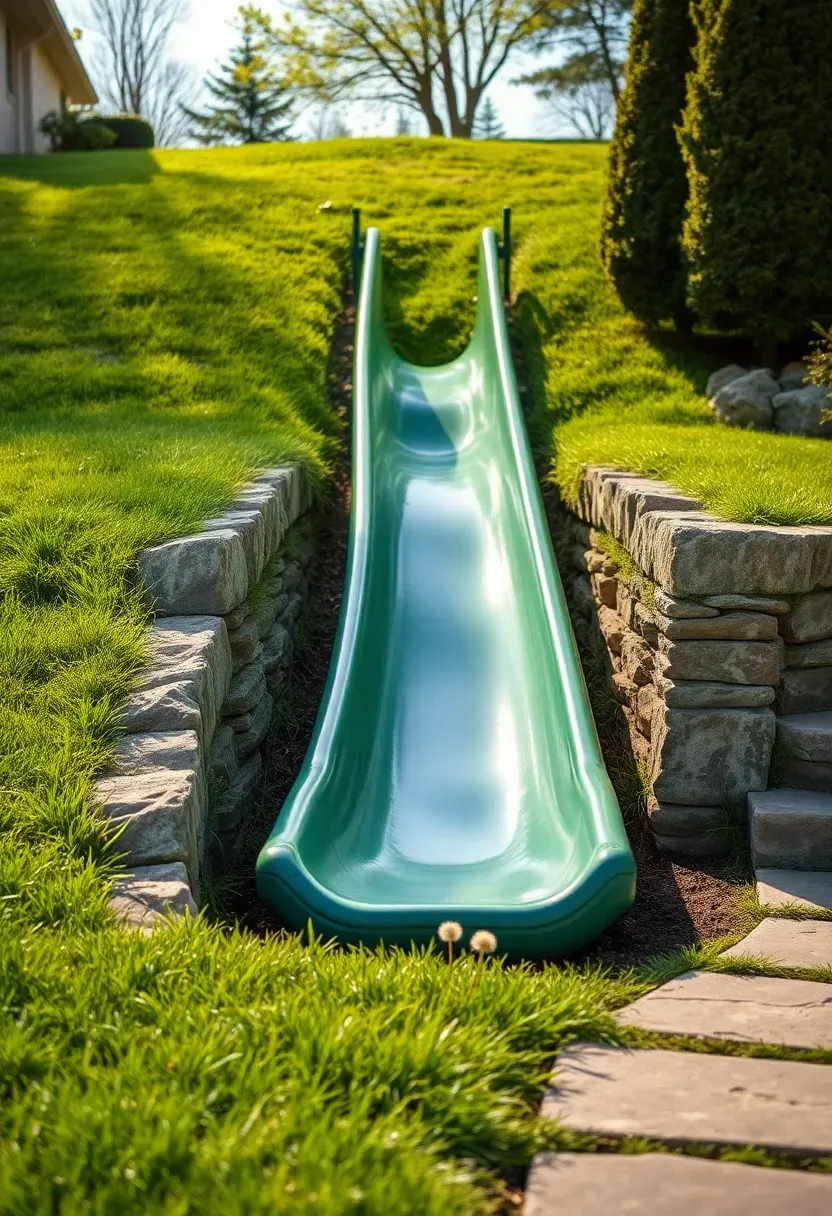
4. Hillside Slide Built Into a Slope
The Problem
Most backyard slides need a platform or tower, which means more construction, more cost, and more visual bulk. If your yard has any grade change at all — even 4-5 feet of slope — you can eliminate all of that by embedding the slide directly into the hill.
The Solution
Buy a standalone slide chute (not a playset slide that requires specific mounting hardware) and dig a channel into the slope. Line the channel with landscape fabric, set the slide chute in place, and backfill the sides with compacted soil. Add stepping stones or a short staircase alongside the hill for the climb back up. Total cost: $150-300 for the chute plus an afternoon of digging.
Pros and Cons
- Pro: No platform to build, low profile, blends into landscaping.
- Con: Requires existing slope; plastic chutes get hot in direct sun — orient north-facing if possible.
Recommended
Items for this idea
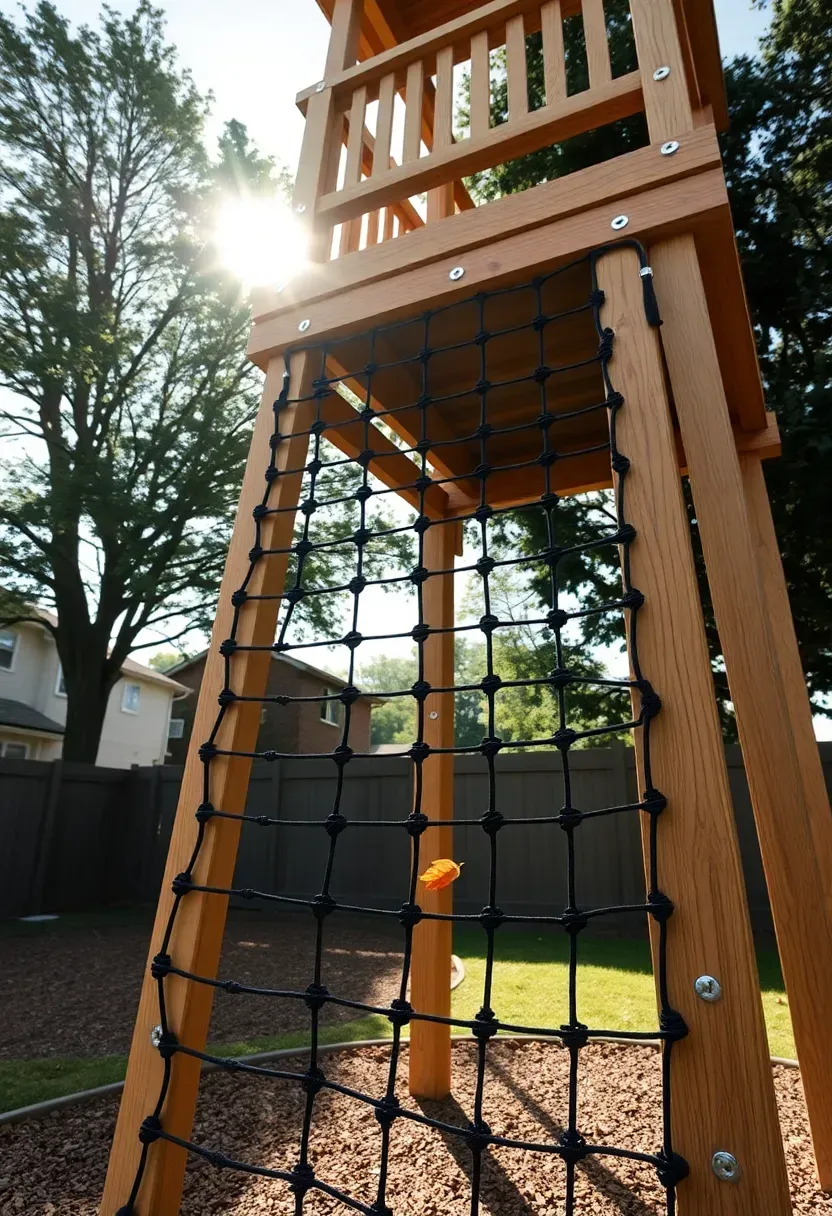
5. Rope and Net Climbing Tower
Cargo net climbing hits a different set of motor skills than a rigid climbing wall. The net moves, which forces kids to adjust their grip and balance constantly. Build a simple 8-foot tower from 4x4 posts and attach UV-resistant polypropylene cargo nets (1-inch mesh for under-fives, 4-inch mesh for older kids) to two or three faces. Leave one side open for a slide or fireman pole exit.
Tips
- Source commercial-grade nets rated for at least 300 pounds — cheap imported nets develop UV damage and break within two years.
- Attach nets using galvanized U-bolts through the posts at 12-inch intervals rather than zip ties or rope lashing.
- Platform at the top should have a 36-inch railing on any open side without a net.
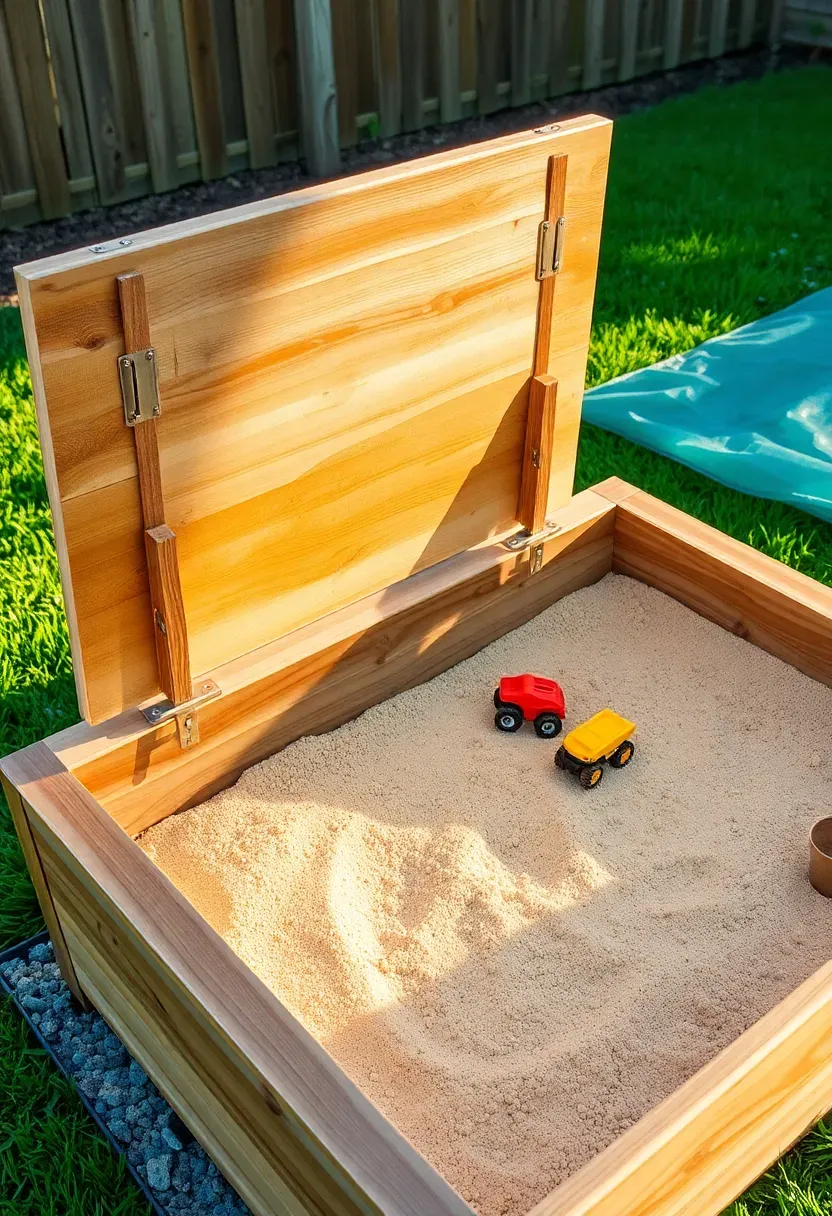
6. Sandbox with Hinged Cover
Open sandboxes attract neighborhood cats, collect rainwater, and grow mold. A hinged cover solves all three problems while doubling as a bench seat when folded back. Build the box from 2x10 cedar or composite lumber at least 6x6 feet — anything smaller and two kids cannot dig at the same time without territorial disputes. Line the bottom with landscape fabric over a 2-inch gravel drainage layer so water does not pool after rain.
Build Details
- Use piano hinges rather than standard hinges; they distribute the load across the full length and last longer.
- Fill with washed play sand to a depth of 12-16 inches — less than that and kids hit the fabric within minutes.
- Add a lip or small ledge inside the rim for setting molds and toys so they are not always buried.
Recommended
Items for this idea
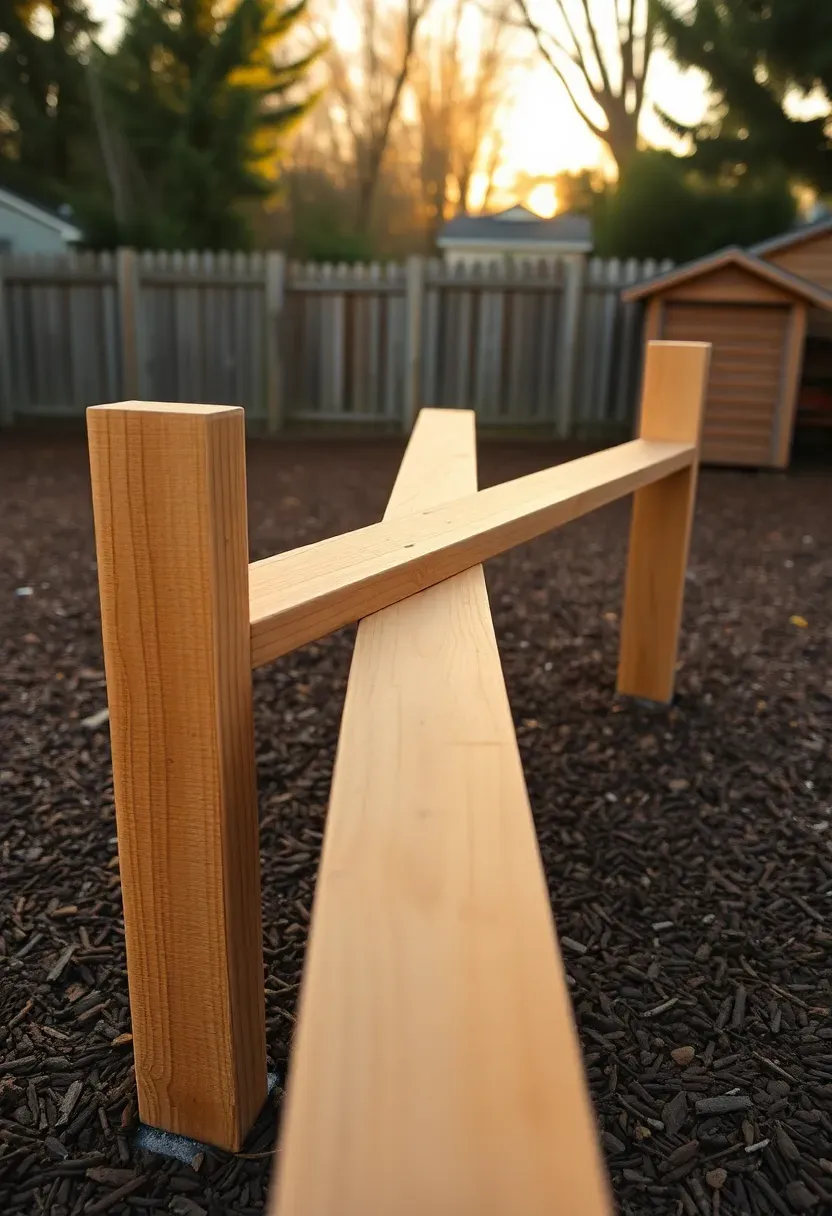
7. Balance Beam Course
How to Build It
Balance beams are absurdly simple to make and kids gravitate toward them instinctively. Three or four 4x6 beams set at different heights and angles create a course that works from toddlers through elementary school.
Step 1: Set the Posts
Cut 4x4 posts to varying heights (8 inches, 14 inches, 20 inches) and sink them 18 inches into the ground with concrete. Space them to support beam lengths of 6-8 feet.
Step 2: Mount the Beams
Notch the post tops to cradle the beams, then secure with lag bolts. Sand all surfaces to 120 grit — splinters end playground sessions fast.
Step 3: Add Grip
Staple strips of non-slip stair tread tape along the top of each beam. Alternatively, route shallow grooves every 6 inches for bare-foot traction.
Watch Out
Never place beams higher than 24 inches for children under eight. A fall from even two feet onto packed dirt can break a wrist — keep the mulch deep under the entire run.
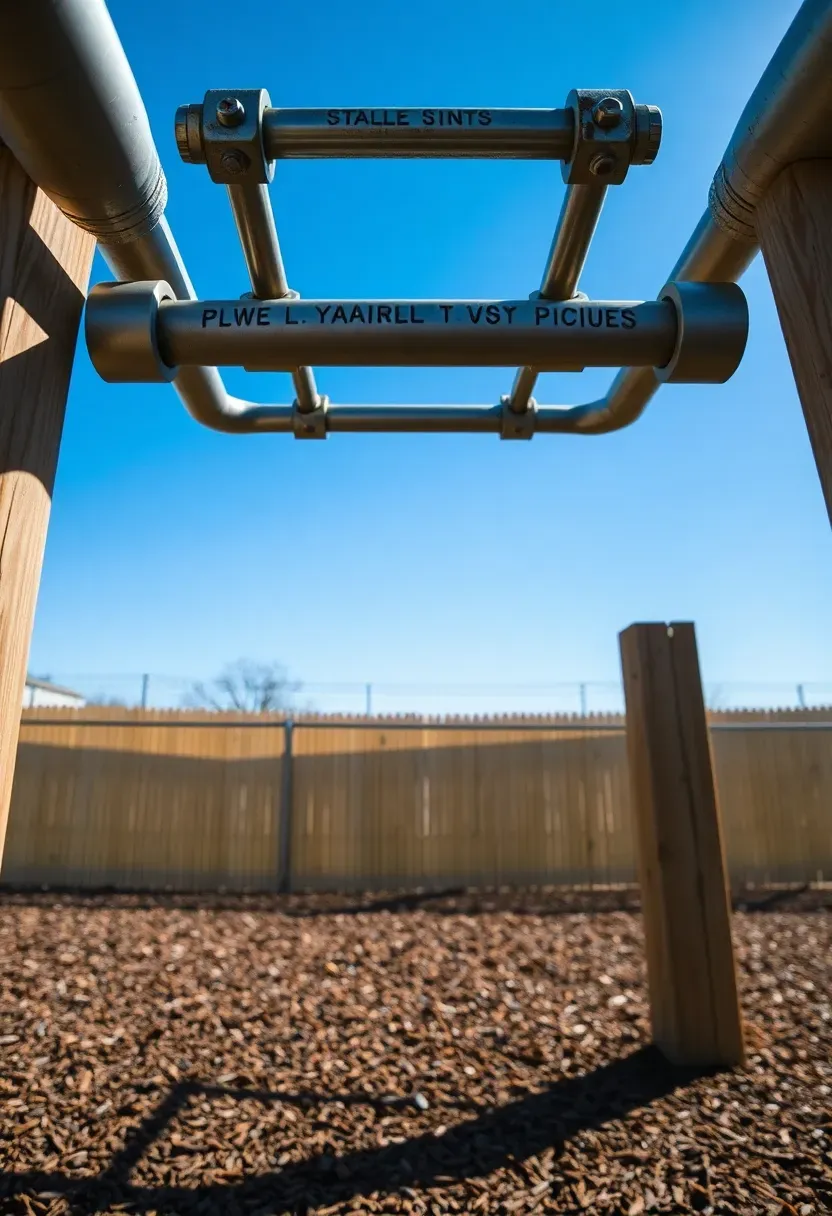
8. Monkey Bars and Overhead Ladder
Monkey bars build upper body strength in a way that nothing else in a playground replicates. Rungs should be 1 inch diameter galvanized steel pipe for children under 10 (their hands cannot grip 1.5-inch bars safely) and spaced 9-12 inches apart. Mount the ladder between two posts at a height where the shortest intended user can just reach the first rung while standing — usually 5 to 5.5 feet. Sloping the bar set from lower to higher adds progressive difficulty without needing separate structures for different ages.
Tips
- Weld or use heavy-duty pipe flanges — threaded connections loosen over time from the repetitive jarring.
- Extend the fall zone 6 feet beyond each end of the run.
- Add grip tape or rubber dip coating to the first and last two rungs as fatigue assist points.
Recommended
Items for this idea
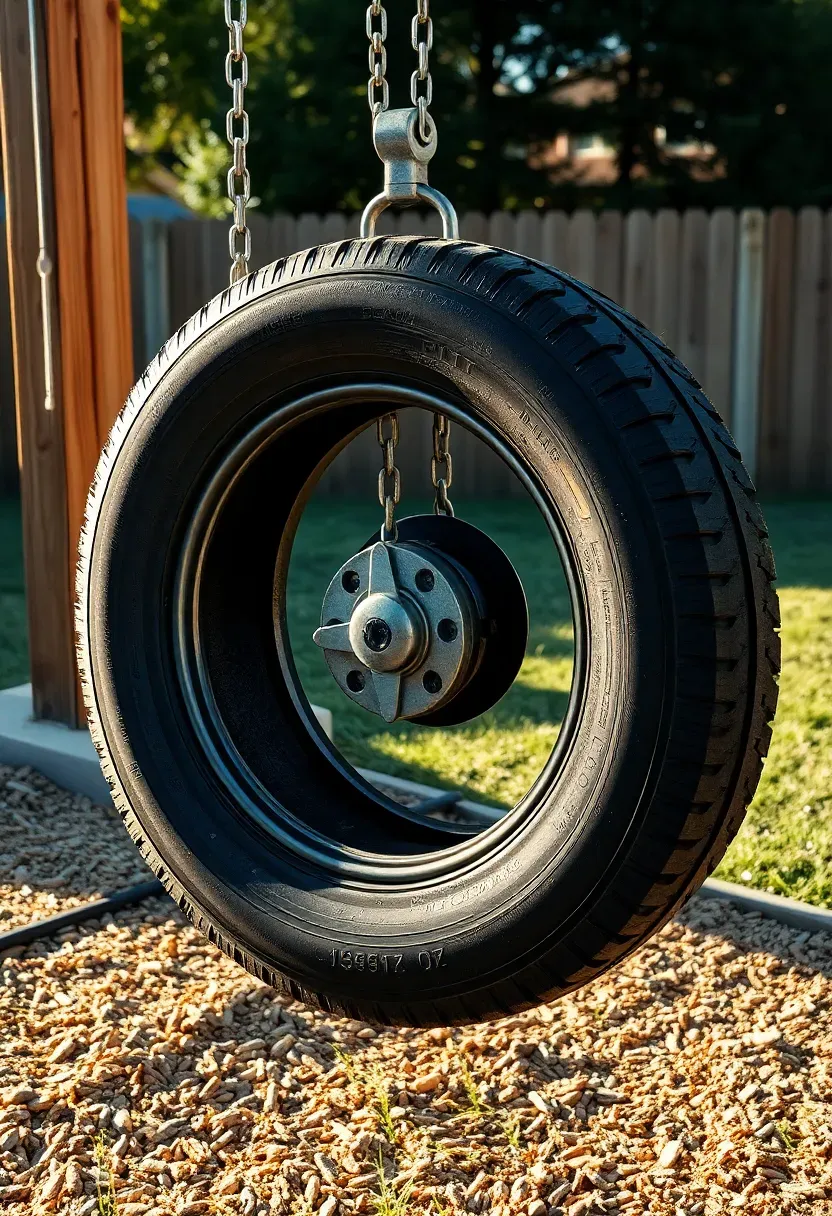
9. Tire Swing on a Single Post
A tire swing moves in every direction — forward, back, sideways, spinning — which is why kids prefer them over flat-seat swings about 90% of the time. The single-post mount uses a heavy-duty swivel bearing attached to a horizontal arm extending from a 6x6 post sunk in concrete. This gives the tire a full 360-degree range of motion in a circular footprint rather than the linear path of a standard swing.
Tips
- Use a used truck tire, not a car tire — the larger diameter is more comfortable and fits two small kids.
- Drill four drainage holes in the tire bottom so it does not become a mosquito breeding pool after rain.
- The swivel bearing is the critical hardware piece; buy a commercial-grade swing swivel rated for 500+ pounds.
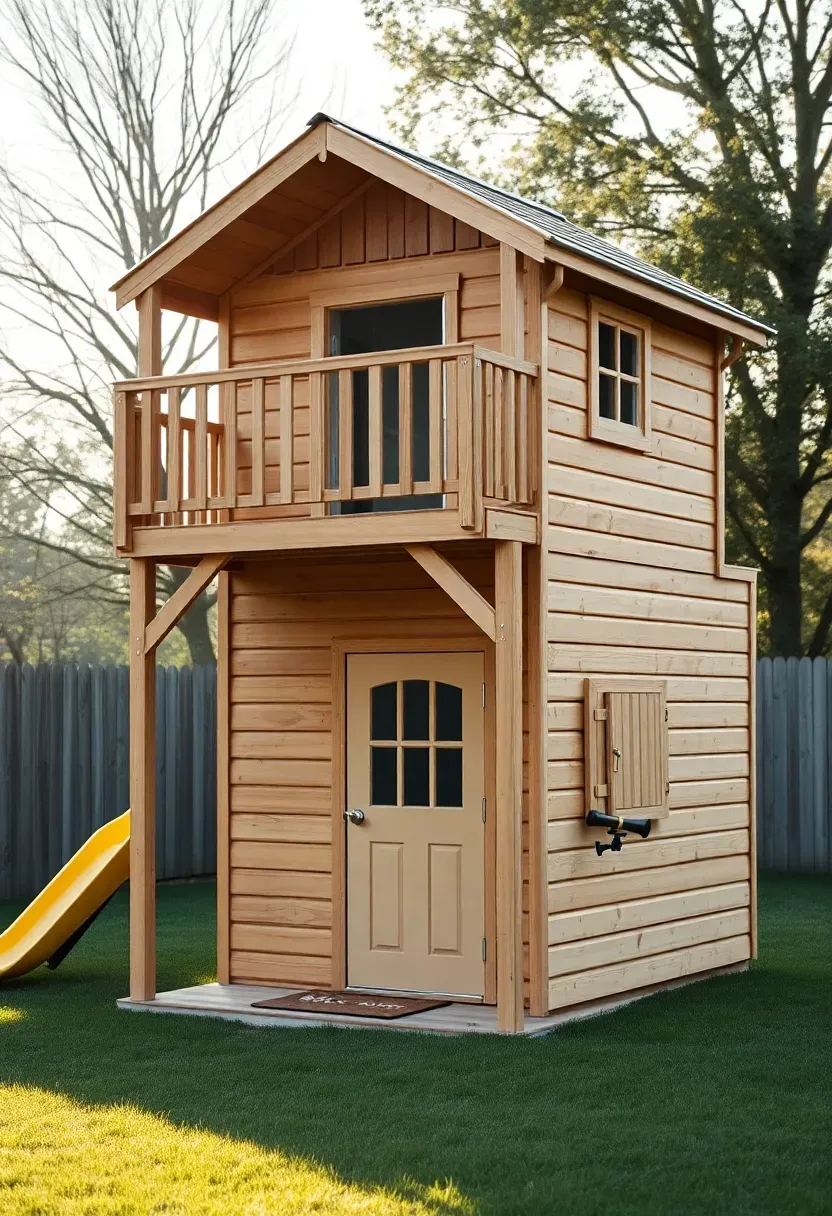
10. Playhouse with Second-Story Deck
A vs B: Kit vs. Custom Build
Prefab Kit: Runs $1,500-4,000, arrives with pre-cut lumber and hardware, builds in a weekend. Quality varies enormously — check that the kit uses 4x4 posts (not 2x4 doubled) and real through-bolt hardware (not lag screws into end grain).
Custom Build: Costs $800-2,500 in materials, takes 2-3 weekends, and lets you size the structure to your yard. You control the lumber grade, the platform height, and which accessories to add.
Choose If
- Go kit if you want speed and a known outcome.
- Go custom if you have specific space constraints or want to add features over time.
The second-story deck is what separates a playhouse from a box with a roof. It gives older kids a hangout spot while younger ones use the enclosed lower level. Add a slide from the deck and a climbing wall or ladder as the access route, and you have covered three playground elements in one footprint.
Recommended
Items for this idea
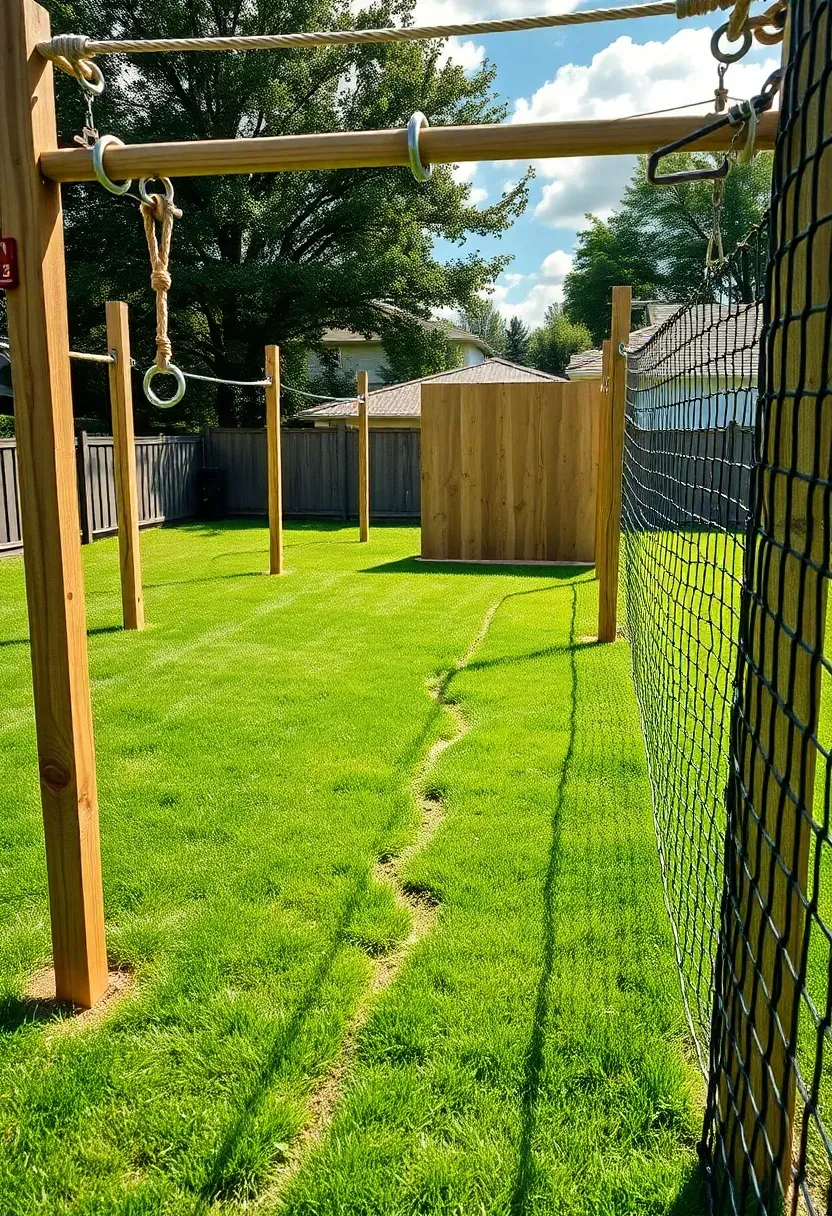
11. DIY Ninja Warrior Course
Kids who watch obstacle course shows will lose their minds over this. String together 5-8 stations across a 40-60 foot run: hanging rings, a rope climb, a warped wall section (just a curved sheet of plywood at 45 degrees), peg boards, and a cargo net scramble. Each station needs its own frame, but they can share a common fall zone if you keep the spacing consistent. Build it in phases — start with three stations and add more as skills develop.
Tips
- Hanging obstacles need minimum 7-foot clearance; frames from 4x4 posts with 4x6 cross beams handle the load.
- Time each run and post a "family record" board nearby — competition is the only motivation system that never fails.
- Weld or bolt ring mounts rather than using carabiners, which kids will clip and unclip until something breaks.
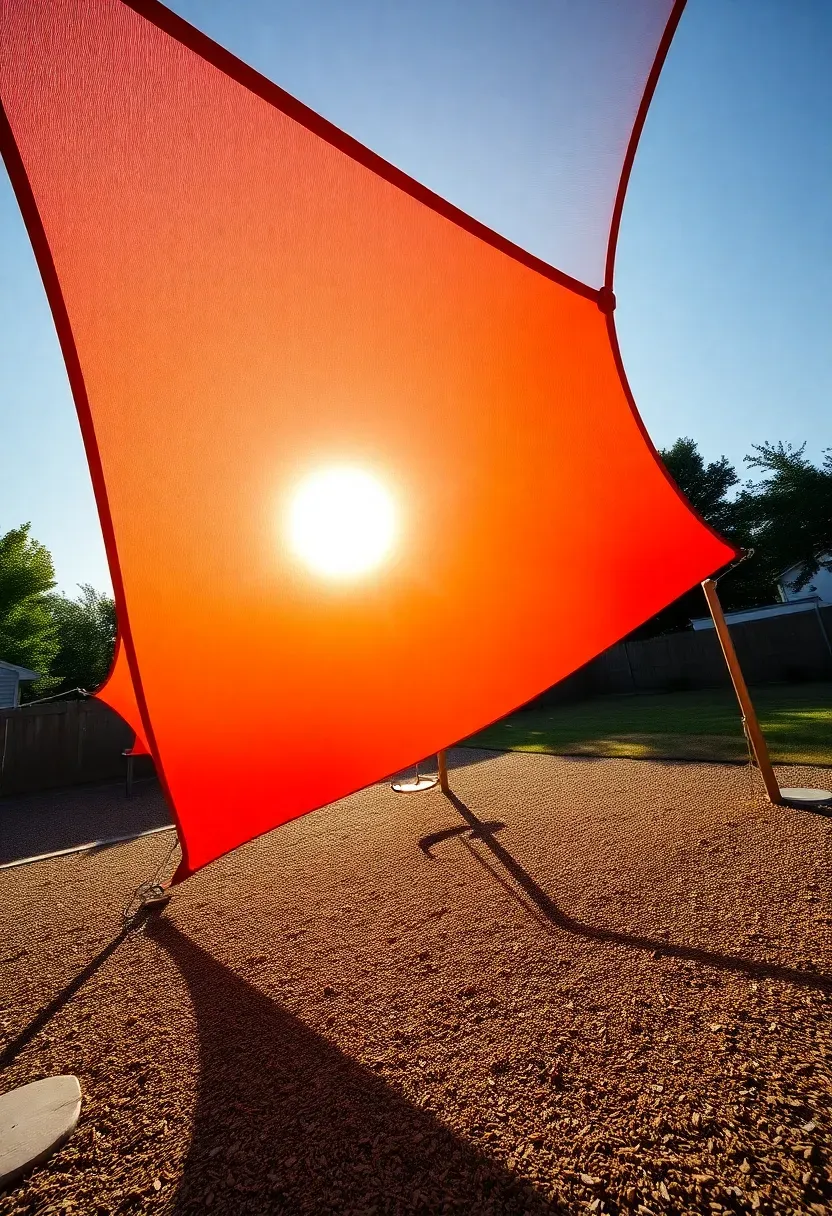
12. Shade Sail Over the Play Zone
Origins
Shade sails started in Australian outdoor culture in the 1990s, where sun protection is a matter of public health rather than comfort preference. The tensioned fabric design borrowed from marine sail technology and became standard over school playgrounds and public parks across the Southern Hemisphere before spreading to residential use worldwide.
Modern Application
Today, high-density polyethylene (HDPE) shade sails block 90-98% of UV rays while allowing airflow, which keeps the temperature underneath 10-15 degrees cooler than direct sun. A triangular sail over a playground does double duty: protecting kids from sunburn and keeping plastic slides, rubber surfaces, and metal hardware from reaching skin-burning temperatures in summer.
How to Apply at Home
- Mount attachment points to 4x4 steel posts set in concrete, existing trees (with trunk protector straps), or house fascia with heavy-duty pad eyes.
- Angle the sail at 20-30 degrees so rainwater runs off to one corner rather than pooling.
- Budget $200-500 for a quality 16x16x16-foot triangular sail with stainless steel hardware.
Recommended
Items for this idea
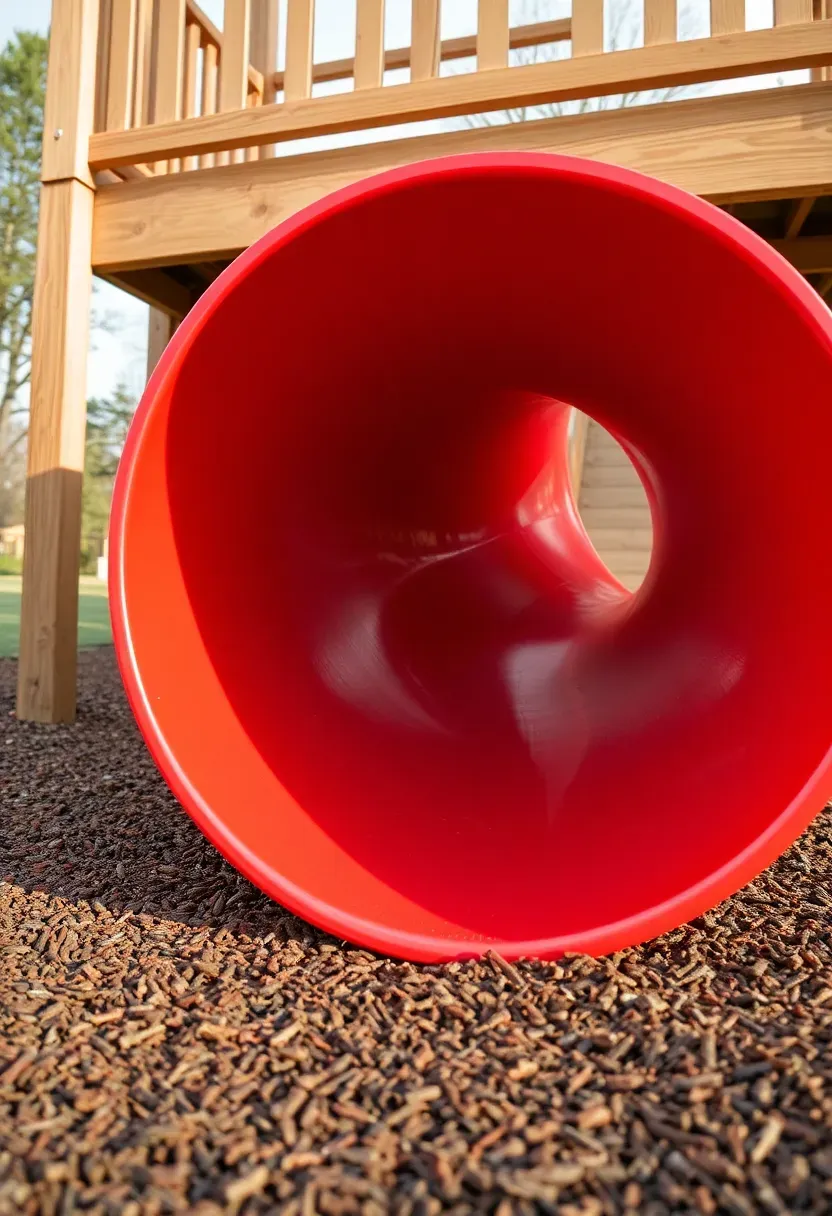
13. Spiral Tube Slide from a Platform
Enclosed tube slides appeal to kids who find open slides boring — the darkness, the turns, the speed all combine into a more intense experience. A spiral tube slide needs a platform at least 6 feet high and a landing zone at least 8 feet from the exit point (kids come out fast). Commercial-grade rotomolded polyethylene tubes run $400-800 depending on length and number of turns, which is the most expensive single component in most backyard playgrounds. But it will be the most-used feature, guaranteed.
Tips
- Bolt the tube flange directly to platform framing with through-bolts, not screws — vibration from repeated use will work screws loose.
- The exit should face away from other structures and foot traffic paths.
- Check the inside diameter: 24 inches fits kids comfortably up to about age 10; 30 inches accommodates larger children and adventurous parents.
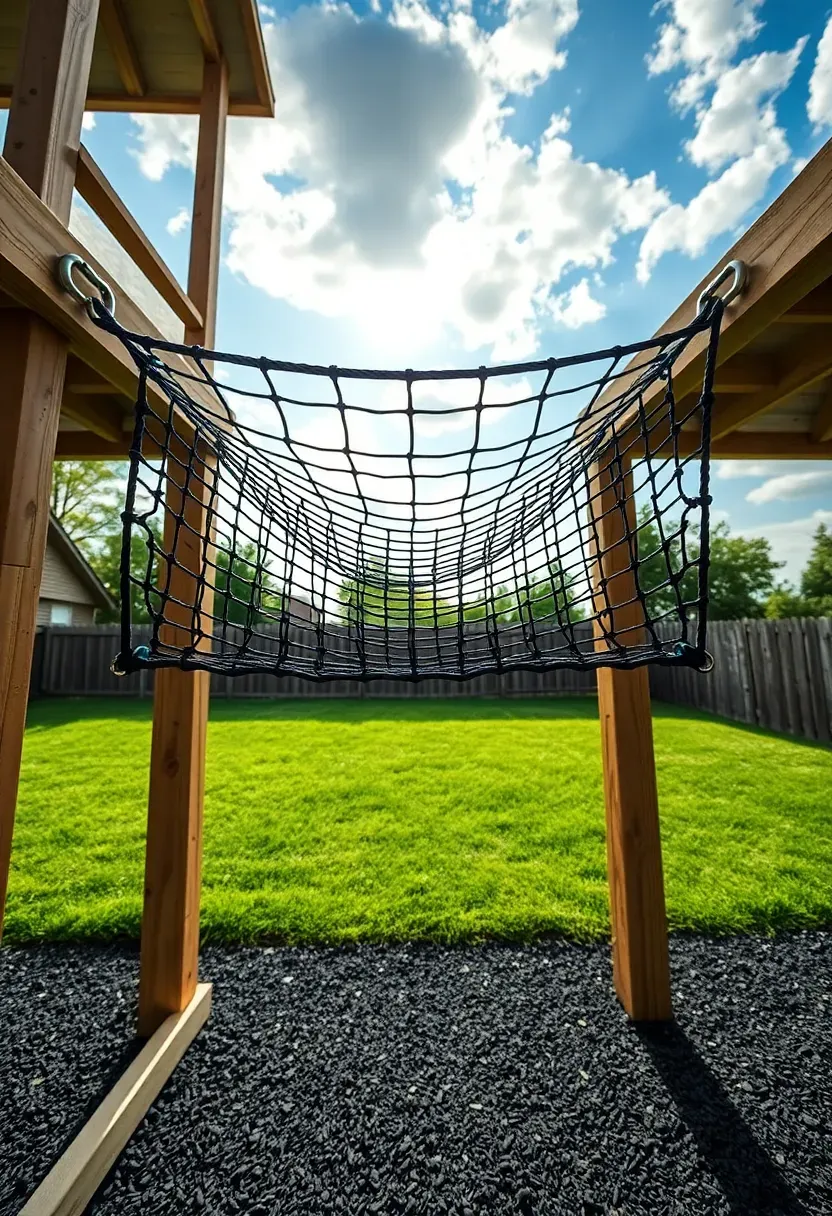
14. Cargo Net Climbing Bridge
Connecting two platforms with a cargo net bridge creates a playground circuit — kids go up one structure, cross the bridge, come down the other, and run back to start again. This loop pattern is what keeps children engaged for long periods rather than doing the same climb-and-slide three times and wandering off. Span the net between platforms at the same height, with vertical net walls on both sides acting as railings.
Build Notes
- Maximum unsupported span of 8 feet for residential cargo nets; beyond that, add a center support post.
- The walking surface net should be tensioned tight enough that it flexes only 4-6 inches under a child's weight.
- Side nets need to be at least 30 inches high, attached to horizontal rope or cable at the top edge.
Recommended
Items for this idea
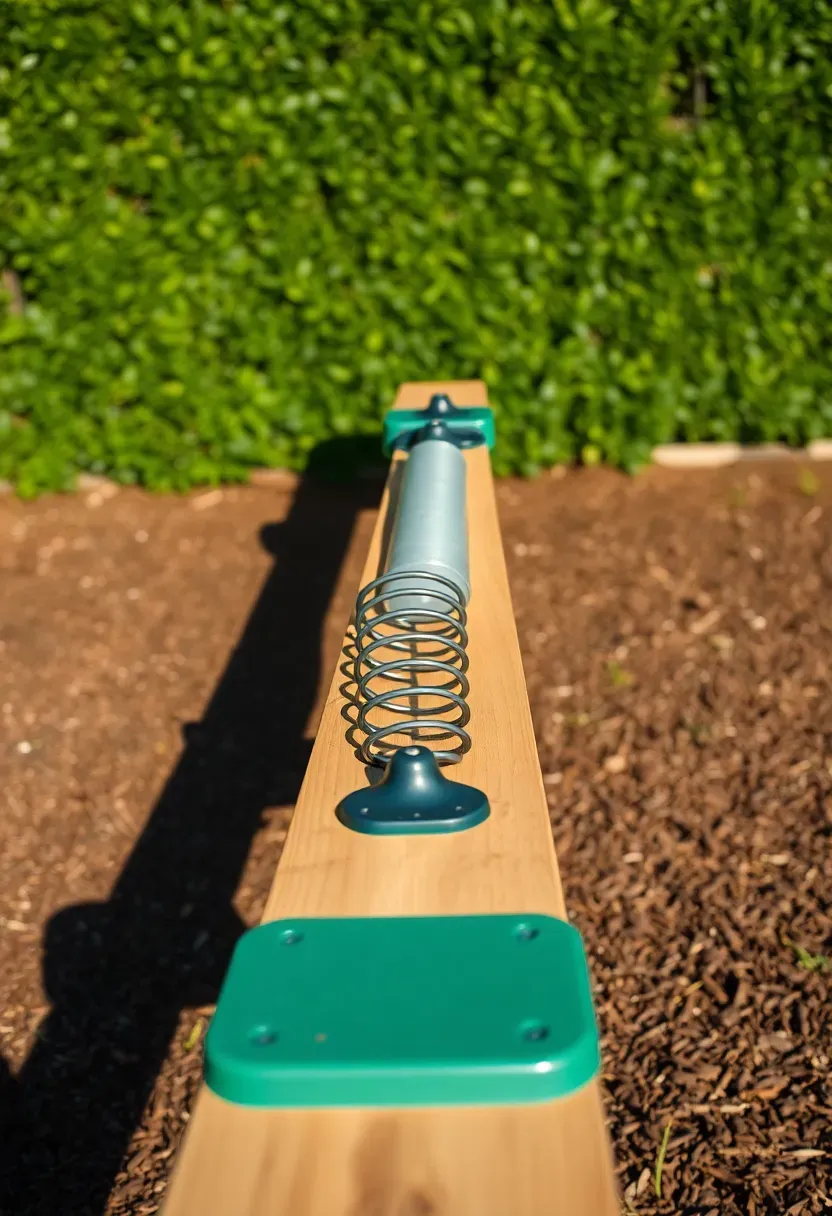
15. Seesaw with Adjustable Pivot
The classic seesaw disappeared from public parks because of liability concerns, but in your own backyard you can build a better version. An adjustable pivot point — where the fulcrum slides along the beam — lets you balance riders of different weights. A 100-pound kid and a 60-pound kid can both enjoy it by shifting the pivot closer to the heavier rider. Use a 4x6 beam, 10 feet long, with a pivot assembly that includes a rubber bumper on each end to cushion ground contact.
Tips
- The pivot should be a steel pipe through the beam riding on grease-packed bearings, not a bolt through wood — wood-on-bolt pivots squeak within weeks and seize within a year.
- Handle grips at each seat position need to be 1-inch diameter dowel or pipe, securely through-bolted.
- Maximum seat height at full tilt should stay under 3 feet for children under eight.
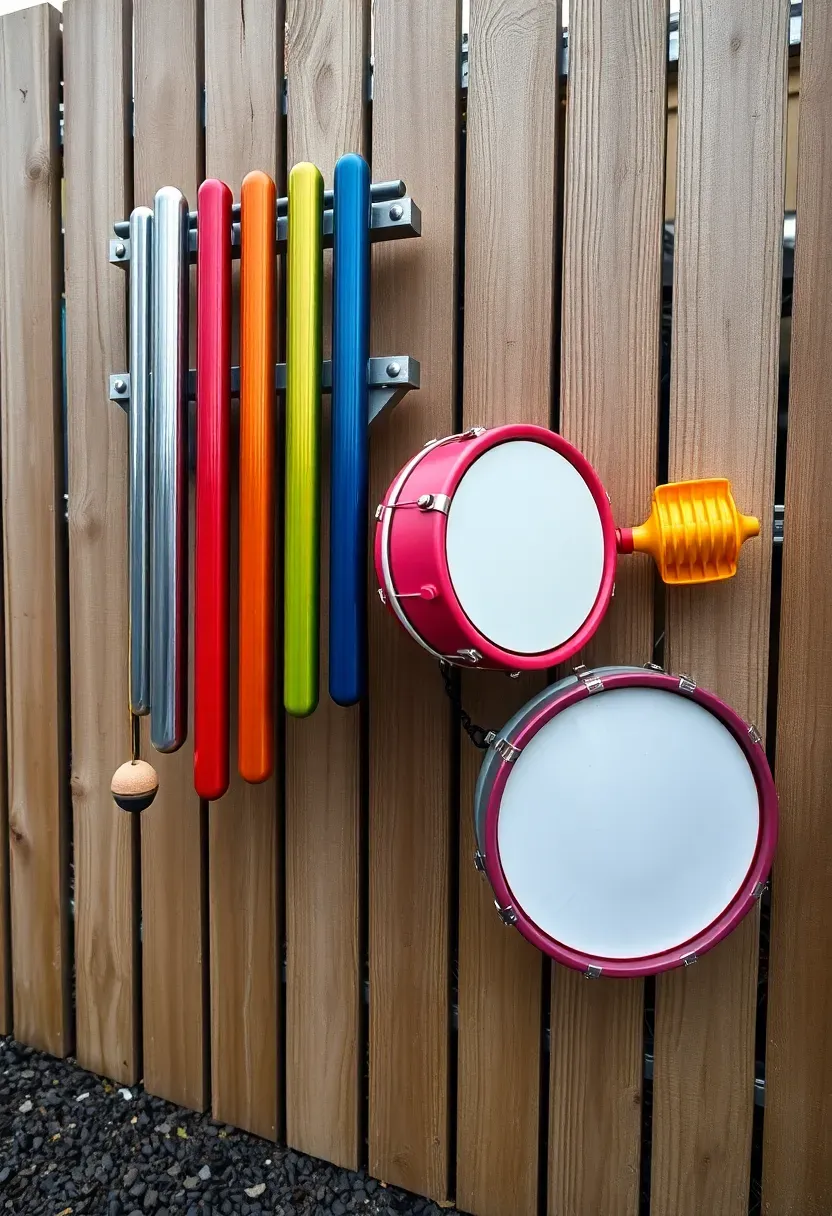
16. Musical Instrument Wall
Mount a row of outdoor-rated instruments along a fence or freestanding panel: chimes made from aluminum tubing, a xylophone from weather-treated hardwood bars, drums from repurposed pots or purpose-built resin shells, and spinning ratchet noisemakers. This is one of the few playground elements that engages kids who are not naturally athletic or adventurous. It also works for toddlers through pre-teens, which is rare.
DIY Approach
- Aluminum conduit pipe cut to tuned lengths makes excellent chimes — look up frequency charts online and cut with a pipe cutter.
- Mount instruments at two heights on the same wall: knee-height for toddlers, waist-height for older kids.
- Attach mallets on retractable cords so they do not disappear into the yard.
Recommended
Items for this idea
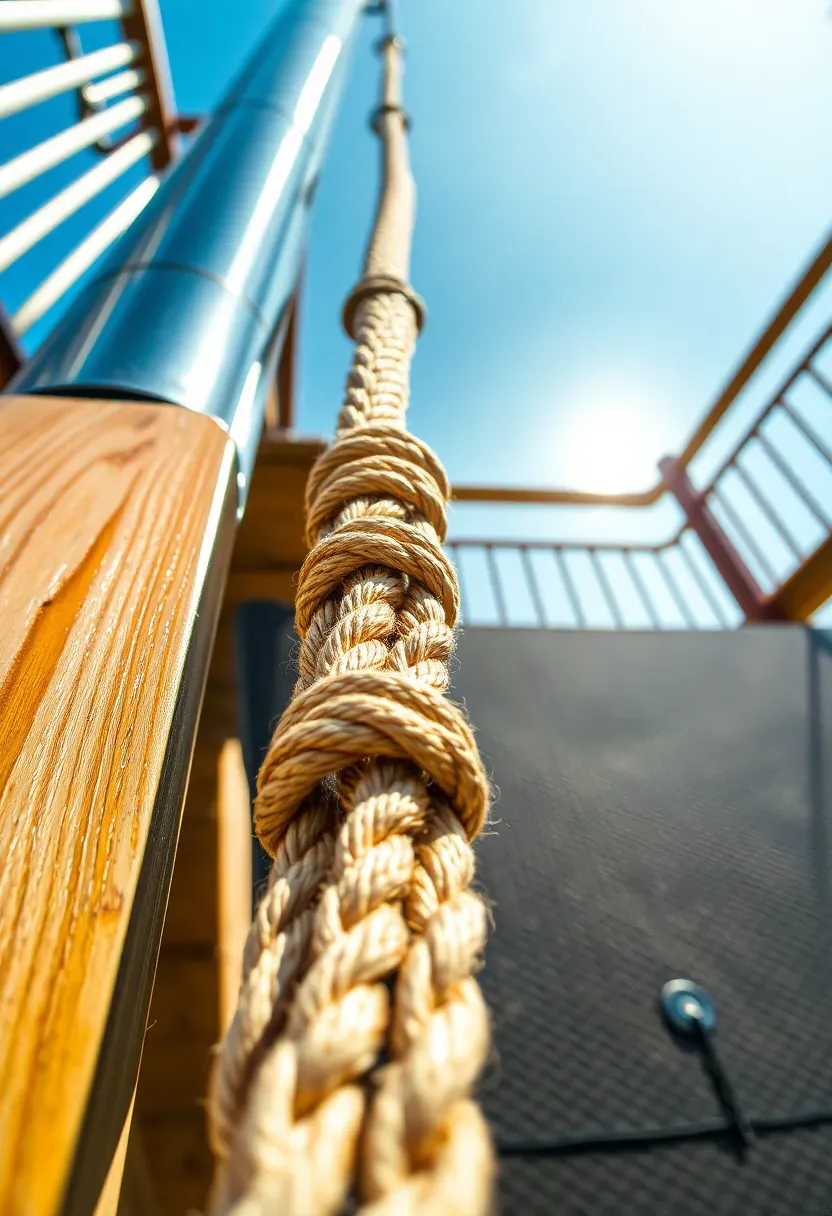
17. Fireman Pole and Rope Drop
Fast ways down from a platform keep the traffic flowing. A fireman pole (stainless steel, 1.5-inch diameter for small hands, 2-inch for older kids) and a knotted climbing rope side by side give two exit options with different skill levels. The pole teaches controlled sliding; the rope builds grip strength and coordination. Mount both from the platform edge with 6 feet of clearance below and a dedicated landing zone of high-impact rubber matting.
Tips
- Polish the pole smooth — any weld seam or rough spot will tear palms during a fast slide.
- Rope should be 1-inch manila or synthetic hemp with knots every 12 inches; thin rope burns hands.
- The platform opening for the pole needs a surrounding guard rail with an entry gap, not an open hole kids can accidentally step into.
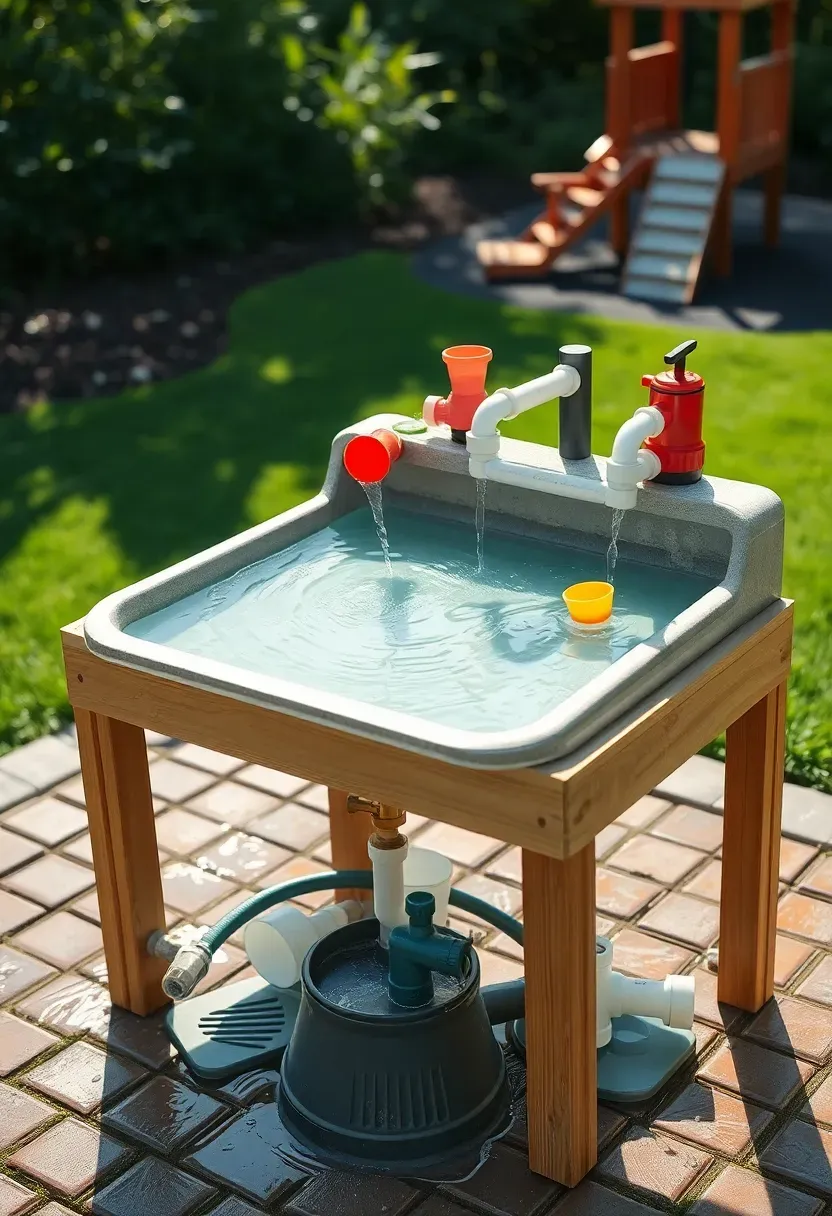
18. Water Play Table Station
How to Set It Up
Water play keeps kids occupied in heat when climbing and running lose their appeal. A dedicated station with pumps, channels, and moving parts turns simple water access into hours of focused play.
Step 1: Build the Table
Construct a waist-height table (24 inches for toddlers, 30 inches for older kids) from cedar or composite lumber with a shallow waterproof tray on top. A concrete mixing tub from the hardware store works as the tray.
Step 2: Add the Plumbing
Connect a garden hose to a slow-flow valve feeding into channels, funnels, and a hand-crank pump. PVC pipe, elbows, and tees create a simple water circuit for under $40 in parts.
Step 3: Create Drainage
Slope the table surface slightly toward one end and place a catch basin underneath. Route drainage to a garden bed rather than letting it pool on the ground.
Watch Out
Standing water breeds mosquitoes. Always drain the system after use and store the tray inverted or covered.

Recommended
Items for this idea
19. Geodesic Climbing Dome
A geodesic dome is playground geometry that actually works. The triangulated structure distributes weight evenly, handles multiple climbers simultaneously, and offers dozens of different climbing routes on a single piece of equipment. Buy a kit (Lifetime and Zupapa make residential-grade domes from 10-16 feet in diameter) or weld your own from 1-inch steel conduit and bolt-together hub connectors. The dome sits directly on the ground with no foundation needed — stake the base ring into soil or secure it to a concrete pad with anchor bolts.
Tips
- A 10-foot dome suits ages 3-8; a 14-foot dome works through age 12 and supports adults.
- Place the dome on level ground with 6 feet of clear fall zone on all sides.
- Thread a weather-resistant tarp over the top half to create a shaded hideout underneath — this dramatically increases the time kids spend inside the dome rather than just climbing over it.
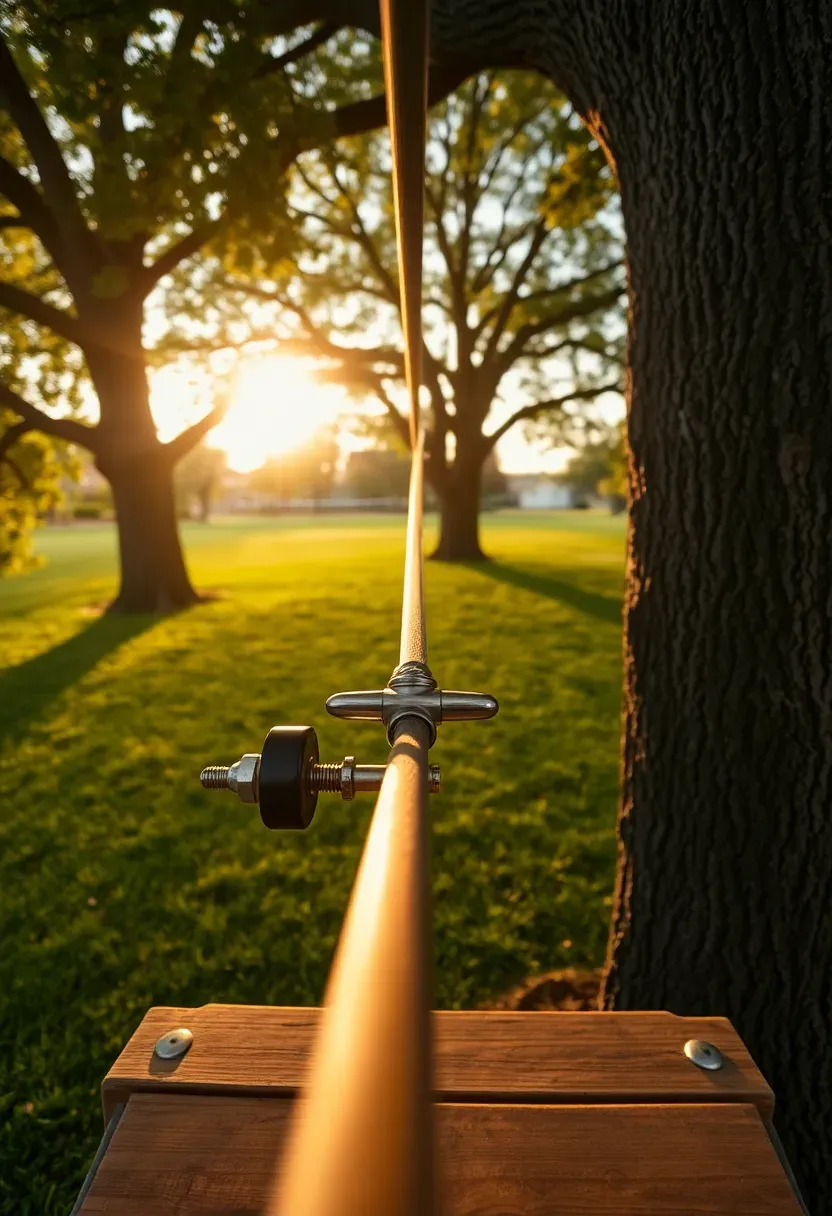
20. Zipline Run Across the Yard
A backyard zipline needs two anchor points (trees with 12-inch+ trunk diameter or steel posts in concrete), 75-150 feet of 3/16-inch galvanized aircraft cable, a trolley with a handle or seat, and a braking system at the end. The launch point should be 6-10 feet high; the landing end 3-4 feet high. That slope creates the speed. The whole setup runs $150-400 for quality hardware, and installation takes an afternoon if you have the anchor points already.
Key Details
- Use a spring-loaded brake block or bungee cord system at the landing end — do not rely on the rider letting go at the right moment.
- Cable turnbuckle at one end lets you adjust tension as the cable stretches over time.
- Weight limit depends entirely on the cable and trolley rating; buy commercial zipline kits rated for 250+ pounds to handle two kids riding tandem.
Recommended
Items for this idea
21. Modular Playground System
A vs B: All-at-Once vs. Phased Build
Full Build: Buy or plan the entire system, build it over one to two weekends. You get a cohesive look and a finished product immediately. Downside: large upfront cost ($2,000-6,000 for materials) and you are guessing about which features your kids will actually use.
Phased Approach: Start with a single platform and one feature (a slide, for example). Add a swing bay in month two, a climbing wall in month three, and connect them with a bridge later. Each module bolts to the main structure using standard brackets.
Choose If
- Go full build if you are selling a house and want curb appeal or if your kids are already old enough that you know what they like.
- Go phased if you want to spread the cost and let your children's preferences guide each addition.
The modular approach has one technical requirement: plan your post spacing and platform heights from the beginning, even if you only build one section first. Retrofitting unplanned connections between platforms built at different heights or with incompatible post spacing is the most common source of frustration in backyard playground projects.
Quick FAQ
How thick should playground ground cover be? Six inches of rubber mulch or 12 inches of wood chips meets safety standards for falls from up to 10 feet. Pea gravel needs 9 inches for equivalent protection. Bare grass fails at any height above 4 feet.
What is the minimum backyard size for a playground? You need the equipment footprint plus a 6-foot fall zone on all sides. A basic swing set and small platform with slide fits in a 20x25-foot area. Add climbing structures and you are looking at 30x40 feet minimum.
Do I need a permit to build a backyard playground? Most residential jurisdictions do not require permits for play structures under 10 feet tall that are not permanently attached to the house. Check your local building code and HOA rules before pouring concrete footings — some communities have setback requirements from property lines.
Which wood lasts longest for outdoor playground builds? Cedar and redwood resist rot naturally and last 15-20 years without chemical treatment. Pressure-treated Southern yellow pine is cheaper and lasts 10-15 years but contains copper-based preservatives that some parents prefer to avoid for children's equipment. Whatever you use, avoid lumber with visible splits or wane — structural failures start at defects.
Can adults use backyard playground equipment? Build for it from the start if you want to. Size your posts at 4x6 or 6x6, use through-bolt connections instead of screws, and rate your hardware for 300+ pounds. A well-built residential playground handles adult weight without issue — and parents who use the equipment alongside their kids report that the playground gets used three times more often.
A backyard playground does not need to be a single massive purchase that arrives on a flatbed truck. Start with good surfacing and one feature your kids are already asking for. Add a second element in a few months. By the end of the first year, you will have a playground that fits how your family actually uses the yard — not how a catalog assumed you would. The best playgrounds I have seen were built by parents who paid attention to where their kids naturally gathered, climbed, and dug, then built structures that supported those instincts rather than trying to redirect them.
Pinterest cover for 21 Backyard Playground Ideas Kids Love
About the author
OBCD
CGI visualization and interior design content. We create detailed 3D renders and curate practical design ideas for every room in your home.