23 Backyard Remodel Ideas Worth the Investment
Last spring I finally committed to gutting my backyard after five years of half-measures. The old concrete slab had settled unevenly, the lawn was more clover than grass, and the fence leaned at an angle that made neighbors nervous. I hired a landscape contractor for the hardscape and did the planting myself. Total cost landed at $14,000 — more than I planned, less than I feared. The biggest lesson was sequencing. Drainage and grading had to happen before anything else, or every dollar spent after would have been wasted. If you are planning a backyard remodel, these 23 ideas cover the full range from weekend-scale fixes to contractor-level builds, with honest budget numbers throughout.
Below you will find 23 backyard remodel ideas grouped by project scale, starting with accessible upgrades and building toward full renovations.
Table of Contents
- Poured Concrete Patio Replacement
- Gravel and Steel Edging Overhaul
- Built-In Outdoor Kitchen
- Tiered Deck with Planter Boxes
- Fire Pit Conversation Area
- Lap Pool with Concrete Surround
- Pergola with Retractable Canopy
- Flagstone Walkway System
- Privacy Wall with Horizontal Slats
- Sunken Lounge Area
- Outdoor Shower Station
- Rain Garden Drainage Solution
- Concrete Block Raised Beds
- Covered Dining Pavilion
- Sport Court Conversion
- Hot Tub Deck Platform
- Dry Creek Bed with Bridge
- Low-Voltage Lighting Package
- Bocce Court Installation
- Cedar Fence Replacement
- Artificial Turf Play Zone
- Water Feature Wall
- Full Yard Demolition and Rebuild
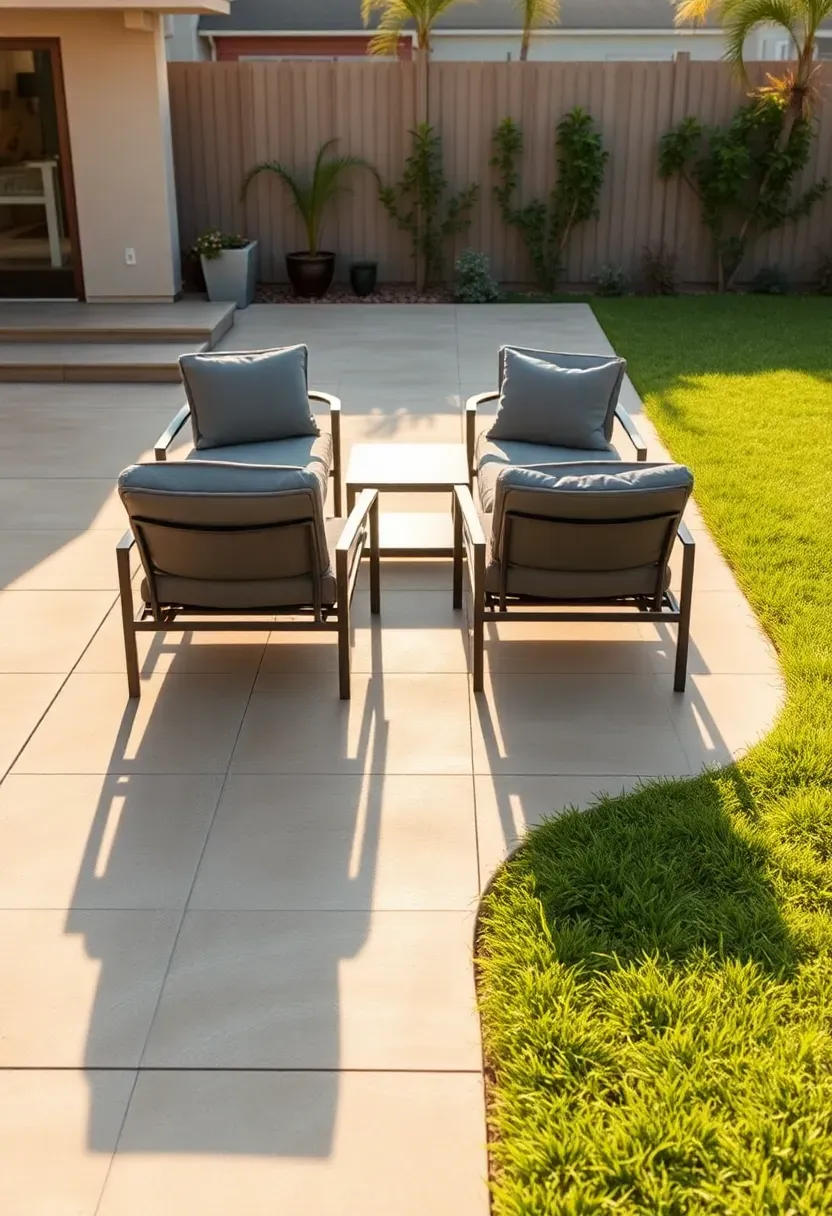
1. Poured Concrete Patio Replacement
Removing a cracked, settled patio slab and pouring a new one is the single most impactful backyard remodel you can do if your existing surface is failing. A typical 300-square-foot pour runs $2,400 to $4,500 depending on your region and finish choice. Broom finish is cheapest, stamped adds 30-40% to the cost, and exposed aggregate falls somewhere between. The key variable most homeowners miss is the sub-base — if your old slab cracked because the gravel base was inadequate or drainage was poor, the new pour needs 4 to 6 inches of compacted crushed stone underneath plus proper slope away from the house.
Tips
- Request control joints every 8-10 feet to manage where cracks naturally form
- Pour thickness should be 4 inches minimum, 5 inches if you plan to park anything on it later
- Schedule the pour for mild weather — concrete cures best between 50-75 degrees Fahrenheit
We picked a few things that go well with this idea: Walsunny 43-Inch Propane Fire Pit Table (★4.4), Ciays 42-Inch Gas Fire Pit Table (★4.6) and Ciays 28-Inch Propane Fire Pit (★4.6). As an Amazon Associate we earn from qualifying purchases.
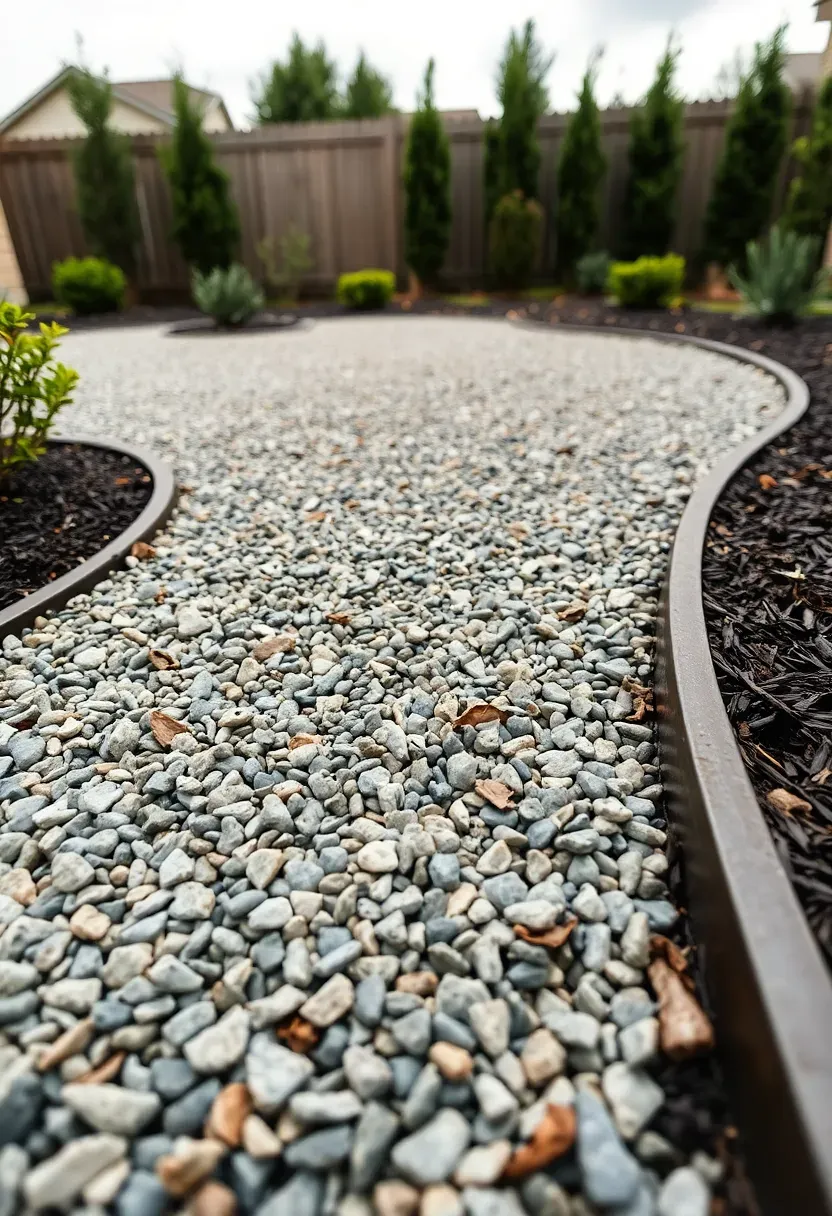
2. Gravel and Steel Edging Overhaul
The Problem
Loose gravel migrates into lawn areas, garden beds lose their shape within a season, and the whole yard looks messy no matter how often you maintain it. Without hard borders, every surface bleeds into the next.
The Solution
Install 4-inch steel landscape edging along every transition — gravel to lawn, gravel to bed, bed to pathway. Steel edging costs $2 to $4 per linear foot and bends around curves easily. Stake it every 3 feet with 10-inch steel stakes. Then refresh or replace the gravel with 3/8-inch angular crushed stone instead of round pea gravel — angular pieces lock together and resist shifting underfoot. Budget $800 to $1,800 for an average backyard.
Pros and Cons
- Pro: Clean sight lines that last years without re-edging
- Pro: Angular gravel drains fast and stays firm enough for furniture
- Con: Steel edging rusts over time, developing a patina (some people like this, some don't)
We picked a few things that go well with this idea: Plawdlik Wooden Adirondack Chair with Cup Holder (★4.8), MUCHENGHY Folding Adirondack Chair (★4.7) and SERWALL Folding Adirondack Chair (★4.5). As an Amazon Associate we earn from qualifying purchases.
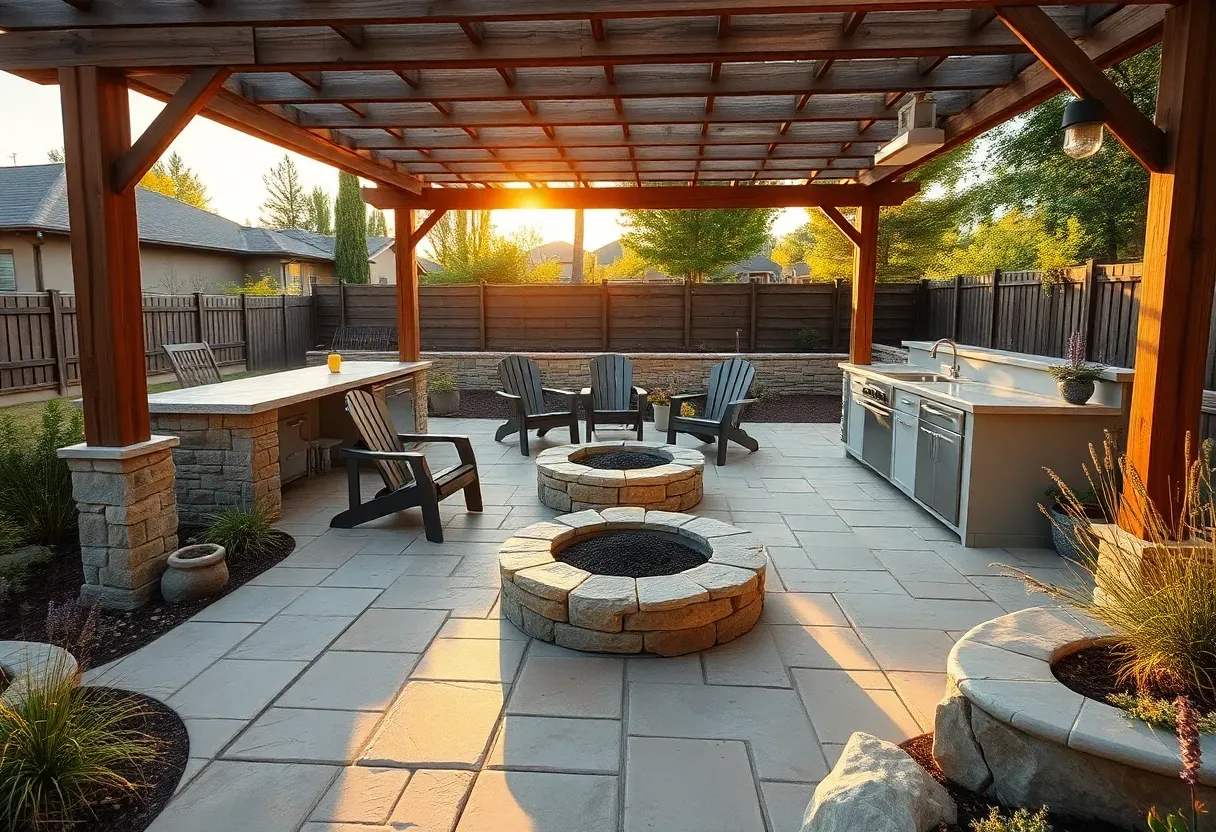
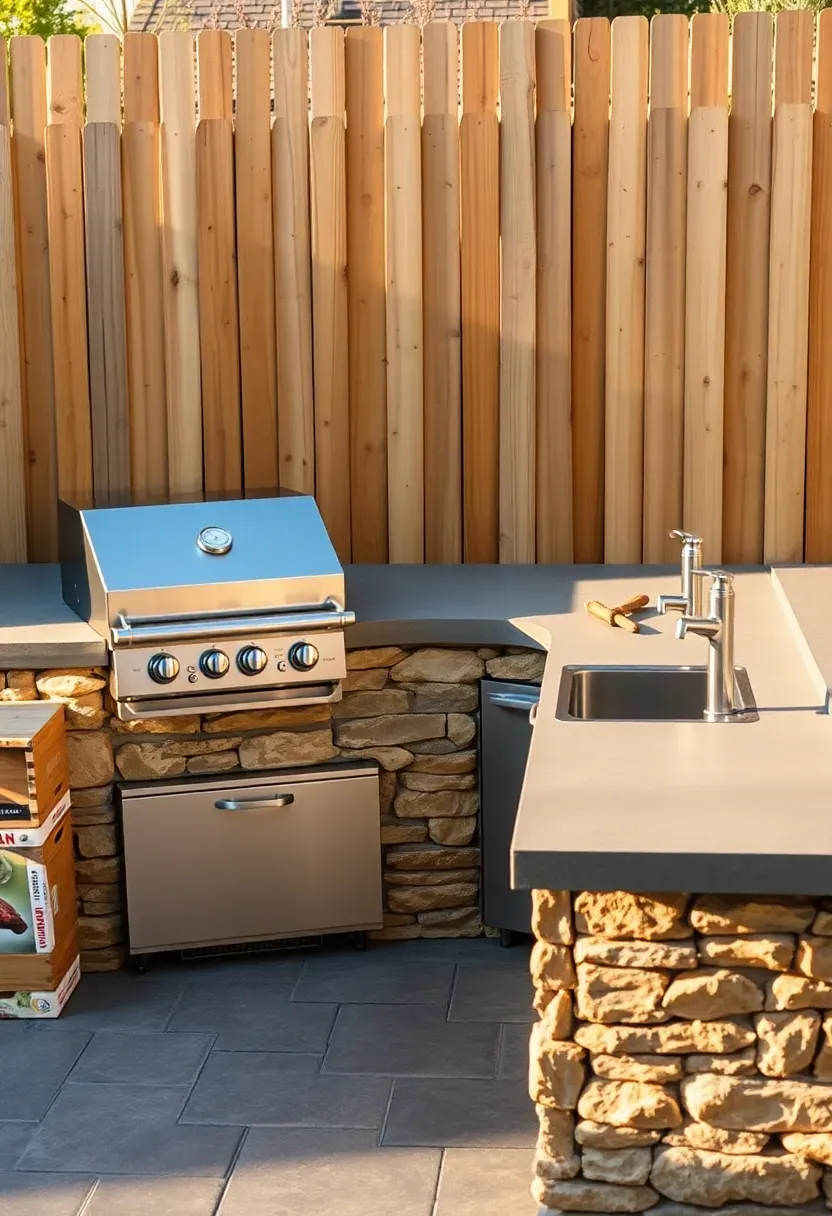
3. Built-In Outdoor Kitchen
An outdoor kitchen ranks among the most ambitious backyard remodel ideas, but it also delivers the most daily use if you cook regularly. The simplest version — a built-in grill with 4 feet of counter on each side — runs $3,000 to $6,000. Add a sink with running water and the plumbing pushes that to $5,000 to $9,000. A full setup with refrigerator, side burner, and storage drawers can reach $15,000 to $30,000. The frame is typically concrete block or steel stud, clad in stone veneer or stucco. Countertops need to be weather-resistant: concrete, granite, or porcelain slab all work. Tile grout outdoors is a maintenance headache — avoid it if you can.
Tips
- Position the kitchen where prevailing wind blows smoke away from seating areas
- Run a gas line rather than relying on propane tanks if your house already has natural gas
- Include at least 24 inches of counter space on each side of the grill for prep and plating
We picked a few things that go well with this idea: Outvita 7Ft Wooden Garden Arbor Arch (★4.4), Yaheetech 85-Inch Wooden Garden Trellis Arch (★4.6) and Bamboo Fan-Shaped Trellis (3-Pack) (★4.5). As an Amazon Associate we earn from qualifying purchases.
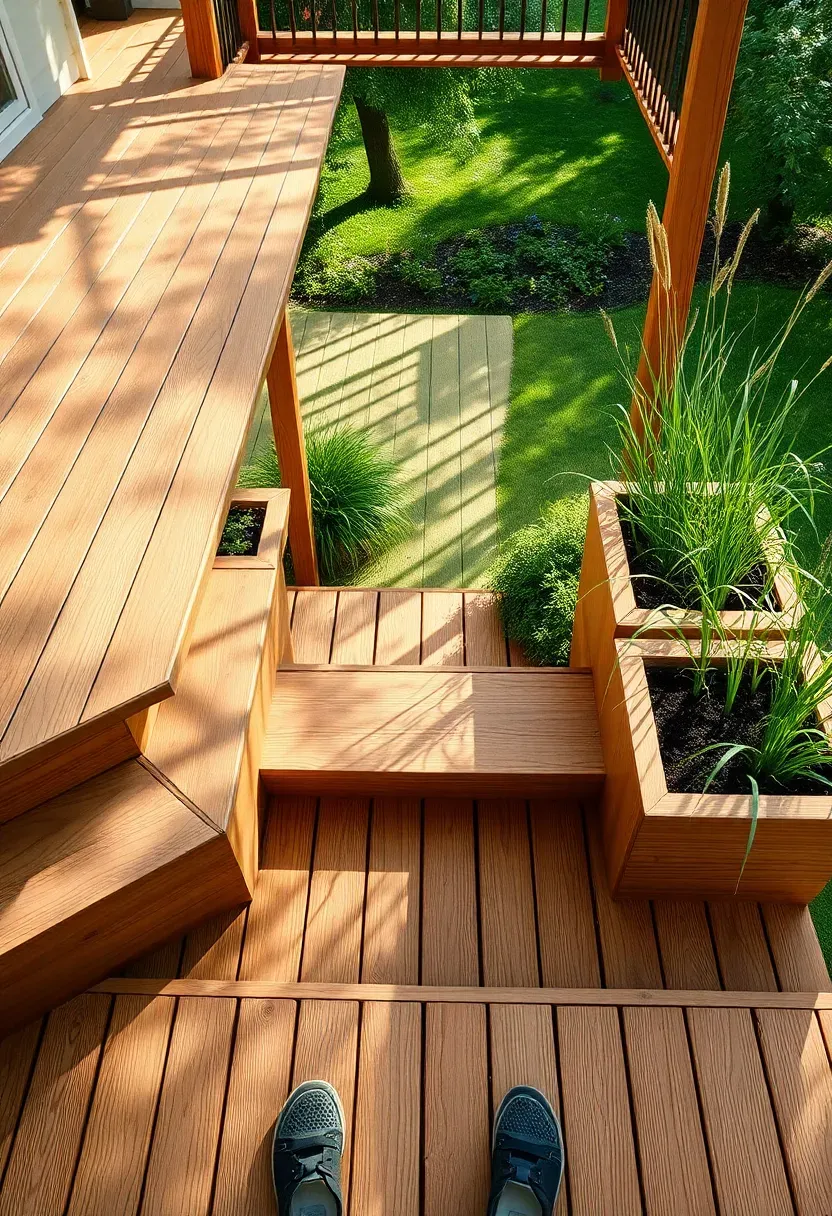
4. Tiered Deck with Planter Boxes
How to Build It
A tiered deck works especially well on yards with a gentle slope, turning an awkward grade change into a design feature.
Step 1: Frame the Upper Level
Build the upper platform at door threshold height using pressure-treated joists on concrete footings. Standard 12x14-foot upper deck costs $2,500 to $5,000 in materials for pressure-treated lumber, more for composite.
Step 2: Drop to the Lower Level
Frame a second platform 12 to 18 inches lower, connected by two or three wide steps. This creates natural zones — dining above, lounging below, or the reverse.
Step 3: Integrate Planter Boxes
Build planter boxes into the corners and along the step transitions using the same decking material. Line them with landscape fabric and fill with lightweight potting mix. Ornamental grasses, trailing sweet potato vine, or compact shrubs work well in deck planters.
Watch Out
- Footings must extend below frost line in cold climates or the deck will heave
- Planter boxes hold water — drill drainage holes and slope the bottom liner toward them
Recommended
Items for this idea
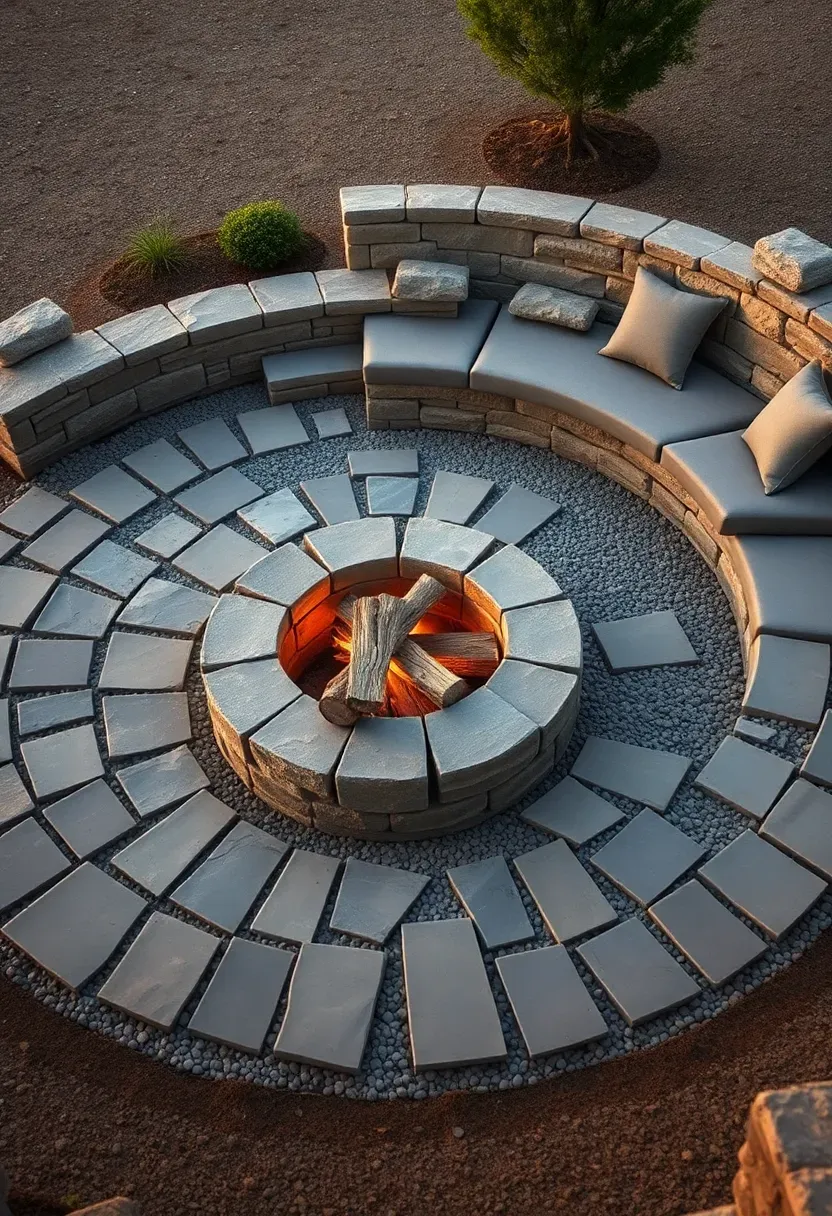
5. Fire Pit Conversation Area
A dedicated fire pit zone anchors a backyard the way a fireplace anchors a living room. Dig out a 12-foot diameter circle, lay a compacted gravel base, then build or set a fire pit at center. Material choices split into two categories: a prefab steel bowl ($150 to $600) that you can move later, or a permanent stone or block ring ($500 to $2,000 built in place). Surround the pit with seating — built-in stone benches cost more upfront but eliminate the need to haul chairs around. Adirondack chairs on gravel work fine for less money. Leave 3 feet minimum between the fire ring edge and any seating for comfortable heat distance.
Tips
- Check local fire codes before building — many municipalities require 10-25 feet of clearance from structures
- Use fire-rated stone or block; regular concrete block can crack or explode from heat
- A drainage layer of 4 inches of gravel under the pit area prevents water from pooling after rain
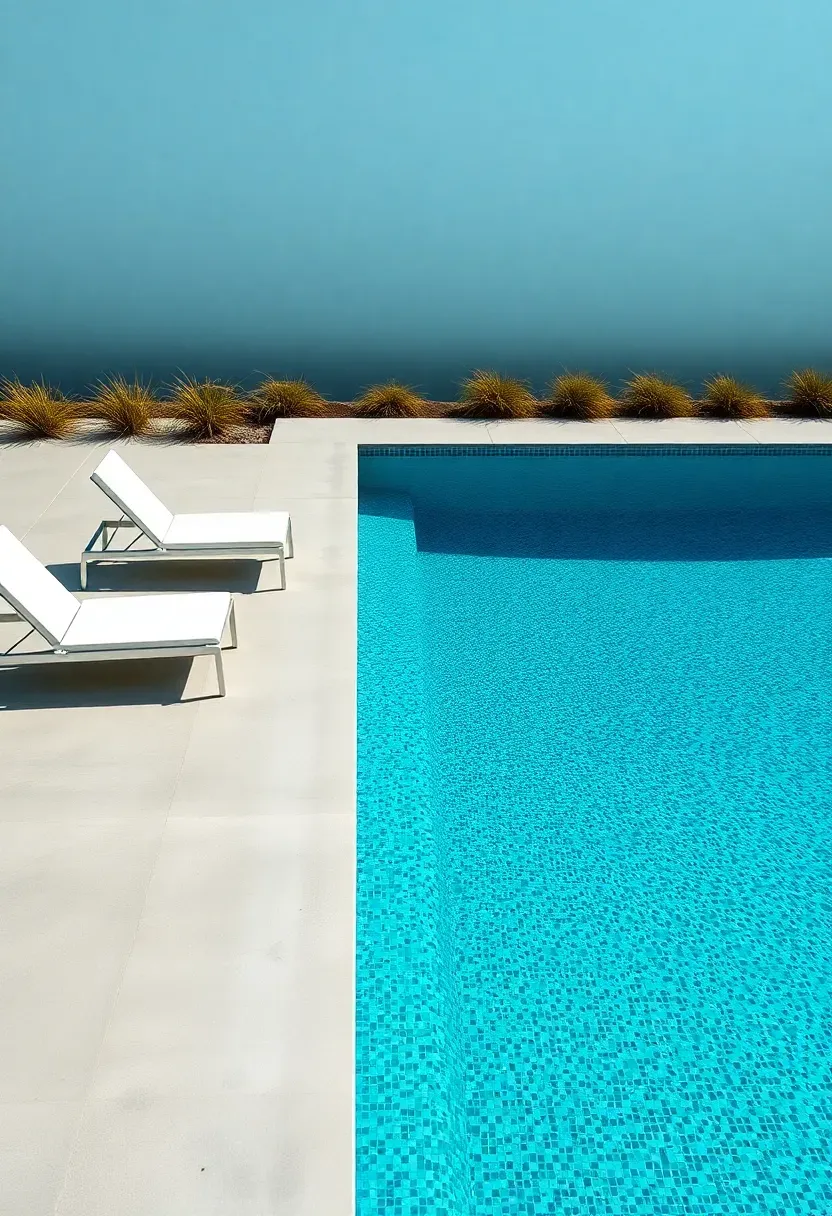
6. Lap Pool with Concrete Surround
Pool vs. No Pool
Adding a pool is the most expensive item on this list and the most polarizing. A 40x10-foot lap pool costs $30,000 to $60,000 for gunite construction, $20,000 to $35,000 for fiberglass. Annual maintenance runs $1,200 to $2,500. Resale value impact varies wildly by region — pools add value in Phoenix, less so in Minnesota.
Making It Work in a Remodel
If your yard is already torn up for other work, adding a pool during the same project saves on mobilization and excavation costs. The concrete surround should be poured at the same time as any patio work to get matching finishes and proper drainage slopes. Budget an extra $3,000 to $8,000 for the surround, fencing (required by code in most places), and equipment pad.
Choose If
You swim regularly or have kids who will use it daily from May through September. Skip it if you are only drawn to the idea of having a pool — maintenance on an unused pool is a frustrating expense.
Recommended
Items for this idea
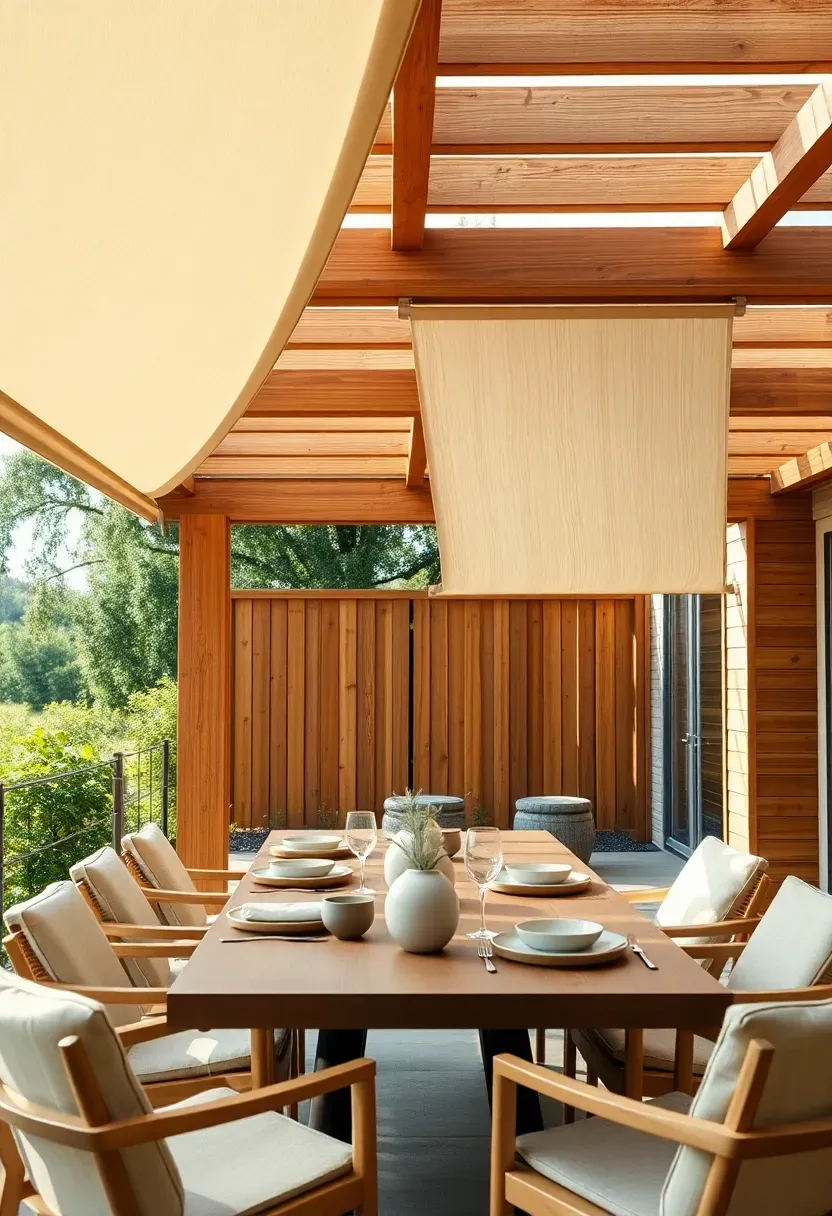
7. Pergola with Retractable Canopy
A pergola defines an outdoor room without the cost or permit requirements of a fully roofed structure. A 12x14-foot cedar pergola runs $2,000 to $5,000 for materials if you build it yourself, $4,000 to $10,000 installed by a contractor. The retractable canopy is the upgrade that makes a pergola actually functional in summer — without it, a pergola provides about 30% shade, which is not enough for midday comfort. Fabric canopy systems with stainless steel wire guides cost $300 to $800 and let you open or close coverage in seconds. Motorized versions exist but triple the price for a convenience you might not need.
Tips
- Set posts on concrete piers, not directly in the ground — even pressure-treated wood rots at the soil line within 5-8 years
- Size the pergola to cover your dining table plus 2 feet on each side for chair pushback
- Use stainless hardware throughout; galvanized bolts leave black stain marks on cedar
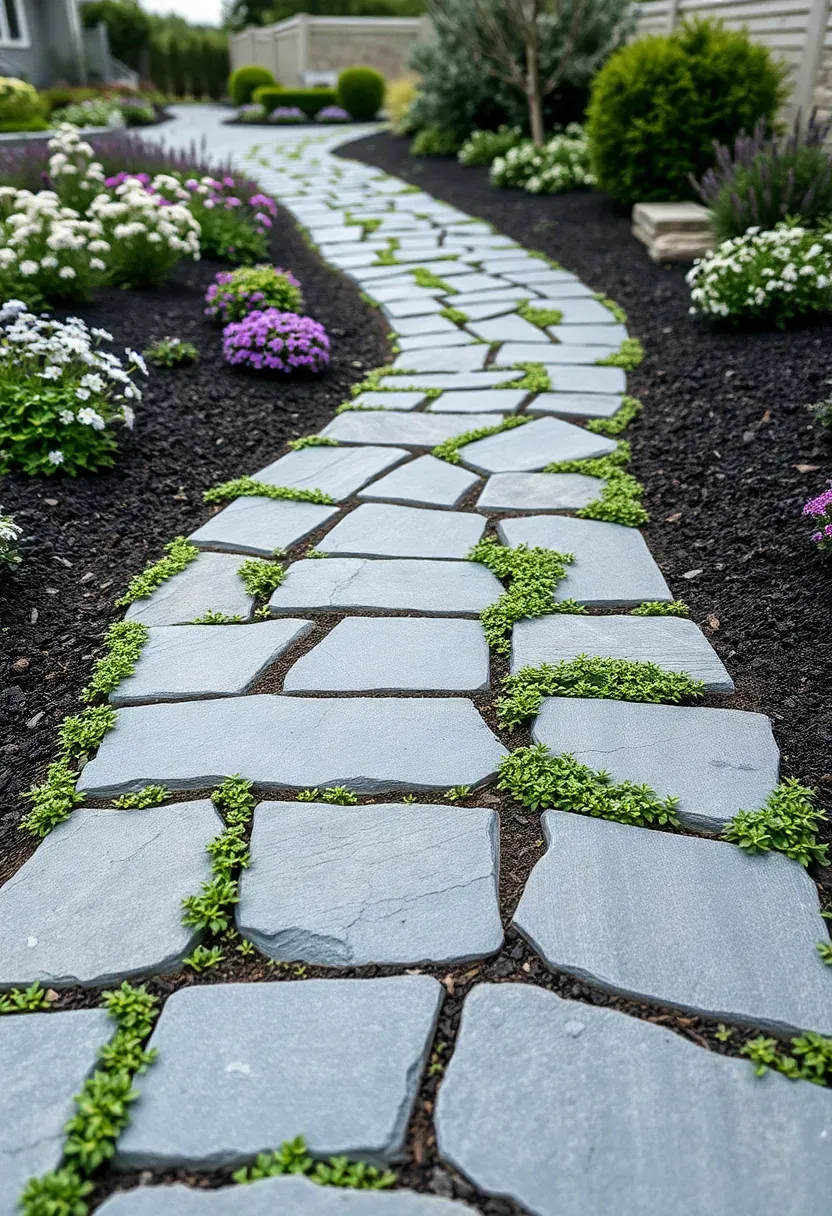
8. Flagstone Walkway System
Flagstone pathways connect the different zones of a remodeled backyard while adding a material that ages well and handles freeze-thaw cycles without cracking the way poured concrete sometimes does. Pennsylvania bluestone and Arizona flagstone are the two most common options. Bluestone runs $5 to $8 per square foot for the stone alone; Arizona flagstone is cheaper at $3 to $6 per square foot but more variable in thickness. Dry-laid installation on a compacted gravel base is the most forgiving method — the stones can be lifted and reset if the base shifts. Mortared installation on a concrete base is more permanent but cracks if the sub-base moves.
Tips
- Minimum pathway width should be 36 inches for comfortable single-file walking, 48 inches if you want two people side by side
- Fill joints with polymeric sand for a clean look, or plant creeping thyme for a softer appearance
- Vary stone sizes rather than using uniform pieces — the irregular pattern looks more natural

Recommended
Items for this idea
9. Privacy Wall with Horizontal Slats
Why Horizontal Instead of Vertical
Vertical fence boards are everywhere. Horizontal slats feel more contemporary and draw the eye along the length of the yard, making narrow spaces feel wider. The gaps between slats (typically 1/2 to 1 inch) let air through while still blocking most sightlines from neighbors.
Building It
Use 1x6 cedar boards attached to 4x4 posts set in concrete at 6-foot intervals. Total material cost for a 30-foot section at 6 feet tall runs about $900 to $1,500. The boards should be mounted with the bark side facing out — this side cups away from the viewer when it dries, keeping the flat face visible. Stain or seal within 30 days of installation before UV damage starts graying the wood.
Choose If
Your yard needs privacy on one or two sides rather than a full perimeter fence. These walls work well as a backdrop for a dining area or hot tub zone.
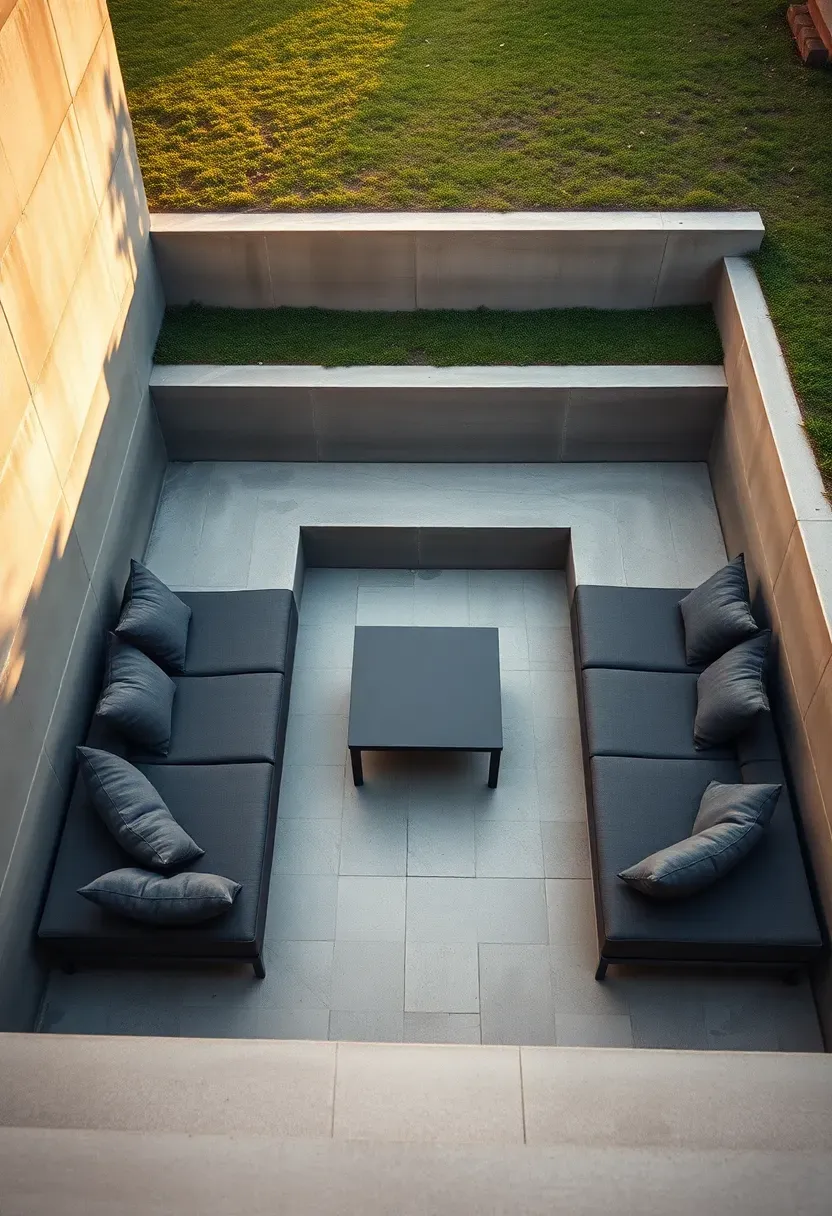
10. Sunken Lounge Area
Dropping a seating area 18 to 24 inches below the surrounding yard creates a sense of enclosure without walls. The conversation feels more intimate, wind is reduced, and the built-in nature of the space means less furniture to buy and store. Excavate a 10x12-foot area, pour a concrete pad at the bottom, and build retaining walls around the perimeter that double as bench seats. Total cost runs $4,000 to $10,000 depending on whether you use poured concrete, stone, or block for the walls. The biggest concern is drainage — this is a hole in the ground, so you need a French drain at the low point connected to your yard's drainage system or a dry well.
Tips
- Include a 4-inch drain at the lowest corner connected to a buried drainpipe
- Seat height from the sunken floor should be 16 to 18 inches for comfort
- Add outdoor cushions rated for weather exposure — indoor cushions develop mildew within weeks

Recommended
Items for this idea
11. Outdoor Shower Station
An outdoor shower is one of those backyard remodel ideas that sounds like a luxury but costs surprisingly little. A cold-water-only setup using a garden hose connection and a wall-mounted shower head runs $200 to $500 total. Hot and cold water from your house plumbing costs $800 to $2,000 depending on the distance from your water heater and whether you need to trench a line. The enclosure can be as simple as three cedar panels on posts with a river rock floor and a floor drain. Position it near the pool, garden, or back door — wherever you are most likely to be dirty or wet.
Tips
- River rock over a French drain works better than a concrete floor, which gets slippery
- Use a mixing valve rated for outdoor use — standard indoor valves corrode faster in weather exposure
- A small bench or shelf inside the enclosure holds soap and towels off the ground
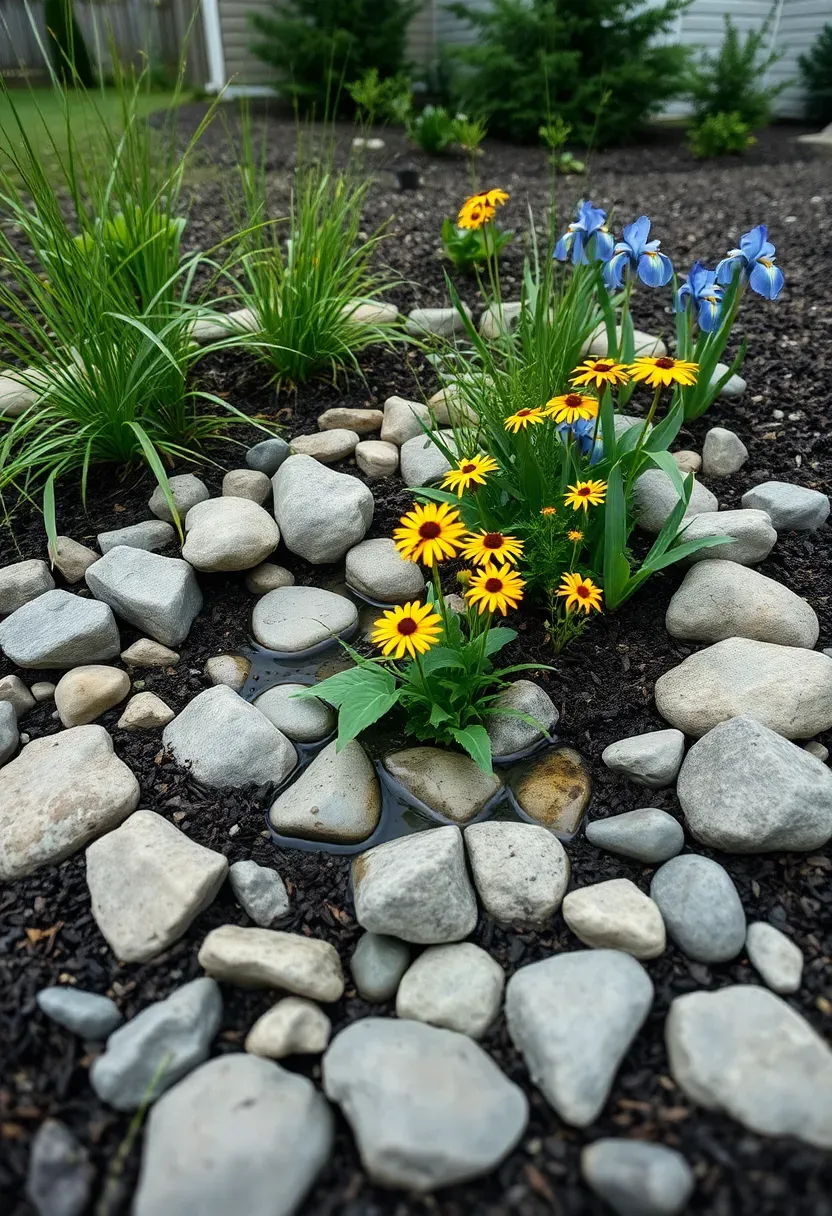
12. Rain Garden Drainage Solution
The Problem
Standing water after every rain, soggy lawn patches, and water pooling against the foundation are signs your yard's drainage needs work. Most backyards built by production home builders have minimal grading, and over time settlement makes it worse.
The Solution
A rain garden is a shallow depression planted with water-tolerant native plants that captures and filters runoff. Dig a basin 6 to 12 inches deep at the natural low point of your yard, amend the soil with compost and sand for better infiltration, and plant species like switchgrass, black-eyed Susan, blue flag iris, or sedge. Size the garden at roughly 20% of the impervious area draining to it. A 100-square-foot rain garden handles runoff from about 500 square feet of patio or roof.
Pros and Cons
- Pro: Eliminates standing water while creating a planting bed that basically maintains itself once established
- Pro: Reduces load on municipal storm drains, which some cities incentivize with rebates
- Con: Looks sparse and muddy during the first growing season before plants fill in

Recommended
Items for this idea
13. Concrete Block Raised Beds
Cinder blocks stacked two or three courses high make raised beds that last indefinitely, cost very little, and look surprisingly clean when done with intention. Standard 8x8x16 blocks cost about $1.50 each. A 4x8-foot bed two courses high uses roughly 36 blocks — under $60 for the structure. No mortar needed; the weight holds them in place. The holes in the top course can be filled with soil and planted with herbs or trailing flowers, giving you bonus growing space. Fill the beds with a topsoil and compost blend and you have a productive garden for under $150 per bed.
Tips
- Use standard gray blocks for a modern industrial look, or paint them with exterior masonry paint for color
- Level the first course carefully on a compacted gravel base — every course above follows the first
- Line the inside with landscape fabric to keep soil from washing out through the block joints
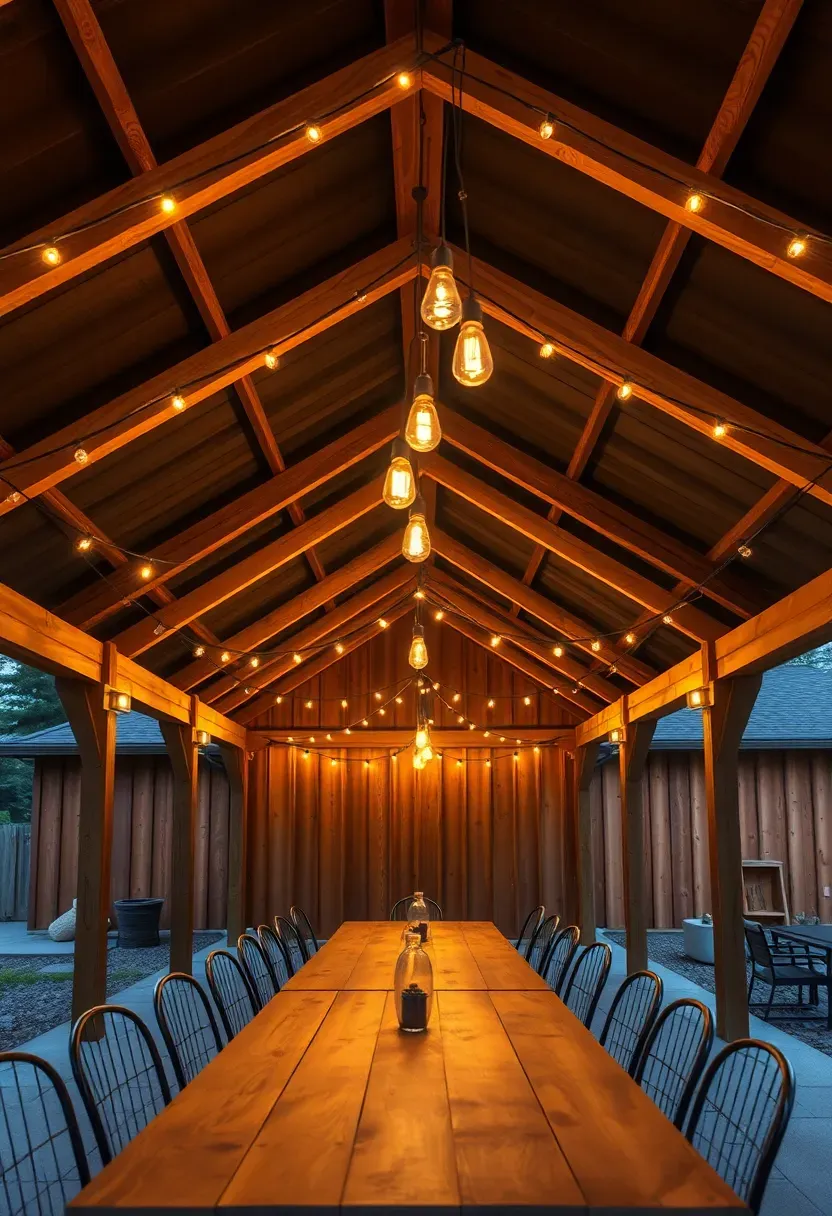
14. Covered Dining Pavilion
How to Plan It
A covered pavilion gives you a true outdoor room that works in rain and harsh sun. Unlike a pergola, a pavilion has a solid roof, which means permits are almost always required.
Step 1: Check Setbacks and Codes
Contact your local building department before anything else. Most jurisdictions require 5-foot side setbacks and treat roofed structures as accessory buildings. Some HOAs restrict detached covered structures entirely.
Step 2: Size and Frame
A 12x16-foot pavilion comfortably seats 8 at a dining table. Post-and-beam construction using 6x6 posts and 2x8 rafters is the most common approach. Budget $5,000 to $8,000 for pressure-treated lumber, roofing, and hardware.
Step 3: Roof and Finish
Metal roofing panels are the most practical choice — they shed water easily, resist wind, and come in colors that complement the house. Standing seam panels cost $3 to $5 per square foot installed. Add string lights under the rafters for evening use.
Watch Out
- A solid roof creates wind uplift forces that open pergolas don't experience — footings need to be engineered for your wind zone
- Gutters on at least one side prevent a waterfall effect at the drip edge during heavy rain
Recommended
Items for this idea
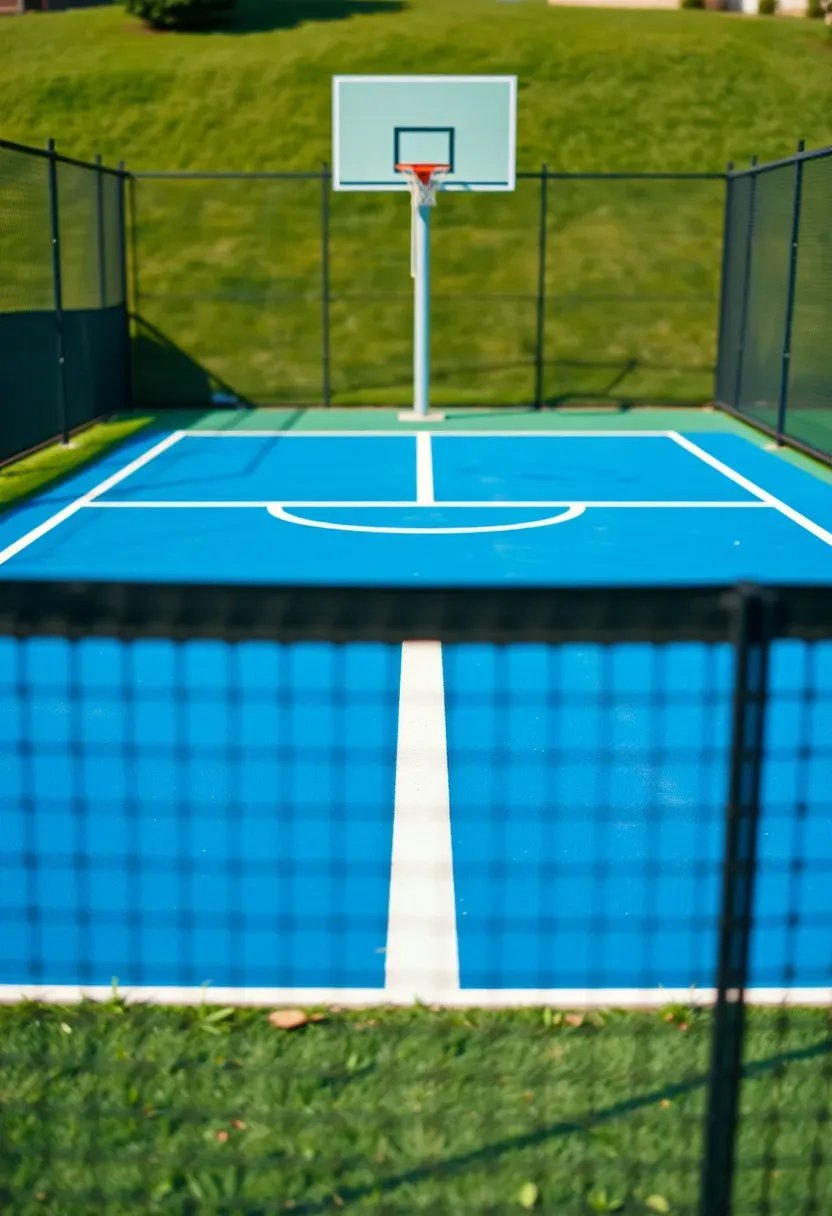
15. Sport Court Conversion
Converting part of your backyard into a multi-sport court gives you a dedicated play surface for basketball, pickleball, volleyball, or tennis depending on the size. A half-court basketball court (30x50 feet) with acrylic sport surface over concrete runs $10,000 to $25,000. Smaller pickleball courts (20x44 feet) cost $8,000 to $15,000. The court surface is a specialized acrylic coating applied over a concrete pad that provides grip, cushioning, and color. Add adjustable sport equipment — a basketball hoop with height adjustment and a removable pickleball net lets the same court serve multiple sports without permanent fixtures everywhere.
Tips
- Orient the court north-south so the sun is not in either player's eyes during peak hours
- Concrete pad needs to be flat to within 1/8 inch over 10 feet — hire a concrete finisher with sport court experience
- Add 10 feet of buffer space around the court boundaries for safety and ball retrieval
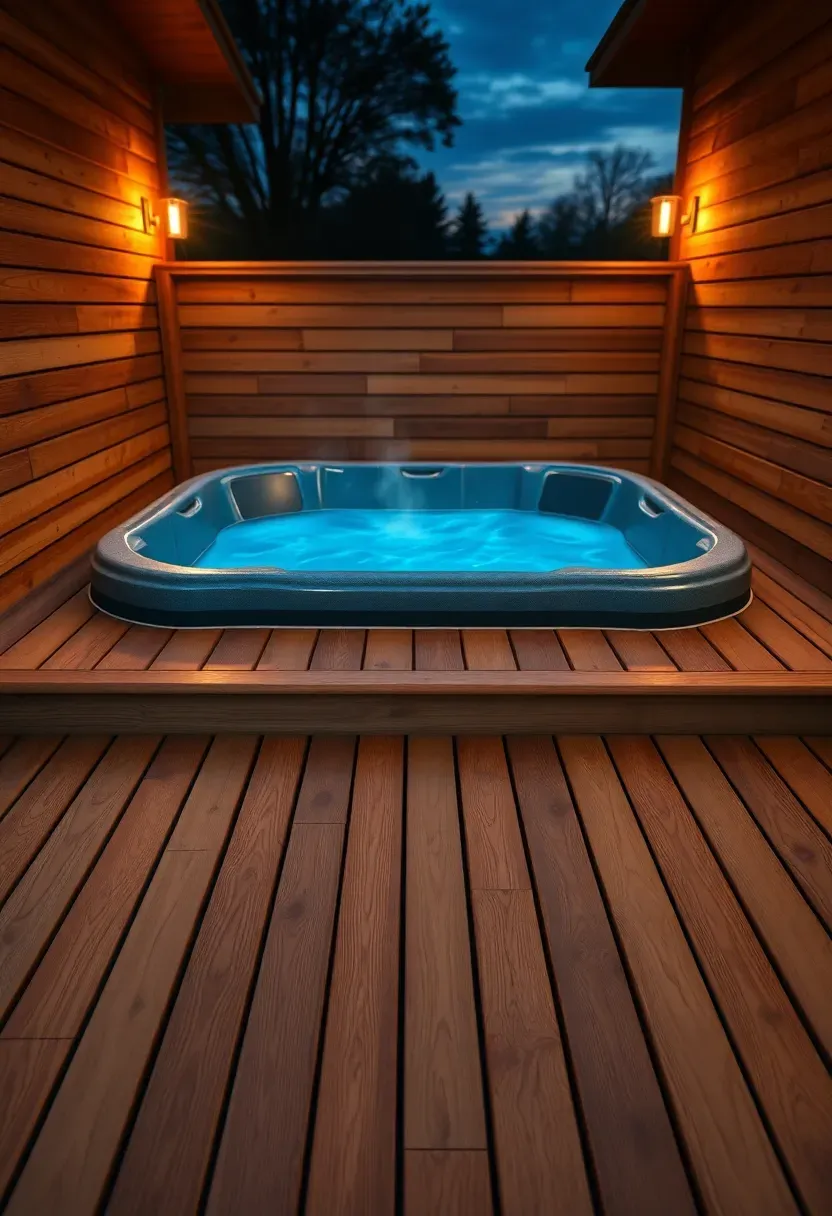
16. Hot Tub Deck Platform
A hot tub needs more structural support than most people realize. A filled 6-person hot tub weighs 4,000 to 5,000 pounds. A standard residential deck is engineered for 40 pounds per square foot live load — a hot tub imposes 80 to 100 psf. You need doubled or tripled joists under the tub area, posts at closer spacing, and footings sized for the concentrated load. Build the deck at a height that puts the tub rim at bench-seating level (16-18 inches) so the surrounding deck becomes a natural seat and entry point. Budget $3,000 to $7,000 for the deck platform alone, not counting the hot tub itself.
Tips
- Run the electrical circuit (most tubs need 240V/50A) before decking goes down — fishing wire after is much harder
- Include a 3-foot equipment access panel on one side for pump and heater maintenance
- Slope the deck slightly away from the tub so splashed water drains off the surface
Recommended
Items for this idea
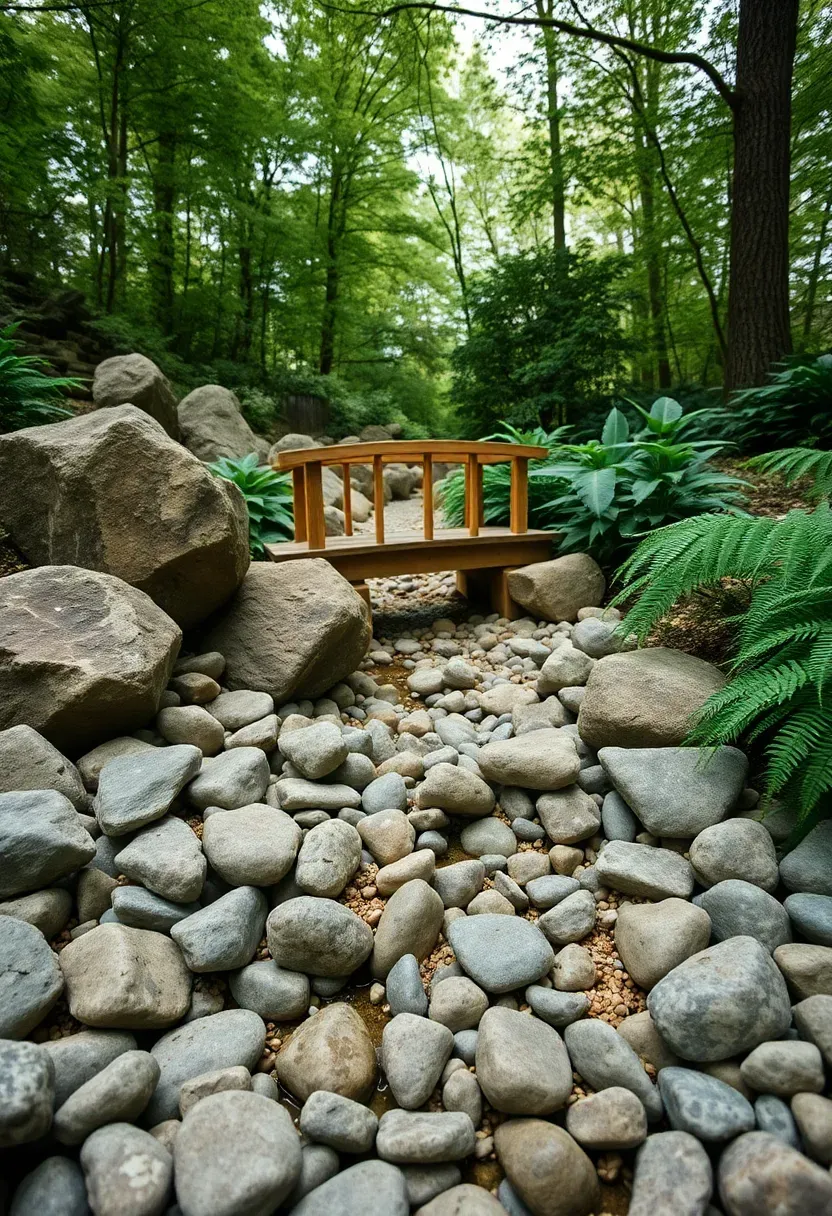
17. Dry Creek Bed with Bridge
A dry creek bed solves drainage problems while adding a landscape feature that looks good even when dry. Excavate a shallow channel (8 to 12 inches deep, 2 to 4 feet wide) along the natural drainage path in your yard. Line it with landscape fabric, then layer river stones from large boulders at the edges to medium cobbles in the center and smaller pebbles filling gaps. The graduated sizing mimics how real creeks sort sediment. A small arched footbridge ($200 to $600 for a prefab cedar or composite bridge) adds a focal point and practical crossing. Total cost for a 30-foot creek bed runs $500 to $1,500 in materials.
Tips
- Follow the natural low points in your yard — fighting the existing grade creates pooling problems upstream
- Place larger accent boulders at bends in the creek where water would naturally slow and deposit sediment
- Connect the creek to a French drain or dry well at the terminus so water actually leaves your property
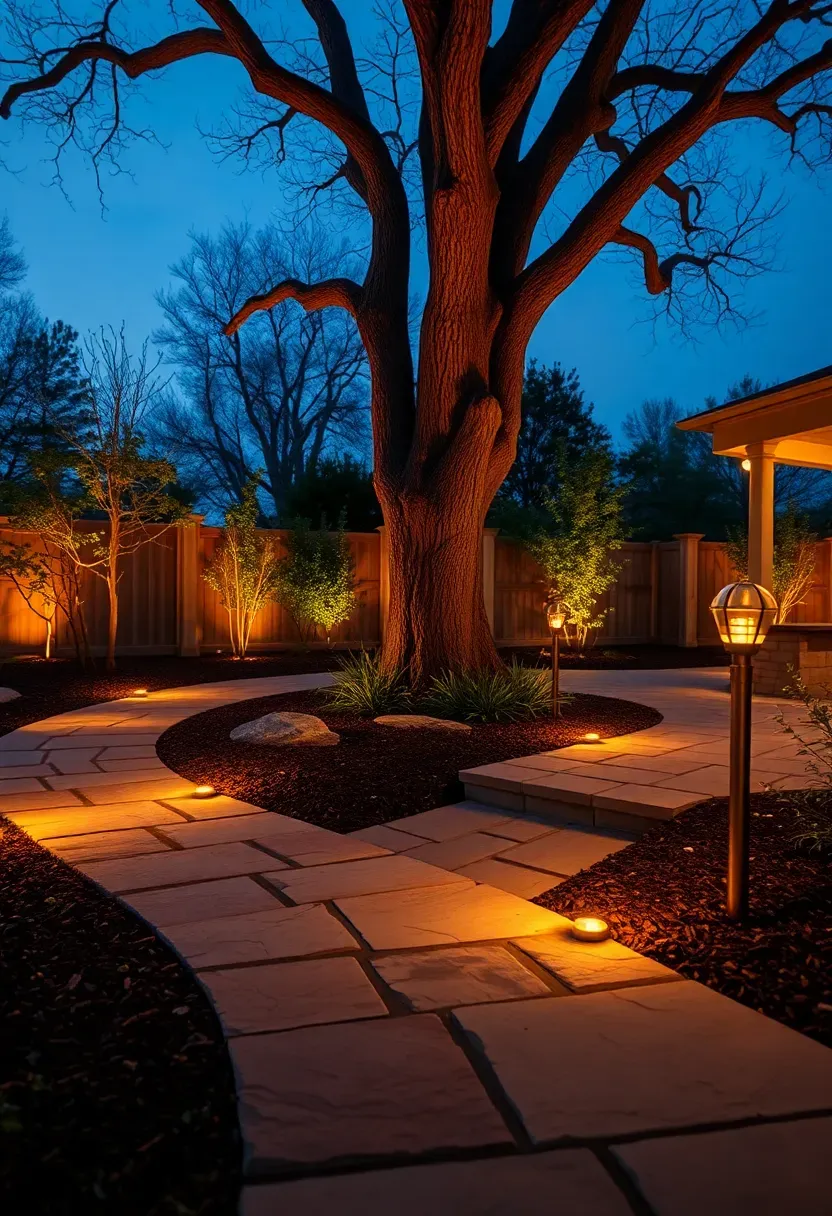
18. Low-Voltage Lighting Package
Origins of Landscape Lighting
Professional landscape lighting used to mean line-voltage fixtures, licensed electricians, and budgets starting at $5,000. The shift to 12-volt LED systems in the mid-2000s dropped costs by 60-70% and made DIY installation realistic. Modern LED path lights draw 3-5 watts each, meaning a 300-watt transformer can power 50+ fixtures.
Modern Application
A complete backyard lighting package includes path lights along walkways, uplights on trees and architectural features, step lights on deck risers, and task lighting near the grill or outdoor kitchen. A 10-15 fixture package with transformer and wire costs $400 to $800 for quality brass or copper fixtures. Budget $1,500 to $3,500 if you hire an installer. The difference between amateur and professional landscape lighting is usually not the fixtures but the placement — lights should be invisible during the day and illuminate surfaces, not eyeballs, at night.
Apply at Home
- Start with path lights and one or two uplights on your best tree — you can always add fixtures to the same transformer later
- Bury wire 6 inches deep in a slit trench rather than leaving it on the surface where mowers will cut it
Recommended
Items for this idea
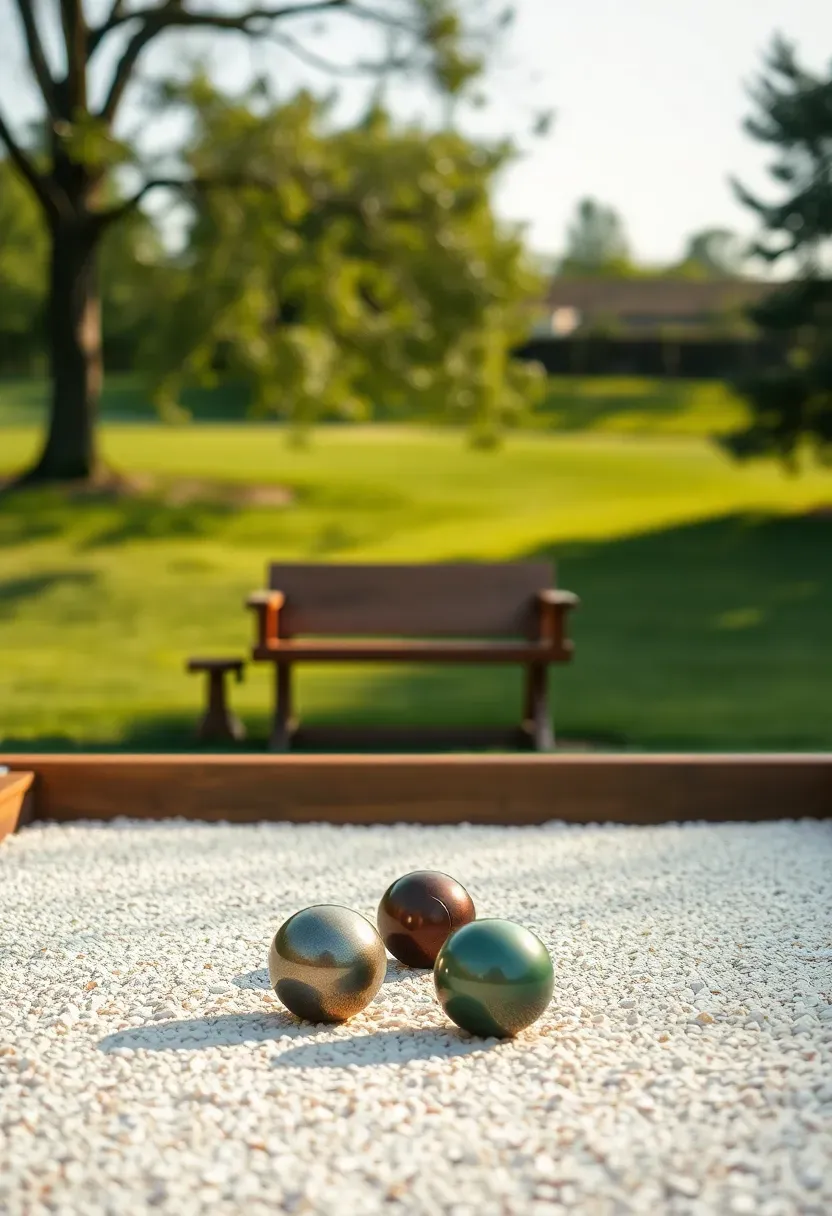
19. Bocce Court Installation
A bocce court is one of the more unusual backyard remodel ideas, but it uses a narrow footprint (60x12 feet is regulation, though 40x10 works for casual play) and creates a genuinely social activity space. Excavate 6 inches, install landscape timber borders, lay 4 inches of compacted crushed stone base, then top with 2 inches of oyster shell flour, decomposed granite, or specialized bocce court surface material. Total materials cost for a 40-foot court runs $800 to $1,800. The court doubles as a visual feature — the pale surface and clean borders look intentional in any yard style. Maintenance is minimal: drag a leveling board across the surface every few weeks and add material annually.
Tips
- Orient the court in shade if possible — direct afternoon sun makes the surface too hot for bare feet and heats the balls
- Wooden borders should be pressure-treated 4x6 timbers staked into the ground every 4 feet
- Install a slight crown (1/2 inch higher at center) so rainwater sheets to the edges rather than pooling

20. Cedar Fence Replacement
Old Fence vs. New Fence
If your existing fence is leaning, rotting at the base, or missing boards, patching it is usually a waste of money. A fence older than 15 years has likely lost structural integrity in the posts, and replacing individual boards on compromised posts just delays the inevitable.
Building New
A 6-foot cedar privacy fence costs $20 to $35 per linear foot installed, or $12 to $20 per foot in materials if you build it yourself. A 150-linear-foot perimeter fence runs $3,000 to $5,250 installed. Set posts in concrete with 2 feet of post below grade. Use 4x4 posts for standard 6-foot fences, 6x6 posts if the fence exceeds 6 feet or faces high wind exposure. Cedar lasts 15-20 years untreated, longer if you apply a penetrating oil stain every 3-4 years.
Choose If
Your fence is original to the house and showing its age, or you are doing a full backyard remodel and the old fence would undermine the finished look.
Recommended
Items for this idea
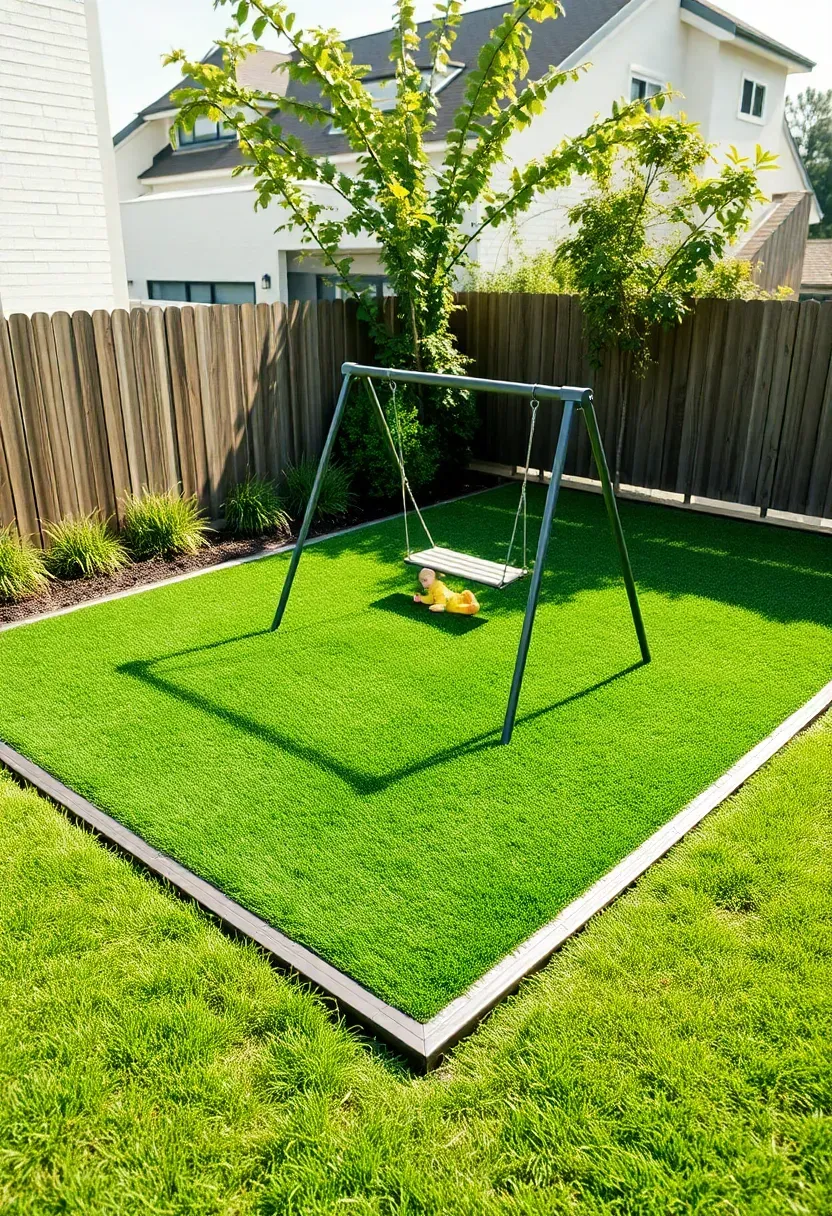
21. Artificial Turf Play Zone
Artificial turf in a dedicated play zone makes sense where real grass cannot survive — heavy foot traffic areas under swing sets, shaded zones where grass thins, or yards with dogs that destroy any living lawn. Quality artificial turf with infill costs $8 to $14 per square foot installed, including base preparation and drainage layer. A 400-square-foot play zone runs $3,200 to $5,600. The turf itself lasts 15 to 20 years. It drains well if installed over a proper crushed stone base, stays green year-round, and eliminates mud. The tradeoff is heat — artificial turf surface temperatures can hit 150 degrees Fahrenheit in direct summer sun, making it uncomfortable for bare feet during peak afternoon hours.
Tips
- Use turf with a minimum pile height of 1.5 inches for a natural look and better cushioning
- Install a perimeter of steel or bender board edging to prevent turf edges from curling up over time
- Rinse pet areas weekly and apply enzyme cleaner monthly to control odor
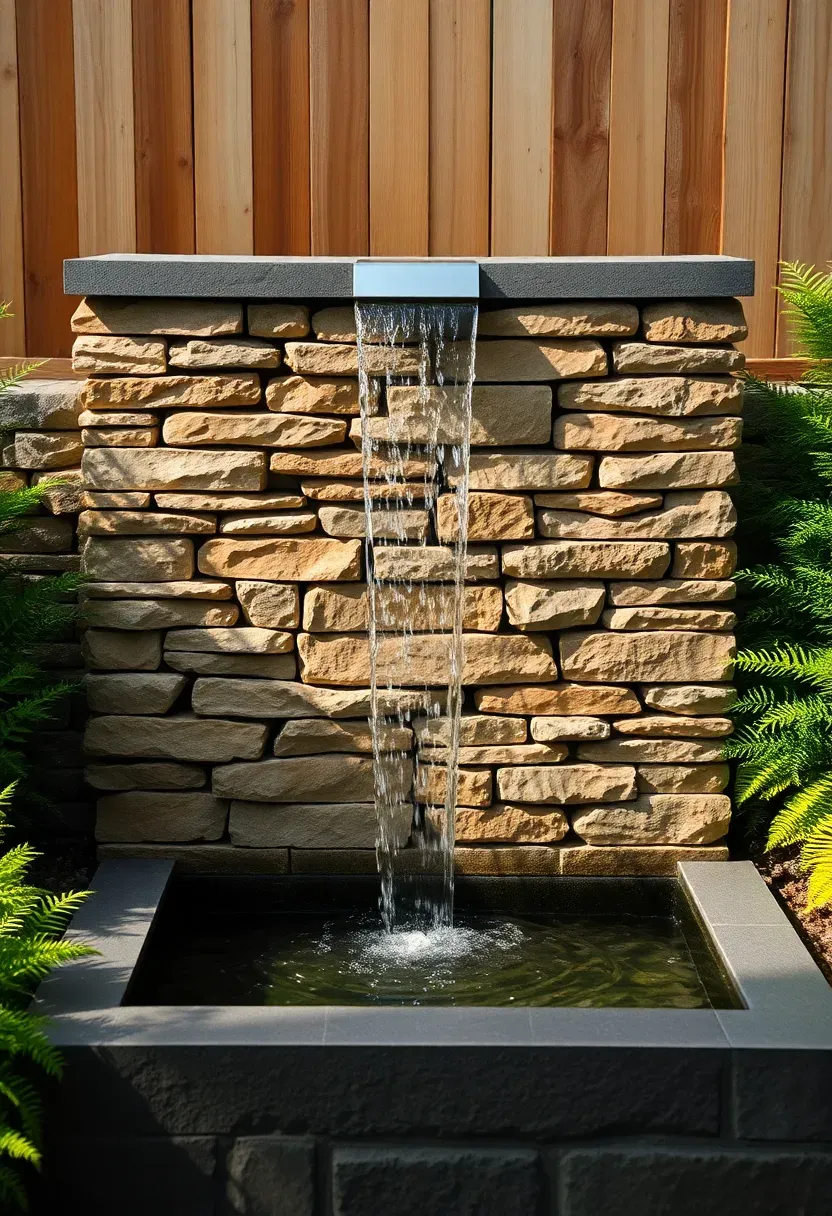
22. Water Feature Wall
Wall Fountain vs. Freestanding Fountain
Both add the sound of moving water, but a wall-mounted water feature takes zero floor space and works as a focal point against a fence or privacy wall. A freestanding fountain needs open ground and becomes the center of whatever area it sits in.
Wall Fountain
A wall-mounted sheer descent or weeping wall uses a pump to push water from a buried basin up to a spillway mounted on a wall or fence. The water sheets down the face of the wall (stone, copper, or stainless steel) and returns to the basin. DIY kits with a 24-inch spillway run $400 to $1,200. Custom stone or metal walls cost $2,000 to $6,000 installed.
Freestanding Fountain
A self-contained recirculating fountain sits on any flat surface. No plumbing needed, just an outdoor electrical outlet. Costs range from $150 for a small cast stone piece to $2,000 for a large architectural fountain. Maintenance is filling evaporation loss and cleaning the pump intake quarterly.
Choose Based On
Pick a wall fountain when space is tight and you want a vertical focal point. Pick freestanding when you want something you can move or place at the center of a garden bed.
Recommended
Items for this idea
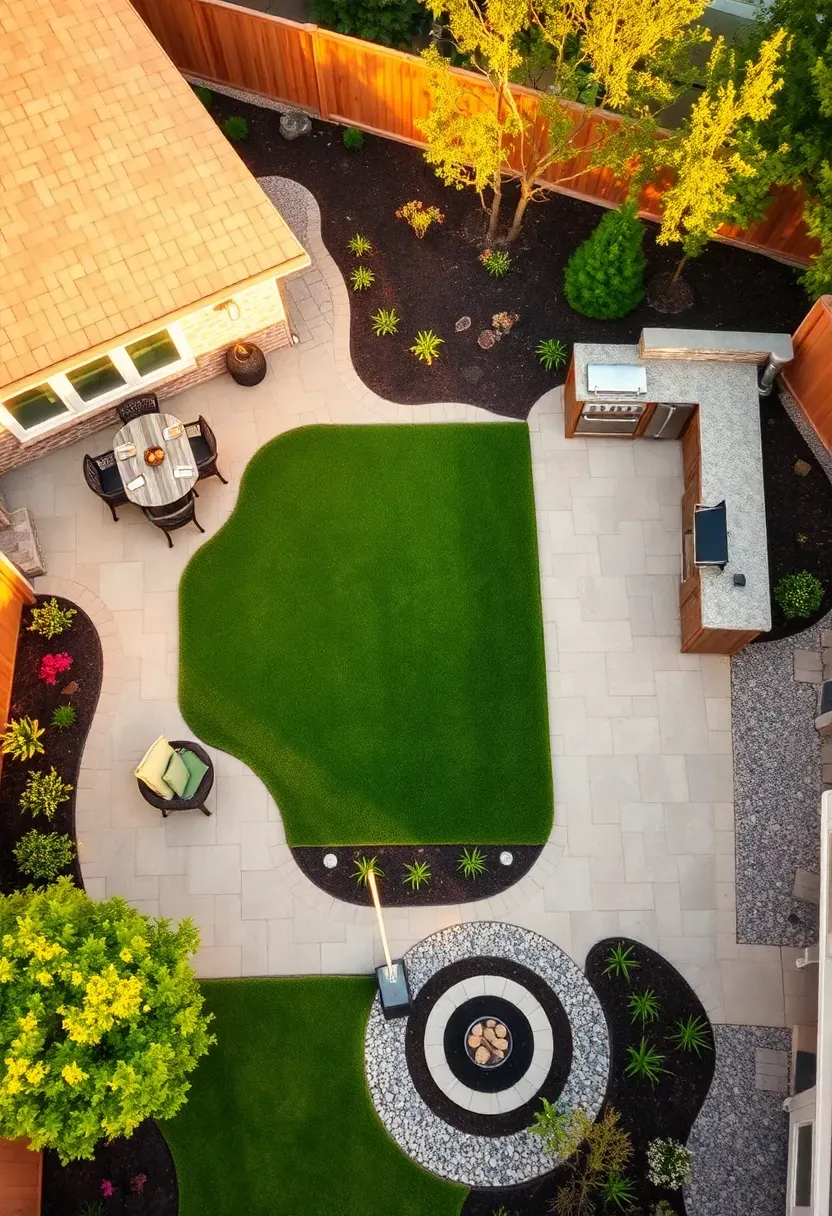
23. Full Yard Demolition and Rebuild
This is the nuclear option, and sometimes it is the right one. If your backyard has multiple compounding problems — failed drainage, cracked hardscape, dead lawn, rotting fence, no usable outdoor living space — fixing each issue individually often costs more than starting over. A full demolition and rebuild for an average suburban backyard (2,000 to 4,000 square feet) runs $15,000 to $45,000 depending on scope and materials. The process follows a strict order: demolition, grading, underground utilities and drainage, hardscape, irrigation, planting, lighting. Skipping steps or doing them out of order wastes money and creates problems you will pay to fix twice.
Tips
- Hire a landscape designer ($800 to $2,000 for a complete plan) before any demolition begins — the plan coordinates all trades and prevents expensive conflicts
- Get permits before starting — retaining walls over 3 feet, covered structures, electrical, and plumbing all require inspection in most jurisdictions
- Phase the work if budget is tight: do all the underground and hardscape work in phase one, defer planting and lighting to phase two
Quick FAQ
Is a backyard remodel worth the money? Most hardscape improvements return 50-70% of their cost at resale, and outdoor kitchens and pools can return more in warm-climate markets. But the real value is daily use — if you spend 3 more hours per week outside because of the remodel, that adds up to 150+ hours of enjoyment per year.
What order should I remodel my backyard? Always start with drainage and grading, then underground utilities (gas, electric, water lines), then hardscape surfaces, then vertical structures (fences, pergolas), then irrigation, then planting, then lighting. This sequence prevents tearing up finished work to access something below it.
Can I remodel a backyard in stages? Yes, and it often makes financial sense. The critical thing is to complete all underground work (drainage, utility lines, irrigation main lines) in the first phase even if you defer the features they serve. Running a gas line for a future outdoor kitchen costs $200 during initial excavation but $1,500 if you have to trench through a finished patio later.
Do I need a permit for backyard remodeling? Ground-level patios, garden beds, and fences under 6 feet typically do not need permits. Retaining walls over 3-4 feet, roofed structures, electrical circuits, gas lines, and pools almost always do. Your local building department can tell you exactly what applies — call before you start, not after.
How long does a full backyard remodel take? A focused DIY project like a fire pit or gravel patio takes a weekend. A mid-range remodel with a patio, pergola, and planting takes 2-4 weeks of weekends. A contractor-led full yard renovation typically runs 4-8 weeks from demolition to final planting, depending on weather and permit timelines.
A remodeled backyard does not require a single massive project. Most of the best outdoor spaces I have worked in were built in two or three phases over a couple of years — hardscape one spring, a structure the next, planting and lighting as the final layer. Pick the idea from this list that solves your biggest frustration first, whether that is drainage, privacy, a place to cook, or just somewhere comfortable to sit. Get that one thing right, and the rest of the plan tends to become obvious.
Pinterest cover for 23 Backyard Remodel Ideas Worth the Investment
About the author
OBCD
CGI visualization and interior design content. We create detailed 3D renders and curate practical design ideas for every room in your home.