17 Backyard Simple Paver Patio Ideas
When I built my first paver patio, I spent three weekends overthinking it. I bought specialty edge restraints, rented a wet saw, and designed an elaborate fan pattern that took twice as long as the actual base prep. The finished patio looked fine, but the neighbor across the street laid a running-bond rectangle in a single Saturday and his looked just as good. The lesson: simple works. A well-executed basic layout on a properly compacted base will outlast a complicated pattern on sloppy prep every time. These 17 ideas keep the designs straightforward so you can focus your energy where it counts — getting the base and drainage right.
Below you will find 17 simple paver patio layouts organized from basic rectangles to slightly more creative shapes, all achievable without specialty cuts or professional crews.
Table of Contents
- Running Bond Rectangle
- Stack Bond Square Pad
- Gravel-Border Patio
- Two-Tone Banded Layout
- Small Bistro Pad
- Fire Pit Circle
- L-Shaped Corner Patio
- Stepping Stone Extension
- Pea Gravel and Paver Hybrid
- Herringbone Without Cuts
- Wide-Format Slab Patio
- Grass-Joint Patio
- Budget Concrete Paver Pad
- Raised Paver Platform
- Curved Edge Simple Patio
- Narrow Side-Yard Patio
- Dry-Laid Flagstone Patio
1. Running Bond Rectangle
Running bond is the default for a reason. You offset each row by half a paver, which means zero cuts along the field — only at the edges. A 10x12-foot rectangle using standard 4x8-inch clay pavers costs roughly $3 to $5 per square foot for materials alone, plus another $2 to $4 for crushed limestone base and polymeric sand. The staggered joints distribute load across pavers, so you get fewer rocking issues compared to stack bond. Most beginners finish a pad this size in one weekend with a plate compactor rental running about $80 a day.
Tips for a clean result
- Snap chalk lines on your compacted base every four rows to keep the bond pattern from drifting
- Start from a straight edge like a house foundation or fence line rather than a free-form border
- Use plastic edge restraint staked every 12 inches to lock the perimeter row in place

We picked a few things that go well with this idea: Dominator Polymeric Sand Camel Brown (10lb) (★4.2), Dominator Polymeric Sand Gray Beige (10lb) (★4.2) and Dominator Polymeric Sand Charcoal Gray (10lb) (★4.2). As an Amazon Associate we earn from qualifying purchases.
2. Stack Bond Square Pad
Why it appeals to minimalists
Stack bond lines up every joint in a grid. It looks intentional and modern, especially with large-format pavers like 12x12 or 16x16-inch squares. The downside is that aligned joints are slightly weaker structurally, so this works best for foot-traffic-only patios rather than areas where you park heavy planters on wheels.
How to lay it
Set your first row against a straight reference edge and use spacers (3/16-inch plastic cross spacers work) to maintain uniform gaps. Fill joints with polymeric sand and mist with water to activate. Budget $4 to $7 per square foot for large-format concrete pavers.
Choose stack bond if
- You want a contemporary look with minimal visual fuss
- Your patio is under 200 square feet where joint alignment matters less structurally
- You plan to pair the patio with clean-lined planters or modern furniture
We picked a few things that go well with this idea: Interlocking Deck Tiles 12x12 (12-Pack) (★4.7), Goovilla Interlocking Patio Tiles (9-Pack) (★4.1) and EchoDeck Interlocking Patio Tiles (44-Pack) (★4.4). As an Amazon Associate we earn from qualifying purchases.
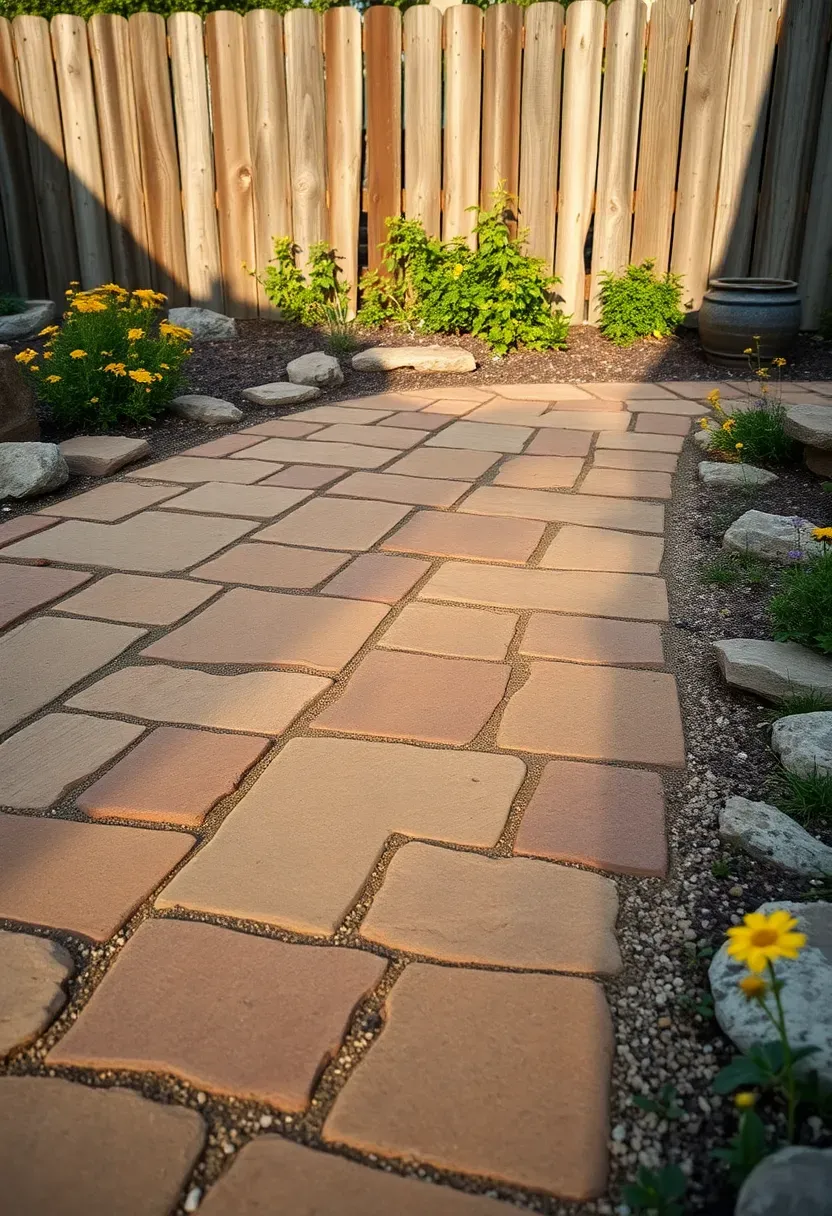
3. Gravel-Border Patio
Instead of edging your paver field with plastic restraints, frame the entire pad with a 12 to 18-inch band of crushed gravel. This approach hides imperfect edge cuts, adds visual width to a small patio, and improves drainage around the perimeter. Use 3/8-inch angular crushed stone — it locks together better than pea gravel, which migrates into the lawn. The gravel border doubles as a transition between the hard patio surface and your grass or planting beds, so the whole thing feels more intentional than a patio that just stops at the grass line.
Practical notes
- Install a steel or aluminum landscape edging strip between gravel and lawn to keep materials separated
- Lay landscape fabric under the gravel to suppress weeds
- Top up gravel every two to three years as it settles and compacts
We picked a few things that go well with this idea: VEVOR Landscape Edging with Spikes (60ft) (★3.9), Gardzen Landscape Edging Kit (100ft) (★4.5) and Gardzen Landscape Edging Coil (100ft) (★4.4). As an Amazon Associate we earn from qualifying purchases.
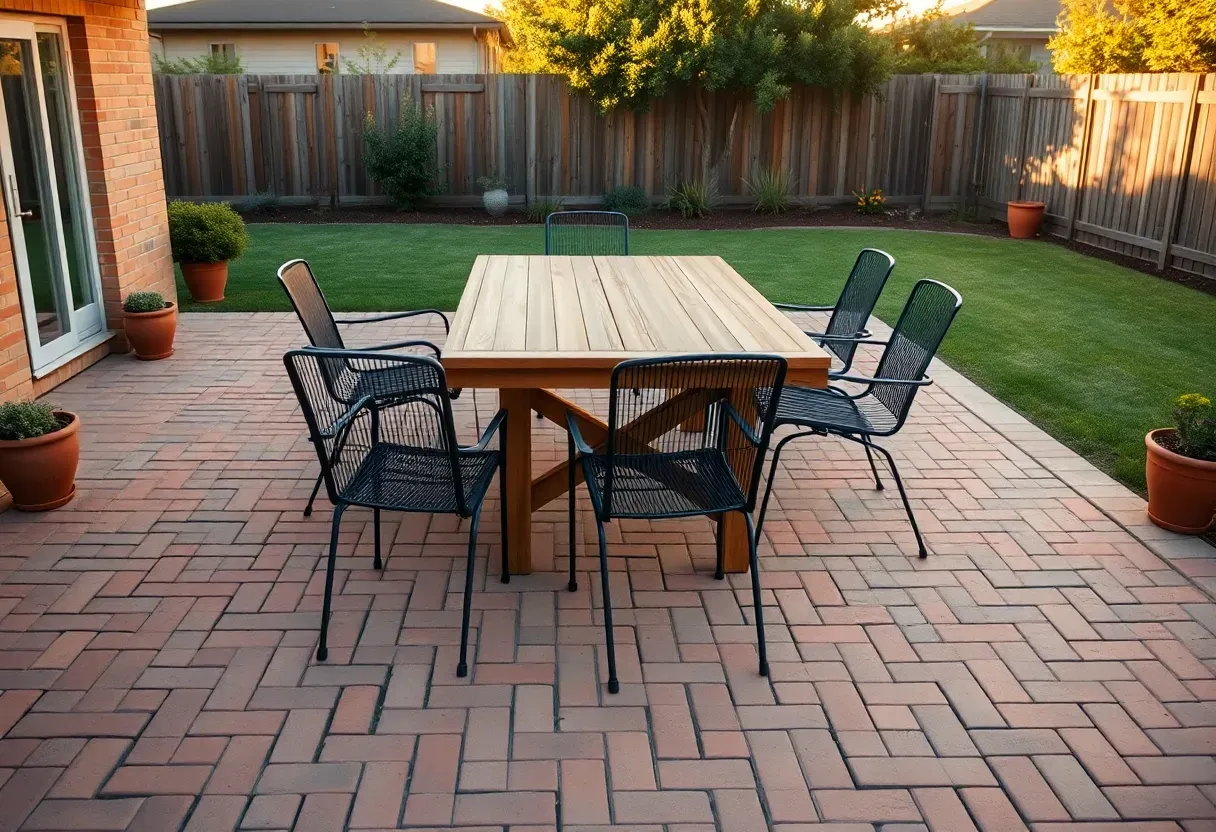
4. Two-Tone Banded Layout
The problem with single-color patios
A large field of identical pavers can look flat and monotonous, especially when viewed from a second-story window or deck.
The fix
Alternate bands of two complementary paver colors — charcoal and sandstone, red and buff, gray and cream. Lay three to five rows of one color, then switch. You are still using the same running bond pattern and the same paver size, so the complexity stays low. The only extra step is keeping your color stacks organized so you do not accidentally mix them mid-row.
Pros and cons
- Adds depth and direction to the patio without complicated patterns
- Material cost stays the same since you are buying two SKUs from the same product line
- Requires careful planning if your patio width does not divide evenly into your band widths
Recommended
Items for this idea
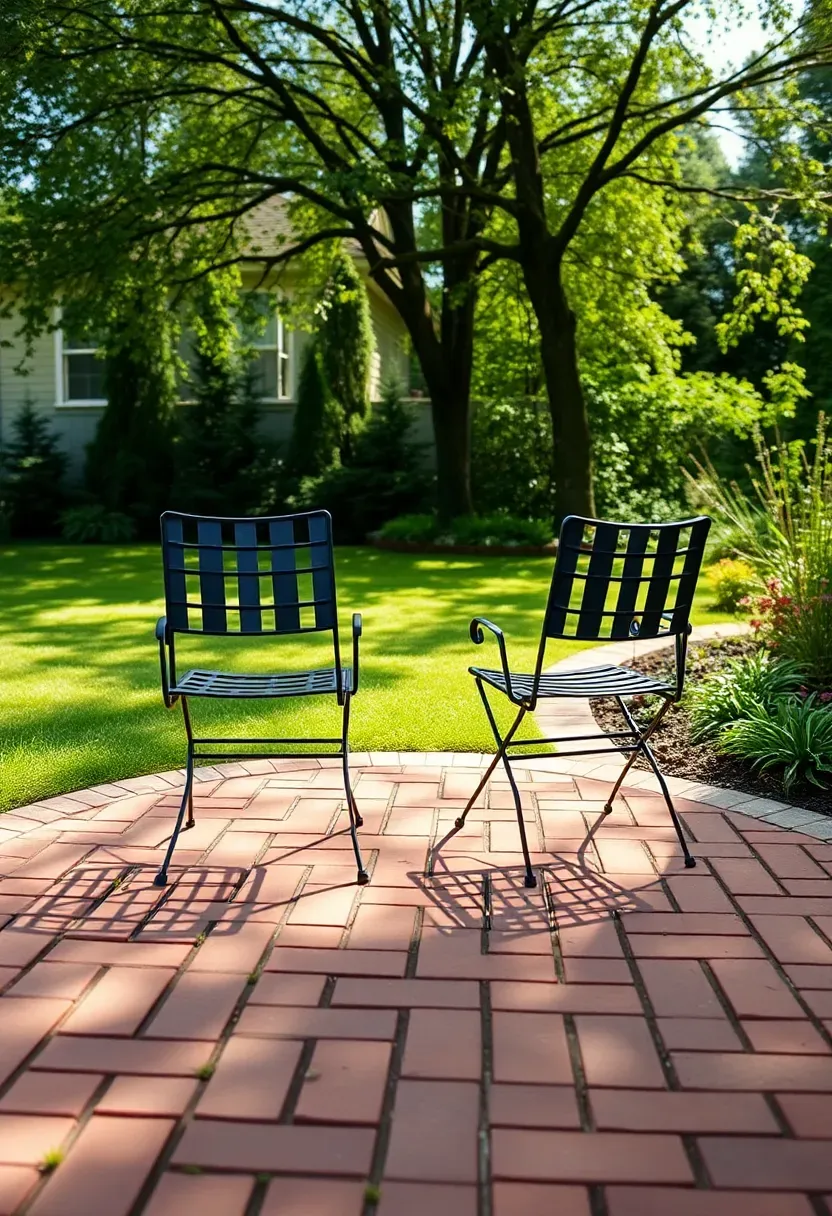
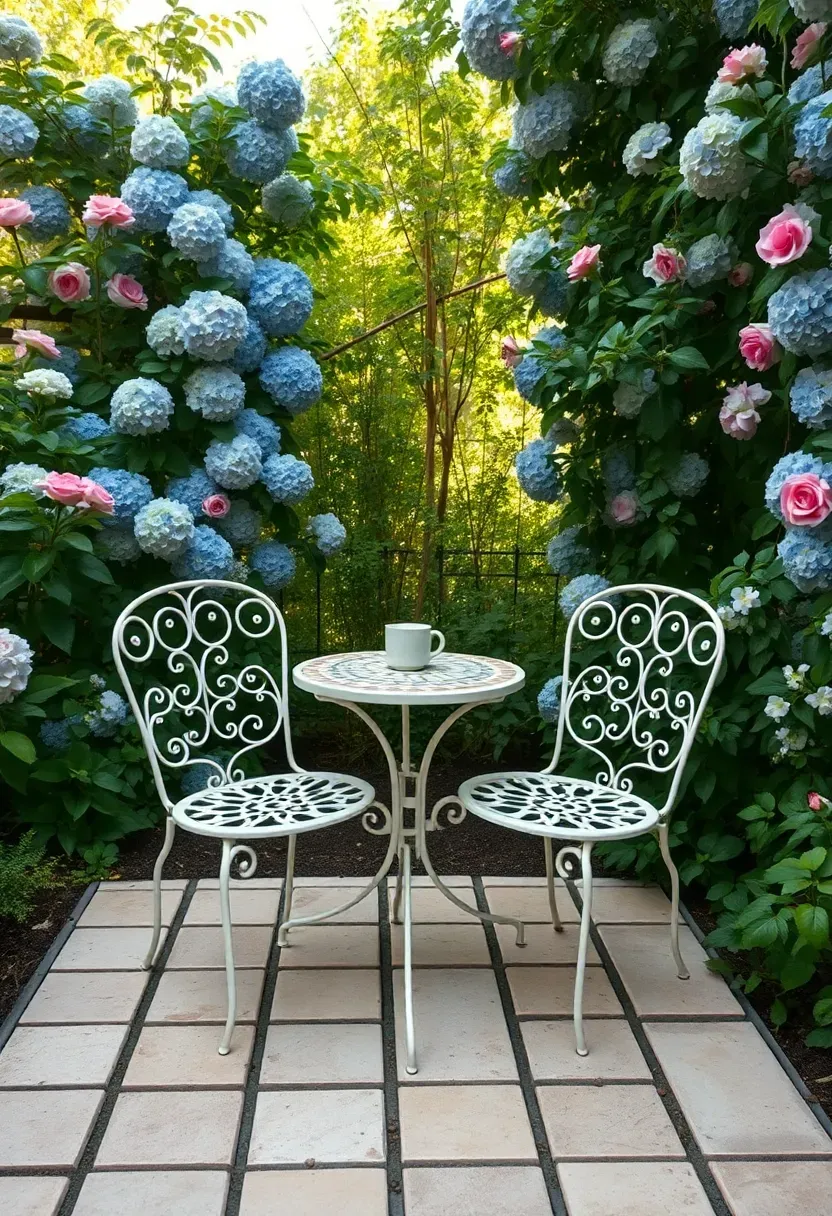
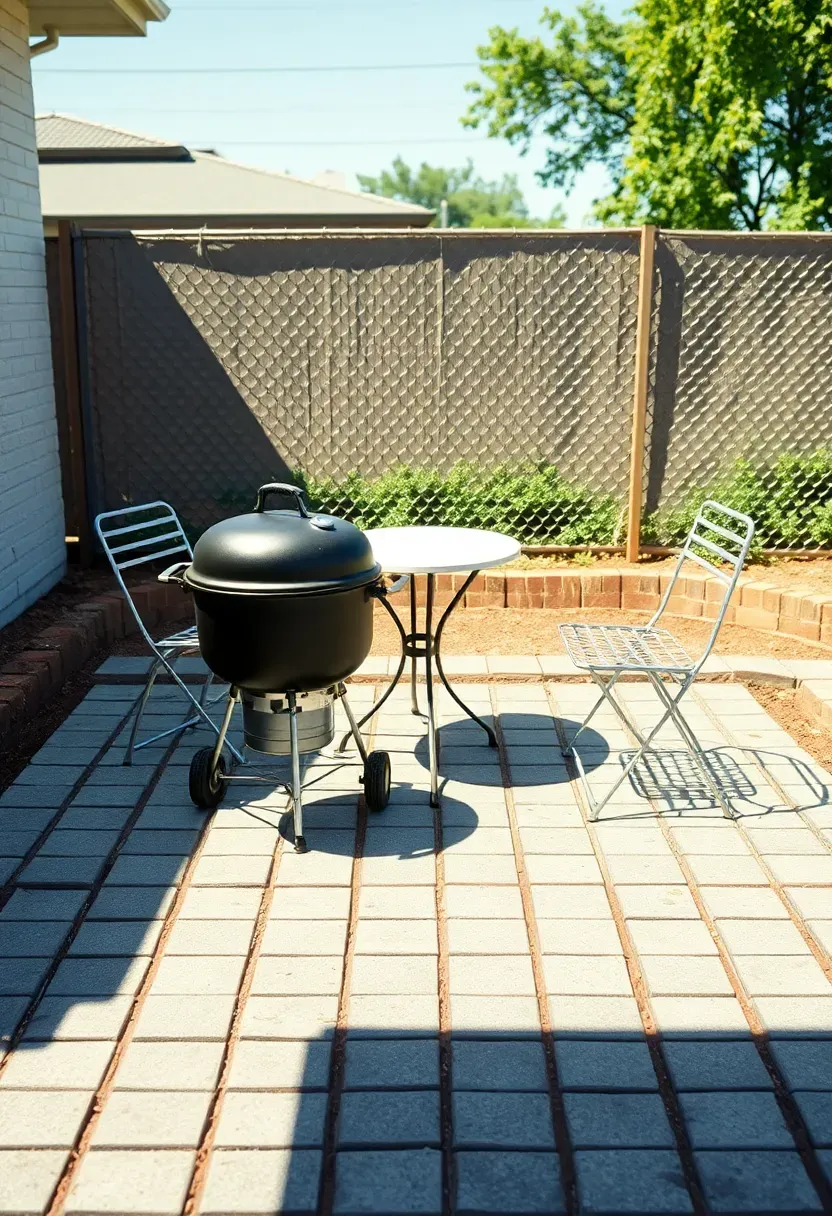
5. Small Bistro Pad
Not every patio needs to host a party. A 6x6-foot or 8x8-foot paver pad tucked into a garden corner makes a perfect spot for morning coffee or reading. The small footprint means you can afford nicer pavers — natural stone or tumbled travertine — without blowing the budget. Excavation takes a couple of hours with a shovel rather than a full day with a skid steer. Keep the shape square or slightly rectangular. At this scale, curves add complexity without much visual payoff. Total materials for an 8x8 pad typically run $150 to $300 depending on paver choice.
Getting it right
- Level the base obsessively — on a small pad, one high corner is immediately obvious
- Consider a single-slab border paver in a contrasting color to define the edge
- Place it where you already have shade or plan to add a small umbrella
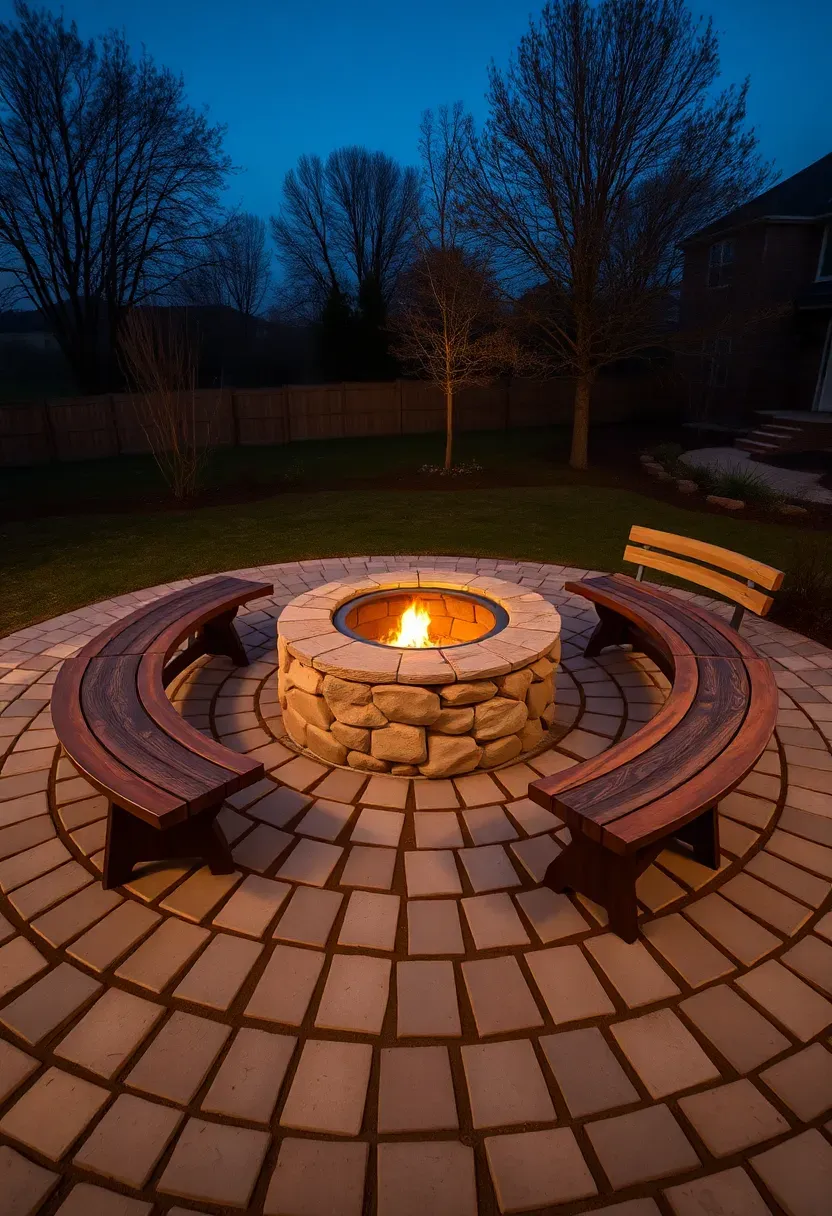
6. Fire Pit Circle
A circular paver patio built around a fire pit is one of the few curved layouts that stays genuinely simple. Many paver manufacturers sell circle kits — pre-cut wedge-shaped pieces that form concentric rings without any saw work. A typical kit covers an 8 to 10-foot diameter circle and runs $300 to $600. Center your fire pit ring, then build outward. The circular geometry naturally creates a social seating arrangement where everyone faces the fire.
Step-by-step basics
First, mark the circle with a stake and string at your desired radius. Excavate 6 inches deep, then fill with 4 inches of compacted road base. Lay the inner ring snug against the fire pit, work outward ring by ring, and sweep polymeric sand into joints.
Watch out for
- Check local fire codes for setback distances from structures and fences
- Do not place a fire pit circle under low tree branches or covered patios
- Use a steel fire ring insert to protect the innermost pavers from direct heat
Recommended
Items for this idea
7. L-Shaped Corner Patio
If your backyard has a corner where two walls of the house meet, an L-shaped patio fills that space without wasting square footage on areas you would not use. Each wing of the L can serve a different purpose — dining in one, lounging in the other. The layout uses two connected rectangles, so every cut is straight. The inside corner where the wings meet is the tricky spot for drainage; slope each wing slightly away from the house at 1/4 inch per foot to move water toward the yard.
Tips
- Lay the longer wing first and use it as the reference line for the shorter wing
- Place a soldier-course border (pavers turned sideways) along the perimeter for a finished look
- Keep wing widths at least 8 feet so furniture fits without feeling cramped
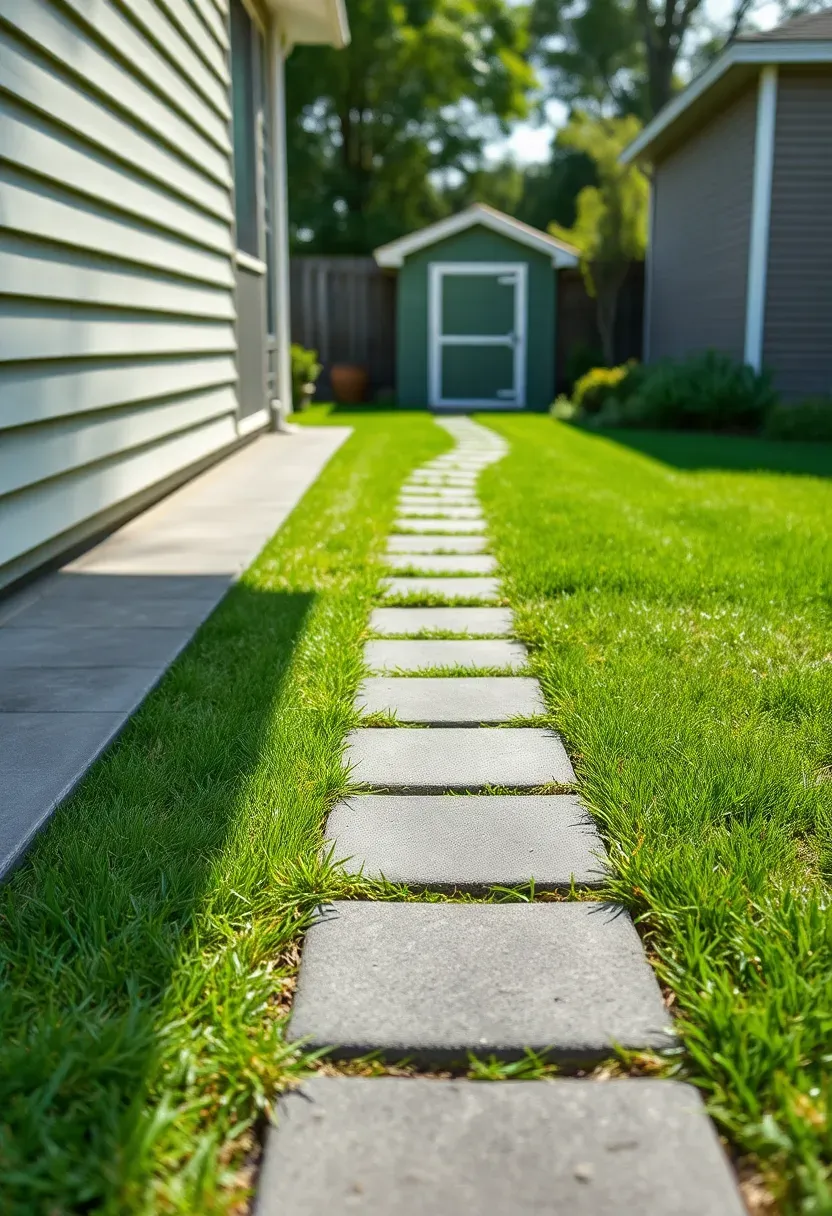
8. Stepping Stone Extension
Starting small and growing later
You built a basic patio pad but want it to connect to the garden shed, fire pit, or back gate. Instead of expanding the full patio, lay a line of individual pavers or small paver clusters through the lawn as stepping stones.
How to do it
Set each stone on a 2-inch sand bed inside a hole cut into the turf. Space them at a comfortable walking stride — roughly 24 to 26 inches center to center. Use the same paver type as your main patio for visual continuity. This approach costs almost nothing compared to a full path, and you can always go back and fill between the stones later if you want a continuous walkway.
Choose this if
- You need a connection path but do not want to excavate a full walkway base
- Your budget is spent on the main patio and the path is phase two
- You like the look of pavers floating in green grass
Recommended
Items for this idea
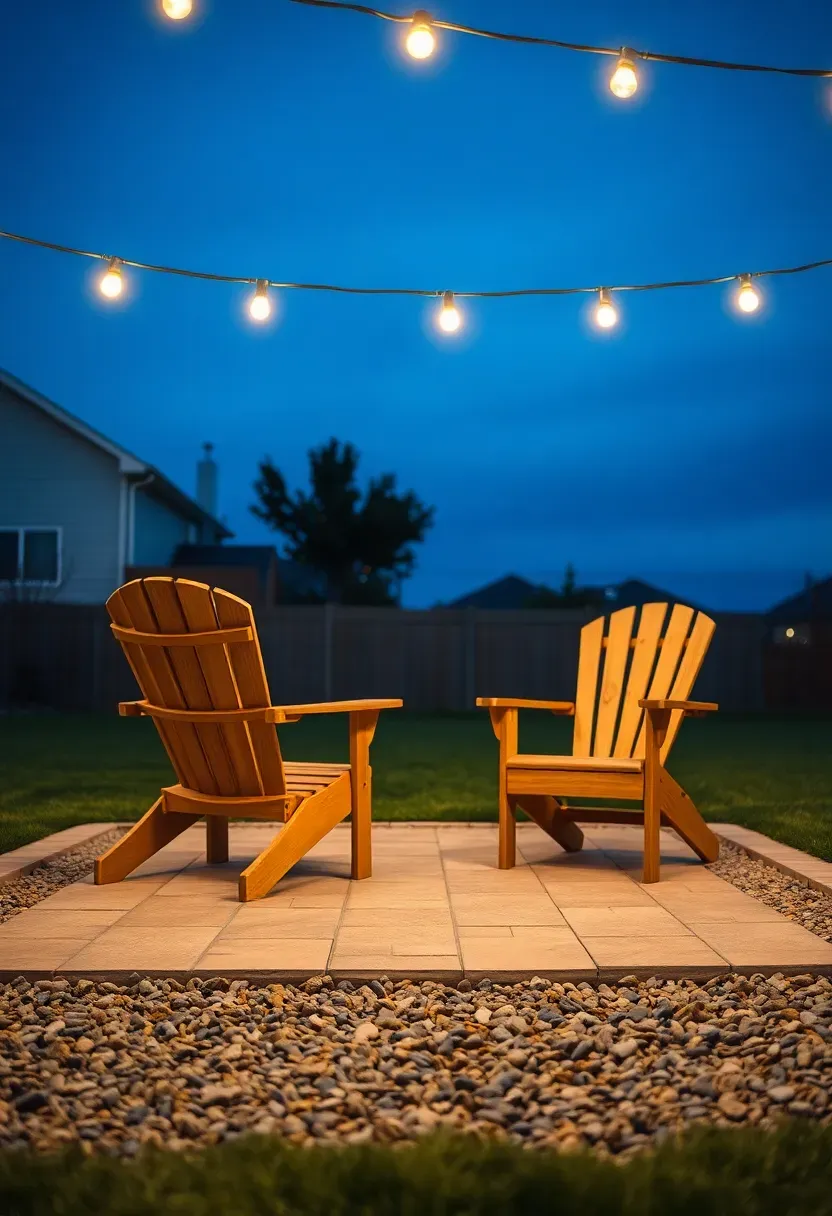
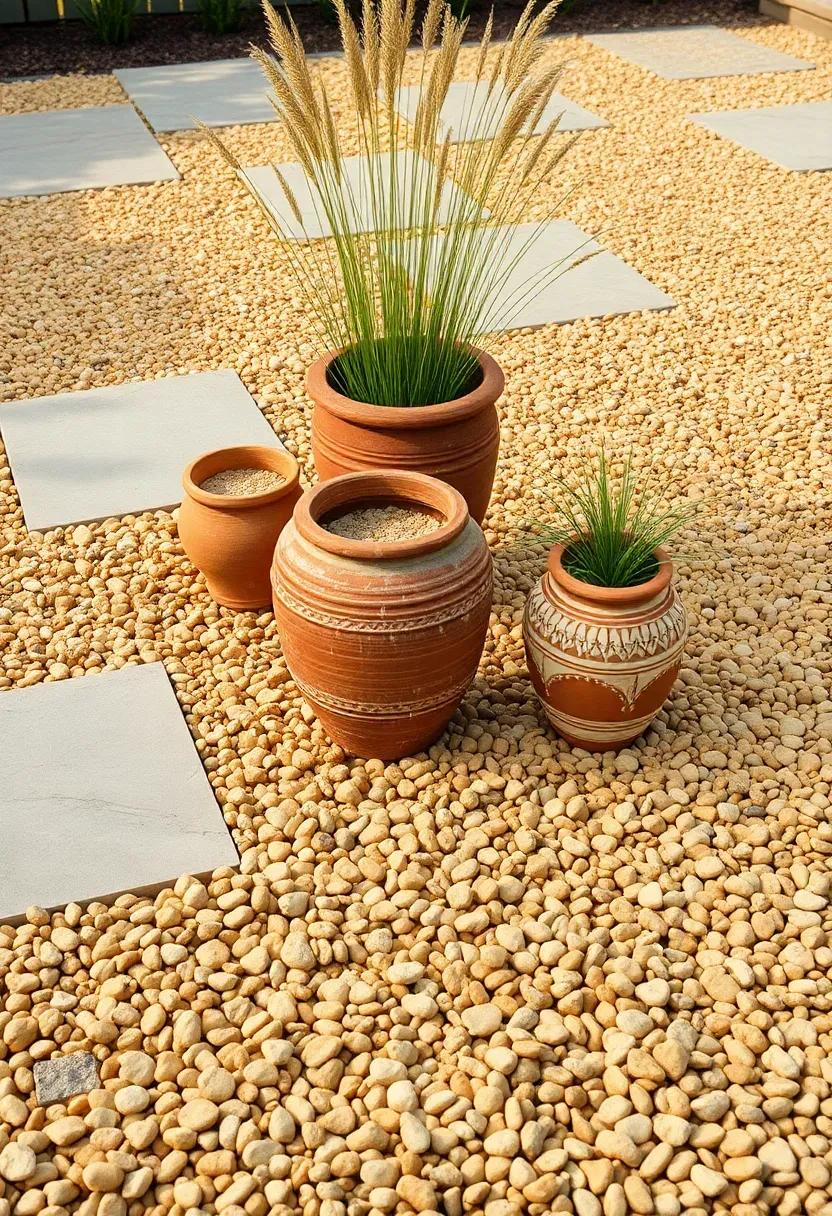
9. Pea Gravel and Paver Hybrid
Scatter large-format pavers (16x16 or 24x24-inch) across a pea gravel field with 4 to 6 inches of space between them. The gravel fills the gaps and provides drainage, while the pavers give you stable spots to place chairs and tables without them sinking. This is one of the cheapest patio options — pea gravel runs $30 to $50 per ton, and a few dozen large pavers cover the furniture zones. The relaxed, slightly Mediterranean look works in cottage-style and modern backyards alike. Maintenance means raking the gravel flat every few months and occasionally topping off areas that get kicked thin.
Practical notes
- Use a compacted crushed stone base under the gravel to prevent pavers from settling unevenly
- Install edging to contain the gravel — without it, stones migrate into the lawn within one season
- Avoid this if you go barefoot often since pea gravel can be uncomfortable between toes
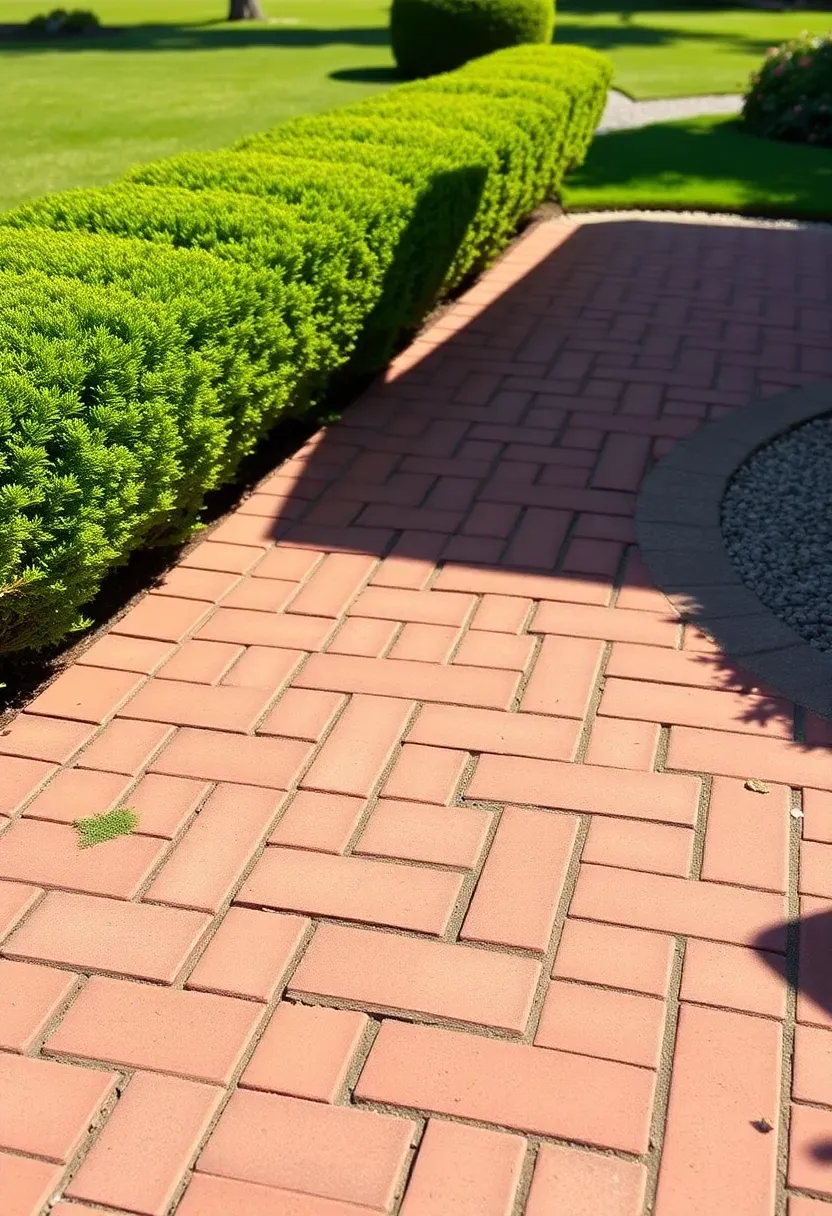
10. Herringbone Without Cuts
Herringbone looks sophisticated, but the diagonal version requires angled cuts at every edge. Skip the headache by laying a 90-degree herringbone instead — the V shapes run parallel and perpendicular to the border. You still need half-cuts at the edges, but a standard paver splitter handles those without a wet saw. This pattern is structurally the strongest of all paver bonds because the interlocking Vs resist shifting under load. It works especially well for patios that double as parking pads for lightweight carts or wheelbarrows.
Tips
- Rent a manual paver guillotine ($40 per day) instead of a wet saw — cleaner half-cuts with no dust
- Snap a diagonal reference line across the base to keep the zigzag from wandering
- Use a contrasting soldier-course border to frame the herringbone field
Recommended
Items for this idea
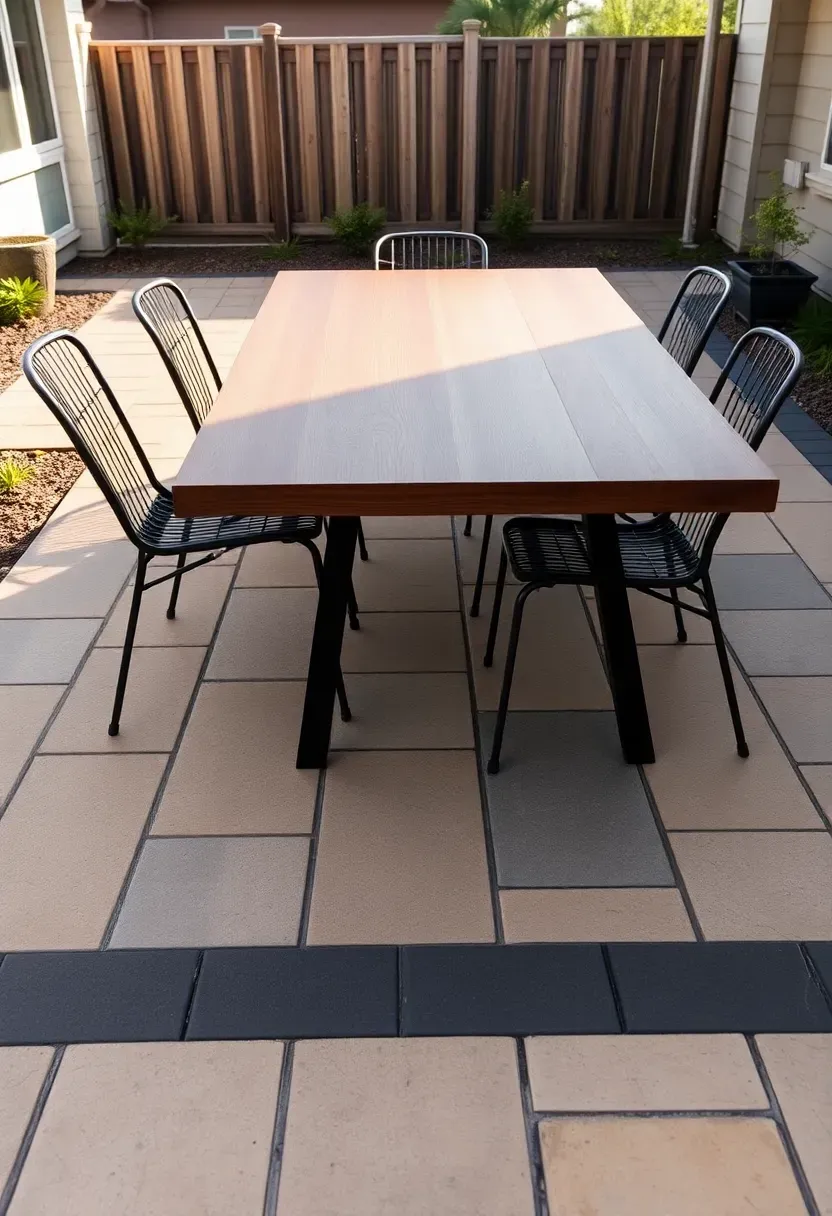
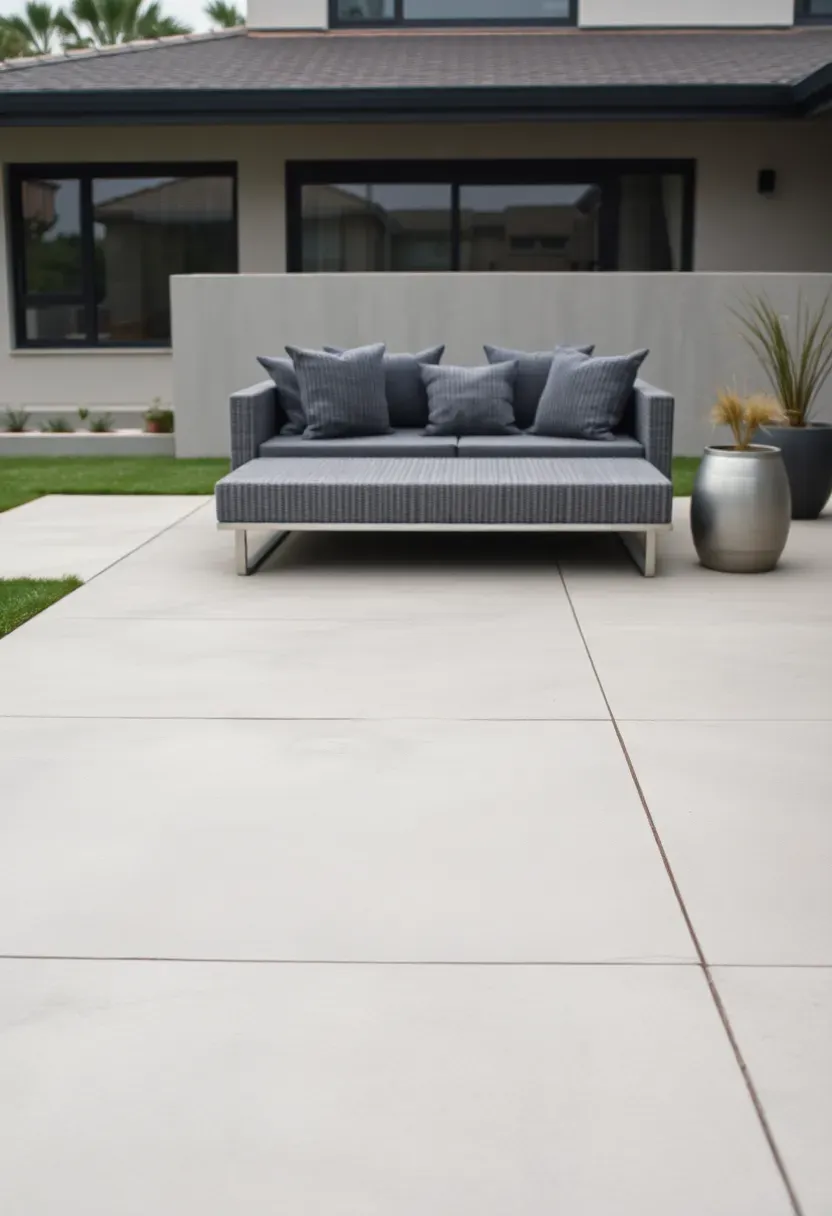
11. Wide-Format Slab Patio
Why bigger pavers mean less work
Large-format pavers — 24x24-inch or even 24x36-inch slabs — cover ground fast. Fewer pieces means fewer joints, less sand, and a quicker install. A 12x12-foot patio takes about 36 slabs at 24x24 inches versus 324 pavers at 4x8 inches.
The tradeoff
Each slab weighs 50 to 80 pounds, so you need a helper or a suction lifter to place them accurately. The base also needs to be flatter since wide slabs rock on even slight humps. Use a screed rail system to level your sand bed precisely.
Best for
- Homeowners who want a modern, almost monolithic patio surface
- Yards where you want the patio done in a single day
- Designs that pair with clean contemporary architecture
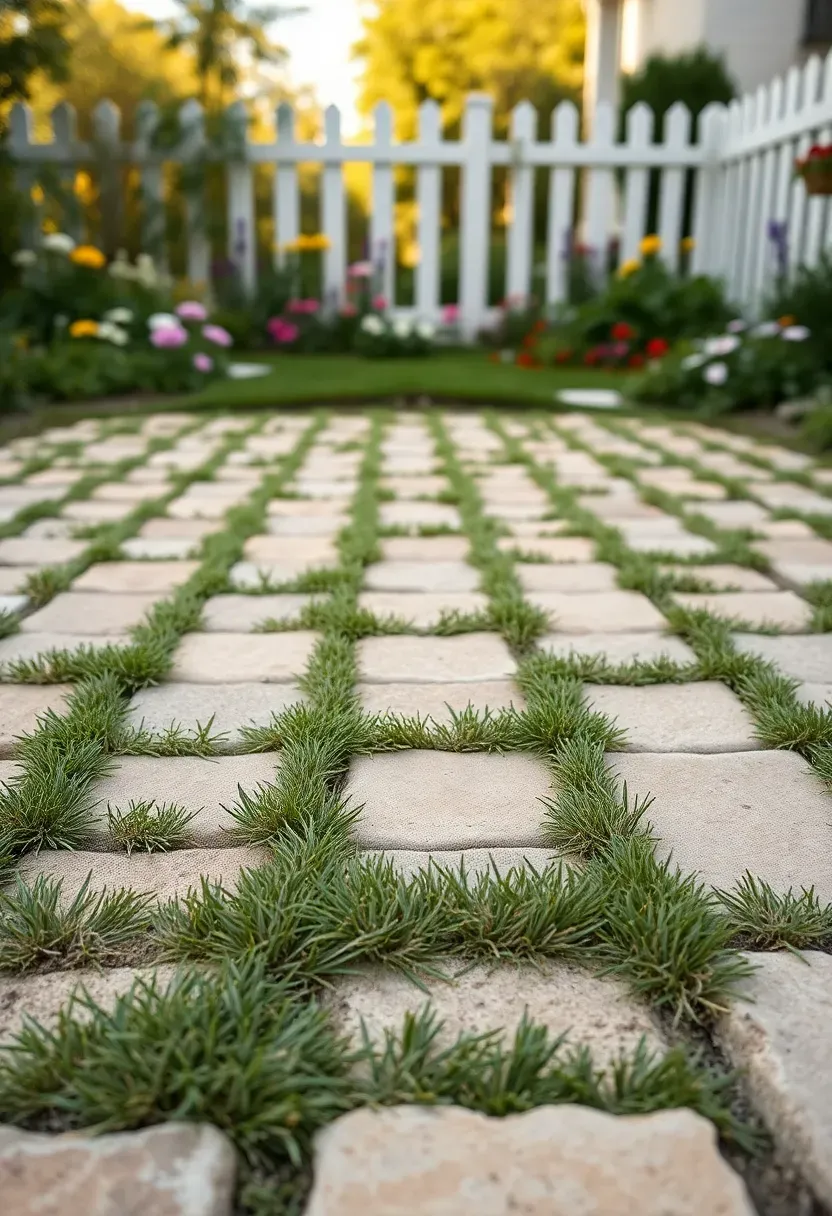
12. Grass-Joint Patio
Leave 2 to 3-inch gaps between your pavers and let grass grow through the joints. The result looks like the patio has been there for decades, settled into the landscape organically. This works best in climates with consistent rainfall — the grass joints need water to stay green. Use a sandy loam to fill the joints instead of polymeric sand, scatter grass seed on top, and keep the area moist for two weeks. Once established, mow the patio surface at the same height as your lawn. The grass joints also handle rainwater, eliminating the need for a separate drainage plan.
Tips
- Pick a shade-tolerant grass variety if your patio is under trees
- Space pavers at regular intervals for a tidy look — random spacing reads as unfinished
- Accept that grass joints go dormant in winter in cold climates and plan accordingly
Recommended
Items for this idea
13. Budget Concrete Paver Pad
The real cost of simple
Standard gray concrete pavers from any big box store cost $0.50 to $0.80 per piece at 4x8 inches. That is roughly $2 to $3 per square foot for materials — about half the cost of clay or tumbled stone pavers. They are not glamorous, but laid in a clean running bond with a crisp edge, they look perfectly respectable.
Making cheap look intentional
The key is edge treatment. A contrasting border row in charcoal or a different size makes the field pavers look chosen rather than settled for. Power-wash the surface annually to prevent green algae buildup. Seal with a matte concrete sealer every three years if you want to deepen the color slightly.
Honest pros and cons
- Cheapest path to a real paver patio — $250 to $400 for a 100-square-foot pad including base
- Colors fade faster than clay pavers, especially in full sun
- Surface can feel utilitarian without border details or furniture styling
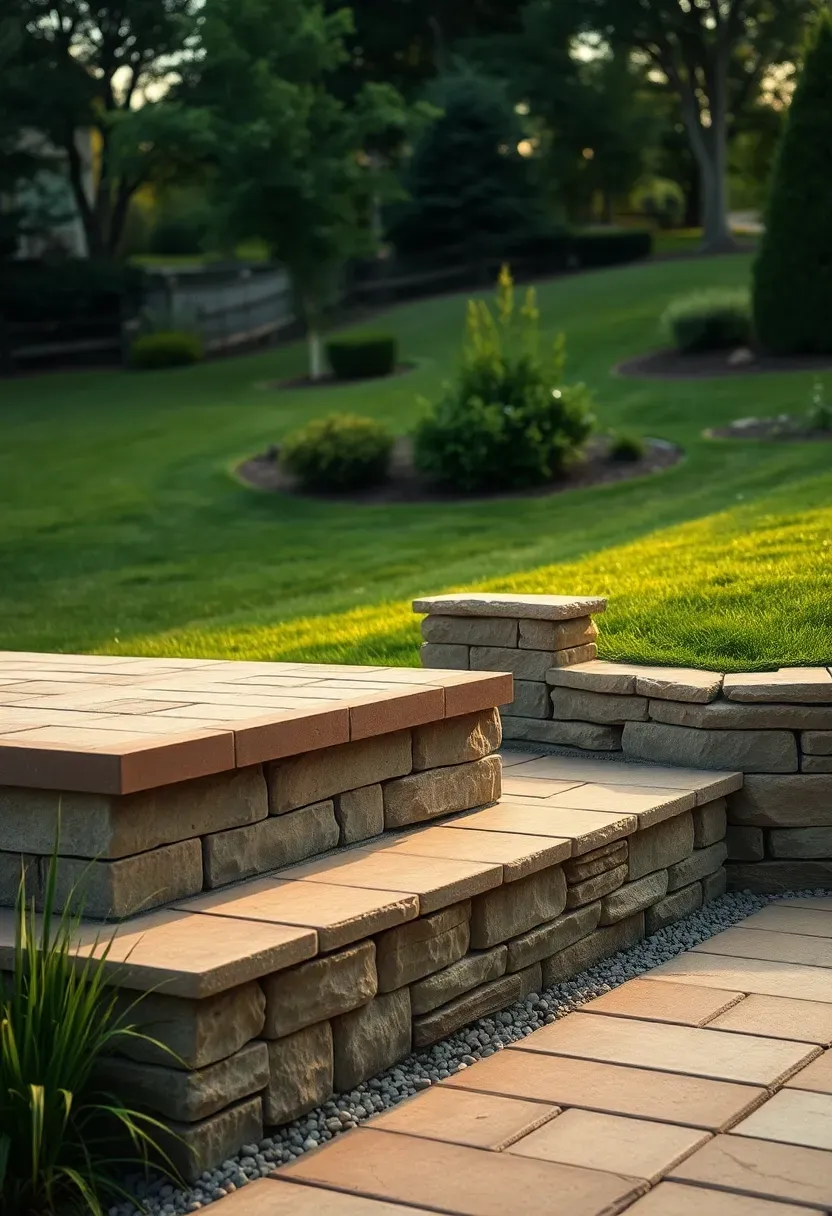
14. Raised Paver Platform
On a sloped yard, a raised paver patio lets you create a level outdoor room without massive excavation. Build a short retaining wall — two to three courses of concrete block or stacked stone — backfill behind it with road base, compact, and lay pavers on top. This lifts the patio 8 to 16 inches above grade, which also creates a natural separation between the patio and the rest of the yard. Budget an extra $10 to $15 per linear foot for the retaining wall compared to a ground-level pad.
Step-by-step overview
Excavate the uphill side and build the retaining wall on the downhill edge. Backfill with compactable gravel, not soil. Install a drainage pipe behind the wall before backfilling. Lay the paver surface on top using the same base-and-sand method as a flat patio.
Watch out for
- Any retaining wall over 2 feet tall may require a building permit depending on your jurisdiction
- Drainage behind the wall is critical — without it, hydrostatic pressure can push the wall out
- Use geogrid reinforcement if your wall height exceeds 18 inches
Recommended
Items for this idea
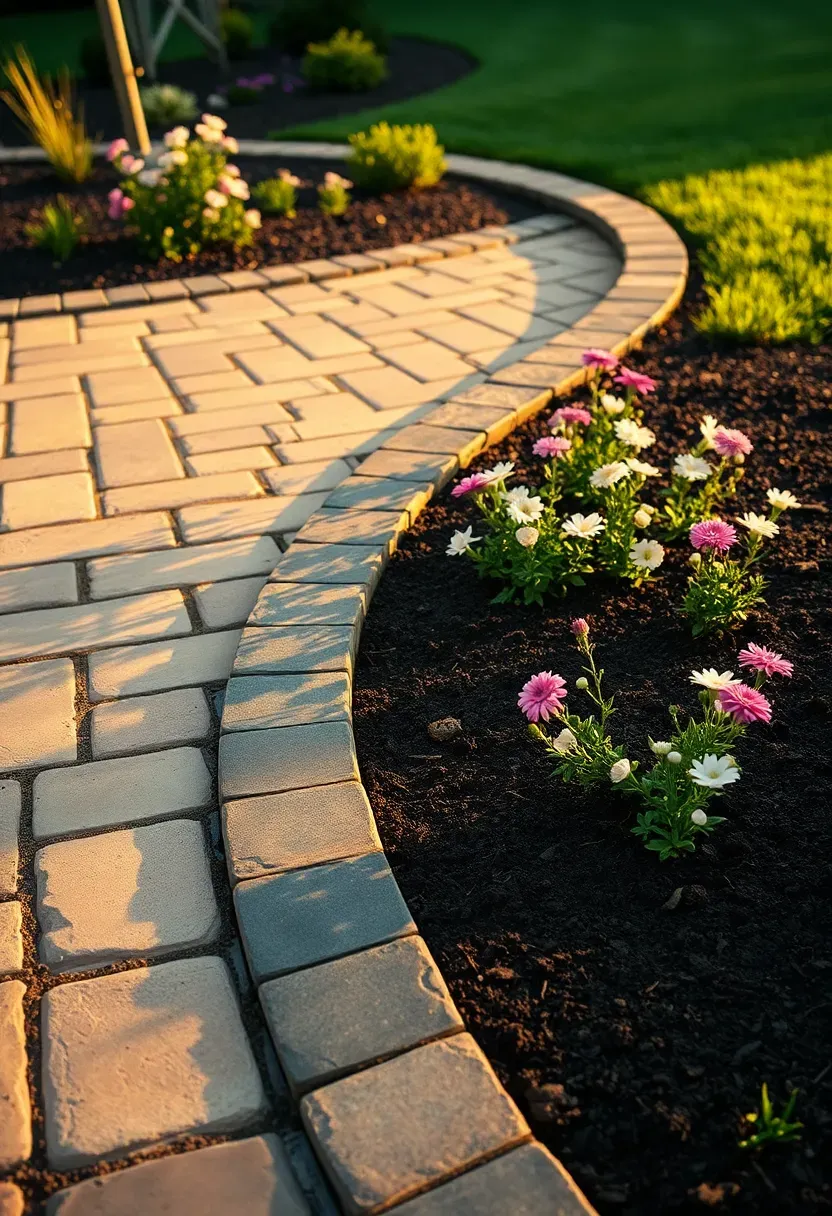
15. Curved Edge Simple Patio
A single curved edge softens a rectangular patio and makes it feel less rigid. You keep three sides straight for easy layout and curve only the side facing the yard. Mark the curve with a garden hose, then cut pavers along that line with a wet saw or angle grinder. The cuts take about an hour for a 12-foot curve. Tumbled pavers work best here because their irregular edges disguise minor cutting imperfections. Fill the curved edge joints with extra polymeric sand since they tend to be slightly wider than the field joints.
Tips
- Keep the curve gentle — a radius of at least 6 feet avoids awkward sharp bends
- Run the curve along a garden bed so the organic shape connects visually to the plantings
- A soldier course along the curve adds definition and hides cut edges
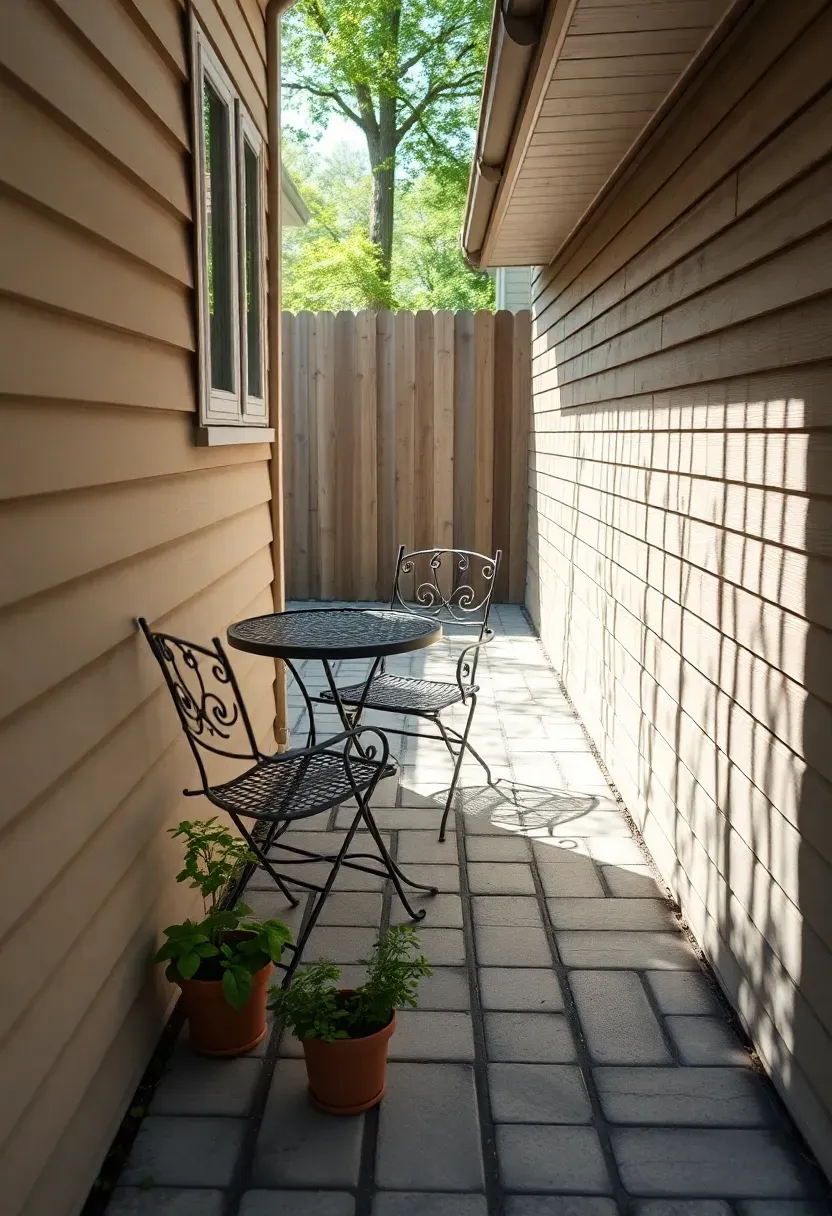
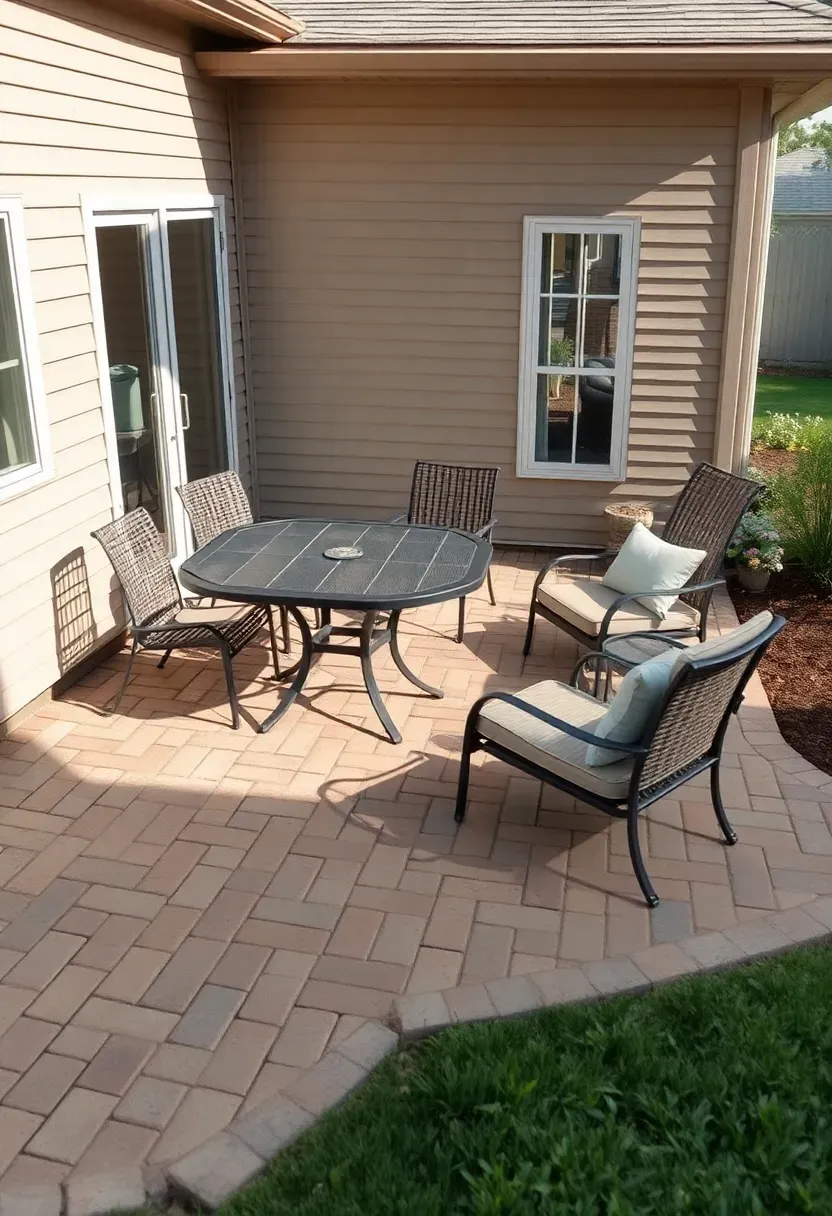
16. Narrow Side-Yard Patio
Making dead space useful
Most side yards are 4 to 8 feet wide and ignored. But that strip between the house and the fence can become a surprisingly usable patio for a small table, a reading chair, or an herb garden staging area.
How to build in tight quarters
Lay pavers wall-to-wall across the width and run the pad 10 to 15 feet long. In a 5-foot-wide space, you skip edge restraint on the house and fence sides since the structures contain the pavers. That saves material and time. Slope away from the house foundation at the usual 1/4-inch-per-foot grade.
Best for
- Homes where the backyard is small and the side yard is wasted space
- Renters or temporary setups where dry-laid pavers can be removed later
- Creating a private nook hidden from the main yard
Recommended
Items for this idea
17. Dry-Laid Flagstone Patio
Flagstone is technically not a paver, but the dry-laid method is identical — sand base, hand-placed stones, swept joints. The irregular shapes of natural flagstone mean no two patios look alike, which gives the surface a character that manufactured pavers cannot replicate. Buy flagstone by the ton ($200 to $400 per ton covers roughly 80 to 120 square feet depending on thickness). Sort pieces by size before laying, placing the largest in high-traffic areas. Fill joints with polymeric sand, decomposed granite, or creeping thyme for a planted look.
Practical notes
- Flagstone thickness varies from 1 to 3 inches within a single pallet — pick uniform pieces or adjust sand depth to compensate
- Wear gloves when handling flagstone edges since they can be sharp enough to cut skin
- Avoid limestone flagstone in freeze-thaw climates — it spalls more than sandstone or quartzite
Quick FAQ
How thick should the base be for a simple paver patio? Four inches of compacted crushed stone (Class II or III road base) is the standard for pedestrian patios. In areas with clay soil or poor drainage, go to 6 inches. The base is the most important part of the project — skimp here and pavers will settle unevenly within a year.
Can I lay pavers directly on dirt? Technically yes, but the patio will shift and sink within months. Even a minimal base of 2 inches of compacted crushed stone and 1 inch of leveling sand dramatically improves stability. Skipping the base is the most common beginner mistake.
Do simple paver patios need a permit? In most jurisdictions, a ground-level dry-laid paver patio under 200 square feet does not require a permit. Raised patios with retaining walls, anything near property lines, or large hardscape areas may need one. Call your local building department — the check takes five minutes.
What is the cheapest paver patio option? Standard gray concrete pavers on a DIY install. Materials run $2 to $4 per square foot including base aggregate and sand. A 100-square-foot patio can be built for under $400 in materials if you already own or can borrow a plate compactor.
How long does a simple paver patio last? Concrete pavers typically last 25 to 50 years. Clay pavers can last even longer since their color goes all the way through and does not fade. The base and joint sand need occasional maintenance, but the pavers themselves rarely need replacement.
A simple paver patio does not need to be boring. Running bond, stack bond, herringbone, gravel hybrids, grass joints — each approach gives you a different look while staying within reach of a weekend DIY project. Pick the layout that fits your yard dimensions and your patience level, spend most of your effort on a solid compacted base, and the surface will reward you with decades of low-maintenance use. Start with a small pad if you are new to this. You can always expand later.
Pinterest cover for 17 Backyard Simple Paver Patio Ideas
About the author
OBCD
CGI visualization and interior design content. We create detailed 3D renders and curate practical design ideas for every room in your home.